Railway sleeper wall
Discussion


I used oak sleepers on mine, brand new, you will have to treat them ASAP otherwise firstly black tannin will start to leach out of them due to the rain we are having, also if you want to try to hold off from them going silver over winter you'll need something on them. Your main issue is the weather, you won't be able to get a couple of days of dry and warm weather in order to treat them. Personally I would either treat inside then bring outside, or wait until Spring.
Mine were cut with a circular saw, and held together with Timberlok screws - you can get them from screwfix, no need for a pilot hole if you use a mains powered drill, not a battery one, it will ruin it in oak.
I used clear presevative http://www.wood-finishes-direct.com/product/barret... and then Osmo Oil http://www.wood-finishes-direct.com/product/osmo-u...
I also put a sheet of damp proof on the back of the sleepers to attempt to stop the rot by a year or so.
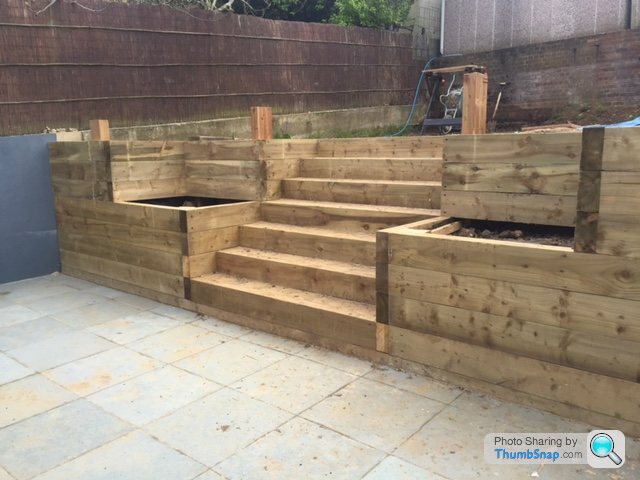
Here are some pictures of mine:


On this one you can see what happens if you don't treat quick enough, the black marks are tannin coming out of the wood due to the adverse weather:

Mine were cut with a circular saw, and held together with Timberlok screws - you can get them from screwfix, no need for a pilot hole if you use a mains powered drill, not a battery one, it will ruin it in oak.
I used clear presevative http://www.wood-finishes-direct.com/product/barret... and then Osmo Oil http://www.wood-finishes-direct.com/product/osmo-u...
I also put a sheet of damp proof on the back of the sleepers to attempt to stop the rot by a year or so.
Here are some pictures of mine:


On this one you can see what happens if you don't treat quick enough, the black marks are tannin coming out of the wood due to the adverse weather:


I have done exactly this this year, to regain ground that was lost due to a slope.
Dug a footing, 400mm wide (to match the whacker) and hardcorse base, about 150mm deep.
Laid the first row, the used 10mm steel bar as 'pins' to lock together - by using the pins at an angle you can lock it down very well. Built the wall using a briok type bond with each layer pinned to the one below at angles so it cannot lift.
Used proper, used/reclaimed German railway sleepers, so bloody big ones, that will ast for ages. The wall was about a metre high (5x260mm high IIRC.
The used a batten along the top edge to drop a membrane down, and backfilled with loose gravel, then hardcore, to give good drainage.
The back side of the lower row is also completely encapsulated (back filled with gravel so its 'locked in'.
Its worked really well, is rock solid, and was quite quick to do.
I was recommended to use 'proper' sleepers for structural stuff, keeping the nice pretty dainty new ones for the aesthetic stuff. The genuine ones cost me £19ea IIRC, I bought about 30.
I'll try get some pictures if people want.
Gassing Station | Homes, Gardens and DIY | Top of Page | What's New | My Stuff