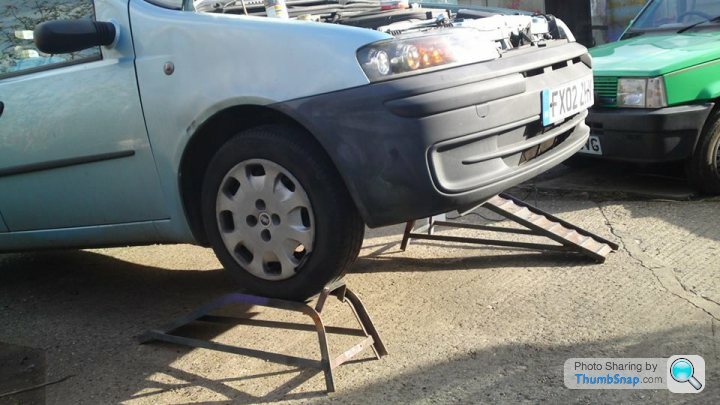
Discussion


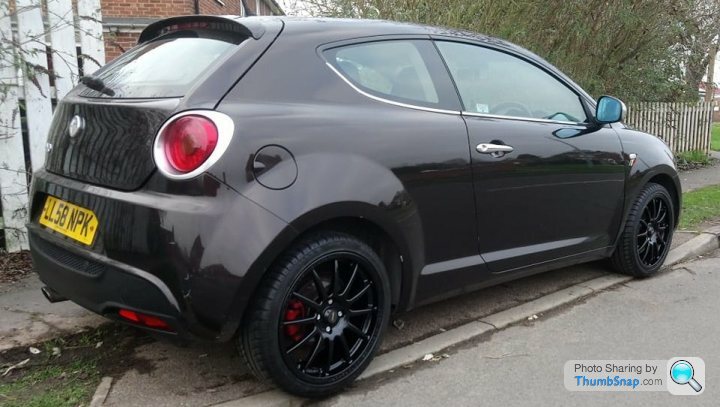
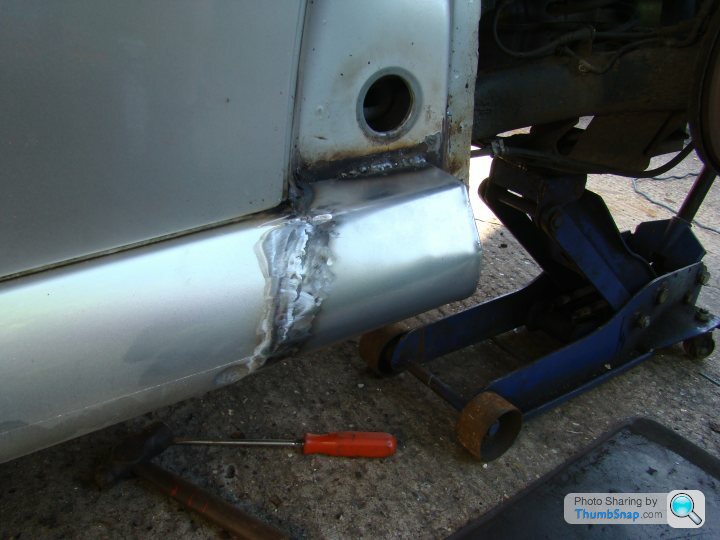
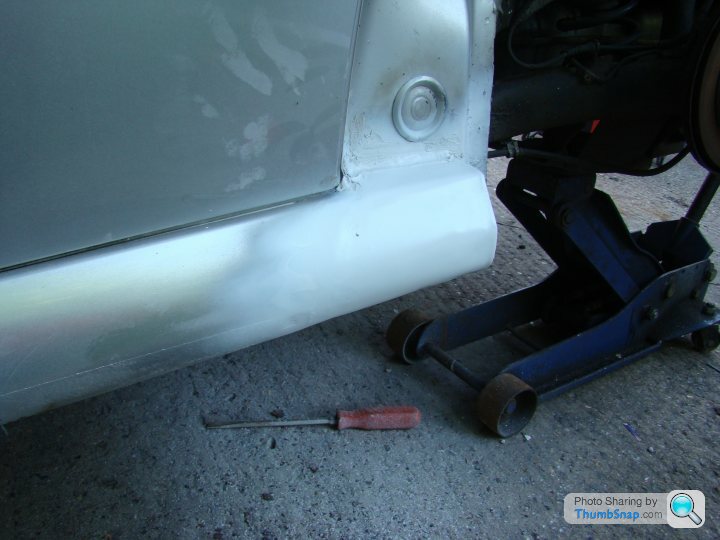
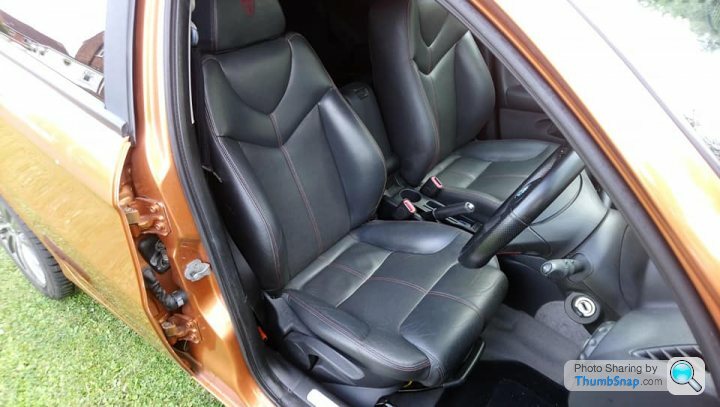
A Seicento Schumacher Driveway CSI special.
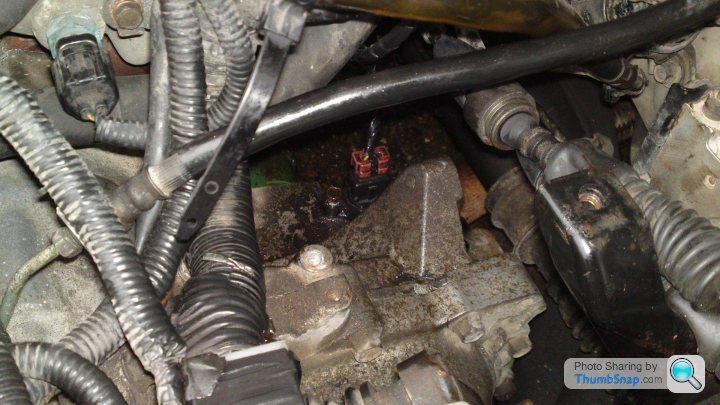
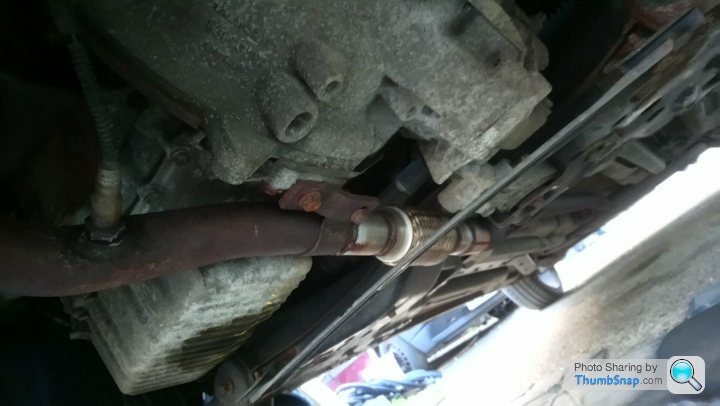
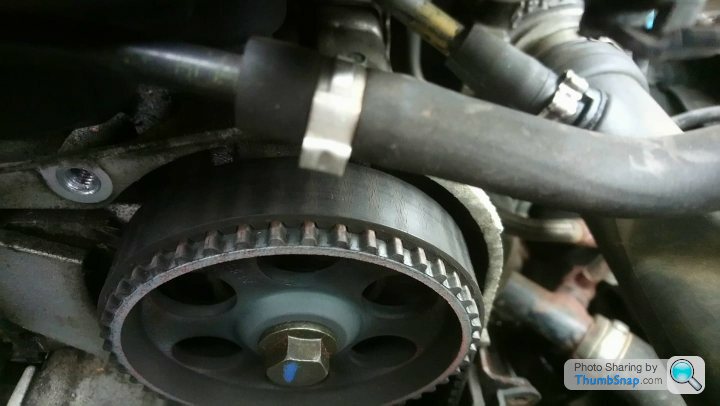
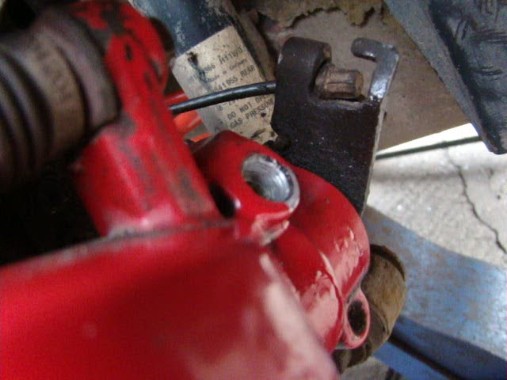
"Special" Because a very special mechanic fitted a new head gasket, old exhaust and inlet gaskets and old head bolts that weren't torqued down properly causing cross over compression between one and two cylinders and three and four cylinders. Just as well the old exhaust manifold gaskets were used because it they were sealed effectively it could have caused irreparable damage.
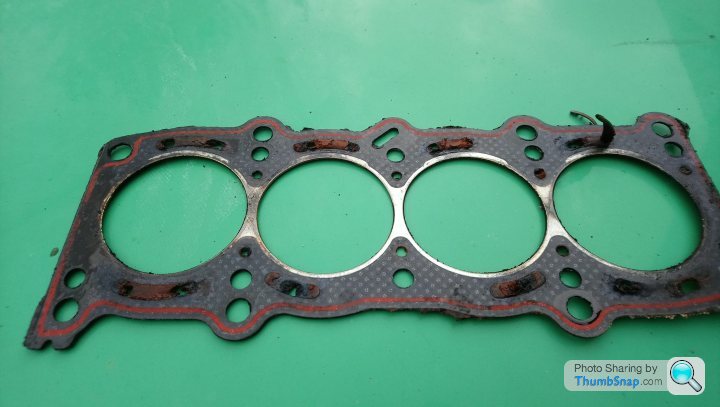
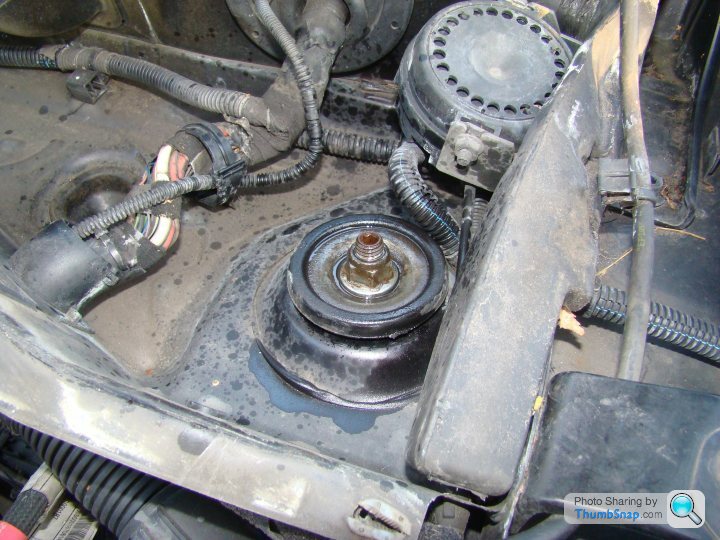
Yes that's silicone from the water pump in the gasket itself.
Not a surprise at all because when I took the coil packs off...
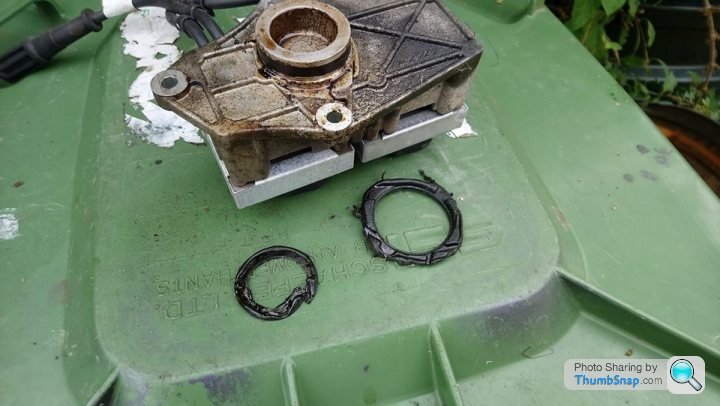
...I found the bodgers best friend black silicone sealant.
There was nothing missing from the replacement gasket. So as well as cleaning and re-seating the valves and cleaning the ports I have removed bits of old gasket left on the head and block.
While I was waiting for stage one to settle I wrote this for the post.
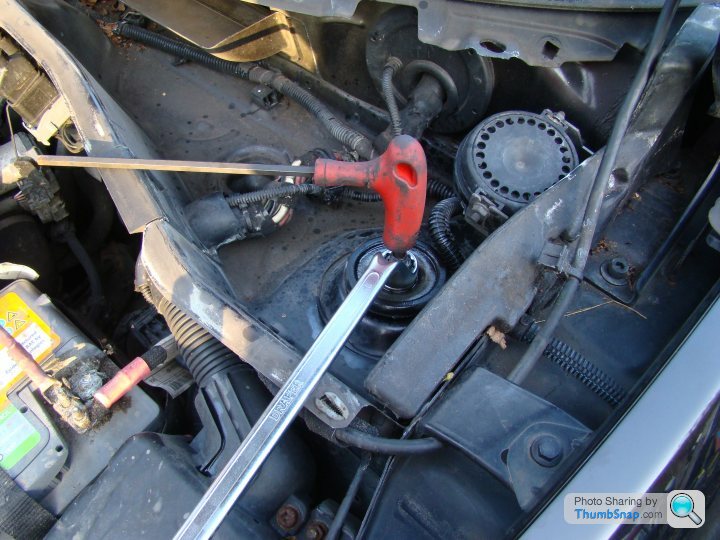
When fitting new head bolts do them up finger tight first and take them back out one at a time. Dip them in the oil you dropped from the engine before as far as the stretch section and go finger tight again. Leave them for ten minutes before stage one. This makes sure the threads are clean and well lubricated.
With a Fiat FIRE engine stage one is 22ft/lbs or 30Nm.
Stage two ninety degrees and stage three another ninety degrees.
You will feel the bolts aren't as tight as you left them every time as the gasket molds itself. Always work slowly and never jerk the bolts as they can sheer.
This...

...is my torque ratchet.
A gift from my Grandmother when I was ten years old. It has never had a handle. If I need more torque I put a 10mm socket on an extension bar and slot it over the end. I have used it for close to thirty years and it has never let me down. A mate of mine suggested I should get a new digital one like his as it's old and probably no longer accurate. So I did four wheel bolts at different amounts and tried his digital one to see. Each bolt was either dead on or one fl/lb more.
"Special" Because a very special mechanic fitted a new head gasket, old exhaust and inlet gaskets and old head bolts that weren't torqued down properly causing cross over compression between one and two cylinders and three and four cylinders. Just as well the old exhaust manifold gaskets were used because it they were sealed effectively it could have caused irreparable damage.
Yes that's silicone from the water pump in the gasket itself.
Not a surprise at all because when I took the coil packs off...
...I found the bodgers best friend black silicone sealant.
There was nothing missing from the replacement gasket. So as well as cleaning and re-seating the valves and cleaning the ports I have removed bits of old gasket left on the head and block.
While I was waiting for stage one to settle I wrote this for the post.
When fitting new head bolts do them up finger tight first and take them back out one at a time. Dip them in the oil you dropped from the engine before as far as the stretch section and go finger tight again. Leave them for ten minutes before stage one. This makes sure the threads are clean and well lubricated.
With a Fiat FIRE engine stage one is 22ft/lbs or 30Nm.
Stage two ninety degrees and stage three another ninety degrees.
You will feel the bolts aren't as tight as you left them every time as the gasket molds itself. Always work slowly and never jerk the bolts as they can sheer.
This...
...is my torque ratchet.
A gift from my Grandmother when I was ten years old. It has never had a handle. If I need more torque I put a 10mm socket on an extension bar and slot it over the end. I have used it for close to thirty years and it has never let me down. A mate of mine suggested I should get a new digital one like his as it's old and probably no longer accurate. So I did four wheel bolts at different amounts and tried his digital one to see. Each bolt was either dead on or one fl/lb more.
Historic Driveway CSI from today in 2016
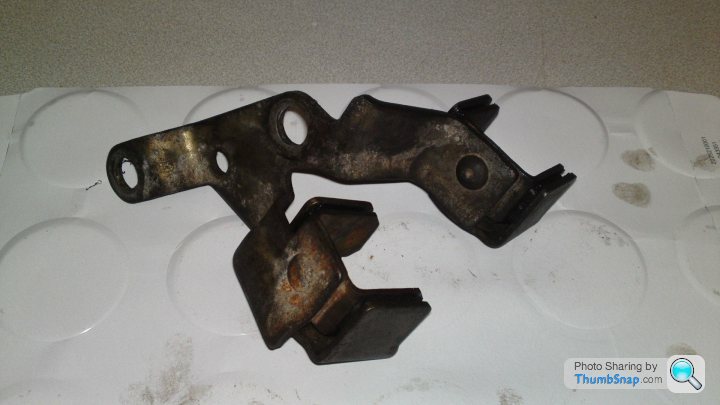
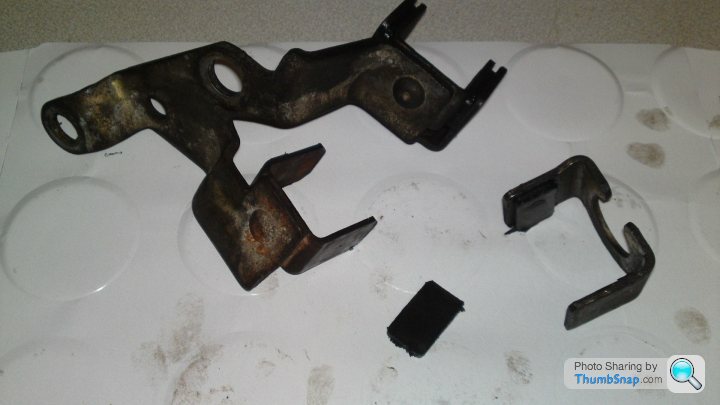
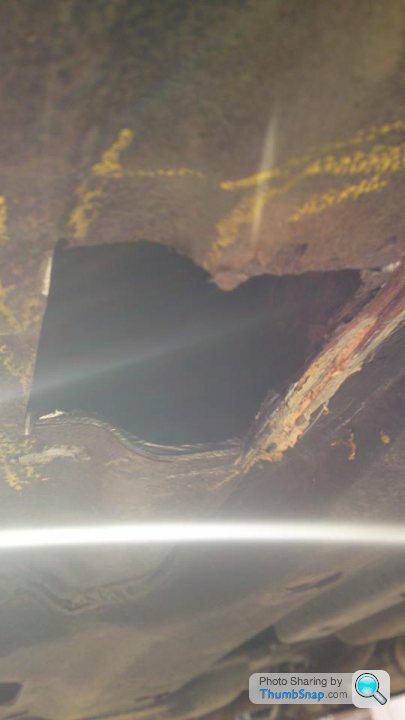
Operation Pigeon Poo
Before...
...and from a different angle.

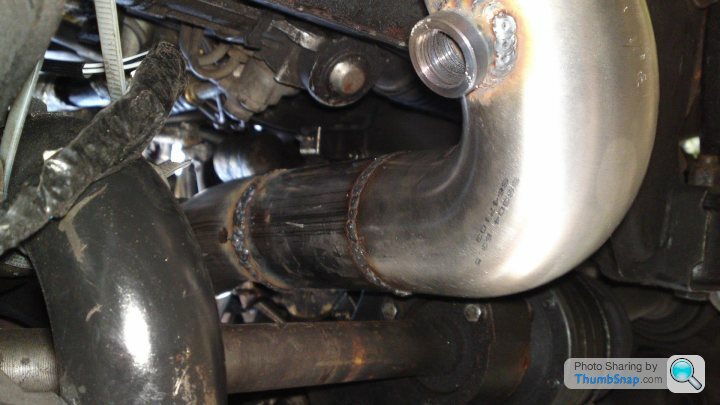
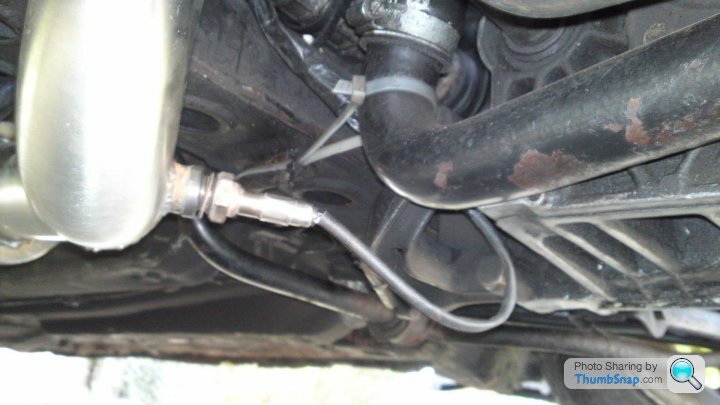
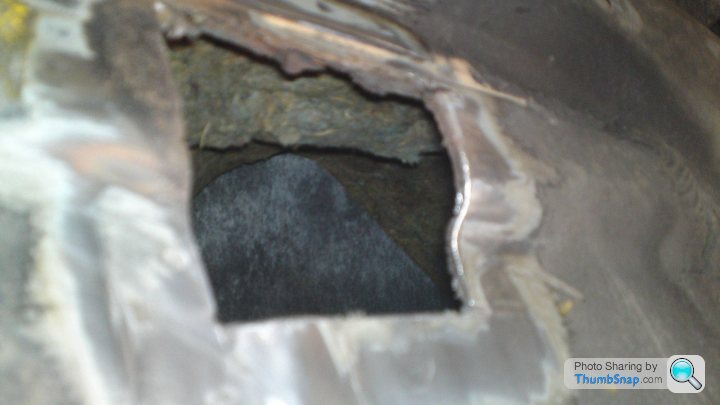
Trial fit with relocated Lambda sensor mounting.
And the verdict was "Guilty".
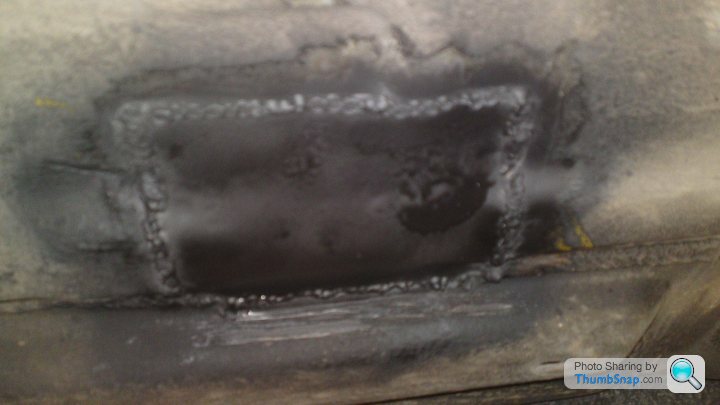
Before and after.

Second trial fitting to make sure there was enough cable from the Lambda to go round the back of the inter cooler pipe bracket as far from the exhaust as possible.
Heat wrapped before fitting for the final time.
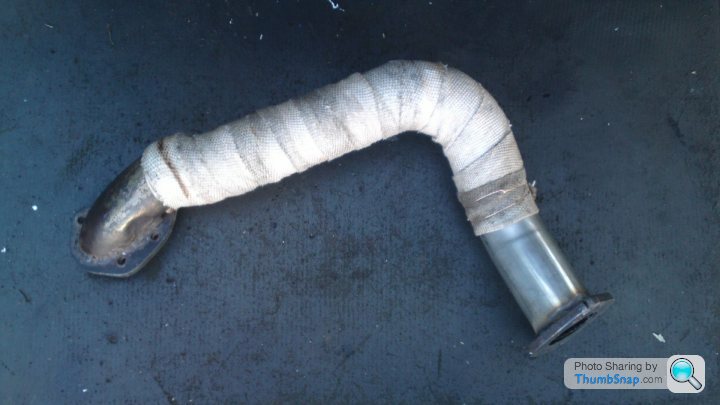
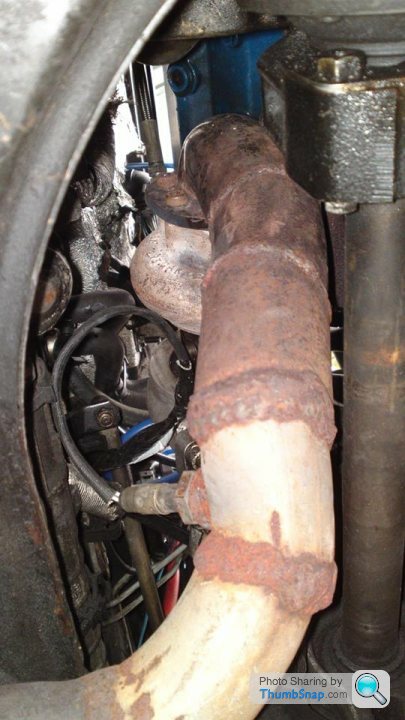
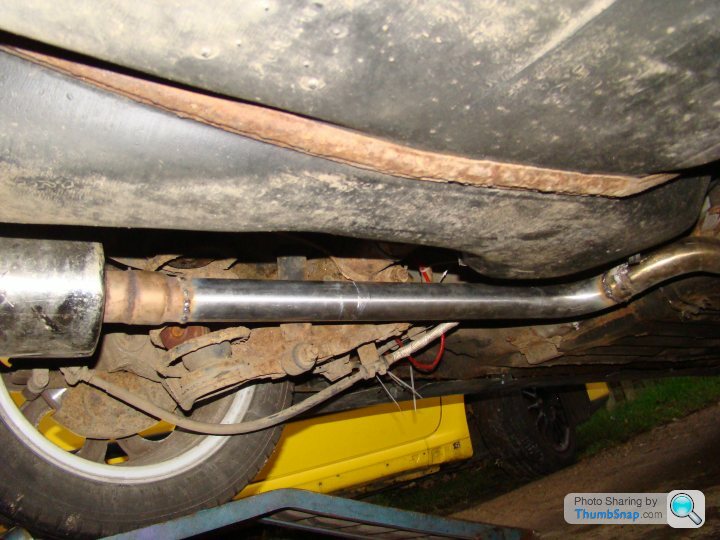
The old Pigeon Poo pipe hangs in my shed as a reminder of how not to make a down pipe.
Operation Pigeon Poo
Before...
...and from a different angle.
Trial fit with relocated Lambda sensor mounting.
And the verdict was "Guilty".
Before and after.
Second trial fitting to make sure there was enough cable from the Lambda to go round the back of the inter cooler pipe bracket as far from the exhaust as possible.
Heat wrapped before fitting for the final time.
The old Pigeon Poo pipe hangs in my shed as a reminder of how not to make a down pipe.

The first Driveway CSI for my Rover 620Ti today and time to free the sticky starter motor.
I did the usual take it off, take it apart, clean it and squirt some bike chain lube in there; but because it's a Lucas motor...
"Star Trek reference I must. I guess if this doesn't work I'll get my local parts place to beam me up a new one".

Historic Driveway CSI from today in 2015
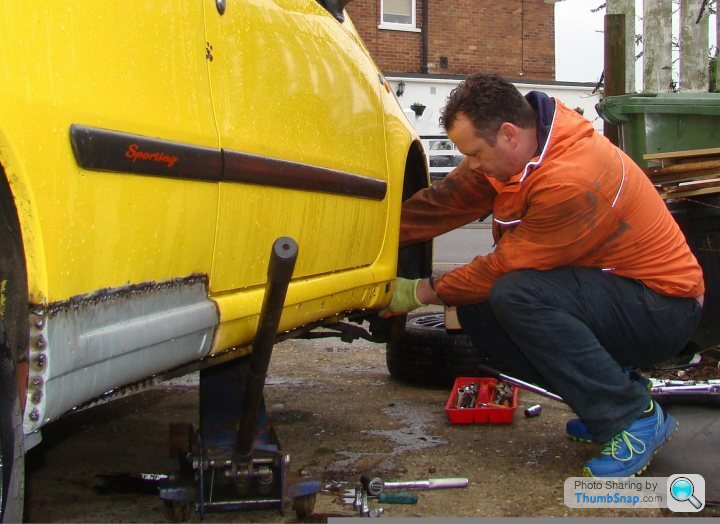
Driveway CSI today is more faffing about with the FTO. The donor car was a lot easier to take apart because I didn't have to put it back together I could use proper tools like hammers and of course my trusted grinder. As the silver car will be going back together (in theory) I'm having to find ways of undoing bolts that were done up in Japan without such annoyances as the engine and gearbox being in the way.
This is like meditation for me. Concentrating on a mundane task thus freeing the rest of my mind.
Free to contemplate life's more important questions. For example when working on the coolant system is it possible to remove the top hose from the radiator without thinking...
"Pimpin' aint easy, but it show is fun".
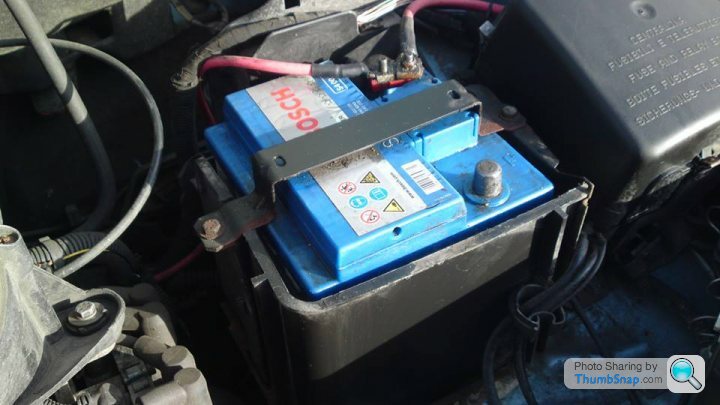
Anyway the battery tray bracket is now off and because the battery is in the boot it can go in the skip (or back of my shed until I find a use for it).
Very oily clutch...
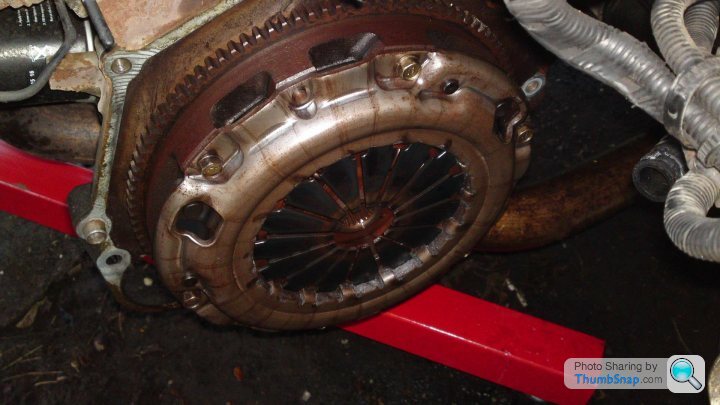

...covered in crap. No wonder it was slipping.
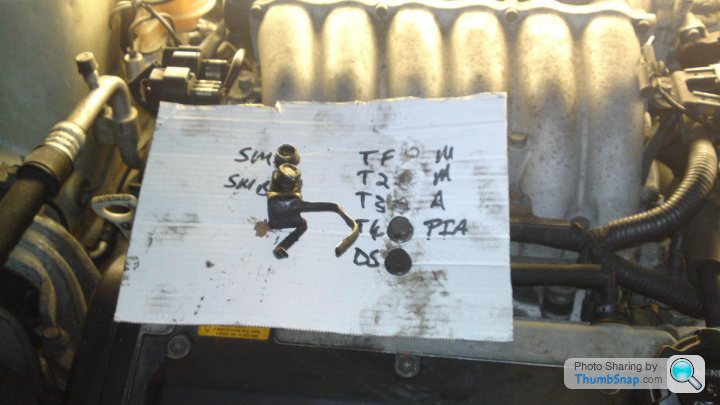
Tool of the job today goes to this piece of cardboard I used to store the bolts.
SM - Starter motor.
SMB - Starter motor + Bracket.
TF - Top front
T1, T2, T3, T4 - Top front 2,3,4
M - manual ratchet.
A - Air ratchet
PIA = Pain in the Arse
Worth it though. I miss this car.
https://www.pistonheads.com/gassing/topic.asp?h=0&...
Driveway CSI today is more faffing about with the FTO. The donor car was a lot easier to take apart because I didn't have to put it back together I could use proper tools like hammers and of course my trusted grinder. As the silver car will be going back together (in theory) I'm having to find ways of undoing bolts that were done up in Japan without such annoyances as the engine and gearbox being in the way.
This is like meditation for me. Concentrating on a mundane task thus freeing the rest of my mind.
Free to contemplate life's more important questions. For example when working on the coolant system is it possible to remove the top hose from the radiator without thinking...
"Pimpin' aint easy, but it show is fun".
Anyway the battery tray bracket is now off and because the battery is in the boot it can go in the skip (or back of my shed until I find a use for it).
Very oily clutch...
...covered in crap. No wonder it was slipping.
Tool of the job today goes to this piece of cardboard I used to store the bolts.
SM - Starter motor.
SMB - Starter motor + Bracket.
TF - Top front
T1, T2, T3, T4 - Top front 2,3,4
M - manual ratchet.
A - Air ratchet
PIA = Pain in the Arse
Worth it though. I miss this car.
https://www.pistonheads.com/gassing/topic.asp?h=0&...
In 2013 I had a Panda 4x4 called "Project Peterborough" the plan was to make it an armored vehicle capable of dealing with the scumbums who use roads in that God forsaken crap hole of a city.
Short version; the head gasket blew because...

...two of the stud holes had car body filler in them to repair stripped threads. The whole project was scrapped in the end.
Short version; the head gasket blew because...
...two of the stud holes had car body filler in them to repair stripped threads. The whole project was scrapped in the end.
Sloppy gear change on my FTO a few years ago...
...today (no photos as it was not my car) my mates Vauxhall Astra Diesel back box had fallen off. It had been repaired before but the repair was rusted to nothing. So I used a length of Stainless Steel dairy pipe the same diameter and cut back until I found solid metal to weld it to. Should be good until it rusts somewhere else.
...today (no photos as it was not my car) my mates Vauxhall Astra Diesel back box had fallen off. It had been repaired before but the repair was rusted to nothing. So I used a length of Stainless Steel dairy pipe the same diameter and cut back until I found solid metal to weld it to. Should be good until it rusts somewhere else.
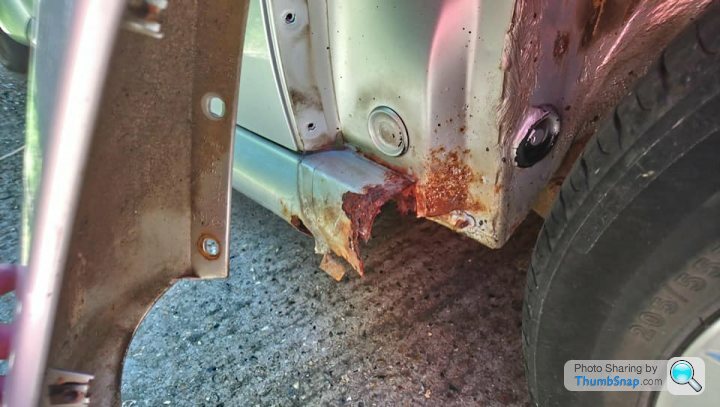
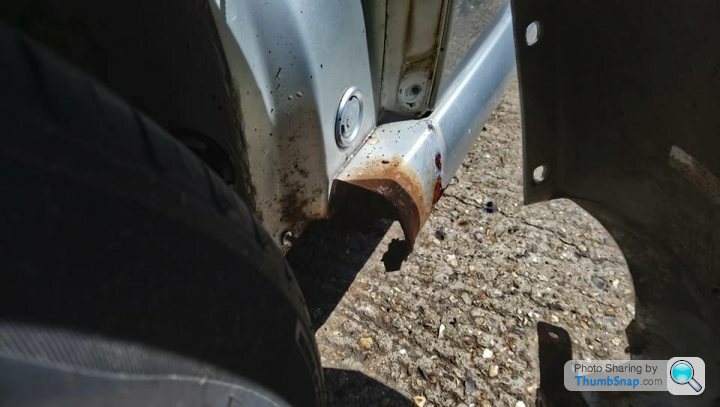
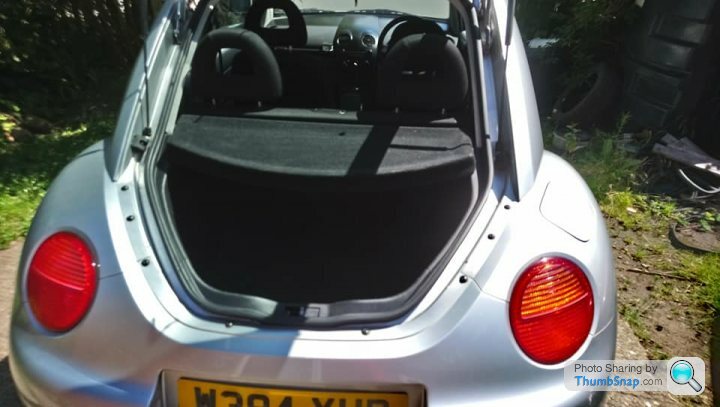
I bought myself a Mk1 Punto to fix up while I am between jobs and maybe turn over a little profit.
£300 for the car £50 recovery. Needs welding and some consumables according to the MOT fail sheet.
Track rod ends were a fail and advisories for the wishbone bushes.
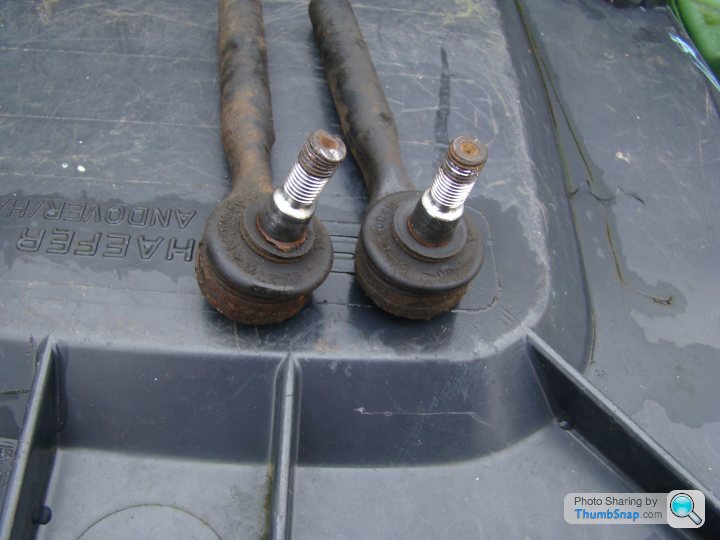
The old ends were perfectly fine. No movement, no cracks, no splits; no way dust has got in there. I changed them anyway as it's £15 in parts and half an hour.
The advisory front wishbones looked to be about a year old with perfect bushes. The rear bushes that were also a failure are also in fine serviceable condition and nowhere near as deteriorated as the fail sheet suggests.

My first thoughts were the bushes and ends were added to try to rip the previous owner off. As you can see I have been addressing the welding on the drivers side of the car. Inner sill was crusty so I cut it out and replaced the end of the outer sill. Primarily I cut the old one off so I could get the inner section that needed replacing.
The passenger side has had previous repairs but patches have been welded over rust. None of it had been cut out and as a result the whole passenger side floor needs replacing. Including the section where the rear subframe bolts to the floor.
I now think the other issues were a fiction to make the repair quote unrealistic. In the hope the car would have been scrapped instead of sold on. If it was the same garage who did the shoddy repair work having to do it again and properly this time would cost them as new floor sections aren't available in the UK and about 600 Euros on the continent. Plus several hours work.
Sadly beyond what I am willing to do so the car will be a donor to a Panda 16V project or broken for parts to make sure it doesn't end up on the road with an MOT as dodgy as the previous welding.
£300 for the car £50 recovery. Needs welding and some consumables according to the MOT fail sheet.
Track rod ends were a fail and advisories for the wishbone bushes.
The old ends were perfectly fine. No movement, no cracks, no splits; no way dust has got in there. I changed them anyway as it's £15 in parts and half an hour.
The advisory front wishbones looked to be about a year old with perfect bushes. The rear bushes that were also a failure are also in fine serviceable condition and nowhere near as deteriorated as the fail sheet suggests.
My first thoughts were the bushes and ends were added to try to rip the previous owner off. As you can see I have been addressing the welding on the drivers side of the car. Inner sill was crusty so I cut it out and replaced the end of the outer sill. Primarily I cut the old one off so I could get the inner section that needed replacing.
The passenger side has had previous repairs but patches have been welded over rust. None of it had been cut out and as a result the whole passenger side floor needs replacing. Including the section where the rear subframe bolts to the floor.
I now think the other issues were a fiction to make the repair quote unrealistic. In the hope the car would have been scrapped instead of sold on. If it was the same garage who did the shoddy repair work having to do it again and properly this time would cost them as new floor sections aren't available in the UK and about 600 Euros on the continent. Plus several hours work.
Sadly beyond what I am willing to do so the car will be a donor to a Panda 16V project or broken for parts to make sure it doesn't end up on the road with an MOT as dodgy as the previous welding.
Edited by Liquid Knight on Tuesday 25th December 16:29
Driveway CSI Festive flat spot special.
A few things have been bugging me about my Alfa 145 since I got her back.
1/ The speakers had all been blown. Simply replaced those.
2/ The smell inside the car due to various substances being smoked in the cabin. Three hour valet later it smells a bit better.
3/ Loud exhaust and flat spot half way up the rev' range.
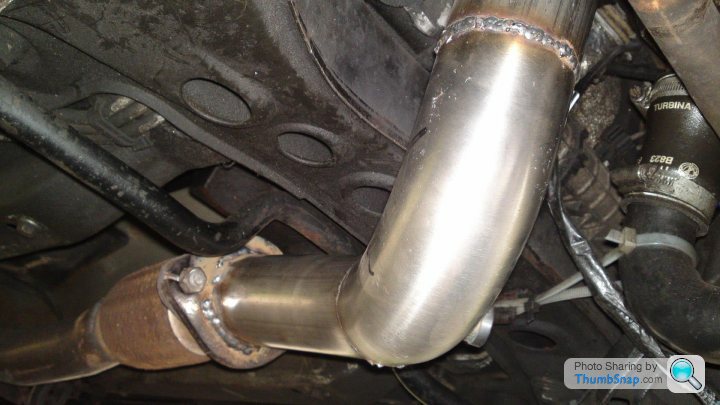
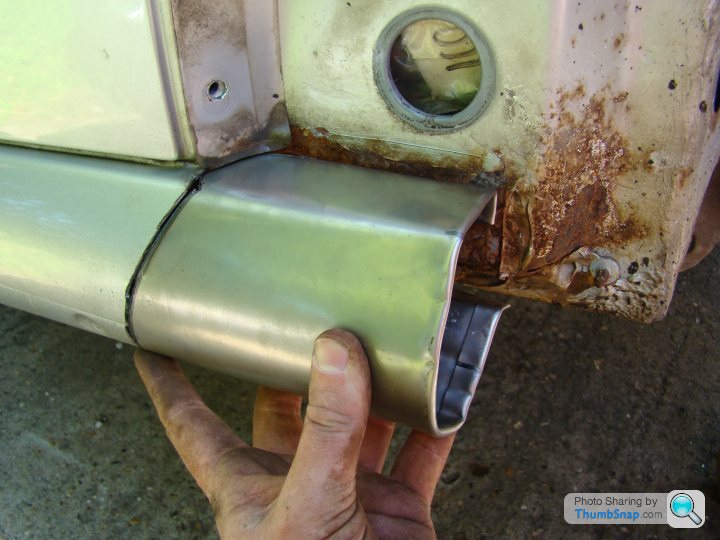
First off I welded a stainless middle box in place but this made no real difference.
While I had the exhaust off I noticed a tight bend and some truly horrific welding.
So Project Pigeon Poo II
Cut out the tight bend and patchwork. Replace with a proper bend and weld it all together with my eyes open.
Results. No more flat spot and the inside of the car is 10dB quieter.
See what I mean about "patchwork"?
Tight bend but doesn't look too bad from here...

...BLEAUGH! How can someone weld that and...
a/ Call themselves a welder.
b/ Sleep at night knowing they have unleashed that into the world.
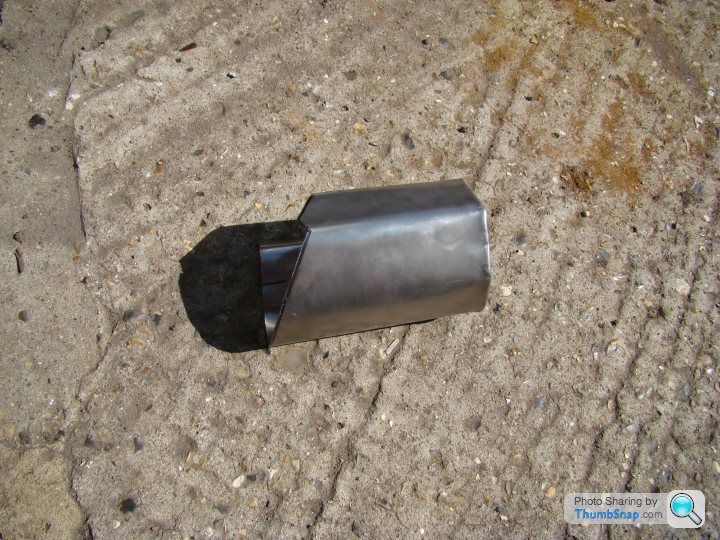
Bit of two inch stainless pipe from a skip at work.
Not great but a damn sight better than it was.
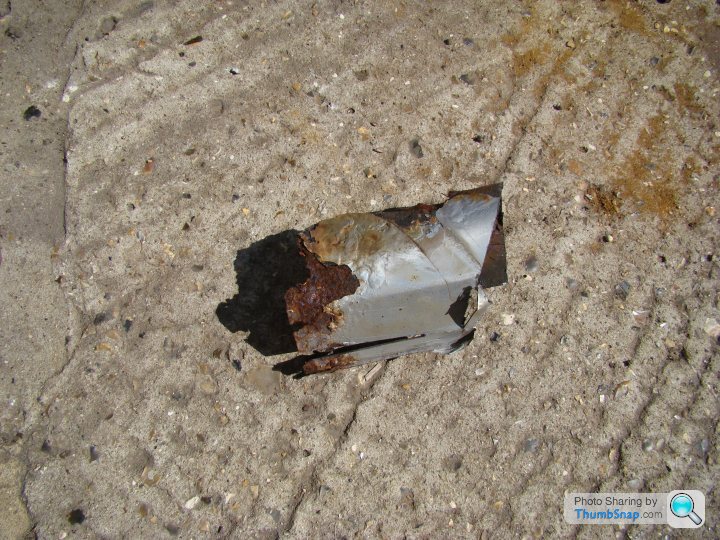
The pigeon poo cross section was less than three quarters of an inch wide. No wonder the poor Twinspark was choking.
A few things have been bugging me about my Alfa 145 since I got her back.
1/ The speakers had all been blown. Simply replaced those.
2/ The smell inside the car due to various substances being smoked in the cabin. Three hour valet later it smells a bit better.
3/ Loud exhaust and flat spot half way up the rev' range.
First off I welded a stainless middle box in place but this made no real difference.
While I had the exhaust off I noticed a tight bend and some truly horrific welding.
So Project Pigeon Poo II
Cut out the tight bend and patchwork. Replace with a proper bend and weld it all together with my eyes open.
Results. No more flat spot and the inside of the car is 10dB quieter.
See what I mean about "patchwork"?
Tight bend but doesn't look too bad from here...
...BLEAUGH! How can someone weld that and...
a/ Call themselves a welder.
b/ Sleep at night knowing they have unleashed that into the world.
Bit of two inch stainless pipe from a skip at work.
Not great but a damn sight better than it was.
The pigeon poo cross section was less than three quarters of an inch wide. No wonder the poor Twinspark was choking.
New Year same Driveway CSI
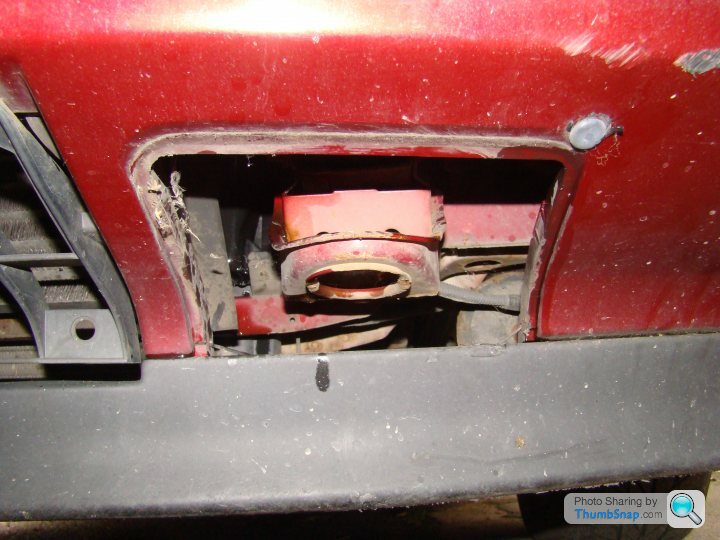
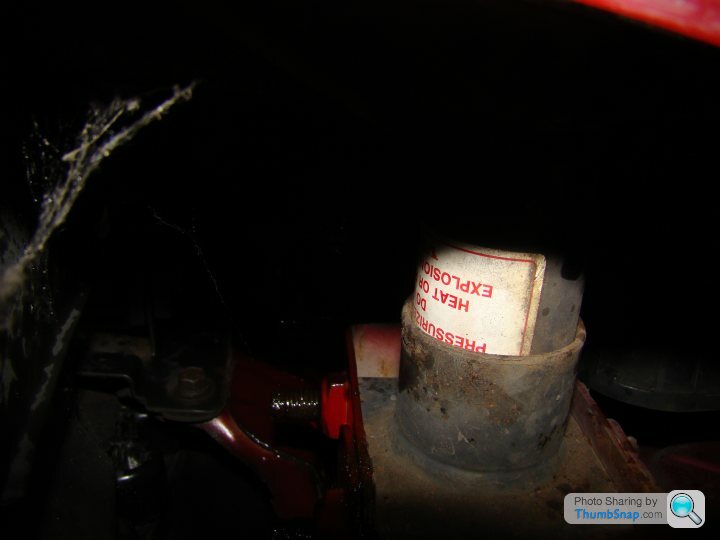
The front bumper on this Volvo 940 was a bit pressed and was rubbing the passenger side tyre at some corners.
Behind the tow eye cover is a compression cylinder bumper mount. Think of it as a shock absorber so the bumper can move instead of a leg or whatever else it hit.
Typically the 16mm nuts holding the bumper on were easy to get to and the lower 14mm bolt was to, but to get the the top bolt I had to take the headlight out, the get to the 10mm headlight nuts I had to take a bit of trim off, to get to the torx screws holding the trim on I had to take the grille out; thankfully the grille is quick release and only held in by a pair of spring clips.
After all that the mount wouldn't come out anyway so I put some spacers on the bumper bolt and reassembled the front end straight again.

I'm going to have to learn more Swedish swear words as "Knulla!" doesn't cut it.
The front bumper on this Volvo 940 was a bit pressed and was rubbing the passenger side tyre at some corners.
Behind the tow eye cover is a compression cylinder bumper mount. Think of it as a shock absorber so the bumper can move instead of a leg or whatever else it hit.
Typically the 16mm nuts holding the bumper on were easy to get to and the lower 14mm bolt was to, but to get the the top bolt I had to take the headlight out, the get to the 10mm headlight nuts I had to take a bit of trim off, to get to the torx screws holding the trim on I had to take the grille out; thankfully the grille is quick release and only held in by a pair of spring clips.
After all that the mount wouldn't come out anyway so I put some spacers on the bumper bolt and reassembled the front end straight again.
I'm going to have to learn more Swedish swear words as "Knulla!" doesn't cut it.
Edited by Liquid Knight on Tuesday 1st January 14:47
Service CSI
So as we know my Mito has been kept to a budget. Mismatched tyres, missing history file, scratch in the rear screen where the wiper was bladeless for a while and other clues; but I would never have guessed this 127,695 mile car had never been serviced.
Due to the lack of history that I put down to people loosing stuff all the time. The car was registered to a woman but sold to me by a couple of blokes. Their domestic situation was none of my business so I didn't give it much thought. Apart from the tyres making different noises the car was and is perfectly fine. I went to my local Alfa dealership who wanted £847+vat to service the car.

Over a grand?
I set about getting the parts, filters, belts, fluids, tensioners, water pump and silicone based gasket stuff. All in £221
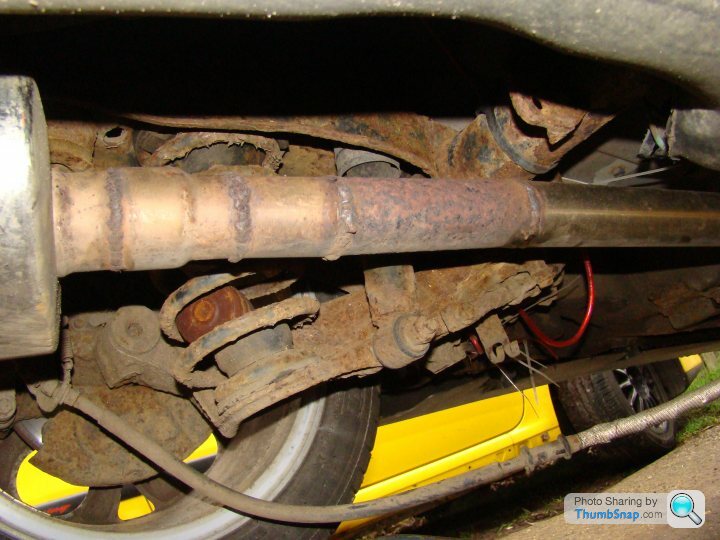
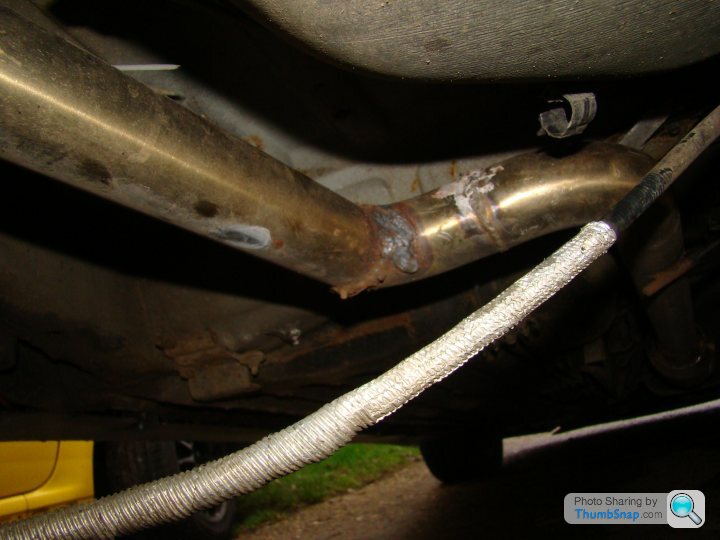
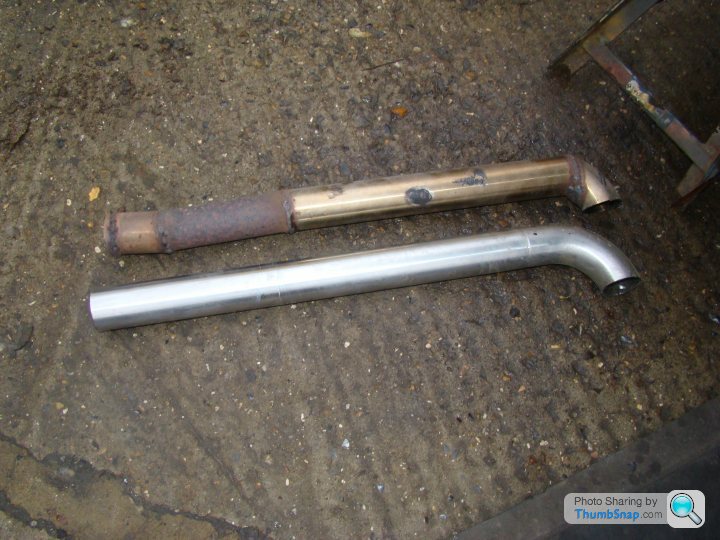
While I was under the car doing the oil change I noticed...
...the exhaust flexipipe has been repaired with a weld in piece instead of replacing the section. More budget maintenance.
It has been done reasonably well. The exhaust has never been off the car from the looks of the dip transfer angles and inconstancy.
My guess is it was a garage/MOT repair but instead of buying the part for £40 they bought a join for £12 and did £40-60 worth of welding instead.
Anyway the filter was done and I checked the old oil for signs of bearing wear or other metal flakes. It was a bit dark but nothing unusual. Air filter much the same so they have been done before.
Time for the belts...
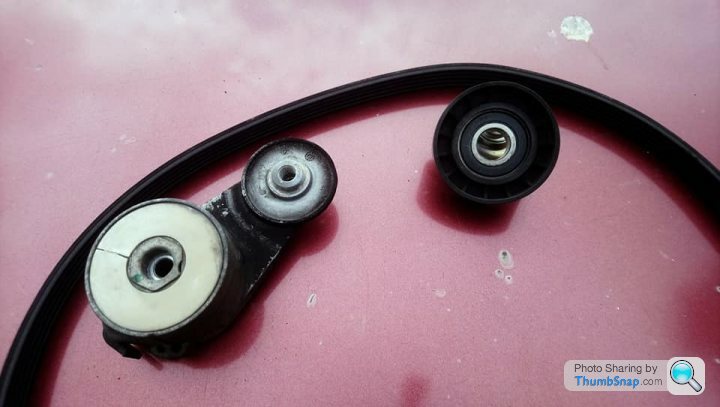
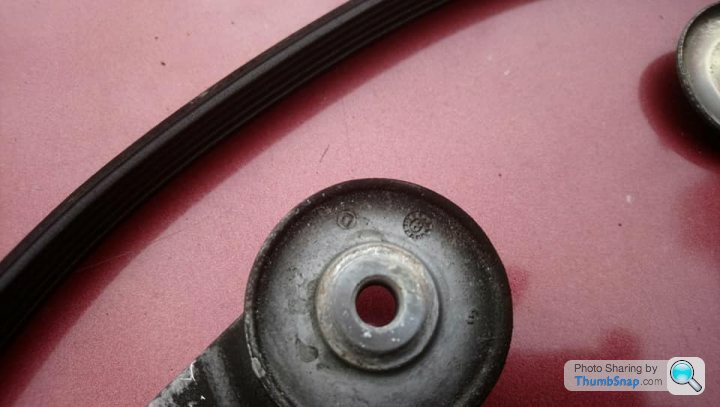
...tired looking, cracked and just about ready to fail. The cam'belt tensioner sounded like a maraca, the water pump had about 1.5mm play in the shaft.
All the belts, tensioners and water pump were marked "8" or "08"
So my poor Mito has either done 127,695 miles without a service or just the first one.
I'm as amazed as I am perturbed. All done and you wouldn't know just how neglected the engine has been. These SuperFIRE's are marvelous bits of kit.
So as we know my Mito has been kept to a budget. Mismatched tyres, missing history file, scratch in the rear screen where the wiper was bladeless for a while and other clues; but I would never have guessed this 127,695 mile car had never been serviced.
Due to the lack of history that I put down to people loosing stuff all the time. The car was registered to a woman but sold to me by a couple of blokes. Their domestic situation was none of my business so I didn't give it much thought. Apart from the tyres making different noises the car was and is perfectly fine. I went to my local Alfa dealership who wanted £847+vat to service the car.
Over a grand?
I set about getting the parts, filters, belts, fluids, tensioners, water pump and silicone based gasket stuff. All in £221
While I was under the car doing the oil change I noticed...
...the exhaust flexipipe has been repaired with a weld in piece instead of replacing the section. More budget maintenance.
It has been done reasonably well. The exhaust has never been off the car from the looks of the dip transfer angles and inconstancy.
My guess is it was a garage/MOT repair but instead of buying the part for £40 they bought a join for £12 and did £40-60 worth of welding instead.
Anyway the filter was done and I checked the old oil for signs of bearing wear or other metal flakes. It was a bit dark but nothing unusual. Air filter much the same so they have been done before.
Time for the belts...
...tired looking, cracked and just about ready to fail. The cam'belt tensioner sounded like a maraca, the water pump had about 1.5mm play in the shaft.
All the belts, tensioners and water pump were marked "8" or "08"
So my poor Mito has either done 127,695 miles without a service or just the first one.
I'm as amazed as I am perturbed. All done and you wouldn't know just how neglected the engine has been. These SuperFIRE's are marvelous bits of kit.
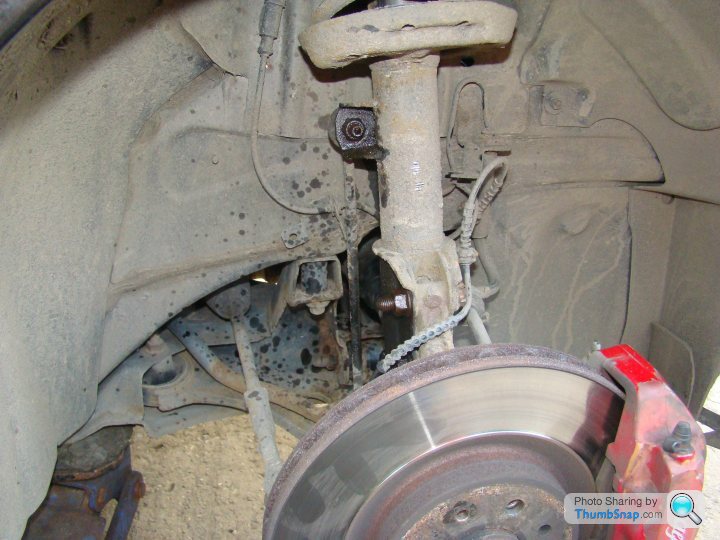
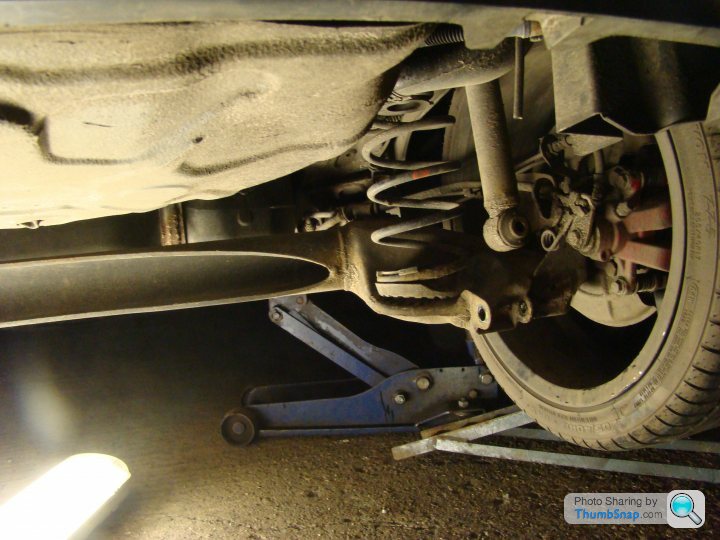
Another little job with my MiTo today. I looked through the history and found one spring had been replaced.


Take the wipers and trim from the lower windscreen.
Dose the strut top threads with penetrating oil.
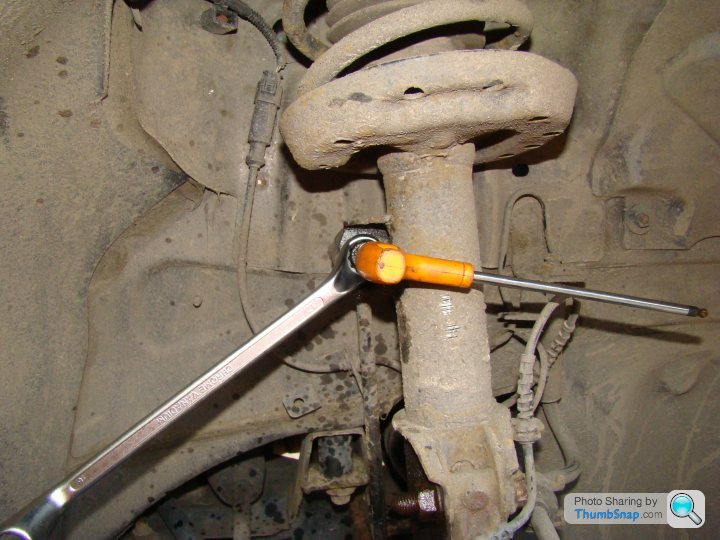
With an 18mm ring spanner and 6mm Allen key crack the top strut nut.
Raise the side you want to do second and drop on a ramp.
Lift the other side and remove the wheel as normal.
Give any exposed threads a good squirt with penetrating oil.
With a 5mm Allen key and 17mm ring spanner remove the anti-roll bar drop link nut.
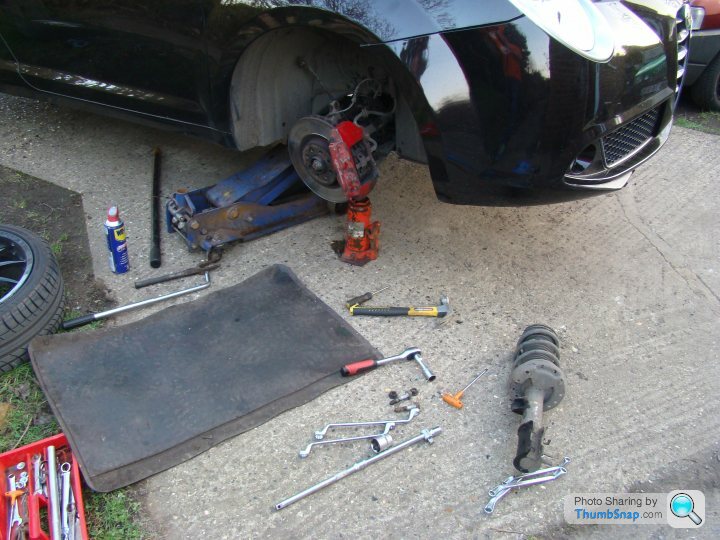
Remove the 18mm lower strut bolts and remove the whole assembly.
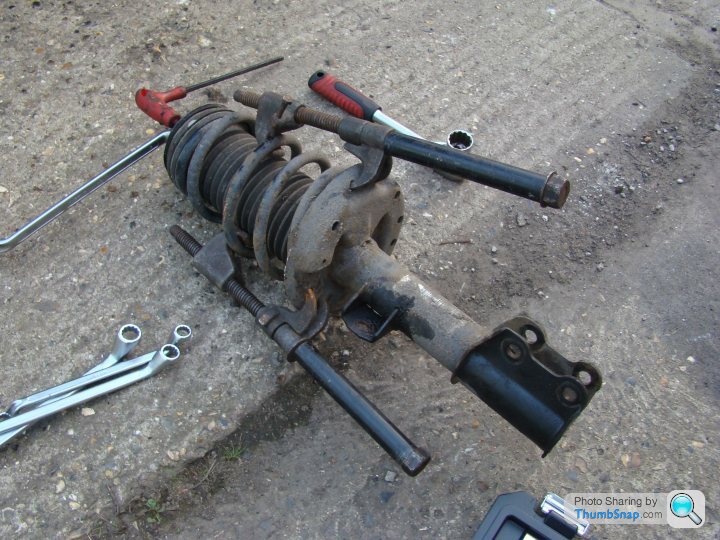
Clamp the old spring to remove the bearing a bush from the top.
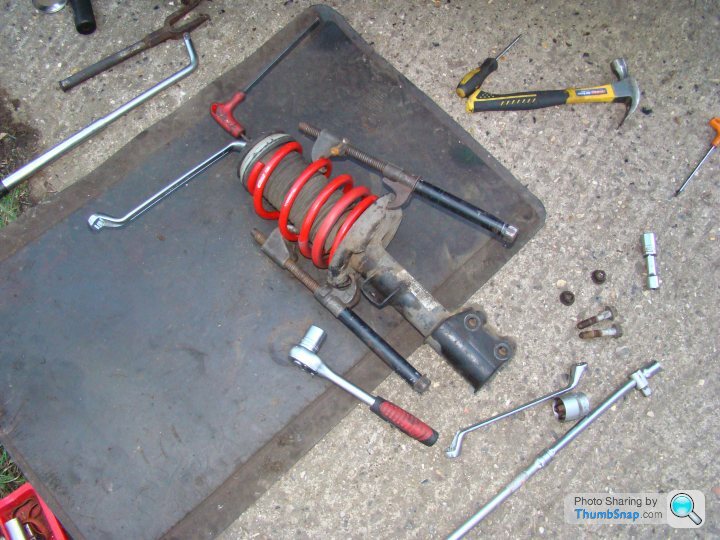
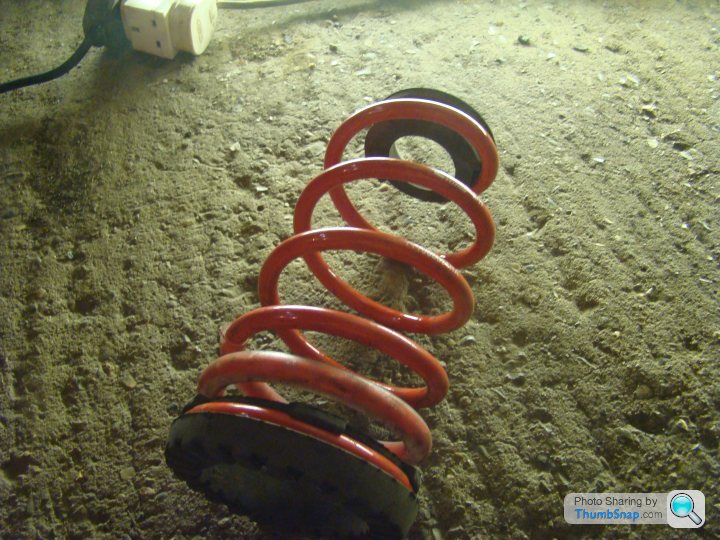
Fit the new spring in place, refitting the bearing and bush.
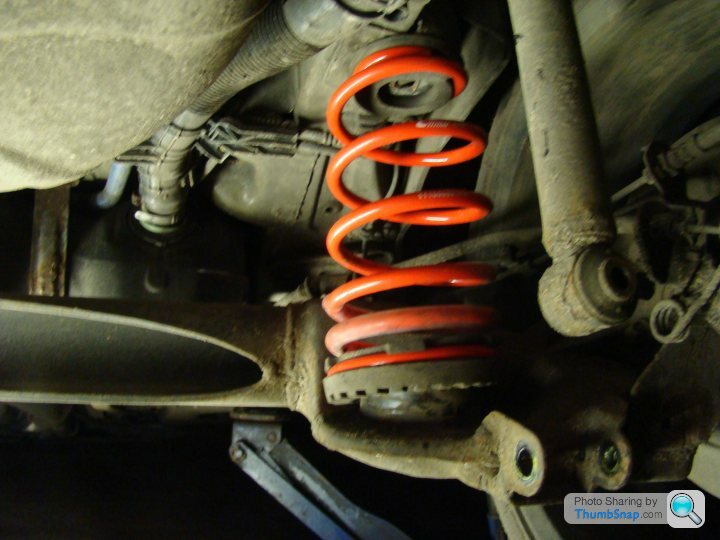
Put the assembly back on the car, refit the road wheel and repeat on the other side.
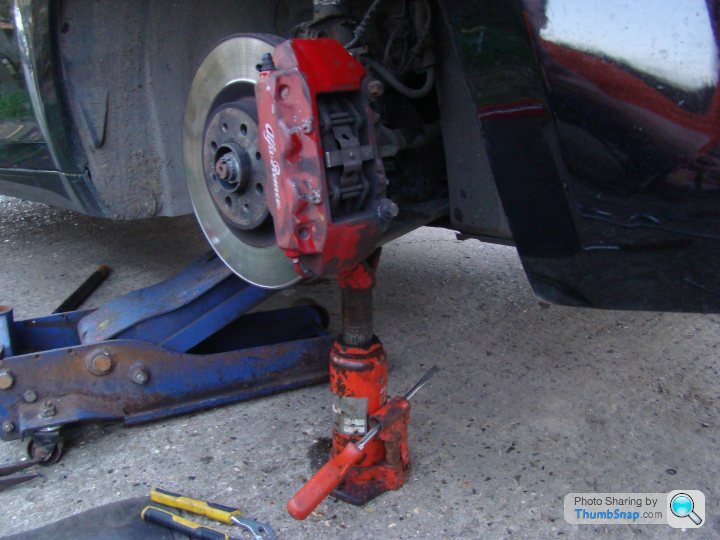
Rear.
Back the car on to ramps.
Soak the exposed threads on the lower shock bolt with penetrating oil.
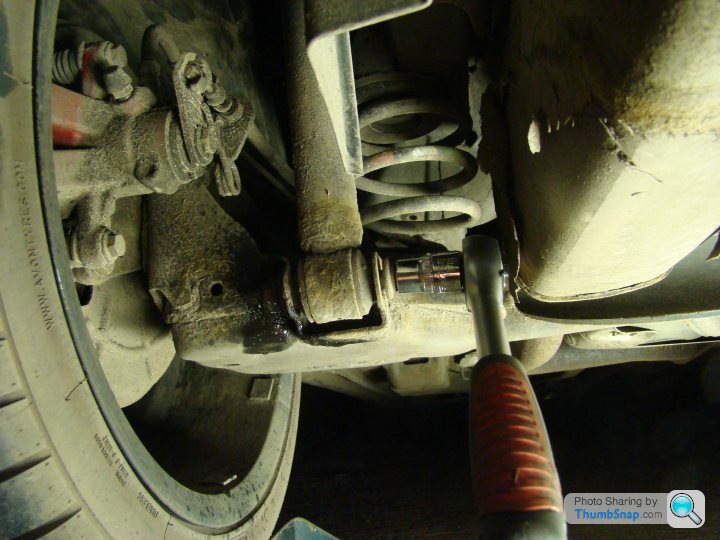
Use an E18 socket to remove the bolts.
Raise the wheel off the ramp at the body jacking point.
Pull the wheel down until the spring is loose enough to remove.
Swap the bushes over.
Put it all back together and you're done.
Front should take about an hour, rear twenty minutes.
Take the wipers and trim from the lower windscreen.
Dose the strut top threads with penetrating oil.
With an 18mm ring spanner and 6mm Allen key crack the top strut nut.
Raise the side you want to do second and drop on a ramp.
Lift the other side and remove the wheel as normal.
Give any exposed threads a good squirt with penetrating oil.
With a 5mm Allen key and 17mm ring spanner remove the anti-roll bar drop link nut.
Remove the 18mm lower strut bolts and remove the whole assembly.
Clamp the old spring to remove the bearing a bush from the top.
Fit the new spring in place, refitting the bearing and bush.
Put the assembly back on the car, refit the road wheel and repeat on the other side.
Rear.
Back the car on to ramps.
Soak the exposed threads on the lower shock bolt with penetrating oil.
Use an E18 socket to remove the bolts.
Raise the wheel off the ramp at the body jacking point.
Pull the wheel down until the spring is loose enough to remove.
Swap the bushes over.
Put it all back together and you're done.
Front should take about an hour, rear twenty minutes.
Histoic Driveway CSI from today in 2015 and I have a five door Punto that needs a little welding, doughnut gasket and a tyre for M.O.T (sorry if this is a repost).
This will be pedantic and long winded was originally written for someone who didn't already know.
First step when welding a hole in the floor of a car is get it up on ramps, lift the side you are welding and rotate the ramp 180 degrees. This is safer than any axle stand/jack combination I have ever seen.
Next disconnect the battery.
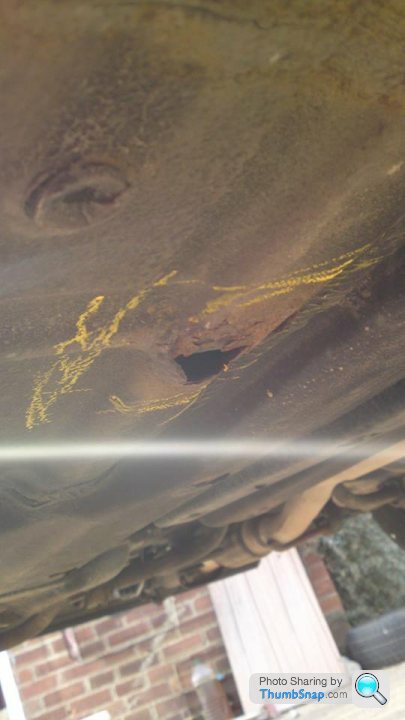
Find and inspect the hole you need to repair.
Make sure the interior carpet is lifted out of the way.
If you need a fire extinguisher bigger than this get someone to help or someone else to do it.

Cut away as much rubbish metal as possible. As this is a Fiat make sure you use a sharp flat bladed screw driver to remove as much of the crazy glue as possible.
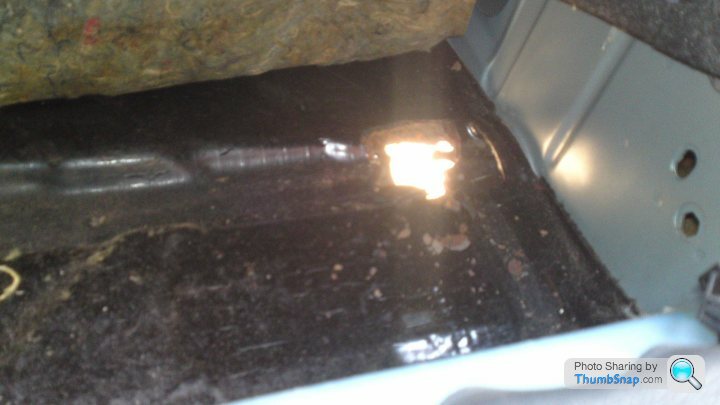
Clean about an inch around the hole. Remove all of the underseal, paint, crazy glue, muck, grease and crap. The cleaner the surface the cleaner and better the weld. Seriously for an hour job like this forty minutes is getting ready, five minutes welding, ten minutes painting and five minutes tidying up.
Cut, shape, tack on a plate ( you can now seam weld inside if you like but I haven't due to lack of space and the suck on soundproofing stinks). Seam weld around the outside about an inch or so at a time pausing to make sure the interior isn't on fire. This also affords you an opportunity to fine tune the shaping of the plate as it may distort a little during the process.
You can flap it flat if you like but I prefer to leave the exposed welds. Let it cool and paint inside and out.

Put the interior back, reconnect the battery, take the car off the ramps and tidy the bits of rust and crap off the floor. Job done.
This will be pedantic and long winded was originally written for someone who didn't already know.
First step when welding a hole in the floor of a car is get it up on ramps, lift the side you are welding and rotate the ramp 180 degrees. This is safer than any axle stand/jack combination I have ever seen.
Next disconnect the battery.
Find and inspect the hole you need to repair.
Make sure the interior carpet is lifted out of the way.
If you need a fire extinguisher bigger than this get someone to help or someone else to do it.
Cut away as much rubbish metal as possible. As this is a Fiat make sure you use a sharp flat bladed screw driver to remove as much of the crazy glue as possible.
Clean about an inch around the hole. Remove all of the underseal, paint, crazy glue, muck, grease and crap. The cleaner the surface the cleaner and better the weld. Seriously for an hour job like this forty minutes is getting ready, five minutes welding, ten minutes painting and five minutes tidying up.
Cut, shape, tack on a plate ( you can now seam weld inside if you like but I haven't due to lack of space and the suck on soundproofing stinks). Seam weld around the outside about an inch or so at a time pausing to make sure the interior isn't on fire. This also affords you an opportunity to fine tune the shaping of the plate as it may distort a little during the process.
You can flap it flat if you like but I prefer to leave the exposed welds. Let it cool and paint inside and out.
Put the interior back, reconnect the battery, take the car off the ramps and tidy the bits of rust and crap off the floor. Job done.
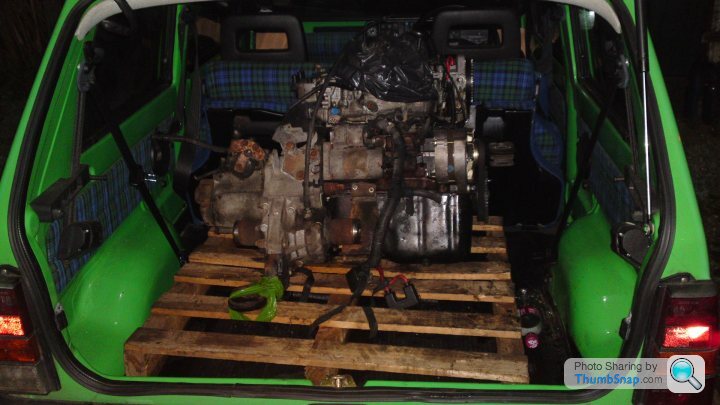
Not a Driveway CSI but from today in 2012 I took my Panda Fantasia to Wemm to collect a Cinquecento Sporting engine and box for another project.
Awesome car. I must get the old girl back on the road by the end of the year.
Back on topic I have had to buy a reconditioned rear caliper for my MiTo.
The original only had three rows of thread holding the bleed nipple in place after it had been crammed on cross threaded. The used one I bought from eBay had a blown seal but I got £100 exchange on the reconditioned one. Paid £80 for the eBay one so in theory I'm £20 up.
Not a CSI really this time, more of a general observation. Isn't it funny how new incarnations of old cars suffer the same problems?
BMW MINI, woefully fragile and far too expensive to repair for what they actually are.
Fiat 500, too pretentious to be seen for the car that it is. A Panda in a prom dress.
VW Beetle.
Quirky but rusts in the exact same place as the original air cooled ones did.
Before I get started here are some of those quirks.
The parcel shelf folds up and meets the profile of the rear screen to act as a dog guard.
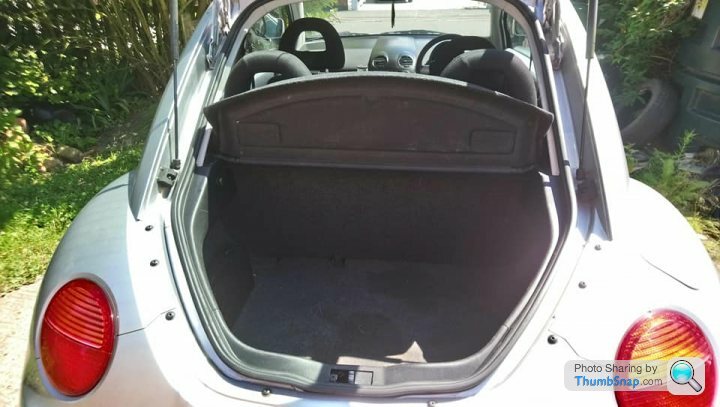
Made in Mexico and this one had a Mk2 Golf Gti 8V engine so I guess a Chihuahua or two at best?
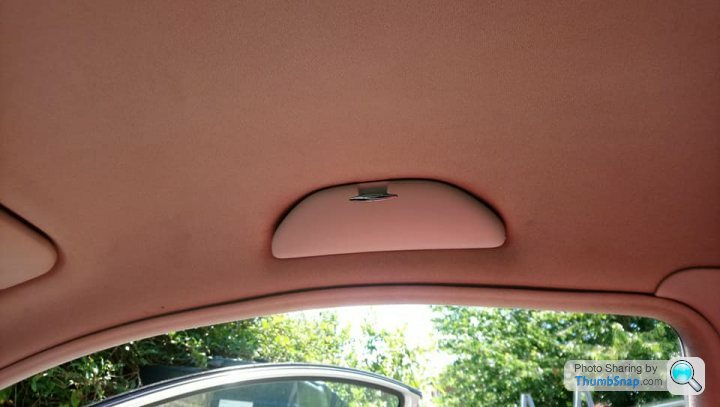
Passengers get an "Oh s t!" handle...
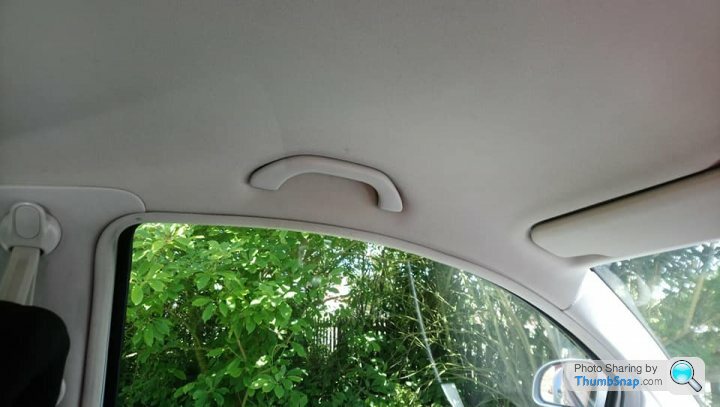
...while the driver gets a sunglasses case.
Right enough with the distractions...
Like any rust repair preparation is the key to good finish (I didn't do this to my usual filler free standard as it's not my car and most of it will be covered by the) wheel arches held up with a stick. Another good thing about the new Beetle, the plastic wings, and rear arches are less bits to go rusty.

Cut away as much as you can...
...get your forming kit together...
...a lip, three bends and a curve later...
...you're ready to trial fit...
...always weld a little too much along exposed seams so you can grind back...
...minimum filler along that seam and I only had white primer in my shed but it needs to be dressed properly later by the owner.
Repeat on the other side and you're done.
The new Beetle. Not bad I guess. It feels like I'm six feet away from the bottom of the windscreen and with the drivers seat adjusted for me there is no room in the back. Great view out of the thing but no idea where the front of the car is when getting into tight spots. Bigger than my Mito but smaller inside. Fewer cup holders but somewhere to stash your sunglasses above the driver and in the rear view mirror console. I have always said that any car that has a vanity mirror on the drivers side is not a drivers car but, with modern left and right hand drive options it makes sense to have the same. Little things like the passenger side mirror being smaller, the reverse and fog lights being symmetrical and of course the dog guard parcel shelf suggest that unlike the BMW MINI rush job a lot of time thought and effort went into the Beetle.
I wouldn't mind swapping the old Gti lump for a 2.0 tfsi and make a bit of a sleeper.
First impressions this is one of only a few VW's I like.
BMW MINI, woefully fragile and far too expensive to repair for what they actually are.
Fiat 500, too pretentious to be seen for the car that it is. A Panda in a prom dress.
VW Beetle.
Quirky but rusts in the exact same place as the original air cooled ones did.
Before I get started here are some of those quirks.
The parcel shelf folds up and meets the profile of the rear screen to act as a dog guard.
Made in Mexico and this one had a Mk2 Golf Gti 8V engine so I guess a Chihuahua or two at best?
Passengers get an "Oh s
t!" handle......while the driver gets a sunglasses case.
Right enough with the distractions...
Like any rust repair preparation is the key to good finish (I didn't do this to my usual filler free standard as it's not my car and most of it will be covered by the) wheel arches held up with a stick. Another good thing about the new Beetle, the plastic wings, and rear arches are less bits to go rusty.
Cut away as much as you can...
...get your forming kit together...
...a lip, three bends and a curve later...
...you're ready to trial fit...
...always weld a little too much along exposed seams so you can grind back...
...minimum filler along that seam and I only had white primer in my shed but it needs to be dressed properly later by the owner.
Repeat on the other side and you're done.
The new Beetle. Not bad I guess. It feels like I'm six feet away from the bottom of the windscreen and with the drivers seat adjusted for me there is no room in the back. Great view out of the thing but no idea where the front of the car is when getting into tight spots. Bigger than my Mito but smaller inside. Fewer cup holders but somewhere to stash your sunglasses above the driver and in the rear view mirror console. I have always said that any car that has a vanity mirror on the drivers side is not a drivers car but, with modern left and right hand drive options it makes sense to have the same. Little things like the passenger side mirror being smaller, the reverse and fog lights being symmetrical and of course the dog guard parcel shelf suggest that unlike the BMW MINI rush job a lot of time thought and effort went into the Beetle.
I wouldn't mind swapping the old Gti lump for a 2.0 tfsi and make a bit of a sleeper.
First impressions this is one of only a few VW's I like.
Driveway CSI update "Et tu, Brute?"
My mate took the Beetle in for MOT. The tester took one look at the weld and said...
"Say hello to LK for me. It's nice to see he's welding again".
...my "mate" then asked...
"How do you know I didn't do it?"
"My eyes work".
...was his reply.
The car passed with no advisories for welding at least.
My mate took the Beetle in for MOT. The tester took one look at the weld and said...
"Say hello to LK for me. It's nice to see he's welding again".
...my "mate" then asked...
"How do you know I didn't do it?"
"My eyes work".
...was his reply.
The car passed with no advisories for welding at least.
Petrol Station CSI today. A beautiful C Type Jaguar was sat with the bonnet open. Running hot but not overheating. I asked what octane fuel was being used.
"Race fuel from the weekend".
I had a similar problem with my X-1/9 the higher octane fuel burned too hot and at road speeds there wasn't enough air flow to cool the car back down. To cure it I had to keep topping up with 95 Ron every quarter of a tank until it stopped and ran normally again.
I have been having fun with my new (to me) Alfa 147
More about that later.
So I had to sell my Mito to cover my bills this month. Zero hours - zero pay but because I'm employed I do not qualify for Universal Credit. Ironic just how un-universal that idea is.
Anyway ow woe is me right? Meh.
I advertised my Mito for £1,295 having paid £1,900 for her in October and spent a good £1,000 at least since, wheels, tyres, springs, shocks, headlights, proper full service, etc, etc.
I was looking at getting a cheaper car £500-600-ish and keeping my head above water. Most cars within that budget are either crap, fked or some kind of automotive punishment, the Focus, Astra, Golf end of the scale. I looked at a few naturally aspirated Subaru's and even considered my mates Beetle but thankfully a chap from the Alfa owners club had a 147 to part exchange.
Deal done.
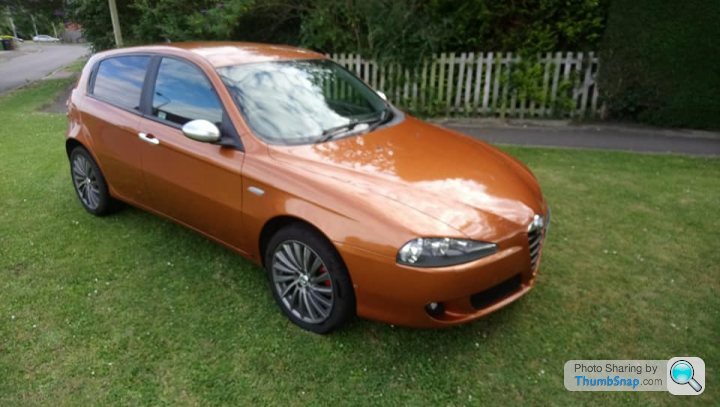
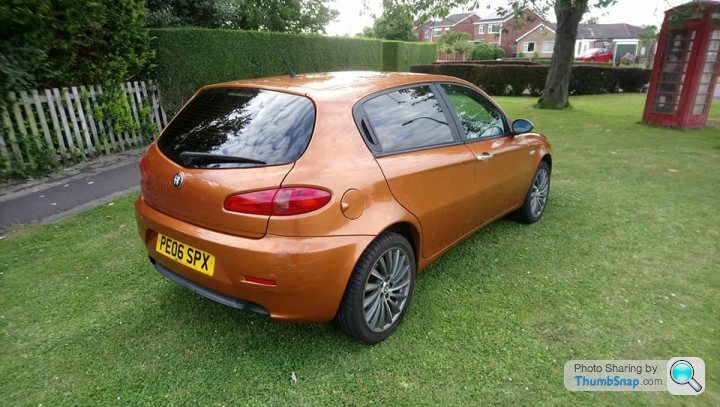
Nice colour Five doors  but has the Ducati Corse interior...
...and for the first time ever; the air conditioning works.
So now the CSI part.
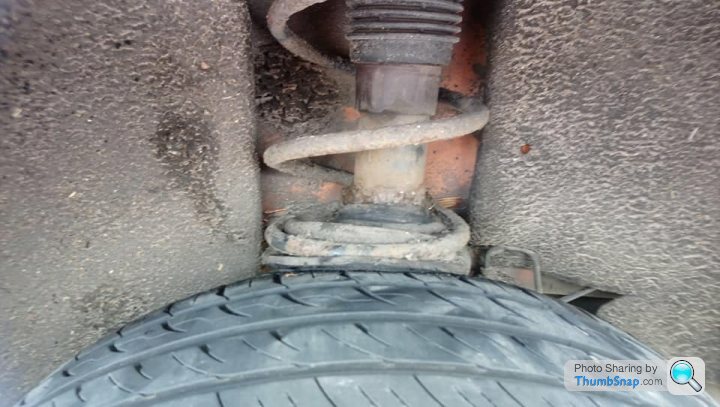
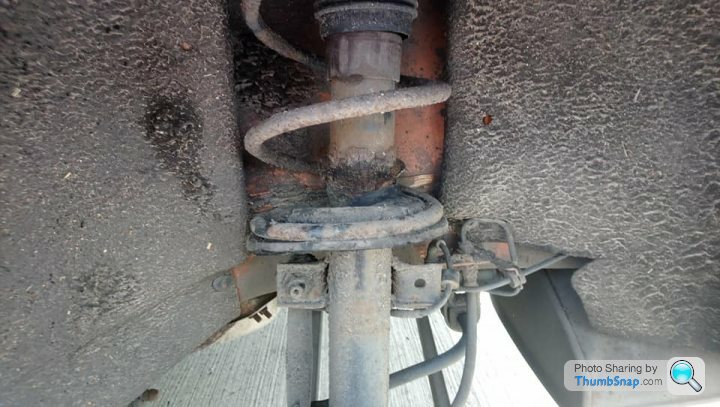
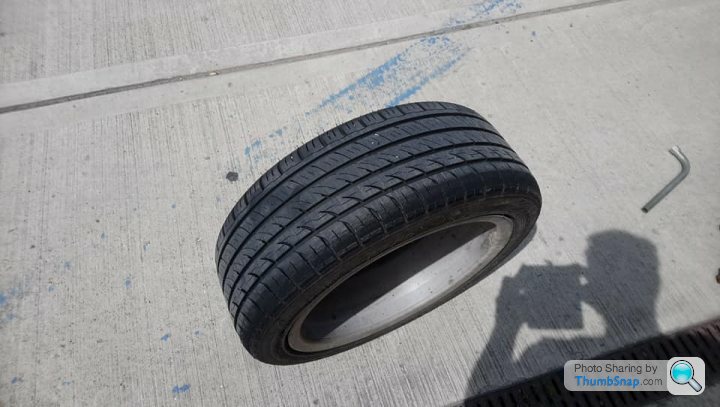
Common with the Alfa 147, 156 and GT the spring collar on the rear upright gave way due to rust. Thankfully it was on a supermarket car park and not a main road. Minimal damage to the tyre and I managed to get the car home.
I do not suspect foul play on the part of the seller. It's one of those things and he drove the car over a hundred miles to collect my Mito with his daughter in the car so I would not imagine even if it could have been predictable that using motorways and A roads would not have been appealing.
Now you are not a proper mechanic unless you make your own tools.
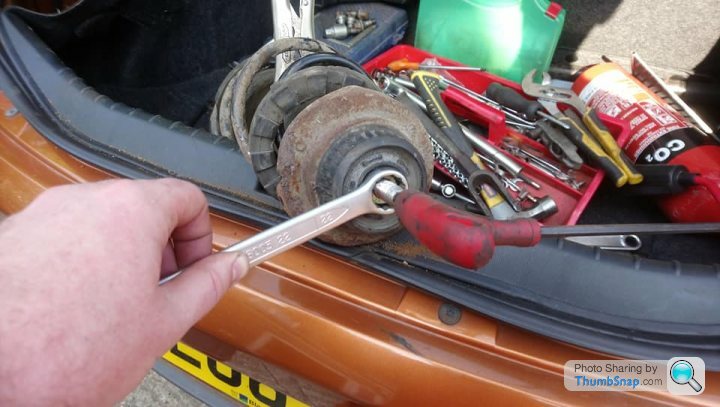
A normal ring spanner is too wide to fit the top strut nut...
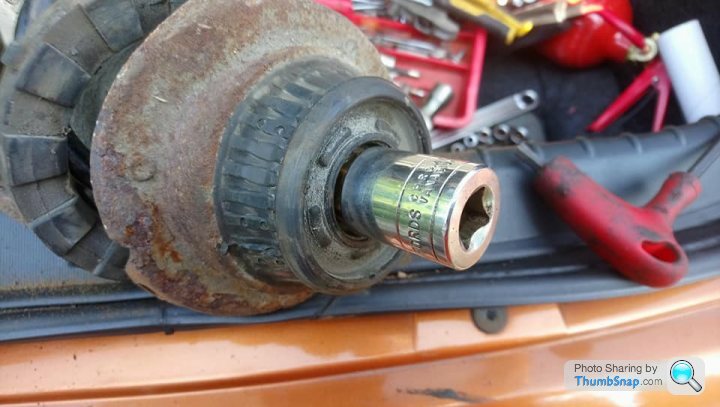
....conventional sockets are too short and long ones get in the way of the Allen key.
Take an old 22mm socket and an older ring spanner...
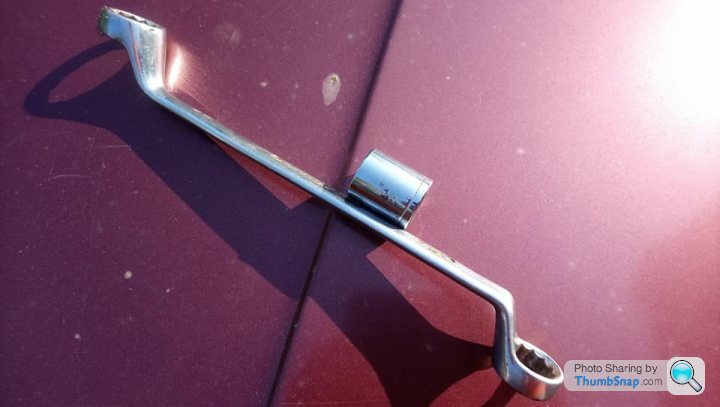
...cut the socket in half...
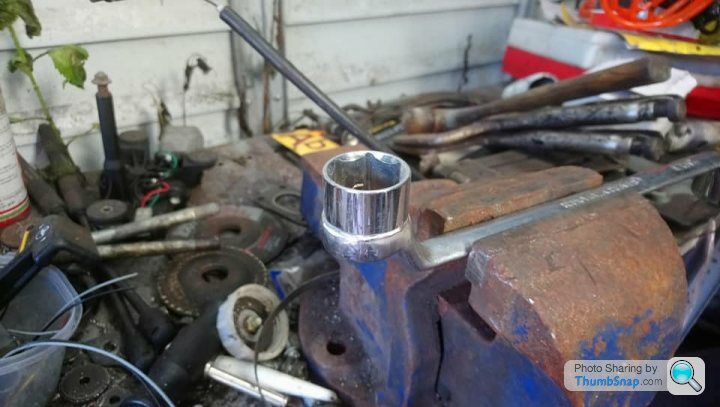
...clean the surface of the ring making a bit of a vee butt.
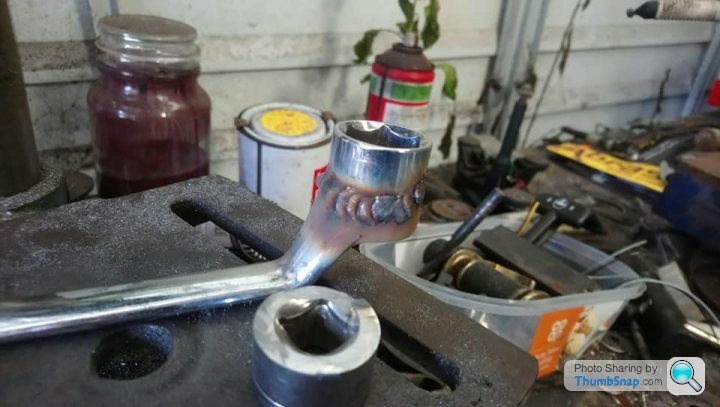
Weld the two pieces together and...

...you have a deep go though strut spanner.
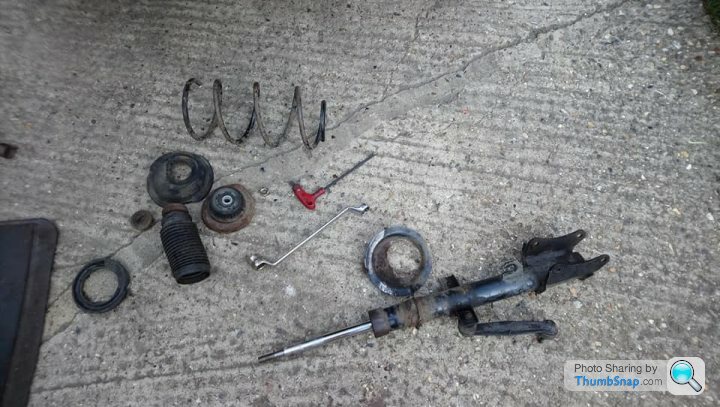
While I'm waiting for the new shocks, drop links and abs sensor (I broke one trying to extrapolate it from the hub) I thought I would do something about the VW Golf used for transporting Cannabis look the car has.
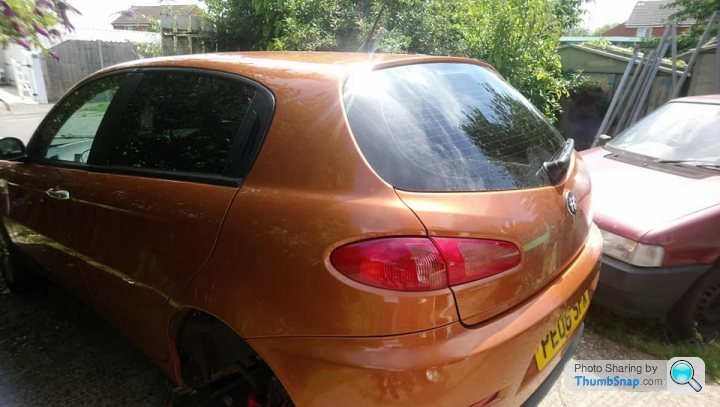
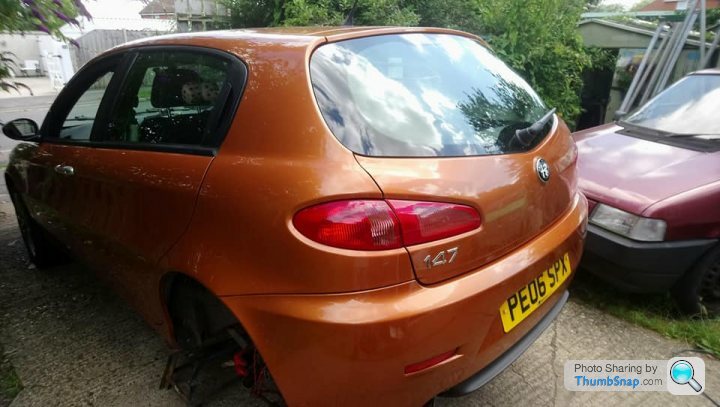
New badge and tinting film removed. That's better.
Anyway ow woe is me right? Meh.
I advertised my Mito for £1,295 having paid £1,900 for her in October and spent a good £1,000 at least since, wheels, tyres, springs, shocks, headlights, proper full service, etc, etc.
I was looking at getting a cheaper car £500-600-ish and keeping my head above water. Most cars within that budget are either crap, f
ked or some kind of automotive punishment, the Focus, Astra, Golf end of the scale. I looked at a few naturally aspirated Subaru's and even considered my mates Beetle but thankfully a chap from the Alfa owners club had a 147 to part exchange. Deal done.
Nice colour
Five doors but has the Ducati Corse interior......and for the first time ever; the air conditioning works.
So now the CSI part.
Common with the Alfa 147, 156 and GT the spring collar on the rear upright gave way due to rust. Thankfully it was on a supermarket car park and not a main road. Minimal damage to the tyre and I managed to get the car home.
I do not suspect foul play on the part of the seller. It's one of those things and he drove the car over a hundred miles to collect my Mito with his daughter in the car so I would not imagine even if it could have been predictable that using motorways and A roads would not have been appealing.
Now you are not a proper mechanic unless you make your own tools.
A normal ring spanner is too wide to fit the top strut nut...
....conventional sockets are too short and long ones get in the way of the Allen key.
Take an old 22mm socket and an older ring spanner...
...cut the socket in half...
...clean the surface of the ring making a bit of a vee butt.
Weld the two pieces together and...
...you have a deep go though strut spanner.
While I'm waiting for the new shocks, drop links and abs sensor (I broke one trying to extrapolate it from the hub) I thought I would do something about the VW Golf used for transporting Cannabis look the car has.
New badge and tinting film removed. That's better.
Edited by Liquid Knight on Wednesday 24th July 15:15
All done (well not exactly I managed to break the abs trigger ring on one of the bearings so I have ordered a new pair)...

The drivers side shock was pretty bad as well. Always a good idea to do things like this in pairs.
Four hits with a hammer and it was gone.
Changed before it needed changing.
On the old car old bodges front the lower hub bolt was rust welded in place and took a lot of effort. The top was bent, crammed in and the nut was cross threaded in place.
The top bolt is now a lower front hub bolt from my old FTO.
Shed full of crap 1 - 0 Previous bodger
Gassing Station | Home Mechanics | Top of Page | What's New | My Stuff