VW T25 restoration
Discussion


marky911 said:
Mornin' Vanny,
well at least you're making good progress and getting stuck in. I hope the engine is a simple fix. Youtube is brilliant. Doesn't matter what project I'm doing, I always type it into youtube and see how it's done. Really is amazing. Don't know how our dads managed without the internet.
Just leaving my seams for this year. Need to see how much we actually use the van. Been a dream for a long time but we are still yet to use it. Just had to cancel Cambridge this weekend!
If the van is a keeper (which I hope it is), I'll get the bodywork done again and maybe a pop-top fitted. It's very, very minor tiny bubbles here and there. Nothing as far as T25s go, so not too worried.
Anyway, it's the weekend, so you should make somemore progress eh. Have fun.
PS. It's apparently only 10 wires to get a Subaru engine in there.
You can get a donor car for a £1000 and the conversion parts for £1000. Will probably add £2k to the value of the van too. Very desirable. Drives like a car then.
Must admit though I couldn't do it! I know my limits.
Hey Marky911well at least you're making good progress and getting stuck in. I hope the engine is a simple fix. Youtube is brilliant. Doesn't matter what project I'm doing, I always type it into youtube and see how it's done. Really is amazing. Don't know how our dads managed without the internet.
Just leaving my seams for this year. Need to see how much we actually use the van. Been a dream for a long time but we are still yet to use it. Just had to cancel Cambridge this weekend!
If the van is a keeper (which I hope it is), I'll get the bodywork done again and maybe a pop-top fitted. It's very, very minor tiny bubbles here and there. Nothing as far as T25s go, so not too worried.
Anyway, it's the weekend, so you should make somemore progress eh. Have fun.
PS. It's apparently only 10 wires to get a Subaru engine in there.
You can get a donor car for a £1000 and the conversion parts for £1000. Will probably add £2k to the value of the van too. Very desirable. Drives like a car then.
Must admit though I couldn't do it! I know my limits.
Im definitely making good progress! I spent at least 16 hours in the garage over the weekend. Sat down with a cuppa tea now (after doing some tonight) and ready to get some mre pics up!
Youtube is just a wealth of knowledge! I used a video to help with a lock replacement on our lasses mk4 golf a few months back!
The seams dont sound too bad at all on yours. Its just a case of watching them to see when they start needing some attention!
It would be nice to drop a subaru engine in just to get a bit more power for the hills but then im getting into territory that I wouldnt be able o fix. The subaru engine looks far more complex that the DG fitted to this one. Theres also the cost. Its £2000 that I haven't budgeted for and ive set myself a reasonable limit of £5200 after pricing up before I bought this but ive got an extra £k for the unexpected as no doubt there will be surprises!
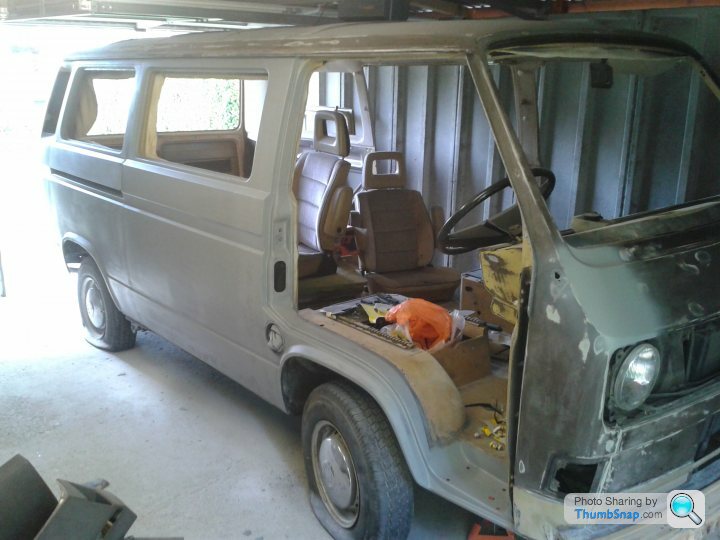
3 weeks into the restoration and I have spent around 56 hours working on her... The driver side of the van is almost complete and I actually feel like im making some progress now so here are a few pics!
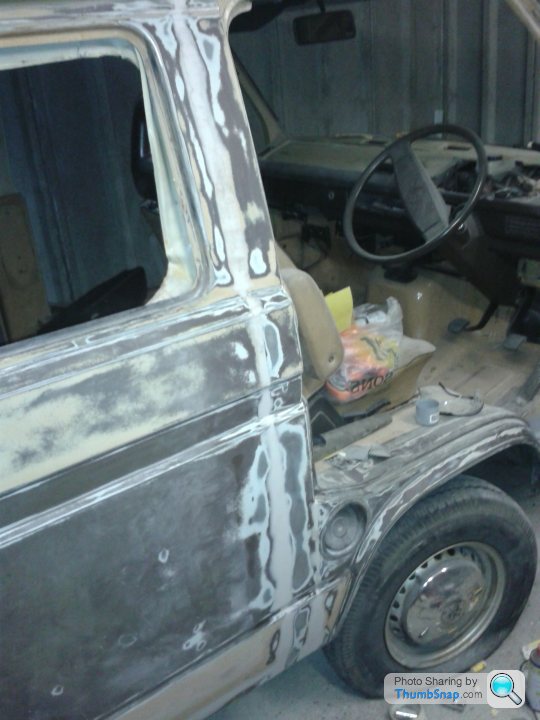
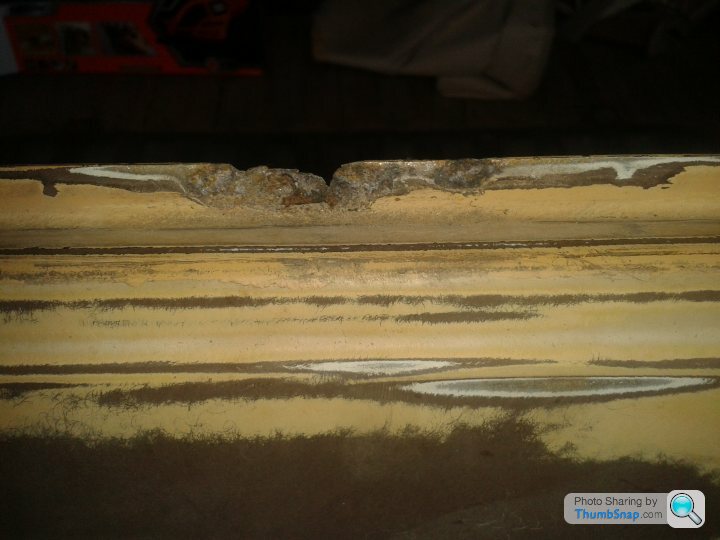
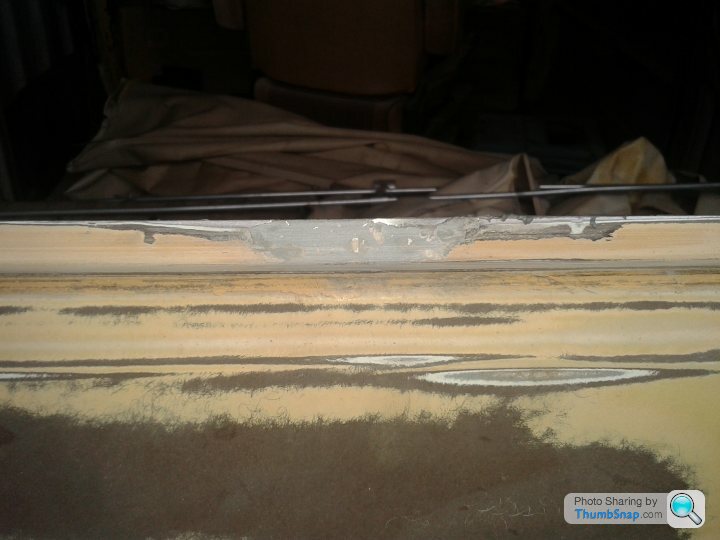
Filling the seams. The bottom seam below the petrol cap had a slight inwards bend. Im not sure if it was supposed to be like that - no sign of damage or weakening so ive just made it totally flush.
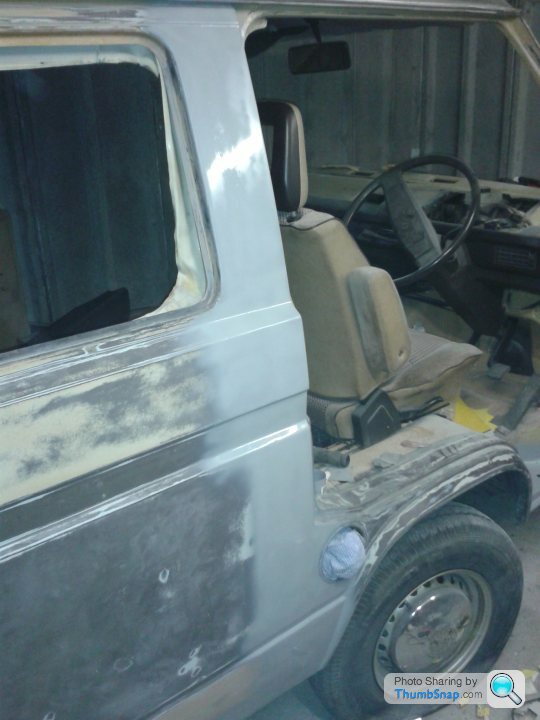
The first coat of primer, to show the imperfections.
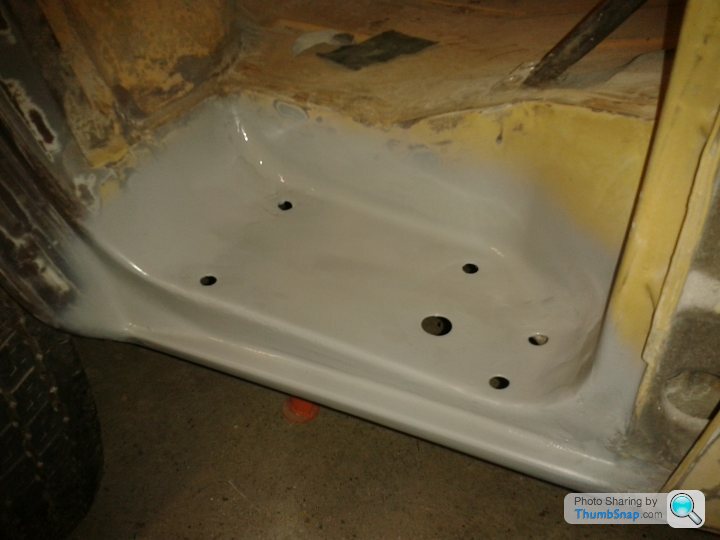
Driver side step. Ive actually done something that I said I wouldnt do. The step had rusted through at the top left hole and there were 2 small holes in the centre. The structure wasnt weakened by it so after speaking to my local motor factors, he said to try chemical metal. I put a cardboard cylinder in where the rubber mount will fit and then filled it. I bashed it with a rubber mallet after and its rock solid. It turned out a lot better than I thought so I guess only time will tell.
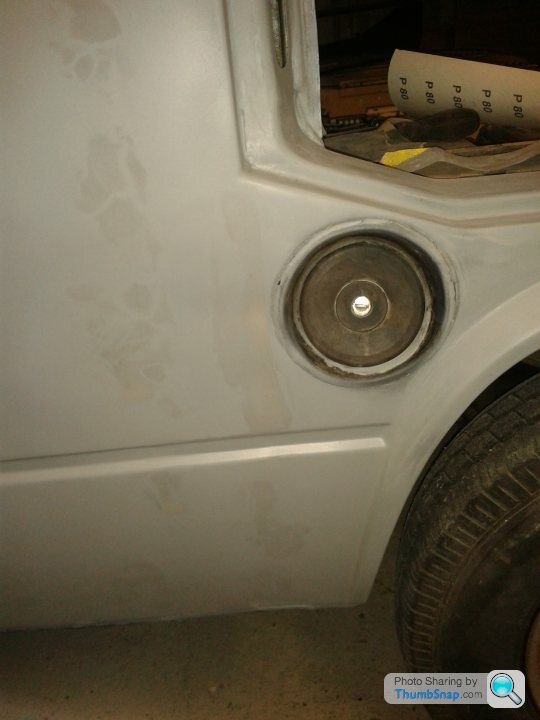
Close up of the seams at the filler cap. Really imrpressed with these!
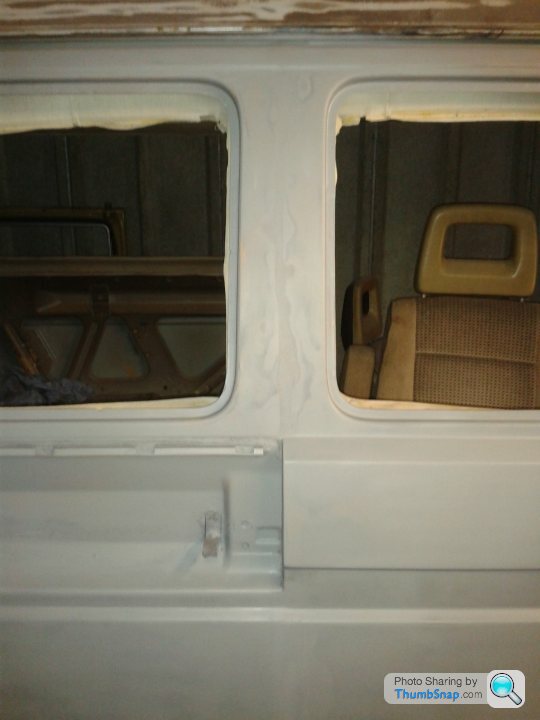
Centre seam between the 2 rear windows.
The completed rear seams
After 1 coat of primer. Very pleased with the result! The middle seam looks like it is still visible but its just where the primer is on the filler.
And finally....
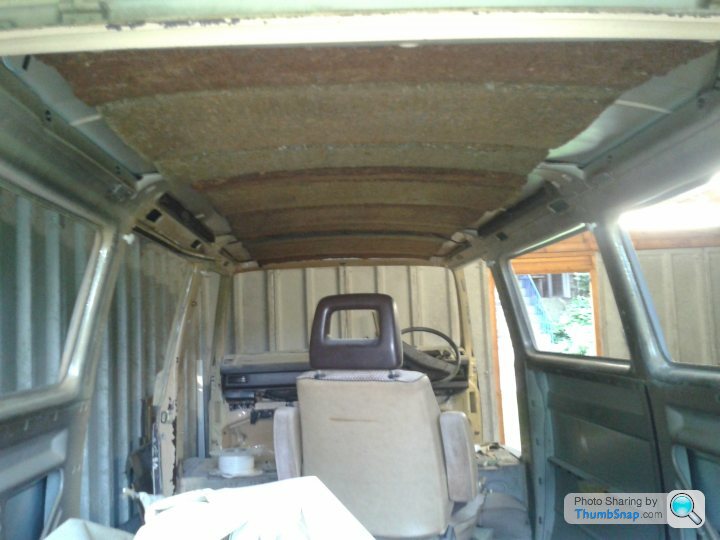
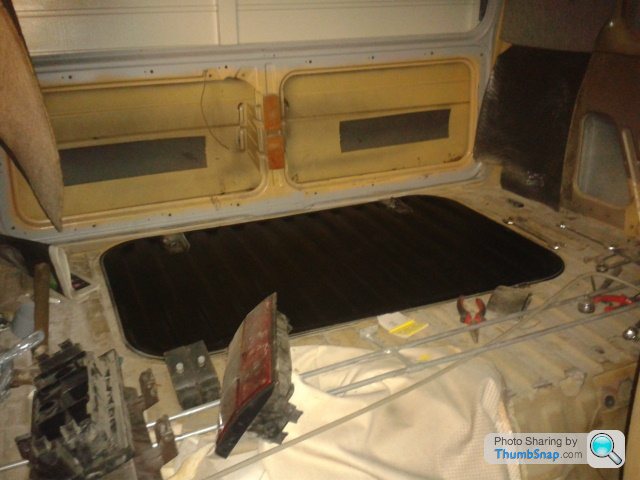
All I have done tonight is carefully removed the head lining. Something less strenuous tonight as im shattered after the weekend! The amount of bolts and screws was immense! Ive taken that out as it was torn in several places and it was so dirty. No point in doing all this work and having a sub standard lining! Im looking at putting a ply lining in with recessed lighting...
Filling the seams. The bottom seam below the petrol cap had a slight inwards bend. Im not sure if it was supposed to be like that - no sign of damage or weakening so ive just made it totally flush.
The first coat of primer, to show the imperfections.
Driver side step. Ive actually done something that I said I wouldnt do. The step had rusted through at the top left hole and there were 2 small holes in the centre. The structure wasnt weakened by it so after speaking to my local motor factors, he said to try chemical metal. I put a cardboard cylinder in where the rubber mount will fit and then filled it. I bashed it with a rubber mallet after and its rock solid. It turned out a lot better than I thought so I guess only time will tell.
Close up of the seams at the filler cap. Really imrpressed with these!
Centre seam between the 2 rear windows.
The completed rear seams
After 1 coat of primer. Very pleased with the result! The middle seam looks like it is still visible but its just where the primer is on the filler.
And finally....
All I have done tonight is carefully removed the head lining. Something less strenuous tonight as im shattered after the weekend! The amount of bolts and screws was immense! Ive taken that out as it was torn in several places and it was so dirty. No point in doing all this work and having a sub standard lining! Im looking at putting a ply lining in with recessed lighting...
mike9009 said:
Nice work, not sure if I could ever dedicate the time to doing what you are doing.
Incidently my T25 passed its MOT last weekend, with only the fuse for the horn needing replacing. Very relieved!
Keep up the good work.
Mike
Thanks mike9009. Ive pretty much given up my social life for the moment but only until ive got the exterior done. Then I can slow down a bit - but not too much!!Incidently my T25 passed its MOT last weekend, with only the fuse for the horn needing replacing. Very relieved!
Keep up the good work.
Mike
Great news about yout T25. The last MOT this one had was in 2003! Ive yet to check the mechanicals but I suspect the brakes are shot at the very least!

marky911 said:
10 out of 10 for effort there Vanagon. You've got well and truly stuck in.
I don't have the time or ability to tackle bodywork on that scale. Well done.
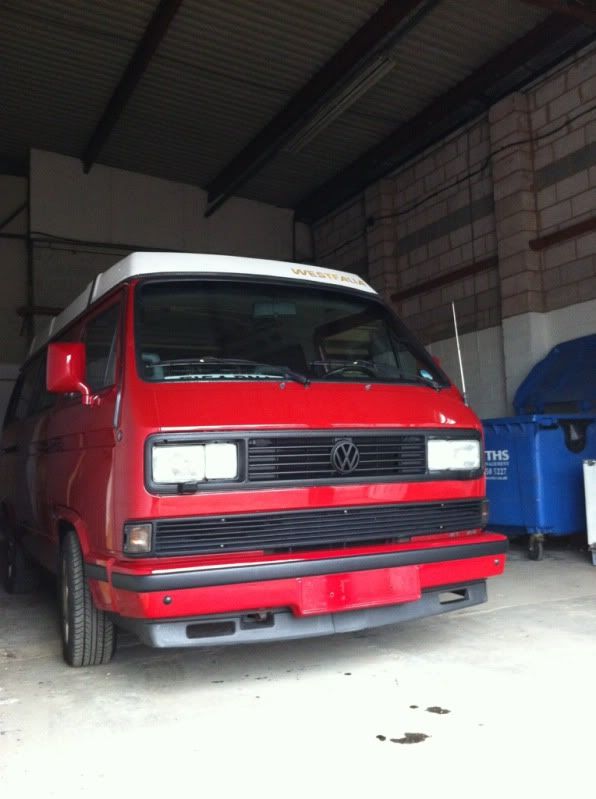
PS. I'm dead jealous you can fit yours in your garage too. Jammy git!
Mine is destined to a life outside unfortunately.
Cheers marky911! Im still really enjoying doing it!I don't have the time or ability to tackle bodywork on that scale. Well done.
PS. I'm dead jealous you can fit yours in your garage too. Jammy git!
Mine is destined to a life outside unfortunately.
Im sure youve got the ability to do it. Ive never done bodywork on a car before. Im finding that when I fill the seams then sand it down, ive got imperfections but I just rough it up again and add a bit more to smooth it off - ive got 6 different grades of sandpaper to go down to get it smooth!
haha dont be jealous! It didnt fit until I let the tyres down and even then theres less than an inch clearance of the beams. Im not fussed about the tyres though as I was told they were in good order but when ive checked between the tread, theyre all cracked so theres no way its going on the road with them! It will live on the road when its done unfortunately.
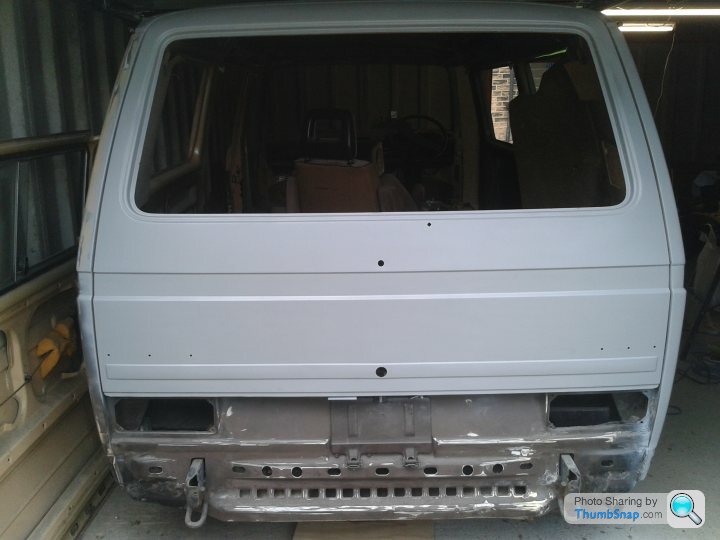
Picture of the back end... practically untouched at the moment
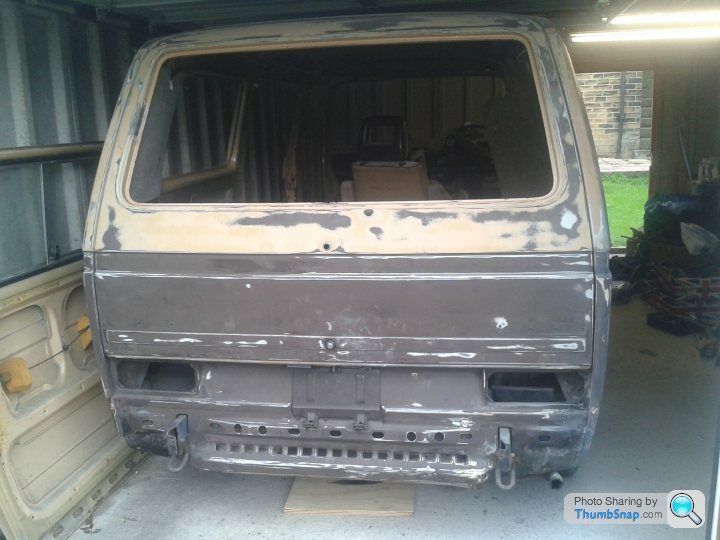
Hole in the rear door where the window seal fits - right in the centre bottom of the window housing.
Chemcial metal added to the hole and then squashed between 2 bits of cardboard to make it flat while it sets. (I forgot to take a picture of what it looks like after I sanded it flat but I'll add that next week)

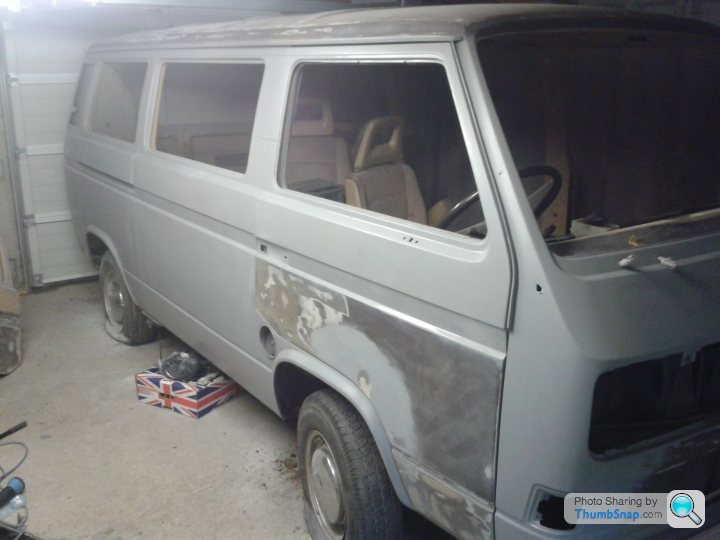
Rear side completely finished!
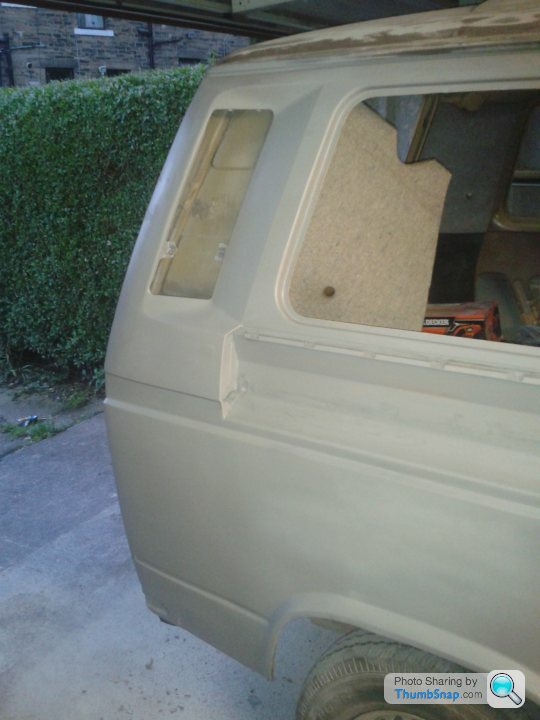
Front side end finished!
Next on the list to do is the rear, then turn the van around so I can do the front and the passenger side!
Hole in the rear door where the window seal fits - right in the centre bottom of the window housing.
Chemcial metal added to the hole and then squashed between 2 bits of cardboard to make it flat while it sets. (I forgot to take a picture of what it looks like after I sanded it flat but I'll add that next week)
Rear side completely finished!
Front side end finished!
Next on the list to do is the rear, then turn the van around so I can do the front and the passenger side!
seen this as an article in a camping mag.
http://www.andysaunderskustoms.co.uk/details/tv/62
just thought i'd say like.......
http://www.andysaunderskustoms.co.uk/details/tv/62
just thought i'd say like.......
Hi all!!
Its been ages since ive found the time to post some more pictures as im getting well and truly stuck in and still loving every minute. Its starting to come alive now and I feel like im making real progress!
I'll start where I left off.
Here is the rear door. There was a hole where the window rubber sits so I filled it and sanded it smooth.
Rear door sanded and primed - you cant even tell where the hole in the window frame was (right above the rear wiper hole on the bottom edge)
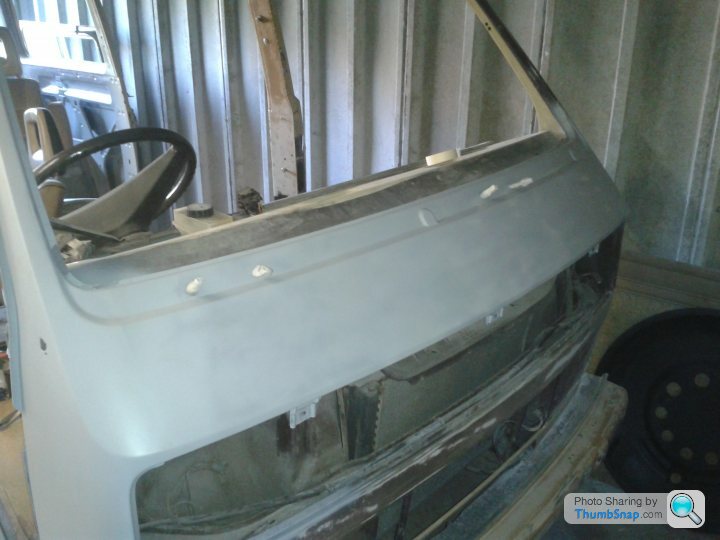
Front lights removed, top panel sanded and primed
Rear - light surface rust (which had been covered with bathroom silicone sealant!) all removed, rubbed down, prepped and now primed (although I dont think I have a picture of this bit after putting primer on)

Gearstick welded and now refitted and polished

Front door fitted, sanded and primed - has been fully done since this picture
Rear valance sanded and primed. In this picture, you can see where I found some extra sanding was required so there are bits of paint missing but its been completed since this picture. theres also a dent on the lower right part of the valance - still debating if to straighten this or not. May cause undue work and it wont be seen anyway!

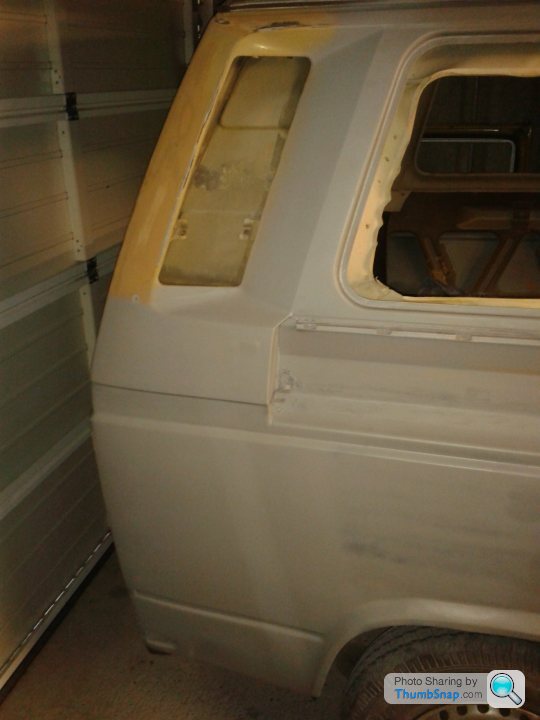
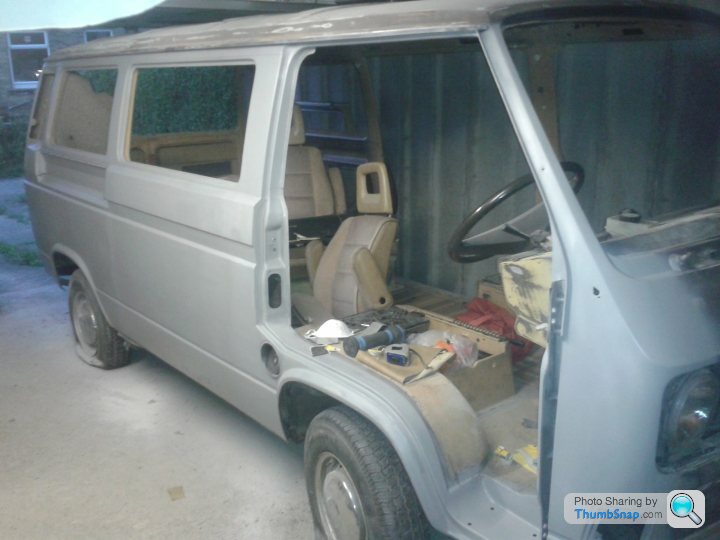
Ive started work on the sliding door and after taking the window out, there is a lot of surface rust at the bottom. This is work in progress. While the door is accessible, ive also chosen my colour - Ford Signal Orange and black. Tester is below! (signal orange on the left, focus ST electric orange on the right (I didnt like the ST orange!)

Ive painted the engine hatch top black after sanding it down (purely because I was going insane and wanted to see some colour!)but ill have to cover it when im sanding now! The release nuts are going to be painted orange.
Well, I think thats it for the bodywork side of things so far.
Ive also finally got round to doing a compression test on the cylinders. 3 of them were reading 6 bar, which I thought was "normal" since they were reading the same (but after reading the manual, it says 8 bar for a used engine is acceptable and a new engine would be up to 13 bar!! eeks!)1 cylider reads zero so clearly a problem there and a rebuild required!
Ive spoken to a mechanic ive used before and he is going to come and give me a price, however, after reading the haynes manual several times and watching a step by step tutorial on youtube (god bless youtube!!) Im feeling up to the challenge of rebuilding it myself. The way I see it, its £110 for the full gasket kit (suspect there maybe something else wrong with the cylinder that reads zero) so its worth a shot. worst case scenario, Ive found a company in essex who will provide a fully refurbished engine block without ancillaries for £900. I figure the mechanic will charge at least £600 to rebuild it so its worth the gamble and if it doesnt pay off, ive only wasted £110, whereas if I can do it, ive saved stacks of cash - and got the pride to boot!
Watch this space!
Its been ages since ive found the time to post some more pictures as im getting well and truly stuck in and still loving every minute. Its starting to come alive now and I feel like im making real progress!
I'll start where I left off.
Here is the rear door. There was a hole where the window rubber sits so I filled it and sanded it smooth.
Rear door sanded and primed - you cant even tell where the hole in the window frame was (right above the rear wiper hole on the bottom edge)
Front lights removed, top panel sanded and primed
Rear - light surface rust (which had been covered with bathroom silicone sealant!) all removed, rubbed down, prepped and now primed (although I dont think I have a picture of this bit after putting primer on)
Gearstick welded and now refitted and polished
Front door fitted, sanded and primed - has been fully done since this picture
Rear valance sanded and primed. In this picture, you can see where I found some extra sanding was required so there are bits of paint missing but its been completed since this picture. theres also a dent on the lower right part of the valance - still debating if to straighten this or not. May cause undue work and it wont be seen anyway!
Ive started work on the sliding door and after taking the window out, there is a lot of surface rust at the bottom. This is work in progress. While the door is accessible, ive also chosen my colour - Ford Signal Orange and black. Tester is below! (signal orange on the left, focus ST electric orange on the right (I didnt like the ST orange!)
Ive painted the engine hatch top black after sanding it down (purely because I was going insane and wanted to see some colour!)but ill have to cover it when im sanding now! The release nuts are going to be painted orange.
Well, I think thats it for the bodywork side of things so far.
Ive also finally got round to doing a compression test on the cylinders. 3 of them were reading 6 bar, which I thought was "normal" since they were reading the same (but after reading the manual, it says 8 bar for a used engine is acceptable and a new engine would be up to 13 bar!! eeks!)1 cylider reads zero so clearly a problem there and a rebuild required!
Ive spoken to a mechanic ive used before and he is going to come and give me a price, however, after reading the haynes manual several times and watching a step by step tutorial on youtube (god bless youtube!!) Im feeling up to the challenge of rebuilding it myself. The way I see it, its £110 for the full gasket kit (suspect there maybe something else wrong with the cylinder that reads zero) so its worth a shot. worst case scenario, Ive found a company in essex who will provide a fully refurbished engine block without ancillaries for £900. I figure the mechanic will charge at least £600 to rebuild it so its worth the gamble and if it doesnt pay off, ive only wasted £110, whereas if I can do it, ive saved stacks of cash - and got the pride to boot!
Watch this space!
PeanutHead said:
Coming alone nicely there Mat, great choice on the Orange and Black.
Keep the updates coming.#
It better be ready for santa pod next year
cheers peanut. Off on my jollies next week so its gonna be a couple of weeks before the next updates I suspect.Keep the updates coming.#
It better be ready for santa pod next year
It should be ready, though their website doesnt have any listings for the next 'big bang' yet. I guess it all depends on when you bring this trolley round so I can drop the engine.... *hint HINT*

Gassing Station | Tents, Caravans & Motorhomes | Top of Page | What's New | My Stuff