DIY Surf bus / campervan build - The Yellow Peril
Discussion


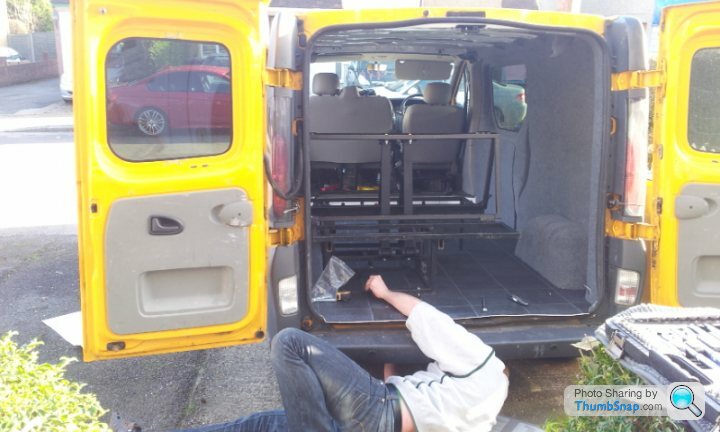
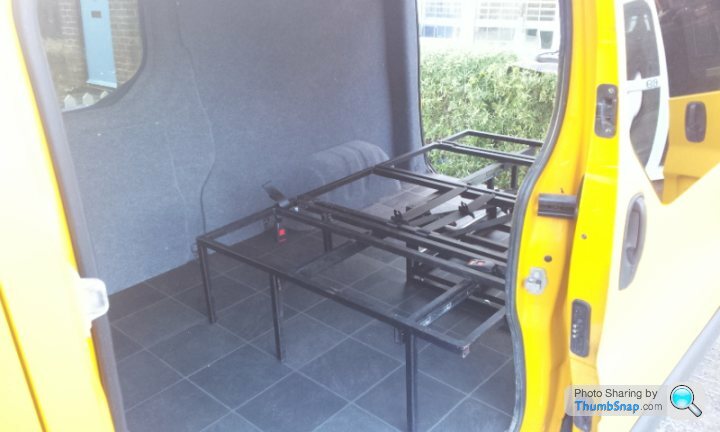
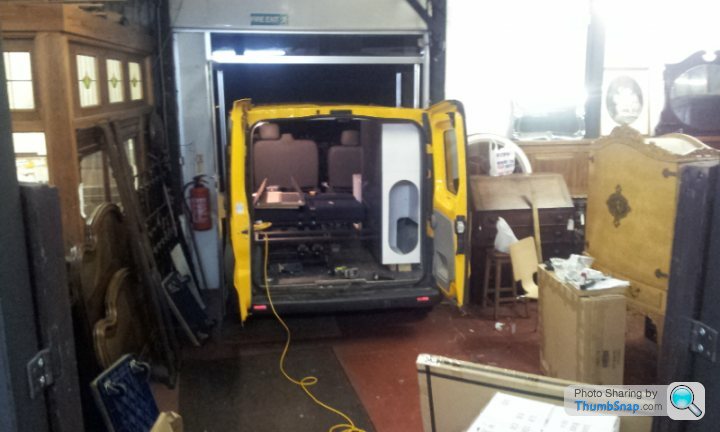
So I thought I would line up the bed frame and drill the holes through the floor. Thought that will take a hour job done. Just locate the hole, drill through, drill wood floor, tidy up. job done. Well four hours later I am done but what a faff.
I haven't seen any how to's on fitting a rock and roll bed frame so I thought I would put up so detail about how I did it.
So the bed I bought is for a VW T5, so I had to play about with it to fit in a Vivaro. The pre drilled holes that line up with strengthened sections in the floor of a T5 are useless to me so I have to make sure it was in safely to prevent the frame ripping up through the floor if I had a accident.
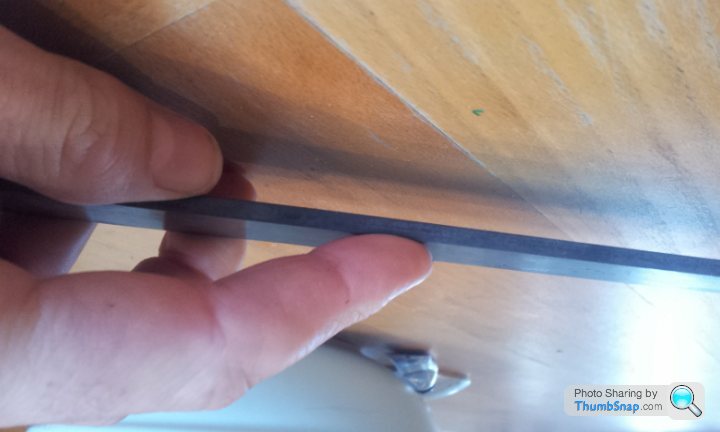
Some of the installs I have seen have been shocking, literally bolt through the 1mm steel floor and then a washer and nut, just 4 of those holding the frame down. I am putting in 7 high tensile M10 bolts, through the floor with 1/4 inch steel plate running underneath to spread the load finished off with Nyloc nuts.
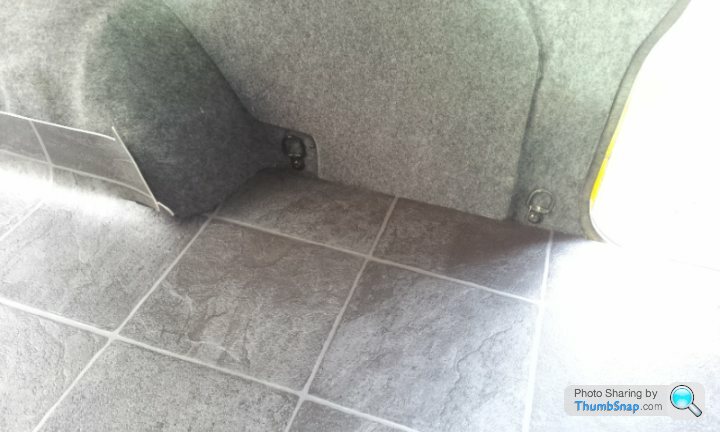
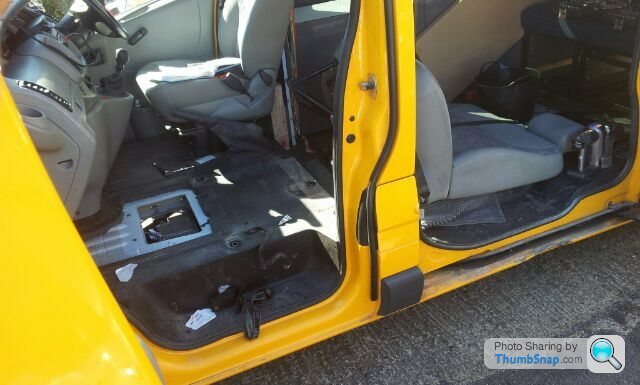
First thing is to pull up the wood floor again so I can line up the frame with the ridges in the floor. Then try and find any supporting members underneath to help with strength.
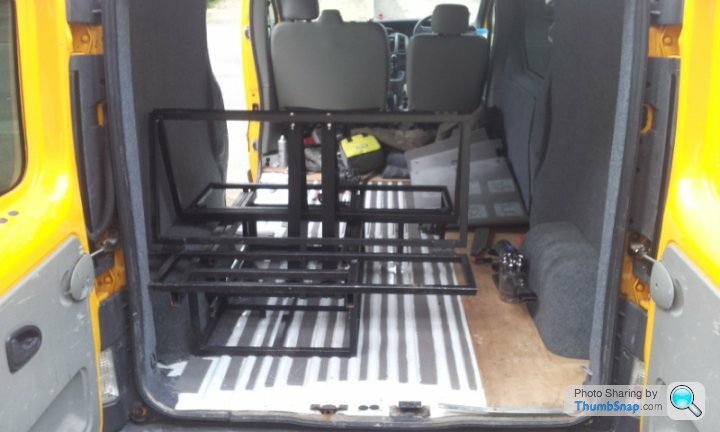
Luckily one of the predrilled T5 holes in the frame lined up on top of a ridge so I started there. 2mm hss bit, then a 8mm, finished off with the 10 mm ( did it that way as I didn;t want to risk snapping the 10 mm).
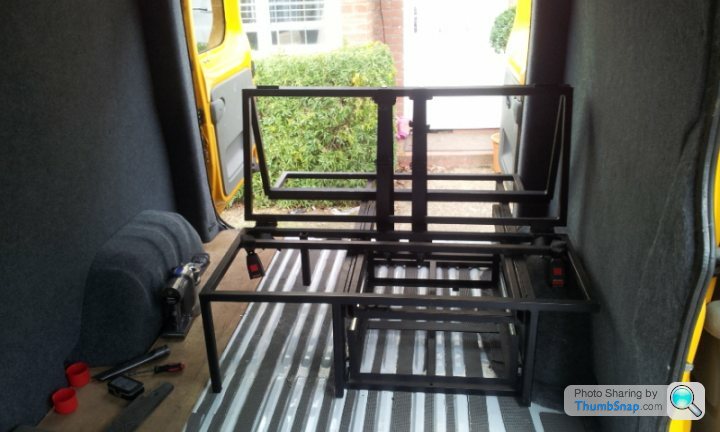
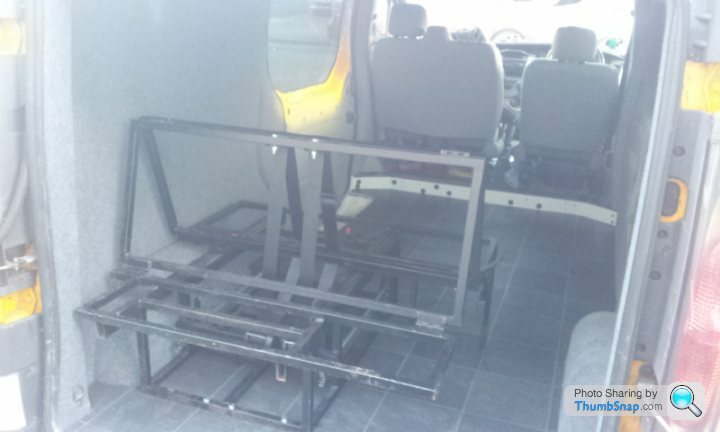
So drilled through the frame and then continued through the floor so they all line up. t t that I am decided to move the frame half way through to double check they are going through the floor. Not the brightest idea, took an age to line up a 50kg frame mm perfect again. Anyway once all the frame holes and floor holes were piloted, I went through with the 8mm whilst in situ, then removed the bed and could drill through the floor of the van with the 10mm and widen the bed frame holes from underneath the frame with the 10mm as it was too long a bit to do from the top.
Everything was fine until I couldn't see the holes underneath the van for the back section nor the front section ? bit of investigation and I realised that the front hole were above the centre box on the exhaust so a night mare to get to and the rear bolt (the ones that take the real load in a collision) were only half way through a box section that ran the width of the van, brilliant ! extra re-enforcement.
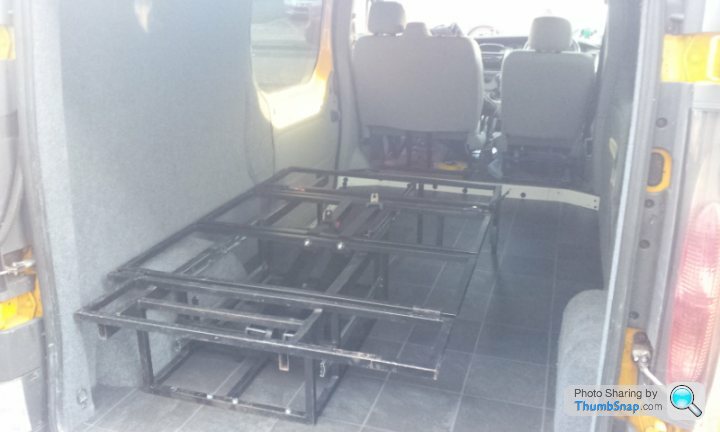
Snapped the 8 mm drill bit on the extra part of the box section so had to be more careful now as only had the 10mm bit left. Got through and tested the bolts.
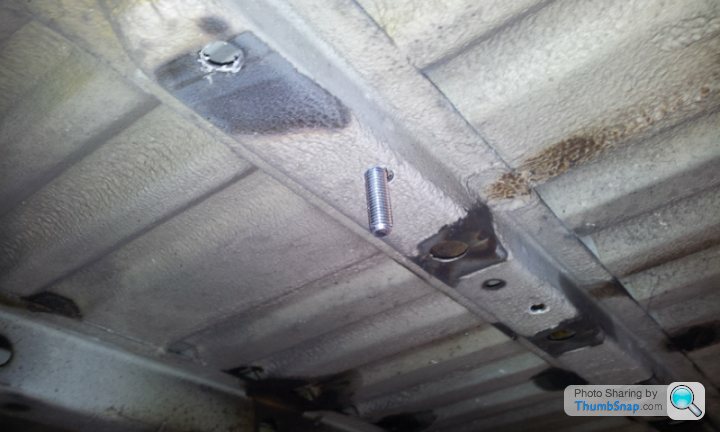
Perfect, the section above the centre box will be a faff to get top but it is the best place for the bolts strength wise. The rear section has three bolts going through box section finished off with a half metre 1/4 inch steel plate spreading the load as a giant washer between the three bolts. That couldn't have gone any better if I had tried.
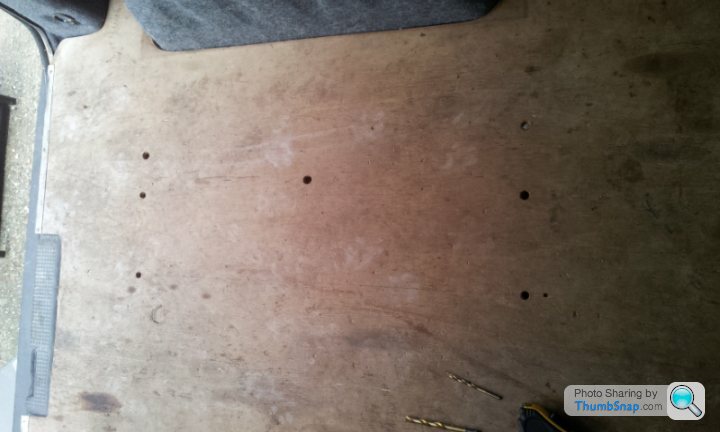
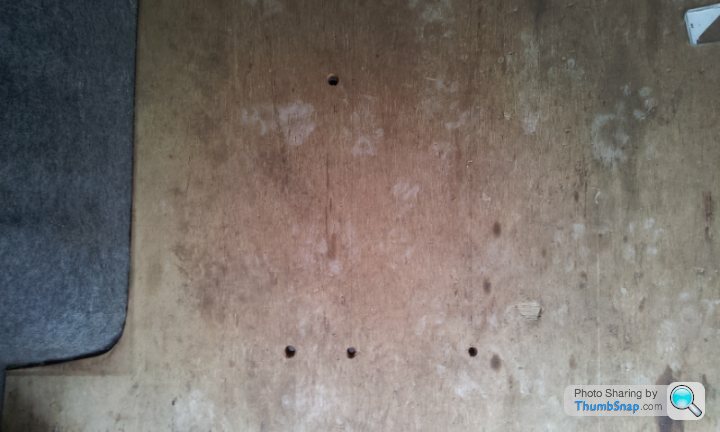
Next step lay wood floor back down and get under the van and drill up from underneath through the van floor hole to make hole in the wooden floor. Back holes, not a problem, front holes...... fecking exhaust box is in the way. Not a problem I will drill them from the top inside the van. Ah, no markings. So using a dowsing stick and a bit of measuring I guesstimated where they should be and finished the job.
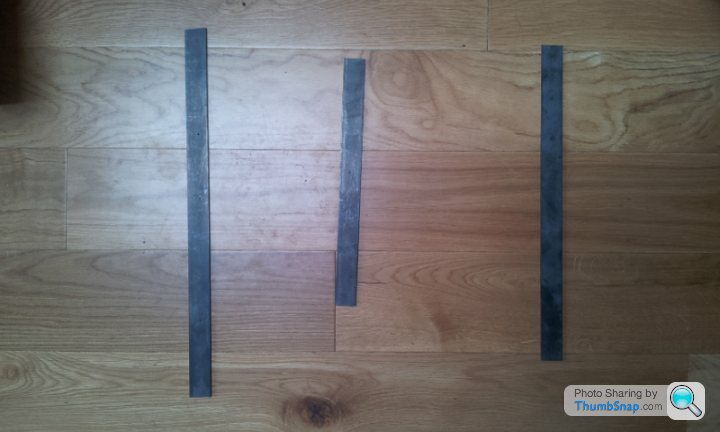
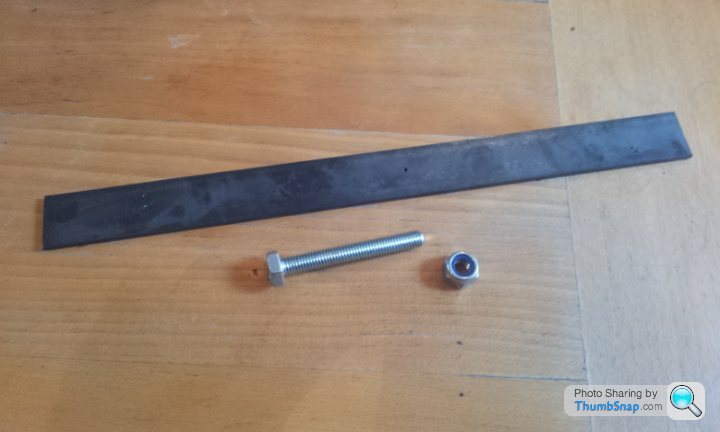
So now I cut the steel plate, 2 sections half a metre long with three bolt going through it for the front and back sections, then one piece for the centre bolt about 40cm long.
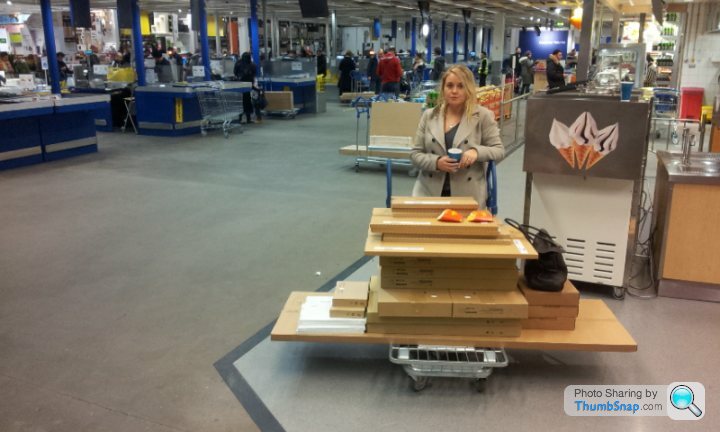
Next day for action is Sunday were I should lay the vinyl floor and bolt down the bed frame. Then upholster the sections for the rock and roll bed. Go to Ikea and buy cupboards for the van, and a new kichten for the house. Then fit it all ! If there is anything in particular anyone wants to see as it is done let me knwo because I am pretty ste at remembering to take pics and keep thinking "they don't want to see that".
I haven't seen any how to's on fitting a rock and roll bed frame so I thought I would put up so detail about how I did it.
So the bed I bought is for a VW T5, so I had to play about with it to fit in a Vivaro. The pre drilled holes that line up with strengthened sections in the floor of a T5 are useless to me so I have to make sure it was in safely to prevent the frame ripping up through the floor if I had a accident.
Some of the installs I have seen have been shocking, literally bolt through the 1mm steel floor and then a washer and nut, just 4 of those holding the frame down. I am putting in 7 high tensile M10 bolts, through the floor with 1/4 inch steel plate running underneath to spread the load finished off with Nyloc nuts.
First thing is to pull up the wood floor again so I can line up the frame with the ridges in the floor. Then try and find any supporting members underneath to help with strength.
Luckily one of the predrilled T5 holes in the frame lined up on top of a ridge so I started there. 2mm hss bit, then a 8mm, finished off with the 10 mm ( did it that way as I didn;t want to risk snapping the 10 mm).
So drilled through the frame and then continued through the floor so they all line up. t
t that I am decided to move the frame half way through to double check they are going through the floor. Not the brightest idea, took an age to line up a 50kg frame mm perfect again. Anyway once all the frame holes and floor holes were piloted, I went through with the 8mm whilst in situ, then removed the bed and could drill through the floor of the van with the 10mm and widen the bed frame holes from underneath the frame with the 10mm as it was too long a bit to do from the top.Everything was fine until I couldn't see the holes underneath the van for the back section nor the front section ? bit of investigation and I realised that the front hole were above the centre box on the exhaust so a night mare to get to and the rear bolt (the ones that take the real load in a collision) were only half way through a box section that ran the width of the van, brilliant ! extra re-enforcement.
Snapped the 8 mm drill bit on the extra part of the box section so had to be more careful now as only had the 10mm bit left. Got through and tested the bolts.
Perfect, the section above the centre box will be a faff to get top but it is the best place for the bolts strength wise. The rear section has three bolts going through box section finished off with a half metre 1/4 inch steel plate spreading the load as a giant washer between the three bolts. That couldn't have gone any better if I had tried.
Next step lay wood floor back down and get under the van and drill up from underneath through the van floor hole to make hole in the wooden floor. Back holes, not a problem, front holes...... fecking exhaust box is in the way. Not a problem I will drill them from the top inside the van. Ah, no markings. So using a dowsing stick and a bit of measuring I guesstimated where they should be and finished the job.
So now I cut the steel plate, 2 sections half a metre long with three bolt going through it for the front and back sections, then one piece for the centre bolt about 40cm long.
Next day for action is Sunday were I should lay the vinyl floor and bolt down the bed frame. Then upholster the sections for the rock and roll bed. Go to Ikea and buy cupboards for the van, and a new kichten for the house. Then fit it all ! If there is anything in particular anyone wants to see as it is done let me knwo because I am pretty s
te at remembering to take pics and keep thinking "they don't want to see that".Edited by Tampon on Tuesday 4th February 10:48
So todays work.
Started at 10.30 and finished at 4.30. Considering "all" I had to do was to cut to shape and glue down the floor, then bolt down the bed it seemed to take forever. I a realising with this doing this van that you need to use one skill once ( and learn it) then you never seem to use it again. That why it seems to take forever.
First job, drill the holes in the steel plate for underneath the floor and hammerite the holes in the floor and the steel plate to prevent rusting.
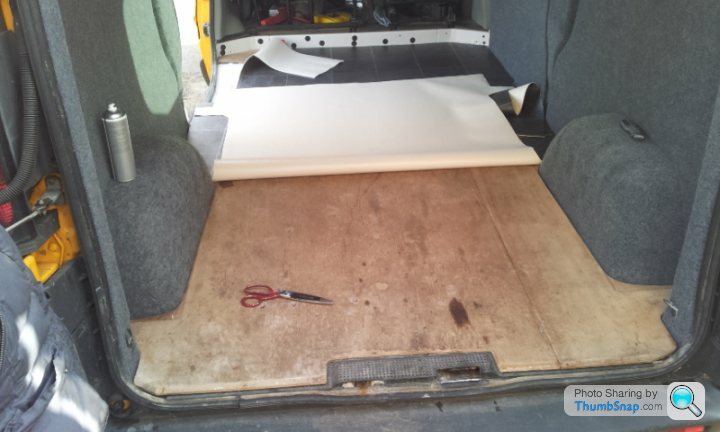
Next was to lay the vinyl flooring out on the van, cut it about 20cm wider than needed and left the whole length out the back of the van.
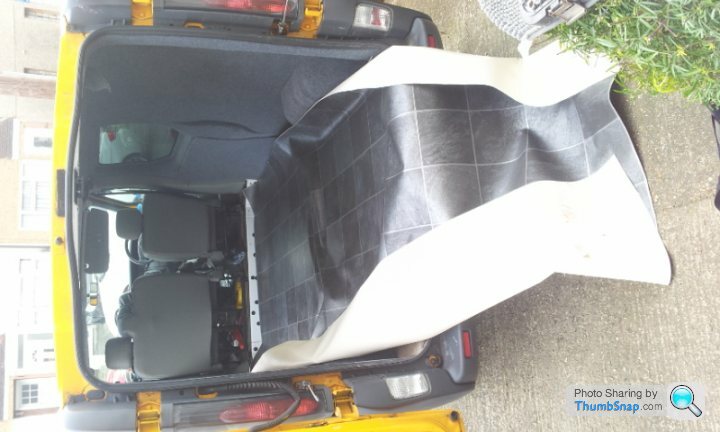
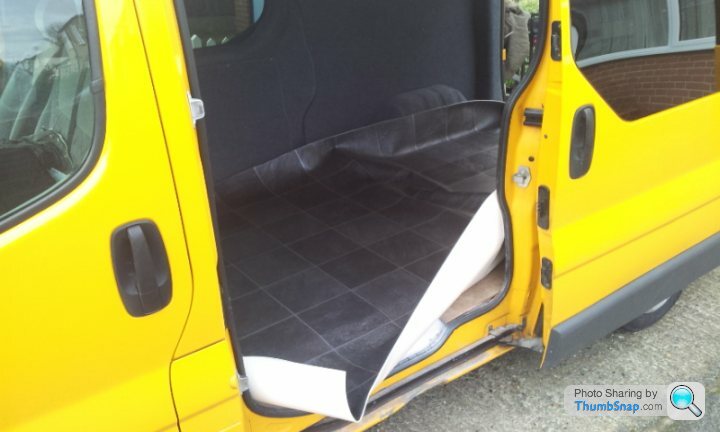
I picked one edge that was straight in the van ( the front bulhead) and started from there. Glued down a section in the middle and worked my way back to the wheel arches. Taking time as this would be the section that would be seen and used as wheel arches bac would have the bed on top.
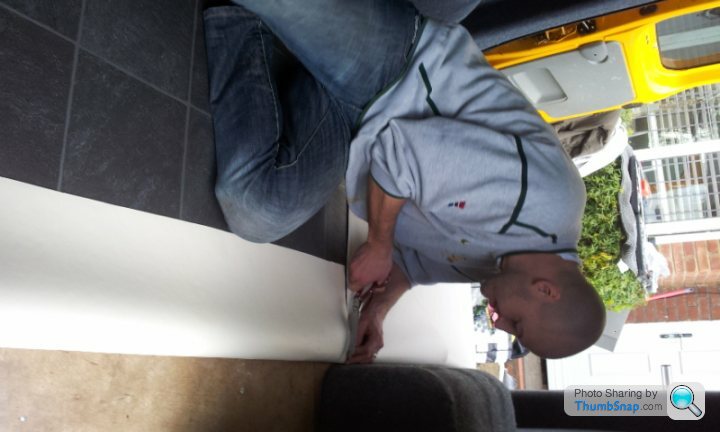
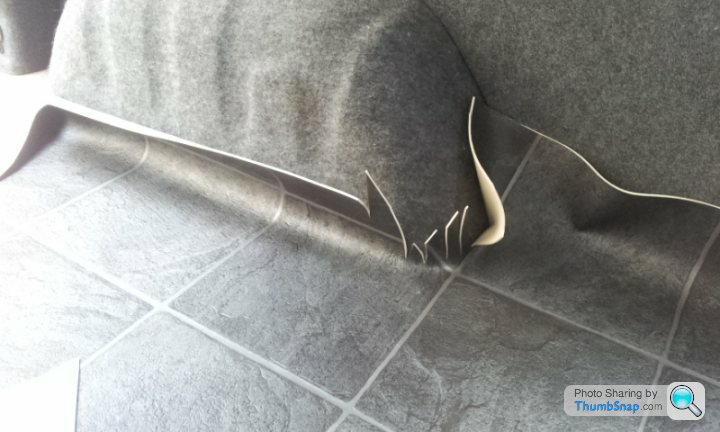
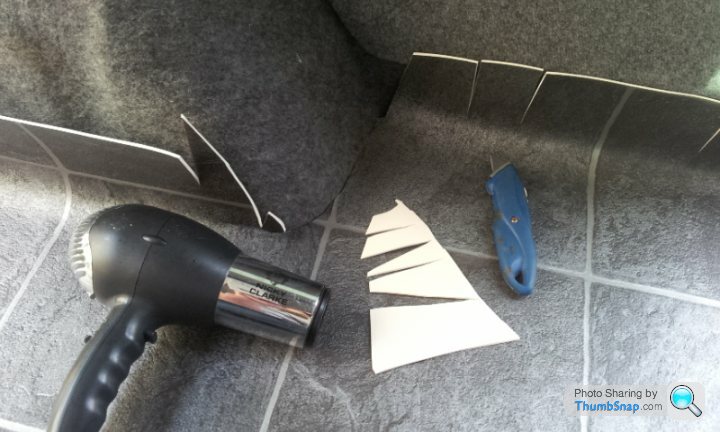
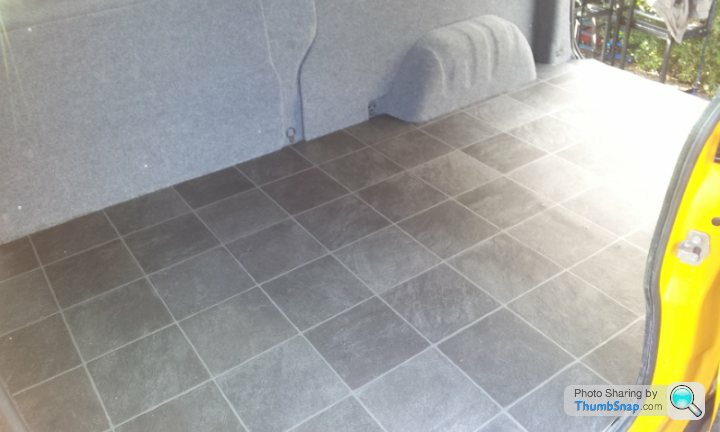
The vinyl was extremely stiff once I took it outside so I used a hairdryer (obviously not mine!) to heat it up to shape it round the beginning of the wheel arches really important to do cut like this to relive any stress on one particular cut and prevent tearing. Go a little bit deeper each time rather than doing it all in one go. Then when it is formed perfectly, run a Stanley round with a finger leading the blade by a few inches to ensure the vinyl is in the right position and make sure the blade is cutting toward the wall rather than to the floor as the vinyl will look like it is short as opposed to butting up against the wall.
Next bit was to put the bed in and line it up with the holes I made last week, and then marry up the bolts with the plates underneath and tighten everything up. Again sounds simple but again what a complete dick of a job.
Discovered quickley that the presion work I had done when the plates and the bolts fitted perfectly on t a dry run didn;t translate to fitting when I was upside down under the van. Out with the hole sizer to make the holes 1mm larger on all the plates then spray them again.
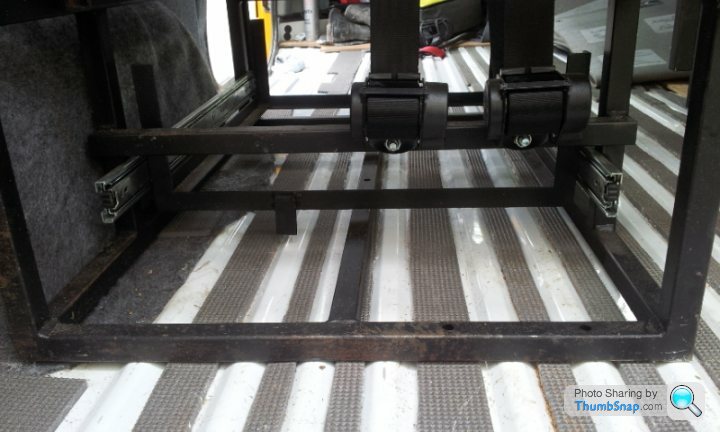
The company that were supposed to spend Nyloc nuts somehow desided to send normal ones. I had 3 Nyloc bolts kicking around so put two of them on the back rail and on on the front and just locked the other four bolts down with a second nut on the thread to ensure they don;t come off when moving.
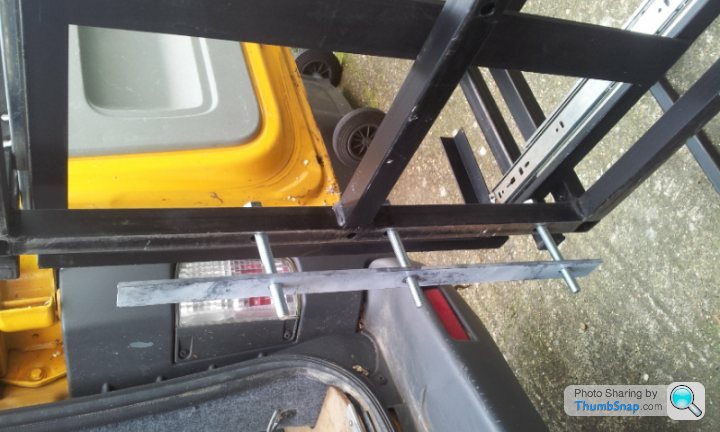
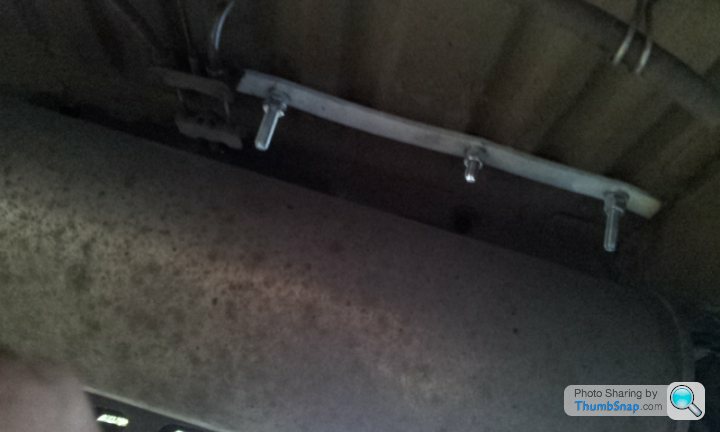
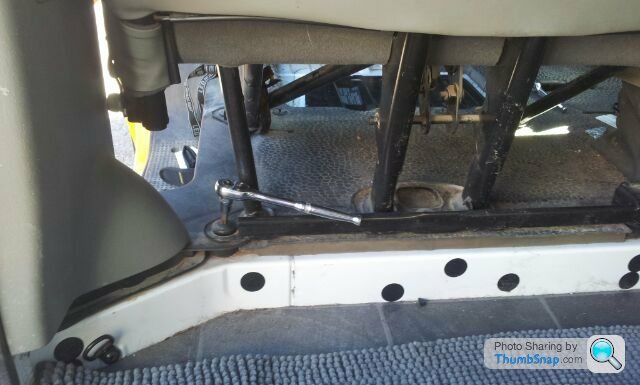
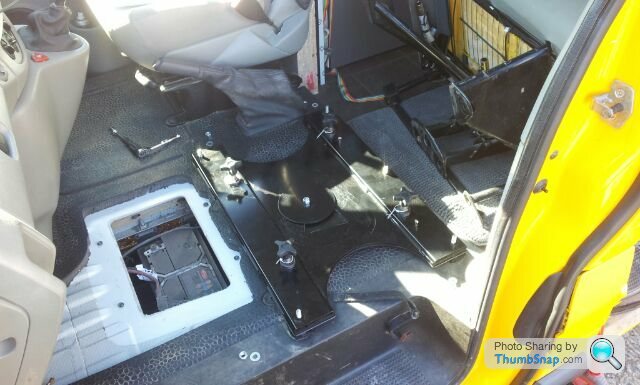
This is the looking back at the centre middle plate to the main support of the back plate bolted through the boc rail at the bac of the van
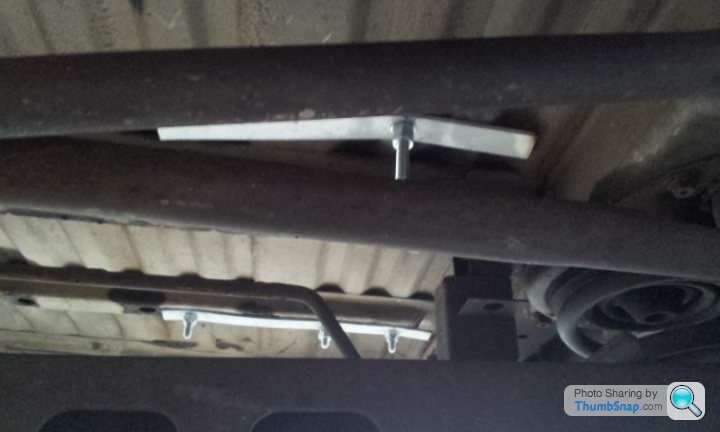
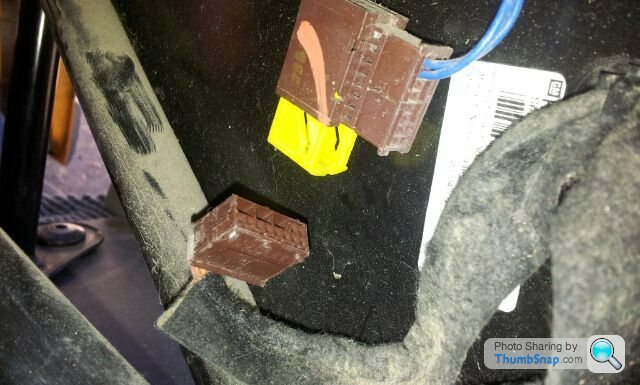
This is the front plate bolt just above the Back box of the exhaust, you might notice the handbrake cables that I didn't account for so had to cut the plate down.
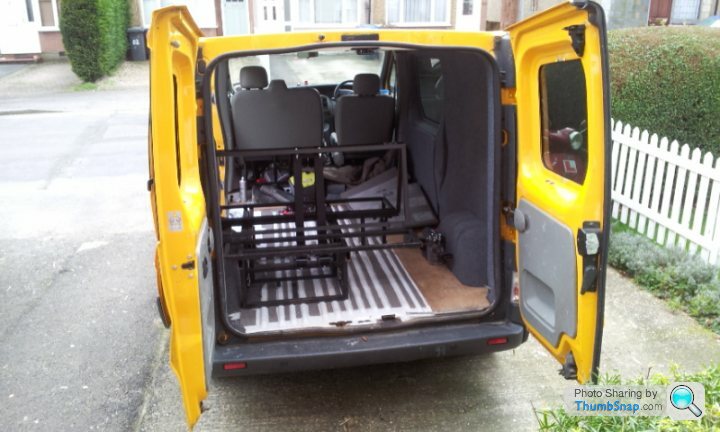
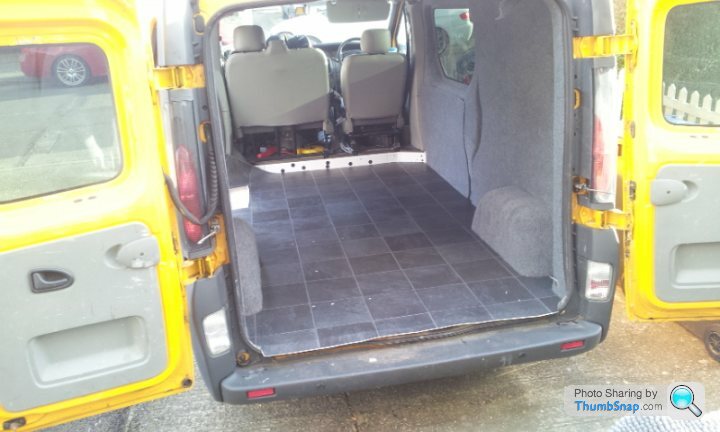
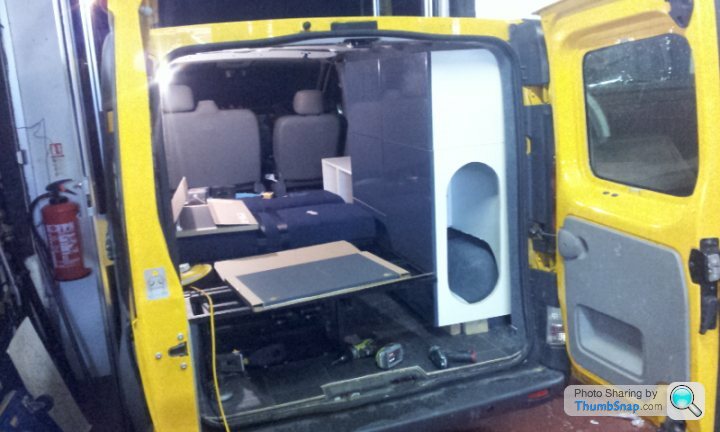
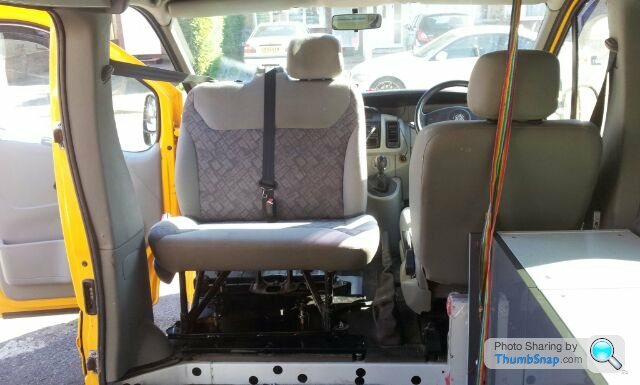
So the rock and roll bed is in !
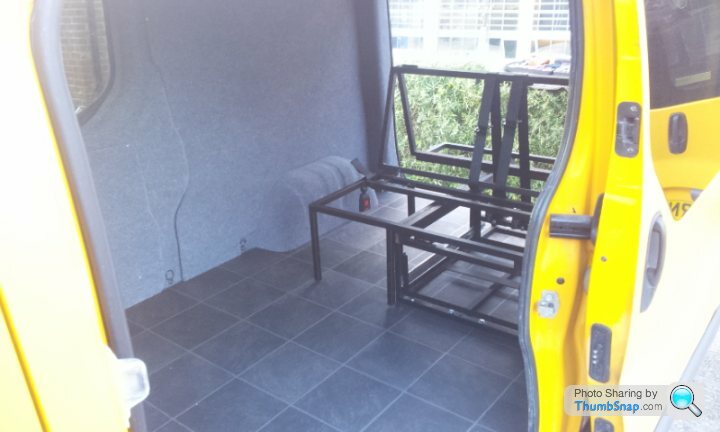
This is the amount of space we have to put the dogs in when the bed is down and we are asleep, also mean we can leave the bed down when camping and use the "kitchen".
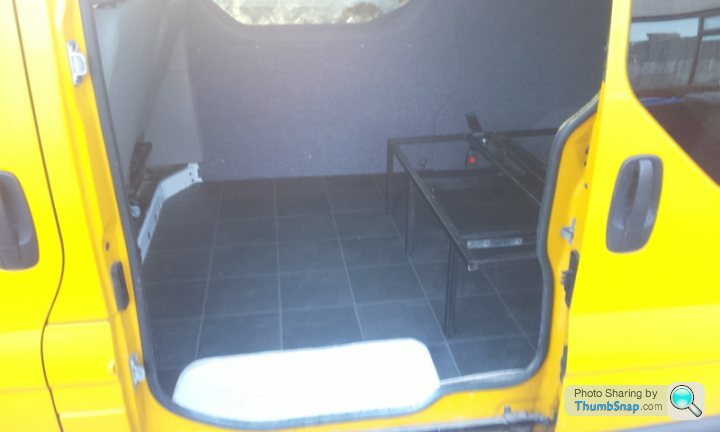
Next bit of work will be upholstering the panels for the bed so we can finally carry passenders. A trip to ikea is on the cards for a week or so's time.
Started at 10.30 and finished at 4.30. Considering "all" I had to do was to cut to shape and glue down the floor, then bolt down the bed it seemed to take forever. I a realising with this doing this van that you need to use one skill once ( and learn it) then you never seem to use it again. That why it seems to take forever.
First job, drill the holes in the steel plate for underneath the floor and hammerite the holes in the floor and the steel plate to prevent rusting.
Next was to lay the vinyl flooring out on the van, cut it about 20cm wider than needed and left the whole length out the back of the van.
I picked one edge that was straight in the van ( the front bulhead) and started from there. Glued down a section in the middle and worked my way back to the wheel arches. Taking time as this would be the section that would be seen and used as wheel arches bac would have the bed on top.
The vinyl was extremely stiff once I took it outside so I used a hairdryer (obviously not mine!) to heat it up to shape it round the beginning of the wheel arches really important to do cut like this to relive any stress on one particular cut and prevent tearing. Go a little bit deeper each time rather than doing it all in one go. Then when it is formed perfectly, run a Stanley round with a finger leading the blade by a few inches to ensure the vinyl is in the right position and make sure the blade is cutting toward the wall rather than to the floor as the vinyl will look like it is short as opposed to butting up against the wall.
Next bit was to put the bed in and line it up with the holes I made last week, and then marry up the bolts with the plates underneath and tighten everything up. Again sounds simple but again what a complete dick of a job.
Discovered quickley that the presion work I had done when the plates and the bolts fitted perfectly on t a dry run didn;t translate to fitting when I was upside down under the van. Out with the hole sizer to make the holes 1mm larger on all the plates then spray them again.
The company that were supposed to spend Nyloc nuts somehow desided to send normal ones. I had 3 Nyloc bolts kicking around so put two of them on the back rail and on on the front and just locked the other four bolts down with a second nut on the thread to ensure they don;t come off when moving.
This is the looking back at the centre middle plate to the main support of the back plate bolted through the boc rail at the bac of the van
This is the front plate bolt just above the Back box of the exhaust, you might notice the handbrake cables that I didn't account for so had to cut the plate down.
So the rock and roll bed is in !
This is the amount of space we have to put the dogs in when the bed is down and we are asleep, also mean we can leave the bed down when camping and use the "kitchen".
Next bit of work will be upholstering the panels for the bed so we can finally carry passenders. A trip to ikea is on the cards for a week or so's time.
Edited by Tampon on Sunday 9th February 22:01
This weekend work. Ikea kitchen run and start of the upholstery of the rock and roll bed.
Go to Ikea Wembley Valentines days at 2pm for a romantic afternoon looking at house purchases and a meatball lunch. First trip round, buy stuff for the house, lights, lamps, etc etc. stop at the kitchen department for some advise for the camper, get given a order book, told to pick what we need then order, simples.
Buy the stuff for the house, sit down have a coffee and try and decipher the enigma code that is the billion options of the kitchen Metod range. Figure it out, go back to order the kitchen. Get told we are number 32 in the queue. What number are the 3 advisers on right now? 27, time 3pm. No problems.
Well a long story short, 8.30pm we place our order !!!!
Van loaded up, Valnetines night a wash out but ready to go for the weekend.

Saturday morning bright and early off to my workshops to do something I know about, Upholstery!
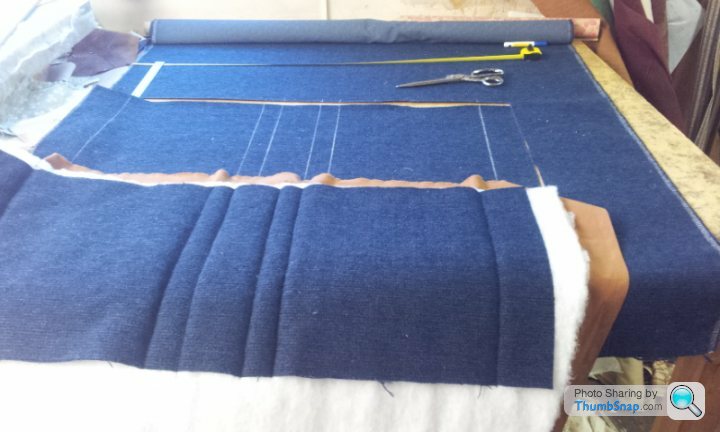
First job mark out what pattern we want on the seats
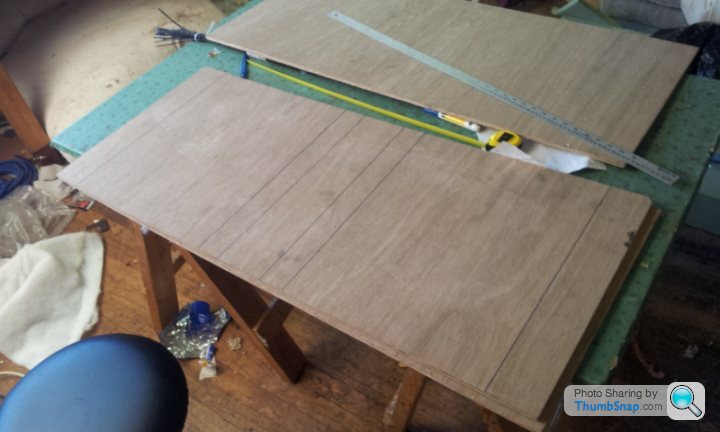
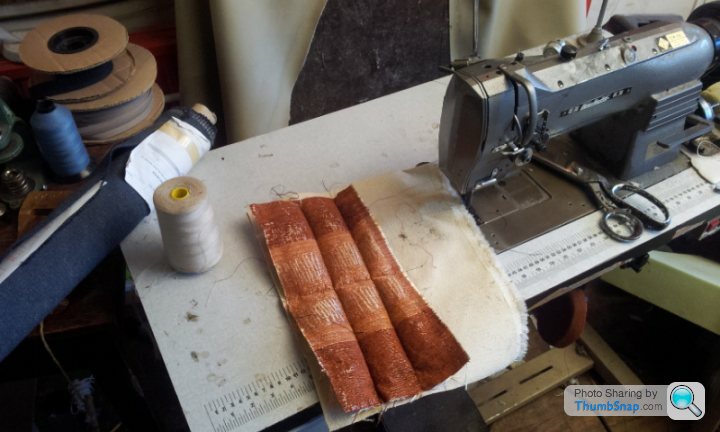
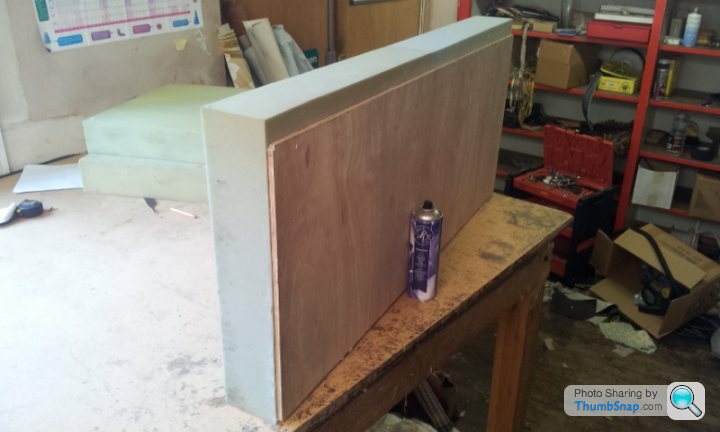
Try a test panel for padding and stitch length
Double check against pattern
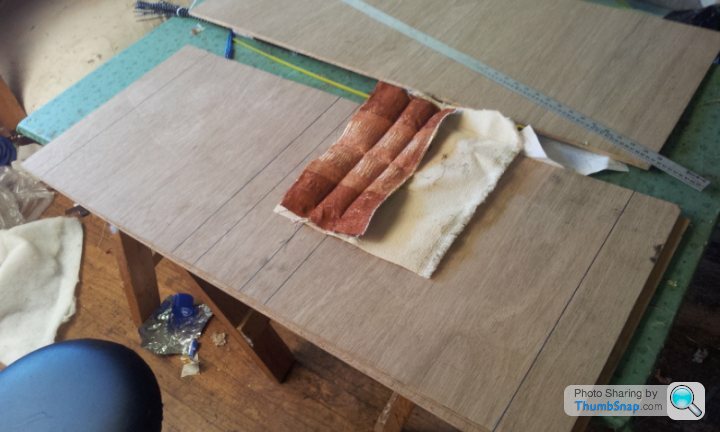
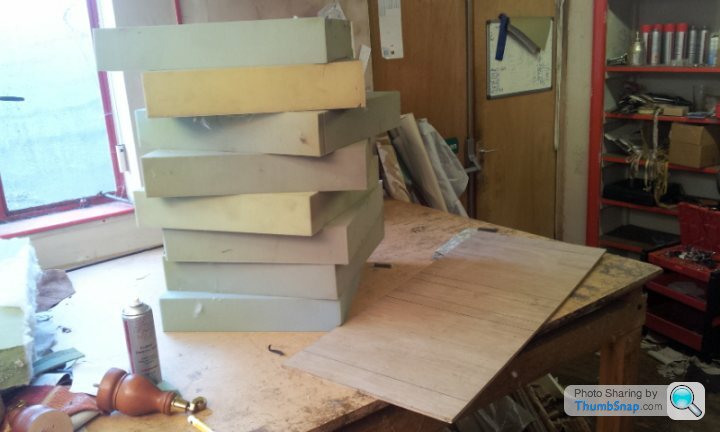
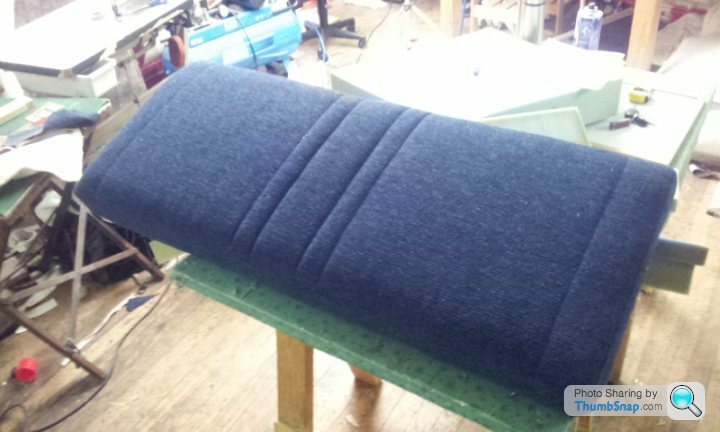
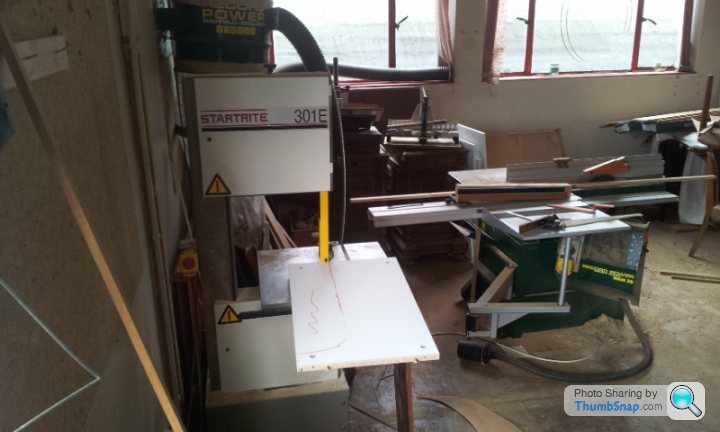
Start foaming up the seat panels, for anyone in the future reading, trim up 1/2 inch larger than the size of the boards for a pro finish ( we use a Industrial band saw for perfect cuts ).
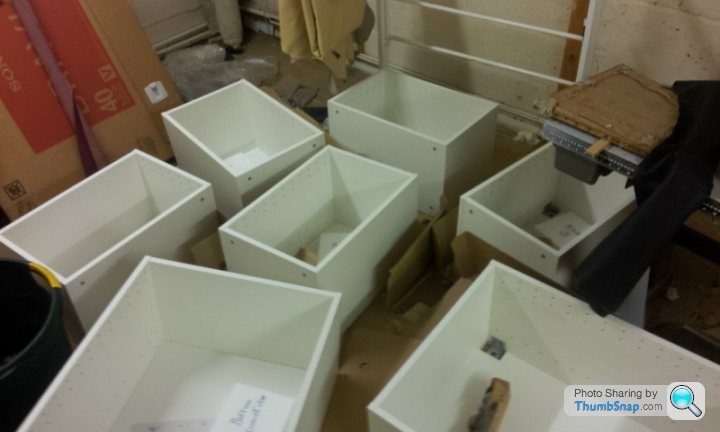
Lovely wife in the other room building the carcasses for the kitchen for me to start on wednesday.

Transfer of pattern onto finished fabric, cut, marked out, sewn up.
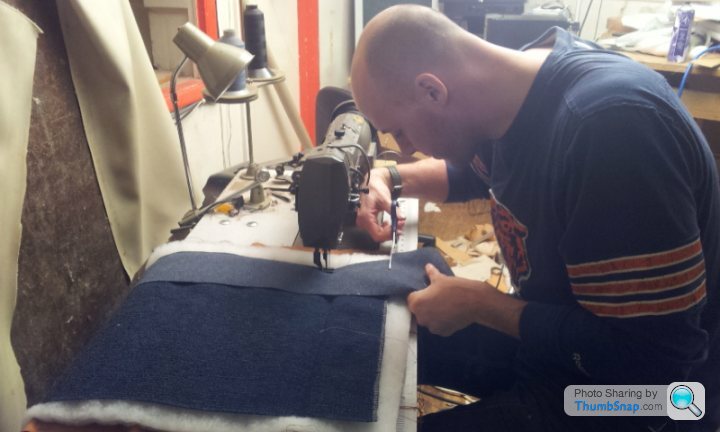
Little action shot of a 6ft 5in man on a sewing machine
Finished article
Wife did a cracking job getting all the stiuff ready for later.
So Wednesday I will fit the seats to the frames, start trying to fit the units into the van, then cut work surface and fit doors sink etc.
Tickets for this Easter trip booked, down to the house in the south of France then to the Alps on the way back with a quick stop off in Bruges on the night before the return trip in Dunkirk. No campsites, wild camping and city centre dossing.
Summer trip booked, Spanish Villa near Barcelona booked for a week, so a stop in the Pyrenees mountains on the way down, campsite on the coast booked after for a day, then off up to St Tropay to soak up the money, then off to Paris and maybe a stop or two on the way as well.
Go to Ikea Wembley Valentines days at 2pm for a romantic afternoon looking at house purchases and a meatball lunch. First trip round, buy stuff for the house, lights, lamps, etc etc. stop at the kitchen department for some advise for the camper, get given a order book, told to pick what we need then order, simples.
Buy the stuff for the house, sit down have a coffee and try and decipher the enigma code that is the billion options of the kitchen Metod range. Figure it out, go back to order the kitchen. Get told we are number 32 in the queue. What number are the 3 advisers on right now? 27, time 3pm. No problems.
Well a long story short, 8.30pm we place our order !!!!
Van loaded up, Valnetines night a wash out but ready to go for the weekend.
Saturday morning bright and early off to my workshops to do something I know about, Upholstery!
First job mark out what pattern we want on the seats
Try a test panel for padding and stitch length
Double check against pattern
Start foaming up the seat panels, for anyone in the future reading, trim up 1/2 inch larger than the size of the boards for a pro finish ( we use a Industrial band saw for perfect cuts ).
Lovely wife in the other room building the carcasses for the kitchen for me to start on wednesday.
Transfer of pattern onto finished fabric, cut, marked out, sewn up.
Little action shot of a 6ft 5in man on a sewing machine
Finished article
Wife did a cracking job getting all the stiuff ready for later.
So Wednesday I will fit the seats to the frames, start trying to fit the units into the van, then cut work surface and fit doors sink etc.
Tickets for this Easter trip booked, down to the house in the south of France then to the Alps on the way back with a quick stop off in Bruges on the night before the return trip in Dunkirk. No campsites, wild camping and city centre dossing.
Summer trip booked, Spanish Villa near Barcelona booked for a week, so a stop in the Pyrenees mountains on the way down, campsite on the coast booked after for a day, then off up to St Tropay to soak up the money, then off to Paris and maybe a stop or two on the way as well.
Edited by Tampon on Monday 17th February 21:09

Chicken Chaser said:
Marvellous job on the upholstery! I'm cracking on with more furniture for my T5 (Must get a build thread up) but the upholstery is something I'm worried about tackling, despite doing everything else myself. Think I'll have to leave it to the pro's
More than happy to talk you through it bud.Depending on where you are I might be able to help you, or you could use my workshops.
Looking really good.
You must have been pretty determined to stay in Ikea for 6 hours, I'd have managed a plate of meatballs and gone to Wickes.
Wife and I went to look at vans today, MWB, Medium roof was decided upon, that's her part of the process done for now, it's down to me to find and buy one - the only fly in the ointment is that I need to be able to tow the race car as well as camp in it so Transit 350 seems to be where we're headed. Not that common, especially at the budget we've set for ourselves (£7k van, £2k fittings).
Once I find one, I'll hopefully be starting a build in a few weeks ready for use in the summer if I get my finger out....
I have a reading week this week for Uni so I decided to push on for a couple of days and get the seating in and the units in. I can honestly say that I have been so frustraited at time this week I could have punched a horse in the face.
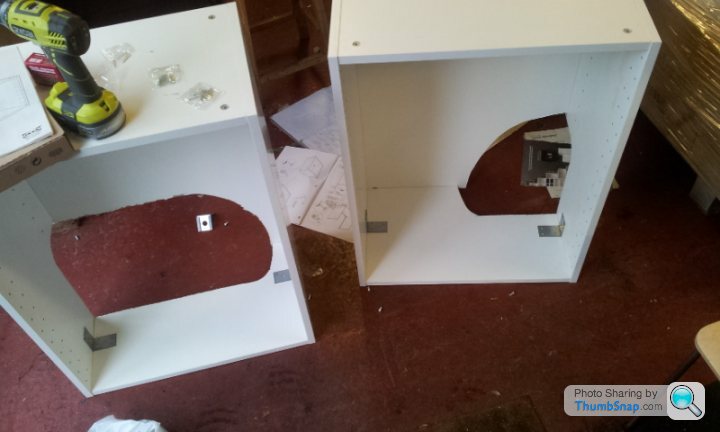
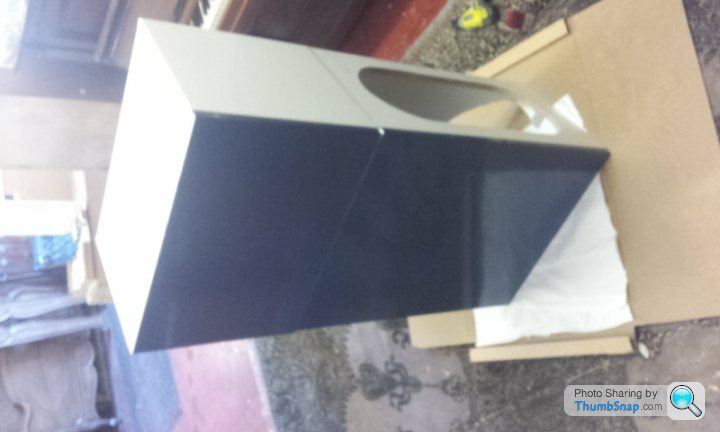
We started off with these carcasses
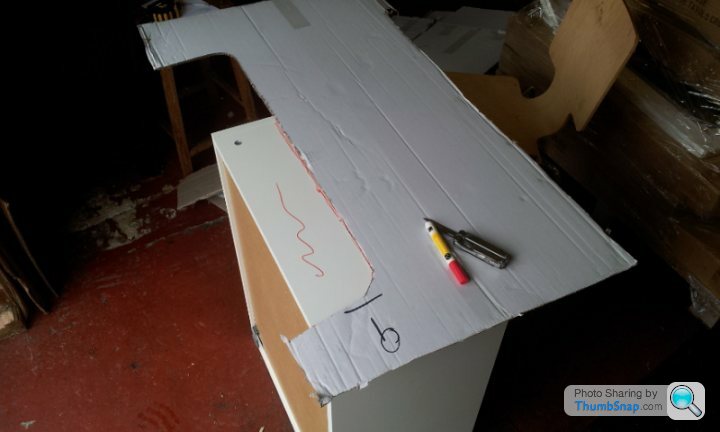
With some CAD design ( cardboard aided design ) couple of templates of the wheel arches, began marking out what to cut off the things I spent hours waiting to buy a few days earlier.
I took the Van back to the workshops as I thought I would need all the tools of the wood working rooms as well this time ( I was very right )
I put 1 inch battens on the floor to raise the cuboards so I could run my electrics under them and to give a nice look. These are screwed into the metal floor of the van

Bottom units cut, tried out in the van (little tip for anyone doing this, do it before you put the bed in, that one little nugget of info could have saved a few expletives and a cut head).
I put in right angled brackets to help with bracing due to having to cut out so much of the back of the bottom cupboards
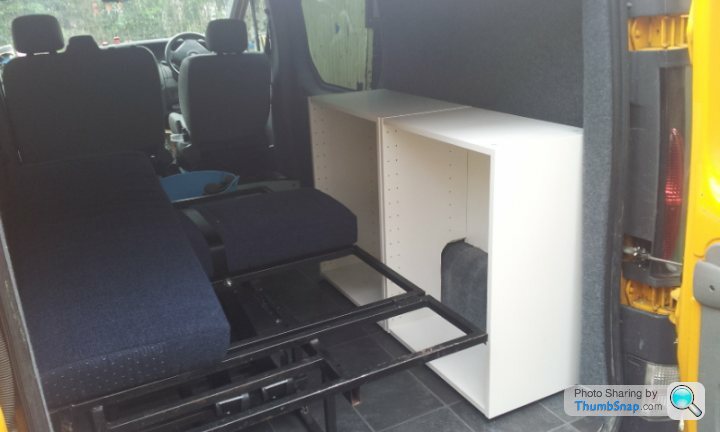
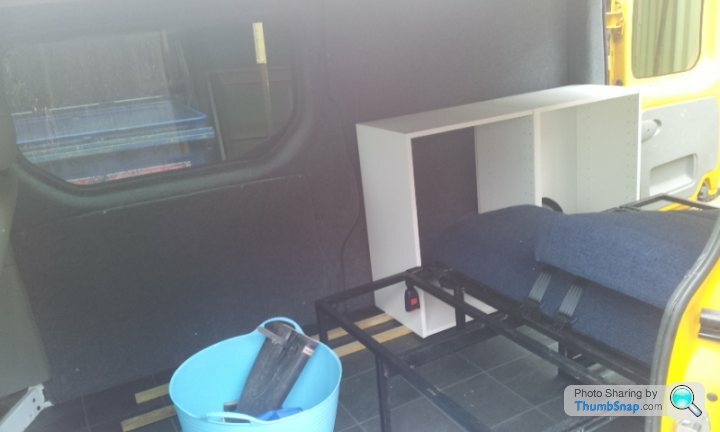
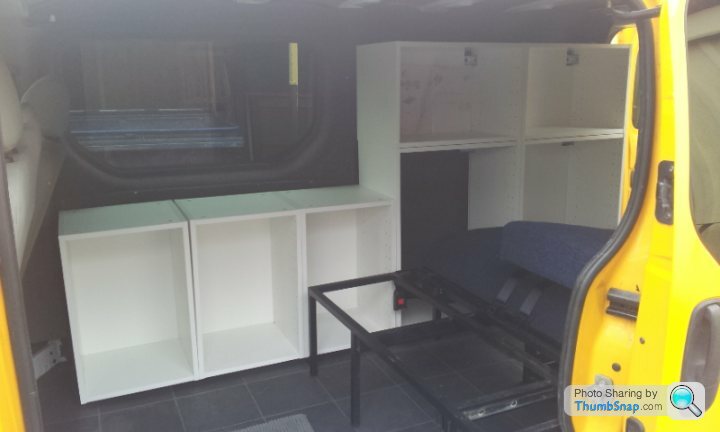
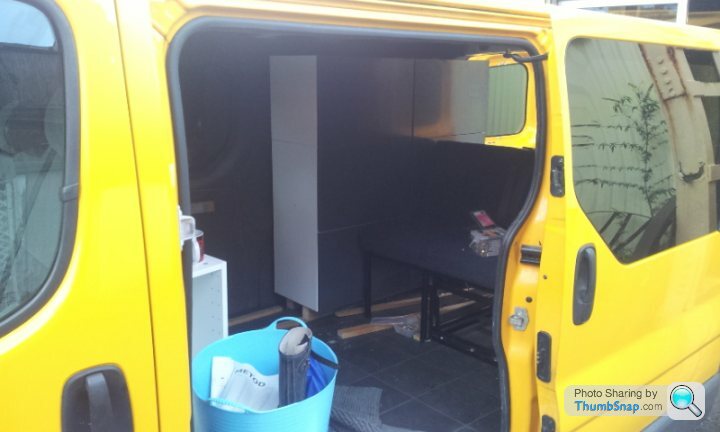
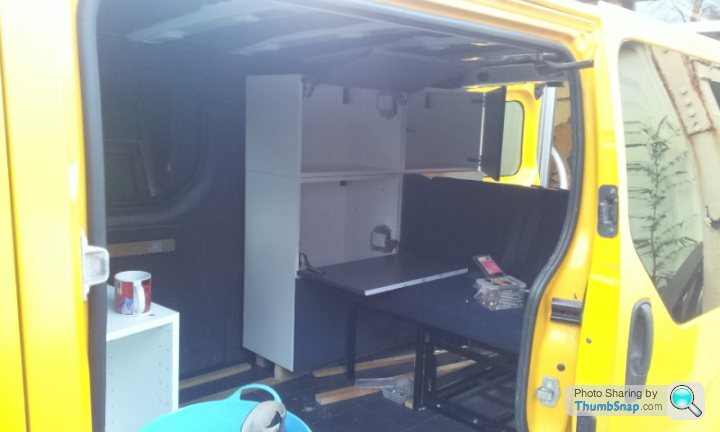
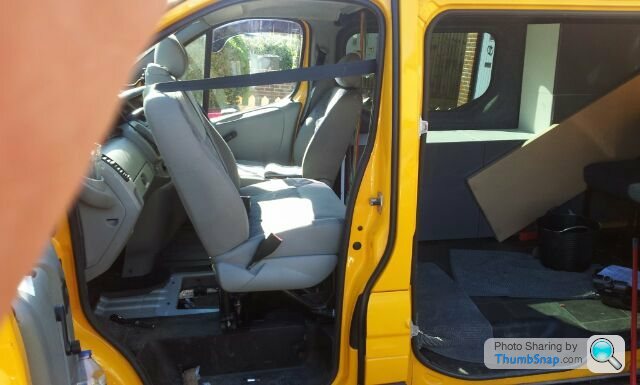
Everything was fitting perfectly, all straight, so I screwed them together and to the battens on the wall and screwed the seat and back pads down called it a day for Wednesday, went home with the van like this. Finally I can carry 5 people again.
Thursday rolls around, I think that it will just be a case of removing the carcasses and fitting the doors and bobs your uncle job done.
No.
First one goes fine, cut the back out of the rear section as it blocked by the bed in the up position and makes a good "boot" accessible only from the back. Start ti get a feel for what the gloss doors will look like (they still have protective film on them dulling them down).
That about where the fun ends for this story as the next 7 hours was full of spite, anger, frustration and hatred of all things ikea.
Basically the measurement I took originally for the units didn;t have the upholstery on the frame, they raised the levels by 4 inches. That essentially meant doors that would have open over the frame now would open a inch then hit the bed, only way around it was to raise the back units up 3 inches. The front three kitchen units couldn;t be raised that much as it would have made the work top above the side window and look gash.
Also meant the gap of a inch that made the units float now had a step init and meant you can see 3x2 under the rear units.
Also the top two units at the back of the van were going to open with a top hinge and the one by the seat would open sideways with a rightside hinge. This all had to be changed and the one by the seat had to be hinged down using the top one hard ware.
Lots of putting in, retrying, taking out, got me to a point where I realised that things weren;t lining up like they had last night. Again 2 hours of undoing, redrilling, refitting, moving battens, shouting etc and we started to get some where
Doors shut
Doors open ( nice little fold down table as well for the back!)
At this point it started to rain like buggery, I was seriously pissed off and wasn;t prepared to stop for fear I would never start again, so I looked a the space between the double doors to the shop, looked at the width of the van and thought that was a perfect fit. It was, only problem was I couldn't get it all the way in, nor open the sliding door and had to walk around to the back of the shop to get into the back of the van.
In and dry
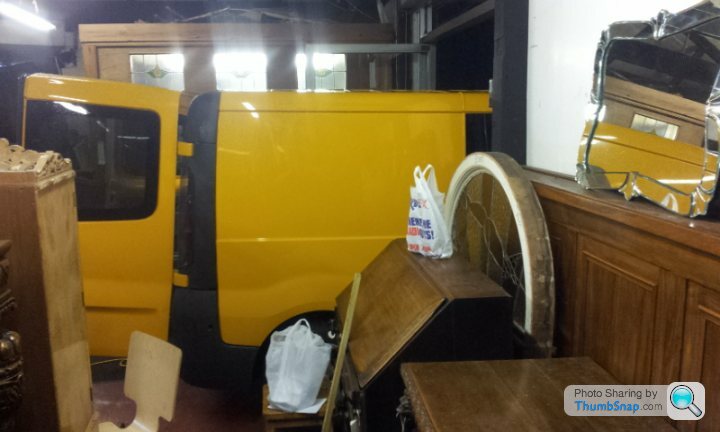
Millimeters to spare
I continued to work into the night knowing it was the last day on it, had loads more problmes putting together the ikea draws, fitting the remaining three units and squaring the doors off to each other. At least I was in the dry and had proper lighting.
You can see by raising the units the CAD cut unit now don;t fit the shape of the wheel arch.
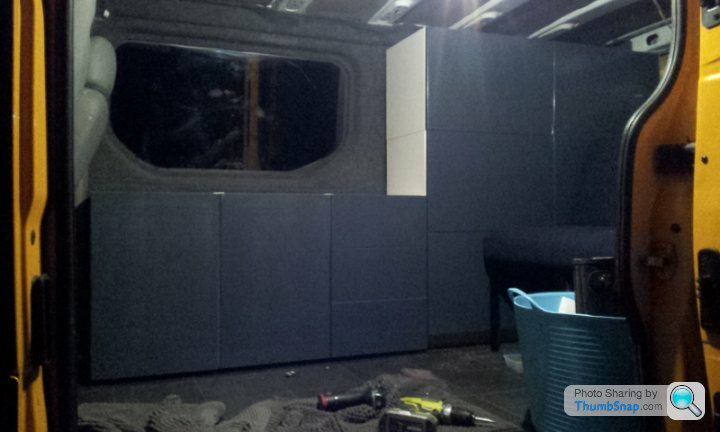
Few more hours later I am finished. You can see the step of the rear units.
So I will have a sink and hob on the left with the water and gas underneath in the left hand unit, then a unit for kitchen crap, then three drawers to finish off the kitchen.
The units by the bed/seat. Bottom one on the left is a fixed pane; and will have the battery and electrics in it, accessible from the top with the hinge down door above it with a shelf in it for day to day stuff. The bottom back unit is fixed as well and will be used to dump stuff in.
Found out ikea gave us the wrong worksurface so found a nice piece of oak from a table which I will use as the work surface and take the ikea one back.
Still some more adjustments of the doors to do, but they are in with no catches yet but I think I will get some push fit ones to try and keep the look as clean as possible.
We started off with these carcasses
With some CAD design ( cardboard aided design ) couple of templates of the wheel arches, began marking out what to cut off the things I spent hours waiting to buy a few days earlier.
I took the Van back to the workshops as I thought I would need all the tools of the wood working rooms as well this time ( I was very right )
I put 1 inch battens on the floor to raise the cuboards so I could run my electrics under them and to give a nice look. These are screwed into the metal floor of the van
Bottom units cut, tried out in the van (little tip for anyone doing this, do it before you put the bed in, that one little nugget of info could have saved a few expletives and a cut head).
I put in right angled brackets to help with bracing due to having to cut out so much of the back of the bottom cupboards
Everything was fitting perfectly, all straight, so I screwed them together and to the battens on the wall and screwed the seat and back pads down called it a day for Wednesday, went home with the van like this. Finally I can carry 5 people again.
Thursday rolls around, I think that it will just be a case of removing the carcasses and fitting the doors and bobs your uncle job done.
No.
First one goes fine, cut the back out of the rear section as it blocked by the bed in the up position and makes a good "boot" accessible only from the back. Start ti get a feel for what the gloss doors will look like (they still have protective film on them dulling them down).
That about where the fun ends for this story as the next 7 hours was full of spite, anger, frustration and hatred of all things ikea.
Basically the measurement I took originally for the units didn;t have the upholstery on the frame, they raised the levels by 4 inches. That essentially meant doors that would have open over the frame now would open a inch then hit the bed, only way around it was to raise the back units up 3 inches. The front three kitchen units couldn;t be raised that much as it would have made the work top above the side window and look gash.
Also meant the gap of a inch that made the units float now had a step init and meant you can see 3x2 under the rear units.
Also the top two units at the back of the van were going to open with a top hinge and the one by the seat would open sideways with a rightside hinge. This all had to be changed and the one by the seat had to be hinged down using the top one hard ware.
Lots of putting in, retrying, taking out, got me to a point where I realised that things weren;t lining up like they had last night. Again 2 hours of undoing, redrilling, refitting, moving battens, shouting etc and we started to get some where
Doors shut
Doors open ( nice little fold down table as well for the back!)
At this point it started to rain like buggery, I was seriously pissed off and wasn;t prepared to stop for fear I would never start again, so I looked a the space between the double doors to the shop, looked at the width of the van and thought that was a perfect fit. It was, only problem was I couldn't get it all the way in, nor open the sliding door and had to walk around to the back of the shop to get into the back of the van.
In and dry
Millimeters to spare
I continued to work into the night knowing it was the last day on it, had loads more problmes putting together the ikea draws, fitting the remaining three units and squaring the doors off to each other. At least I was in the dry and had proper lighting.
You can see by raising the units the CAD cut unit now don;t fit the shape of the wheel arch.
Few more hours later I am finished. You can see the step of the rear units.
So I will have a sink and hob on the left with the water and gas underneath in the left hand unit, then a unit for kitchen crap, then three drawers to finish off the kitchen.
The units by the bed/seat. Bottom one on the left is a fixed pane; and will have the battery and electrics in it, accessible from the top with the hinge down door above it with a shelf in it for day to day stuff. The bottom back unit is fixed as well and will be used to dump stuff in.
Found out ikea gave us the wrong worksurface so found a nice piece of oak from a table which I will use as the work surface and take the ikea one back.
Still some more adjustments of the doors to do, but they are in with no catches yet but I think I will get some push fit ones to try and keep the look as clean as possible.
Edited by Tampon on Friday 21st February 18:41
Definitely starting to take shape! Have you thought about the uneven loading? Looks like a lot of weight on the drivers side so might make it handle a little strangely? I'm sure you have thought about it but don't want you putting in all this hard work and it makes it hard/dangerous to drive.
Keep up the good work!
Keep up the good work!
Well it has been a couple of months and finishing my degree and hnting for jobs has left me precious little time.
We have been using the bus ( more of which I will do later).
So I left it with the carcases in and the rock and roll bed.
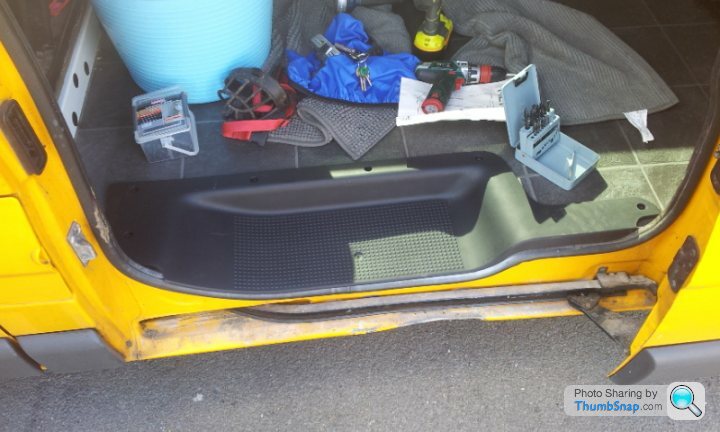
Since then I have found a vivaro 9 seater bus step for the sliding door area to help smarten that up. Had to modifiy it a touch to get it to fit but it finishes it off nicely now.
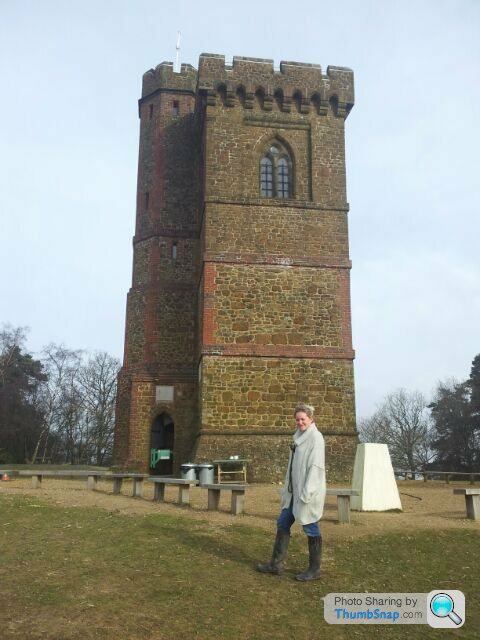
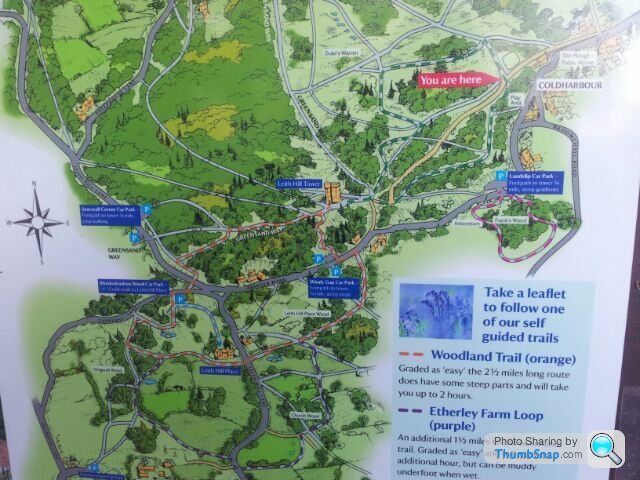
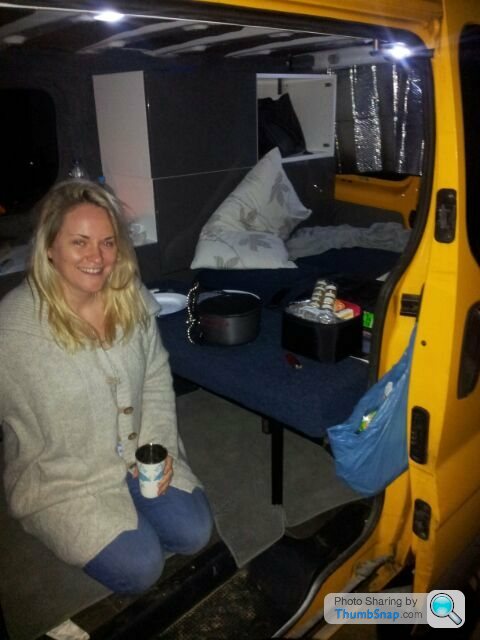
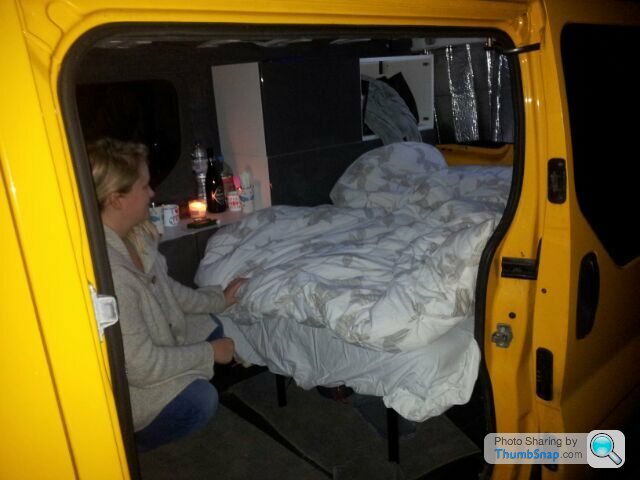
Then we decided to take her out and give her a test run to see how she went. We went to Leith Hill in Surrey and wild camped in one of the woodland carkparks. Really nice afternoon and evening, I have bought a smev sink and hob but haven;t got the work surface fitted yet so not able to use that. We have a spare flat camping stove which we took and have campaign and steaks in the evening with the dogs roaming around. Van was really comfortable with it being 5 degrees out side. Had some doggers pull up early in the evening and waiting by the van but the dogs kicked off and they quickly left. I found it funny wife was worried she would get gangbanged.


We have been using the bus ( more of which I will do later).
So I left it with the carcases in and the rock and roll bed.
Since then I have found a vivaro 9 seater bus step for the sliding door area to help smarten that up. Had to modifiy it a touch to get it to fit but it finishes it off nicely now.
Then we decided to take her out and give her a test run to see how she went. We went to Leith Hill in Surrey and wild camped in one of the woodland carkparks. Really nice afternoon and evening, I have bought a smev sink and hob but haven;t got the work surface fitted yet so not able to use that. We have a spare flat camping stove which we took and have campaign and steaks in the evening with the dogs roaming around. Van was really comfortable with it being 5 degrees out side. Had some doggers pull up early in the evening and waiting by the van but the dogs kicked off and they quickly left. I found it funny wife was worried she would get gangbanged.
Edited by Tampon on Sunday 27th April 13:40
Couple of thing we found when doing this test run was that although we were more than warm enough the windows in the morning were covered in condensation even with the front windows rolled down. Also the blacked out windows are great during the day as no one can see in if you are changing in the morning, and good in the evening keep the van dark, but with the lights on in the van you can see everything, not great when you wild camp like we do and aren't supposed to be there. So blinds or window covers are the order of the day.
Another thing is we really needed swivel seats at the front and sitting next to each other in the back whilst we read, listened to music, ate etc was odd, so that was next on the agenda.
I say next because I decided to see if the van was multi purpose and took the rear seats out and went and bought a motorbike ! She worked a treat although I am now extremely careful with the high gloss cupboards and not scratching them or scuffing the floor. Keep the tie down points was definitely worth it. Took me and my friend about 10 minutes to take it out and 15 minutes to put back in. The main issue is the seat doesn't fit through the back doors as with the cupboards in the pillar on the left hand side stops the seat coming straight out. so we unbolted it, extended it, flipped it on its edge carefully inside the van then took it out.
[url]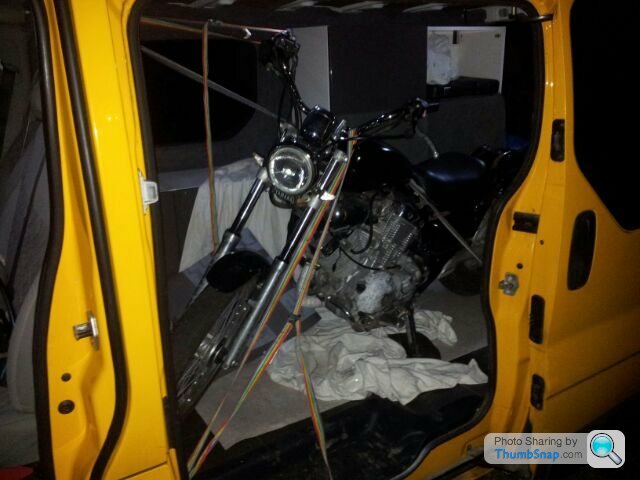

On to the swivel. We decided against getting it straight away as at £250 we thought it might be nice to have it at some point. Well after the trip it was well needed so we splashed out on a double swivel base. I arrived and Jesus wept, it is seriously heavy, crash tested and quick release so it should add value to the van in the long run. Fitting it is easy, 5 bolts undone, rock double seat back, bolt down base, bolt double seat on to base. Job done.
Only issue is the washers they give you look like they wouldn't stop a fart in a fishing net so I got some heavy duty ones and finished it properly. It has made a MASSIVE difference to the van. Bigger inside, comfortable as one can read with their feet up whilst the other sits on the bed. give extra space for changing inside as you can leave the bed down and sit on the bench and get changed as opposed to hopping about crouched over. All in all really worth the money, transforms the usability of the van. Only issue is you have to remember to disconnect the seat belt pretensioner or risk fking the wire, first thing I did was nearly cut through the wire! I think I might splice in a quick connect connection to make thing easier for longer trips.
 |http://thumbsnap.com/wMRPTw18[/url]
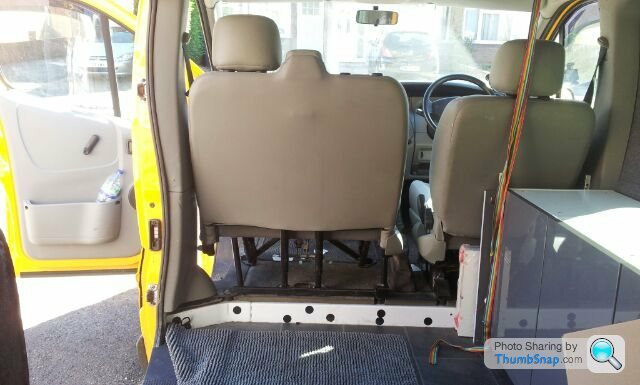
So the seat is in, it has two locating pins and then the four twist lock handles which lock it into the base. It can be spun around with the doors shut with a little shimmying. It doesn't lock when the chair is facing back ward to prevent people traveling with it like that
Another thing is we really needed swivel seats at the front and sitting next to each other in the back whilst we read, listened to music, ate etc was odd, so that was next on the agenda.
I say next because I decided to see if the van was multi purpose and took the rear seats out and went and bought a motorbike ! She worked a treat although I am now extremely careful with the high gloss cupboards and not scratching them or scuffing the floor. Keep the tie down points was definitely worth it. Took me and my friend about 10 minutes to take it out and 15 minutes to put back in. The main issue is the seat doesn't fit through the back doors as with the cupboards in the pillar on the left hand side stops the seat coming straight out. so we unbolted it, extended it, flipped it on its edge carefully inside the van then took it out.
[url]
On to the swivel. We decided against getting it straight away as at £250 we thought it might be nice to have it at some point. Well after the trip it was well needed so we splashed out on a double swivel base. I arrived and Jesus wept, it is seriously heavy, crash tested and quick release so it should add value to the van in the long run. Fitting it is easy, 5 bolts undone, rock double seat back, bolt down base, bolt double seat on to base. Job done.
Only issue is the washers they give you look like they wouldn't stop a fart in a fishing net so I got some heavy duty ones and finished it properly. It has made a MASSIVE difference to the van. Bigger inside, comfortable as one can read with their feet up whilst the other sits on the bed. give extra space for changing inside as you can leave the bed down and sit on the bench and get changed as opposed to hopping about crouched over. All in all really worth the money, transforms the usability of the van. Only issue is you have to remember to disconnect the seat belt pretensioner or risk f
king the wire, first thing I did was nearly cut through the wire! I think I might splice in a quick connect connection to make thing easier for longer trips.|http://thumbsnap.com/wMRPTw18[/url]So the seat is in, it has two locating pins and then the four twist lock handles which lock it into the base. It can be spun around with the doors shut with a little shimmying. It doesn't lock when the chair is facing back ward to prevent people traveling with it like that
Edited by Tampon on Sunday 27th April 13:44
As far as actual work on the van that is pretty much it. I changed the interior light bubs for 16 diode LED ones. They are much brighter and have hardly any draw whatsoever. So we have just used those for lighting at the moment. I left the lights on for 24 hrs and the battery had gone down 0.1 of a volt in that time, so they definitely work. The only thing is they give off a very white light which I don;t really like but my wife does so that doesn't really matter.
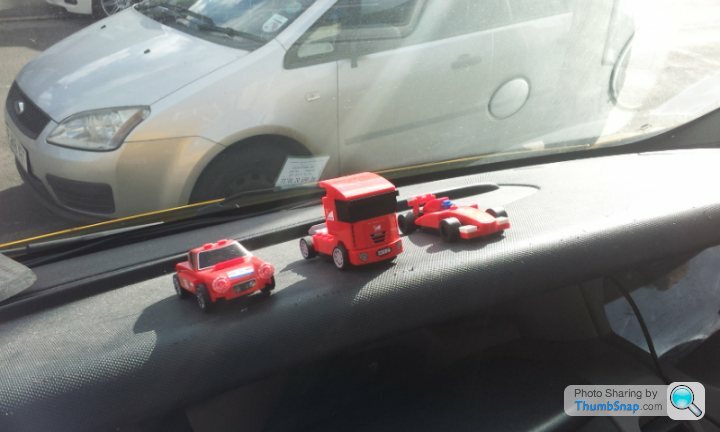
I had some Ferrari Lego that I bought from a shell station a few months back and decided that the van needs some fun in her so I built it and blue tacked it to the dash board. The wife hates it but I love it and like the idea of taking them on my travels with me. Might need some characters as well but can;t decided which.
Everybody needs a little bit of lego in their lives.
 |http://thumbsnap.com/COQDMvKQ[/url]
I got a knackered car battery recently and research how to recondition them. It was measuring 11.9 volts charged before I started. Stripped it down, drained the acid, refilled with Epsom salts and distilled water. Slow charged it for 2 days. Dumped everything again and refilled with Epsom salts and it showed 12.8 volts. I ran a few cycles on it with a home rigged lighting kit and charged it a few times, and it remained at 12.8 volts and would drain 0.08 to 0.1 volt in a hour with the lights that will go into the van. I left it in the shed for a week as well to see if the cold would drain it like a knackered battery would, and it dropped 0.2 volts.
All in all looks like I have found a cheap way to get a used leisure battery working well later on. Now I just have to buy the split charge kit and wire the van up.
We went to the south of France at the beginning of April for my wife to write a chapter on her PhD and for me to write my final year dissertation. We set off for the family house in the Dordogne. We left london at 4pm, got to the ferry for 6 with a bag of fish and chips, landed in Dunkirk at 10pm and drove down just south of Paris and stopped at gone 1am. We stayed in a Aires off the Paege and had a lovely nights sleep there. Got up in the morning and went to the house. Spent few weeks writing with not many explorations although we did go to Brantome for lunch a few times.

I have to say that the drive down was dead easy, bit slower than I normally drive ( average 90mph in the cars in the years before) the van would cruise at 90mph but a hill would see that drop to 80 mph. Also the mpg took a battering. Averaged 32mpg at that speed, but that is what to expect when you are trying to push a loaded square brick at fast speeds. 6 speed box made things nice and comfortable for the long journey and the sound deadening of in the van worked a treat, easily have a conversation at normal voice level at that speed.
On the way back we decided to wild camp in Versailles as we have never been there before. Drove up and arrived at 10pm the day before our ferry. Drove to the Palace and then started searching for some where to park up, there were loads of campers in car parks just off the main strip but that not really us, and it was a touch too noisy by the main road so we drove around and found a car park behind the Palace set in some trees off a side road so camped there.
I had cut some of the foil wrapped bubble wrap to fit the windows perfectly and stay there with just the tight fit against the frame. Total black out and no condensation on the windows so that worked a treat, just have to find a way of making them more attractive. Got up in the morning took the dogs for a walk in the gardens next to the palace and then had a coffee and drove to the ferry.

Over all the bus did great, I do miss having a car though, when I was down south as trying to hustle the van round those windy corners wasn't 'fun' like it is in the car. We drove a touch slower on the way back about 75mph and the mileage shot up to 41mpg, so I might have to change my driving style on these trips now. One goo thing is I can drive from London to the south of France on one tankful, where as before I would have had to fill the Subaru Legacy up three time on a one way trip.
I would recommend using the Aires in France, try and go for one without Petrol stations or shops as they are quieter, we wen to one and outside of Paris and it was like a youth club, seemed to be bus loads of student partying there, odd. Same on the way back, monday night 20 year olds drinking at motorway services? We heard horror stories about how we would be robbed, gassed etc but it was dead easy, loads of other people sleeping there. Lots of salesmen/ Reps kipping in the back of the BMWs or Audis as well as the truckers.
The ferry was the same price as a car which I was surprised about, we entered it as a small van first and it was double the price, same size vehicle but in as a small motor home and it came right down, something to do with commercial vehicles.
I had some Ferrari Lego that I bought from a shell station a few months back and decided that the van needs some fun in her so I built it and blue tacked it to the dash board. The wife hates it but I love it and like the idea of taking them on my travels with me. Might need some characters as well but can;t decided which.
Everybody needs a little bit of lego in their lives.
|http://thumbsnap.com/COQDMvKQ[/url]I got a knackered car battery recently and research how to recondition them. It was measuring 11.9 volts charged before I started. Stripped it down, drained the acid, refilled with Epsom salts and distilled water. Slow charged it for 2 days. Dumped everything again and refilled with Epsom salts and it showed 12.8 volts. I ran a few cycles on it with a home rigged lighting kit and charged it a few times, and it remained at 12.8 volts and would drain 0.08 to 0.1 volt in a hour with the lights that will go into the van. I left it in the shed for a week as well to see if the cold would drain it like a knackered battery would, and it dropped 0.2 volts.
All in all looks like I have found a cheap way to get a used leisure battery working well later on. Now I just have to buy the split charge kit and wire the van up.
We went to the south of France at the beginning of April for my wife to write a chapter on her PhD and for me to write my final year dissertation. We set off for the family house in the Dordogne. We left london at 4pm, got to the ferry for 6 with a bag of fish and chips, landed in Dunkirk at 10pm and drove down just south of Paris and stopped at gone 1am. We stayed in a Aires off the Paege and had a lovely nights sleep there. Got up in the morning and went to the house. Spent few weeks writing with not many explorations although we did go to Brantome for lunch a few times.
I have to say that the drive down was dead easy, bit slower than I normally drive ( average 90mph in the cars in the years before) the van would cruise at 90mph but a hill would see that drop to 80 mph. Also the mpg took a battering. Averaged 32mpg at that speed, but that is what to expect when you are trying to push a loaded square brick at fast speeds. 6 speed box made things nice and comfortable for the long journey and the sound deadening of in the van worked a treat, easily have a conversation at normal voice level at that speed.
On the way back we decided to wild camp in Versailles as we have never been there before. Drove up and arrived at 10pm the day before our ferry. Drove to the Palace and then started searching for some where to park up, there were loads of campers in car parks just off the main strip but that not really us, and it was a touch too noisy by the main road so we drove around and found a car park behind the Palace set in some trees off a side road so camped there.
I had cut some of the foil wrapped bubble wrap to fit the windows perfectly and stay there with just the tight fit against the frame. Total black out and no condensation on the windows so that worked a treat, just have to find a way of making them more attractive. Got up in the morning took the dogs for a walk in the gardens next to the palace and then had a coffee and drove to the ferry.
Over all the bus did great, I do miss having a car though, when I was down south as trying to hustle the van round those windy corners wasn't 'fun' like it is in the car. We drove a touch slower on the way back about 75mph and the mileage shot up to 41mpg, so I might have to change my driving style on these trips now. One goo thing is I can drive from London to the south of France on one tankful, where as before I would have had to fill the Subaru Legacy up three time on a one way trip.
I would recommend using the Aires in France, try and go for one without Petrol stations or shops as they are quieter, we wen to one and outside of Paris and it was like a youth club, seemed to be bus loads of student partying there, odd. Same on the way back, monday night 20 year olds drinking at motorway services? We heard horror stories about how we would be robbed, gassed etc but it was dead easy, loads of other people sleeping there. Lots of salesmen/ Reps kipping in the back of the BMWs or Audis as well as the truckers.
The ferry was the same price as a car which I was surprised about, we entered it as a small van first and it was double the price, same size vehicle but in as a small motor home and it came right down, something to do with commercial vehicles.
Edited by Tampon on Sunday 27th April 13:39
dasherdiablo1 said:
Have you thought about the uneven loading? Looks like a lot of weight on the drivers side so might make it handle a little strangely? I'm sure you have thought about it but don't want you putting in all this hard work and it makes it hard/dangerous to drive.
I did think about that when I was putting in the cupboards but it really isn't a issue, the weight of the swivel seat and the rock and roll bed even it out. Even if they weren;t there I doubt it would be a problem at all as driving van for work before with uneven loads was fine. sticking a tonne of lead against the right hand wall might be a issue but not for normal loads.

roverspeed said:
Great build thread.
One addition I would highly recommend is cruise control.
I have a t5.1 for work, never though I'd use cruise control much, makes a huge difference for me on mpg
That is already on the books. I have had it on all my cars and love it. One addition I would highly recommend is cruise control.
I have a t5.1 for work, never though I'd use cruise control much, makes a huge difference for me on mpg
It costs about £400 so isn't a small investment. So I am waiting til I start teaching in June and earning the big bucks!
If anyone knows any place round Heathrow/ Surrey that can do it or can recommend please let me know.
Afternoon, currently sat in a villa in Spain after driving round France for the last couple of weeks. Bit cloudy outside so I thought I would update as I have had a few people email me questions about stuff with the van.
With me finishing my degree and starting work as a teacher I now had set deadlines to have things completed for due to school holidays. With one month to go and constant nagging that the van would;t be finished for our trip to Europe on the 23rd of july I decided that I would have to pull my finger out.
First off was to sort the electrics so I could put the ceiling up with the lights then do the sink and hob, finished off with the curtains.
Bought a 120 amp kit off ebay with a volt sensing relay (VSR) which means you only have to hook one end to the starter battery and the other to the leisure battery and the relay sorts the rest out. Other much cheaper ones need wiring into something that only works when the alternator is on to allow the circuit between the two batteries to be broken when you switch the engine off to prevent the van battery being drained.
The kit cost around £70 for the relay plus 5 metres of cabling and all the connections, heat shrink and 60 am fuses and holders. You have to build the loom yourself though and the purchase of proper wire strippers and crimpers along with a cheap soldering iron and kit made the job easy.
I have never touched electrics before and after enquiring about costs of installation from a sparky (£150-250) I thought bugger that I will do it myself. Turned out it was very easy once I got my head around "grounding" a circuit to make it work.
I spent best part of 2hrs cutting, measuring, stripping, crimping, soldering and heat shrinking the connections for the connection between the two batteries.
Next up was a second battery. I read about people restoring car batteries with Epson salts and desulphering the plates with a slow process of slow charge, drain and start again. I got a knackered 70 amp hours battery from a friends mondeo he was chucking out and drained the acid out of the battery, chuck two teaspoons of Epson salts into each cell and topped it up with distilled water.
The battery started off only showing 11.3 volts fully charged, with the first drain and refill it went straight up to 12.4 volt fully charged. I then ran the battery down to 12.1 volts with my led lights left on for a day and charged it again, this time it went to 12.5V.
I then ran it down again with the lights hooked up and they lasted 36hrs to 12.1v. Drained the battery and redid the Epson salts and distilled and charged it, ran it down, charged it, ran it down and charged it. The battery now show 12.76 volts fully charged and goes up to 12.8 on a hot day. I have left the battery for 2 weeks in the shed and it loses 0.15 Volts in that time. Perfect a second battery for the cost of £4.50. I also restored my wives scooter battery and should get another 12 months out of it as it was getting sluggish.
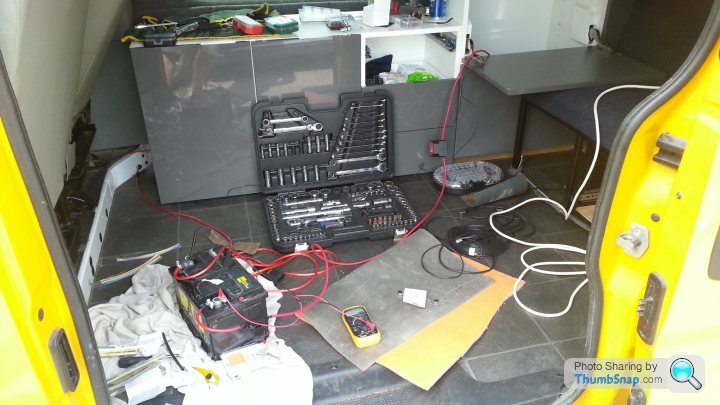
Checking the wiring worked and it would charge the second battery and switch off the circuit when the engine was off.
The cable attached to the main battery then a fuse and was run under the flooring mat to the drivers die where it pops out and then runs under the cabinets to the rear "service cupboard."
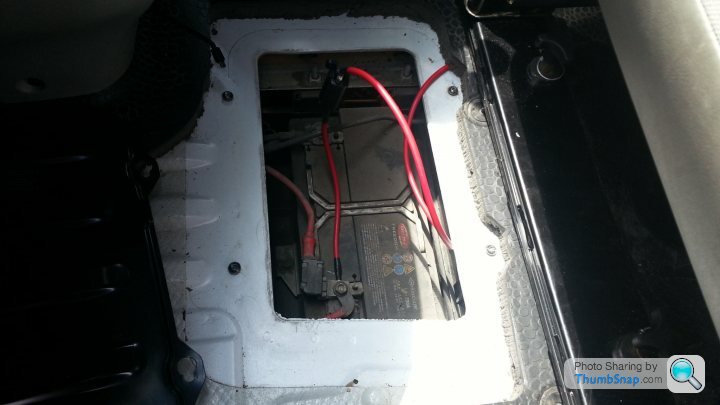
It pops up here. I have drilled two 1 inch holes in the floor here as a drop out for the gas and for the vent for the battery.
I bought a fusebox and hooked it up to check if everything was working.
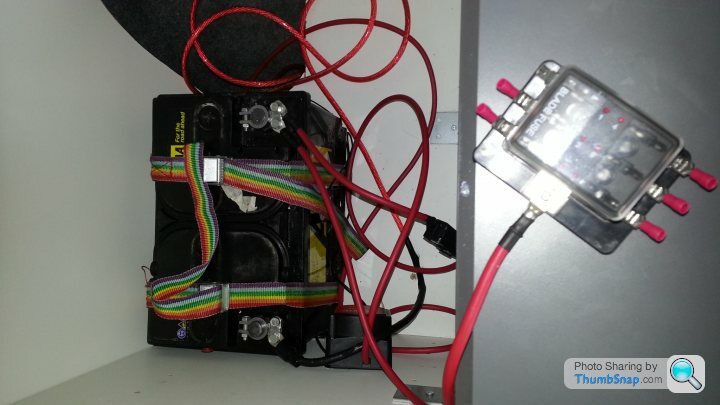
I grounded the 2nd battery to one of the bolt holes used for the tie down points now covered by the cabinets. I used a dremmel to sand the area around the hole back to bare metal. I used a grounding block next to the fuse box to ground each item and connected the grounding block to the negative terminal on the 2nd battery (which was grounded to the van body). Took me a while to figure that little lot out as I am a proper newbie to this stuff, but it is all extremely simple once it clicks.
With me finishing my degree and starting work as a teacher I now had set deadlines to have things completed for due to school holidays. With one month to go and constant nagging that the van would;t be finished for our trip to Europe on the 23rd of july I decided that I would have to pull my finger out.
First off was to sort the electrics so I could put the ceiling up with the lights then do the sink and hob, finished off with the curtains.
Bought a 120 amp kit off ebay with a volt sensing relay (VSR) which means you only have to hook one end to the starter battery and the other to the leisure battery and the relay sorts the rest out. Other much cheaper ones need wiring into something that only works when the alternator is on to allow the circuit between the two batteries to be broken when you switch the engine off to prevent the van battery being drained.
The kit cost around £70 for the relay plus 5 metres of cabling and all the connections, heat shrink and 60 am fuses and holders. You have to build the loom yourself though and the purchase of proper wire strippers and crimpers along with a cheap soldering iron and kit made the job easy.
I have never touched electrics before and after enquiring about costs of installation from a sparky (£150-250) I thought bugger that I will do it myself. Turned out it was very easy once I got my head around "grounding" a circuit to make it work.
I spent best part of 2hrs cutting, measuring, stripping, crimping, soldering and heat shrinking the connections for the connection between the two batteries.
Next up was a second battery. I read about people restoring car batteries with Epson salts and desulphering the plates with a slow process of slow charge, drain and start again. I got a knackered 70 amp hours battery from a friends mondeo he was chucking out and drained the acid out of the battery, chuck two teaspoons of Epson salts into each cell and topped it up with distilled water.
The battery started off only showing 11.3 volts fully charged, with the first drain and refill it went straight up to 12.4 volt fully charged. I then ran the battery down to 12.1 volts with my led lights left on for a day and charged it again, this time it went to 12.5V.
I then ran it down again with the lights hooked up and they lasted 36hrs to 12.1v. Drained the battery and redid the Epson salts and distilled and charged it, ran it down, charged it, ran it down and charged it. The battery now show 12.76 volts fully charged and goes up to 12.8 on a hot day. I have left the battery for 2 weeks in the shed and it loses 0.15 Volts in that time. Perfect a second battery for the cost of £4.50. I also restored my wives scooter battery and should get another 12 months out of it as it was getting sluggish.
Checking the wiring worked and it would charge the second battery and switch off the circuit when the engine was off.
The cable attached to the main battery then a fuse and was run under the flooring mat to the drivers die where it pops out and then runs under the cabinets to the rear "service cupboard."
It pops up here. I have drilled two 1 inch holes in the floor here as a drop out for the gas and for the vent for the battery.
I bought a fusebox and hooked it up to check if everything was working.
I grounded the 2nd battery to one of the bolt holes used for the tie down points now covered by the cabinets. I used a dremmel to sand the area around the hole back to bare metal. I used a grounding block next to the fuse box to ground each item and connected the grounding block to the negative terminal on the 2nd battery (which was grounded to the van body). Took me a while to figure that little lot out as I am a proper newbie to this stuff, but it is all extremely simple once it clicks.
Edited by Tampon on Sunday 3rd August 14:11
Gassing Station | Tents, Caravans & Motorhomes | Top of Page | What's New | My Stuff