2014 Pro Alloy Intercooler Group Buy
Discussion


Plumber1 said:
DeanoM12 said:
Scooby P1 said:
Plumber1 said:
Got mine, first black one 
Not sure it was the first one Duncs. Mine is at home....wife signed for it this afternoon!Boom.
 Mine also came in a huge box! On the plus side, I turned the box into a pretend race car and am currently sat in it in my living room....Win!! Lawrence, do you really want a photo? sounds technical!
 Why will yours not be going anywhere for a year?
Mine is currently awaiting a new driveshaft seal before it can go anywhere but that's minor.
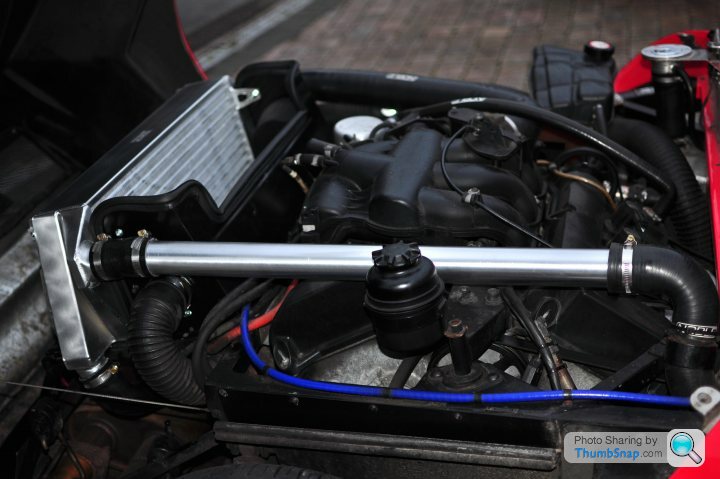
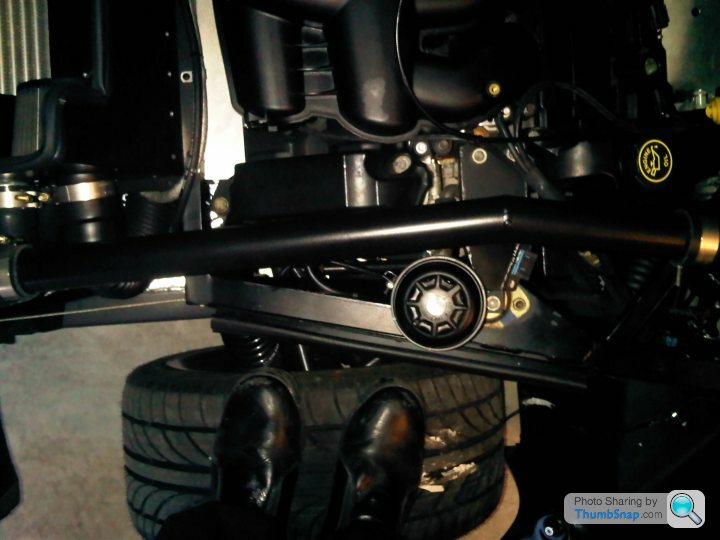
Then I will share a photo of my engine bay with all its black parts. Plan is to get the hard pipes in black eventually and then it will no longer look like a kit car with multi coloured parts when you open the rear clam!
Mine is currently awaiting a new driveshaft seal before it can go anywhere but that's minor.
Then I will share a photo of my engine bay with all its black parts. Plan is to get the hard pipes in black eventually and then it will no longer look like a kit car with multi coloured parts when you open the rear clam!
D_G said:
DeanoM12 said:
On the plus side, I turned the box into a pretend race car and am currently sat in it in my living room....Win!! Lawrence, do you really want a photo?
Of you sat in a cardboard box in your living room...?

Did you paint the box orange?
Did you get my email??
Scooby P1 said:
Why will yours not be going anywhere for a year?
Mine is currently awaiting a new driveshaft seal before it can go anywhere but that's minor.
Then I will share a photo of my engine bay with all its black parts. Plan is to get the hard pipes in black eventually and then it will no longer look like a kit car with multi coloured parts when you open the rear clam!
It's already been off the road for a year. Not sure what the problem is but it doesn't sound great. Can't be fanny'd to sort it at the mo as the house is taking priority.....lame I know!! Can I have a go in yours? you owe me Mine is currently awaiting a new driveshaft seal before it can go anywhere but that's minor.
Then I will share a photo of my engine bay with all its black parts. Plan is to get the hard pipes in black eventually and then it will no longer look like a kit car with multi coloured parts when you open the rear clam!

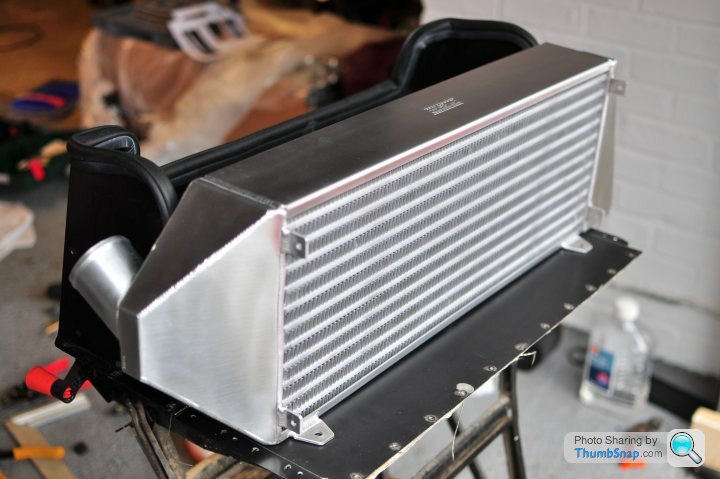
Fitted my new intercooler yesterday. It tool me 4 hours in total including packing everything away and chatting to the neighbours. I dare say that if I did the job again, I could complete it in 2 hours.
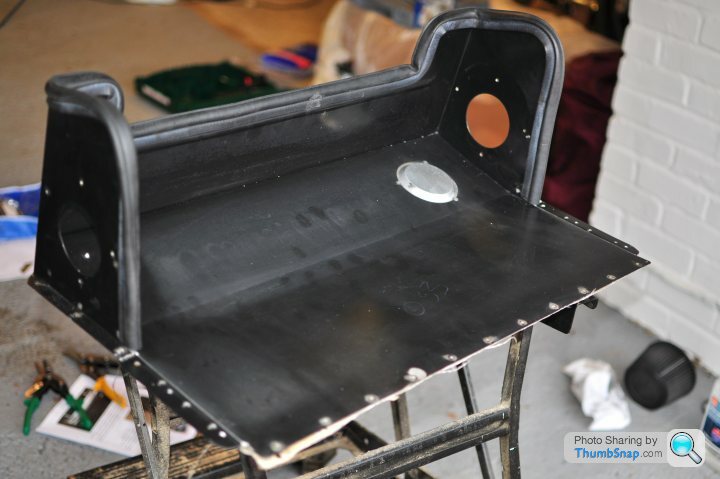
I was a little nervous about cutting up the intercooler box, as its a one-way process. I used tin snips for the radius at the top, but then found a dremmil with cutting wheel gave a better straight cut without deforming the sheet.
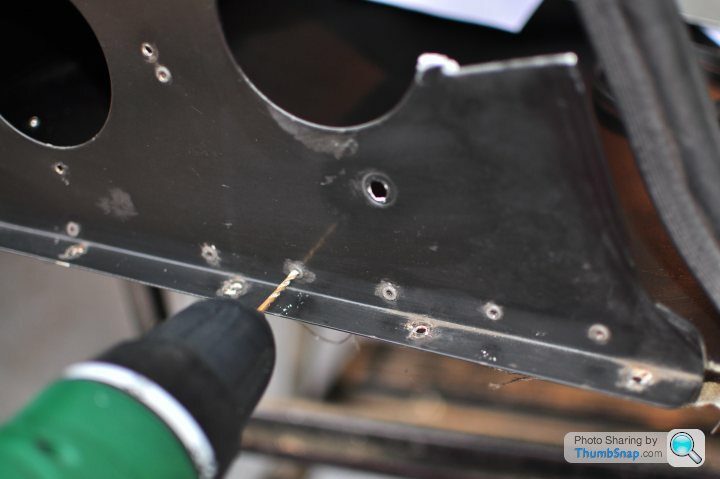
The intersection of the side panels and bottom floor of the box is joined with rivets. The instructions seem to suggest cutting through both layers, but I decided to drill out 4 of the 5 rivets on each side and then fold the floor flange flat to give more support once refitted to the chassis.


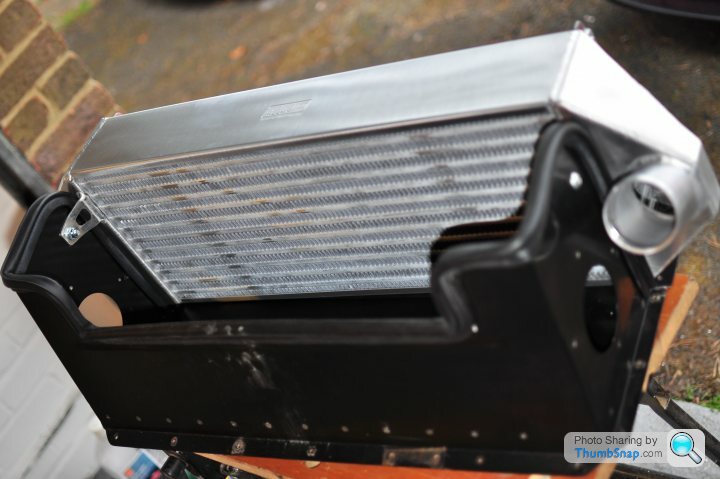
Probably basic stuff for many of you, but it's the first time I've tried cutting up my pride & joy.
I took loads of photos of the process, so if anyone's stuck I can share more.
A well earned reward:-

I dare say that if I did the job again, I could complete it in 2 hours.I was a little nervous about cutting up the intercooler box, as its a one-way process. I used tin snips for the radius at the top, but then found a dremmil with cutting wheel gave a better straight cut without deforming the sheet.
The intersection of the side panels and bottom floor of the box is joined with rivets. The instructions seem to suggest cutting through both layers, but I decided to drill out 4 of the 5 rivets on each side and then fold the floor flange flat to give more support once refitted to the chassis.
Probably basic stuff for many of you, but it's the first time I've tried cutting up my pride & joy.
I took loads of photos of the process, so if anyone's stuck I can share more.
A well earned reward:-
Instructions were a bit unclear at that point.
I did the same as you and drilled out the rivets and folded the flange down- but marked out the position of the original screw holes in chassis first to transfer to the folded down flap.
I've just reset the adaptive map as well, just in case there's any difference in airflow to account for. Probably wise as I've also changed the plugs and moved the airfilters.
I guess being adaptive it would sort itself out given a few miles...?
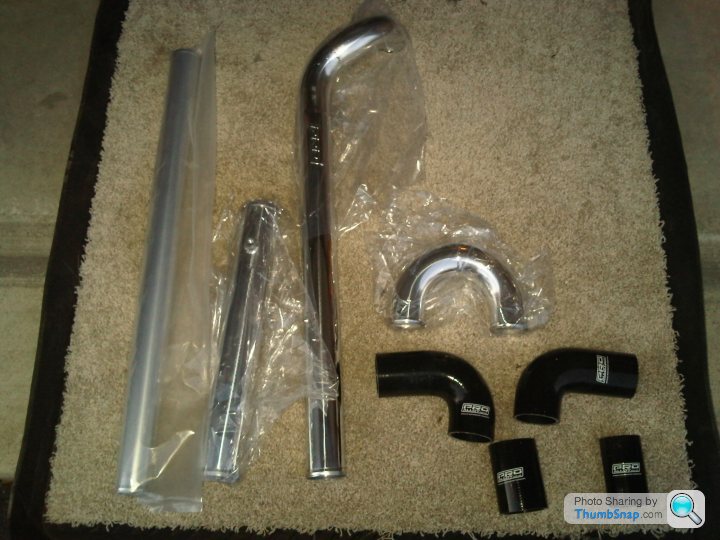
Does the hard pipe kit come with directions on where everything goes?
I assume I could figure it out but I want to make sure I use all the pieces in the right place and in the proper position.
Here are pics of the pieces I received.
You can see they supplied a long straight pipe but I have a offset in my current pipe in that location.
Thanks for your help.
I assume I could figure it out but I want to make sure I use all the pieces in the right place and in the proper position.
Here are pics of the pieces I received.
You can see they supplied a long straight pipe but I have a offset in my current pipe in that location.
Thanks for your help.
Edited by patsrocket on Wednesday 9th April 14:00
mrpbailey said:
Is anybody else still waiting to receive their items? Or have I just been forgotten about?
There was a delay on the hard pipes Paul, seeing as Pat has received his in the states I would assume your parts would also be on their way to you! I'll check with Pro Alloy in the morning for you Gassing Station | Noble | Top of Page | What's New | My Stuff