tipo 184 build diary
Discussion


Following with interest. As soon as I have a garage it is likely to be filled with an MX5 to convert into one of these.
I don't know if you know but there's a guy building one of these on Instagram - @alfa_tipo_184_desert_racer
Looks like he's a few months ahead of you.
Have you ordered your kit yet? Any idea how many they've sold? It's such a cool project, I really hope it does well for the team behind it.
I don't know if you know but there's a guy building one of these on Instagram - @alfa_tipo_184_desert_racer
Looks like he's a few months ahead of you.
Have you ordered your kit yet? Any idea how many they've sold? It's such a cool project, I really hope it does well for the team behind it.
2hrs
treated myself to a big dewalt battery 18v 6ah xr flex , it can do 2 hrs non stop
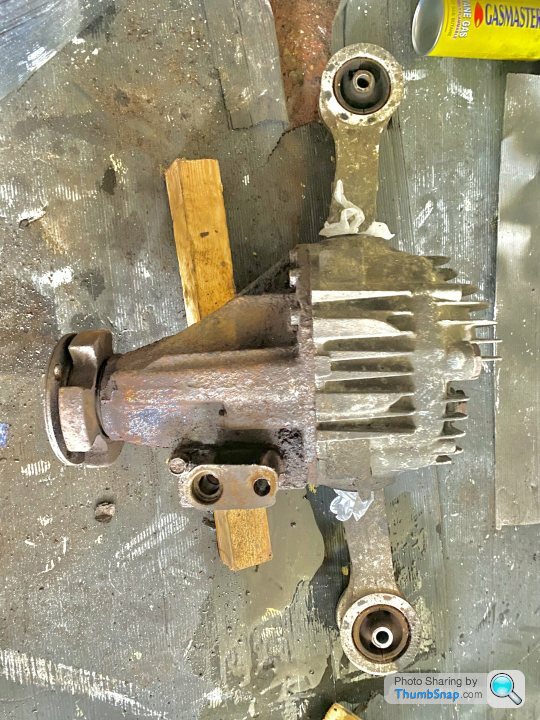
so today i got off the differential from the sub frame which was only two small nuts and one big nut both sides, i sheared off two of the smaller bolts so i’ll have to tack weld it in place once my new differential bushes arrive
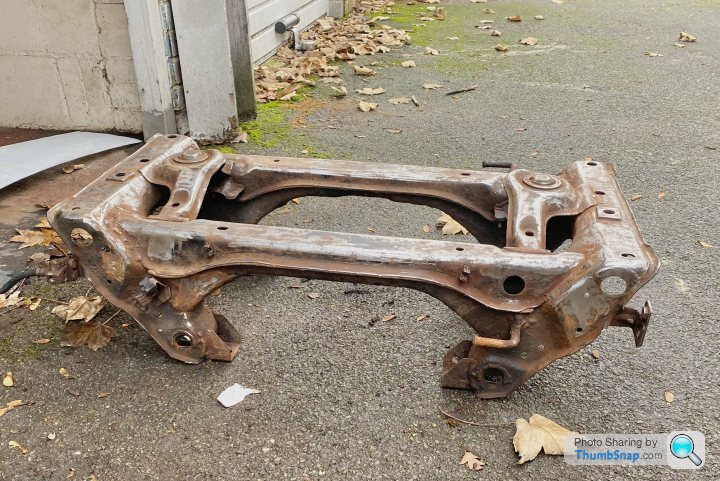
started to grind down the rust on the subframe
next job was to remove the ladder frame off the diff, this was causing me a headache as it was loose side to side but wouldn’t budge, had to watch a you tube video on how to remove it,
you have to put back the bolts half way , then bash them with a club hammer, the mushroom bolts pop out the top and then i bent the frame sideways and the last one snaps off
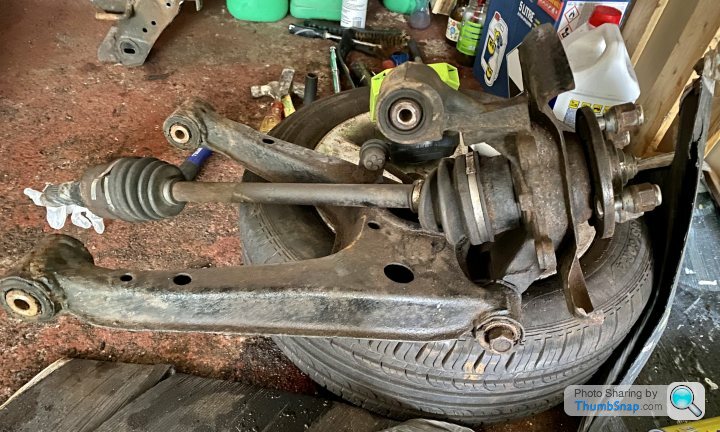
removed axles which pry off the diff, iam trying to undo the big bolt that goes through the lower wishbone, but this is well stuck on both drivers side and passenger’s.
will have to maybe cut the wishbone , i’ve bought new lower arms anyway
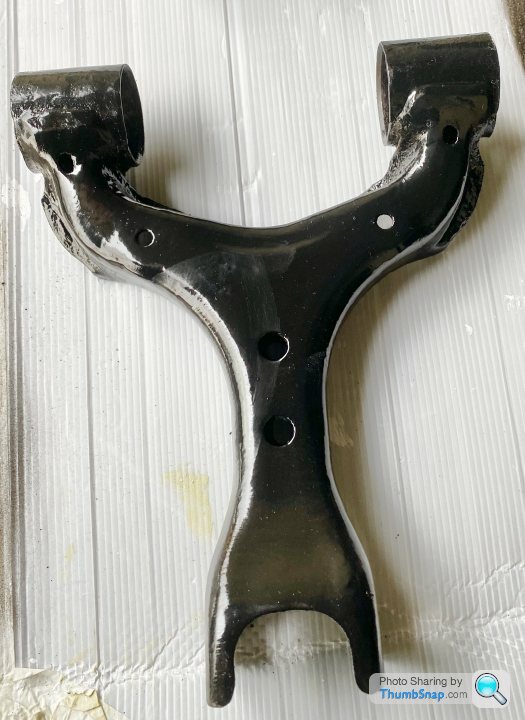
rust treated the top arms and then painted them with hammerite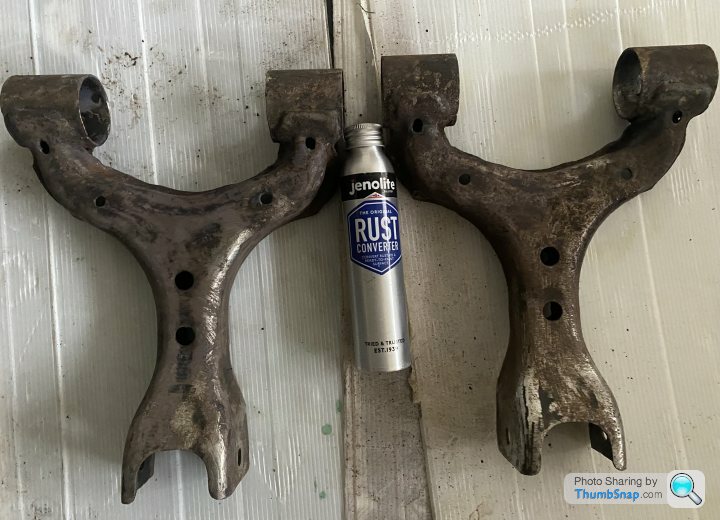
next was grinding off the rust from the diff, then treating it with rust converter, this takes 3 hrs to dry so i will paint it tomorrow
treated myself to a big dewalt battery 18v 6ah xr flex , it can do 2 hrs non stop
so today i got off the differential from the sub frame which was only two small nuts and one big nut both sides, i sheared off two of the smaller bolts so i’ll have to tack weld it in place once my new differential bushes arrive
started to grind down the rust on the subframe
next job was to remove the ladder frame off the diff, this was causing me a headache as it was loose side to side but wouldn’t budge, had to watch a you tube video on how to remove it,
you have to put back the bolts half way , then bash them with a club hammer, the mushroom bolts pop out the top and then i bent the frame sideways and the last one snaps off
removed axles which pry off the diff, iam trying to undo the big bolt that goes through the lower wishbone, but this is well stuck on both drivers side and passenger’s.
will have to maybe cut the wishbone , i’ve bought new lower arms anyway
rust treated the top arms and then painted them with hammerite
next was grinding off the rust from the diff, then treating it with rust converter, this takes 3 hrs to dry so i will paint it tomorrow
2 .5 hrs
got the bushes out of the differential with an cordless sds drill, you have to drill out the rubber mount then fold in the metal ,it’s in two half’s so once one side is folded in then they drop out, still takes about 10mins a side to do
then i sanded everything down and sprayed the differential with very high temperature aluminium paint , the black on the front part
i carried on grinding down the rusty subframe,which i’ll continue with tomorrow as my battery’s died
also got out two more bushes from the rear suspension arms with fire , my plumbing flame gun and a bolster and screwdriver gets them out
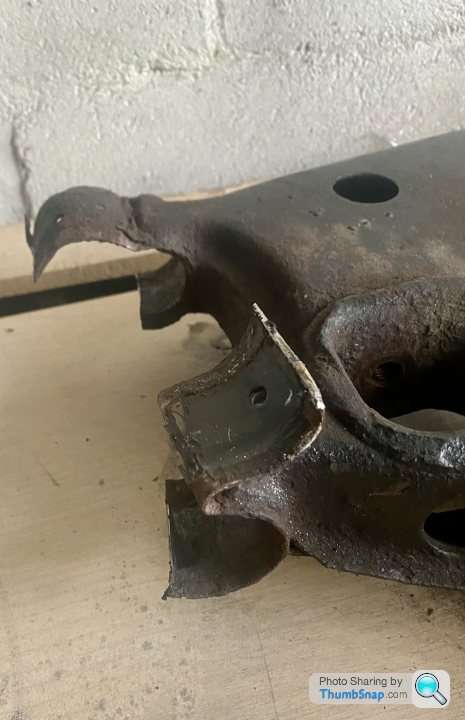
i also had to cut the suspension arms to get the bolt out, it was solid which is common,
i’ll take some photos tomorrow of that
got the bushes out of the differential with an cordless sds drill, you have to drill out the rubber mount then fold in the metal ,it’s in two half’s so once one side is folded in then they drop out, still takes about 10mins a side to do
then i sanded everything down and sprayed the differential with very high temperature aluminium paint , the black on the front part
i carried on grinding down the rusty subframe,which i’ll continue with tomorrow as my battery’s died
also got out two more bushes from the rear suspension arms with fire , my plumbing flame gun and a bolster and screwdriver gets them out
i also had to cut the suspension arms to get the bolt out, it was solid which is common,
i’ll take some photos tomorrow of that
How are you finding the instructions so far? Do they produce a paper manual as well as YouTube videos (which seem to assume an immaculate, pre-stripped MX5).
If you happen to be around West London and need an extra pair of hands do feel free to give me a shout. I do shift work so I'm often around irregular hours. Based on your difficulty finding a garage I assumed you might be in this part of the world!
If you happen to be around West London and need an extra pair of hands do feel free to give me a shout. I do shift work so I'm often around irregular hours. Based on your difficulty finding a garage I assumed you might be in this part of the world!
2.5 hrs
got the differential bushes fitted today, upgraded ones, i managed to hammer in one to about half way then it wouldn’t budge so i went to my local garage who’s got a press, they done both in 2 mins
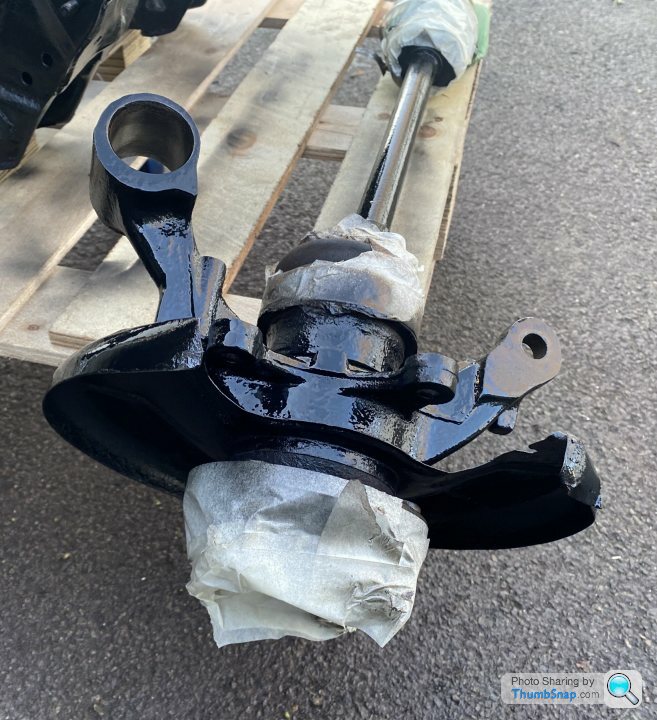
sanded down both brake knuckles and brake dust plate and rust converter ed them ready for tomorrow to paint,
picture of the old differential rubber in half
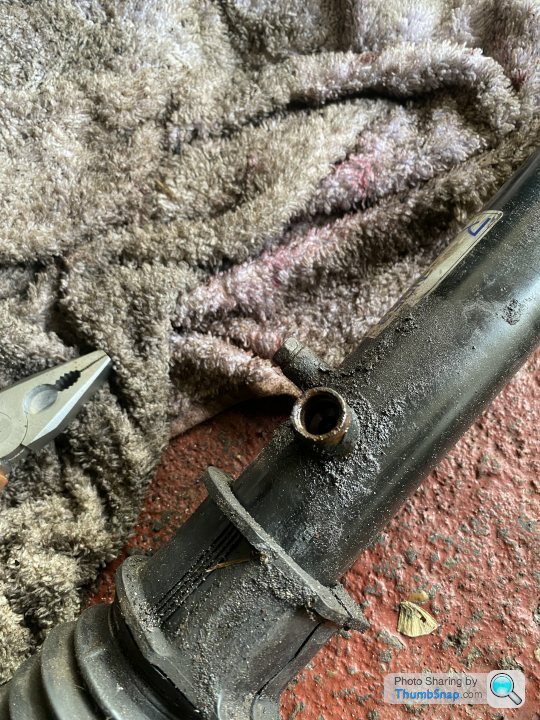
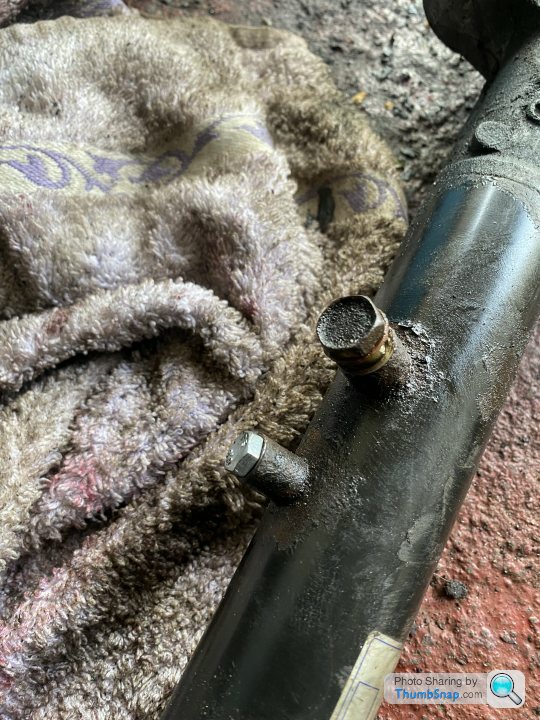
here’s the suspension i had to cut to get the bushes and bolt out
there’s no build manual to take the car apart , it’s just common sense and keeping all the bits what’s needed for the tipo
i haven’t ordered my kit yet, i don’t have the room in a single garage to store it until i’ve got everything stripped and refurbished
iam based in twickenham
got the differential bushes fitted today, upgraded ones, i managed to hammer in one to about half way then it wouldn’t budge so i went to my local garage who’s got a press, they done both in 2 mins
sanded down both brake knuckles and brake dust plate and rust converter ed them ready for tomorrow to paint,
picture of the old differential rubber in half
here’s the suspension i had to cut to get the bushes and bolt out
there’s no build manual to take the car apart , it’s just common sense and keeping all the bits what’s needed for the tipo
i haven’t ordered my kit yet, i don’t have the room in a single garage to store it until i’ve got everything stripped and refurbished
iam based in twickenham
tricky360 said:
2.5 hrs
got the differential bushes fitted today, upgraded ones, i managed to hammer in one to about half way then it wouldn’t budge so i went to my local garage who’s got a press, they done both in 2 mins
sanded down both brake knuckles and brake dust plate and rust converter ed them ready for tomorrow to paint,
picture of the old differential rubber in half
here’s the suspension i had to cut to get the bushes and bolt out
there’s no build manual to take the car apart , it’s just common sense and keeping all the bits what’s needed for the tipo
i haven’t ordered my kit yet, i don’t have the room in a single garage to store it until i’ve got everything stripped and refurbished
iam based in twickenham
Ah nice, I'm just over the river in Kingston. As I say, feel free to drop me a line if you need an extra pair of hands.got the differential bushes fitted today, upgraded ones, i managed to hammer in one to about half way then it wouldn’t budge so i went to my local garage who’s got a press, they done both in 2 mins
sanded down both brake knuckles and brake dust plate and rust converter ed them ready for tomorrow to paint,
picture of the old differential rubber in half
here’s the suspension i had to cut to get the bushes and bolt out
there’s no build manual to take the car apart , it’s just common sense and keeping all the bits what’s needed for the tipo
i haven’t ordered my kit yet, i don’t have the room in a single garage to store it until i’ve got everything stripped and refurbished
iam based in twickenham
Unfortunately, they're closed while they look for a new workshop, but London Hackspace has a great selection of tools you can drop in and use for a suggested £15 a month donation. Welders, lathes, 3d printers, sandblasting cabinets, drill presses, bottle presses, mills. I'm a member and can highly recommend it for odd jobs where the cost of the tool is prohibitive. They're looking at a new place in Acton which should hopefully be open by the summer I think.
4 hrs
done some work at home on the suspension
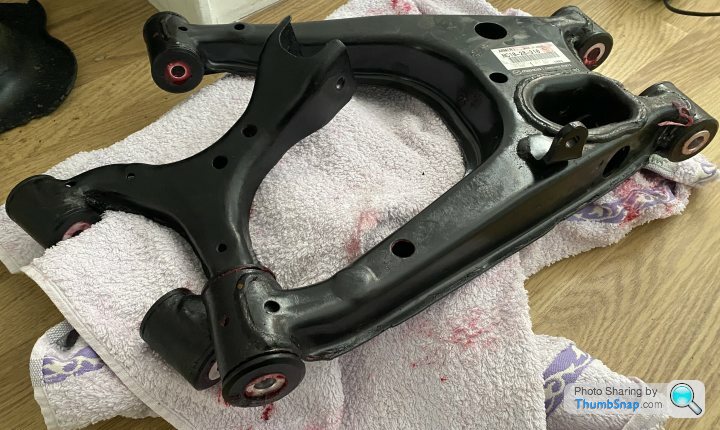
got new sports bushes to fit, these were hard to do ,
first the instructions were very vague , each bushing has a different location so instead of numbering them or doing a picture diagram, it was just written in broken english so had to work out what goes where
i had to soak them in boiling hot water to soften them first ,then applied the grease
had a hand clamp that helped squeeze the bushings in first then the metal inserts were put in with a metal threaded bar method which was a lot easier
look up jazda on you tube for his method
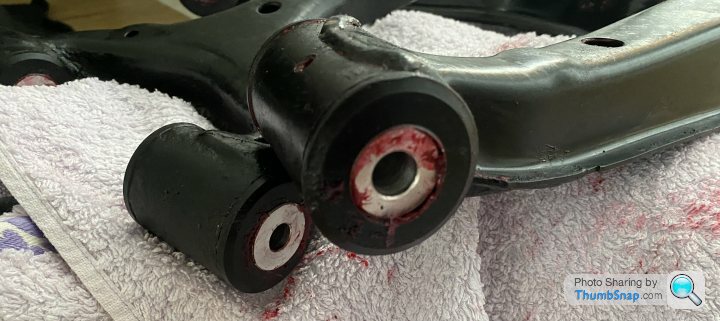
the grease is bright red ,not blood !
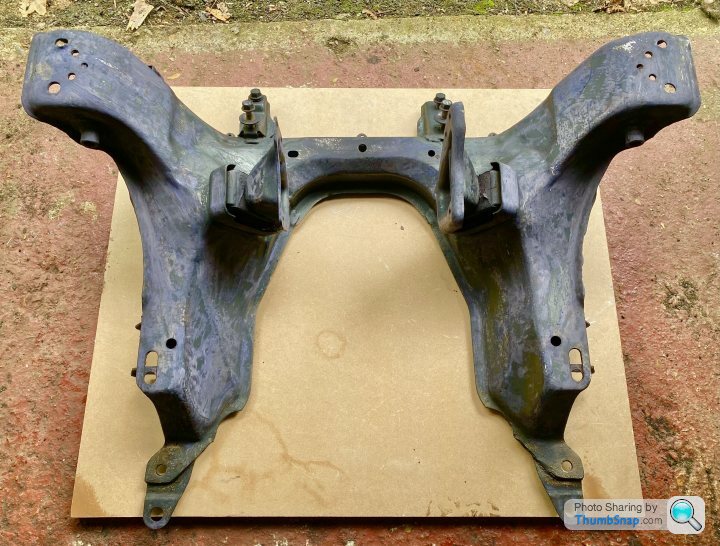
next was to paint the subframe
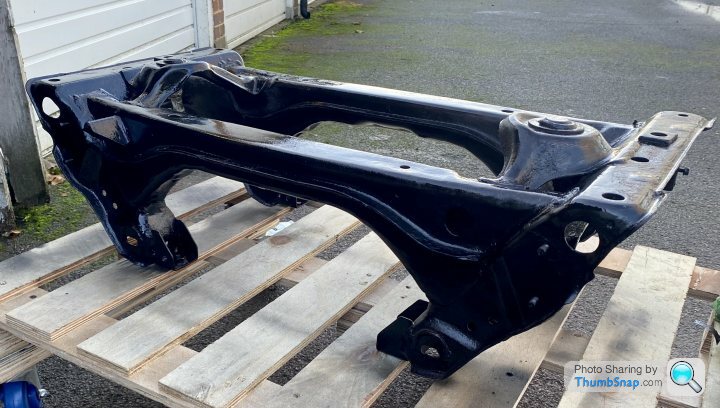
4 coats of hammerite black
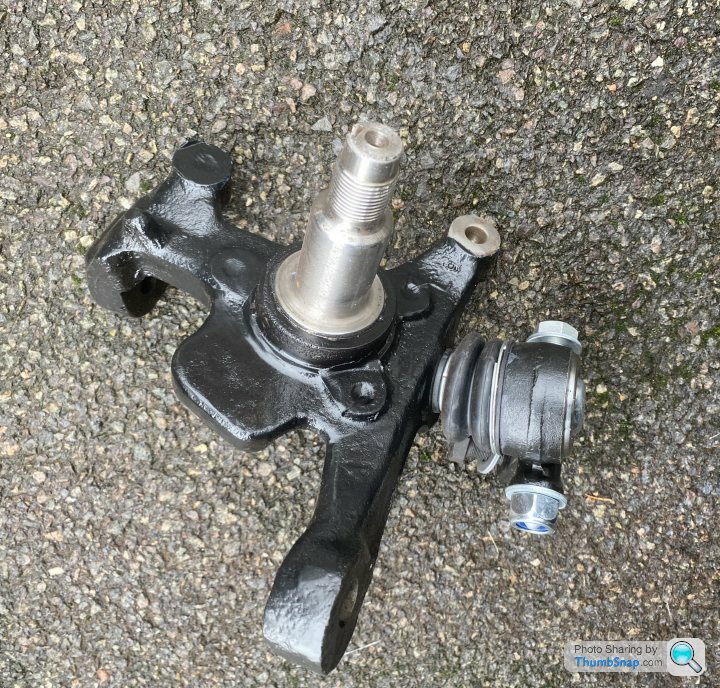
then i painted up the rear knuckles
so monday or tuesday i’ll put the rear all back together,
i’ve ordered a engine hoist for tuesday/wednesday so i can then start on the front subframe
done some work at home on the suspension
got new sports bushes to fit, these were hard to do ,
first the instructions were very vague , each bushing has a different location so instead of numbering them or doing a picture diagram, it was just written in broken english so had to work out what goes where
i had to soak them in boiling hot water to soften them first ,then applied the grease
had a hand clamp that helped squeeze the bushings in first then the metal inserts were put in with a metal threaded bar method which was a lot easier
look up jazda on you tube for his method
the grease is bright red ,not blood !
next was to paint the subframe
4 coats of hammerite black
then i painted up the rear knuckles
so monday or tuesday i’ll put the rear all back together,
i’ve ordered a engine hoist for tuesday/wednesday so i can then start on the front subframe
2 hrs
no work on the car since last update, as it’s been too cold to go to the garage! and my work has picked up this last month so that has to come first.
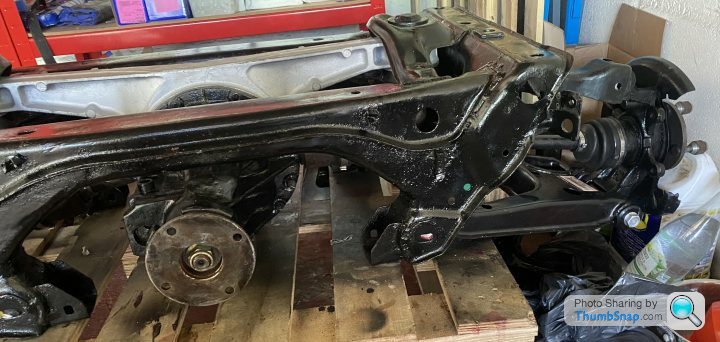
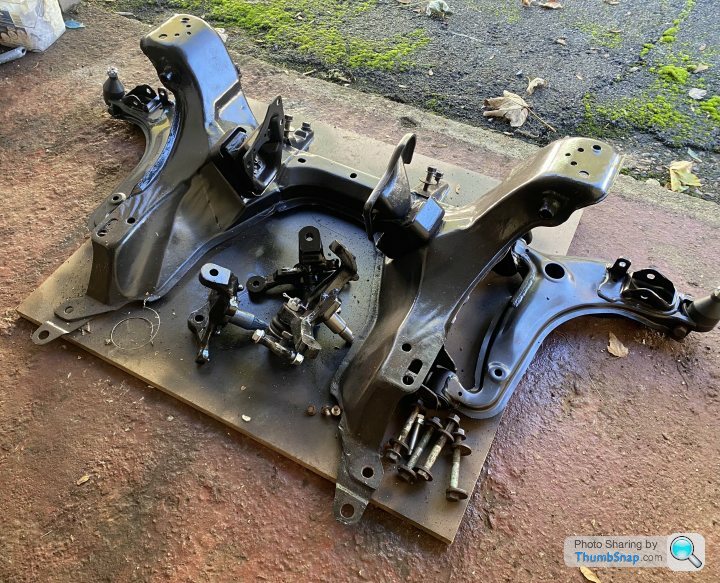
had a couple of hours spare today so went to fit up the rear subframe
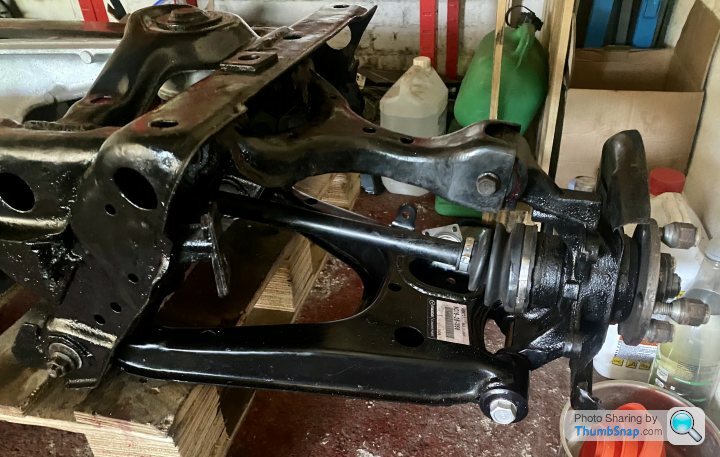
new differential seals fitted and put in the axles and new suspension arms

nearly completed subframe, just got to put in one more bushing on the top suspension arm that i forgot to do at home
got my engine hoist to put together now ,and then i can start on the front subframe and take the engine and gearbox off and put it to one side
no work on the car since last update, as it’s been too cold to go to the garage! and my work has picked up this last month so that has to come first.
had a couple of hours spare today so went to fit up the rear subframe
new differential seals fitted and put in the axles and new suspension arms
nearly completed subframe, just got to put in one more bushing on the top suspension arm that i forgot to do at home
got my engine hoist to put together now ,and then i can start on the front subframe and take the engine and gearbox off and put it to one side
Edited by tricky360 on Thursday 16th February 09:09
Edited by tricky360 on Thursday 16th February 09:10
2.5 hrs
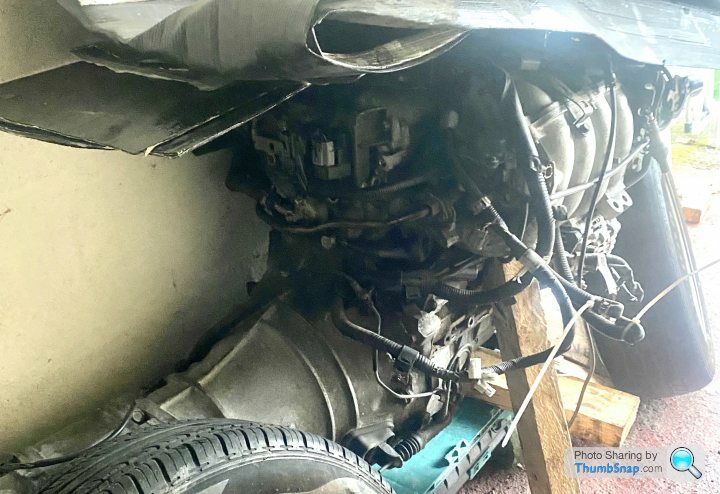
managed to get to the garage on friday to take off the engine from the front frame
had to put together my engine hoist first, then get some long enough chains
engine came off really easy and put it on a trolly to the side of the garage
i’ll work on the engine later on in the build
next was to take off the front wheels and strip down the front
looking at the build video, it looks like i don’t need any of the power steering system so this week i’ll strip that off and start grinding down the frame and getting it painted up
then it’s time to buy the kit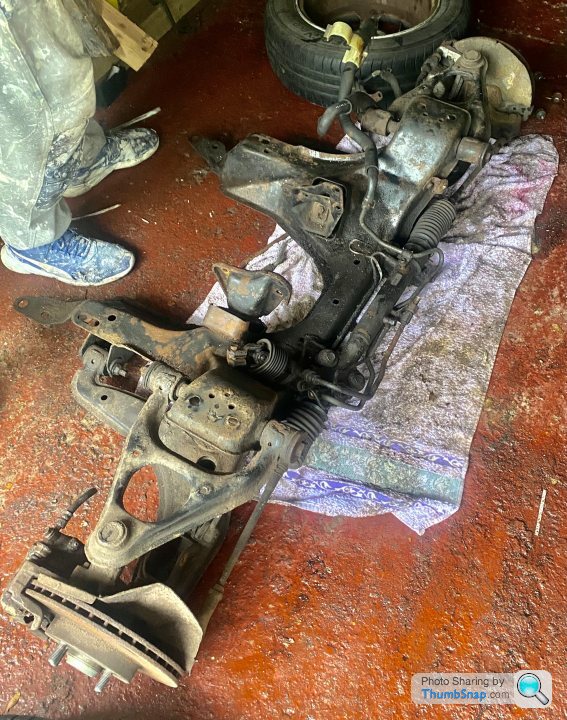
Edited by tricky360 on Monday 20th March 19:53
Edited by tricky360 on Monday 20th March 19:54
update time!
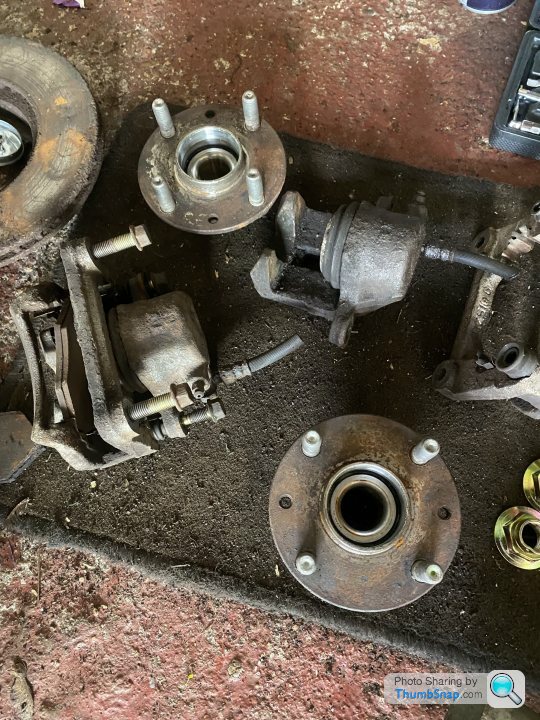
brakes striped down
been ages since i did anything to the car which i will explain later why!

snapped off one of the bolts holding on the brake dust overs
so took the hub to my local garage i use all the time and they removed the snapped bolt and sand blasted the hub for me for free
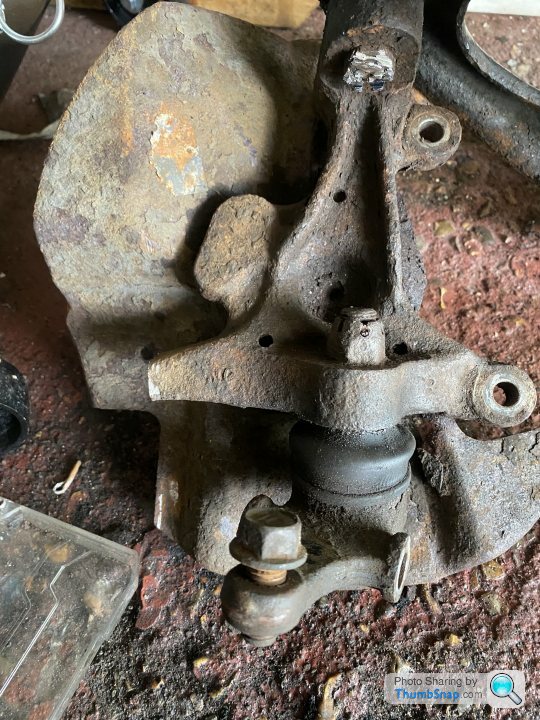
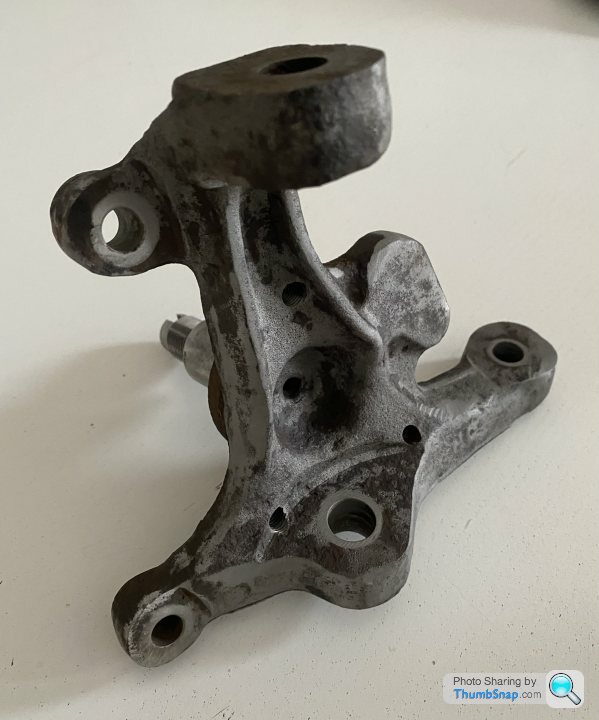
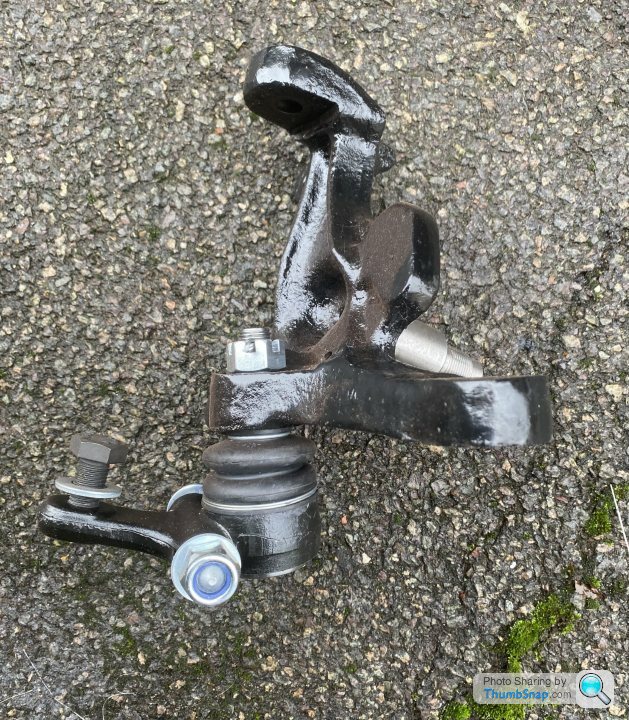
with me rushing to finish and get as much done as possible, i cut the wrong part off the knuckle 😤
brakes striped down
been ages since i did anything to the car which i will explain later why!
snapped off one of the bolts holding on the brake dust overs
so took the hub to my local garage i use all the time and they removed the snapped bolt and sand blasted the hub for me for free
with me rushing to finish and get as much done as possible, i cut the wrong part off the knuckle 😤
steering rack piping taken off
had to find some nuts to block up the holes left from the removed pipe work
next was to finish grinding down the front subframe which was going smoothly until i decided to do one last bit, i took off my safety glasses just to hit one last section and a bit of metal /rust shot into my eye
thought it would come out with a rub and a wash but i turned out to be stuck in my lens!
after two days of feeling i had hay fever in one side of my face with streaming watery eye , runny nose and a burning itch in my eye
i went to the hospital
they got it out and said it would take 2-3 days to heal
after one week of the same symptoms i had to go to an emergency eye hospital up london and it turns out some small fragments were still in the eye and had reacted to the natural salt in your tears and had made a rust ring in the eye
they got the last bits out and has taken 2 weeks to heal properly.
so i’ve learnt my lesson, always wear the safety gear from now on
back on it now, been ages since i did anything to the build, work has been mega busy and using the garage to store equipment from my job, which i swore i wouldn’t do, i couldn’t get into the garage.
after my eye injury taking a bit longer to get better i’ve cleared the garage and have started again
have to refresh my memory of where i got up to and what bolt goes where
started on the front sub frame, finished grinding down the rust ( with safety glasses on!)
put rust converter on it ready for the hammerite
Google a company called Corolless. They do specialist paints for marine applications.
They'll sell you a rust inhibiting primer and a glass-reinforce black top coat. It's inexpensive (1 x 500ml tin of each did my entire defender rebuild), easy to apply and looks great. It's also very very hardy.
10x better than hammerite. You won't be disappointed
They'll sell you a rust inhibiting primer and a glass-reinforce black top coat. It's inexpensive (1 x 500ml tin of each did my entire defender rebuild), easy to apply and looks great. It's also very very hardy.
10x better than hammerite. You won't be disappointed
2hr today
sprayed the subframe underneath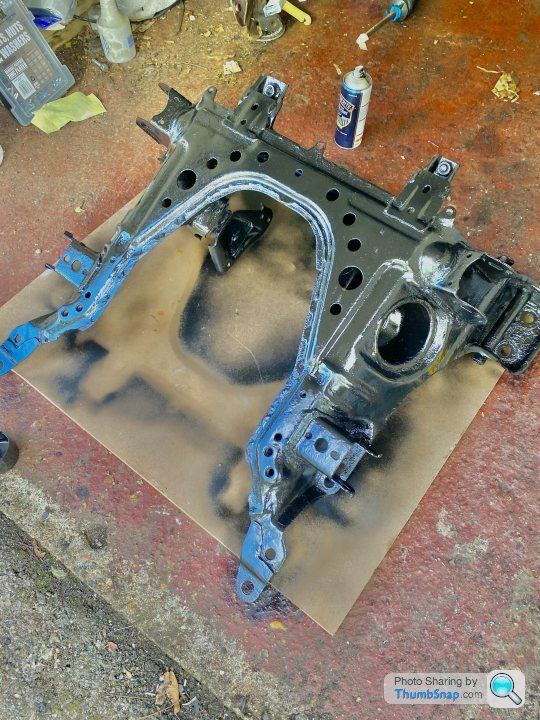
next was to grind down the second hand knuckle i bought from ebay
and the hubs
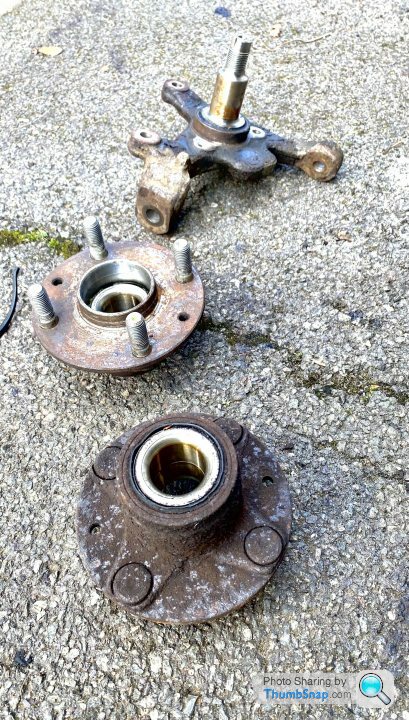
started cleaning up the hubs but i thought i would just buy new ones as they’re not very expensive
managed to snap off the last bolt which holds the dust shield , so a trip to my local garage to get it tapped out
sprayed the subframe underneath
next was to grind down the second hand knuckle i bought from ebay
and the hubs
started cleaning up the hubs but i thought i would just buy new ones as they’re not very expensive
managed to snap off the last bolt which holds the dust shield , so a trip to my local garage to get it tapped out
sooo, after a long summer with no work on the car due to family and work i’ve got back on to it,
bought a set of hubs from ebay, only needed one ,but couldn’t rember which side ! so a seller on ebay was doing a deal for both left and relight so i got them
got one all finished
next was finish spraying the front sub frame
bought new lower arms , they come with ball joints pre fitted , i already bought some so they will be surplus
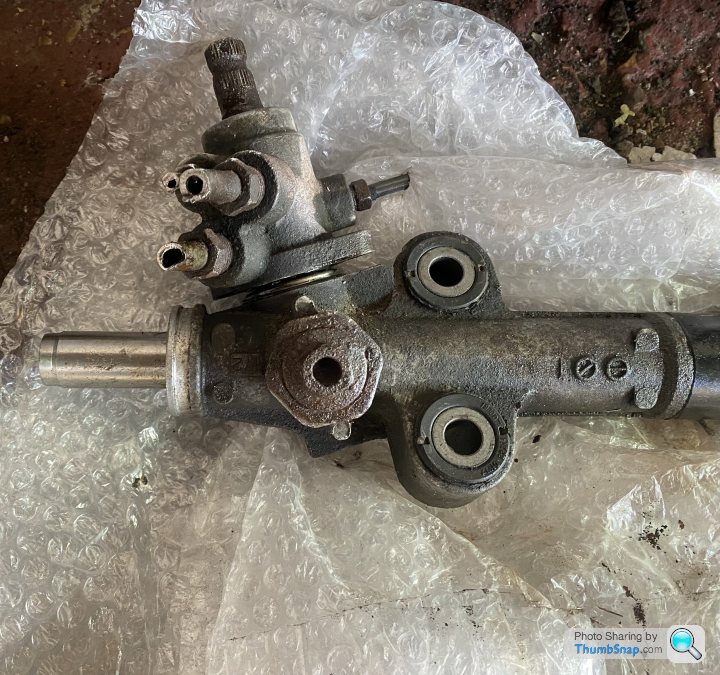
next was the steering rack
the build video doesn’t mention it really , but if you look the power steering is completely taken out , so i wasn’t sure if you delete everything, after watching another youtube video how to do it properly you have to open up the rack and cut off a metal ring inside
so i’ve bought another rack from ebay for £ 45 to have a go at it , if i can’t do it my local garage said they will do it for me
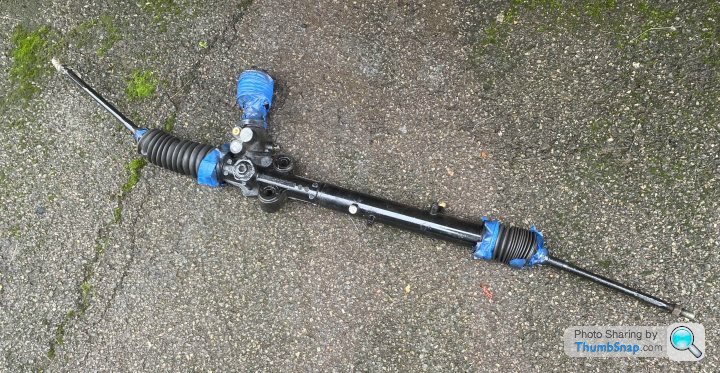
so i finished this rack first without the ring delete , i will open up the second hand one first before i do this one
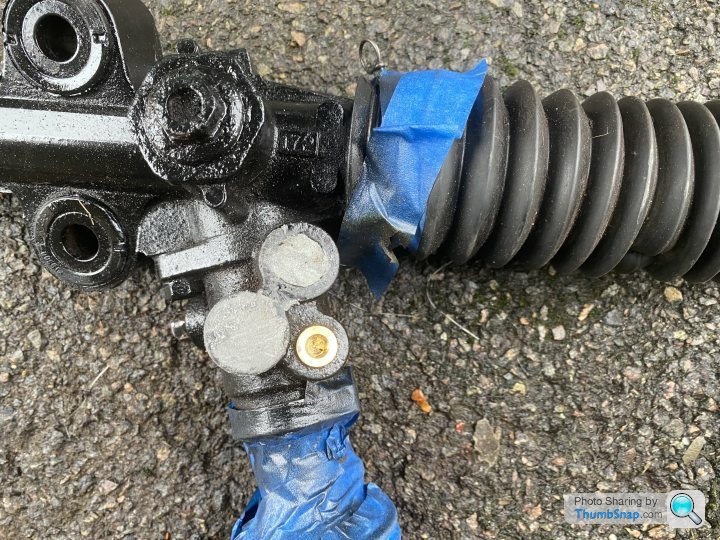
this is the holes you need to either plug up with bolts or just fill in with jb weld or similar, i got some metal putty from machine mart and it’s set solid once it gets mixed and air dried
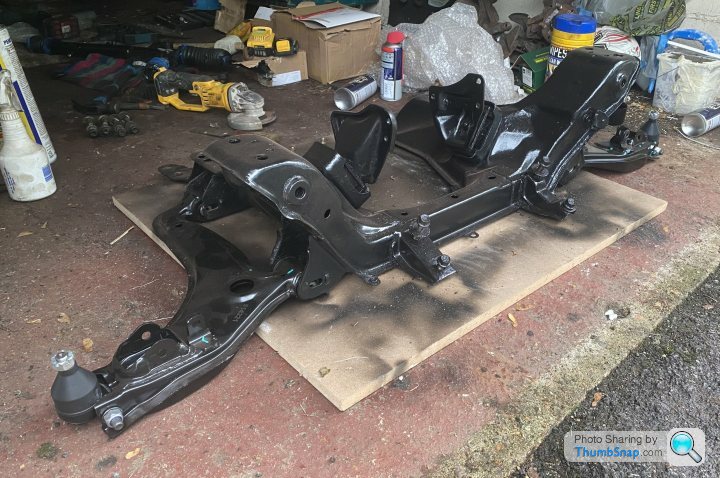
front all sprayed up
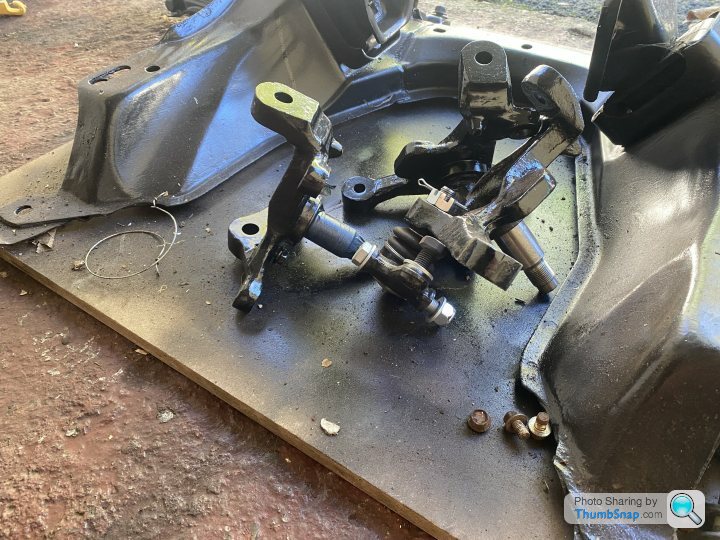
hubs done , even the ones i don’t need i’ve finished off

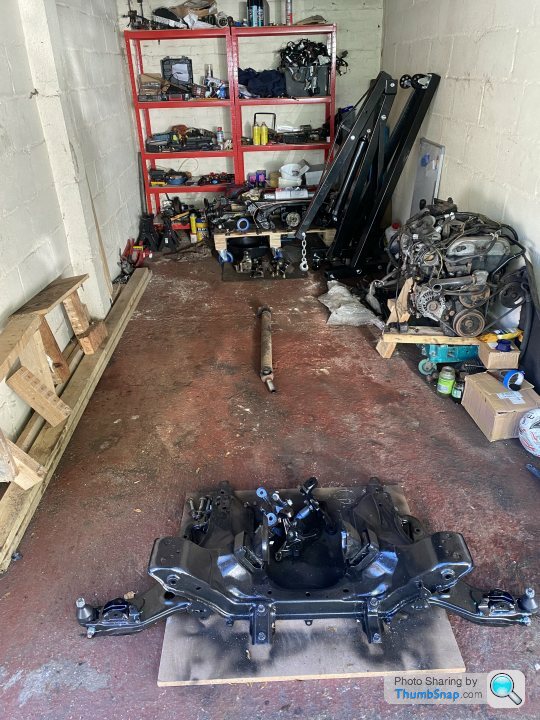
prop shaft ready for exchanging
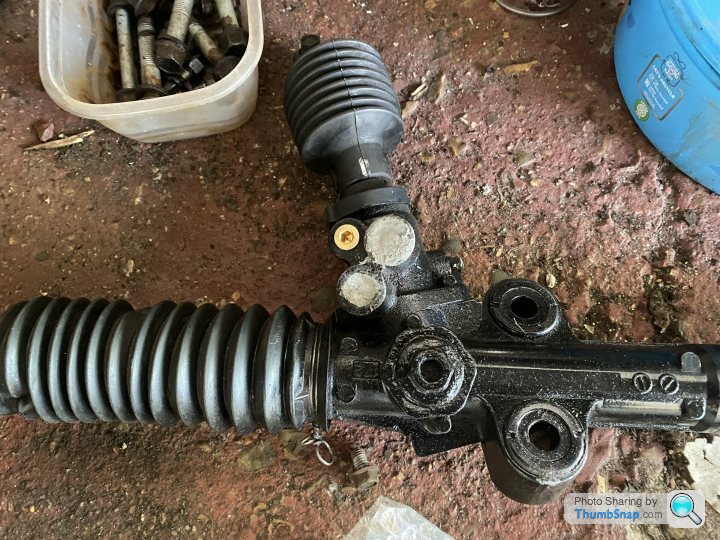
second steering rack done, just got to re fit steering knuckle, bought a secondhand one from ebay for £45 so now have two without power steering
cleaned out the garage ,was getting messy and i need it clean for the delivery tomorrow ! that’s right, i’ve ordered the starter kit and wheels and suspension so i can get on with the next phase , getting it rolling
Gassing Station | Kit Cars | Top of Page | What's New | My Stuff