Mac#1 Motorsport Worx Build
Discussion


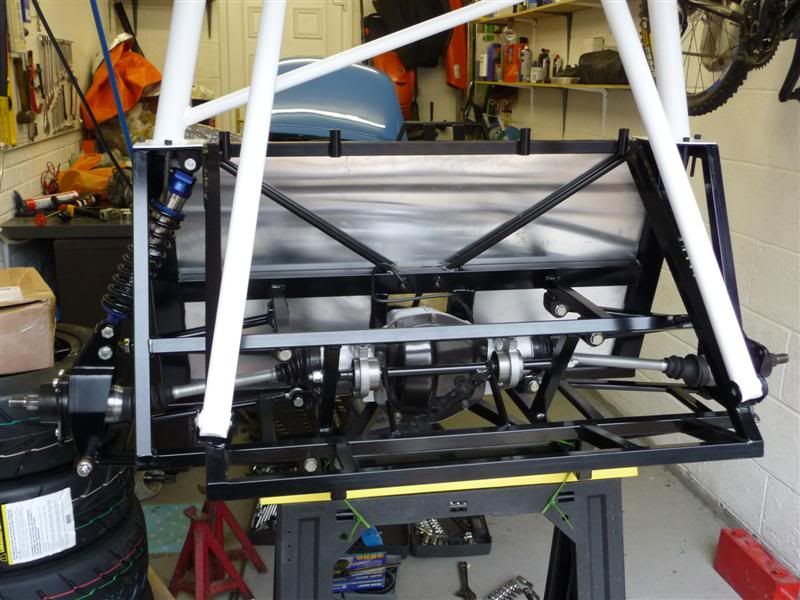
Tried to fit my Freelander rear diff yesterday but didnt realise until it was nearly in the car that the casing needed a little mod, doh!
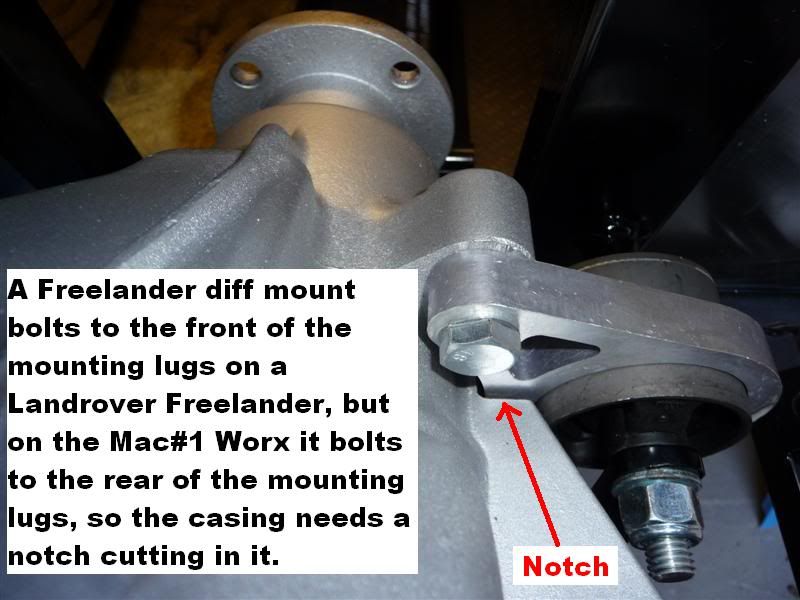
Once the notch was cut out of the casing, the diff bolted into the chassis easily.
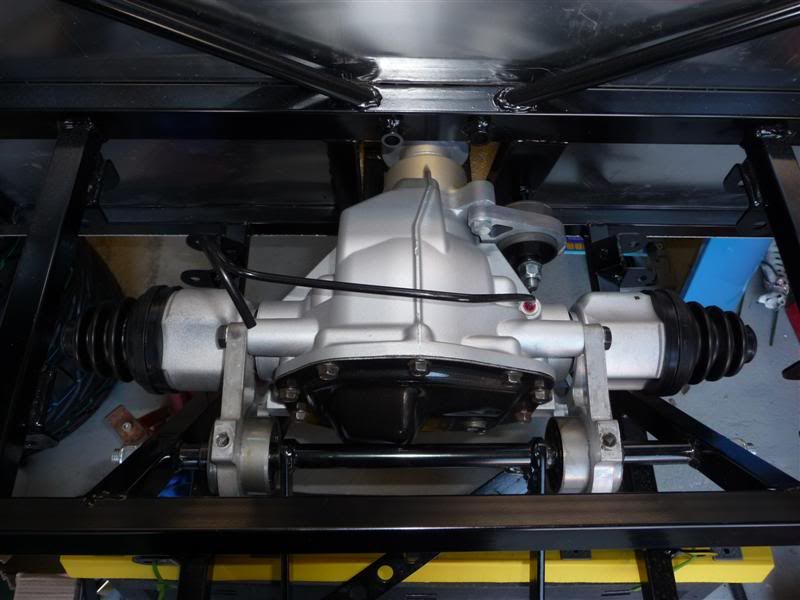
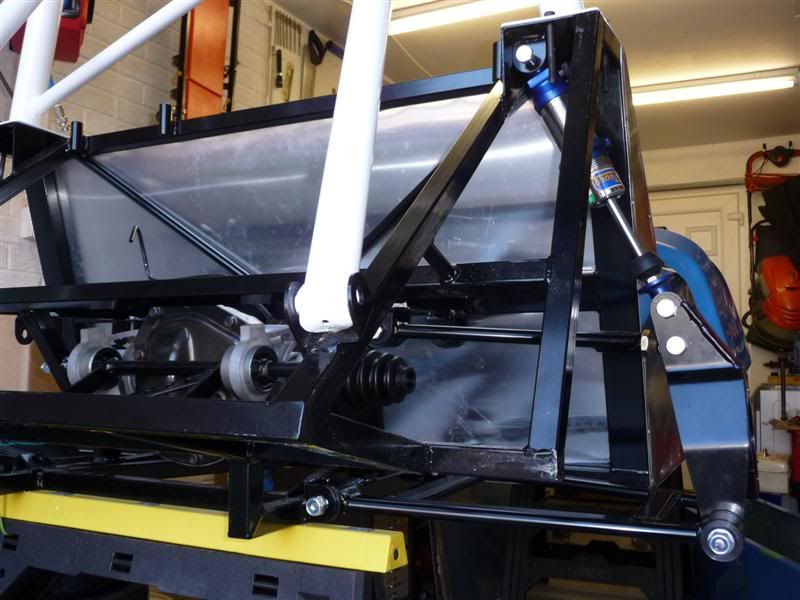
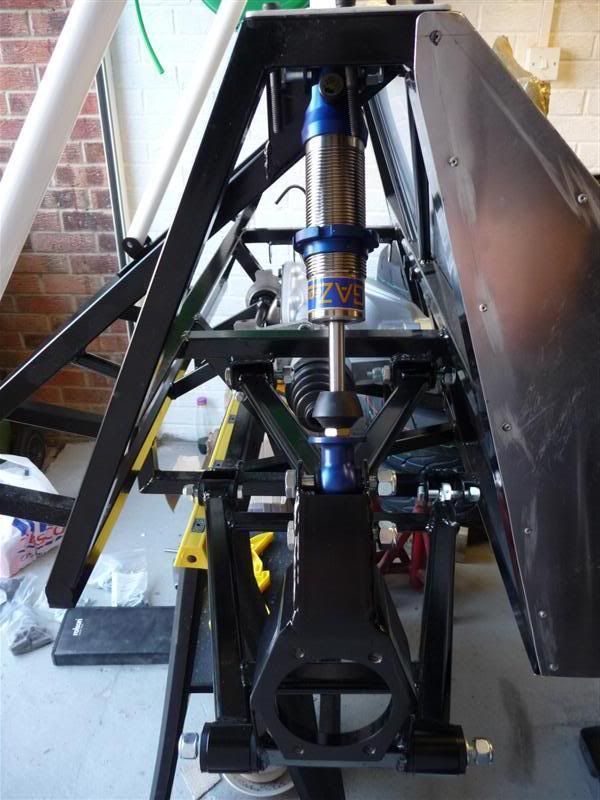
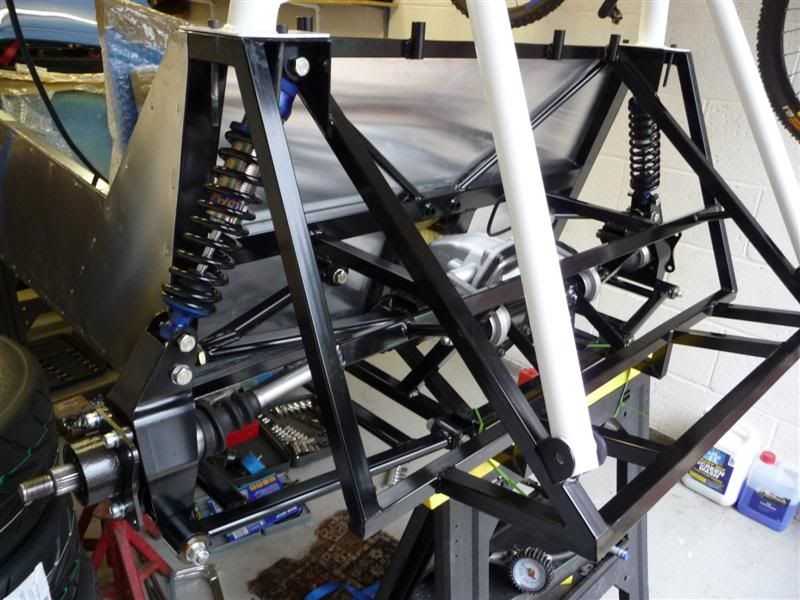
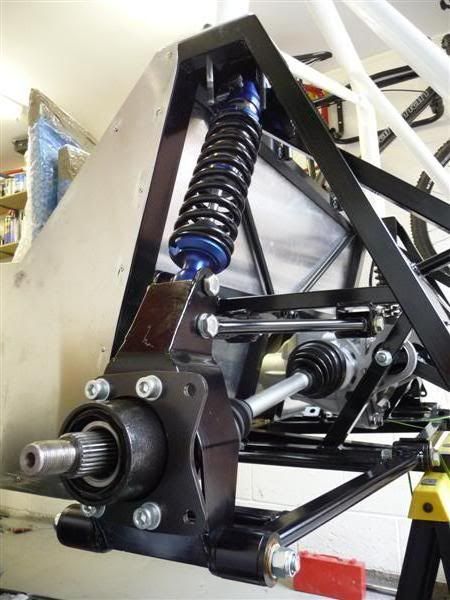
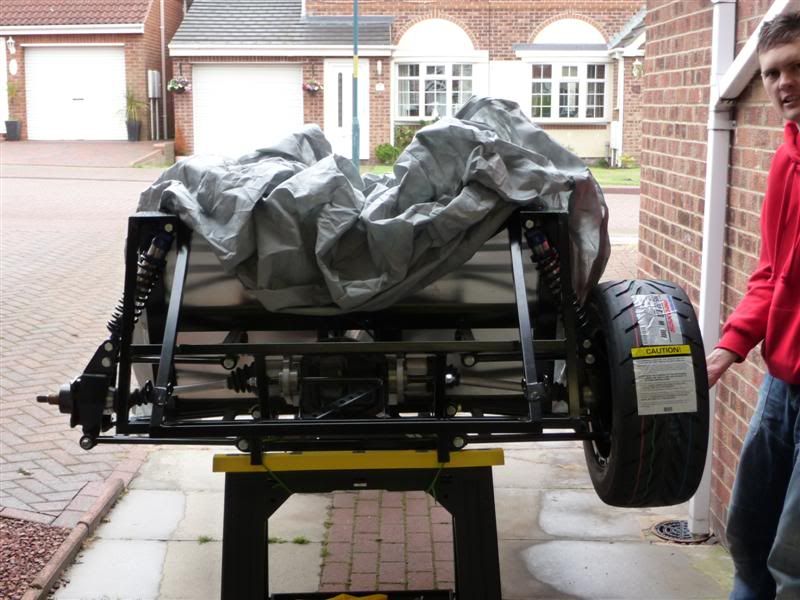
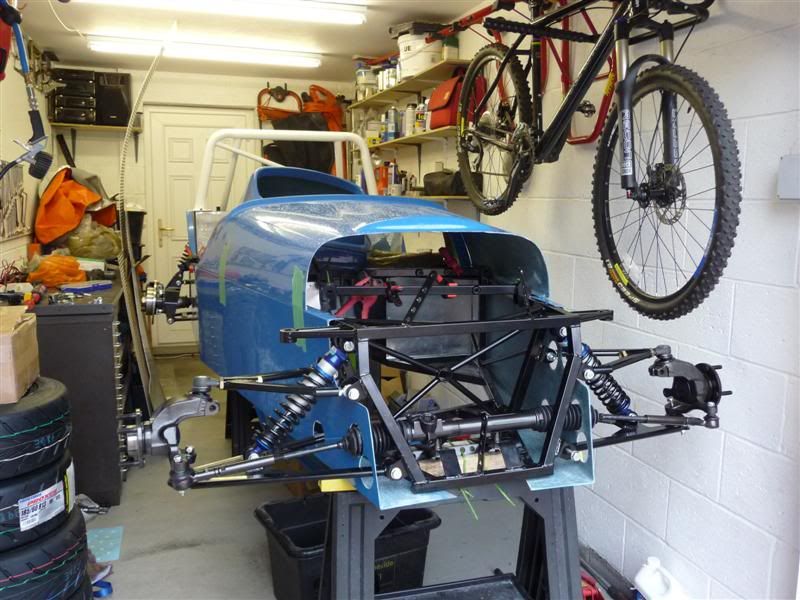
I then set about a quick mock up of the rear suspension, which looks something like this
Once the notch was cut out of the casing, the diff bolted into the chassis easily.
I then set about a quick mock up of the rear suspension, which looks something like this
Thanks for your concern mate, but no need to worry. This braking combination has been used on many Mac#1 customers cars and found to be trouble free, the front and rear calipers have different sized pistons in them and they work nicely together, with no need to fit a brake bias adjuster into the rear brake line.
singlecoil said:
Red16 said:
The pistons have diameters of 35.1mm in the front calipers and 25mm in the rear calipers.
Thanks, I'll make a note of that, it could crop up quite soon.Todays progress goes like this...
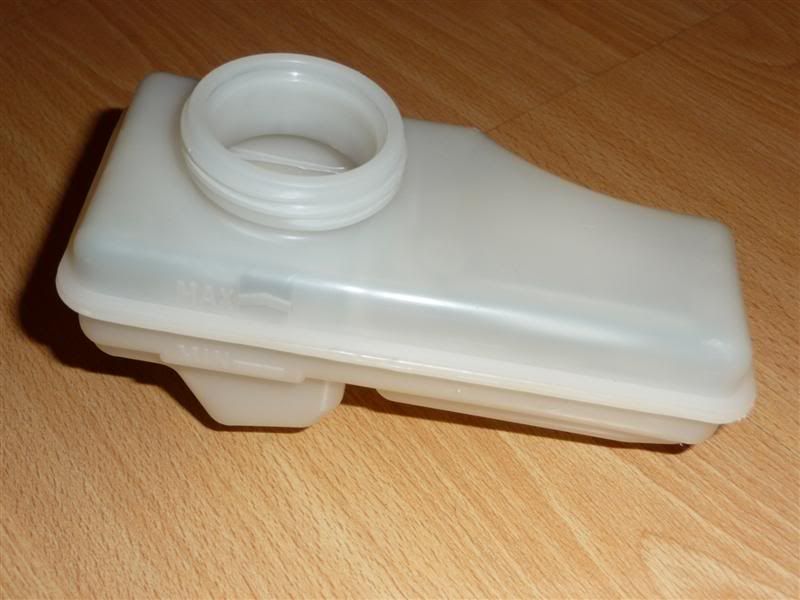
One new Sierra brake fluid reservoir
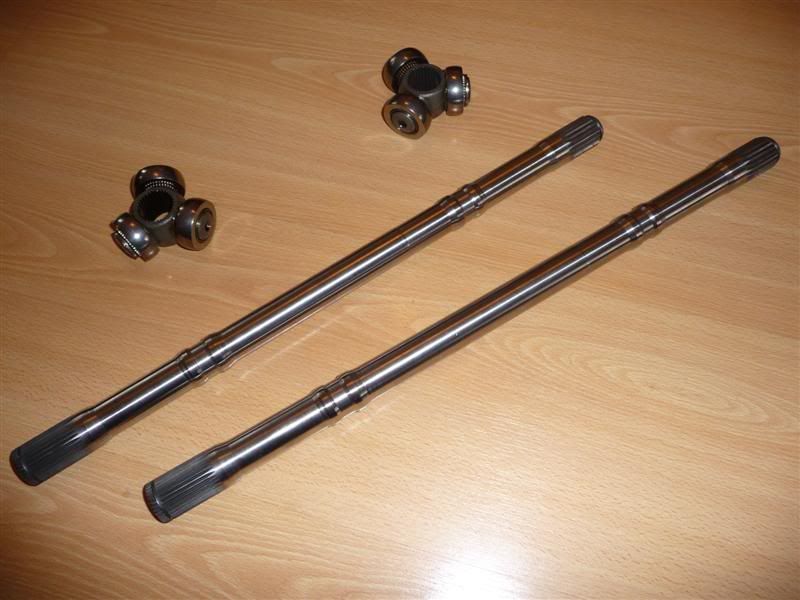
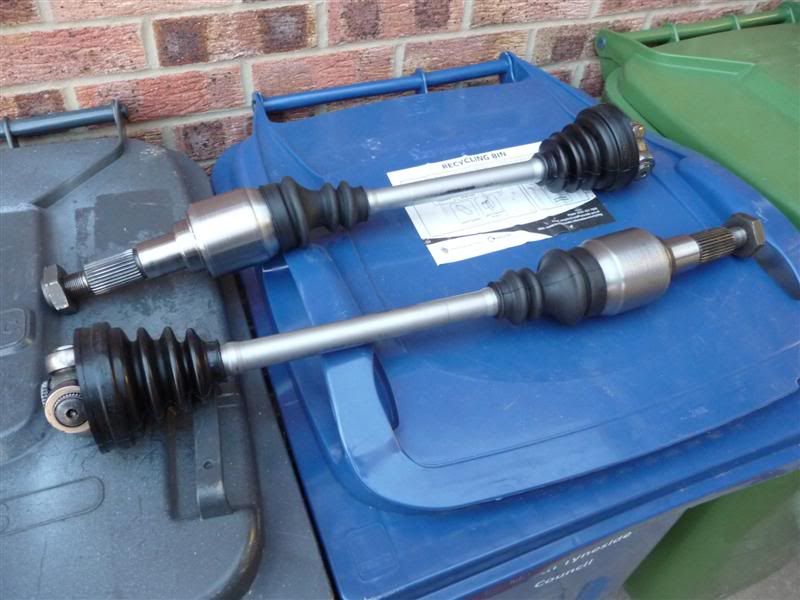
Driveshafts built up, but still requiring securing around each end of the cv boots
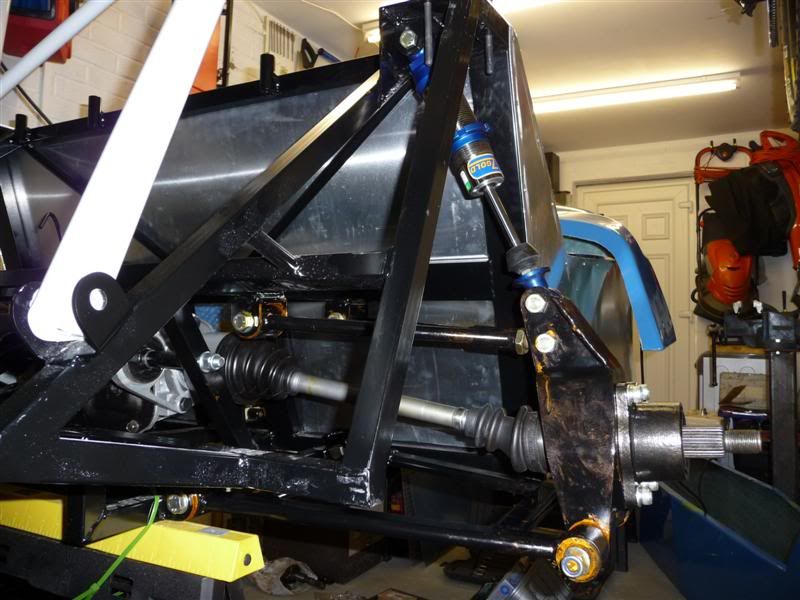
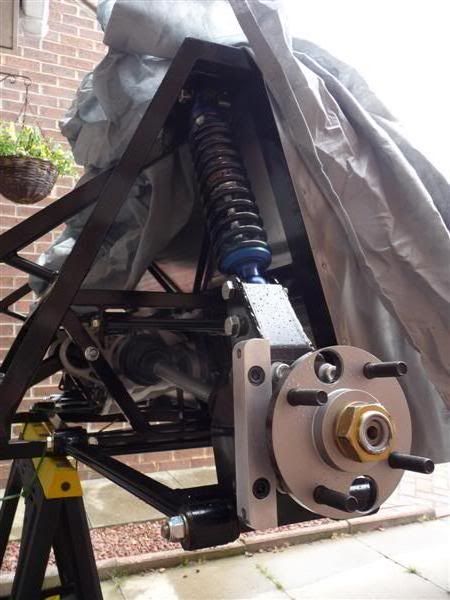
Drivers side driveshaft fitted, suspension assembled with upright, bushes fettled to rotate nice and easily, no squeeks

List of jobs for next time i venture out to the garage...
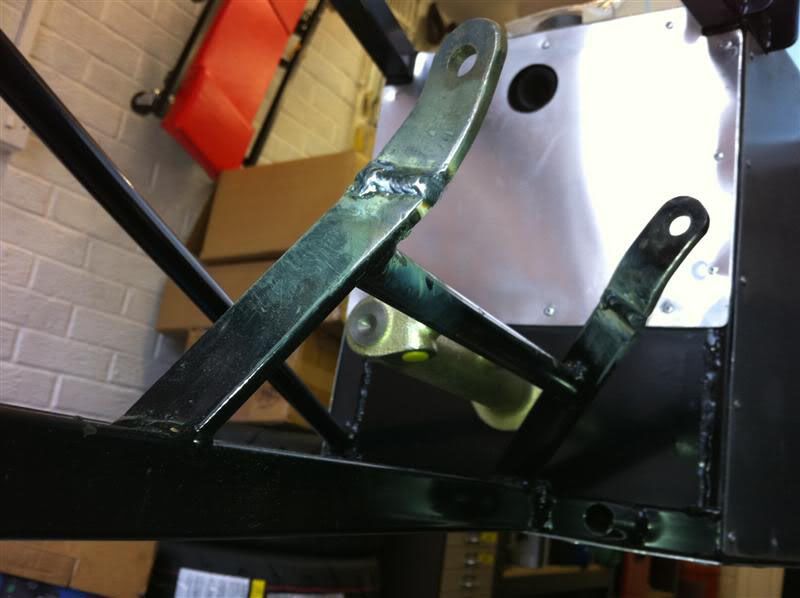
1. Brake caliper brackets to paint and fit.
2. Copper slip and other crap to wipe from the chassis, it looks filthy in the photos

3. Spring to fit to coilover strut.
4. Couple of nuts/bolts to torque up.
Then the other side can be assembled.
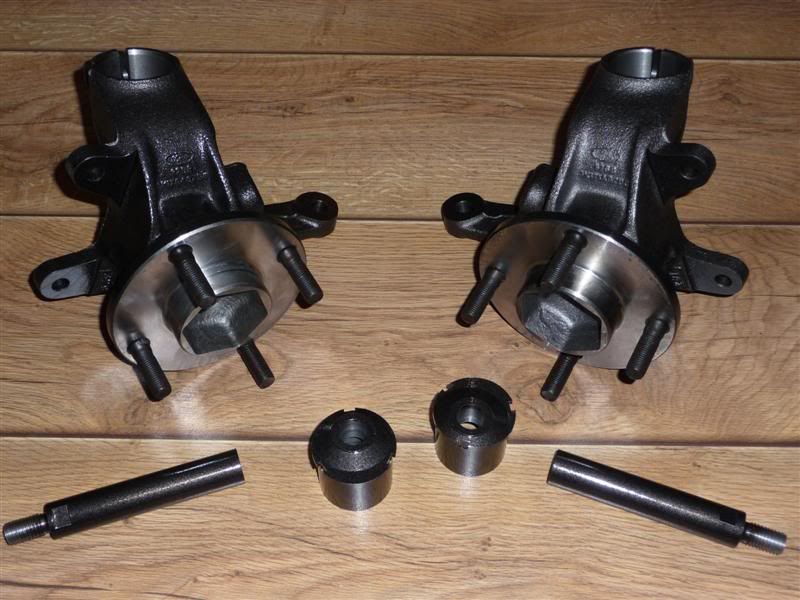
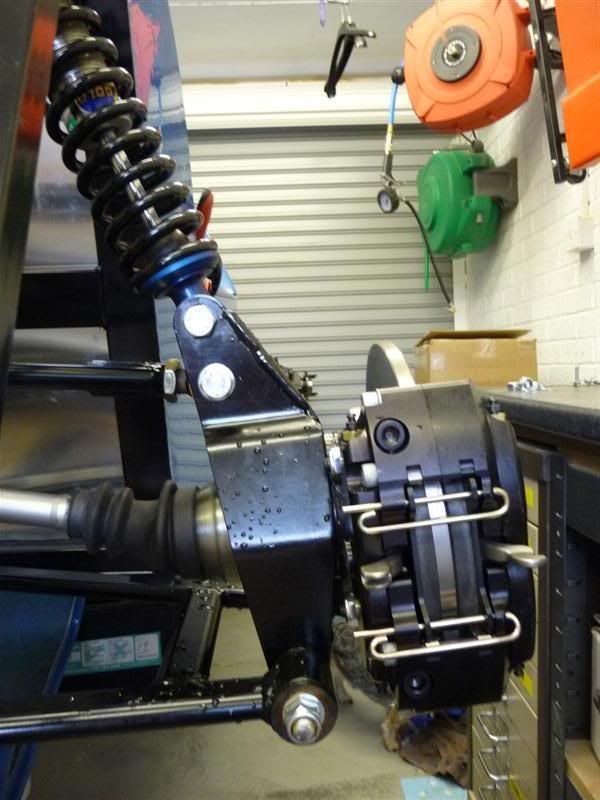
The rear hubs are away being machined to 134mm diameter to allow the rear brake discs to be fitted.
Edited by Red16 on Monday 5th July 23:35
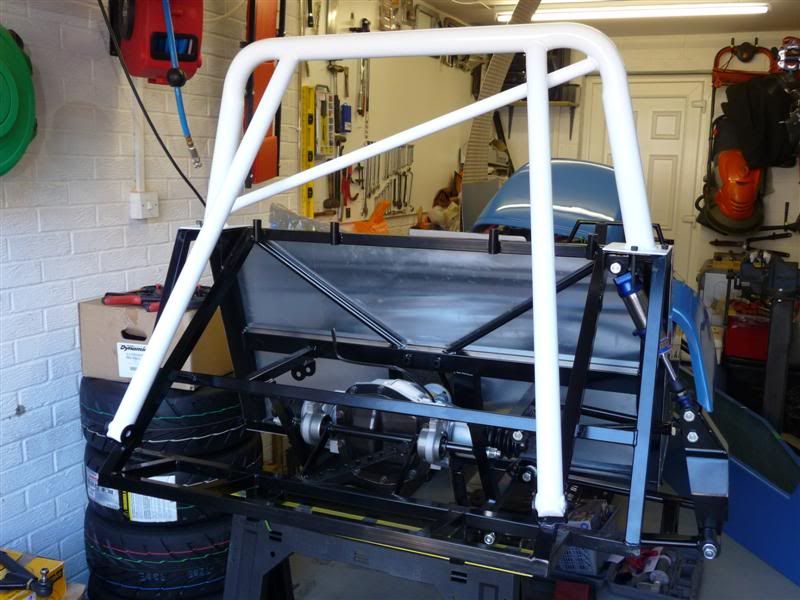
Been assembling the rear end today
Fitted the brake caliper brackets to the uprights.
Drivers side
Passenger side
Then done a small amount of work to the front end, fitted the arms to the steering rod and secured the rubber boots.

Hoping to get my rear hubs back tomorrow, then the brakes can be fitted.
Fitted the brake caliper brackets to the uprights.
Drivers side
Passenger side
Then done a small amount of work to the front end, fitted the arms to the steering rod and secured the rubber boots.
Hoping to get my rear hubs back tomorrow, then the brakes can be fitted.
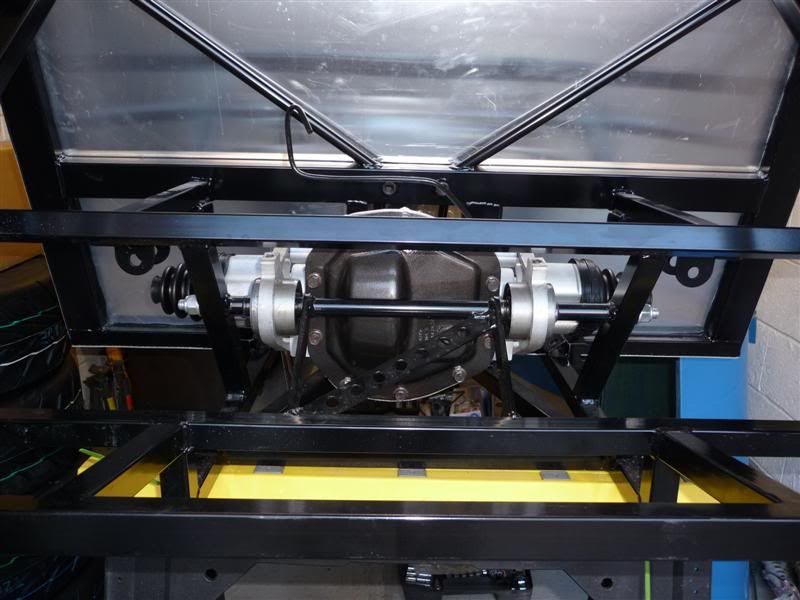
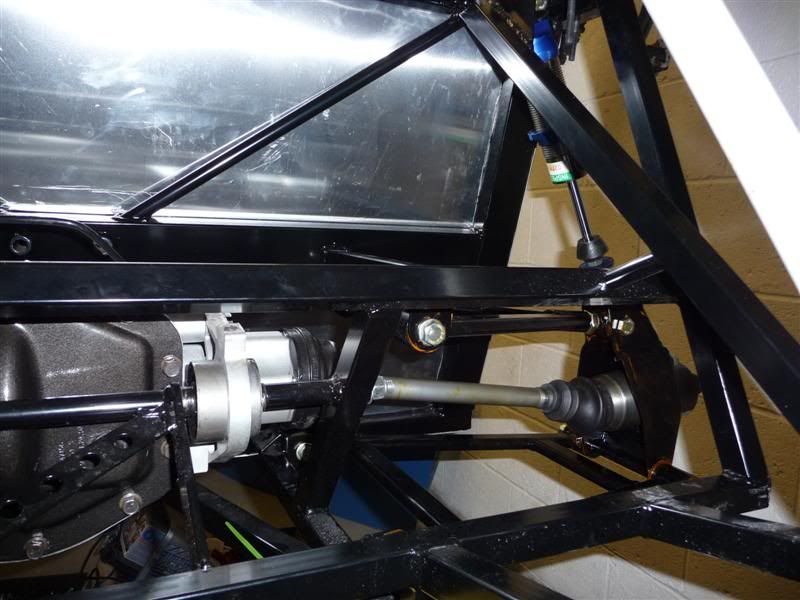
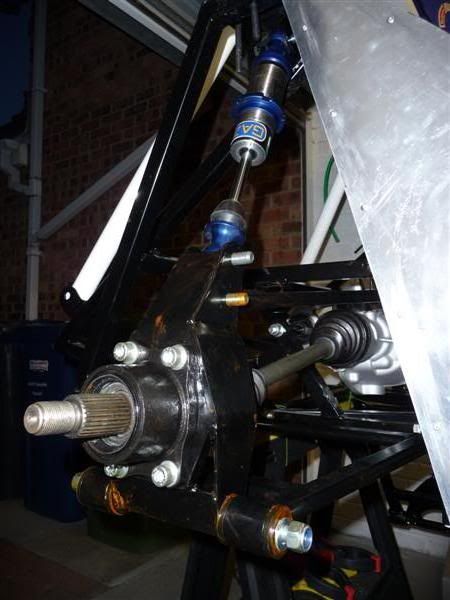
Rear hubs and brake caliper brackets fitted, driveshaft nuts need to be torqued up once the brakes are operational.
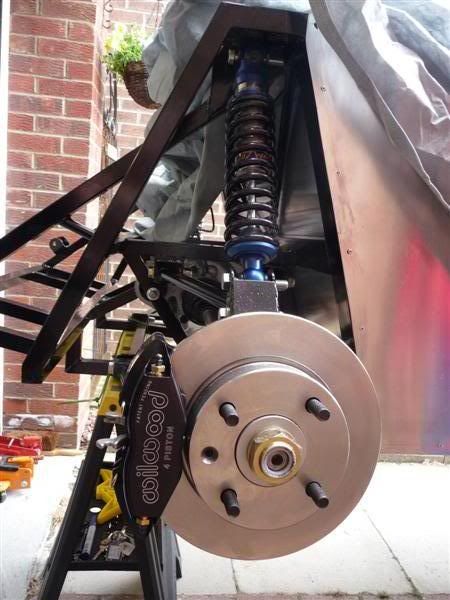
Rear brake discs and calipers fitted and it started to look like this
With my mate, Decka, acting as a temporary wheel nut a wheel was tried on the back, starting to look quite wide now
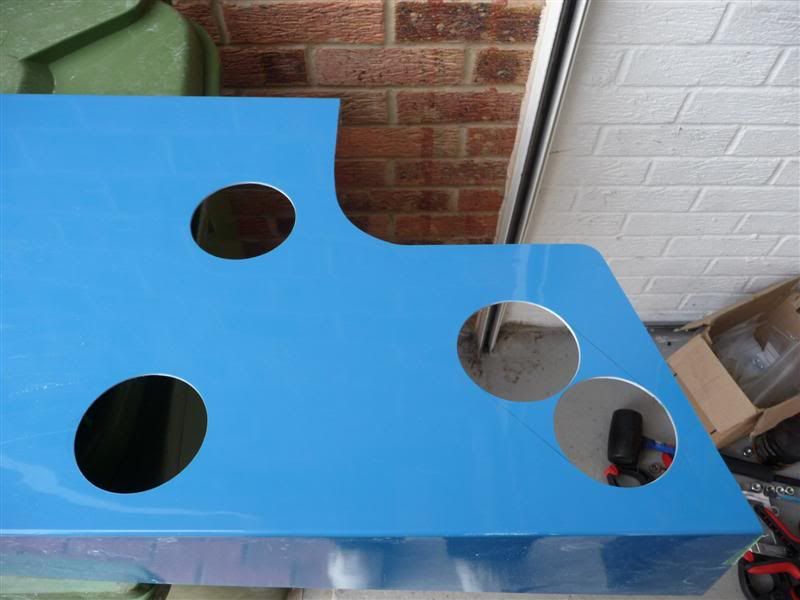
The side panels were trimmed for the final time, or so i thought, i now think i'll merge the steering rack hole with the front lower wishbone hole, as most people do.
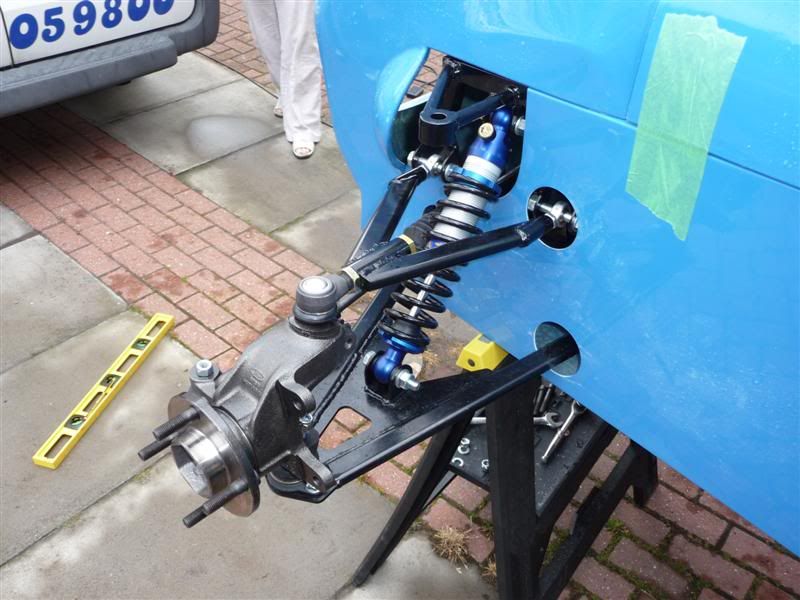
The passenger side front suspension was then built up

Drivers side
Took the nose cone off to fit it in the garage, need to move my vice stand to get the car further back... job for another day
Thanks to Decka for the assistance today, I'm dead happy with the kit, it's really starting to look like a car now
Rear brake discs and calipers fitted and it started to look like this
With my mate, Decka, acting as a temporary wheel nut a wheel was tried on the back, starting to look quite wide now
The side panels were trimmed for the final time, or so i thought, i now think i'll merge the steering rack hole with the front lower wishbone hole, as most people do.
The passenger side front suspension was then built up
Drivers side
Took the nose cone off to fit it in the garage, need to move my vice stand to get the car further back... job for another day
Thanks to Decka for the assistance today, I'm dead happy with the kit, it's really starting to look like a car now
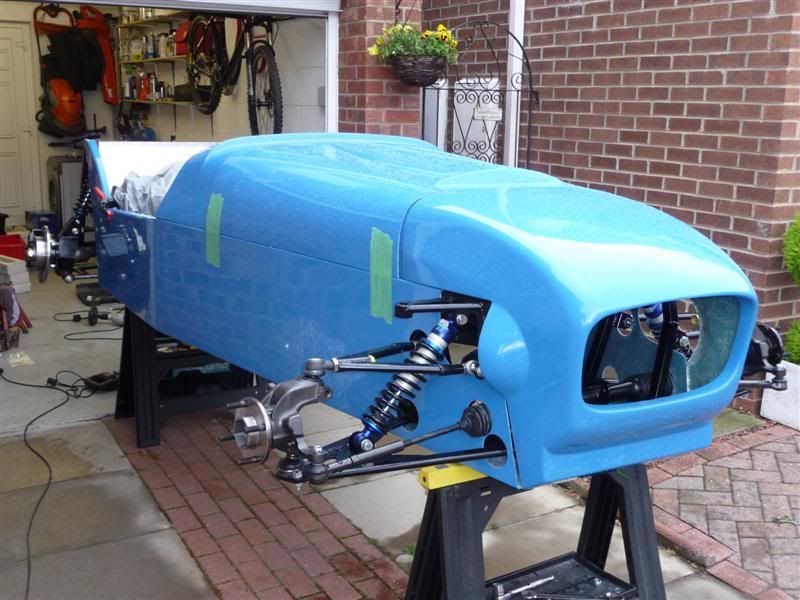
This afternoon i took the suspension off the front of the car and decided to do the final trimming to the side panels
Before
After

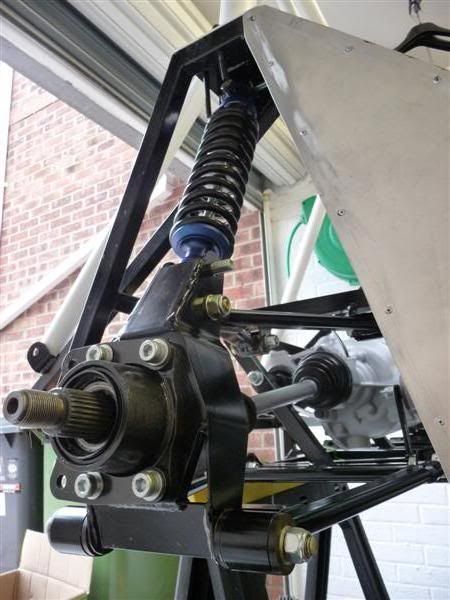
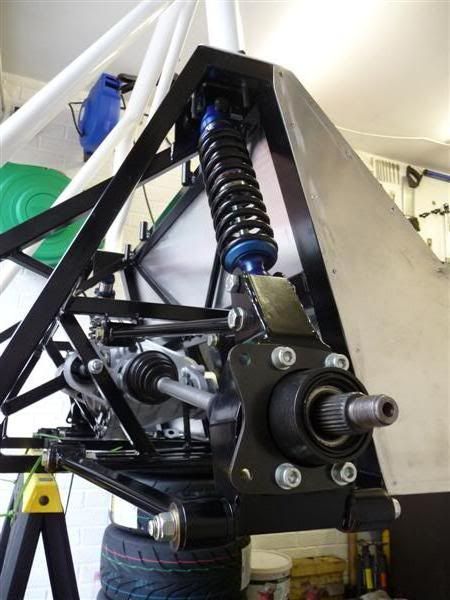
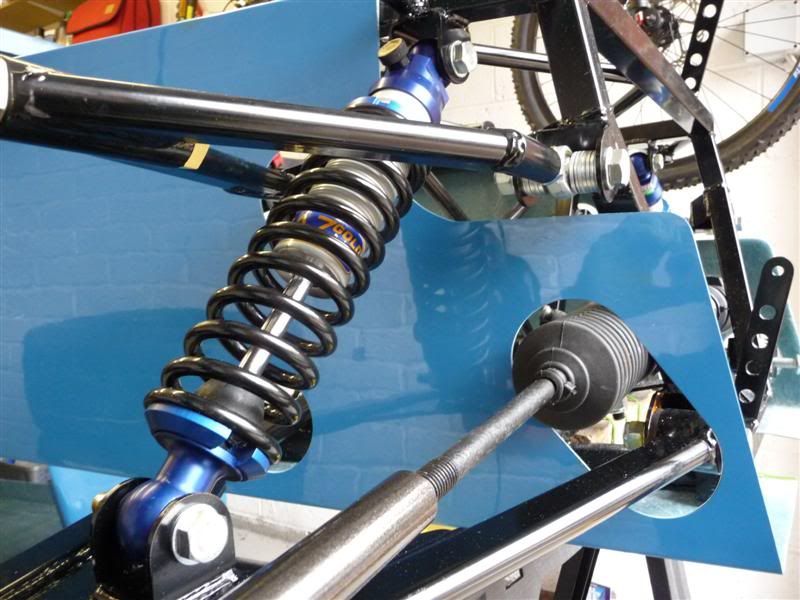
All the steering/suspension fitted back to the car again. The washers in the upper wishbone mounting brackets are temporary until i get some bushes knocked up.
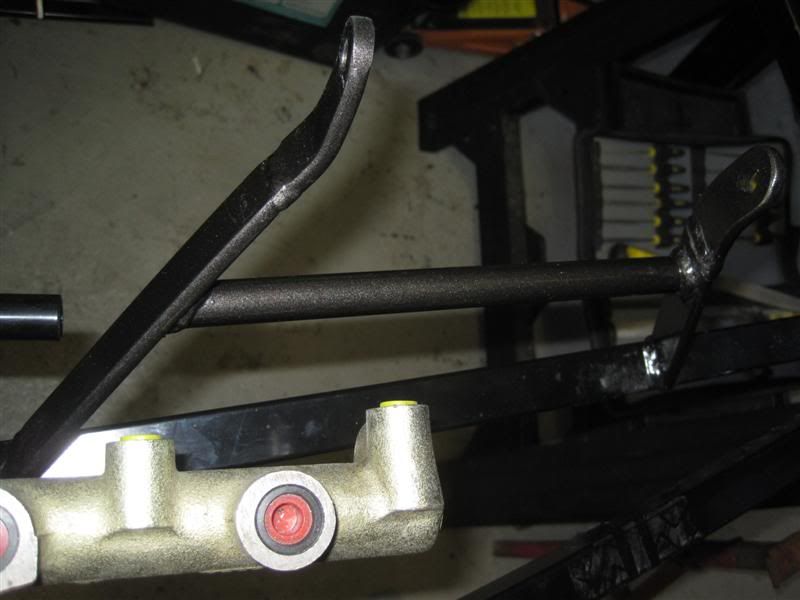
I done a quick little job while the side panel was off and fitted the master cylinder.

Before
After
All the steering/suspension fitted back to the car again. The washers in the upper wishbone mounting brackets are temporary until i get some bushes knocked up.
I done a quick little job while the side panel was off and fitted the master cylinder.
rdodger said:
Before you make up the bushes. Is the space there to allow the adjustment of the caster angle?
Yes it is, the washers are being used until I decide on the dimensions of the bushes needed to achieve the caster angle I want/need, which at the moment I have no idea about... something else to learn and speak to Mac about.Well after ages of not doing much, I've been in the garage making progress today...
The beginning of the bulkhead/pedal cover panel
How it looks resting in position

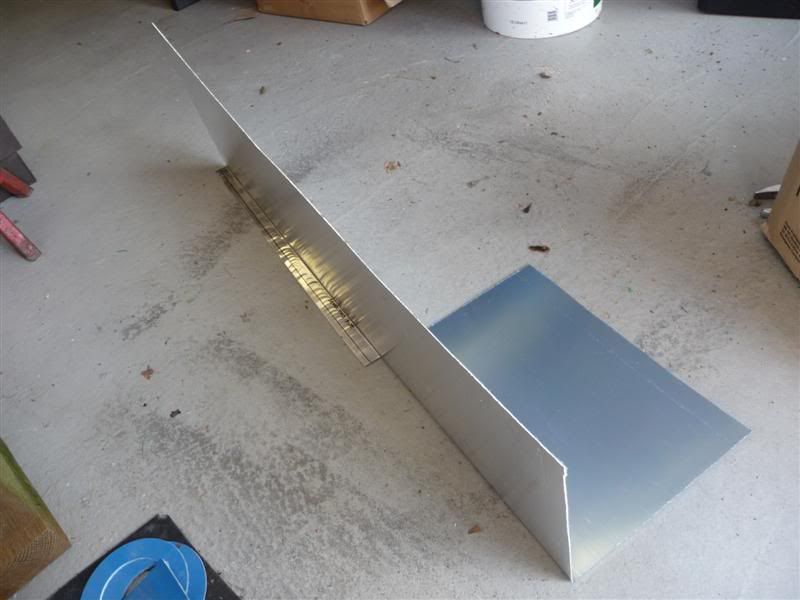
The steering column goes through the bulkhead/pedal cover panel, so I made this wedge to cover the steering column in instead of it being exposed, not sure if I'm going to use it or redesign and remake it though.

How it'd look if I used it as it is.
The beginning of the bulkhead/pedal cover panel
How it looks resting in position
The steering column goes through the bulkhead/pedal cover panel, so I made this wedge to cover the steering column in instead of it being exposed, not sure if I'm going to use it or redesign and remake it though.
How it'd look if I used it as it is.
jason61c said:
Keep up the good work, looks like a nice build 
I wish I could keep my workspace that tidy!!
Thanks, I've suddenly got some motivation to crack on with the car, it's from a mate who's building a Mac Type 9R at the moment, his enthusiasm must be rubbing off!I wish I could keep my workspace that tidy!!
You kind of have to keep it tidy if you havent got much space, lol.
MH said:
Tidy work there, it's looking good.
I like your vice mount too!
Cheers I like your vice mount too!
I'm going to have to move the vice stand when the cars finished, as it will prevent the car going all the way in to the garage, doh!
Here's an update to cover the last few days worth of work on the car.
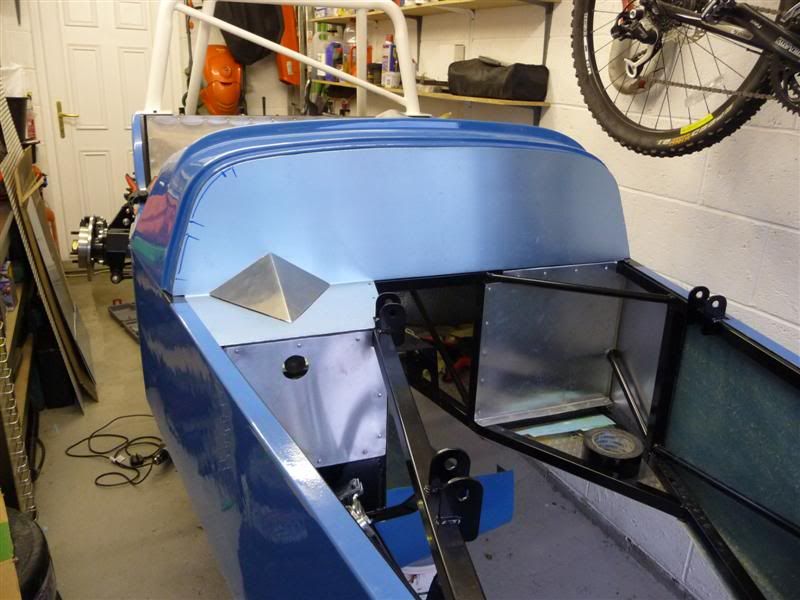
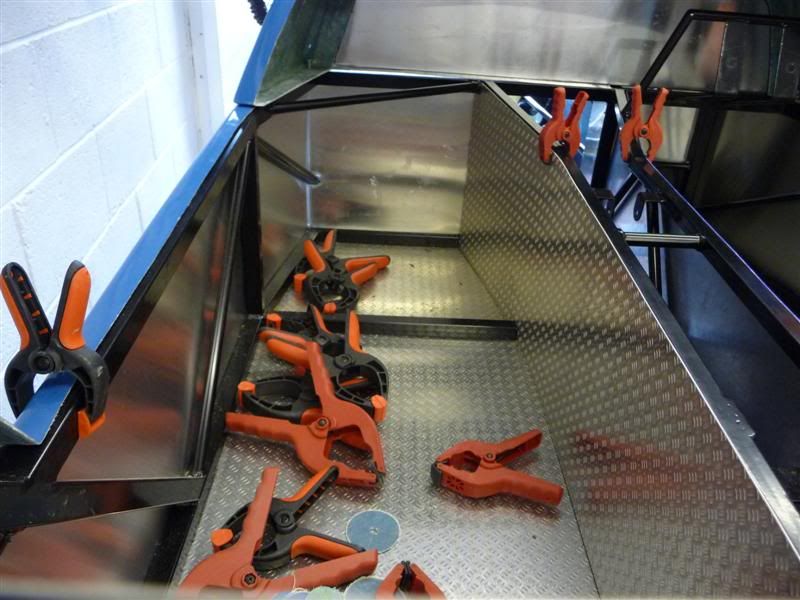
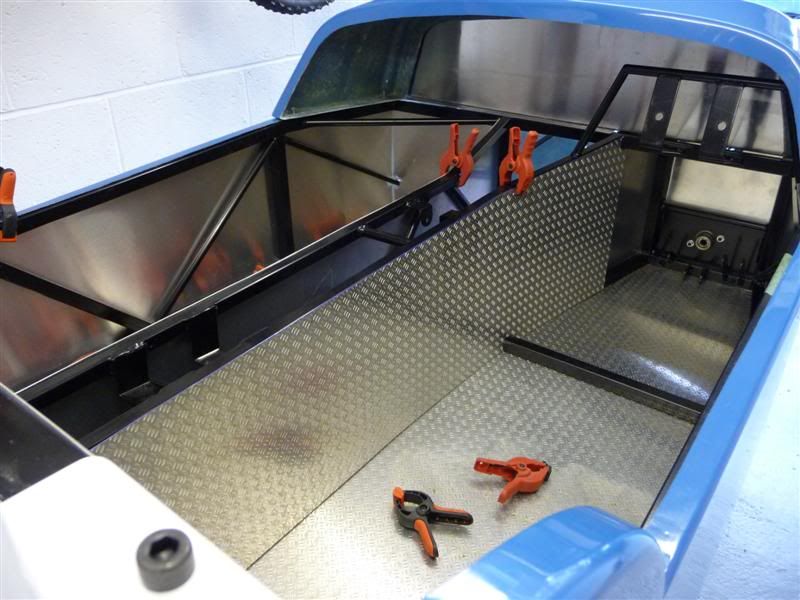
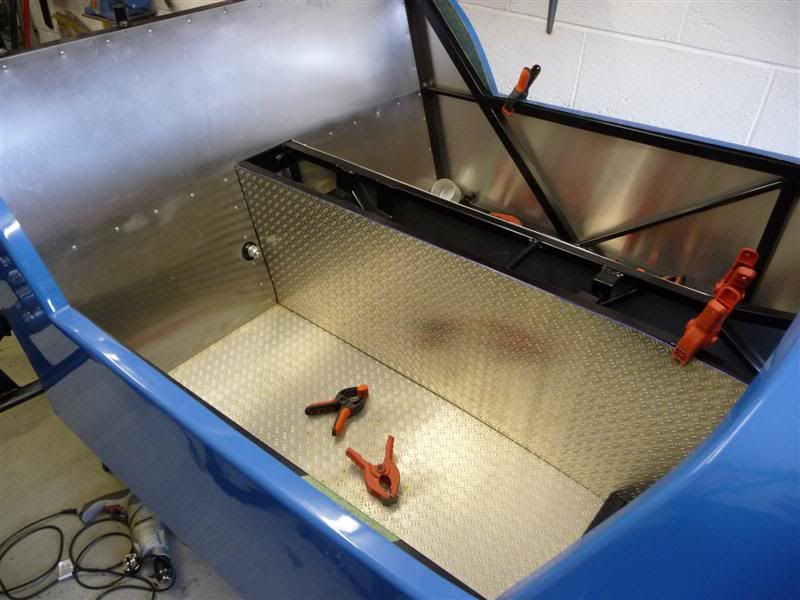
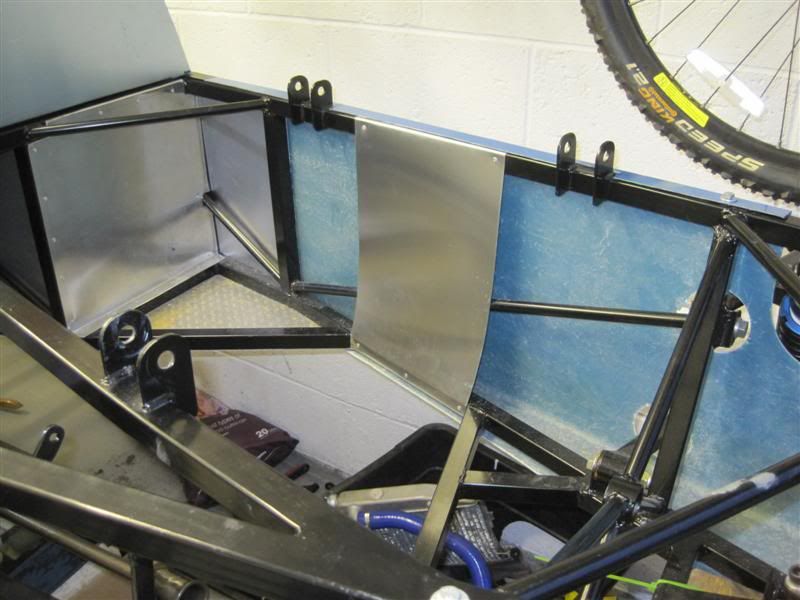
Cut out the transmission tunnel side panels
Purchase one ZX10R turbo engine
Engine spec is...
Dynajet Power commander 3 with hub
ECU and full loom
Adjustable cam sprockets
JE turbo pistons
Arrows con rods H beam
Cometic Head Gasket
APE billet manual cam chain tensioner
Muzzy lock up clutch
Modified stock sump pan
External oil filter relocation kit
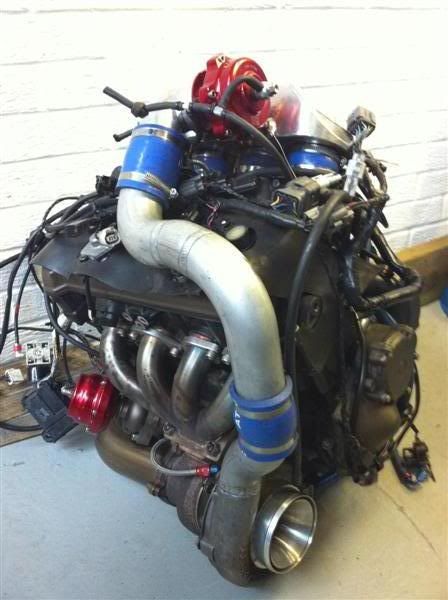
GT30R Race roller bearing turbocharger
321 Stainless headers
2 inch up pipe
Billet plenum with internal bell mouths
44mm Tial waste gate
50mm Tial blow off valve
Bosch high horsepower competition fuel pump
Aeromotive billet fuel pressure regulator
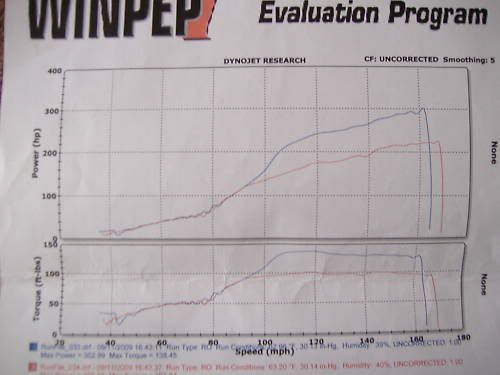
It's making a healthy 225bhp/101lbft at 6psi and 303bhp/139lbft at 12psi
Tried to fit the engine into the car the other day and found that the mounts did not line up as expected, a call to Mac revealed that the 2004 engine I bought has different mounts to the rest of the ZX10r range (2005 onwards)... typical, lol.
So I set about fabrication a new engine cradle (mk1) and this is how it currently looks.
I'll be making another cradle (mk2) which will utilise the original rubber mounts to minimise vibration transferred to the chassis from the engine.
But for now this one will do until I modify the chassis engine mount, which is also not in the correct place for this engine. Not a lot in it, so it should be a relatively easy alteration.

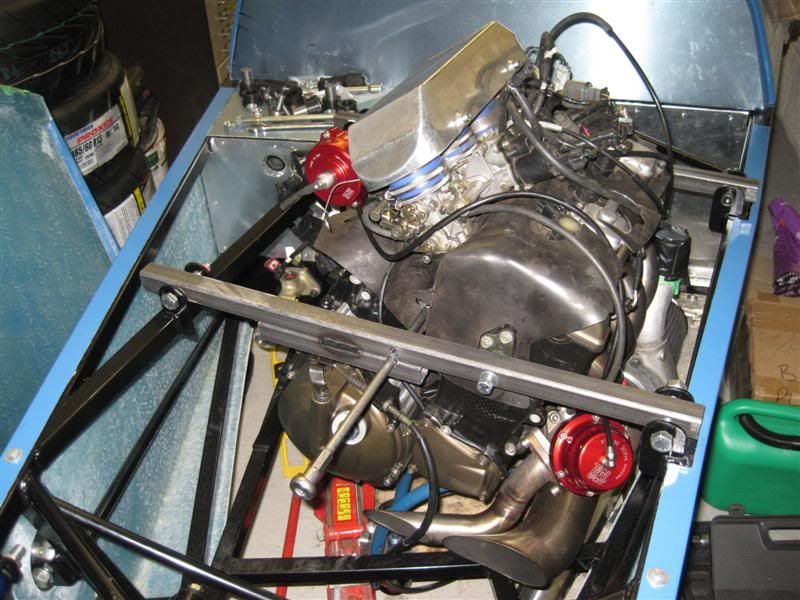
At the close of play today, the engine is sitting nicely in the chassis and the sump is level and not too low.

The bonnet now just fits on over the top of the inlet manifold, I could lower the engine down a little bit further to gain a bit of extra clearance but I don't like the idea of the sump being any lower than it currently is, as it is sitting just about level with the base of the chassis.
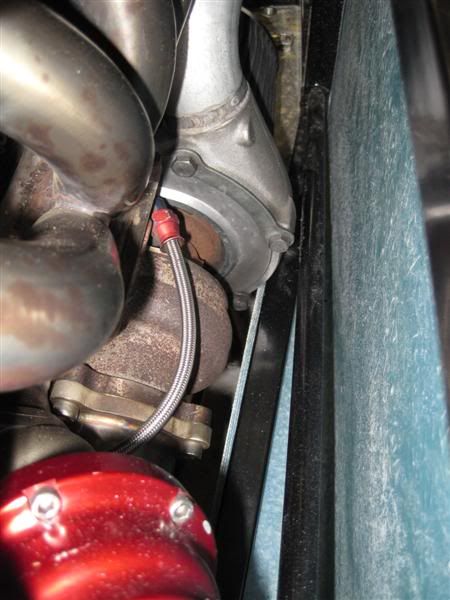
The gt3071r turbo is quite a snug fit down the side of the engine bay

But there is still clearance between the turbo and chassis bracing, which I'm happy about as I don't want the turbo to be on show really, be nice to keep the car quite discreet.
Cut out the transmission tunnel side panels
Purchase one ZX10R turbo engine
Engine spec is...
Dynajet Power commander 3 with hub
ECU and full loom
Adjustable cam sprockets
JE turbo pistons
Arrows con rods H beam
Cometic Head Gasket
APE billet manual cam chain tensioner
Muzzy lock up clutch
Modified stock sump pan
External oil filter relocation kit
GT30R Race roller bearing turbocharger
321 Stainless headers
2 inch up pipe
Billet plenum with internal bell mouths
44mm Tial waste gate
50mm Tial blow off valve
Bosch high horsepower competition fuel pump
Aeromotive billet fuel pressure regulator
It's making a healthy 225bhp/101lbft at 6psi and 303bhp/139lbft at 12psi
Tried to fit the engine into the car the other day and found that the mounts did not line up as expected, a call to Mac revealed that the 2004 engine I bought has different mounts to the rest of the ZX10r range (2005 onwards)... typical, lol.
So I set about fabrication a new engine cradle (mk1) and this is how it currently looks.
I'll be making another cradle (mk2) which will utilise the original rubber mounts to minimise vibration transferred to the chassis from the engine.
But for now this one will do until I modify the chassis engine mount, which is also not in the correct place for this engine. Not a lot in it, so it should be a relatively easy alteration.
At the close of play today, the engine is sitting nicely in the chassis and the sump is level and not too low.
The bonnet now just fits on over the top of the inlet manifold, I could lower the engine down a little bit further to gain a bit of extra clearance but I don't like the idea of the sump being any lower than it currently is, as it is sitting just about level with the base of the chassis.
The gt3071r turbo is quite a snug fit down the side of the engine bay
But there is still clearance between the turbo and chassis bracing, which I'm happy about as I don't want the turbo to be on show really, be nice to keep the car quite discreet.
Edited by Red16 on Tuesday 7th September 00:33
Just making it a wee bit more interesting bonesX, lol, I'm struggling to contain myself at the moment, it's on my mind 24/7, when it's on the road I think i'll have my arse glue'd to the drivers seat!!!
The engine cradle (mk2) is progressing slowly, here's how it's looking at the moment.

I still need to weld in some spacers, to stop the cradle bending when the engine mount bolts are torque'd up.

The engine cradle (mk2) is progressing slowly, here's how it's looking at the moment.
I still need to weld in some spacers, to stop the cradle bending when the engine mount bolts are torque'd up.
Another piece of the engine cradle puzzle completed

Added the upper central mount to the engine cradle

Modified the lower engine mount on the chassis
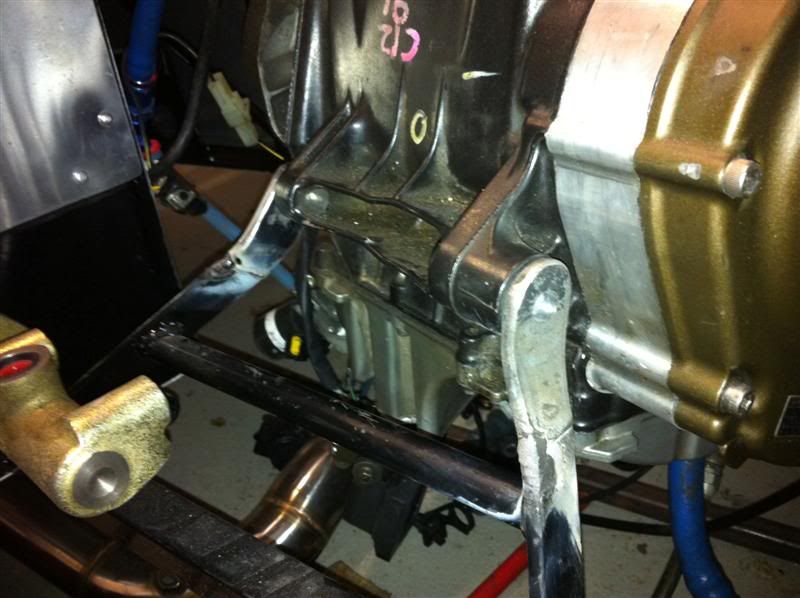
The engine has now been removed allowing me to get into the engine bay to properly weld the lower engine mount on the chassis, it's only tack welded in position at the moment. While the engine is out i'll weld the underside of the central engine mount bar onto the engine cradle.
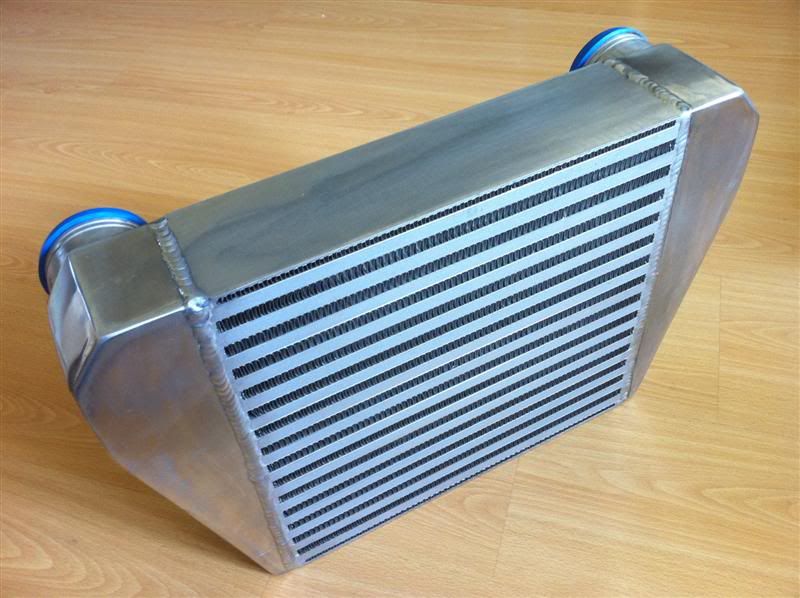
I've bought a few parts which arrived today, first off an intercooler
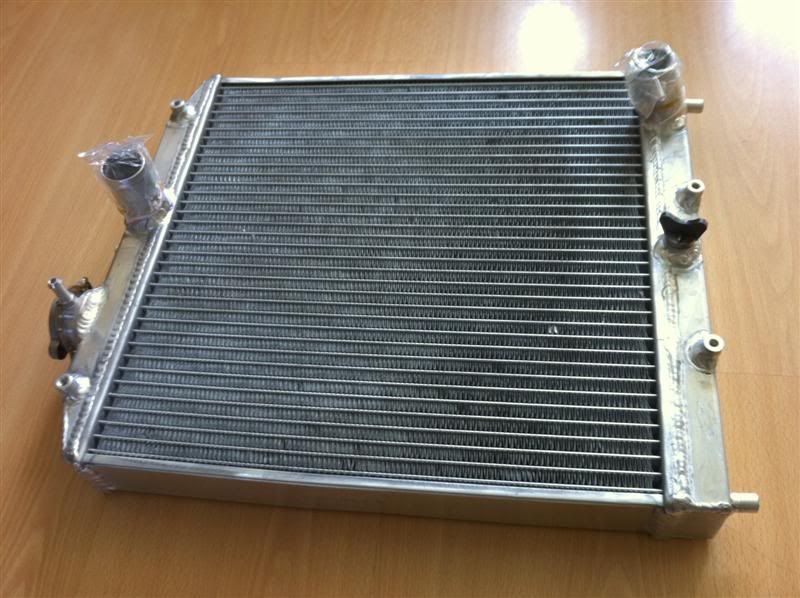
A larger radiator
Also have wheel nuts and a brake pedal saddle, so I can fit the pedals and when I have the brake hoses made up I can fit the brakes, bleed them, then fit wheels and have a rolling chassis
Added the upper central mount to the engine cradle
Modified the lower engine mount on the chassis
The engine has now been removed allowing me to get into the engine bay to properly weld the lower engine mount on the chassis, it's only tack welded in position at the moment. While the engine is out i'll weld the underside of the central engine mount bar onto the engine cradle.
I've bought a few parts which arrived today, first off an intercooler
A larger radiator
Also have wheel nuts and a brake pedal saddle, so I can fit the pedals and when I have the brake hoses made up I can fit the brakes, bleed them, then fit wheels and have a rolling chassis
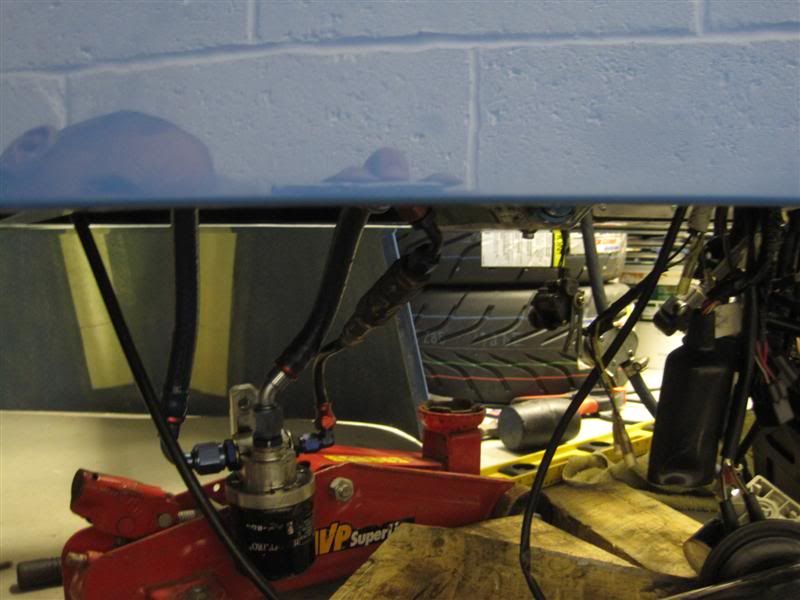
I ordered a full set of custom braided brake hoses yesterday, but the fittings required to fit the Wilwood calipers needed to be ordered in, if all goes to plan the hoses will be made up tomorrow and i can get them fitted to the car.
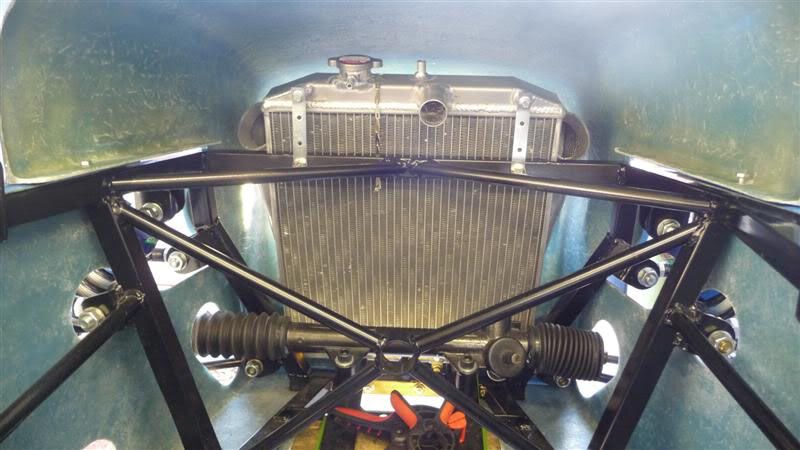
I began to fit the radiator today, held it in position with green cable ties to allow the nose cone to be fitted to ensure it would fit inside the nose cone alright and leave adequate space for the intercooler to go infront.
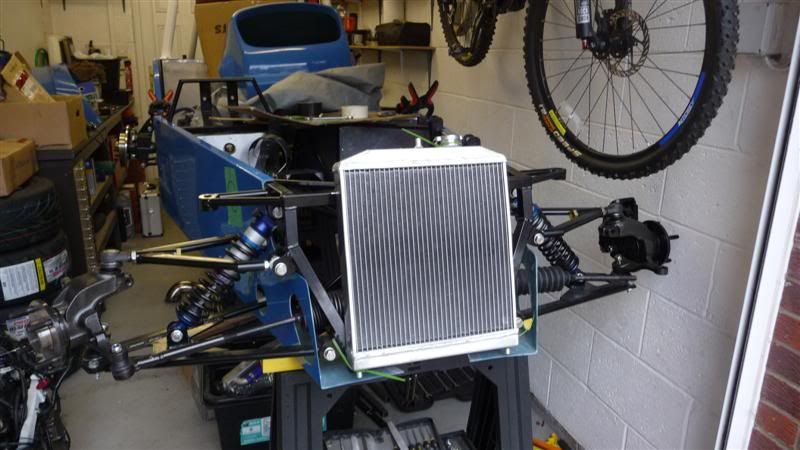
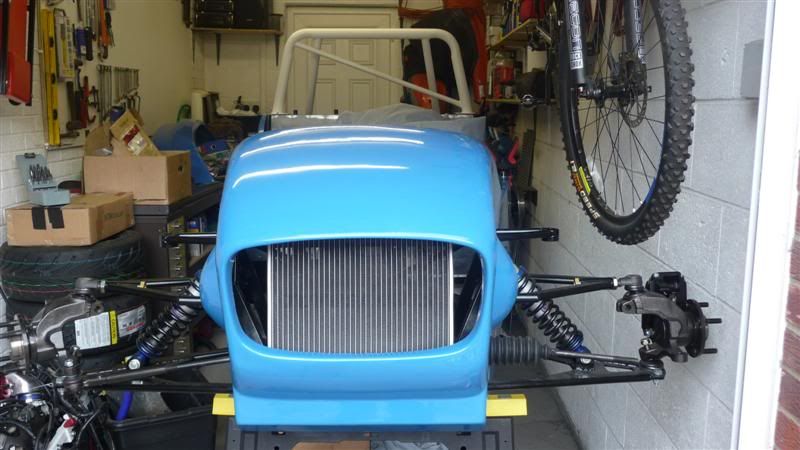
Tried the nose cone on and it fit perfectly around the radiator
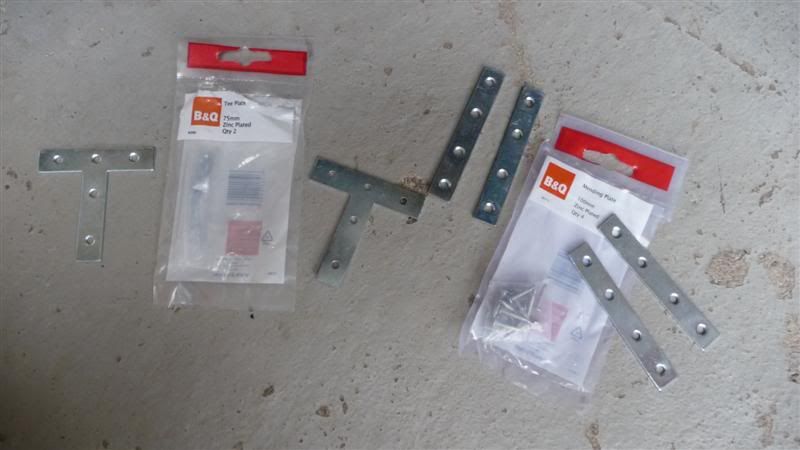
I then realised I didn't have any material in the garage to make brackets with, doh! So a quick trip to B&Q and I ended up with these zinc plated brackets which were just about perfect.
The holes in the brackets were opened out to accomodate the radiator mounting bolts and then the chassis was drilled so they could be bolted to the car.

The upper brackets have yet to be fitted. I'm leaving those until later to give me the option of making a little bit more space in the small part of the nose cone for the intercooler.

I began to fit the radiator today, held it in position with green cable ties to allow the nose cone to be fitted to ensure it would fit inside the nose cone alright and leave adequate space for the intercooler to go infront.
Tried the nose cone on and it fit perfectly around the radiator
I then realised I didn't have any material in the garage to make brackets with, doh! So a quick trip to B&Q and I ended up with these zinc plated brackets which were just about perfect.
The holes in the brackets were opened out to accomodate the radiator mounting bolts and then the chassis was drilled so they could be bolted to the car.
The upper brackets have yet to be fitted. I'm leaving those until later to give me the option of making a little bit more space in the small part of the nose cone for the intercooler.
singlecoil said:
That is a really creepy silhouette. Have you seen that early vampire film, Nosferatu?
I havent, but since googling it I know what you mean, lol.indy sean said:
hi i did a mk with a zx10r turbo where will you be putting your intercooler then???
Intercooler will be fitted infront of the radiator, so it sits directly behind the opening in the nose cone, hoping to get the brackets made and the intercooler inlet/outlet modified to suit today.indy sean said:
i ran a v one like you have still got it actually then chaged to a cossie one
What do you mean by a v one? Are you refering to the intercooler?indy sean said:
i ran mine at 8 psi and got 268 bhp, was lively, with a 314 diff they do run out of puff with the gearing on the zx10 engine as 5 - 6 is not much change in ratio, upto 120mph they are rapid,
Thats a nice power figure I'm running a Freelander diff which is 3.21, so it'll be slightly slightly shorter gearing than yours, guess i'll just have to get the hang of changing gear quickly and regularly, lol.What speed were you doing at the top end of 4th gear?
indy sean said:
cheers theres some video of mine on you tube,
Is that the white one with black chequer graphics?Today I have mostly been playing about with an intercooler and radiator.
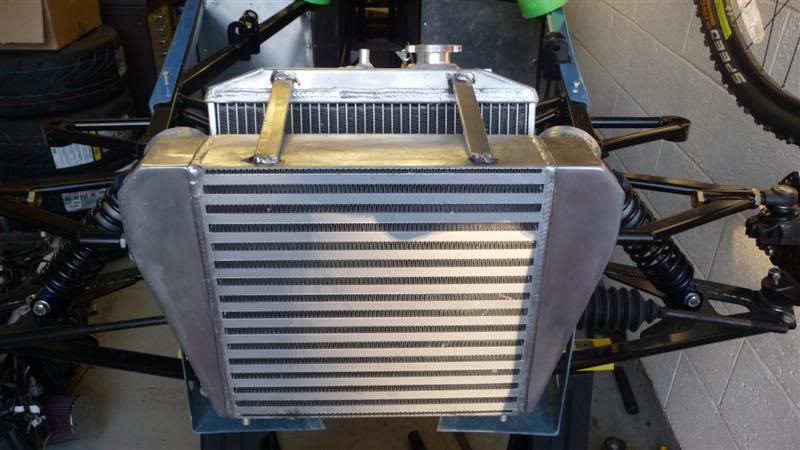
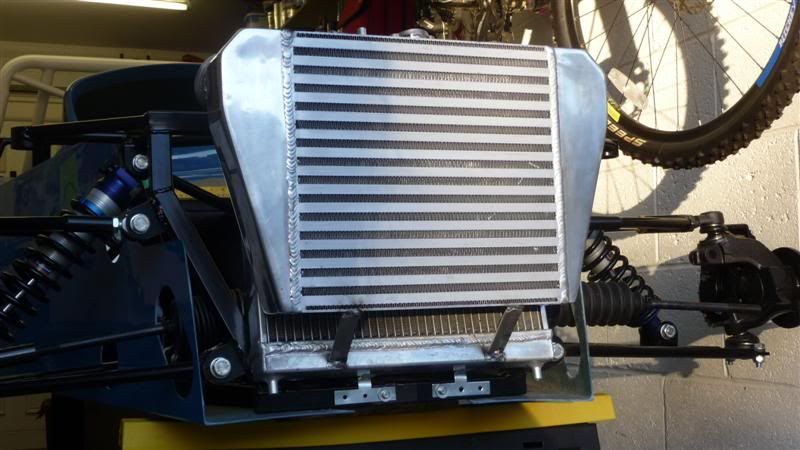
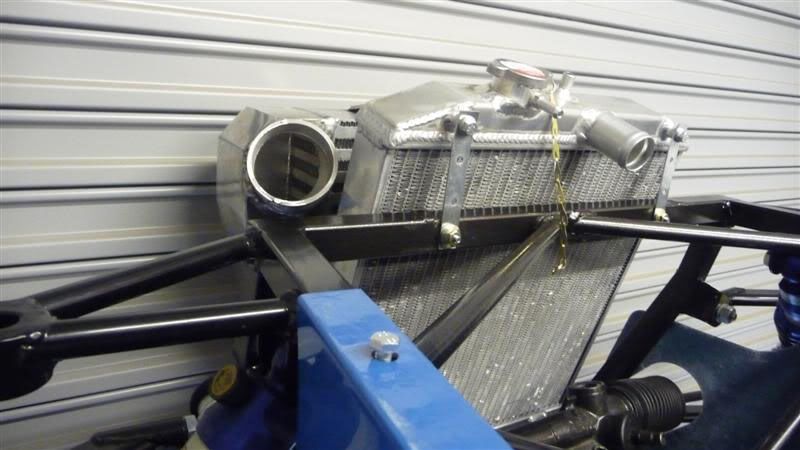
The intercooler inlet/outlet pipes have been cut off at an angle, rotated and then rewelded.
Then brackets were made and welded to hold the intercooler onto the radiator.
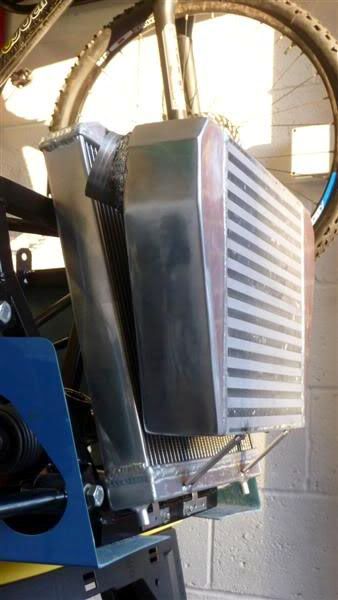
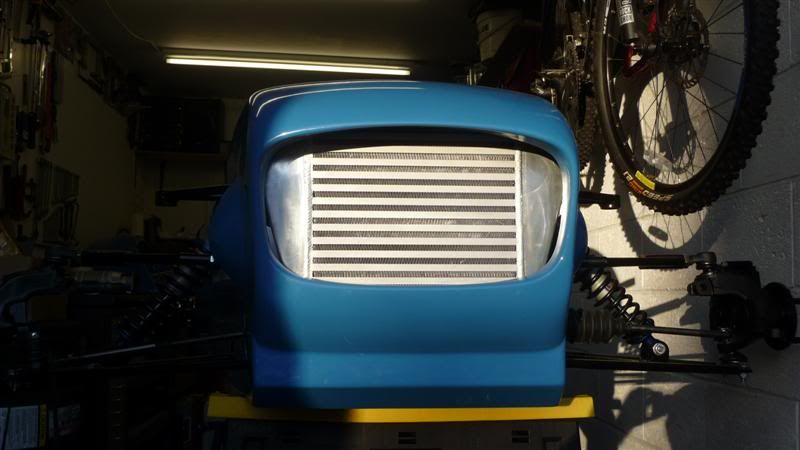
With the nose cone on you can see it's a tight fit but not fixing the upper radiator mounts to the chassis yesterday paid off, as it allowed the rad to be moved back slightly to gain enough space for the intercooler to clear the nose cone.
I think it'd probably look better and more subtle if the cooler was painted matt black.
Here you can see how the modified intercooler inlets/outlets now clear the radiator ready for boost pipework to be routed down either side of the engine bay.
The intercooler inlet/outlet pipes have been cut off at an angle, rotated and then rewelded.
Then brackets were made and welded to hold the intercooler onto the radiator.
With the nose cone on you can see it's a tight fit but not fixing the upper radiator mounts to the chassis yesterday paid off, as it allowed the rad to be moved back slightly to gain enough space for the intercooler to clear the nose cone.
I think it'd probably look better and more subtle if the cooler was painted matt black.
Here you can see how the modified intercooler inlets/outlets now clear the radiator ready for boost pipework to be routed down either side of the engine bay.
Gassing Station | Kit Cars | Top of Page | What's New | My Stuff