Mac#1 Motorsport Worx Build
Discussion


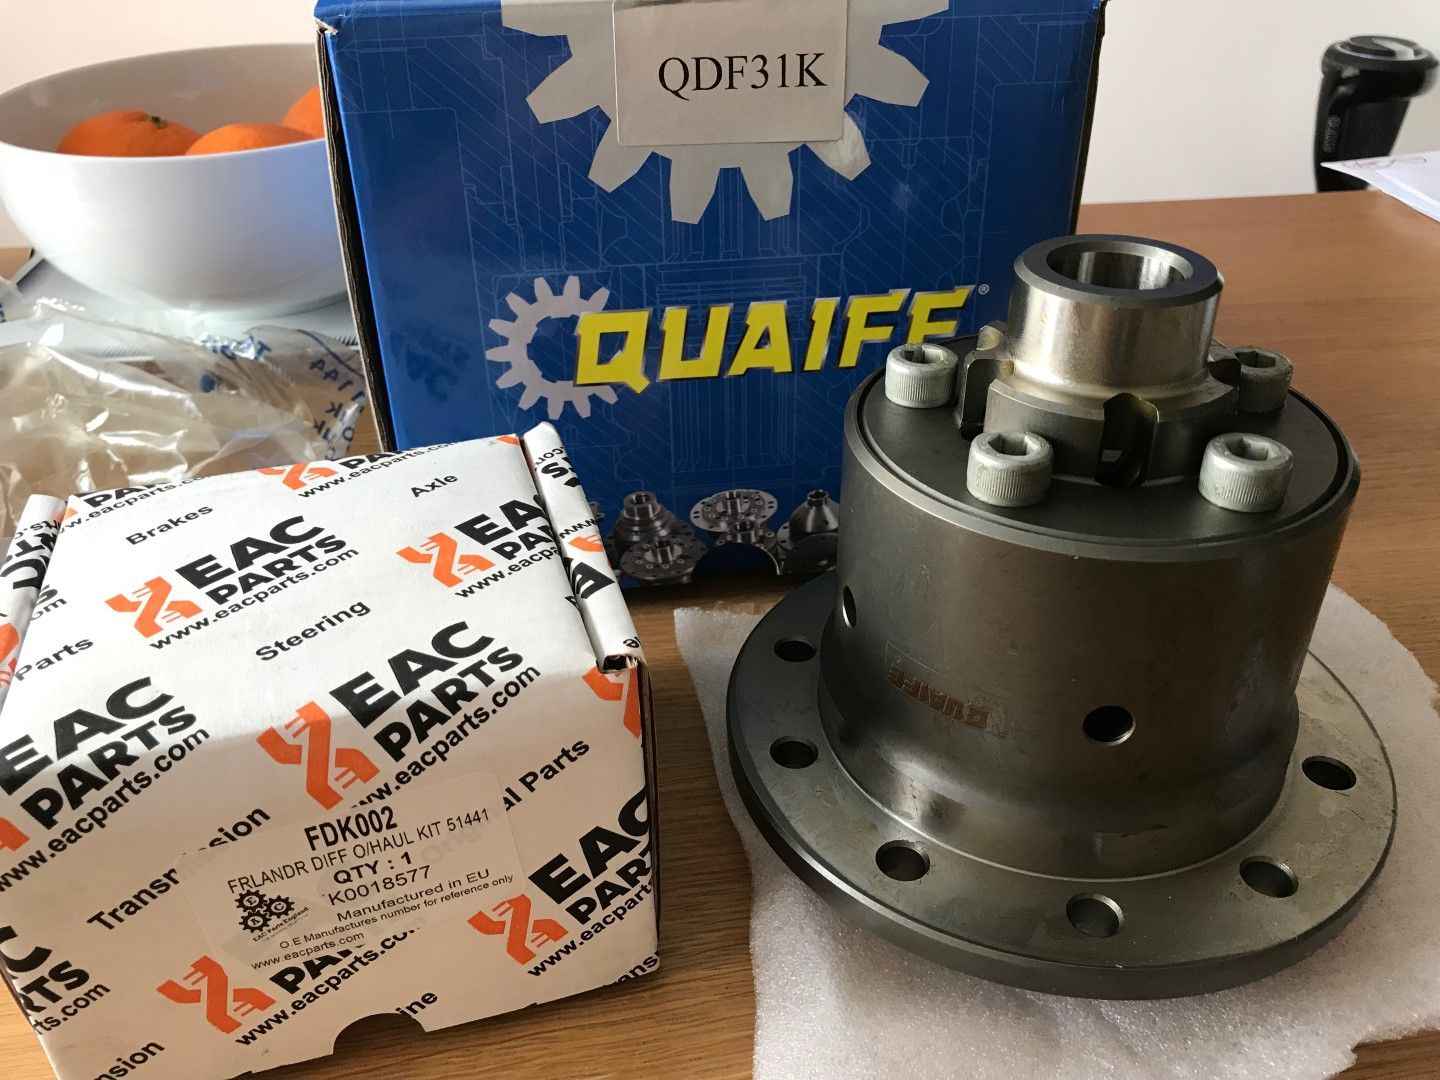
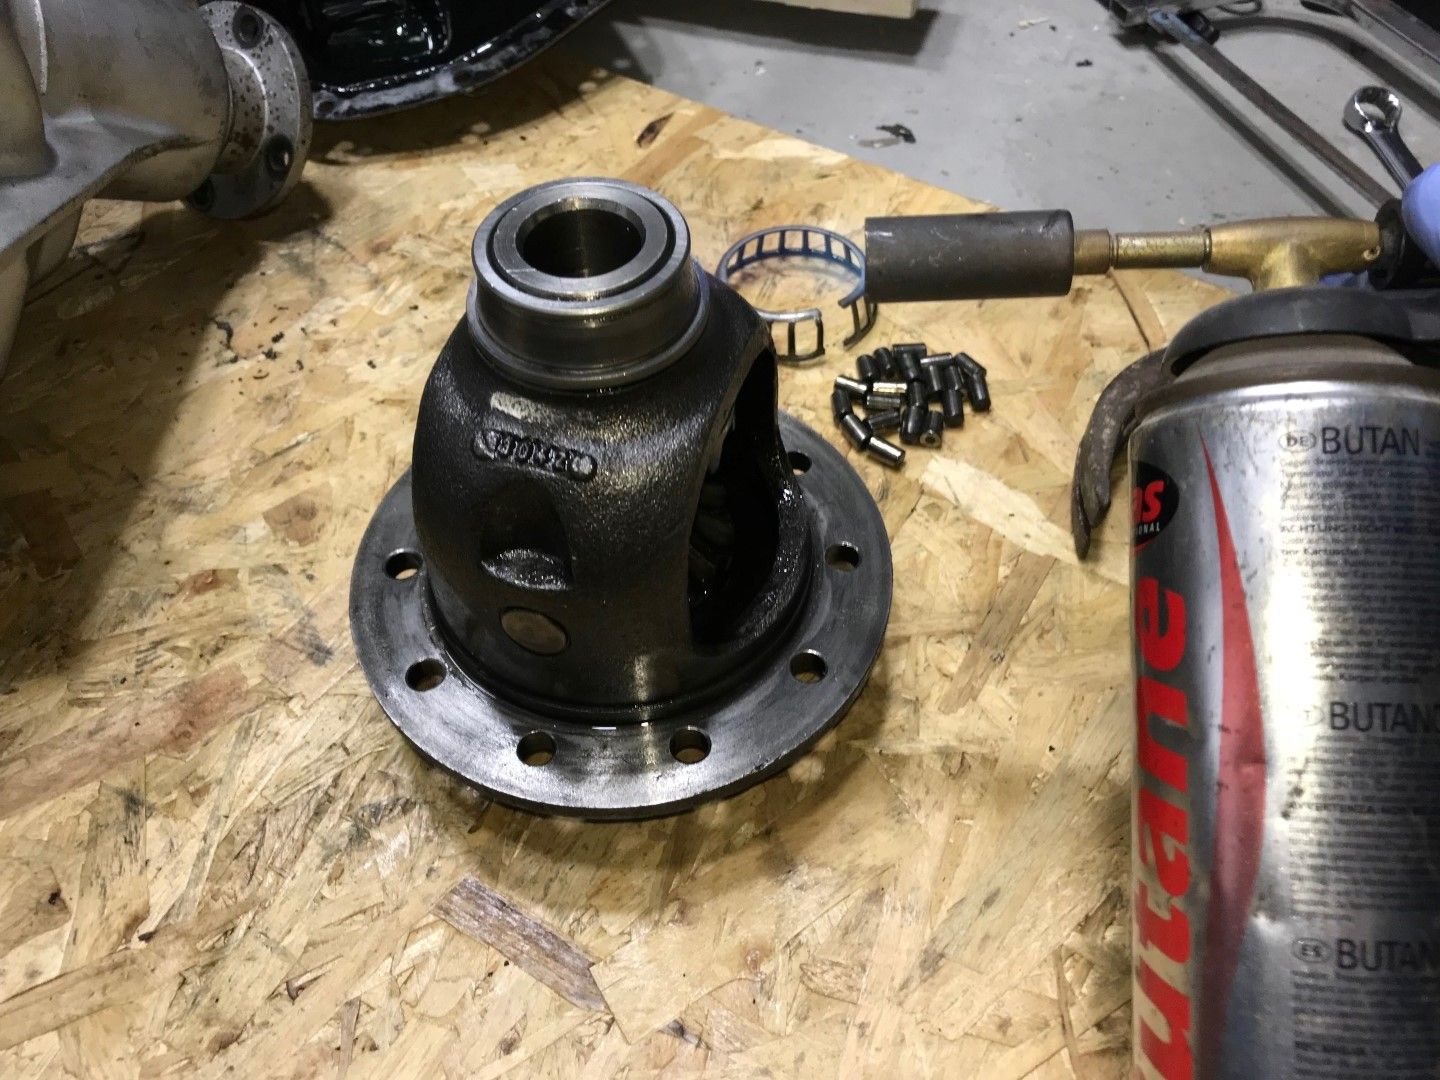
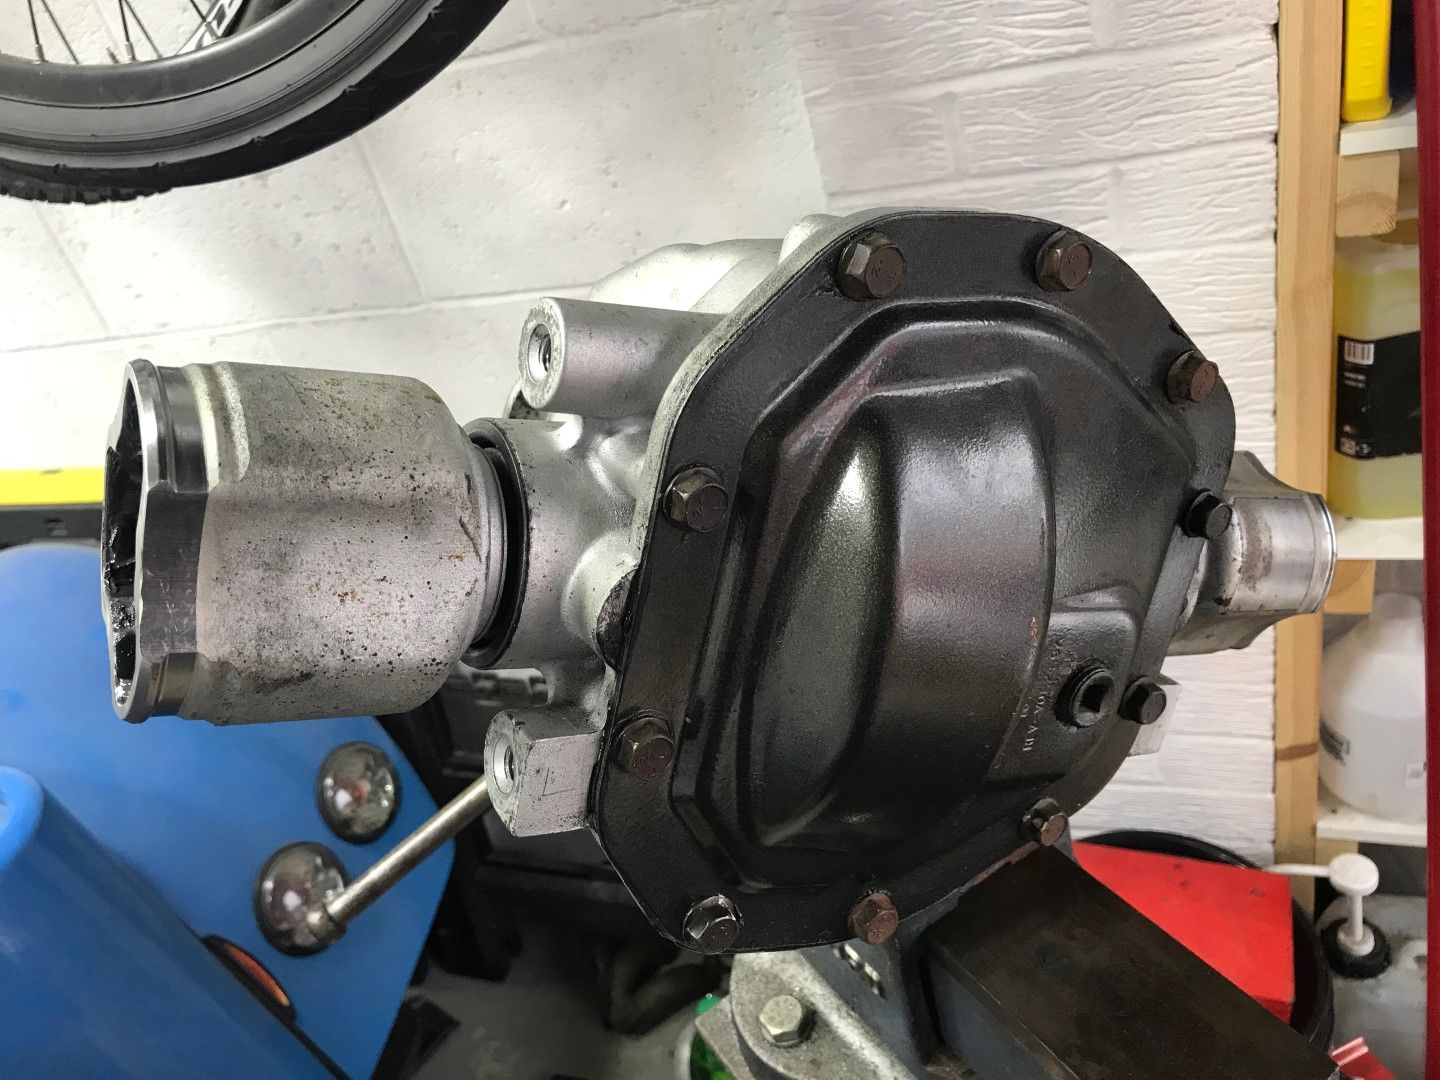
A little upgrade for the rear differential, one Quaife ATB limited slip diff assembly supplied by Quaife and a diff overhaul kit supplied by Ashcroft Transmissions. For my future reference, the diff casing stamped with the number 51441, which helps identify which bearing kit is required for the overhaul.
To go along with the diff upgrade and the new polybushes to mount the diff, the front mount threaded rod with nuts each end is being replaced for a much better fitting M12x130mm shouldered bolt.
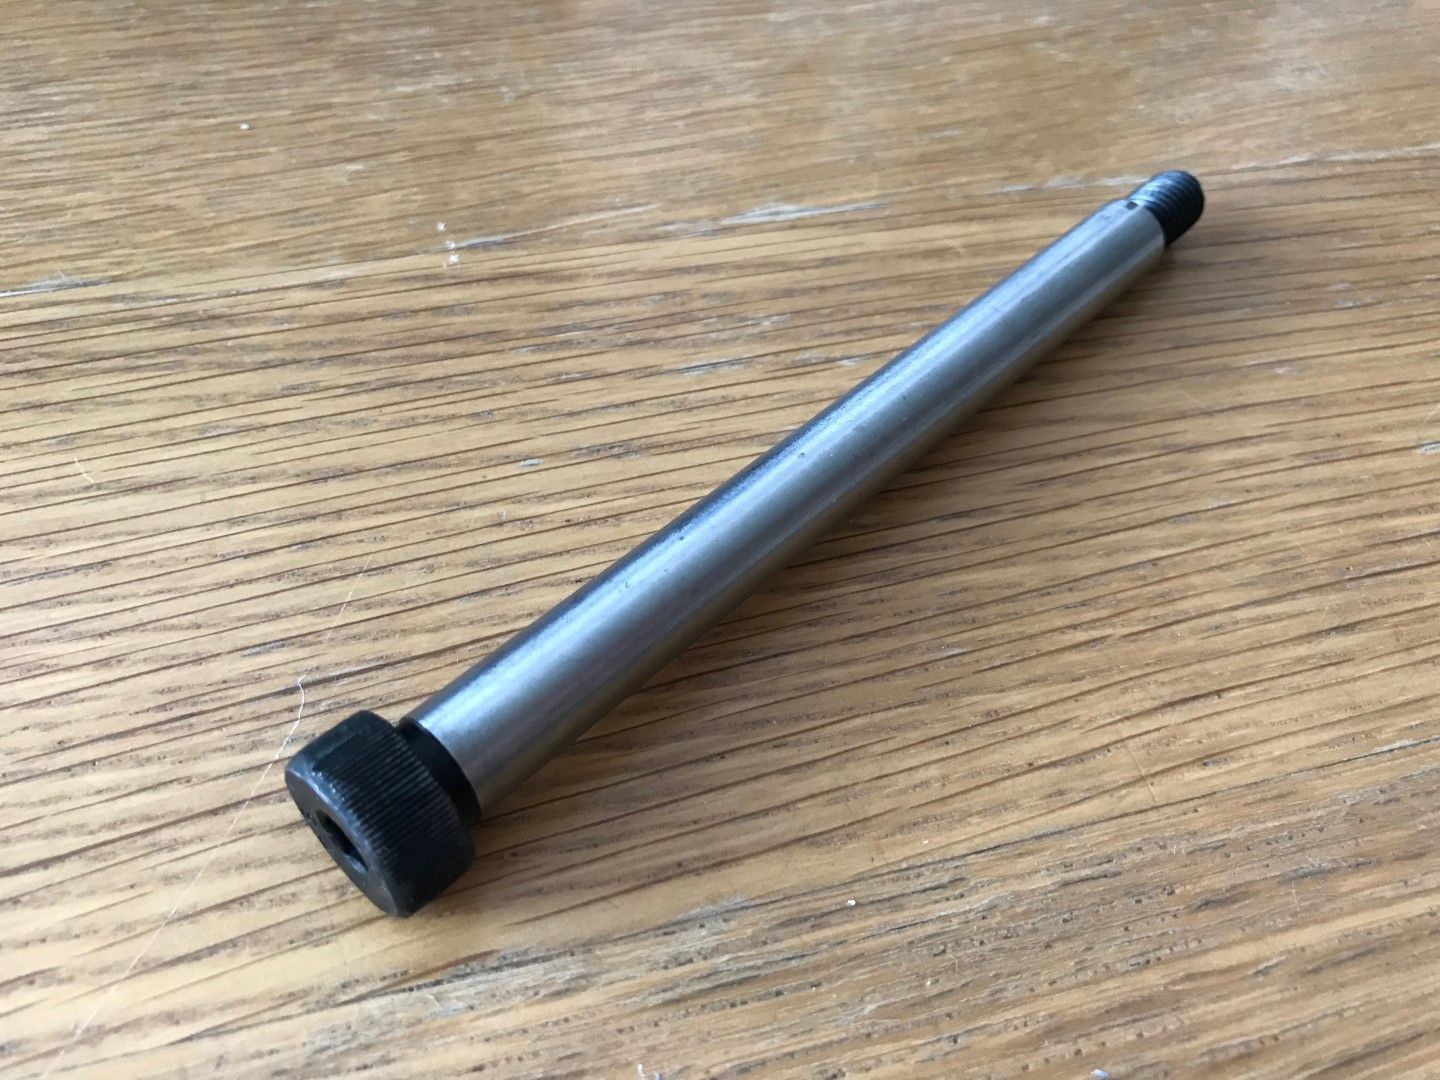

To go along with the diff upgrade and the new polybushes to mount the diff, the front mount threaded rod with nuts each end is being replaced for a much better fitting M12x130mm shouldered bolt.

dhutch said:
Looks good as always, I can't comment on the details but improved/simplified oil supply sound like a good thing, and adding a quafie ATB to mind transformed the car both on road and during autotest competition use. Thanks for the update!
Heard loads of people say the ATB transformed their cars, it's always good getting positive feedback, can't wait to try it out.dhutch said:
I didn't built the car, and while I've had most of it apart and back together, roll hoop, dampers, full rebush, new seats, rad and fan, megajolt ecu, gearbox rebuild etc it's all been done bit by bit of ten years. If I'd done a build log in the re-engine people would have died of boredom at the rate of change! Still the house is coming on much faster so you can't have it all.
Once you have a house there is always something to be done to take away from the car/hobby time you used to have.


Rear cover removed from the diff and the oil drained out
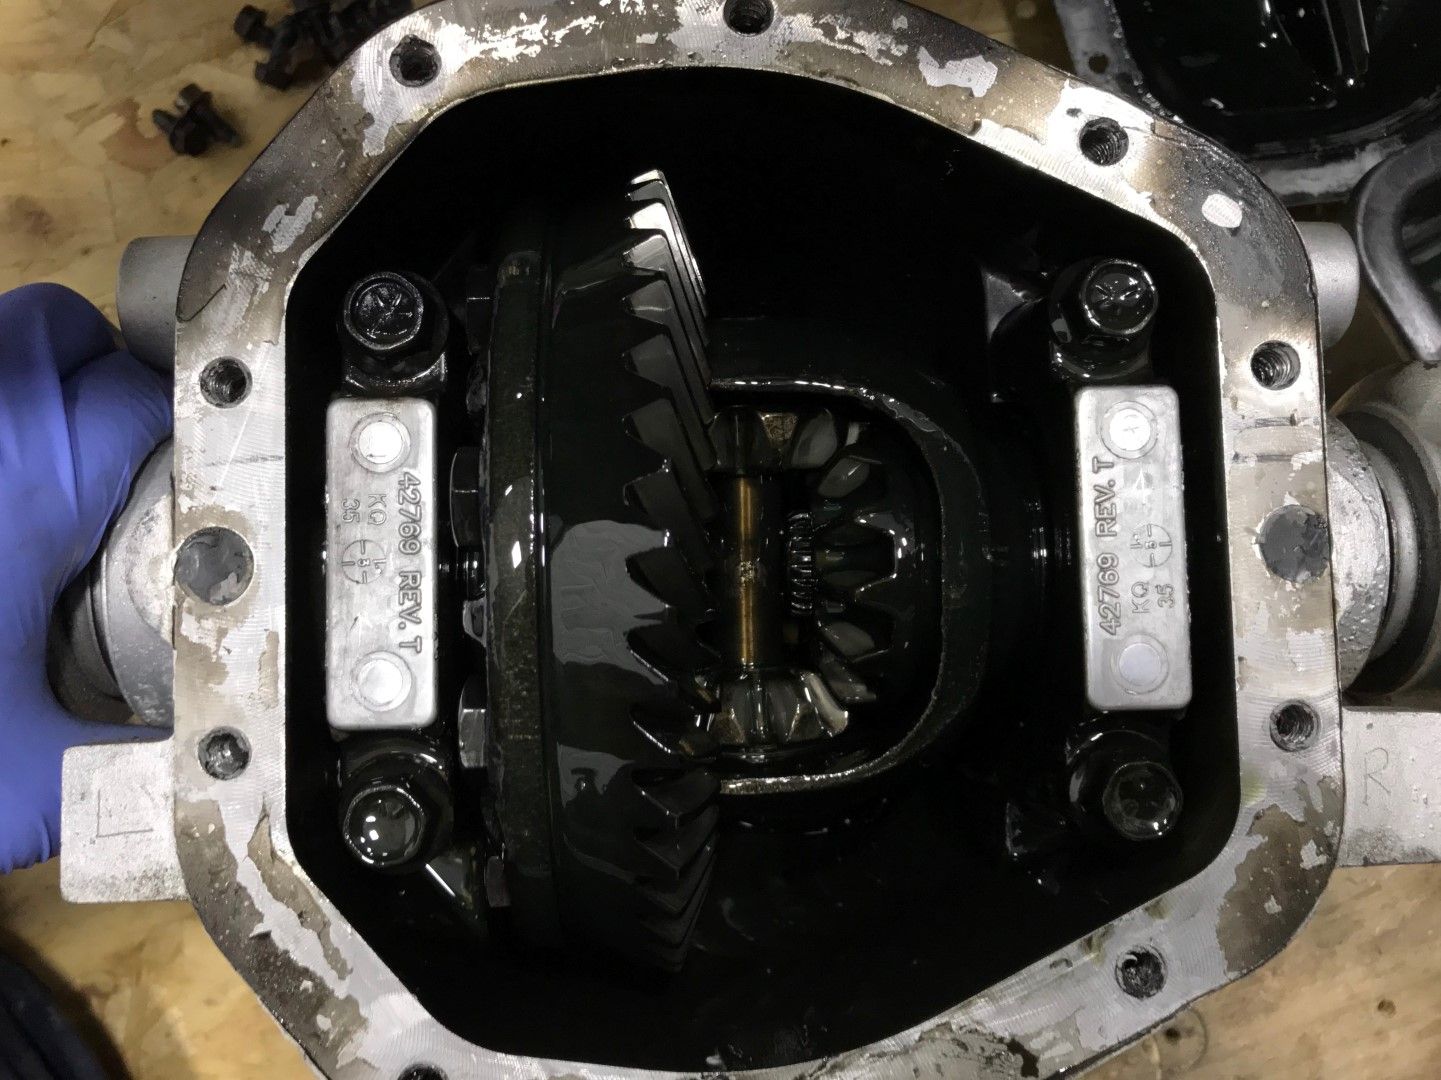
Freelander open differential assembly removed
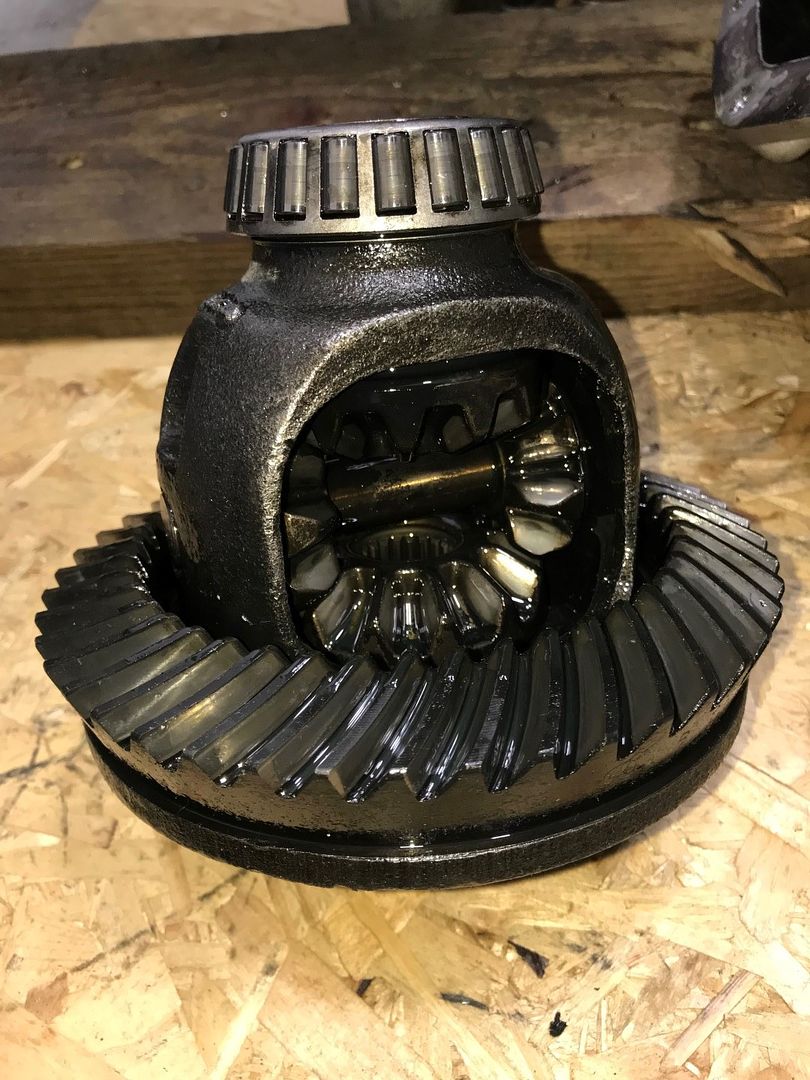
Bolts removed from the diff assembly and the crown wheel is free
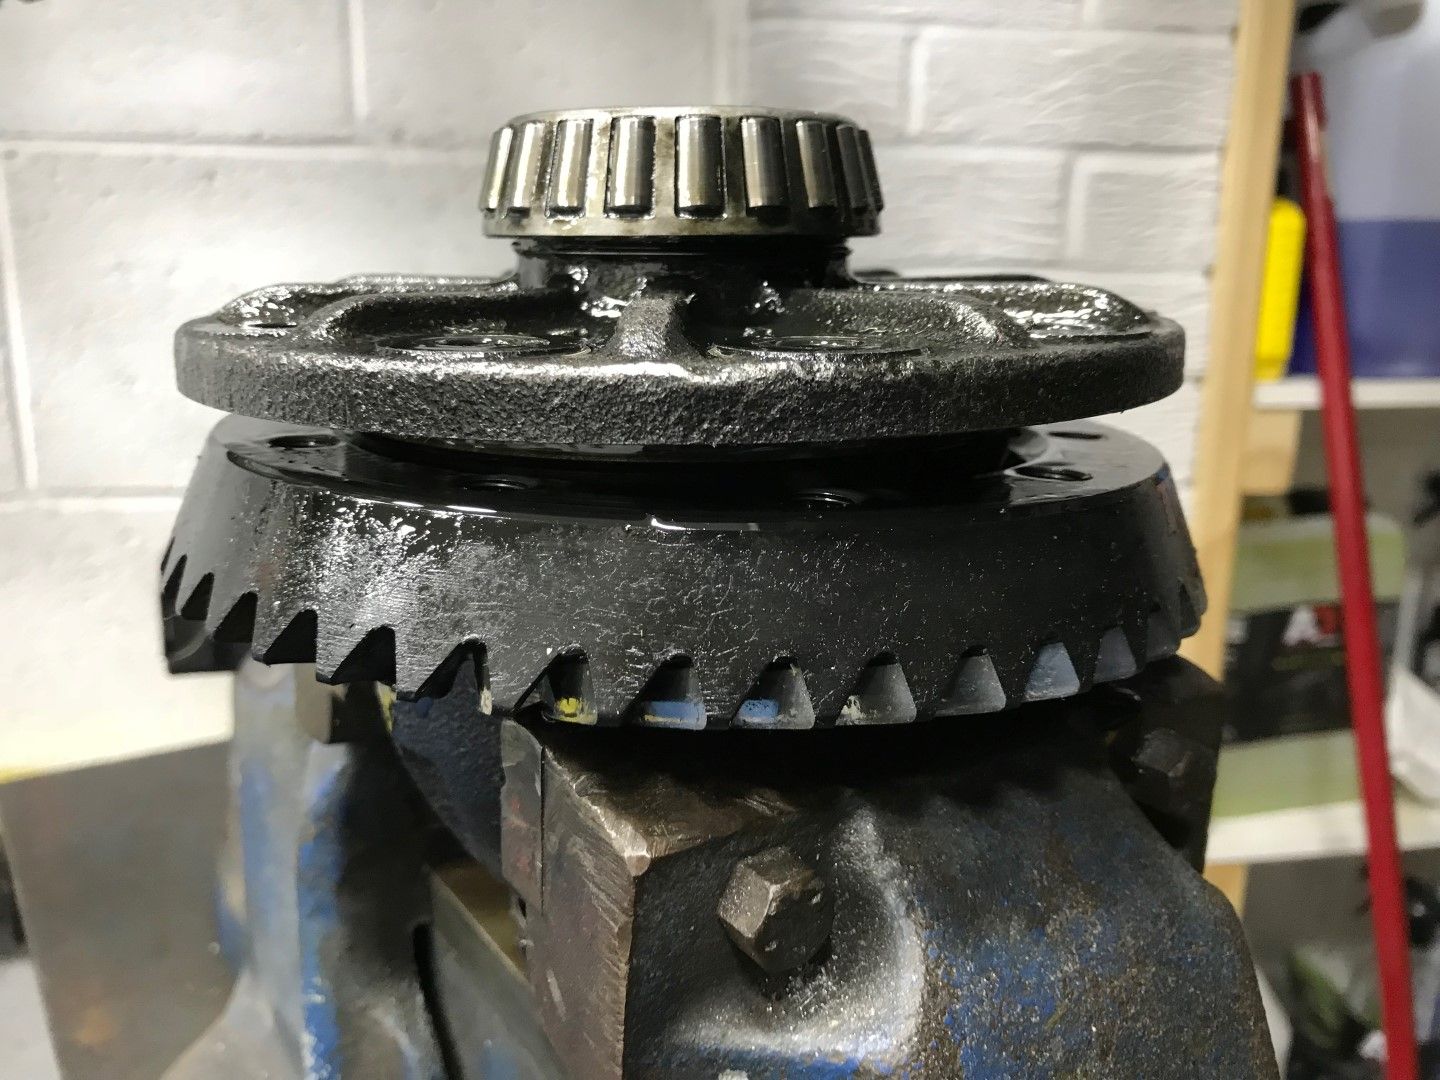
Freelander open diff and crown wheel
Cut through the outer bearing cages, remove cages and rollers
Apply heat to the bearing inner races
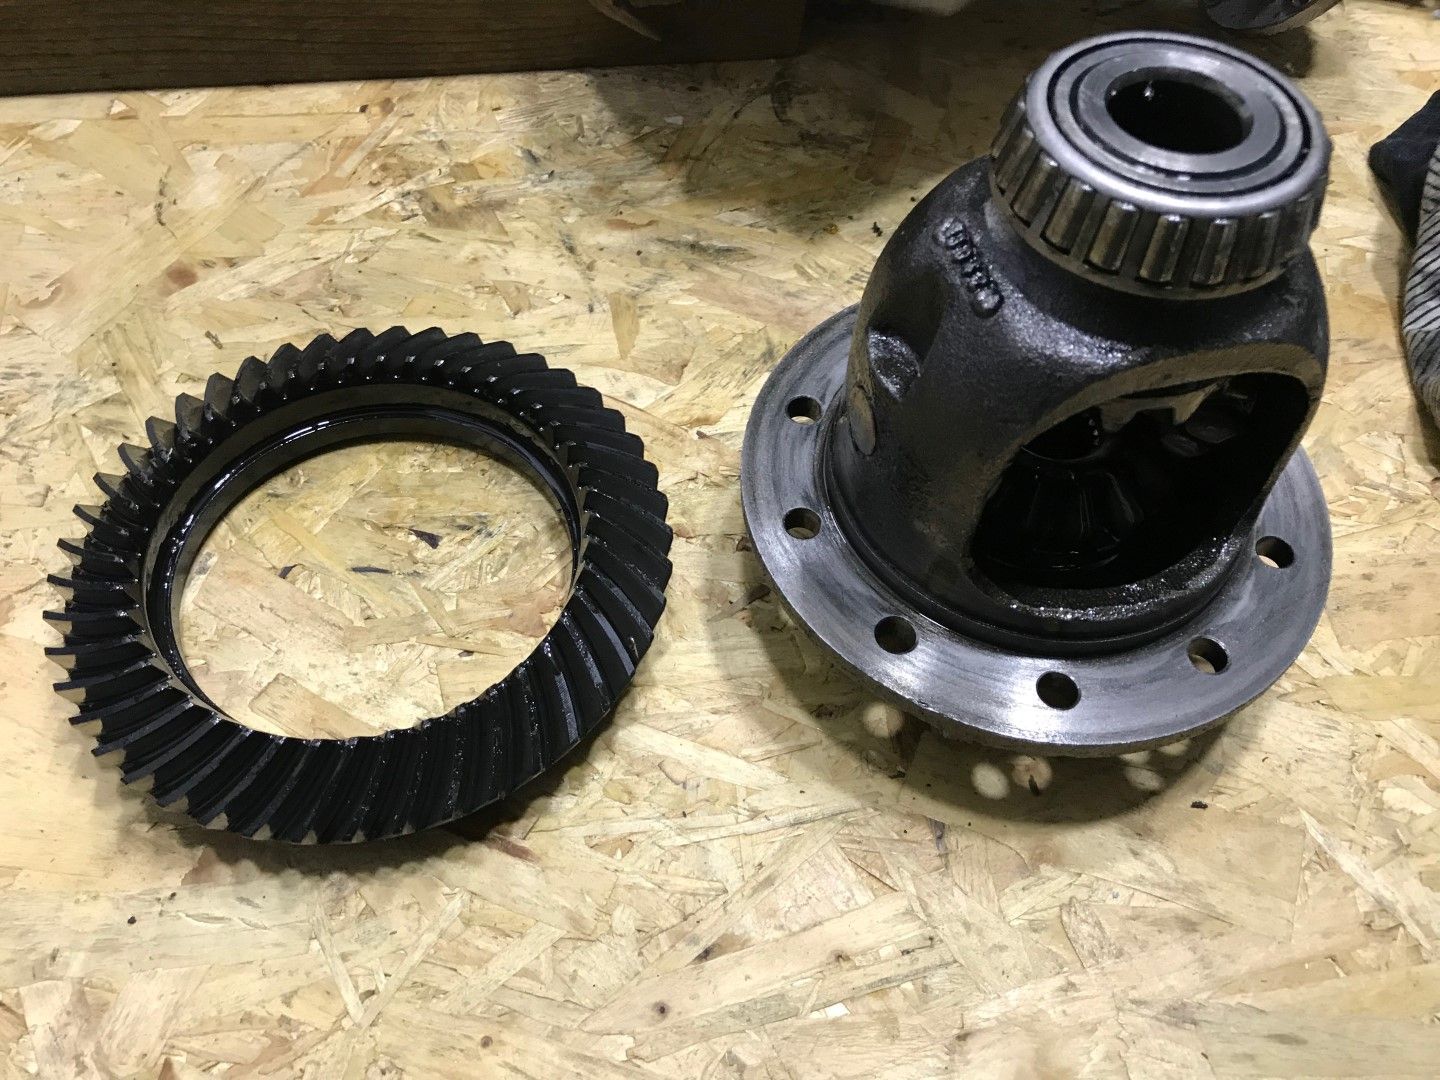
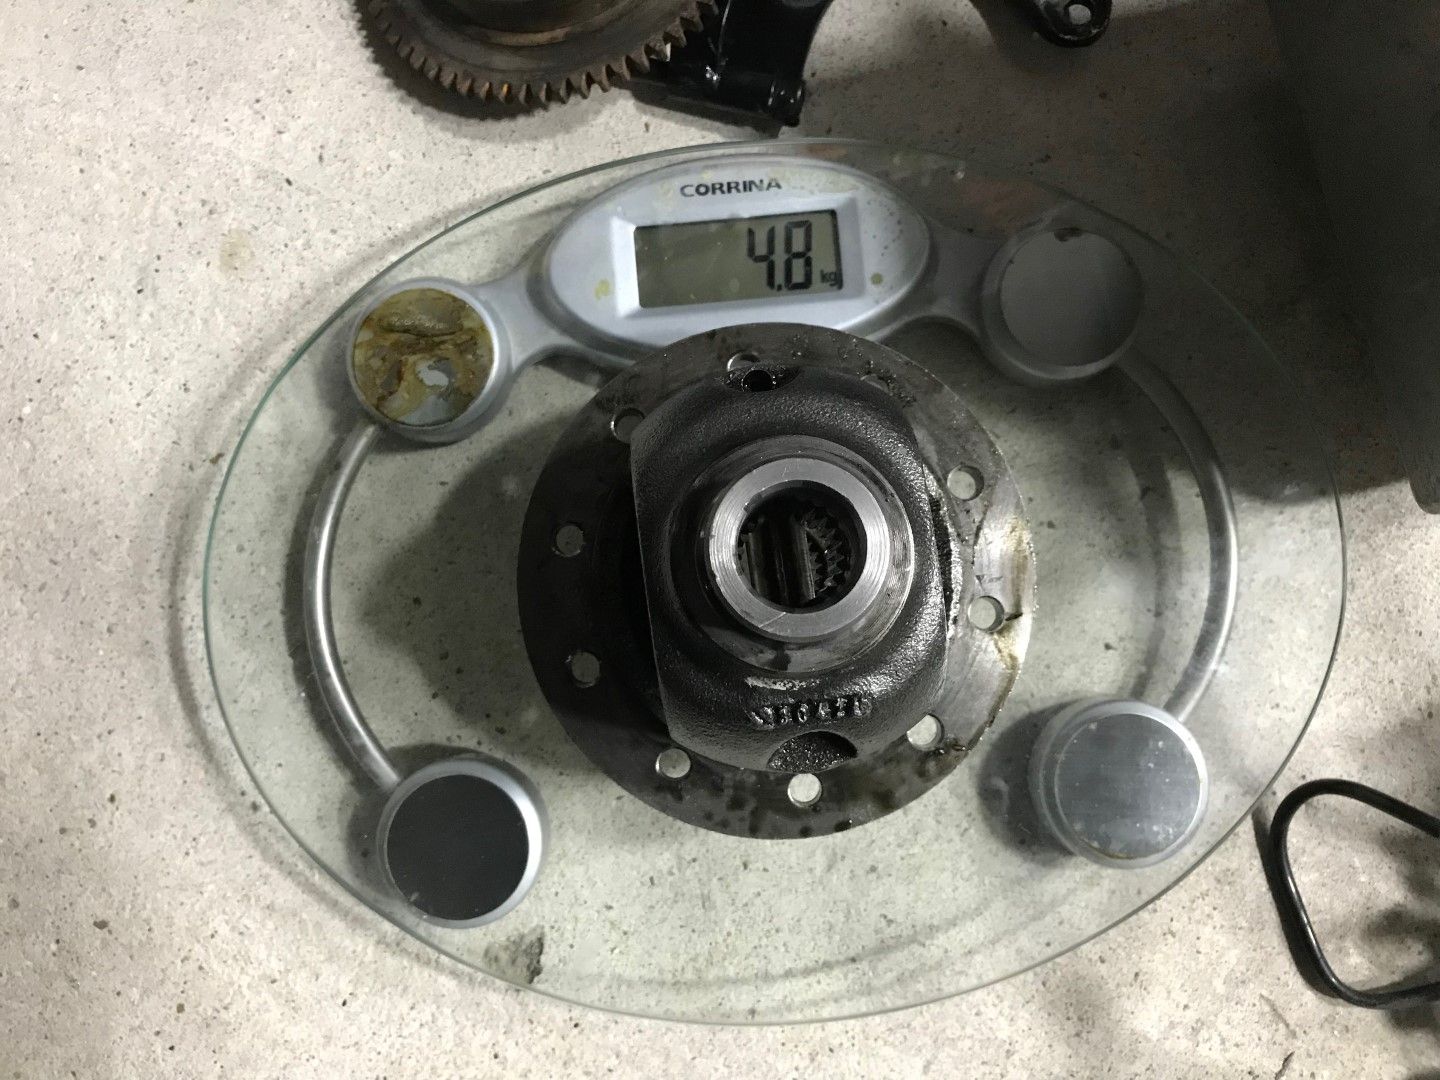
Bearing inner races removed and the open diff weighs in at 4.8kg, 2.3kg lighter than the Quaife ATB LSD.

Freelander open differential assembly removed

Bolts removed from the diff assembly and the crown wheel is free

Freelander open diff and crown wheel

Cut through the outer bearing cages, remove cages and rollers

Apply heat to the bearing inner races

Bearing inner races removed and the open diff weighs in at 4.8kg, 2.3kg lighter than the Quaife ATB LSD.

Edited by Red16 on Wednesday 30th January 21:42


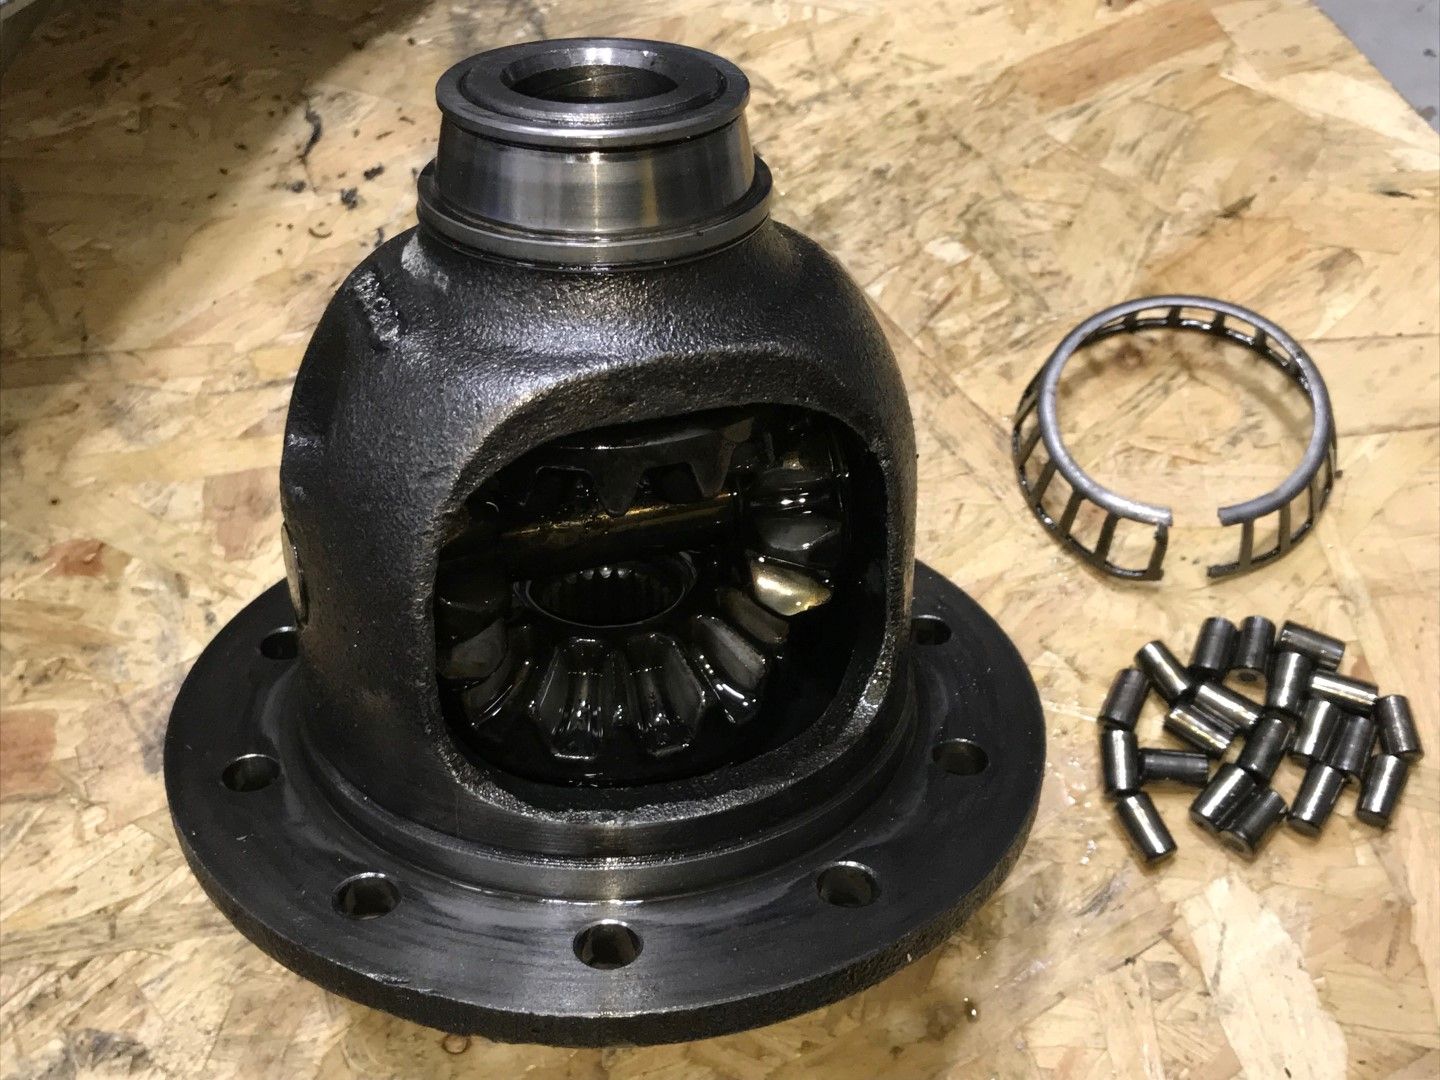
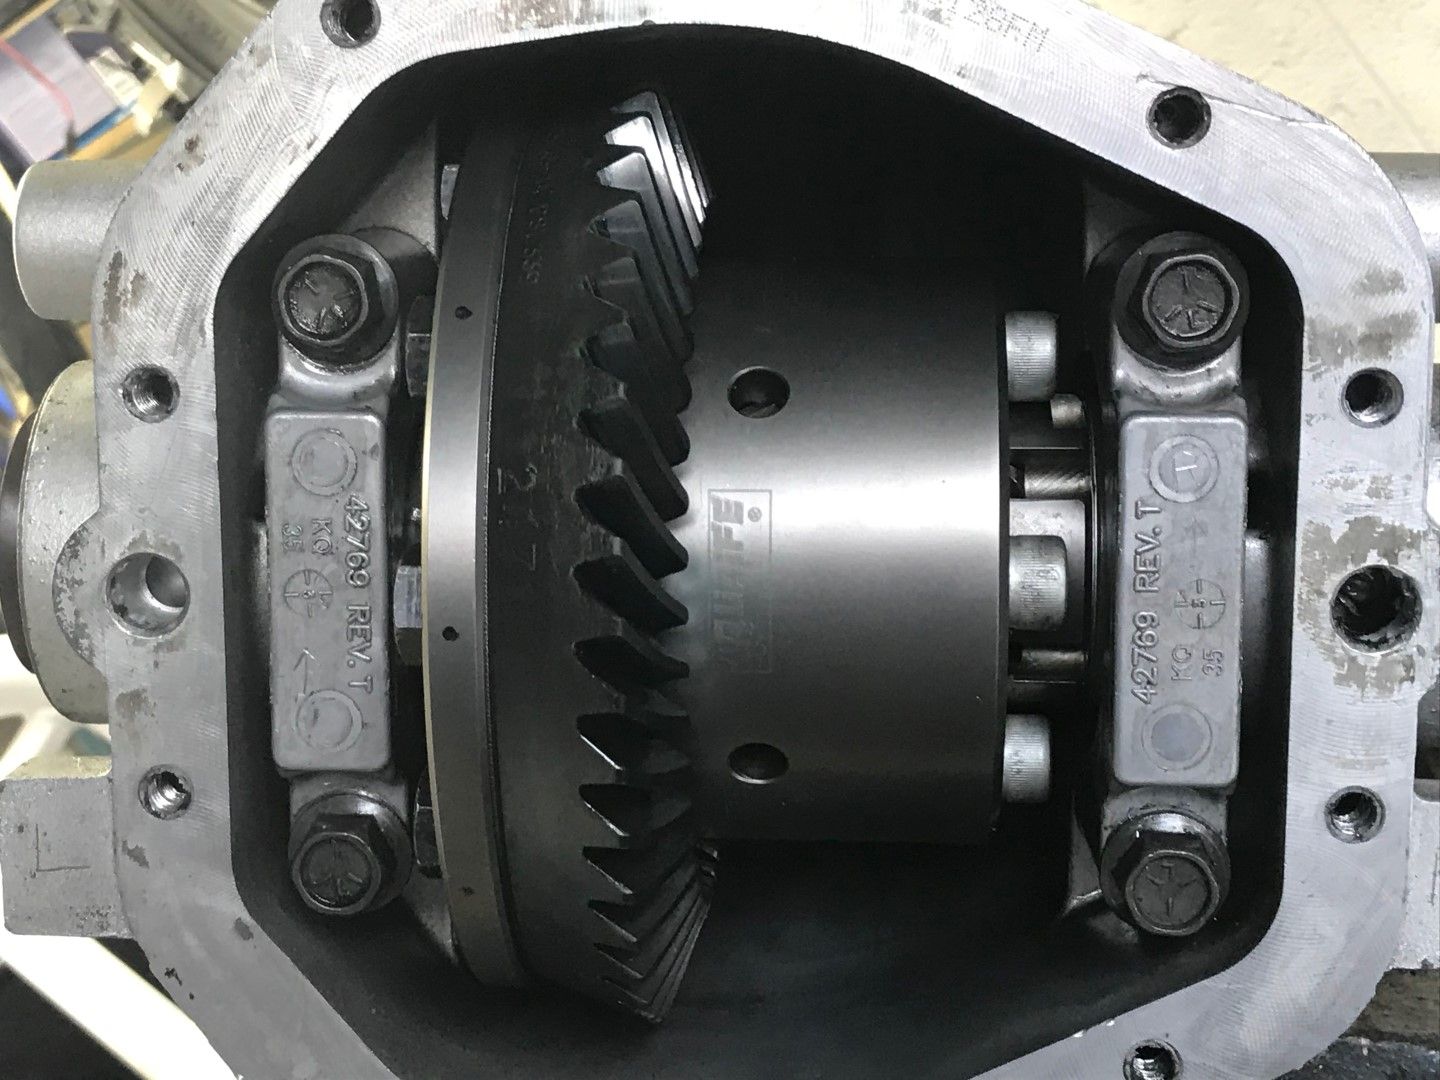
Qaife ATB back in the diff housing
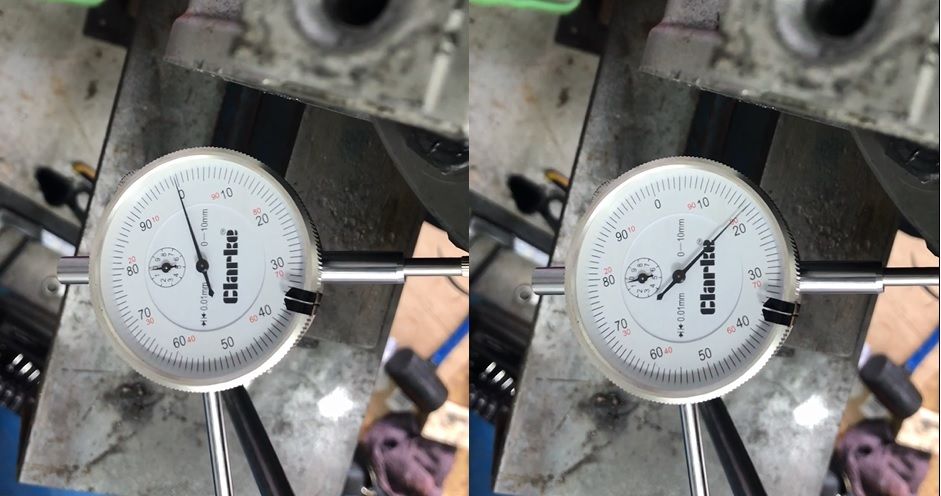
Pinion to crown wheel backlash measurement, 0.18mm, manufacturer spec says 0.13-0.2mm so no issues here.
I have a video of this but for some reason it doesn't appear in photobucket after being uploaded.
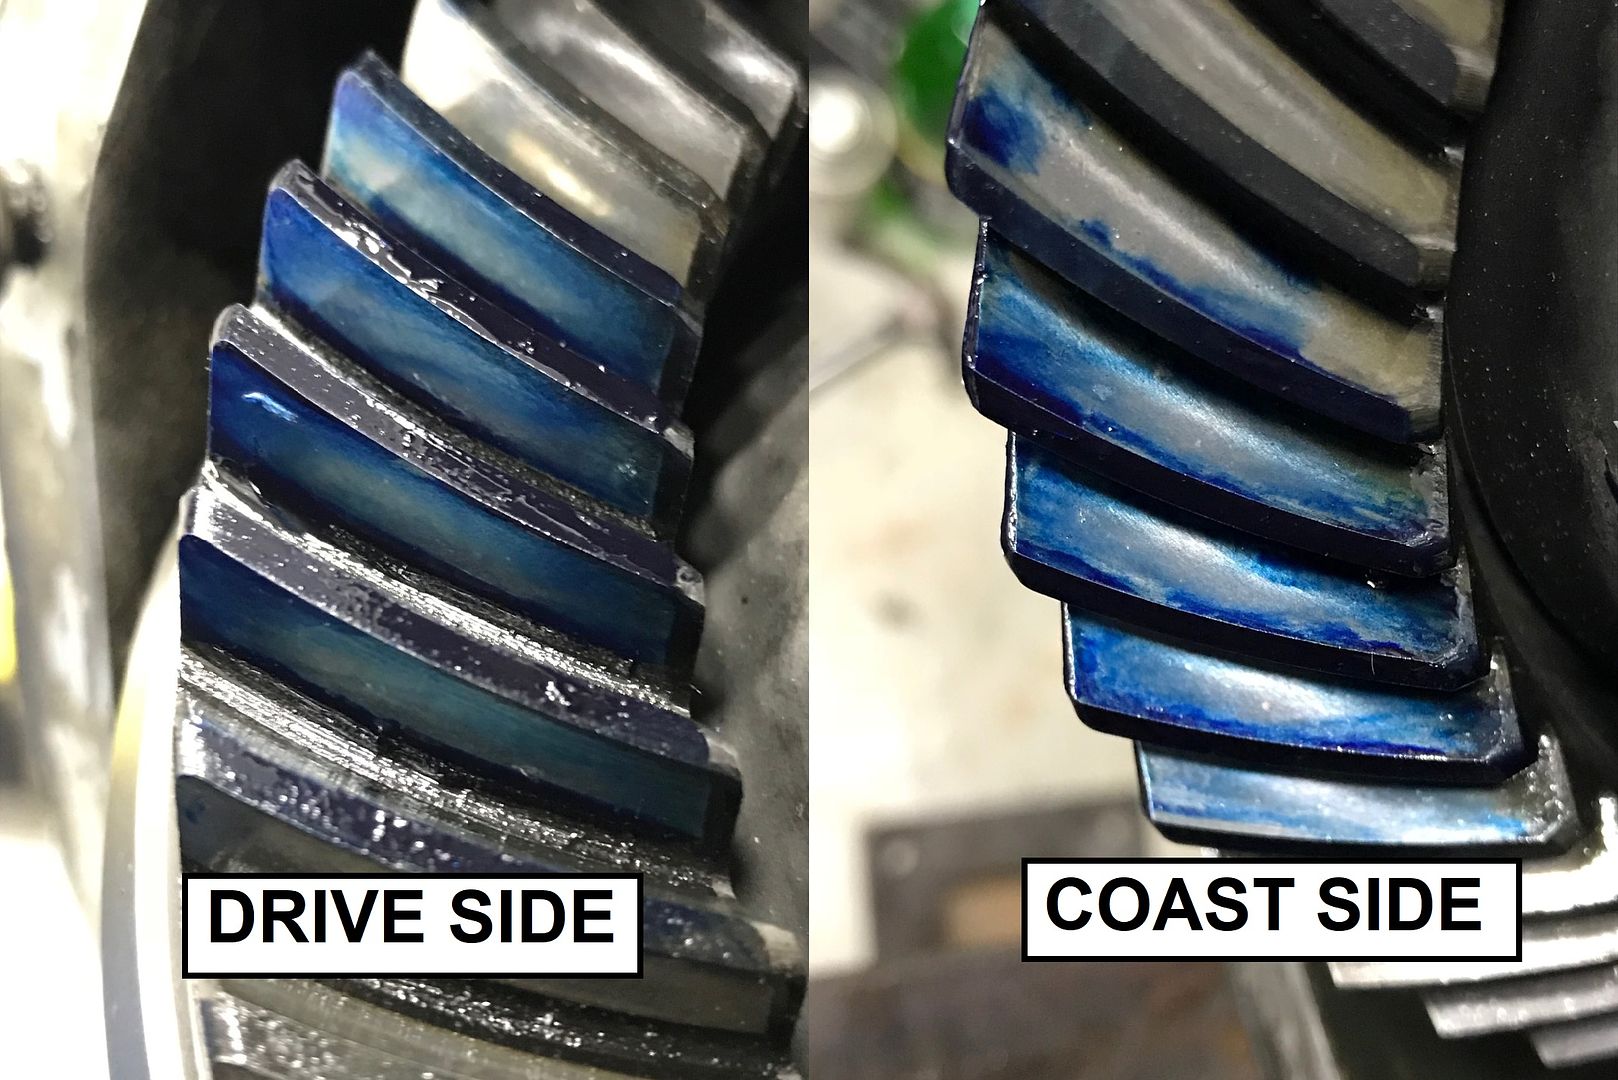
Tooth contact, looks pretty good, central and even.
Replaced the drive shaft oil seals, pushed in the driveshaft CV cups and fitted the rear cover.

Pinion to crown wheel backlash measurement, 0.18mm, manufacturer spec says 0.13-0.2mm so no issues here.
I have a video of this but for some reason it doesn't appear in photobucket after being uploaded.

Tooth contact, looks pretty good, central and even.

Replaced the drive shaft oil seals, pushed in the driveshaft CV cups and fitted the rear cover.

Spent a few hours yesterday progressing the hydraulic clutch conversion.
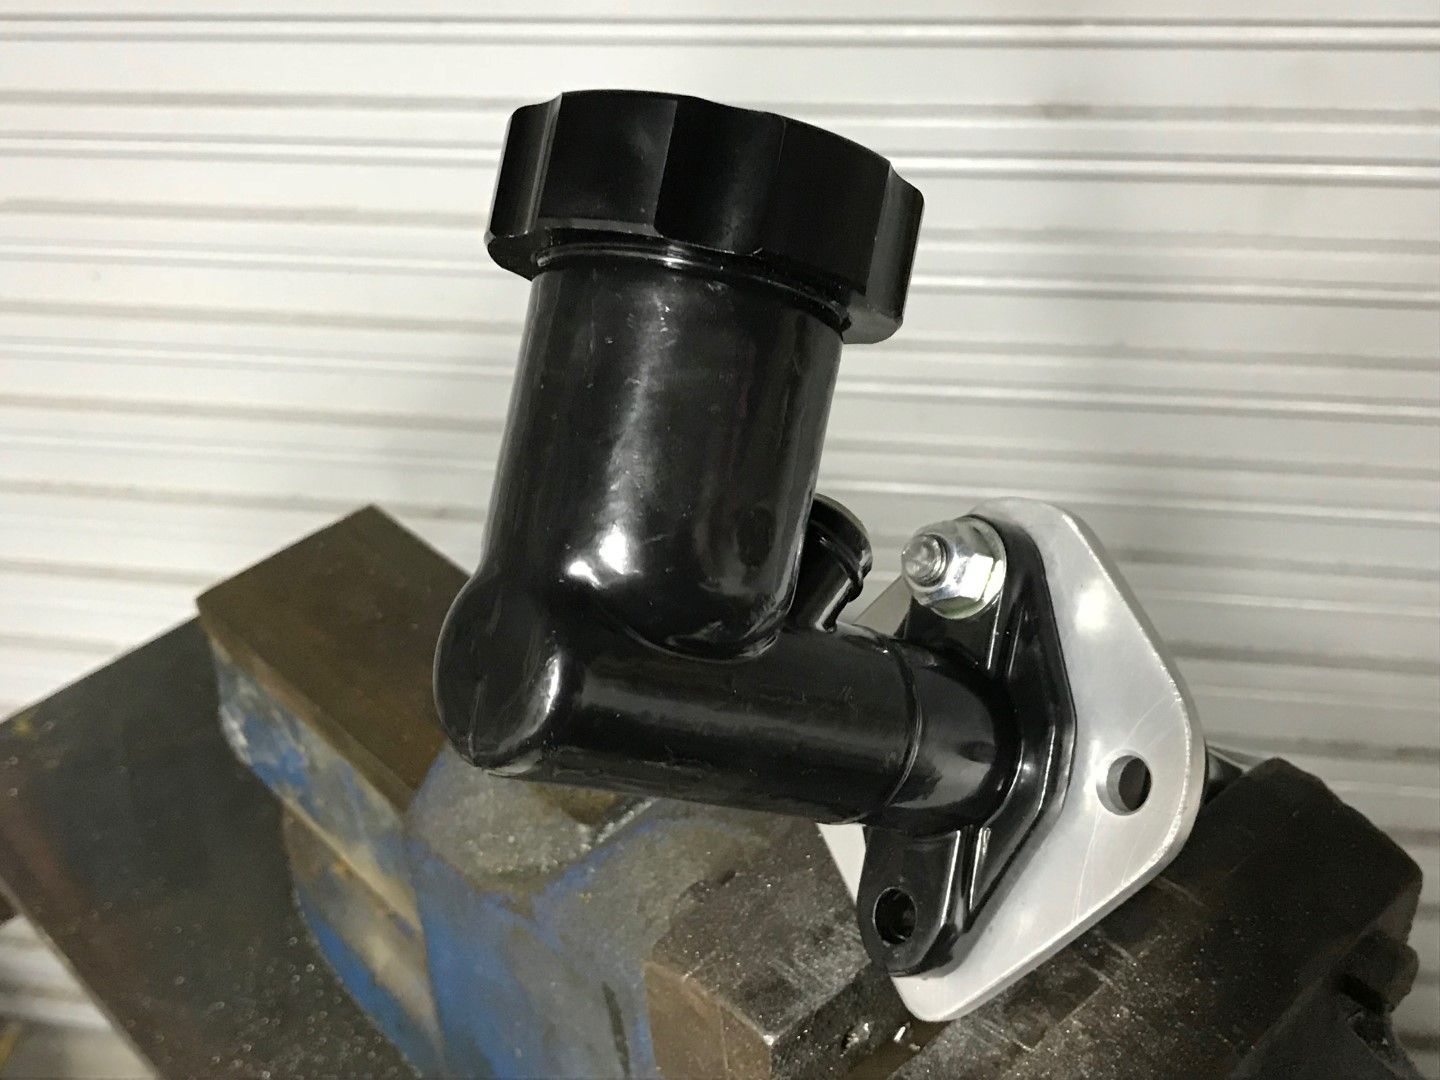
The upper bolt hole on the master cylinder was right in line with a small tubular cross brace on the bulkhead so I didn't want to use it and destroy the brace.
I made an aluminium adaptor plate to allow the master cylinder to bolt to the bulkhead, the upper bolt hole is countersunk on the rear of the plate to allow the plate to bolt flush to the bulkhead.
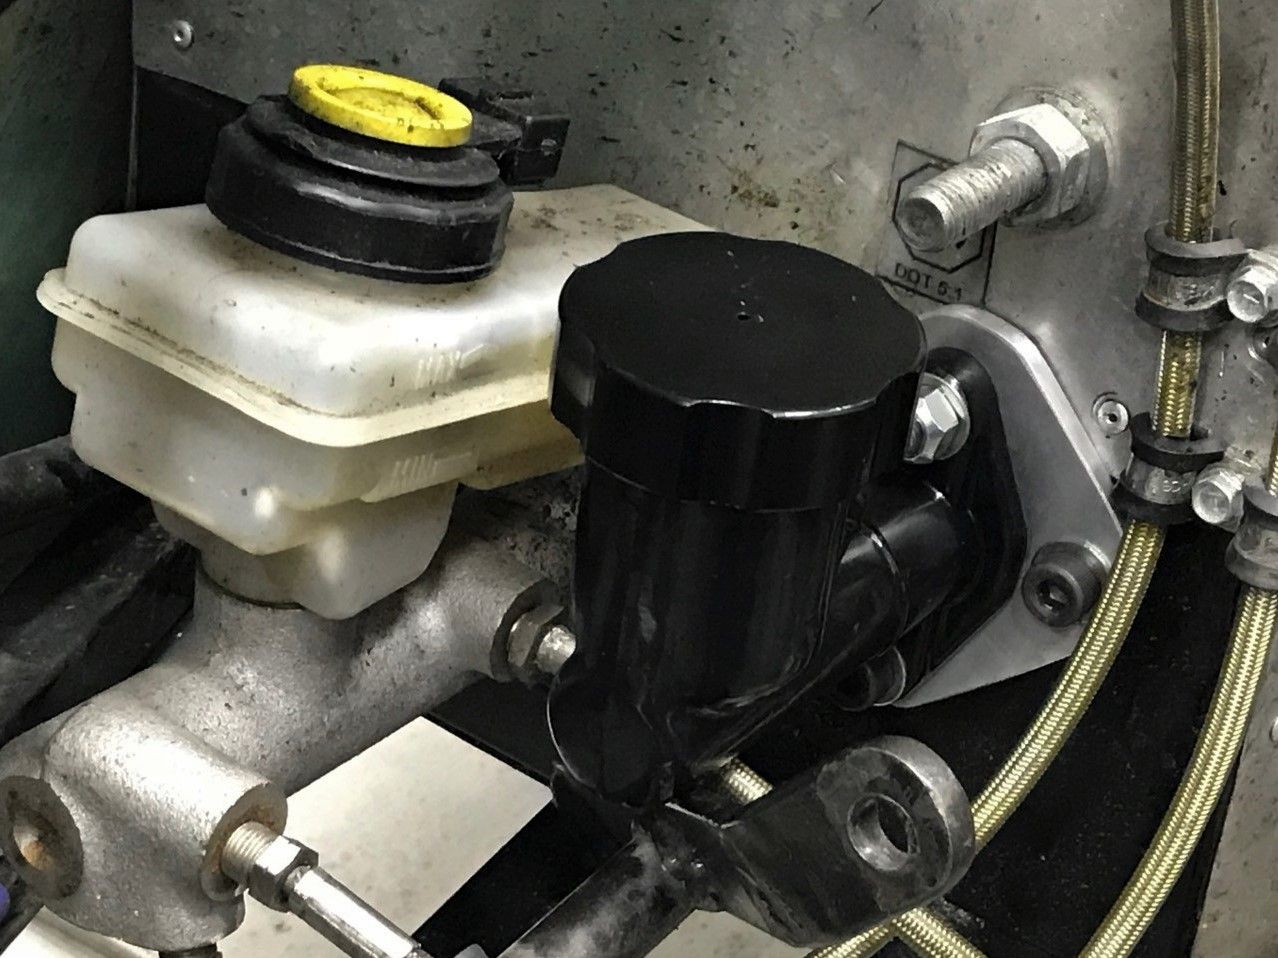
Fitted to the bulkhead it looks like this
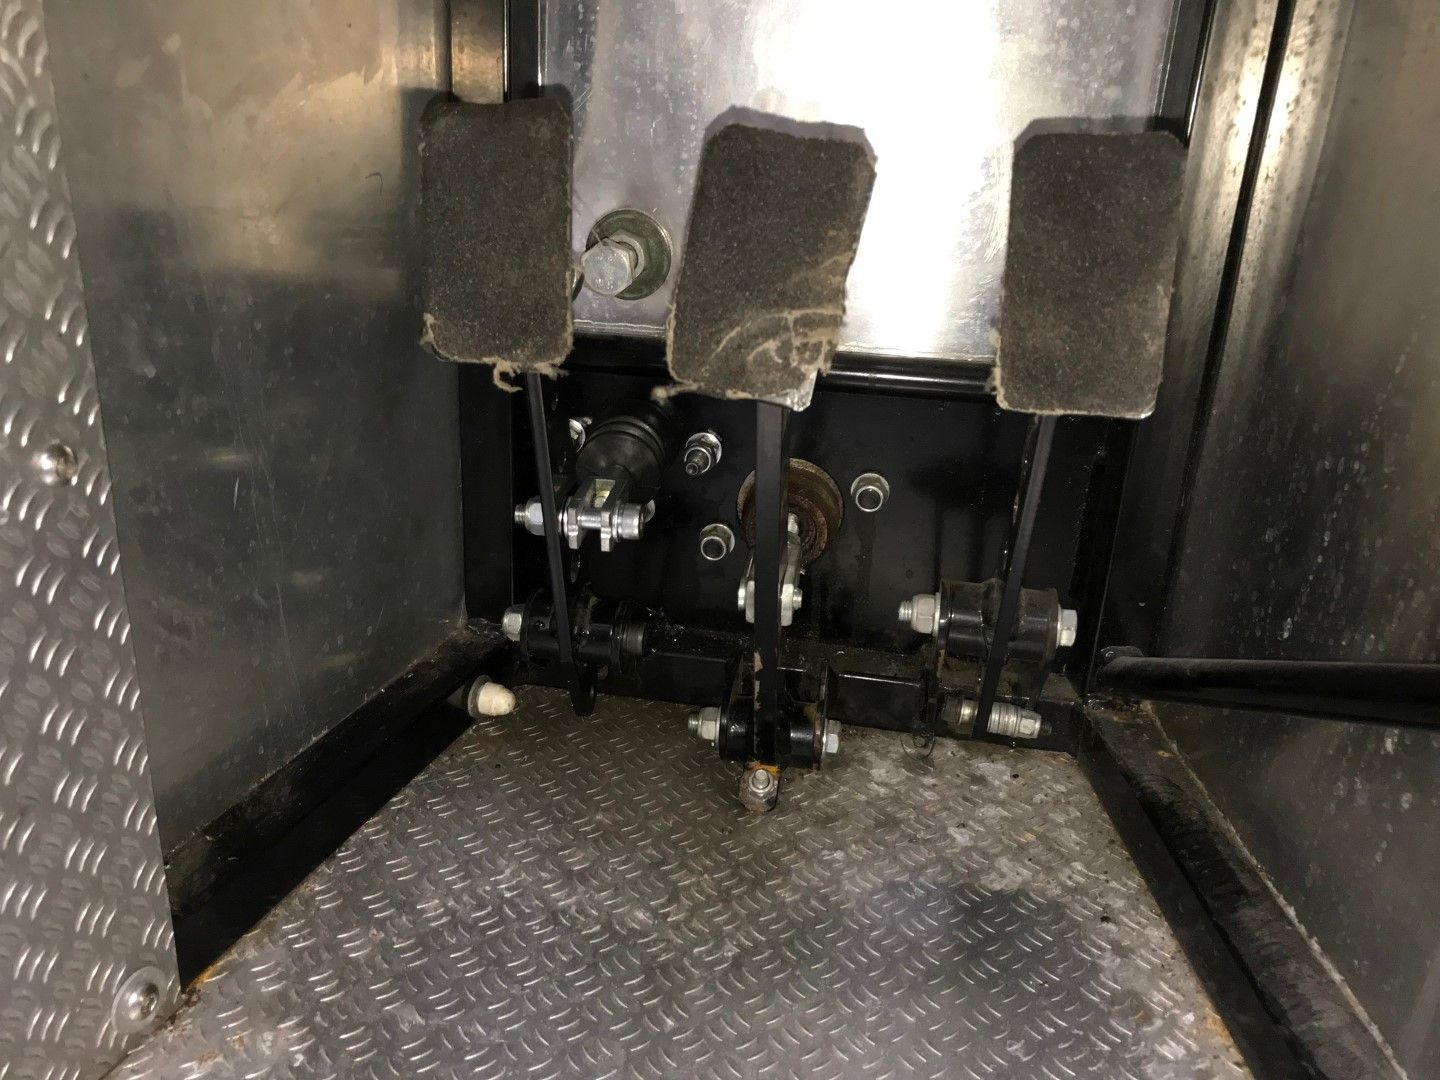
Due to the position of the lower engine mount on the chassis the master cylinder has to be mounted slightly offset to the clutch pedal assembly, inside the foot well looks like this.
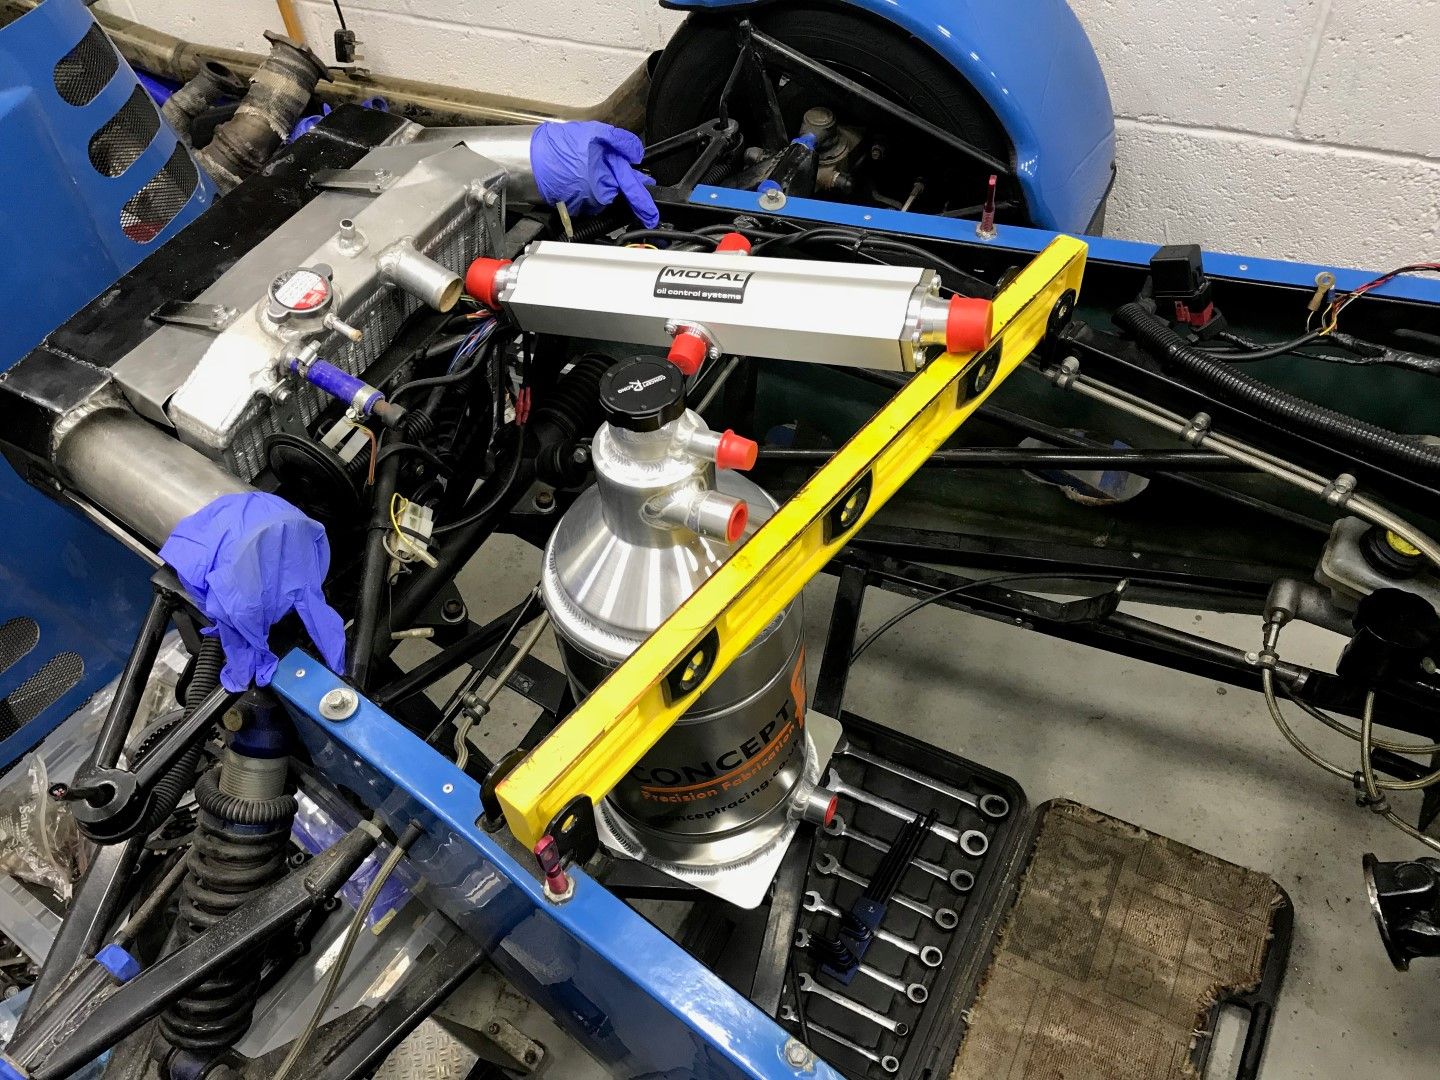
Playing with the position of the dry sump oil tank and Mocal laminova oil cooler, but really need to wait until the engine is back in to finalise this bit really.


I'm back again with an update which looking at the previous post is long overdue.
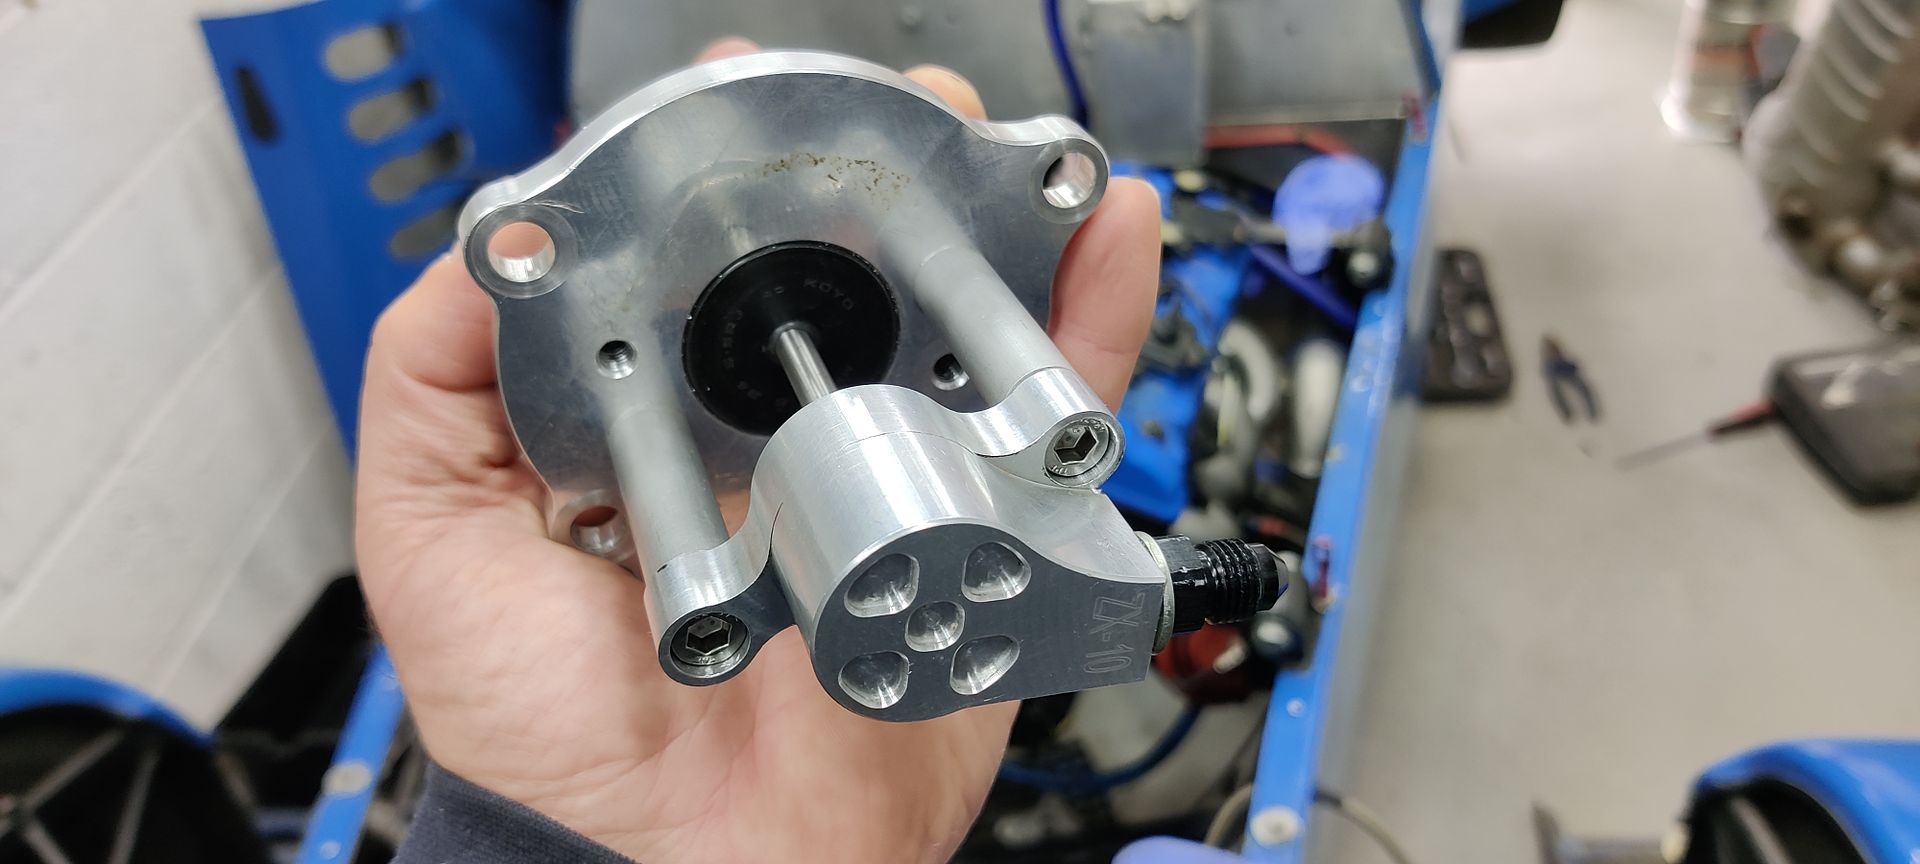
The hydraulic clutch slave cylinder fouled on the propshaft adaptor, so I had to redrill and tap new mounting holes in the transmission bearing housing in the locations marked with X's

Holes drilled, tapped and cylinder mounted to bearing housing.
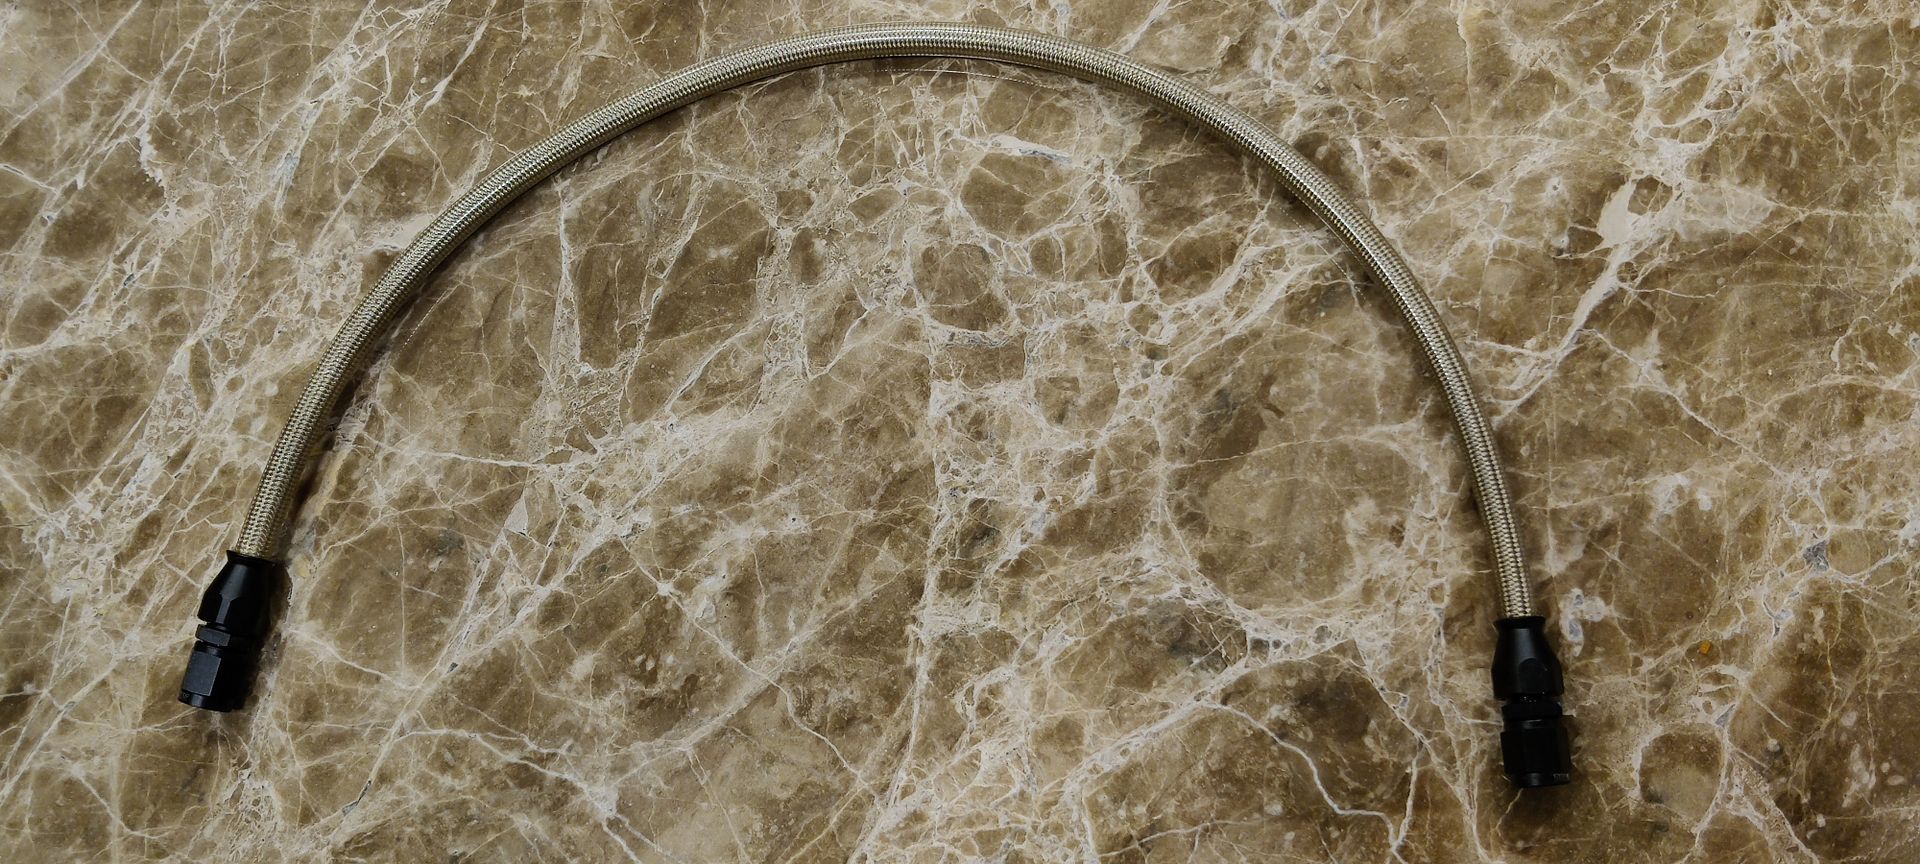
Clutch hose made up with PTFE lined braided hose and reusable JIC fittings.
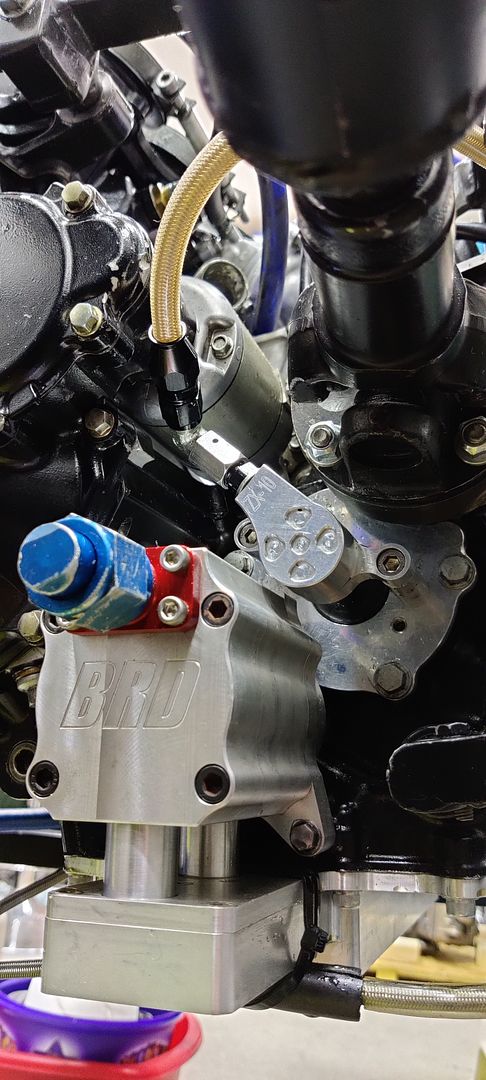
Installed to the engine it looks like this.
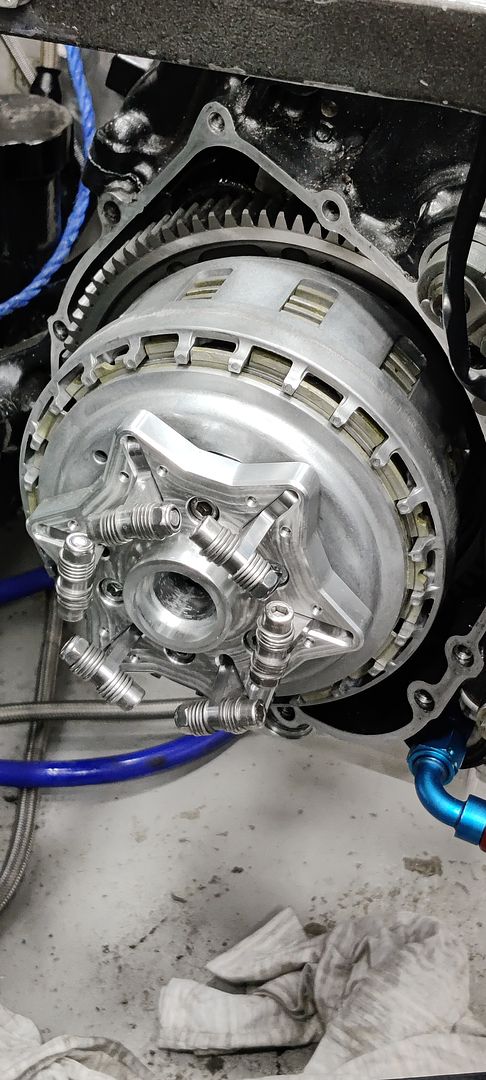
Clutch assembled with new EBC heavy duty spring, steel plates and kevlar plate kit along with the 6 arm lockup clutch assembly from Warpspeed Racing.
The hydraulic clutch slave cylinder fouled on the propshaft adaptor, so I had to redrill and tap new mounting holes in the transmission bearing housing in the locations marked with X's
Holes drilled, tapped and cylinder mounted to bearing housing.
Clutch hose made up with PTFE lined braided hose and reusable JIC fittings.
Installed to the engine it looks like this.
Clutch assembled with new EBC heavy duty spring, steel plates and kevlar plate kit along with the 6 arm lockup clutch assembly from Warpspeed Racing.
The clutch was filled with fluid and bled, but unfortunately while testing the clutch one of the slave cylinder o-rings was extruded.
.jpeg?)
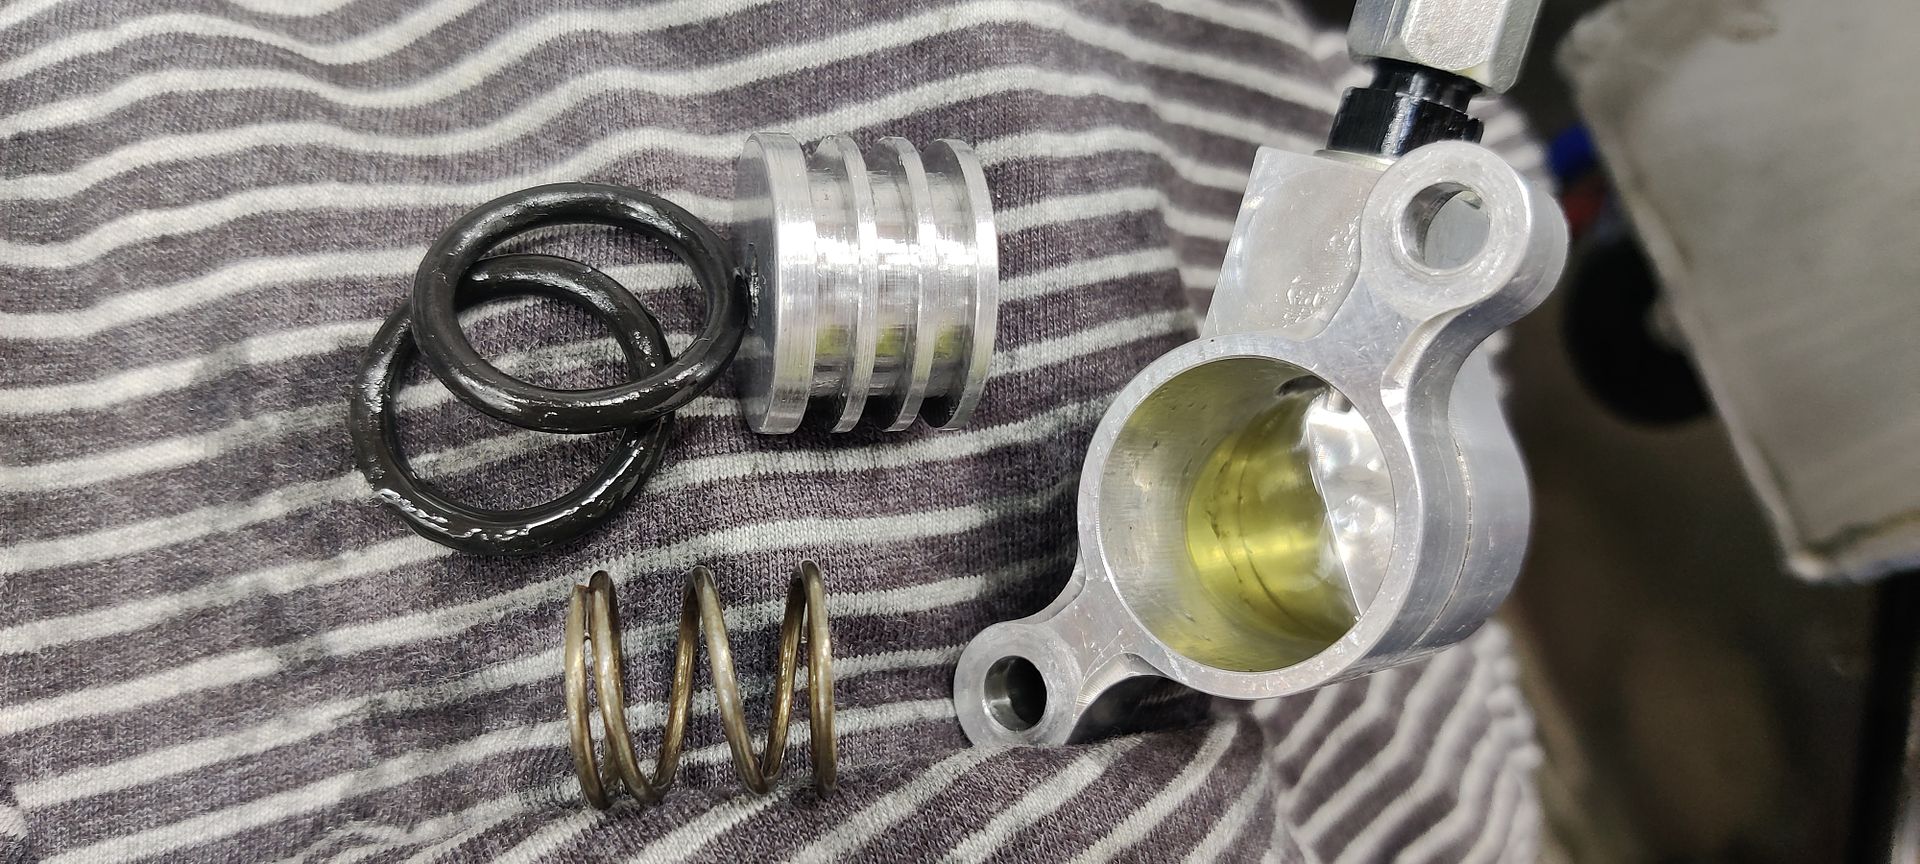
A quick measure up and a search online led me to a place in Darlington called FPE Seals www.fpeseals.com where I bought some u-seals to replace the original o-rings with.

Here's a video of the fully operational clutch being applied and released.
A quick measure up and a search online led me to a place in Darlington called FPE Seals www.fpeseals.com where I bought some u-seals to replace the original o-rings with.
Here's a video of the fully operational clutch being applied and released.

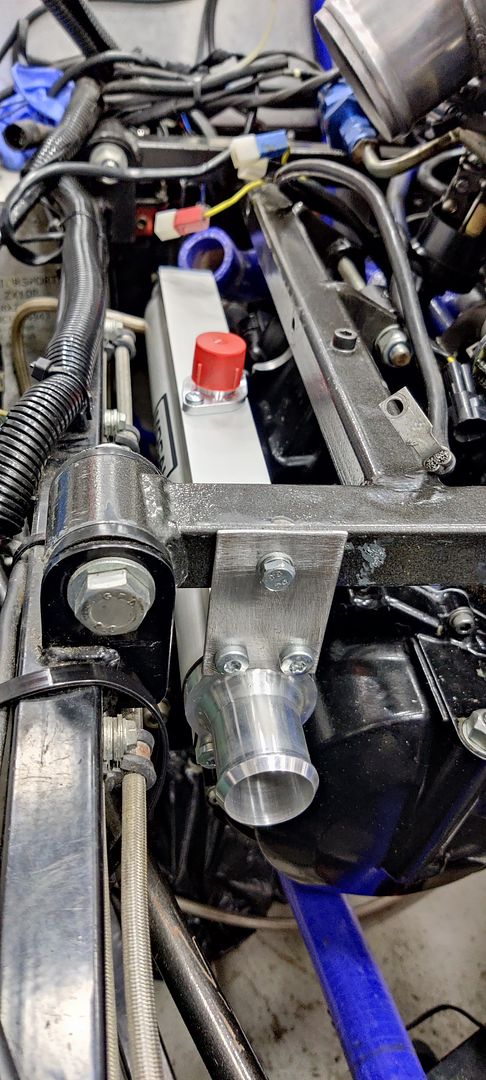
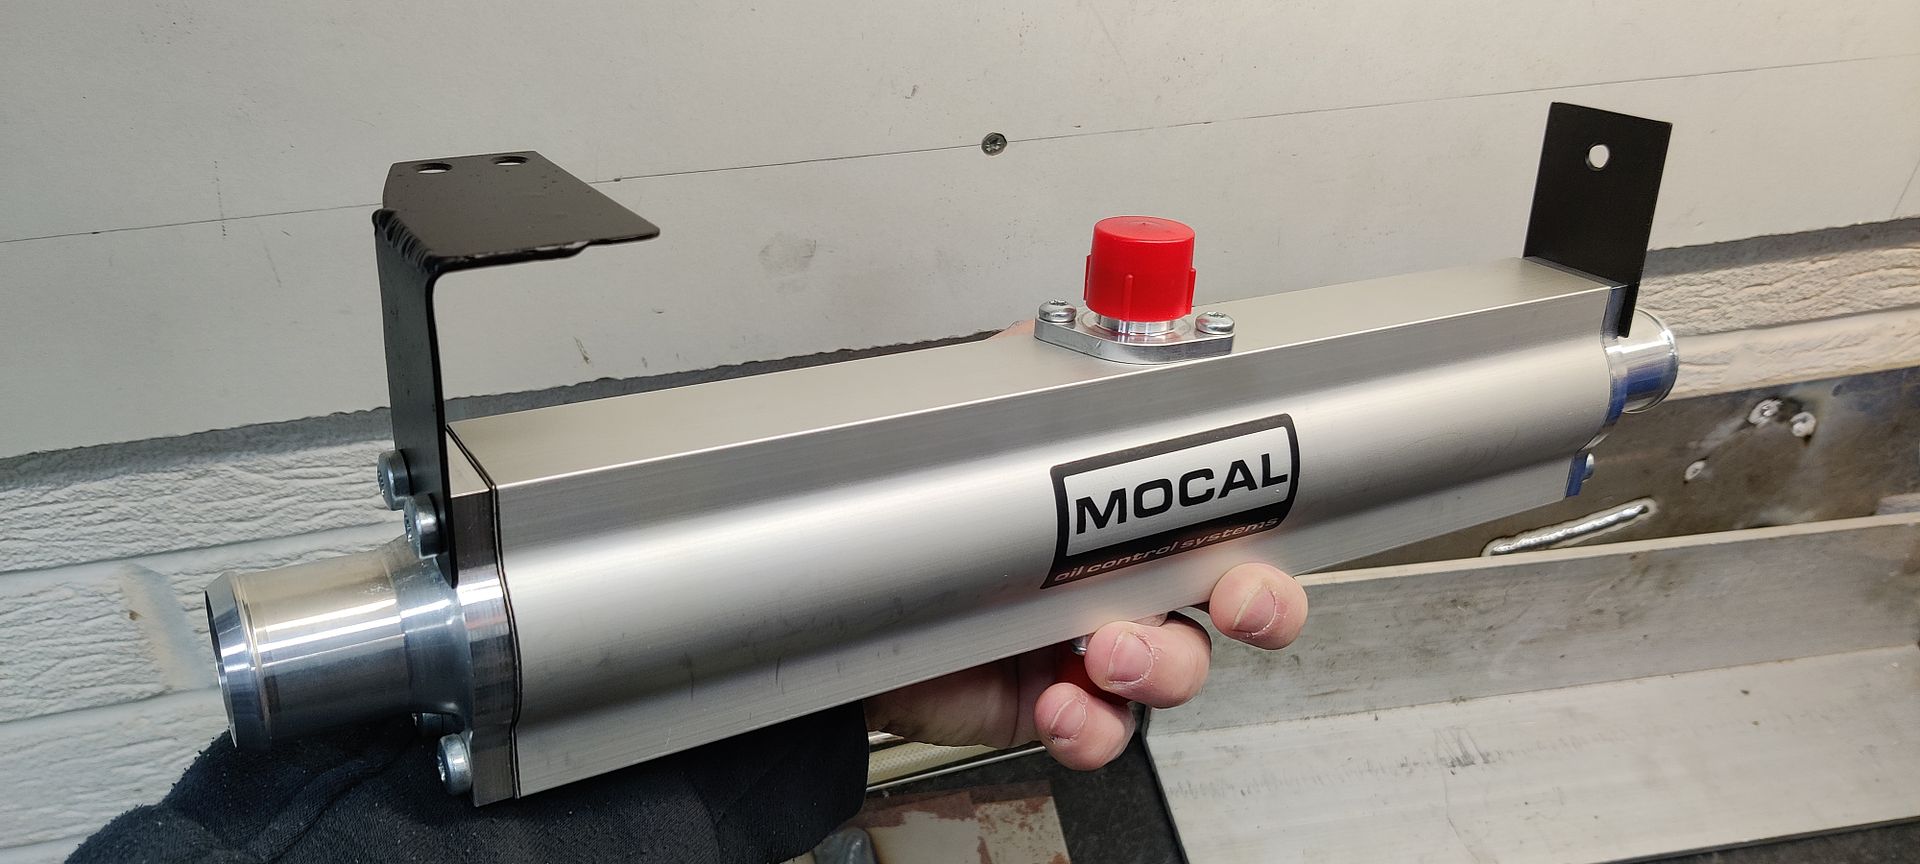
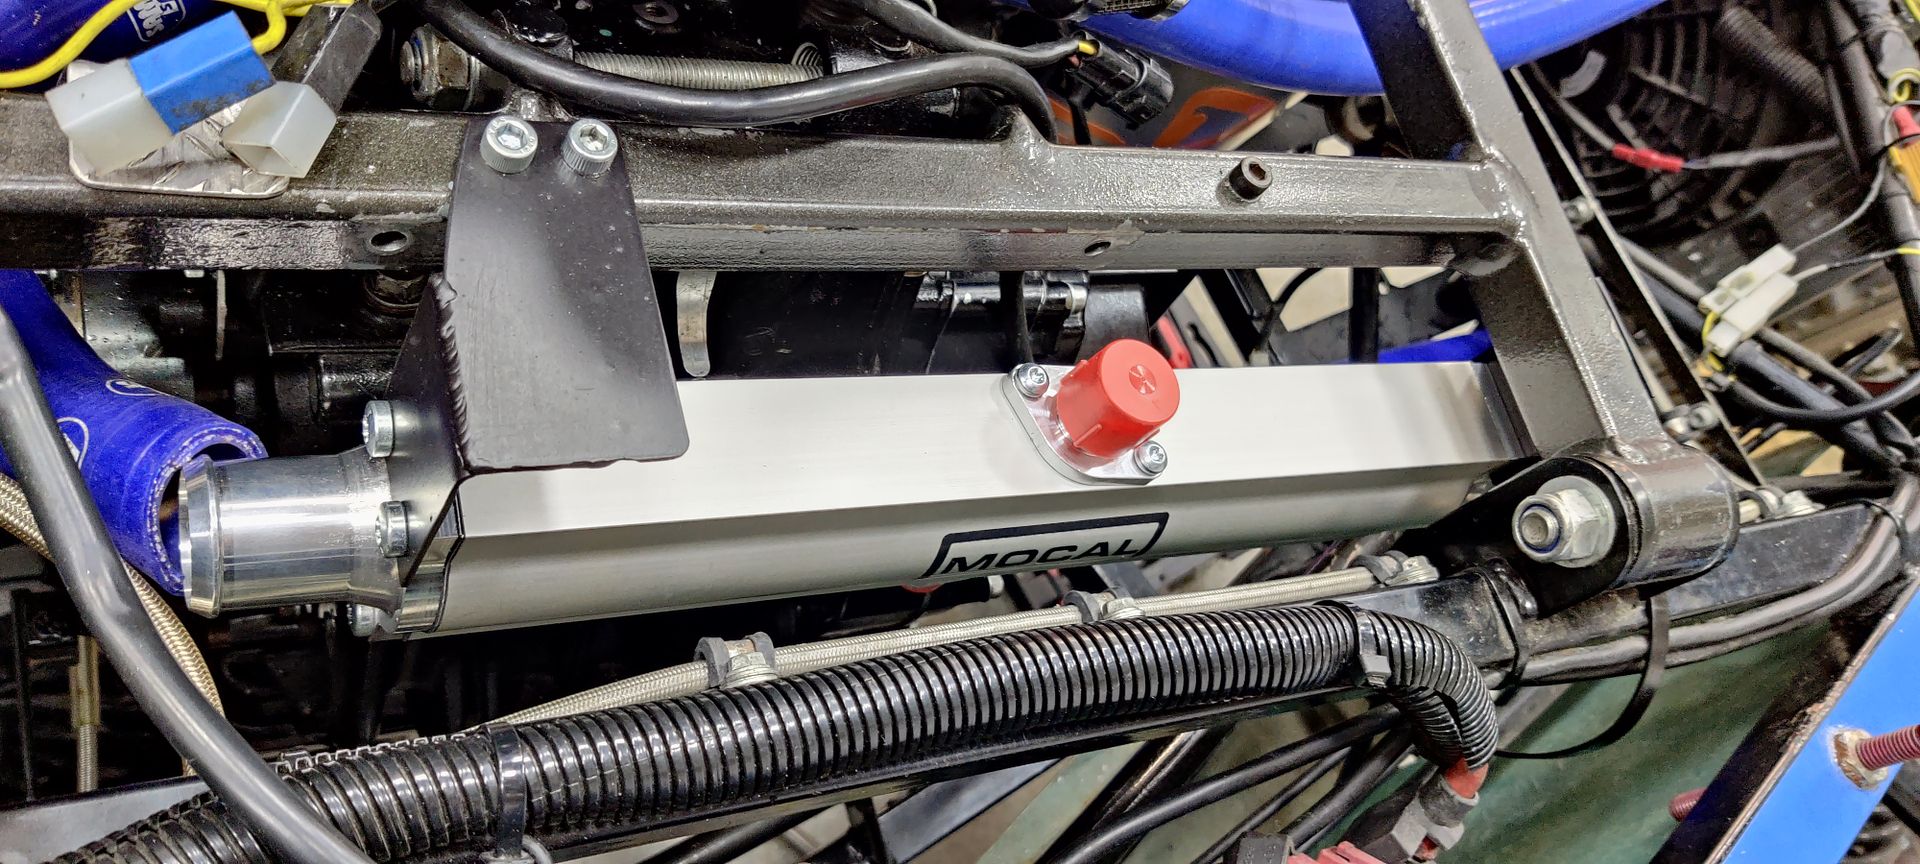
Mocal laminova oil to water heat exchanger in position with the front home made bracket.
Rear bracket parts
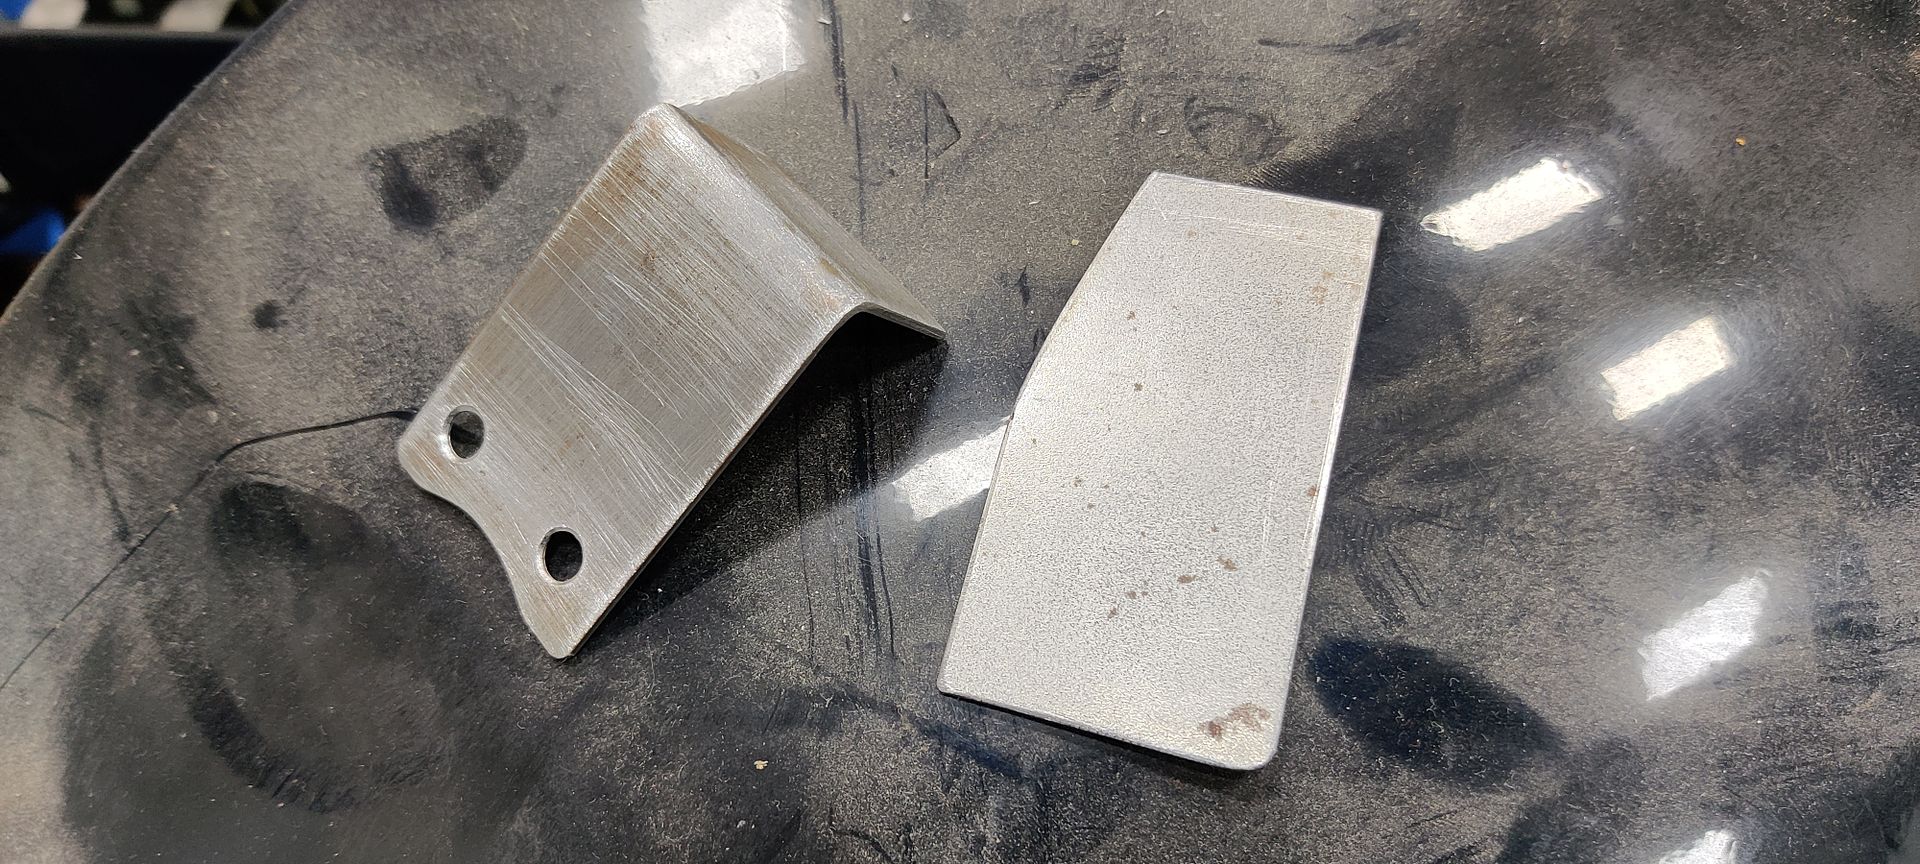
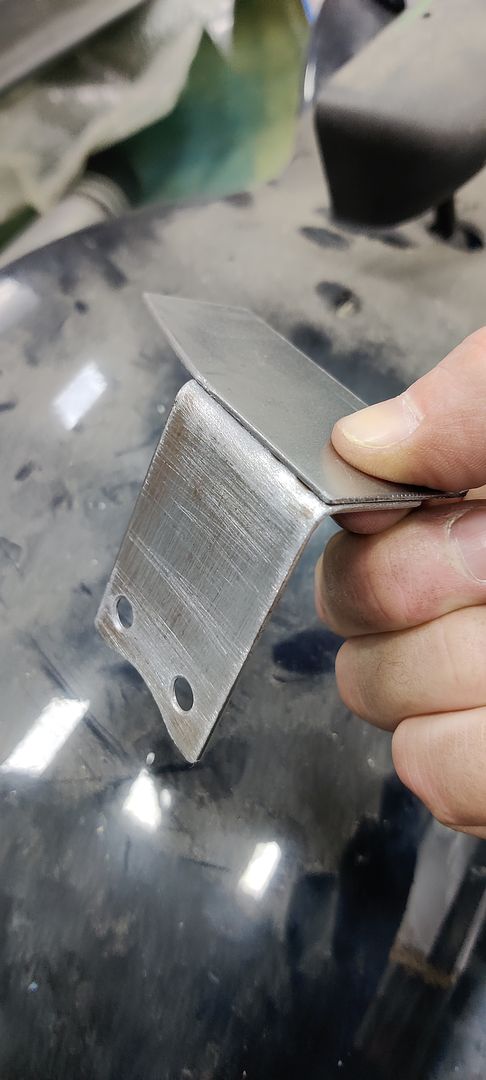
Brackets welded up and painted black.
Oil cooler mounted to allow measuring up for coolant hoses and position of electric water pump.
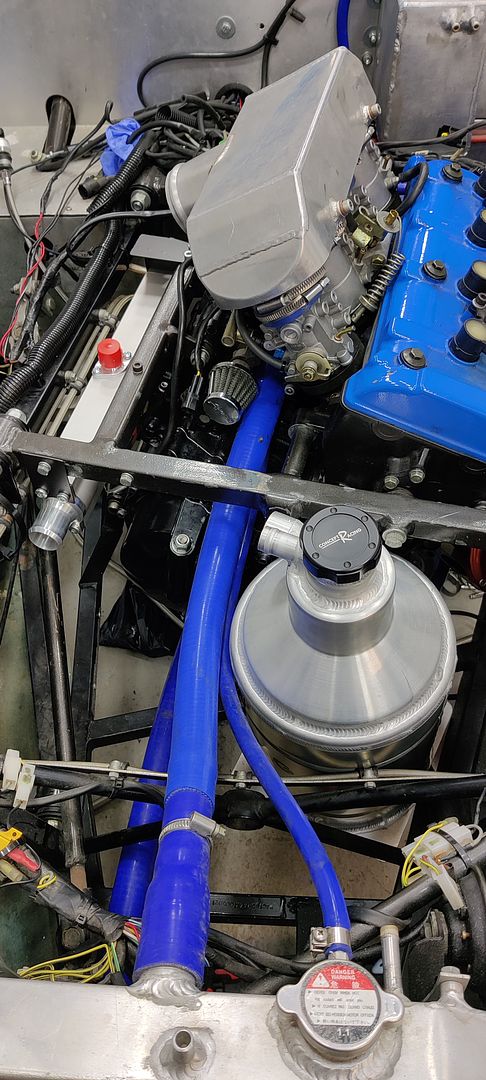
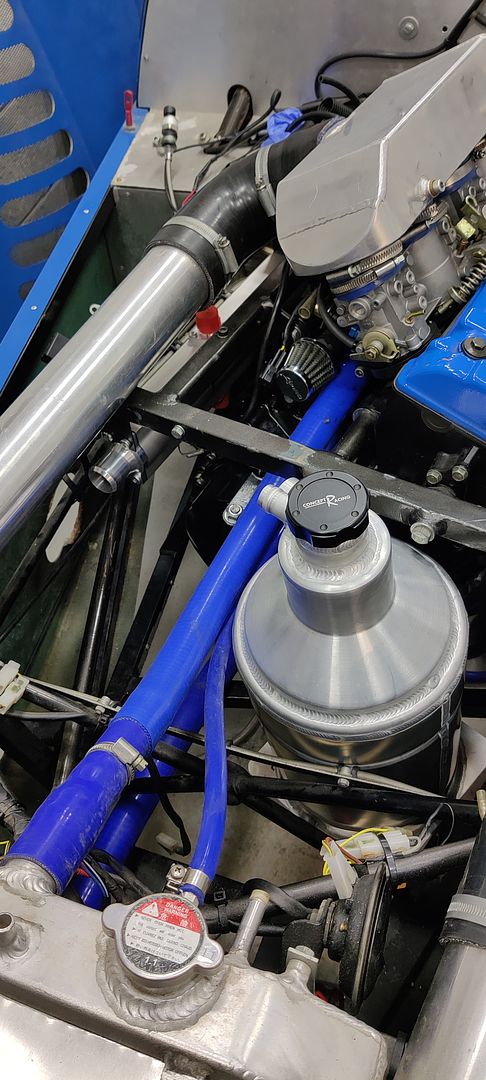
Inlet manifold and boost pipework in position, engine bay is tight but workable.
Rear bracket parts
Brackets welded up and painted black.
Oil cooler mounted to allow measuring up for coolant hoses and position of electric water pump.
Inlet manifold and boost pipework in position, engine bay is tight but workable.
Gassing Station | Kit Cars | Top of Page | What's New | My Stuff