Mac#1 Motorsport Worx Build
Discussion


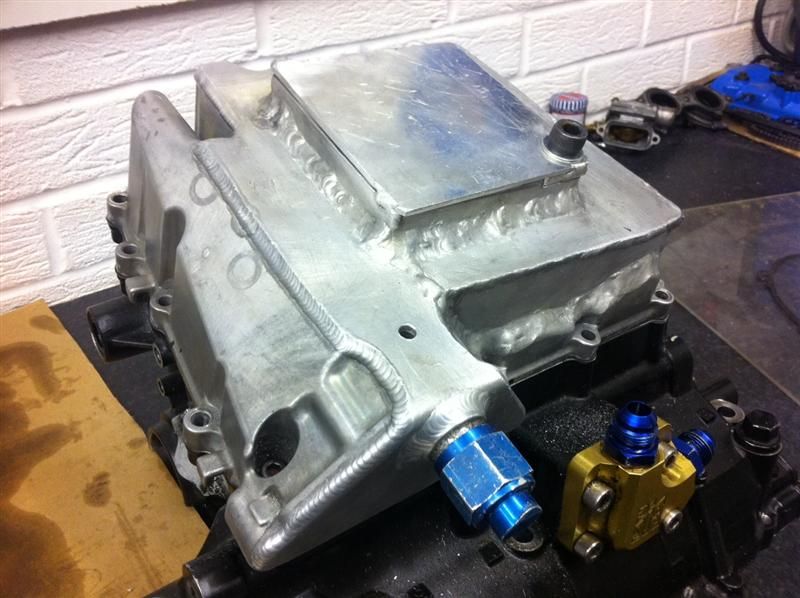
I made a base plate for the sump and tacked it in position, it has a drain hole tapped into the corner to allow the oil to bedrained from thecentral sump area. I'm not sure if i'll redo this plate and have the drain hole in the side to give a shade more ground clearance.
The new bearings finally arrived at kawasaki, part numbers for my future reference are
Big end bearing shells : Black 92139-0027 (8 off)
Main bearing shells, journals 1, 5 : Blue 92139-0029 (4 off)
Main bearing shells, journals 2, 3, 4 : Blue 92139-0032 (6 off)
A dummy build was carried out, checking big end and main bearing clearances with the plastigage supplied with the Carrillo rods, all ok.
The crankshaft was also measured for runout/bend, end float/side clearance and the conrods were also measured for side clearance, all ok.
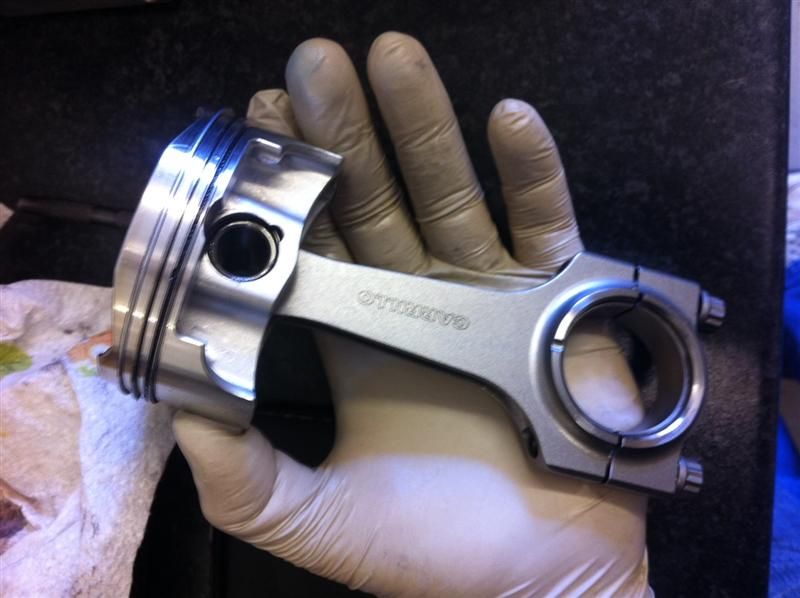
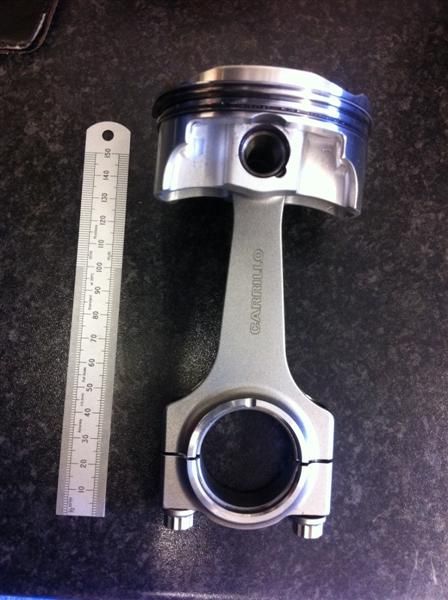
The Carrillo rods were fitted to the pistons, here's a couple of photos of them, for no reason in particular, other than I like them
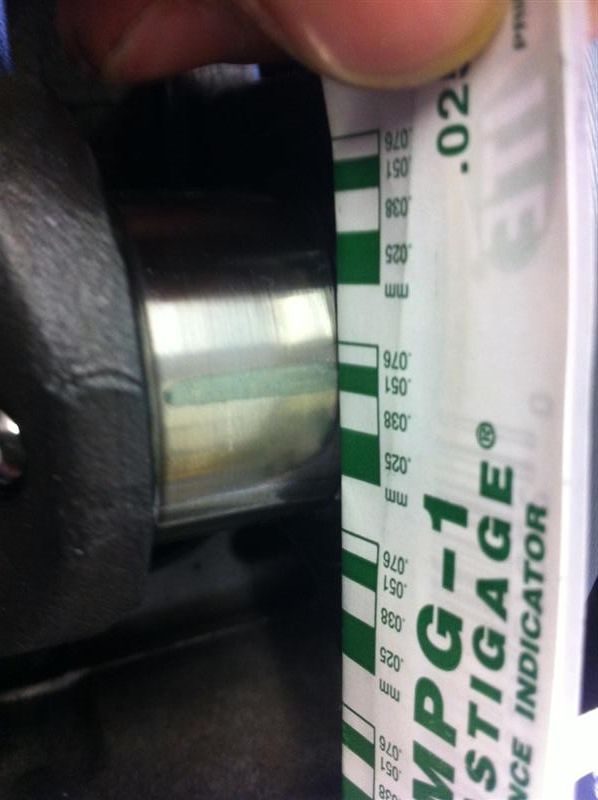
The con rod bolts are measured for stretch when fitted, this ensures they are tightened correctly.
To do this you need to measure the free length of the bolts (46.30mm), check the table in the supplied booklet, the supplied M8 CARR bolts require a stretch of 0.11mm-0.15mm, so the correctly stretched length needs to be between 46.41mm and 46.45mm with no more than 43Nm (32lbft) of torque being used.
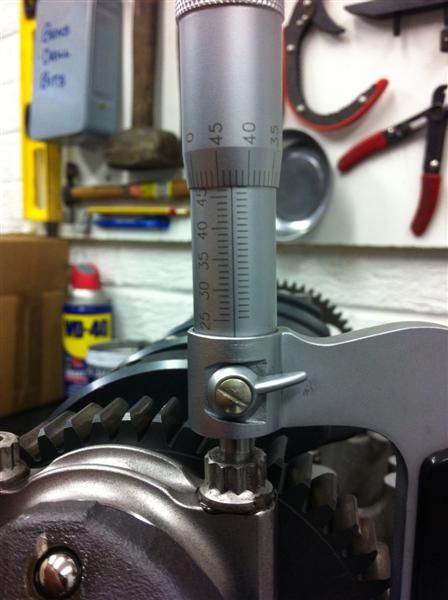
Here is a con rod bolt being measured for stretch with a micrometer
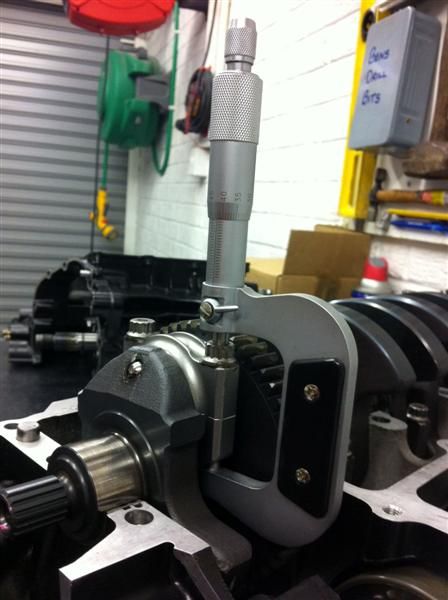
Here you can see the bolt length measures 46.43mm, which is within the recommended stretch range, this was achieved with 43Nm of torque.
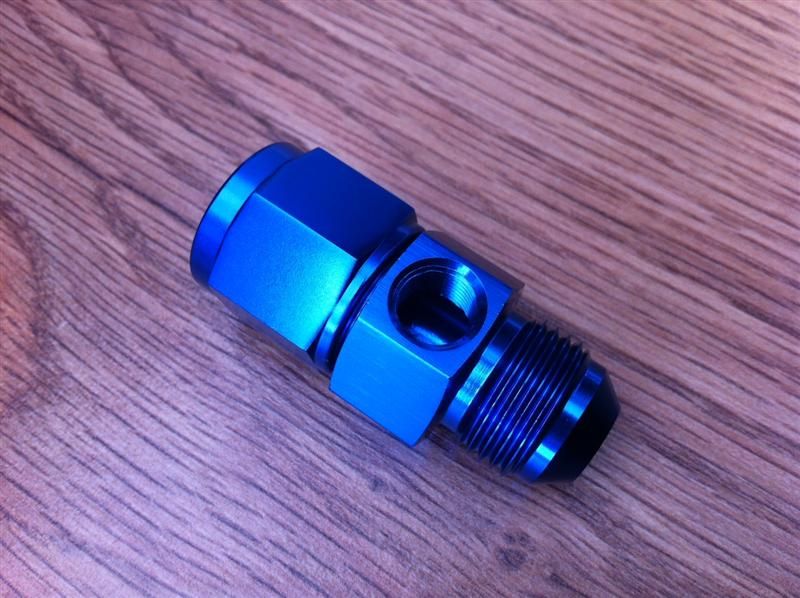
The postman dropped off this -8 to 1/8" NPT adaptor to allow me to fit an oil pressure gauge sender to the engine.
The new bearings finally arrived at kawasaki, part numbers for my future reference are
Big end bearing shells : Black 92139-0027 (8 off)
Main bearing shells, journals 1, 5 : Blue 92139-0029 (4 off)
Main bearing shells, journals 2, 3, 4 : Blue 92139-0032 (6 off)
A dummy build was carried out, checking big end and main bearing clearances with the plastigage supplied with the Carrillo rods, all ok.
The crankshaft was also measured for runout/bend, end float/side clearance and the conrods were also measured for side clearance, all ok.
The Carrillo rods were fitted to the pistons, here's a couple of photos of them, for no reason in particular, other than I like them
The con rod bolts are measured for stretch when fitted, this ensures they are tightened correctly.
To do this you need to measure the free length of the bolts (46.30mm), check the table in the supplied booklet, the supplied M8 CARR bolts require a stretch of 0.11mm-0.15mm, so the correctly stretched length needs to be between 46.41mm and 46.45mm with no more than 43Nm (32lbft) of torque being used.
Here is a con rod bolt being measured for stretch with a micrometer
Here you can see the bolt length measures 46.43mm, which is within the recommended stretch range, this was achieved with 43Nm of torque.
The postman dropped off this -8 to 1/8" NPT adaptor to allow me to fit an oil pressure gauge sender to the engine.
Sealer was applied to the lower engine casing and then the two were put together, bolts/washers fitted and torqued, then the generator, clutch, oil pump, water pump etc were fitted.
Sump finished and fitted.
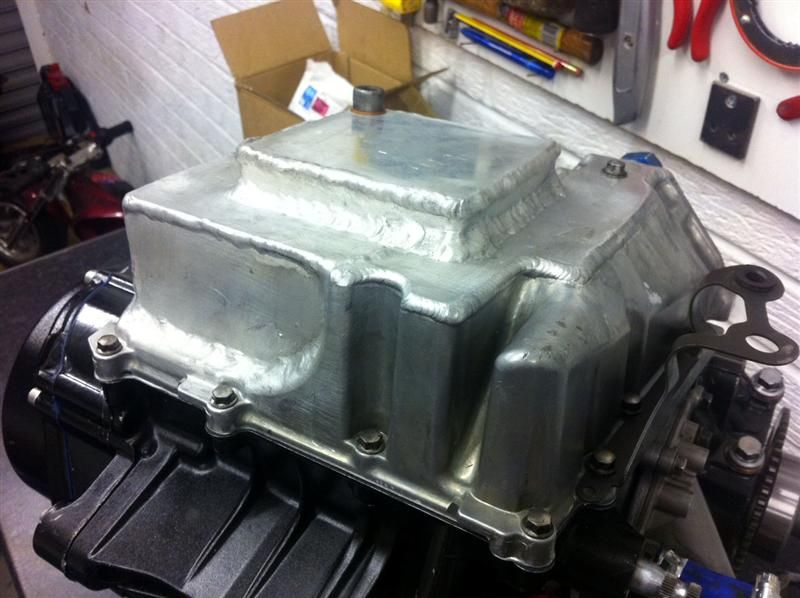
The next things on the to do list are the starter motor and it's gears/covers, then the timing chain and cylinder head.
Sump finished and fitted.
The next things on the to do list are the starter motor and it's gears/covers, then the timing chain and cylinder head.
Here's a small update, I got the cylinder head and cams fitted, then timed it all up.
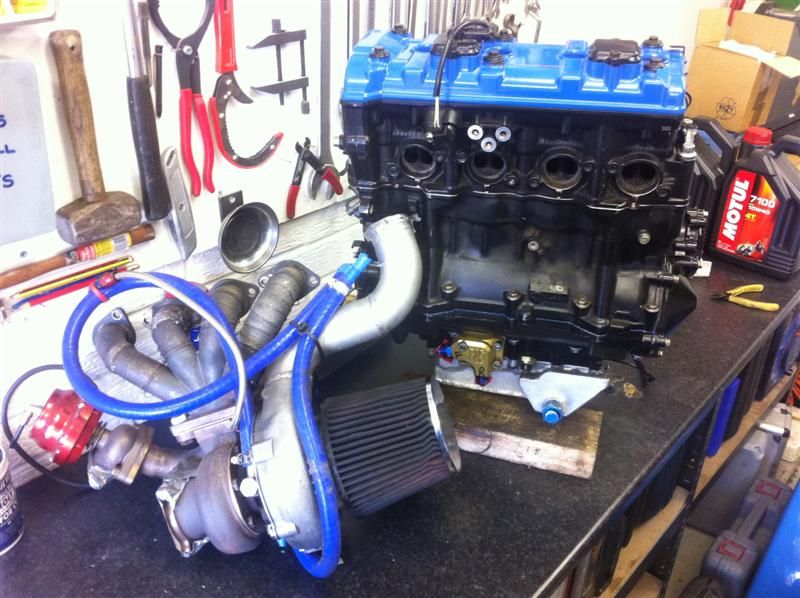
The old exhaust manifold wrap was very flakey and had started to fall off so I removed it to start again, but found the manifold had cracked in numerous places around the collector, doh! It's since been repaired and is ready to go, when I get some free time.
The old exhaust manifold wrap was very flakey and had started to fall off so I removed it to start again, but found the manifold had cracked in numerous places around the collector, doh! It's since been repaired and is ready to go, when I get some free time.
RyanDD said:
Really nice build.
I think a motorbike engine is a car is good fun
but a turbo bike engine! Nuts
That sump is very tasty
Thanks very much :-)I think a motorbike engine is a car is good fun
but a turbo bike engine! Nuts
That sump is very tasty
teabagger said:
any updates on this??
See below...rdodger said:
Any more updates?
I forgot to update this thread a while ago, the manifolds were fitted to the engine, engine put in the car, exhaust fitted and everything plumbed in.Today the weather has been canny so I've had the car outside on the drive and got the engine running, nice to hear it again :-)
I've recently had some work done by Damien at Daytuner, i'll post more info and photos of those things tomorrow.
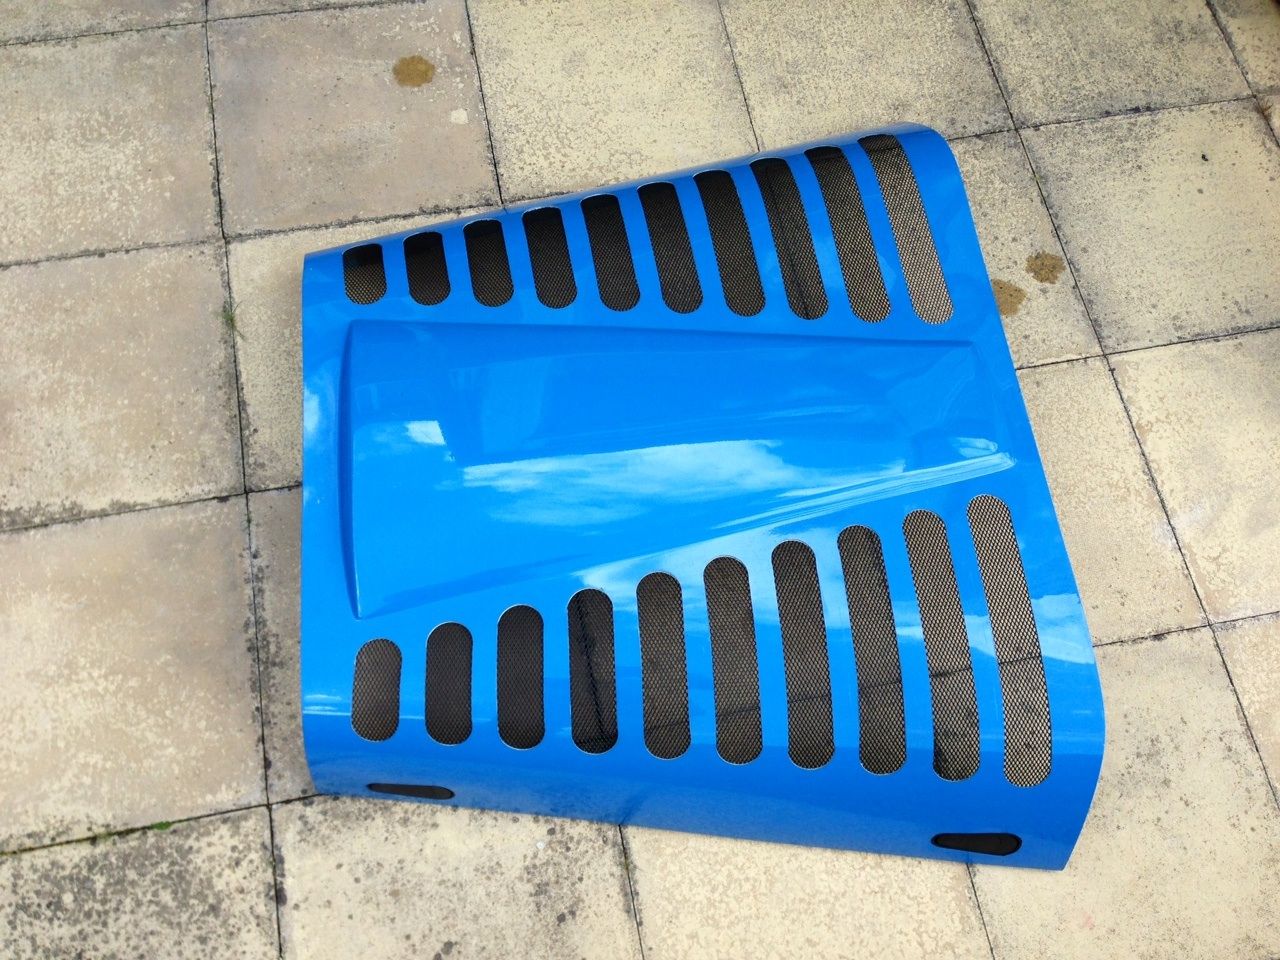
Today I took advantage of the nice weather and bonded mesh to the bonnet, here's the finished article
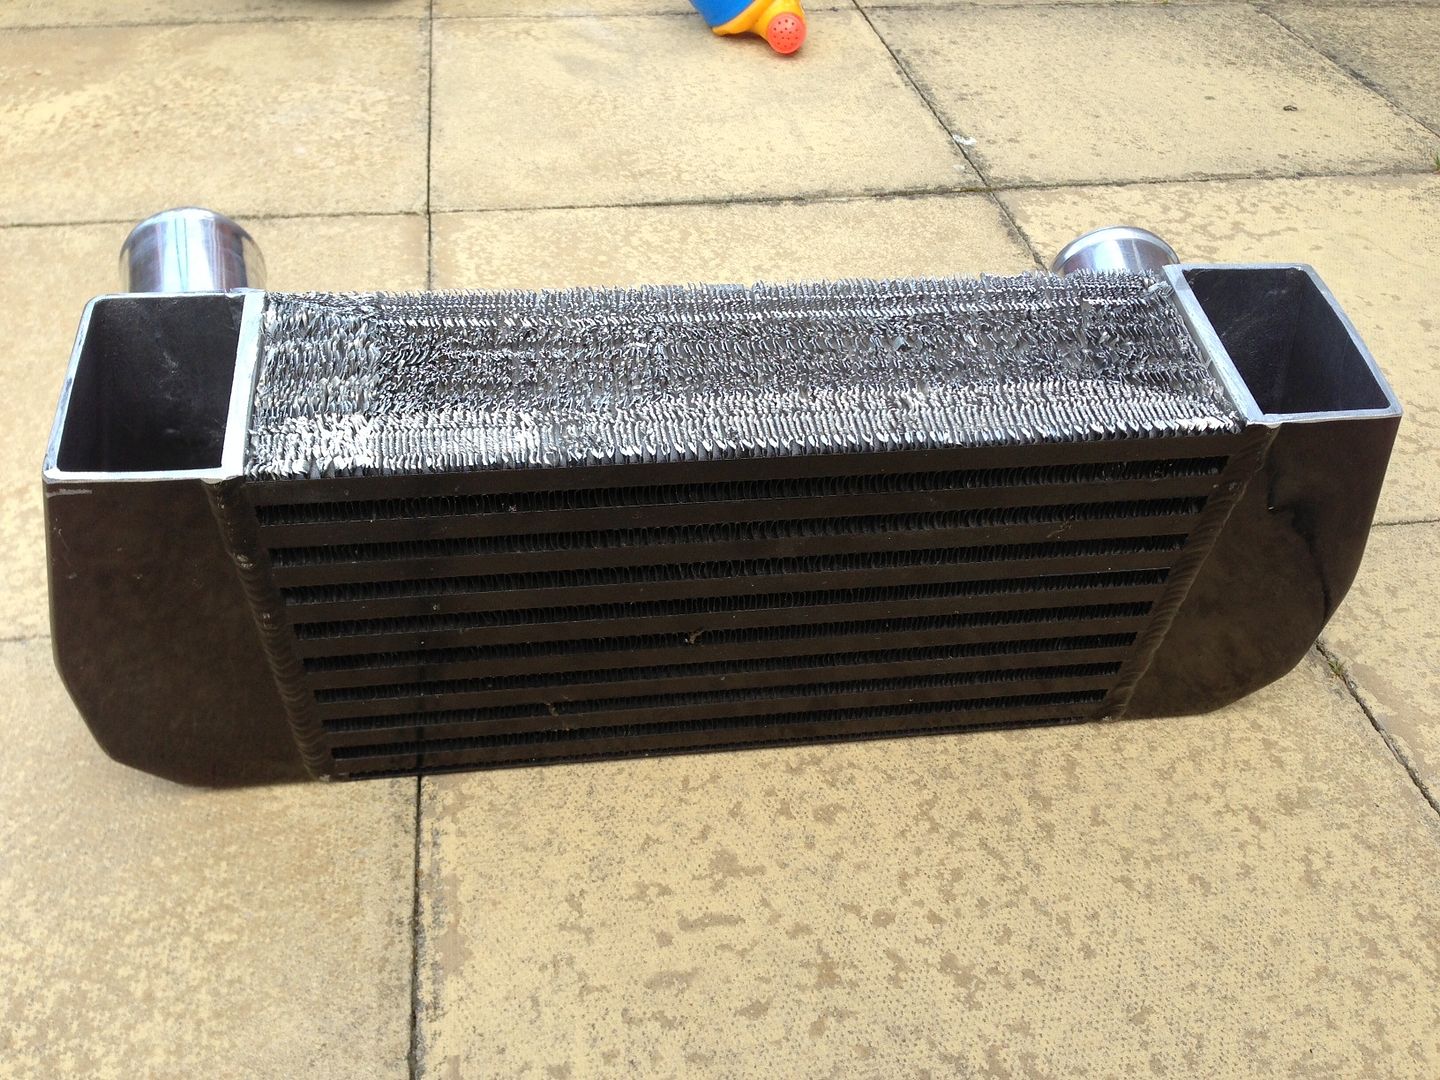
I also cut 1/3 off the bottom of the intercooler to allow more air to the radiator, when at steady throttle on hot days the water temp was reaching and settling out at 102 degrees C but the inlet charge air temp was 37 deg C max, around 5-7 degrees over ambient air temp, so it looks like the cooler is more than up to the job, hence deciding to reduce the size a little.
Here's how the intercooler currently looks

Edited by Red16 on Thursday 25th July 19:31
Edited by Red16 on Thursday 25th July 19:45
While the car was at Daytuner the following things were carried out,
Fuel injectors cleaned and tested.
A charging issue was rectified.
Power Commander and all associated wiring sensors removed.
MBE 9A4 ECU and required sensors installed and mapped.
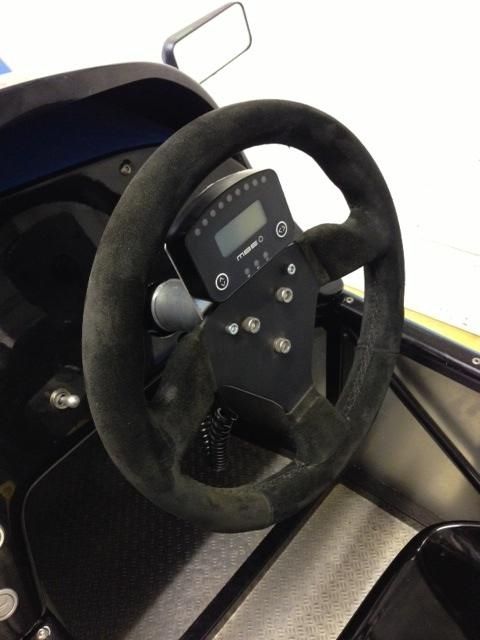
MBE 995 dash display fitted to the steering wheel.
The Davies Craig water pump, radiator fan and turbo cooler fan were all wired up to an ECU output to allow them to all run according to temperature, the water pump also runs on after ECU turned off to aid turbo cooling.
Here's the MBE 995 dash display fitted to the steering wheel, it displays gear position, boost/vacuum pressure, coolant temperature, oil pressure, RPM, air charge temperature and battery voltage, it also has shift lights at the top and warning lights at the bottom.
Fuel injectors cleaned and tested.
A charging issue was rectified.
Power Commander and all associated wiring sensors removed.
MBE 9A4 ECU and required sensors installed and mapped.
MBE 995 dash display fitted to the steering wheel.
The Davies Craig water pump, radiator fan and turbo cooler fan were all wired up to an ECU output to allow them to all run according to temperature, the water pump also runs on after ECU turned off to aid turbo cooling.
Here's the MBE 995 dash display fitted to the steering wheel, it displays gear position, boost/vacuum pressure, coolant temperature, oil pressure, RPM, air charge temperature and battery voltage, it also has shift lights at the top and warning lights at the bottom.

Yesterday I got on with modifying the intercooler.
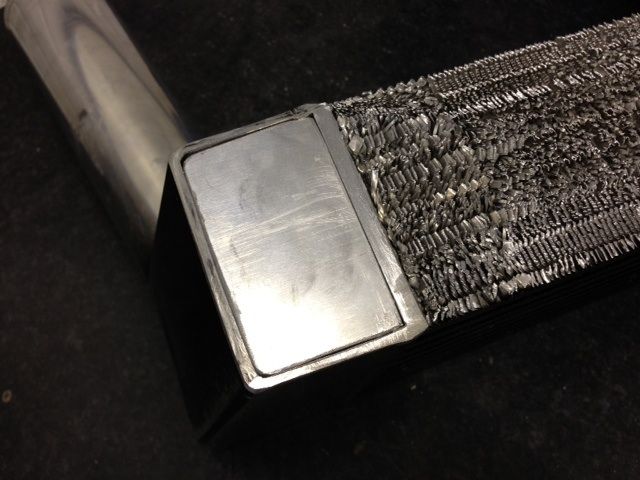
I made an aluminium plate to seal the bottom of each end tank, they were a snug fit so they pushed nicely into place, here's one in position
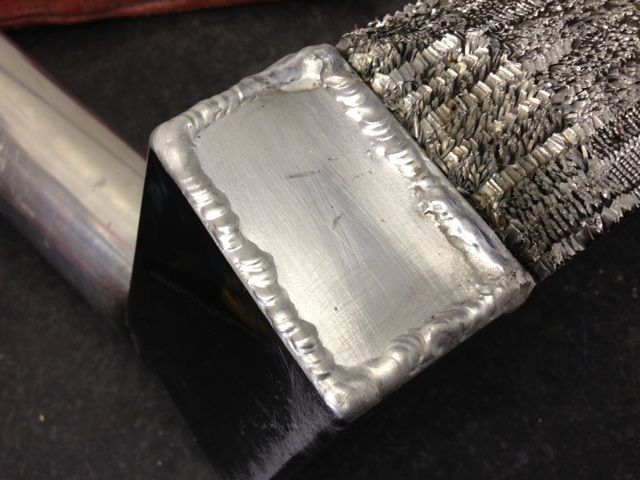
Welded up, not perfect welding but I'm happy my TIG welding is improving
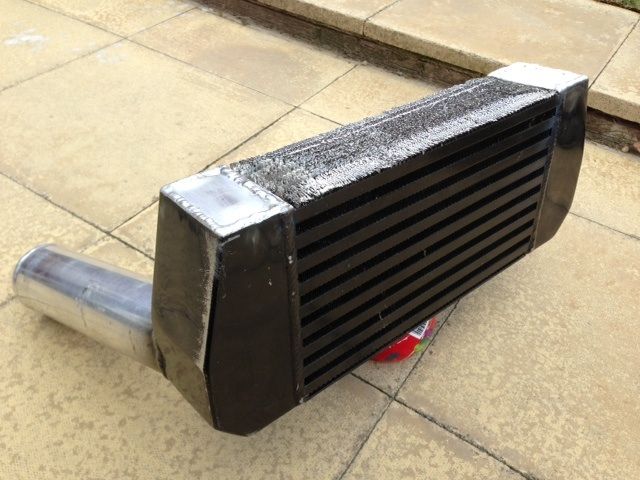
The finished intercooler
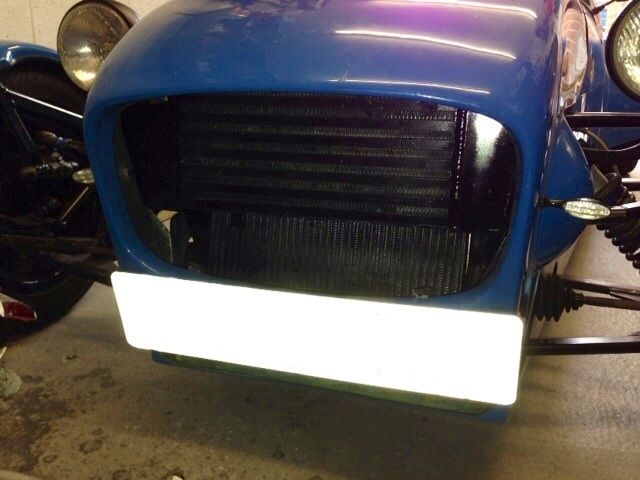
With the mesh in the nose cone removed, you can see how much more radiator is now exposed
The car was built back up and taken for a test drive, it was a scorching hot day, water temps maxed at 90 deg C while driving and 92 deg C in short traffic jams, air charge temps were around the same as before maxing out at 39 deg C.
All in all I'm really happy with the days work!
I made an aluminium plate to seal the bottom of each end tank, they were a snug fit so they pushed nicely into place, here's one in position

Welded up, not perfect welding but I'm happy my TIG welding is improving

The finished intercooler

With the mesh in the nose cone removed, you can see how much more radiator is now exposed

The car was built back up and taken for a test drive, it was a scorching hot day, water temps maxed at 90 deg C while driving and 92 deg C in short traffic jams, air charge temps were around the same as before maxing out at 39 deg C.
All in all I'm really happy with the days work!
Edited by Red16 on Sunday 28th July 10:50

Tested the new sump modifications out the other day, gave the car a good run out, everything appears well, no leaks, oil pressure looking good etc.
Unfortunately later on the car began smoking, mainly as it came on and off boost, the turbo was the most likely cause but further investigation was required.
A compression test of the engine showed 155psi on all four cylinders proved the engine was ok.
Took a boost pipe off and found oil inside, then took the K&N off the compressor housing and found oil in the inlet!
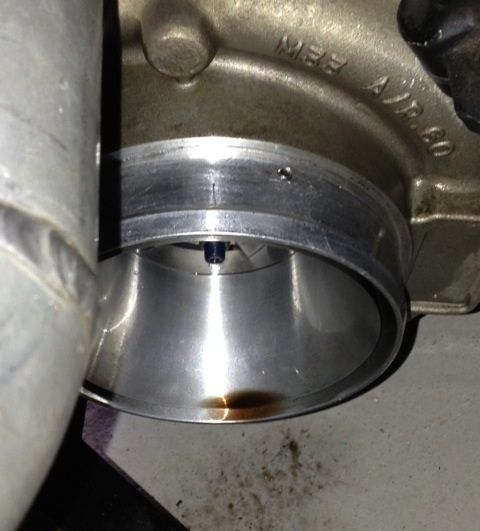
I've been in touch with Owen Developments today and I've bought a GT3071R core with metal bearing cage upgrade and a new ported compressor housing as my current on is too big, i'll install that core into my current turbine housing before fitting to the car.
rdodger said:
It's seems to be fighting you all the way.
Lets hope this is an end to it!
Aye it certainly is, hopefully thing's get easier now!Lets hope this is an end to it!
Yazza54 said:
Please don't take this the wrong way because it looks an awesome bit of kit and I've been nothing but impressed with the standard of your work, but at any point have you regretted going the balls to the wall turbo BEC route?
It seems to have spent more time in bits than on the road
Feel free to speak your mind, as long as it's genuine/constructive I've got no issue with that.It seems to have spent more time in bits than on the road
I actually enjoy tinkering and modifying the car, not so much repairing it though! The thing is, you only really find out if your one off parts/modifications really work once you put them on the car and drive it, consider the time/money mainstream manufacturers spend on research and development, and also the fact it's running 300-350bhp per litre, you have to expect/accept a portion of failures/hiccups during the initial running in period! Hopefully most of mine are behind me now!
I don't regret going the turbo BEC route at all, I've been in a few standard BEC's and although they are quick they just don't give you the attack on your senses that my car does. One thing I would change would be to go for a Hayabusa Turbo if I wasto do another turbo BEC, the reason being they are just so well catered for in terms of aftermarket parts and experience, you're spoilt if you have one.
Totally respect what you are doing, I`m in a development phase with mine as well. It`s all working well at 1.3 bar now and am currently having it dynoed for an AFR and coolant temp check. It should really be at 2.3 bar and around 500+ bhp but it`s so damn rampant at 1.3 I can only imagine what it will be like with the wick turned up. My problem is I don`t have the apparent skills you do so it`s expensive on the labour front.
I have designed a new charge cooling set up which whilst it won`t win any beauty contests will hopefully build some safety in.
I`m looking at doubling the size of the chargecooler core and more than doubling the size of the pre rad, which is already large as pre rads go. I`m taking it out of the front of the car and relocating it in the rear, either inside roll bar hoop at an angle or in place of the rear "parcel shelf" with fans to pull through and a scoop to ensure adequate airflow.
This will increase airflow to engine coolant rad as well although I don`t seem to be having probs in that area. Turning up boost on 7-alikes can just turn them into heat pumps!
jontysafe said:
Totally respect what you are doing, I`m in a development phase with mine as well. It`s all working well at 1.3 bar now and am currently having it dynoed for an AFR and coolant temp check. It should really be at 2.3 bar and around 500+ bhp but it`s so damn rampant at 1.3 I can only imagine what it will be like with the wick turned up. My problem is I don`t have the apparent skills you do so it`s expensive on the labour front.
I have designed a new charge cooling set up which whilst it won`t win any beauty contests will hopefully build some safety in.
I`m looking at doubling the size of the chargecooler core and more than doubling the size of the pre rad, which is already large as pre rads go. I`m taking it out of the front of the car and relocating it in the rear, either inside roll bar hoop at an angle or in place of the rear "parcel shelf" with fans to pull through and a scoop to ensure adequate airflow.
This will increase airflow to engine coolant rad as well although I don`t seem to be having probs in that area. Turning up boost on 7-alikes can just turn them into heat pumps!
I'e not seen your thread on Passionford lately, are you still keeping it up to date?I have designed a new charge cooling set up which whilst it won`t win any beauty contests will hopefully build some safety in.
I`m looking at doubling the size of the chargecooler core and more than doubling the size of the pre rad, which is already large as pre rads go. I`m taking it out of the front of the car and relocating it in the rear, either inside roll bar hoop at an angle or in place of the rear "parcel shelf" with fans to pull through and a scoop to ensure adequate airflow.
This will increase airflow to engine coolant rad as well although I don`t seem to be having probs in that area. Turning up boost on 7-alikes can just turn them into heat pumps!
What power/torque is your YB making at 1.3bar?
Do you have any figures for your current water/air temperatures?
With regards to your chargecooler, function over form is where it's at, once you've proved it works reliably then you can make it look pretty! I've got a turbo cooler rad in the parcel shelf area, if you don't have a solid floor on the diff area of the car it gets a decent amount of airflow, I'm tempted to fit a solid floor and then duct the rear rad sometime in the future.
TheAlastair34 said:
great work.
i follow the thread on afew forums locost builders, passionford etc....
ive also had smiliar issue in regards to turbo faliure and cooling in my 7, ive just fitted a turbo cooler and pump to mine after my turbo went after 200 miles!!!
Thanks very much for following the cars progress.i follow the thread on afew forums locost builders, passionford etc....
ive also had smiliar issue in regards to turbo faliure and cooling in my 7, ive just fitted a turbo cooler and pump to mine after my turbo went after 200 miles!!!
Do you have a build thread on your car? I'd be interested to see it if you do.
Gassing Station | Kit Cars | Top of Page | What's New | My Stuff