Body work on pre-80s TVRs
Discussion


Is this a good item?
We see a lot of cars being stripped of paint and prepared for the paint.
Some people do a lot themselves and others leave it to the professional.
Seen building up wider arches, filling cracks, better fitting doors or engine covers aso. Discussions on ways of stripping (by hand sanding, soda blasting).
A lot of them do it for the first time so have questions that can be answered by the more experienced.
We can learn from their mistakes and folds.
Like myself last night.
Finishing the doors for the second layer of plaster by the body shop the door fell with a broken corner as a result.
Remedial work to be done today because want the doors out to the painter.
Show a picture later (just for fun).
Hans
Hopes A doesn't mind.

Oke thanks for the inspiration.
I used "renovation the body of Corvette Stingray" as a beginning.
But working on the body is different biscuit (dutch saying).
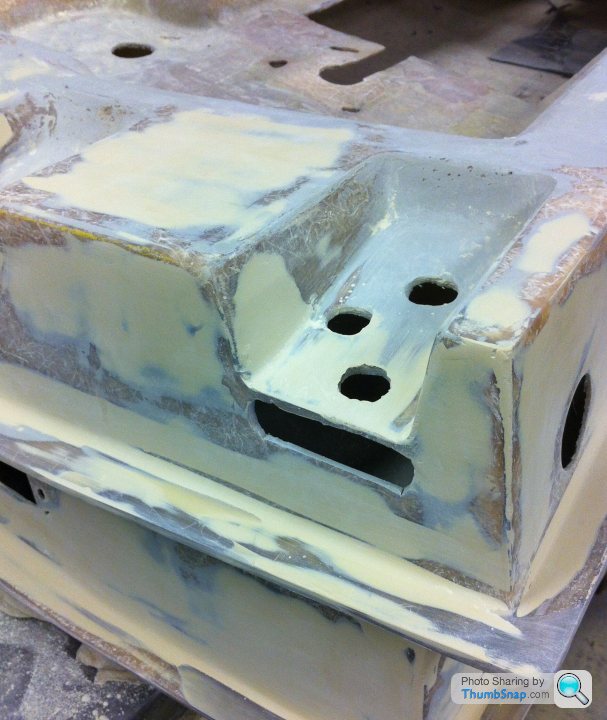
As promised the pics of repair the door that fell out of my hands.
First a basket from tape, enough cloth and poly. Always use enough cloth when new layer is thick otherwise you will find small cracks in the top afterwards.
These will always break the paint later.
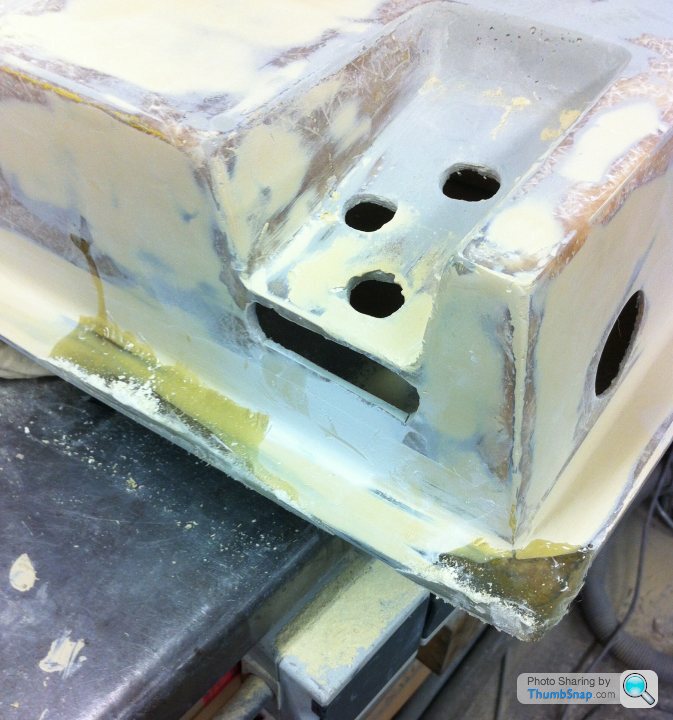
Than rubbing untill all is flat and smooth.
So doors brought to the painter today reunited with the body.
Hans
I used "renovation the body of Corvette Stingray" as a beginning.
But working on the body is different biscuit (dutch saying).
As promised the pics of repair the door that fell out of my hands.
First a basket from tape, enough cloth and poly. Always use enough cloth when new layer is thick otherwise you will find small cracks in the top afterwards.
These will always break the paint later.
Than rubbing untill all is flat and smooth.
So doors brought to the painter today reunited with the body.
Hans
I have removed all the paint and topcoat in many places.
First of all because there was accident ?? damage to the door and engine cover with cracks.
But is that wise?
My painter said NO when I showed him the body when the stripping was ready.
According to him better just sand down the body and repair where necessary.
Than you do not have to apply new topcoat.
On my car we had to apply new topcoat (2x) sanding inbetween, than filler + rubbing , at last paint.
What advice do you have?
After sanding the body
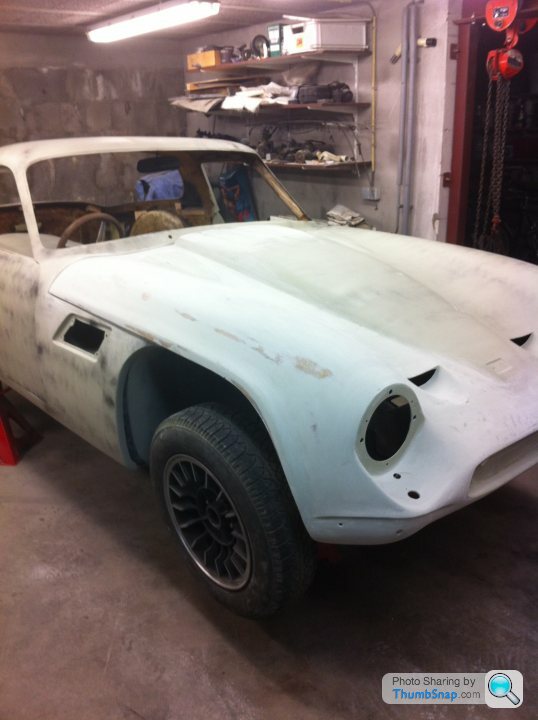
First layer of top coat.
Engine cover after 2nd layer of top coat and partly rubbed. Looks promising.
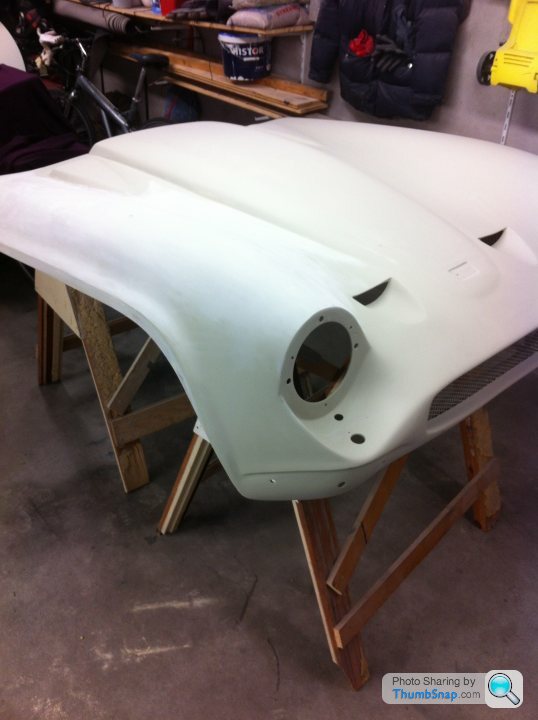
A test with matt sheen filler in the most repaired section in engine bay. Matt finish covers a lot of the repairs.
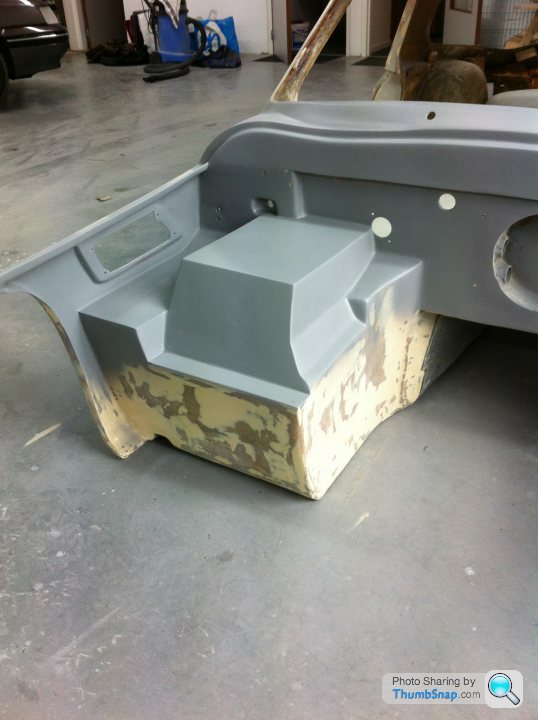
Possibly I will do that in the whole engine bay because the underside of the engine cover is too much work to smoothing.
Shall never be a mirror.
Hans
First of all because there was accident ?? damage to the door and engine cover with cracks.
But is that wise?
My painter said NO when I showed him the body when the stripping was ready.
According to him better just sand down the body and repair where necessary.
Than you do not have to apply new topcoat.
On my car we had to apply new topcoat (2x) sanding inbetween, than filler + rubbing , at last paint.
What advice do you have?
After sanding the body
First layer of top coat.
Engine cover after 2nd layer of top coat and partly rubbed. Looks promising.
A test with matt sheen filler in the most repaired section in engine bay. Matt finish covers a lot of the repairs.
Possibly I will do that in the whole engine bay because the underside of the engine cover is too much work to smoothing.
Shall never be a mirror.
Hans
I have removed all the paint and topcoat in many places.
First of all because there was accident ?? damage to the door and engine cover with cracks.
But is that wise?
My painter said NO when I showed him the body when the stripping was ready.
According to him better just sand down the body and repair where necessary.
Than you do not have to apply new topcoat.
On my car we had to apply new topcoat (2x) sanding inbetween, than filler + rubbing , at last paint.
What advice do you have?
After sanding the body
First layer of top coat.
Engine cover after 2nd layer of top coat and partly rubbed. Looks promising.
A test with matt sheen filler in the most repaired section in engine bay. Matt finish covers a lot of the repairs.
Possibly I will do that in the whole engine bay because the underside of the engine cover is too much work to smoothing.
Shall never be a mirror.
Hans
OH, OH, The Pain !! been there !!
Had to rebuild the rear driver's corner on mine, discovered previous repair made up of aluminium strips, pop rivets, and filler. Whoever crashed it had the good idea to pick up the bigger GRP bits, but then made a total mess of it.
Managed to get it all out and reuse the bigger bits (to keep the shape right, as near as possible) and glass it back up properly.
I found the rain leak in the footwell was caused by a crack along the pedal box corner moulding ...
Just remember all that filler will slow the car down
Looks fantastic !!
Before the body goes for the final painting, I checked the underbody.
Filled all original holes for holding the floor mats. Had done some with plaster but they became vissible after the last rubbing.
So had them filled with poly + mats.
Now I am wondering whether it is necessary to stiffen the floors for fixing the seating rails?
And the wheel arches for fixing the 3-point harness?
Any suggestions?
Hans
.
The seat belts of cause will need fixing to the chassis by some form of steel. May be wide 3/16 strapping but it's got to be firm it's you're and you're passengers life's !!!!! Seats most people fit steel straps fixed again to the chassis but it's up to you personally I would never bolt a seat just to fibreglass steel floors for me. Richard
Now I am wondering whether it is necessary to stiffen the floors for fixing the seating rails?
And the wheel arches for fixing the 3-point harness?
Any suggestions?
Hans
[/quote]
To clear FIA regulations is a 30x30mm square tube needed, I made mine below the floor in order keep the seat position as low as possible.
For street use, will I recommend 4 pieces of 1mm stainless steel, 4" X 15", per seat, sandwished above and below the floor, and bolted to the frame at the 2 rear cabin fixing points.
For street use, will I recommend 4 pieces of 1mm stainless steel, 4" X 15", per seat, sandwished above and below the floor, and bolted to the frame at the 2 rear cabin fixing points.
[quote=griff 200].
The seat belts of cause will need fixing to the chassis by some form of steel. May be wide 3/16 strapping but it's got to be firm it's you're and you're passengers life's !!!!! Seats most people fit steel straps fixed again to the chassis but it's up to you personally I would never bolt a seat just to fibreglass steel floors for me. Richard
Hi Richard,
Of course the 2 fixing to the floor I will use the body to chassis fixing for.
But what is a good solution for the cross belt over the shoulder to the top mount above the roller mechanism on the wheel arch.
Any picture and type of belt?
I wanted to use the TR7 type.
Hans
For comparison -
My S3 originally had fixed belts, and just a small 'spreader' plate at the back, which I'm sure would not pass today's standards. I have fitted inertia reels, and a roll cage (to protect me, not for track work). I made a couple of folded plates which bolt to the underneath of the wheel arch through to the rollbar mounts, and then up inside each wheel arch to support both the seatbelt reel and the shackle mounted at the top of the wheel arch.
This way I reckon the force would have to rip out most of the floor and wheelarch, so should be strong enough....
I made up a new mounting solution for my seatbelts. It consists of a 20mm box section tube with captive nuts welded into it and welded on spreader plates which have bolt holes for mounting to the chassis. It was a bit of a squeeze but it slides inbetween the chassis and the body just above the diff and then I used 4 exhaust U bolts round the chassis tubes to bolt through the spreader plates. A couple of discreet holes in the body gives access to the captive nuts from inside the cabin and the seat belts bolt down into these.
Monkeythree said:
I made up a new mounting solution for my seatbelts. It consists of a 20mm box section tube with captive nuts welded into it and welded on spreader plates which have bolt holes for mounting to the chassis. It was a bit of a squeeze but it slides inbetween the chassis and the body just above the diff and then I used 4 exhaust U bolts round the chassis tubes to bolt through the spreader plates. A couple of discreet holes in the body gives access to the captive nuts from inside the cabin and the seat belts bolt down into these.
Hi M.Not completely clear to me.
What type of belts do you have?
And the fixing point you made is that for the roll mechanism?
On many pic you see the roll mechanism fixed in the luggage area.
Why not just behind the seat near the B post?
And to grab the belt you have to stretch a lot. Has someone made a nice solution for that?
The S serie have a nice detail for that.
Hans
Hansoplast said:
Monkeythree said:
I made up a new mounting solution for my seatbelts. It consists of a 20mm box section tube with captive nuts welded into it and welded on spreader plates which have bolt holes for mounting to the chassis. It was a bit of a squeeze but it slides inbetween the chassis and the body just above the diff and then I used 4 exhaust U bolts round the chassis tubes to bolt through the spreader plates. A couple of discreet holes in the body gives access to the captive nuts from inside the cabin and the seat belts bolt down into these.
Hi M.Not completely clear to me.
What type of belts do you have?
And the fixing point you made is that for the roll mechanism?
On many pic you see the roll mechanism fixed in the luggage area.
Why not just behind the seat near the B post?
And to grab the belt you have to stretch a lot. Has someone made a nice solution for that?
The S serie have a nice detail for that.
Hans
I have fixed harness type belts but my solution for the rear mount would also work for inertia reel belts (roll mechanism). It locates the fixing point on the luggage area floor but the steel bar I made is fixed to the chassis, not to the fibreglass body. I made holes in the body so the bolts go through the body and into the bar which is fixed to the top of the chassis. The problem with the B post area is that there is no chassis there to fix to, only fibreglass which in my opinion is not strong enough.
Hope that helps explain it a bit better.
Tom
Gassing Station | TVR Classics | Top of Page | What's New | My Stuff