Tuscan Challenge Road Car (at the moment) build project
Discussion


wadsapple said:
where's your fuel cell ,swirl pot and pumps Nick if you don't mind me asking. How you getting on with it are you out this year ?
I've got a 60L ATL sat where the passenger seat would be, and it's got internal pumps so no swirl pot or external pumps. It could be modified to stick it in the boot though with a little modification if I ever wanted a passenger seat. It has harness mounts on the passenger side anyway so it looks like this has been done before.Mines sat still for a while not under a sheet in Steves workshop. After the diff exploded it took a while to get a new one (GKN plate diff with a chrome moly crown wheel etc. That's now in the car I believe but we stopped working on it as I wanted to have my Chim back - thought it needed a service, but turns out it needed new outriggers and an engine rebuild so that took rather a while. Still not quite finished in fact - but when that's back on the road soon hopefully, we'll get the Tuscan back out and crack on with getting it done - not sure when it will be out yet but my job has gone mad over the last year so it's been very hard finding the time to do anything involving cars for a while now :-(
450Nick said:
My car design may help you...
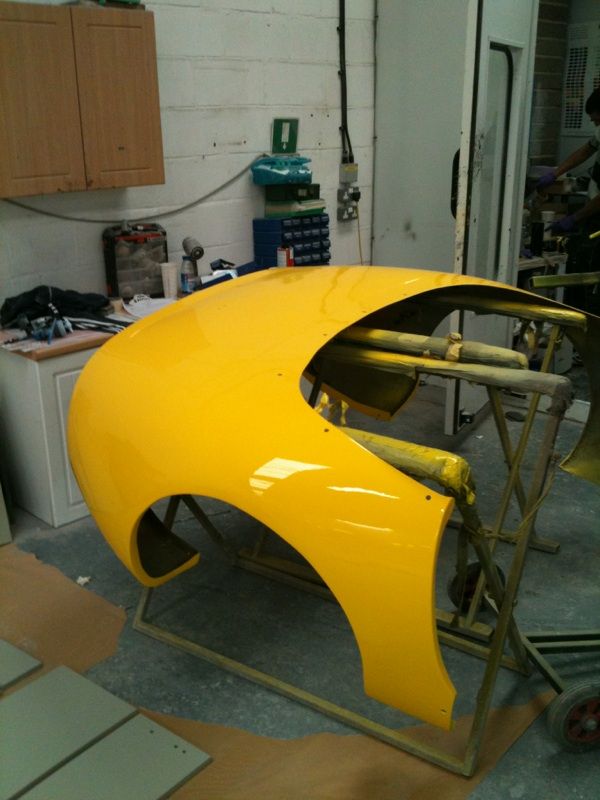
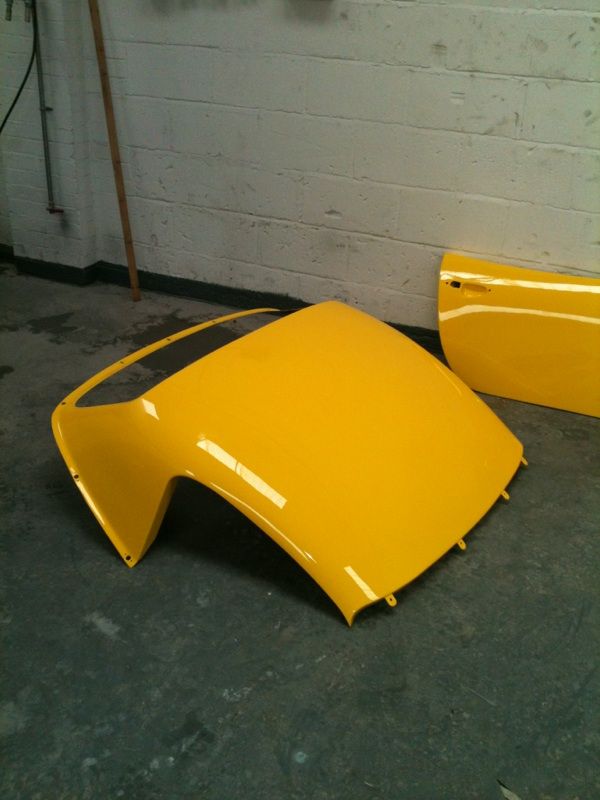
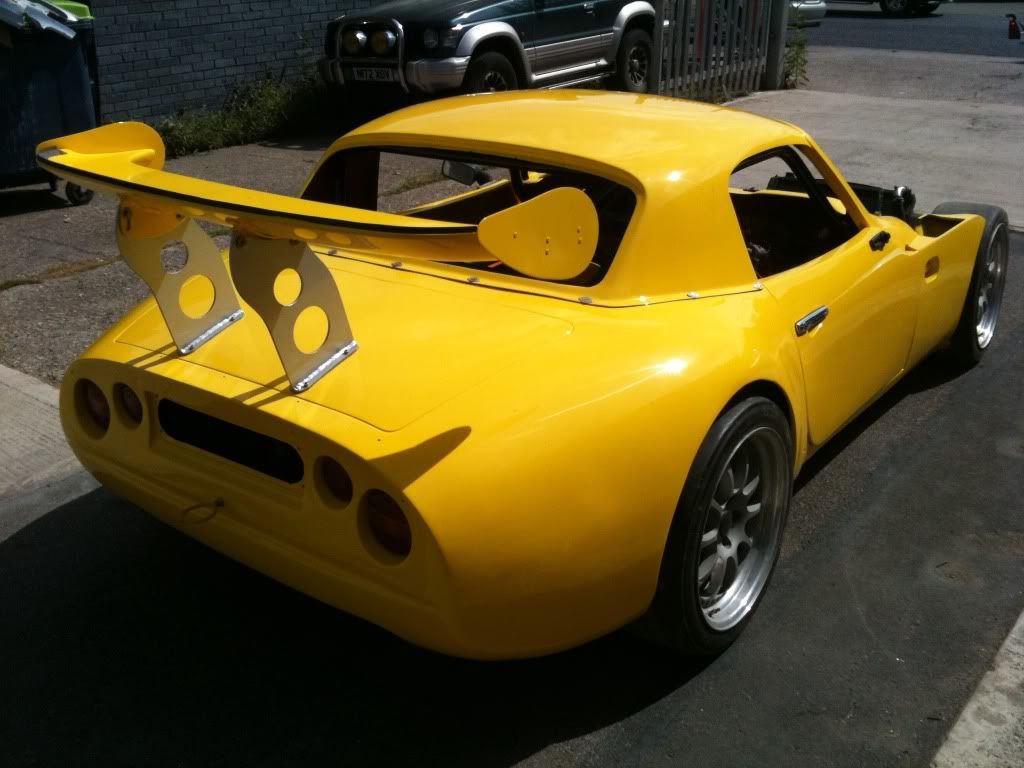
I have a version of the John Reid roof, though the previous owners cut off the roll over hoop, and I've mounted the seat sufficiently low that this is ok from a rules perspective. My roof has several metal tabs glassed into the leading edge. These fit into corresponding slots in the top of the windscreen, and have a rubber/foam seal along the same edge to dissuade water from entering.
To secure the roof down, there are then several 'dzeus' fasteners around the base edge of the roof, locking into the rear clam with another weatherproof strip. The only gap remaining is therefore the windows, which could be sealed with a window and rubber or water channel. Simple, but the roof is very sturdy when fitted, and has waterproof seals to prevent water ingress. Seems a simple solution to me...
Hi mateI have a version of the John Reid roof, though the previous owners cut off the roll over hoop, and I've mounted the seat sufficiently low that this is ok from a rules perspective. My roof has several metal tabs glassed into the leading edge. These fit into corresponding slots in the top of the windscreen, and have a rubber/foam seal along the same edge to dissuade water from entering.
To secure the roof down, there are then several 'dzeus' fasteners around the base edge of the roof, locking into the rear clam with another weatherproof strip. The only gap remaining is therefore the windows, which could be sealed with a window and rubber or water channel. Simple, but the roof is very sturdy when fitted, and has waterproof seals to prevent water ingress. Seems a simple solution to me...
Hope things are progressing in the right direction...love the look of your car brill...your roof arrangement sounds good, you mention lugs in the top of the screen, are mine the same as yours?

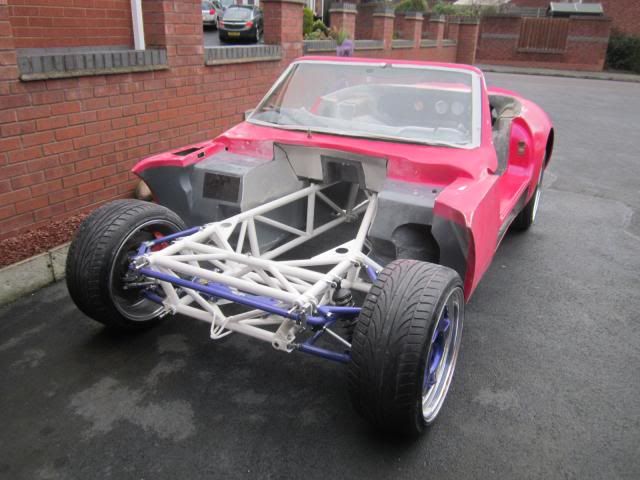
Bit more progress made recently ..
The drivers footwell has pedal box mounts on the chassis I am going to use floor mounted pedals, as the drivers side floor is relatively thin and flexible we decided to cut two sections out of the floor...
Karl did one side I did the other....now the body sits on the chassis, we put bolts through the floor to secure...they lined up with the chassis which is good....
Almost looks like a car...
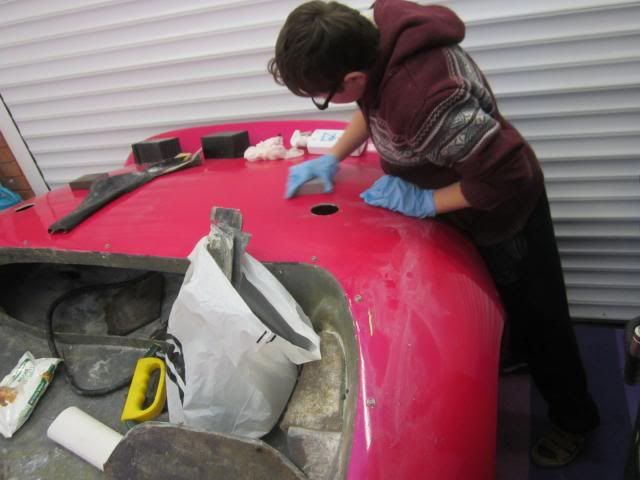
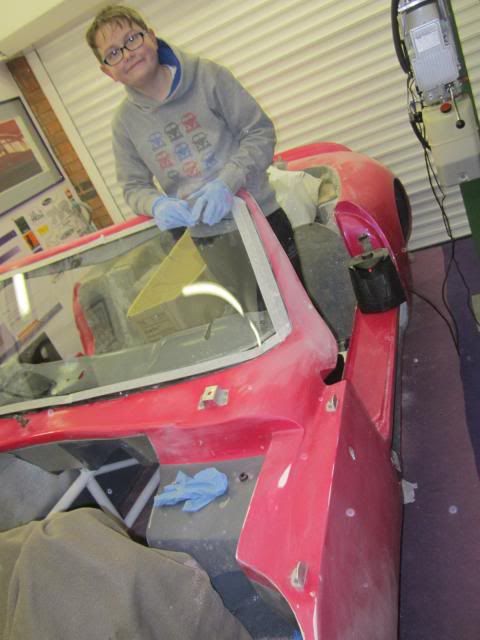
George was keen to start prepping the body for paint so I let him have a go...hasn't done a bad job in all fairness...much more prep required though but it's a start and keeps him happy..also removed all body fixings ..
Next thing was the roll cage ...
The drivers footwell has pedal box mounts on the chassis I am going to use floor mounted pedals, as the drivers side floor is relatively thin and flexible we decided to cut two sections out of the floor...

Karl did one side I did the other....now the body sits on the chassis, we put bolts through the floor to secure...they lined up with the chassis which is good....
Almost looks like a car...

George was keen to start prepping the body for paint so I let him have a go...hasn't done a bad job in all fairness...much more prep required though but it's a start and keeps him happy..also removed all body fixings ..


Next thing was the roll cage ...
wadsapple said:
Thanx for that nick food for thought, I hear you about work going mad . I have had to extend my working week to four hours, but obviously not all on the same day.;)
Haha that sounds pretty hectic - you lucky bugger!Yeah since September I've been spending my time flitting between Leeds, London, Germany, Italy, Cairo, Houston, Seattle, Florida, Singapore and Malaysia, with a ski trip and xmas at home in between. Haven't really been home other than to sort out some issues when I found out the guy I rented a room to had gone AWOL with several thousand pounds worth of stuff, and 3 months unpaid rent. So yeah the Tuscan has been a little down the priority list of late! Hopefully things will quiet down again fairly soon though and I'll have a chance to look at it but making the first race is probably unlikely! There's not a huge amount more to do though so it should end up on a track sometime this year fingers crossed!
schimg said:
Hi mate
Hope things are progressing in the right direction...love the look of your car brill...your roof arrangement sounds good, you mention lugs in the top of the screen, are mine the same as yours?
Thanks Steve! It seems like a bit of an uphill struggle at the moment, but I'll get there eventually! Yes my windscreen looks pretty similar to yours, the slots fit the lugs pretty tightly, and then the fasteners at the back lock it in nice and tight, though it comes off in a few seconds. If you were to integrate some windows or rain channels/deflectors into the A-pillars then you'd have something perfectly driveable in the wet I'd say... Hope things are progressing in the right direction...love the look of your car brill...your roof arrangement sounds good, you mention lugs in the top of the screen, are mine the same as yours?
450Nick said:
Thanks Steve! It seems like a bit of an uphill struggle at the moment, but I'll get there eventually! Yes my windscreen looks pretty similar to yours, the slots fit the lugs pretty tightly, and then the fasteners at the back lock it in nice and tight, though it comes off in a few seconds. If you were to integrate some windows or rain channels/deflectors into the A-pillars then you'd have something perfectly driveable in the wet I'd say...
Just read your reply yo Perry....sounds like you have been globe trotting! So doesn't sound like all doom and gloom regarding fitting roofs and sealing them... Griff and chimaera ones have a seal in the front that works but ours are obviously different ......toying with how to close off window area....plus how to secure car...locking aero catches and Newton filler is a start...
..at Race Retro Stoneliegh on Friday will see what there is ..going to keep an eye open for a pedal box.....JR will be there too ...got some on of the DTEC sail flags I borrowed for him

Cheers folks....been working on it when I get a moment......putting floor back took time....gonna spend the next hour painting the floor which I have now refabricated ....later we are off to John Eales for an AP Clutch and bearing.....
We will then get the engine and box back together .....take the body back off again ....borrow an engine hoist.....see how it sits within the engine bay.....see where to fab mounting points....obviously taking height etc into account.....weld it up....get a sump.....easy really!
Thanks for looking!
We will then get the engine and box back together .....take the body back off again ....borrow an engine hoist.....see how it sits within the engine bay.....see where to fab mounting points....obviously taking height etc into account.....weld it up....get a sump.....easy really!
Thanks for looking!
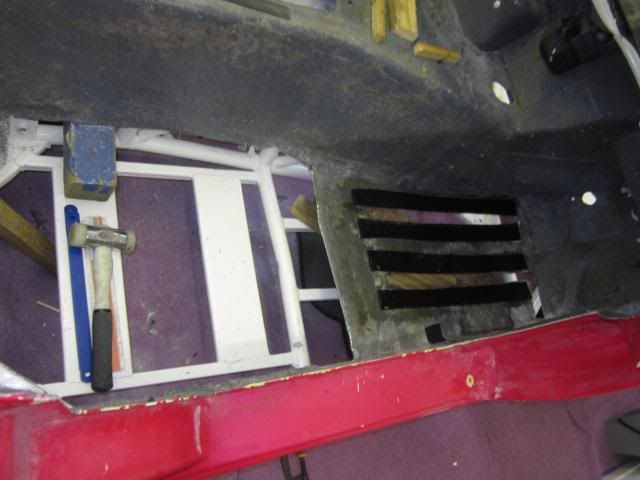
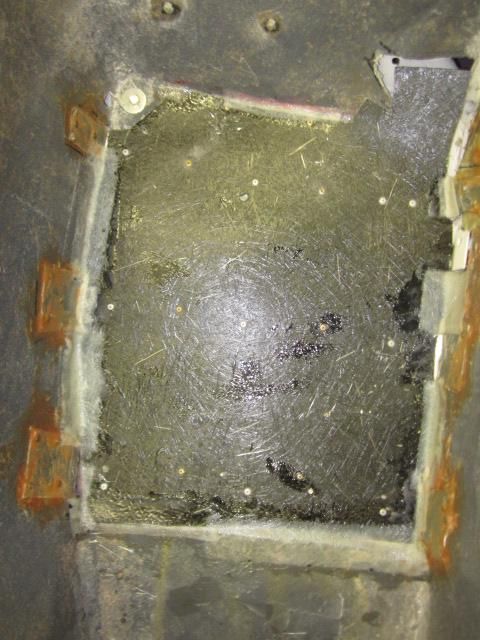
Right the floor...ended up cutting a lot of the floor away this was because I had welded in steel
cross section plates to accommodate the seats and additional seat belt and harness points ....on the passenger side and drivers side...
left me with big open areas...plus fresh air to bolt the body to the chassis....here is the driver side....in addition we cut the drivers footwell floor either side of the pedal box.....I then cut fibre glass strengthening strips and bonded them either side of the body where the pedal box mounts came through...these are the black strips of fibreglass ...
The floor sections I had cut out were about 13mm thick....there was no way I could re use them, so I made three aluminium supports for each seating area then riveted them to the tunnel section and sill section....
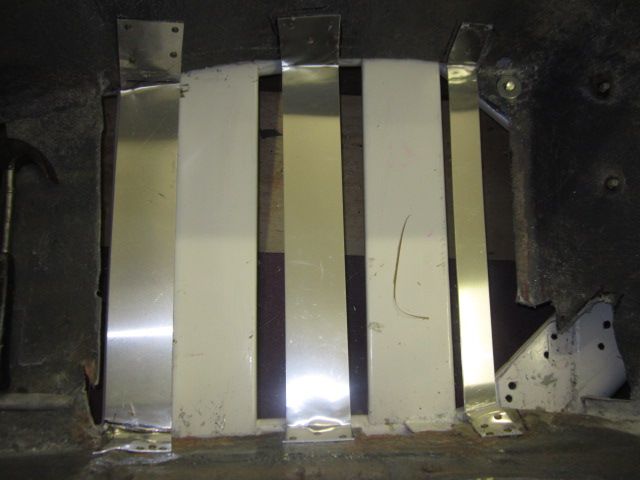
Then made a template of the area with an empty stella box....guess other brands would have done the trick though!
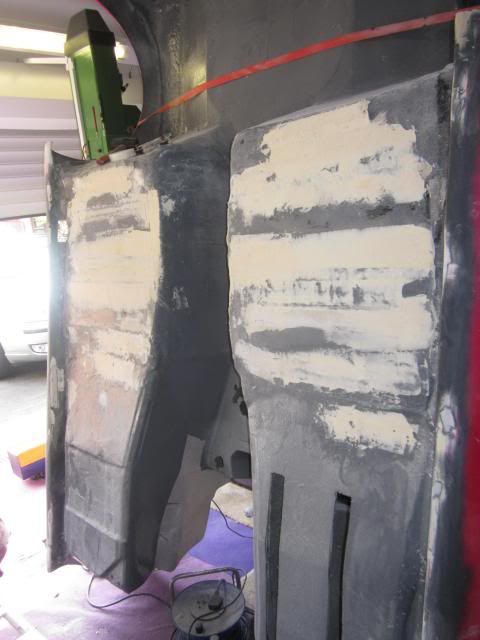
Then cut the flat fibreglass sheet that I had to shape....
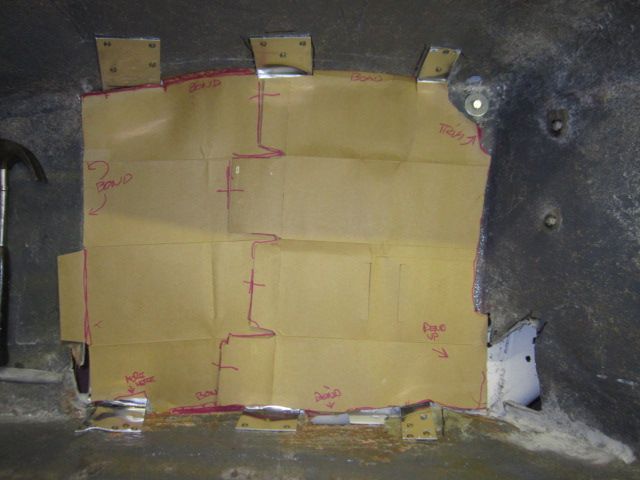
Riveted this to the aluminium....and bonded the edges with matting and resin...this was surprisingly strong and thin....making sure all the time that the floor I was trying to create was not going to come into contact with the chassis....sounds easy but it wasn't!
For extra strength I bonded another couple of layers of resin over the whole thing...leaving the ares where the body mounts free so that I could sort these areas out from underneath the car...
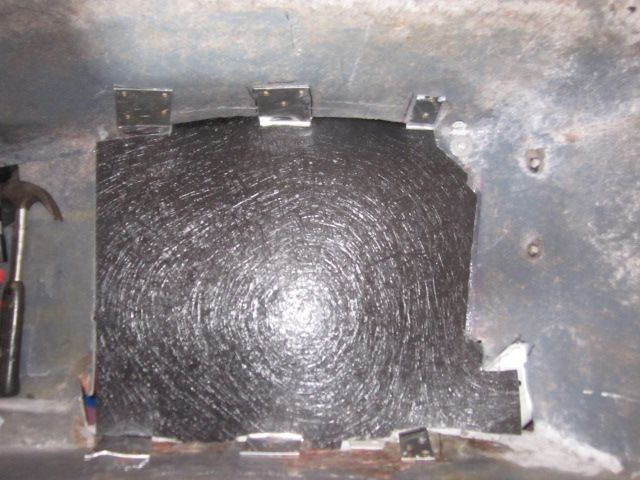
This is what it looked like sort of half way through....I got the paint colour matched to a brush-on grey...here I have done one side......

BUT I was unhappy with how uneven the floor looked from underneath....so smoothed out the whole area ....being mindful not to create a problem by having the body not clearing the chassis.....(are you still awake! lol)....thing is with this as that I will know that it is a bit rough underneath....I am in no rush I need to do it justice...being midful of keeping within budget and expertise...
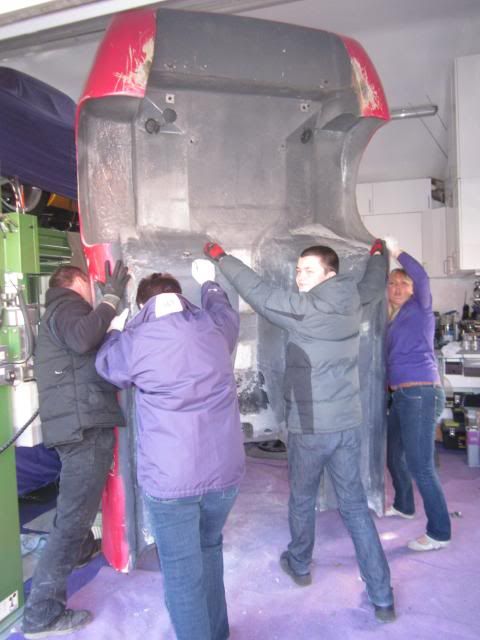
Then we released the body from the retaining straps....this time Liz, Ginny Karl and Ben moved the tub...whilst I took images...
cross section plates to accommodate the seats and additional seat belt and harness points ....on the passenger side and drivers side...
left me with big open areas...plus fresh air to bolt the body to the chassis....here is the driver side....in addition we cut the drivers footwell floor either side of the pedal box.....I then cut fibre glass strengthening strips and bonded them either side of the body where the pedal box mounts came through...these are the black strips of fibreglass ...

The floor sections I had cut out were about 13mm thick....there was no way I could re use them, so I made three aluminium supports for each seating area then riveted them to the tunnel section and sill section....

Then made a template of the area with an empty stella box....guess other brands would have done the trick though!

Then cut the flat fibreglass sheet that I had to shape....

Riveted this to the aluminium....and bonded the edges with matting and resin...this was surprisingly strong and thin....making sure all the time that the floor I was trying to create was not going to come into contact with the chassis....sounds easy but it wasn't!
For extra strength I bonded another couple of layers of resin over the whole thing...leaving the ares where the body mounts free so that I could sort these areas out from underneath the car...

This is what it looked like sort of half way through....I got the paint colour matched to a brush-on grey...here I have done one side......

BUT I was unhappy with how uneven the floor looked from underneath....so smoothed out the whole area ....being mindful not to create a problem by having the body not clearing the chassis.....(are you still awake! lol)....thing is with this as that I will know that it is a bit rough underneath....I am in no rush I need to do it justice...being midful of keeping within budget and expertise...

Then we released the body from the retaining straps....this time Liz, Ginny Karl and Ben moved the tub...whilst I took images...

Edited by schimg on Wednesday 26th March 18:44
Edited by schimg on Wednesday 26th March 19:12
Slowly does it....keep chipping away.... :-)
Called at Mr Eales's place a couple of weeks back (what a nice bloke and cracking set-up),
The second time we went there he had just started up a challenge car that had had an engine rebuild.....black car and was stunning, certainly puts mine to shame!
Anyway trip was useful got a proper AP friction and bearing, both the one's that were in my gearbox looked OK but just foolish not to replace at this stage....fitted the new bearing...
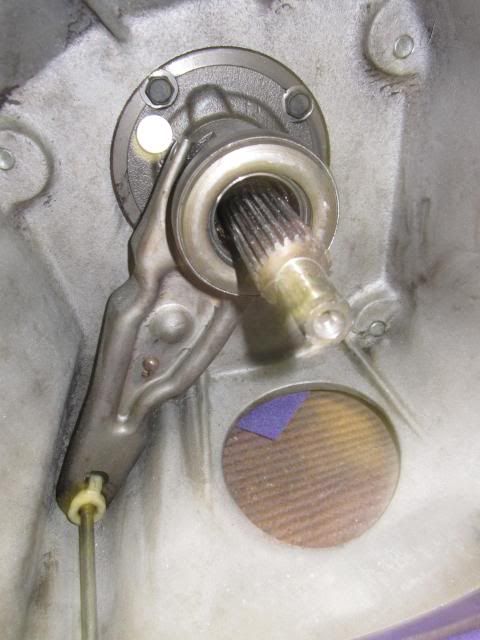
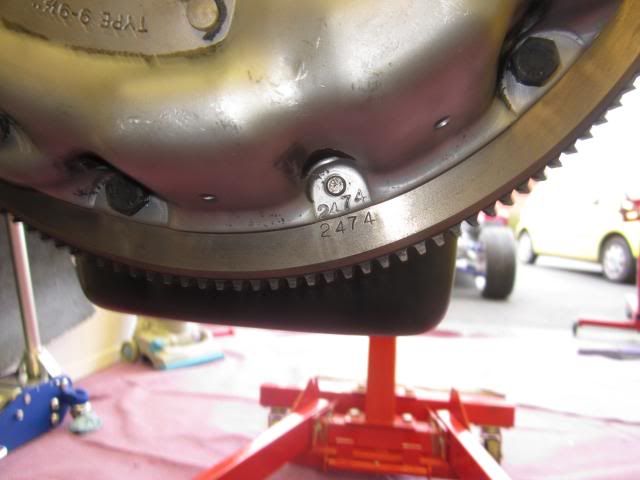
Good job we spoke with John as he pointed out the balance marks on the pressure plate which matches the rest of the engine...we would have probably noticed but good that he pointed this out to us...fitted the new AP racing friction plate too
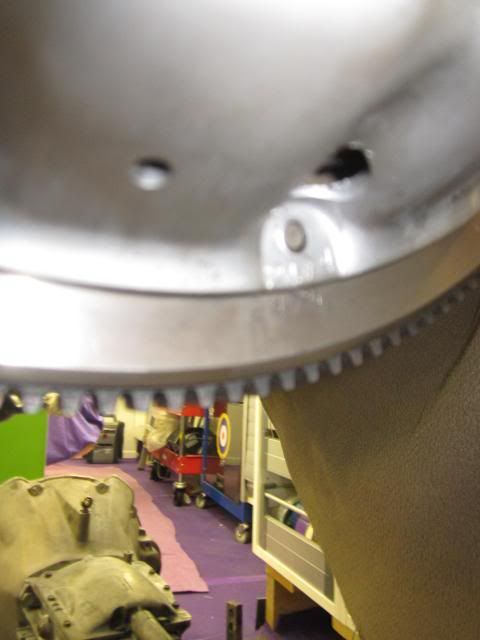
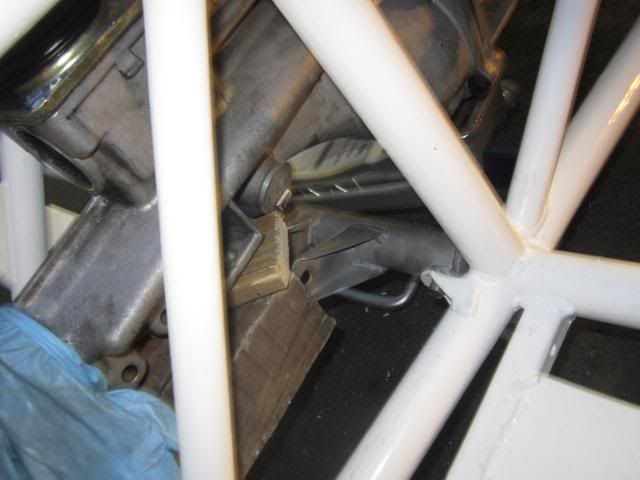
poor image that!
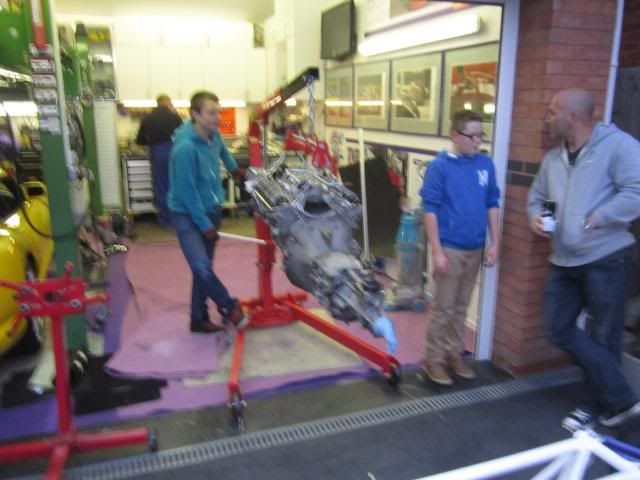
George and Ben attached the hoist chains..Ben will be an asset in years to come as Tim Hood is letting Ben help out on the race car...at the weekends which is cool for a budding mechanic
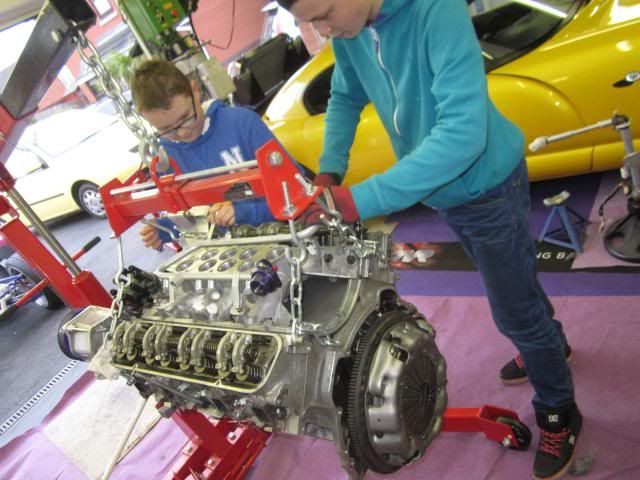
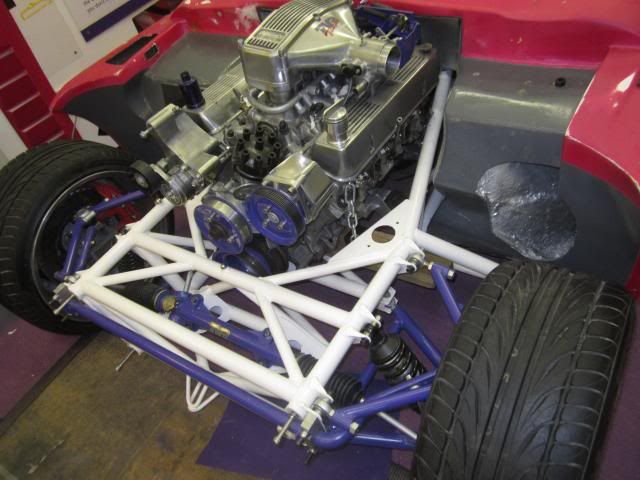
Then we put the engine and box together ...
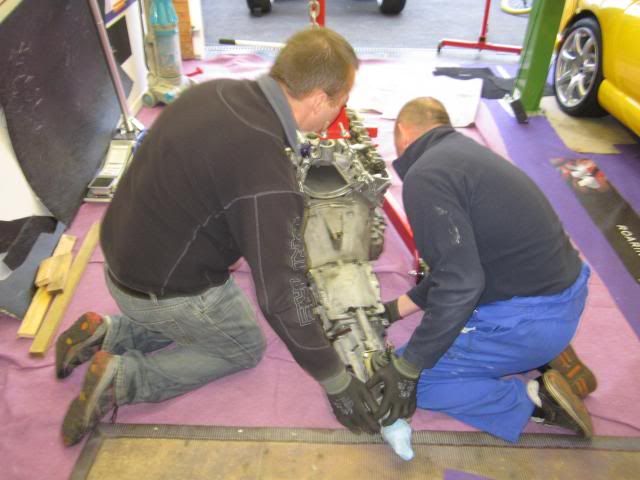
Whipped the body off...moved the engine and box over the chassis for the first "try-fit"
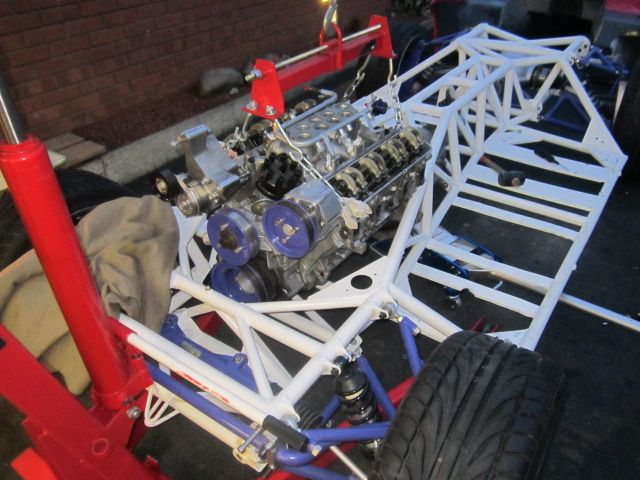
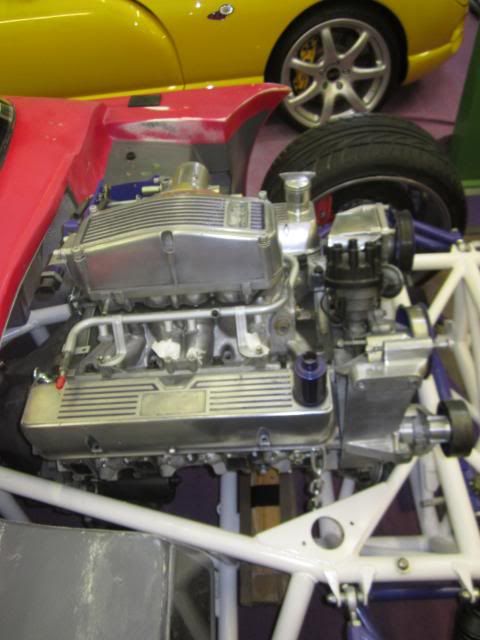
So have the "proper" rear gearbox cross member...
But not the rubber / link part to put on the cross member...
The gear stick appears to be there abouts....(probably wrong!)
But looks OK for a start...
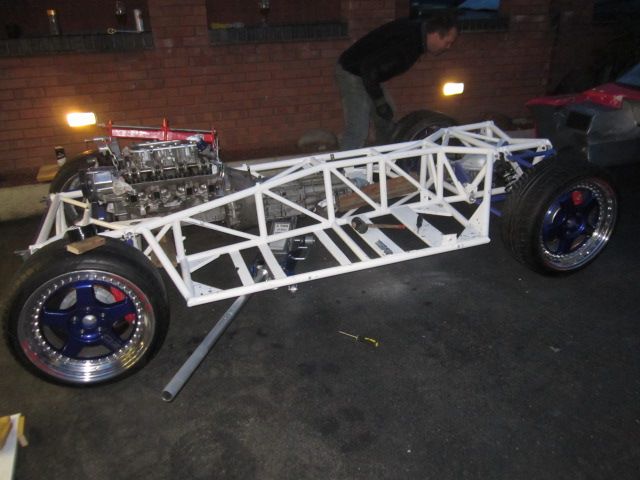
then we dropped the body back on ...
Now to see how get the front engine mounts sorted....and the rear gearbox one for that matter!
Called at Mr Eales's place a couple of weeks back (what a nice bloke and cracking set-up),
The second time we went there he had just started up a challenge car that had had an engine rebuild.....black car and was stunning, certainly puts mine to shame!
Anyway trip was useful got a proper AP friction and bearing, both the one's that were in my gearbox looked OK but just foolish not to replace at this stage....fitted the new bearing...

Good job we spoke with John as he pointed out the balance marks on the pressure plate which matches the rest of the engine...we would have probably noticed but good that he pointed this out to us...fitted the new AP racing friction plate too

poor image that!
George and Ben attached the hoist chains..Ben will be an asset in years to come as Tim Hood is letting Ben help out on the race car...at the weekends which is cool for a budding mechanic


Then we put the engine and box together ...

Whipped the body off...moved the engine and box over the chassis for the first "try-fit"


So have the "proper" rear gearbox cross member...

But not the rubber / link part to put on the cross member...
The gear stick appears to be there abouts....(probably wrong!)

But looks OK for a start...
then we dropped the body back on ...


Now to see how get the front engine mounts sorted....and the rear gearbox one for that matter!
Graham said:
I dont think there is much of your old car left andy !!
Yes Andy your car previously.....this was a very tidy motor....lots of black going on....v.well put together by the look of things...engine sounded v.good .....they need to open the doors though when they run it!Was good to have another reference point for mine.....
G1ABB said:
Looking great Steve.
Thanks Graham,Slow progress but keep plugging away....picking up my pedal box later....will help me sort our reservoir positions...brake lines....drivers footwell...
Not spoke to you for ages....I see your red Speed 12 is in a safe place....how is number 2 coming along must be about there now?
Love to Jasmine, James, Amika ...but good to hook up at some point.....you are always welcome down this way!
Decided to go floor mounted pedal box....the chassis has the rails to support box and adjust it.....
Bought the one advertised by Glen on here....it came with his 5000m project...the stuff has never been used a couple of the cylinders are still in their packaging......
The box is OBP...took that all apart changing colour ....from black to the same colour as the cage " course silver" ....
I will mount the reservoirs on the top of the bulkhead....they have the following reference marks "TAS 380" and "17001"...being a bit blonde do these sound like they will be upto the job?
I also have a brake bia bar ......so (again never done this before, so input appreciated) was thinking need to split brakes lines to front and rear system.....right?
Then have a separate reservoir fro each system?
The third reservoir for the clutch system?
Then onto the slave cylinders..they are Girling with the following marking:
1. 625 (bs2 310360
2. 3/4 64667768
3. 700 ( this one is attached to the OBP handbrake......
Are they the right ones?
Which would you use for what?
.....
Next question I now have an OBP handbrake .....it's hydraulic ....sure I got told that you can't use these on road cars ?
Or am I loosing it (again lol)
Gassing Station | General Motorsport | Top of Page | What's New | My Stuff