2 Door Range Rover project
Discussion


RobXjcoupe said:
You may find the red oxide will peel quickly from the plastic. I know it’s a pain but you need to remove the red oxide, then use a plastic etch primer. The chrome spray usually needs a black undercoat before the chrome spray finish is applied.
Thanks. There’s no plastic. The lamp sections are diecast. To be honest, I’m half expecting the heat from the bulbs to mess up the paint. DonkeyApple said:
RobXjcoupe said:
You may find the red oxide will peel quickly from the plastic. I know it’s a pain but you need to remove the red oxide, then use a plastic etch primer. The chrome spray usually needs a black undercoat before the chrome spray finish is applied.
Thanks. There’s no plastic. The lamp sections are diecast. To be honest, I’m half expecting the heat from the bulbs to mess up the paint. RobXjcoupe said:
DonkeyApple said:
RobXjcoupe said:
You may find the red oxide will peel quickly from the plastic. I know it’s a pain but you need to remove the red oxide, then use a plastic etch primer. The chrome spray usually needs a black undercoat before the chrome spray finish is applied.
Thanks. There’s no plastic. The lamp sections are diecast. To be honest, I’m half expecting the heat from the bulbs to mess up the paint. Let’s say getting the heater control fascia done was a ball ache of a learning curve.

If it fails then it’s back in the sand blaster and I’ll pop down to the village nutter for some tinfoil.
C Lee Farquar said:
These rear lights seem a bit slap dash in comparison to the rest of the build?
At the very least I was expecting you to have sourced some new stock from an itinerant Aborigine via bush telegraph.
I did have to wade through a sea of nettles to get to the donor vehicle I took them off if that helps restore some faith? At the very least I was expecting you to have sourced some new stock from an itinerant Aborigine via bush telegraph.
It’s all a bit of an experiment. Quick blast in the cabinet, few coats of red oxide and the chrome paint due Thursday so if no pictures by the weekend then you’ll know it’s been a disaster.
DonkeyApple said:
RobXjcoupe said:
DonkeyApple said:
RobXjcoupe said:
You may find the red oxide will peel quickly from the plastic. I know it’s a pain but you need to remove the red oxide, then use a plastic etch primer. The chrome spray usually needs a black undercoat before the chrome spray finish is applied.
Thanks. There’s no plastic. The lamp sections are diecast. To be honest, I’m half expecting the heat from the bulbs to mess up the paint. Let’s say getting the heater control fascia done was a ball ache of a learning curve.
If it fails then it’s back in the sand blaster and I’ll pop down to the village nutter for some tinfoil.
5 years later they haven’t peeled, flaked what so ever. Now any refurbished aluminium parts I have are etch primed first. Steel is ok using a regular primer but the etch does what is says and I wouldn’t change that now. I get a good long lasting finish with regular rattle cans but always use an etch primer first

RobXjcoupe said:
DonkeyApple said:
RobXjcoupe said:
DonkeyApple said:
RobXjcoupe said:
You may find the red oxide will peel quickly from the plastic. I know it’s a pain but you need to remove the red oxide, then use a plastic etch primer. The chrome spray usually needs a black undercoat before the chrome spray finish is applied.
Thanks. There’s no plastic. The lamp sections are diecast. To be honest, I’m half expecting the heat from the bulbs to mess up the paint. Let’s say getting the heater control fascia done was a ball ache of a learning curve.
If it fails then it’s back in the sand blaster and I’ll pop down to the village nutter for some tinfoil.
5 years later they haven’t peeled, flaked what so ever. Now any refurbished aluminium parts I have are etch primed first. Steel is ok using a regular primer but the etch does what is says and I wouldn’t change that now. I get a good long lasting finish with regular rattle cans but always use an etch primer first
C Lee Farquar said:
Adjourned until Saturday afternoon 
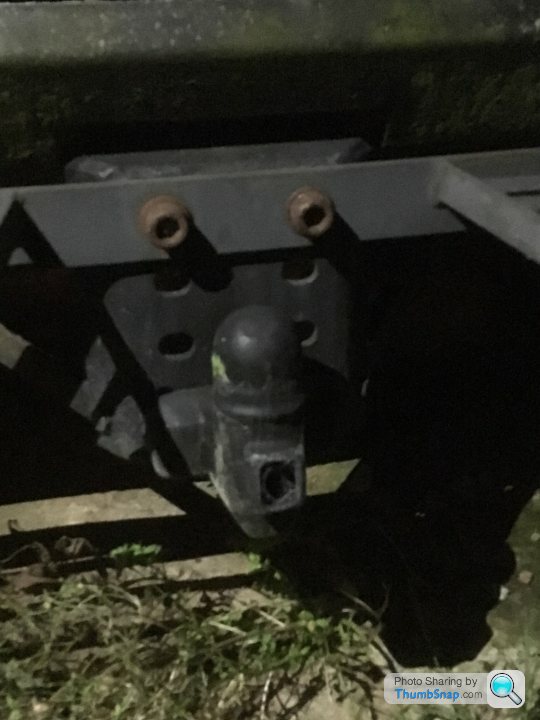
Yesterday saw a firm decision to move to Plan B with regards to the painting of the lights. Plan B fundamentally being constructed around the concept of ordering the correct paint second time around.In the meantime, all the internal electrics are now complete and the tow hitch was back from the powder coaters so that was fitted. I wasn't going to originally have a tow hitch and had taken a very heavy, adjustable one off but this summer my children have fallen in love with camping and as I don't want to be lugging all the kit in and out of the car the plan is to keep it all in a trailer and just hitch it up and go to make my life easier.
I didn't particularly like the standard pressed plate type of hitch and the one that I have used is a wonderfully heavy duty thing that still manages to look quite slim/elegant. It originally arrived in the UK attached to a South African import so I am assuming that this is where it originated from as I've not seen the design before.


These pictures have also reminded me that I planned to replace the mudflaps as I should be able to remember what the car is so don't feel I need those reminders at each corner.
Would have been plenty of room as she clearly left all her shoes at home.
It’s a chunky thing. I reckon it lowers the centre of gravity sufficiently to not have to fold the rear seats down.
I don’t know about midflaps. I’ve a set of originals that I bought possibly ten years ago when I started buying stuff for this car!
It’s a chunky thing. I reckon it lowers the centre of gravity sufficiently to not have to fold the rear seats down.
I don’t know about midflaps. I’ve a set of originals that I bought possibly ten years ago when I started buying stuff for this car!
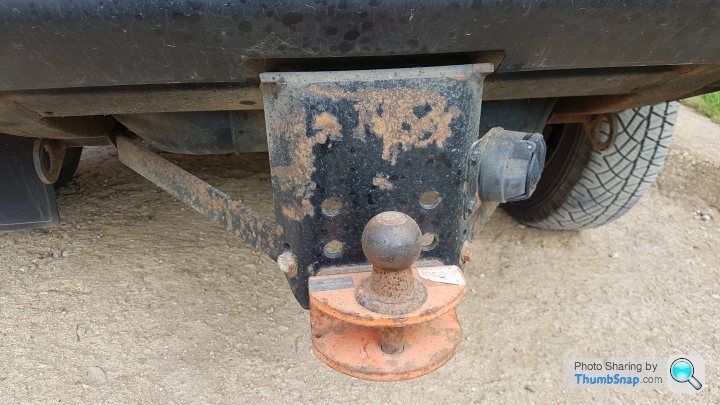
I’ve one of those hitches on one of my donor wagons. I just took the rear bolts off it last week for the system I fitted to mine.
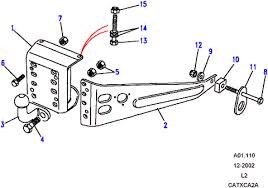
What are the exact bits that you need as apart from the fact that I tried to remove it to fit to another car for an emergency random ebay puchase collection and failed as a bumper bolt was seized, I do have all the bits.
I’ve also a full Dixon Bate adjustable system that I removed from my 72. Galvanised and not looking like it’s ever been used but sitting there desperate to tow an aircraft carrier. Serious kit for shifting donkeys and mothers in law.
Gassing Station | Readers' Cars | Top of Page | What's New | My Stuff