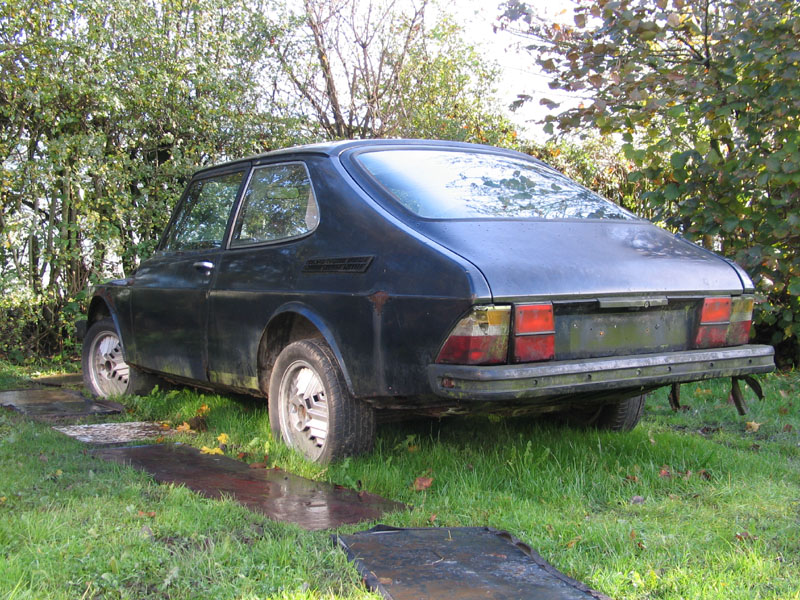
99t's Saab 99 Turbo
Discussion


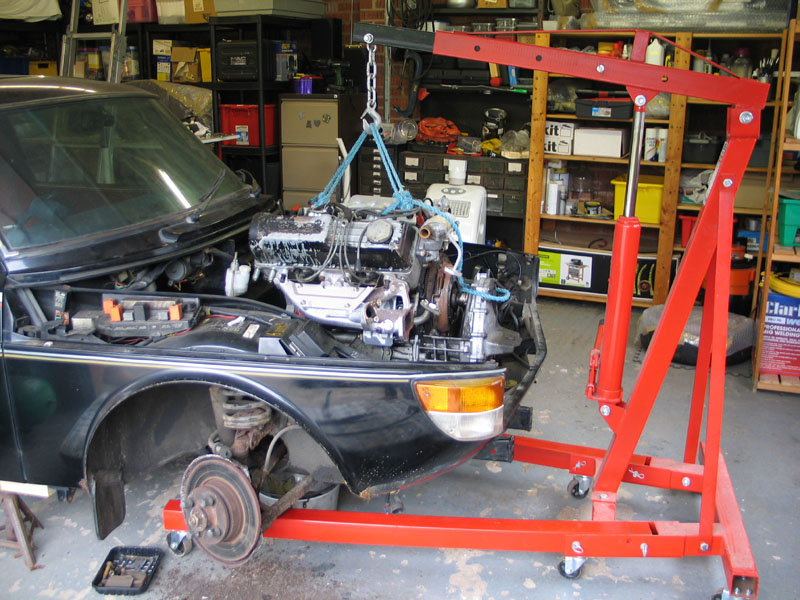
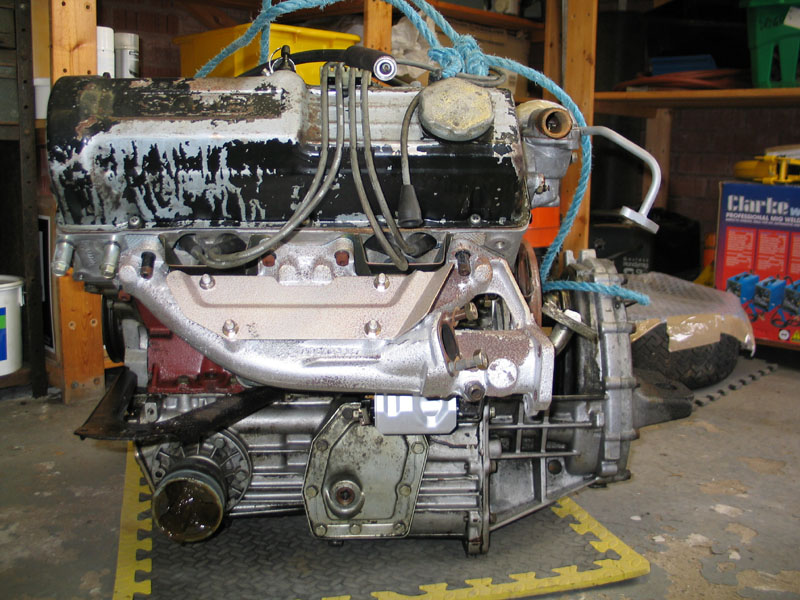
Nearly ready to pull the engine and box - the last two evenings have consisted of a huge fight with the taper pin securing the gear linkage.
Now these have a reputation for either just falling out on their own, or else only coming out in pieces after the application of extreme violence!
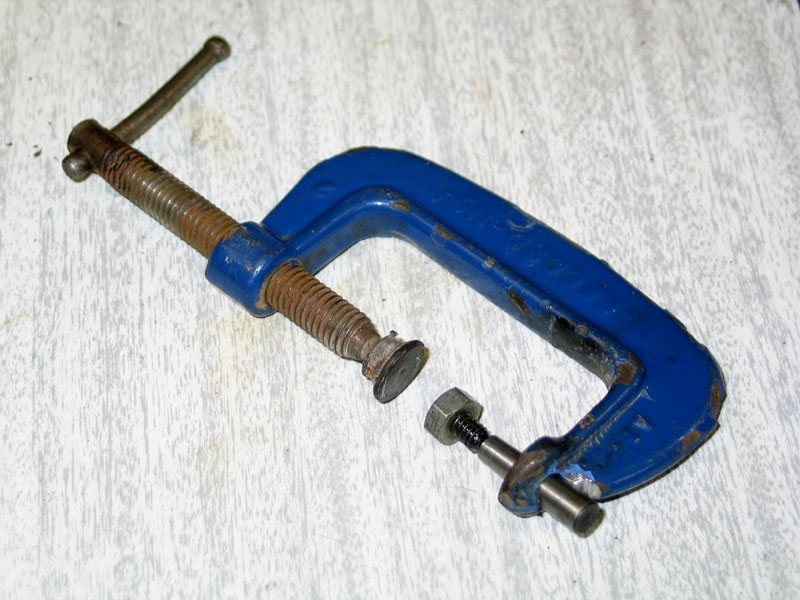
Mine, of course, fell into the latter category. After several attempts hitting it with the largest hammer I could swing (under the car with extremely limited access) I improvised a press tool by drilling a clearance hole in an old G clamp.
On its own this wasn't enough to move it either (even tightened until the handle bent) but once pre-loaded by this, I could then hit the clamp hard, thus adding the force of the hammer blow to the pressure from the clamp, and after several heavy blows it was free and even sufficiently undamaged to probably reuse
Now these have a reputation for either just falling out on their own, or else only coming out in pieces after the application of extreme violence!
Mine, of course, fell into the latter category. After several attempts hitting it with the largest hammer I could swing (under the car with extremely limited access) I improvised a press tool by drilling a clearance hole in an old G clamp.
On its own this wasn't enough to move it either (even tightened until the handle bent) but once pre-loaded by this, I could then hit the clamp hard, thus adding the force of the hammer blow to the pressure from the clamp, and after several heavy blows it was free and even sufficiently undamaged to probably reuse
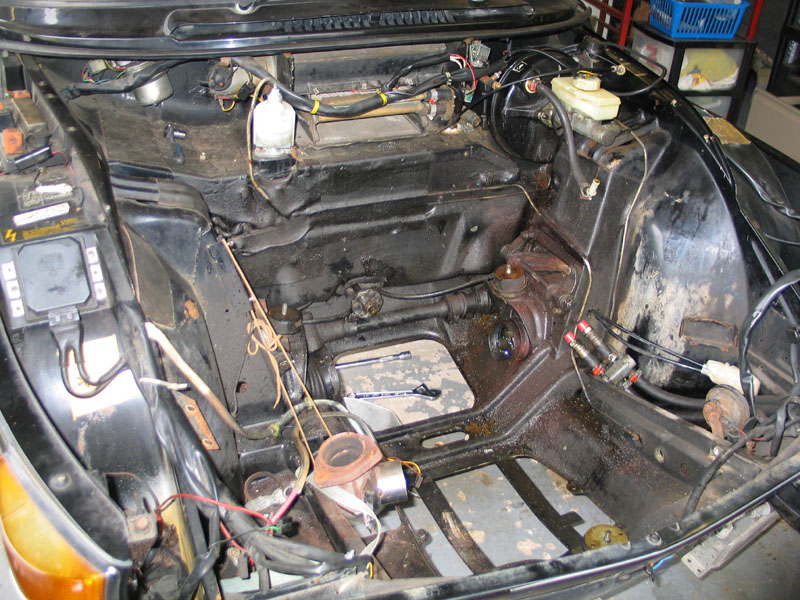
Been working steadily, stripping the car back so that I can start cutting out the rot. The engine bay is fairly well stripped out now, exhaust off and most of the interior is now out too.
I'm lucky that the vast majority of the trim I've removed is in very good condition, so I've been bubble wrapping anything vaguely fragile as I take it off so that hopefully after storage it'll still be as good when it goes back together... Does add an awful lot of time to the strip down process though!
Rear suspension bolts have all been freed off and the rear beam temporarily dropped (to aid removal of the exhaust), and is now back on finger-tight to keep the shell rolling for now, but the lower damper to suspension arm mounts looked more than a little bit crusty...
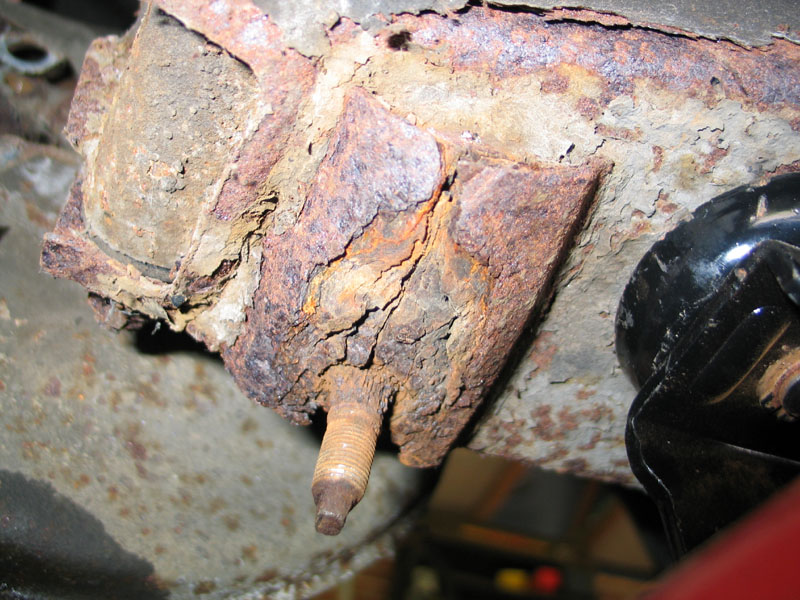
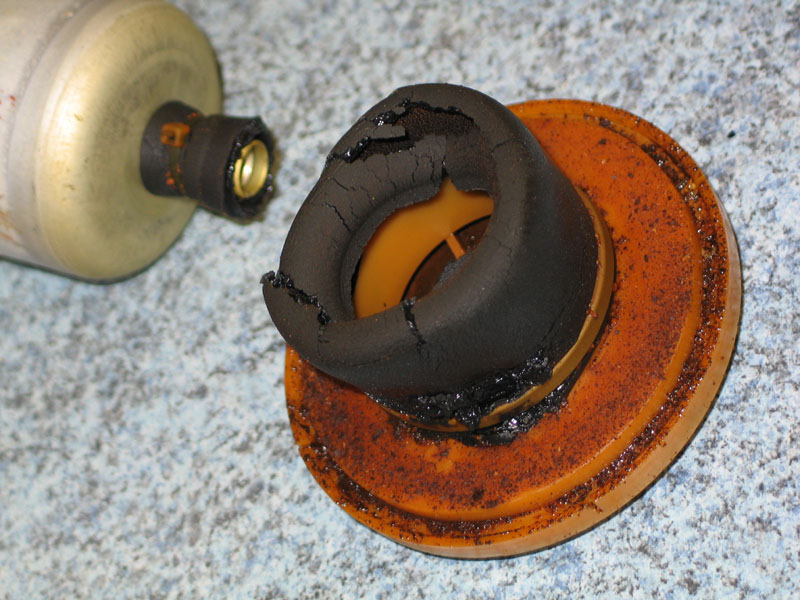
...and the damper pin and its mounting rubber and washers have definitely seen better days!
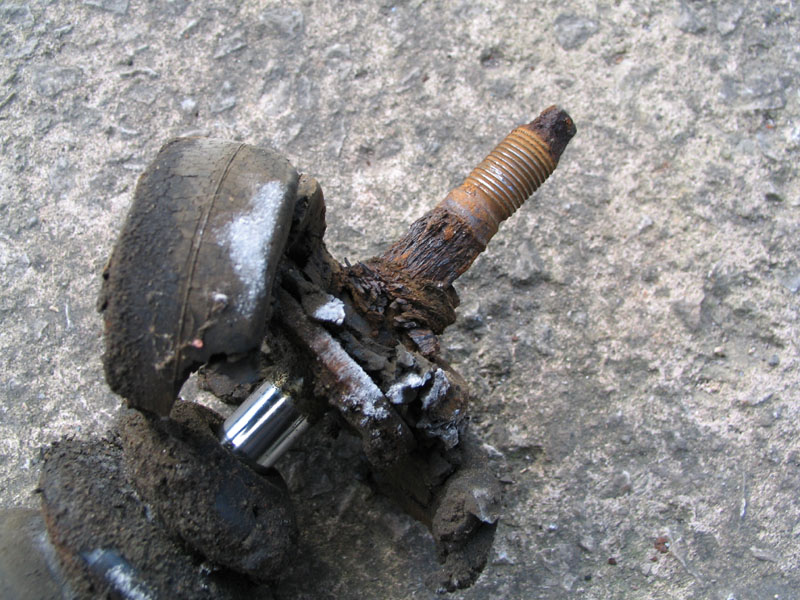
I do have a pair of NOS suspension arms stashed away, which would require fitting the later type dampers with an eye rather than pin fitting. On the plus side there are more dampers available in the later fitting, but on the other hand they would be incorrect for the car with regard to originality, so I'll see how bad the original suspension arms turn out to be once blasted, before making a final decision whether to repair or replace...
I'm lucky that the vast majority of the trim I've removed is in very good condition, so I've been bubble wrapping anything vaguely fragile as I take it off so that hopefully after storage it'll still be as good when it goes back together... Does add an awful lot of time to the strip down process though!
Rear suspension bolts have all been freed off and the rear beam temporarily dropped (to aid removal of the exhaust), and is now back on finger-tight to keep the shell rolling for now, but the lower damper to suspension arm mounts looked more than a little bit crusty...
...and the damper pin and its mounting rubber and washers have definitely seen better days!
I do have a pair of NOS suspension arms stashed away, which would require fitting the later type dampers with an eye rather than pin fitting. On the plus side there are more dampers available in the later fitting, but on the other hand they would be incorrect for the car with regard to originality, so I'll see how bad the original suspension arms turn out to be once blasted, before making a final decision whether to repair or replace...
Edited by 99t on Tuesday 10th April 07:58
A little while since an update, but I've not been idle...
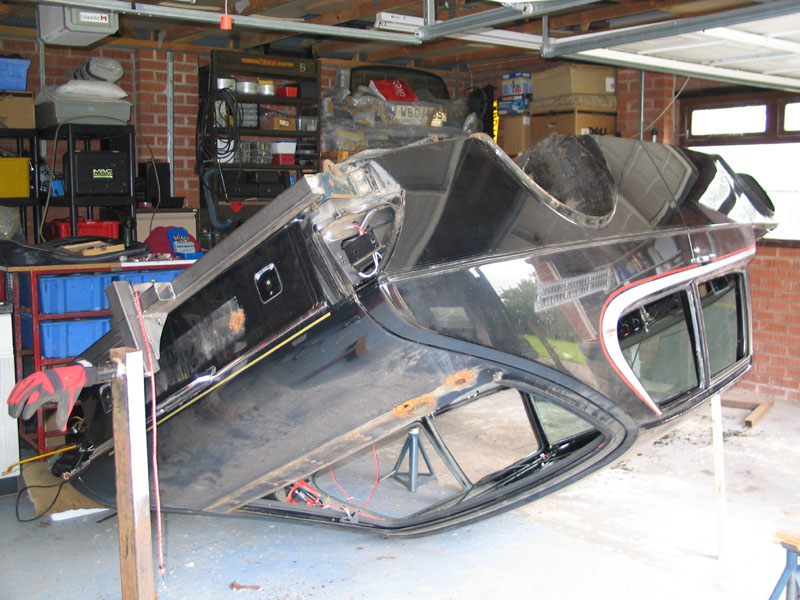
I am lucky enough to have previously acquired a body roller (with mounts for a completely different vehicle) so I decided to make my own bespoke mounts for the Saab using the very substantial bumper mounting points as a pickup location. I'm far too old and dodgy of joint to be crawling around on concrete floors any more or setting my remaining hair on fire with overhead welding - shudder!!
Obviously, getting the balance of the shell correct once mounted is pretty important, but basically I had to guess what height the pivot point should be in order in order to achieve this - preferably with the shell slightly weighted towards remaining the right way up!
I guessed that once stripped, approximately 70% of the weight of the shell would be below the centre of the shell (measured from the roof to the bottom of the sills) and so made the mounts so that the pivot point is some way below the centre and approximately level with the tops of the wheel arches.
Raising the car up enough to mount it on the "spit" was a nervous experience involving lifting one end of the shell with my engine hoist and simultaneously the other end with a large jack and several blocks of wood - the potential for disaster was huge, but with patience and care I got it mounted up without a problem.
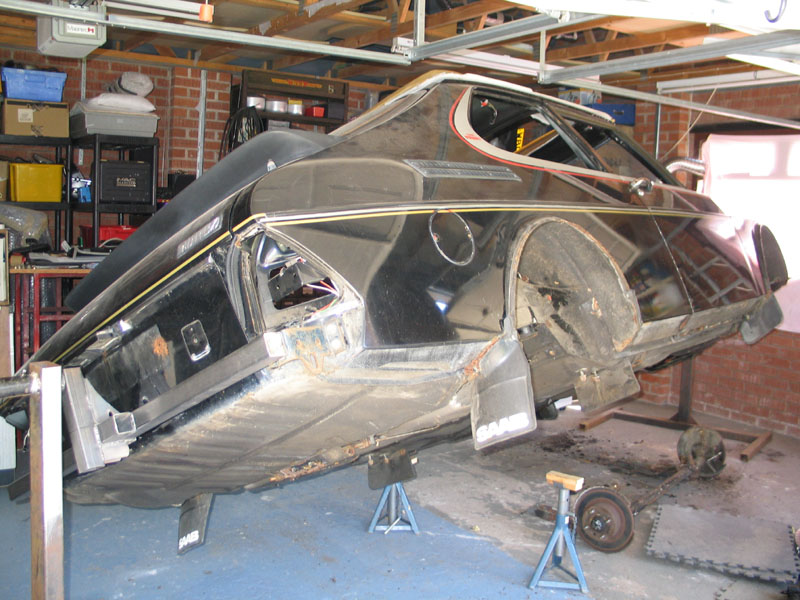
The balance is surprisingly close. It is very slightly top-heavy at the moment but I do still have the weighty front and rear screens to remove which I reckon will bring it pretty close to perfect. Even as it is, the car can be pivoted to 45 degrees and back using one finger and to ninety degrees using a little more strength but certainly not any real effort.
Theoretically it will go through a full three-sixty but I've not had the bottle to try that yet!!
Once mounted I've continued the strip down and the mix of finding good and bad has continued. The front suspension lower wishbone nuts looked like this after removing the layer of oily accumulation that was coating them..
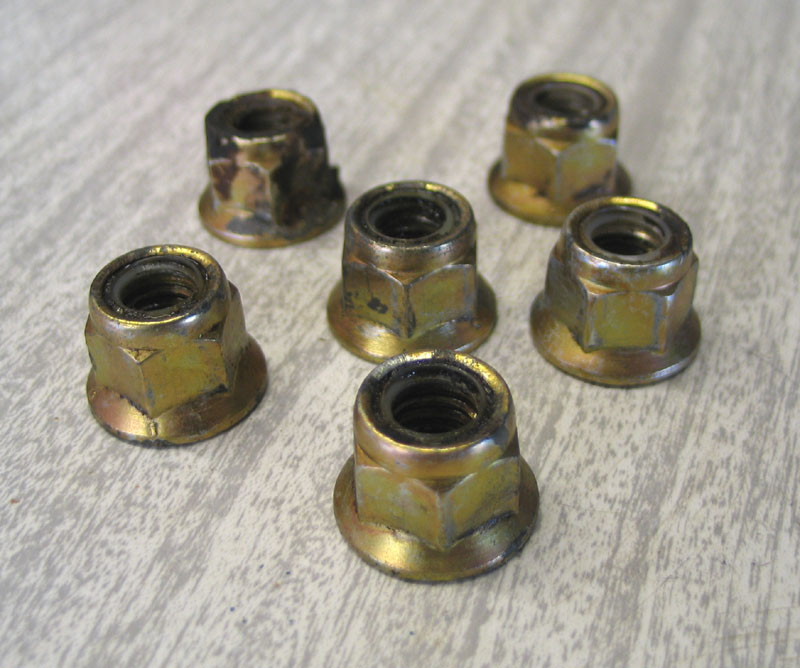
Not bad for 34 years under a car and proof that little protects like a good oil leak!
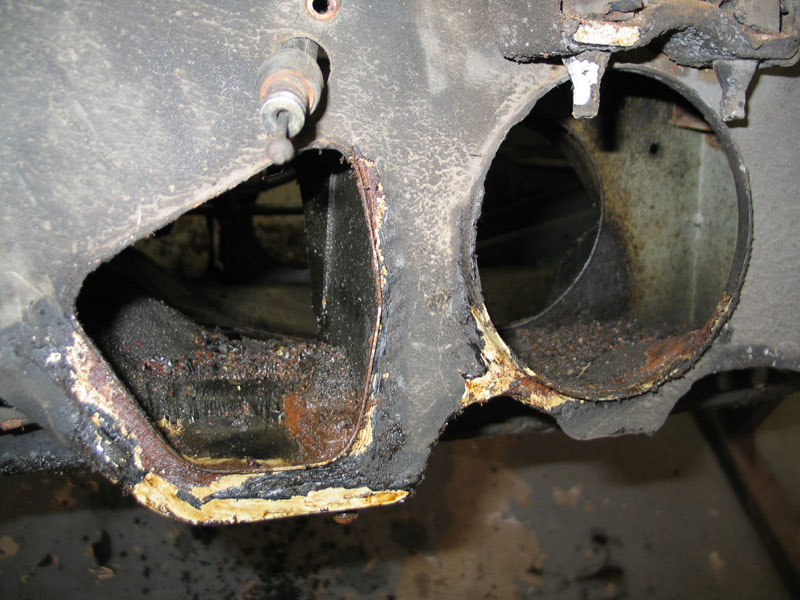
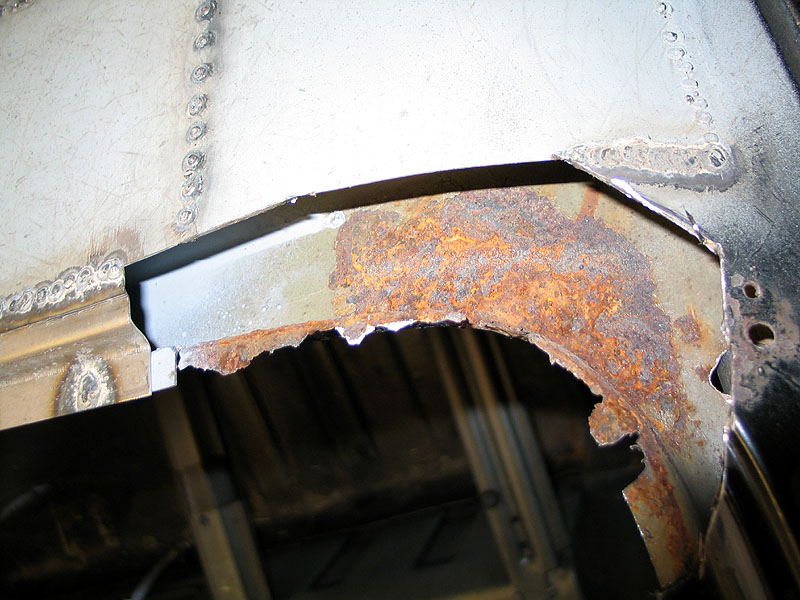
Further proof of the benefit of oil leaks, if needed, lies in the form of the driveshaft tunnels - a weak point on Saab 99s and later Saab 900s, often needing extensive patching.
On mine, both sides were well and truly coated in oil and wiping this away has revealed nothing worse than a touch of surface rust so far.
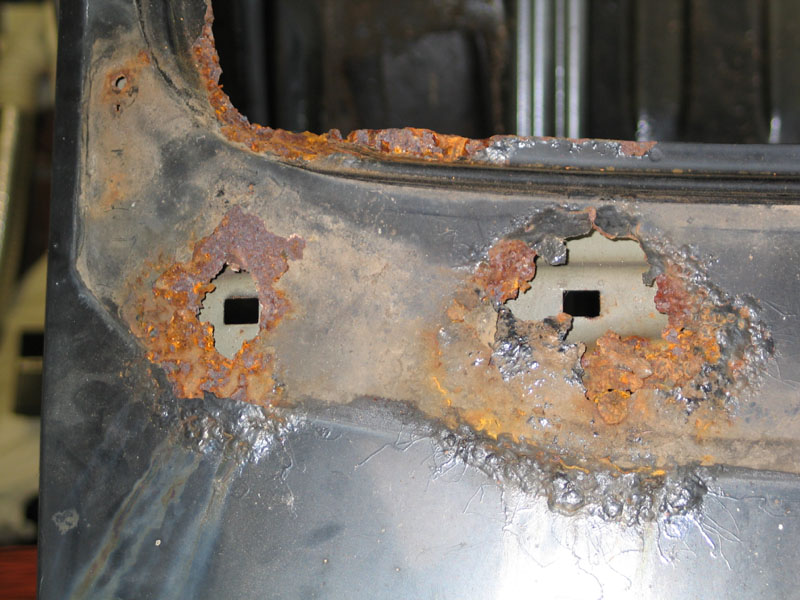
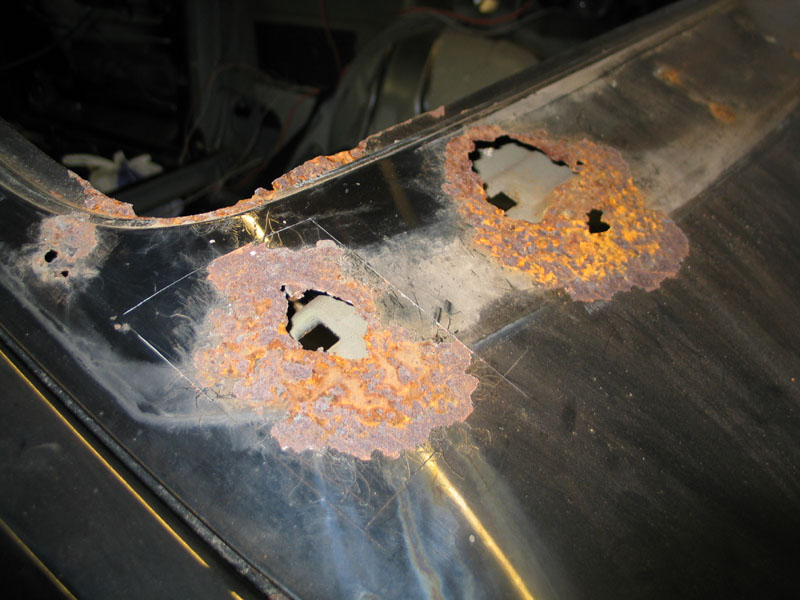
On the other hand, why oh why did Saab feel it was a good idea to secure the mud flaps with self-tapping screws into the inner arches? The results are sadly all too predictable...
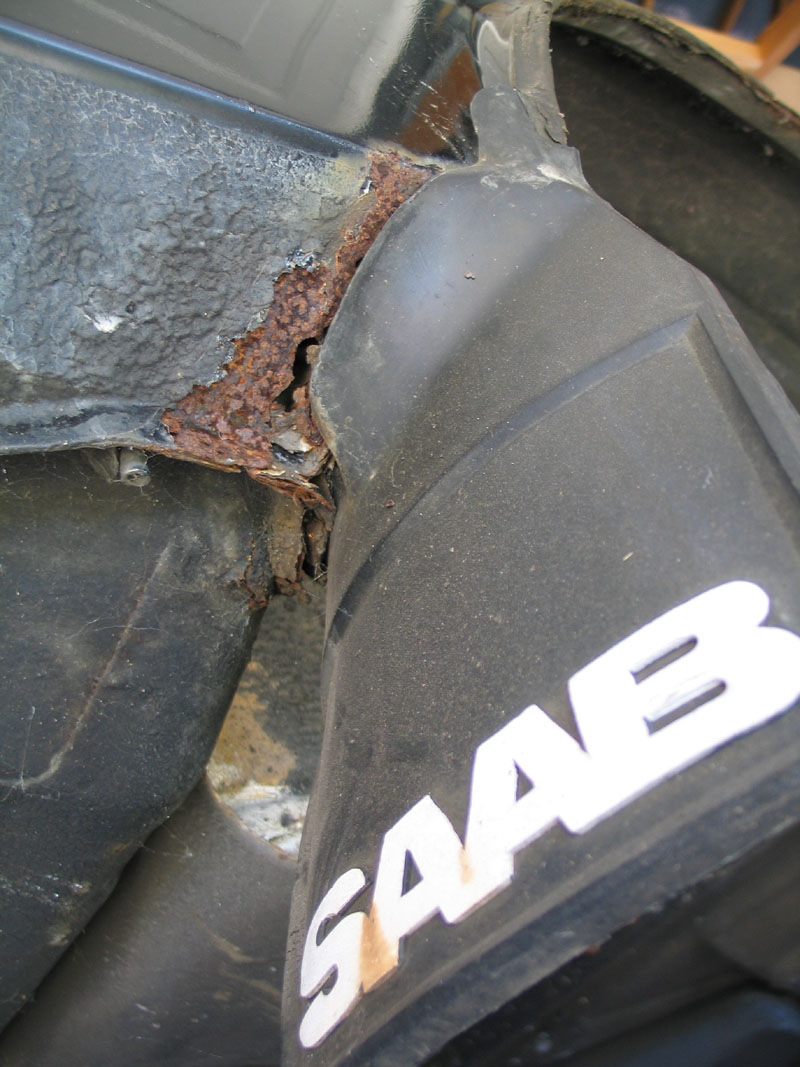
Mud flap removed
Inner arch
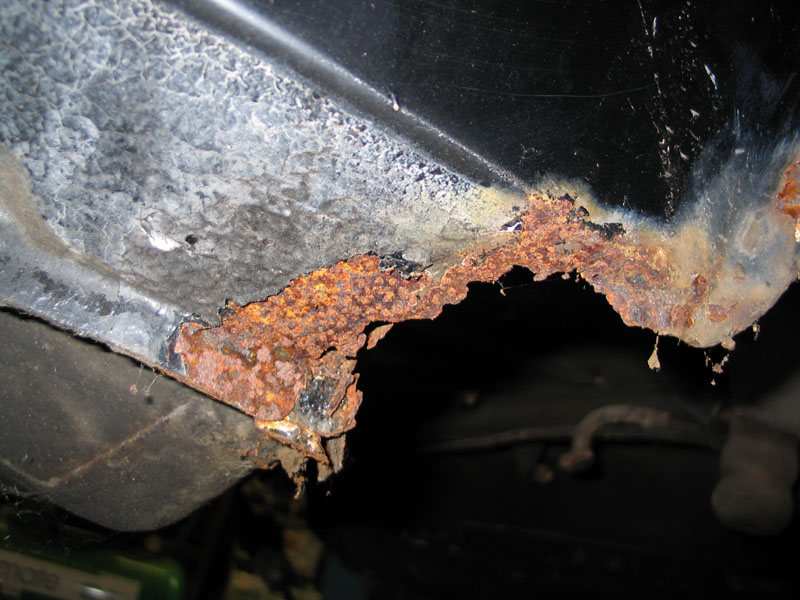
At least the rot hasn't spread as far as the rear torque arm mounting point, which is unusually solid.
Glass out next and then I'll be ready to start the repairs...
I am lucky enough to have previously acquired a body roller (with mounts for a completely different vehicle) so I decided to make my own bespoke mounts for the Saab using the very substantial bumper mounting points as a pickup location. I'm far too old and dodgy of joint to be crawling around on concrete floors any more or setting my remaining hair on fire with overhead welding - shudder!!
Obviously, getting the balance of the shell correct once mounted is pretty important, but basically I had to guess what height the pivot point should be in order in order to achieve this - preferably with the shell slightly weighted towards remaining the right way up!
I guessed that once stripped, approximately 70% of the weight of the shell would be below the centre of the shell (measured from the roof to the bottom of the sills) and so made the mounts so that the pivot point is some way below the centre and approximately level with the tops of the wheel arches.
Raising the car up enough to mount it on the "spit" was a nervous experience involving lifting one end of the shell with my engine hoist and simultaneously the other end with a large jack and several blocks of wood - the potential for disaster was huge, but with patience and care I got it mounted up without a problem.
The balance is surprisingly close.
It is very slightly top-heavy at the moment but I do still have the weighty front and rear screens to remove which I reckon will bring it pretty close to perfect. Even as it is, the car can be pivoted to 45 degrees and back using one finger and to ninety degrees using a little more strength but certainly not any real effort.Theoretically it will go through a full three-sixty but I've not had the bottle to try that yet!!
Once mounted I've continued the strip down and the mix of finding good and bad has continued. The front suspension lower wishbone nuts looked like this after removing the layer of oily accumulation that was coating them..
Not bad for 34 years under a car and proof that little protects like a good oil leak!
Further proof of the benefit of oil leaks, if needed, lies in the form of the driveshaft tunnels - a weak point on Saab 99s and later Saab 900s, often needing extensive patching.
On mine, both sides were well and truly coated in oil and wiping this away has revealed nothing worse than a touch of surface rust so far.
On the other hand, why oh why did Saab feel it was a good idea to secure the mud flaps with self-tapping screws into the inner arches? The results are sadly all too predictable...
Mud flap removed
Inner arch
At least the rot hasn't spread as far as the rear torque arm mounting point, which is unusually solid.
Glass out next and then I'll be ready to start the repairs...
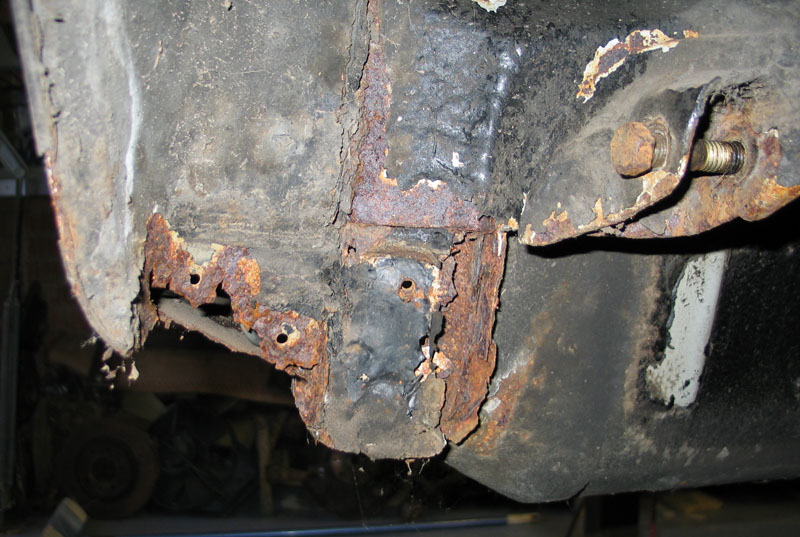
Still stripping stuff off the shell, nearly there now, and as usual a mix of good news and bad!
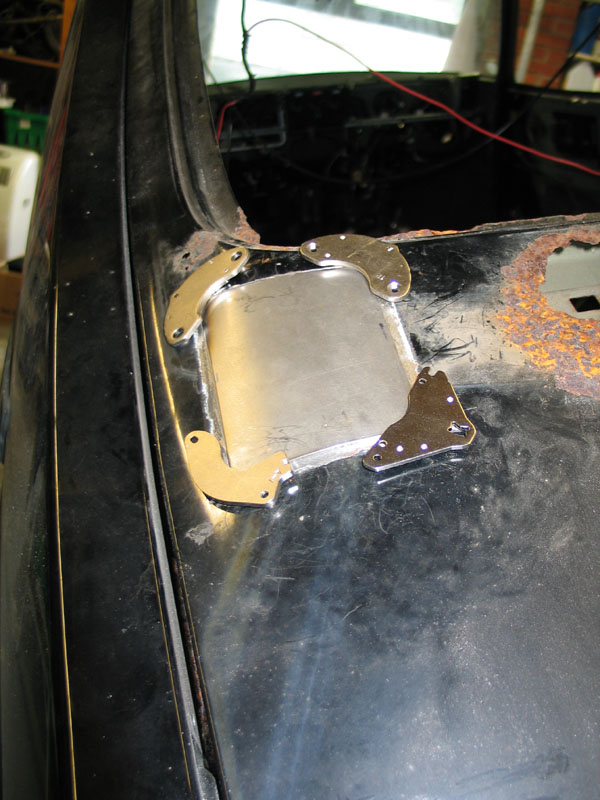
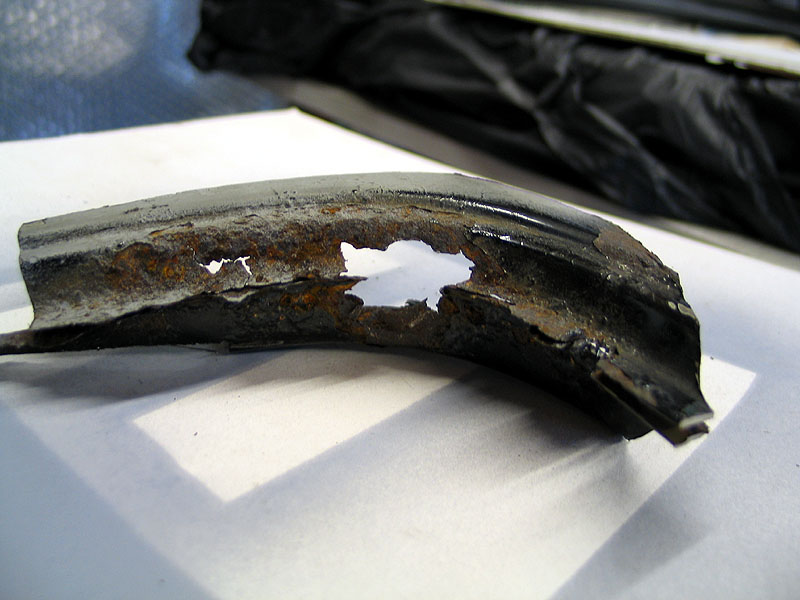
I knew the tailgate was bad under the spoiler and elsewhere, but want to retain the original as so many of these have been fitted with later tailgates from Saab 900s which are substantially different below the handle and just don't look right on a 99. Whilst a 900 one can be modified to appear correct, it is as much work as repairing a rusty one and to be honest, it is getting harder to find a really good 900 one to start with.
Removing the glass and rear spoiler revealed the extent of the rot in my one, and it looks like it will keep me busy for a while...
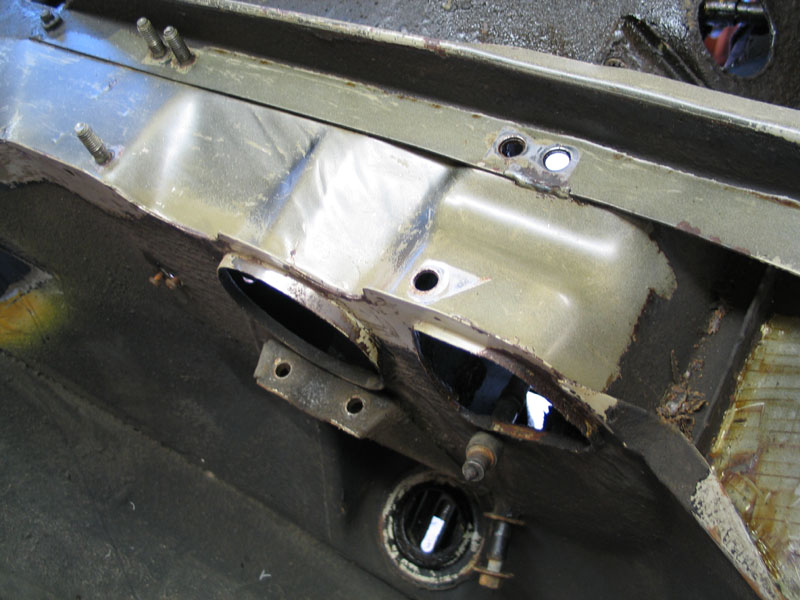
Fuel tank - I removed the fuel pump to drain the last dregs out of the tank and was pleased to see that the (steel) tank appears remarkably rust free inside. The rubber piece connecting the fuel pickup to the pump however - not so good..
Rear suspension arms - I've looked at these more closely and even without blasting them, I can tell that both are really weakened with rust and the offside one is particularly bad. I want to stick with the original style shocks (pins top and bottom rather than pin top, eye bottom as fitted to later 99s and 900s) and I remembered I had some used arms stashed away from an identical car I broke a few years ago.
Now the car they came off appeared to have stood in a field for years and was utterly, utterly rotten...
...so I didn't have high hopes that they would be any better, but figured I wouldn't have kept them if they were complete scrap...
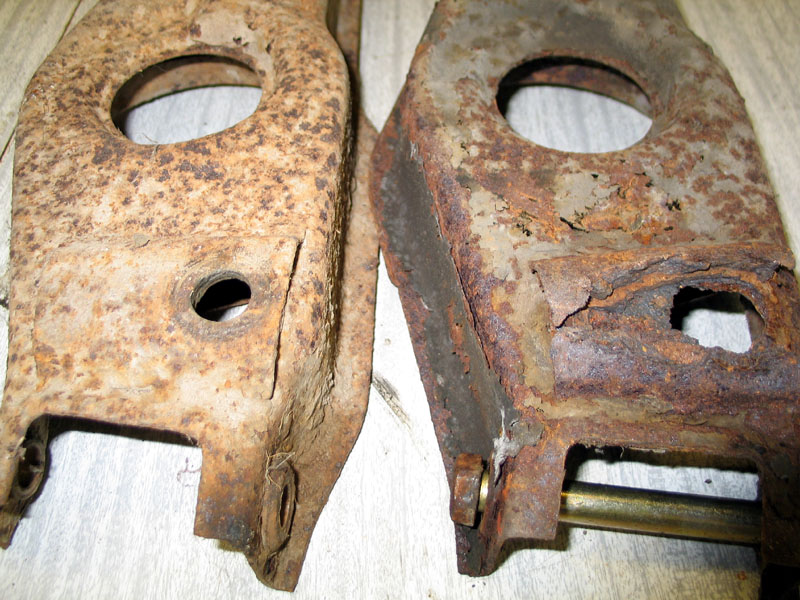
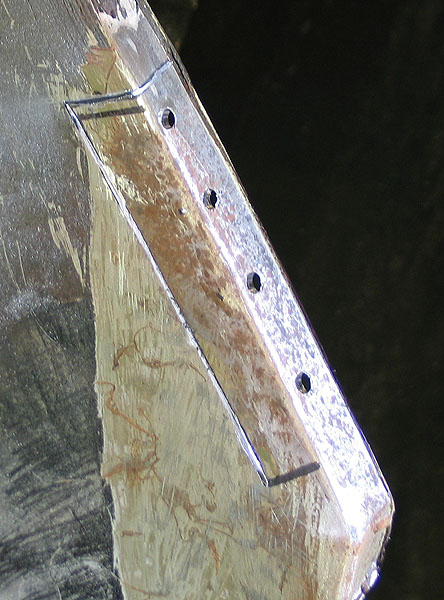
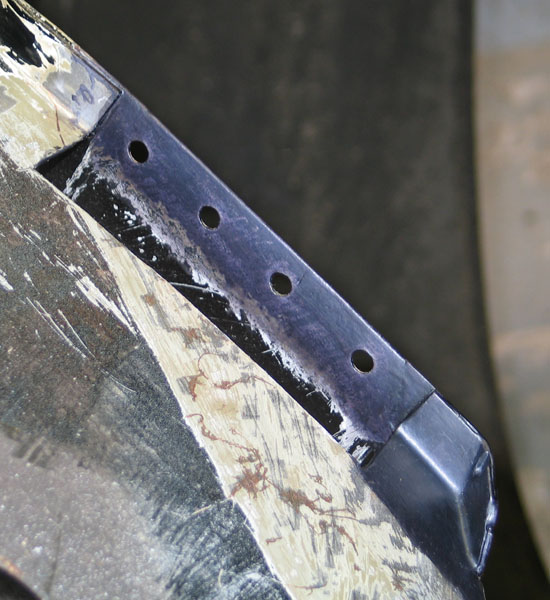
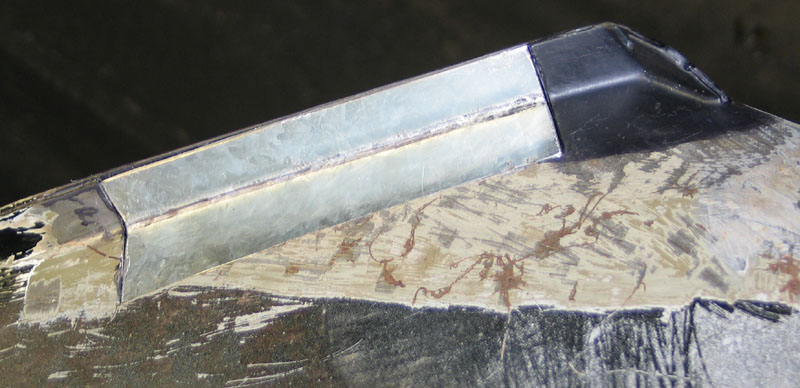
Ta Da!! They'll do nicely Although covered in surface rust, they appear to be about double the thickness of my rusty ones (they aren't, that is just an indication of how many layers have flaked off the originals) and will de-rust nicely I think.
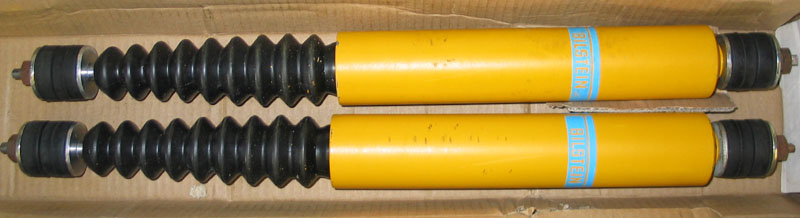
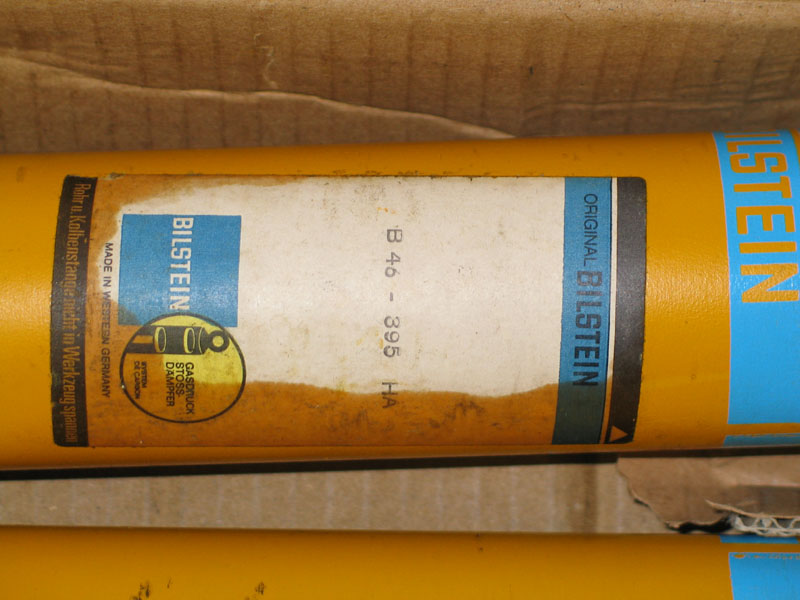
I was so pleased, I dusted my wallet off and snapped up what must be one of the last available NOS sets of B6 Bilsteins for the rear with the correct pin configuration, which were discontinued a few years back. Lovely!!
I knew the tailgate was bad under the spoiler and elsewhere, but want to retain the original as so many of these have been fitted with later tailgates from Saab 900s which are substantially different below the handle and just don't look right on a 99. Whilst a 900 one can be modified to appear correct, it is as much work as repairing a rusty one and to be honest, it is getting harder to find a really good 900 one to start with.
Removing the glass and rear spoiler revealed the extent of the rot in my one, and it looks like it will keep me busy for a while...
Fuel tank - I removed the fuel pump to drain the last dregs out of the tank and was pleased to see that the (steel) tank appears remarkably rust free inside. The rubber piece connecting the fuel pickup to the pump however - not so good..
Rear suspension arms - I've looked at these more closely and even without blasting them, I can tell that both are really weakened with rust and the offside one is particularly bad. I want to stick with the original style shocks (pins top and bottom rather than pin top, eye bottom as fitted to later 99s and 900s) and I remembered I had some used arms stashed away from an identical car I broke a few years ago.
Now the car they came off appeared to have stood in a field for years and was utterly, utterly rotten...
...so I didn't have high hopes that they would be any better, but figured I wouldn't have kept them if they were complete scrap...
Ta Da!! They'll do nicely
Although covered in surface rust, they appear to be about double the thickness of my rusty ones (they aren't, that is just an indication of how many layers have flaked off the originals) and will de-rust nicely I think.I was so pleased, I dusted my wallet off and snapped up what must be one of the last available NOS sets of B6 Bilsteins for the rear with the correct pin configuration, which were discontinued a few years back. Lovely!!
Blimey, August already! The passage of time is definitely speeding up as I get older (or busier?) 
Anyway...
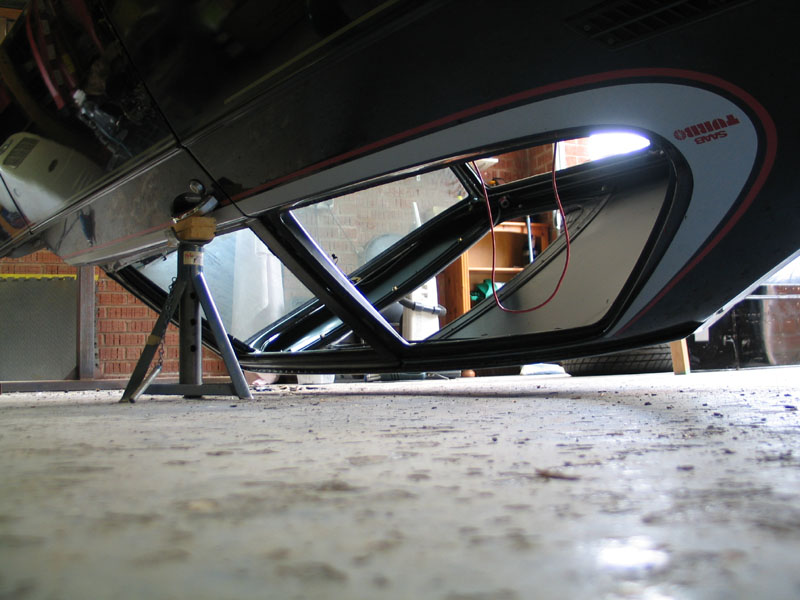
Took a brave pill and tested the spit out properly. Note the piece of wood and axle stand are just to fix the angle whilst I'm working.
Clearances are tight, but good enough.
Decided to start working on front offside and rear nearside corners of the shell as I figured that whilst I'm waiting for chemials to act or paint to dry on one corner I should be able to work on the diagonally opposite one without too much dust settling on whatever is drying. It's a theory anyway.
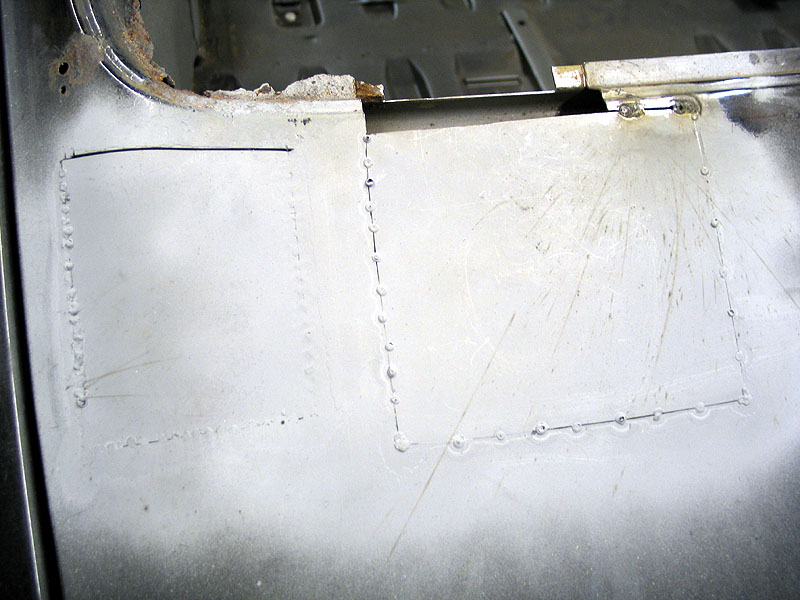
Front nearside engine bay floor to inner wing seam, cutting out thin rusted metal (note pinholes)
Good metal cleaned up and treated (note rust spiders still to do)
If only all the repair sections were going to be this easy to make..
Whilst it was upside down I started cleaning a bit of underseal off the bottom of the driveshaft tunnels - looks better than I dared hope.
Tailgate repair next...
Anyway...
Took a brave pill and tested the spit out properly. Note the piece of wood and axle stand are just to fix the angle whilst I'm working.
Clearances are tight, but good enough.
Decided to start working on front offside and rear nearside corners of the shell as I figured that whilst I'm waiting for chemials to act or paint to dry on one corner I should be able to work on the diagonally opposite one without too much dust settling on whatever is drying. It's a theory anyway.
Front nearside engine bay floor to inner wing seam, cutting out thin rusted metal (note pinholes)
Good metal cleaned up and treated (note rust spiders still to do)
If only all the repair sections were going to be this easy to make..
Whilst it was upside down I started cleaning a bit of underseal off the bottom of the driveshaft tunnels - looks better than I dared hope.
Tailgate repair next...
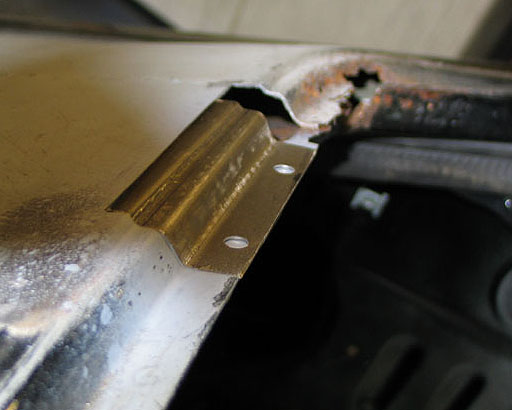
I knew that I had to be very careful repairing the tailgate. It isn't unknown for these to snap when the rust gets too extensive and mine wasn't far off that stage on the nearside and flexed worryingly when open.
Consequently, I decided to repair it section by section, letting in new metal to add back as much strength as possible before cutting the next piece out.
First piece ready to weld, old hard drive magnets have their uses...
First two patches tacked into place. I had real problems with distortion on these slightly curved sections - in fact the sharp-eyed amongst you may have spotted that the left hand patch has grown in size from the photo above??!!
Basically my first (and second!! ) attempts at welding the first section in, even keeping the power and heat build up to a minimum, the section was pulling itself straight as it cooled and ending up nearly 1cm below the level it should be in the middle.
No way was I prepared to use that much filler, so I had to cut out the first two attempts and finally got it right third time, due to making the curve slightly higher than needed initially and putting the tiniest spot welds in at diagonals and quenching each one immediately. Took ages but I was finally happy with their position, even if its not pretty at this stage.
Straightish section of lower flange replaced and upper section ready for welding
Welds added all round, now for the difficult bit
Hmmm??? This is going to be fun to make...
Consequently, I decided to repair it section by section, letting in new metal to add back as much strength as possible before cutting the next piece out.
First piece ready to weld, old hard drive magnets have their uses...
First two patches tacked into place. I had real problems with distortion on these slightly curved sections - in fact the sharp-eyed amongst you may have spotted that the left hand patch has grown in size from the photo above??!!
Basically my first (and second!!
) attempts at welding the first section in, even keeping the power and heat build up to a minimum, the section was pulling itself straight as it cooled and ending up nearly 1cm below the level it should be in the middle. No way was I prepared to use that much filler, so I had to cut out the first two attempts and finally got it right third time, due to making the curve slightly higher than needed initially and putting the tiniest spot welds in at diagonals and quenching each one immediately. Took ages but I was finally happy with their position, even if its not pretty at this stage.
Straightish section of lower flange replaced and upper section ready for welding
Welds added all round, now for the difficult bit
Hmmm??? This is going to be fun to make...
Awesome work OP!
I used to have one of these as an 18year-old back in the late 80s.
I have laughed at some of your tales of tricky access - wastegate bolts particularly! My brother and I spent about 2 years swearing at mine till we finally gave up the unequal struggle to keep it on the road. We even invented a chap called Sven Hasselblad, the genius head of Saab-Scania's 'User Inconvenience Directorate' who single-handedly designed things like the wastegate location, the clutch, the water-pump and the front brake caliper design
ClaphamGT3 said:
We even invented a chap called Sven Hasselblad, the genius head of Saab-Scania's 'User Inconvenience Directorate' who single-handedly designed things like the wastegate location, the clutch, the water-pump and the front brake caliper design
 I like that! Will probably think of him regularly from now on!!
Gassing Station | Readers' Cars | Top of Page | What's New | My Stuff