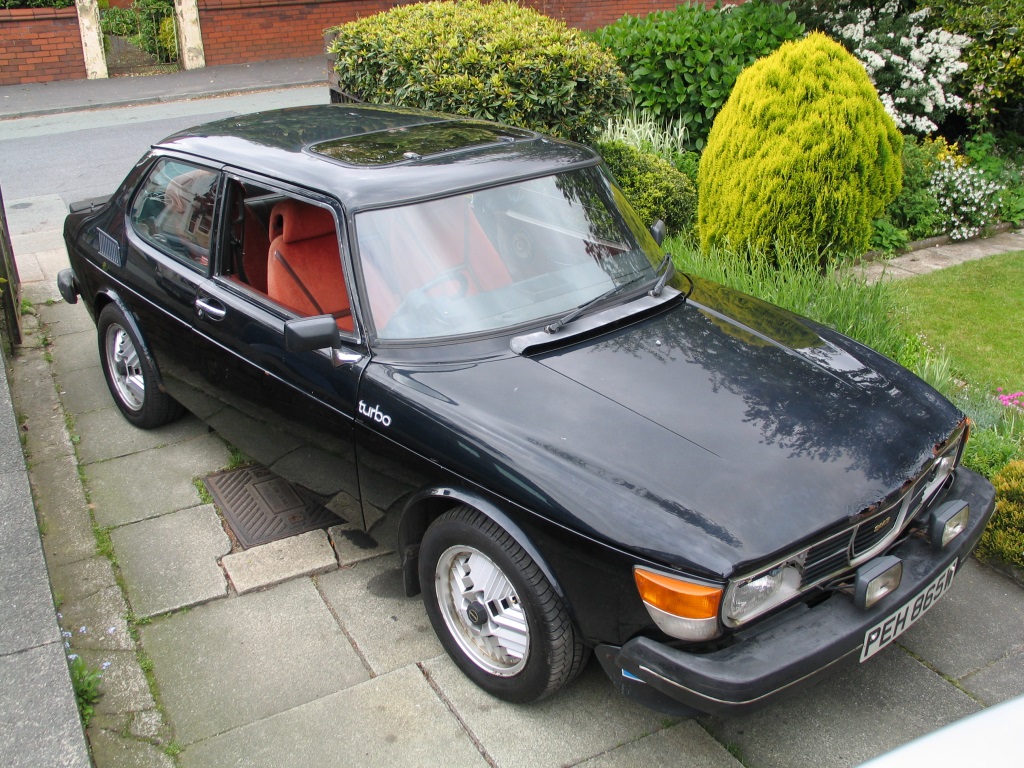
99t's Saab 99 Turbo
Discussion


Steady progress over Christmas and New Year
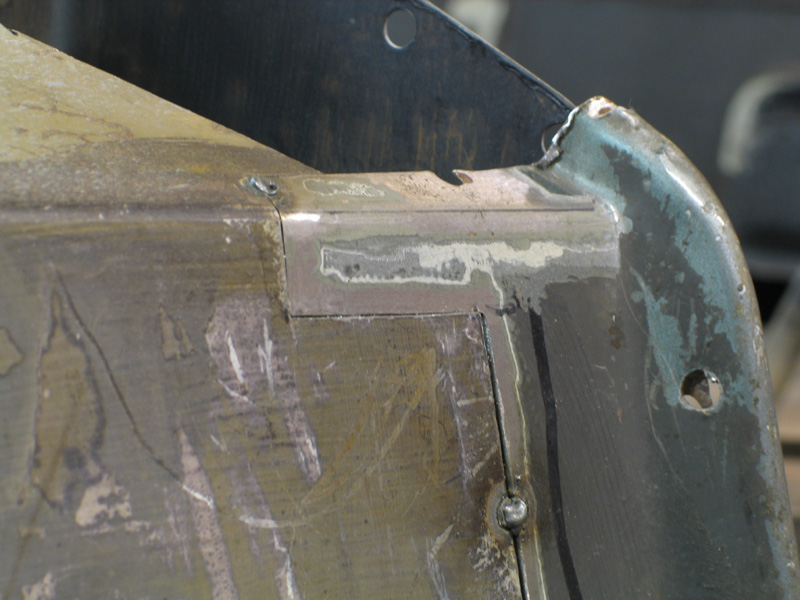
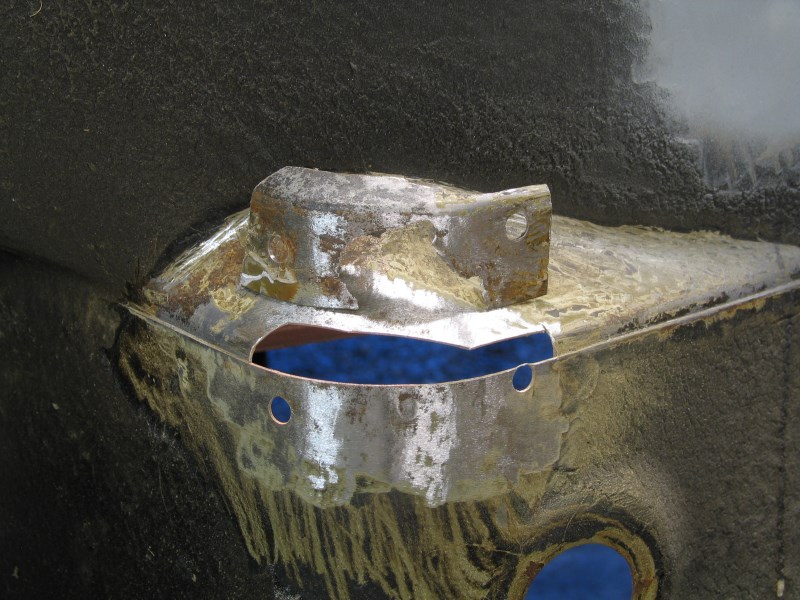
Folded up the repair section for the floor under the jacking point, which was harder than it looks since none of the flat pieces of the section have parallel edges, they all need to converge or diverge a little. So if the angle of the fold is even a fraction out it throws all the rest of the piece out too!!
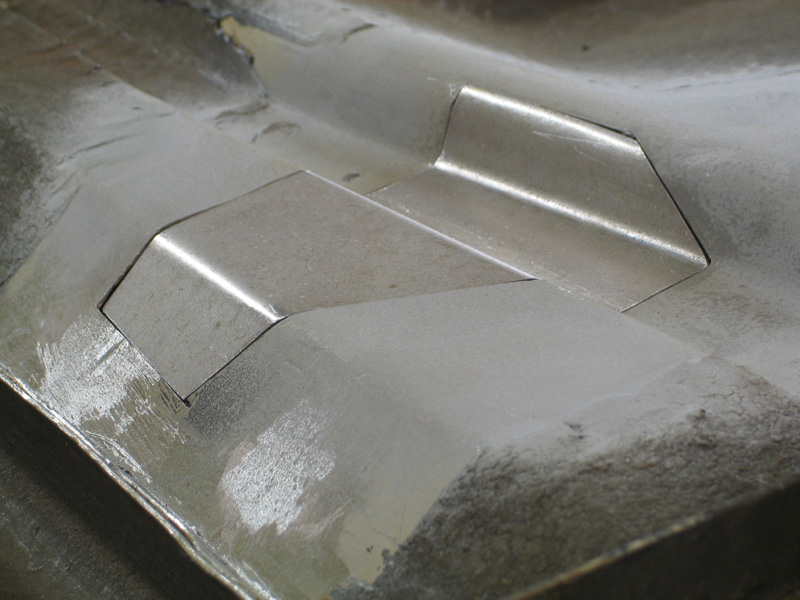
Welded in, will dress the welds back later. Jacking point will be re-attached once I've de-rusted it.
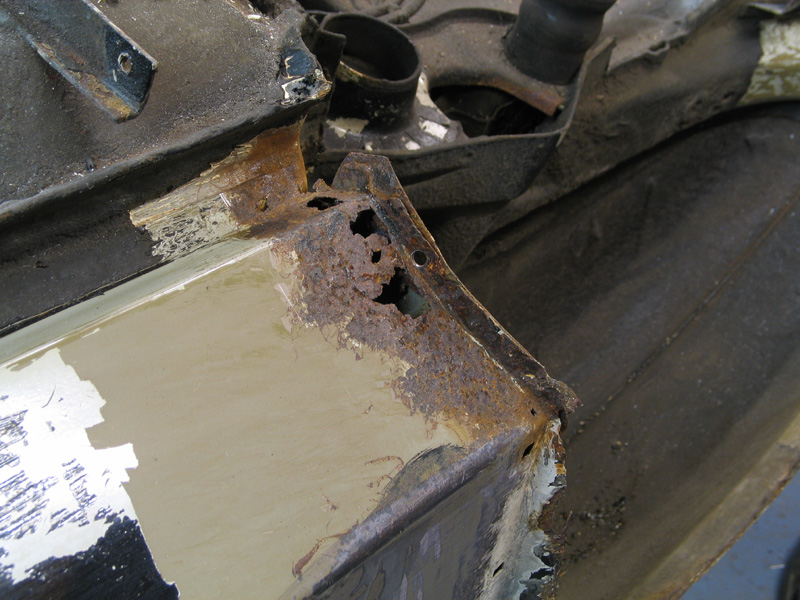
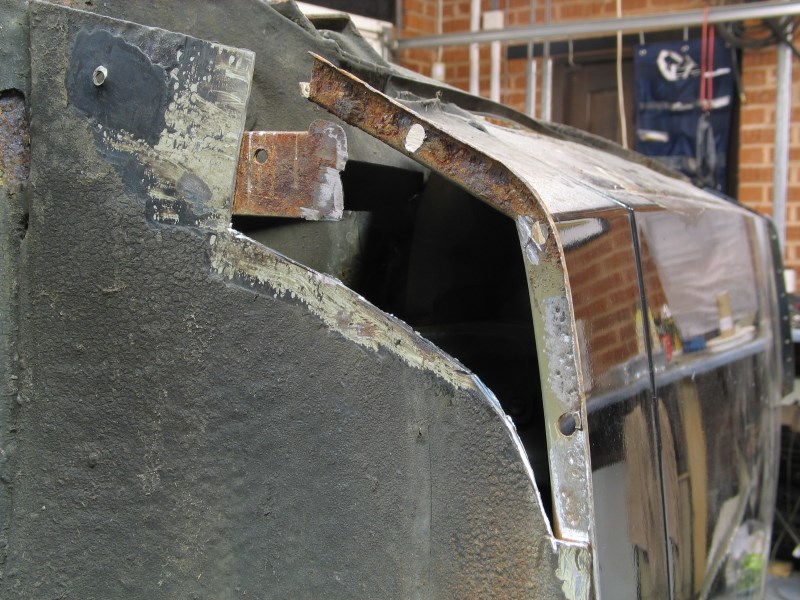
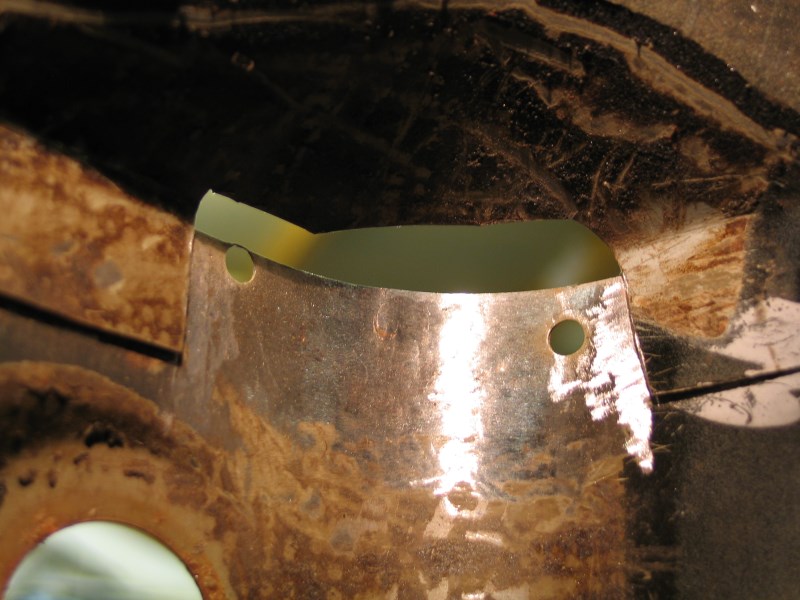
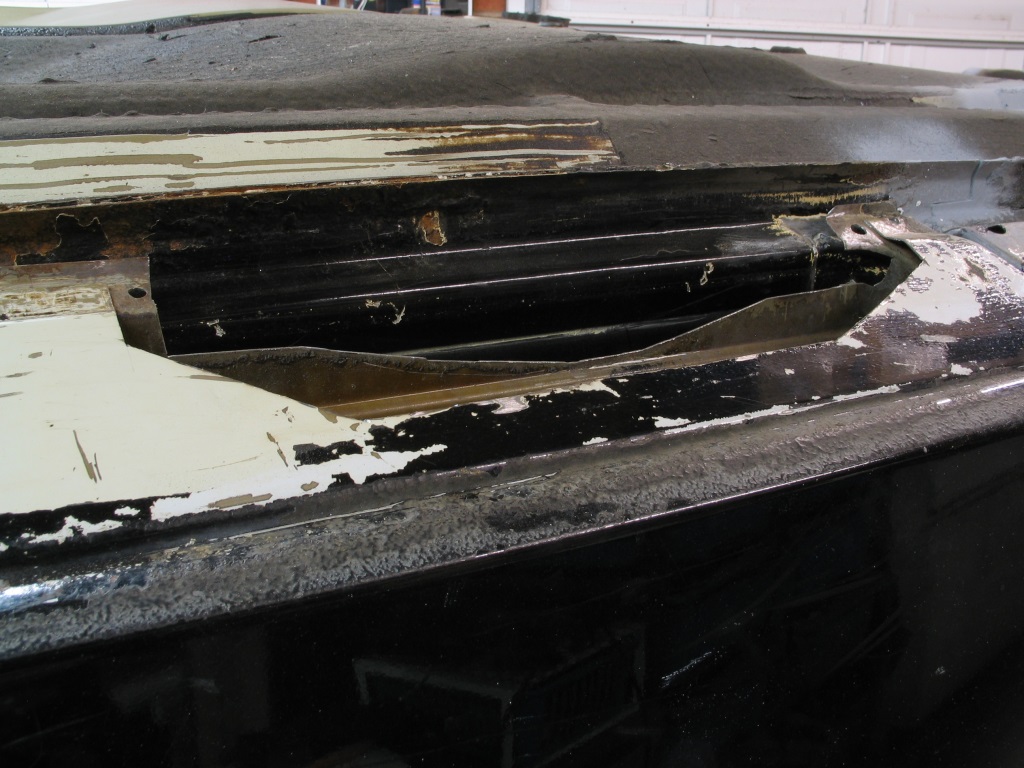
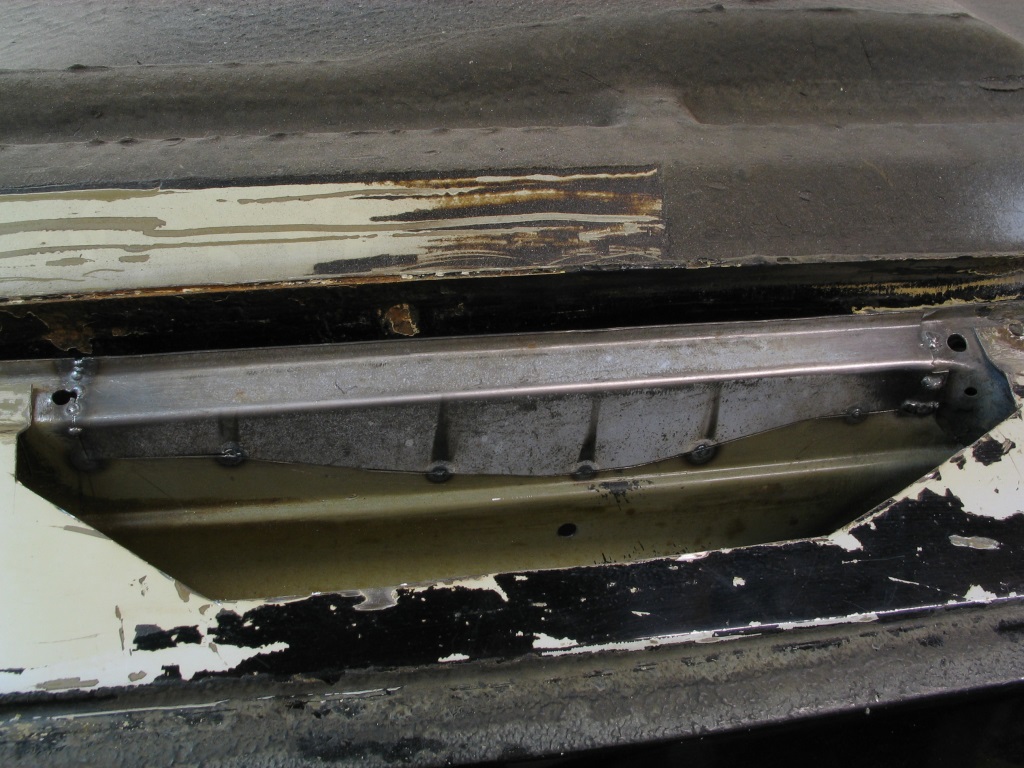
Continued working around the driver side rear arch. Front end of the inner arch..
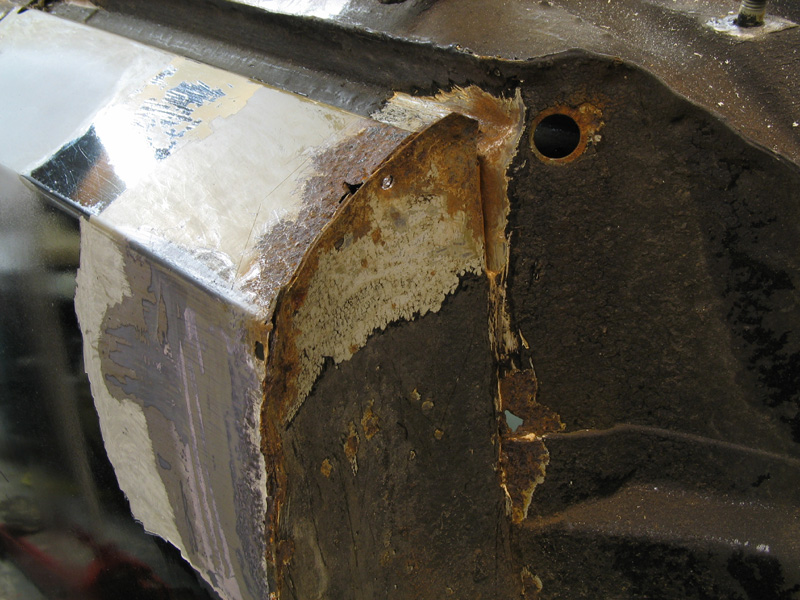
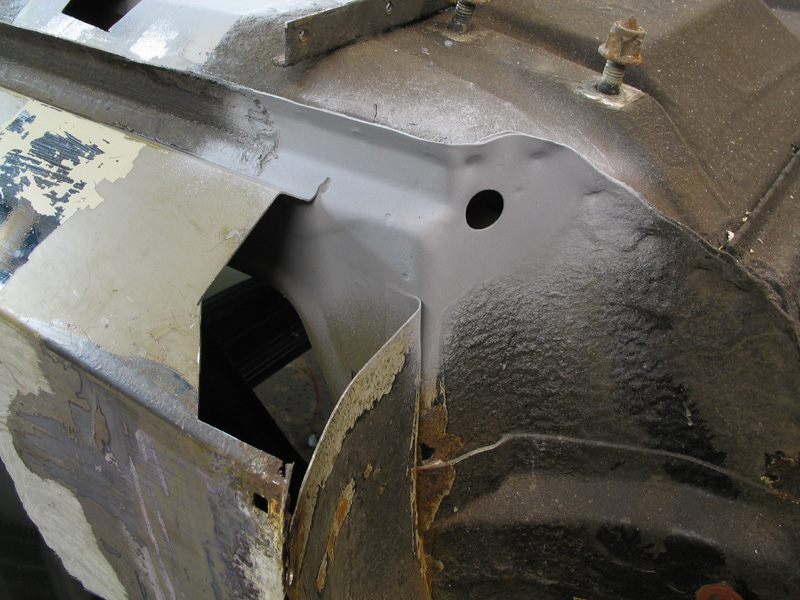
.. and from another angle.
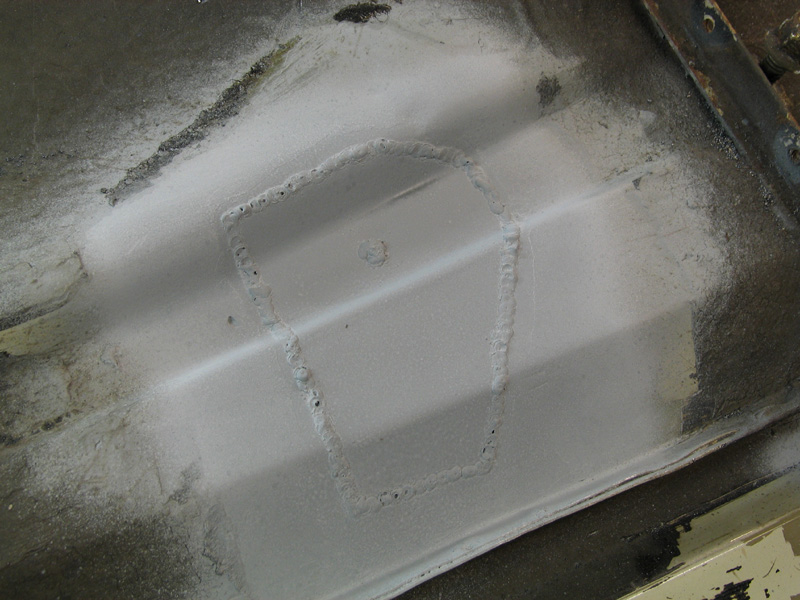
Worst rust cut out
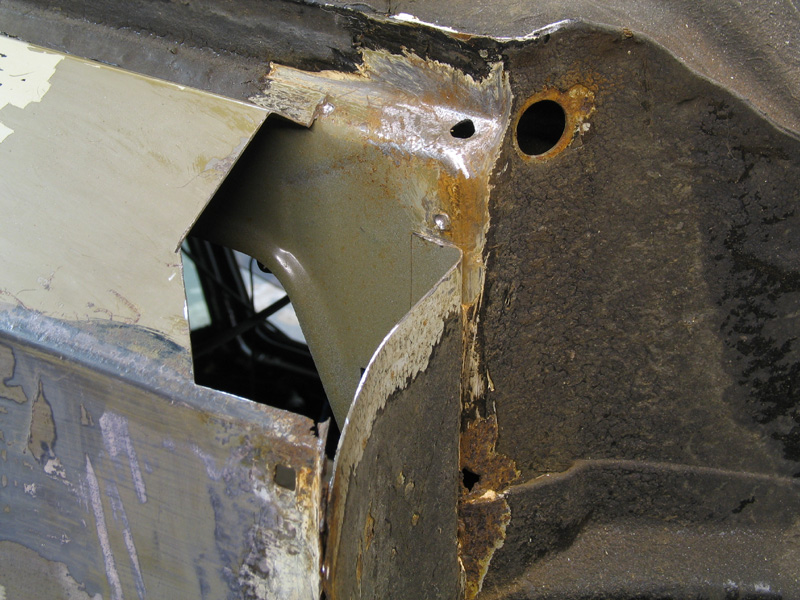
And small hole in sill repaired and area de-rusted. I'll deal with the rust hole lower down separately!
Repair sections knocked up


But not welded in yet as I want to retain access to the inner arch for the next bit.
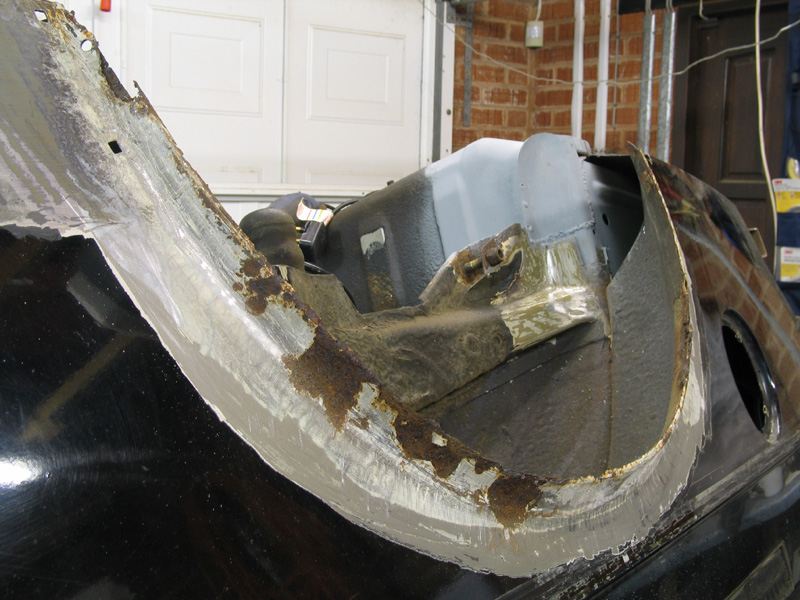
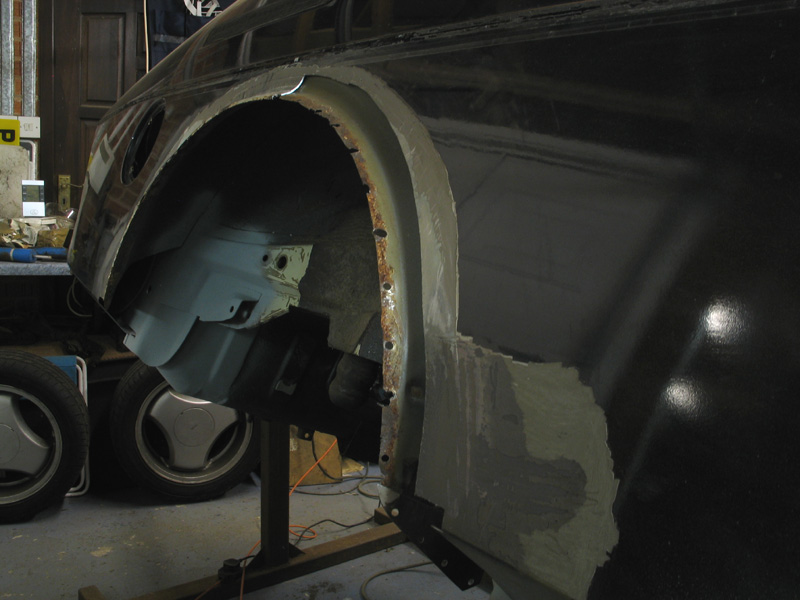
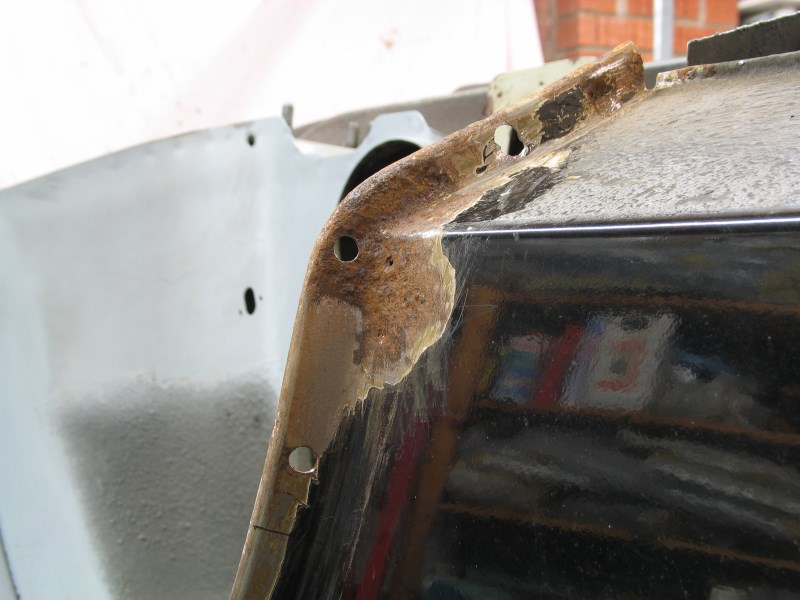
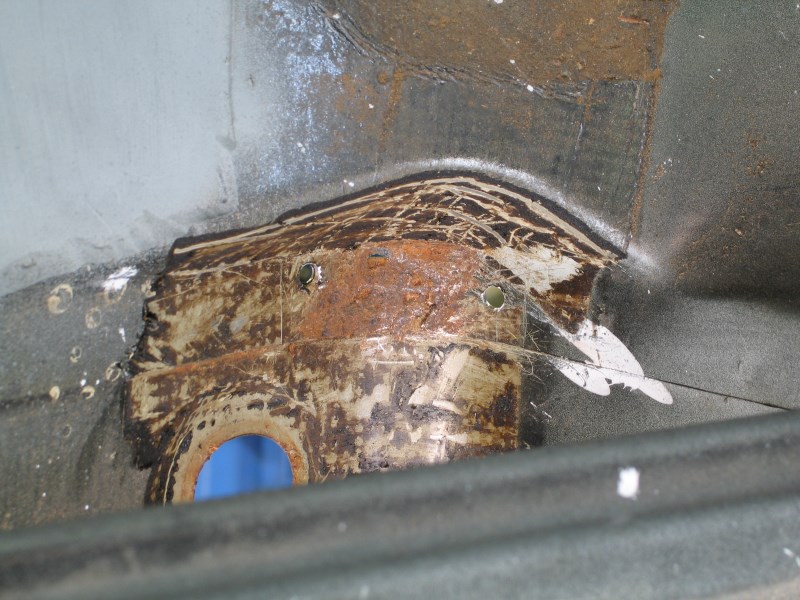
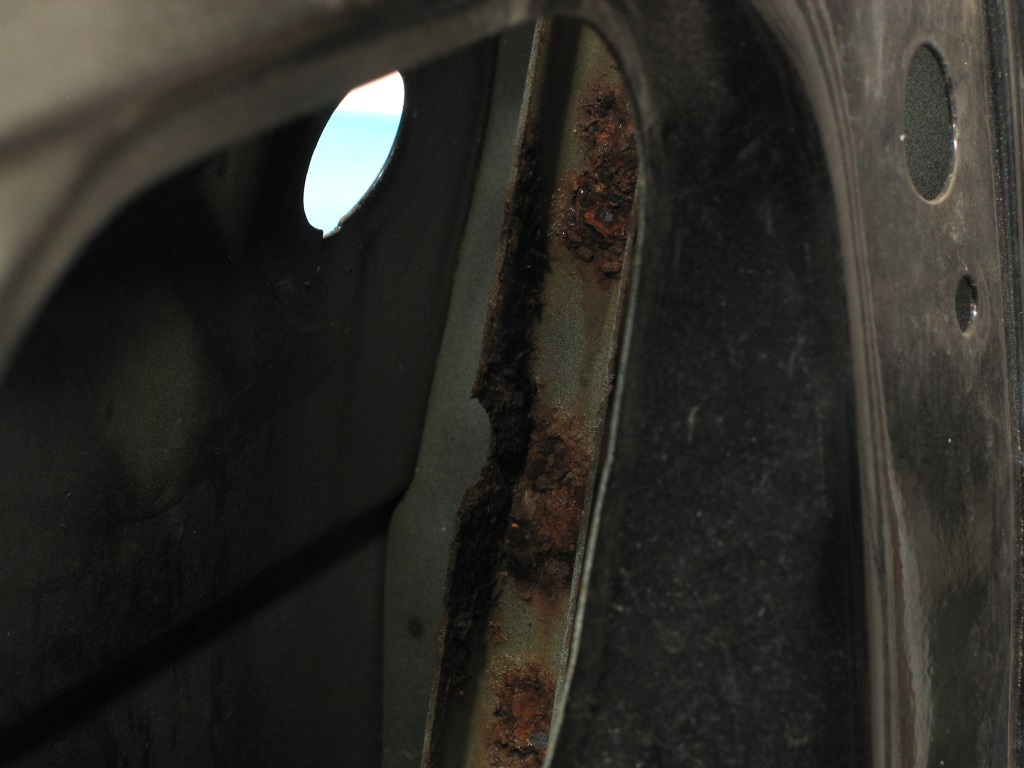
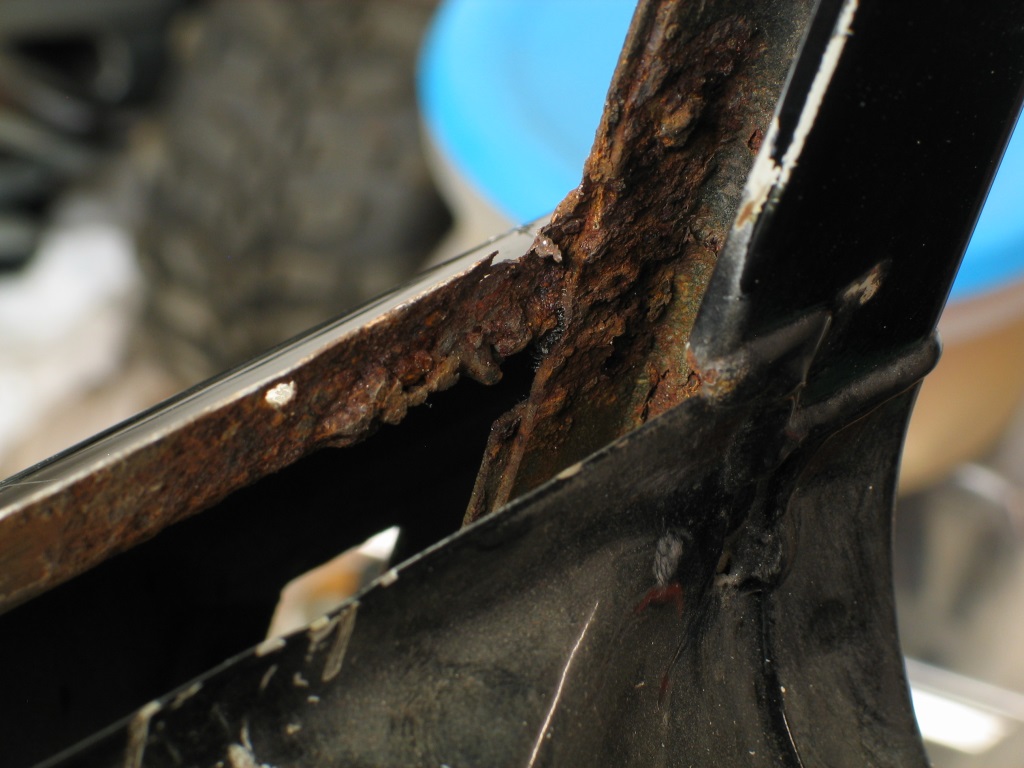
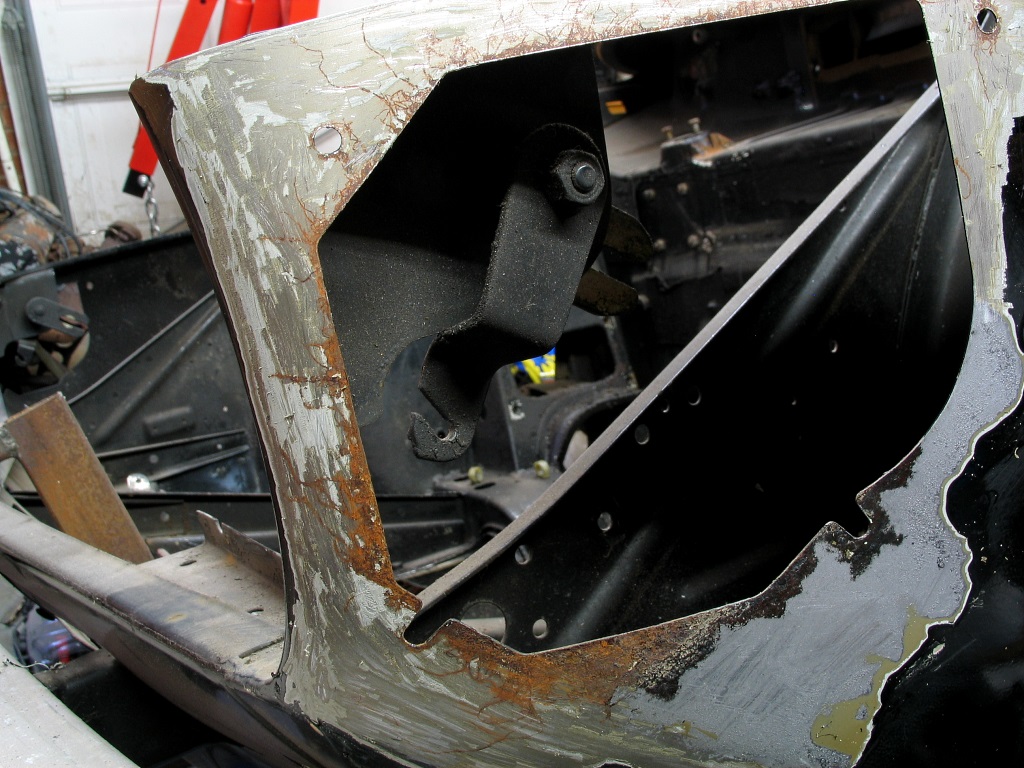
Main wheel arch well rotted, inner and outer arches bulging apart and also full of filler.
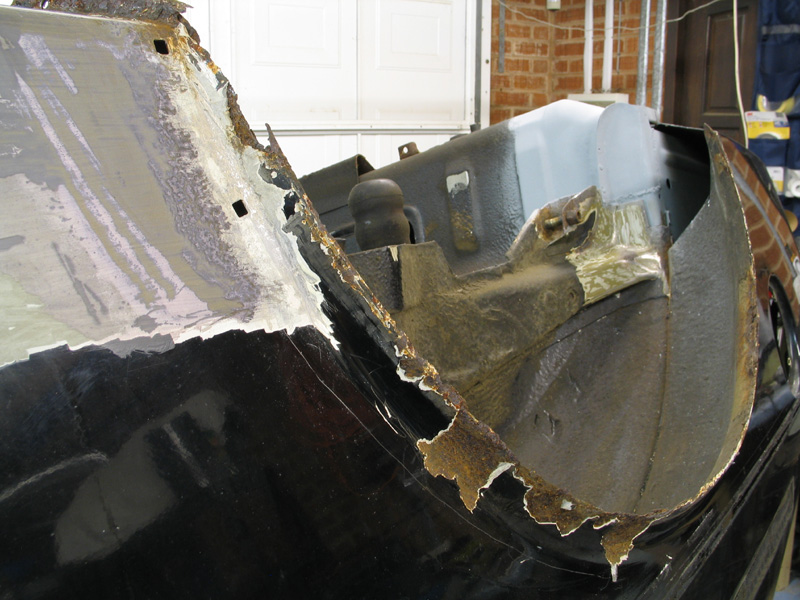
Stripped back
In the meantime I had been prepping a donor arch cut from a C900. It appeared rust free initially, but stripping the sealant revealed that it was just starting to go slightly, but only light surface rust fortunately.
De-rusting it properly meant splitting the inner and outer sections but I intended to do this anyway so no problem really.
Once split and cleaned I marked around the outer section.

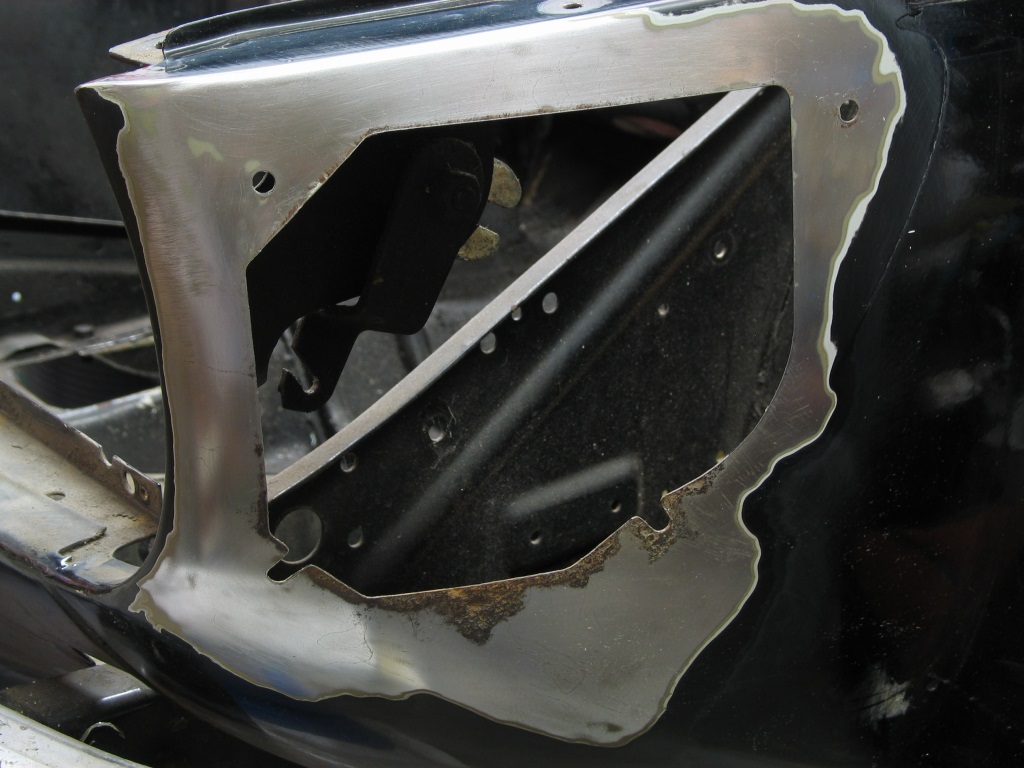
Slowly and carefully cut the outer arch away and drilled the spot-welds to the inner arch (some of which were an absolute swine to find due with all the rust damage)
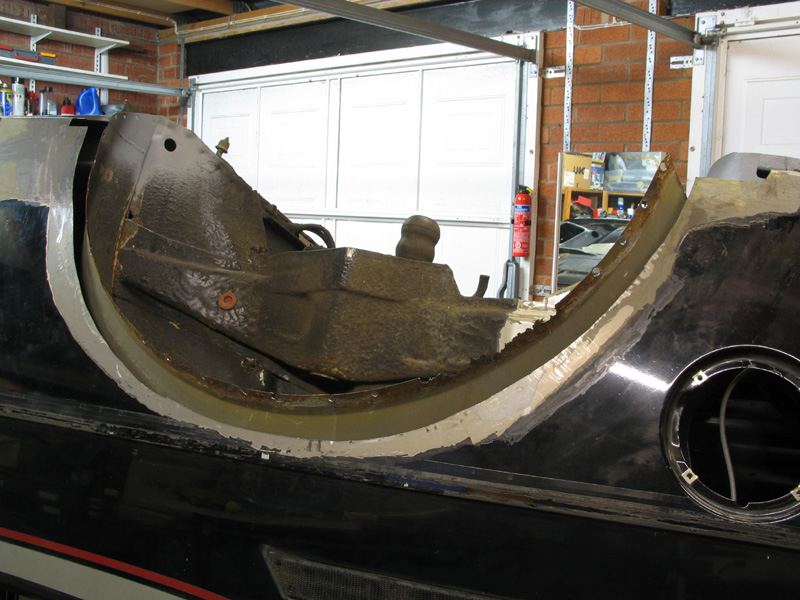
Finally, outer arch removed. At this stage I removed the worst flaky / lumpy rust from the inner arch and flattened down a few high points so that my outer repair section would slot nicely into place.
I will be replacing a section of the inner arch later on but for now I left it in place to help ensure correct alignment of the outer section.
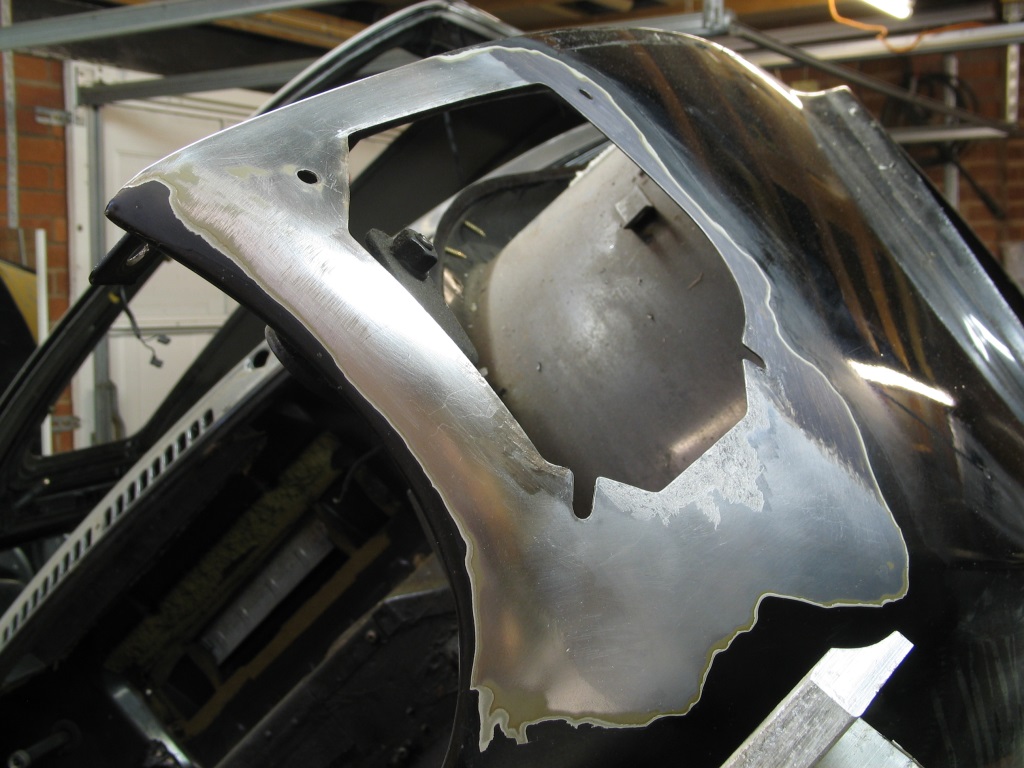
I also incorporated small sections at the bottom of the arch where it folds under the car to help with 3D alignment
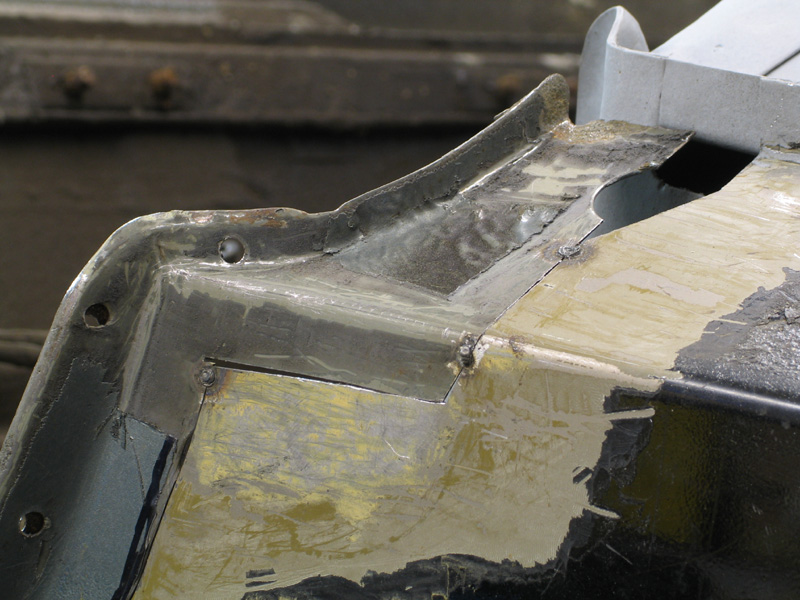
After much trimming, fettling, repositioning, checking, checking and re-checking, I tacked the outer arch into place.

Next job is to add spot welds slowly (whilst quenching) to build up a seam weld all the way round without distorting and then for the first time since I've owned it the car will have one solid rear arch!!
Folded up the repair section for the floor under the jacking point, which was harder than it looks since none of the flat pieces of the section have parallel edges, they all need to converge or diverge a little. So if the angle of the fold is even a fraction out it throws all the rest of the piece out too!!
Welded in, will dress the welds back later. Jacking point will be re-attached once I've de-rusted it.
Continued working around the driver side rear arch. Front end of the inner arch..
.. and from another angle.
Worst rust cut out
And small hole in sill repaired and area de-rusted. I'll deal with the rust hole lower down separately!
Repair sections knocked up
But not welded in yet as I want to retain access to the inner arch for the next bit.
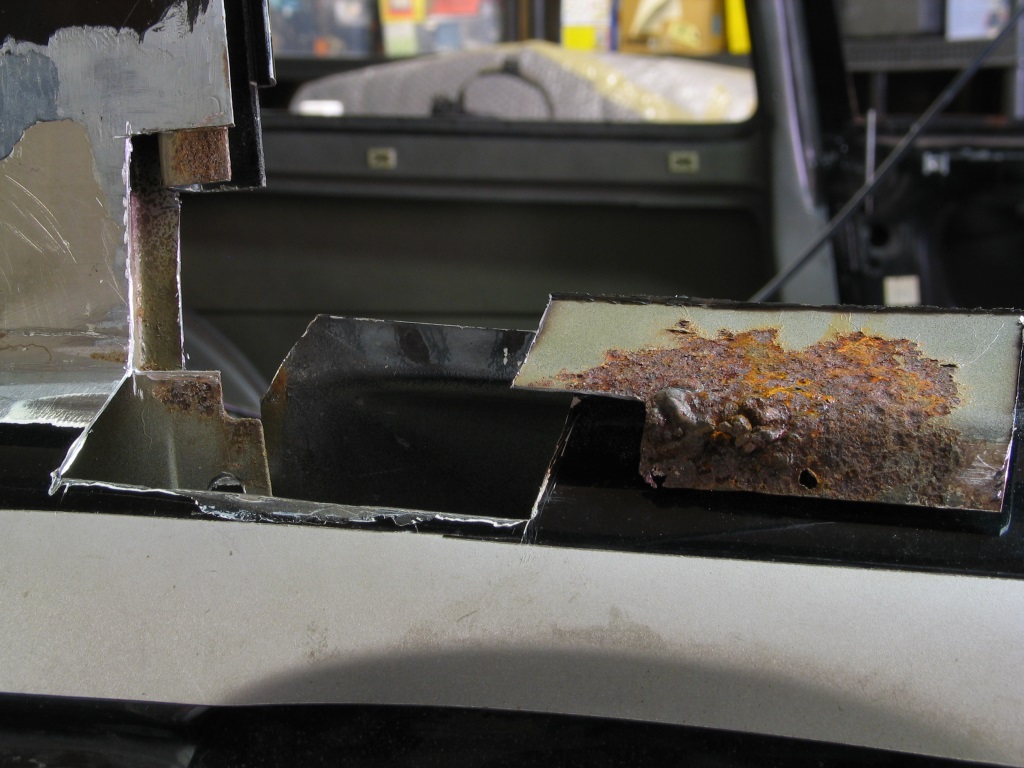
Main wheel arch well rotted, inner and outer arches bulging apart and also full of filler.
Stripped back
In the meantime I had been prepping a donor arch cut from a C900. It appeared rust free initially, but stripping the sealant revealed that it was just starting to go slightly, but only light surface rust fortunately.
De-rusting it properly meant splitting the inner and outer sections but I intended to do this anyway so no problem really.
Once split and cleaned I marked around the outer section.
Slowly and carefully cut the outer arch away and drilled the spot-welds to the inner arch (some of which were an absolute swine to find due with all the rust damage)
Finally, outer arch removed. At this stage I removed the worst flaky / lumpy rust from the inner arch and flattened down a few high points so that my outer repair section would slot nicely into place.
I will be replacing a section of the inner arch later on but for now I left it in place to help ensure correct alignment of the outer section.
I also incorporated small sections at the bottom of the arch where it folds under the car to help with 3D alignment
After much trimming, fettling, repositioning, checking, checking and re-checking, I tacked the outer arch into place.
Next job is to add spot welds slowly (whilst quenching) to build up a seam weld all the way round without distorting and then for the first time since I've owned it the car will have one solid rear arch!!

Time for a rather overdue update!
2013 seems to have mainly been a year of family stuff so far, including making an honest woman of the long-suffering Mrs 99t in August.
As a result the poor old Saab has been somewhat neglected, and when I have made it out to the garage, progress has consisted of tinkering rather than making significant progress..
I'll return to the wheelarch I was last working on another time – it is welded in properly now but I've not yet dressed the welds yet as I find it a mind-numbingly boring task! A job for a wet Sunday in January perhaps!
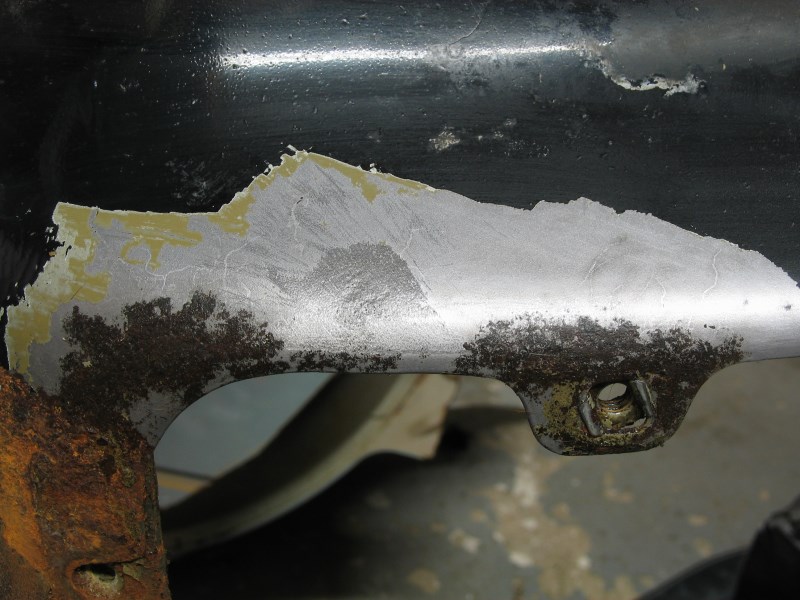
One thing I have found, and which means I have to bare-metal far more of the underside than I thought I would, it the amount of rust underneath what appears to be perfectly sound paint and underseal.
Saab were reputed to be using poor quality steel in the late Seventies, and this must be a contributing factor to the survival rates of these cars being so low.
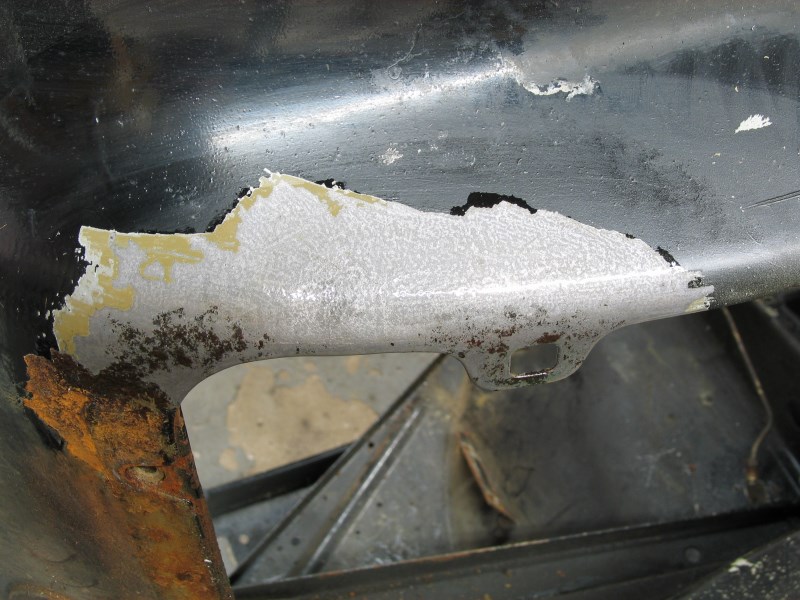
E.g. really sound looking paint and stone chip protection behind rear wheel arch
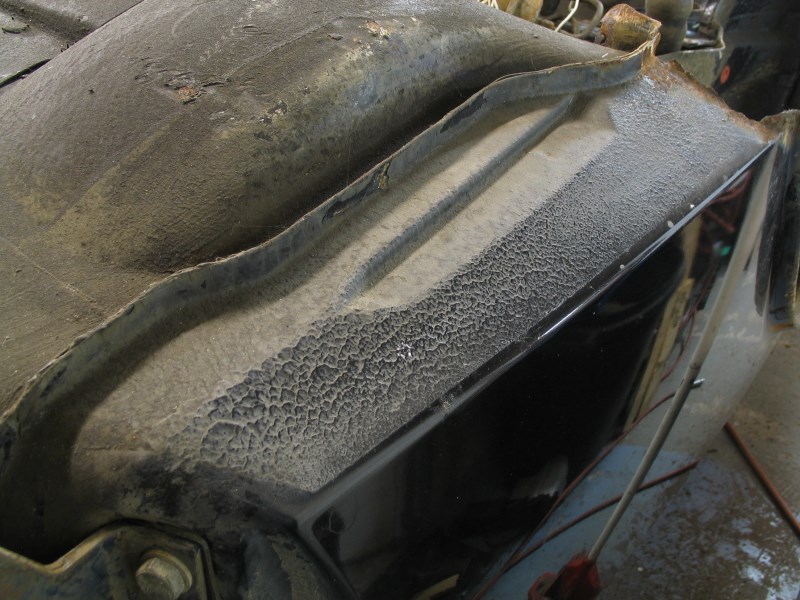
Stripped back (yes ok it's the other side, but it looked exactly the same before stripping!)
Rust spiders everywhere!
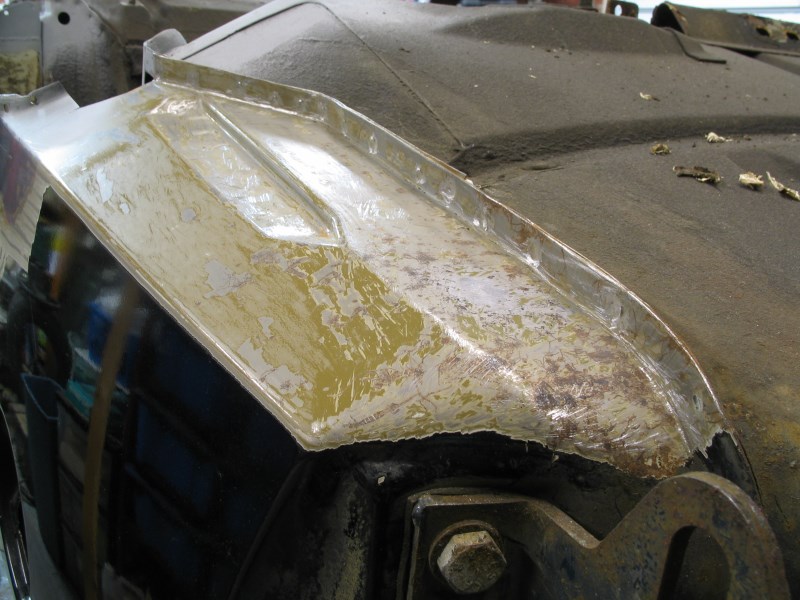
The way I have been dealing with surface rust like this is using undiluted 75% phosphoric acid, brushed on in a very thin layer. It is, by far, the quickest and most effective way of cleaning up metal I have come across.
Although very watery, it only needs to be applied very sparingly - just enough to wet the panel, so even when applied vertically it barely runs at all.
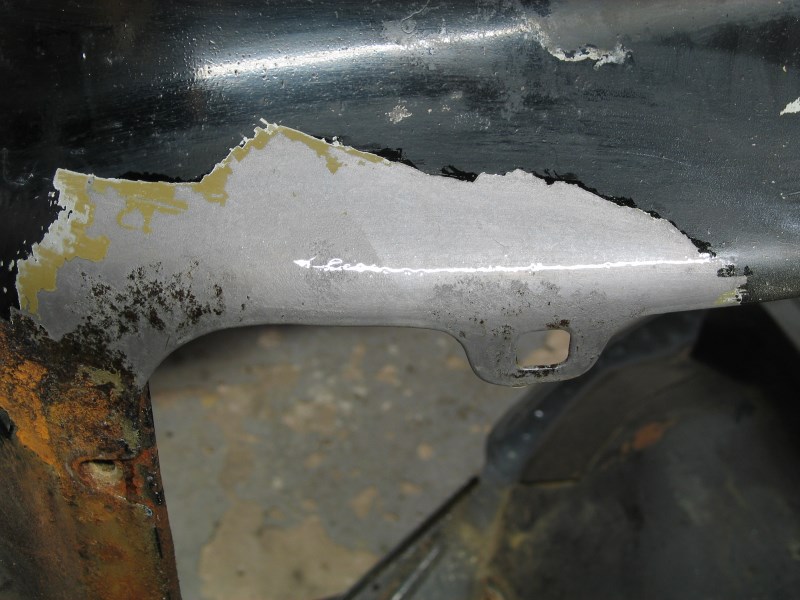
So for example, this
Becomes this after about ten minutes
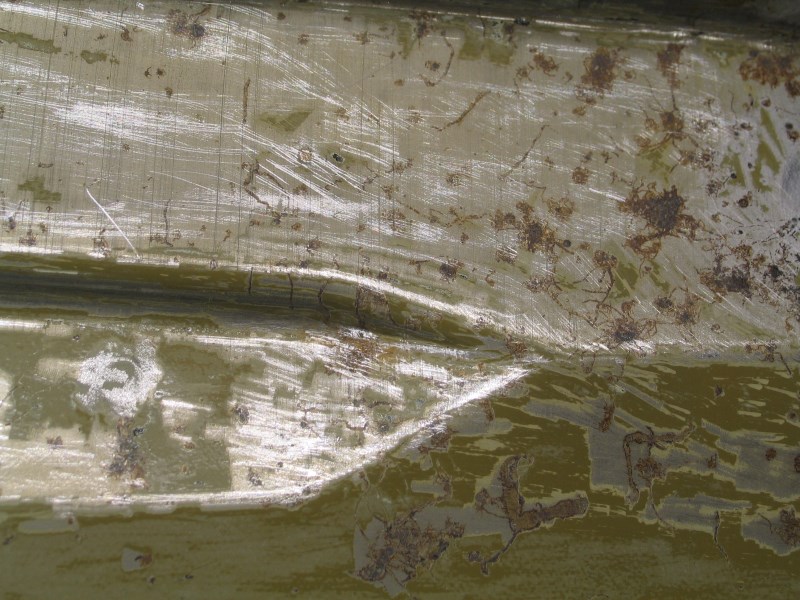
Twenty minutes
After half an hour just the deepest bits remain – give these a very light rub with a wire brush to loosen the surface deposits
By an hour the first section is almost entirely clean metal (may just need a touch from a tiny diamond bit in a Dremel in one or two deep pits) and I've started cleaning the next section.
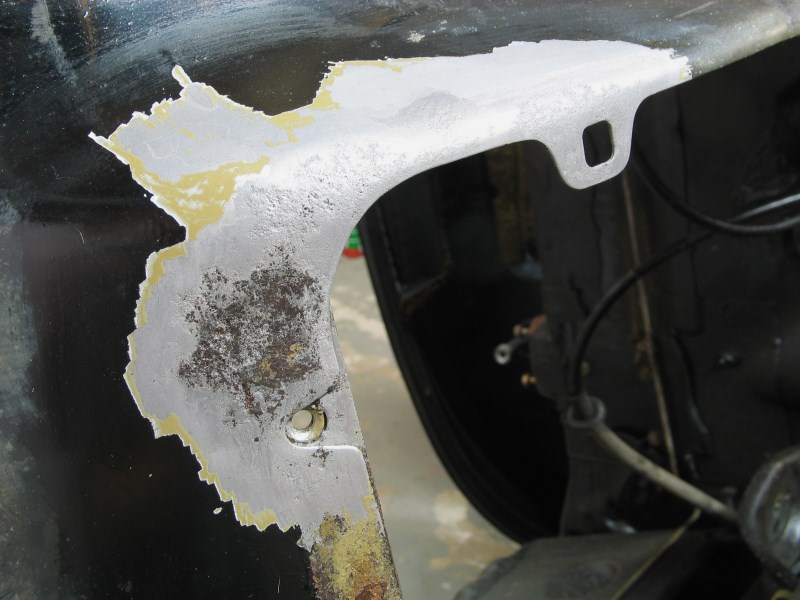
As a bonus, the acid “pickles” the metal surface and makes it fairly rust resistant if left untreated, not that I intend to do that, but it must surely help with future rust resistance...?
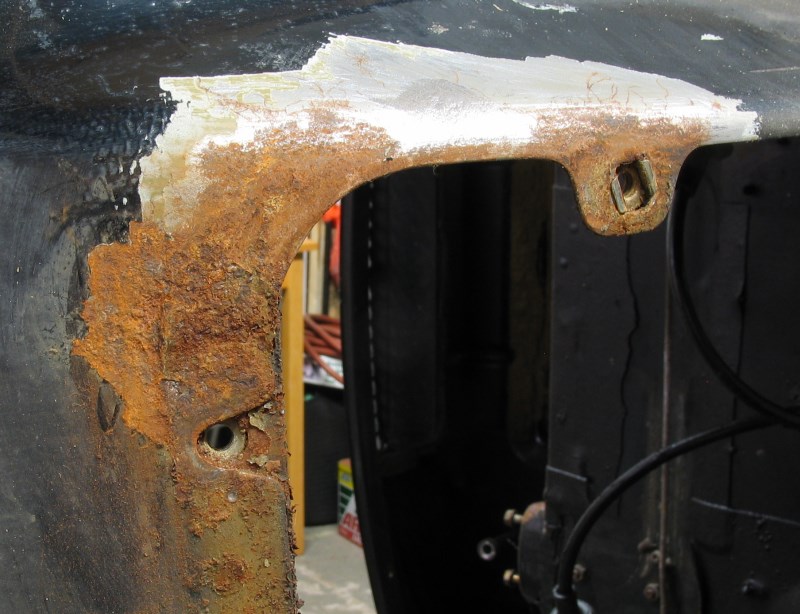
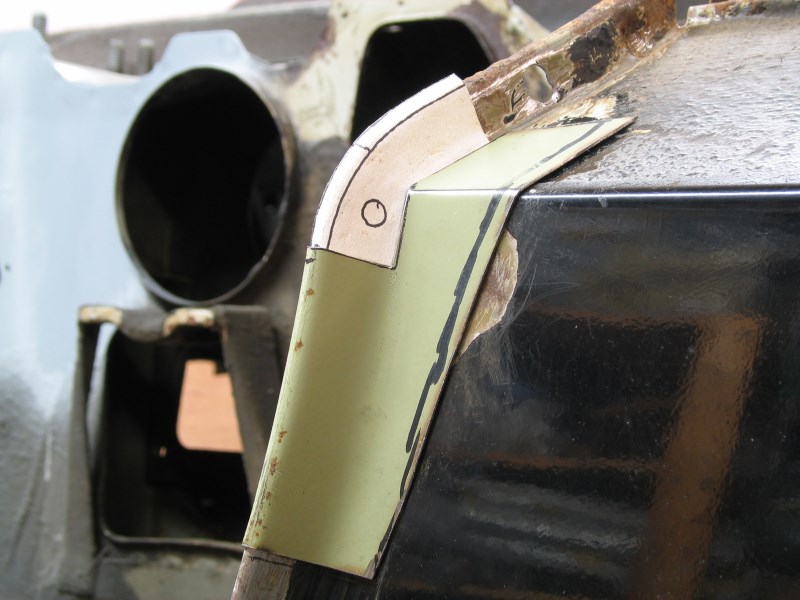
Other bits – lower front arch
Inner arch cut back
Piece cut from a NOS wing section that didn't include the required part, but does share the same radius

Corner section I'll have to make up (ongoing)
Apologies, this update is flitting around all over the car, the next bits were in the boot floor – bright spot at top of boot floor below
Closer
Next two bits in progress
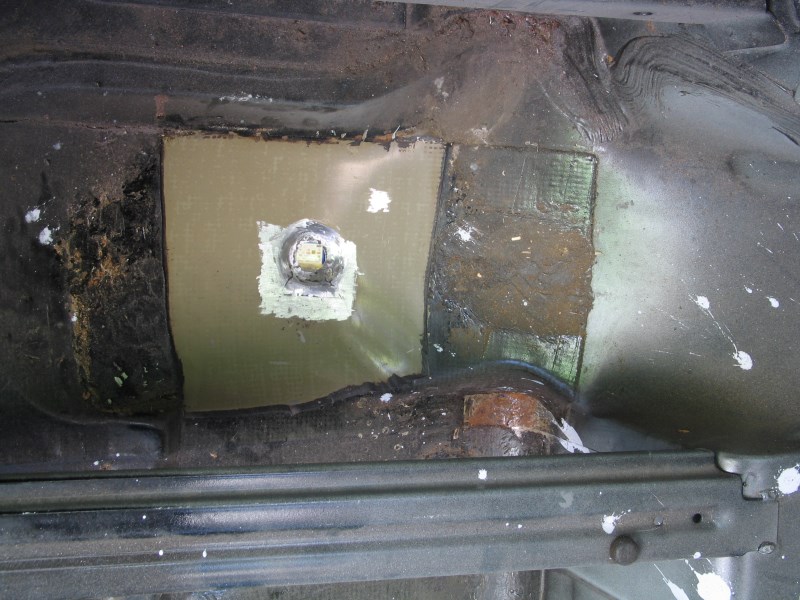
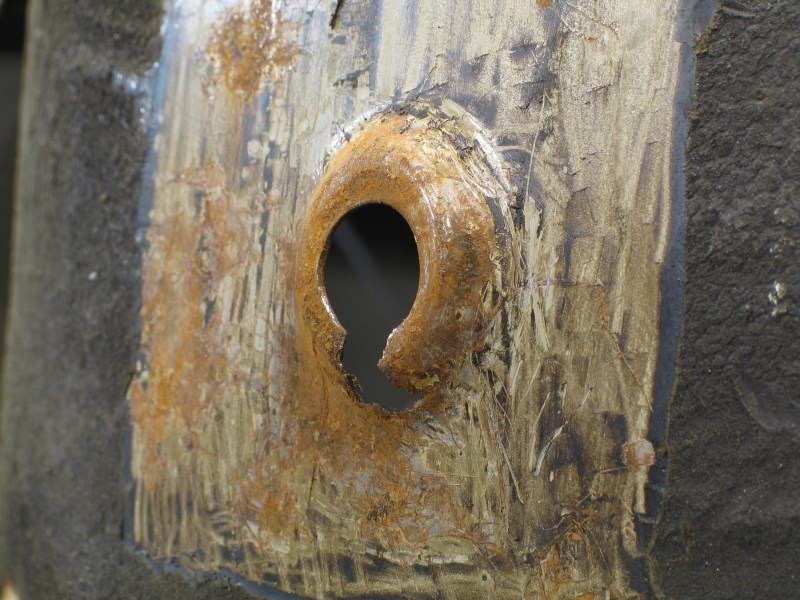
Spare wheel well drain hole - before
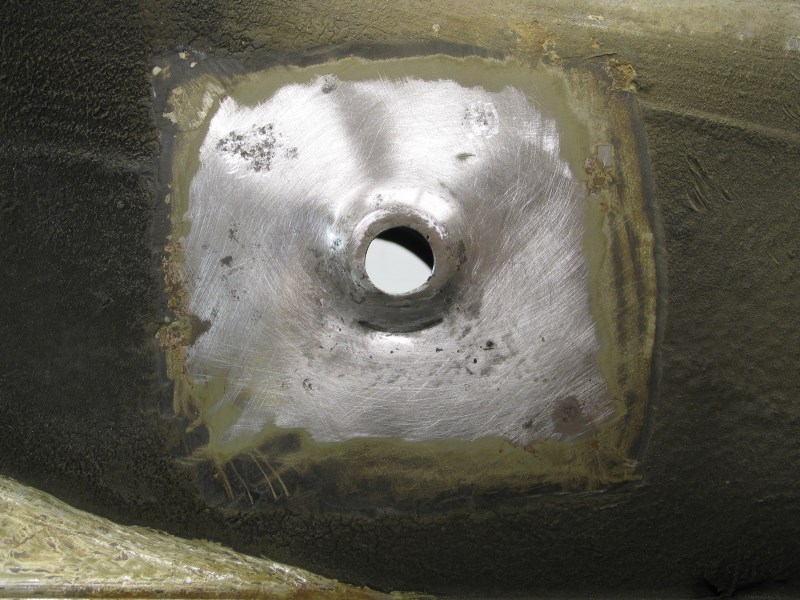
After
And just another rusty seam!!
Only the inner section needs replacing
And viewed from the other side – repair section to make..
And that brings things pretty much up to date. Hopefully future updates will be more regular and focussed than this ramble!!
2013 seems to have mainly been a year of family stuff so far, including making an honest woman of the long-suffering Mrs 99t in August.
As a result the poor old Saab has been somewhat neglected, and when I have made it out to the garage, progress has consisted of tinkering rather than making significant progress..
I'll return to the wheelarch I was last working on another time – it is welded in properly now but I've not yet dressed the welds yet as I find it a mind-numbingly boring task! A job for a wet Sunday in January perhaps!
One thing I have found, and which means I have to bare-metal far more of the underside than I thought I would, it the amount of rust underneath what appears to be perfectly sound paint and underseal.
Saab were reputed to be using poor quality steel in the late Seventies, and this must be a contributing factor to the survival rates of these cars being so low.
E.g. really sound looking paint and stone chip protection behind rear wheel arch
Stripped back (yes ok it's the other side, but it looked exactly the same before stripping!)
Rust spiders everywhere!
The way I have been dealing with surface rust like this is using undiluted 75% phosphoric acid, brushed on in a very thin layer. It is, by far, the quickest and most effective way of cleaning up metal I have come across.
Although very watery, it only needs to be applied very sparingly - just enough to wet the panel, so even when applied vertically it barely runs at all.
So for example, this
Becomes this after about ten minutes
Twenty minutes
After half an hour just the deepest bits remain – give these a very light rub with a wire brush to loosen the surface deposits
By an hour the first section is almost entirely clean metal (may just need a touch from a tiny diamond bit in a Dremel in one or two deep pits) and I've started cleaning the next section.
As a bonus, the acid “pickles” the metal surface and makes it fairly rust resistant if left untreated, not that I intend to do that, but it must surely help with future rust resistance...?
Other bits – lower front arch
Inner arch cut back
Piece cut from a NOS wing section that didn't include the required part, but does share the same radius
Corner section I'll have to make up (ongoing)
Apologies, this update is flitting around all over the car, the next bits were in the boot floor – bright spot at top of boot floor below
Closer
Next two bits in progress
Spare wheel well drain hole - before
After
And just another rusty seam!!
Only the inner section needs replacing
And viewed from the other side – repair section to make..
And that brings things pretty much up to date. Hopefully future updates will be more regular and focussed than this ramble!!

As the year nears its conclusion, I thought I'd best detail the progress made in 2014.
Sorry to say this won't take long...
I assumed the fuel accumulator was beyond salvation and dipped it in acid for several days - initially just to help to get the unions undone (and save the moulded fuel lines).

However whilst slightly surprised that it cleaned up so well, I was genuinely amazed that it also pressure tested ok.
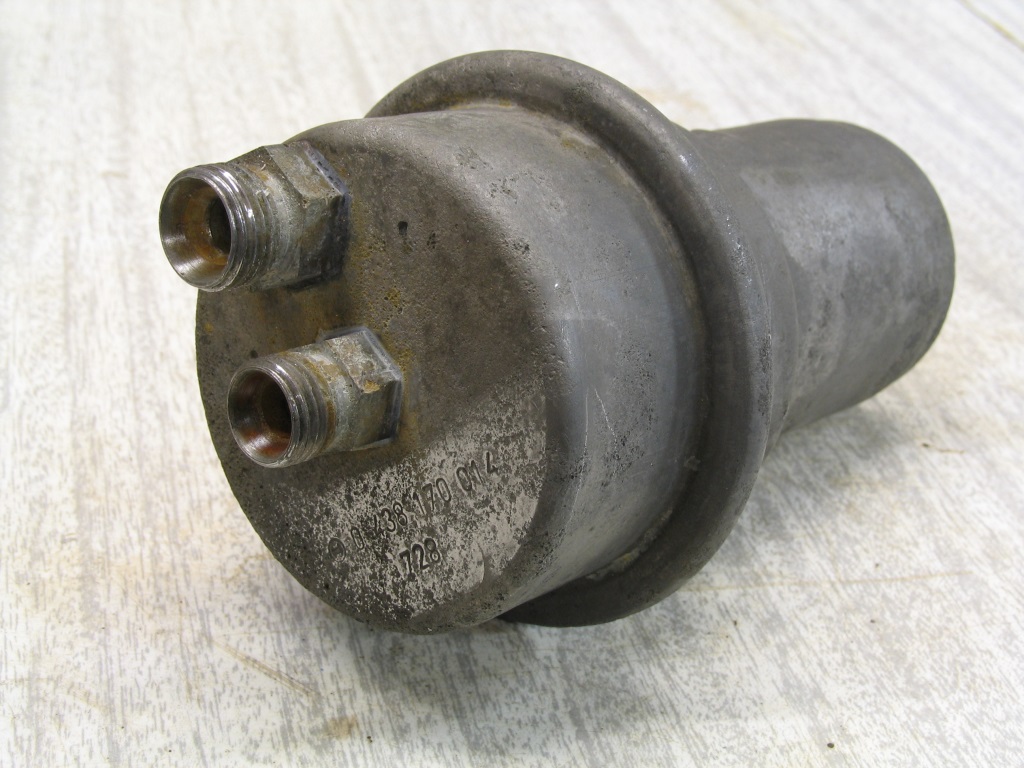
Still not entirely sure I want to reuse it, but it may just suffice if a correct replacement proves impossible to obtain.
I also started on the doors. As this work progresses you may well wonder why I didn't just replace the doors with better ones (and in fact I even have a much better pair "in stock"!)
Originality is the answer. I want to end up with a 99 Turbo that retains all of its original panels (or as much of them as possible) even though it would be far quicker and easier to replace in most cases.
The Geek in me likes that the original doors retain some nice factory information under the trim panels
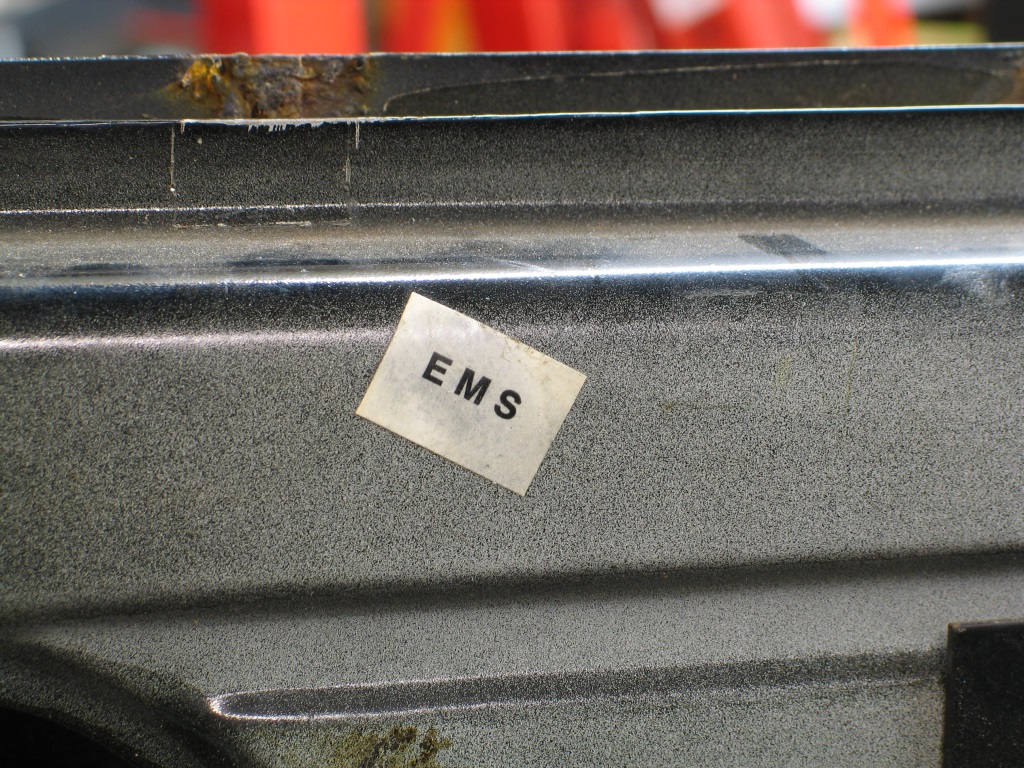
and
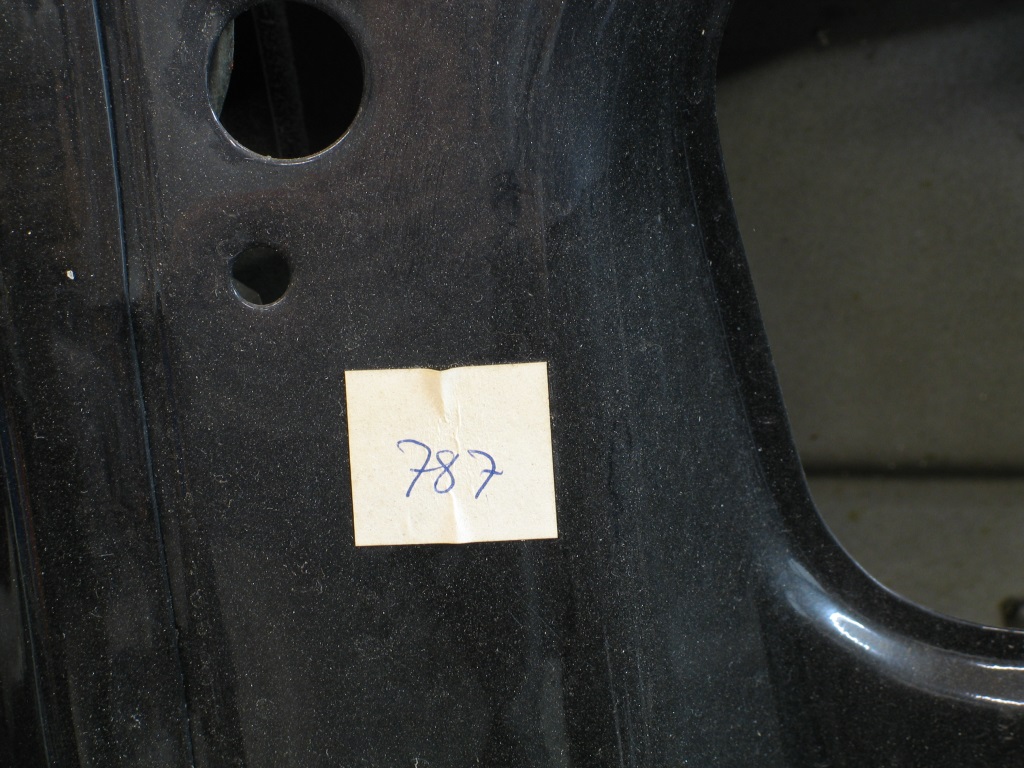
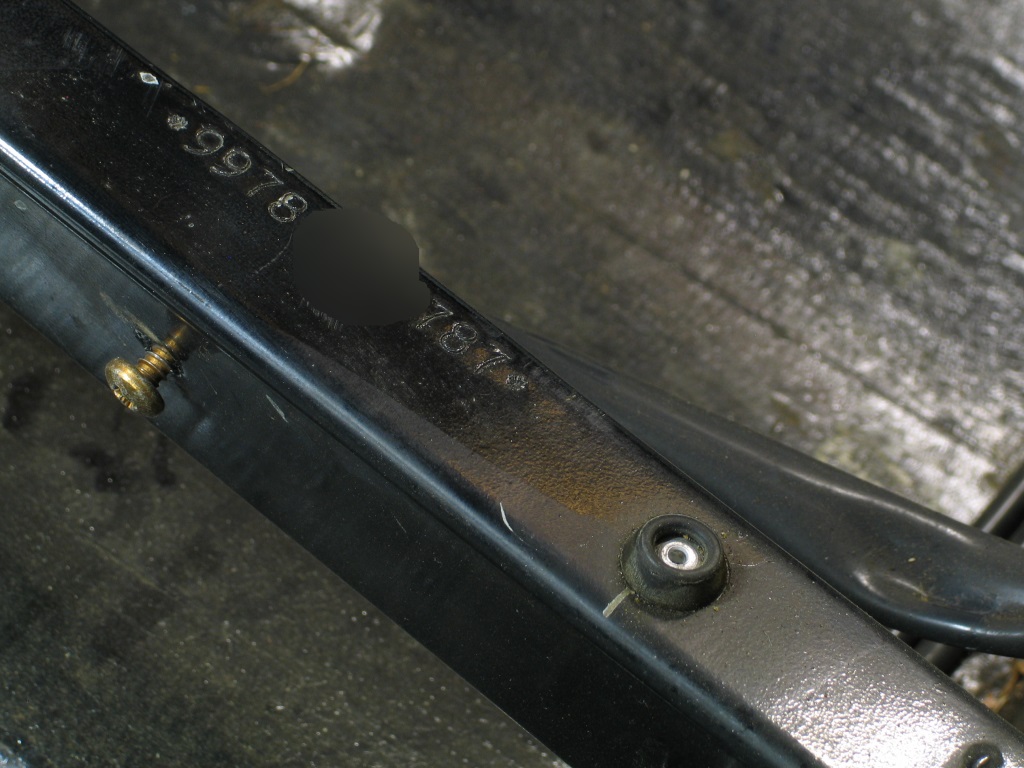
which might not mean much without this
So, deep breath... and cut some rust out of the bottom of the driver's door...

...and started tacking new sections in.
Besides the rotten bottoms, the other major issue with the doors is badly rusty window channels (which guide the glass when wound down into the door).
As the channel rusts the metal expands and compresses the rubber / felt liner that the glass slides in, making it excessively tight and making window winding difficult. People often blame the winder mechanism for stiff windows, but in my experience the mechanism is rarely the culprit in a Saab 99.
Mine were pretty bad in places. The channels are welded into the very ends of the door so access is really poor, so painstaking removal is the only option.
The top lip of the door skin is also rusty and badly repaired previously so decision where to cut into the door frame was made easier.
The U-section channel has a curve along its length so not easy to make a replacement with the facilities I have, so elected to repair.
De-rusted

Patched (about 8 small patches in total), treated and epoxy coated, ready to weld back into the door.

And that's about it in terms of actual work!
Earlier in the year I tracked down a few more NOS parts in Tenerife of all places!
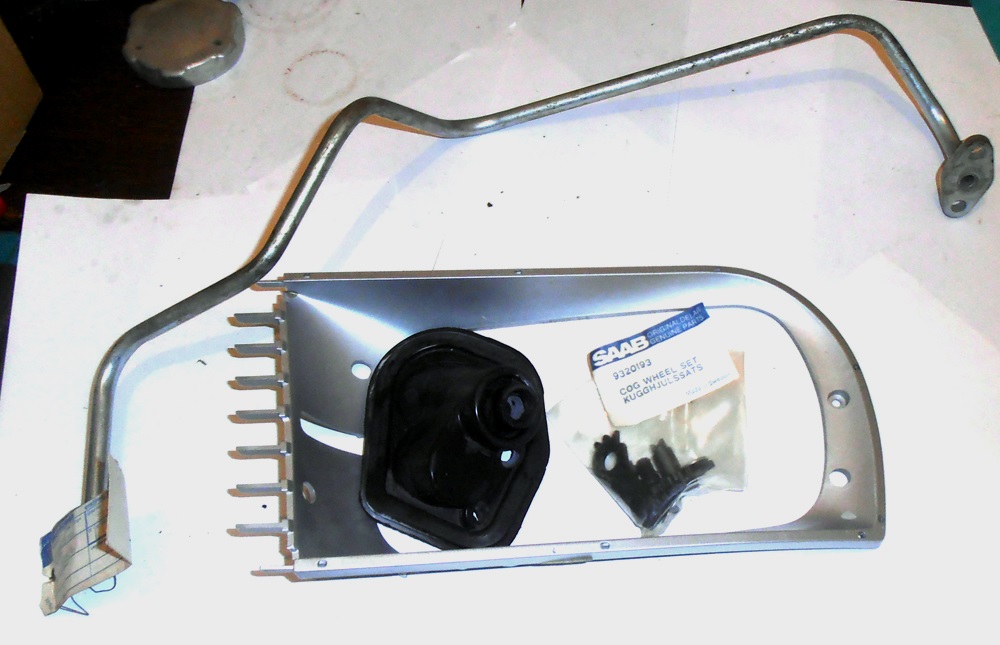
Then just after Christmas the postman arrived with a genuine exhaust tailpipe poking out of his sack!
Happy New Year to All and here's to a productive 2015
Sorry to say this won't take long...
I assumed the fuel accumulator was beyond salvation and dipped it in acid for several days - initially just to help to get the unions undone (and save the moulded fuel lines).
However whilst slightly surprised that it cleaned up so well, I was genuinely amazed that it also pressure tested ok.
Still not entirely sure I want to reuse it, but it may just suffice if a correct replacement proves impossible to obtain.
I also started on the doors. As this work progresses you may well wonder why I didn't just replace the doors with better ones (and in fact I even have a much better pair "in stock"!)
Originality is the answer. I want to end up with a 99 Turbo that retains all of its original panels (or as much of them as possible) even though it would be far quicker and easier to replace in most cases.
The Geek in me likes that the original doors retain some nice factory information under the trim panels
and
which might not mean much without this
So, deep breath... and cut some rust out of the bottom of the driver's door...
...and started tacking new sections in.
Besides the rotten bottoms, the other major issue with the doors is badly rusty window channels (which guide the glass when wound down into the door).
As the channel rusts the metal expands and compresses the rubber / felt liner that the glass slides in, making it excessively tight and making window winding difficult. People often blame the winder mechanism for stiff windows, but in my experience the mechanism is rarely the culprit in a Saab 99.
Mine were pretty bad in places. The channels are welded into the very ends of the door so access is really poor, so painstaking removal is the only option.
The top lip of the door skin is also rusty and badly repaired previously so decision where to cut into the door frame was made easier.
The U-section channel has a curve along its length so not easy to make a replacement with the facilities I have, so elected to repair.
De-rusted
Patched (about 8 small patches in total), treated and epoxy coated, ready to weld back into the door.
And that's about it in terms of actual work!
Earlier in the year I tracked down a few more NOS parts in Tenerife of all places!
Then just after Christmas the postman arrived with a genuine exhaust tailpipe poking out of his sack!
Happy New Year to All and here's to a productive 2015
Ok, going to try to update more regularly this year.
One of the reasons I hadn't done much towards the latter end of last year is because I decided to give up another one of my other long-term projects, a slightly later two-door 99 turbo.
I had purchased this as a parts car, then given it a reprieve as it drove well. When I started welding however, I wished I hadn't bothered. It was far rustier than the three-door, also high mileage and badly (MOT) rust repaired previously. Stored for the last few years whilst I pondered its future, I finally, reluctantly accepted that life is too short and it would take more time than I was prepared to invest to even make an even half-decent car of it.
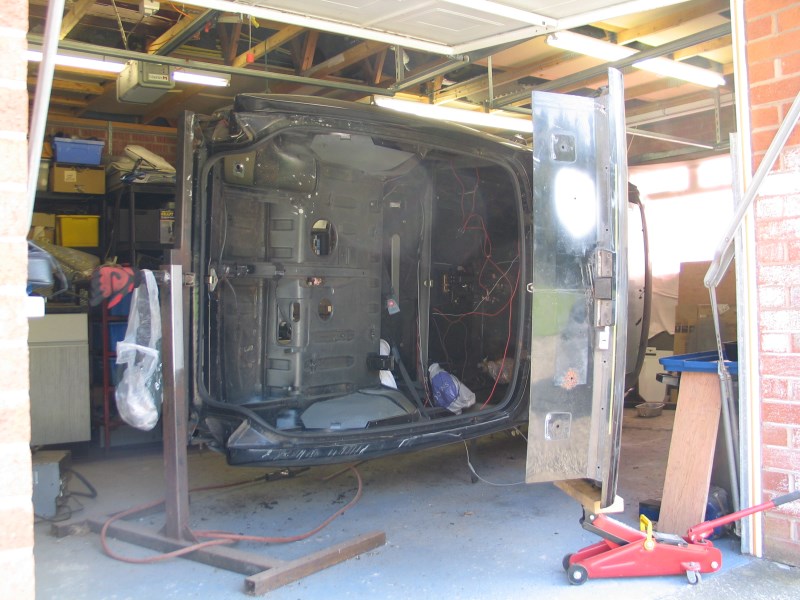
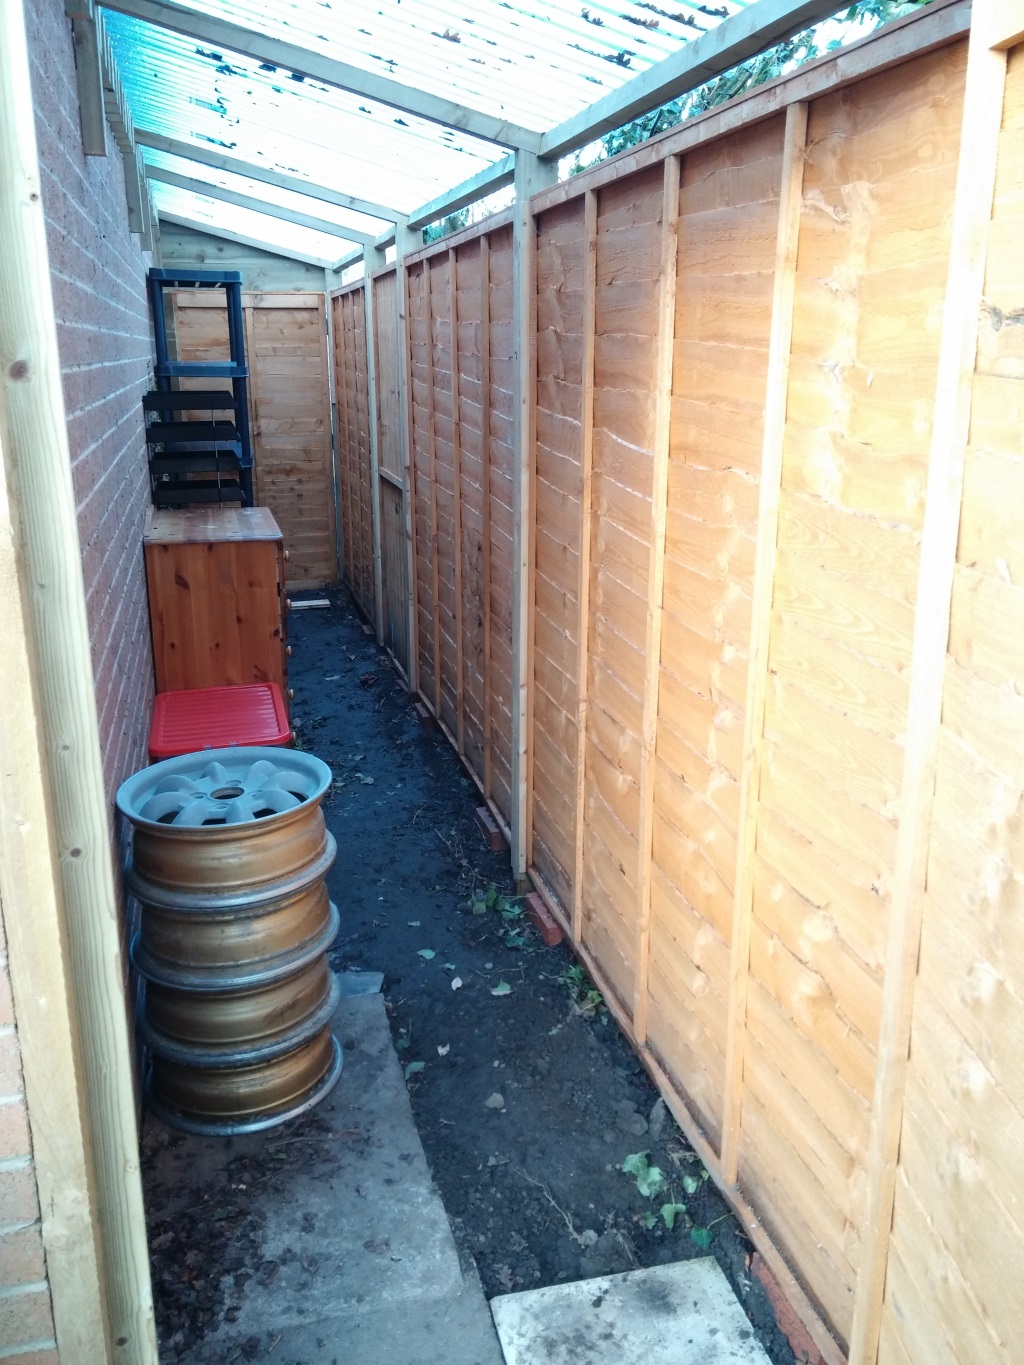
Decision made I stripped it, keeping anything that could be of future use. All the saved parts meant that I couldn't even get into the garage until I built a new shed to store all the parts. The only space Mrs 99t would allocate me for this was behind the garage - about three feet wide and twenty something feet long!
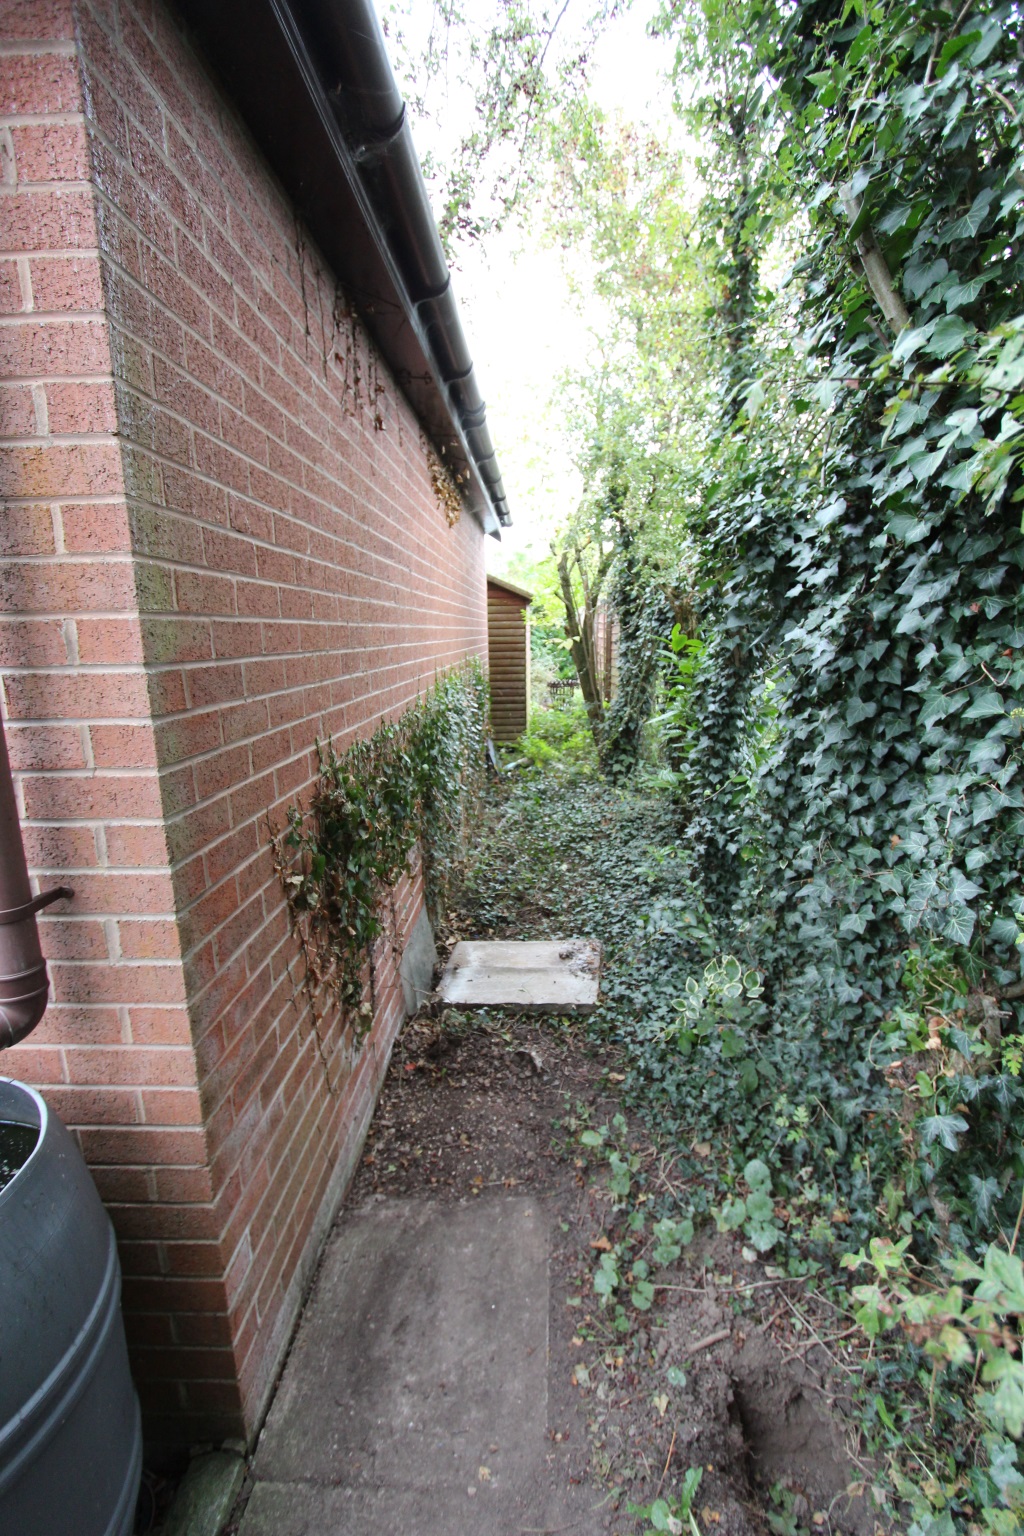
Still a work in progress but this is what it looked like before I put the stripped parts in it! Rather fuller now but at least I can get into the garage again!
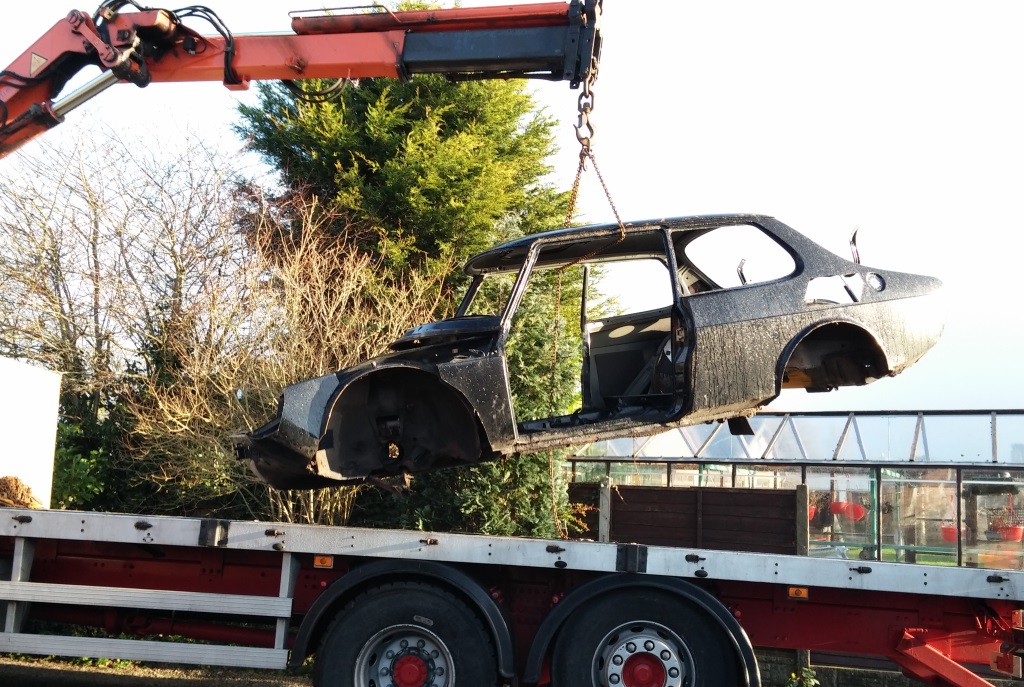
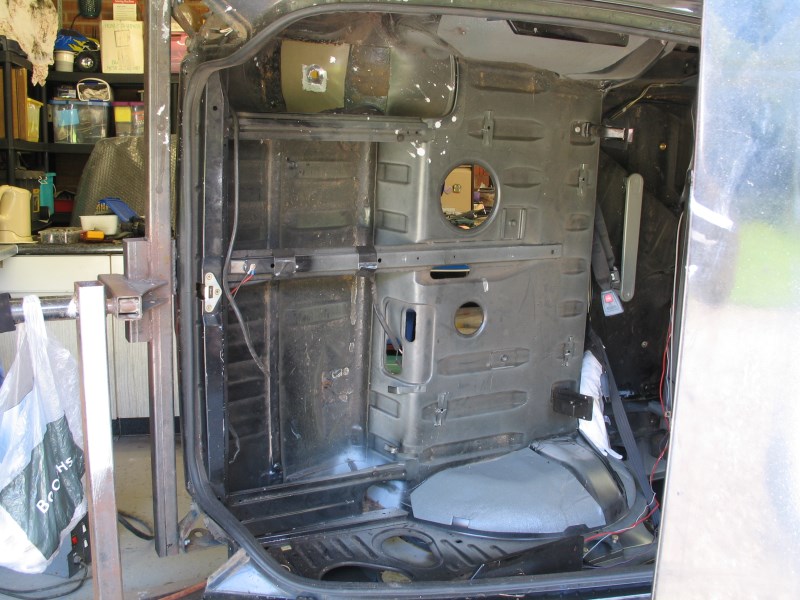
Shell gone, shed built and (over)filled and I can finally get back to this project...
Work on the tailgate continues. Really and honestly I should admit at this point that it was beyond sensible repair and I could have saved many, many hours by replacing it. My obsession with retaining all the original panels remains intact however, so onwards and upwards...
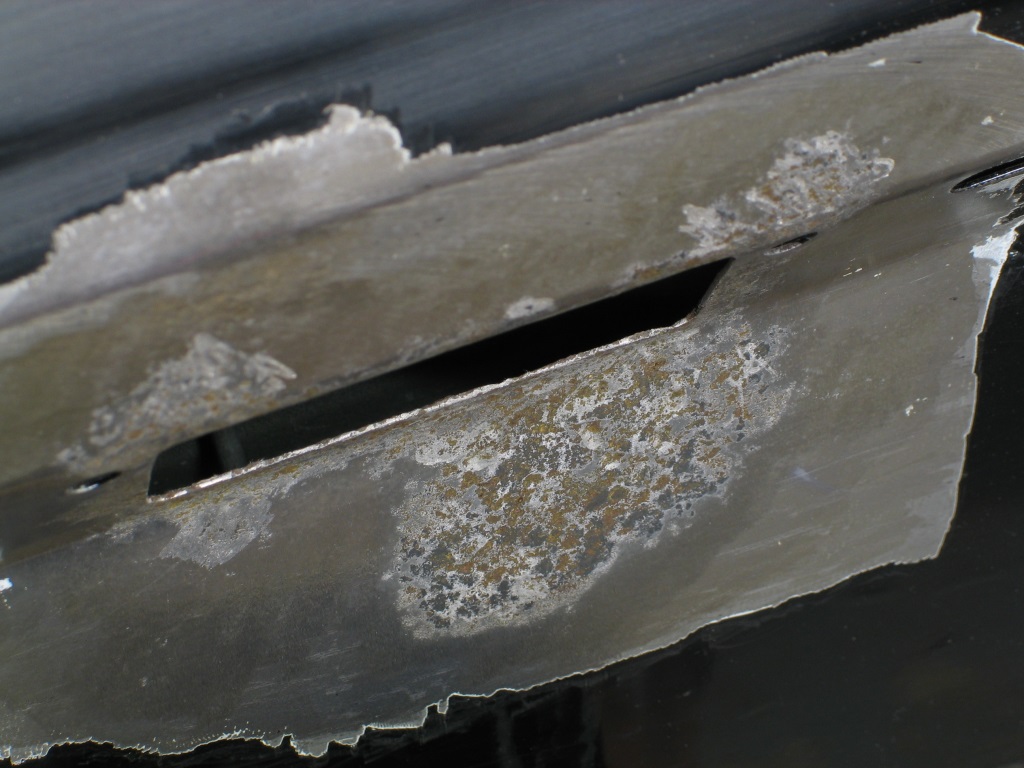
Areas around number plate fixings well corroded.
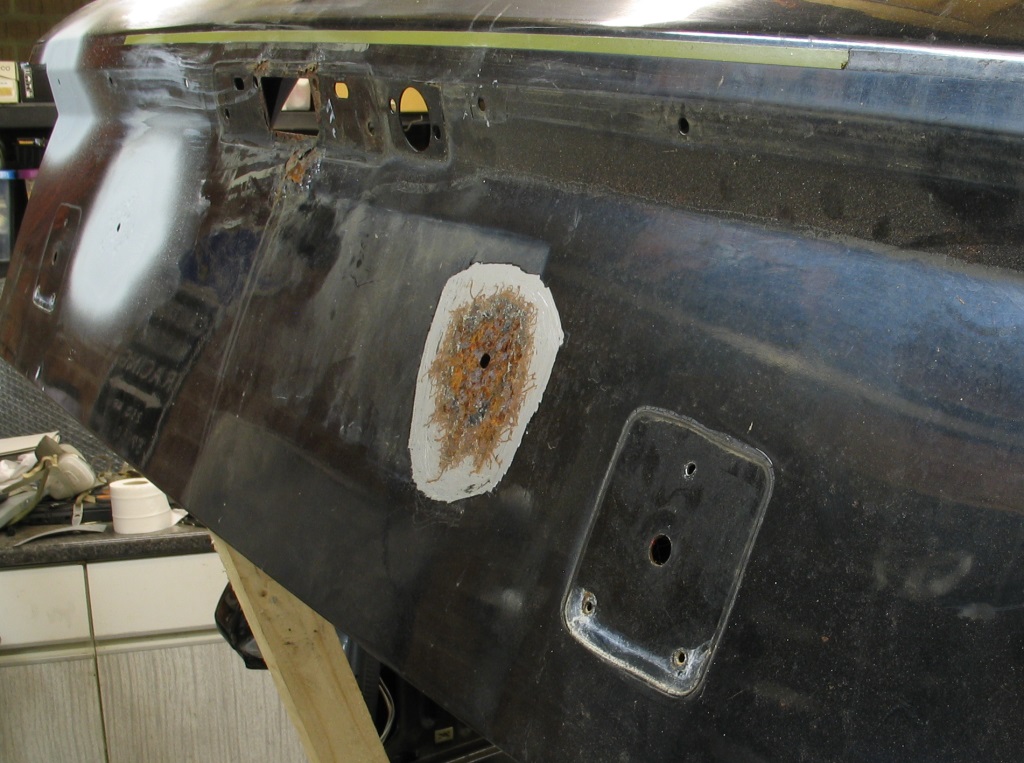
The nearside cleaned up ok as pits weren't too deep but the offside was worse and needed a patch.
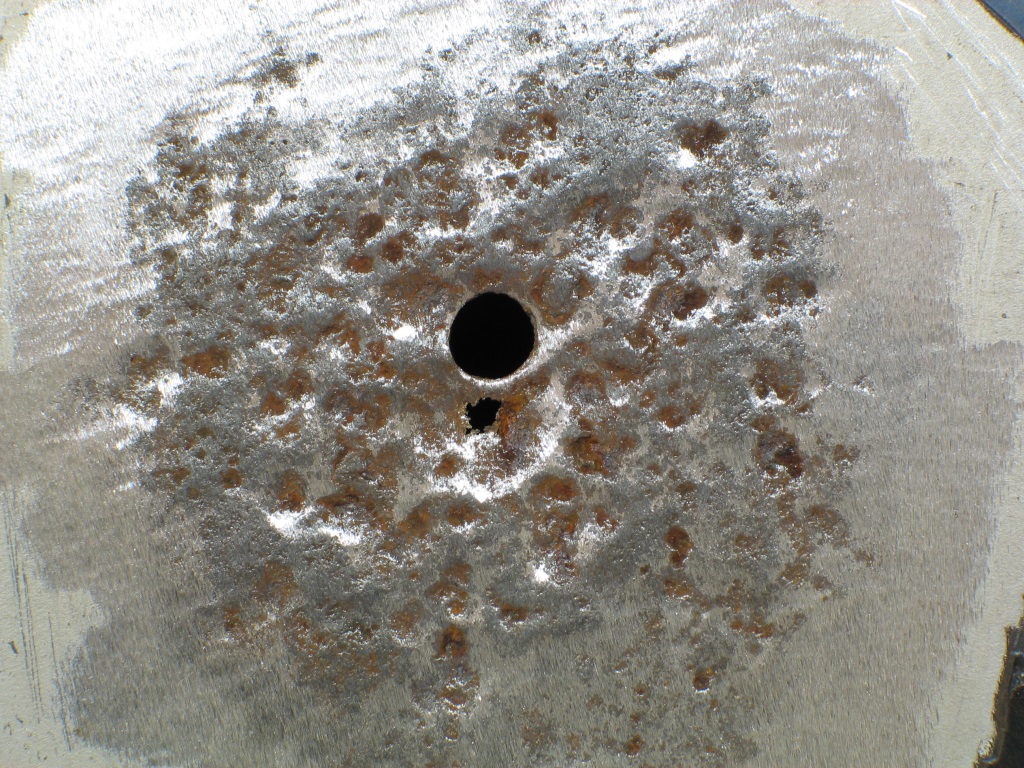

Area around hatch release with the mechanism removed
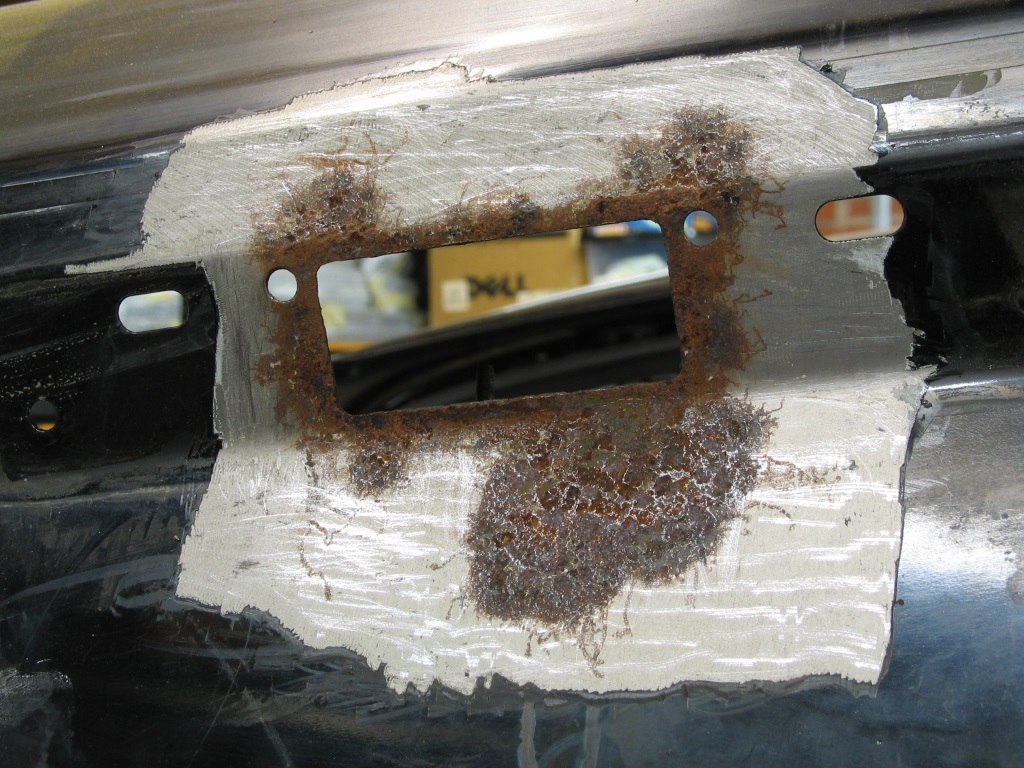
Rust above will clean up, but again metal below too thin.
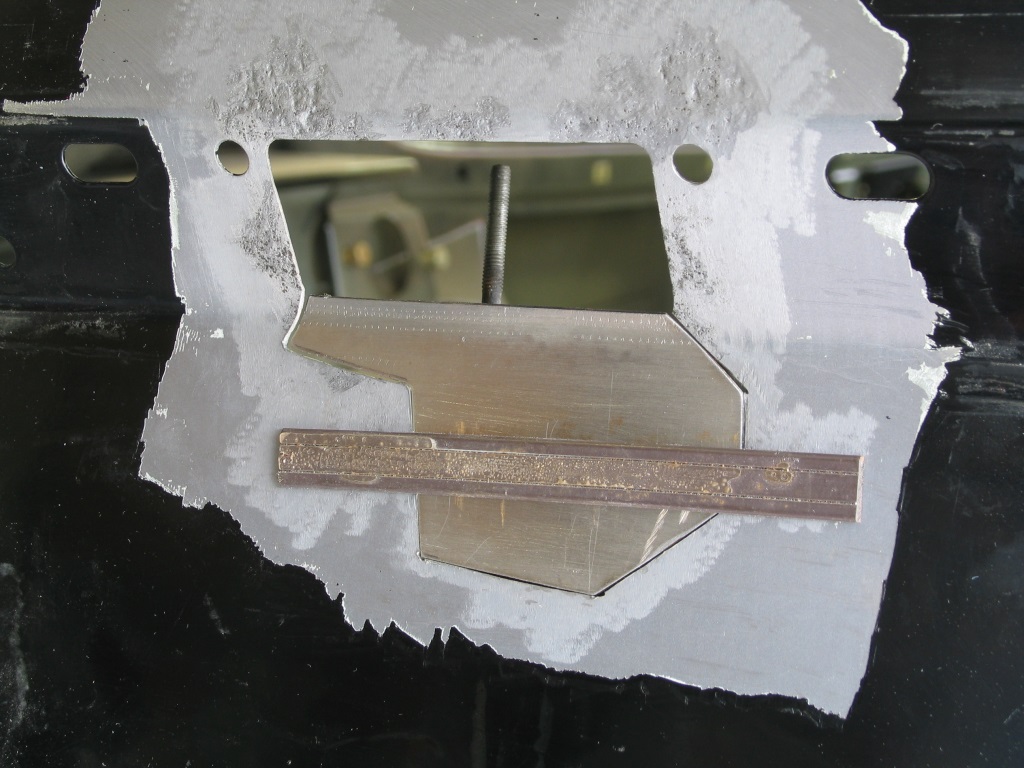
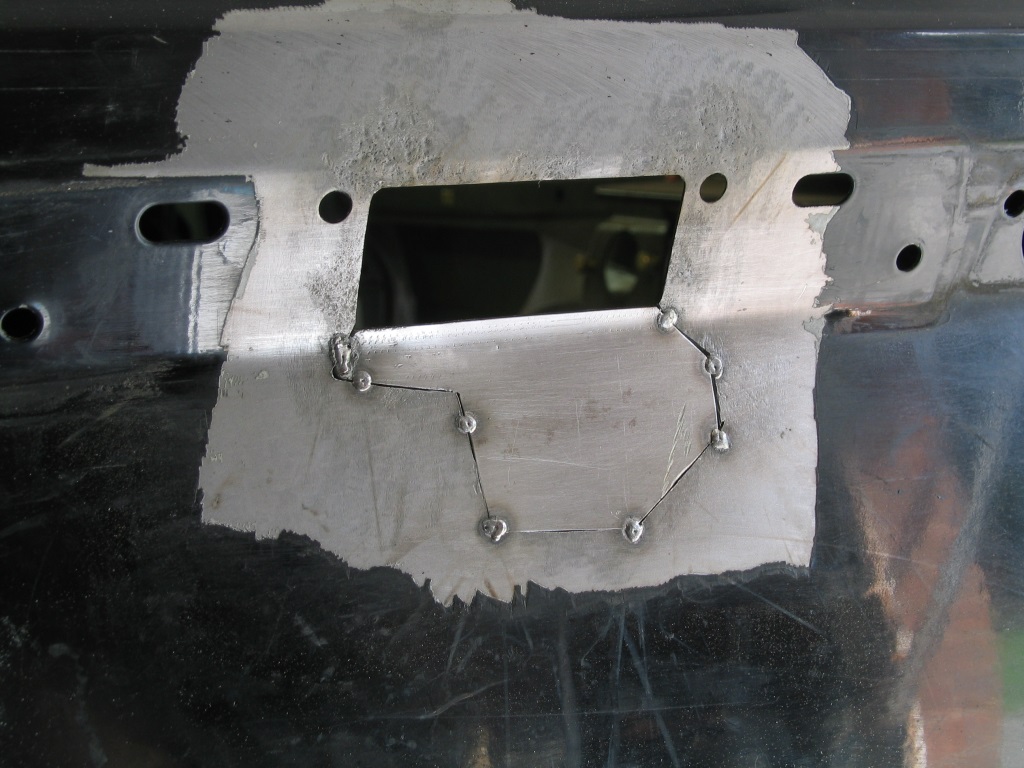
Lots of spot welds, alternating welding and quenching which results in this, not pretty but hopefully little or no distortion
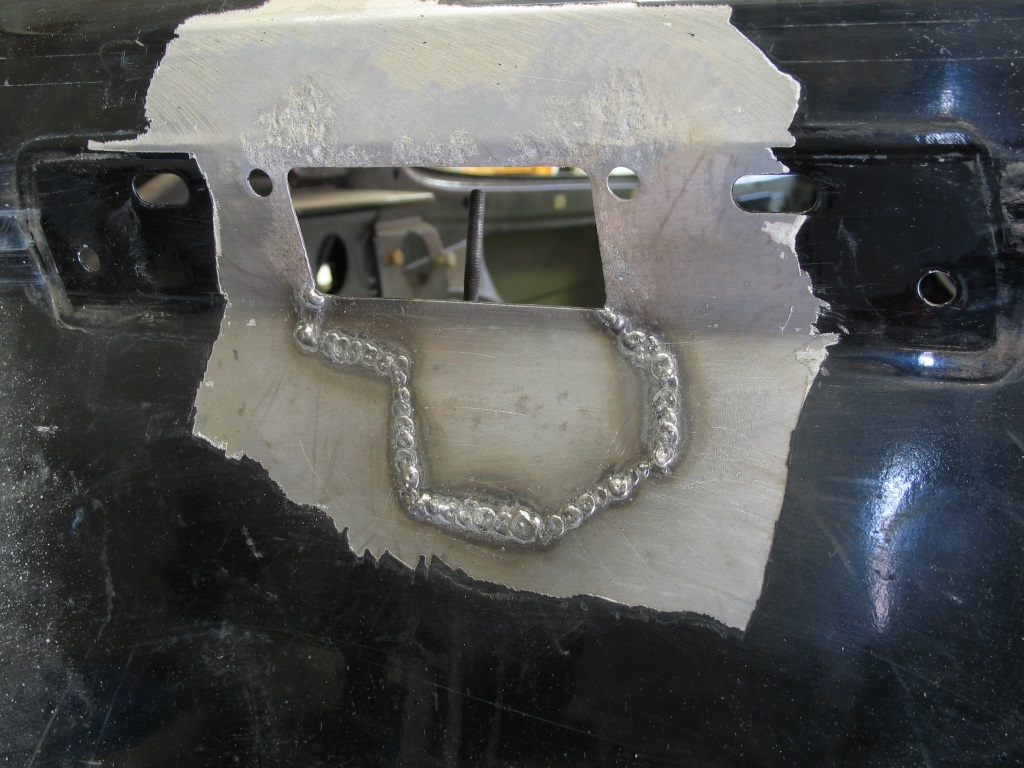
After a quick dress to the welds
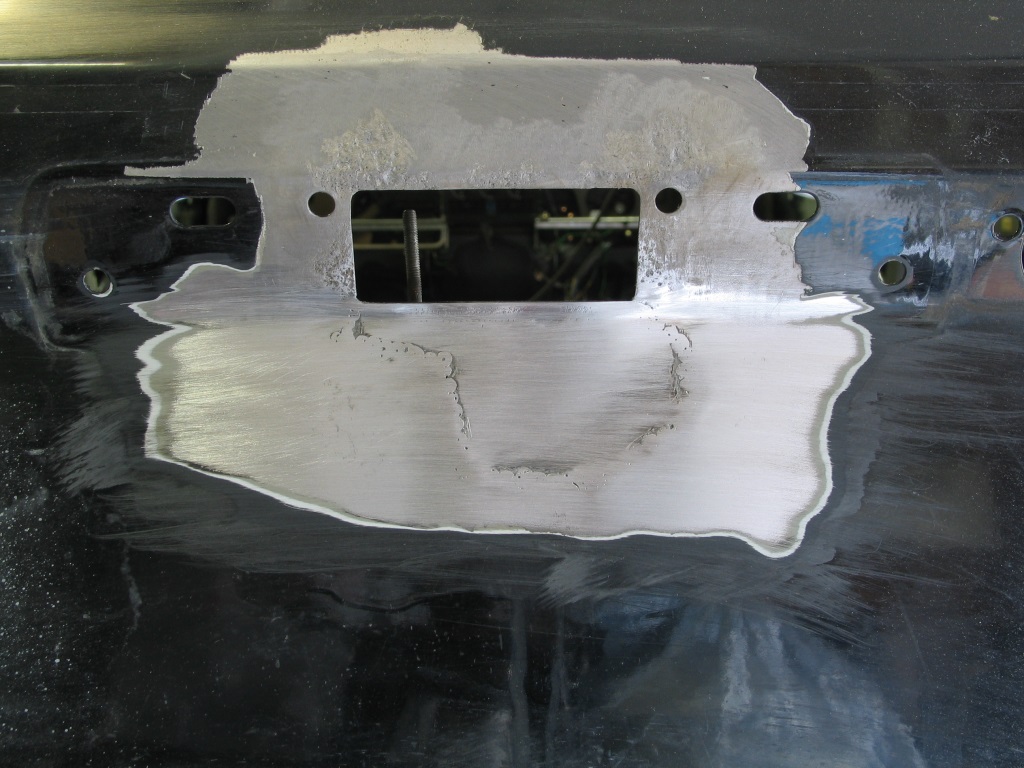
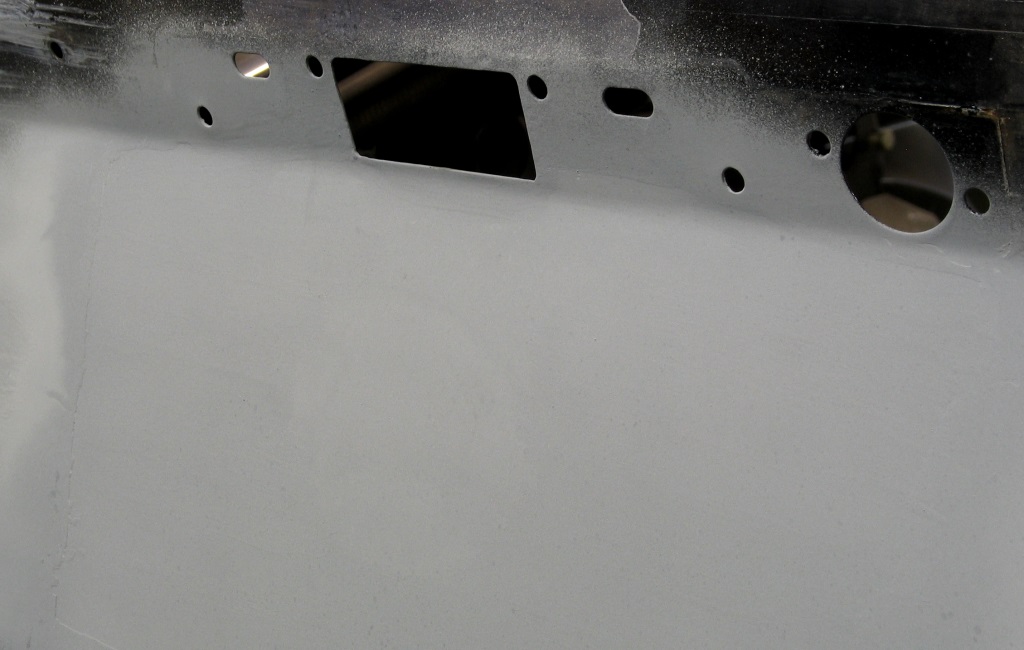
Very difficult to take a picture of an expanse of grey primer and make it show anything meaningful!! You'll have to take my word for it that with the lightest skim of filler (less than 1mm I reckon) it passes the palm of the hand test
Bored of the tailgate for now I attacked the bubbling paint around the nearside front indicator / sidelight aperture...
Rust spiders alive and well

Initial pass with wet and dry to remove lightest corrosion and staining.
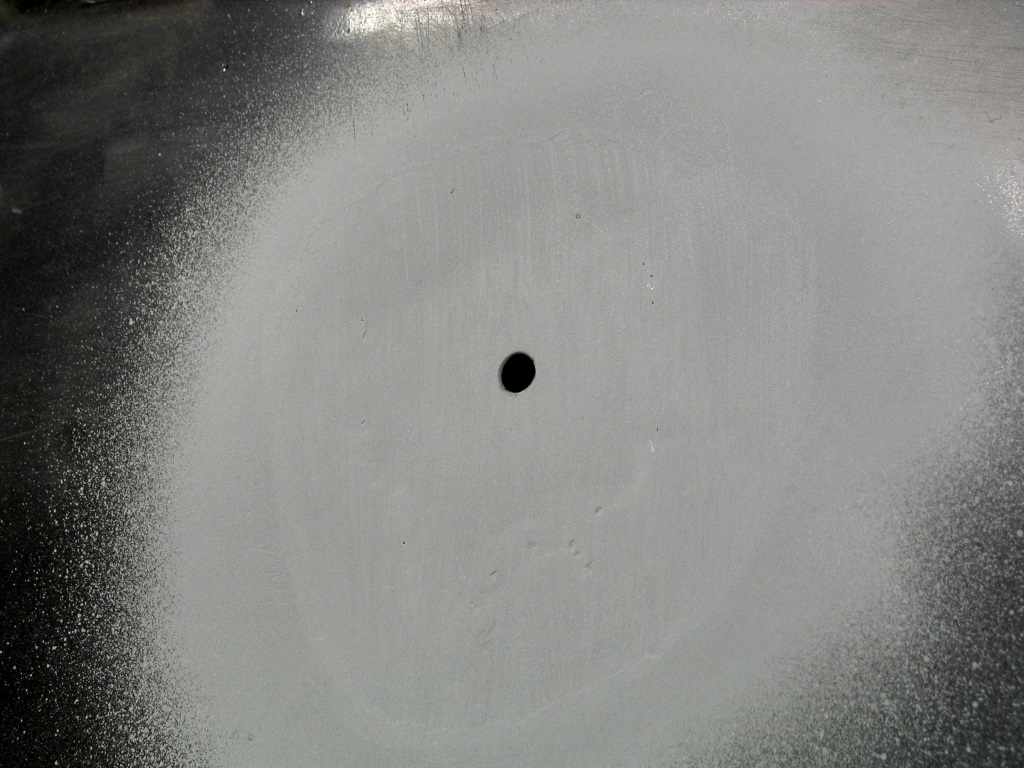
Removing the heavier rust deposits and pits at the bottom of the aperture via mix of mechanical removal (tiny diamond bit on Dremel) and soaking in Phosphoric acid, repeat as necessary until all clean. Fortunately the Swedes used thick steel and even the deepest pits have cleaned up without going through the metal.
Then coat with Hydrate 80 (and later Electrox) which will keep moisture out until I'm ready to start painting (which certainly isn't going to be any time soon!!)
One of the reasons I hadn't done much towards the latter end of last year is because I decided to give up another one of my other long-term projects, a slightly later two-door 99 turbo.
I had purchased this as a parts car, then given it a reprieve as it drove well. When I started welding however, I wished I hadn't bothered. It was far rustier than the three-door, also high mileage and badly (MOT) rust repaired previously. Stored for the last few years whilst I pondered its future, I finally, reluctantly accepted that life is too short and it would take more time than I was prepared to invest to even make an even half-decent car of it.
Decision made I stripped it, keeping anything that could be of future use. All the saved parts meant that I couldn't even get into the garage until I built a new shed to store all the parts. The only space Mrs 99t would allocate me for this was behind the garage - about three feet wide and twenty something feet long!
Still a work in progress but this is what it looked like before I put the stripped parts in it! Rather fuller now but at least I can get into the garage again!
Shell gone, shed built and (over)filled and I can finally get back to this project...
Work on the tailgate continues. Really and honestly I should admit at this point that it was beyond sensible repair and I could have saved many, many hours by replacing it. My obsession with retaining all the original panels remains intact however, so onwards and upwards...
Areas around number plate fixings well corroded.
The nearside cleaned up ok as pits weren't too deep but the offside was worse and needed a patch.
Area around hatch release with the mechanism removed
Rust above will clean up, but again metal below too thin.
Lots of spot welds, alternating welding and quenching which results in this, not pretty but hopefully little or no distortion
After a quick dress to the welds
Very difficult to take a picture of an expanse of grey primer and make it show anything meaningful!! You'll have to take my word for it that with the lightest skim of filler (less than 1mm I reckon) it passes the palm of the hand test
Bored of the tailgate for now I attacked the bubbling paint around the nearside front indicator / sidelight aperture...
Rust spiders alive and well
Initial pass with wet and dry to remove lightest corrosion and staining.
Removing the heavier rust deposits and pits at the bottom of the aperture via mix of mechanical removal (tiny diamond bit on Dremel) and soaking in Phosphoric acid, repeat as necessary until all clean. Fortunately the Swedes used thick steel and even the deepest pits have cleaned up without going through the metal.
Then coat with Hydrate 80 (and later Electrox) which will keep moisture out until I'm ready to start painting (which certainly isn't going to be any time soon!!)
appletonn said:
99t said:
Cardinal Red (ok on a Turbo not an EMS)

EMS = Electronic Manual Special I believe, or the Swedish equivalent perhaps?
Old thread but OMG that is lovely in that colour!EMS = Electronic Manual Special I believe, or the Swedish equivalent perhaps?
They did sell 100 or so five door Cardinal versions here, uber, uber-rare now. One just happens to be for sale - no affiliation but it looks a cracker...

http://www.carandclassic.co.uk/car/C454182
Shadow R1 said:
He is still around, posted on the high miles monaro thread not long ago.
Sorry chaps, hadn't seen the question.Work on the 99 paused around the time of my last post when other projects (but specifically my '66 El Camino) came along.
The shell is still living happily on the spit in the dehumidified garage and all the trim and mechanical bits are safely stored away, individually bubble wrapped and labelled in the majority of cases!
There is an awful lot of de-rusting and welding still to do on the shell, work that I think I had become sick of doing by 2015. I've not done much welding since then so feel better about cracking on with it some time in the not-too-distant future.
The time since I last worked on the Saab hasn't been wasted though - I now have the proper air-fed painting gear which means I can spray 2K without killing myself, and the challenges presented by the roof on the Elk, which I believe I have now overcome, have forced me to become substantially more accomplished at bodywork prep than I was four years ago - which will be necessary when I come to paint the Saab in unforgiving gloss black..
TL:DR - thanks for the interest in progress, there won't be any updates on this for a while yet but I consider work to be paused rather than stopped.
Gassing Station | Readers' Cars | Top of Page | What's New | My Stuff