Lotus Excel project
Discussion


Just a quickie update, I've been putting together a list of jobs that'll need doing to get it to mechanically function and see an MOT centre. I'm not expecting an MOT pass, but if I get the fail sheet, it'll at least give the project a bit more direction. Any advice is more than welcome!
Pre-work - Clean out workshop!
Move car into workshop
Clean and tidy
Inspect Chassis
Plugs out, crank by hand
Diesel in bores (maybe)
Oil Service
Plugs
Battery
Try to start
Full service
Replace rear Spring
Clutch pedal and box
Clutch slave cylinder
Clutch master cylinder
Exhaust
New tyres
Refit Door cards
Remove loose headlining
MOT!!!
Actually, maybe I should add brakes to the list!
marshalla said:
Definitely. The Toyota calipers are notorious for seizing if they don't get exercised regularly.
Cheers, added a brake refurb. 
On a non-unrelated note, would you mind having a prod at the lotusexcel.net admin please? I'm still not a member so I can't read the technical articles or post anything.
Just a quick update.
I was down there clearing the barn out this weekend. It's still not done, but we've made some headway. Henry's a 1985 model, not '86 and was something like the 1200th car off the line, according to the VIN.
It also seems that the engine did run a couple of years ago, so that's promising. There's also areally thick thorny stalk growing through the panel gap between the bumper and slam panel
No more pictures unfortunately. Dan
Resurrecting the thread somewhat, but I've updated the blog with the latest goings on:
www.danslotusproject.blogspot.com
I'll get round to adding the pics here too at some point.
www.danslotusproject.blogspot.com
I'll get round to adding the pics here too at some point.
I haven't been round to see the Excel for a while, life has got in the way (stupid life!). Anyway, after a few weeks clearing a space in the barn, Henry has a new Home!
I (OK, Karen) took some "before" shots, prior to washing him off.
It took 3 and occasionally 4 of us to:
Pump up 4 tyres
Put on the spare wheel after one tyre exploded (at 20 psi!)
Find out he'd grown quite fond of his resting place
Jack up and free off 3 wheels individually through various applications of "gentle negotiation"
Free up the fourth with a big shove!
Push him to outside the barn and give him a wash
Really excited now - The project really begins!
We got him washed off and removed the branch lodged in the bumper. Looks a lot nicer now.
Karen's sister got roped in to do the steering whilst we made a 3 point turn in the field, then pushed him in backwards.
We managed to get the back corner about where it needed to be, but couldn't get the nose parallel to the wall as there's not much room to maneuver. Ended up jacking it up with the trolleyjack at 90 degrees as a makeshift dolly, then lifting the other corner manually and shoving like hell!
myles1972 said:
Watching with interest. Do you have a timeframe for completion?
HA! Erm, I mean no.Actually I'm hoping to have it running before Christmas and on the road next summer. Though by that I mean MOTed and road legal. Maybe another year before I've sorted the interior and bodywork.
Though I do quite like the idea of keeping the bodywork rough-looking and putting some insane powerplant in there. Not going to happen though.
I WOULD like to see what I can get out of the engine though. About 220+ would be nice but it's only the low compression version so It'd be a full stripdown and rebuild job with HC internals.
Trouble is, it's about an hour away at my girlfriend's folks' and I have 2 other projects so working on it's an "as and when" job.
I've Re-Updated the blog!
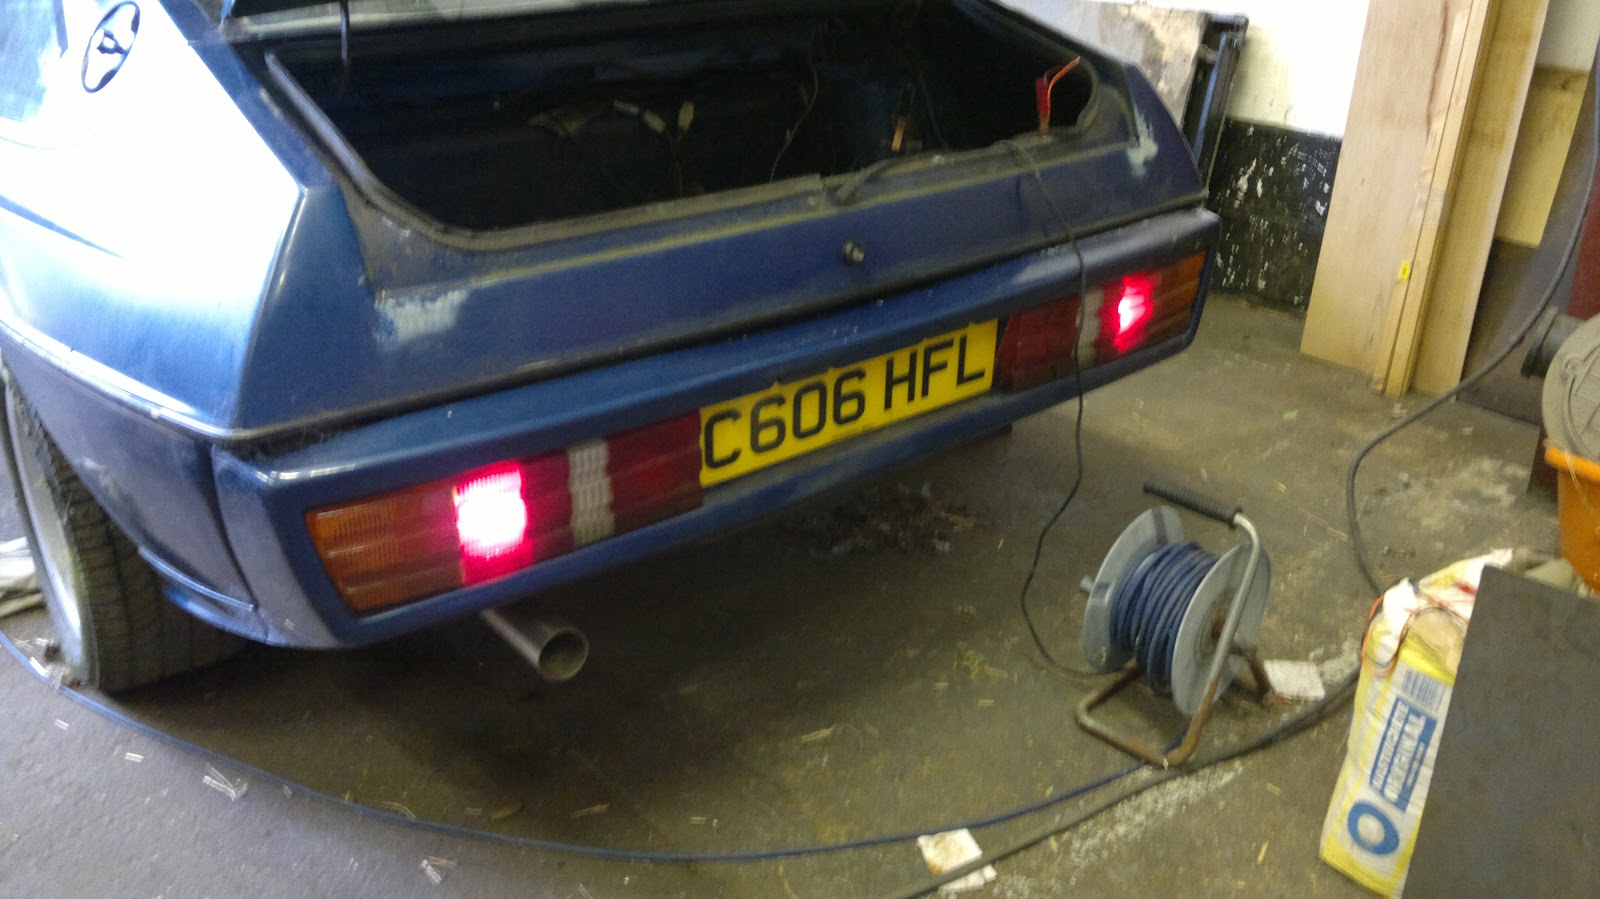
The chassis is in good nick and the engine turns by hand. The best bit - It turns on the starter too and tried to cough into life on a squirt of easy-start! I feel like it's trying to drag itself back to life from the brink. It wants to be back on the road again, it's just my job to repair the things that are stopping it. Sentimental sod.
Anyway, from www.danslotusproject.blogspot.com :
Today (actually yesterday) was a big day, I liberated a battery from my boat, which I MUST remember to put back tomorrow, and tried out the electrics, including the starter motor!
First I put back the 3 bolts I'd taken out of the oil cooler. Not exciting, but needed to be done.
So, battery in the boot:

The eagle-eyed amongst you may notice it's not quite a factory-fit installation.
A lot of the electrics were a bit gammy, so sprayed some electrical cleaner in and gave them a wiggle.
Results so far:
Working - Brake lights, 1 fog lamp, high beam flash on N/S headlamp, left indicator, stereo, horn, dash lights, windscreen wiper, electric windows, heater fan.
Not working - Headlamp motors, right indicator flashes very quickly on front only, interior light, the other fog lamp, hazard lights, heater pointer (I can get screen or feet but not vent), fuel pump.


No fuel pump means no starting, but I did crank it over with a bit of easy start down the intake trumpets (how could I not) and there was firing! Not running by any stretch, but he did try, and it's the taking part that counts.
Talking about taking (a)part. The fuel pump had to come out so I'll try and free it up at home. There's 3 wires attached, 1 black, 1 positive feed and one that looks like it goes to a capacitor on the body of the pump. The black needs unscrewing, the other two are just spade connectors. Then a 13 or 14mm spanner takes the pipes off, with an adjustable to hold the "socket" steady (otherwise you just twist the pipe and it springs back). I tied the clear lower one up out of the way because it looked like a direct feed from the apparently empty tank.
After that it's just 3 nuts to get a spanner on to remove as a unit. Worth bearing in mind that if you then take it home and leave it on the kitchen step in the garden, it'll get wet if it rains in the night. I'm a genius.

The other job was to get the headlamp pods up. There's a knob between the front wheel and bumper on either side that you can apparently use to wind the headlight pods up manually in case you need to get yourself home. I say apparently as they were damned near jammed solid. Ended up getting a screwdriver on the end of the knob and doing it that way. mm by mm. Took ages!
From what I understand it only goes in one direction, has a mechanism on it like a medicine bottle, so the same rotation sends it up then down then up... I'm going to get an electric drill on it next time.

"ooh, I think I've got a bit of sleep in my eye!"
So that's sunday's report. I'll be playing with the pump at some point this week and seeing if I can free it up.
One point of concern was that it looks like petrol's been leaking into the boot. I should probably fix that.

The chassis is in good nick and the engine turns by hand. The best bit - It turns on the starter too and tried to cough into life on a squirt of easy-start! I feel like it's trying to drag itself back to life from the brink. It wants to be back on the road again, it's just my job to repair the things that are stopping it. Sentimental sod.
Anyway, from www.danslotusproject.blogspot.com :
Today (actually yesterday) was a big day, I liberated a battery from my boat, which I MUST remember to put back tomorrow, and tried out the electrics, including the starter motor!
First I put back the 3 bolts I'd taken out of the oil cooler. Not exciting, but needed to be done.
So, battery in the boot:
The eagle-eyed amongst you may notice it's not quite a factory-fit installation.
A lot of the electrics were a bit gammy, so sprayed some electrical cleaner in and gave them a wiggle.
Results so far:
Working - Brake lights, 1 fog lamp, high beam flash on N/S headlamp, left indicator, stereo, horn, dash lights, windscreen wiper, electric windows, heater fan.
Not working - Headlamp motors, right indicator flashes very quickly on front only, interior light, the other fog lamp, hazard lights, heater pointer (I can get screen or feet but not vent), fuel pump.
No fuel pump means no starting, but I did crank it over with a bit of easy start down the intake trumpets (how could I not) and there was firing! Not running by any stretch, but he did try, and it's the taking part that counts.
Talking about taking (a)part. The fuel pump had to come out so I'll try and free it up at home. There's 3 wires attached, 1 black, 1 positive feed and one that looks like it goes to a capacitor on the body of the pump. The black needs unscrewing, the other two are just spade connectors. Then a 13 or 14mm spanner takes the pipes off, with an adjustable to hold the "socket" steady (otherwise you just twist the pipe and it springs back). I tied the clear lower one up out of the way because it looked like a direct feed from the apparently empty tank.
After that it's just 3 nuts to get a spanner on to remove as a unit. Worth bearing in mind that if you then take it home and leave it on the kitchen step in the garden, it'll get wet if it rains in the night. I'm a genius.
The other job was to get the headlamp pods up. There's a knob between the front wheel and bumper on either side that you can apparently use to wind the headlight pods up manually in case you need to get yourself home. I say apparently as they were damned near jammed solid. Ended up getting a screwdriver on the end of the knob and doing it that way. mm by mm. Took ages!
From what I understand it only goes in one direction, has a mechanism on it like a medicine bottle, so the same rotation sends it up then down then up... I'm going to get an electric drill on it next time.
"ooh, I think I've got a bit of sleep in my eye!"
So that's sunday's report. I'll be playing with the pump at some point this week and seeing if I can free it up.
One point of concern was that it looks like petrol's been leaking into the boot. I should probably fix that.
kev b said:
Did you try tapping the fuel pump lightly with a hammer before removing it, as this often starts them ticking. The "capacitor" is a radio interference suppressor. I would make a new cambelt my first job, if the old one snaps you will be in for great expense!
Luckily the previous owner came into the barn to inform me that I should first try tapping it with a bit of wood then progres to hammer. No luck though, so I'm going to get it on a battery in my "home workshop" (living room floor) and see what I can do then strip it donw and free it up if possible.God shout on the cambelt though. I'll get one ordered.
kev b said:
Did you try tapping the fuel pump lightly with a hammer before removing it, as this often starts them ticking. The "capacitor" is a radio interference suppressor. I would make a new cambelt my first job, if the old one snaps you will be in for great expense!
If percussive persuasion works, new points sets are available for the fuel pump, as are conversion kits to make it fully electronic.Cambelt and tensioner - they should be replaced together.
Gassing Station | Readers' Cars | Top of Page | What's New | My Stuff