ADR Sport 2 Sports Racer
Discussion


For the Mallory event, I didn't own any wets. I took some to Combe and used them until the standing water dissipated and I could run slicks.
Wheels are like hen's teeth, so it's taken me a long time to find some without spending a huge amount of cash on brand new items. I finally got some a couple of weeks before Mallory, but couldn't find any wets to fit them between getting the wheels and getting to Mallory. I found some in time for Combe, but they are really not very good at all and I need to find some others. If I bought them new, it'd be a third of my season budget, hence why I'm keen to find some good used ones!
Wheels are like hen's teeth, so it's taken me a long time to find some without spending a huge amount of cash on brand new items. I finally got some a couple of weeks before Mallory, but couldn't find any wets to fit them between getting the wheels and getting to Mallory. I found some in time for Combe, but they are really not very good at all and I need to find some others. If I bought them new, it'd be a third of my season budget, hence why I'm keen to find some good used ones!
ASWMC Sprint Championship Round 2: 2013 Catch the Pigeon Sprint
It's my bogey track. I entered twice last year and missed both. I broke the ADR the event before the first round at Clay Pigeon and didn't get it fixed in time. At the second event, I got almost all the way there before my tow car left me stranded. This time, I saw the paddock, so it started well. I also managed to walk the track, so that was good too!
In first practice, my camera wouldn't start, but I recorded a time that was close enough to be happy, despite catching the throttle under braking and nearly leaving the track. Second practice left me filled with confidence. So much so, that I had a spin at the second corner. Still, the second lap was quick, so that was good news.
In the afternoon, there were three timed runs and I needed them. On the first corner of the first run, the throttle stuck open and I was lucky to keep on the track. I hit the kill switch when I was sure the throttle was sticking and got a tow in - better to do that than bin it or pop the engine. After some investigation in the paddock, I couldn't see anything that was causing the sticking. The throttle cable was in perfect condition, there was no snagging and the movement was fluid. Was it my foot that had done it? Unsure, I headed out for the second run. I had three runs, so I could afford to cruise around and give myself enough time under braking to dip the clutch and hit the kill switch if anything went wrong. What I didn't plan to do was hit the kill switch on the up-change out of the final corner of the first lap. Needless to say the kill switch is being moved before Llandow!
That left it all to the final run and I still didn't know if the sticky throttle was the car or my foot. I took a tentative first lap and then pushed harder on the second lap. I'd broken the class record, but not by as much as Luke Trotman, who took the win in his Mallock. When I got home, I discovered that the data logger hadn't worked and I had no data, so the data debug will be limited and a new logger is on the list of things to do.
The only data I have is gathered from the video, so I've taken apex speeds and peak speeds on the straights. Top speed was just 68mph and the lowest speed was a paltry 26mph. It's safe to say this track is not dominated by aero. In fact, it probably has very little effect at all. The average apex speed was 35mph and the average top speed on the straights was barely over 50mph.
Here's the video.
ASWMC Sprint Championship Round 3: Llandow Sprint
Clay Pigeon isn't my only bogey track. I'd not made it to Llandow either, aside from a half-day test session last Summer. I had to pull my entry thanks to a wheel failure and a breakdown in the tow car last year, just like Clay Pigeon.
This year, I arrived to find a rather damp track. It wasn't wet though, so the slicks stayed on. The track was slippy, but I discovered the kerbs were slippier when I touched one and exited stage left (but right side first). Side-stepping the clutch soon got me back underway and I somehow finished the first practice run fastest in class. Clearly everyone else was running wets or having a slow start.
In second practice, I managed to stall the car going to the line. My starter pack was helpfully retrieved by Nick (cheers!) and I was able to restart the engine. Coming down the back straight on the second lap, I could hear a loud metallic vibration and I saw red flags waving. Slowing down, the noise abated and I saw Tom's car stranded next to the track, a victim of an ECU failure. As I slowed down, I started to feel the vibration much stronger and it felt like a wheel was going to come off (again!) so I stopped.
After hopping out the car, I could see nothing obvious and the wheels were attached. As the Clerk of the Course arrived, I spotted the swarf beneath the chain. The tensioner had failed again and the car was immobile. The only recovery at Llandow was a rope on the back of the truck, so I hitched a lift back to the paddock and recovered the car on my trailer.
Having annoyed all my fellow competitors with a 15 minute stoppage, I returned back to my paddock space to find a bunch of them stood around wielding pry bars, drills and screwdrivers. They were out to get me ... on track! This is what club motorsport is all about and a load of truly awesome people skipped lunch and got up to their elbows in oily stuff to get the car fixed.
Dave provided a pry bar to get the tensioner un-tensioned and it was soon in my hands. A few swift blows with a mallett and screwdriver got it close to its original shape, but the bottom was properly mangled and needed Brian's file and Julian's trailer-mounted vice to get the sprocket spinning again. Once back in place, a new strap was fabricated from scraps of aluminium and screwed in place with Andrew's screws. A piece of aluminium angle replaced the missing metal on the tensioner mount and after fitting my new chain, the car could drive again.
The rattle I'd heard down the straight was a different problem. I discovered the cause as the car was recovered onto the trailer. A floor bolt had come adrift (probably on one of the kerbs) and the floor was hanging down. A suitable replacement couldn't be found, but ample lockwire did the job. I was ready for the timed runs and I was almost due out. Julian didn't get to his car until Nick brought the double-driven car back into the paddock to swap drivers.
Heading out in the first timed run, I had a few gear selection troubles, but I put a time in and that was good enough to lead the class by 7 seconds. It was raining during the run, so there was the chance I could be beaten - I've seen people gain 7 seconds on the last run when conditions have not changed all day. I had to do another run, whether the car would do it or not. It was dry now and the sun was out. It wasn't a great run, but a second improvement was enough to take the win by a big enough margin for 21 points. I'd have been lucky to get more points by breaking the record!
A testing day, but the end result was a win and an extension of my ASWMC Sprint Championship lead by a whole point and that's all I could have hoped for. Here's the video to see my maladies.
People keep talking about the rear wing and its placement behind the rear arches. Comments vary from "does it work like that" to "you're an idiot if you think that'll work" and everything inbetween. After the off at Castle Combe, mud sprayed onto the bottom of the wing and the distribution of the dirt showed that the air was attached to the underside of the wing.
I've been playing around with Khamsin, a plug-in for Sketchup, and thought this might be the starting point for some analysis. I drew a basic side profile of the ADR, extruded it out and added in the wing elements in the appropriate place. It's amazing how quickly this sort of thing can be done in Sketchup! I made three components (body, main plane and flap), copied them into a virtual wind tunnel, configured Khamsin and started the analysis. The results clearly showed that in the centre of the car, the rear wing is working effectively.

I then did the same using the shape of the rear wheel arches and, whilst the effect isn't so great, the wing is still clearly effective.

What intrigued me next was to see what a 500mm diffuser would do to the results, so I drew one and re-ran the simulation. The results were dramatic with the rear wing driving the diffuser hard. The figures showed that the downforce had increased by 45% and the drag had reduced by 11%! Admittedly, this is far too simplified to be taken seriously, but it correlates with the "mud-viz" used at Combe and suggests that a new diffuser will really improve downforce for little or no drag penalty. It's next on the list!

I've been playing around with Khamsin, a plug-in for Sketchup, and thought this might be the starting point for some analysis. I drew a basic side profile of the ADR, extruded it out and added in the wing elements in the appropriate place. It's amazing how quickly this sort of thing can be done in Sketchup! I made three components (body, main plane and flap), copied them into a virtual wind tunnel, configured Khamsin and started the analysis. The results clearly showed that in the centre of the car, the rear wing is working effectively.
I then did the same using the shape of the rear wheel arches and, whilst the effect isn't so great, the wing is still clearly effective.
What intrigued me next was to see what a 500mm diffuser would do to the results, so I drew one and re-ran the simulation. The results were dramatic with the rear wing driving the diffuser hard. The figures showed that the downforce had increased by 45% and the drag had reduced by 11%! Admittedly, this is far too simplified to be taken seriously, but it correlates with the "mud-viz" used at Combe and suggests that a new diffuser will really improve downforce for little or no drag penalty. It's next on the list!
Two years ago, Crystal Palace was the venue for my fourth sprint. I was surprised and pleased at the time to do quite well, leaving with two class wins and a top 3 overall. With two seasons of experience behind me and two years developing the car, I thought this year might be more successful. Then the entry list came out. A factory Radical SR8 driven by an experienced and talented racing driver and the existing class record holder in his 480bhp V8-powered Pilbeam hinted that I might not have it all my own way.
I arrived at the venue raring to go and drove down the hill to the paddock via the finish line, partly because there's a steep change in gradient that smacks the splitter and partly because it's a lovely drive around the outside of the track. At scrutineering, I was again hauled up on the unorthodox wing position, but my Blue Book now falls open on the right page, so proving eligibility was simple enough. For the first run, the car was misfiring badly and I stalled several times to the line (thanks to everyone who helped restart me!) before heading off. On the first upshift, the gear lever came away in my hand. I'd used a 4mm bolt to avoid the shaft, but as the helpful Radical engineer explained back in the paddock, the reason for the larger bolt is to stop it falling off. 5mm bolt re-fitted with two new plugs (yes, it was running on two cylinders - 500cc and 90bhp) and I could take some time off my 39.60 from first practice.
Second practice went better, but I braked too early for the first corner, was hesitant through turn 2, taking an early turn-in. Again, I was early on the brakes into the hairpin and turned in too early, getting on the throttle late as a result. I locked the rear on the downshift into the chicane, arriving on opposite lock and being late on the throttle on the exit. I was also hesitant through North Tower bend, picking up a new bit of information for next time round. Despite the areas I could improve, I still managed a PB of 35.58.
Buoyed by a good practice and leading the class at the time, I was confident for the afternoon. Unfortunately, the afternoon was a dead-loss. Heading into the hairpin, I brushed the throttle when I hit the brakes. Given that I was concentrating on braking as late as possible, there was no margin and I headed for the tyres at an uncomfortable pace. Knowing the tyres are at an angle, I coaxed the nose into the corner to give myself more slowing down time. I hit the bank with enough force that it slowed me down enough to miss the tyres, but that broke the pushrod. The pushrod wedged itself into the wishbone clevis, which allowed me to drive back to the paddock, but it was game over for the day.
Overnight, a fellow competitor fabricated a new pushrod and I had it fitted by 06:30, ready to drive down and sign on. The weather was fantastic, but the guys the day before had been stonkingly quick. I'd watched from the outside of turn two leading to the hairpin and Roger Green was incredible. A drive that deserved FTD, but a big car like that on circuit wets would never have been able to do it. He did take the class record though and David was out to prove himself by slaughtering me and taking that record back.
First practice was a shakedown after the confidence-knocking shunt of the previous day. I locked up into the first corner and carried first gear to the hairpin, being very tentative. I locked up again on the downshift into the chicane and was tentative into North Tower, but pushed on through to try and find the limit through the second half. The result was a 37.97.
The gloves came off in second practice and I went to put in a time. I hit the limiter by the apex in turn 2, so made a note to upshift before turn-in next time. I had understeer at the hairpin, which led to running wide and being late on the throttle. The result was 35.37 and a new PB.
In the afternoon, my first timed run was what can only be described as EPIC! I couldn't fault it and it netted me a 34 second run. I was second in class, but with Gary amalgamated from the single seater class and bound to take FTD, a class win was on the cards. I was just a tenth clear of David in his Pilbeam, but with nothing more to give, I was certain that he'd scalp me in the next two runs.
In the second timed run, the throttle cable snapped just before the hairpin and I rolled back into the paddock under marshal-power - thanks, guys! David was kind enough to give me a spare cable and all the guys in class (plus a helpful passing racer) jumped on the car to get me ready for one last run. I lined up ready for one last hurrah, but no expectations of going quicker, especially as there was oil down on the exit of the hairpin.
I gave it too much into turn 1, missing the apex slightly. I slightly dodgy turn-in to turn 2 suggested it might possibly be flat. 76mph down the short straight into the hairpin, I again got mid-corner understeer fron the still cold left-front tyre. I countered it with a stab on the throttle and a bit more lock, keeping tight on the exit to avoid the oil. I wasn't late enough on the brakes into the chicane and then tentative into North Tower, but hot through the finish. The result was a new class record, a class win and 2nd overall.
Thanks to all the guys who helped me that weekend, whether a hand on the bodywork, fabricating parts or stood on a marshals' post. If you were not there, things would not have worked out for me. Here's the video of what you made possible...
There's clearly some work to do, so I've dropped the car off with Jo White at Vulcan Dezign to make permanent fixes for the temporary fixes of last weekend, work on the brakes that keep locking too easily and do some aero mods. I'll be picking it up again and heading straight to Abingdon Carnival on Saturday to try and score maximum points!
I'd competed at the Abingdon Carnival before but in the AutoSolo several years ago. This was my first time at the sprint. The event consists of two sprint courses and the results take the fastest run from each course, which totals around 90-100 seconds. The entries are split into two groups with one group running the Abingdon course and the other running the Bentley course with a switchover after lunch.
I was first on the Bentley course and the convoy run was not a good start. The course was simple; a straight, a 90-right, a hairpin left, 90 right, a straight and a right-left-right chicane before the finish. It was all about power and mechanical grip. I found out on the convoy run that steering lock was important too. I didn't have enough for the last left-hander in the middle of the chicane. As a result, I ran out onto the grass on the exit. Some creative driving would be required.
In first practice, I took it steady to set a reasonable time, but at the chicane tried stamping on the throttle to get some oversteer around the corner. At that point, I realised I was in 2nd gear and the car just accelerated and understeered two wheels off. In second practice, it was much the same, but I gave it beans in 1st gear rather than 2nd. The grip at Abingdon is good and 999cc isn't enough to generate oversteer at will. I went four wheels off in an attempt to emulate a Flymo. I also learned that I was braking far too early for the first corner. More to come in the timed runs!
In the first timed run, I braked too early at the first corner, then out-braked myself at the third corner, diving through the cones and rejoining a couple of cones later. Frustratingly, I managed to get around the chicane with a bit of oversteer helping to turn the car. Despite the off, I was fastest, but that run wouldn't count with four wheels off. On the final timed run, I made sure I didn't make any mistakes and put in a good run to lead the class.
Let's look at the data for the Bentley course. Off the line, I'm up into 4th gear at 102mph before the first corner. 0-100mph takes 10.05 seconds - not bad for a 999cc car! The G-meter shows braking is variable and peaks at about 1.1G, reducing slightly as I align the car for the left kink just before the turn. I made a pretty good job of that on cold tyres and the nice upwards slew shows I trail braked into the corner. The smooth curve shows I got on the throttle right at the apex, but the bunching of plots in the top-left shows some fluctuation on the exit. I expect this is a little clumsily corrected oversteer on the exit, most likely as a result of giving too much throttle. You can see that we're up over 0.6G acceleration here, which suggests full throttle before the corner exit.

Moving onto turn two, I reached 74mph before jumping on the brakes. 1.1G of braking compared to 1.3G in cornering suggests I could have braked later. Also, the concave curve from braking at the bottom to cornering on the right suggests I didn't fully utilise the traction circle and could have carried more speed in on the brakes. The number of points on the right is because I balanced the car on the throttle around the long left-handed hairpin. There was clearly a bit of oversteer on the exit as there's another hiccup on the curve in the top right.

67mph achieved before braking for the right-hander and again there's not enough pressing of the brake. There was a new master cylinder fitted for this event and the different pedal ratios means the balance isn't quite right and the feel is very different. Again, I've braked too early as I've rolled off the brakes quite quickly on turn-in, resulting in the concave graph. True to form, I've also stamped on the throttle on the exit and got a mild case of oversteer on the exit! It's worth noting that as I'm still on the edge of the traction circle, this is unlikely to have cost much time.
Heading down the straight to the final chicane, I reach 94mph before jumping on the brakes. Again, I'm braking at 1.1G, which probably means my brake balance is pretty far out and I'm feeling a lockup and not braking any harder. There's a jink left under braking before trail-braking into the right-hander. The lateral G peaks at 1.5G in the right-hander, at which point I'm off the brakes before getting back on the brakes lightly for the left-hander in the middle of the chicane. I kept on the brakes past the apex on the left before stamping on the throttle and this is where the G meter gets all messy. The trail braking past the apex was to keep the nose tucked in and keep make it round, but this meant losing speed on the exit of the corner and not making the most of the traction circle. Needs must! The final right-hander was also scrappy. Definitely lots of time to make up next year.

Moving onto the Abingdon course after lunch, this was a much faster course. From the line, accelerate through the first left, upshifting along the way and into 6th down the bumpy perimeter road. Turn in flat out to the right-hander, then pick a braking point for the multi-apex left-right-left chicane, then accelerate down the straight and scrub off a little speed into the ultra-fast left-hander before the finish. It's a tricky course as the corners are blind with lots of false apexes on the approach to the chicane and bumps the whole way round. I'll definitely walk the course on the Friday next year as it'll take a lot of learning.
In first practice, I was tentative into the chicane and the last corner. I even lifted on the flat right-hander on the approach to the chicane. In second practice, I was again too slow into the chicane, and still wondering if I should keep flat over the right into it. The apex of the final corner is earlier than it looks! Let's move onto the data from the last timed run.
Away from the line, the left-hander slows acceleration down and 0-100mph takes 10.9 seconds as a result. You can see the gearchanges through the corners with the dips as the lateral G increases and decreases. You can also see the upshift into 6th happened after turning into the right-hander, hitting 119mph in the process. It was a scrappy turn-in, not helped by the bumps and peak braking was only 0.9G, so much more to come there.

There's also some indecision about the direction I'm taking under braking, again the bumps causing me problems. Turning into the left-hander, I'm not using the brakes as hard as I could and the cluster of points around that area shows that I took a couple of bites at the corner. Clearly, I need to walk the course! I carried on braking lightly into the right-hander in the chicane, pulling just over 1.2G in the corner. It looks like there was again a bit of oversteer as I got on the throttle towards the final left of the chicane and what looks like a bit more as I turned left.

I took two more gears up to 4th down the straight, hitting 113mph before braking at 1G and dropping into 3rd. I took two bites at the corner, suggesting turn-in oversteer. The G plot moves about all over the place, so it was pretty scrappy, but part of that will be down to the bumpiness. Clearly, the car doesn't ride the bumps as well as it should, so there's something to delve deeper into there. Interestingly, there was a peak of 1.4G during a moment of no longitudinal acceleration. A short burst of acceleration took me over the finish line at 94mph.

Here's the video to go with it.
I was first on the Bentley course and the convoy run was not a good start. The course was simple; a straight, a 90-right, a hairpin left, 90 right, a straight and a right-left-right chicane before the finish. It was all about power and mechanical grip. I found out on the convoy run that steering lock was important too. I didn't have enough for the last left-hander in the middle of the chicane. As a result, I ran out onto the grass on the exit. Some creative driving would be required.
In first practice, I took it steady to set a reasonable time, but at the chicane tried stamping on the throttle to get some oversteer around the corner. At that point, I realised I was in 2nd gear and the car just accelerated and understeered two wheels off. In second practice, it was much the same, but I gave it beans in 1st gear rather than 2nd. The grip at Abingdon is good and 999cc isn't enough to generate oversteer at will. I went four wheels off in an attempt to emulate a Flymo. I also learned that I was braking far too early for the first corner. More to come in the timed runs!
In the first timed run, I braked too early at the first corner, then out-braked myself at the third corner, diving through the cones and rejoining a couple of cones later. Frustratingly, I managed to get around the chicane with a bit of oversteer helping to turn the car. Despite the off, I was fastest, but that run wouldn't count with four wheels off. On the final timed run, I made sure I didn't make any mistakes and put in a good run to lead the class.
Let's look at the data for the Bentley course. Off the line, I'm up into 4th gear at 102mph before the first corner. 0-100mph takes 10.05 seconds - not bad for a 999cc car! The G-meter shows braking is variable and peaks at about 1.1G, reducing slightly as I align the car for the left kink just before the turn. I made a pretty good job of that on cold tyres and the nice upwards slew shows I trail braked into the corner. The smooth curve shows I got on the throttle right at the apex, but the bunching of plots in the top-left shows some fluctuation on the exit. I expect this is a little clumsily corrected oversteer on the exit, most likely as a result of giving too much throttle. You can see that we're up over 0.6G acceleration here, which suggests full throttle before the corner exit.
Moving onto turn two, I reached 74mph before jumping on the brakes. 1.1G of braking compared to 1.3G in cornering suggests I could have braked later. Also, the concave curve from braking at the bottom to cornering on the right suggests I didn't fully utilise the traction circle and could have carried more speed in on the brakes. The number of points on the right is because I balanced the car on the throttle around the long left-handed hairpin. There was clearly a bit of oversteer on the exit as there's another hiccup on the curve in the top right.
67mph achieved before braking for the right-hander and again there's not enough pressing of the brake. There was a new master cylinder fitted for this event and the different pedal ratios means the balance isn't quite right and the feel is very different. Again, I've braked too early as I've rolled off the brakes quite quickly on turn-in, resulting in the concave graph. True to form, I've also stamped on the throttle on the exit and got a mild case of oversteer on the exit! It's worth noting that as I'm still on the edge of the traction circle, this is unlikely to have cost much time.
Heading down the straight to the final chicane, I reach 94mph before jumping on the brakes. Again, I'm braking at 1.1G, which probably means my brake balance is pretty far out and I'm feeling a lockup and not braking any harder. There's a jink left under braking before trail-braking into the right-hander. The lateral G peaks at 1.5G in the right-hander, at which point I'm off the brakes before getting back on the brakes lightly for the left-hander in the middle of the chicane. I kept on the brakes past the apex on the left before stamping on the throttle and this is where the G meter gets all messy. The trail braking past the apex was to keep the nose tucked in and keep make it round, but this meant losing speed on the exit of the corner and not making the most of the traction circle. Needs must! The final right-hander was also scrappy. Definitely lots of time to make up next year.
Moving onto the Abingdon course after lunch, this was a much faster course. From the line, accelerate through the first left, upshifting along the way and into 6th down the bumpy perimeter road. Turn in flat out to the right-hander, then pick a braking point for the multi-apex left-right-left chicane, then accelerate down the straight and scrub off a little speed into the ultra-fast left-hander before the finish. It's a tricky course as the corners are blind with lots of false apexes on the approach to the chicane and bumps the whole way round. I'll definitely walk the course on the Friday next year as it'll take a lot of learning.
In first practice, I was tentative into the chicane and the last corner. I even lifted on the flat right-hander on the approach to the chicane. In second practice, I was again too slow into the chicane, and still wondering if I should keep flat over the right into it. The apex of the final corner is earlier than it looks! Let's move onto the data from the last timed run.
Away from the line, the left-hander slows acceleration down and 0-100mph takes 10.9 seconds as a result. You can see the gearchanges through the corners with the dips as the lateral G increases and decreases. You can also see the upshift into 6th happened after turning into the right-hander, hitting 119mph in the process. It was a scrappy turn-in, not helped by the bumps and peak braking was only 0.9G, so much more to come there.
There's also some indecision about the direction I'm taking under braking, again the bumps causing me problems. Turning into the left-hander, I'm not using the brakes as hard as I could and the cluster of points around that area shows that I took a couple of bites at the corner. Clearly, I need to walk the course! I carried on braking lightly into the right-hander in the chicane, pulling just over 1.2G in the corner. It looks like there was again a bit of oversteer as I got on the throttle towards the final left of the chicane and what looks like a bit more as I turned left.
I took two more gears up to 4th down the straight, hitting 113mph before braking at 1G and dropping into 3rd. I took two bites at the corner, suggesting turn-in oversteer. The G plot moves about all over the place, so it was pretty scrappy, but part of that will be down to the bumpiness. Clearly, the car doesn't ride the bumps as well as it should, so there's something to delve deeper into there. Interestingly, there was a peak of 1.4G during a moment of no longitudinal acceleration. A short burst of acceleration took me over the finish line at 94mph.
Here's the video to go with it.
After the unfamiliar lines of Abingdon, it was back to Castle Combe a fortnight later for the familiar lines of my home circuit at the Dick Mayo Sprint. This time, the start line had been moved to the pit lane rather than the race start line as has been the case in previous years. This meant the winner of each class would get a class record to go with it. The day started wet with the rain falling on the way to the circuit, but it stopped almost immediately. By the time the drivers' briefing was over, the sun was out and by the time I was on track, it was definitely slicks weather.
So slicks it was, but it wasn't half slippy! Despite a tentative disposition given it was first practice, still damp and I was on slicks, the lack of grip caught me out at Quarry. The data shows I barely broke 1G through Quarry. The tyres warmed up through the lap though, and I was back to 1.4G through Bobbies. Second practice was dry and I pushed on to lop a few seconds off. I was comfortably fastest at this point, so I was confident for the afternoon. The first run was quicker still and I thought that was a good run. Clive Wooster and Luke Trotman had both gone quicker than me. I needed a big improvement to beat Clive and I didn't think I could, so I was quite pleased when my last run was seconds quicker and enough to win the class by four tenths.
So, how did it happen? Off the line, I made a good enough start and made a point of going flat over Avon Rise. You can see the lateral G increases whilst the car is still accelerating and 1.2G laterally was generated over Avon Rise. It's actually quite a corner! Coming off the rise, I moved straight to the brakes without completely straightening the car.

Turning into Quarry, I took a couple of bites at the corner as I tried to slow the car and missed the apex. Peaks of 1.5G show the car had good grip and show how much better the surface is than Abingdon where the cornering forces were lower, despite the much warmer weather. The exit was clearly not too smooth, but I made good use of the traction available. In the panic to slow the car for the corner, I'd not made enough downshifts and was still in 4th gear, where 2nd would be more appropriate.

Braking for The Esses was too light and I released the brakes partially before turning in. This was because I needed to keep the speed up as I'd realised my mistake. There's more speed that could be carried into and through the right-hander, whilst the left-hander was pretty much what the car could do. I was off the throttle during the transition from right to left, but the data suggests I could carry more speed and trail brake to between the two apices. I was clearly heavy on the throttle coming out of The Esses as there's a two-stage horizontal trend line on the G-circle.

Through Old Paddock, it's clear to see that I was flat out, despite the strong wind coming from the right side of the car on turn-in and the opposite side on the exit. This was causing oversteer on the way in and massive understeer on the exit. I unexpectedly came through the corner on opposite lock with two wheels on the grass. The marshal on the post said I looked like I was about to crash. I didn't disagree, but I was still flat!

Tower is the corner I never get right and, as usual, I've braked too early, rolled off the brakes and taken a couple of bites into the corner. What's striking is how early I got on the throttle, most likely because I realised I'd braked too early before I'd reached the turn-in point. The maximum lateral G was seen with the foot on the throttle, so there's lots of time to be found here.

Into Bobbies, the braking is as strong as anywhere on the circuit, most likely because of the uphill approach to the corner. Good use of the tyres made here, but I was clearly on the throttle before turning into the second apex, although there appears to be a lift on the transition. The finish is on the exit of Westway, which is flat, hence the horizontal trend line to the left of the graph, peaking at about 0.9G. Lots of time to be lopped off next year!

Here's the video to go with it.
So slicks it was, but it wasn't half slippy! Despite a tentative disposition given it was first practice, still damp and I was on slicks, the lack of grip caught me out at Quarry. The data shows I barely broke 1G through Quarry. The tyres warmed up through the lap though, and I was back to 1.4G through Bobbies. Second practice was dry and I pushed on to lop a few seconds off. I was comfortably fastest at this point, so I was confident for the afternoon. The first run was quicker still and I thought that was a good run. Clive Wooster and Luke Trotman had both gone quicker than me. I needed a big improvement to beat Clive and I didn't think I could, so I was quite pleased when my last run was seconds quicker and enough to win the class by four tenths.
So, how did it happen? Off the line, I made a good enough start and made a point of going flat over Avon Rise. You can see the lateral G increases whilst the car is still accelerating and 1.2G laterally was generated over Avon Rise. It's actually quite a corner! Coming off the rise, I moved straight to the brakes without completely straightening the car.
Turning into Quarry, I took a couple of bites at the corner as I tried to slow the car and missed the apex. Peaks of 1.5G show the car had good grip and show how much better the surface is than Abingdon where the cornering forces were lower, despite the much warmer weather. The exit was clearly not too smooth, but I made good use of the traction available. In the panic to slow the car for the corner, I'd not made enough downshifts and was still in 4th gear, where 2nd would be more appropriate.
Braking for The Esses was too light and I released the brakes partially before turning in. This was because I needed to keep the speed up as I'd realised my mistake. There's more speed that could be carried into and through the right-hander, whilst the left-hander was pretty much what the car could do. I was off the throttle during the transition from right to left, but the data suggests I could carry more speed and trail brake to between the two apices. I was clearly heavy on the throttle coming out of The Esses as there's a two-stage horizontal trend line on the G-circle.
Through Old Paddock, it's clear to see that I was flat out, despite the strong wind coming from the right side of the car on turn-in and the opposite side on the exit. This was causing oversteer on the way in and massive understeer on the exit. I unexpectedly came through the corner on opposite lock with two wheels on the grass. The marshal on the post said I looked like I was about to crash. I didn't disagree, but I was still flat!
Tower is the corner I never get right and, as usual, I've braked too early, rolled off the brakes and taken a couple of bites into the corner. What's striking is how early I got on the throttle, most likely because I realised I'd braked too early before I'd reached the turn-in point. The maximum lateral G was seen with the foot on the throttle, so there's lots of time to be found here.
Into Bobbies, the braking is as strong as anywhere on the circuit, most likely because of the uphill approach to the corner. Good use of the tyres made here, but I was clearly on the throttle before turning into the second apex, although there appears to be a lift on the transition. The finish is on the exit of Westway, which is flat, hence the horizontal trend line to the left of the graph, peaking at about 0.9G. Lots of time to be lopped off next year!
Here's the video to go with it.
It was all or nothing at Clay Pigeon. To keep my championship hopes alive, I needed a class win and a new record, both by a second. With only a Mini and a Seat Marbella in class, the win was a formality, provided I finished. The record was also pretty likely, given that I'd broken it earlier in the year in near freezing conditions with a tentative run after the sticky throttle I'd had that day.
The weather was scorching and with the 1.75 lap format and no straights, keeping the tyres cool was going to be a problem! Straight out of the box, I put in my fastest ever run with a 73.37. That was several seconds inside the record. All I had to do was the same in the afternoon. In second practice, I dropped down to a 72.42 and hopes were high that I could do a 71 in the afternoon.
When the afternoon came around, I was perplexed by a 74.03. Still, that was maximum points and there was a chance to do it properly in the second run. In true fashion, I went a tenth quicker than second practice in the first lap and pushed it through the chicane more than I had done all day. A 71 was looking probable. The extra speed through the chicane caught me out at the next corner though and I spun to the inside under braking. Still, that leaves just one ASWMC record to get; Llandow.
I'd been well under the record at Llandow during testing in 2012, but never had a dry run in competition to prove it. The day looked dry. In first practice, I made a solid start. In second practice, I was 0.99 clear of Clive Wooster in his Radical SR4 and dipped under the record. If I could maintain the gap and lop a few tenths off in the afternoon, that would be maximum points and enough to keep the championship alive.
Over the line, I heard a clunk. On investigation, it appeared the chain had gone. I whipped out my spare and got to work. Once the chain was out, I realised the real situation. The sprocket was missing from the chain tensioner and was clearly near the track somewhere around the finish. Chance of finding it? Nil! Day over and with it any chance of the championship. Congratulations to Ian Parr on his championship win.

When I got home and took it all apart, it turned out the bolt that holds the idler sprocket axle in place had sheared as a result of a stress fracture at the point of the split in the sleeve that acts as the axle. I swiftly ordered a new sprocket, but not knowing the size of the original, there was a certain amount of guesswork. My guess was not as educated as I had hoped and the sprocket needed an extra tooth or two. I was not going to make Curborough in the ADR, but thanks to a very nice man, I was able to play in a Dax Rush with a 'Busa engine and a turbo on road tyres. Awesome fun!

The weather was scorching and with the 1.75 lap format and no straights, keeping the tyres cool was going to be a problem! Straight out of the box, I put in my fastest ever run with a 73.37. That was several seconds inside the record. All I had to do was the same in the afternoon. In second practice, I dropped down to a 72.42 and hopes were high that I could do a 71 in the afternoon.
When the afternoon came around, I was perplexed by a 74.03. Still, that was maximum points and there was a chance to do it properly in the second run. In true fashion, I went a tenth quicker than second practice in the first lap and pushed it through the chicane more than I had done all day. A 71 was looking probable. The extra speed through the chicane caught me out at the next corner though and I spun to the inside under braking. Still, that leaves just one ASWMC record to get; Llandow.
I'd been well under the record at Llandow during testing in 2012, but never had a dry run in competition to prove it. The day looked dry. In first practice, I made a solid start. In second practice, I was 0.99 clear of Clive Wooster in his Radical SR4 and dipped under the record. If I could maintain the gap and lop a few tenths off in the afternoon, that would be maximum points and enough to keep the championship alive.
Over the line, I heard a clunk. On investigation, it appeared the chain had gone. I whipped out my spare and got to work. Once the chain was out, I realised the real situation. The sprocket was missing from the chain tensioner and was clearly near the track somewhere around the finish. Chance of finding it? Nil! Day over and with it any chance of the championship. Congratulations to Ian Parr on his championship win.
When I got home and took it all apart, it turned out the bolt that holds the idler sprocket axle in place had sheared as a result of a stress fracture at the point of the split in the sleeve that acts as the axle. I swiftly ordered a new sprocket, but not knowing the size of the original, there was a certain amount of guesswork. My guess was not as educated as I had hoped and the sprocket needed an extra tooth or two. I was not going to make Curborough in the ADR, but thanks to a very nice man, I was able to play in a Dax Rush with a 'Busa engine and a turbo on road tyres. Awesome fun!
I've been doing CFD simulations on my own computer for some time using Sketchup and the Khamsin plugin to do the meshing and processing using OpenFOAM. It's really matured this year with the latest Khamsin plugin, which is much improved. Despite this, it's still hard to setup and the processing can take a very long time, especially if you want to model a whole car. The tool to view the results, Paraview, is also pretty tricky to learn. This is where Hibou Scientific's latest product, Aerodynamic on Demand, comes in.
The web application takes your model in standard STL format, which can be exported from any CAD program, including the free and easy to use Sketchup. There are currently four options to choose from; Geometry Check, Discovery, Detailed and Premium. The first option is just to make sure your model is good and pointing in the right direction. It's worth doing this to be sure you have it right, especially as it's free and results don't take long to come back. The other options give you increasing accuracy and a few extra features such as graphs of downforce/drag over the length of the car. Needless to say, I had to give this a go and delved in with a Premium analysis for $15AUD (just under a tenner), currently discounted from $40AUD.
I fired up Sketchup and drew a quick model of the ADR by tracing a side-on photo and extruding. It's rough, but all I need for now. After I added in the Export STL plugin from the Sketchup website, I was able to generate the STL file. I tapped in my email address, the speed I wished to simulate at, the yaw angle (0 degrees), selected the STL file, pressed the button for Premium analysis and I was able to immediately checkout with Paypal. Simples!
It's worth noting that these simulations take a long time with big models and it takes 24-36 hours for the results to come back. When they arrived the next day, I was presented with some summary data and a large number of 3D views that could be navigated in the web browser (Chrome works, but my version of Internet Explorer does not as it uses WebGL). The left mouse button rotates the car, the right button zooms in/out and the middle button moves around, which is where my first problem arose - my laptop only has two mouse buttons!
So what did I receive back? Why don't you take a look? On the Summary tab, it tells me what options I selected when the model was uploaded and how big the model is on the left. On the right, it shows the complexity of the model, downforce and drag values and the all important centre of pressure. At this point, I gravitated to the downforce value and was surprised to see 5kg of lift with a CoP near the front wheels. Then there's the L/D ratio of 0.19:1. Not good news! We'll see why later.
The next tab has three 3D views; Geometry, Streamlines and Pressure Map. The first is the same view you get in the free geometry check. The second is a pretty view for showing people that might show something interesting if you're lucky. The third is the pressure map and shows the car colourised by pressure with grey being ambient, blue being low pressure and red being high pressure. What we're aiming for here is a blue bottom and a red top! This is the first point of analysis, so what did I learn?

The first thing that's striking is the dark red area on the top of the splitter. That shows there's good downforce on the splitter as it's a nice shade of blue on the bottom. It also shows there's a nice amount of drag there too as the vertical area behind the splitter is also red. Going back to the underside of the splitter, it's blue at the leading edge because the air is separating from the splitter. It might be good for downforce at that exact point, but it's not much help for the rest of the car that has to utilise that air!
Also immediately obvious is the blue areas on the side of the car ahead of the wheels. Again, that's separation of the flow caused by lazy modelling as the edges of the car are sharp. Whilst the same is true of the side of the wheels, you'll note an interesting pattern which shows the generation of vortices from the high pressure area ahead of the tyre to the low pressure area at the side. This is often coined as tyre squirt.
Moving to the bottom of the car, there's red areas in the wheel arches caused by the high pressure area ahead of the tyre spilling into the wheel arch. That's why cars have vents on the top of the wheel arches! Looking at the floor as a whole, there's a blue tinge to in, which means there is some low pressure there, albeit not much.
Turning the car over, there's clear low pressure over much of the body, notably the convex front wheel arches, rear wheel arches, rear deck and the rollbar. The rollbar is mostly due to separation and the flow at that point is slightly upwards, hence why the underside is grey. I don't believe the real car has this much lift from the rollbar as it's not got sharp edges, so separation isn't going to be an issue. The wheel arches and rear deck most likely do have this low pressure, but without re-designing the body, I can't do much about it. What's important here is that most of the top side of the body is a darker blue than the underside.
Moving rearwards, the rear wing shows strong high pressure on the top and low pressure on the underside. This explains how the centre of pressure is so far forwards as the rear wing is producing solid downforce to counteract the lift from the bulk of the body. We'll see that graphically later on.
The next tab is the 3D streamlines and has 13 views with streamlines from a vertical line ahead of the car. These streamlines show the path of the air around the car. This view shows clearly how the air rolls over the sides of the car, generating a vortex that runs down the side of the car into the rear wing end plate.This view shows some air going under the car and through the diffuser, whilst the air over the top hits the rollbar. The rollbar is again causing a vortex and some of the air goes both under and over the rear wing.

The next tab is a series of 13 vertical cross sections showing the pressure or velocity of the air all around the car. From this, you can see the wake of the car and also clearly see the separation at the top of the rollbar. The following tab is the same, but with 6 horizontal cross sections.

On the last tab is the distribution of drag and downforce over the length of the car. Taking the drag first, the nose causes the largest single point of drag. The rollbar is also causing a large amount of drag, most likely more than on the real car because of the separation on the top side. The final two peaks are the rear of the car, which is a flat back in the model and coloured blue in the pressure map, and the rear wing.

The downforce is also interesting (negative numbers are downforce, whilst positive are lift) with most of the downforce coming from the front splitter, moving to lift where the high pressure under the wheel arches combine with the low pressure over the top. Low pressure on the floor and ambient in the cockpit means net downforce, whilst the huge lift from the rollbar is the cause of the biggest single point of lift. Clearly, this is skewing the overall figures with over 100N of lift from the rollbar alone! Steady lift from the rear clam is countered by 146N of downforce from the rear wing, which appears to have a lift/drag ratio of about 4.4:1. The lift from the rear clam has been shown true when the rear body clip broke at Llandow and the whole rear clam lifted at around 100mph!

So, what have I learned from this? It's likely that the car doesn't produce much downforce. Taking off the 100N of lift from the rollbar, that's only about 5kg of downforce at 60mph. Even allowing for the simplistic nature of the model and the lack of wheel rotation, there's not much downforce there. How can I improve that? Simplistically, that's a case of reducing pressure on the underside and increasing pressure on the top. We must also be mindful of the balance, which is currently very much rearwards.
We know that there's high pressure in the wheel arch, so venting that will help reduce lift, bringing the CoP forwards. With lower pressure in the wheel arch, we can fit a diffuser to the trailing edge of the splitter to reduce pressure under the splitter and increase the area of the splitter (force is equal to pressure x area). To try and reduce pressure on the whole of the underside, we can enlarge the diffuser to try and draw air under the car at higher speed, thus reducing pressure. We can also try to relieve the pressure ahead of the front wheels by reducing the pressure of the air going past the wheel arch. This could be achieved by vortex generation from end plates on the splitter. So the next step is to model that...
The web application takes your model in standard STL format, which can be exported from any CAD program, including the free and easy to use Sketchup. There are currently four options to choose from; Geometry Check, Discovery, Detailed and Premium. The first option is just to make sure your model is good and pointing in the right direction. It's worth doing this to be sure you have it right, especially as it's free and results don't take long to come back. The other options give you increasing accuracy and a few extra features such as graphs of downforce/drag over the length of the car. Needless to say, I had to give this a go and delved in with a Premium analysis for $15AUD (just under a tenner), currently discounted from $40AUD.
I fired up Sketchup and drew a quick model of the ADR by tracing a side-on photo and extruding. It's rough, but all I need for now. After I added in the Export STL plugin from the Sketchup website, I was able to generate the STL file. I tapped in my email address, the speed I wished to simulate at, the yaw angle (0 degrees), selected the STL file, pressed the button for Premium analysis and I was able to immediately checkout with Paypal. Simples!
It's worth noting that these simulations take a long time with big models and it takes 24-36 hours for the results to come back. When they arrived the next day, I was presented with some summary data and a large number of 3D views that could be navigated in the web browser (Chrome works, but my version of Internet Explorer does not as it uses WebGL). The left mouse button rotates the car, the right button zooms in/out and the middle button moves around, which is where my first problem arose - my laptop only has two mouse buttons!
So what did I receive back? Why don't you take a look? On the Summary tab, it tells me what options I selected when the model was uploaded and how big the model is on the left. On the right, it shows the complexity of the model, downforce and drag values and the all important centre of pressure. At this point, I gravitated to the downforce value and was surprised to see 5kg of lift with a CoP near the front wheels. Then there's the L/D ratio of 0.19:1. Not good news! We'll see why later.
The next tab has three 3D views; Geometry, Streamlines and Pressure Map. The first is the same view you get in the free geometry check. The second is a pretty view for showing people that might show something interesting if you're lucky. The third is the pressure map and shows the car colourised by pressure with grey being ambient, blue being low pressure and red being high pressure. What we're aiming for here is a blue bottom and a red top! This is the first point of analysis, so what did I learn?
The first thing that's striking is the dark red area on the top of the splitter. That shows there's good downforce on the splitter as it's a nice shade of blue on the bottom. It also shows there's a nice amount of drag there too as the vertical area behind the splitter is also red. Going back to the underside of the splitter, it's blue at the leading edge because the air is separating from the splitter. It might be good for downforce at that exact point, but it's not much help for the rest of the car that has to utilise that air!
Also immediately obvious is the blue areas on the side of the car ahead of the wheels. Again, that's separation of the flow caused by lazy modelling as the edges of the car are sharp. Whilst the same is true of the side of the wheels, you'll note an interesting pattern which shows the generation of vortices from the high pressure area ahead of the tyre to the low pressure area at the side. This is often coined as tyre squirt.
Moving to the bottom of the car, there's red areas in the wheel arches caused by the high pressure area ahead of the tyre spilling into the wheel arch. That's why cars have vents on the top of the wheel arches! Looking at the floor as a whole, there's a blue tinge to in, which means there is some low pressure there, albeit not much.
Turning the car over, there's clear low pressure over much of the body, notably the convex front wheel arches, rear wheel arches, rear deck and the rollbar. The rollbar is mostly due to separation and the flow at that point is slightly upwards, hence why the underside is grey. I don't believe the real car has this much lift from the rollbar as it's not got sharp edges, so separation isn't going to be an issue. The wheel arches and rear deck most likely do have this low pressure, but without re-designing the body, I can't do much about it. What's important here is that most of the top side of the body is a darker blue than the underside.
Moving rearwards, the rear wing shows strong high pressure on the top and low pressure on the underside. This explains how the centre of pressure is so far forwards as the rear wing is producing solid downforce to counteract the lift from the bulk of the body. We'll see that graphically later on.
The next tab is the 3D streamlines and has 13 views with streamlines from a vertical line ahead of the car. These streamlines show the path of the air around the car. This view shows clearly how the air rolls over the sides of the car, generating a vortex that runs down the side of the car into the rear wing end plate.This view shows some air going under the car and through the diffuser, whilst the air over the top hits the rollbar. The rollbar is again causing a vortex and some of the air goes both under and over the rear wing.
The next tab is a series of 13 vertical cross sections showing the pressure or velocity of the air all around the car. From this, you can see the wake of the car and also clearly see the separation at the top of the rollbar. The following tab is the same, but with 6 horizontal cross sections.
On the last tab is the distribution of drag and downforce over the length of the car. Taking the drag first, the nose causes the largest single point of drag. The rollbar is also causing a large amount of drag, most likely more than on the real car because of the separation on the top side. The final two peaks are the rear of the car, which is a flat back in the model and coloured blue in the pressure map, and the rear wing.
The downforce is also interesting (negative numbers are downforce, whilst positive are lift) with most of the downforce coming from the front splitter, moving to lift where the high pressure under the wheel arches combine with the low pressure over the top. Low pressure on the floor and ambient in the cockpit means net downforce, whilst the huge lift from the rollbar is the cause of the biggest single point of lift. Clearly, this is skewing the overall figures with over 100N of lift from the rollbar alone! Steady lift from the rear clam is countered by 146N of downforce from the rear wing, which appears to have a lift/drag ratio of about 4.4:1. The lift from the rear clam has been shown true when the rear body clip broke at Llandow and the whole rear clam lifted at around 100mph!
So, what have I learned from this? It's likely that the car doesn't produce much downforce. Taking off the 100N of lift from the rollbar, that's only about 5kg of downforce at 60mph. Even allowing for the simplistic nature of the model and the lack of wheel rotation, there's not much downforce there. How can I improve that? Simplistically, that's a case of reducing pressure on the underside and increasing pressure on the top. We must also be mindful of the balance, which is currently very much rearwards.
We know that there's high pressure in the wheel arch, so venting that will help reduce lift, bringing the CoP forwards. With lower pressure in the wheel arch, we can fit a diffuser to the trailing edge of the splitter to reduce pressure under the splitter and increase the area of the splitter (force is equal to pressure x area). To try and reduce pressure on the whole of the underside, we can enlarge the diffuser to try and draw air under the car at higher speed, thus reducing pressure. We can also try to relieve the pressure ahead of the front wheels by reducing the pressure of the air going past the wheel arch. This could be achieved by vortex generation from end plates on the splitter. So the next step is to model that...
After the first round of CFD analysis, I summed up that the car would benefit from reducing pressure in the wheel arch, bringing in the CoP forwards. This would enable the use of a small front diffuser on the trailing edge of the front splitter to draw air into the newly formed low pressure region. In addition, some vortex generation at the side of the front clam would reduce pressure in the gap between the tyre and bodywork, helping to reduce pressure ahead of the front wheels. To bring the balance rearwards, a larger diffuser would reduce the pressure on the whole underside, especially at the rear.
So with that information to hand, I modelled a few changes (Google Chrome recommended). In addition to the changes above, I also raised the front of the splitter so that it was angled closer to the direction of airflow towards it in an effort to reduce the separation caused by modelling with square edges! Looking at the pressure map, you can see that I made a small error in the right-front wheel arch, which resulted in a high pressure area all around. On the left side, you can see that there is low pressure on the front diffuser and that the pressure on the leading edge of the tyre is lower than that of the other side. In hindsight, I would have modelled just one side of the car with the changes to more easily see the differences.
There are some meshing problems on the leading edge of the splitter, hence the high/low pressure variation. You can also see high pressure build-up on the air exit on the sidepods, mostly down to the crude implementation of the changes. At the rear, there's a much larger low pressure area thanks to the extra floor area of the larger diffuser and the low pressure it generates, specifically at the point of angle change.
Skipping the streamlines and slices, let's move onto the drag and downforce. Drag is up 20N, whilst lift is also down 46N. It's clearly at the rear too as the CoP is 65 metres ahead of the car showing that there's lift at the front and downforce at the rear. The downforce/drag distribution graphs show this well. The splitter produces less downforce now, although this may be down to the meshing issues exposed in the pressure map. The figures at the front of the car are also skewed by the modelling mistake I made in blocking off the rear of the wheel arch. The main point of downforce generation has been at the diffuser.

Most interestingly, I've also got the full results as a download and can process this in the tool of my choice, which happens to be the free Paraview. So here's a little view of the front diffuser in action. You can see the vortex flowing into the sidepod and the air washes down the side of the car and under the rear wing. The high speed air (red) shows why it's low pressure under the splitter.

So with that information to hand, I modelled a few changes (Google Chrome recommended). In addition to the changes above, I also raised the front of the splitter so that it was angled closer to the direction of airflow towards it in an effort to reduce the separation caused by modelling with square edges! Looking at the pressure map, you can see that I made a small error in the right-front wheel arch, which resulted in a high pressure area all around. On the left side, you can see that there is low pressure on the front diffuser and that the pressure on the leading edge of the tyre is lower than that of the other side. In hindsight, I would have modelled just one side of the car with the changes to more easily see the differences.
There are some meshing problems on the leading edge of the splitter, hence the high/low pressure variation. You can also see high pressure build-up on the air exit on the sidepods, mostly down to the crude implementation of the changes. At the rear, there's a much larger low pressure area thanks to the extra floor area of the larger diffuser and the low pressure it generates, specifically at the point of angle change.
Skipping the streamlines and slices, let's move onto the drag and downforce. Drag is up 20N, whilst lift is also down 46N. It's clearly at the rear too as the CoP is 65 metres ahead of the car showing that there's lift at the front and downforce at the rear. The downforce/drag distribution graphs show this well. The splitter produces less downforce now, although this may be down to the meshing issues exposed in the pressure map. The figures at the front of the car are also skewed by the modelling mistake I made in blocking off the rear of the wheel arch. The main point of downforce generation has been at the diffuser.
Most interestingly, I've also got the full results as a download and can process this in the tool of my choice, which happens to be the free Paraview. So here's a little view of the front diffuser in action. You can see the vortex flowing into the sidepod and the air washes down the side of the car and under the rear wing. The high speed air (red) shows why it's low pressure under the splitter.
After the previous blogs on aero modifications, it makes sense that the car should see some aero mods for 2014. That's not all it's had though as there were still two weak points to the car; steering lock and the chain tensioner. I started at the front and the first change was to move the timing strut from the middle of the car back to the side of the splitter. Not for aero reasons, but because it kept getting in the way when removing the front clam! A bit of fibreglass and some matt black paint sorted that nicely.

Moving backwards, a vertical gurney has sprouted on the leading edge of each wheel arch. This causes low pressure behind it, which helps draw the high pressure air out from ahead of the front wheels. The net result is reduced lift and drag. The downforce at the front had started tearing the splitter floor off the front crash structure, pulling the rivets out. They've been replaced with high tensile bolts and skid plates have been added under the splitter to try and reduce the wear on the leading edge. Added to the trailing edge of the splitter is a small diffuser to try and reduce the pressure under the splitter further.
The rest of the changes were carried out to a much higher standard by Jo at Vulcan Dezign. First off, the steering arms were changed to gain clearance to the front wheels. Then the lower wishbones were replaced by newly fabricated units with a little more wheel clearance. This means the rack now goes from lock to lock without fouling. A new column with a new boss for the steering wheel gets rid of the minor slop from the wear that was in the old boss.

The real work went into fixing the chain tensioning mechanism. Failures of the previous mechanism had cost me money, grief and results, so Jo thought long and hard about how to resolve it. The answer is a rotating rear transaxle. The Quaife unit is able to be mounted in several orientations, which means it can be rotated slightly to tension the chain, removing the need for the idler gear and the tray it sits on. Hopefully, I'll gain reliability, some power (fewer losses without an idler gear) and the ability to change ratios with a greater latitude in tensioning. I've done 3 seasons geared for >130mph and if I ever broke 120mph, I didn't have the data logger running to prove it.


The rear sprocket was worn beyond tolerances, so a new one's been ordered from Elite Racing Transmissions. The new one will arrive in the new year and has 25 teeth instead of the previous one's 20 teeth. This means that my 17 tooth front sprocket is the appropriate gearing for Castle Combe, rather than the 14 I have previously run (13 was optimum). The 14 tooth is correct for Crystal Palace as I ran this year, but instead of using 1st and 2nd gear, I'll now be close to the limiter in 3rd. This focuses more on gear changes, which means a flat shifting system is high on the list of priorities.
Whilst all that's been done, I still have to build a rear diffuser extension to balance out all the downforce that's been generated at the front. The centre section was folded from aluminium whilst at Vulcan Dezign, but I need to mount it and build the outer sections to match. I also need to find some arch vents to further reduce the pressure in the wheel arches. The car also needs to go back together with a few extra sensors for the RaceCapture Pro data logger; ride height sensors (to validate the aero mods), RPM (so I don't have to correlate with the RacePak G2X logger) and gearbox speed (for analysing clutch slip and wheelspin).
Moving backwards, a vertical gurney has sprouted on the leading edge of each wheel arch. This causes low pressure behind it, which helps draw the high pressure air out from ahead of the front wheels. The net result is reduced lift and drag. The downforce at the front had started tearing the splitter floor off the front crash structure, pulling the rivets out. They've been replaced with high tensile bolts and skid plates have been added under the splitter to try and reduce the wear on the leading edge. Added to the trailing edge of the splitter is a small diffuser to try and reduce the pressure under the splitter further.
The rest of the changes were carried out to a much higher standard by Jo at Vulcan Dezign. First off, the steering arms were changed to gain clearance to the front wheels. Then the lower wishbones were replaced by newly fabricated units with a little more wheel clearance. This means the rack now goes from lock to lock without fouling. A new column with a new boss for the steering wheel gets rid of the minor slop from the wear that was in the old boss.
The real work went into fixing the chain tensioning mechanism. Failures of the previous mechanism had cost me money, grief and results, so Jo thought long and hard about how to resolve it. The answer is a rotating rear transaxle. The Quaife unit is able to be mounted in several orientations, which means it can be rotated slightly to tension the chain, removing the need for the idler gear and the tray it sits on. Hopefully, I'll gain reliability, some power (fewer losses without an idler gear) and the ability to change ratios with a greater latitude in tensioning. I've done 3 seasons geared for >130mph and if I ever broke 120mph, I didn't have the data logger running to prove it.
The rear sprocket was worn beyond tolerances, so a new one's been ordered from Elite Racing Transmissions. The new one will arrive in the new year and has 25 teeth instead of the previous one's 20 teeth. This means that my 17 tooth front sprocket is the appropriate gearing for Castle Combe, rather than the 14 I have previously run (13 was optimum). The 14 tooth is correct for Crystal Palace as I ran this year, but instead of using 1st and 2nd gear, I'll now be close to the limiter in 3rd. This focuses more on gear changes, which means a flat shifting system is high on the list of priorities.
Whilst all that's been done, I still have to build a rear diffuser extension to balance out all the downforce that's been generated at the front. The centre section was folded from aluminium whilst at Vulcan Dezign, but I need to mount it and build the outer sections to match. I also need to find some arch vents to further reduce the pressure in the wheel arches. The car also needs to go back together with a few extra sensors for the RaceCapture Pro data logger; ride height sensors (to validate the aero mods), RPM (so I don't have to correlate with the RacePak G2X logger) and gearbox speed (for analysing clutch slip and wheelspin).
I’m not exactly sure. I have been told that a while back ADR were selling a CD containing plans, don’t know if this is the case. Anyway, the plans have been modified (don’t think it was a full set of plans) and a couple of chassis resembling the ADR design have been built locally.
Mine is the one on the right.

Mine is the one on the right.
Interesting! That looks like ADR 1000 chassis, which is quite similar to the Sport 2. I believe the ADR 1000 is what the plans were for. You'll find the rack on the outside will limit the lock you have if you decide to run wider tyres. I guess you're sticking with the live axle? What will you do about bodywork? I know of a couple of sets of moulds for the Sport 2, which might suit, depending on how wide you're going. I also know someone who has jigs for the front wishbones who can build you some more.
I think the ADR is slightly out of sorts with most Pistonheads readers.
The ADR originally ran a BMW engine and live axle in both ADR 1000 and Sport 2 guises. As you can see, mine is now an independent rear and a Suzuki GSXR1000 engine. Faster, more powerful and lighter than it was originally. They certainly used to be cheap - I have the original invoice for this car and it's peanuts compared to what the ADR3 sells for now, although the cost to bring this up to the performance of the ADR3 has been more than the difference in price.
The ADR originally ran a BMW engine and live axle in both ADR 1000 and Sport 2 guises. As you can see, mine is now an independent rear and a Suzuki GSXR1000 engine. Faster, more powerful and lighter than it was originally. They certainly used to be cheap - I have the original invoice for this car and it's peanuts compared to what the ADR3 sells for now, although the cost to bring this up to the performance of the ADR3 has been more than the difference in price.
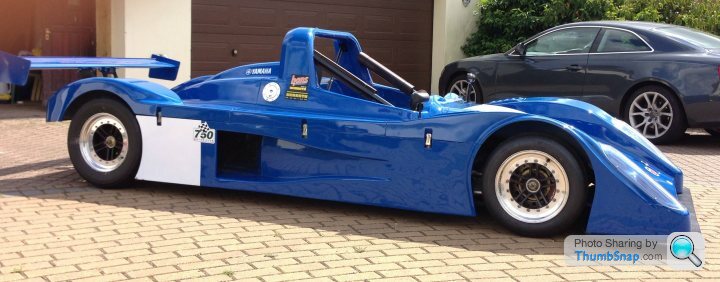
Gassing Station | Readers' Cars | Top of Page | What's New | My Stuff