Boxster 3.2 S Facelift 986
Discussion


falkster said:
Thanks mate! Don't worry about getting the few 'poor mans Porsche' comments but if you take those people out, as I've done, they'll change their mind.
Its funny as that's what I've done with a couple of people who seemed shocked that a car that is basically 3/4 of a 996 but with less power is so capable and sounds so good. Otherwise I have to say the comments have all been positive so its all good. My missus still hasnt driven it yet so I am looking forward to her reaction to it (I think it'll be heavy clutch and I dont like the brakes).

Been a busy boy today. I started the morning with the car looking in dire need of some TLC...

So I washed her with some AG Shampoo and then it was out with the machine polisher. Went over the car with a Scholl purple pad (medium cut) and Scholl S17+ polish. Next up was a mix of Vanilla Moose Glaze mixed with Red Moose Glaze (Pink Glaze I guess!) put on with a Scholl Orange finishing pad. The paintwork looked amazing at this point but of course needed wax to protect all my hard work.
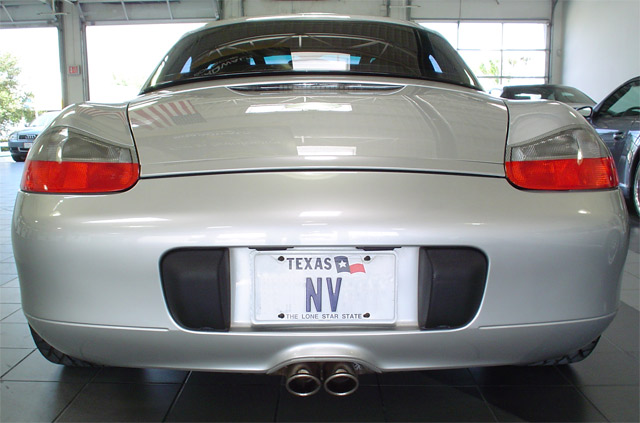
So for the first time I used some Collinite 845 Insulator wax on my Scholl Orange pad with the rotary set to speed level 5. Its a shame that you cant see it in the flesh as the photos don't really do it justice but, for silver which is hard to tell warmth or depth with, it looks amazing. The car looks wet and reflects everything beautifully. So anyway lets lets the pics do some of the talking...


All in all a very productive day. The car looks even better in the dark with all the light bouncing of it and the freshly waxed wheels really finish it off. I hope it at least stays dry for me to enjoy the way it looks tomorrow but I will still enjoy watching the way the water beads when its rains!! (sad I know!)
Some shots to attempt to show the depth and reflective qualities...


Gratuitous wheel shot...

So I washed her with some AG Shampoo and then it was out with the machine polisher. Went over the car with a Scholl purple pad (medium cut) and Scholl S17+ polish. Next up was a mix of Vanilla Moose Glaze mixed with Red Moose Glaze (Pink Glaze I guess!) put on with a Scholl Orange finishing pad. The paintwork looked amazing at this point but of course needed wax to protect all my hard work.
So for the first time I used some Collinite 845 Insulator wax on my Scholl Orange pad with the rotary set to speed level 5. Its a shame that you cant see it in the flesh as the photos don't really do it justice but, for silver which is hard to tell warmth or depth with, it looks amazing. The car looks wet and reflects everything beautifully. So anyway lets lets the pics do some of the talking...
All in all a very productive day. The car looks even better in the dark with all the light bouncing of it and the freshly waxed wheels really finish it off. I hope it at least stays dry for me to enjoy the way it looks tomorrow but I will still enjoy watching the way the water beads when its rains!! (sad I know!)
Some shots to attempt to show the depth and reflective qualities...
Gratuitous wheel shot...
Experienced a drop in fuel economy over the past few days and had been meaning to clean the throttle body out so did that this afternoon. The car now feels extremely smooth and hopefully the fuel economy will return. The throttle body was dirty but the switch cleaner soon sorted that. Gave the engine bay a good clean too but the failing light meant I didn't get any pics.
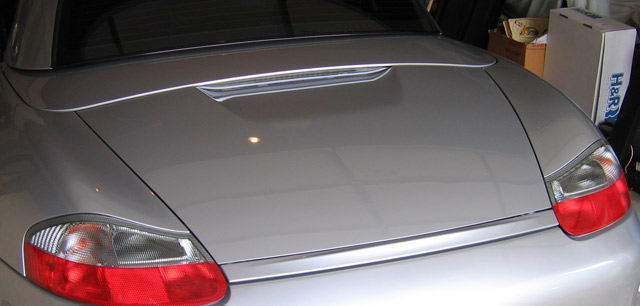
Fitted the clear smoked 3rd brake light in the freezing cold today.
Started with the removing the cover that the cars been under since Friday morning.

Put the lid in service position and access the two screws to remove it.

Be careful when replacing the new part as there are two little black grommets that the screws screw into which can get knocked through and they're a pain to find again - you have to remove the boot carpet at the rear of the boot and check there.
Anyway it was dark by the time I finished so this is the best photo I could get.

Started with the removing the cover that the cars been under since Friday morning.
Put the lid in service position and access the two screws to remove it.
Be careful when replacing the new part as there are two little black grommets that the screws screw into which can get knocked through and they're a pain to find again - you have to remove the boot carpet at the rear of the boot and check there.
Anyway it was dark by the time I finished so this is the best photo I could get.
Gassing Station | Readers' Cars | Top of Page | What's New | My Stuff