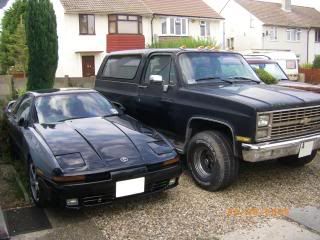
mkiii Supra 5.7L V8 conversion
Discussion


Hi PH,
I have been a PH fan for longer than I can remember but never got round to registering.... But now I have so I thought it only appropriate to share with you my car and the build that got it to where it is today. Here is a "quick" summary of my work to swap a Chevy 5.7L V8 in to my 1990 Supra.
History
I bought my mkiii Supra in January 2007. It was a JDM import 2.0L Twin Turbo (chassis code GA70, engine code 1G-GTE) with 63,000 miles on the clock and 210bhp out of the factory in 1990.
Being an import it was in immaculate condition and hadn't suffered the rust problems a lot of UK mkiii’s have.
I fitted a locked (shimmed) diff as I wanted to get in to drifting. Unfortunately the 2.0L engine was not torquey enough and being a rare engine would have cost too much to get any decent power from it (the turbos weren't at full boost till about 4k so I really had to rev the knackers off it to drift it). I decided in early 2009 to do an engine swap. The obvious choice was a 2JZ-GE (3.0L NA) from the mkiv supra as it has similar power but across the whole rev range and people were pretty much giving them away at that time (unlike the 2JZ-GTE which were still going for silly money). HOWEVER, after speaking to one of the guys in the mkiii supra club, I was (easily) convinced that if I was going to do an engine change, I may as well do it properly and put a V8 in it. This was May 2009.
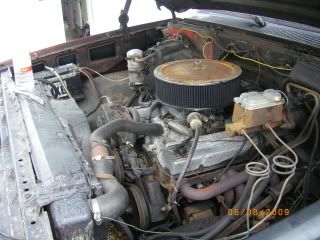
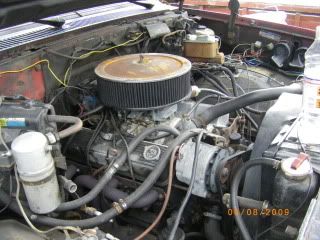
The search for a Chevy 350 (5.7L) started, and in August 2009 I bought and collected a 1984 Chevy Blazer.
The Blazer started life as a diesel V8 however the previous owner managed to cook the diesel lump (I have NO idea how) and fitted a brand new petrol 350 (5.7L) crate motor in 2002. The Blazer was used for a year, covering about 5,000 before it was left to stand and fall in to disrepair. The owner then decided to sell/break it in 2009 when I bought the whole thing for £1850. I pulled the engine, sold the TH400 automatic gearbox and then eventually sold the rolling shell to someone who wanted to restore it. This got me £1030 back so the engine, Holley 650 vac sec carb, alternator, water pump, inlet manifold, standard HEI dizzy and power steering pump ended up costing me £820 – not bad for 8 year old kit with only 5,000 miles on them. A bargain by anyone’s standards and worth the 3 months it took to find.
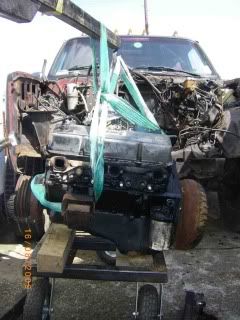
Unfortunately the crate motor was not very well protected against the elements and had a fair amount of surface corrosion on from sitting for 7 years in rainy Manchester.
One week after buying it I set about removing the engine from the Blazer on the driveway to get from
to
A mate then came round the next day and helped me remove the engine.

My plan was to keep the engine standard to start with and just get it in the Supra and running properly. Once all that was sorted I could then think about power upgrades. GoodWrench (the company who now make the Crate motors on behalf of Chevy) state that with the right Carb/exhaust set up this particular 350 can produce up to 260bhp and over 300 ft-lbs of torque out of the box and if you are interested HERE is a very good article on tuning a standard GoodWrench 350, getting it up to serious power with relatively basic mods that don’t cost the earth….
However, back to my build:
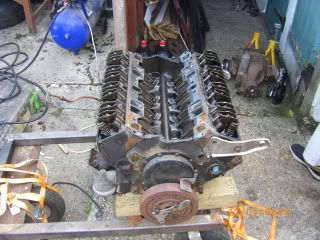
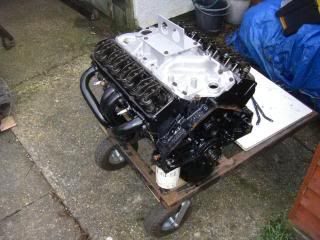
Now the engine was out I could start to strip it down to the heads (leaving the heads on) and start to clean everything up.
The Blazer came with some Headman Headers however they were also very rusty. There was a large possibility that I wouldn’t use the Headmans on the Supra as there wouldn’t be space in the gearbox tunnel for them however I cleaned them up to stop them corroding further in case I could use them as donors.
September 2009
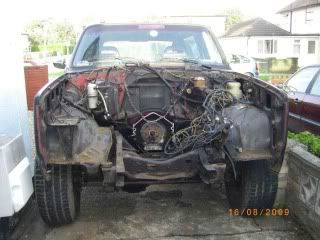
Then I removed the Supra engine with the help of a couple of mates (it's amazing what mates will do for unlimited tea and biscuits!)


which left the front end sitting a little higher than before...
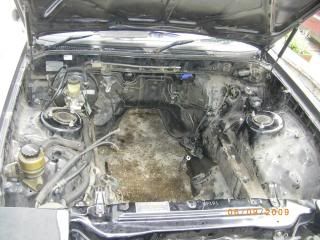
I then cleaned the engine bay up as it was caked in salt, oil, dirt etc.
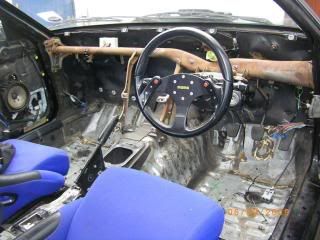
I had stripped a lot of the weight out of the Supra between 2007 and 2009 - the standard seats which weigh a nautical tonne were replaced with some buckets, the carpets, trim, sound deadening etc were all already out of the car at this point. After removing the Supra engine, I removed the dash and the cross bar behind it.
along with a few other brackets and fittings which I cleaned and primered
I then started on cleaning up the engine
I bought a Saginaw 4 speed manual gearbox which needed a clean up on the outside but was mechanically sound
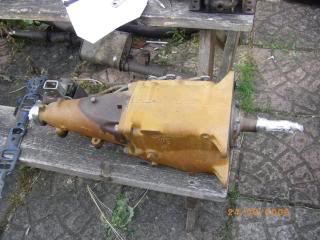

I also bought an ali bell housing
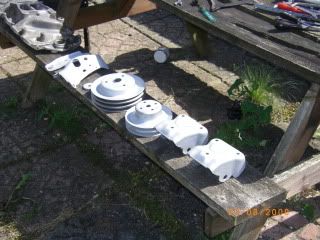
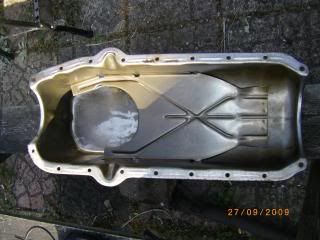
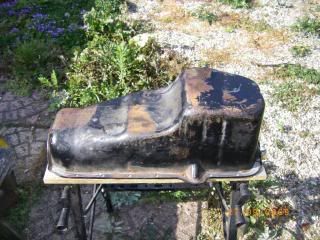
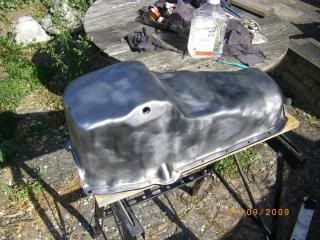
I then set to work on the sump
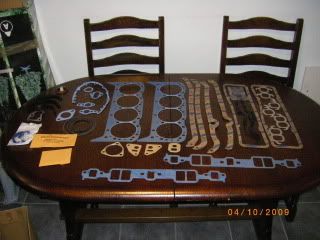
I also bought some other parts, a full Fel-Pro Gasket set (I wasn't planning on using everything but it's always useful to have spares)
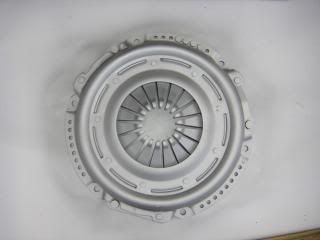
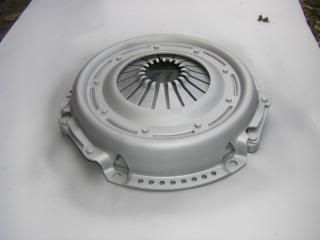
and clutches numbers 2 and 3 with flywheel (I had bought one previously to this and it turned out it was the wrong diameter). From these two clutches I had all the right bits for my set up

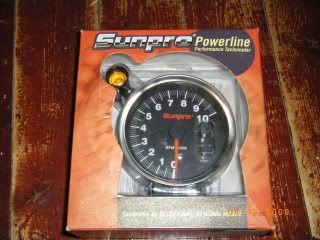
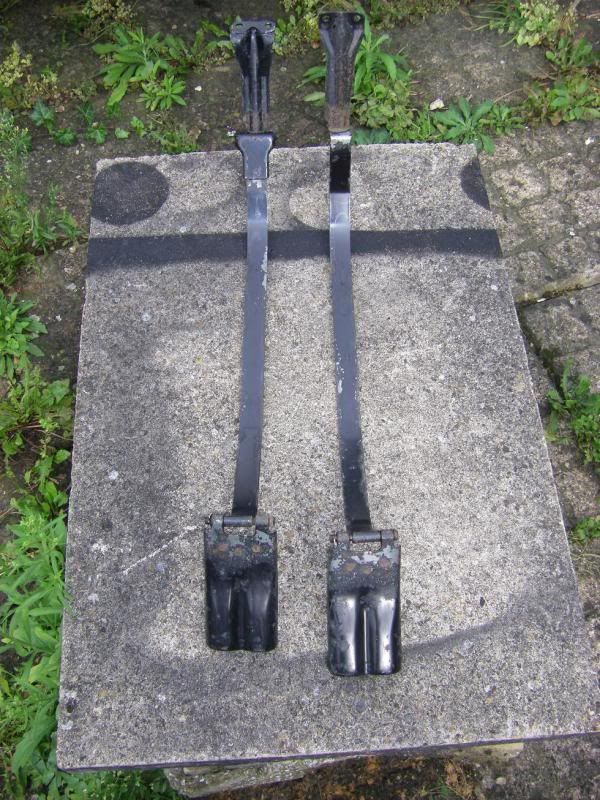
rev counter
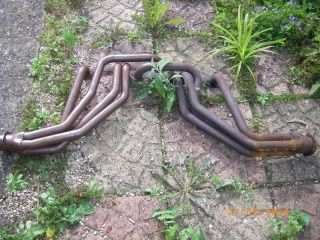
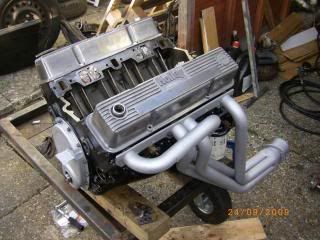
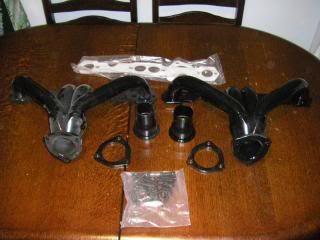
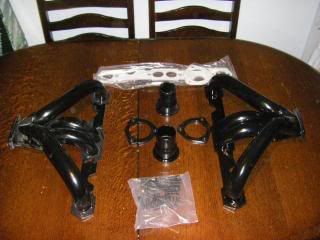
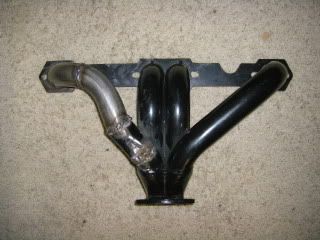
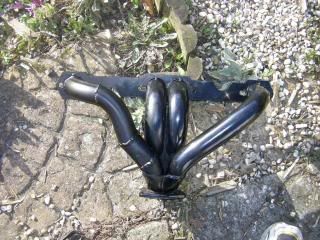
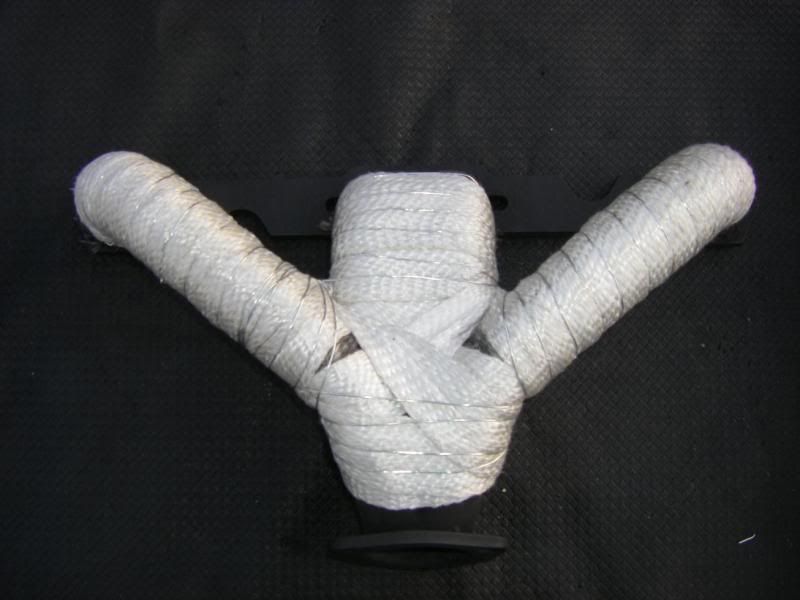
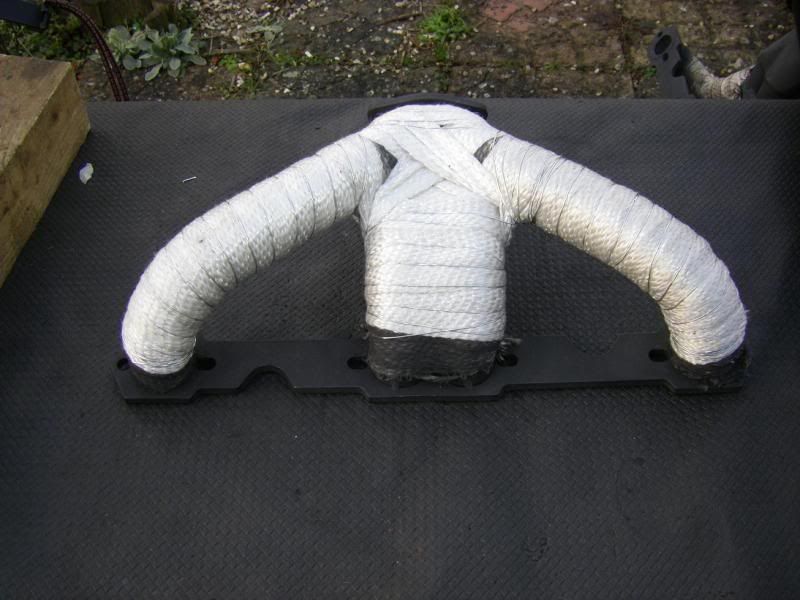
Block hugger headers
and Corvette engine mounts.
By this point I had also decided against using the 4 speed Saginaw box. There were several reasons for this decision;
1) the restrictive ratios of the 4 speed box would leave top speed pretty lacking
2) The external linkages on the Saginaw would mean a lot of modifying was needed to the Supra transmission tunnel
3) The Saginaw is generally a clunky old box and probably wouldn't take too kindly to changing gear mid-drift
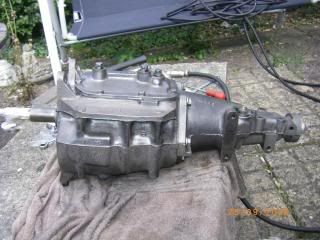
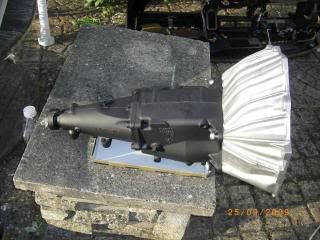
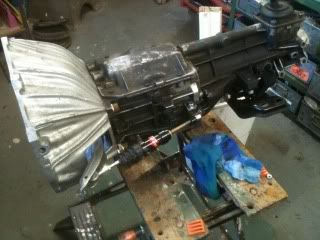
Fortunately I had managed to source a pukkah 5 speed T5 box which has the same stud pattern as the Saginaw so I could use the ali bell housing I had already bought.
Nov 2009
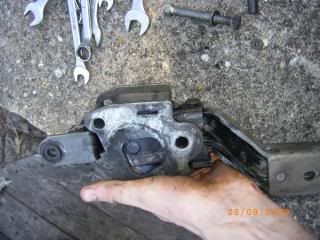
I towed the Supra to a mate's workshop where we welded the gearbox mounts and engine mounts in place, using an empty block connected to the T5 for alignment (gearbox mounts done first)
Luckily the position of the T5 gearstick wasn't far off that of the original W58 box so only minimal trimming was needed.
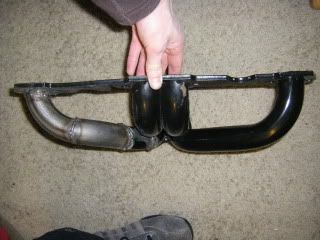
A spare head was then placed on the empty block and work on the exhausts was started. The block huggers fitted snuggly on the passenger side however one section needed modifying for the drivers side to give clearance to the steering column
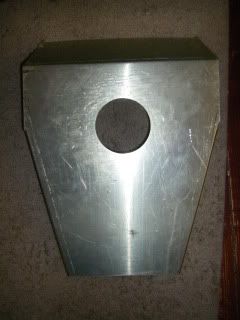
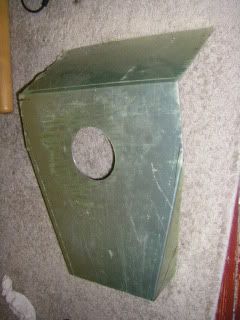
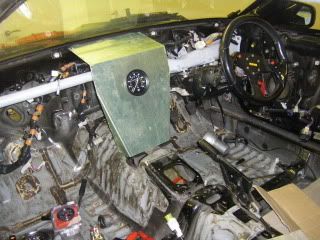
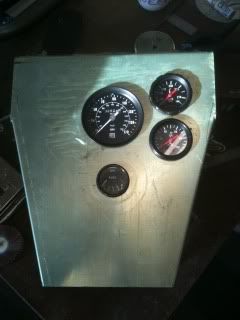
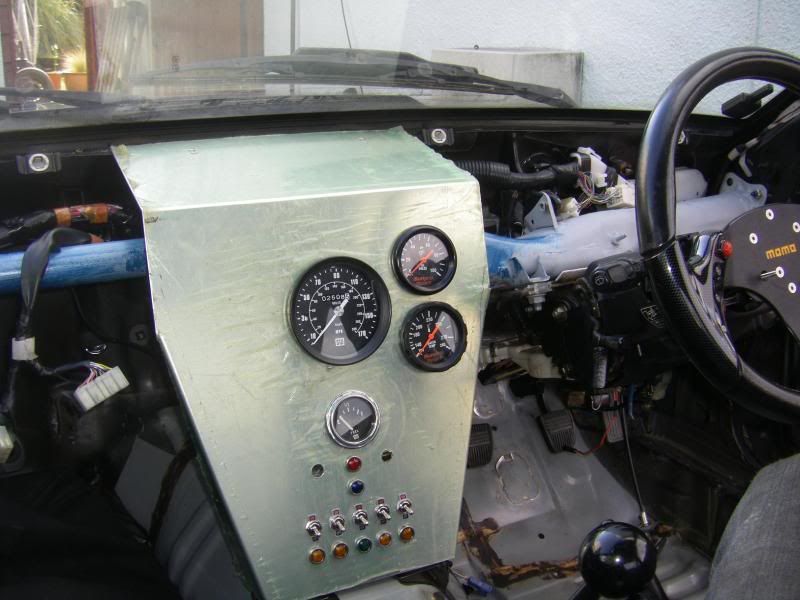
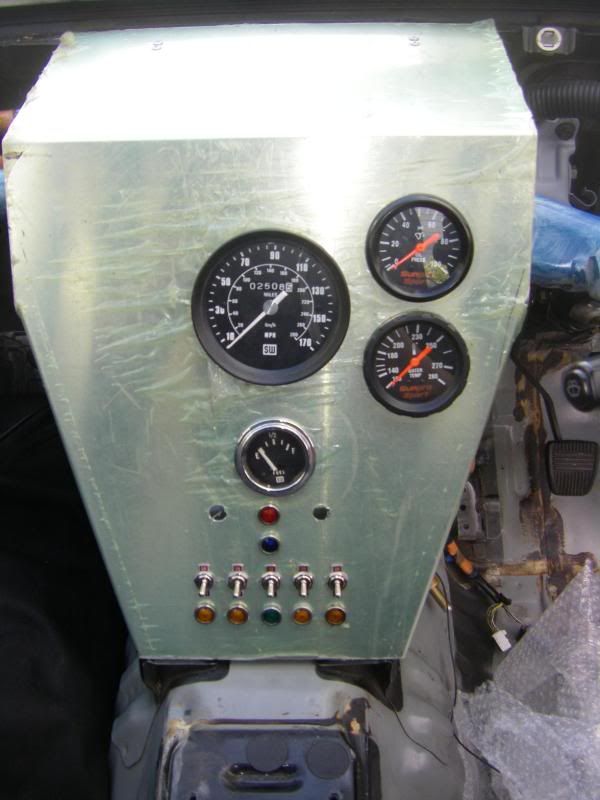
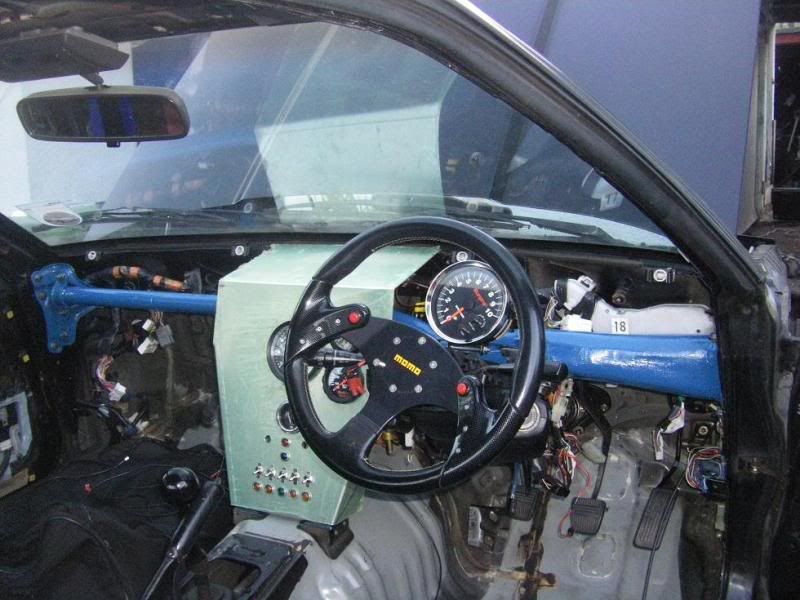
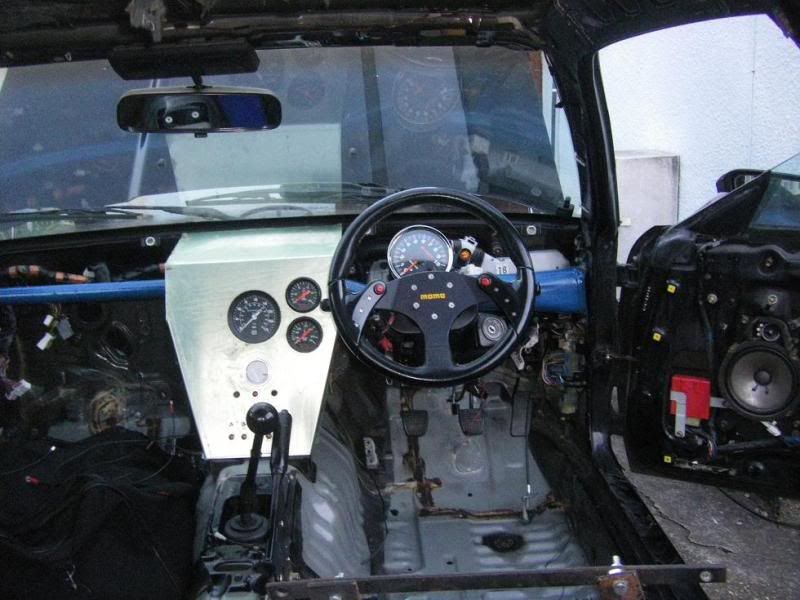
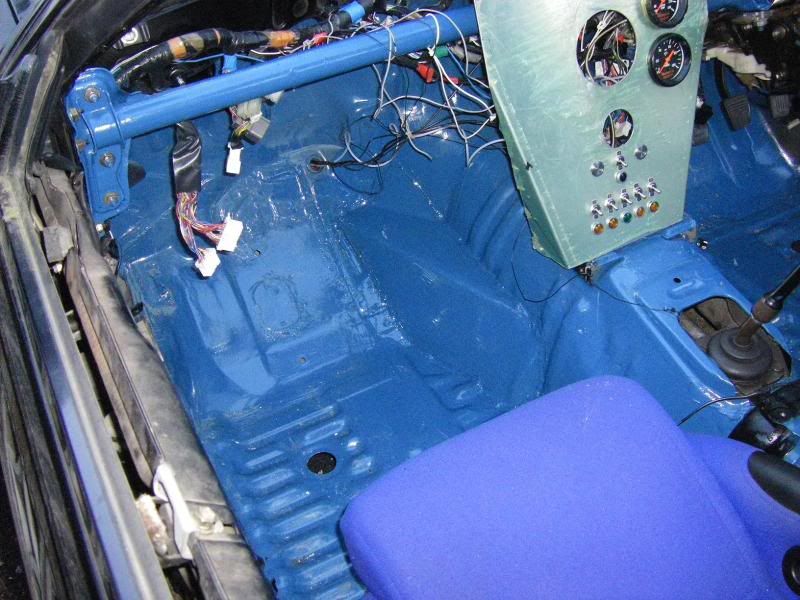
The original dash had cracked in the sun days before removing it from the Supra in September so that had sealed it's fate. As I wanted the Supra to be lightweight and the dash weighs ~12kg I was planning on just using a simple instrument panel anyway. Work was started on this at a similar time to the engine mounts being welded up. It was folded out of some aircraft grade Ali and the central hole for the speedo was cut.
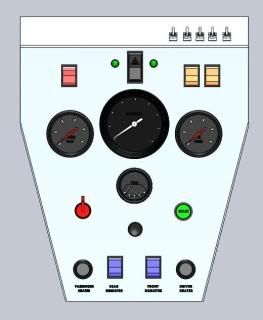
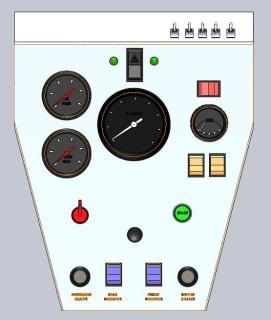
I then had a play about in Solidworks to see how the other gauges and switches should be positioned. I hadn't bought all the switches and buttons at this point so I just modelled some basic ones up to get an idea. Here are some of the possibilities:
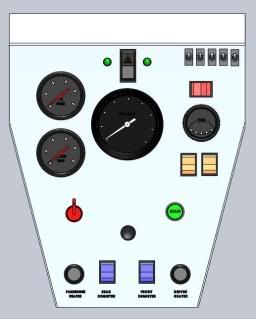
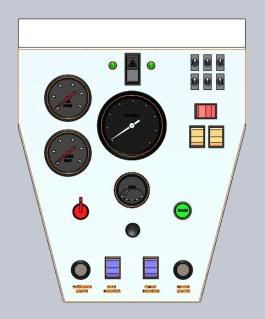
I decided it would be better to have the oil pressure and water temp on the same side of the speedo so one glance will show if there were any problems. I had some problems with the positioning of these gauges though as the cross bar behind the original dash could foul on them as the gauges were pretty deep. After some measuring up the water temp and oil pressure gauges were positioned on the right hand side of the speedo and the ali panel could be cut.
January 2010
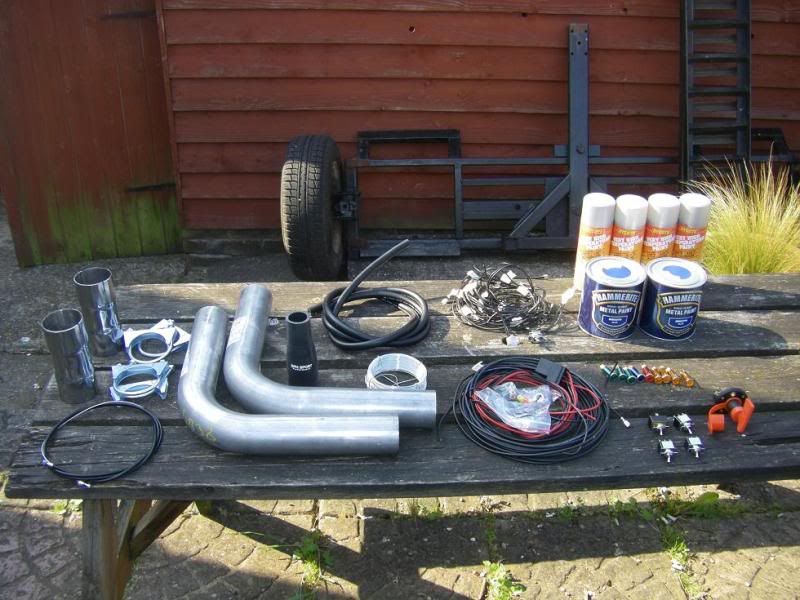
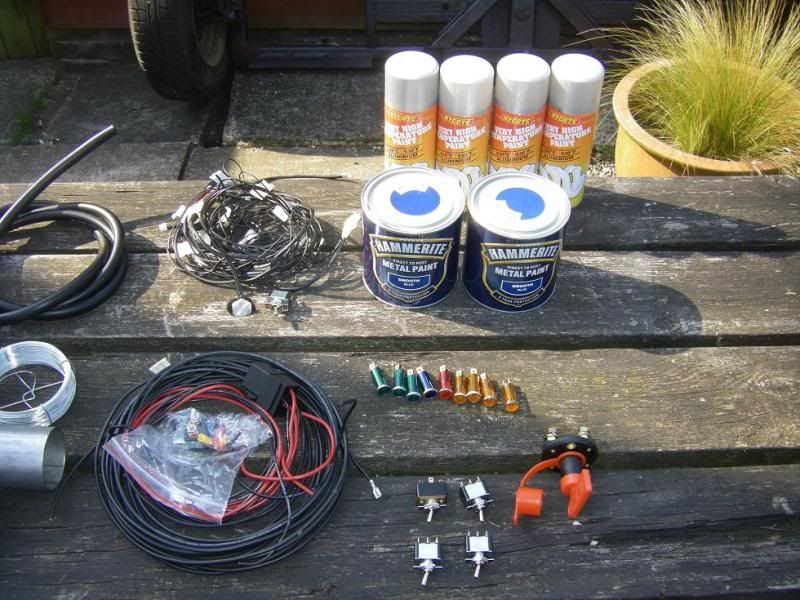
Sourced some more parts from a hotrod swap meet including eleccy rad fans, 12V heater blowers for the front demisters and Sunpro oil pressure and water temp gauges, Smiths fuel gauge and Mallory fuel pressure gauge.
Clutch arm and Wilwood pull clutch slave cylinder was also bought around this time.
Size 9 for size comparison
and mounted to the gearbox
March 2010
The rad fans were chopped and fitted to the car
Drilled some more gauge holes in the instrument panel.
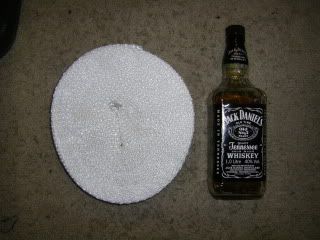
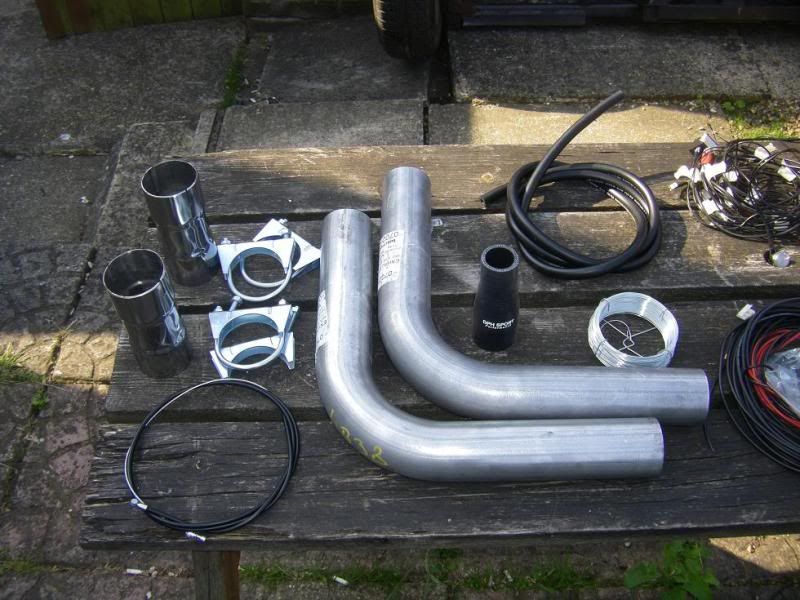
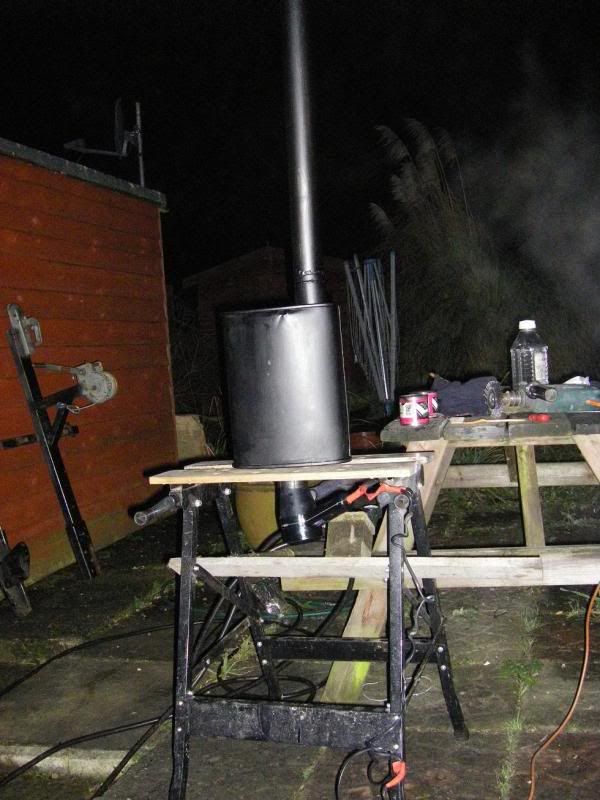
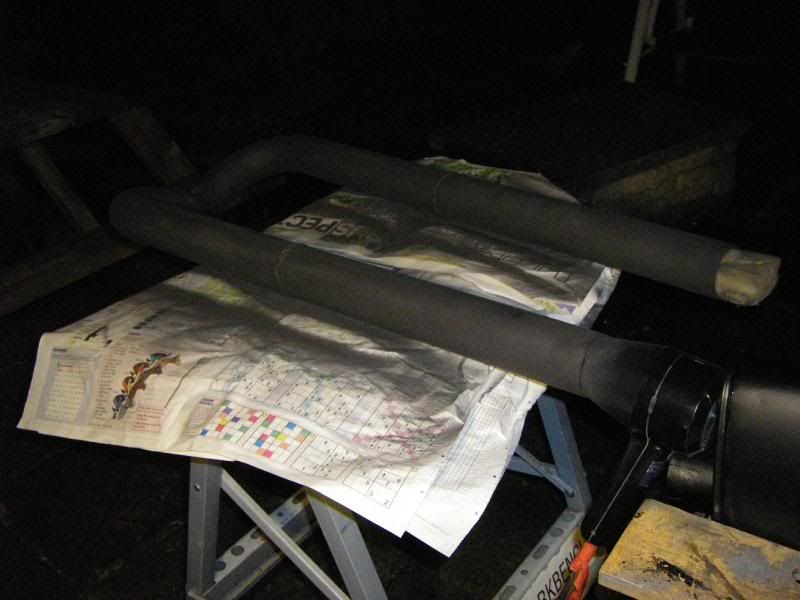
Picked up a pair of turbo muffler silencers from a hotrod swap meet (£20 the pair) and started sourcing bends and straights for the rest of the exhaust system. Also rec'd 30m roll of exhaust wrap (1L JD bottle for size reference)
I'd wanted to get the engine installed in the car at this point however when I came to fit the clutch to the engine I found out I couldn't use the original flex plate bolts from the auto box so had to order some ARPs and await delivery. I did however do some final cleaning and painting of the engine bay
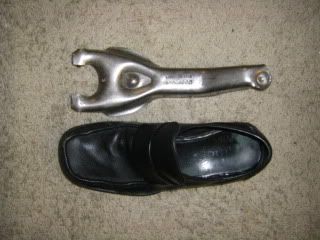
I also cut (and then cut again, and cut again) the hole for the clutch slave cylinder assembly to go in. The hole had to be MASSIVE, much bigger than I'd expected, but I wanted to give it some clearance so there's no danger of smacking it when putting the engine & box in together.
This pic shows how long the fork is
Some of the unpainted engine surfaces had started to rust slightly over Christmas (exhaust gasket surface, fuel pump etc) but it wasn't serious and would come off easily enough when the time came to fit the auxiliaries.
The modified header got a clean up and 2 coats of high temp black "smooth"
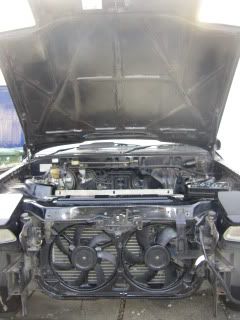
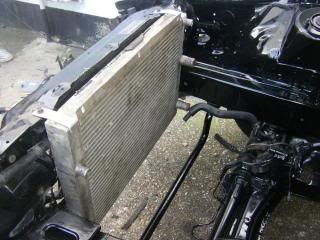
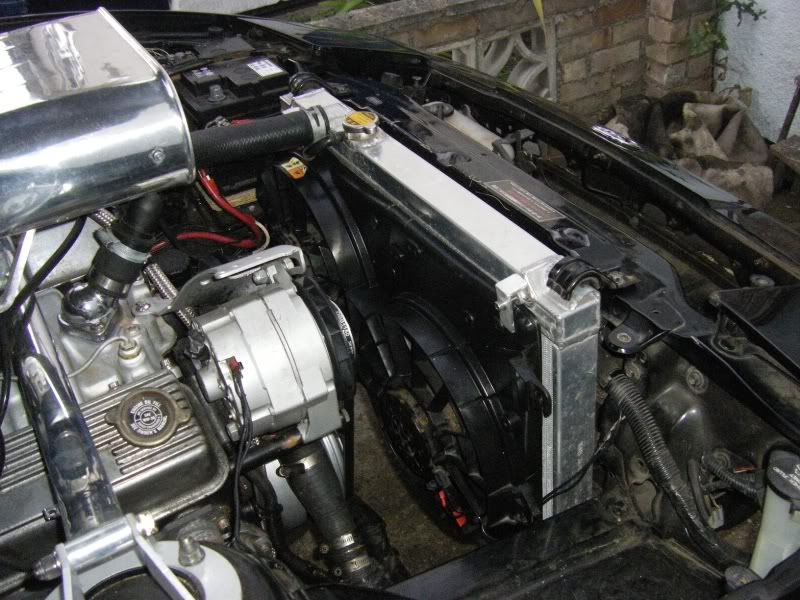
After fitting a rad I noticed the rad fan motors were fouling on the rad so spacers were made up and fitted to the mounting bolts. This rad was just for set up, I bought a Fluidine rad later which had proper mkiii Supra mounting brackets and better cooling than this rad would have had.

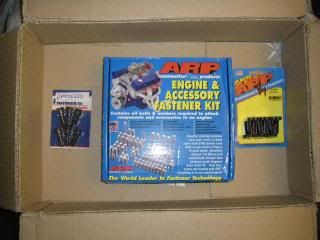
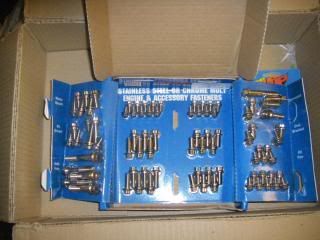
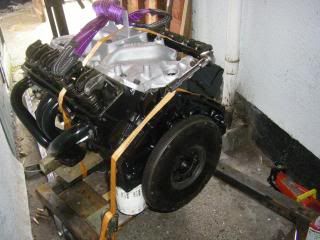
I then ordered an ARP top end stud set for the 350 and some high tensile clutch housing bolts (not ARP). These arrived along with the ARP flywheel bolts so the engine could now go in.
Despite the persistent rain and having no cover on the driveway, I couldn't wait to get the engine in so I cleaned up the rest of the rust that had formed on the block since it was painted back in November and also cleaned up and painted the clutch assy.
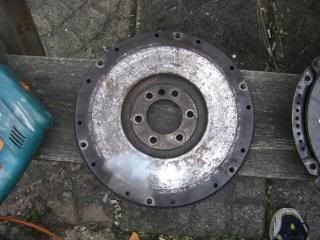

I then fitted the flywheel to the crank using the ARPs
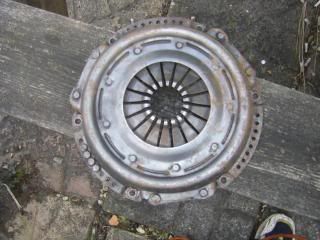
Aligned and assembled the clutch using a custom made alignment tool
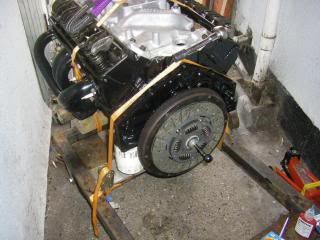
and mounted the gearbox to the engine - a job I thought would be much trickier by myself than it actually was
A mate then arrived and we got the engine into the car (luckily the rain had stopped by now too)
It was so tight I had to let the air out of the front tyres in order to get the sump over the cross member
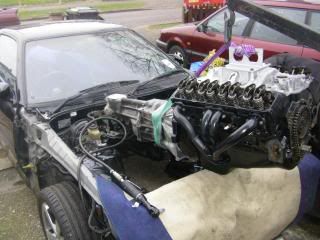
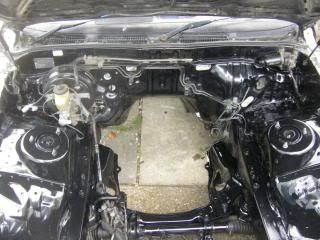
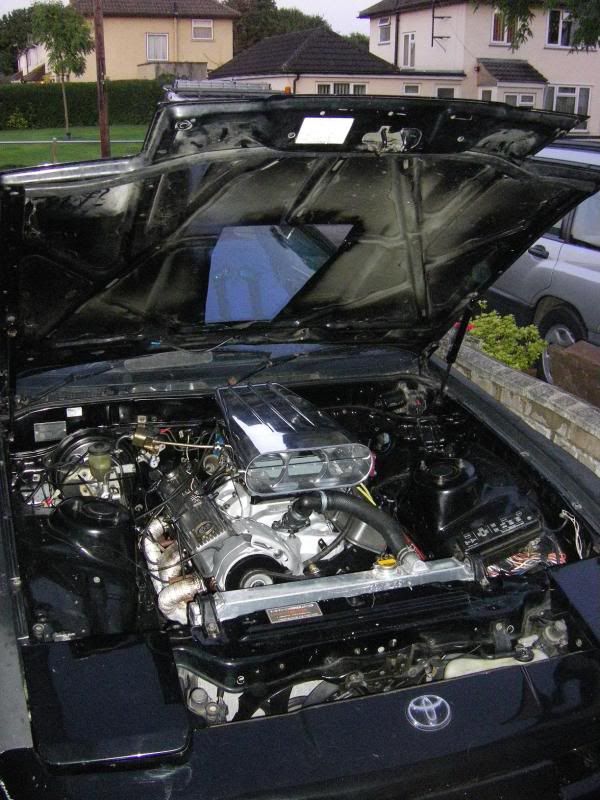
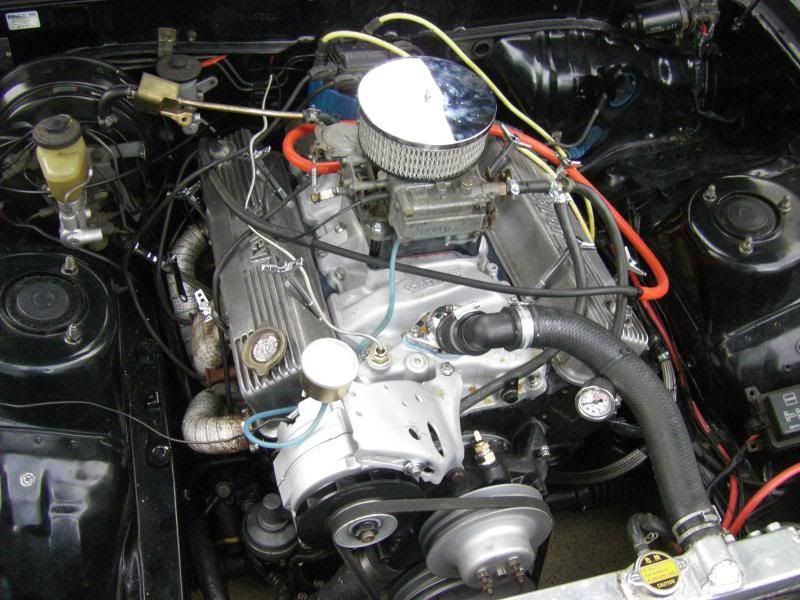
The engine sits nice and far back which is how I wanted it. There were obviously a few things left to be fitted to the block but there's a good amount of space to work in front of the engine (this engine only being 4 cylinders long, the original being 6). There's not so much at the sides tho
The car sat a lot higher than I had expected at this point. Even after a few days the front shocks didn't drop that much which I was surprised about as it had sat for 6 months with no weight on them at all.
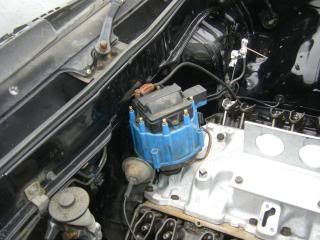
A large hole was then cut in to the fire wall to allow some space for the dizzy. I couldn't afford to upgrade to a Mallory system at this point (which has a much smaller diameter) and cutting is free so I stuck to the HEI.
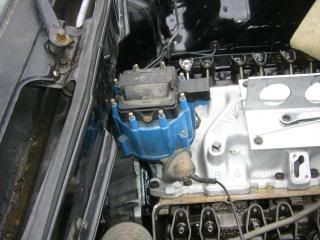
However there was no space for timing adjustment once the HT leads had been fitted so the grinder came out again
So now it fits and the timing can be adjusted
With the engine in, the timing cover, fuel pump, starter motor & dip stick (later replaced by a smaller, shiny one) could all be fitted (with new gaskets). It was at this point I found the settings on my photobucket account and made all my photos full screen. Apologies for the small pics up till now...
The fun job of sorting the wiring could then begin. I had purposefully kept the carb set up so I didn't have to worry about fuel injection wiring, sensors etc etc and as it came from a running vehicle it should require minimal set up too. That meant the 'only' wiring I needed to do was:
Lights
Leccy windows/folding mirros
fans
horn
wipers
Instrument lighs
leccy gauges (fuel gauge)
window demisters
some of which could be taken from the original loom, some of which would need custom wiring. I forgot to mention earlier that when I sold the 1G I had to sell the loom and ECU with it. This meant installing another wiring loom in to the Supra which I got from a car being broken in the club. The only problem is that the UK and JDM looms are slightly different. Some features were only available on JDM cars (leccy folding mirrors for example) so the UK loom doesn't have wiring for these. For the common parts (pop up headlights, wipers etc) the wiring is the same but different connectors were used (for some stupid reason) so that all had to be sorted out.
April 2009
I originally planned to have the main fan controlled by a thermostatic switch screwed in to the top of the water pump and the other fan controlled by a switch in the cabin, however I decided it would be best to have both fans controlled by switches in the cabin. Wiring for the relays for the fans was installed and hidden up above the fans and control wires taken back thro the firewall and in to the cabin. The horn wiring was also installed at this point.
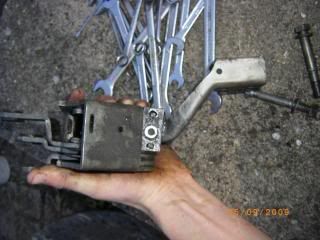
I made mounts for the rev counter by folding some strip steel and securing them to the steering column bolts. These were then cleaned up and painted black.

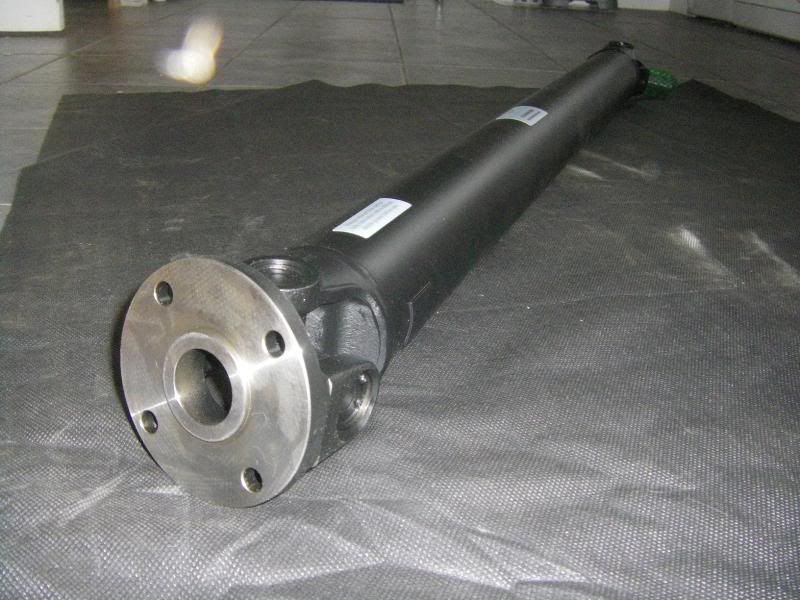
Now the engine and gearbox were in place I could measure up for the custom prop shaft. The rear end was to remain standard Supra (altho I changed the diff for a better ratio 3.0L Turbo LSD as opposed to the open (well, by this time welded) lower ratio 1G diff) so all I needed was a prop to go from the T5 output spline to the input flange of the Supra diff. After speaking to Recoprop and waiting 3 times for them to call me back with no success I contacted Bailey Morris in St Neots who turned out to be very helpful and a lot closer than Reco. BM spec'd up the prop and agreed to lend me a yoke so I could double check it fitted the T5 (which it did). I also took my spare diff over to them to confirm the flange they had spec'd fitted (which it did!). It took them just over a week to make it up, balance it and have it ready for me to collect, which they stayed open late for me to do after work. It is made out of 3" diameter tube, rated to 400bhp and it cost just over £200 which I thought was extremely good considering the service I got (having said that I did then have to take the prop back to be rebalanced which was a bit of a pain).

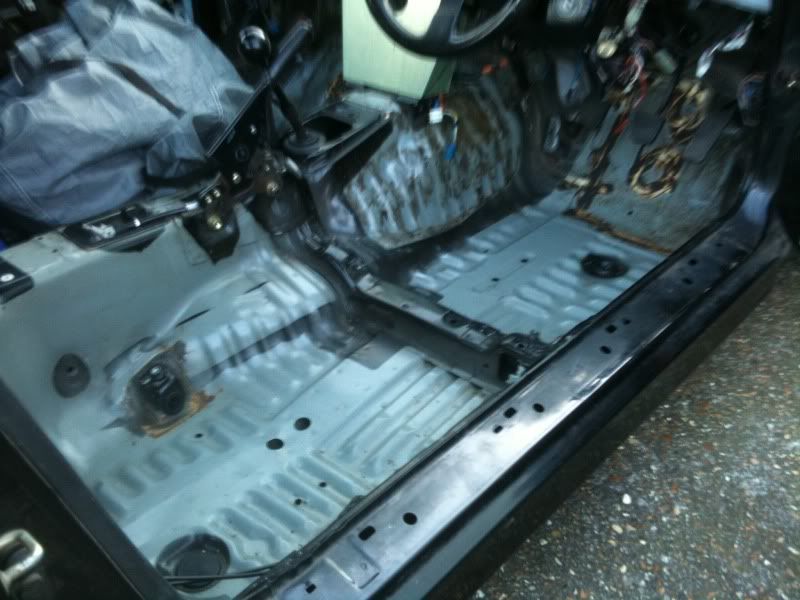
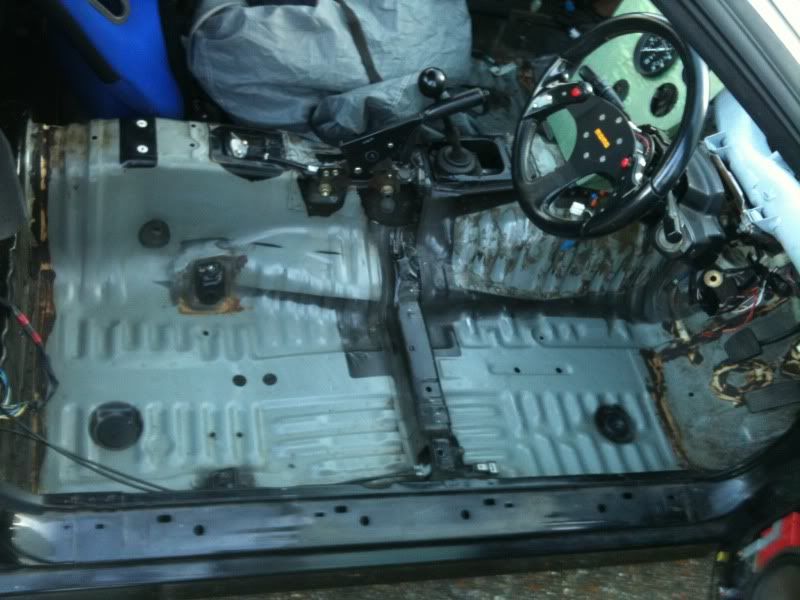
I then took on a job I had been avoiding - cleaning the adhesive from the floor pan that stuck the insulation down. It is the stickiest, nastiest substance known to man and the best way I could find to get it off with was by swilling white spirit over it then using a drill with a wire brush attachment to release it from the metal and wipe it up before it had a chance to dry again. The only problem with this method is you end up wearing most of it.
May 2009
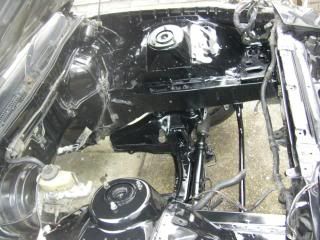
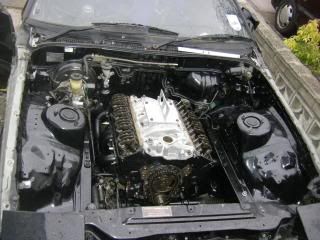
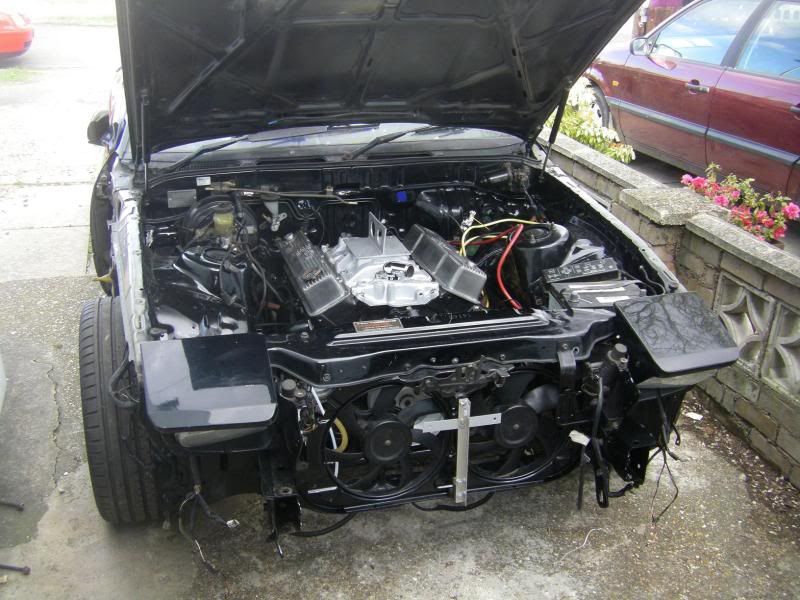
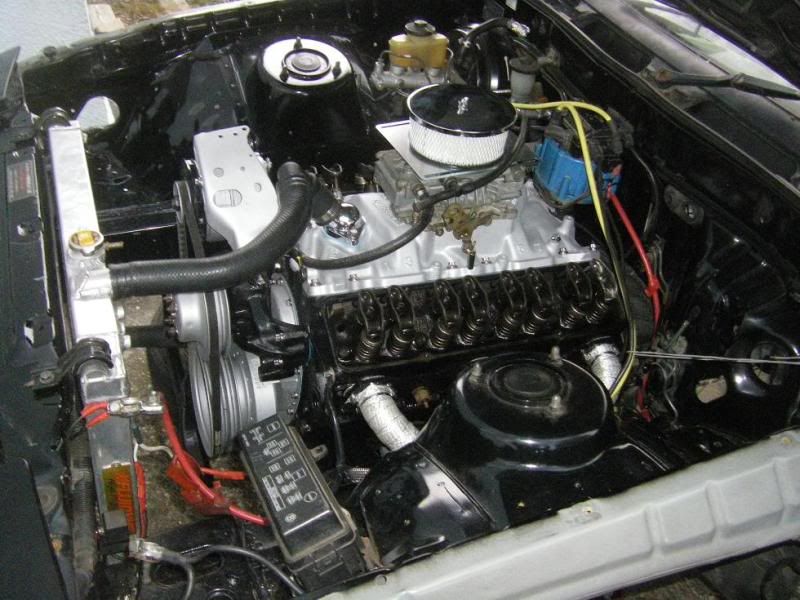
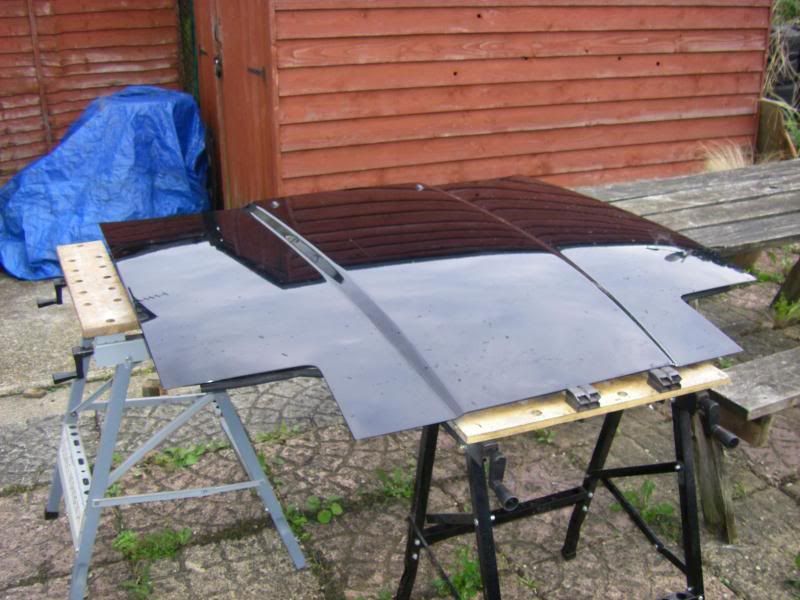
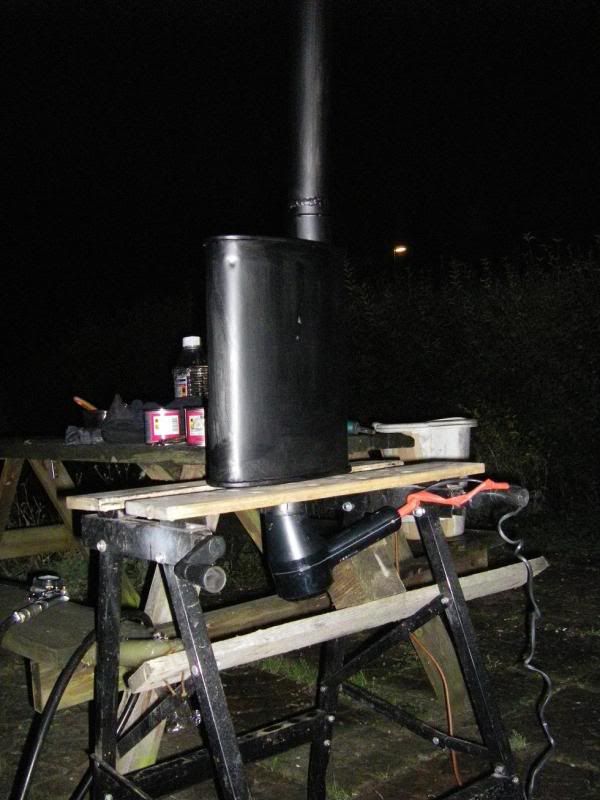
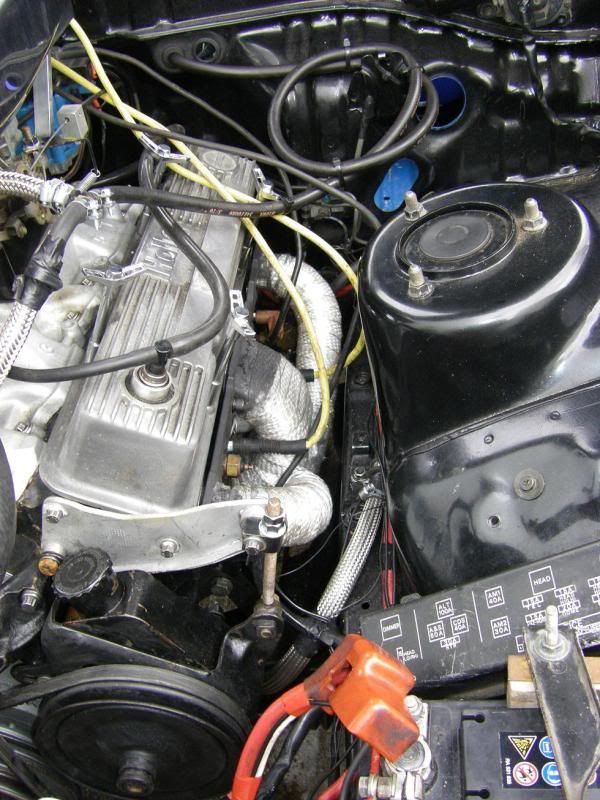
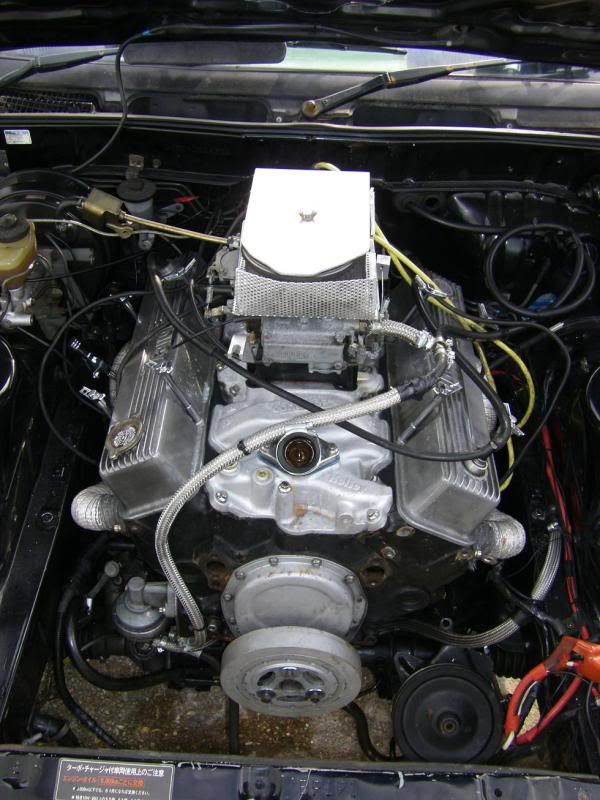
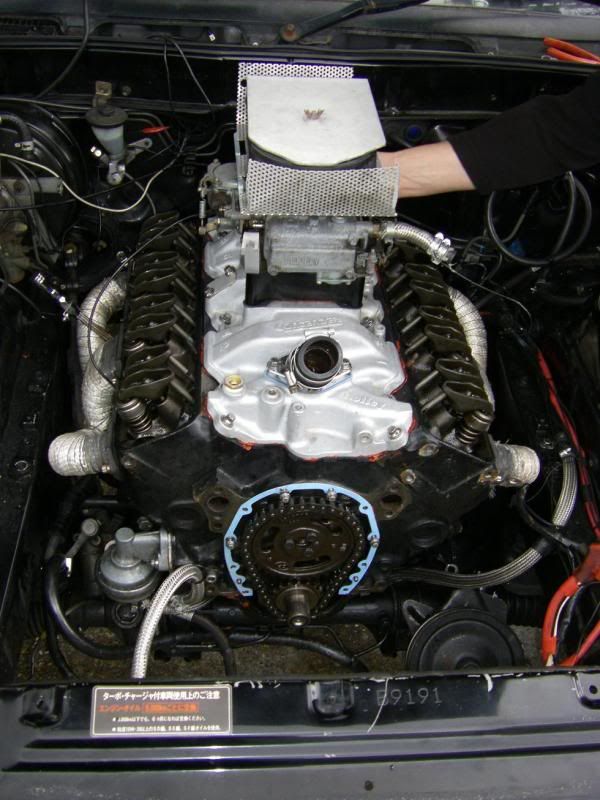
Here's a token picture of how the engine bay was looking at this point.
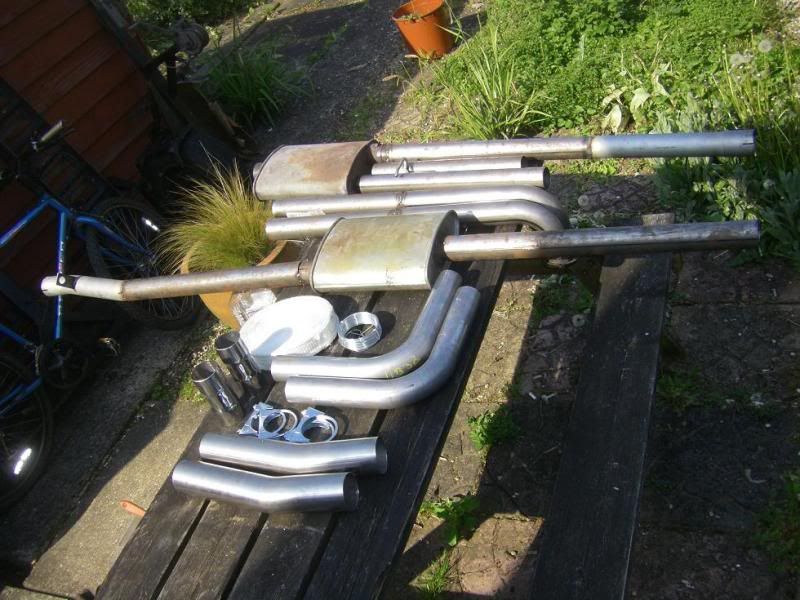
I had now got hold of enough bends and straights that I could start work on the exhausts. I'd also bought a few other bits and pieces.
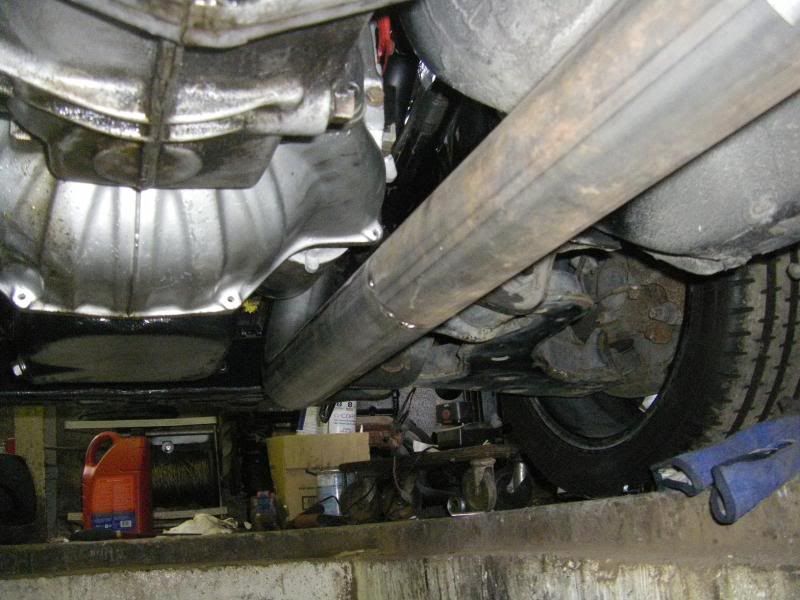
So I took the car to a local pit as trying to do this with the car on axl stands would have been an absolute nightmare. Jim (who suggested the V8 in the first place and did the welding for the engine mounts) came along too and we only had 5 hours at the pit so didn't manage to get the exhausts finished, however they were cut to shape and tacked in place enough that they could be finished on the driveway.
Looking forwards:
Looking back:
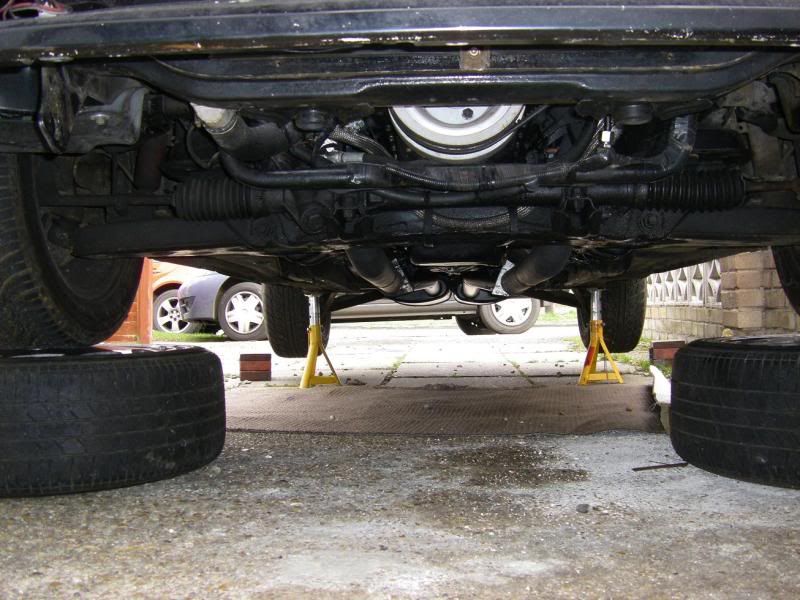
The sump
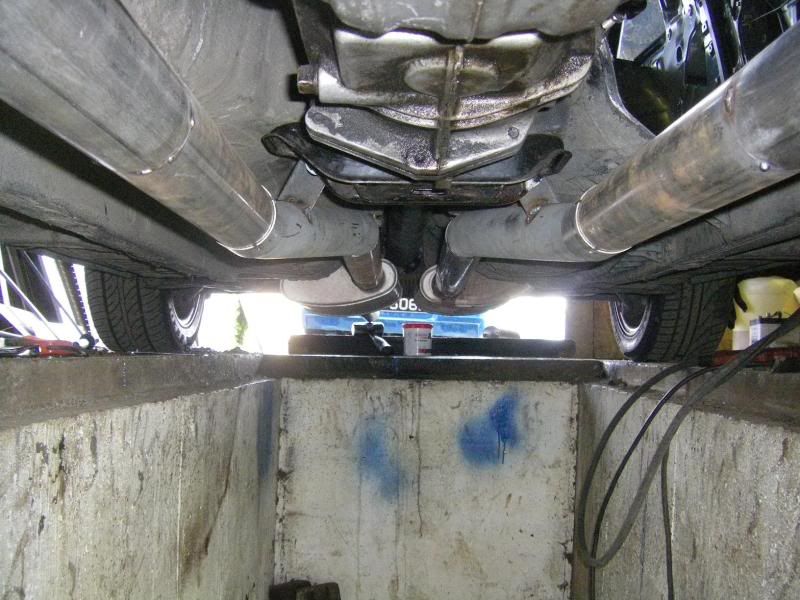
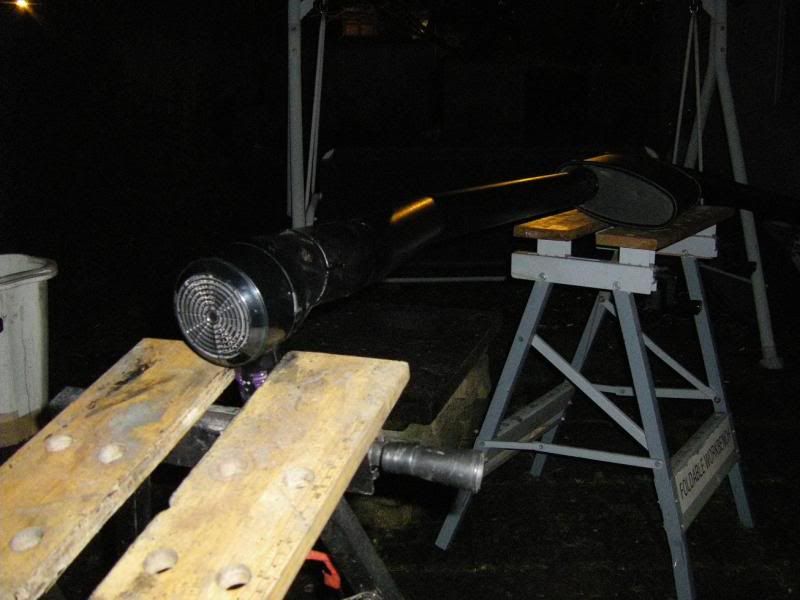
Drivers side down pipe
We only had one rubber hanger so the drivers side silencer wasn't fitted properly hence it's not square in the pic above.
I also test fitted the prop while I was under the car. It had just over 2" of engagement on the spline to the T5 which is easily enough for the power I'm running (Bailey Morris recon 1" of engagement would take the 260hp the stock motor produces).
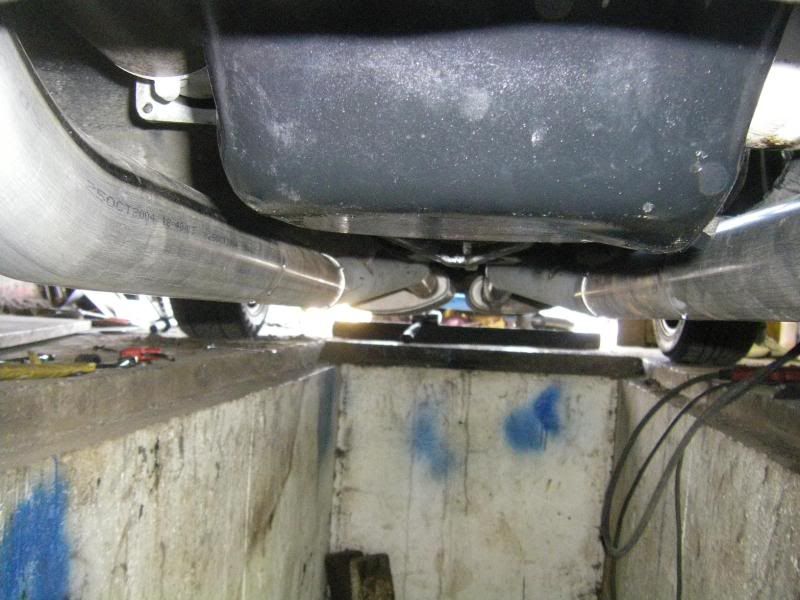
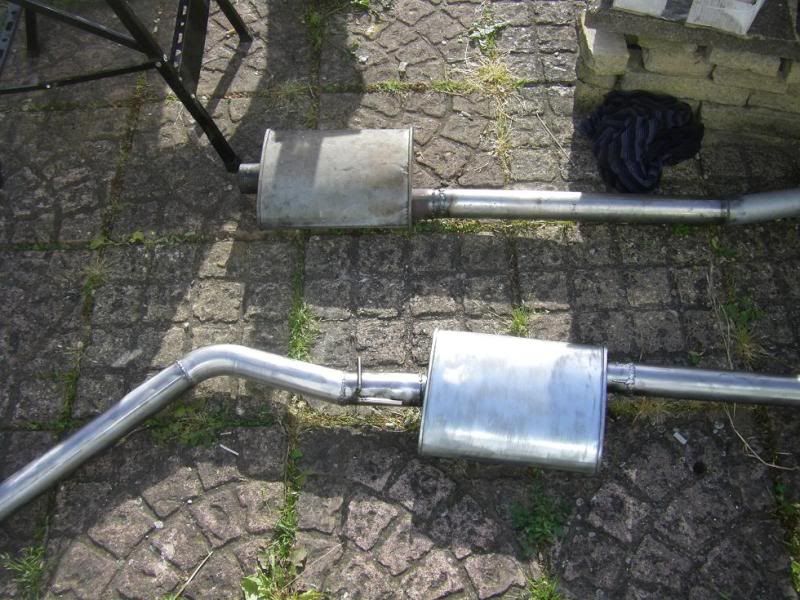
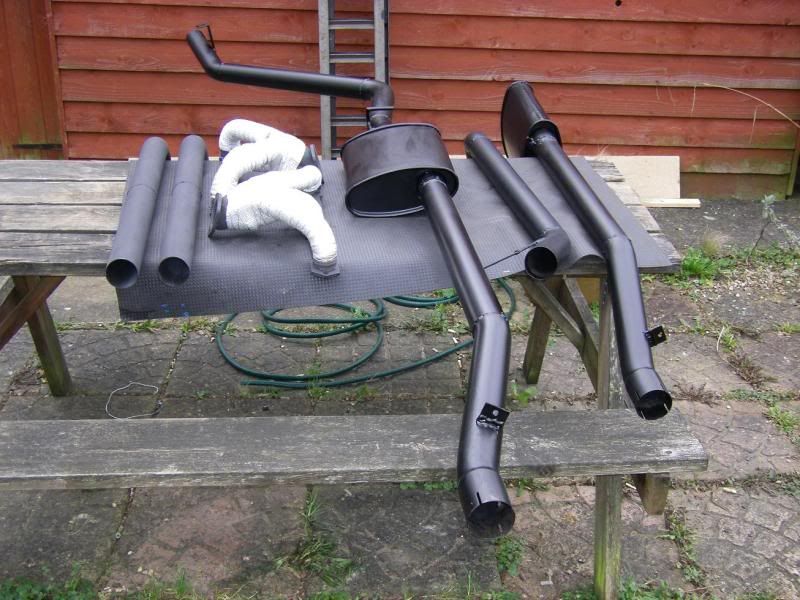
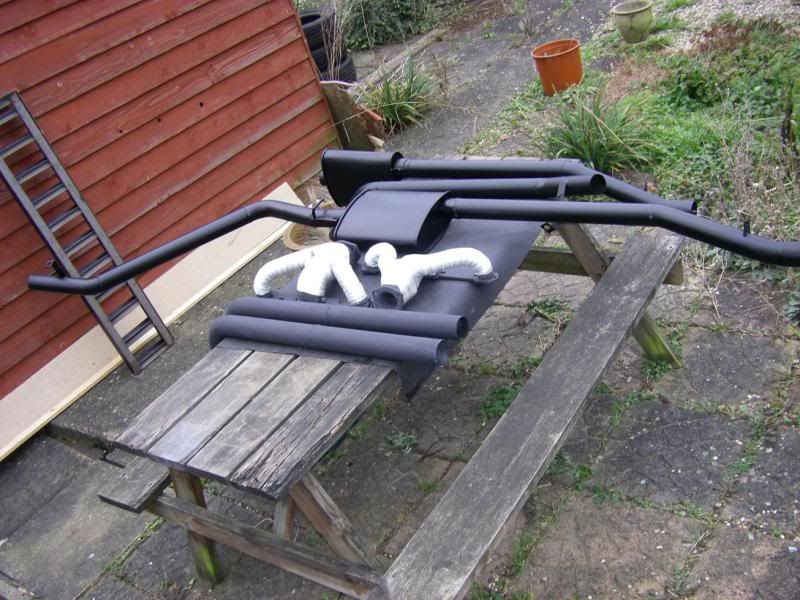
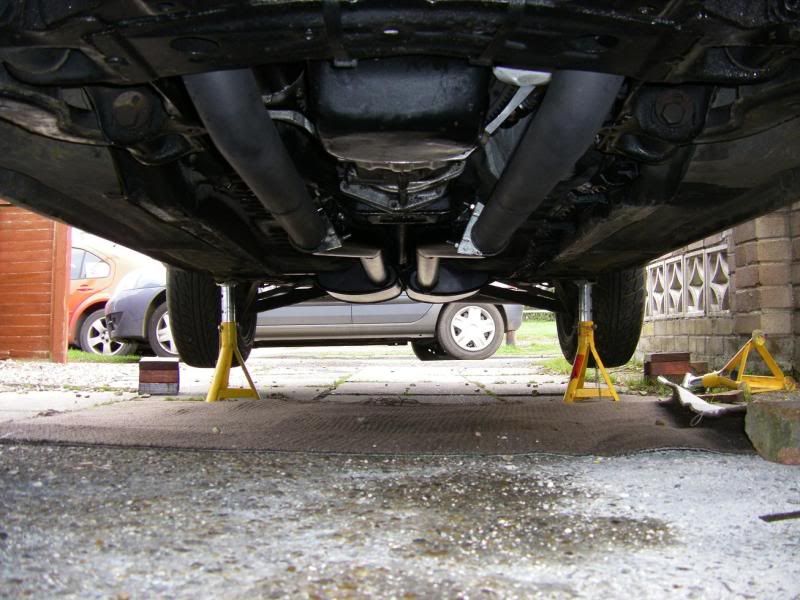
After getting the car back from the pit the exhausts could be finished off. The exhaust sections looked like
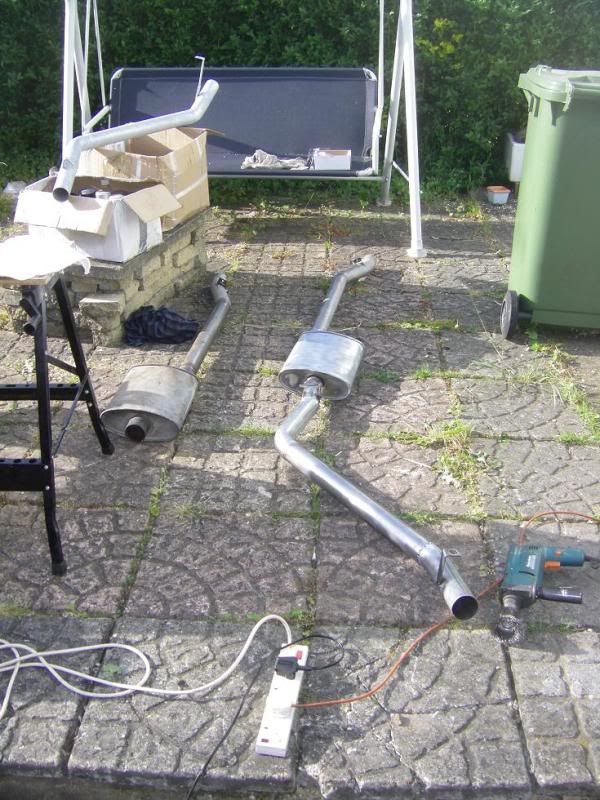
We jacked the car up nice and high and all the joints were fully welded.
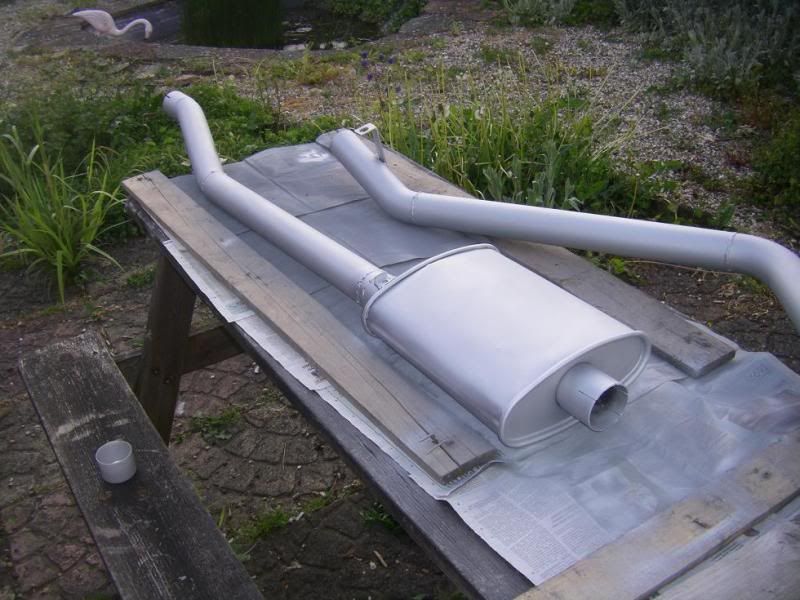
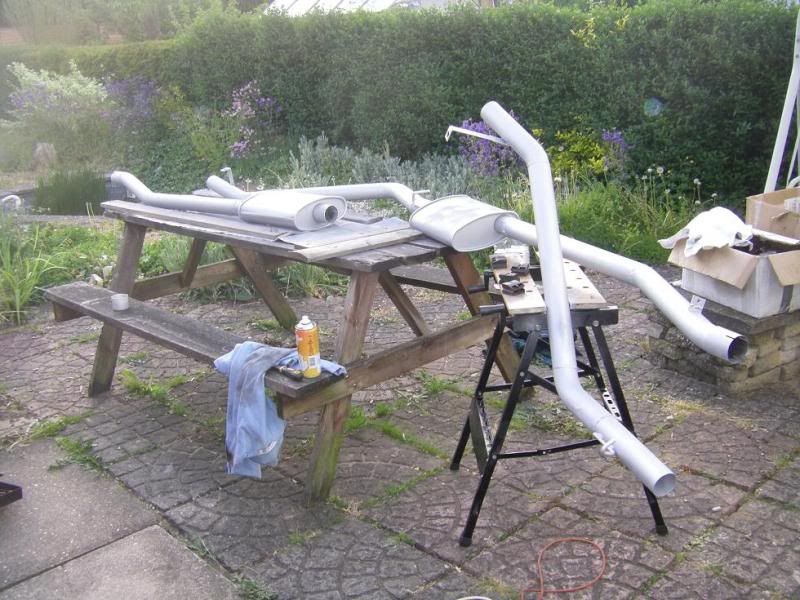
The pipes were then removed from the car, cleaned up and painted in high temp ali paint.
The exhausts were the last major job to do, and with them pretty much done (they just needed the headers wrapping then re-hanging with the gaskets in place and tightening up) the end was in sight. However there was still a massive list of jobs to do with the most important one being the electrics. Other things on the list at that point were:
Make clutch cable
fill clutch with hydraulic fluid
set position of clutch
connect all gauges (electric and mechanical)
weld cover over clutch in passenger footwell
paint interior of car
fit and connect radiator
fit and set carb
connect fuel lines
set timing
fit accel cable
fit seats
get insurance
get MOT
get tax etc etc
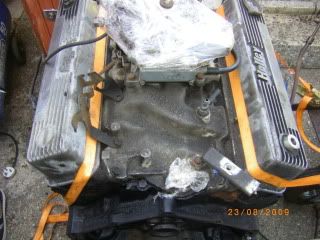
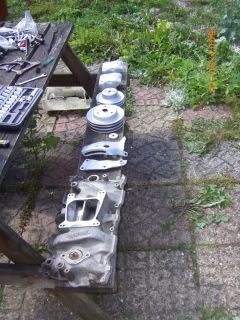
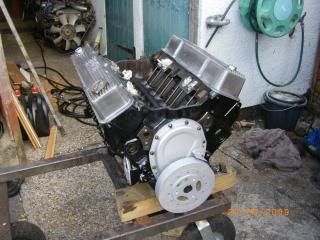
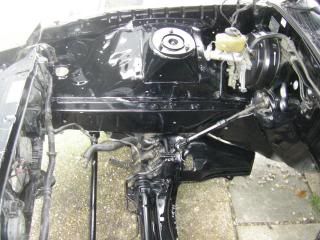
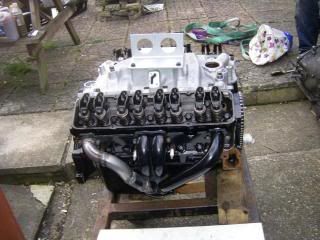
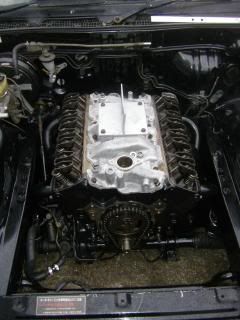
I installed the inlet manifold with new gaskets and silicone sealant and torqued it to spec.

The thermostatic switch in the water pump for the fan relay can be seen in the photo above however it is just being used as a plug now.
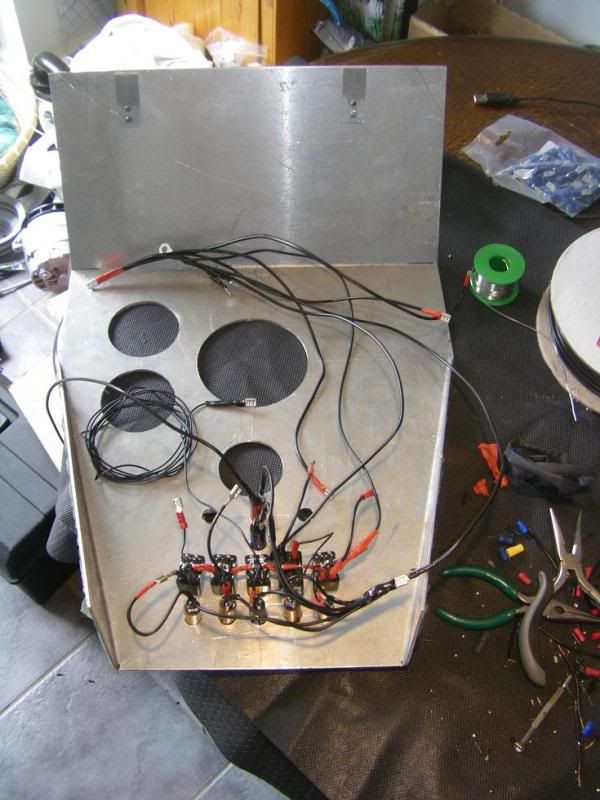
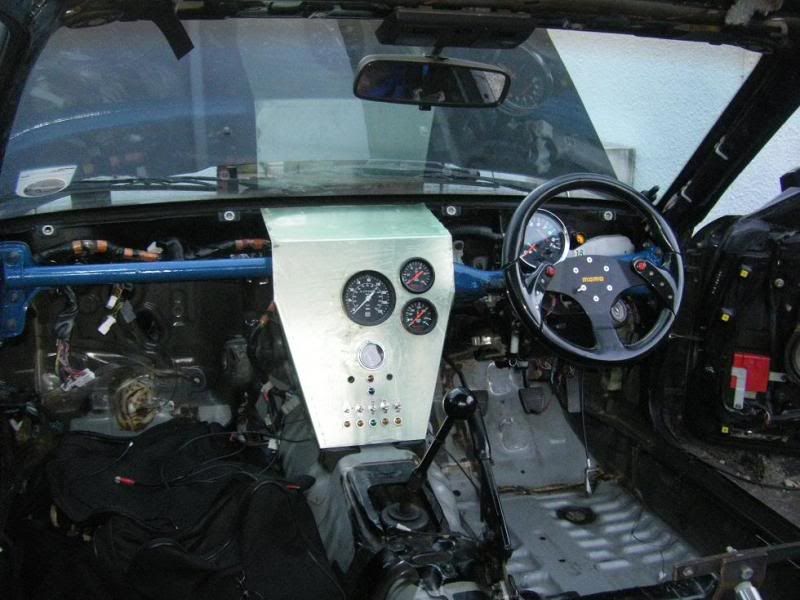
More work then went into the instrument panel, cutting holes for the remaining gauges, buttons and switches. Once they were all in place the wiring was done and I fabricated some rubber mounts to keep the panel tightly in place. (the 2 empty holes in the photos below needed boring out to 19mm for which I was waiting a drill bit)...
I'd decided that I wouldn't paint the interior black. I thought a nice deep midnight blue could look pretty cool so bought some dark blue Hammerite.
Unfortunately Hammerite don't do a midnight blue so when I painted the dash cross member it came out like this
Not one to give up on things I decided to pursue the blue as it matched the seats, however I have since painted it all black again and it looks sooooo much better
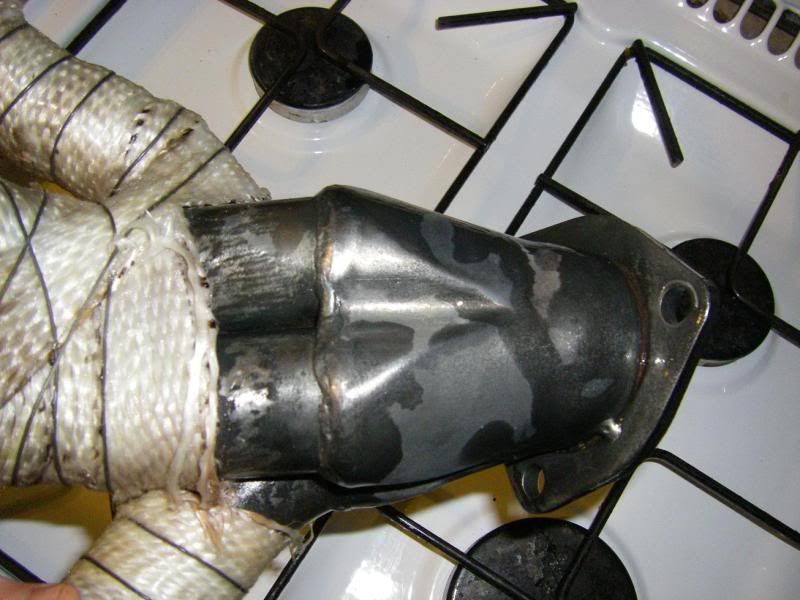
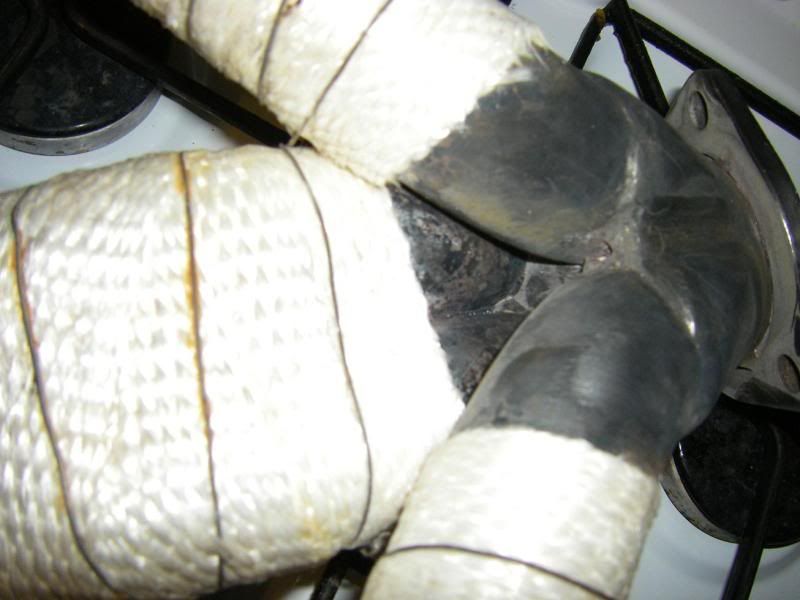
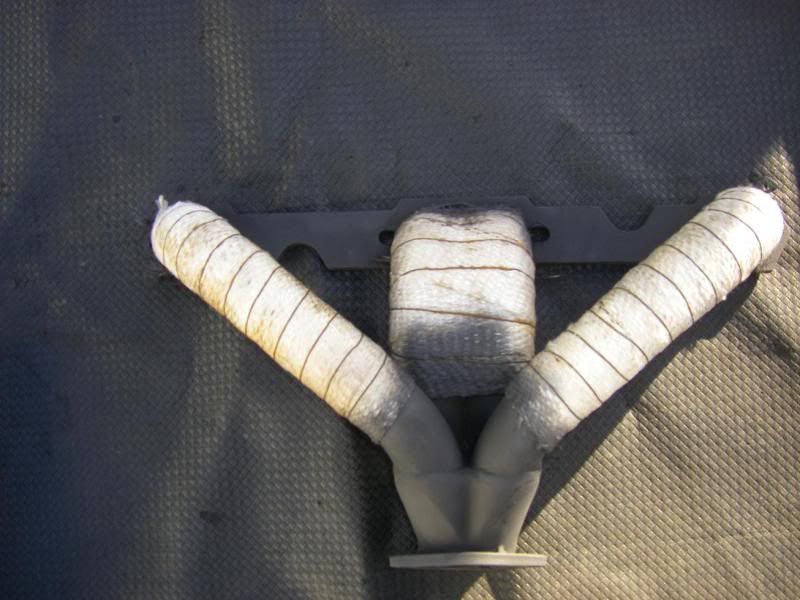
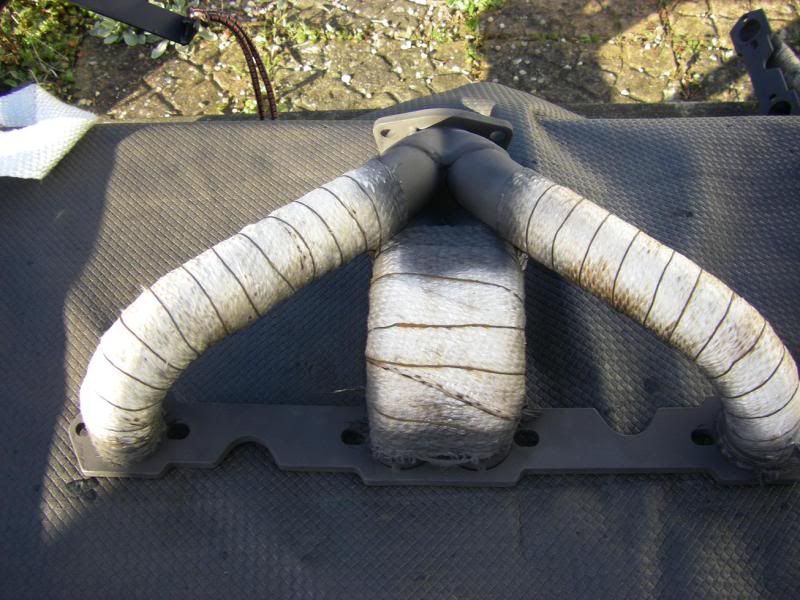
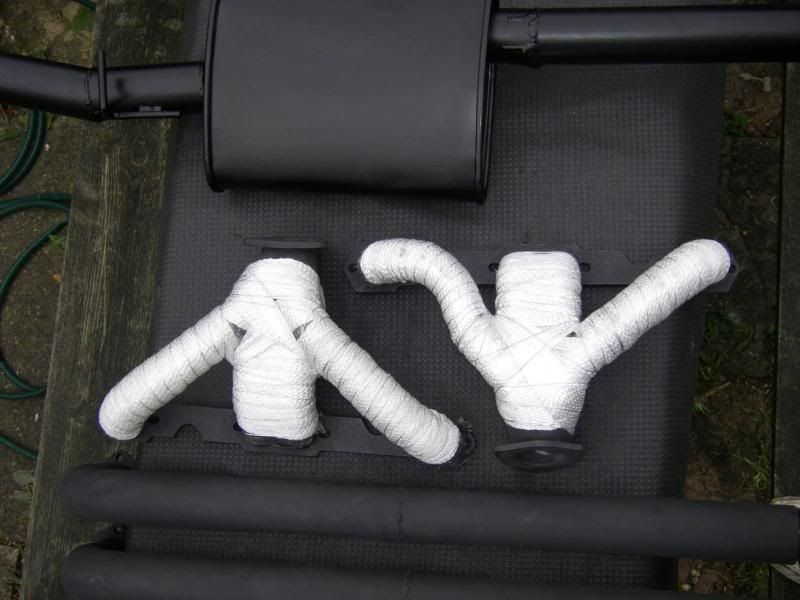
Wrapping the headers was not a fun job, the fiberglass wrap I bought was pretty cheap and the fibres all broke out and became airborne (I did it outside wearing a facemask). I wanted to use a single strip per header so the job took a pretty long time
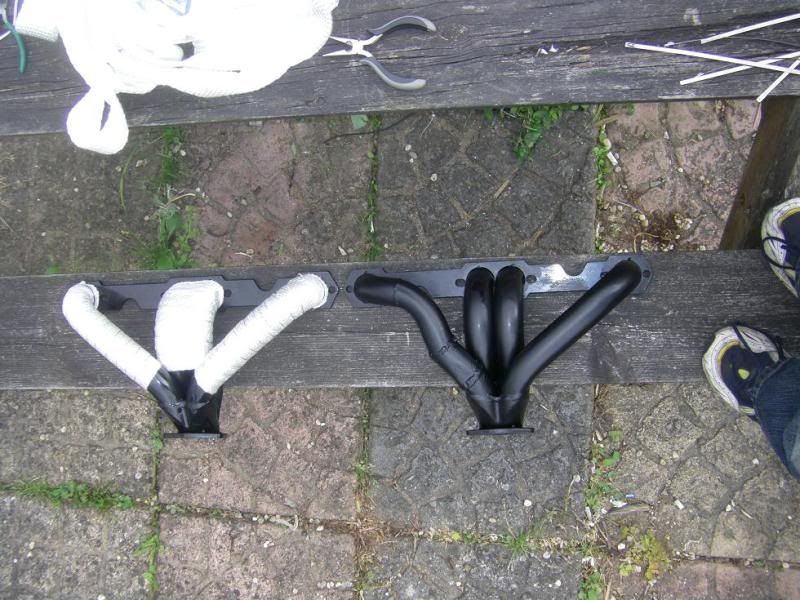
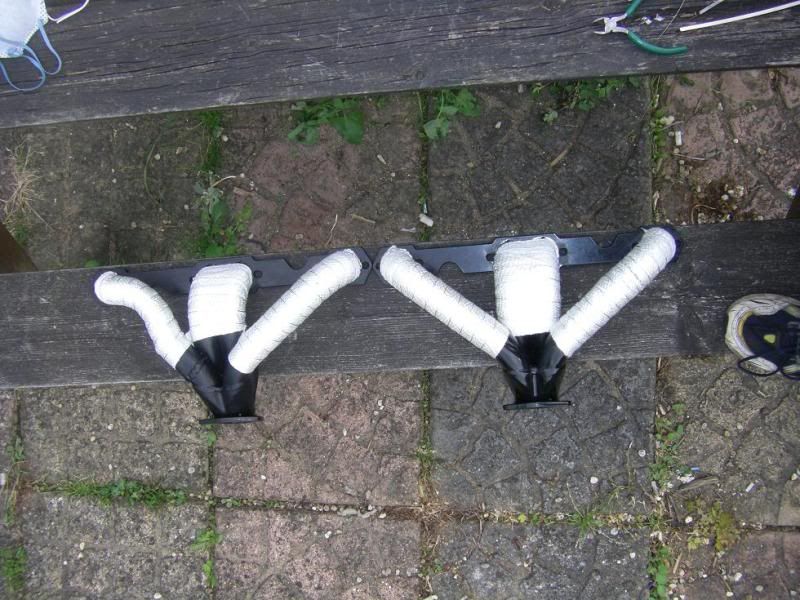
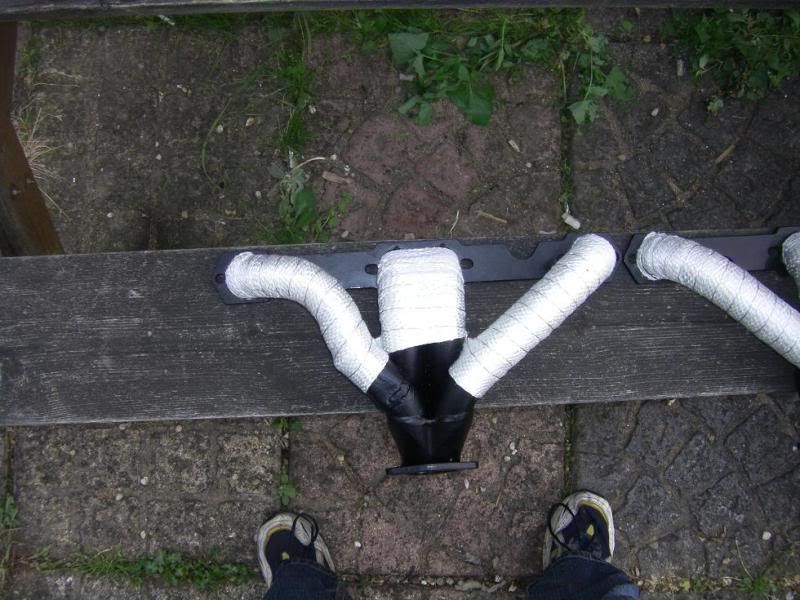
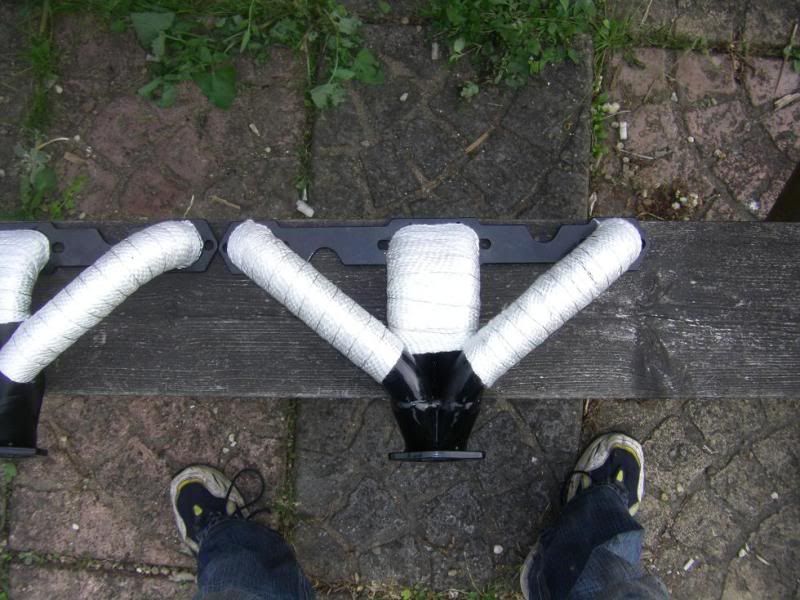
However I was impressed with how well they came out - taking a bit of extra effort was definitely worth it.
I also installed the water pump with new gaskets and sealant at this point.
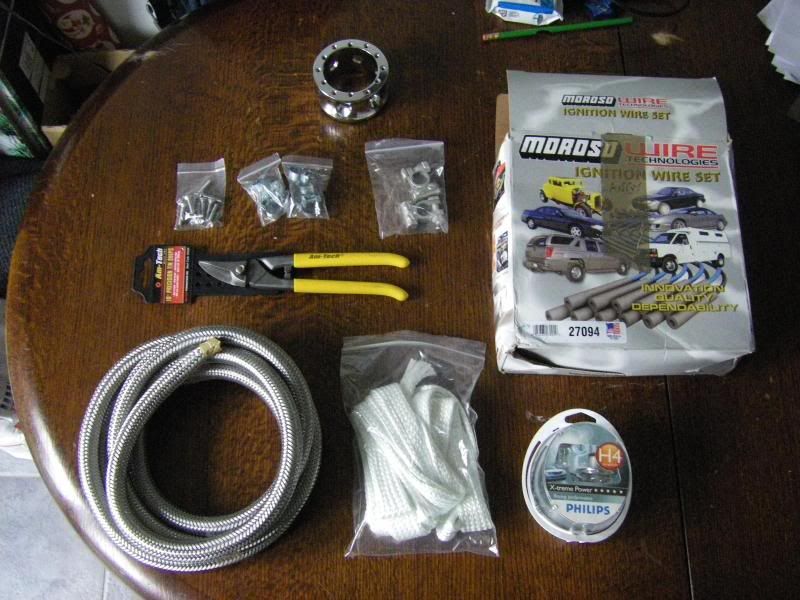
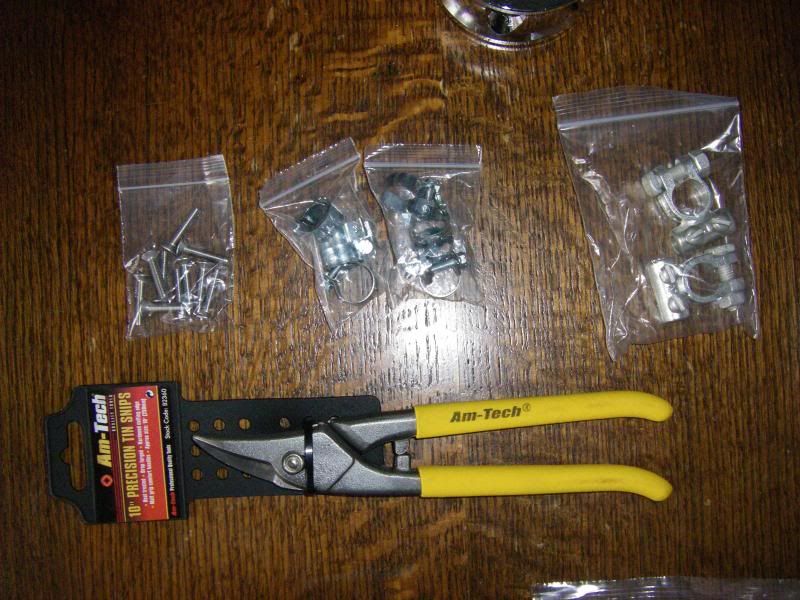
June 2010
A few more essential parts were purchased
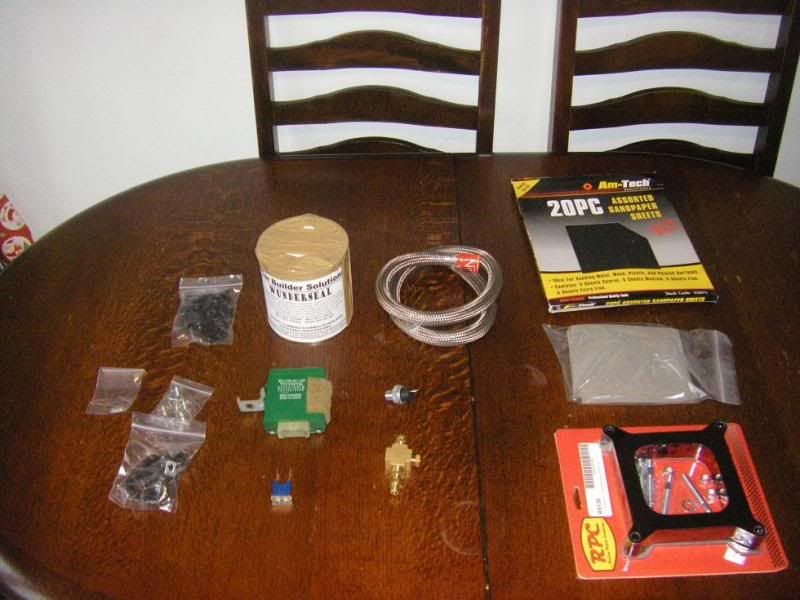
from left to right:
Throttle cable nipple
Pack of mixed blank grommets
Fuel hose clamps
Fuel hose P clips
Underseal
Supra light module (missing from the loom from the breaker)
100A Alternator Fuse
Braided Fuel hose outer
Low oil pressure sender switch
4 way oil line connector
sandpaper
sanding foam pads
1" carb spacer
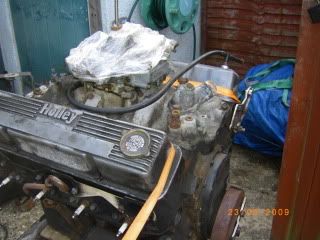
I also got some S/S 'T' style rocker cover bolts (ARP ones were too short for Holley covers)
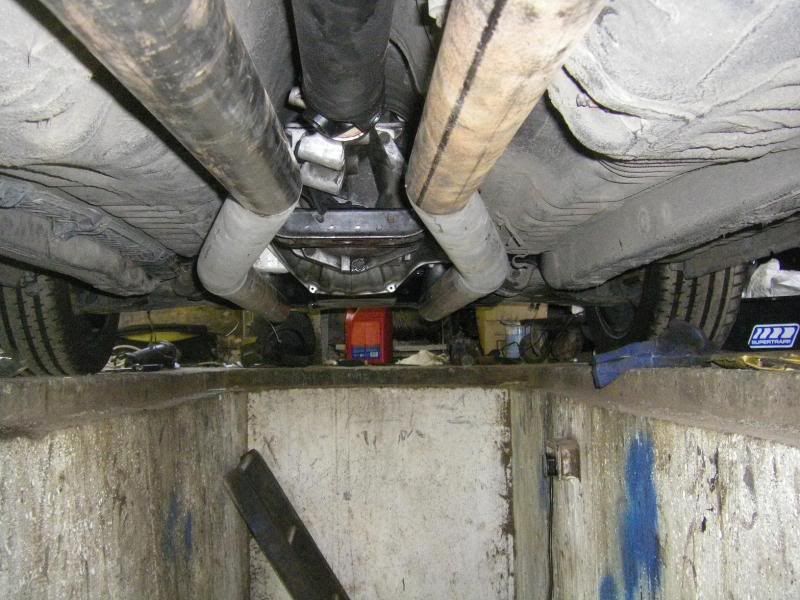
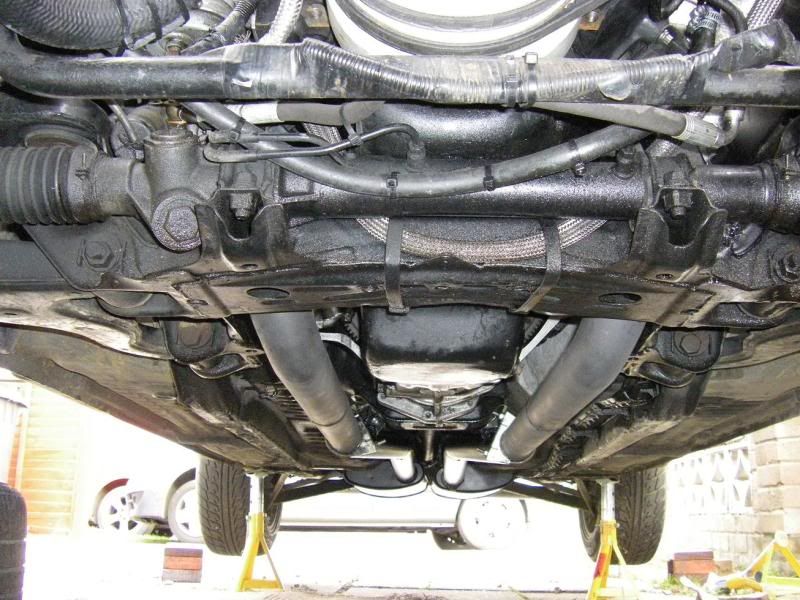
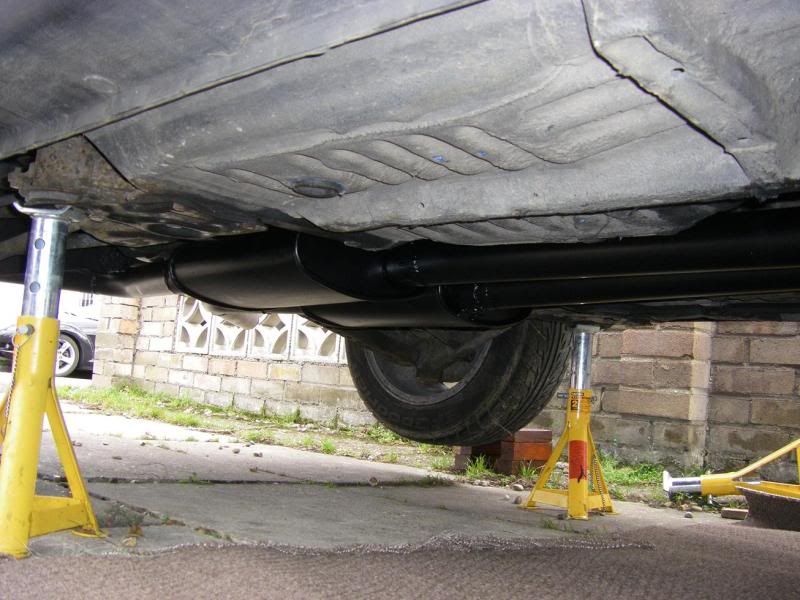
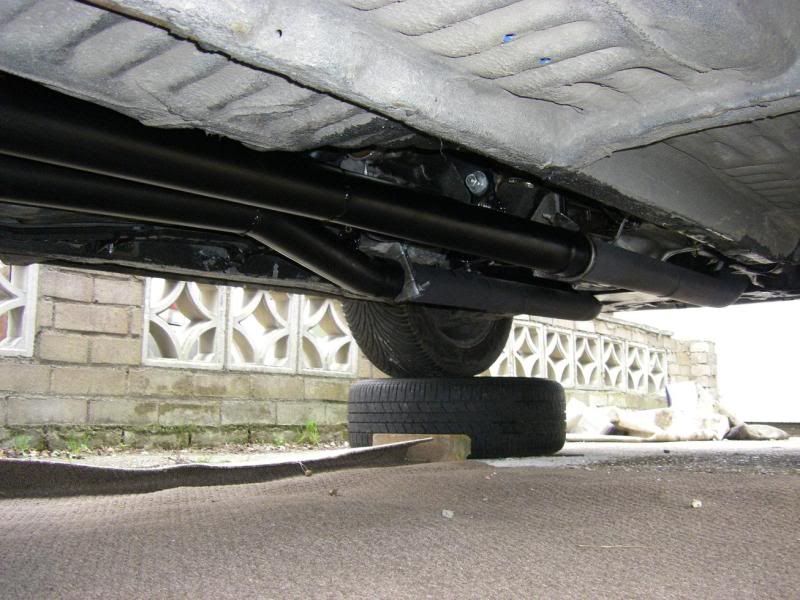
The exhausts were fitted for the "last" time
I was impressed with how good they looked once properly installed on the car. The plan was to paint the pipes black all the way along so they are not so obvious under the rear of the car which has now been done and again, look much better.
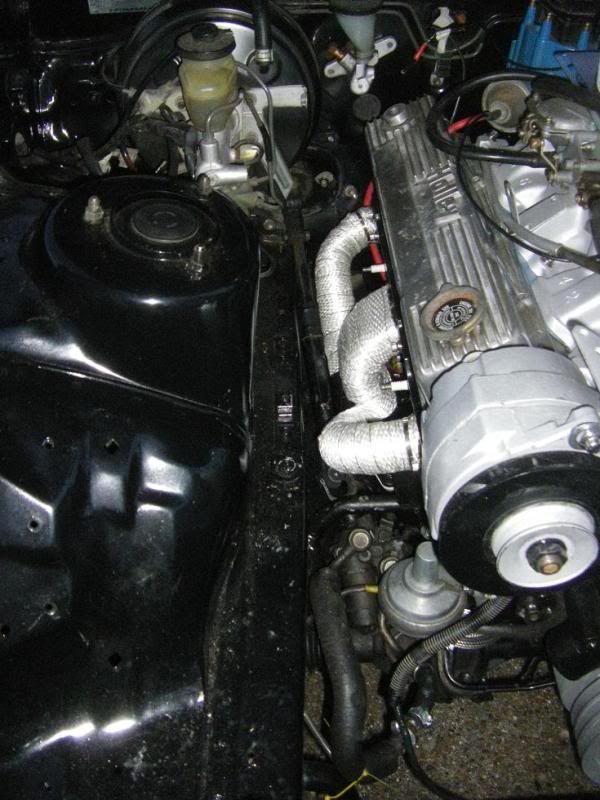
I then fitted the fuel pipes, alternator & radiator and did some more of the wiring. The low oil pressure sender, oil gauge, hand brake light, fan switches & lights, reverse lights, starter motor, start button and horn button were all finished and the HT leads fitted (2 had to be replaced at this point for Halfrauds yellow ones as the originals were too cracked to use)
The gearbox and engine were filled with oil next and fuel put in the tank for the first time in 9 months. It took 1 gallon just to fill all the pipes to the pump, I had to put another gallon in just to get the carb chambers full (a sign of things to come!!). The HT leads were fitted however my hopes of starting her at this point were scuppered by the battery going flat due to it taking so long to draw the fuel through the new pipes and in to the holley chambers (granted I hadn't charged it the previous night so it didn't have much juice in anyway).
The clutch cable was made up next however I bought the wrong fitting for the slave cylinder (needed a flange, I'd bought a banjo) so the banjo was ordered and the cable finished off another day.
With the battery charged and more fuel in the tank I could set the floats on the Holley. With all the electrics for the engine sorted it was time to see if she started. She fired up first time and after setting the timing I could stand back and listen to what the exhausts sounded like. Unfortunately I have lost the video that I took at this point but needless to say I was like a school boy in a sweet shop... WHAT A NOISE
Aug 2010
With the clutch banjo delivered the clutch could be finished off and set. Whilst waiting for it to arrive I painted the floor pan and boot floor (notice the black!) and refitted the seats. I'd connected the rest of the electrics so the lights, electric windows, mirrors (after some custom wiring was spliced in to the UK loom), central locking, indicators etc all worked.
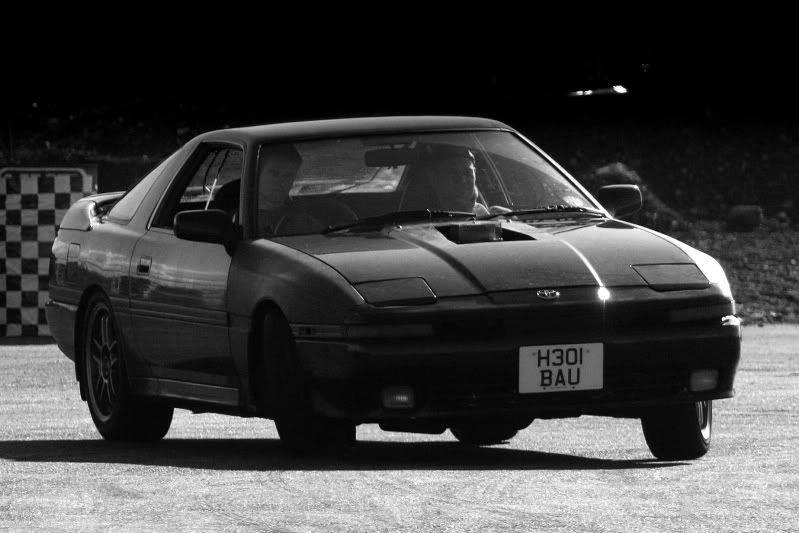
I had taxed it the day before finishing the clutch and as the previous MOT hadn’t expired yet, and the insurance was all sorted, it meant it was time to take it for a spin. 364 days after buying the Blazer the Supra was out driving on the public roads. I didn’t take it far as it was dark by this time and I still had all my tools to put away however it was AMAZING.
The car was then put in for a new MOT, which it failed due to emissions (would you believe!). I leaned it out on the idle mixture screw and the emissions were retested until it passed. I then drove it home and reset the idle screw to where it was (i.e. where it should be). A few other jobs were done around this time:
1" carb spacer was fitted
Rocker cover T-bolts fitted
bought and fitted a new dipstick
found battery clamp
fitted bonnet spacers to help aid cooling in traffic.
fitted bonnet struts that actually keep the bonnet up
booked a drift day (last one I went to had been 15 months before so I couldn't wait to get back out. Also I thought i'd break her in gently)
sorted alternator wiring
sealed and painted clutch cover
I have been a PH fan for longer than I can remember but never got round to registering.... But now I have
so I thought it only appropriate to share with you my car and the build that got it to where it is today. Here is a "quick" summary of my work to swap a Chevy 5.7L V8 in to my 1990 Supra.History
I bought my mkiii Supra in January 2007. It was a JDM import 2.0L Twin Turbo (chassis code GA70, engine code 1G-GTE) with 63,000 miles on the clock and 210bhp out of the factory in 1990.
Being an import it was in immaculate condition and hadn't suffered the rust problems a lot of UK mkiii’s have.
I fitted a locked (shimmed) diff as I wanted to get in to drifting. Unfortunately the 2.0L engine was not torquey enough and being a rare engine would have cost too much to get any decent power from it (the turbos weren't at full boost till about 4k so I really had to rev the knackers off it to drift it). I decided in early 2009 to do an engine swap. The obvious choice was a 2JZ-GE (3.0L NA) from the mkiv supra as it has similar power but across the whole rev range and people were pretty much giving them away at that time (unlike the 2JZ-GTE which were still going for silly money). HOWEVER, after speaking to one of the guys in the mkiii supra club, I was (easily) convinced that if I was going to do an engine change, I may as well do it properly and put a V8 in it. This was May 2009.
The search for a Chevy 350 (5.7L) started, and in August 2009 I bought and collected a 1984 Chevy Blazer.
The Blazer started life as a diesel V8 however the previous owner managed to cook the diesel lump (I have NO idea how) and fitted a brand new petrol 350 (5.7L) crate motor in 2002. The Blazer was used for a year, covering about 5,000 before it was left to stand and fall in to disrepair. The owner then decided to sell/break it in 2009 when I bought the whole thing for £1850. I pulled the engine, sold the TH400 automatic gearbox and then eventually sold the rolling shell to someone who wanted to restore it. This got me £1030 back so the engine, Holley 650 vac sec carb, alternator, water pump, inlet manifold, standard HEI dizzy and power steering pump ended up costing me £820 – not bad for 8 year old kit with only 5,000 miles on them. A bargain by anyone’s standards and worth the 3 months it took to find.
Unfortunately the crate motor was not very well protected against the elements and had a fair amount of surface corrosion on from sitting for 7 years in rainy Manchester.
One week after buying it I set about removing the engine from the Blazer on the driveway to get from
to
A mate then came round the next day and helped me remove the engine.
My plan was to keep the engine standard to start with and just get it in the Supra and running properly. Once all that was sorted I could then think about power upgrades. GoodWrench (the company who now make the Crate motors on behalf of Chevy) state that with the right Carb/exhaust set up this particular 350 can produce up to 260bhp and over 300 ft-lbs of torque out of the box and if you are interested HERE is a very good article on tuning a standard GoodWrench 350, getting it up to serious power with relatively basic mods that don’t cost the earth….
However, back to my build:
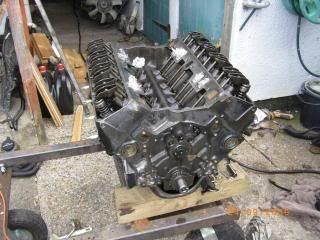
Now the engine was out I could start to strip it down to the heads (leaving the heads on) and start to clean everything up.
The Blazer came with some Headman Headers however they were also very rusty. There was a large possibility that I wouldn’t use the Headmans on the Supra as there wouldn’t be space in the gearbox tunnel for them however I cleaned them up to stop them corroding further in case I could use them as donors.
September 2009
Then I removed the Supra engine with the help of a couple of mates (it's amazing what mates will do for unlimited tea and biscuits!)
which left the front end sitting a little higher than before...
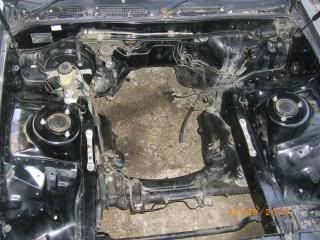
I then cleaned the engine bay up as it was caked in salt, oil, dirt etc.
I had stripped a lot of the weight out of the Supra between 2007 and 2009 - the standard seats which weigh a nautical tonne were replaced with some buckets, the carpets, trim, sound deadening etc were all already out of the car at this point. After removing the Supra engine, I removed the dash and the cross bar behind it.
along with a few other brackets and fittings which I cleaned and primered
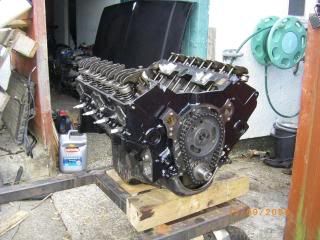
I then started on cleaning up the engine
I bought a Saginaw 4 speed manual gearbox which needed a clean up on the outside but was mechanically sound
I also bought an ali bell housing
I then set to work on the sump
I also bought some other parts, a full Fel-Pro Gasket set (I wasn't planning on using everything but it's always useful to have spares)
and clutches numbers 2 and 3 with flywheel (I had bought one previously to this and it turned out it was the wrong diameter). From these two clutches I had all the right bits for my set up
rev counter
Block hugger headers
and Corvette engine mounts.
By this point I had also decided against using the 4 speed Saginaw box. There were several reasons for this decision;
1) the restrictive ratios of the 4 speed box would leave top speed pretty lacking
2) The external linkages on the Saginaw would mean a lot of modifying was needed to the Supra transmission tunnel
3) The Saginaw is generally a clunky old box and probably wouldn't take too kindly to changing gear mid-drift
Fortunately I had managed to source a pukkah 5 speed T5 box which has the same stud pattern as the Saginaw so I could use the ali bell housing I had already bought.
Nov 2009
I towed the Supra to a mate's workshop where we welded the gearbox mounts and engine mounts in place, using an empty block connected to the T5 for alignment (gearbox mounts done first)
Luckily the position of the T5 gearstick wasn't far off that of the original W58 box so only minimal trimming was needed.
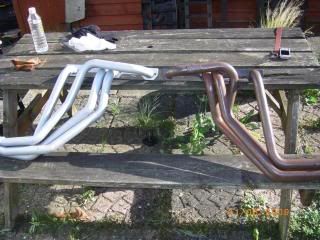
A spare head was then placed on the empty block and work on the exhausts was started. The block huggers fitted snuggly on the passenger side however one section needed modifying for the drivers side to give clearance to the steering column
The original dash had cracked in the sun days before removing it from the Supra in September so that had sealed it's fate. As I wanted the Supra to be lightweight and the dash weighs ~12kg I was planning on just using a simple instrument panel anyway. Work was started on this at a similar time to the engine mounts being welded up. It was folded out of some aircraft grade Ali and the central hole for the speedo was cut.
I then had a play about in Solidworks to see how the other gauges and switches should be positioned. I hadn't bought all the switches and buttons at this point so I just modelled some basic ones up to get an idea. Here are some of the possibilities:
I decided it would be better to have the oil pressure and water temp on the same side of the speedo so one glance will show if there were any problems. I had some problems with the positioning of these gauges though as the cross bar behind the original dash could foul on them as the gauges were pretty deep. After some measuring up the water temp and oil pressure gauges were positioned on the right hand side of the speedo and the ali panel could be cut.
January 2010
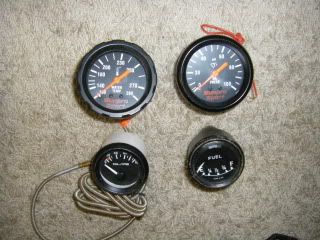
Sourced some more parts from a hotrod swap meet including eleccy rad fans, 12V heater blowers for the front demisters and Sunpro oil pressure and water temp gauges, Smiths fuel gauge and Mallory fuel pressure gauge.
Clutch arm and Wilwood pull clutch slave cylinder was also bought around this time.
Size 9 for size comparison
and mounted to the gearbox
March 2010
The rad fans were chopped and fitted to the car
Drilled some more gauge holes in the instrument panel.
Picked up a pair of turbo muffler silencers from a hotrod swap meet (£20 the pair) and started sourcing bends and straights for the rest of the exhaust system. Also rec'd 30m roll of exhaust wrap (1L JD bottle for size reference)
I'd wanted to get the engine installed in the car at this point however when I came to fit the clutch to the engine I found out I couldn't use the original flex plate bolts from the auto box so had to order some ARPs and await delivery. I did however do some final cleaning and painting of the engine bay
I also cut (and then cut again, and cut again) the hole for the clutch slave cylinder assembly to go in. The hole had to be MASSIVE, much bigger than I'd expected, but I wanted to give it some clearance so there's no danger of smacking it when putting the engine & box in together.
This pic shows how long the fork is
Some of the unpainted engine surfaces had started to rust slightly over Christmas (exhaust gasket surface, fuel pump etc) but it wasn't serious and would come off easily enough when the time came to fit the auxiliaries.
The modified header got a clean up and 2 coats of high temp black "smooth"
After fitting a rad I noticed the rad fan motors were fouling on the rad so spacers were made up and fitted to the mounting bolts. This rad was just for set up, I bought a Fluidine rad later which had proper mkiii Supra mounting brackets and better cooling than this rad would have had.
I then ordered an ARP top end stud set for the 350 and some high tensile clutch housing bolts (not ARP). These arrived along with the ARP flywheel bolts so the engine could now go in.
Despite the persistent rain and having no cover on the driveway, I couldn't wait to get the engine in so I cleaned up the rest of the rust that had formed on the block since it was painted back in November and also cleaned up and painted the clutch assy.
I then fitted the flywheel to the crank using the ARPs
Aligned and assembled the clutch using a custom made alignment tool
and mounted the gearbox to the engine - a job I thought would be much trickier by myself than it actually was
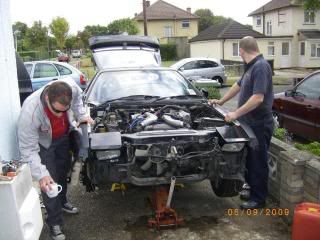
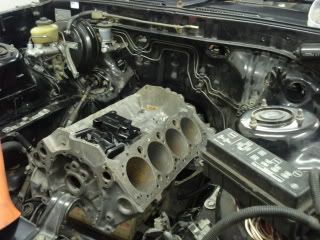
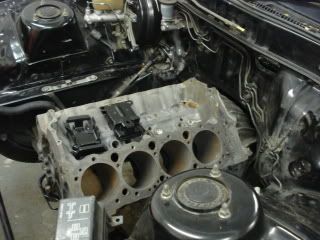
A mate then arrived and we got the engine into the car (luckily the rain had stopped by now too)
It was so tight I had to let the air out of the front tyres in order to get the sump over the cross member
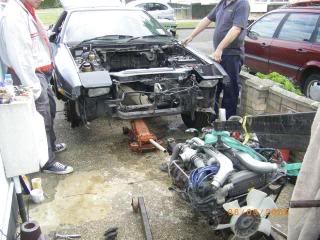
The engine sits nice and far back which is how I wanted it. There were obviously a few things left to be fitted to the block but there's a good amount of space to work in front of the engine (this engine only being 4 cylinders long, the original being 6). There's not so much at the sides tho
The car sat a lot higher than I had expected at this point. Even after a few days the front shocks didn't drop that much which I was surprised about as it had sat for 6 months with no weight on them at all.
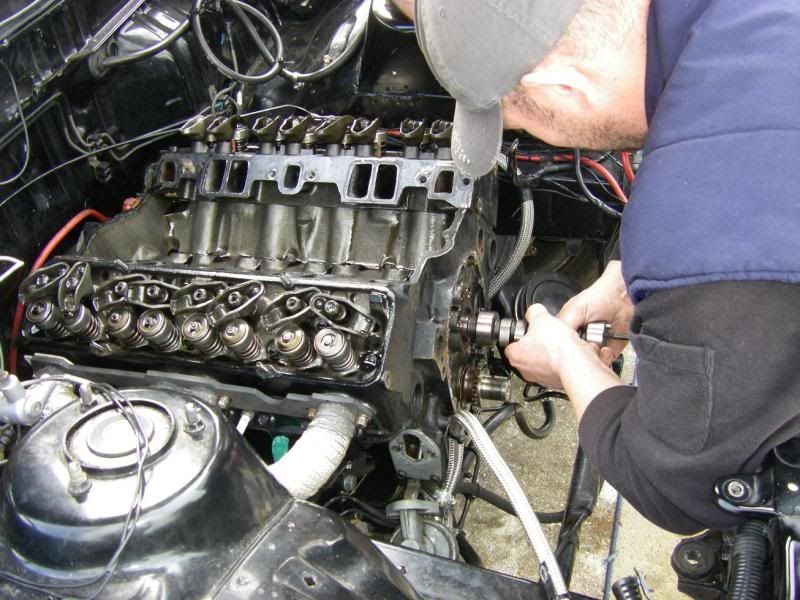
A large hole was then cut in to the fire wall to allow some space for the dizzy. I couldn't afford to upgrade to a Mallory system at this point (which has a much smaller diameter) and cutting is free so I stuck to the HEI.
However there was no space for timing adjustment once the HT leads had been fitted so the grinder came out again
So now it fits and the timing can be adjusted
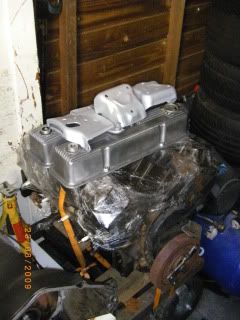
With the engine in, the timing cover, fuel pump, starter motor & dip stick (later replaced by a smaller, shiny one) could all be fitted (with new gaskets). It was at this point I found the settings on my photobucket account and made all my photos full screen. Apologies for the small pics up till now...
The fun job of sorting the wiring could then begin. I had purposefully kept the carb set up so I didn't have to worry about fuel injection wiring, sensors etc etc and as it came from a running vehicle it should require minimal set up too. That meant the 'only' wiring I needed to do was:
Lights
Leccy windows/folding mirros
fans
horn
wipers
Instrument lighs
leccy gauges (fuel gauge)
window demisters
some of which could be taken from the original loom, some of which would need custom wiring. I forgot to mention earlier that when I sold the 1G I had to sell the loom and ECU with it. This meant installing another wiring loom in to the Supra which I got from a car being broken in the club. The only problem is that the UK and JDM looms are slightly different. Some features were only available on JDM cars (leccy folding mirrors for example) so the UK loom doesn't have wiring for these. For the common parts (pop up headlights, wipers etc) the wiring is the same but different connectors were used (for some stupid reason) so that all had to be sorted out.
April 2009
I originally planned to have the main fan controlled by a thermostatic switch screwed in to the top of the water pump and the other fan controlled by a switch in the cabin, however I decided it would be best to have both fans controlled by switches in the cabin. Wiring for the relays for the fans was installed and hidden up above the fans and control wires taken back thro the firewall and in to the cabin. The horn wiring was also installed at this point.
I made mounts for the rev counter by folding some strip steel and securing them to the steering column bolts. These were then cleaned up and painted black.
Now the engine and gearbox were in place I could measure up for the custom prop shaft. The rear end was to remain standard Supra (altho I changed the diff for a better ratio 3.0L Turbo LSD as opposed to the open (well, by this time welded) lower ratio 1G diff) so all I needed was a prop to go from the T5 output spline to the input flange of the Supra diff. After speaking to Recoprop and waiting 3 times for them to call me back with no success I contacted Bailey Morris in St Neots who turned out to be very helpful and a lot closer than Reco. BM spec'd up the prop and agreed to lend me a yoke so I could double check it fitted the T5 (which it did). I also took my spare diff over to them to confirm the flange they had spec'd fitted (which it did!). It took them just over a week to make it up, balance it and have it ready for me to collect, which they stayed open late for me to do after work. It is made out of 3" diameter tube, rated to 400bhp and it cost just over £200 which I thought was extremely good considering the service I got (having said that I did then have to take the prop back to be rebalanced which was a bit of a pain).
I then took on a job I had been avoiding - cleaning the adhesive from the floor pan that stuck the insulation down. It is the stickiest, nastiest substance known to man and the best way I could find to get it off with was by swilling white spirit over it then using a drill with a wire brush attachment to release it from the metal and wipe it up before it had a chance to dry again. The only problem with this method is you end up wearing most of it.
May 2009
Here's a token picture of how the engine bay was looking at this point.
I had now got hold of enough bends and straights that I could start work on the exhausts. I'd also bought a few other bits and pieces.
So I took the car to a local pit as trying to do this with the car on axl stands would have been an absolute nightmare. Jim (who suggested the V8 in the first place and did the welding for the engine mounts) came along too and we only had 5 hours at the pit so didn't manage to get the exhausts finished, however they were cut to shape and tacked in place enough that they could be finished on the driveway.
Looking forwards:
Looking back:
The sump
Drivers side down pipe
We only had one rubber hanger so the drivers side silencer wasn't fitted properly hence it's not square in the pic above.
I also test fitted the prop while I was under the car. It had just over 2" of engagement on the spline to the T5 which is easily enough for the power I'm running (Bailey Morris recon 1" of engagement would take the 260hp the stock motor produces).
After getting the car back from the pit the exhausts could be finished off. The exhaust sections looked like
We jacked the car up nice and high and all the joints were fully welded.
The pipes were then removed from the car, cleaned up and painted in high temp ali paint.
The exhausts were the last major job to do, and with them pretty much done (they just needed the headers wrapping then re-hanging with the gaskets in place and tightening up) the end was in sight. However there was still a massive list of jobs to do with the most important one being the electrics. Other things on the list at that point were:
Make clutch cable
fill clutch with hydraulic fluid
set position of clutch
connect all gauges (electric and mechanical)
weld cover over clutch in passenger footwell
paint interior of car
fit and connect radiator
fit and set carb
connect fuel lines
set timing
fit accel cable
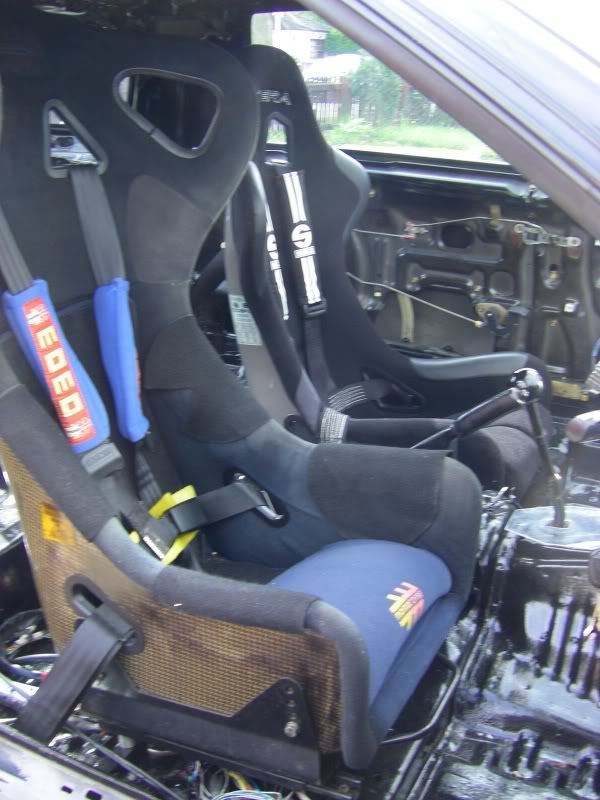
fit seats
get insurance
get MOT
get tax etc etc
I installed the inlet manifold with new gaskets and silicone sealant and torqued it to spec.
The thermostatic switch in the water pump for the fan relay can be seen in the photo above however it is just being used as a plug now.
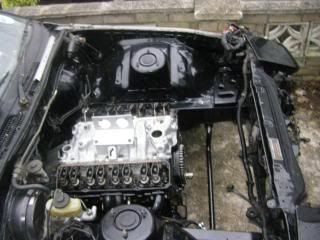
More work then went into the instrument panel, cutting holes for the remaining gauges, buttons and switches. Once they were all in place the wiring was done and I fabricated some rubber mounts to keep the panel tightly in place. (the 2 empty holes in the photos below needed boring out to 19mm for which I was waiting a drill bit)...
I'd decided that I wouldn't paint the interior black. I thought a nice deep midnight blue could look pretty cool so bought some dark blue Hammerite.
Unfortunately Hammerite don't do a midnight blue so when I painted the dash cross member it came out like this
Not one to give up on things I decided to pursue the blue as it matched the seats, however I have since painted it all black again and it looks sooooo much better
Wrapping the headers was not a fun job, the fiberglass wrap I bought was pretty cheap and the fibres all broke out and became airborne (I did it outside wearing a facemask). I wanted to use a single strip per header so the job took a pretty long time
However I was impressed with how well they came out - taking a bit of extra effort was definitely worth it.
I also installed the water pump with new gaskets and sealant at this point.
June 2010
A few more essential parts were purchased
from left to right:
Throttle cable nipple
Pack of mixed blank grommets
Fuel hose clamps
Fuel hose P clips
Underseal
Supra light module (missing from the loom from the breaker)
100A Alternator Fuse
Braided Fuel hose outer
Low oil pressure sender switch
4 way oil line connector
sandpaper
sanding foam pads
1" carb spacer
I also got some S/S 'T' style rocker cover bolts (ARP ones were too short for Holley covers)
The exhausts were fitted for the "last" time
I was impressed with how good they looked once properly installed on the car. The plan was to paint the pipes black all the way along so they are not so obvious under the rear of the car which has now been done and again, look much better.
I then fitted the fuel pipes, alternator & radiator and did some more of the wiring. The low oil pressure sender, oil gauge, hand brake light, fan switches & lights, reverse lights, starter motor, start button and horn button were all finished and the HT leads fitted (2 had to be replaced at this point for Halfrauds yellow ones as the originals were too cracked to use)
The gearbox and engine were filled with oil next and fuel put in the tank for the first time in 9 months. It took 1 gallon just to fill all the pipes to the pump, I had to put another gallon in just to get the carb chambers full (a sign of things to come!!). The HT leads were fitted however my hopes of starting her at this point were scuppered by the battery going flat due to it taking so long to draw the fuel through the new pipes and in to the holley chambers (granted I hadn't charged it the previous night so it didn't have much juice in anyway).
The clutch cable was made up next however I bought the wrong fitting for the slave cylinder (needed a flange, I'd bought a banjo) so the banjo was ordered and the cable finished off another day.
With the battery charged and more fuel in the tank I could set the floats on the Holley. With all the electrics for the engine sorted it was time to see if she started. She fired up first time and after setting the timing I could stand back and listen to what the exhausts sounded like. Unfortunately I have lost the video that I took at this point but needless to say I was like a school boy in a sweet shop... WHAT A NOISE
Aug 2010
With the clutch banjo delivered the clutch could be finished off and set. Whilst waiting for it to arrive I painted the floor pan and boot floor (notice the black!) and refitted the seats. I'd connected the rest of the electrics so the lights, electric windows, mirrors (after some custom wiring was spliced in to the UK loom), central locking, indicators etc all worked.
I had taxed it the day before finishing the clutch and as the previous MOT hadn’t expired yet, and the insurance was all sorted, it meant it was time to take it for a spin. 364 days after buying the Blazer the Supra was out driving on the public roads. I didn’t take it far as it was dark by this time and I still had all my tools to put away however it was AMAZING.
The car was then put in for a new MOT, which it failed due to emissions (would you believe!). I leaned it out on the idle mixture screw and the emissions were retested until it passed. I then drove it home and reset the idle screw to where it was (i.e. where it should be). A few other jobs were done around this time:
1" carb spacer was fitted
Rocker cover T-bolts fitted
bought and fitted a new dipstick
found battery clamp
fitted bonnet spacers to help aid cooling in traffic.
fitted bonnet struts that actually keep the bonnet up
booked a drift day (last one I went to had been 15 months before so I couldn't wait to get back out. Also I thought i'd break her in gently
)sorted alternator wiring
sealed and painted clutch cover
Edited by Figgle on Thursday 15th June 08:00
Edited by Figgle on Friday 30th June 10:30
Edited by Figgle on Thursday 2nd May 12:47
Edited by Figgle on Wednesday 5th January 13:50
Edited by Figgle on Wednesday 5th January 13:51
 What a first post!

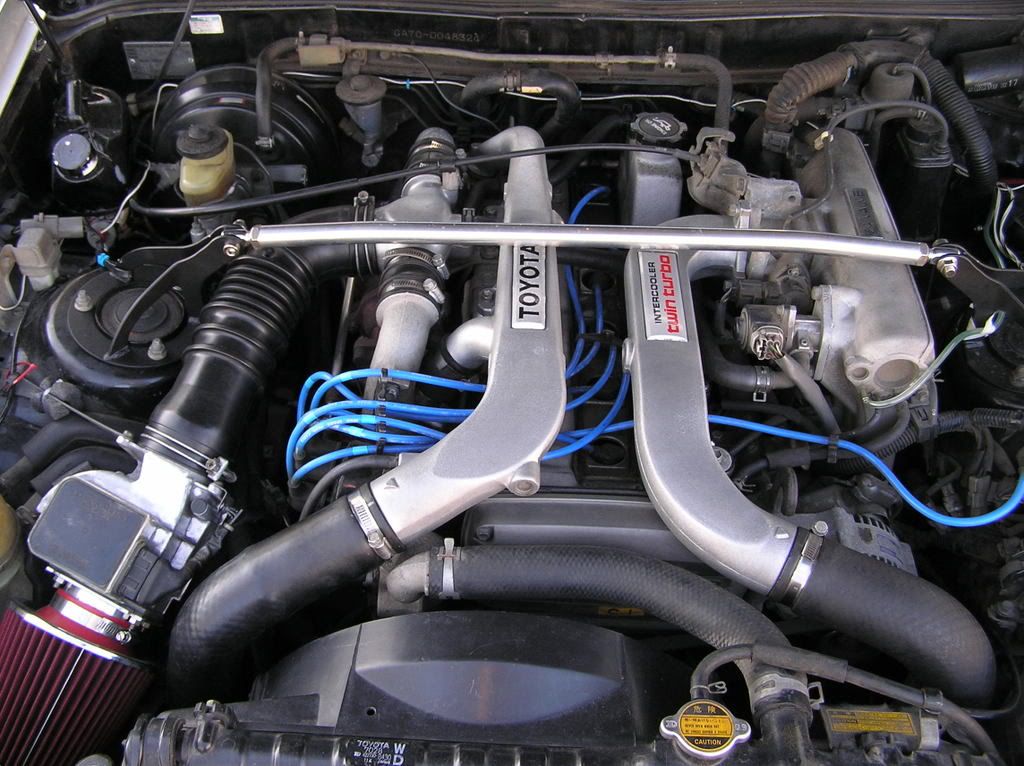
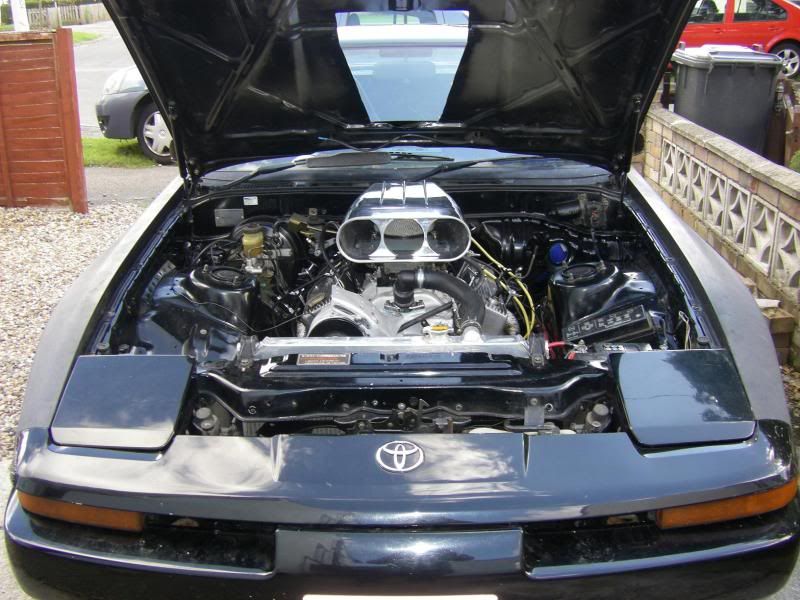
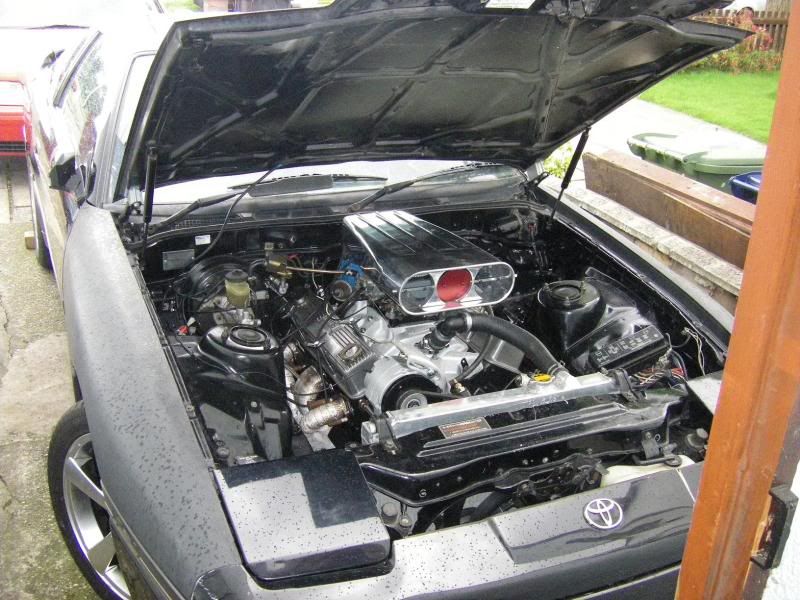
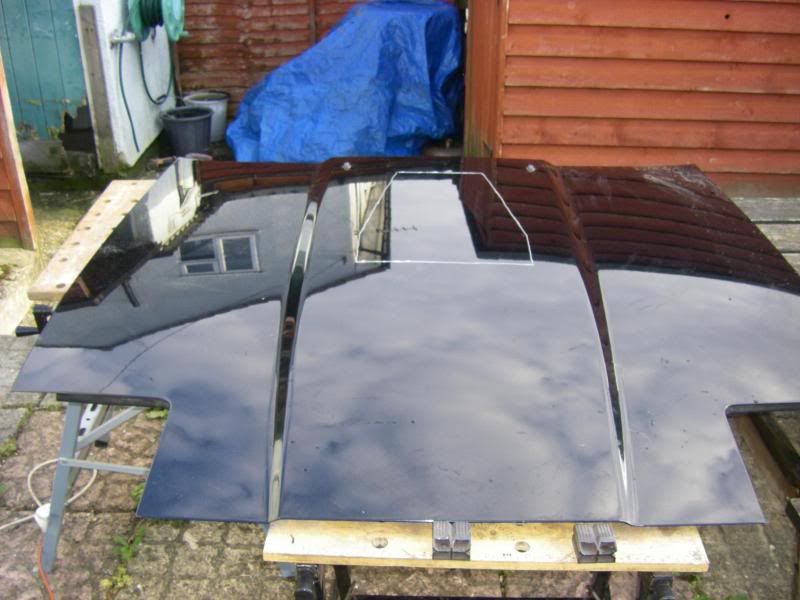
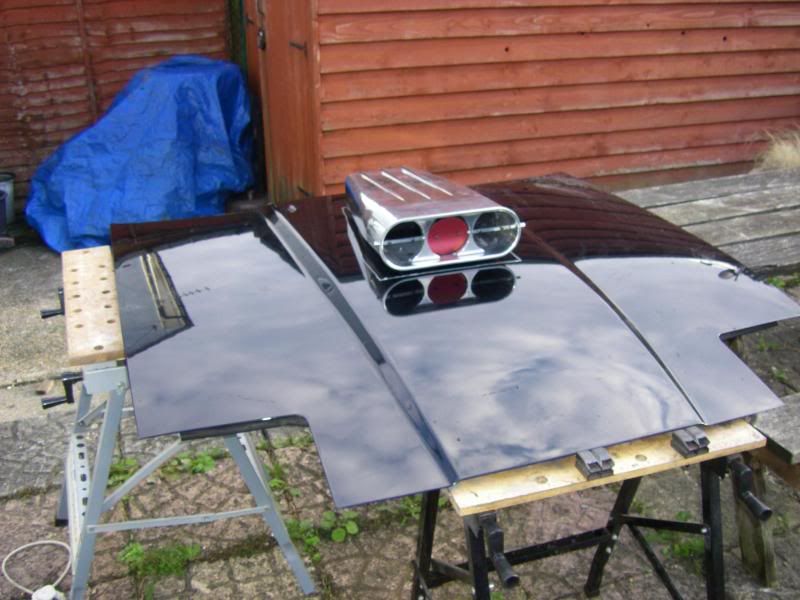
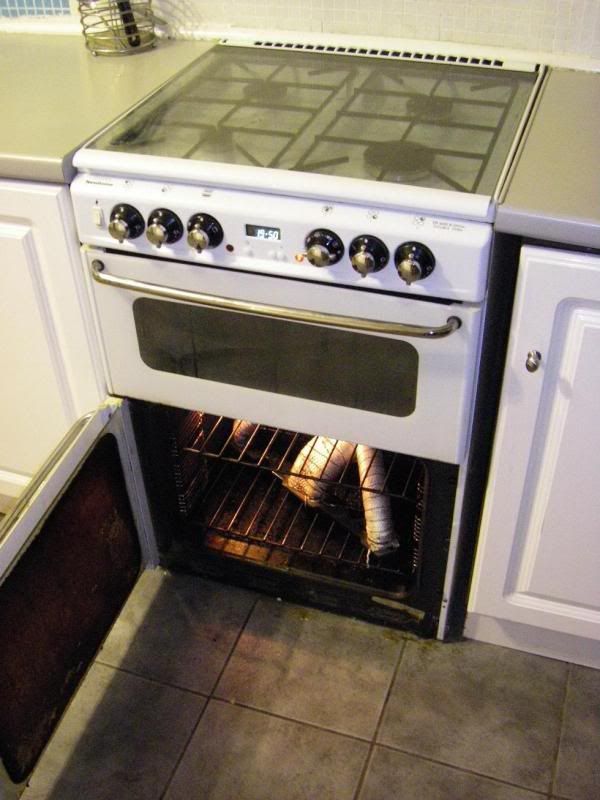
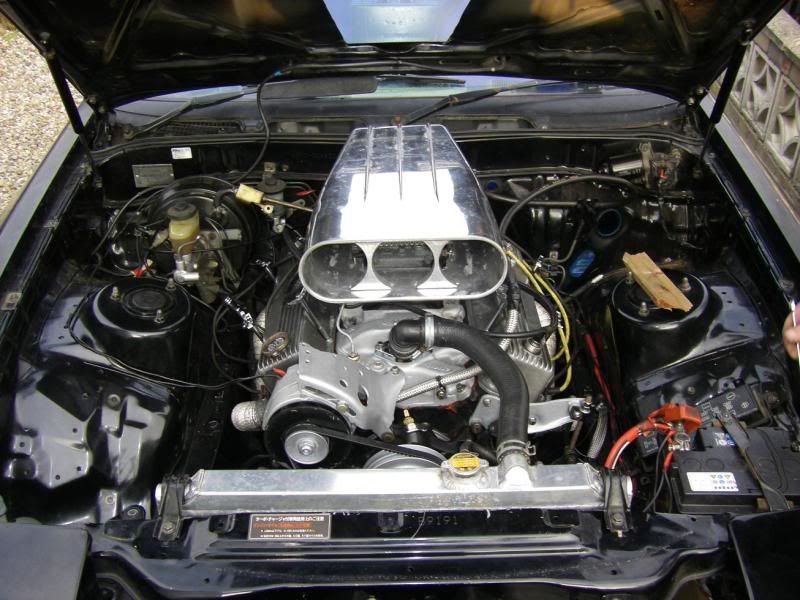
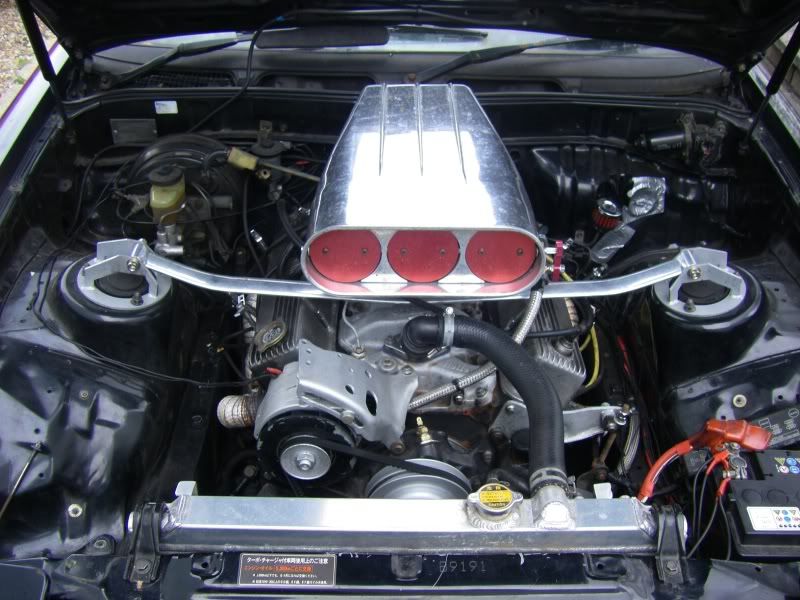
It was then time to fit my butterfly street scoop, something I'd wanted to do for ages as it has been a dream of mine since I can remember to own a car with one of these sticking through the bonnet. It kinda means I can't go for the sleeper look (I'm not one for big body kits) but it just looks so damn cool I think I'll get over that!
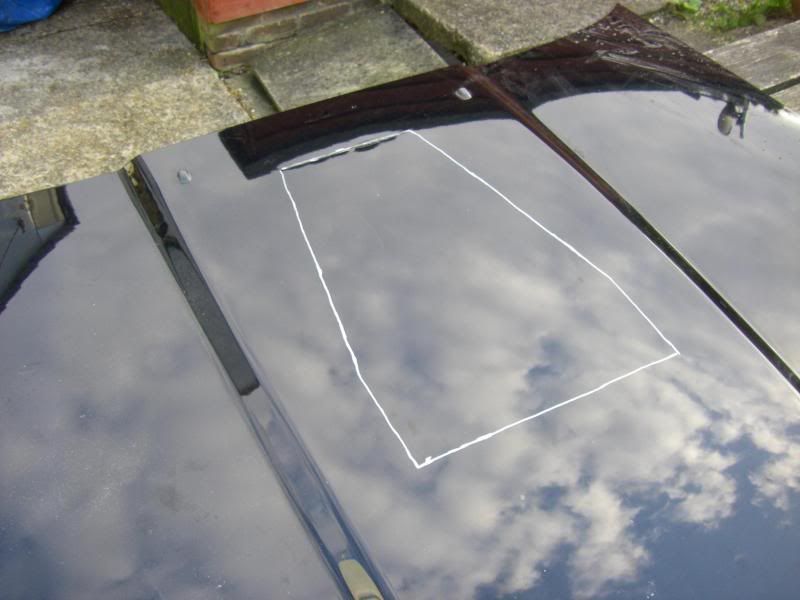
Here's how I did it:
Place the scoop on the carb with the bonnet up.
Take measurements to reference points, remove scoop, close bonnet and mark up where the scoop will sit remembering to allow a little extra for the bonnet to clear as it opens/closes.
Remove bonnet
Go over the marking lines with the angle grinder lightly to show them clearly.
Double check the scoop fits OK and is central and square
Angle grind hole
Turn bonnet over and remove cross beams
Spray paint edges so they don't rust (I'm not bothered about a colour match as the whole car is getting re-done at some point)

refit bonnet (it's a bit lighter now so it's a bit easier
)
I had the bonnet spacers in which meant the bonnet sat pretty high round the scoop

So I removed the spacers however the scoop was still too low so I replaced the 1" spacer with a 2" spacer.
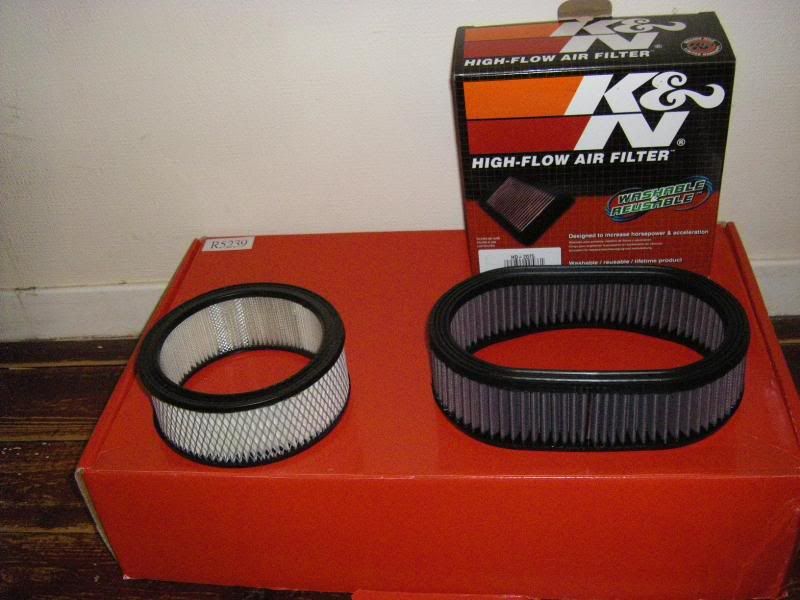
I also decided to get a new air filter. The white one in the pictures is supplied with the scoop and is made of paper. Whether Mr. Gasket expect you to use 2 carbs (and hence 2 filters) with this scoop (it was supplied with 2 filters) or the paper filter is actually capable of driving a 5.7L engine I will never know, but in my opinion that filter was not up to the job. I went on the K&N website which allows you to search for filters by size and shape (other major filter manufacturers didn't do this) so I could chose the largest standard filter that would fit inside the scoop. This turned out to be a 6" x 9" x 2.5" oval filter. I also managed to find one in stock in the UK for ~£35. To compare, the paper filter was a 6" diameter round x 2.5" tall and the K&N cotton will flow much better than the paper.
I could then start fabricating a mounting for the new filter.
Sept 2010
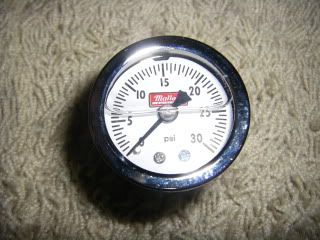
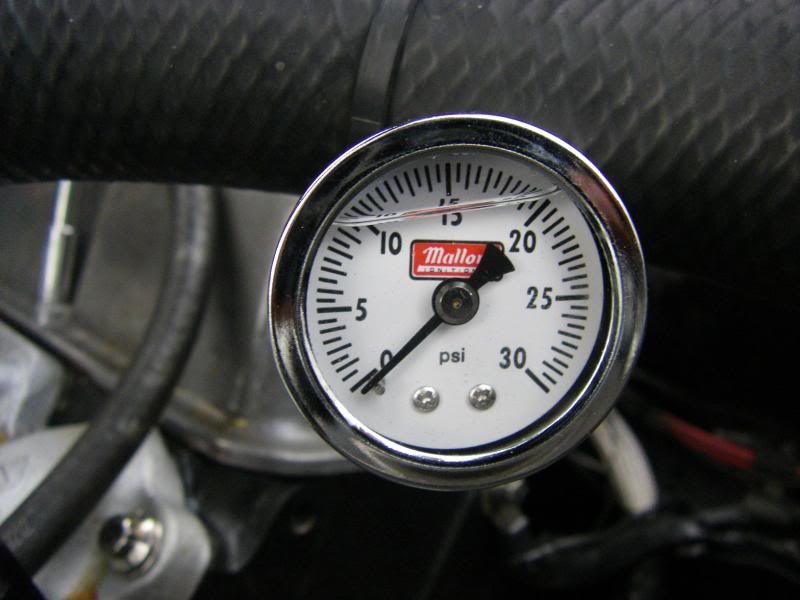
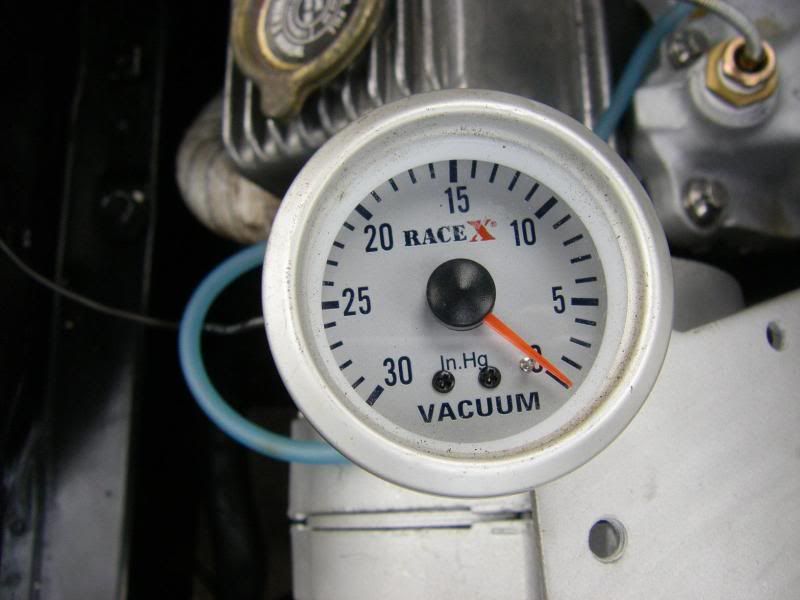
I'd bought the components I needed to hook up my fuel pressure gauge so that was mounted under the bonnet and the vacuum gauge was mounted in the cabin. The idle mixture could now be set properly (the highest vacuum is achieved at the carb baseplate during the most efficient idle mixture. One thing I learned reading up on carbs is that different parts of the carb experience different vacuum levels. This took a while to get my head round but it basically means if you hook your vacuum advance pipe up to the wrong fitting on the carb it won't work properly!!). The rocker covers were also connected to a vacuum source to reduce the sump pressure (I had identified a couple of oil leaks and connecting the vac lines to the rocker covers sorted them out).
Below you can see the vac tubing (red - now replaced with black), the fuel pressure gauge and the vac gauge - both of which are now plumbed in to the cockpit.
I then looked in to reconnecting the original fuel gauge. I pulled it out of Supra instrument cluster and and did some tests on it to determine what voltage it operated on. It appeared to run on mV (0 volts showing empty, a few mV showing full) so I had 2 options. Build a reducing circuit to drop 0-12V swing from the pot in the tank level sender or use an after market fuel gauge that works on 12V. I chose the latter.
Oct 2010
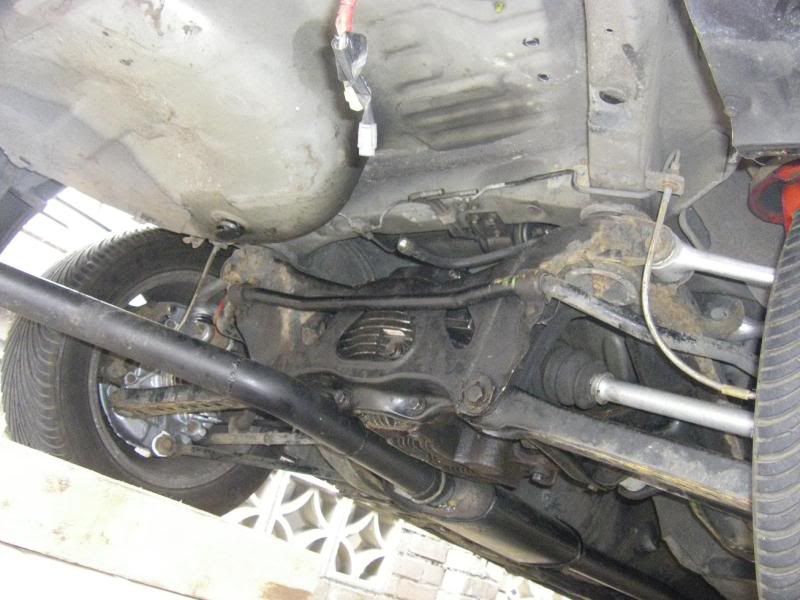
When I removed the 1G from the Supra I cut the power steering lines, turned up a barb and connected the inlet to the outlet to preserve the rack. However, a big car like the Supra needs power steering so I drove the Supra to Pirtek in Cambridge who made up a high pressure line. £50 and ~half an hour I thought was pretty good. I drove home and then had to fit it which was a bit of a pain but I won't go in to that. I filled the reservoir with power steering fluid, connected the belt, started the engine and turned the wheel lock to lock a few times. This removed all the air from the system and proved that it all worked properly (which is a big relief, mainly to my arms).
I didn't have time to finish the mounting bracket for the K&N so by the time I went to the DWYB at the Pod on 6th Oct the filter was on but the scoop couldn't be fitted yet so there was just a big hole in the bonnet.
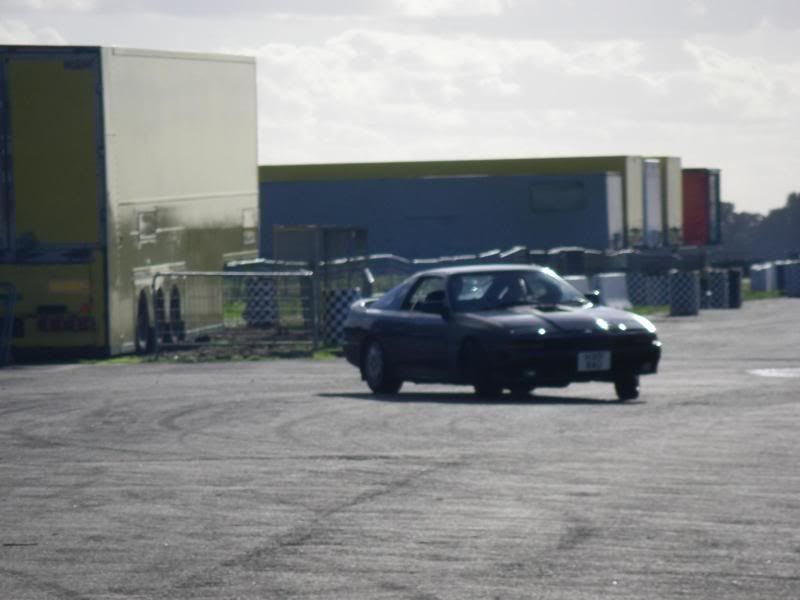
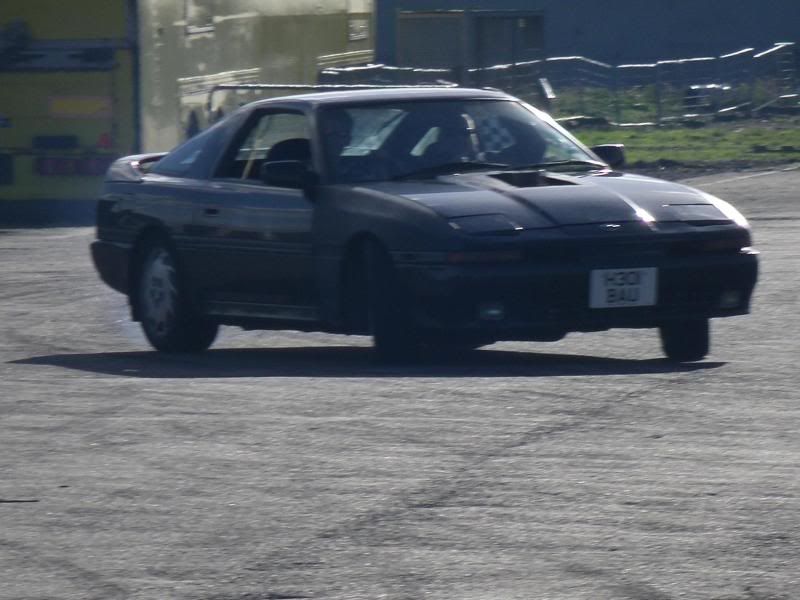
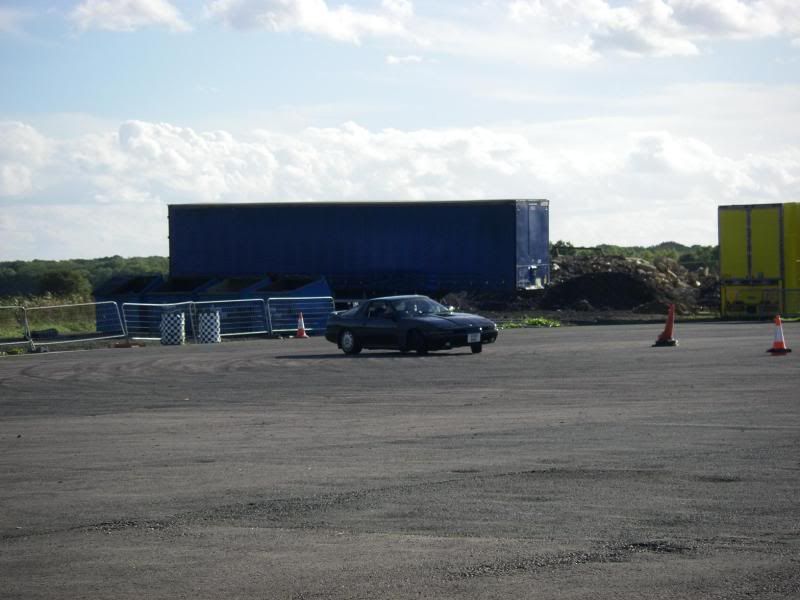
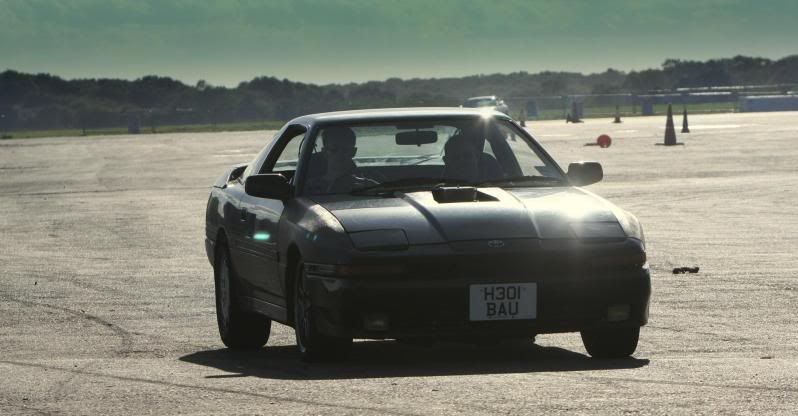
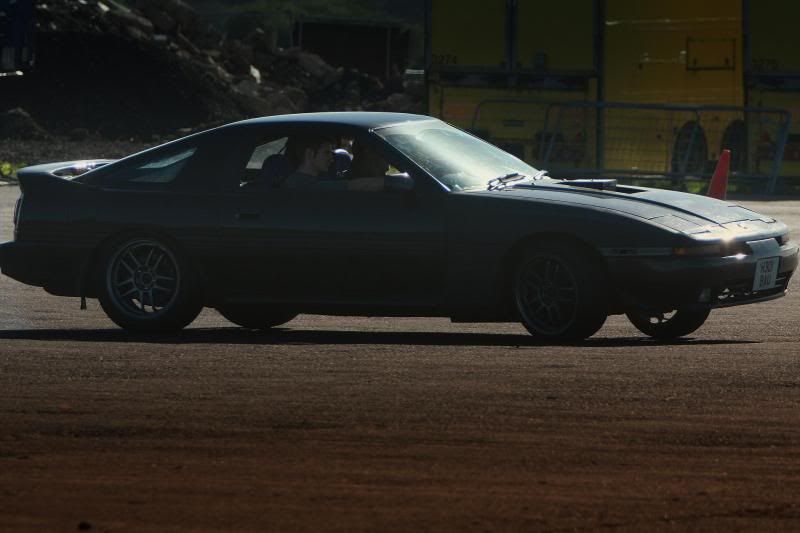
My first trip out was a bit of a let down. The LSD I had in didnt really limit anything and just spun the inside wheel when drifting to the left (right was fine for some reason). So Paul (a mate who had come with me) and I set about an F1-style diff change in the still-pissing rain. This involved taking both exhausts off, dropping the old diff, swapping the diff casing as one was knackered, filling the diff with oil, refitting the diff and not refitting the exhausts
Spent the day drifting on open headers, it was AMAZING. With the locked diff in place the car drifts beautifully. Took a while for me to get back in to it but by lunch time I was linking some pretty tidy turns. Jim (my mate who helped me weld the engine mounts) came down to see how the old girl behaved and she put on a pretty good show. We took to the top track (which was the 2008 (or 2009?) EDC track) after lunch and didn't do too badly. The car was bogging down a bit in 3rd gear round the top corner; the carb needs a bit of fine tuning, but overall I was amazed at how little went wrong. 4 small problems emerged throughout the day:1) The steering wheel is too far away so I'm pretty much driving with straight arms. This is actually pretty knackering after a while and also makes pulling out of a turn pretty difficult if you get it a bit wrong. I have got a spacer (cheers Oz) but havent decided the best way to fit it yet (basically involves attaching two sets of threaded holes together; I don't really want to bore one set out to remove the threads incase I need to use them in the future)
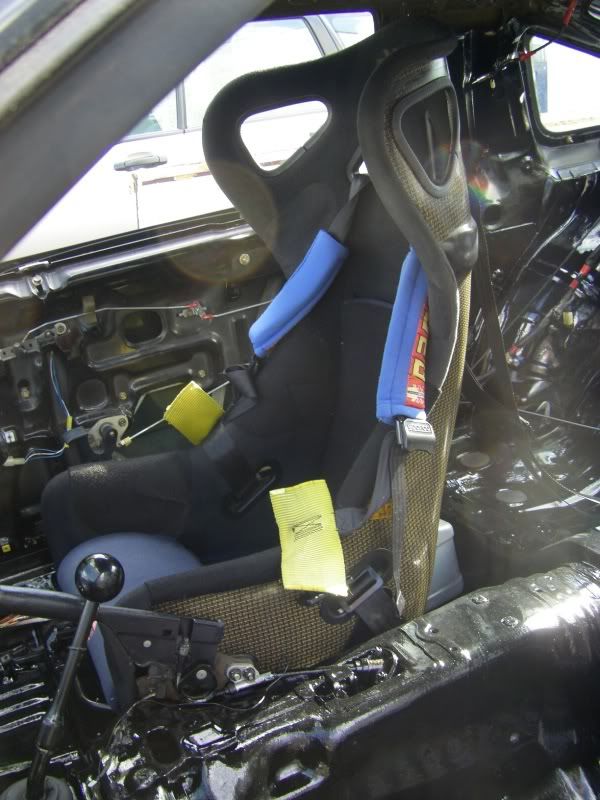
2) My seats are uncomfortable. They are reclined too much (adding to problem 2) and the frame digs in to your legs when drifting as they dont have enough side support)
3) The instrument panel jumped out of place for some reason. It may need some additional brackets around the place. Nothing major...
4) As we were jacking the car up to put the exhausts back on we noticed fuel dribbling out from the engine bay. Turns out the bung on the return pipe had come off. New bung (fuel pipe with a blocked end) fitted to get home.
Considering the number of things that could have gone wrong, and the fact that I set off thinking the Supra would be coming back on a trailer for one reason or another, I am over the moon. I just can't wait to get back out there.
I didn't get many photos as I was too busy grinning all day but here's a couple.
A quick video of my first outing on the small kidney after removing the exhausts and fitting the locked diff
http://www.youtube.com/watch?v=zyDS0p237jo&fea...
And some more photos sent by one of the photographers at the pod
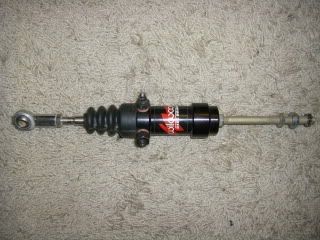
Note to self; Add coil overs to ever growing Xmas list.

Even though the day at the Pod had been a great success, there was still more spending to be done
The braided hose and insulation were to keep the fuel line to the carb cool to see if that solved the bogging down problem.
Even with the steering wheel on the closest factory adjustment my arms were still pretty much straight which makes it very difficult to turn the wheel quickly so I bought a 2" spacer which solved the problem. I also bought a new set of HT leads and some better headlight bulbs.
I then managed to get the scoop bracket finished and the scoop fitted just in time to go on the Miss Banzai London Tunnel run on 16th Oct. This was to be my furthest trip out without a convoy (every journey until now I'd had a mate following just in case,....) but no one else was going to the tunnel run and even my co-pilot pulled out last minute. So I filled the boot with tools and headed for the big smoke. I don't have many photos from that night, only
(Stolen from someone elses album)
and
The car was getting quite a lot of attention and Miss Banzai awarded me Car of the Night, which was totally unexpected and a massive honour. It really brought home what I had achieved which was cool.
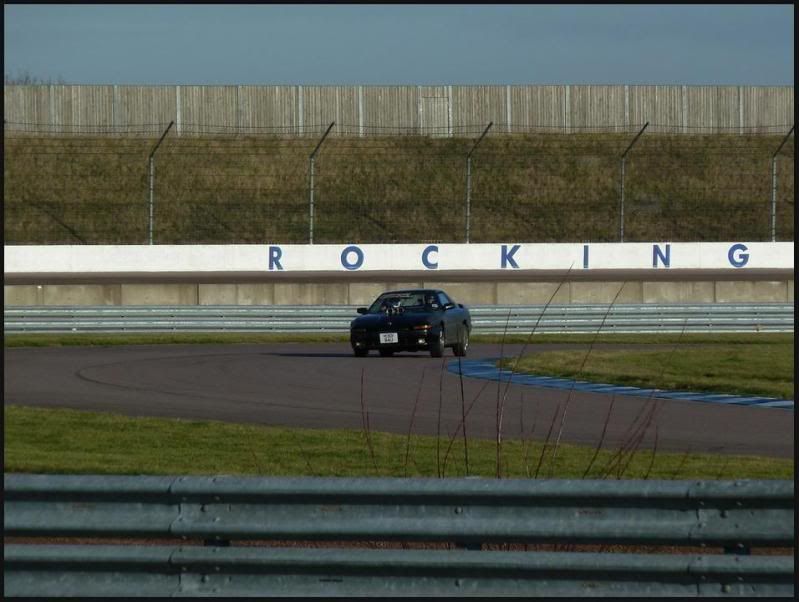
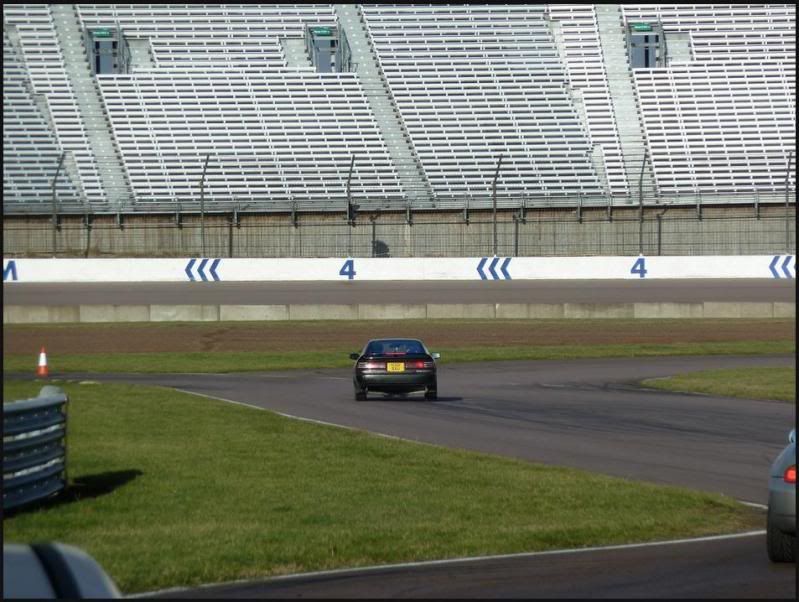
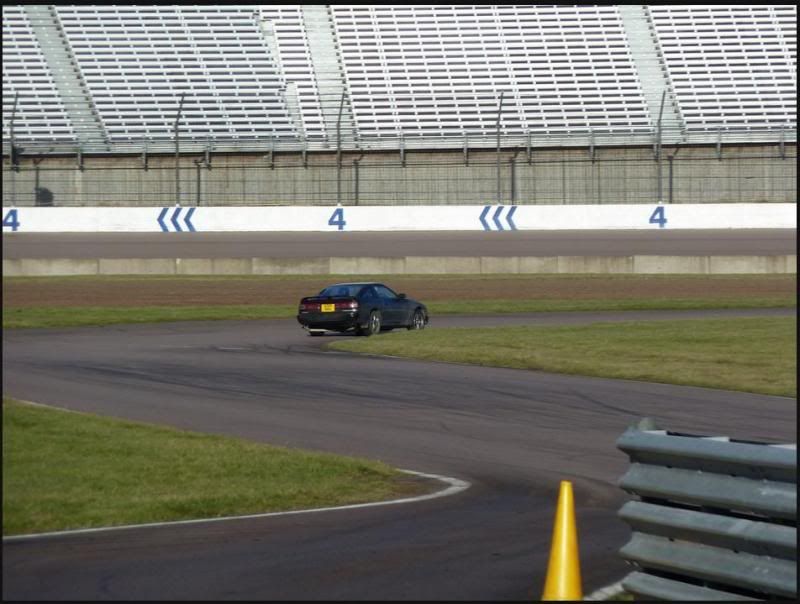
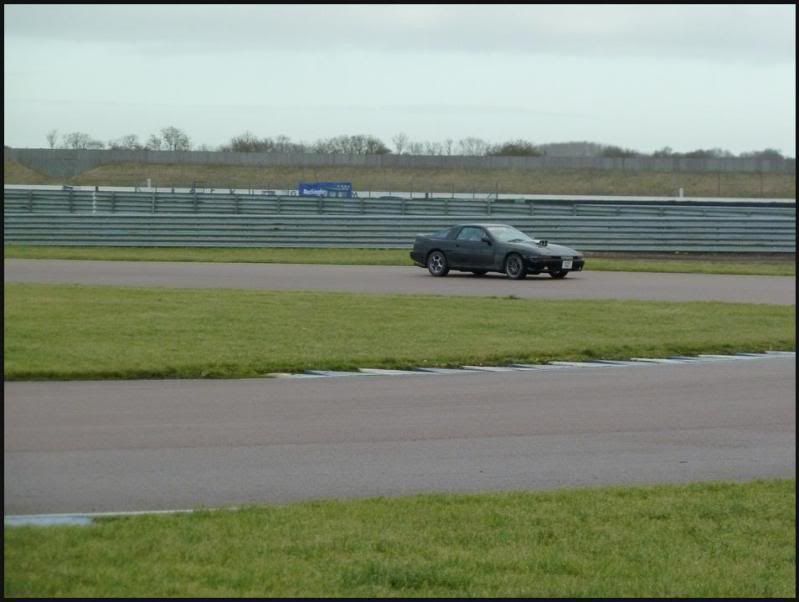
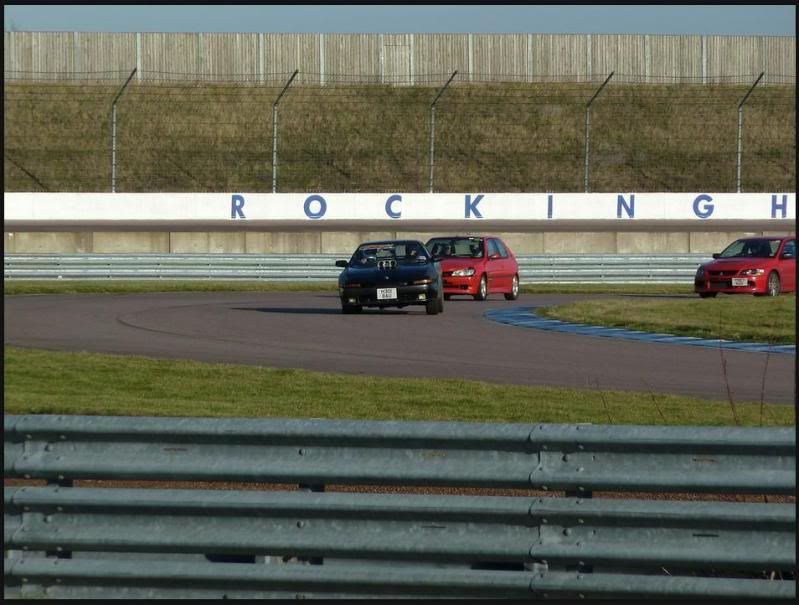
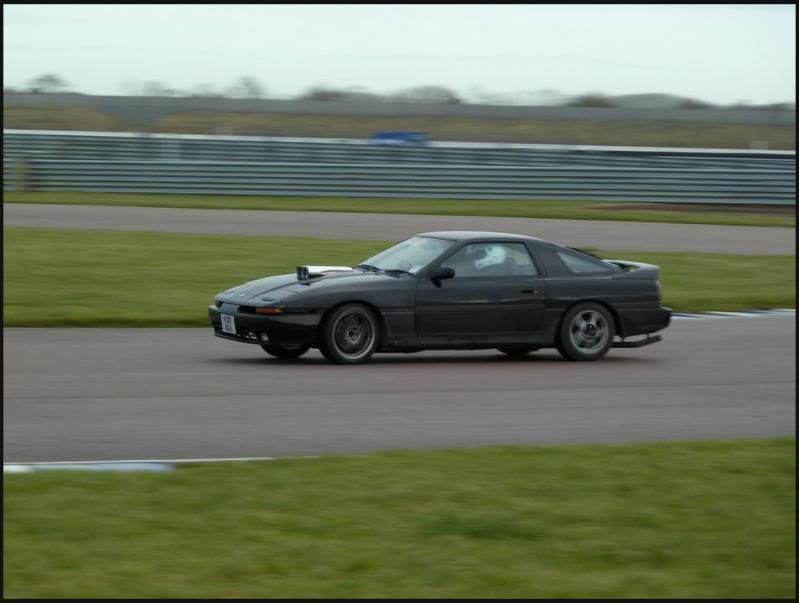
After the tunnel run I did one more drift day at the Pod and one open pit lane day at Rockingham (in December. It was COLD and the only heaters in the Supra point upwards at the windscreen) both without any major problems which I was amazed about - I had some annoying problems, 3 bolts on the power steering pump which I didn't know existed came undone at Rockingham(I thought the powersteering pump was one unit but it turns out the pump is mounted to a frame. I hadn't retightened these bolts when fitting the pump and they just came undone) which cost me about 2 hours to sort.
Here's some footage from Rockingham
A couple of (quite similar) clips:
http://www.youtube.com/watch?v=N97Omc6bdF8
http://www.youtube.com/watch?v=U7NCN2wDFrQ
and some in car footage (apologies for the long delays at the beginning and ends before there's any action, my video editting software screws up the sound and I wouldn't want you to be denied that
)skip to 0:55 on this vid for the start of the track action.
http://www.youtube.com/watch?v=fdyp2RxXWi4
skip to 1:55 on this vid. Stop watching at 7:50 as I forget to turn the camera off. I had a pretty (short but) good battle with a Noble after being caught up in traffic at 6:50. Unfortunately I think I actually have a chance, try to hard and he gets away

http://www.youtube.com/watch?v=Gp1g5NgMEXM
and some pics
Sorry; getting a bit out of sequence here but before Rockingham I took the exhausts off to paint them black. The silver "High Temperature" exhaust paint I used originally had flaked off.
I removed the exhausts from the car, wire wheeled them back to bare metal, cleaned them twice with a clean cloth and white spirit to get rid of any residue or dust and then applied 3 coats of high temp paint, curing it with a hairdryer in between coats to try and get it to bond to the pipe better.
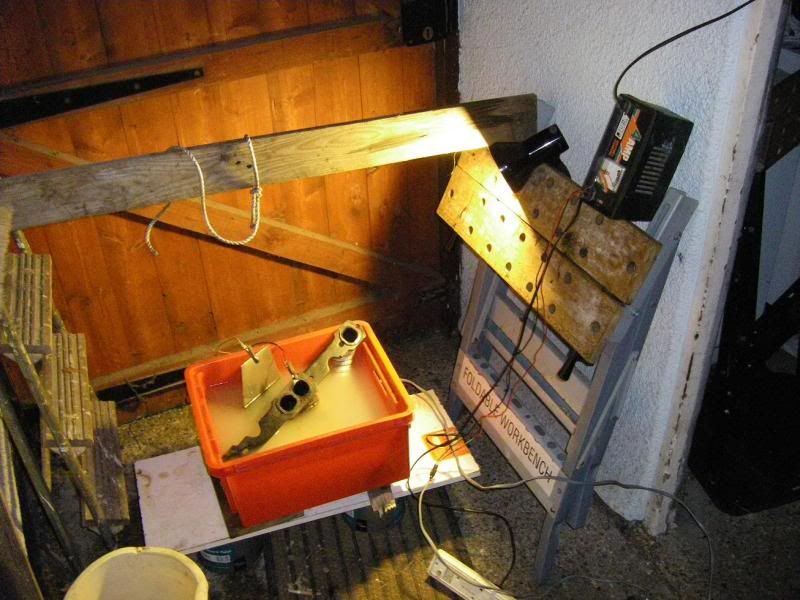
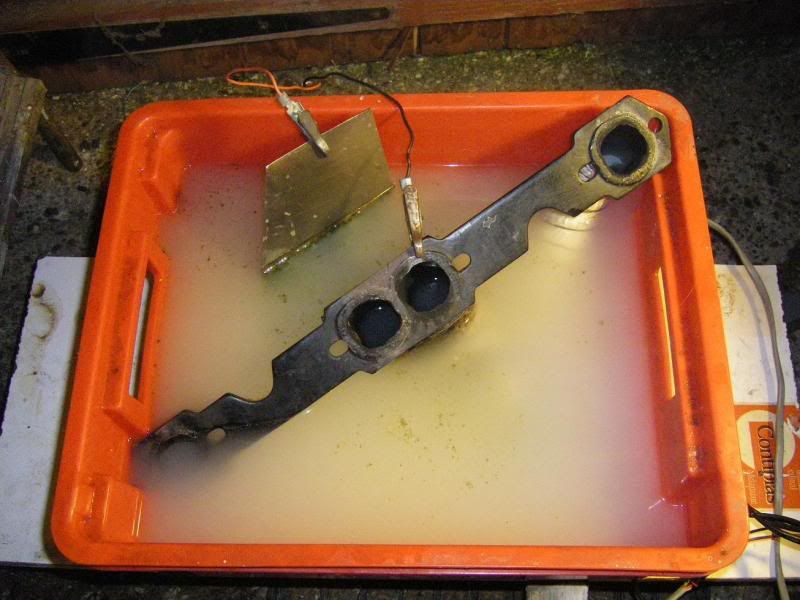
The headers got similar treatment but without removing the wrap so I cleaned them up using electrolysis which I learned about from a fellow PHer (How's the XR2 coming on Max?), painted them with 3 coats of 650 and cured in the oven at 200deg for 10 mins between each coat (the joys of shared living!). I then re-wrapped the headers - again, a job I never want to have to repeat.
I fitted all new gaskets as the old ones were made of cheese and had to use a selection of header bolts to make tightening them easier - different screw head type depending on the position - standard hex head, double hex ARPs and socket head cap!
Some photos:
After painting:
and then curing the paint in the oven before wrapping
Curing the 300deg engine paint on the rear sections of the exhausts (using my housemate's hairdryer
)
Restricting the airflow so the pipe gets hotter
Curing the 650deg exhaust paint on the down pipes
All the parts ready to go on the car
The headers fitted

Everything fitted
I also bled the brakes and filled them with racing fluid in preparation for Rockingham.
January 2011
After getting some good track time and shaking out some of the problems I decided it was time to do some of the jobs that had been bugging me for a while.
these included:
Minor jobs:
Making and fitting a new bracket for the alternator as the original ones weren't up to much (the alternator belt drives the water pump so lose than and stuff gets very warm!)
Making and fitting a new bracket for the accelerator cable as the old one was no longer any good after fitting the 2" carb spacer
Make some new mounts to hold the scoop more securely
fix the bonnet latch bracket
Major jobs:
Buy and fit new seats
paint the interior black whilst the seats are out
Swap the cam for a mild street cam I'd bought at a swap meet
Refurb the fuel tank whilst it was out for the fuel pump (the tank is a prime spot for serious tin worm on the Supra as are the tank straps)
Fit new fans as the previous set weren't sealed on to the rad very well
Fit speedo drive and cable.
Sorry for the randomness of this now, I will just post the pics from all the jobs above as I can't remember exactly what order they occurred in. Hopefully you can stick with it...
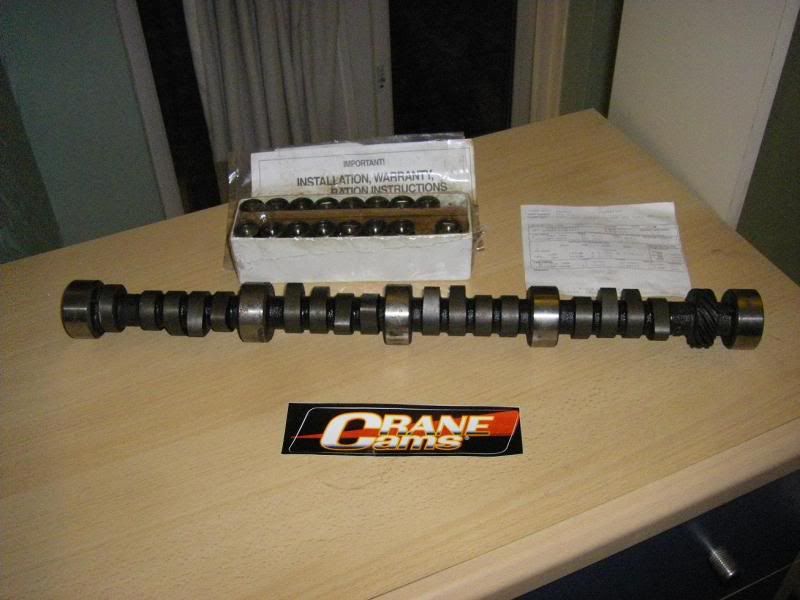
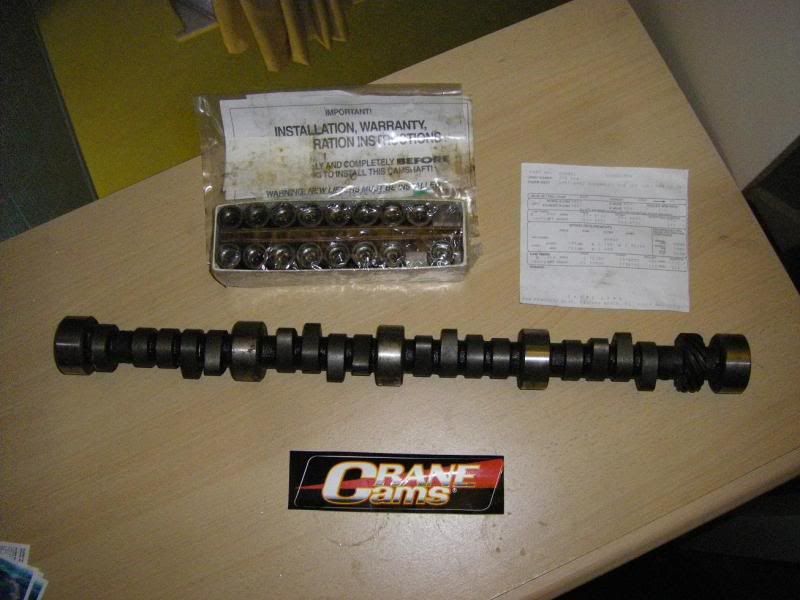
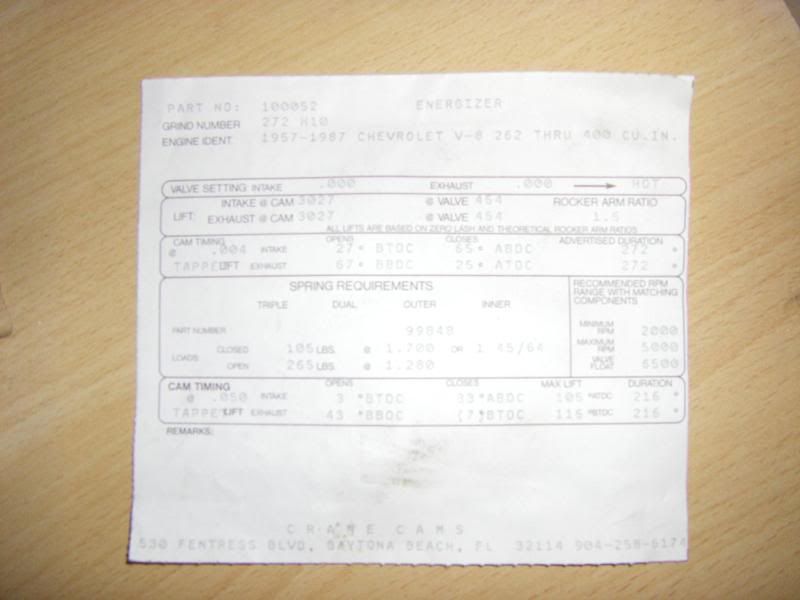
Cam:
The cam is a 272 duration Crane cam which came 2nd hand but unused with lifters for £40. The cam that Goodwrench put in this particular 350 is really restrictive so this was a nice easy way of letting it breathe more easily.
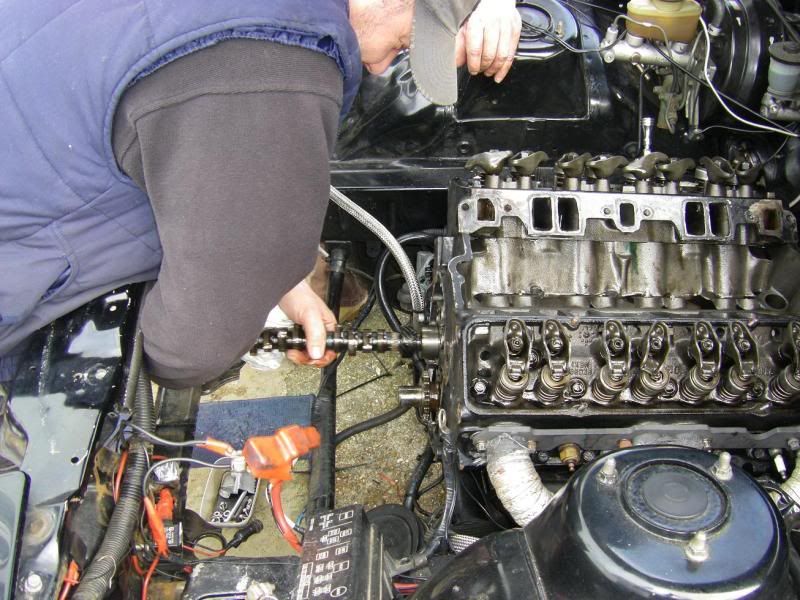
The Chevy is a single cam engine with push rods. This means the cam is mounted inbetween the V and has to be fitted/removed forwards. This means everything has to come off the top and front of the engine, the rad and fans come out, bumper etc etc
Remove Carb, inlet manifold, fuel pump and rocker covers and then the push rods can be taken out and placed in order in a very high-tech V8 jig
The old cam was then removed
compared to the new one
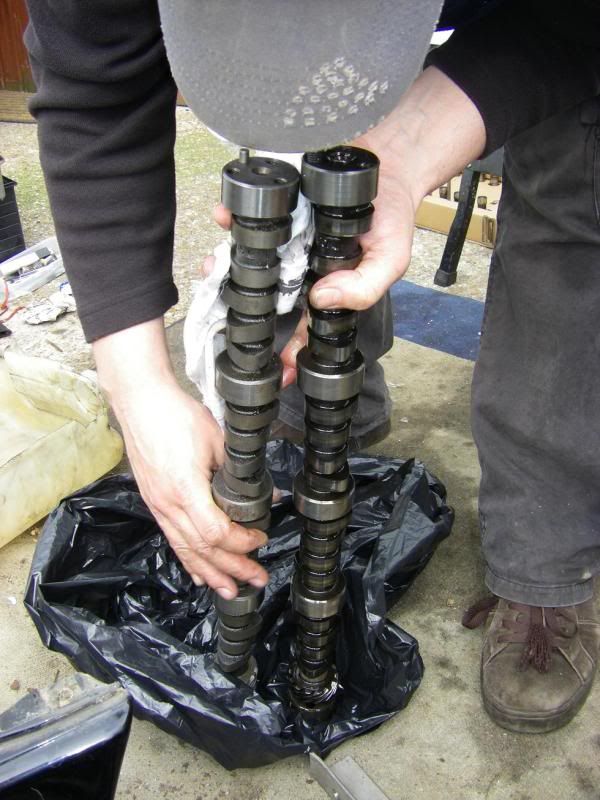
and the new one greased up and fitted (not an easy job)
Then replaced everything in reverse order from being removed using new gaskets.
Going from:
to
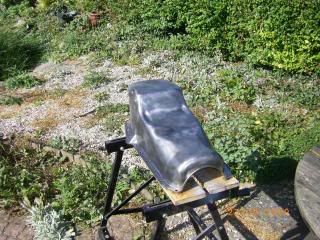
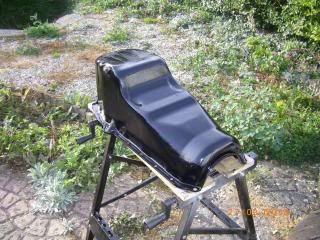
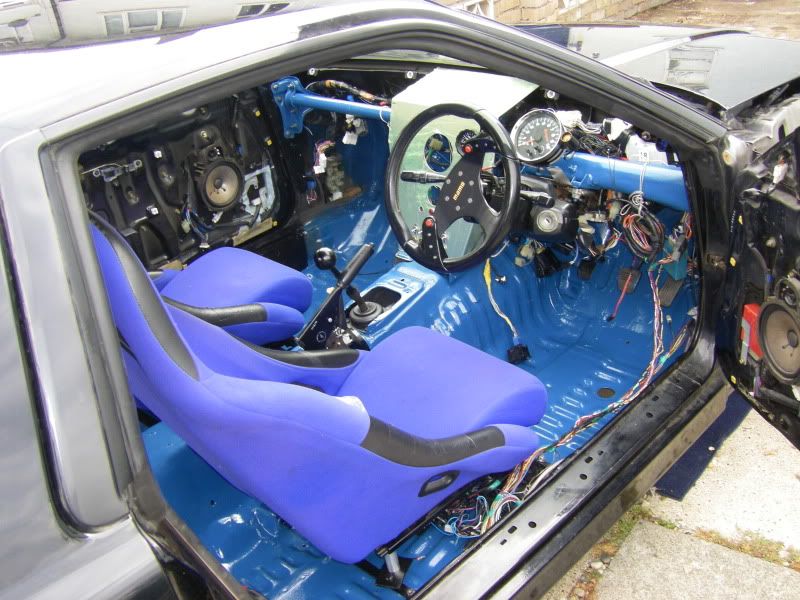
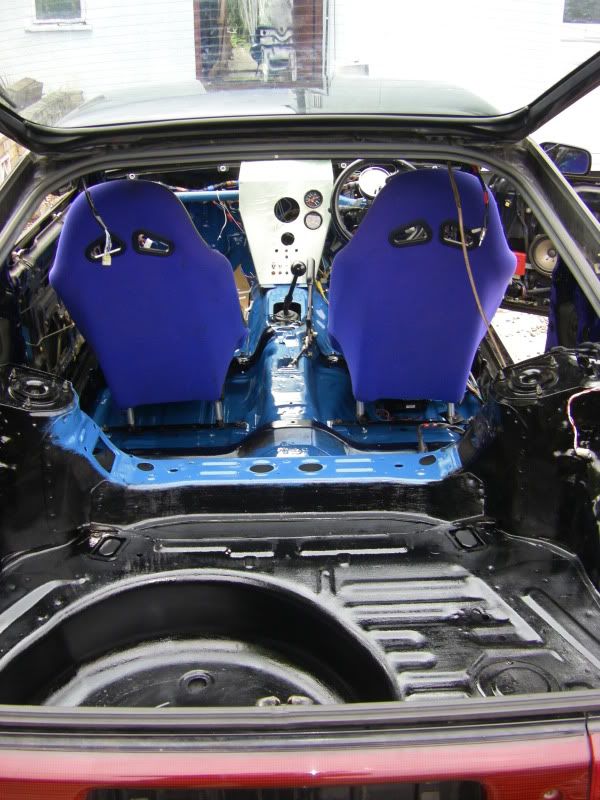
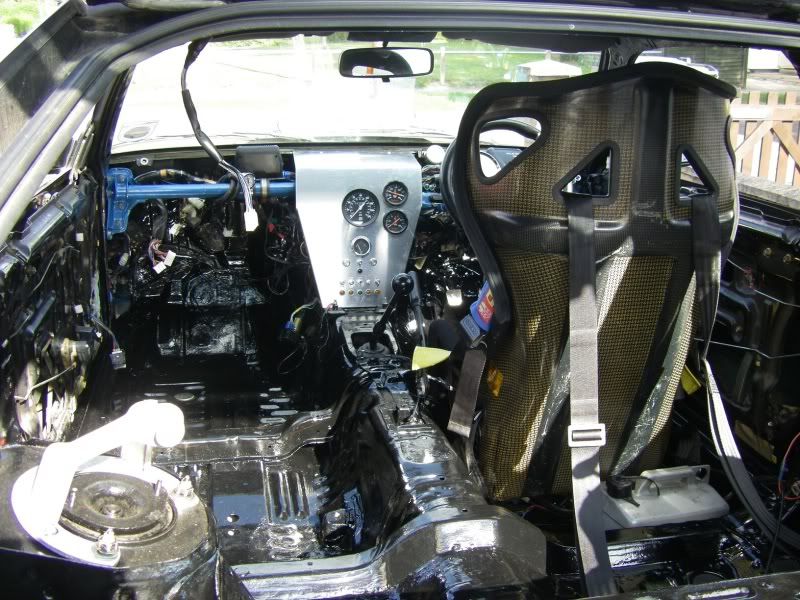
Seats
As I needed to get in the car with a helmet on and I'm 6'1, I needed the new seats to be as low as possible so I set about finding some side mounted ones. First I bought this
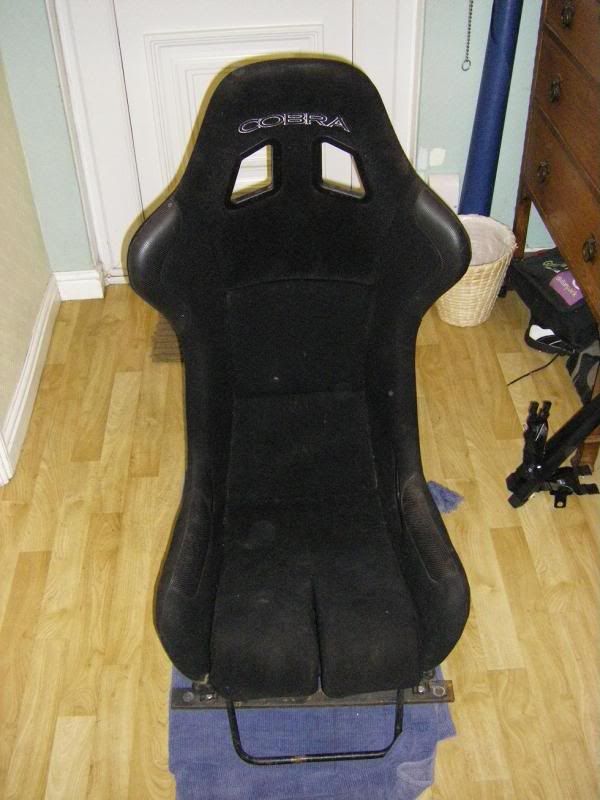
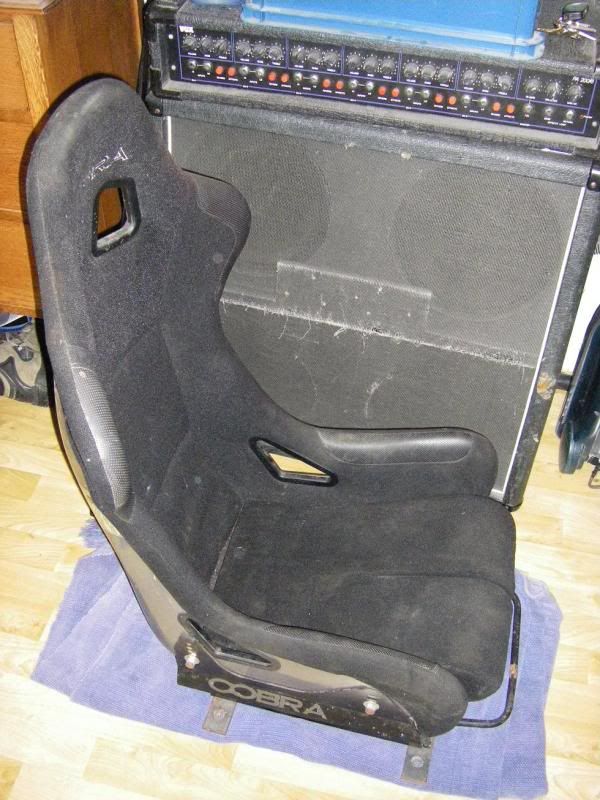
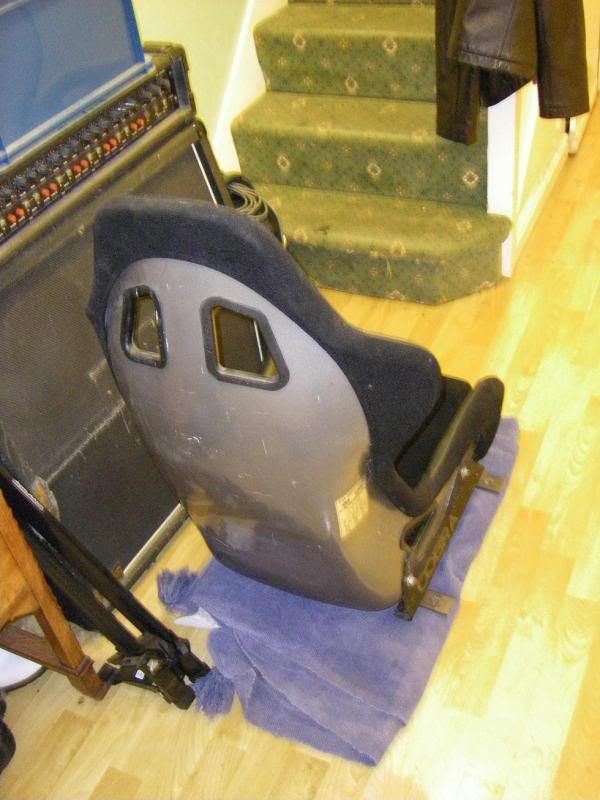
and then this
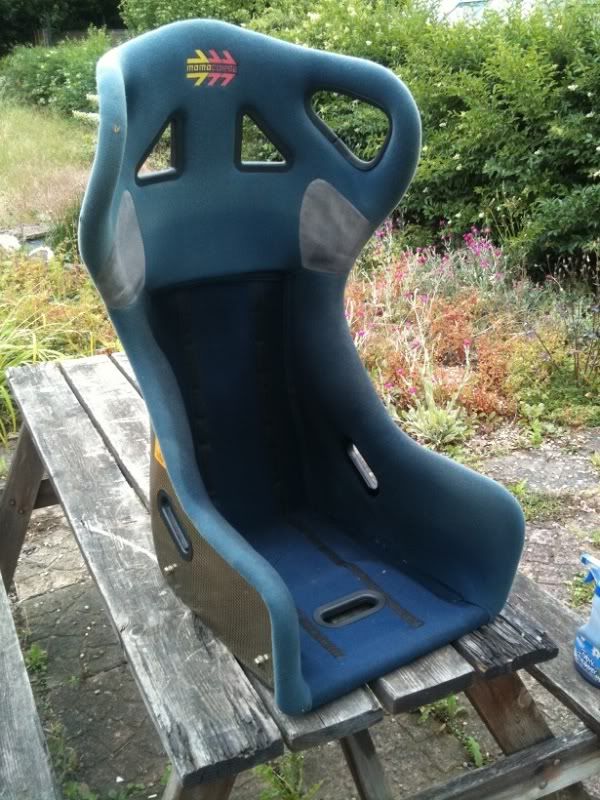
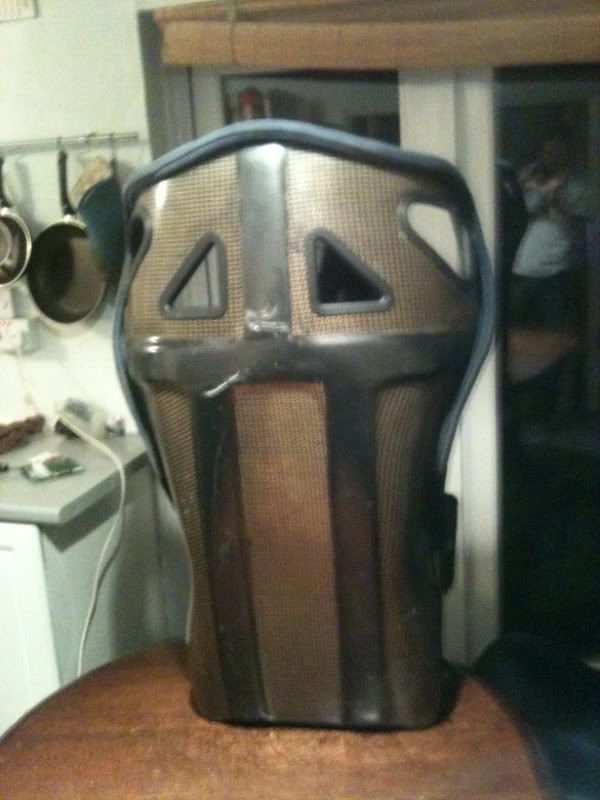
a Carbon fibre Mome Corse Extreme
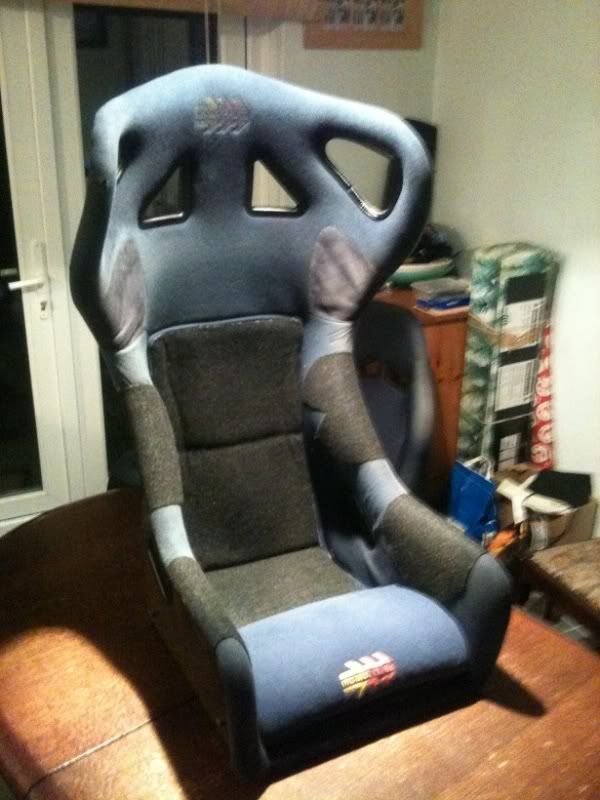
and then sprayed it black with upholstery die and fitted it

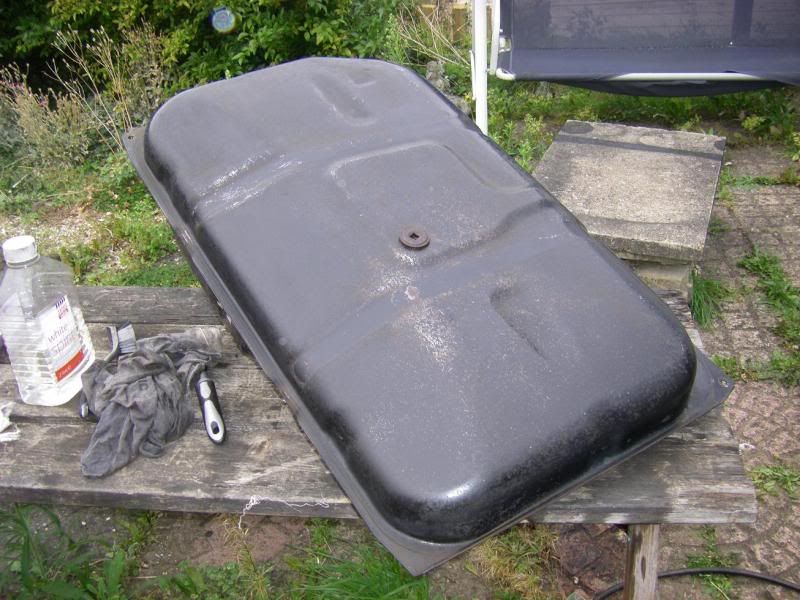
Fuel tank
When I dropped the tank I was surprised how good condition it was in considering some of the stories I had heard on the Supra forum, but then mine is an import so is a bit cleaner. So all I needed to do was clean it up and paint it.

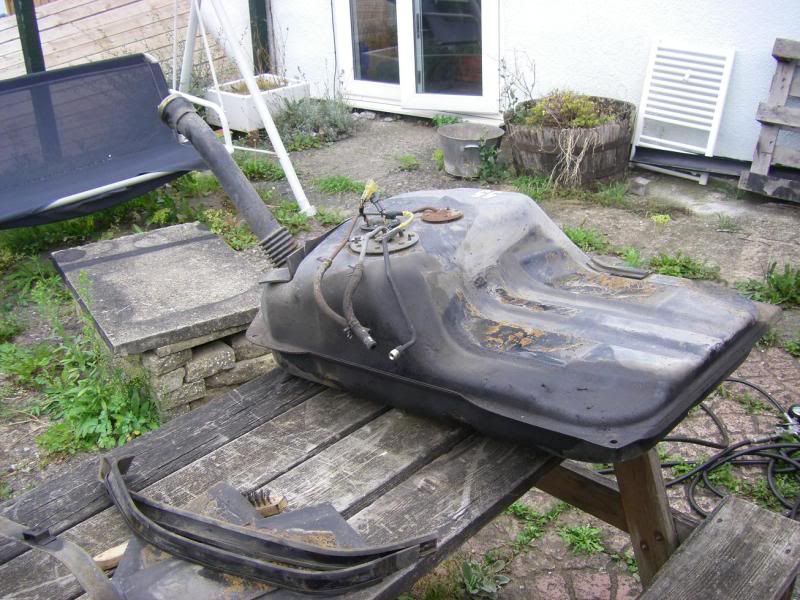
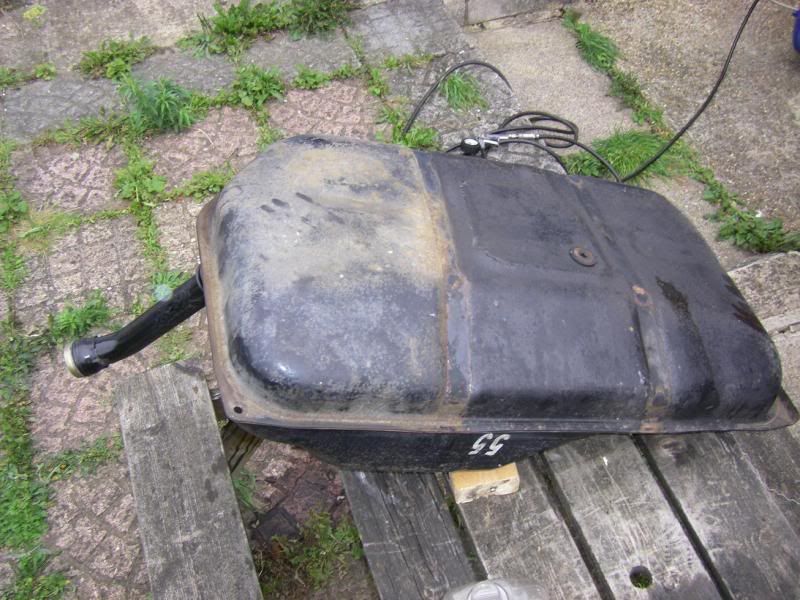
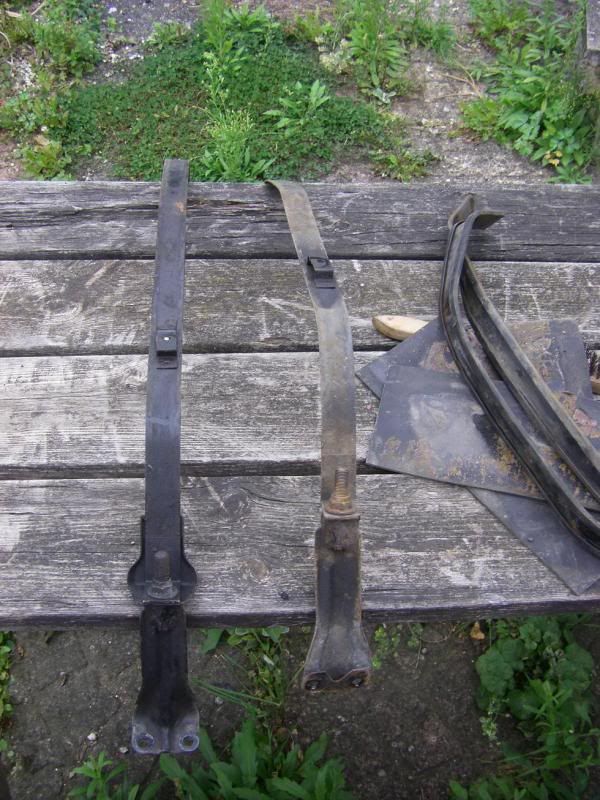
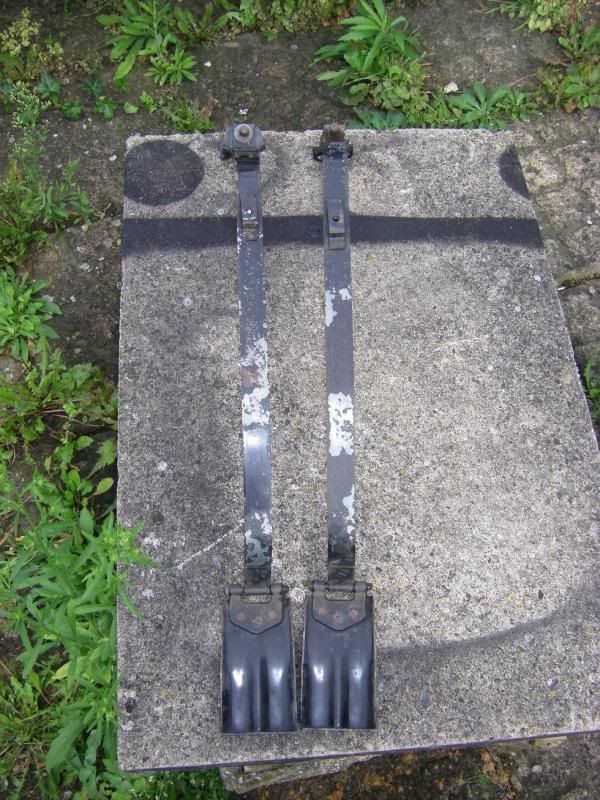
The two tank straps were also in good condition and just needed a clean up and some fresh paint
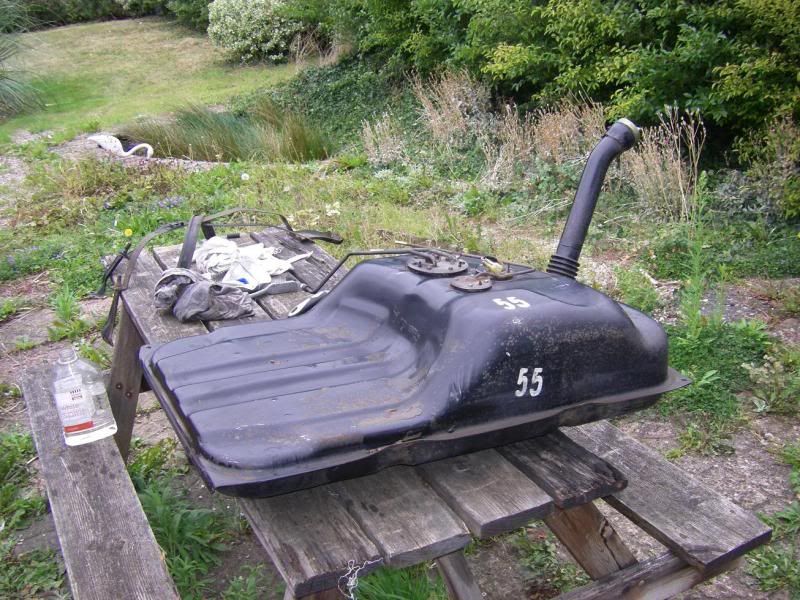
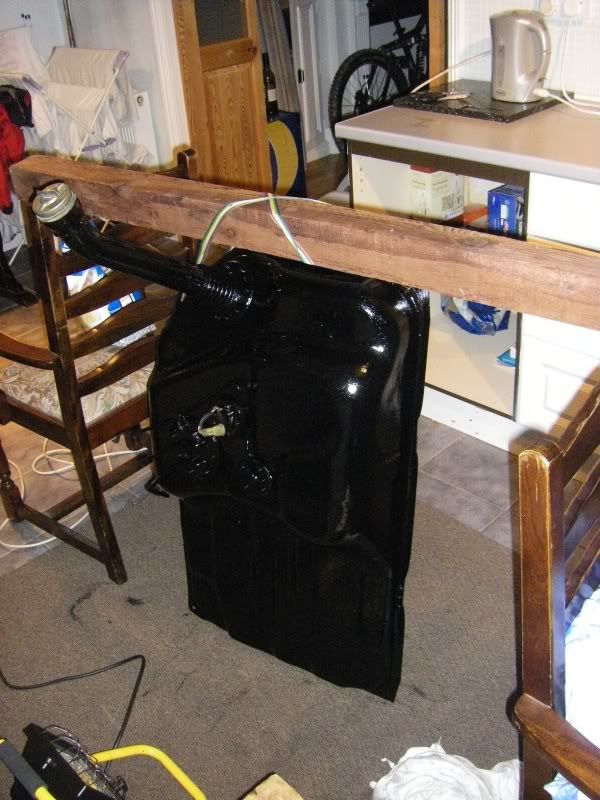

I thought while I was under there and lots of stuff was removed it was a good time to get paint on as many parts as possible
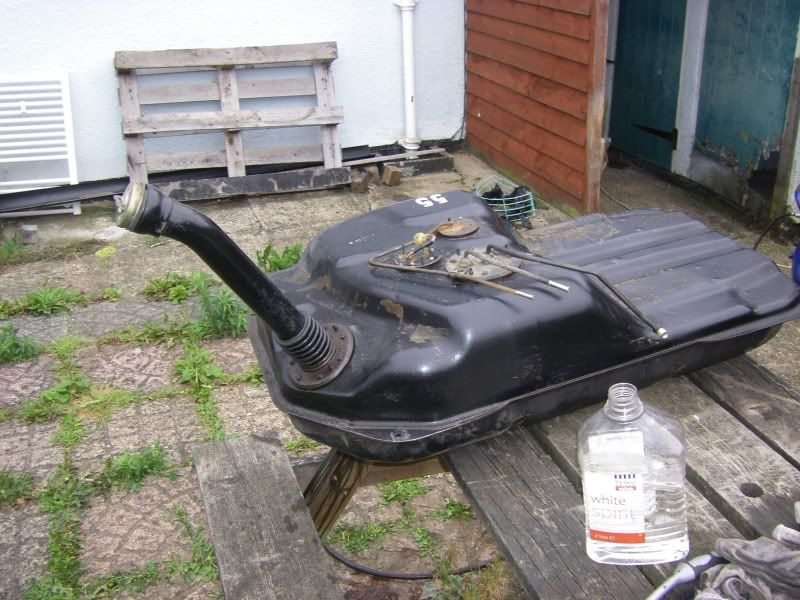
When I fitted the V8 I didn’t remove the factory electric fuel pump from the tank so decided it needed removing so I made up a new pick up for the fuel line
With 3 coats of Hammerite on the tank, Underseal rubbed around the seam and the fuel hanger and pick up replaced the tank was ready for the rubbers to be reapplied and new fuel lines fitted
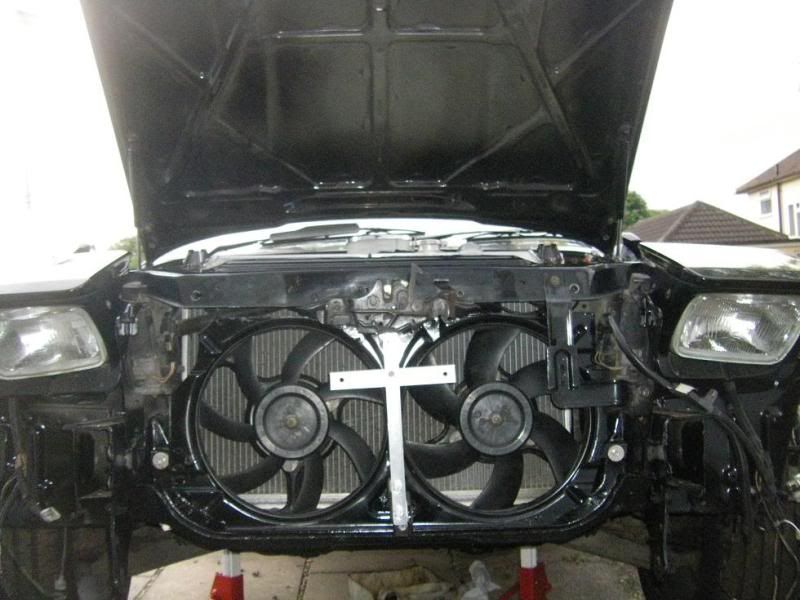
Fans
Someone on the mkiii supra forum had identified that Mondeo fans from a certain era of mondeo fit the Supra rad perfectly, so a trip to ebay and £20 later I was the proud owner of some new fans. The fans I'd fitted before had to go in front of the rad and blew air through it, however the metalwork on the supra is so bendy that I couldn't seal the fans in and a lot of the air went round the side of the rad. The mondeo fans mount to the back of the rad and can now cool the engine so much the thermostat closes in traffic!
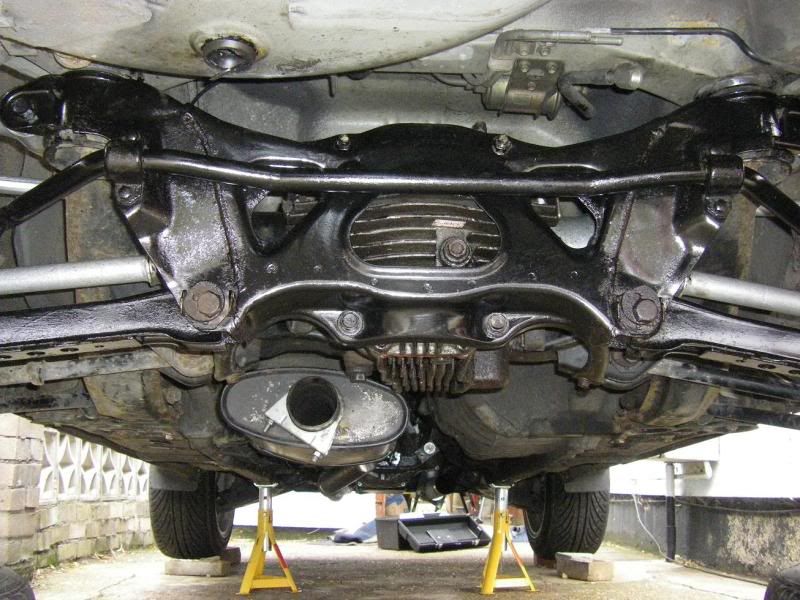
I also fitted a strut brace front and rear to stiffen it up a bit. Luckily it fitted perfectly once I'd turned it upside down to go under the carb. The rear one isn't quite as manly so doesn't warrant a photo however I have since sourced the sturdy one and fitted this, see later in thread....
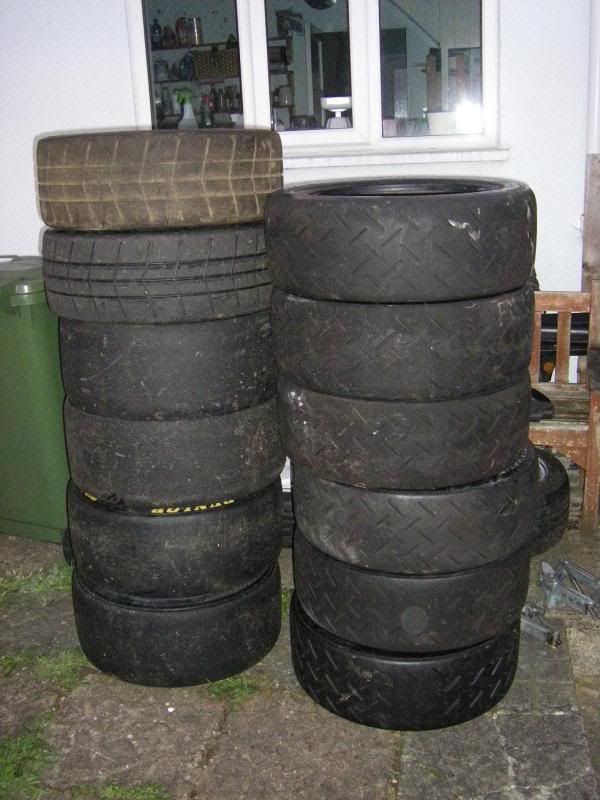
So with all this done it was now the summer and I was hankering for another track day. I booked Snetterton for 2nd August, changed all the fluids and got all my track tyres ready
The open pit lane day was just before the Touring car round at Snetterton so the place was full of touring cars getting some cheeky practice in before the weekend race. No photos of this, sorry
I hope you managed to stay with it and tolerated my ramblings and picture overload. Hopefully I will have some more updates for you soon
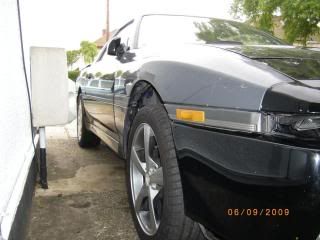
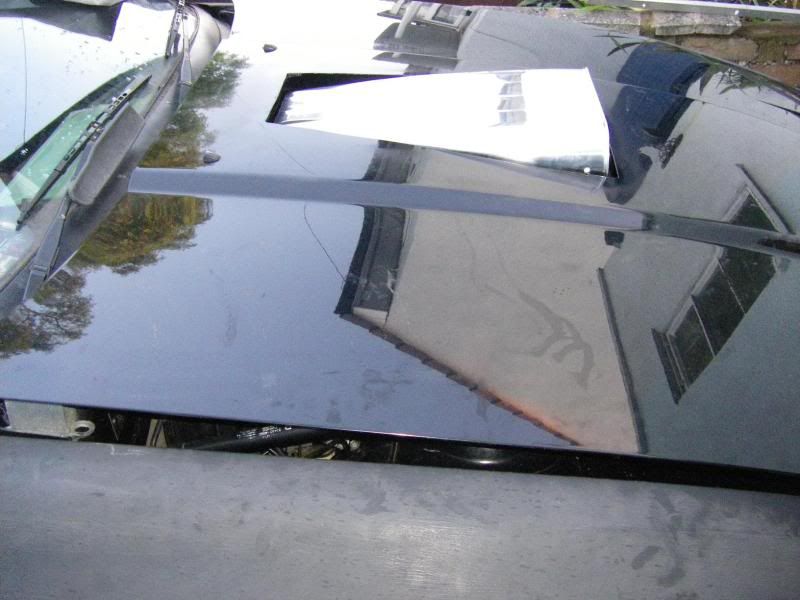
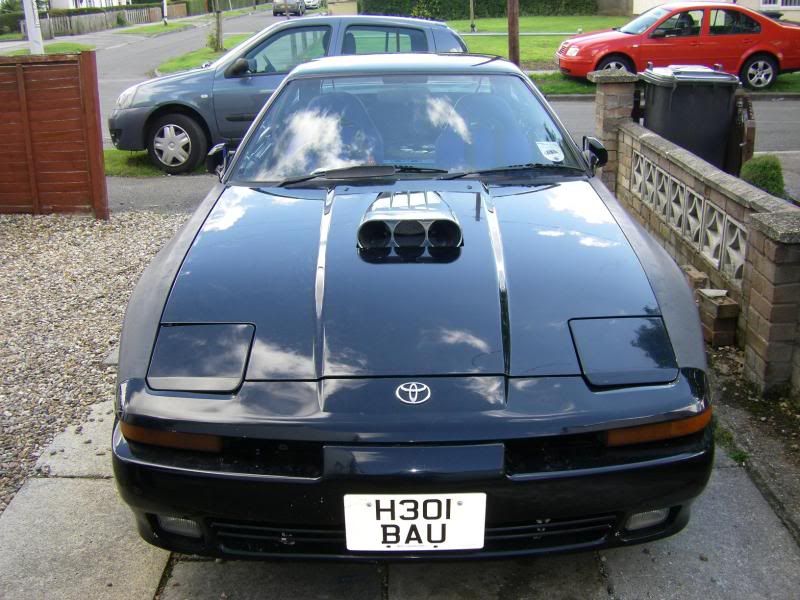
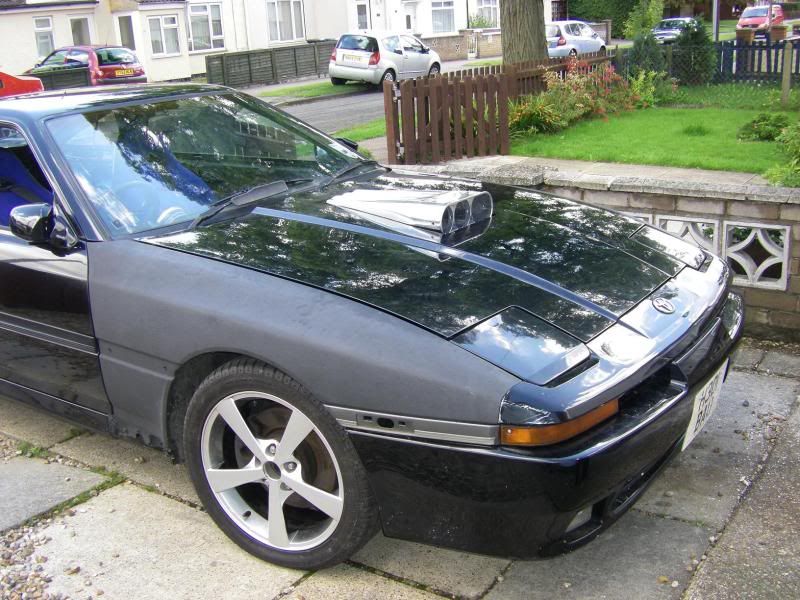
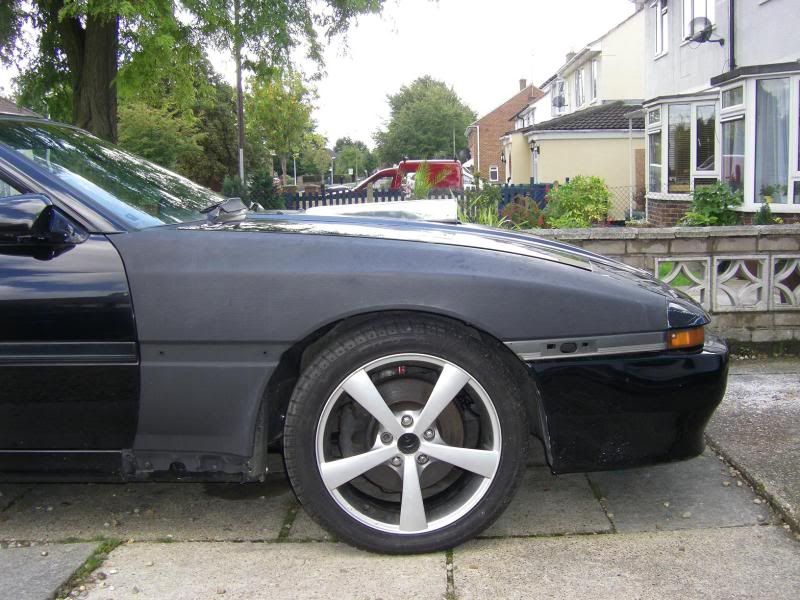
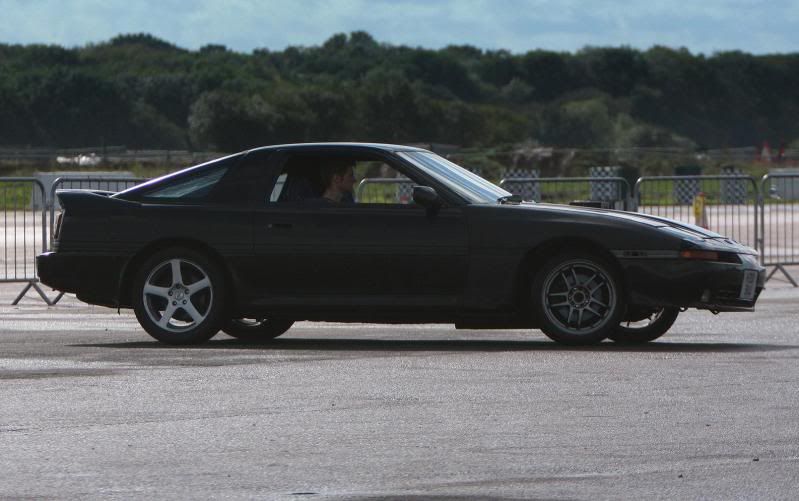
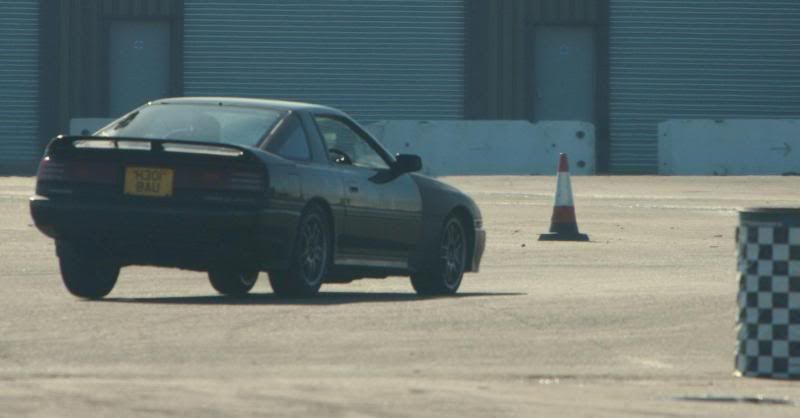
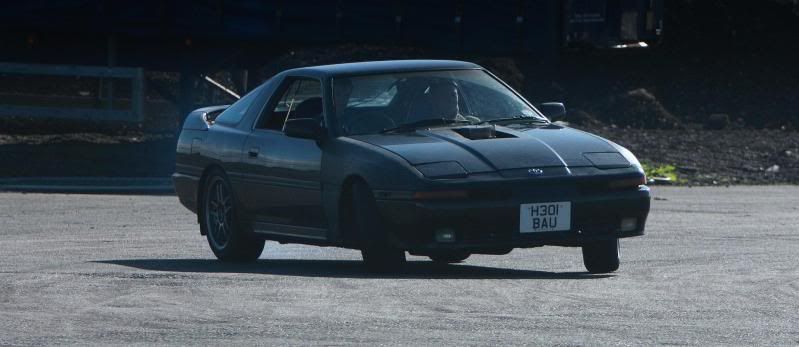
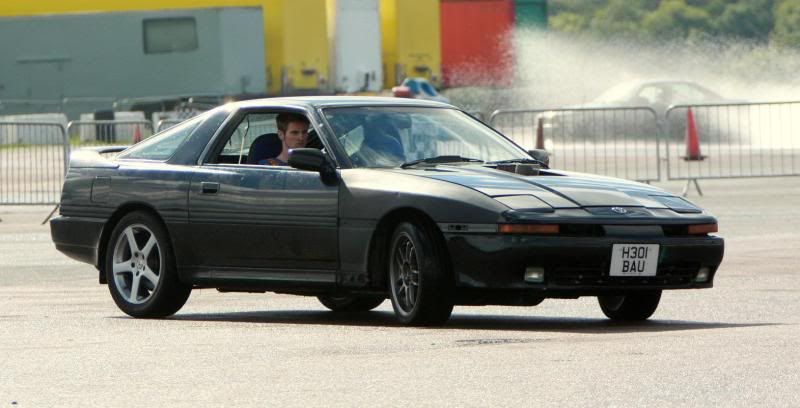
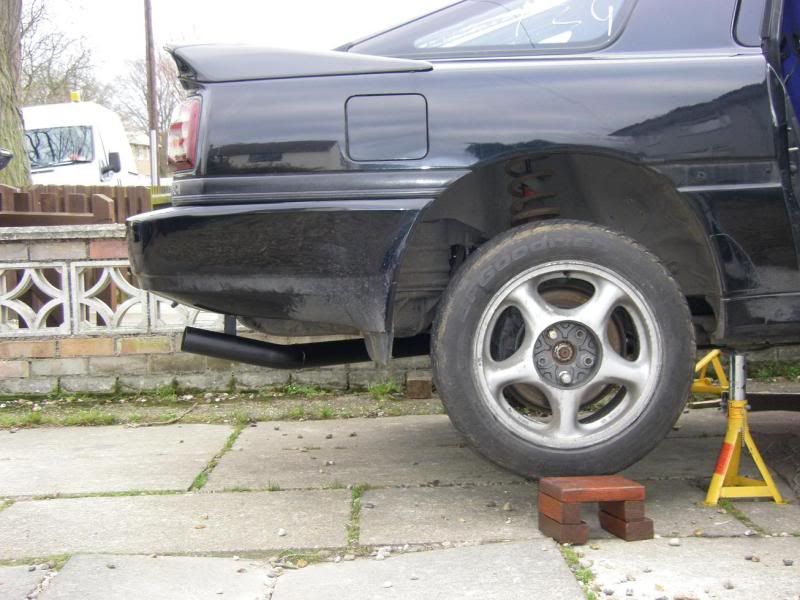
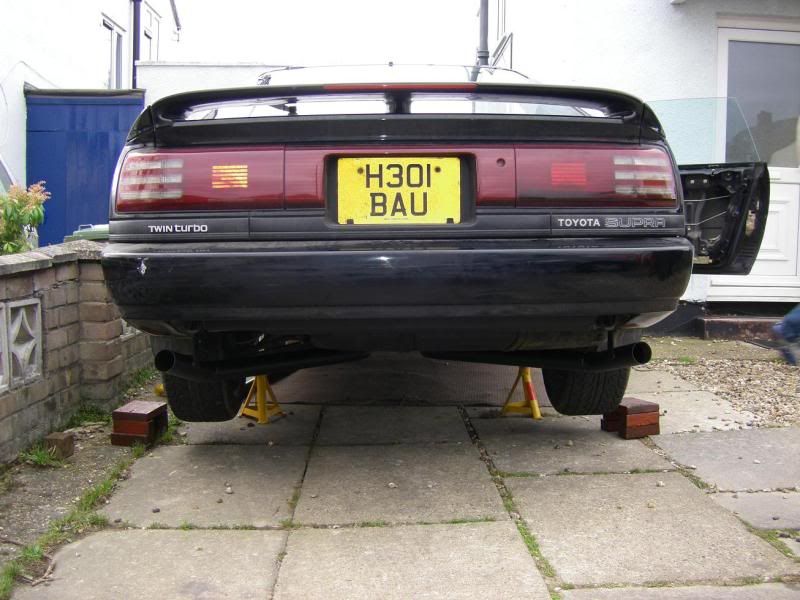
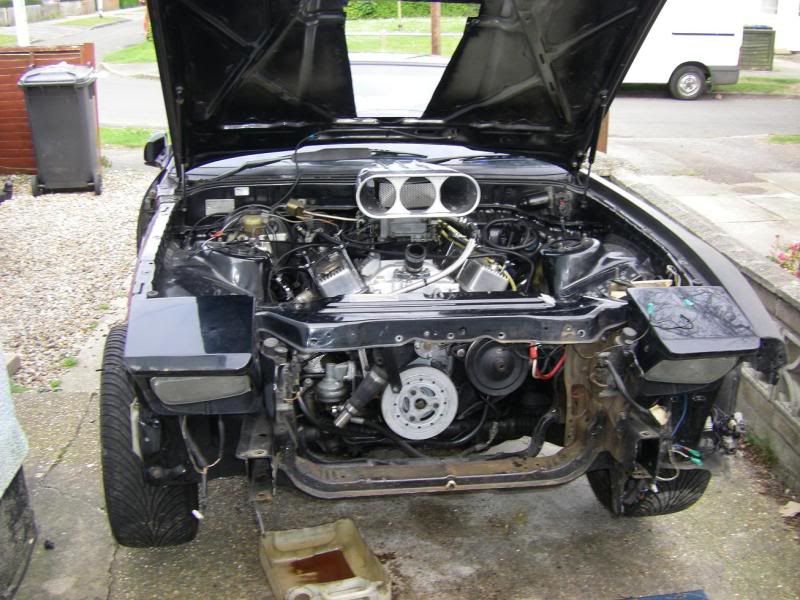
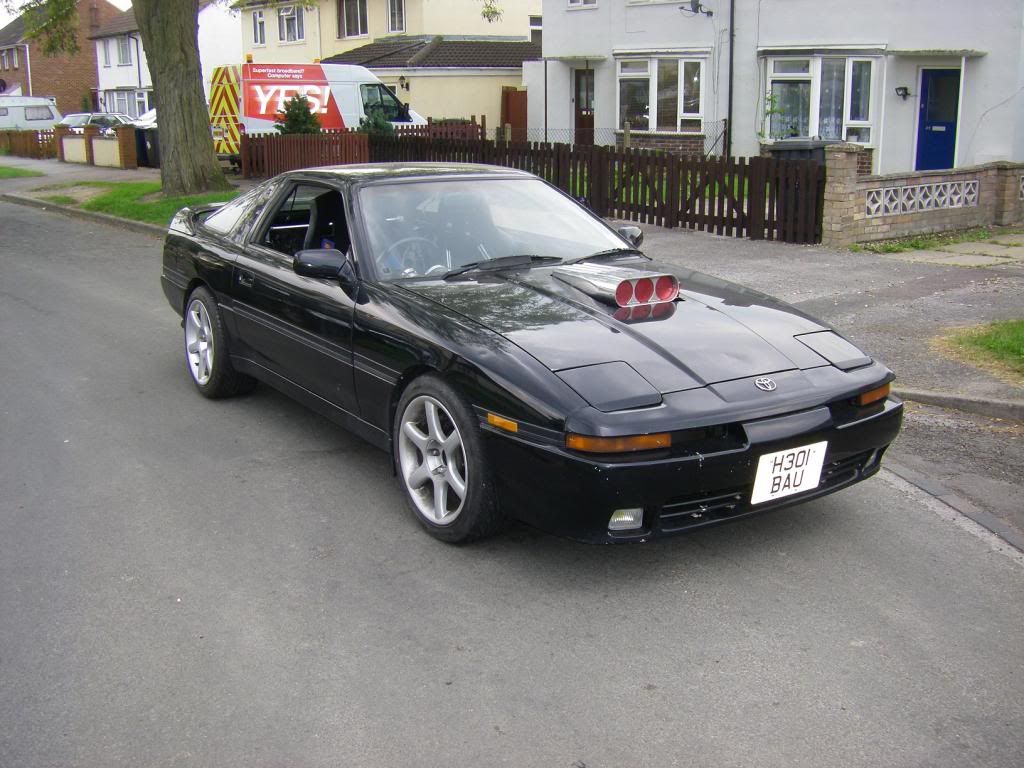
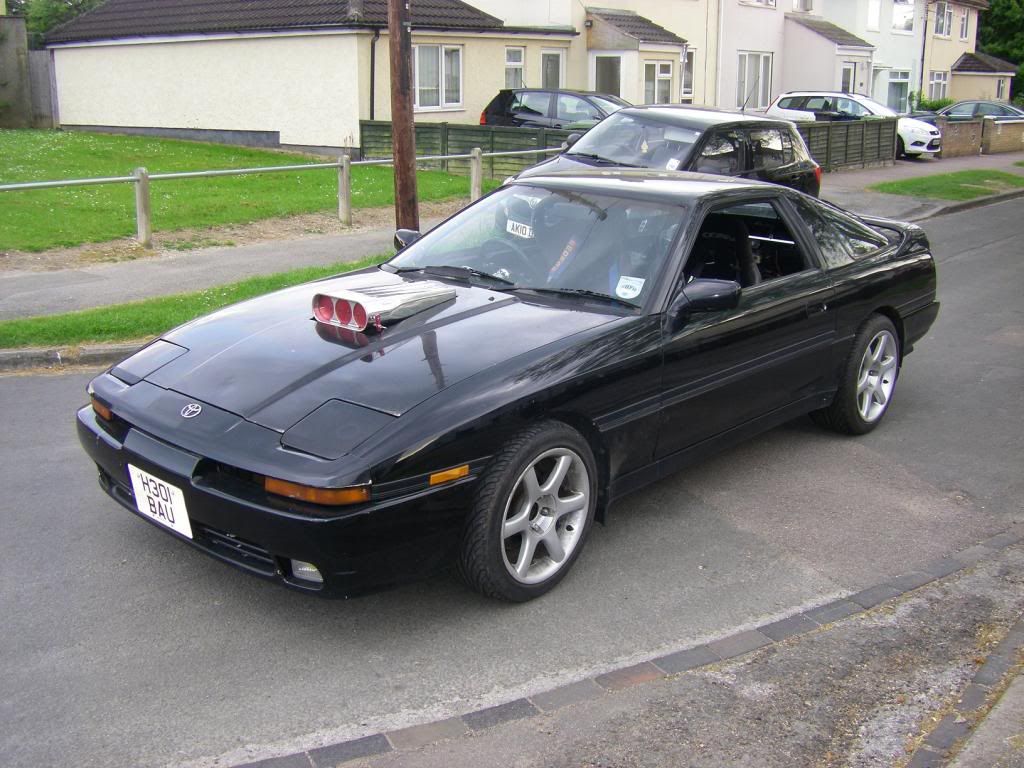
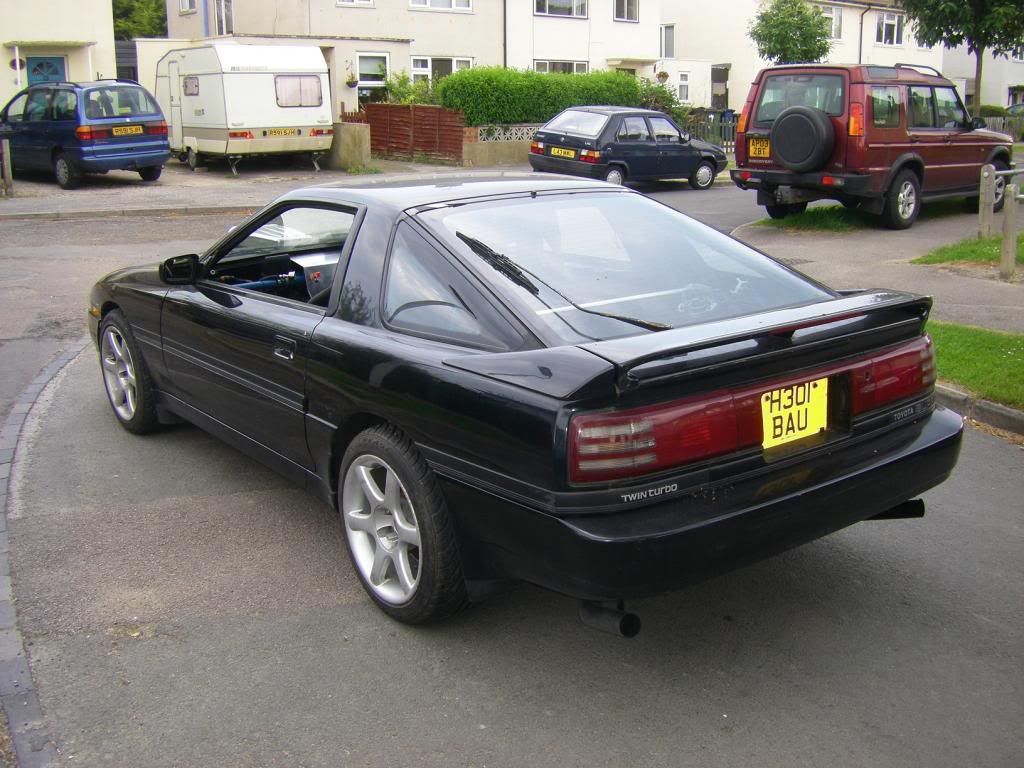
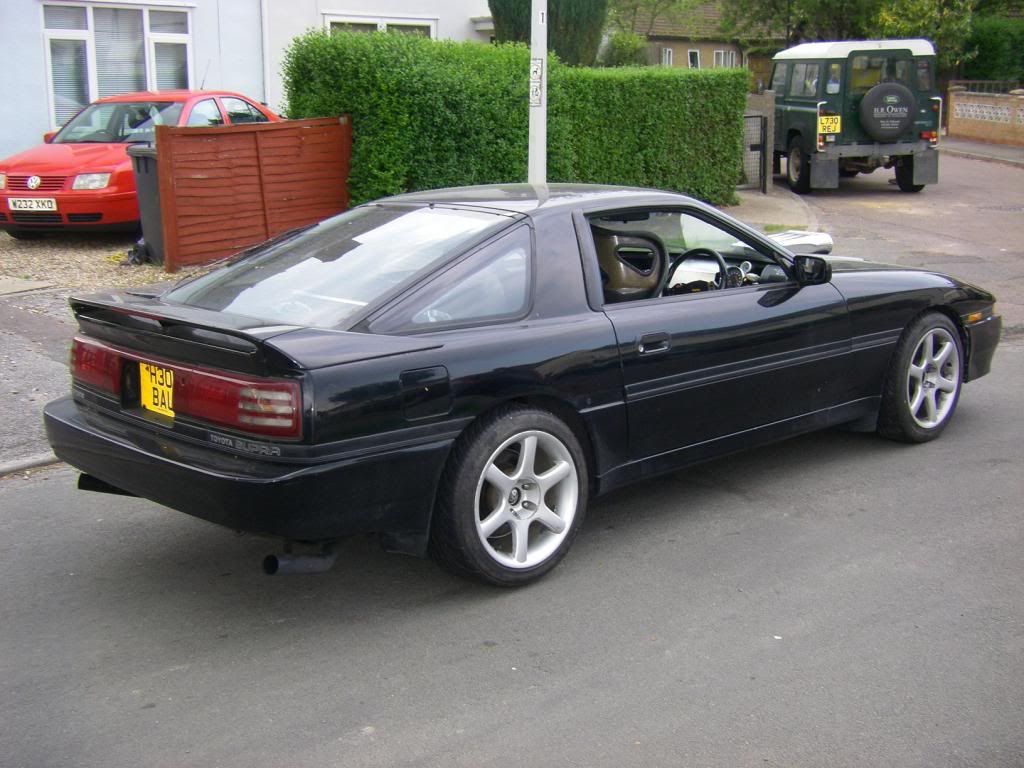
Just in case I didn't include them, here are some relatively up to date pictures

Edited by Figgle on Friday 24th March 01:57

Incredible effort, absolutely love it. That is one of the most personal builds Ive ever seen, clearly all carried out exactly how you wanted it and its utterly unique as a result.
Real shame the engine lunched itself though. Ive bookmarked this and hope you manage to get it back on the track in the near future!
Real shame the engine lunched itself though
. Ive bookmarked this and hope you manage to get it back on the track in the near future!Thanks guys 
Titwonk - no sorry mate, they're the only ones i've got. The passenger side was easy, just welded a tube onto a section of box and welded that to the front subframe. The Corvette engine mounts have ears that drop over either end of the tube, put a bolt through and Robert's your mothers brother. The driver's side was a little more fiddly as the mount had to span the power steering pump but it wasn't too much of a hassle. Next time I have the bonnet up I'll try and get some better pics for you.
Repent - Thanks a lot mate, that's really nice of you to say. It is a shame about the lump but it's all part of the fun
Hi Figgle good first post!!
Were you at JAE back in 2011? I might have had a chat with you about this build, I was on the MKIVsupra.net stand with my piddly little NA lol. If it was you, you had all your build in a nicely done binder. Was really impressed. I sold my supra due to work, but intend on getting another to have some V8 goodness installed
Were you at JAE back in 2011? I might have had a chat with you about this build, I was on the MKIVsupra.net stand with my piddly little NA lol. If it was you, you had all your build in a nicely done binder. Was really impressed. I sold my supra due to work, but intend on getting another to have some V8 goodness installed
Gassing Station | Readers' Cars | Top of Page | What's New | My Stuff