E46 M3 Project
Discussion


Differential rebuilt
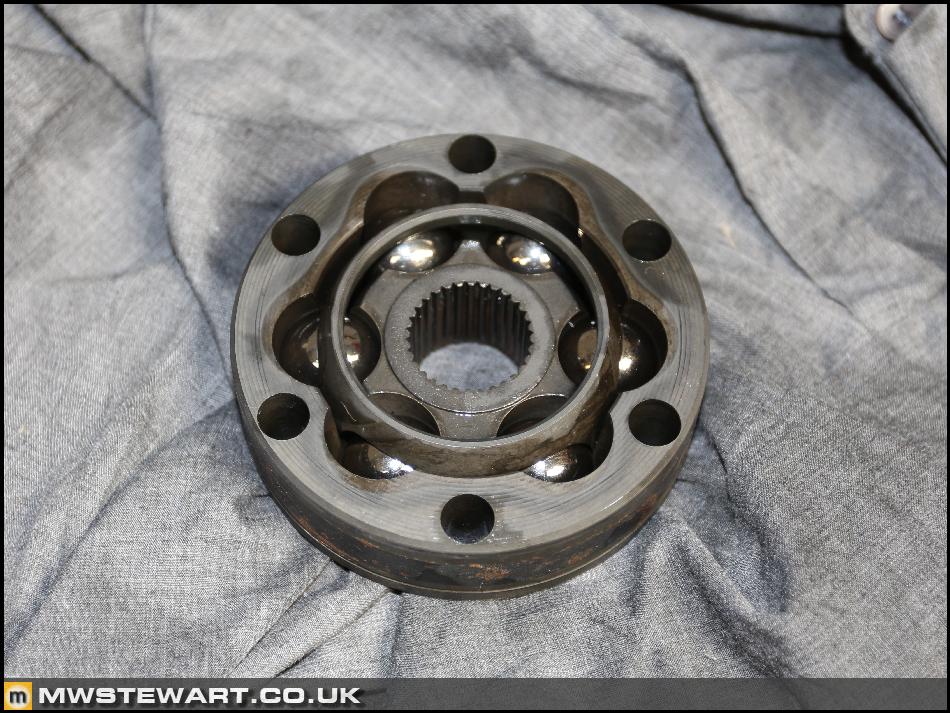
The differential arrived back from JC Racing and I had to take a few photos, because it's a work of art!
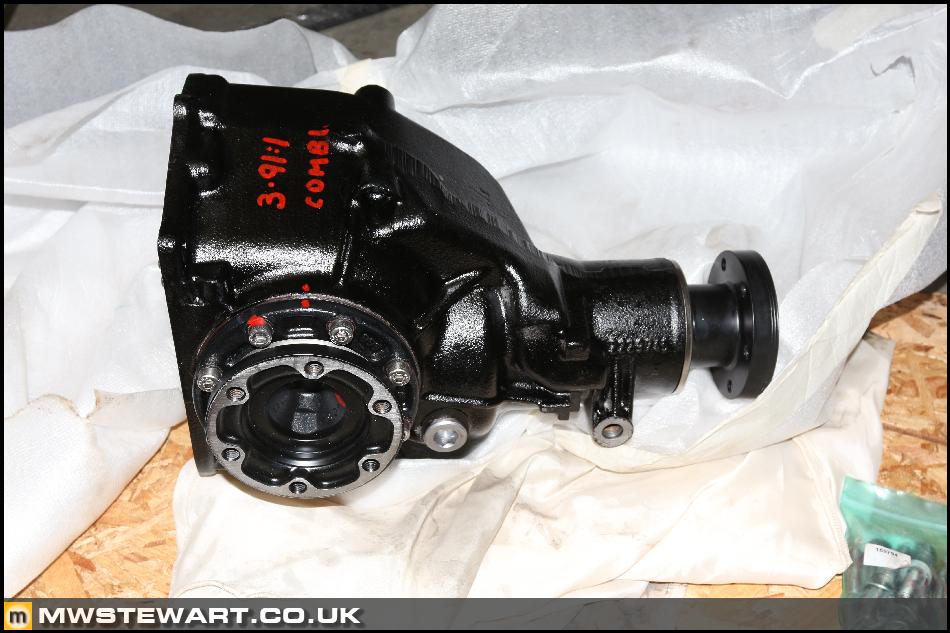
Even the flanges are power coated and accurately masked on the mating surfaces.
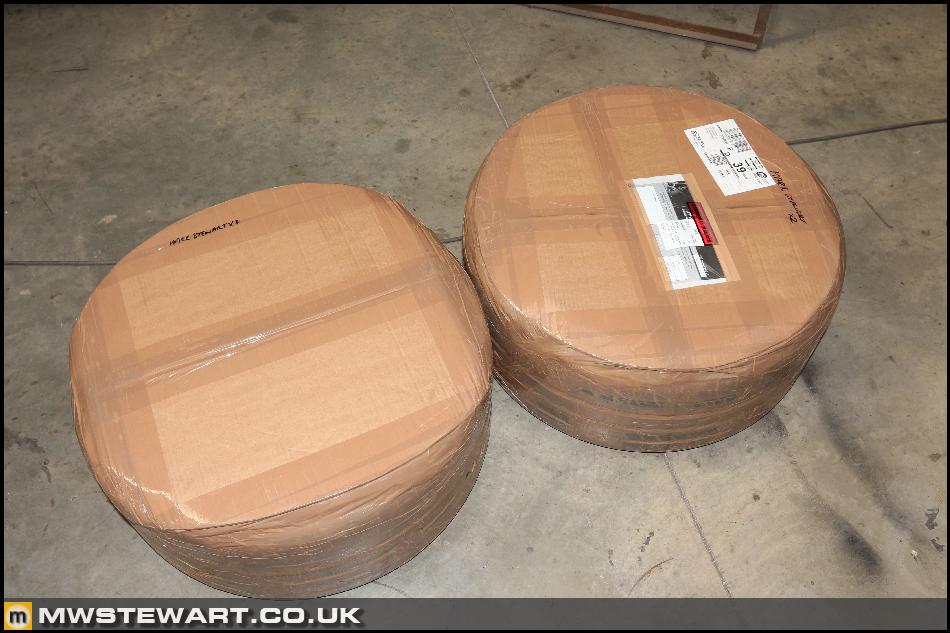
Rear wheels refurbished
I had the rear OEM CSL wheels refurbished by Lepsons in correct finish - there wasn't anything physically wrong with my wheels just the paint had lost some of its original lustre. The front wheels will be refurbished when the rear end is back on the ground.
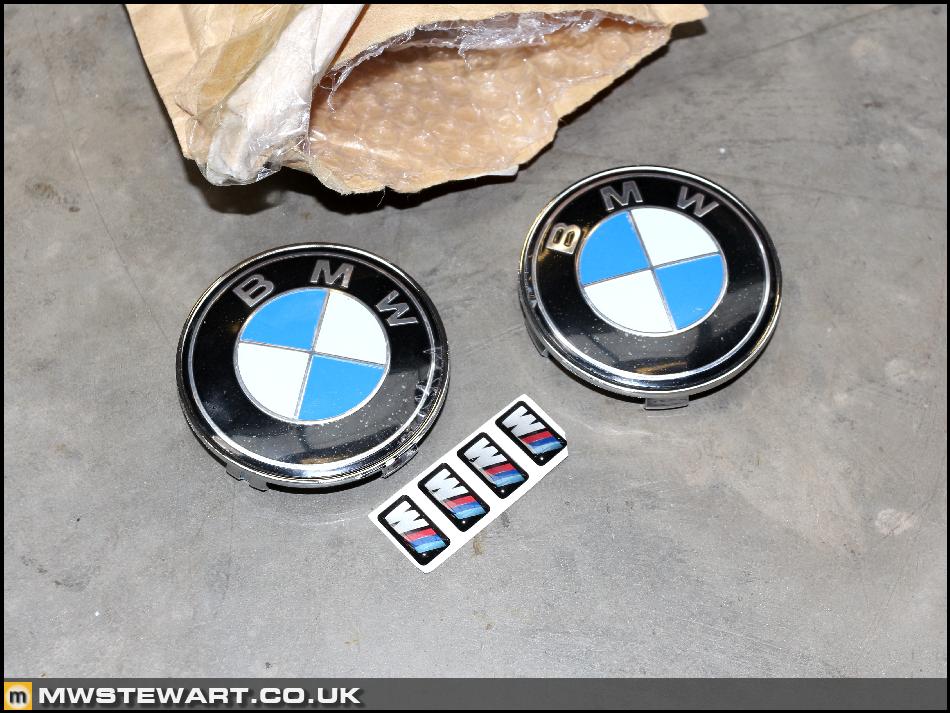
I bought new BME centre caps and 'M' logo gel badges.

Underside parts cleaned
My Dad has taken time out this week to lend a hand, and he's been a massive help by cleaning everything ready to go back on the car.
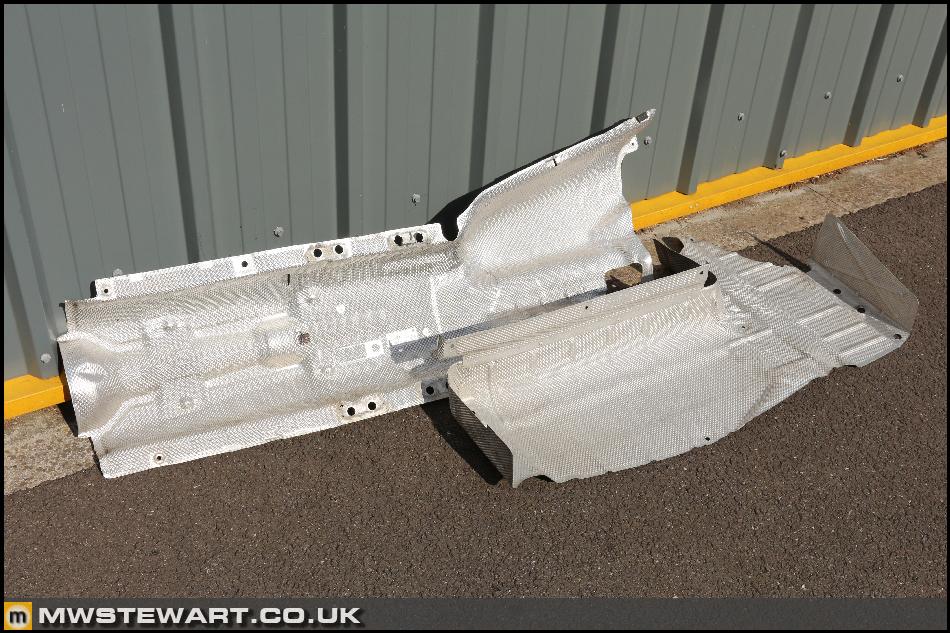
The heat shields were cleaned with petrol. Before:
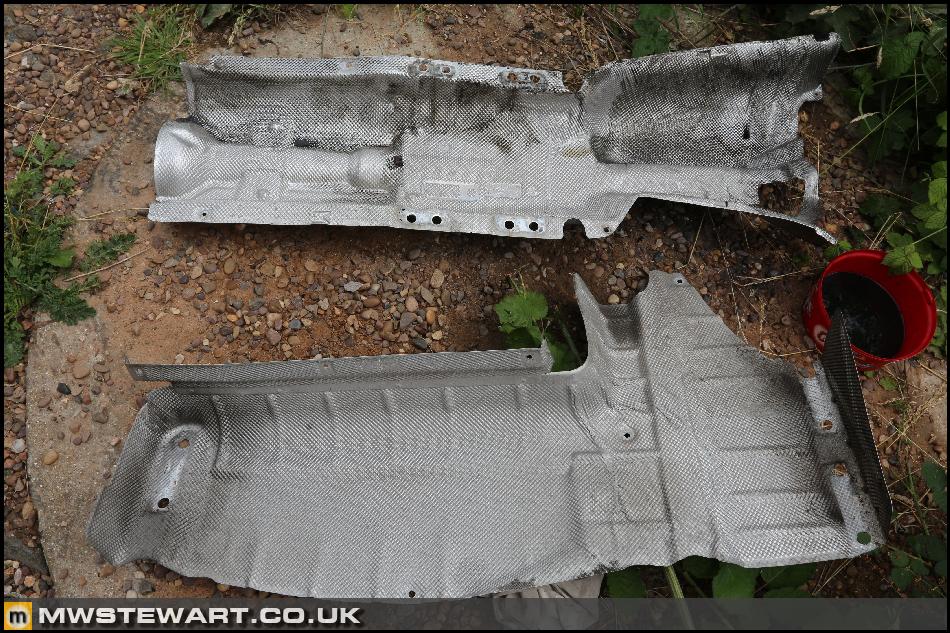
After:
All plastics were cleaned initially with paraffin to remove overspray from where BMW applied their underbody protection wax at the factory, and then all plastics were treated.
Every little last component was cleaned. The car won't be used in wet weather from now on so I want the underside to look really nice.
Rear silencer mounts were sanded and painted.
Behind the rear bumper was also cleaned.
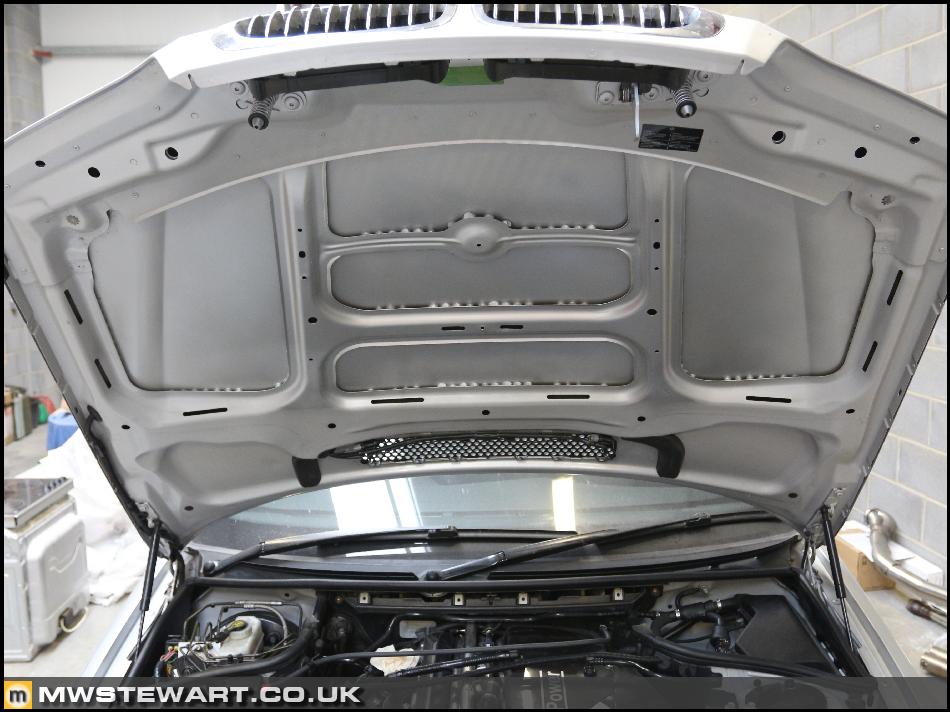
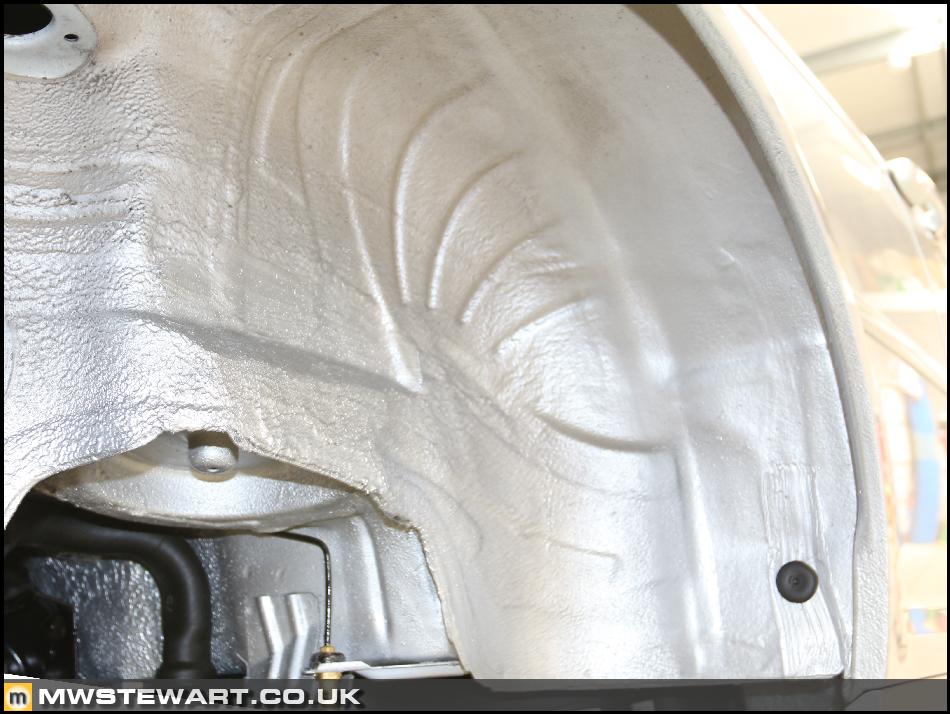
Bonnet underside painted
As per the CSL I'm not going to use the standard M3 under-bonnet sound deadening, however on the M3 this area isn't painted and can look unsightly with the deadening removed. I have painted the area to make it look better.
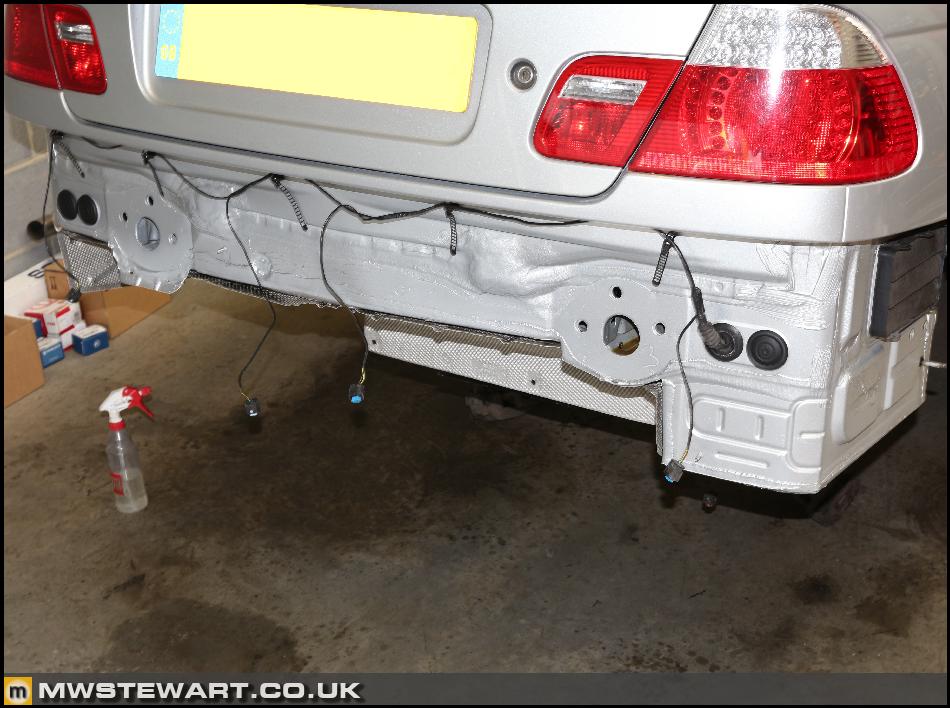
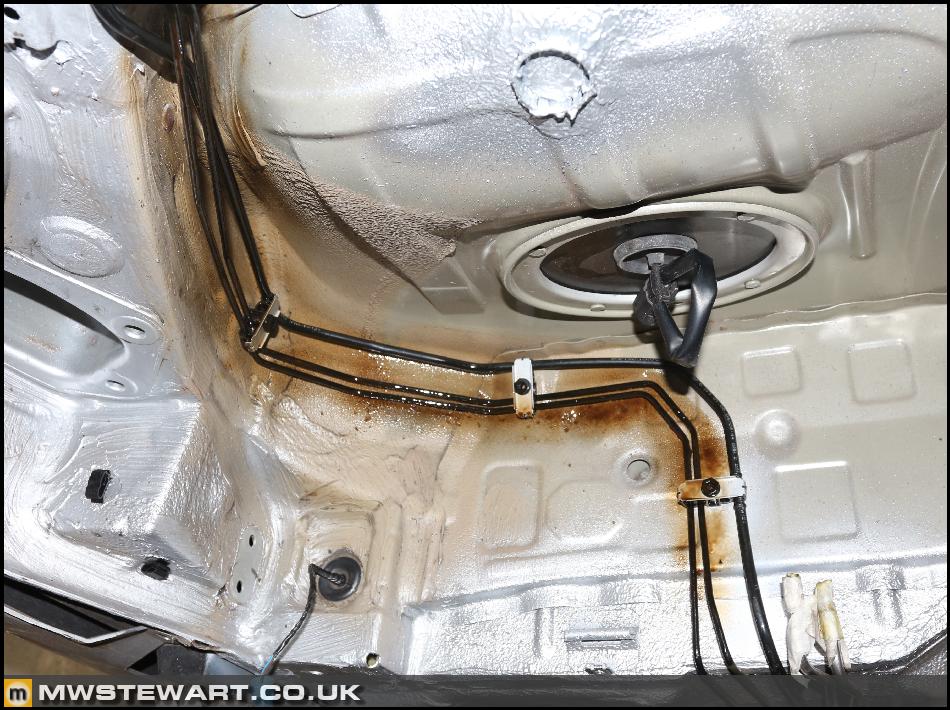
Rear brake lines
Corroded rear brake lines can be a problem on the M3. Mine had a few areas of light corrosion, mainly behind the petrol tank, but were otherwise perfectly fine. I sanded down all the lines and repainted them.
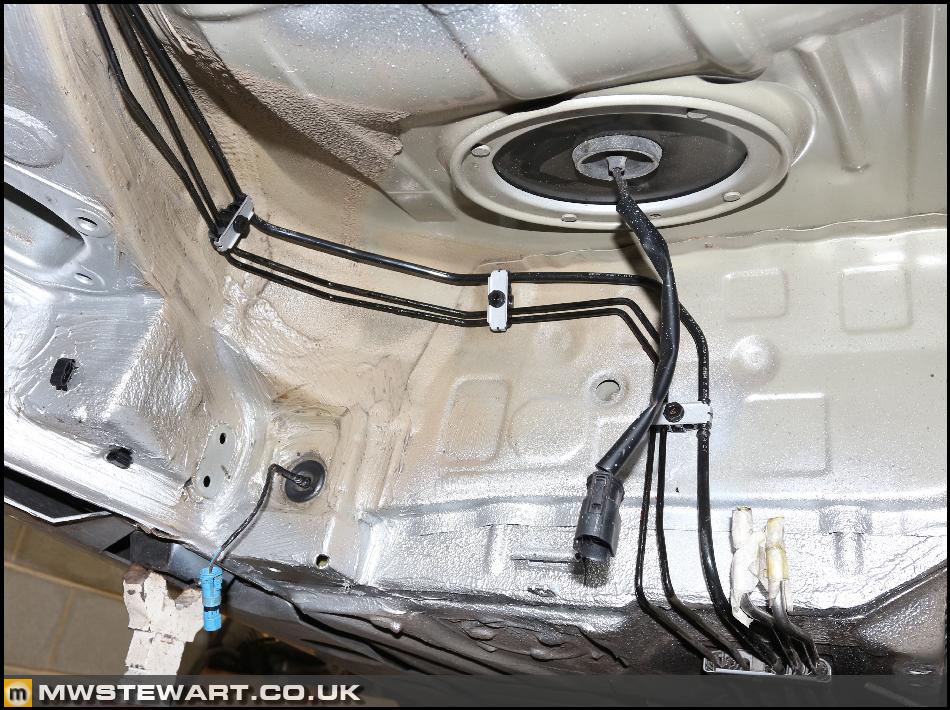
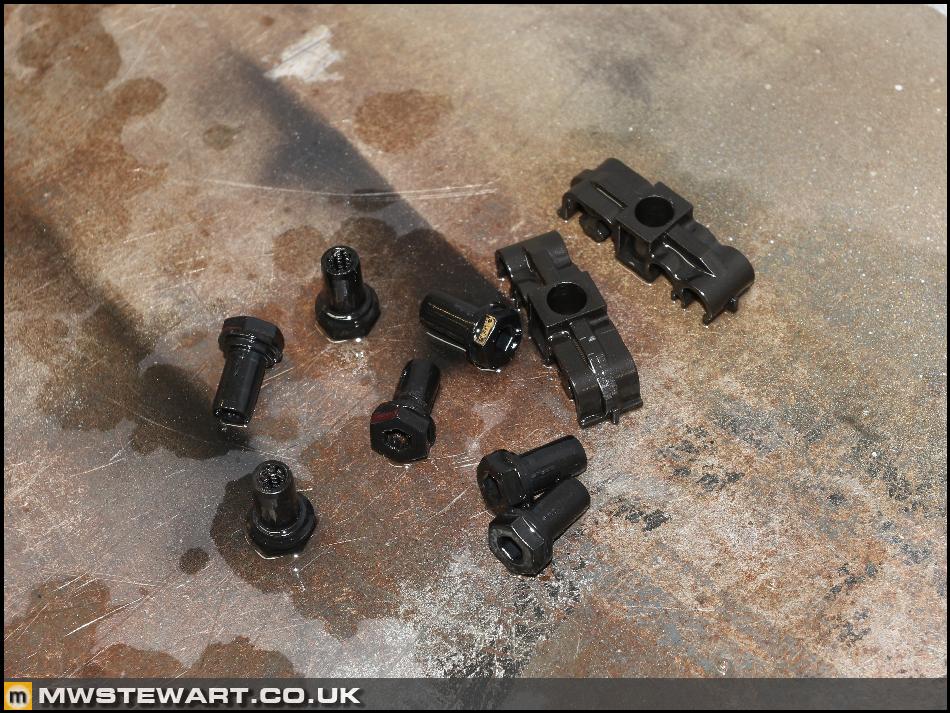
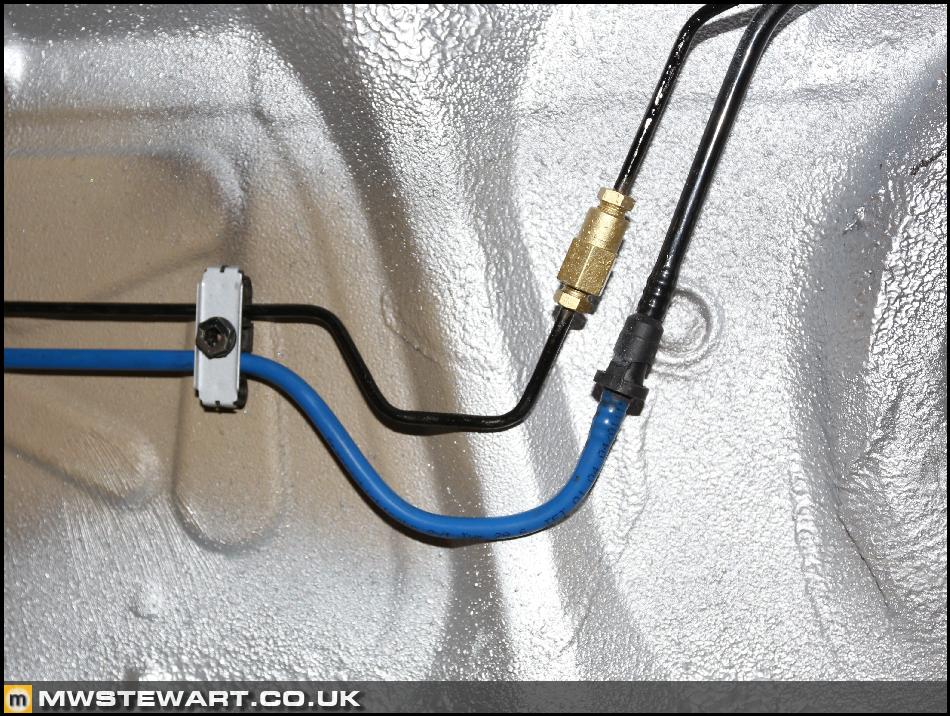
Everything was cleaned and the pipe management clips were refitted - I had the brackets zinc plated with the last batch and sprayed them in silver zinc. I also gave any zinc plated brake line fittings a coat of Plasti-kote brass.
I sprayed the brake lines with Dinitrol wax in areas where they are hidden and can't be easily inspected.
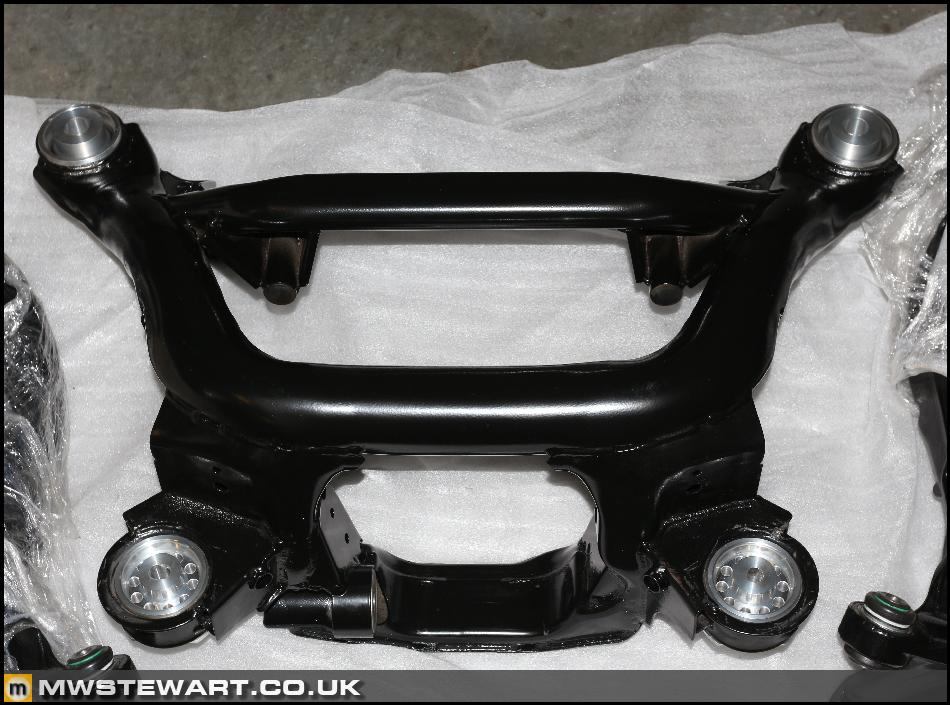
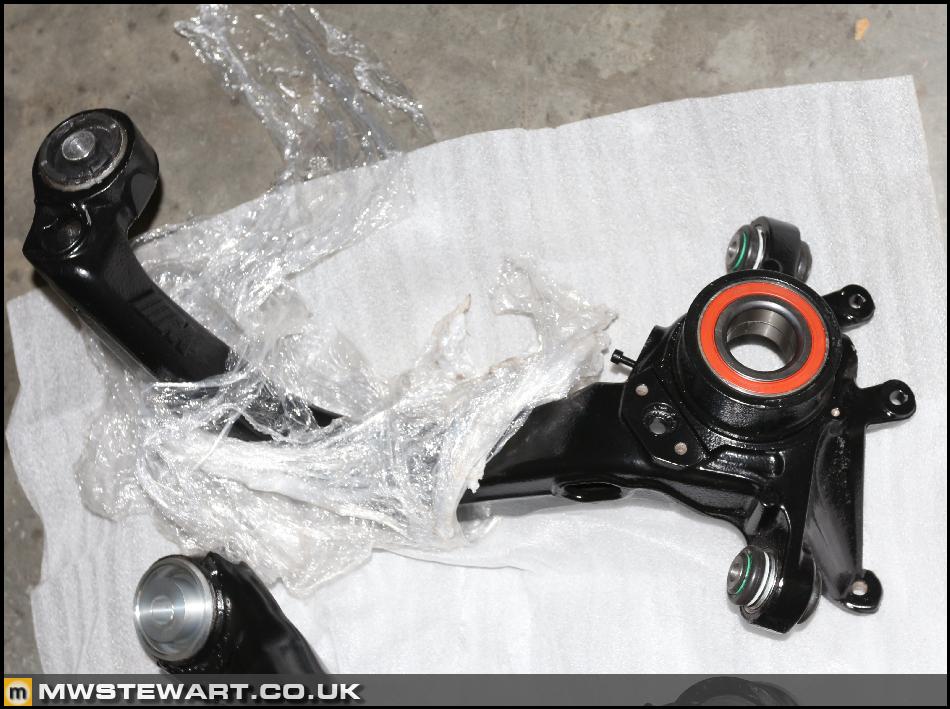
Subframe and trailing arm bush/bearing installation
4 x Ball joints
1 x Diff bush
2 x RTABS
4 x Subframe mounts
2 x Upper arm bushes
2 x Wheel bearings
It took Dad and I quite a few hours today to get the above fitted; I don't have any specific tools for the job so we made do with a mixture of socket, threaded bar, long nuts, and assorted pieces of metal.
In the end I decided to use the Tuner solid subframe mounts.
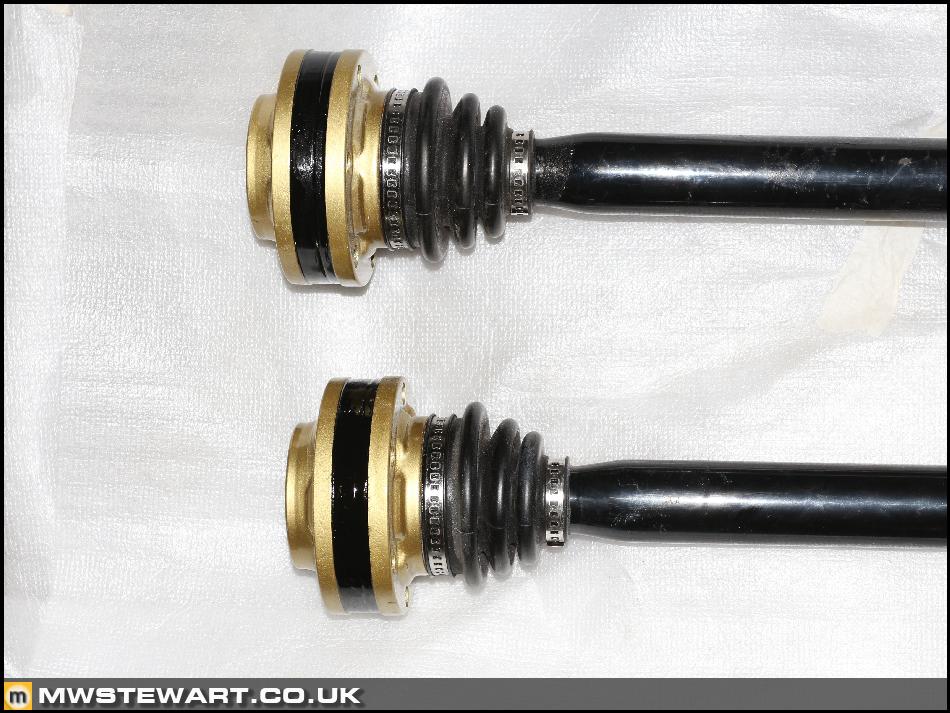
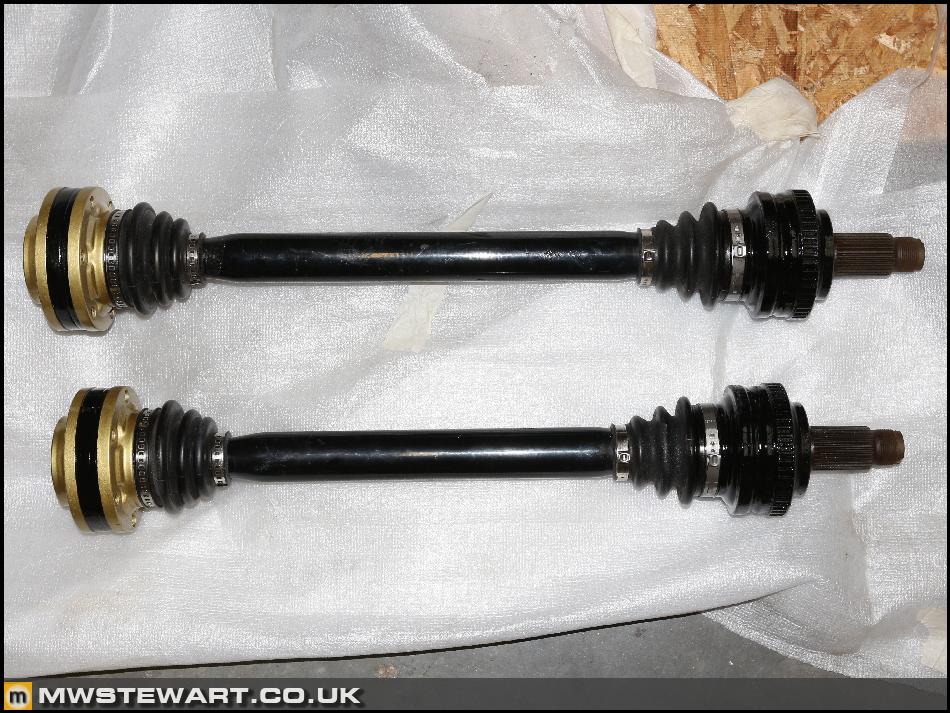
Driveshafts completed
I finished restoring the outboard end of the driveshafts. I also replaced the OEM mild steel boot clamps with stainless steel versions.
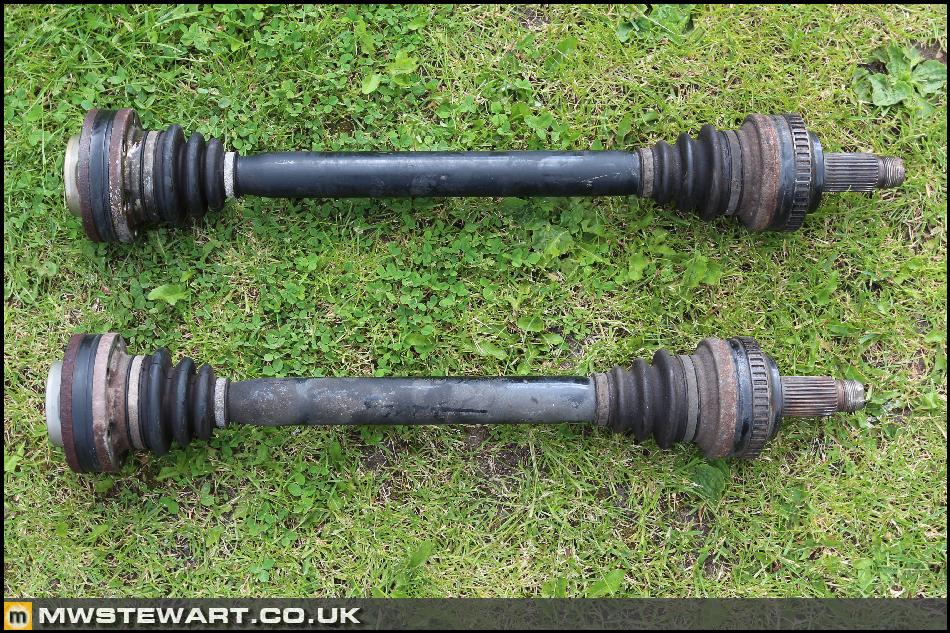
To recap, here's what they looked like before:
CSL Flap motor wiring
The flap motor/actuator requires two additional pins in DME connector X62002. For reference it is a connector comprised of the following modular blocks:
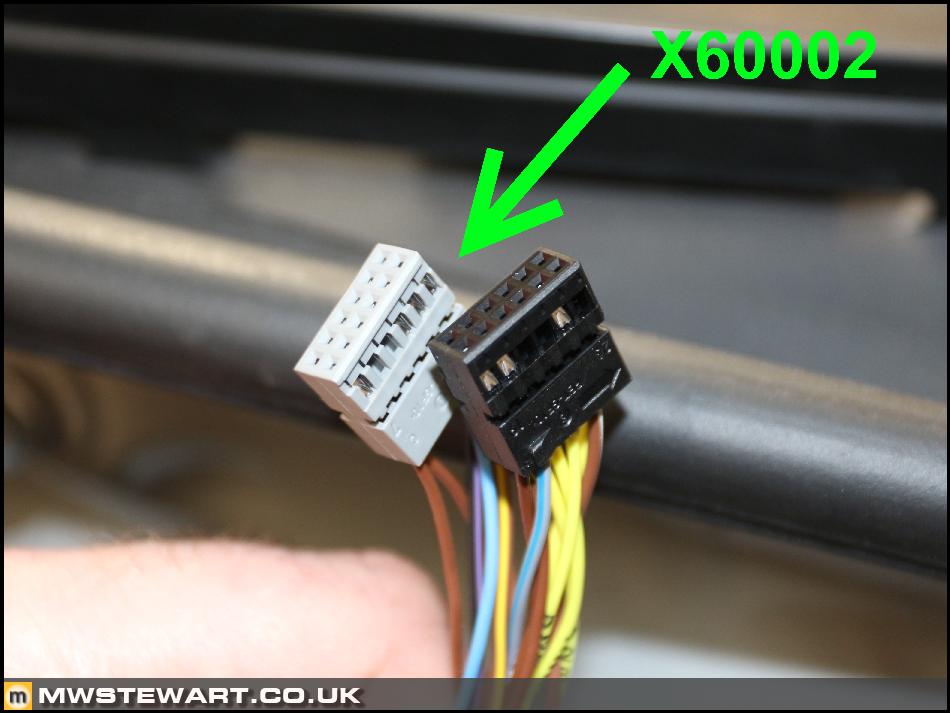
I'm now all done at the DME end and just had some connector housings at the IAT and flap sensor to finish off.
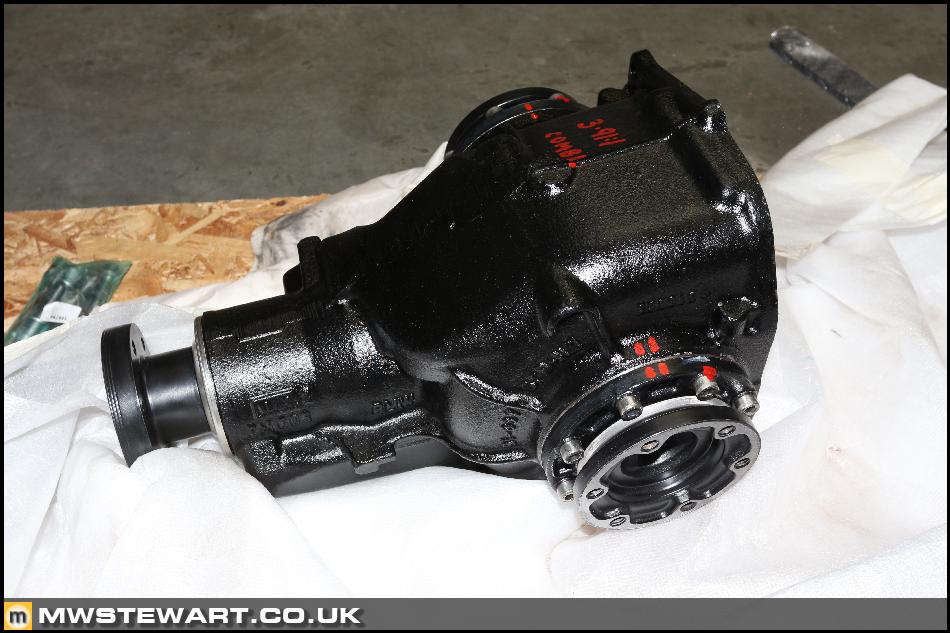
The differential arrived back from JC Racing and I had to take a few photos, because it's a work of art!
Even the flanges are power coated and accurately masked on the mating surfaces.
Rear wheels refurbished
I had the rear OEM CSL wheels refurbished by Lepsons in correct finish - there wasn't anything physically wrong with my wheels just the paint had lost some of its original lustre. The front wheels will be refurbished when the rear end is back on the ground.
I bought new BME centre caps and 'M' logo gel badges.
Underside parts cleaned
My Dad has taken time out this week to lend a hand, and he's been a massive help by cleaning everything ready to go back on the car.
The heat shields were cleaned with petrol. Before:
After:
All plastics were cleaned initially with paraffin to remove overspray from where BMW applied their underbody protection wax at the factory, and then all plastics were treated.
Every little last component was cleaned. The car won't be used in wet weather from now on so I want the underside to look really nice.
Rear silencer mounts were sanded and painted.
Behind the rear bumper was also cleaned.
Bonnet underside painted
As per the CSL I'm not going to use the standard M3 under-bonnet sound deadening, however on the M3 this area isn't painted and can look unsightly with the deadening removed. I have painted the area to make it look better.
Rear brake lines
Corroded rear brake lines can be a problem on the M3. Mine had a few areas of light corrosion, mainly behind the petrol tank, but were otherwise perfectly fine. I sanded down all the lines and repainted them.
Everything was cleaned and the pipe management clips were refitted - I had the brackets zinc plated with the last batch and sprayed them in silver zinc. I also gave any zinc plated brake line fittings a coat of Plasti-kote brass.
I sprayed the brake lines with Dinitrol wax in areas where they are hidden and can't be easily inspected.
Subframe and trailing arm bush/bearing installation
4 x Ball joints
1 x Diff bush
2 x RTABS
4 x Subframe mounts
2 x Upper arm bushes
2 x Wheel bearings
It took Dad and I quite a few hours today to get the above fitted; I don't have any specific tools for the job so we made do with a mixture of socket, threaded bar, long nuts, and assorted pieces of metal.
In the end I decided to use the Tuner solid subframe mounts.
Driveshafts completed
I finished restoring the outboard end of the driveshafts. I also replaced the OEM mild steel boot clamps with stainless steel versions.
To recap, here's what they looked like before:
CSL Flap motor wiring
The flap motor/actuator requires two additional pins in DME connector X62002. For reference it is a connector comprised of the following modular blocks:
I'm now all done at the DME end and just had some connector housings at the IAT and flap sensor to finish off.
jbaddeley said:
Looking good. So was the bill from jc what you expected?
It came in at £350, but I had a £60 discount for sending a spare back plate that I didn't need. The main consumables were oil seals, dust covers, and the pinion bearing.Dr G said:
MW - I enjoy looking at the results of your effort as much as you appear to enjoy getting things 'just so'. The results speak for themselves.
Thank you. I hope to have the rear end finished within the next two days.gaz1234 said:
ocd?
how is the subframe?
Looking pretty good now it's powder coated. I aim to have it and the rear arms installed tomorrow.how is the subframe?
I think I've said this a few times now, but it's always worth repeating that you're doing an amazing job on this. It really is OEM+, this is a far higher level of attention to detail than the factory could have ever done.
You said it was a dry day only car though, and I imagine the Fiesta will be the same so what's your daily driver? I would guess it's not the F430...
You said it was a dry day only car though, and I imagine the Fiesta will be the same so what's your daily driver? I would guess it's not the F430...
leglessAlex said:
I think I've said this a few times now, but it's always worth repeating that you're doing an amazing job on this. It really is OEM+, this is a far higher level of attention to detail than the factory could have ever done.
You said it was a dry day only car though, and I imagine the Fiesta will be the same so what's your daily driver? I would guess it's not the F430...
Thank you!You said it was a dry day only car though, and I imagine the Fiesta will be the same so what's your daily driver? I would guess it's not the F430...
The Golf has fallen to me since my OH received a company car. I've racked up 20k in it since last August and aside having to replace the original battery, which started loosing its charge, it hasn't missed a beat. I enjoy using it, too.
Track_Cit said:
This is great!
I thought I had OCD, but man you are on a whole other level!
So without trawling through the whole thread, are you basically turning a normal M3 into a CSL M3?
Ha - if a job's worth doing, it's worth doing well I thought I had OCD, but man you are on a whole other level!
So without trawling through the whole thread, are you basically turning a normal M3 into a CSL M3?
I'm turning it into my ultimate M3; a more evolved version of the standard M3 that retains everything an M3 should have i.e. a good level of equipment, good refinement, and a decent level of comfort.
marcgti6 said:
Always look forward to reading your updates.
Looking forward to seeing this and the Fiesta once they're finished.
Great work (but you already knew that!)
Cheers Looking forward to seeing this and the Fiesta once they're finished.
Great work (but you already knew that!)

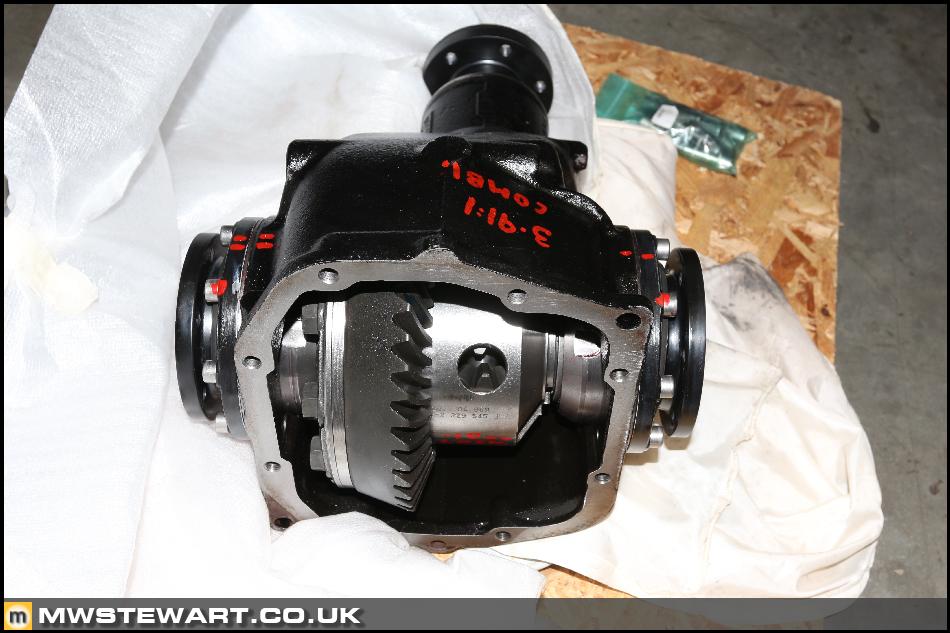
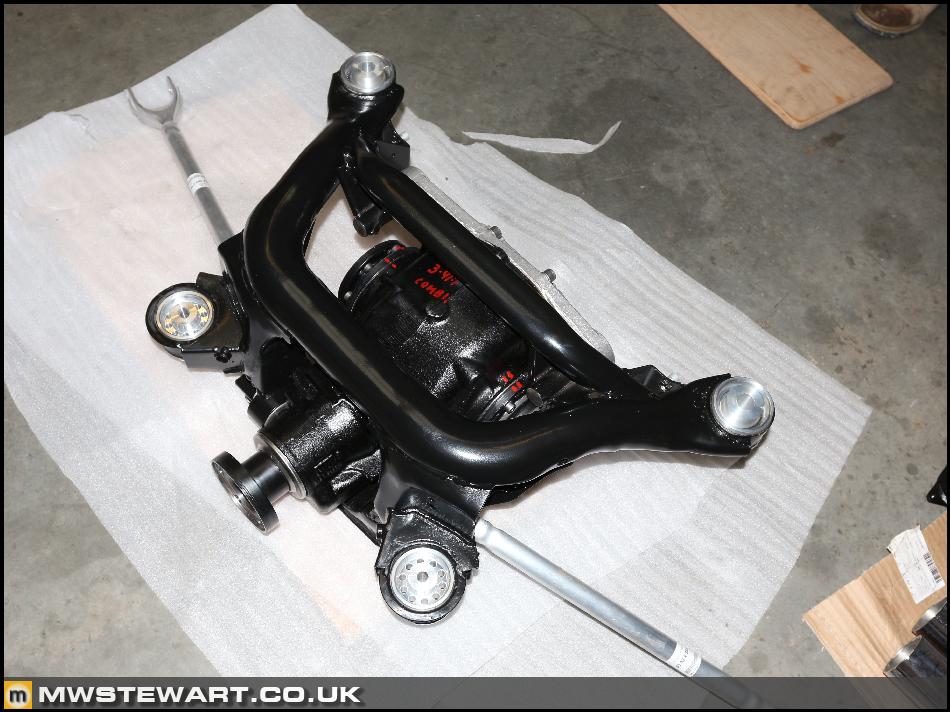
Differential end plate mounted using the stainless set screws supplied by J C Racing, and completed assembly mounted to subframe.
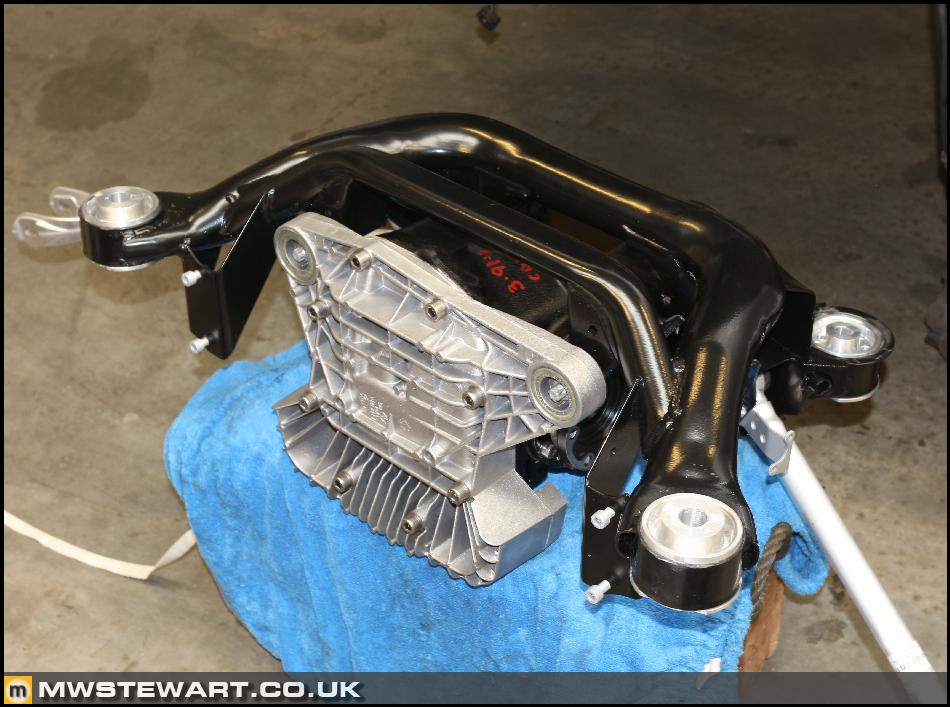
CSL lower arms mounted to the subframe.
New bushes installed in the upper arms using the same technique used for the other rear end bushes/bearings, though these went in very easily compared to the rest.
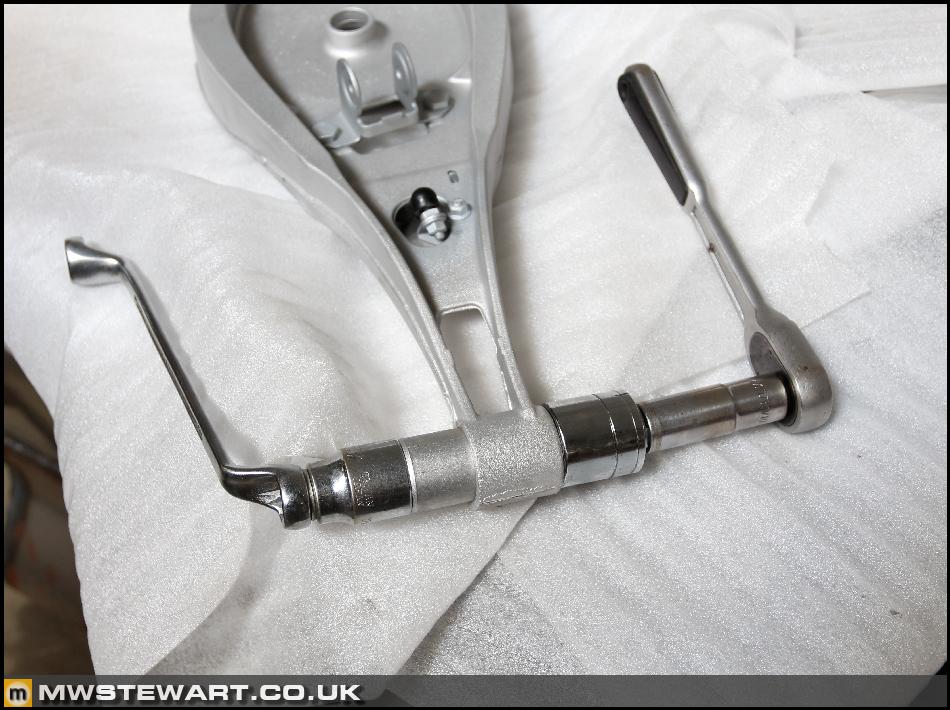
I have replaced the rear headlamp/xenon auto-levelling components as the ball joints in my original parts were showing some pitting. This component is a poor design really as there are no dust boots on the joints.
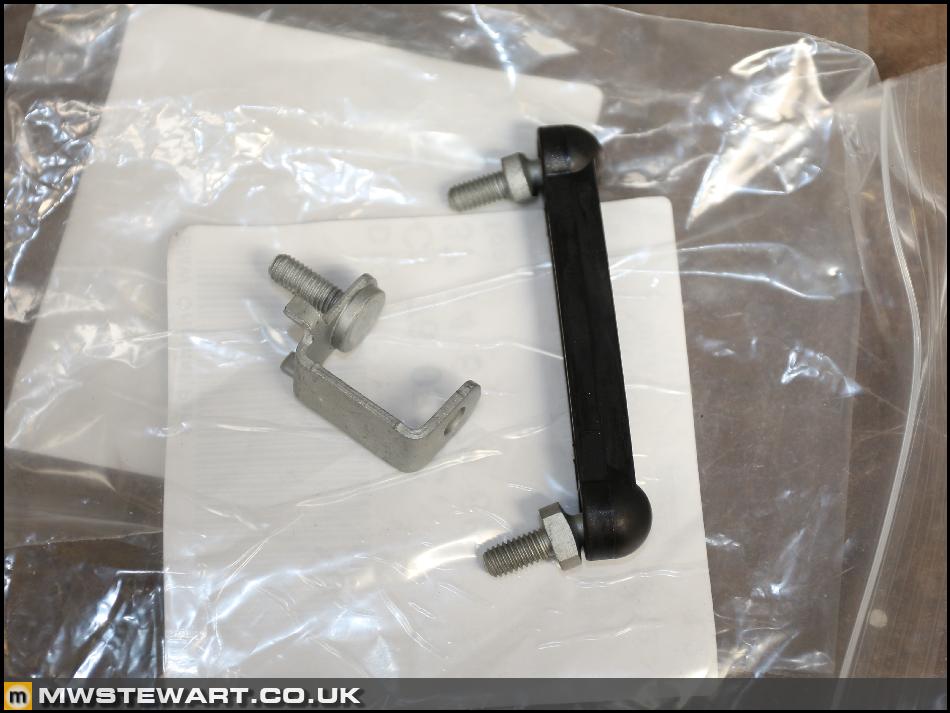
Rear wheel arches cleaned - thanks Dad.

Evaporative emissions & fuel filler components cleaned and mounted with new OEM stainless clamps.
I took the opportunity to remove the prop shaft rear UJ, clean it, and re-pack it with CV grease. I had ordered a 330i grease cap for the reassembly process after reading some reports on the internet that it is a better solution than the standard M3 gasket, as it keeps the grease in the UJ rather than letting it encroach into the nose of the diff. In my case at least this turned out to be internet myth: it didn't fit, so I used the standard part.
CSL lower arms mounted to the subframe.
New bushes installed in the upper arms using the same technique used for the other rear end bushes/bearings, though these went in very easily compared to the rest.
I have replaced the rear headlamp/xenon auto-levelling components as the ball joints in my original parts were showing some pitting. This component is a poor design really as there are no dust boots on the joints.
Rear wheel arches cleaned - thanks Dad.
Evaporative emissions & fuel filler components cleaned and mounted with new OEM stainless clamps.
I took the opportunity to remove the prop shaft rear UJ, clean it, and re-pack it with CV grease. I had ordered a 330i grease cap for the reassembly process after reading some reports on the internet that it is a better solution than the standard M3 gasket, as it keeps the grease in the UJ rather than letting it encroach into the nose of the diff. In my case at least this turned out to be internet myth: it didn't fit, so I used the standard part.
mwstewart said:
Differential end plate mounted using the stainless set screws supplied by J C Racing, and completed assembly mounted to subframe.
CSL lower arms mounted to the subframe.
New bushes installed in the upper arms using the same technique used for the other rear end bushes/bearings, though these went in very easily compared to the rest.
I have replaced the rear headlamp/xenon auto-levelling components as the ball joints in my original parts were showing some pitting. This component is a poor design really as there are no dust boots on the joints.
Rear wheel arches cleaned - thanks Dad.
Evaporative emissions & fuel filler components cleaned and mounted with new OEM stainless clamps.
I took the opportunity to remove the prop shaft rear UJ, clean it, and re-pack it with CV grease. I had ordered a 330i grease cap for the reassembly process after reading some reports on the internet that it is a better solution than the standard M3 gasket, as it keeps the grease in the UJ rather than letting it encroach into the nose of the diff. In my case at least this turned out to be internet myth: it didn't fit, so I used the standard part.
When this is done it will be an M3 as BMW wanted to make it.CSL lower arms mounted to the subframe.
New bushes installed in the upper arms using the same technique used for the other rear end bushes/bearings, though these went in very easily compared to the rest.
I have replaced the rear headlamp/xenon auto-levelling components as the ball joints in my original parts were showing some pitting. This component is a poor design really as there are no dust boots on the joints.
Rear wheel arches cleaned - thanks Dad.
Evaporative emissions & fuel filler components cleaned and mounted with new OEM stainless clamps.
I took the opportunity to remove the prop shaft rear UJ, clean it, and re-pack it with CV grease. I had ordered a 330i grease cap for the reassembly process after reading some reports on the internet that it is a better solution than the standard M3 gasket, as it keeps the grease in the UJ rather than letting it encroach into the nose of the diff. In my case at least this turned out to be internet myth: it didn't fit, so I used the standard part.
Kudos to you Mark, went on your site and read through your srticles, lots of amazing content!
JakeT said:
When this is done it will be an M3 as BMW wanted to make it.
Kudos to you Mark, went on your site and read through your srticles, lots of amazing content!
Thank you!Kudos to you Mark, went on your site and read through your srticles, lots of amazing content!
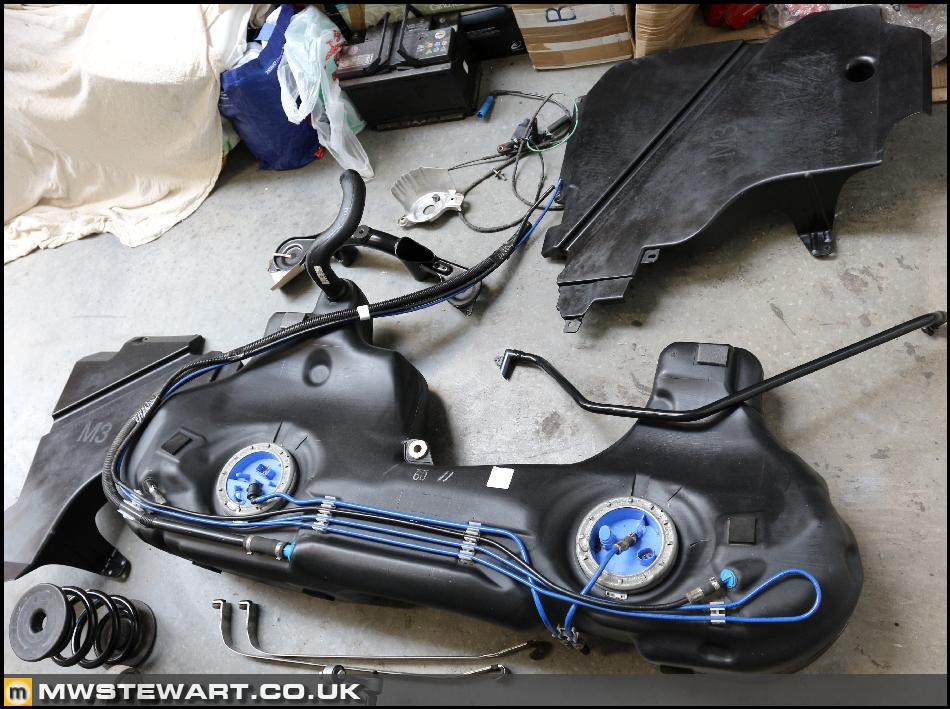
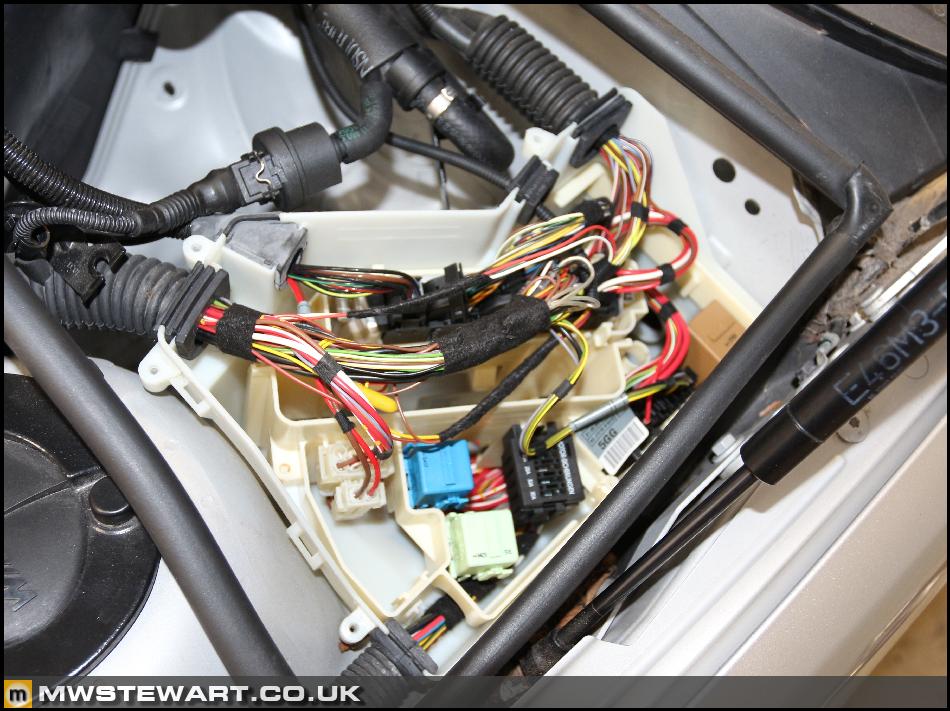
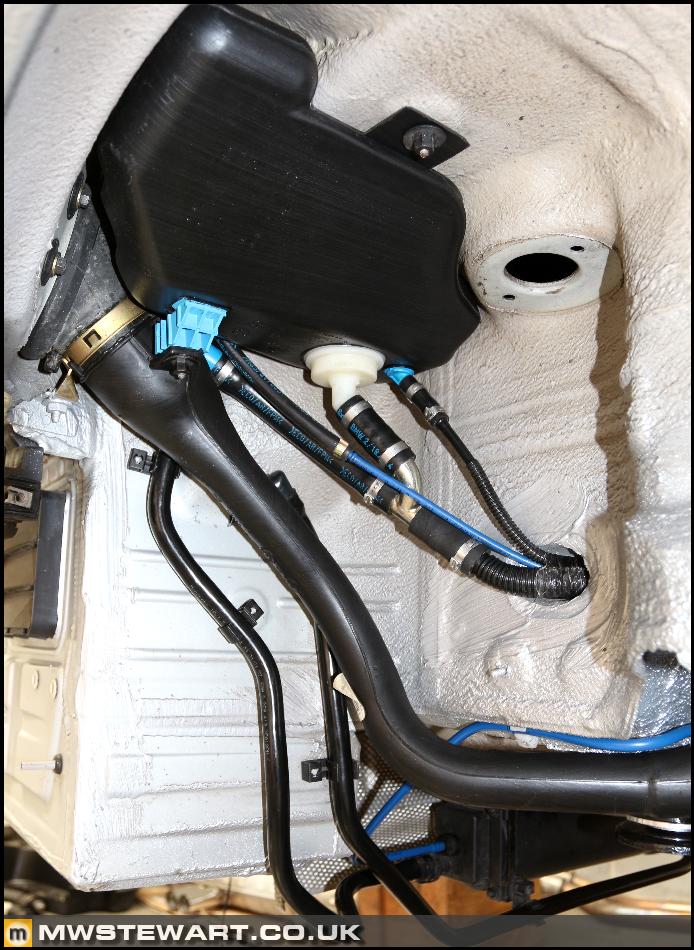
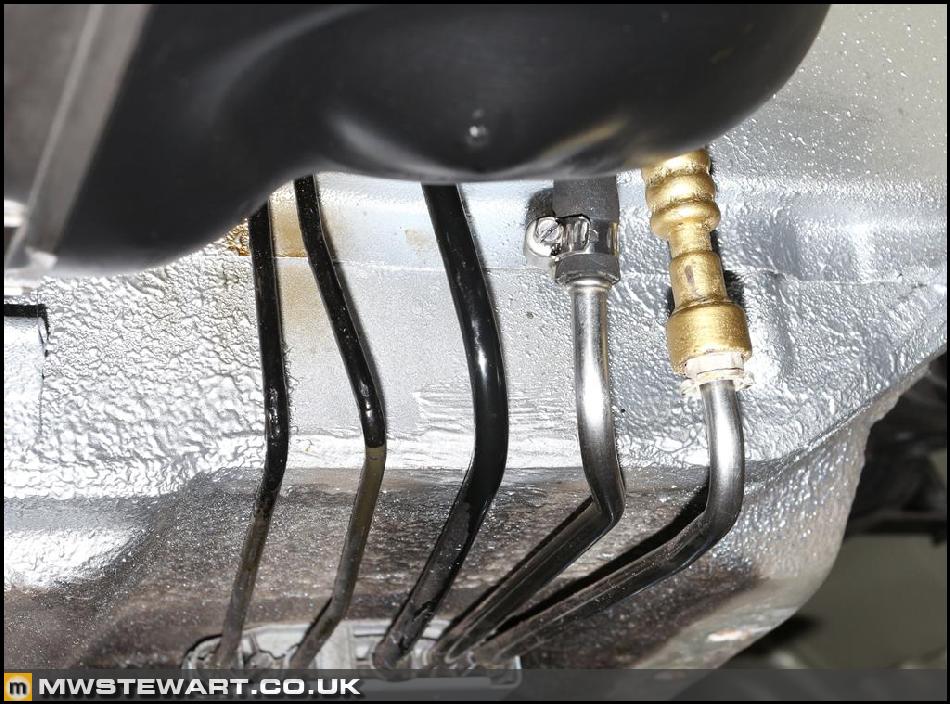
Fuel lines connected and clipped in. Ignore how dirty everything is on the main floor pan - that and the front end are a project for the winter months

Propshaft UJ mounted.

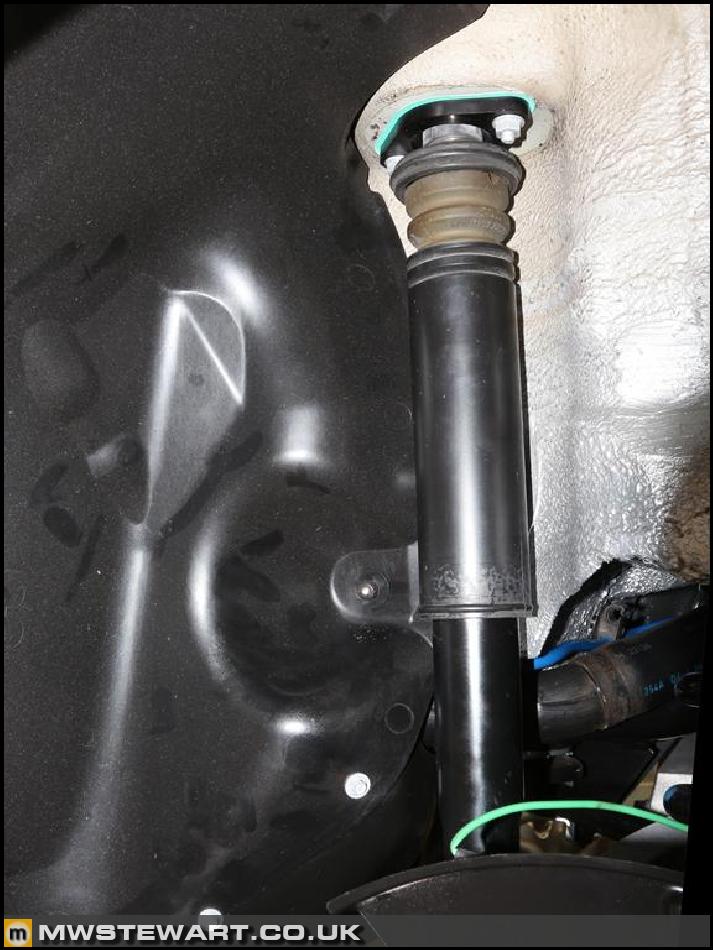
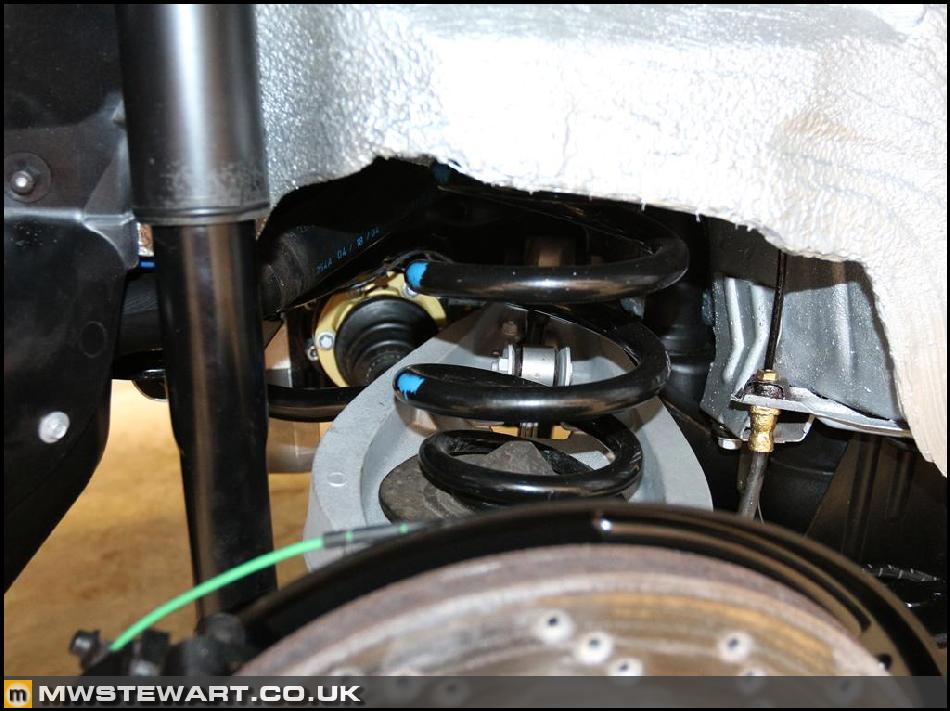
CSL dampers fitted with Rogue Engineering RSM's. Arch liners also installed with the reconditioned fastenings.
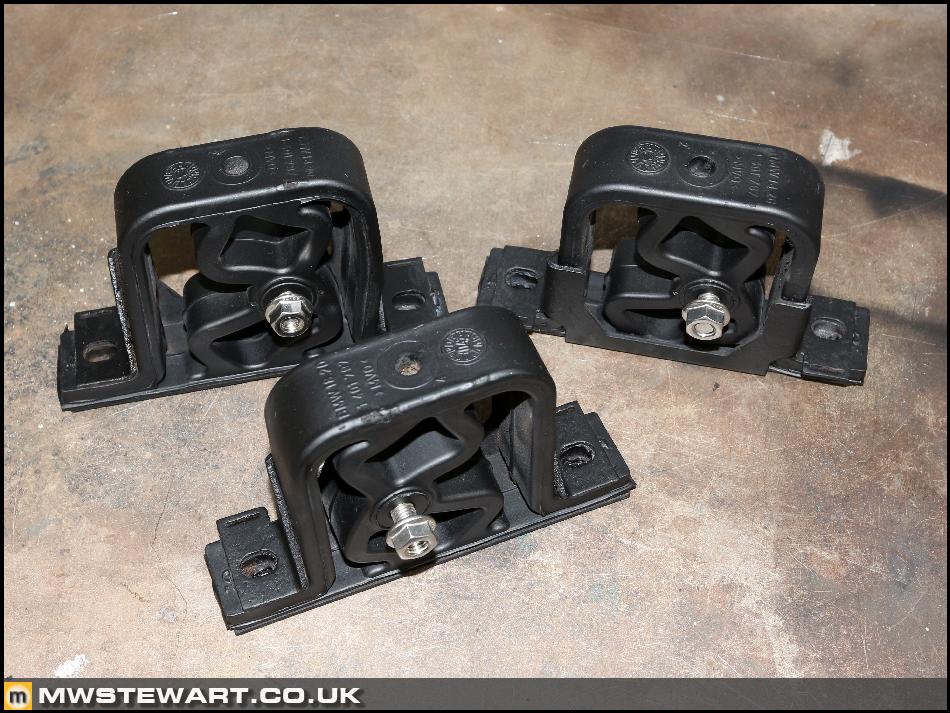
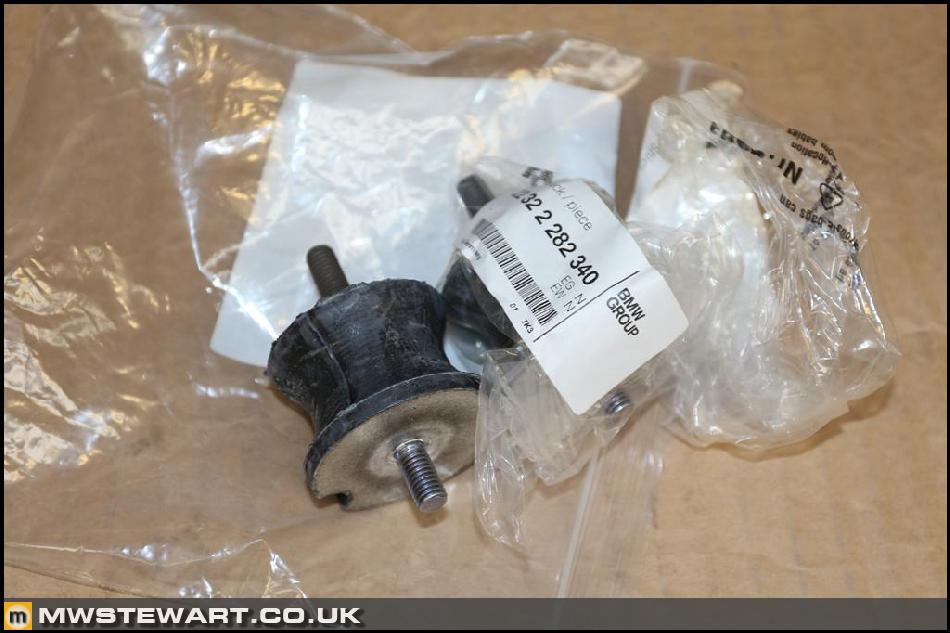
Given the exhaust and centre heat shield were removed I took the to opportunity to replace the gearbox mounts.
Rear trailing arms mounted and handbrake adjusted. My handbrake shoes were as new so they were simply de-glazed with sandpaper. I had all of the handbrake components zinc plated so they were sprayed in silver zinc paint to finish. The brake backplates are brand new and I have greased the handbrake shoe securing pin locations are they are prone to rusting out which leads to issues with the handbrake.

Front and rear calipers were stripped, cleaned, and painted.
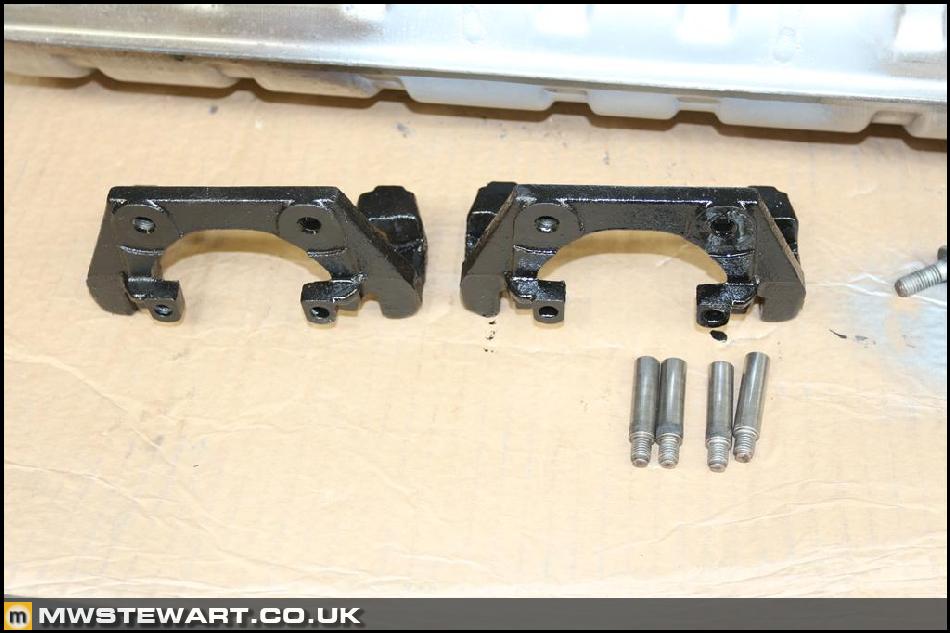
Rear brakes fitted.
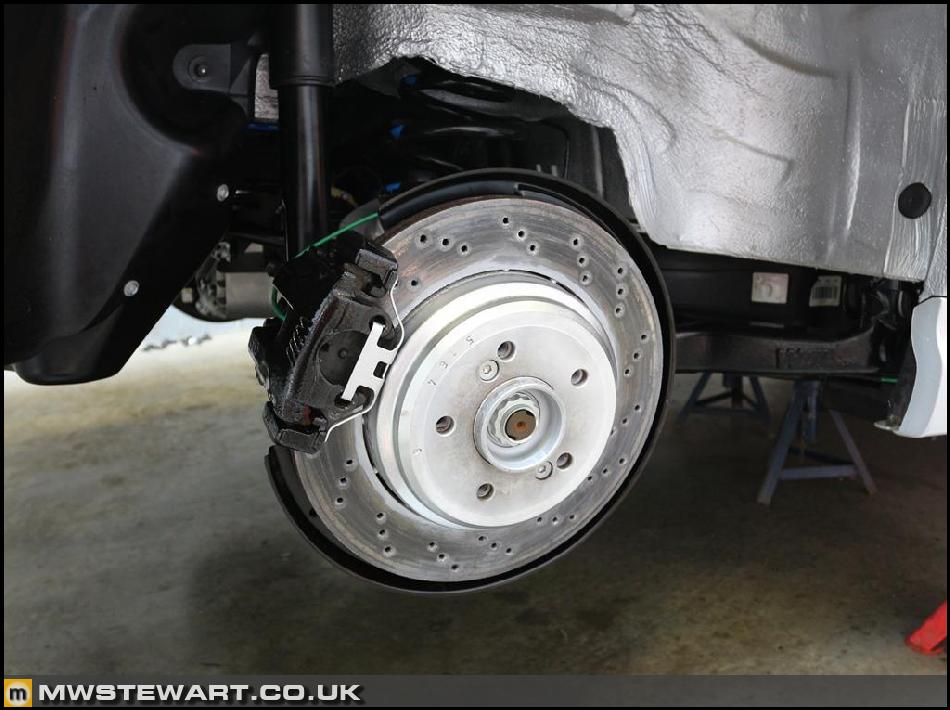
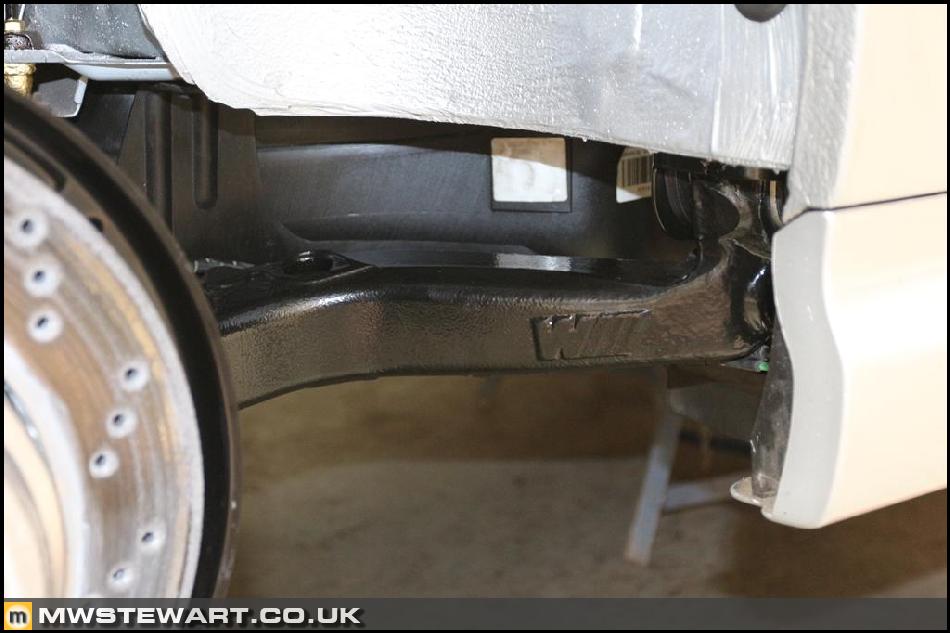
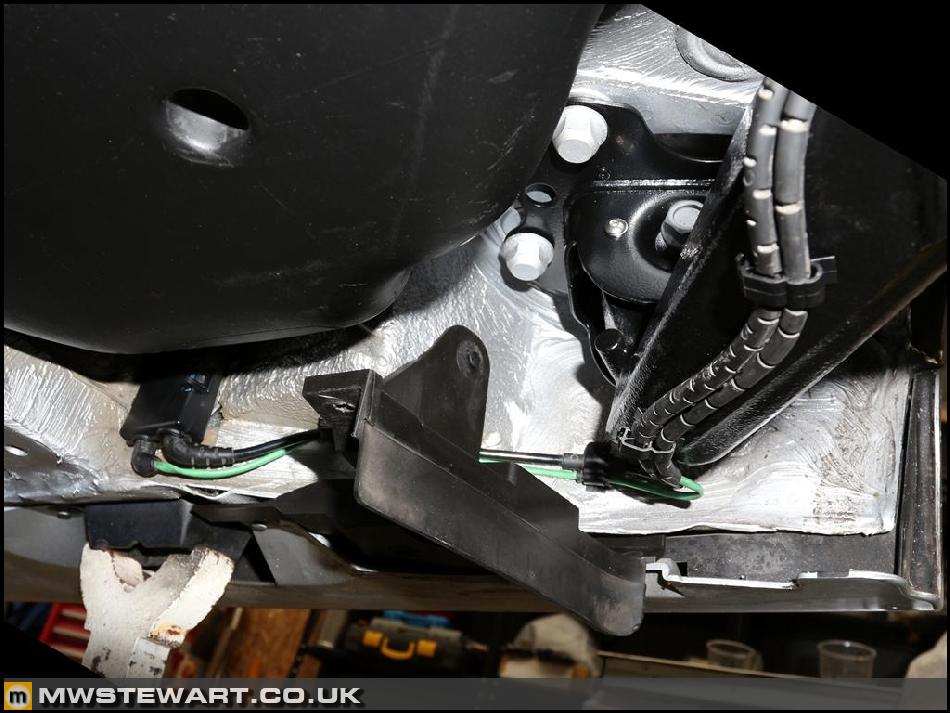
General photos of restoration progress
Rear right trailing arm showing petrol tank.
Trailing arm mount area showing ABS and brake pad cable management.
Shot through rear right wheel arch.

martin mrt said:
Jesus Christ mark, the level of detail on this makes any other project look like a cobbled together bodge affair!!!
I simply cannot wait to see the finished results
Cheers Martin!I simply cannot wait to see the finished results
Saftlad said:
Amazing attention to detail mate, but you want to check those rear arm front mounts, dont look right to me.
Cheers - the upside down 'M'?Gassing Station | Readers' Cars | Top of Page | What's New | My Stuff