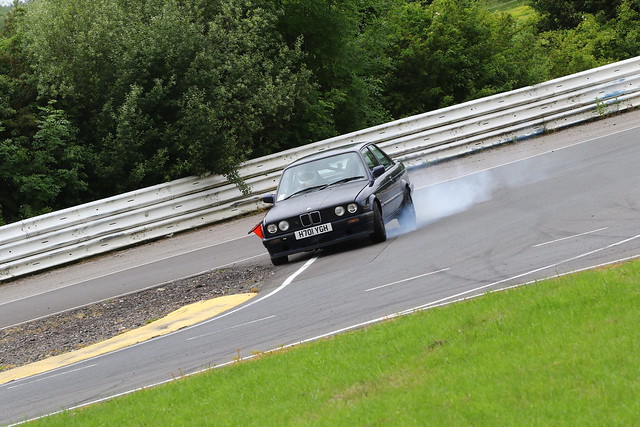
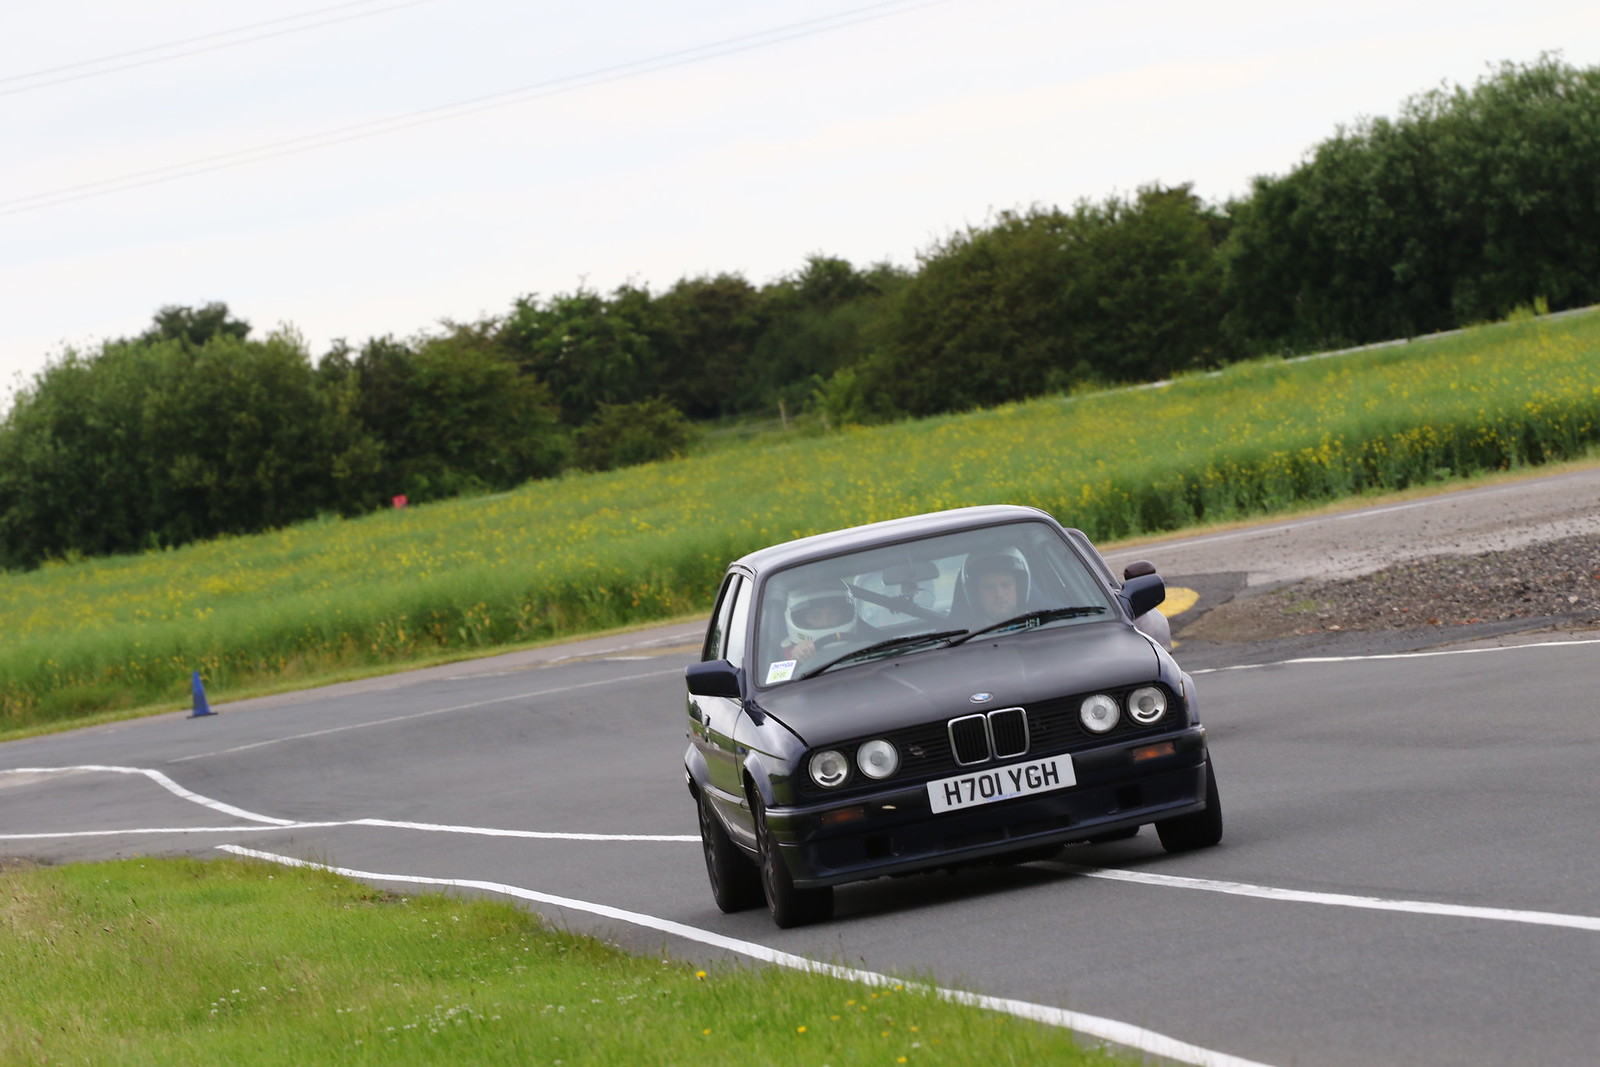
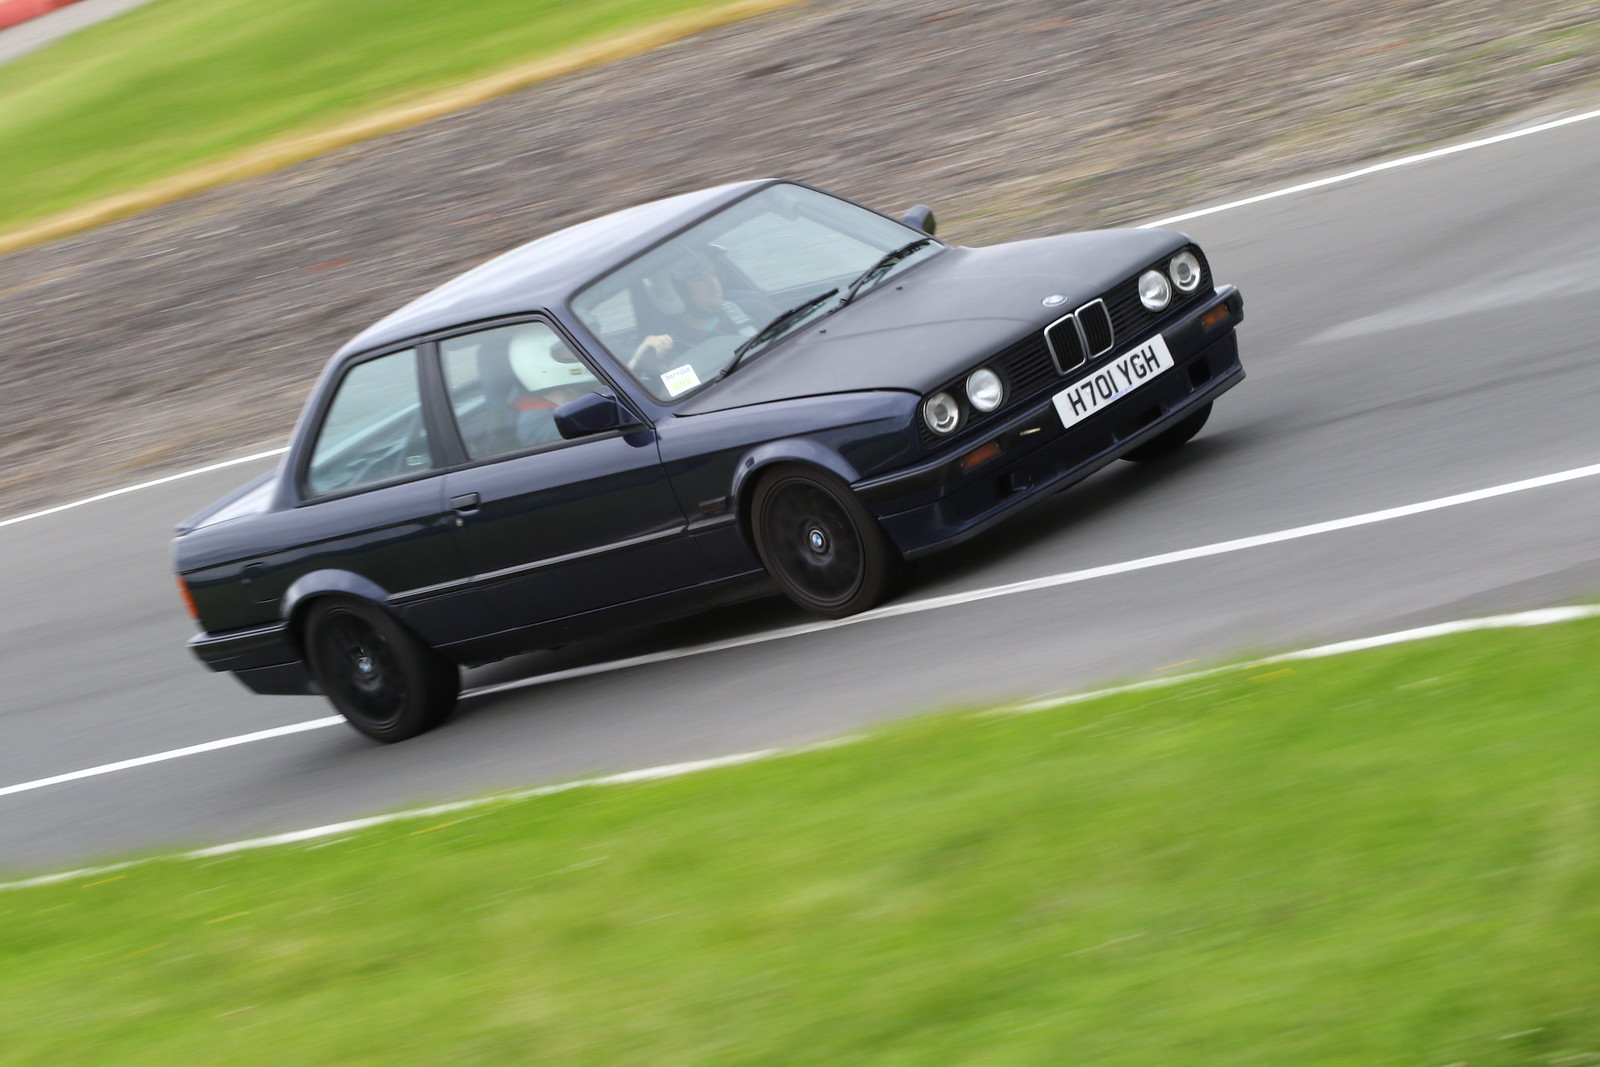
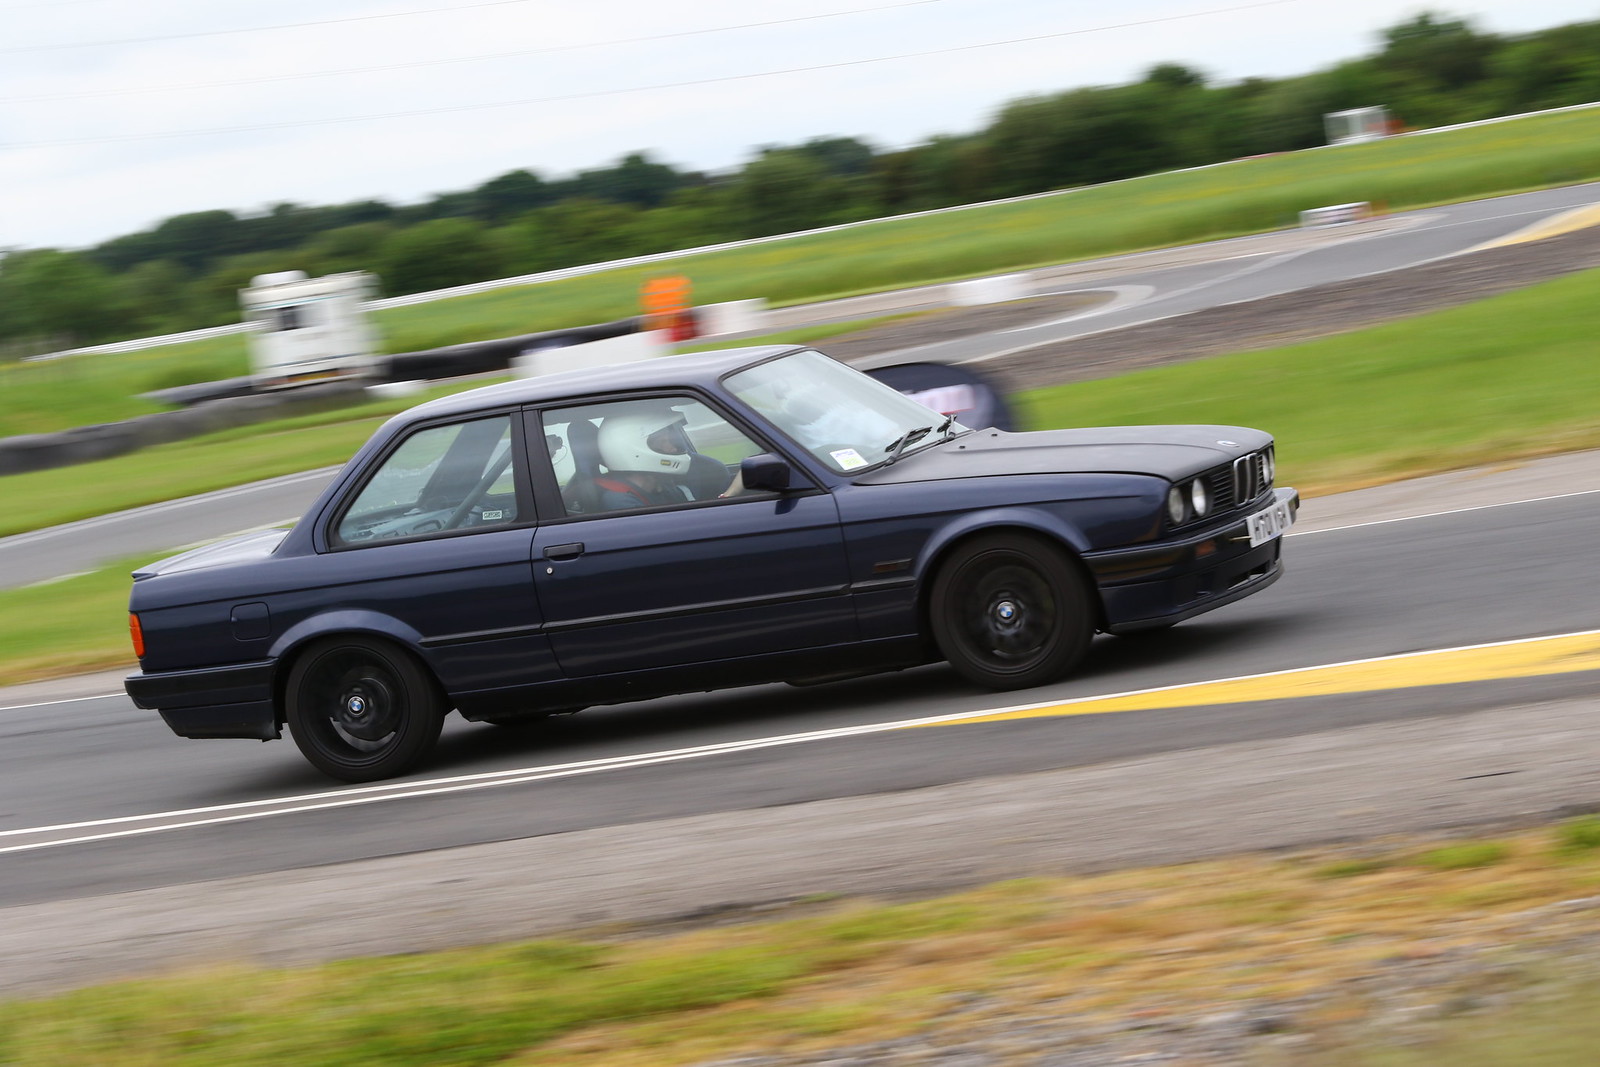
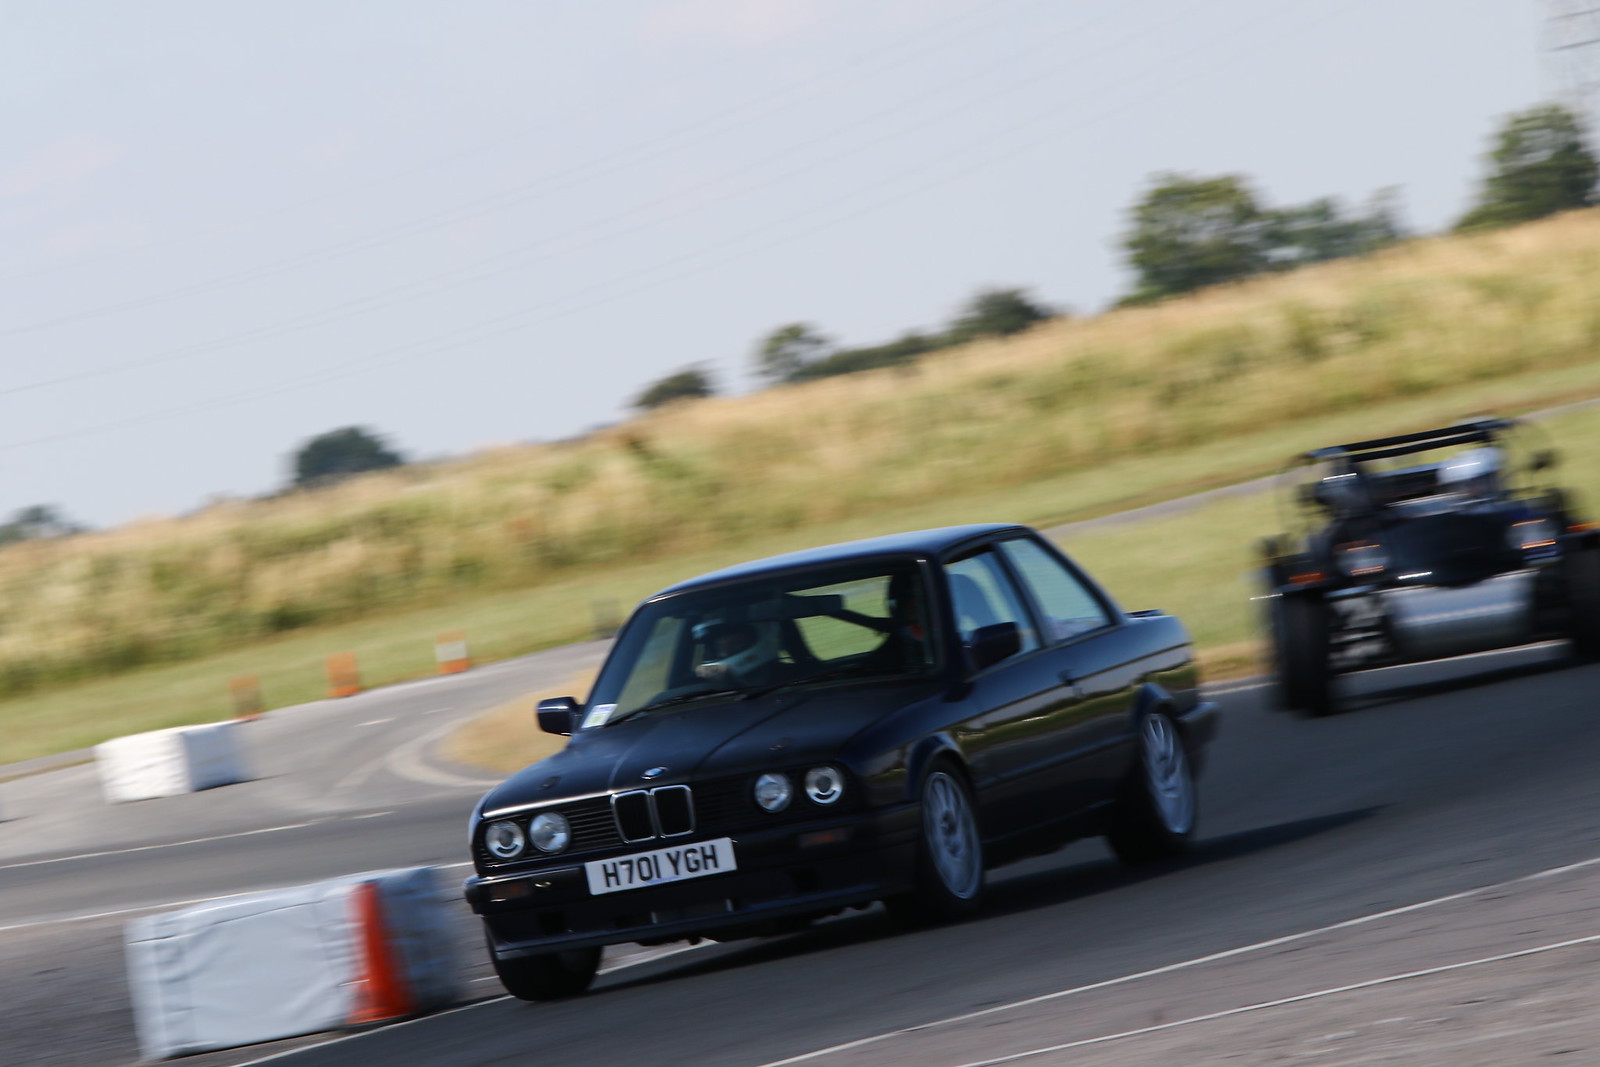
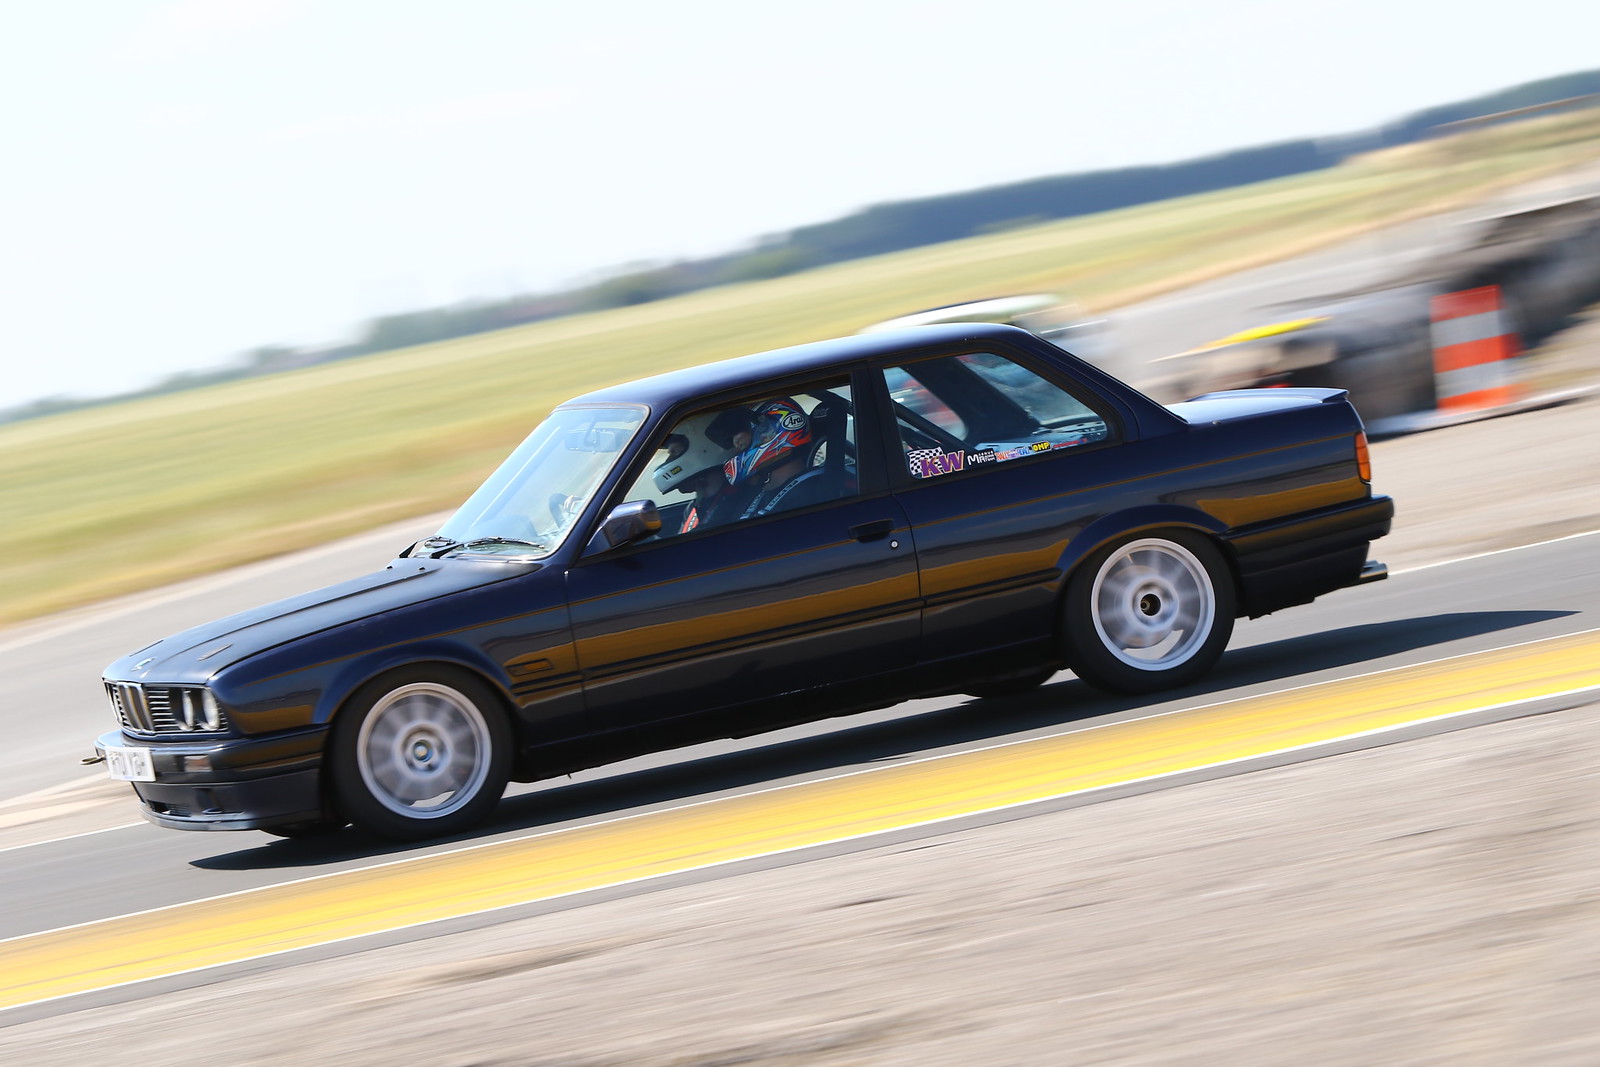
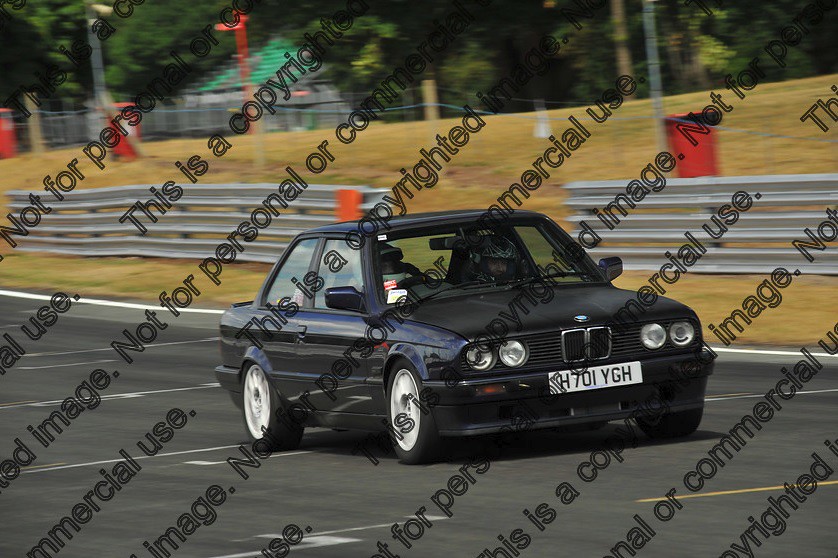
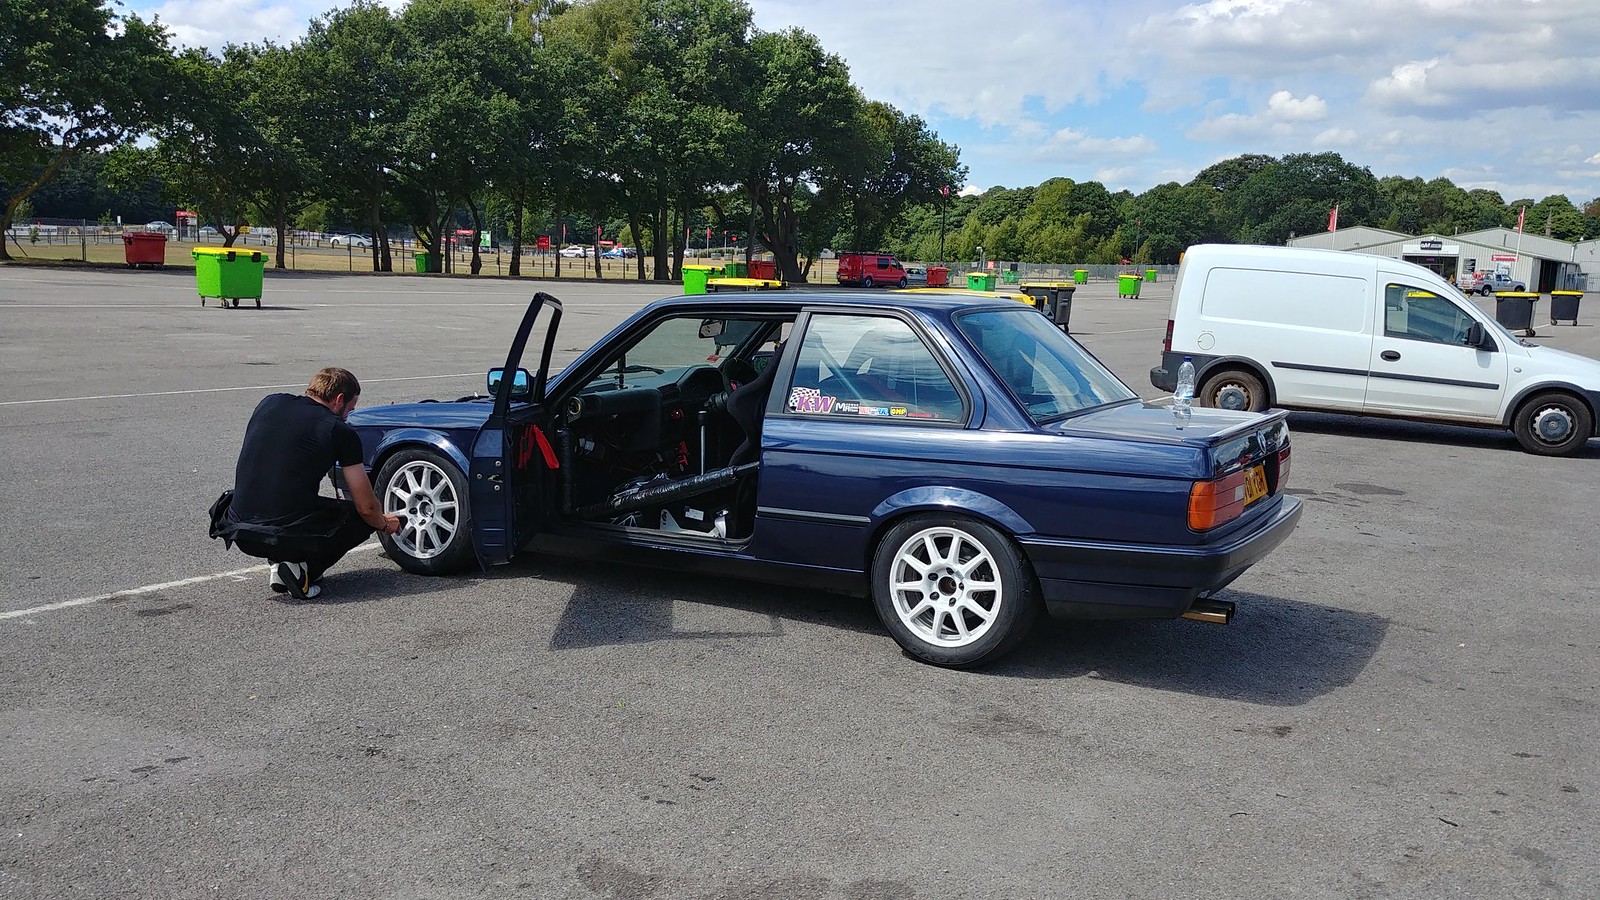
E30 M52-swapped Trackday Car
Discussion


You can almost certainly get a few tenths off unless it's been skimmed to death in a previous life - which would be pretty unlikely.
It'll only up the compression by a tiny amount but you'll be secure in the knowledge that the mating face is totally clean and flat for the head gasket - you do not want to build it all up and find the gasket goes again after a few months. Ask me how I know.
It'll only up the compression by a tiny amount but you'll be secure in the knowledge that the mating face is totally clean and flat for the head gasket - you do not want to build it all up and find the gasket goes again after a few months. Ask me how I know.
So I guess the engine rebuild has 'formally' begun!
The block, head and intake cam are still at the machine shop, so no progress there. To be honest, I'm still in no particular rush to get them back (Shalmanaser - I've taken your advice and opted to have the head skimmed and block decked too As you say, better to be safe than sorry). I plan to do the bulk of the assembly over a 4-day weekend and I don't have the time to do that for a few weeks at least.
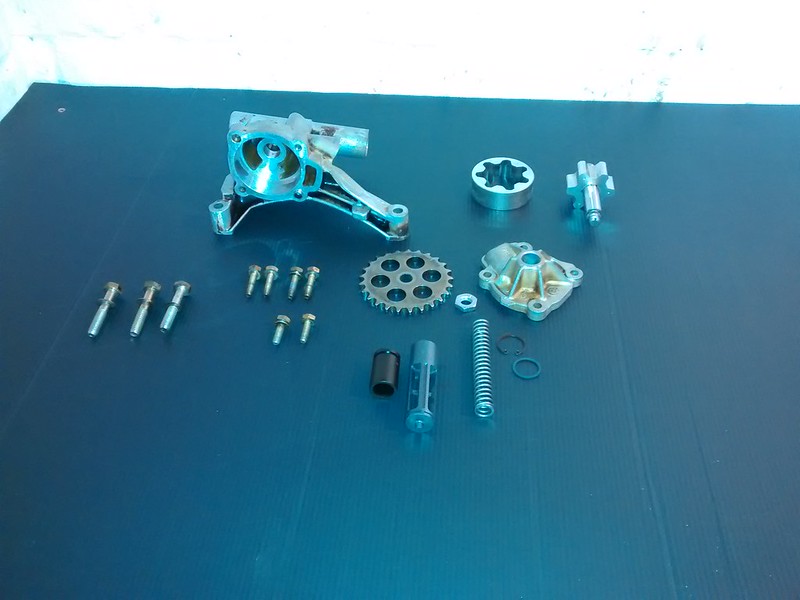
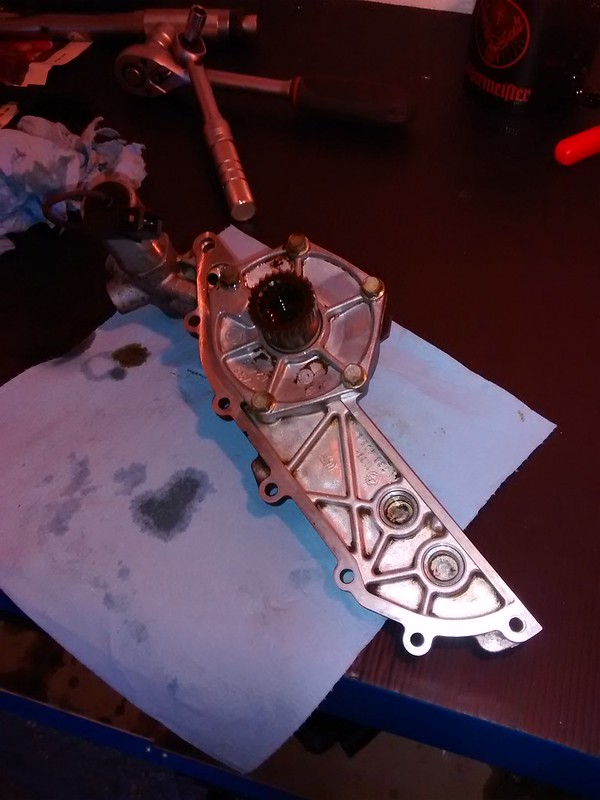
However my box of goodies from BMW arrived this week so I cracked on with rebuilding the oil pump and the VANOS unit. All seemingly basic stuff, so hopefully it'll all function properly when it times come to turn the key!
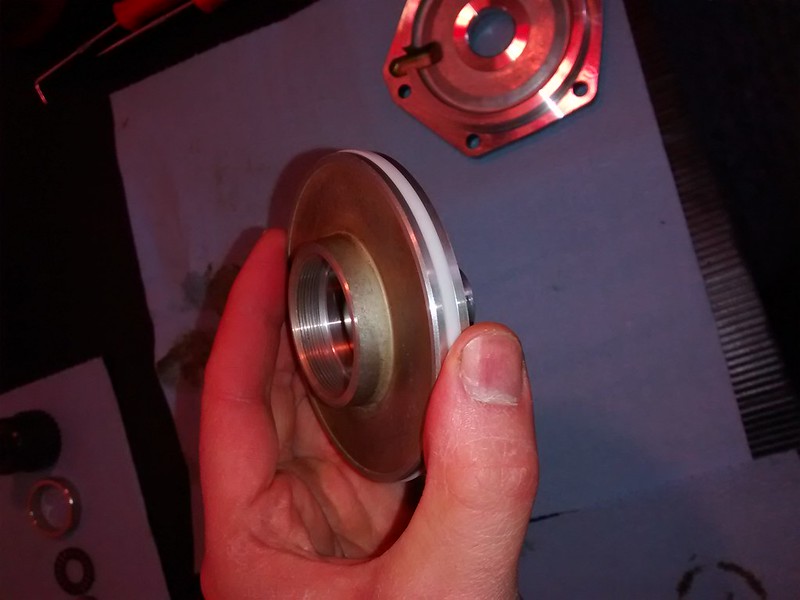
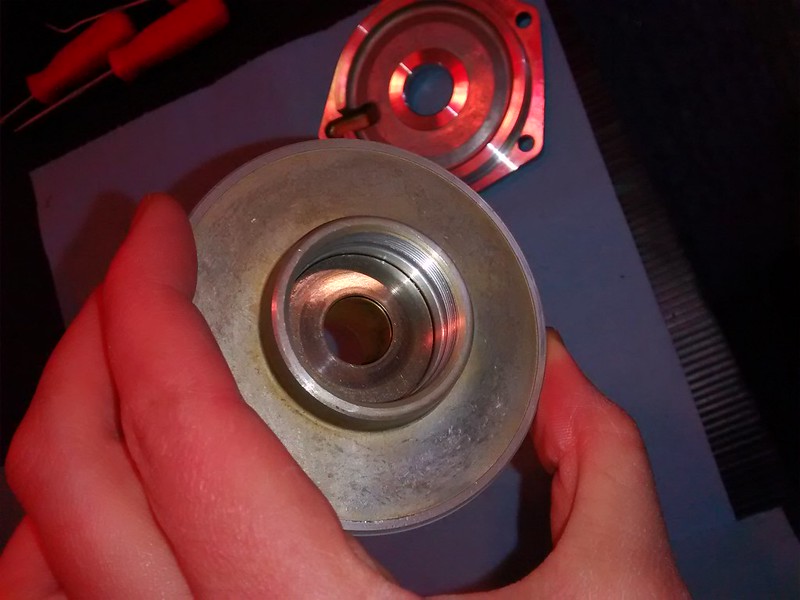
So, some pictures of cleaned/new oil pump bits. The inner/outer rotors, spring, valve and sealing o-ring were all replaced with new.
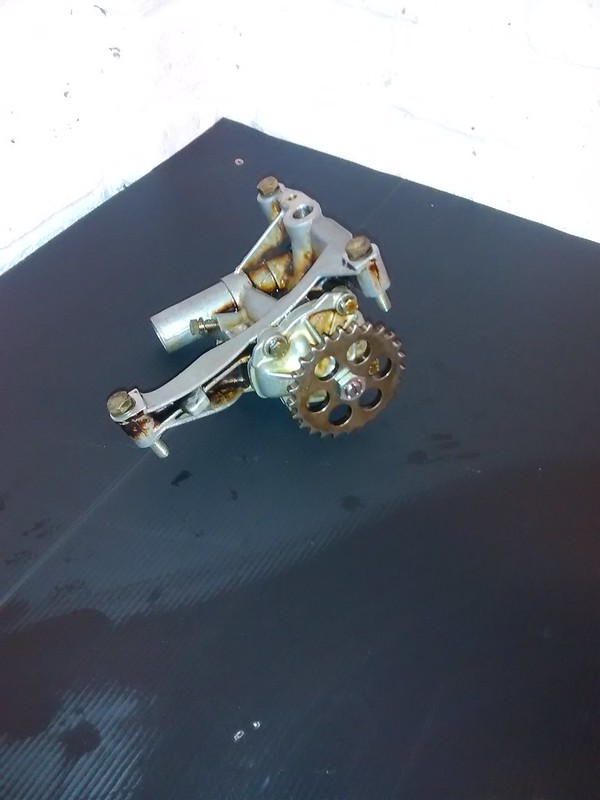
I'll hopefully be able to get a mate to tack weld the nut on once it's all fitted to the engine with the drive chain.
On the VANOS I replaced the infamous seals and the anti-rattle ring.
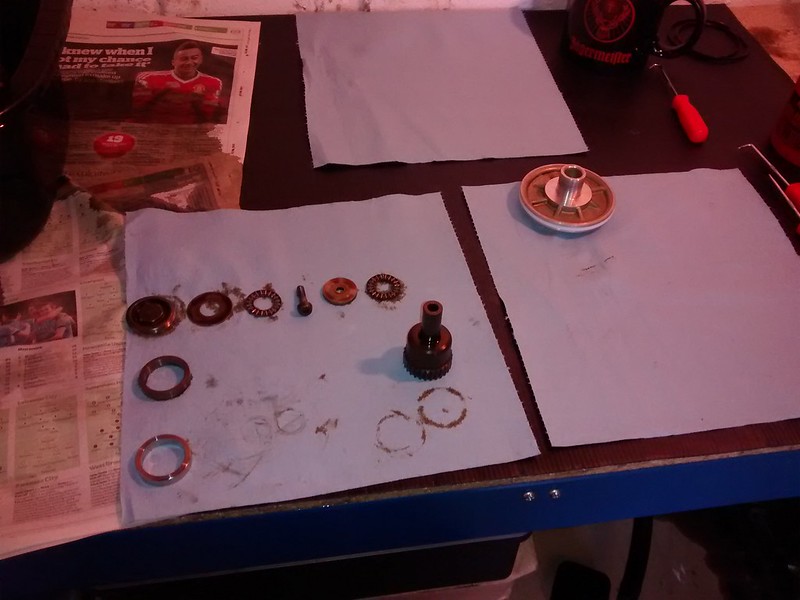
Following the rebuild there was no perceivable axial or radial play and a little bit of preload, so it all felt good to me. Hopefully it'll run many thousands of miles with no nasty noises
So far as trackdays are concerned, I'm hoping to do the LMC Aintree day in May as it's pretty local - then I'm at Blyton again on 17th June. That should be the last day out with the old engine...
The block, head and intake cam are still at the machine shop, so no progress there. To be honest, I'm still in no particular rush to get them back (Shalmanaser - I've taken your advice and opted to have the head skimmed and block decked too
As you say, better to be safe than sorry). I plan to do the bulk of the assembly over a 4-day weekend and I don't have the time to do that for a few weeks at least. However my box of goodies from BMW arrived this week so I cracked on with rebuilding the oil pump and the VANOS unit. All seemingly basic stuff, so hopefully it'll all function properly when it times come to turn the key!
So, some pictures of cleaned/new oil pump bits. The inner/outer rotors, spring, valve and sealing o-ring were all replaced with new.
I'll hopefully be able to get a mate to tack weld the nut on once it's all fitted to the engine with the drive chain.
On the VANOS I replaced the infamous seals and the anti-rattle ring.
Following the rebuild there was no perceivable axial or radial play and a little bit of preload, so it all felt good to me. Hopefully it'll run many thousands of miles with no nasty noises
So far as trackdays are concerned, I'm hoping to do the LMC Aintree day in May as it's pretty local - then I'm at Blyton again on 17th June. That should be the last day out with the old engine...
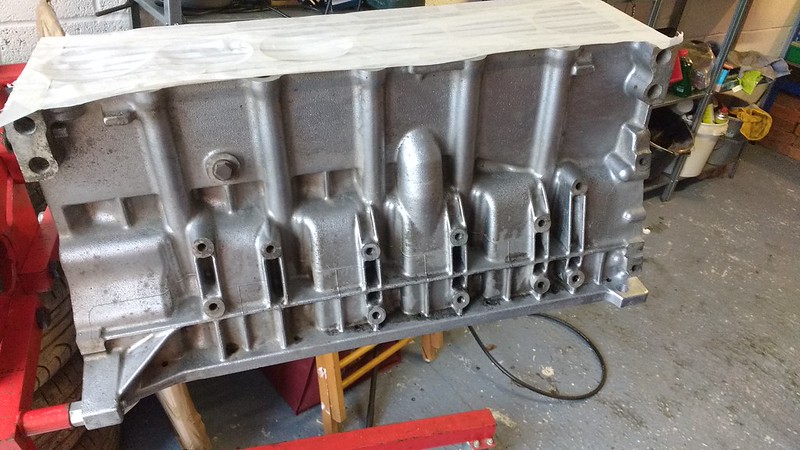
More progress over the weekend, though not as much as I'd originally planned. I hoped to have the block back to do the build this weekend, but that never happened.
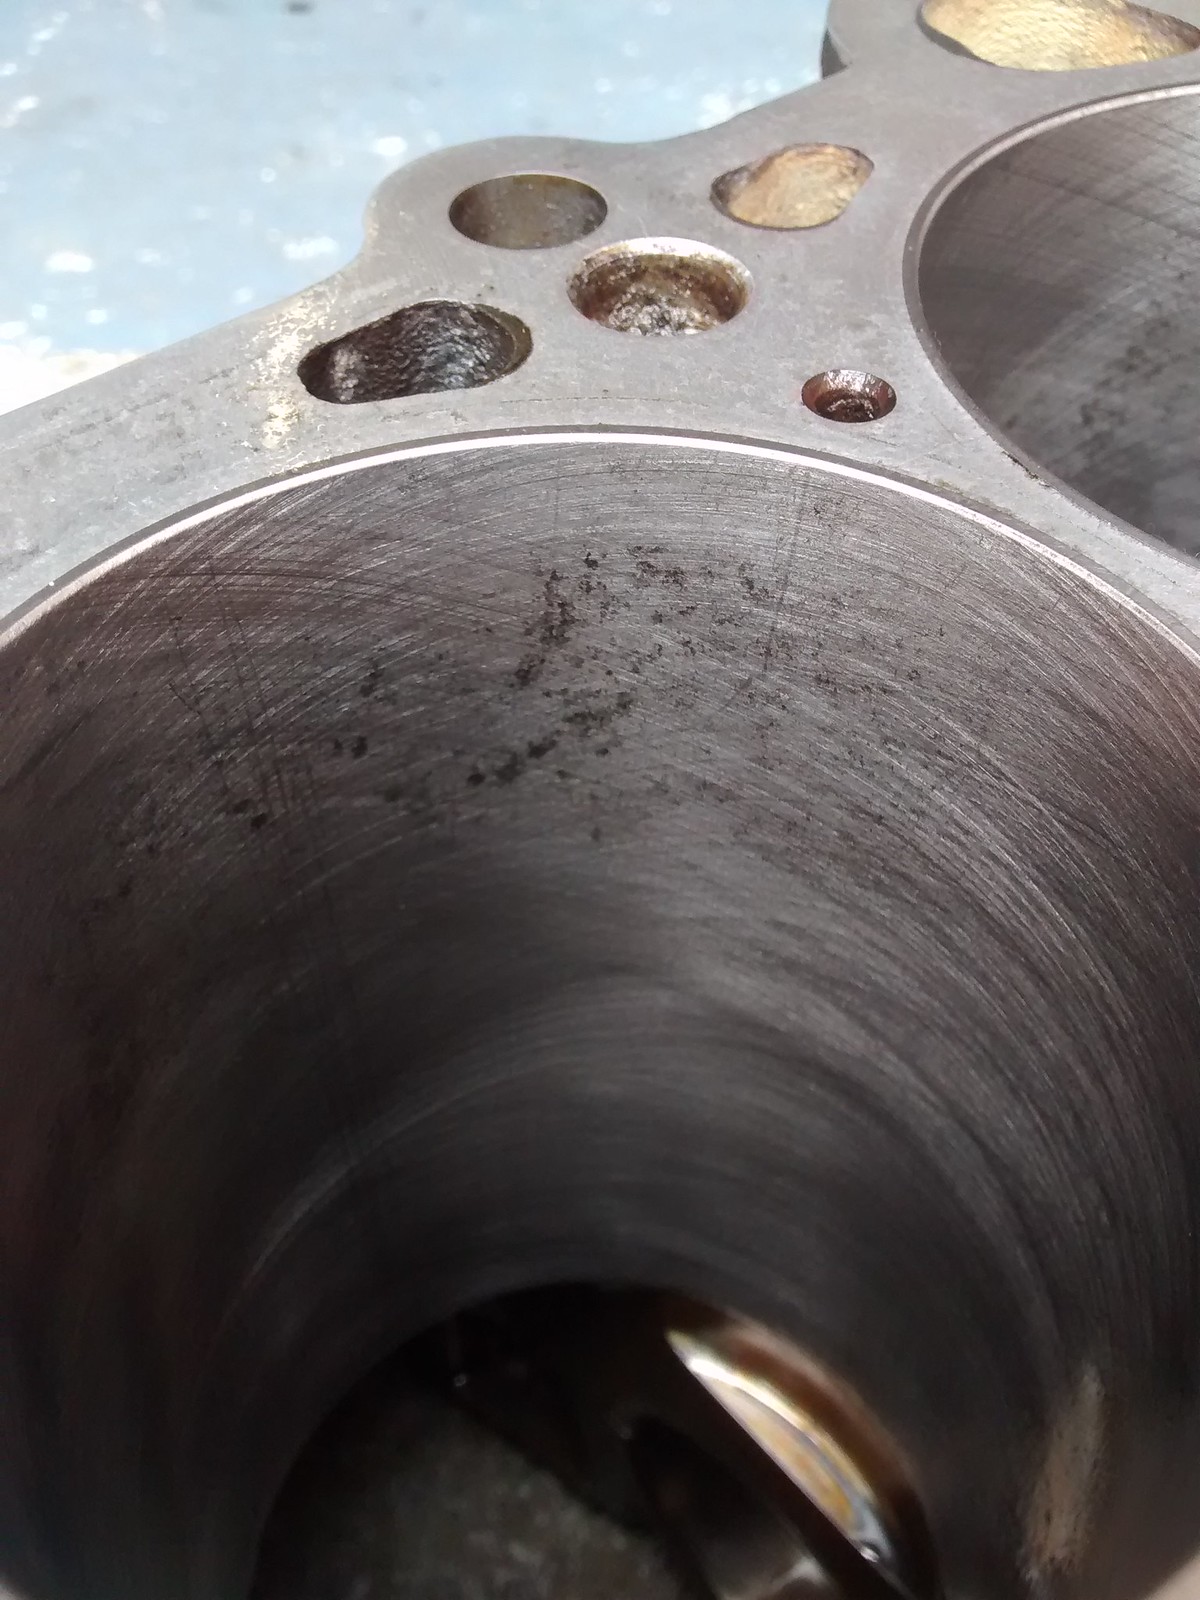
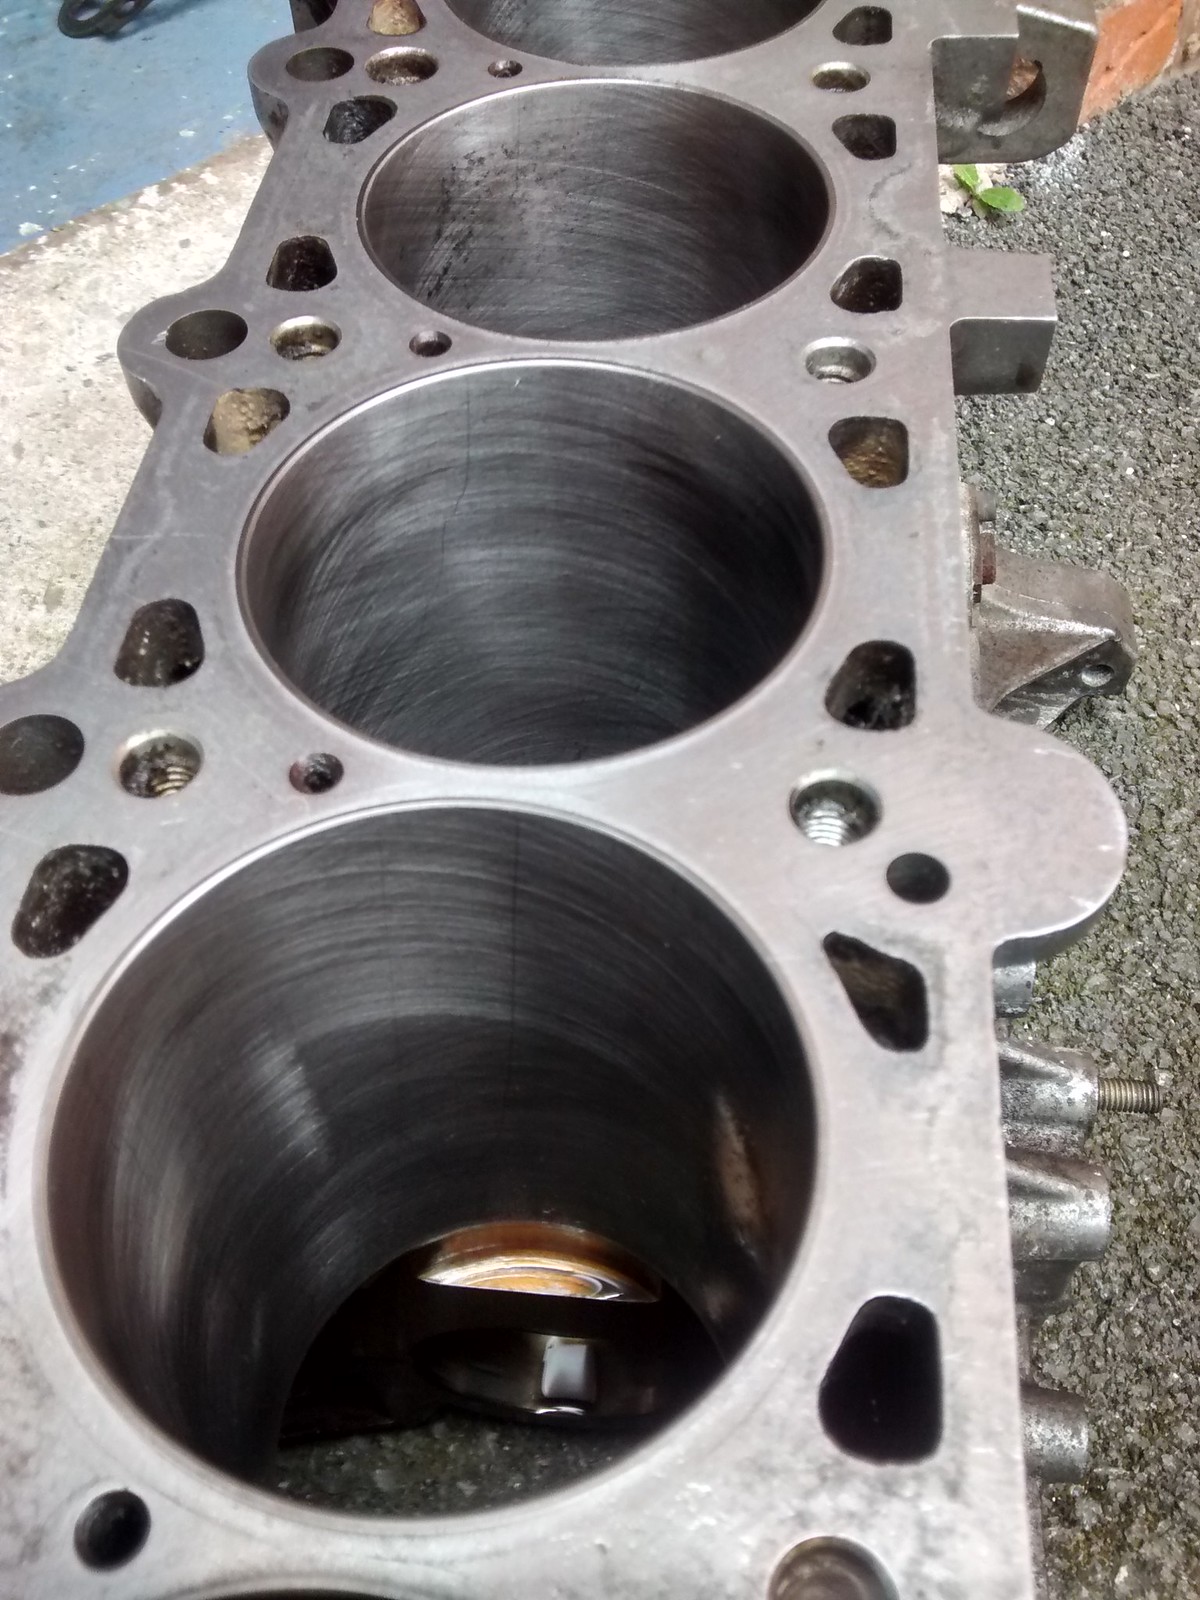
The block I'd handed over for machining had excessive wear (0.07 mm - or 3 thou - taper in 5 bores) and water damage in the bores. The only way this block was going to work was with a +0.25 or +0.5 mm overbore. I didn't fancy dropping a grand on oversize pistons, so I sourced another block (£50 - worth a punt, right?) and dropped that off at the shop on Wednesday. I may still go the overbore route if sourcing a good block proves troublesome...but I get the impression from the shear number of people who seem to have done this build, that shouldn't be too hard? We'll see!
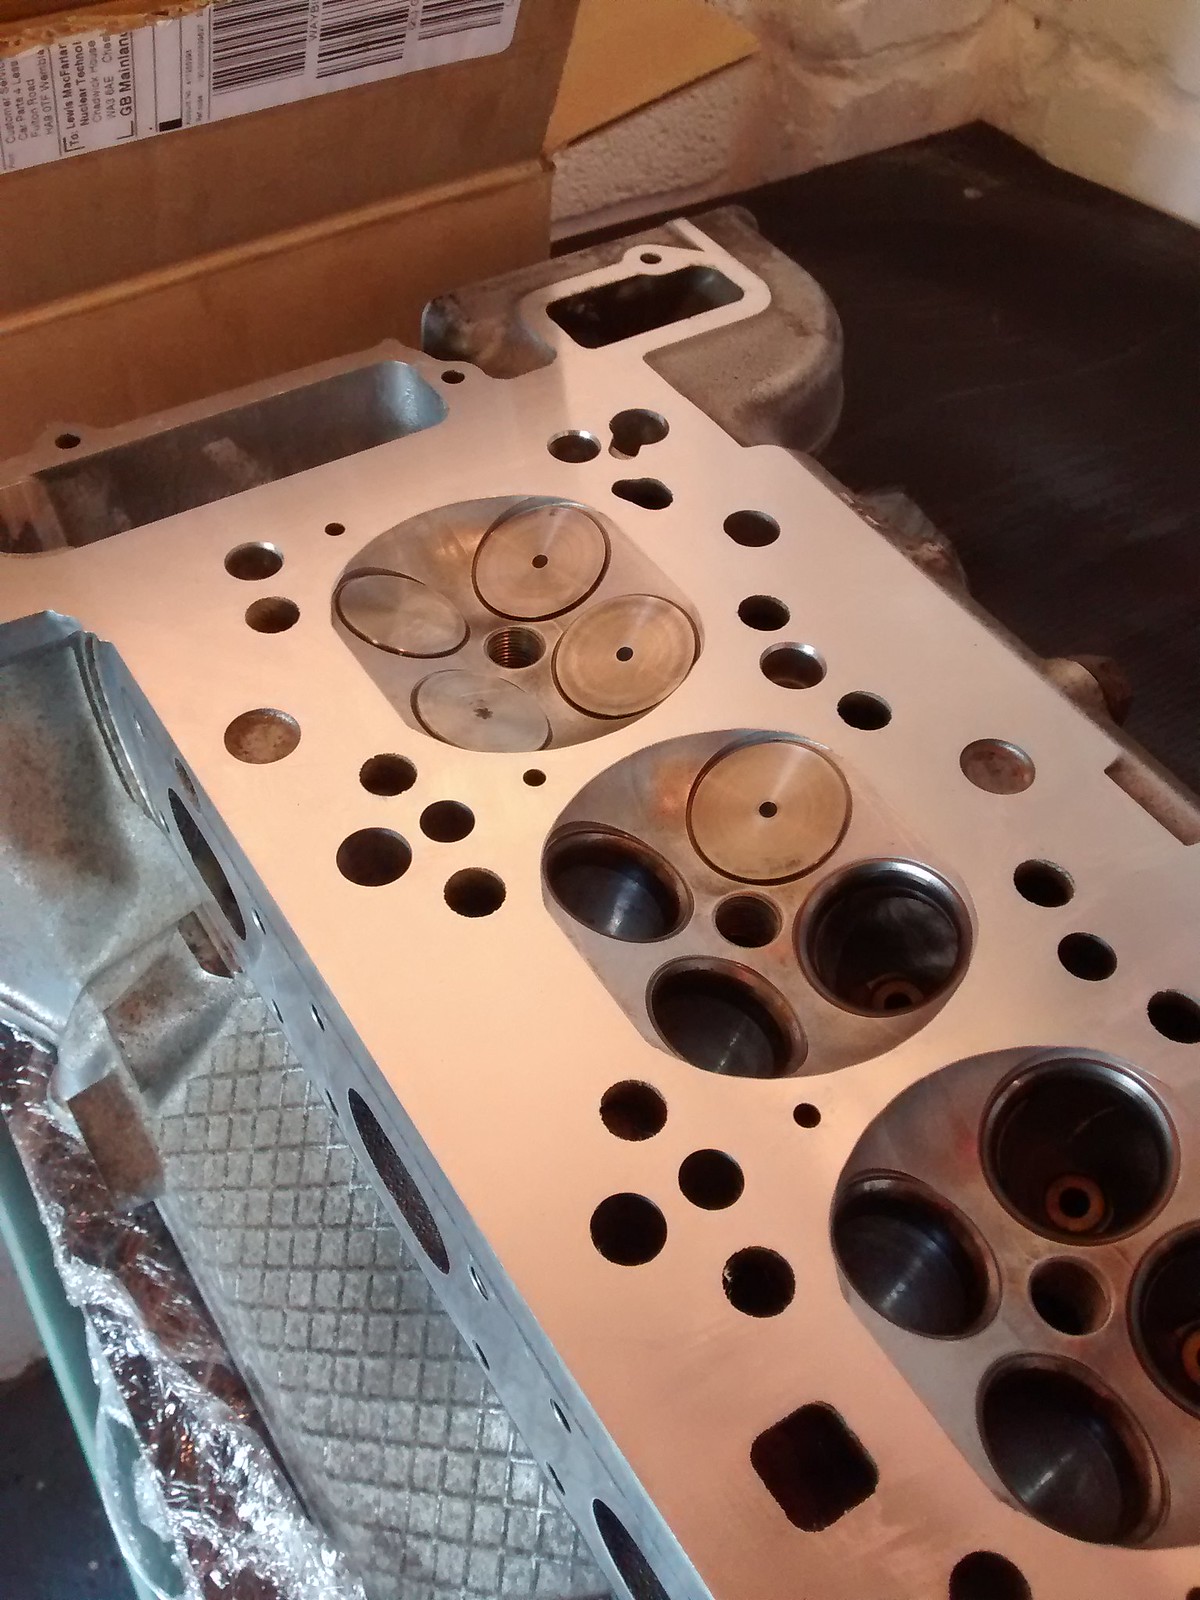
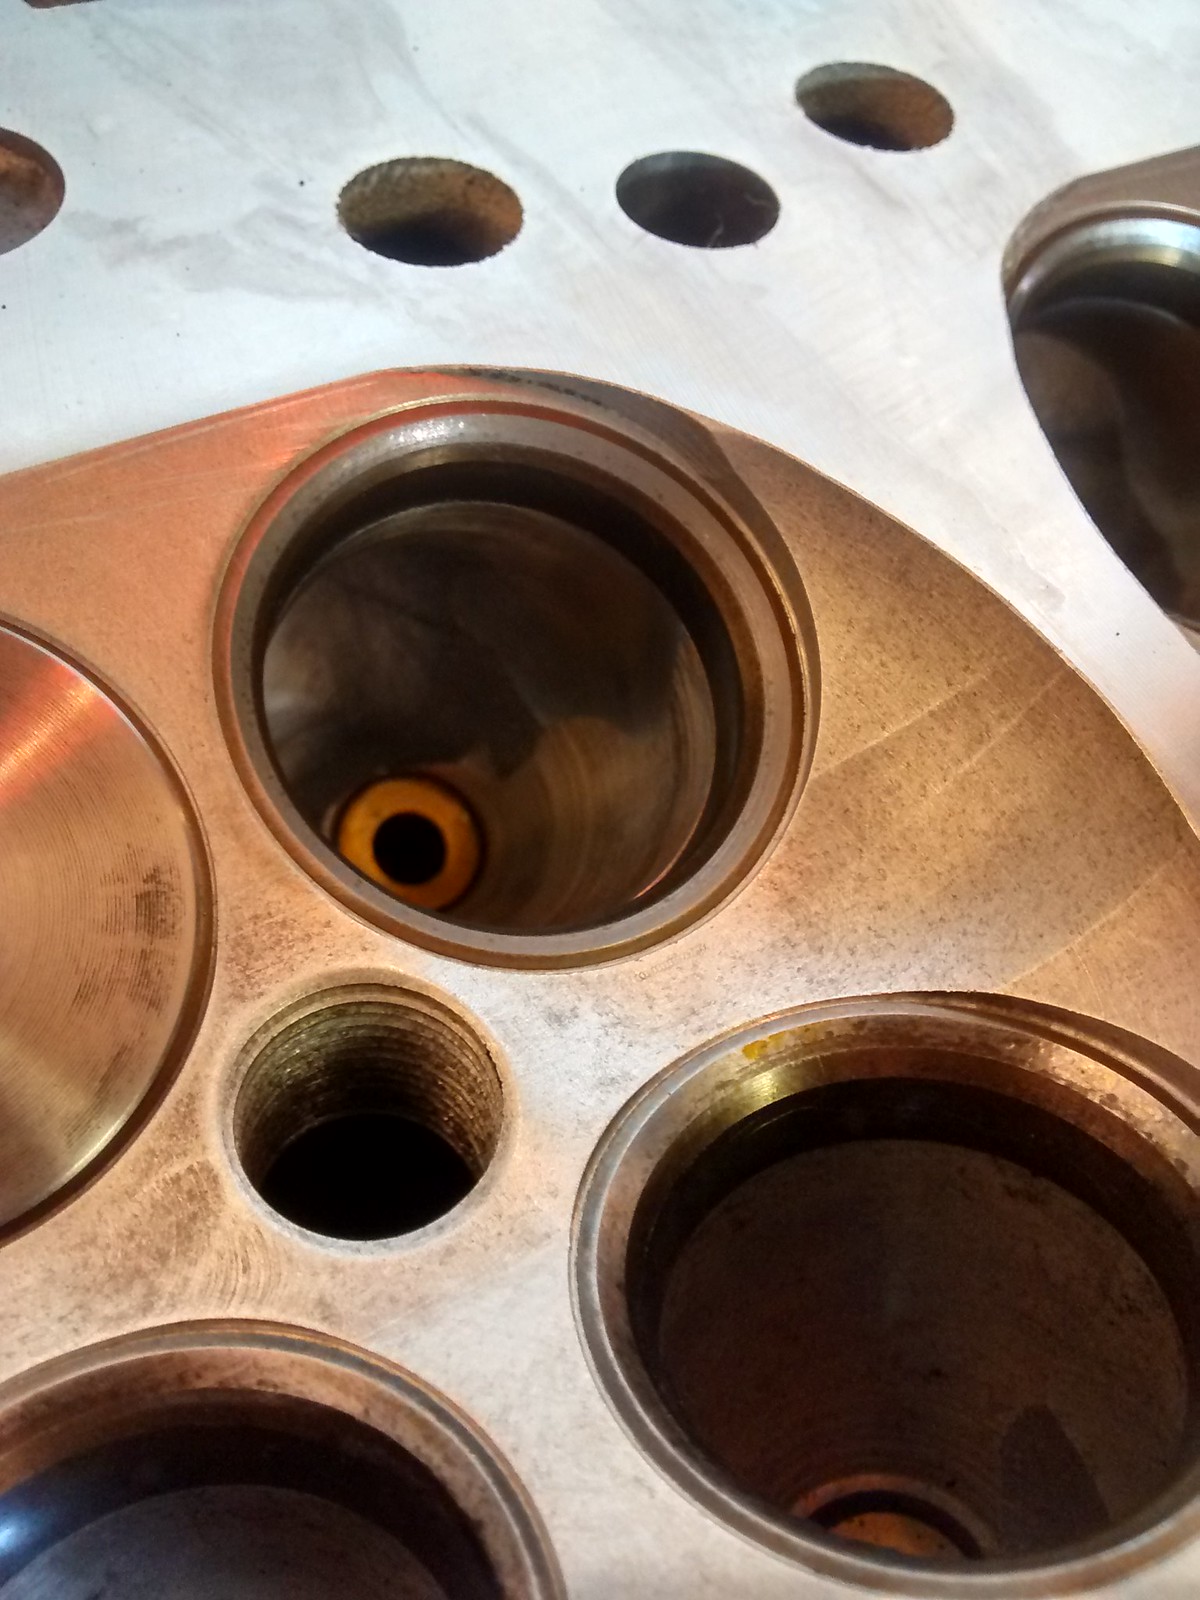
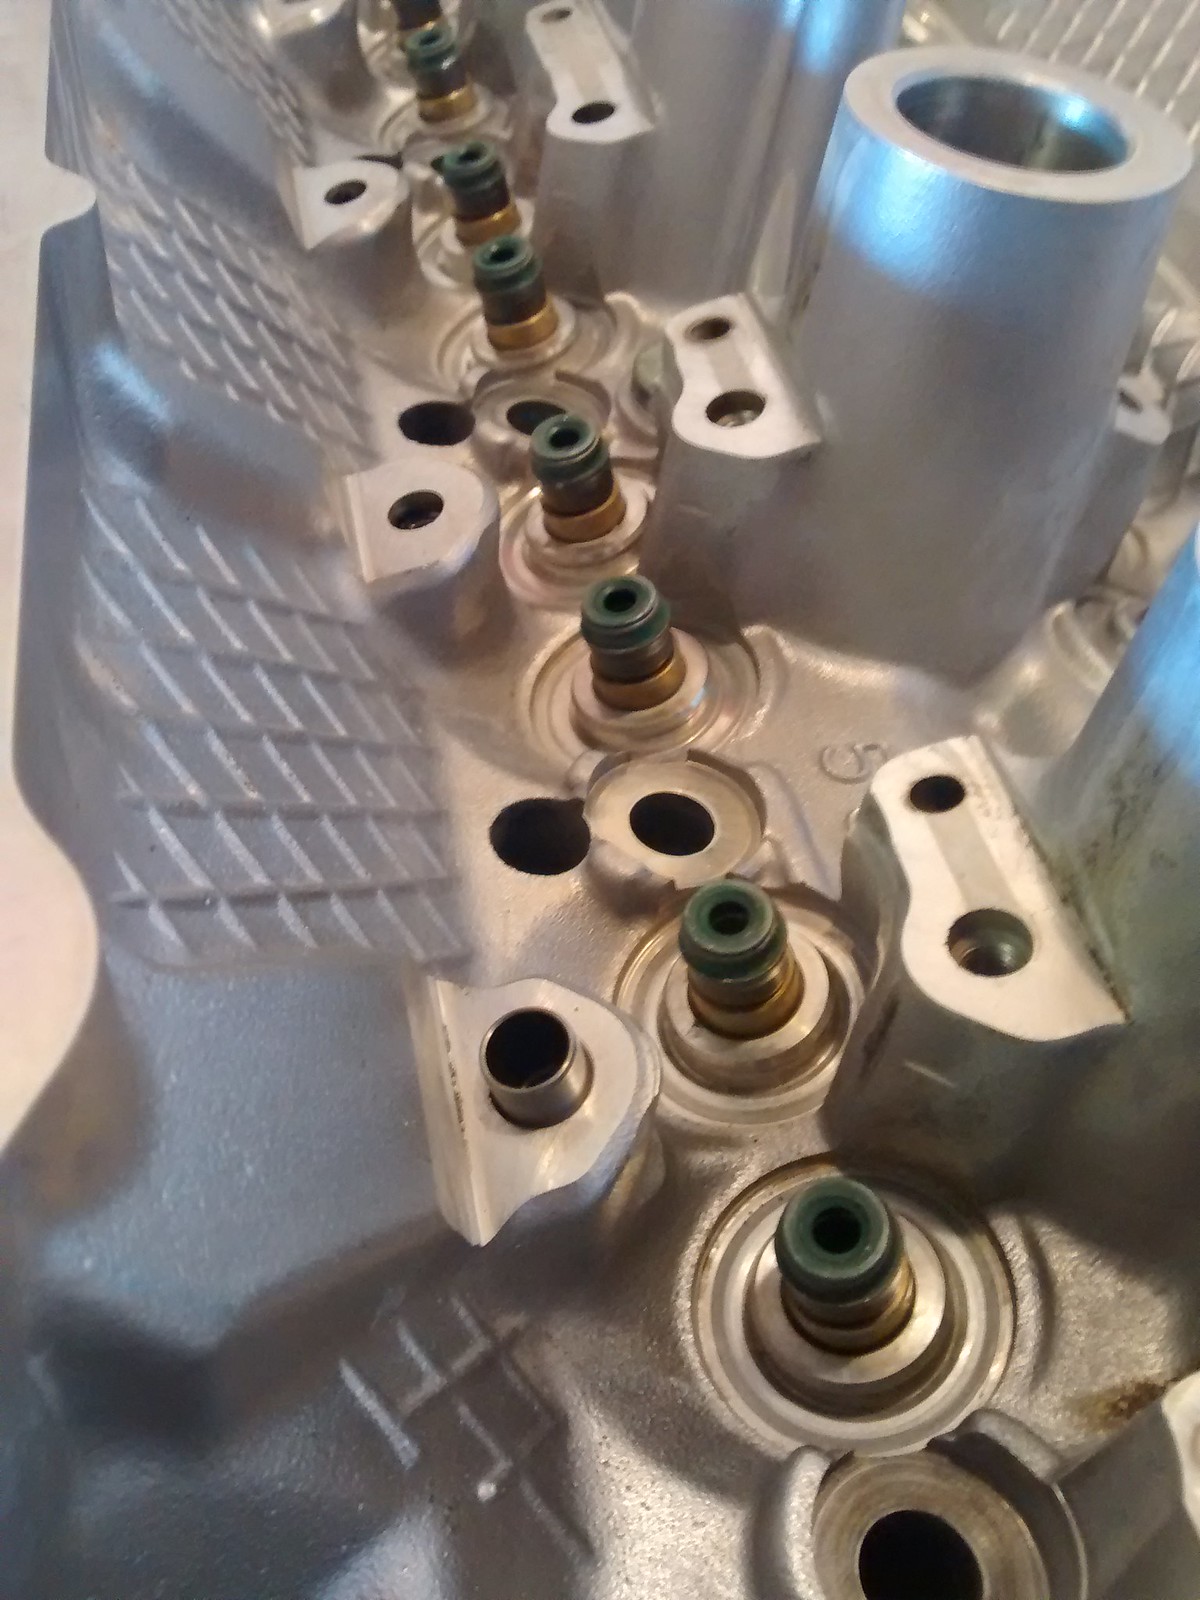
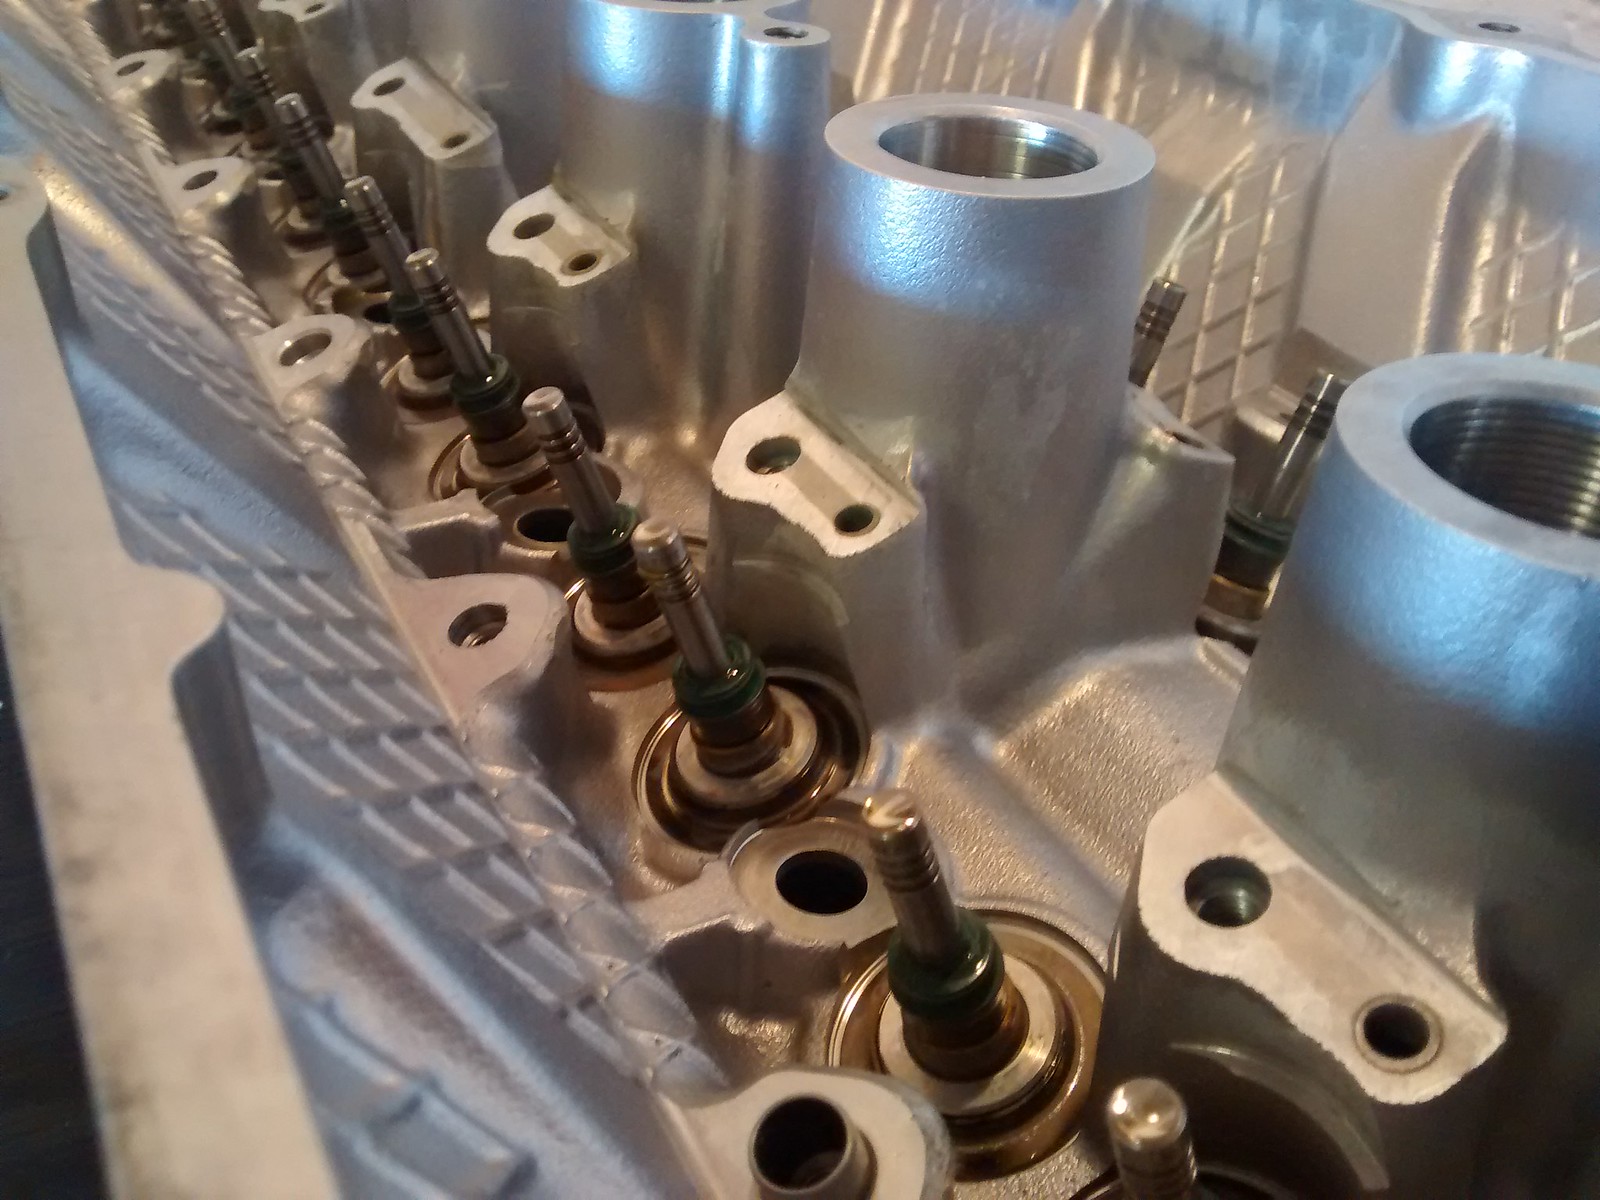
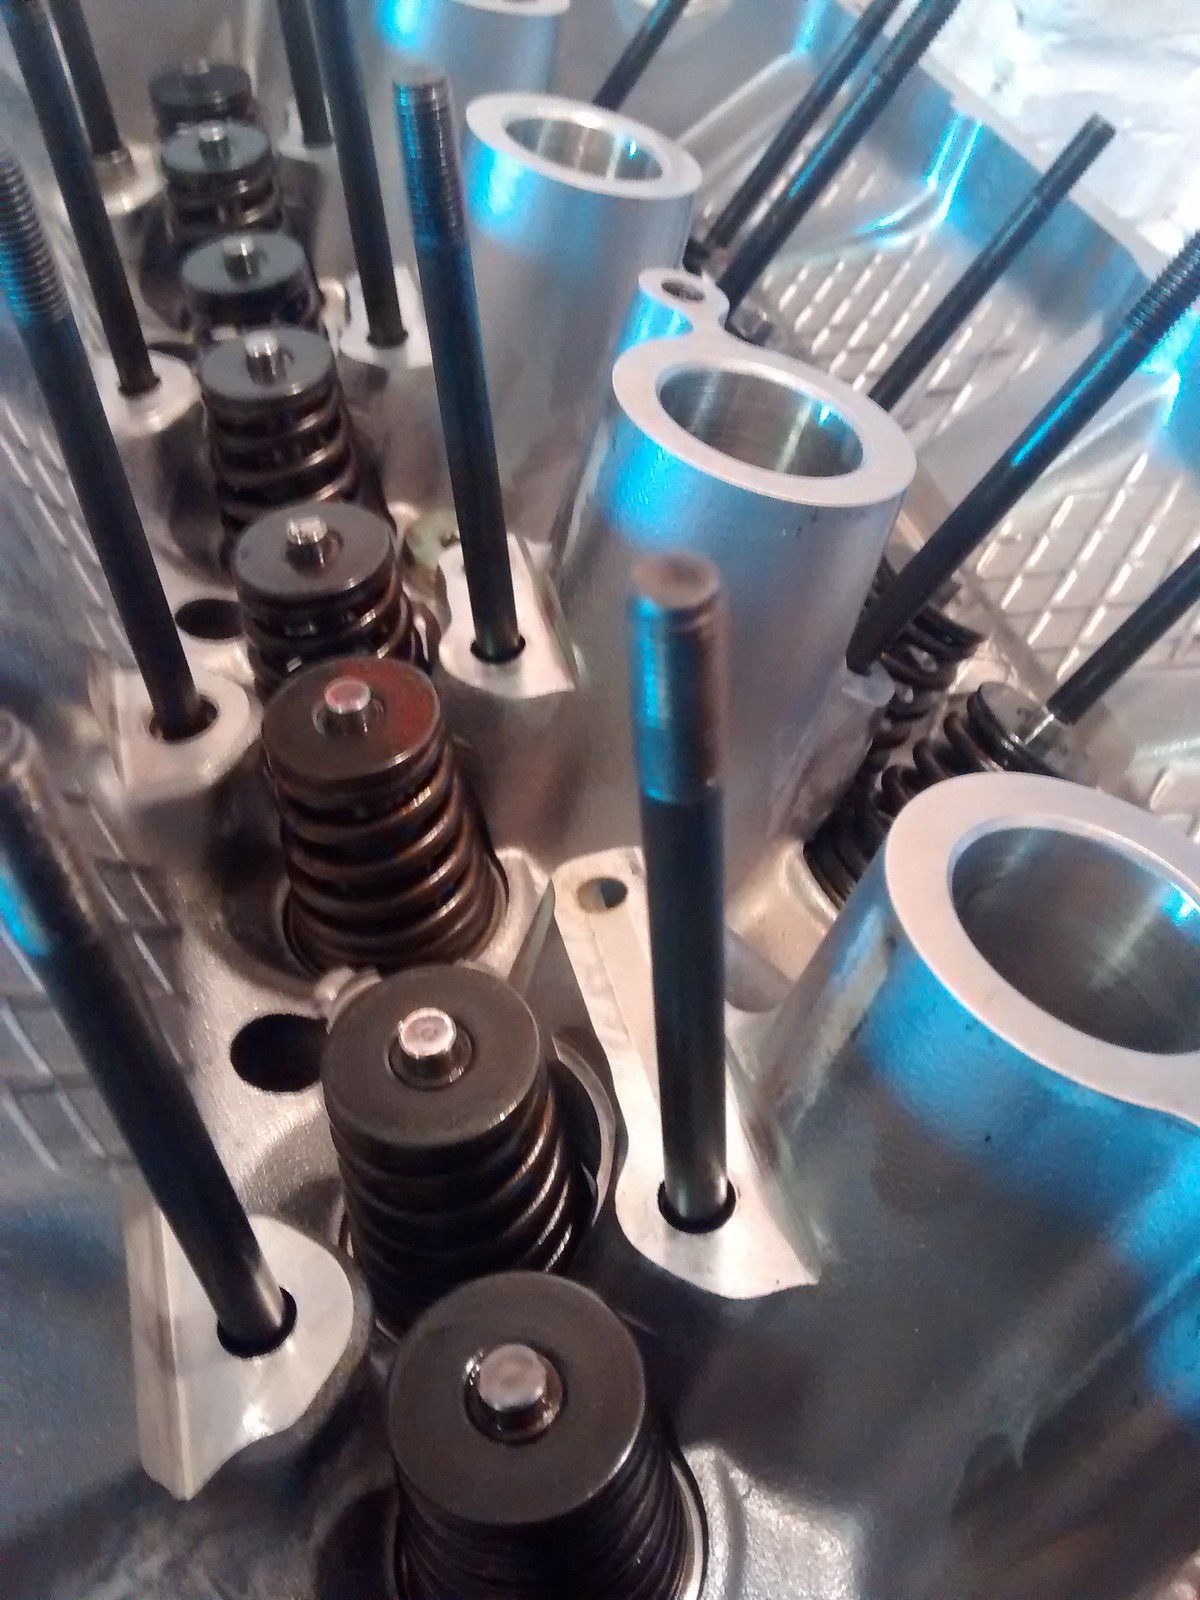
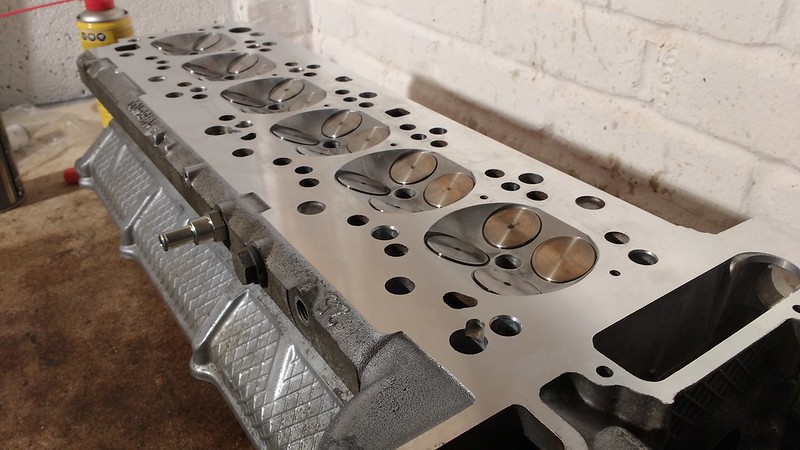
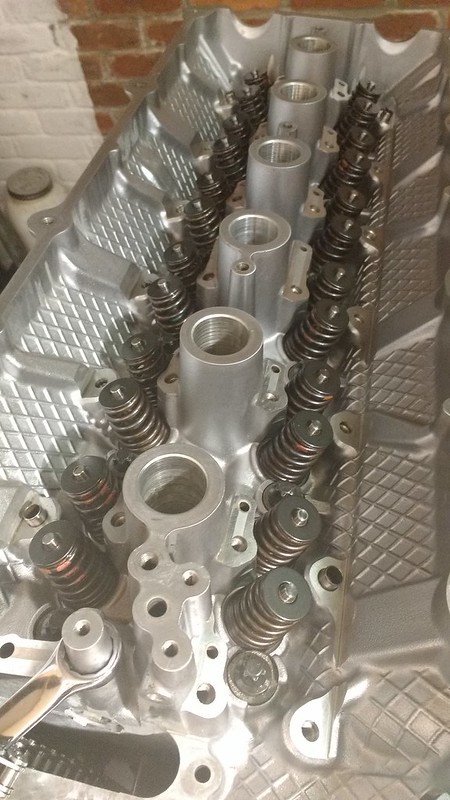
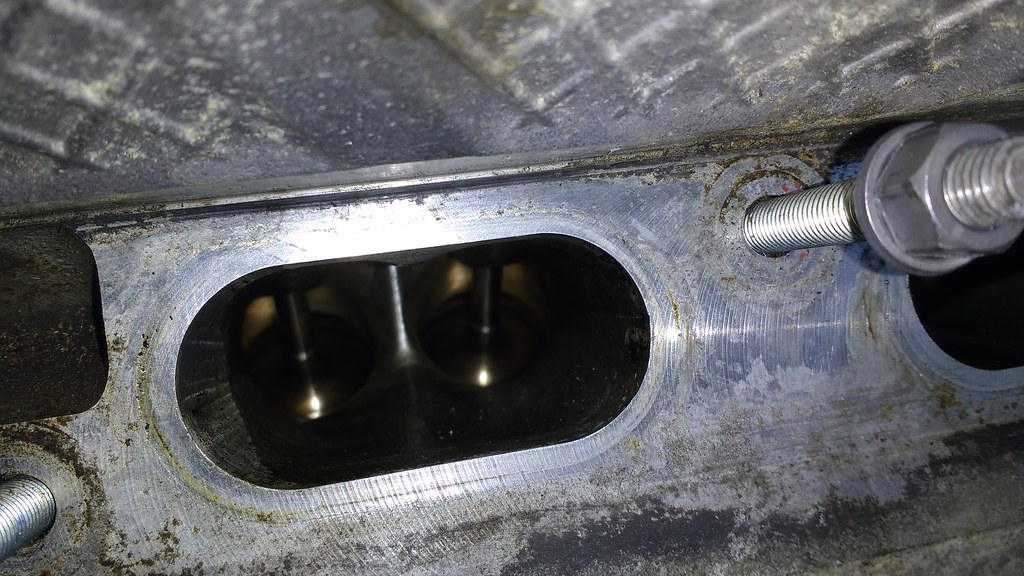
Anyway, I did get my freshly skimmed & tanked cylinder head back at least. So I got on with putting the valves back in that.
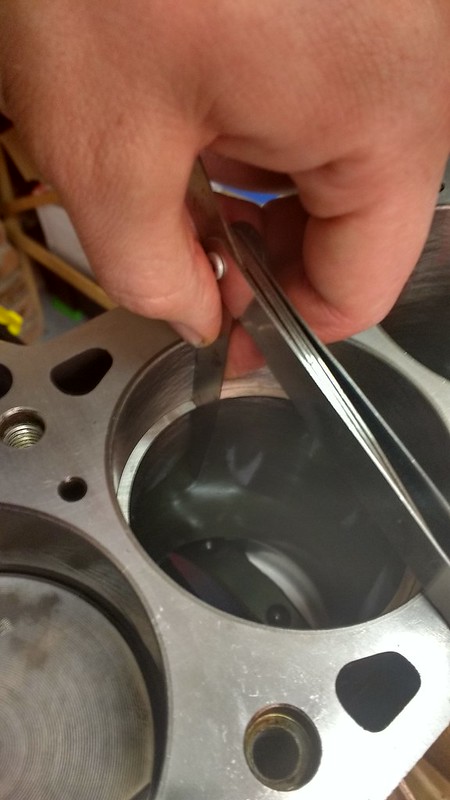
I started with some light lapping using a fine paste, checking valve guide clearance as I went. All seemed good and the lapping tidied up the exhaust valve pitting nicely. Didn't need a lot of it mind - and soon I seemed to have a good seal in all 6 chambers. Second photo is lapped vs. unlapped valve seat.
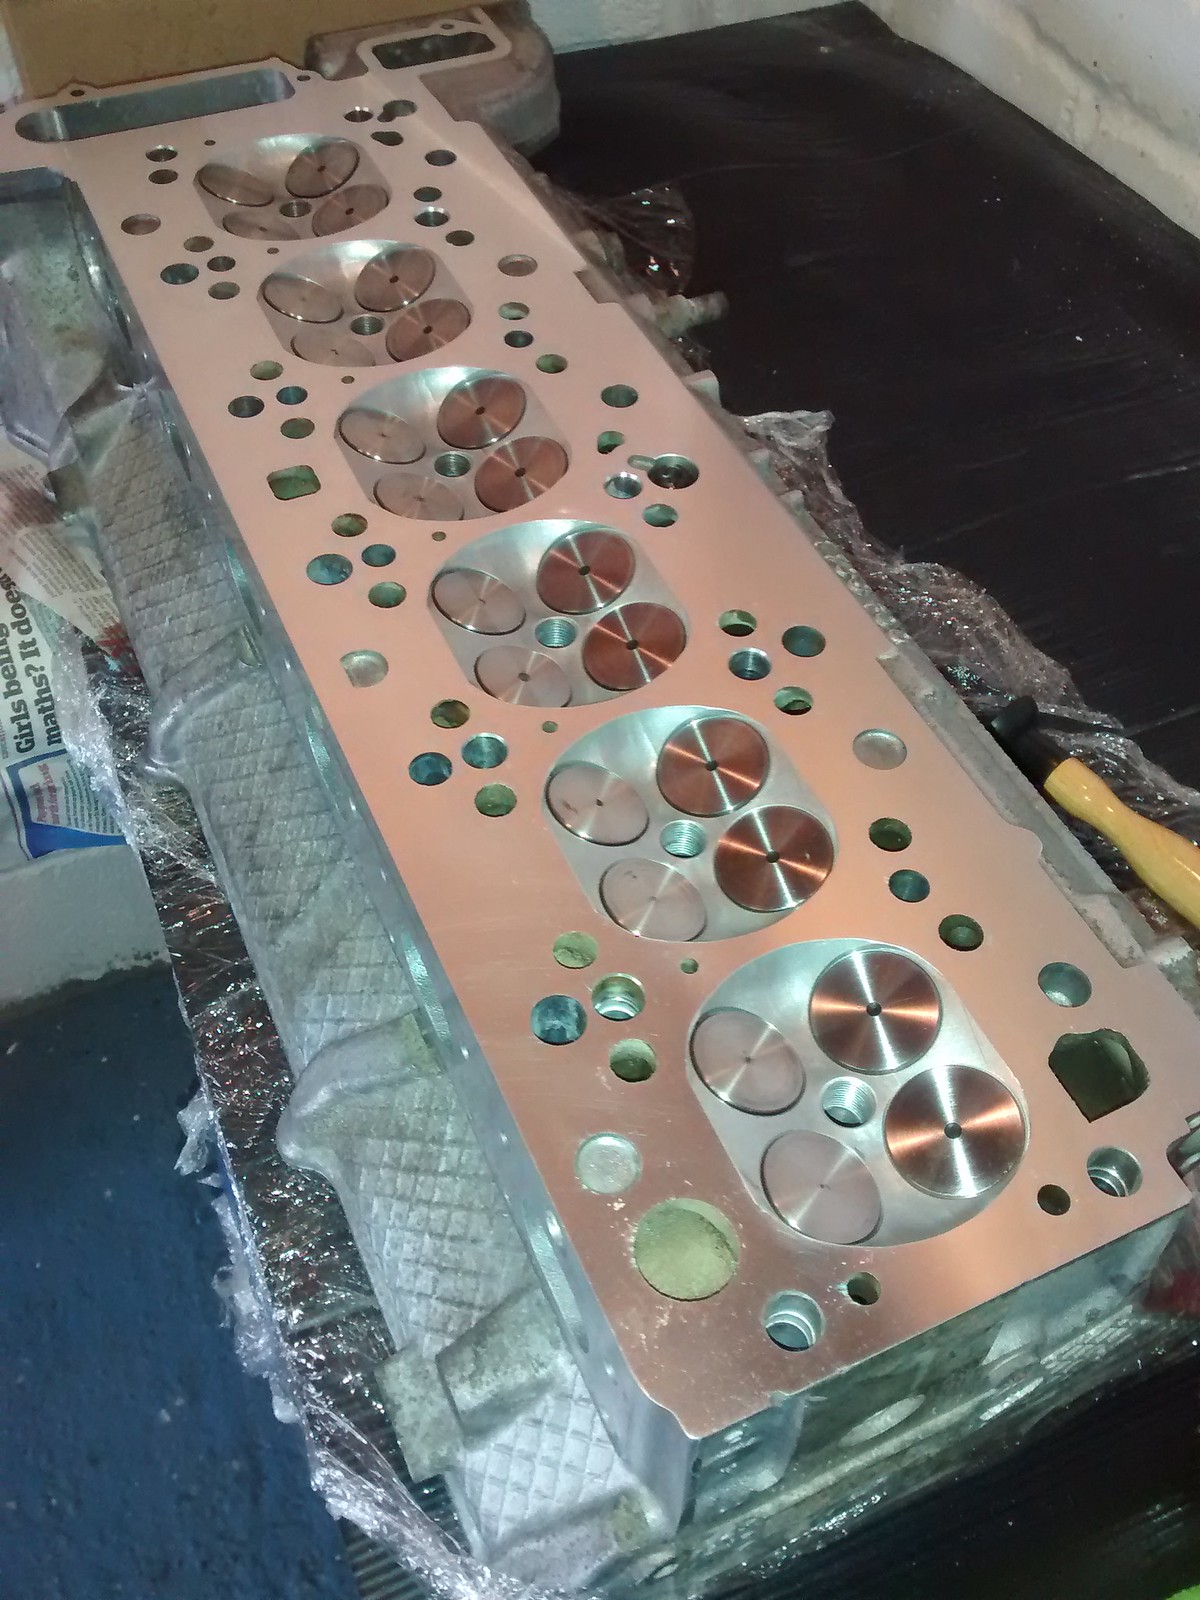
So out came all the valves again, keeping careful note of their original locations. Then I put the jetwash back onto the cylinder head to make sure it was completely clear of machine swarf and abrasives. Then I dried it in the conservatory. My garden is southwest facing and pretty open to the elements! So in this weekend's weather, the conservatory becomes a proverbial oven. Did the job nicely

So clean, engine-ruinous-matter free cylinder head was transferred back to the garage for new valve stem seals. Valves popped back into their correct locations. Oil non-return valve and valve spring bottom plates dropped back in. Then to faffing around with springs and collets.
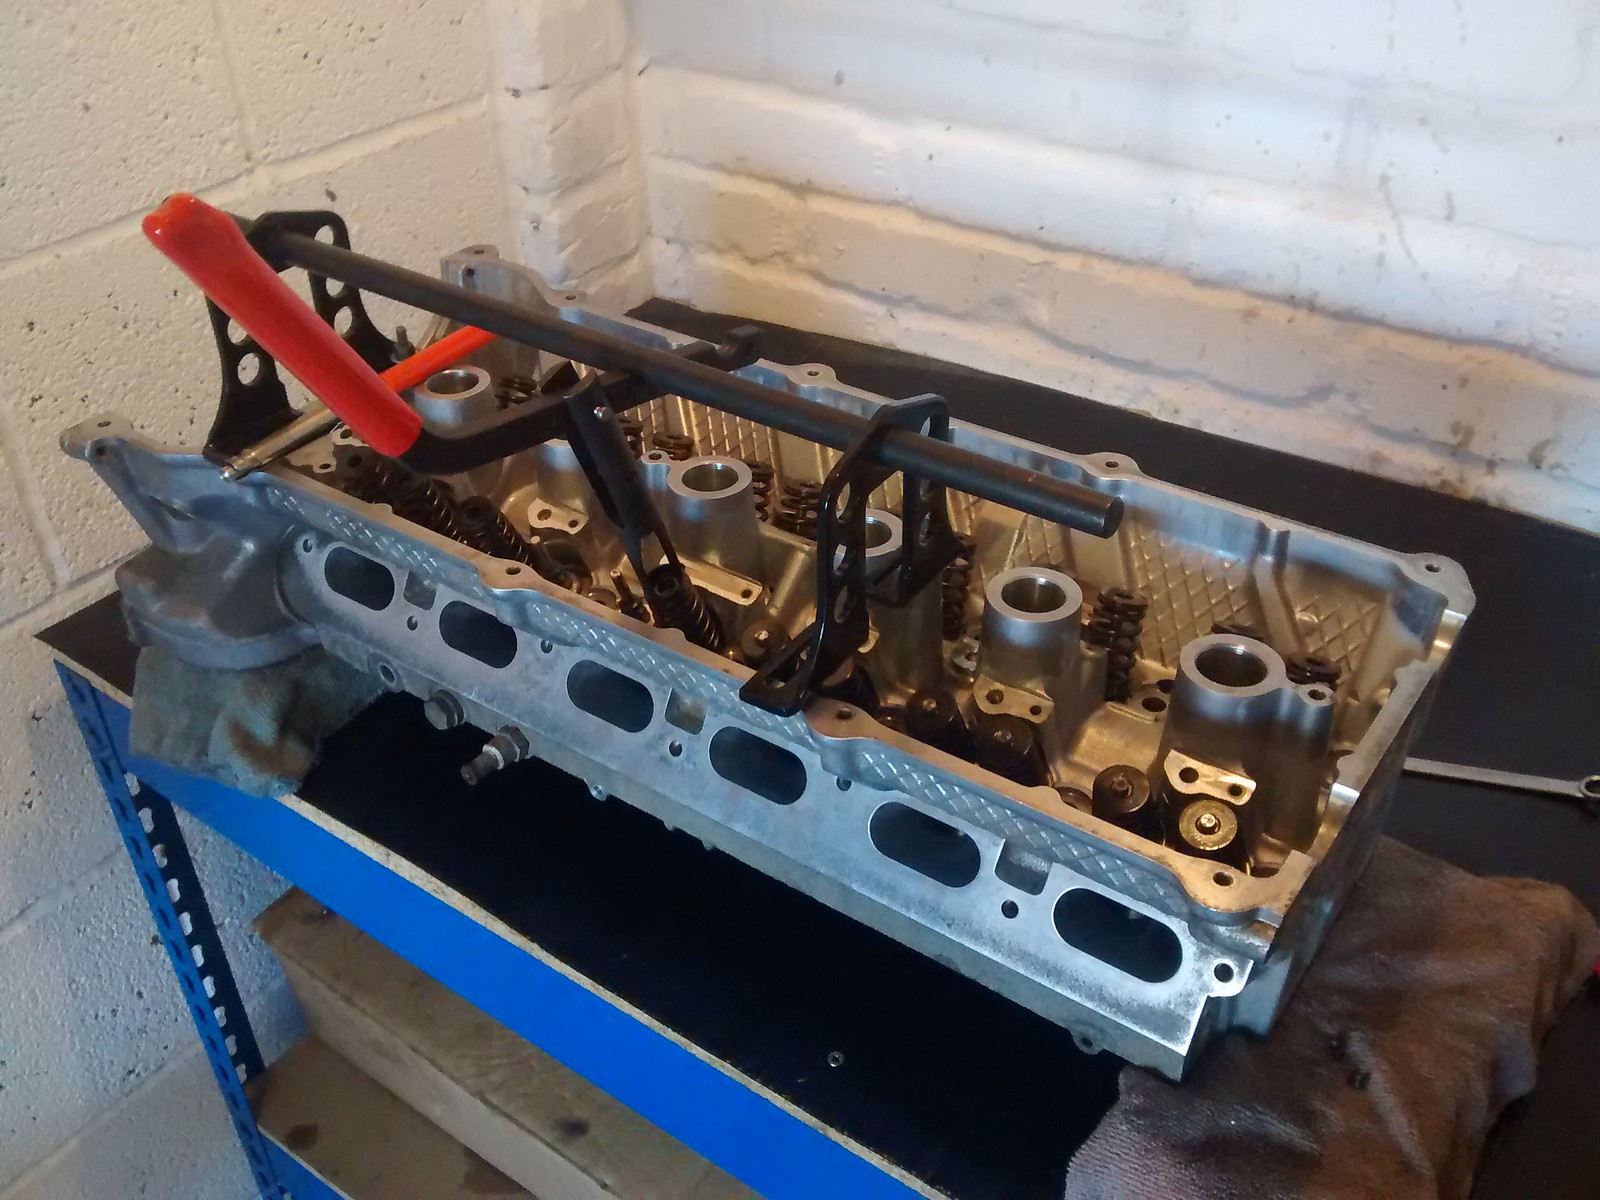
I should add I'm using valve springs from the M54 throughout. The springs are the same part number as M52 valve springs, but after measuring them all up, it seems the M54 ones come in a few mm longer on average. Read - less compression, less wear?
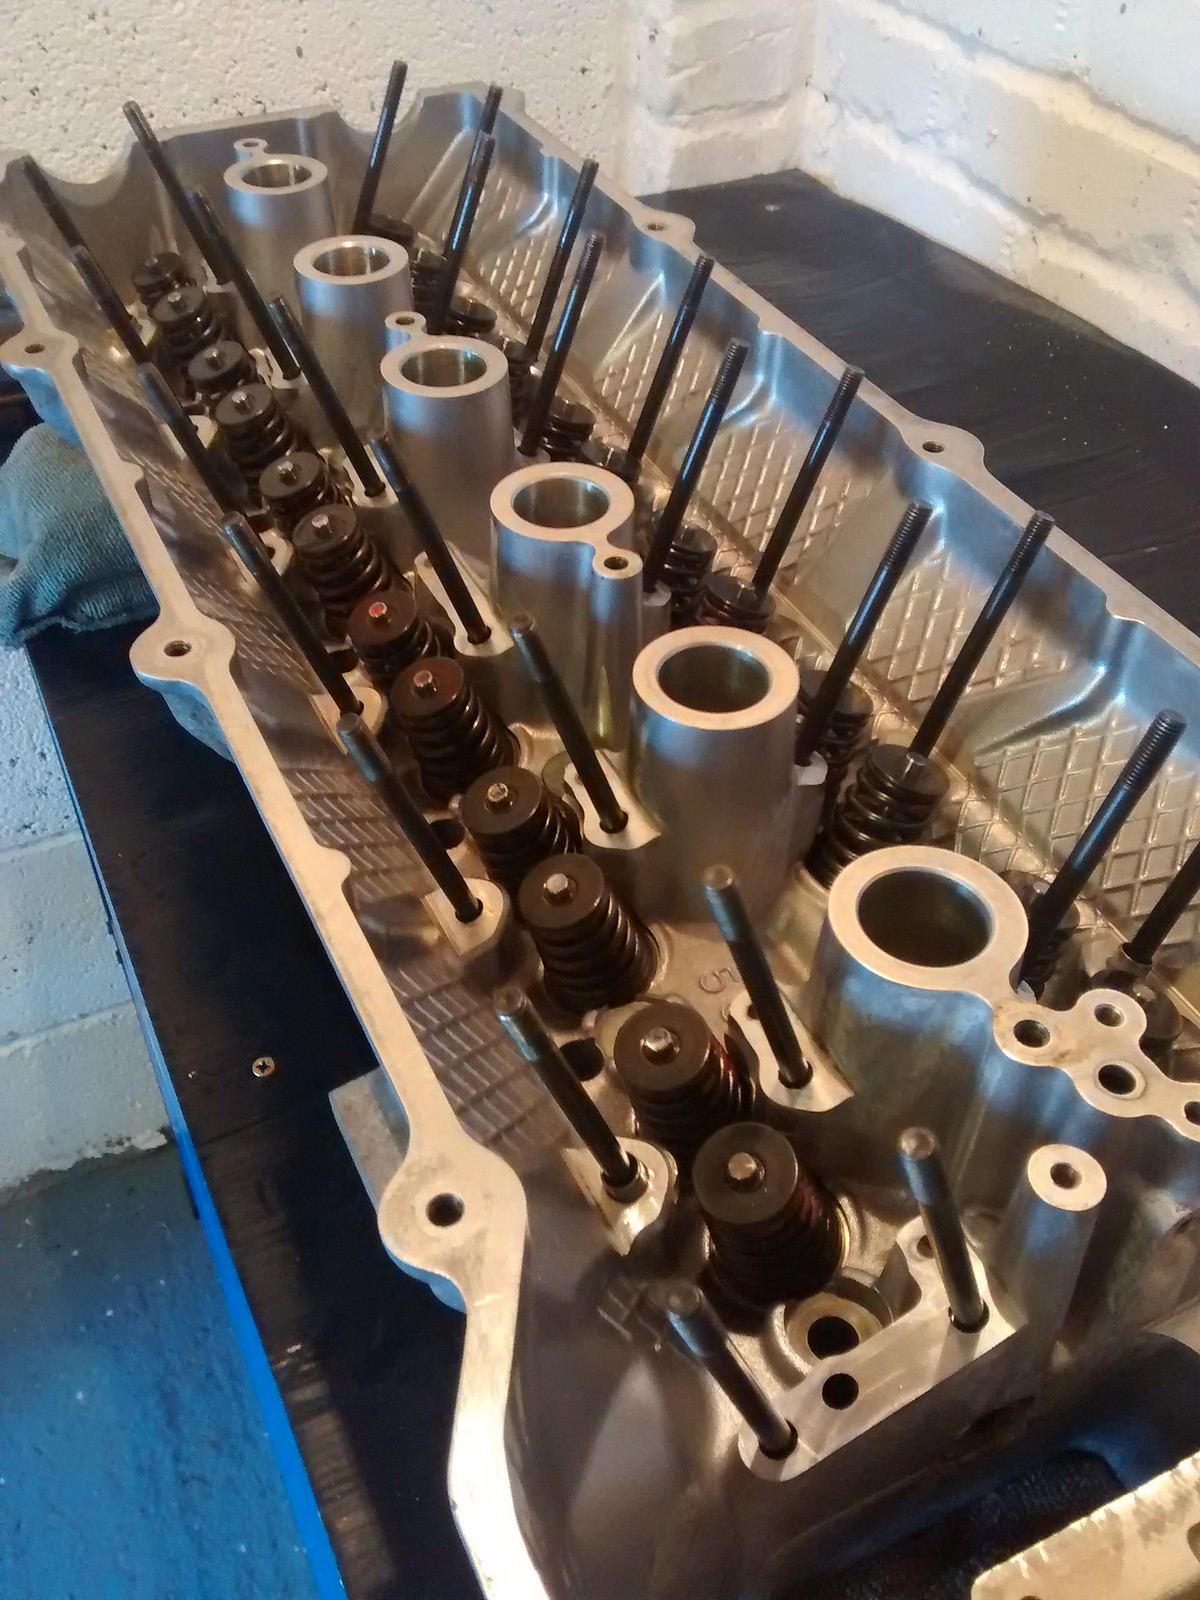
I'd bought a cylinder head servicing toolset before taking the various engines to pieces - that used a lever arm compressor that has a frame that bolts to the head. It also came with a special little collet tool - a magnet for removal at one end (wonderful) and some kind of spring loaded gripper at the other (less so). Faffed around with this thing for a little while only to realise it wasn't going to work with the compressor in situ. So settled for fitting the collets by hand instead. I was worried after a few minutes that this would be impossible. But - it seems there is a knack. And once I had it sussed, it didn't take long to do all 24
Wound in the camshaft lifter block studs, job done! It's now wrapped up in plastic and sitting on the top shelf awaiting a freshly skimmed, cleaned and honed block. If that ever happens...
I'm off to Donington Park for an evening trackday in the car this week, then Blyton again on 17th of June. After that, the car is going to be retired for engine swap preparations.
The block I'd handed over for machining had excessive wear (0.07 mm - or 3 thou - taper in 5 bores) and water damage in the bores. The only way this block was going to work was with a +0.25 or +0.5 mm overbore. I didn't fancy dropping a grand on oversize pistons, so I sourced another block (£50 - worth a punt, right?) and dropped that off at the shop on Wednesday. I may still go the overbore route if sourcing a good block proves troublesome...but I get the impression from the shear number of people who seem to have done this build, that shouldn't be too hard? We'll see!
Anyway, I did get my freshly skimmed & tanked cylinder head back at least. So I got on with putting the valves back in that.
I started with some light lapping using a fine paste, checking valve guide clearance as I went. All seemed good and the lapping tidied up the exhaust valve pitting nicely. Didn't need a lot of it mind - and soon I seemed to have a good seal in all 6 chambers. Second photo is lapped vs. unlapped valve seat.
So out came all the valves again, keeping careful note of their original locations. Then I put the jetwash back onto the cylinder head to make sure it was completely clear of machine swarf and abrasives. Then I dried it in the conservatory. My garden is southwest facing and pretty open to the elements! So in this weekend's weather, the conservatory becomes a proverbial oven. Did the job nicely
So clean, engine-ruinous-matter free cylinder head was transferred back to the garage for new valve stem seals. Valves popped back into their correct locations. Oil non-return valve and valve spring bottom plates dropped back in. Then to faffing around with springs and collets.
I should add I'm using valve springs from the M54 throughout. The springs are the same part number as M52 valve springs, but after measuring them all up, it seems the M54 ones come in a few mm longer on average. Read - less compression, less wear?
I'd bought a cylinder head servicing toolset before taking the various engines to pieces - that used a lever arm compressor that has a frame that bolts to the head. It also came with a special little collet tool - a magnet for removal at one end (wonderful) and some kind of spring loaded gripper at the other (less so). Faffed around with this thing for a little while only to realise it wasn't going to work with the compressor in situ. So settled for fitting the collets by hand instead. I was worried after a few minutes that this would be impossible. But - it seems there is a knack. And once I had it sussed, it didn't take long to do all 24
Wound in the camshaft lifter block studs, job done! It's now wrapped up in plastic and sitting on the top shelf awaiting a freshly skimmed, cleaned and honed block. If that ever happens...
I'm off to Donington Park for an evening trackday in the car this week, then Blyton again on 17th of June. After that, the car is going to be retired for engine swap preparations.
Edited by motorhole on Monday 30th May 12:01
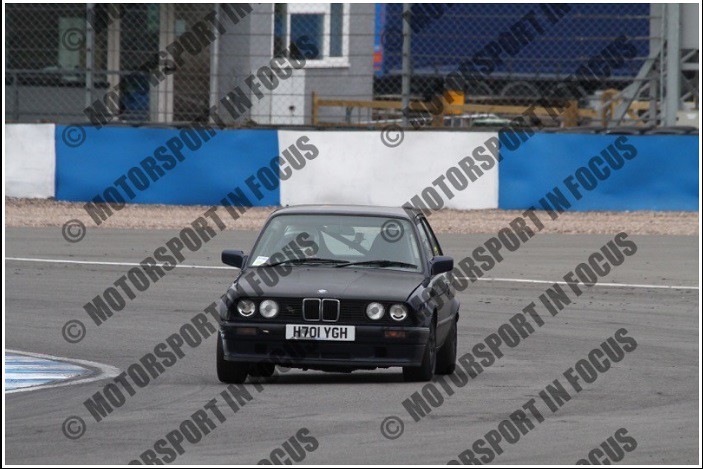
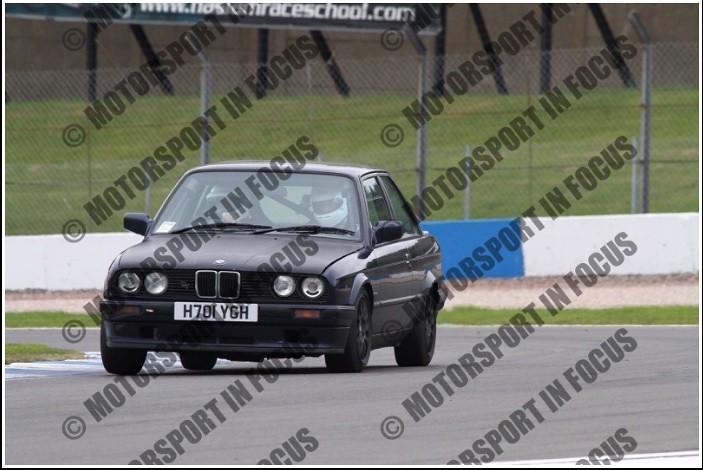
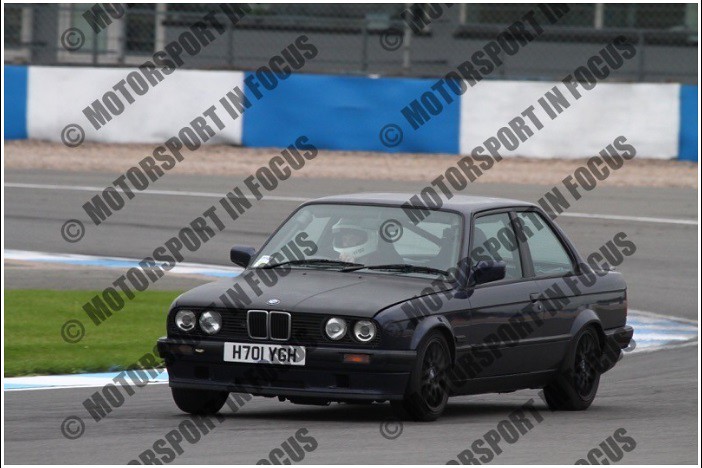
Donington was great!
Now I'm not ashamed to admit I was pretty slow from the get go. I'd never been to Donington before and I know it can be a bit of a car wrecker so caution was in order. As the evening wore on though and I got a better feel for the lines and that the car wasn't going to bite, I got to go a bit quicker and in the last session, had a great time chasing down an Exige which then, ultimately, ended up holding me up. Surprised how little difference in acceleration there was, the E30 stayed with it well onto the straight out of the last corner.
I had Sf_Manta with me too - his first time out in the car since he helped with the engine swap a couple of years ago. He was on hand to provide guidance on tyre pressures (having been an ex race tyre engineer) and that made a difference without a doubt. He also took a couple of flybys for me:
https://www.youtube.com/watch?v=uESHS9Yfc70
https://www.youtube.com/watch?v=i9kOadgTCJU
Downsides? Well coming down from north of 115 mph twice per lap meant the OEM brake pads left deposits on the discs resulting in brake judder when hot. Not intolerable, just - well, it was noticeable! I guess some decent performance orientated pads will nip that in the bud. I have no on-board video footage because I arrived at Donny to find my GoPro battery was hosed and wouldn't hold charge. And what's this about the Cafe closing at 5.30? Nowhere to get a brew or even buy a bottle of water between sessions! Not for reference for future evening trackdays.
All in all though, great track - love that you can take loads of kerb, especially at the apex of the old hairpin. Car never missed a beat. I'll be back...
Good to see the pictures from that day Certainly enjoyed that chase on the Exige in the last session, I can bet the driver was spitting bullets that he couldn't get away from what on first glance looks like a scruffy old E30 
Really think the suspension doesn't look too bad from those pictures, and it's perceived roll, the car looks actually fairly flat. I'd get the engine build done first then see how it handles the increase in power before jumping too hard on the suspension upgrade, it may even just be some stiffer springs needed.
Some DS2500 pads and decent track tyres would be a good idea as I mentioned then (Avon ZZR's, R888s or such) and that car would be a genuinely quick car at Donington.
Certainly enjoyed that chase on the Exige in the last session, I can bet the driver was spitting bullets that he couldn't get away from what on first glance looks like a scruffy old E30 Really think the suspension doesn't look too bad from those pictures, and it's perceived roll, the car looks actually fairly flat. I'd get the engine build done first then see how it handles the increase in power before jumping too hard on the suspension upgrade, it may even just be some stiffer springs needed.
Some DS2500 pads and decent track tyres would be a good idea as I mentioned then (Avon ZZR's, R888s or such) and that car would be a genuinely quick car at Donington.
Sf_Manta said:
Good to see the pictures from that day Certainly enjoyed that chase on the Exige in the last session, I can bet the driver was spitting bullets that he couldn't get away from what on first glance looks like a scruffy old E30
Bet he had the last laugh though, as he pulled out of the paddock gate...I'm willing to bet even an Exige is rather more refined on the drive home than my E30! Those yellow speed awareness stripes for fast roundabouts - they're just brutal Certainly enjoyed that chase on the Exige in the last session, I can bet the driver was spitting bullets that he couldn't get away from what on first glance looks like a scruffy old E30 Well, that's it for now I guess! Did Blyton Park again on 16th June, now the car is parked up for what may be a number of months.
Another faultless showing from the car. Less so than me! I was slower than last time out and had a few 'moments', one of which got captured on camera. Unfortunately the big slide I just about managed to rescue missed being on video by about 30 seconds of battery life. Can only put it down to the car being so good, I started pushing my luck
So, obviously the engine swap has to go ahead. But while it's out, I thought I might as well go about sorting the wiring properly too. The engine wiring, being an off the shelf item, is fine, but a lot of the body loom is now redundant and can be removed. A few switches etc I'd like to relocate too and put in a USB power point - and finally get round to replacing bulbs on the instrument cluster. I may also have more focused suspension and trackday tyres too by the time it sees its next day out.
A few pictures from the day out
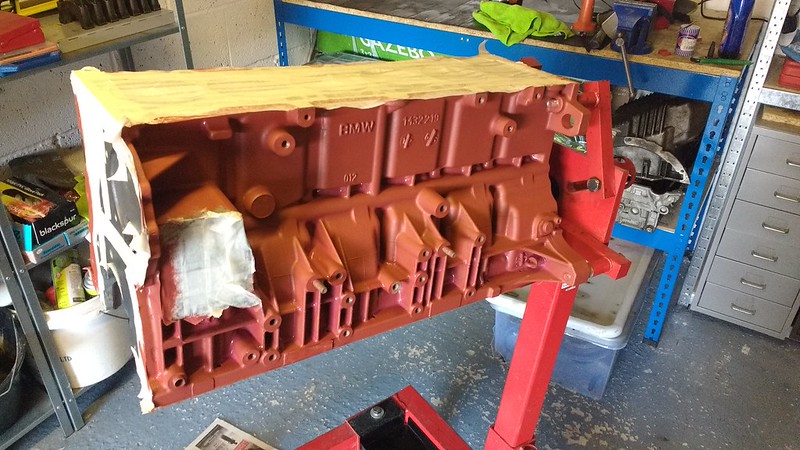
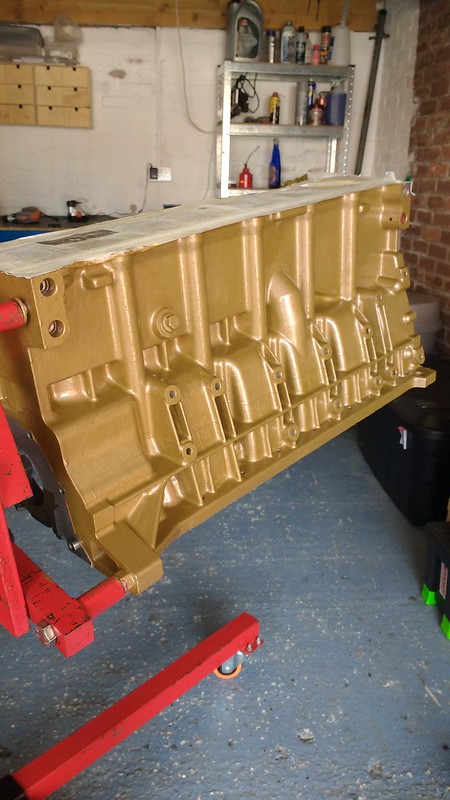
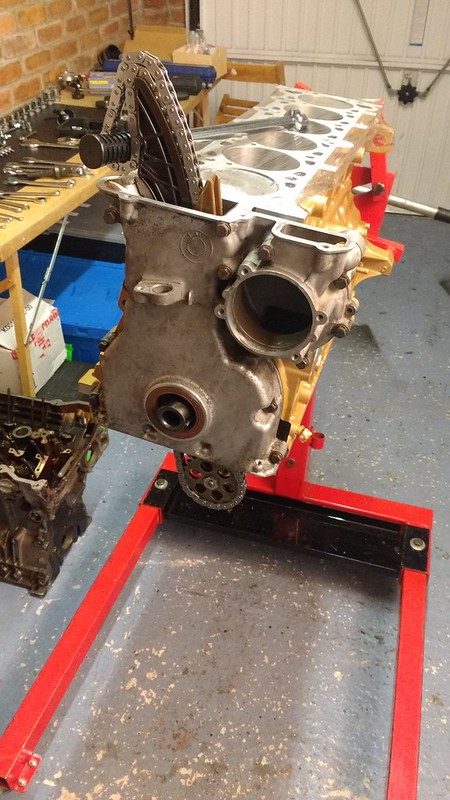
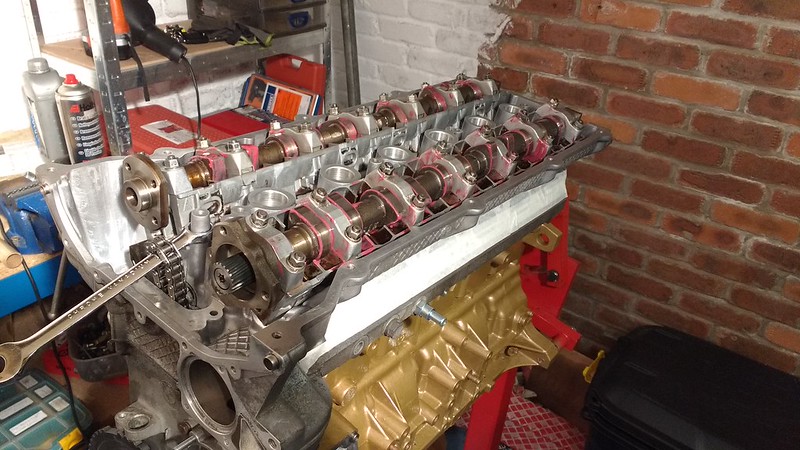
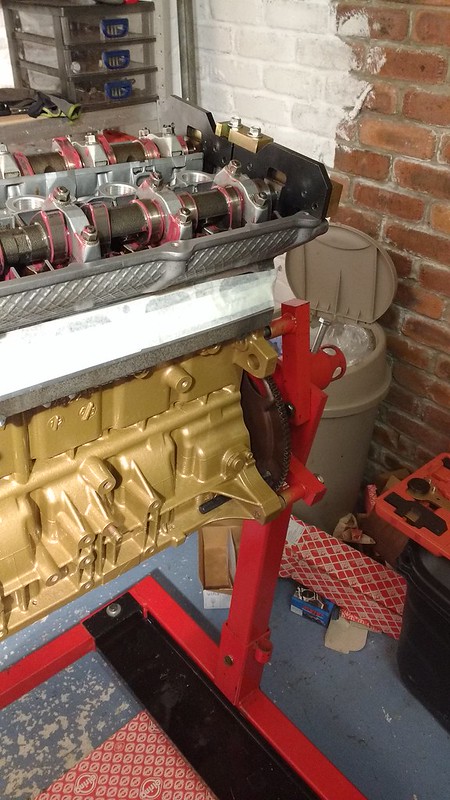
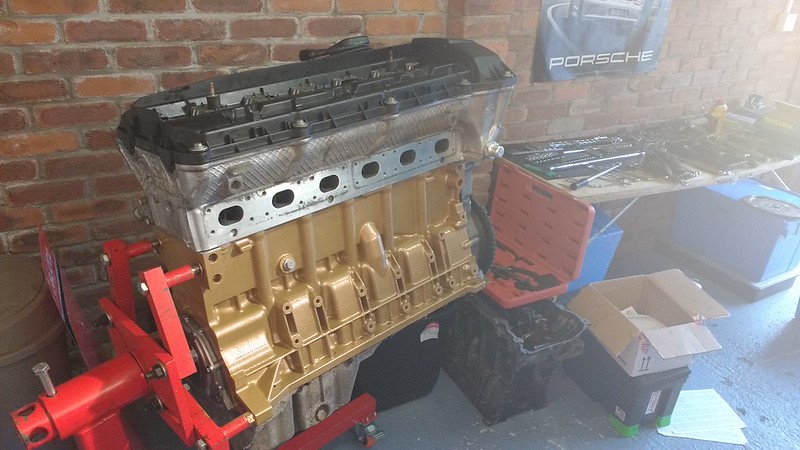
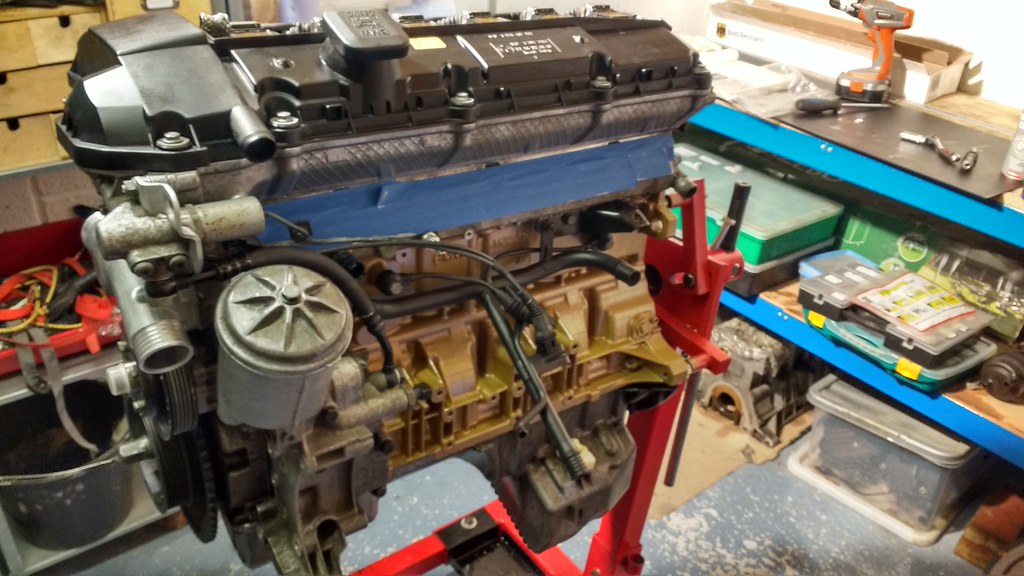
So over the past few weeks, everything has fallen in place for me to crack on with the engine build. After getting the block back from the machine shop, it got the pressure washer and superheated conservatory treatment too to get rid of any residual swarf. I'd already chased the head bolt threads with a tap before it went to the machine shop, so all good there. Then it was time for some paint. A coat of special metals primer followed by - well, I was thinking copper. A copper block with bare aluminium head and timing cover would've looked pretty steampunk I reckon. Shame Hammerite don't know the difference between copper and gold.
Ah well, I'm still pretty happy with the finish.
I then set about measuring all the main bearing clearances and installing the crank. The tolerances all came out great, but the install didn't quite go as planned. I'd order ARP main bearing studs - just as a 'while I'm there' sort of thing. Turns out the ARP studs arn't long enough to fully bottom out in the threaded holes in the block whilst still maintaining enough thread to torque the nuts down properly. ARP recommended winding the studs out sufficiently but I wasn't happy loosing 5 - 6 mm thread engagement in an aluminium block on something that's going to be torqued down to best part of
90 NM. Of course, ARP being American - US M52s had iron blocks - maybe less of a problem on those? Anyway I don't understand why the studs just couldn't be the correct length to begin with. The instructions issued with the studs do advise that they are bottomed out hand tight so it's all very strange.
Solution? OEM main bearing cap bolts. If I was to do this in the future, I'd measure up and just order 14 of the correct length ARP studs suited to the application rather than get the kit off the shelf.
Next issue was getting the crank turning smoothly. It seemed to have a tight spot that I tracked down to the thrust bearing. Upon inspection, the thrust bearing had an odd casting mark on one of the thrust surfaces (OEM Glyco Bearings).
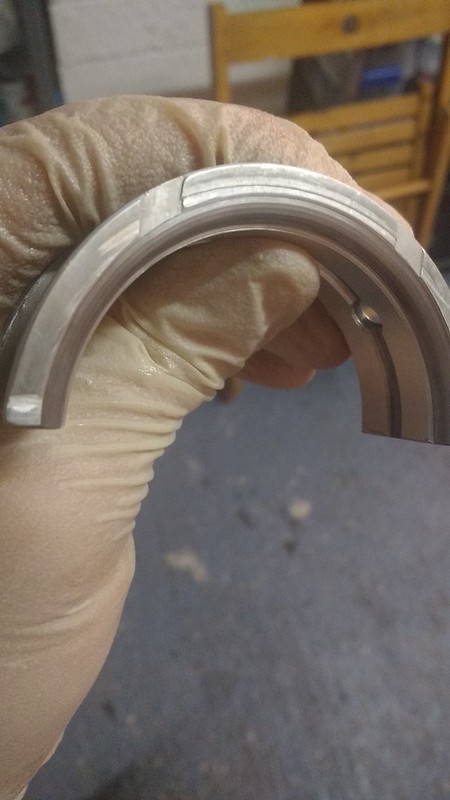
The other side was flat and smooth. The area above the line sits about 0.2 mm proud of the remainder of the thrust surface. I did re-install and by using a pry to ensure the crank was fully seated against the thrust surface whilst torquing down, the crank turned smoothly and freely. Maybe it's meant to be this way so it wears in a certain manner? End float (measured using a dial indicator and measured again with feeler gauges at the thrust surface) came out fine. Nevertheless, I didn't trust it. So I ordered a set of King bearings for comparison. The King thrust bearing was flat on both thrust surfaces. Re-doing all the tolerances and the end-float, the King bearings made for a smooth crank install from the off.
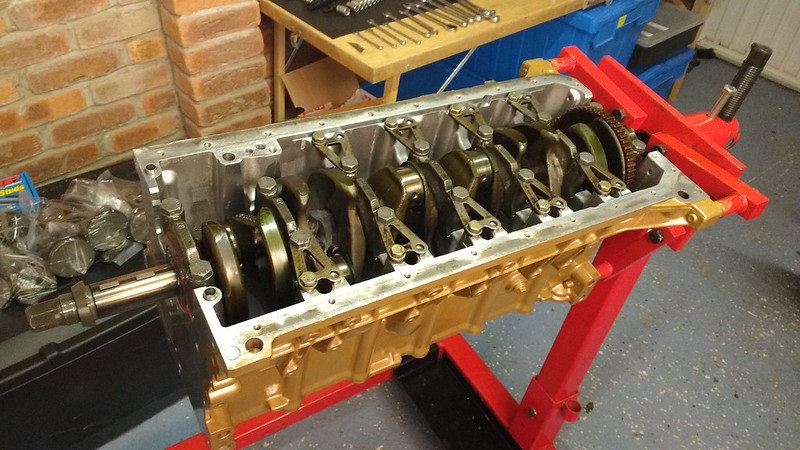
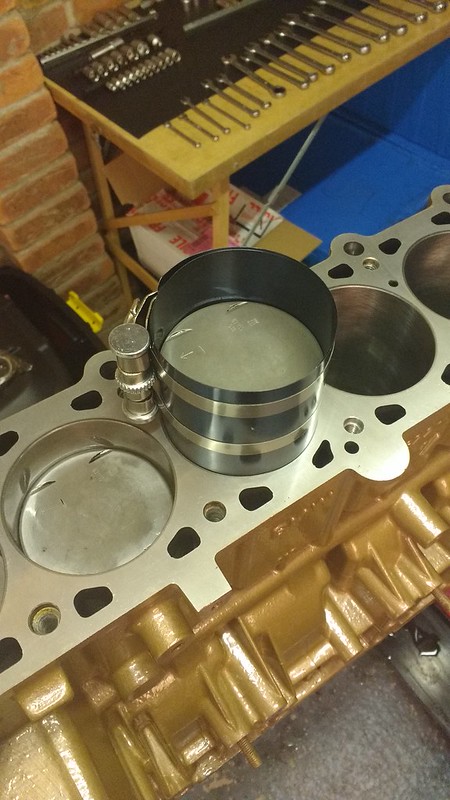
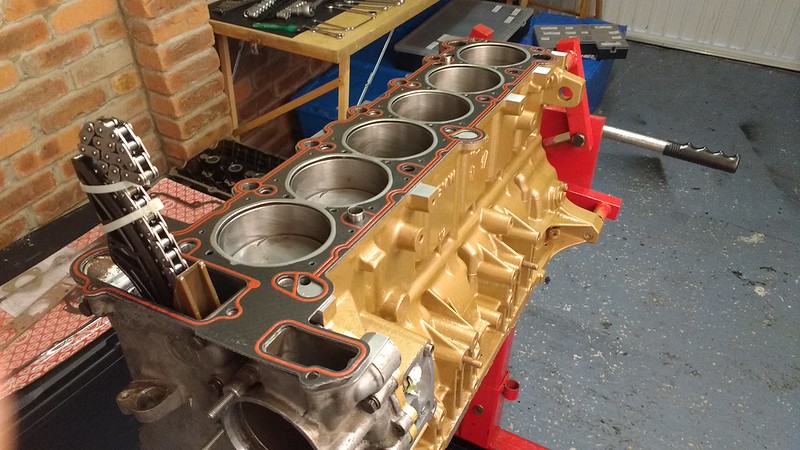
Then it was full steam ahead really! Rings gapped up fine. Big end clearances were all good. No issues with ARP rod bolts. Got the short block assembled in short order.
Oil pump nut was torqued down dry with red loctite and I staked the threads for good measure to prevent it backing off.
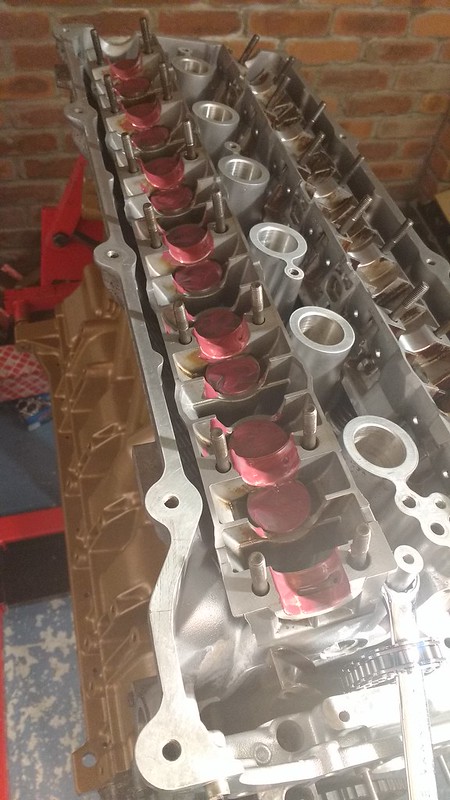
Then came the bit I was most concerned about. Head gasket installation. I took every preventative measure I could think off to avert a thread pull. Chased with a tap, then cleaned with air before going to the machine shop. Cleaned with the pressure washer. Cleaned again with brake cleaner, then more pressurised air. Then I cleaned the NEW head bolts with carb cleaner and lint free cloth. I wound one of these bolts down all the threads to make sure it could be bottomed out hand-tight smoothly, on every one. Oiled the thread engagement length on every bolt and under every bolt head. Let the excess drain. Then went ahead.
No issues! Phew. Every one held the full 40 NM 2 x 90-degrees.

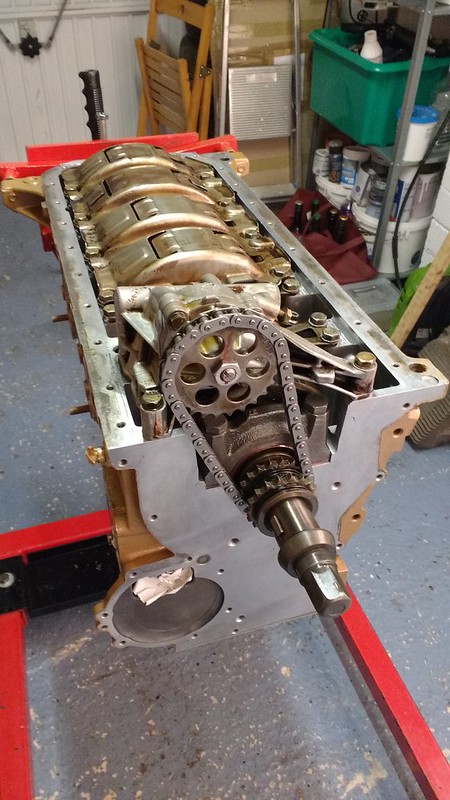
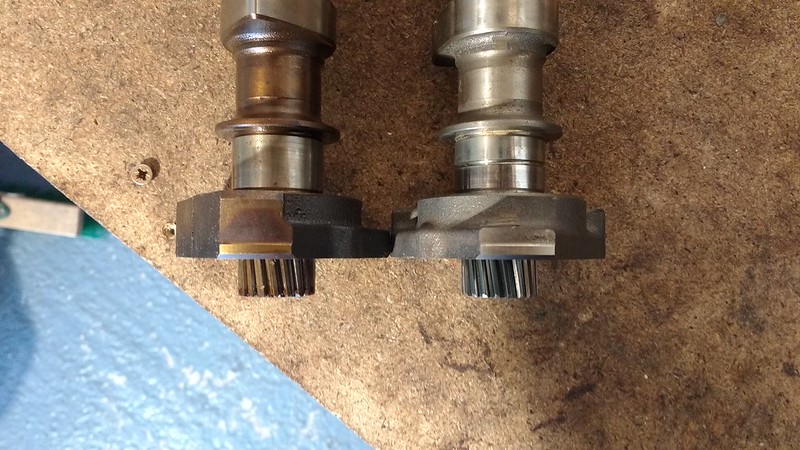
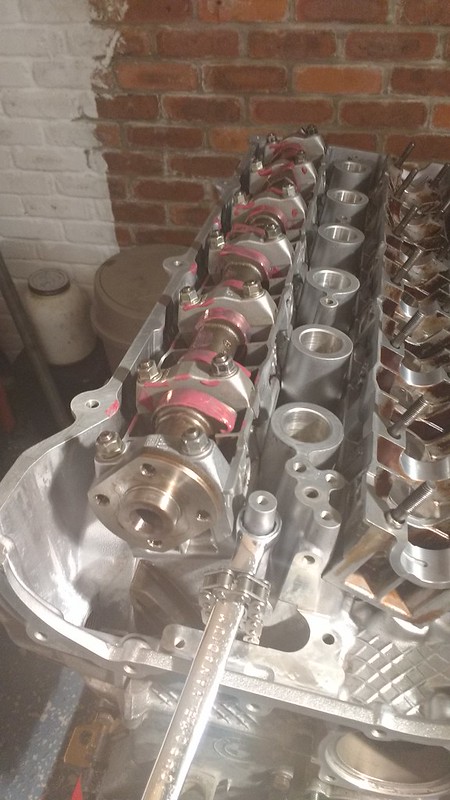
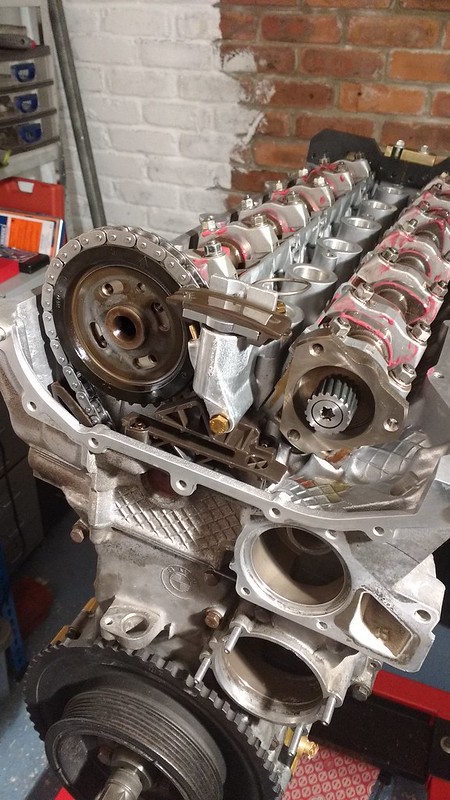
Like a few others have done, I'd had the M54 inlet cam VANOS gear machined down so it matched the M52 inlet cam, for a 'free' slightly more aggressive profile. So now I cracked on with the cam install.
And, finally, timing. It's worth knowing that an automatic flywheel is slim enough to fit between the rear crank oil seal housing and an engine stand. Makes locking the crank up a doddle!
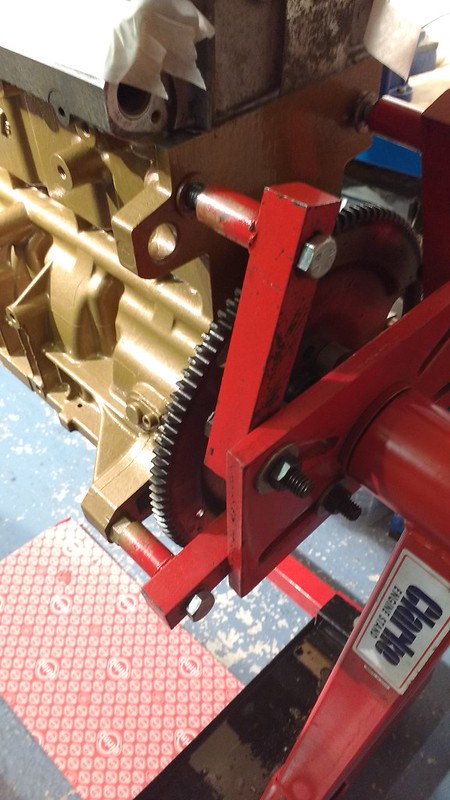
Then, with everything locked up at TDC I commenced following the Haynes instructions to time it up. Double checking everything with the instructions from independent sources for good measure After testing for a couple of full rotations that everything returned properly to TDC, I was happy I'd got it right. Apart from setting the chain tension before torquing up the exhaust cam sprocket bolts (more on that later)!
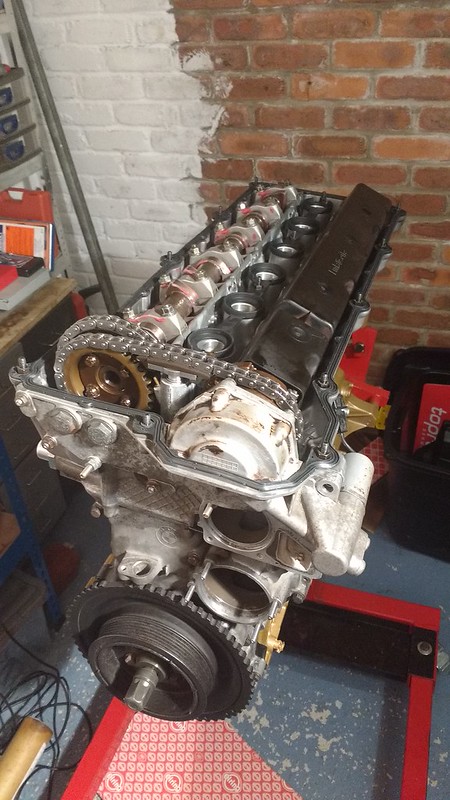
Then finishing jobs...
Basically when it comes to torquing down the dummy tool to 1.3 NM before tightening the exhaust cam sprocket bolts to spec, well - I don't have a torque wrench that goes that low. Thinking I was clever, I worked out how much weight I had to hang from my spanner to give me 1.3 NM but like a retard, I used 10g/N rather than the 100g/N I should've used. So I have to go back and re-do that step but that shouldn't take too long
I still have to sort the ancillaries and electrics out and attach the oil filter housing, but these are small jobs. Also I've just fitted the E36 sump to seal it up for now, I'll be replacing that with the E34 sump along with the pickup pipe etc off the engine that's currently sat in the car when it comes out.
So all in all, hopefully a successful first time build. Time will tell in a few months when I drop it in.
Ah well, I'm still pretty happy with the finish.
I then set about measuring all the main bearing clearances and installing the crank. The tolerances all came out great, but the install didn't quite go as planned. I'd order ARP main bearing studs - just as a 'while I'm there' sort of thing. Turns out the ARP studs arn't long enough to fully bottom out in the threaded holes in the block whilst still maintaining enough thread to torque the nuts down properly. ARP recommended winding the studs out sufficiently but I wasn't happy loosing 5 - 6 mm thread engagement in an aluminium block on something that's going to be torqued down to best part of
90 NM. Of course, ARP being American - US M52s had iron blocks - maybe less of a problem on those? Anyway I don't understand why the studs just couldn't be the correct length to begin with. The instructions issued with the studs do advise that they are bottomed out hand tight so it's all very strange.
Solution? OEM main bearing cap bolts. If I was to do this in the future, I'd measure up and just order 14 of the correct length ARP studs suited to the application rather than get the kit off the shelf.
Next issue was getting the crank turning smoothly. It seemed to have a tight spot that I tracked down to the thrust bearing. Upon inspection, the thrust bearing had an odd casting mark on one of the thrust surfaces (OEM Glyco Bearings).
The other side was flat and smooth. The area above the line sits about 0.2 mm proud of the remainder of the thrust surface. I did re-install and by using a pry to ensure the crank was fully seated against the thrust surface whilst torquing down, the crank turned smoothly and freely. Maybe it's meant to be this way so it wears in a certain manner? End float (measured using a dial indicator and measured again with feeler gauges at the thrust surface) came out fine. Nevertheless, I didn't trust it. So I ordered a set of King bearings for comparison. The King thrust bearing was flat on both thrust surfaces. Re-doing all the tolerances and the end-float, the King bearings made for a smooth crank install from the off.
Then it was full steam ahead really! Rings gapped up fine. Big end clearances were all good. No issues with ARP rod bolts. Got the short block assembled in short order.
Oil pump nut was torqued down dry with red loctite and I staked the threads for good measure to prevent it backing off.
Then came the bit I was most concerned about. Head gasket installation. I took every preventative measure I could think off to avert a thread pull. Chased with a tap, then cleaned with air before going to the machine shop. Cleaned with the pressure washer. Cleaned again with brake cleaner, then more pressurised air. Then I cleaned the NEW head bolts with carb cleaner and lint free cloth. I wound one of these bolts down all the threads to make sure it could be bottomed out hand-tight smoothly, on every one. Oiled the thread engagement length on every bolt and under every bolt head. Let the excess drain. Then went ahead.
No issues! Phew. Every one held the full 40 NM 2 x 90-degrees.
Like a few others have done, I'd had the M54 inlet cam VANOS gear machined down so it matched the M52 inlet cam, for a 'free' slightly more aggressive profile. So now I cracked on with the cam install.
And, finally, timing. It's worth knowing that an automatic flywheel is slim enough to fit between the rear crank oil seal housing and an engine stand. Makes locking the crank up a doddle!
Then, with everything locked up at TDC I commenced following the Haynes instructions to time it up. Double checking everything with the instructions from independent sources for good measure
After testing for a couple of full rotations that everything returned properly to TDC, I was happy I'd got it right. Apart from setting the chain tension before torquing up the exhaust cam sprocket bolts (more on that later)!Then finishing jobs...
Basically when it comes to torquing down the dummy tool to 1.3 NM before tightening the exhaust cam sprocket bolts to spec, well - I don't have a torque wrench that goes that low. Thinking I was clever, I worked out how much weight I had to hang from my spanner to give me 1.3 NM but like a retard, I used 10g/N rather than the 100g/N I should've used. So I have to go back and re-do that step but that shouldn't take too long
I still have to sort the ancillaries and electrics out and attach the oil filter housing, but these are small jobs. Also I've just fitted the E36 sump to seal it up for now, I'll be replacing that with the E34 sump along with the pickup pipe etc off the engine that's currently sat in the car when it comes out.
So all in all, hopefully a successful first time build. Time will tell in a few months when I drop it in.
Once more, it’s been a long while since I updated this build thread. And once more, while I’ve not been updating, I have been getting on with things. Quite a lot of things in fact! So I’m warning you all now. This is a long post. Hopefully it’s not too snoozy, especially as it’s a little light on photos!
So I think last time I left this blog, I’d finished my engine build with the intension of doing the swap after Christmas. Er, yeah. Well, that hasn’t happened yet. I began, as you do, by stripping down the engine bay, a job that was much quicker than expected. I was also pleased at the cleanliness of the intake ports and valves on the old engine. Either the regular maintenance was paying dividends or it was overfuelling like a good ‘un. The economy and smell didn’t indicate the latter, so I was happy.
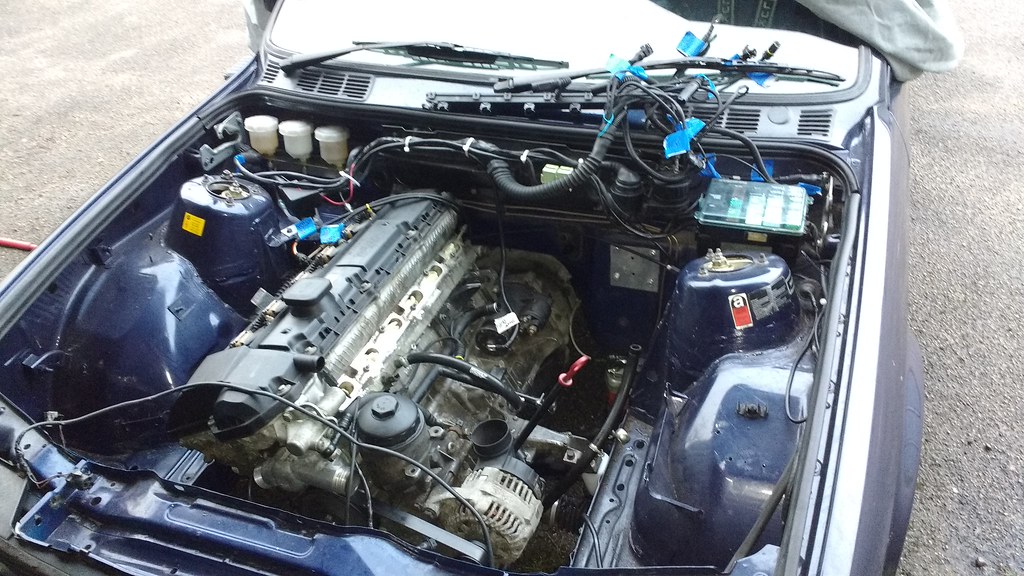
After getting so far, I then made the decision to undertake a series of other updates that would be easier without all the engine stuff in the way – “while you’re there”, as it were. And as usual, I got a little bit carried away. The big one being rewiring the whole car and moving the fusebox inside.
And why would I want to do that? Well I was still lugging around all the excess that comes with central locking, power mirrors, interior lighting, on board computer and all the other stuff a track car doesn’t need. It adds up – it really does! But more so, removing it is free, all it takes is time.
Electric windows are one thing that are staying. The reason is that the door bars would get in the way of hand winders. I don’t fancy cooking myself in a car with plastic windows that don’t open. And as the car is still road legal and occasionally gets parked up, the lack of security and water tightness afforded by sliders didn’t appeal. Removing them if the car were ever converted to full race car would be a pretty trivial task.
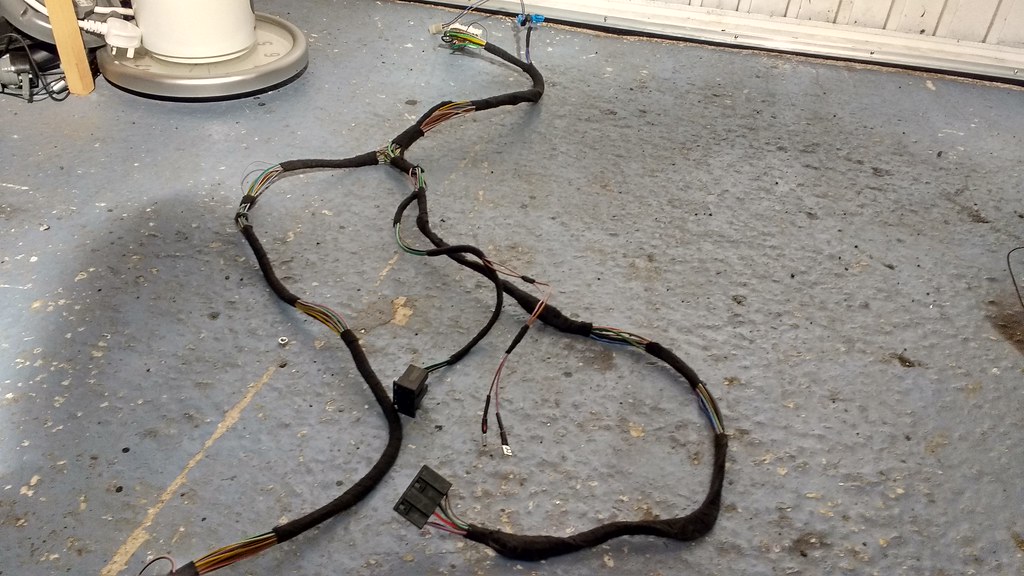
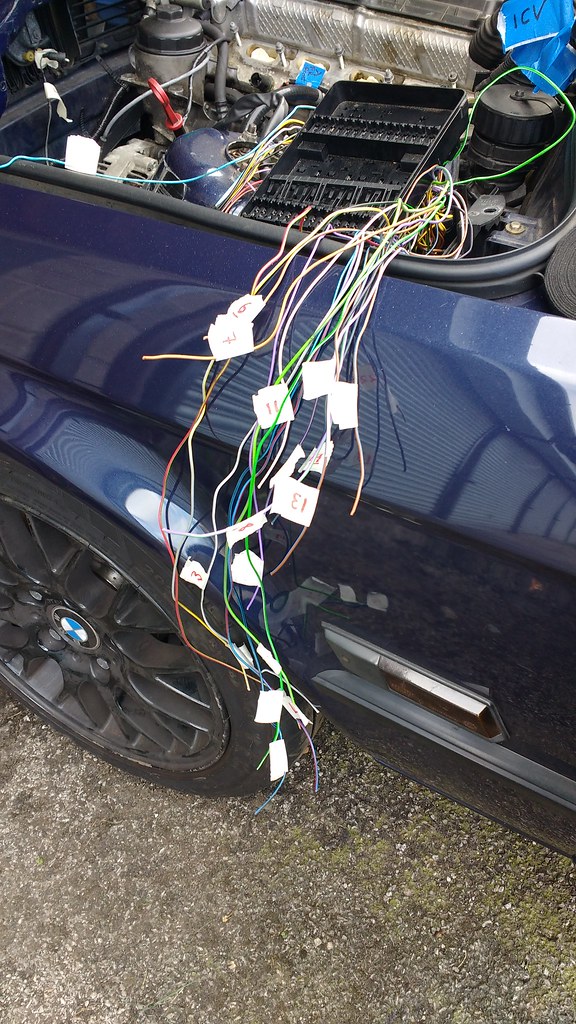
Re-worked anti-chafe door looms for the windows:
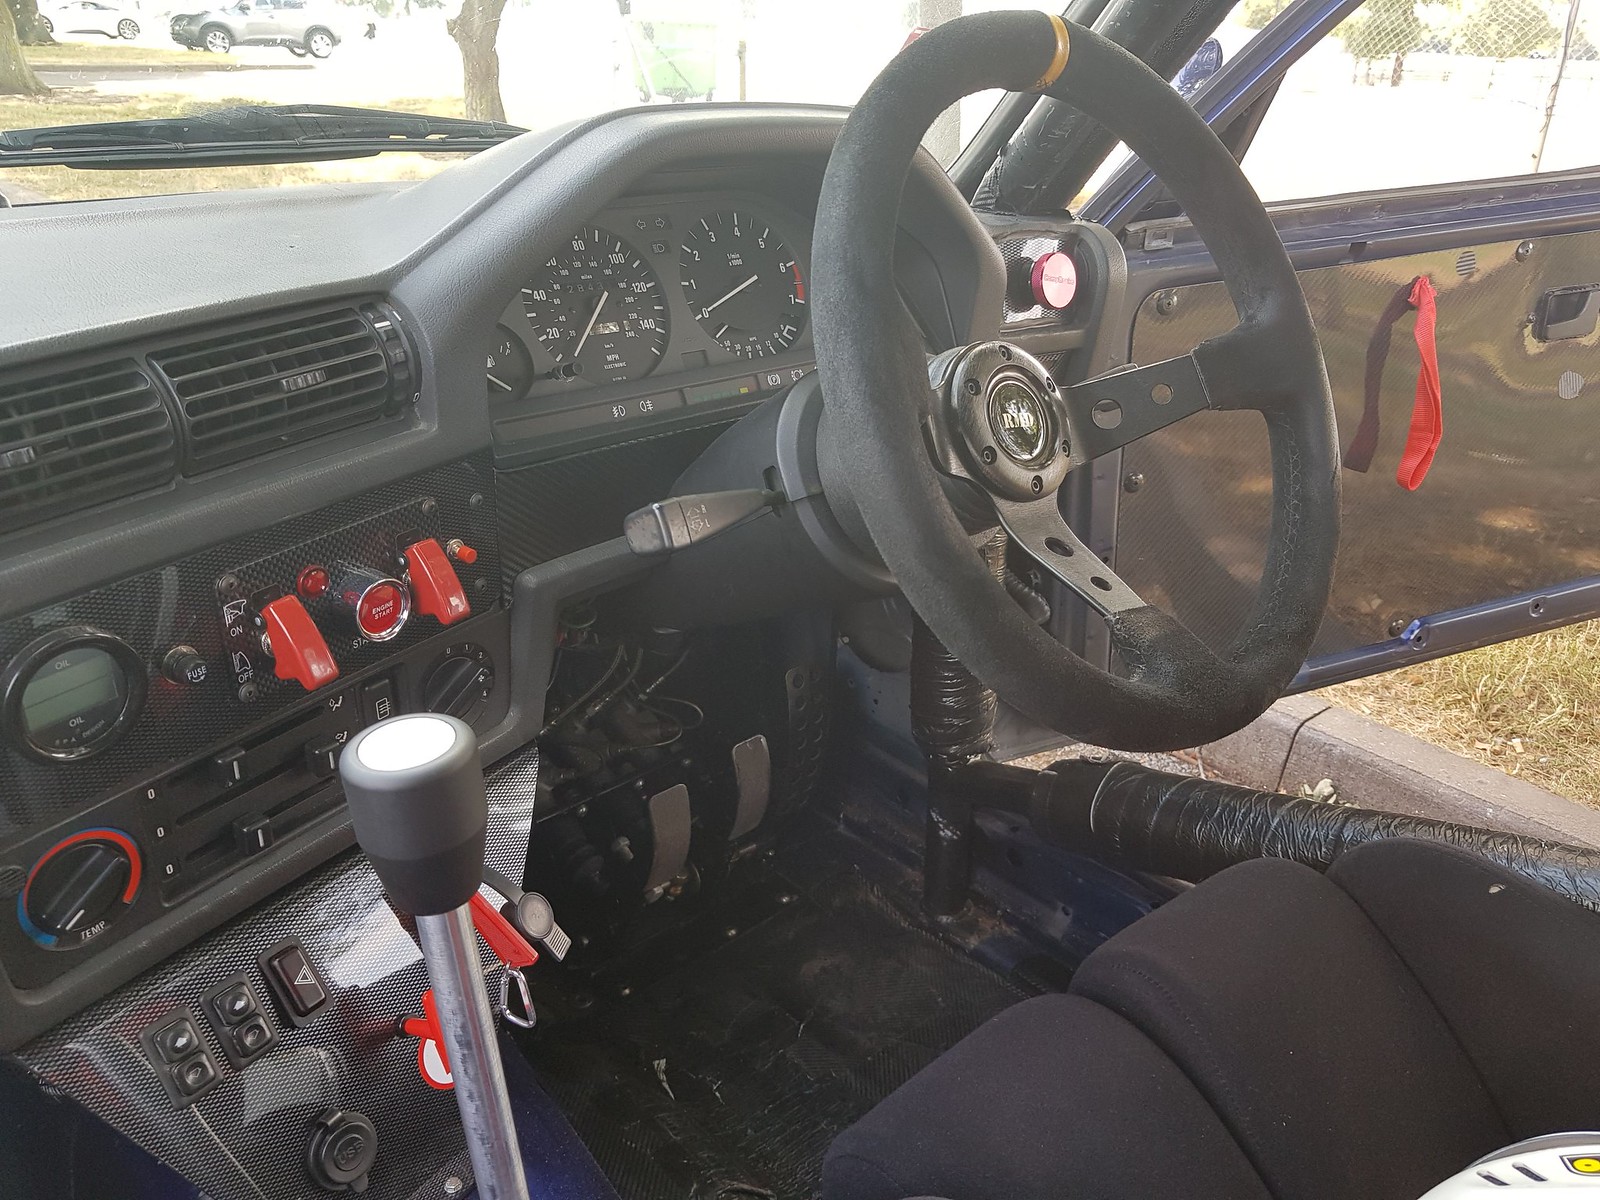
And that’s kinda where I’m going with a lot of these mods. Standard E30s are fast rising in value. Race and rally cars are doing well too, but as always, half-assed trackday cars are worth f-all in comparison. Conclusion? Make it scrutineerable, or very very close to it. So as part of the rewiring project, there’s an FIA master switch going in with a push button start and the steering lock is going in the bin. A plumbed-in fire extinguisher system will be fitted too.
So once I’d got as far as reworking the electric window loom and unraveling it from all the central locking and electric mirror gubbins, I removed the dash and took it home to my workshop.
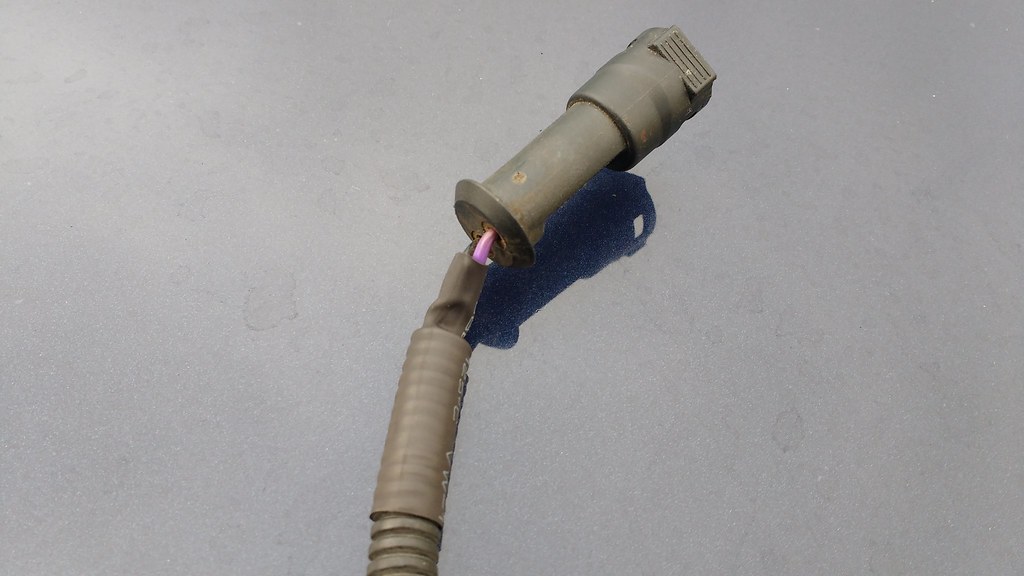
Incidentally, this is how much wiring makes up the central locking and power mirrors looms!
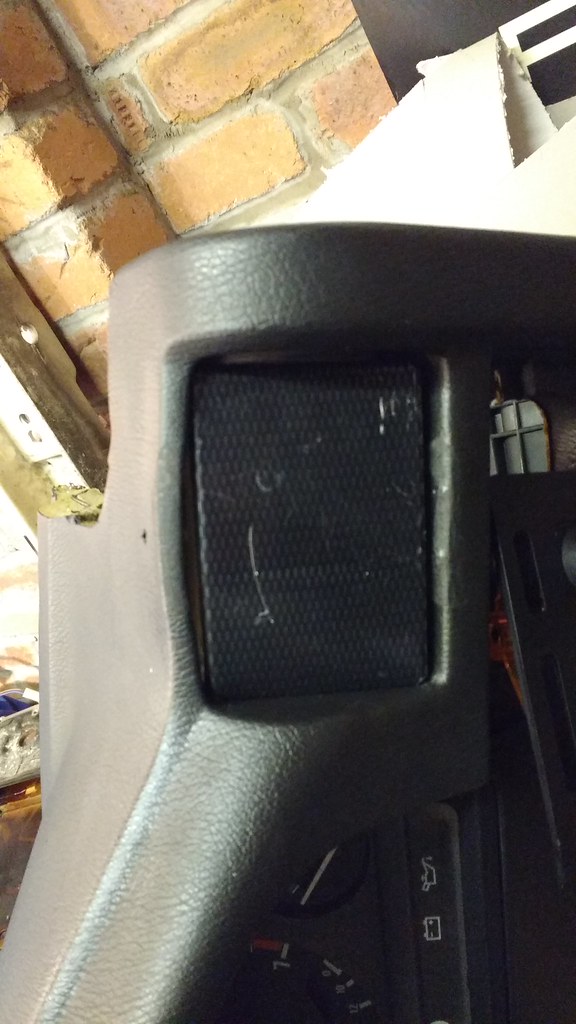
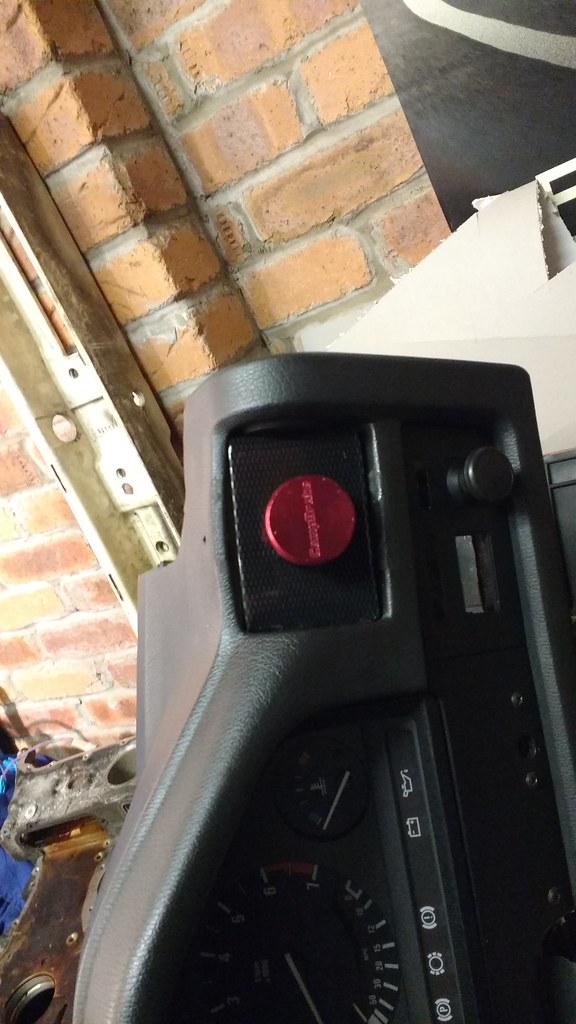
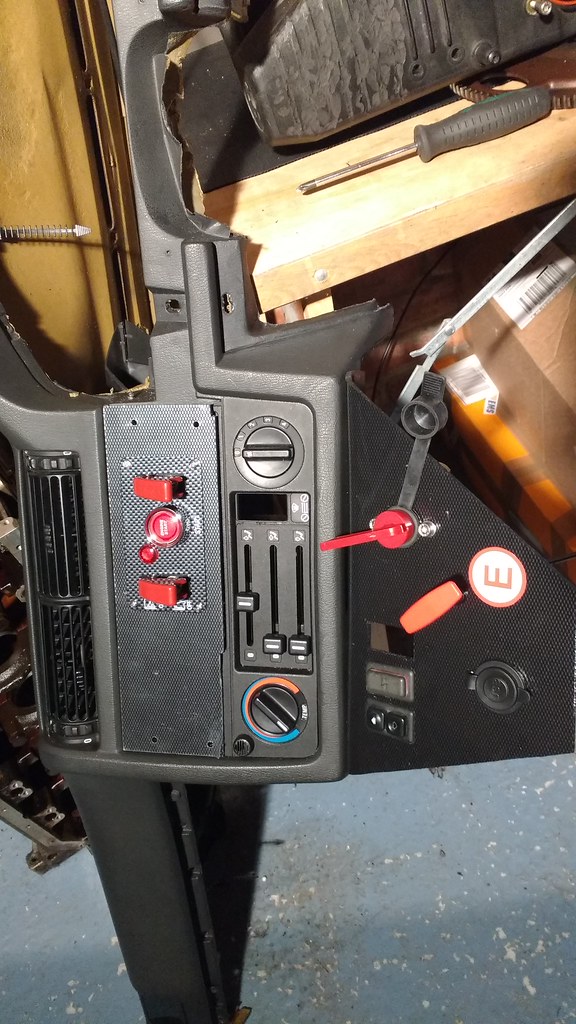
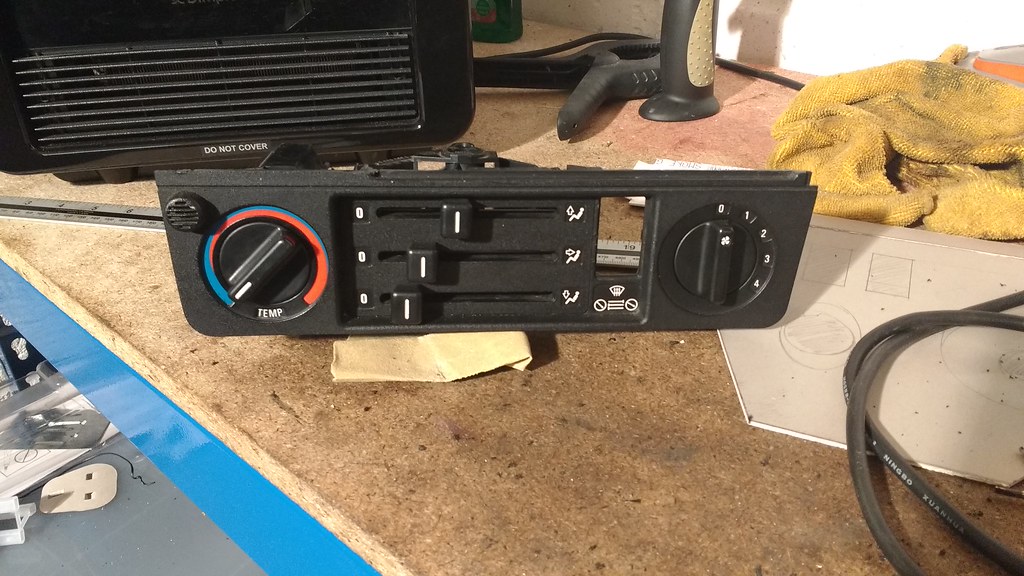
The dash loom was a nice thing to re-work in the warmth of a garage in winter. But while I was at it, I also filled in the side air vents with ABS plastic folded to fit. This also neatens up the sh*t looking aluminium bracket that my brake bias knob was previously attached to. The side vents were disconnected anyway, because of the cage. No loss there.
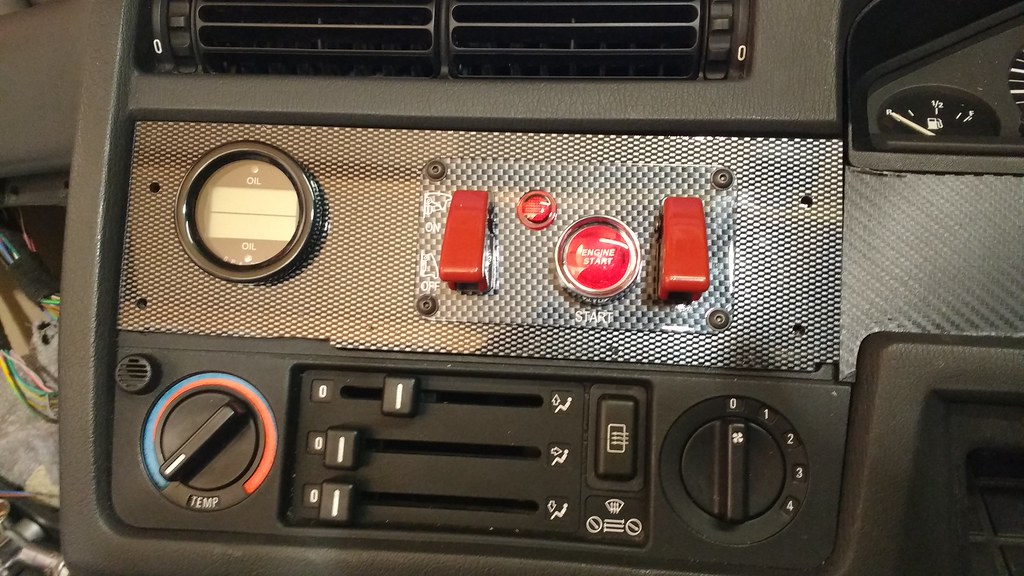
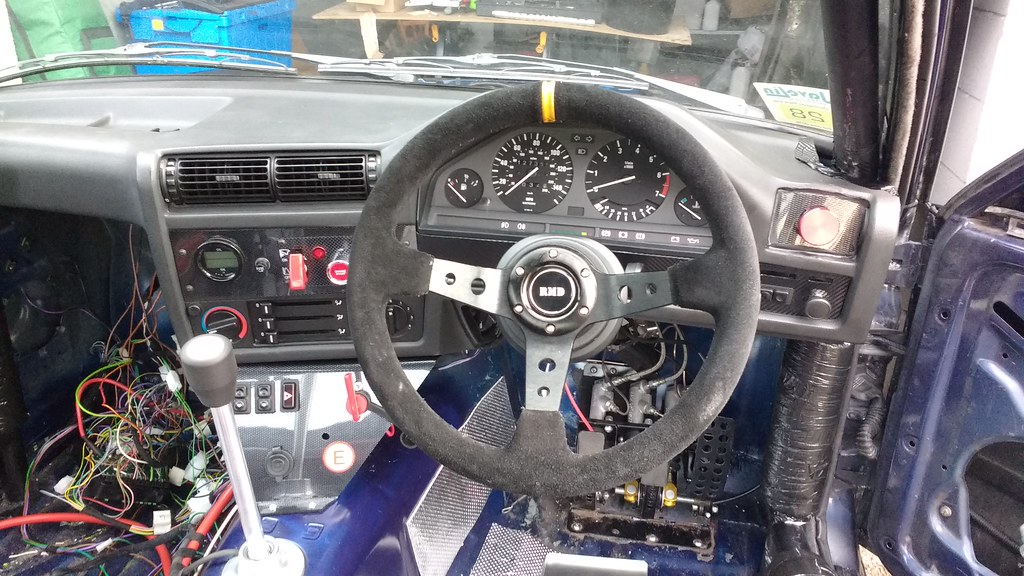
The centre vents stay, to blow cool or hot air in my face depending on how I feel. The centre fascia was also cut up to retain the standard heater controls but to allow a new panel in that will hold the ignition panel and a dual oil temperature/pressure gauge. This I sourced from SPA Designs. The option of the red backlight appealed as it will match all the standard BMW instruments. Feeling pretty handy with the ABS now, I made a panel to go between the dash and the transmission tunnel. This was to hold the electric window switches, hazard light switch, FIA master switch, a USB power point (more on that later) and the fire extinguisher cable pull. The loom needed extending for the relocation of the hazard light switch into this panel.
Reworked dash loom:
Dash modifications:
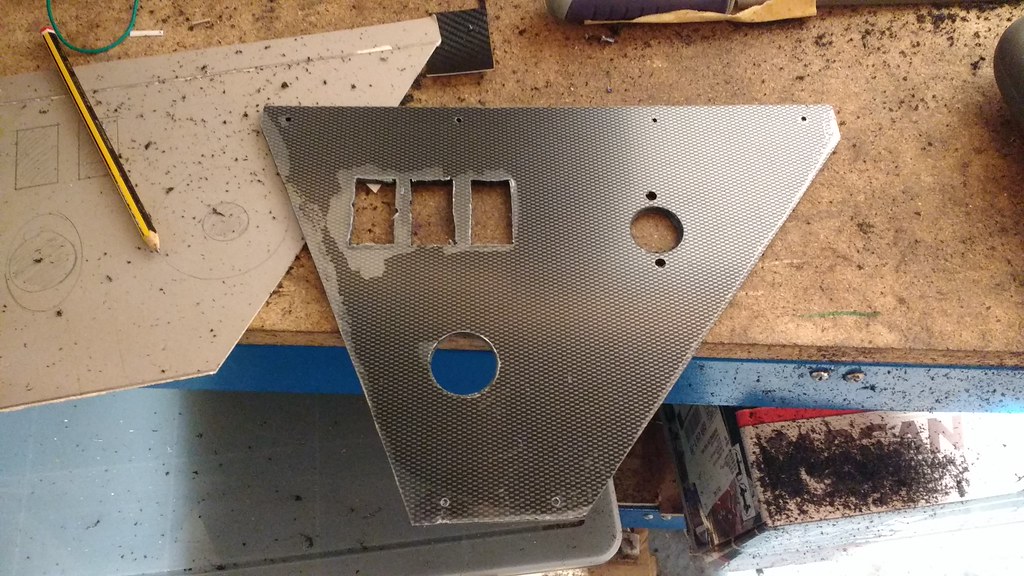
(and yes - the template for the new lower dash panel was made up whilst the dash was still in the car!)
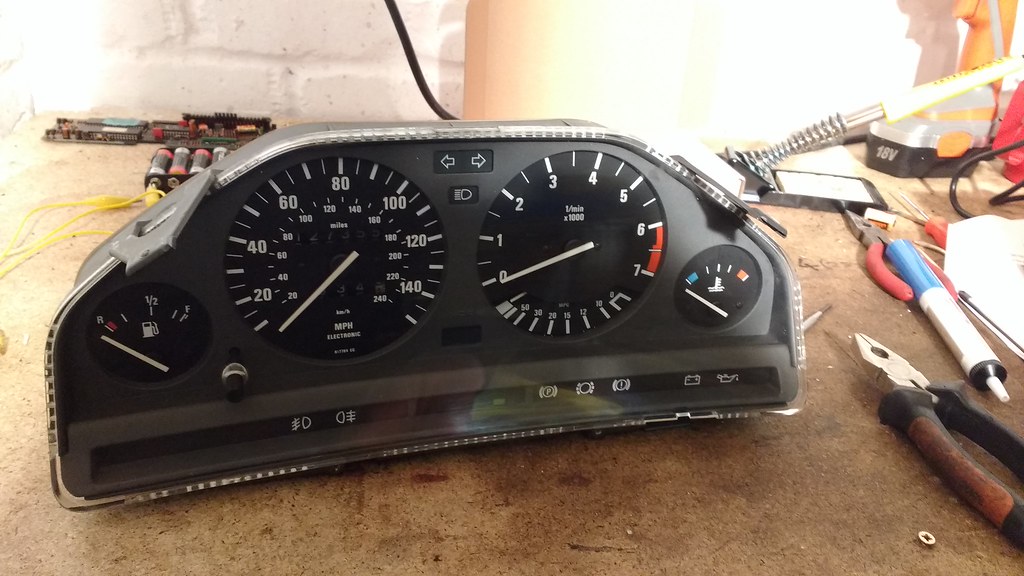
A routine failure on E30s of this sort of age is the SI batteries in the instrument cluster failing. So I soldered in some new ones to save having to pull it apart again at some indeterminate point in the future and while I was there, fitted one of these shift light modules:
http://www.e30ig.com/#1thing
It’s quite a nice little thing. It replaces the LED board that illuminates the service indicator lights in the cluster, so that they can function as shift lights. At stage 1 ignition, it retains service indicator capability, but with the engine running, they perform the shift light function. They also have different thresholds for when the engine is cold and when it is hot. It’s all pretty easy to set up with the cluster on a bench, following the instructions. Perfect little gadget for tarts like me. Anyway, once all this had been done, the cluster was cleaned, reassembled and fitted to the dash.
Here's a video from setting up the shift lights: https://www.flickr.com/photos/79393764@N00/3292987...
And the completed cluster:
With the weather beginning to improve, I set about continuing with the fusebox relocation project. What’s the point you might ask? Well I figure race cars do it for some reason. The biggest benefit being to make the wiring loom modular, with all the connectors protected from heat/fluids/dirt etc in the engine bay. A minor weight distribution benefit will also be realised – moving the fusebox inside the car means I can move the header tank from in front of the wheelarch to where the fusebox was. Like I’m gonna notice that! Still, every little helps.
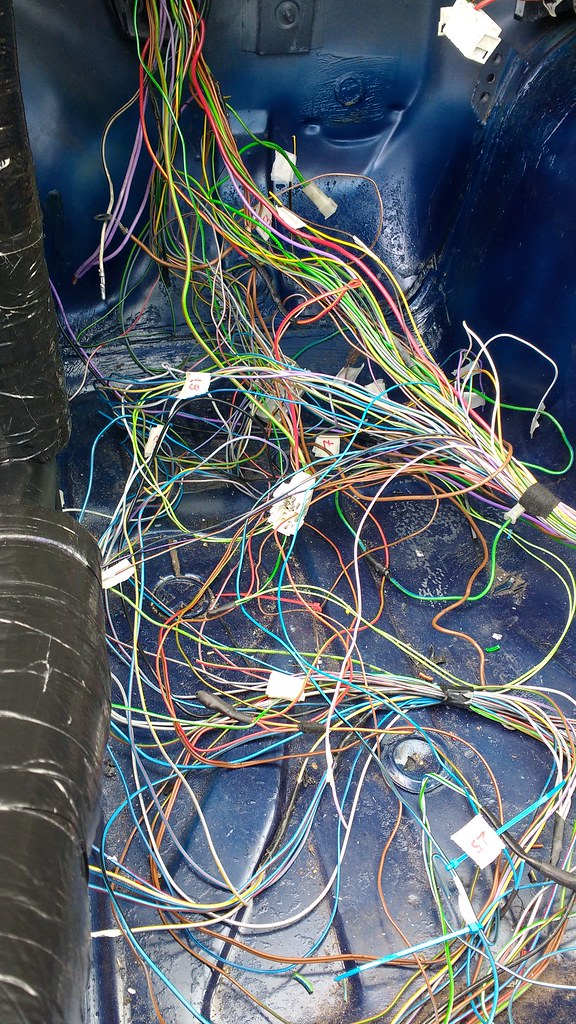
It’s no small job and not a job for anyone who lacks patience. It’s also a job that I’ve regretted undertaking on numerous occasions! But now I’m so far along, I can’t go back. The fusebox is out, all the wires have been labelled and fingers crossed it’ll all work right first time. Ha! Like that’s going to happen. I’ll find that out in a couple of weeks.
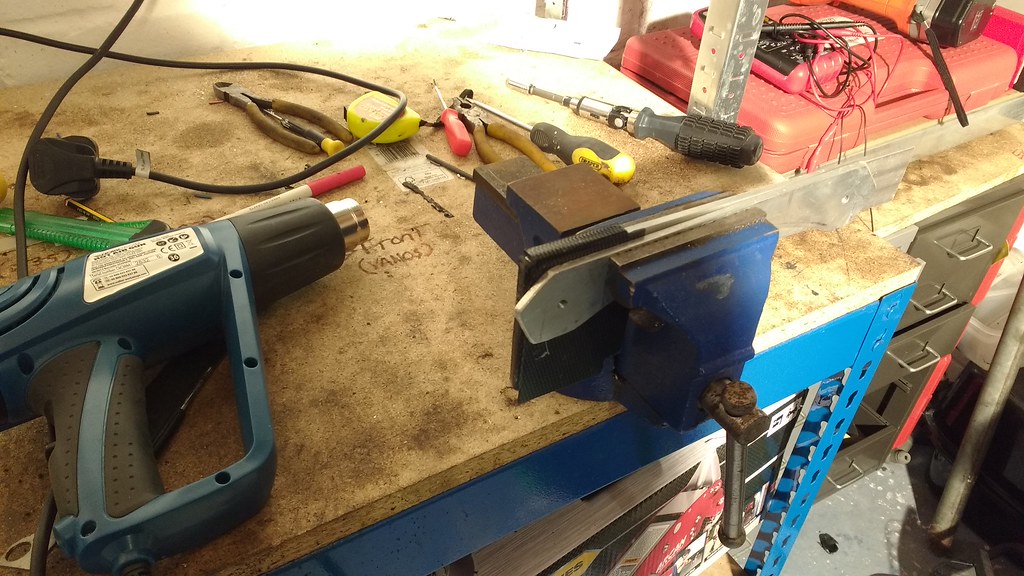
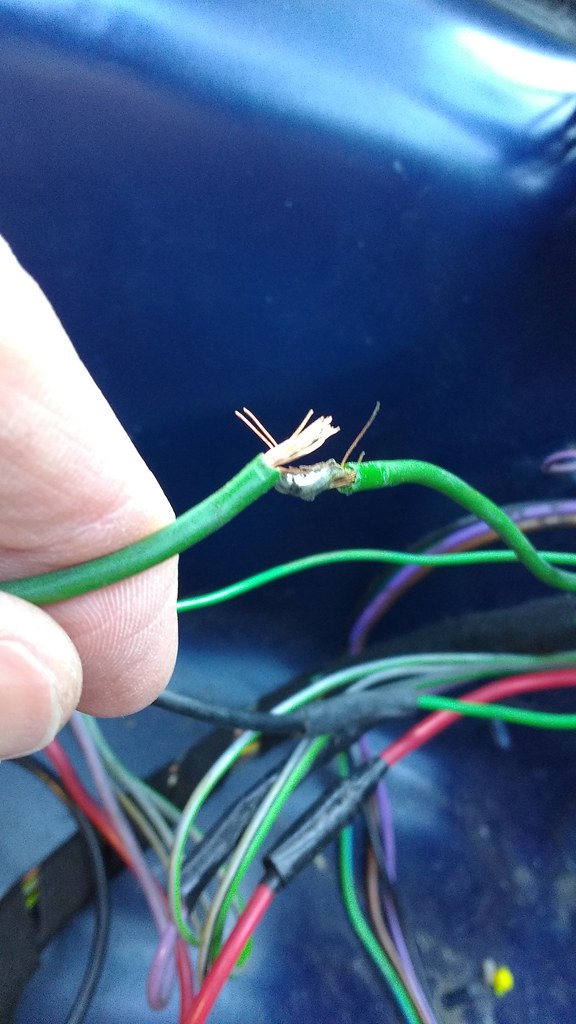
Just a small example of some of the dodgy soldering I've come across - work of previous alarm fitters:
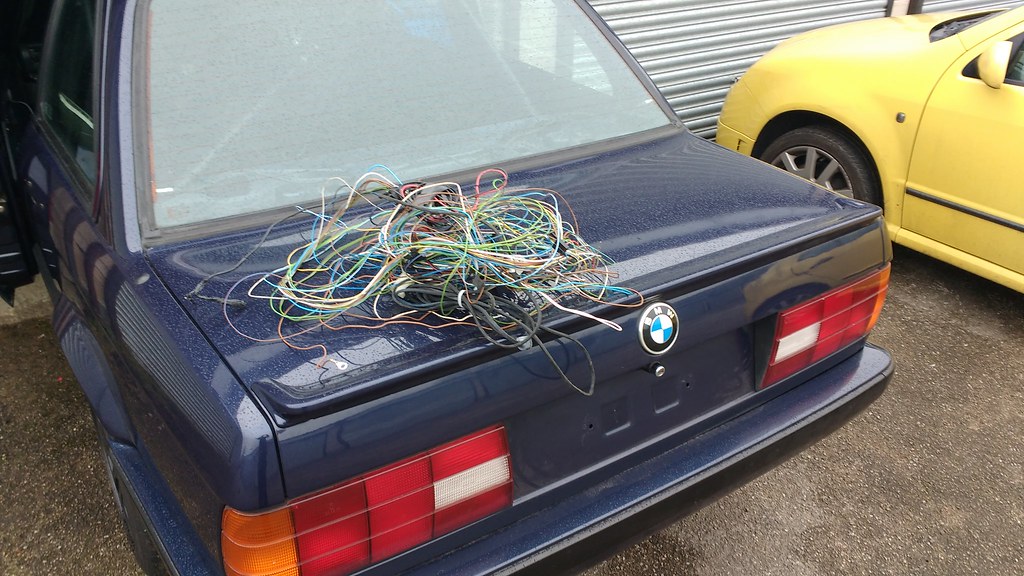
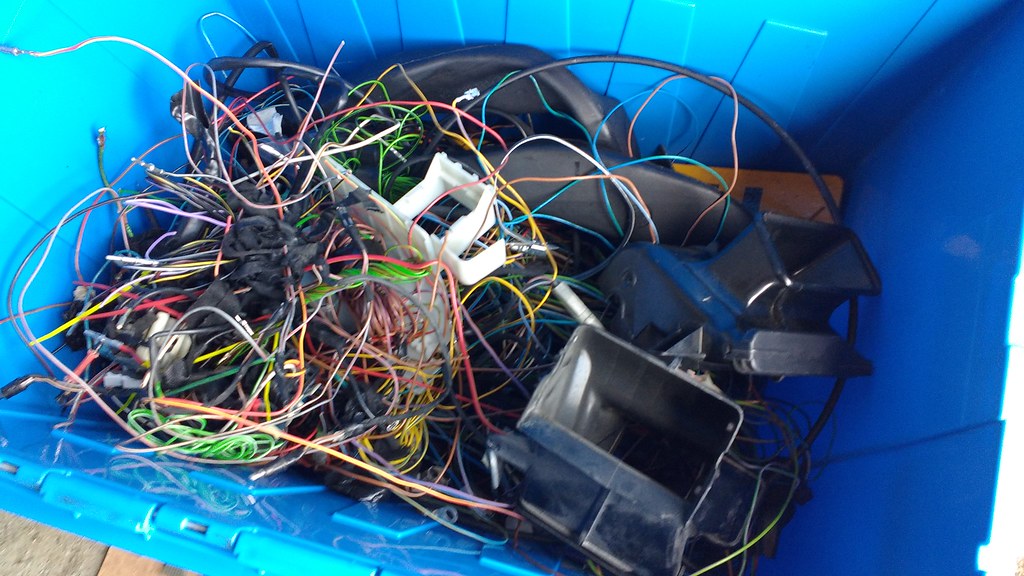
And all of the stuff removed from the car permanently! Well, all of the stuff that fits in the box at least. It'll go on the scales when I'm done.
Back to the USB power point – I’ve inherited my wife’s old Samsung Galaxy S3. As it was free, I plan to make use of that as a data logger. I’ve installed the full version of the Android app Race Chrono and have picked up a 10Hz Bluetooth GPS receiver. That should all work pretty well, though unfortunately my ECU isn’t fully OBD2 compliant (from a 1995 car). At least the likes of Torque and other generic OBD2 readers don’t seem to be able to read it. For diagnostics I have a specific BMW tool which works fine, so there must be some kind of difference in protocol. If anyone knows what’s going on with this and could help me out, that would be great. Being able to log throttle input and rpm would be a great addition.
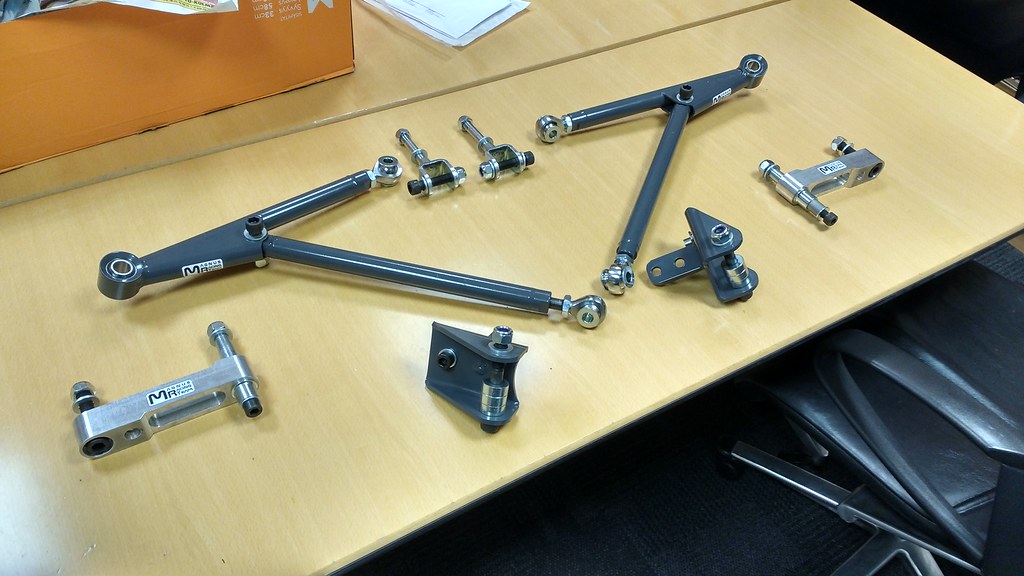
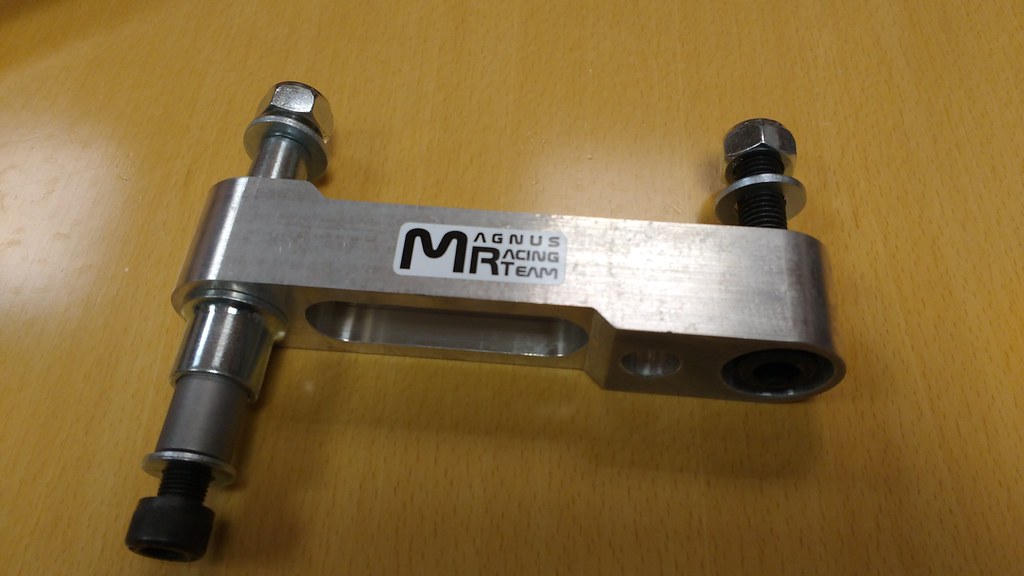
So what else is on the cards? I’ve removed the massive lump of high density plastic inside the front bumper. That removes perhaps 7 or 8kg from way out in front of the front axle line. And I’ve been collecting bits. The engine is going to be opened up again as I have a set of Just Deutsch camshafts on order and bigger fuel injectors to go with them. Hopefully that will mean 250-260 bhp is on the cards once it’s been mapped. In my garage I have a DTM style gear shifter (desperately required!) and some adjustable fully rose-jointed front control arms to counter the caster issues created by the 5-stud swap. I have Carbon Lorraine RC5+ pads to go in the front calipers and EBC yellowstuff for the rears. And something to replace the Koni coilovers is in the wings. I think I’ve said before that I want to make use of the strut ARB pickup that the standard E36 compact coilovers don’t feature, and I find them a little soft for serious track use. I’m looking at getting a custom Bilstein B16 based set ordered, but I have to make the decision to stick with single adjustable or pay the extra for double. Having had a chat with Bilstein at Autosport, I didn’t realise they offer custom applications so readily and was well impressed with the product for the price.
Here's a couple of gratuitous photos of the adjustable arms with bump steer correction
And, that’s about it for now. It’s all taking much longer than I would like, but working on the car out of a single garage, 5 miles away from home means I only really get a day a week on it. 2 if I’m lucky. I’ve been trying to do as much stuff from home as possible, but there’s not much that can be done now the dash is finished. At least now it’s getting darker much later, I might get a few more hours a week in the evenings after work. A lot to do, not enough time so I’d best get cracking!
So I think last time I left this blog, I’d finished my engine build with the intension of doing the swap after Christmas. Er, yeah. Well, that hasn’t happened yet. I began, as you do, by stripping down the engine bay, a job that was much quicker than expected. I was also pleased at the cleanliness of the intake ports and valves on the old engine. Either the regular maintenance was paying dividends or it was overfuelling like a good ‘un. The economy and smell didn’t indicate the latter, so I was happy.
After getting so far, I then made the decision to undertake a series of other updates that would be easier without all the engine stuff in the way – “while you’re there”, as it were. And as usual, I got a little bit carried away. The big one being rewiring the whole car and moving the fusebox inside.
And why would I want to do that? Well I was still lugging around all the excess that comes with central locking, power mirrors, interior lighting, on board computer and all the other stuff a track car doesn’t need. It adds up – it really does! But more so, removing it is free, all it takes is time.
Electric windows are one thing that are staying. The reason is that the door bars would get in the way of hand winders. I don’t fancy cooking myself in a car with plastic windows that don’t open. And as the car is still road legal and occasionally gets parked up, the lack of security and water tightness afforded by sliders didn’t appeal. Removing them if the car were ever converted to full race car would be a pretty trivial task.
Re-worked anti-chafe door looms for the windows:
And that’s kinda where I’m going with a lot of these mods. Standard E30s are fast rising in value. Race and rally cars are doing well too, but as always, half-assed trackday cars are worth f-all in comparison. Conclusion? Make it scrutineerable, or very very close to it. So as part of the rewiring project, there’s an FIA master switch going in with a push button start and the steering lock is going in the bin. A plumbed-in fire extinguisher system will be fitted too.
So once I’d got as far as reworking the electric window loom and unraveling it from all the central locking and electric mirror gubbins, I removed the dash and took it home to my workshop.
Incidentally, this is how much wiring makes up the central locking and power mirrors looms!
The dash loom was a nice thing to re-work in the warmth of a garage in winter. But while I was at it, I also filled in the side air vents with ABS plastic folded to fit. This also neatens up the sh*t looking aluminium bracket that my brake bias knob was previously attached to. The side vents were disconnected anyway, because of the cage. No loss there.
The centre vents stay, to blow cool or hot air in my face depending on how I feel. The centre fascia was also cut up to retain the standard heater controls but to allow a new panel in that will hold the ignition panel and a dual oil temperature/pressure gauge. This I sourced from SPA Designs. The option of the red backlight appealed as it will match all the standard BMW instruments. Feeling pretty handy with the ABS now, I made a panel to go between the dash and the transmission tunnel. This was to hold the electric window switches, hazard light switch, FIA master switch, a USB power point (more on that later) and the fire extinguisher cable pull. The loom needed extending for the relocation of the hazard light switch into this panel.
Reworked dash loom:
Dash modifications:
(and yes - the template for the new lower dash panel was made up whilst the dash was still in the car!)
A routine failure on E30s of this sort of age is the SI batteries in the instrument cluster failing. So I soldered in some new ones to save having to pull it apart again at some indeterminate point in the future and while I was there, fitted one of these shift light modules:
http://www.e30ig.com/#1thing
It’s quite a nice little thing. It replaces the LED board that illuminates the service indicator lights in the cluster, so that they can function as shift lights. At stage 1 ignition, it retains service indicator capability, but with the engine running, they perform the shift light function. They also have different thresholds for when the engine is cold and when it is hot. It’s all pretty easy to set up with the cluster on a bench, following the instructions. Perfect little gadget for tarts like me. Anyway, once all this had been done, the cluster was cleaned, reassembled and fitted to the dash.
Here's a video from setting up the shift lights: https://www.flickr.com/photos/79393764@N00/3292987...
And the completed cluster:
With the weather beginning to improve, I set about continuing with the fusebox relocation project. What’s the point you might ask? Well I figure race cars do it for some reason. The biggest benefit being to make the wiring loom modular, with all the connectors protected from heat/fluids/dirt etc in the engine bay. A minor weight distribution benefit will also be realised – moving the fusebox inside the car means I can move the header tank from in front of the wheelarch to where the fusebox was. Like I’m gonna notice that! Still, every little helps.
It’s no small job and not a job for anyone who lacks patience. It’s also a job that I’ve regretted undertaking on numerous occasions! But now I’m so far along, I can’t go back. The fusebox is out, all the wires have been labelled and fingers crossed it’ll all work right first time. Ha! Like that’s going to happen. I’ll find that out in a couple of weeks.
Just a small example of some of the dodgy soldering I've come across - work of previous alarm fitters:
And all of the stuff removed from the car permanently! Well, all of the stuff that fits in the box at least. It'll go on the scales when I'm done.
Back to the USB power point – I’ve inherited my wife’s old Samsung Galaxy S3. As it was free, I plan to make use of that as a data logger. I’ve installed the full version of the Android app Race Chrono and have picked up a 10Hz Bluetooth GPS receiver. That should all work pretty well, though unfortunately my ECU isn’t fully OBD2 compliant (from a 1995 car). At least the likes of Torque and other generic OBD2 readers don’t seem to be able to read it. For diagnostics I have a specific BMW tool which works fine, so there must be some kind of difference in protocol. If anyone knows what’s going on with this and could help me out, that would be great. Being able to log throttle input and rpm would be a great addition.
So what else is on the cards? I’ve removed the massive lump of high density plastic inside the front bumper. That removes perhaps 7 or 8kg from way out in front of the front axle line. And I’ve been collecting bits. The engine is going to be opened up again as I have a set of Just Deutsch camshafts on order and bigger fuel injectors to go with them. Hopefully that will mean 250-260 bhp is on the cards once it’s been mapped. In my garage I have a DTM style gear shifter (desperately required!) and some adjustable fully rose-jointed front control arms to counter the caster issues created by the 5-stud swap. I have Carbon Lorraine RC5+ pads to go in the front calipers and EBC yellowstuff for the rears. And something to replace the Koni coilovers is in the wings. I think I’ve said before that I want to make use of the strut ARB pickup that the standard E36 compact coilovers don’t feature, and I find them a little soft for serious track use. I’m looking at getting a custom Bilstein B16 based set ordered, but I have to make the decision to stick with single adjustable or pay the extra for double. Having had a chat with Bilstein at Autosport, I didn’t realise they offer custom applications so readily and was well impressed with the product for the price.
Here's a couple of gratuitous photos of the adjustable arms with bump steer correction
And, that’s about it for now. It’s all taking much longer than I would like, but working on the car out of a single garage, 5 miles away from home means I only really get a day a week on it. 2 if I’m lucky. I’ve been trying to do as much stuff from home as possible, but there’s not much that can be done now the dash is finished. At least now it’s getting darker much later, I might get a few more hours a week in the evenings after work. A lot to do, not enough time so I’d best get cracking!
!! LONG POST ALERT !!
This thread is long overdue an update. Between work, married life and trying to progress the car, I’ve not had a lot of time for updates. I’ve also been a bit distracted by driving around in this.

Anyway, now as the evenings draw in I have to find other ways of entertaining myself on the dark evenings. Time to update the build thread!
I also apologise for this being a bit text heavy. I’ve been so preoccupied with cracking on with the project that I haven’t taken many pictures – and those pictures and videos I have taken aren’t the best!
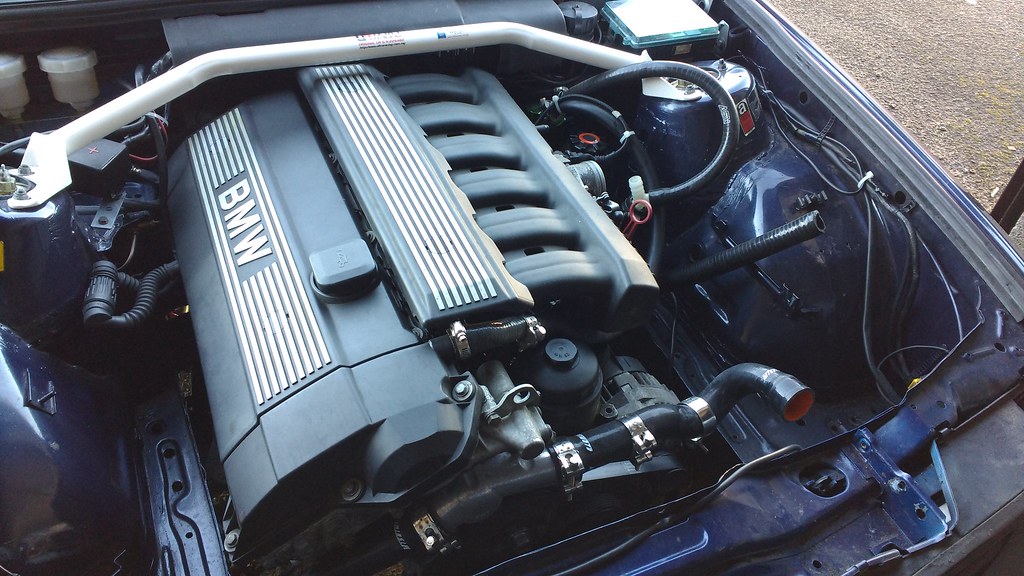
Anyway. Let’s at least start with the best bit. The engine.
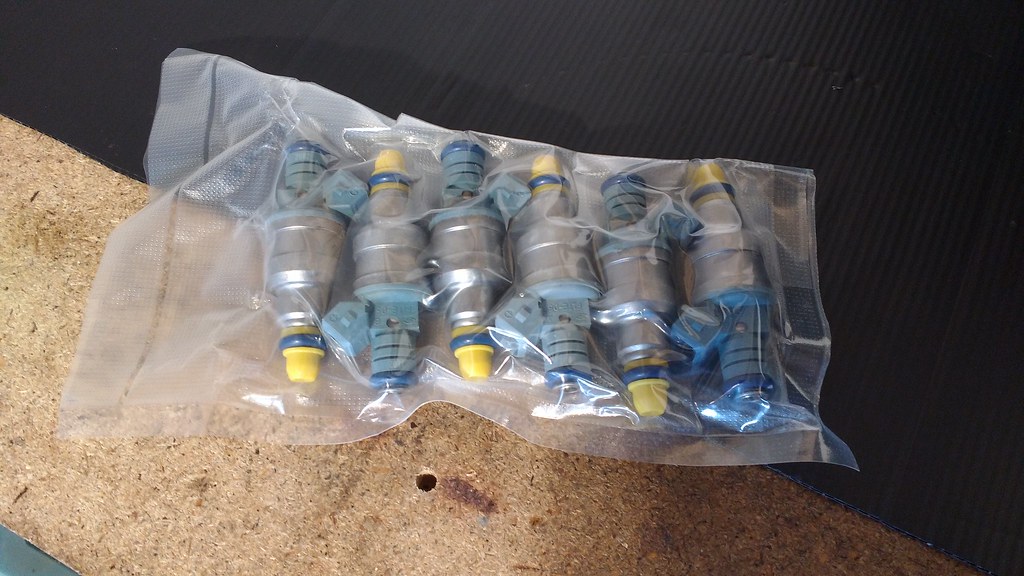
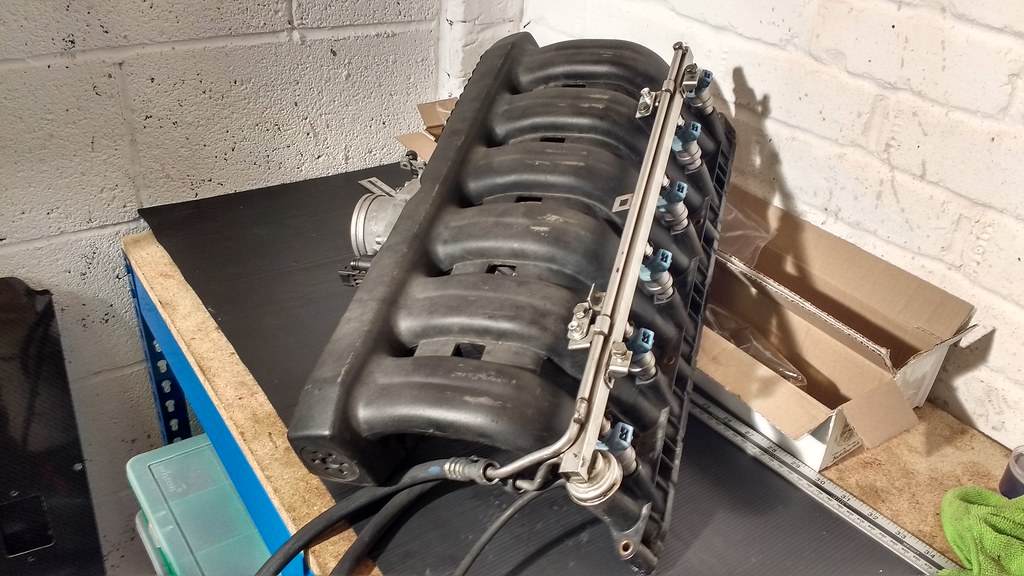
I figured as I’d put so much time and money into it – and that I only really wanted to map it once – I moved on the M54 inlet cam and opted for a pair of cams from Just Deutsch. These are M52 regrinds specifically developed for stroked engines. I won’t reveal lift & duration here, I’ll just say for now that they aren’t too far from the US S52 cams, but modified to yield more mid-range torque. These were accompanied by larger 24lb fuel injectors – plug and play into the M52 fuel rail – also supplied by Just Deutsch.
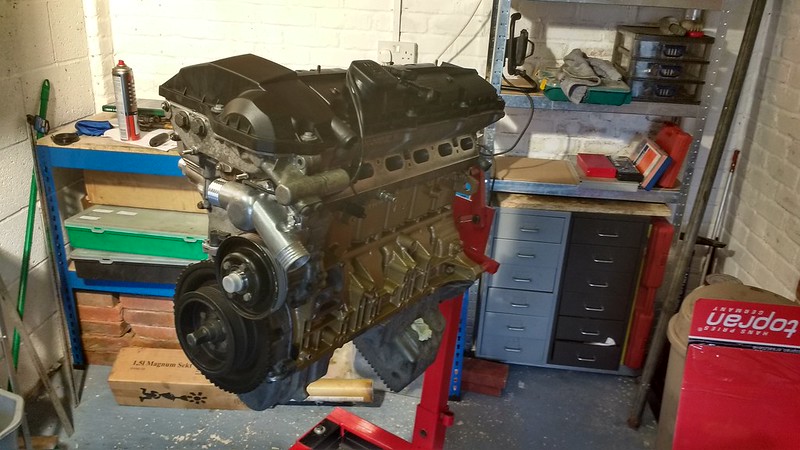
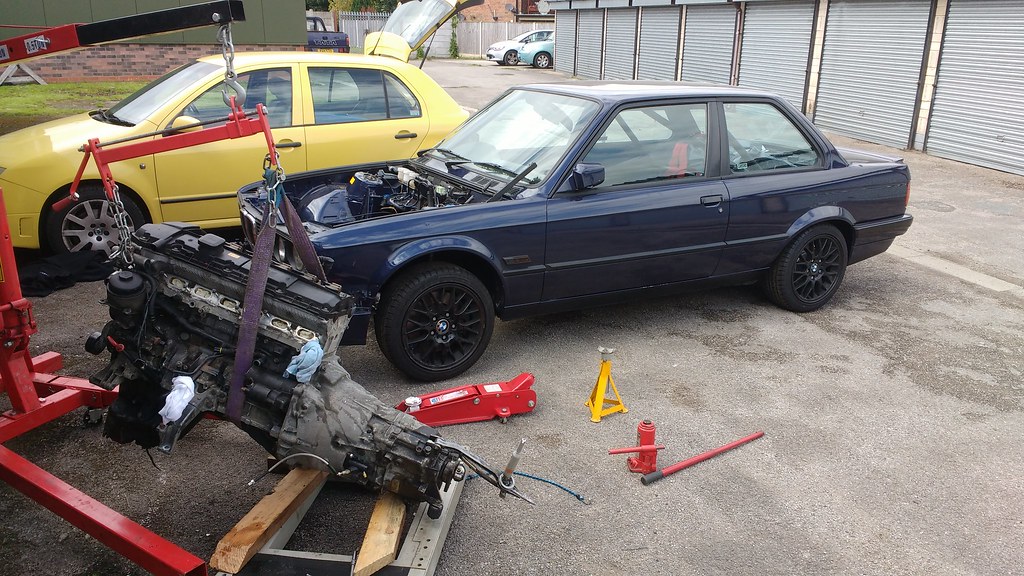
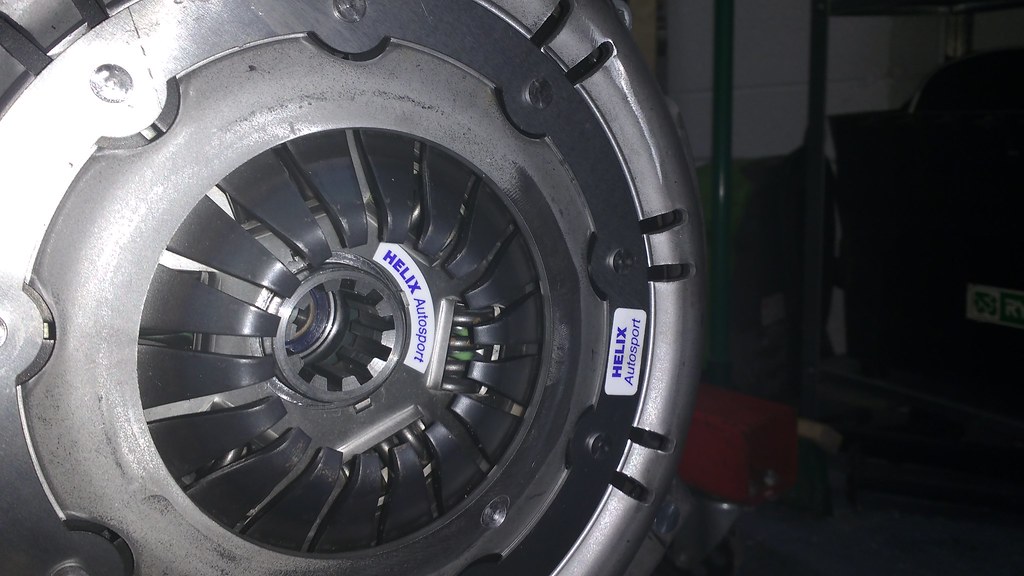
With a large bore throttle body and 6-paddle sprung clutch by Helix attached, it was time to lift out the old lump and drop in the new. Hopefully the new engine will be good for about 260 bhp and 250lbft of torque, but we’ll see. It needs to run first, right? We’ll return to that point later.
Onto electrics - I think the last thing I talked about before going AWOL was fusebox relocation. So how did that go? “Not swimmingly” is the most apt phrase I think. Electrical work took me so much longer than planned. I lost days cutting, splicing, routing and taping and almost lost the will to live. But after weekends spent on my knees in the footwell (Ooh-er…), the time had come to test it.
The dashboard was in. The ignition panel and FIA master switch were wired up. All the modular loom connectors were attached to the fusebox which, for this purpose, was hastily laid on top of an old toolbox in the passenger footwell. The fire extinguisher was primed and ready. I connected the battery, turned the key to “accessory” and went through the list of tests.
It turns out three things didn’t work as they were supposed to.
1) The heater box didn’t work. At all.
2) The indicators were behaving strangely. Front/rear indicators on both sides worked fine off the stalk. But the side indicators didn’t work. Then with the hazard light switch on, ONLY the side indicators worked. Nothing from the front/rear indicators.
3) The handbrake light on the dash didn’t go out when the handbrake was released.
So it turned out that 1) and 2) were simple issues to deal with. The heater box only gets power in “run”. Checked that – it works, job done. The indicators – The hazard light is wired into the dash loom and the indicator switch, the body loom. The right wires had to be spliced in the right places and I’d forgotten to do this. Once that was done, I had 6 working indicator lamps. Number 3) – oh my.
First port of call was the switch on the handbrake. I quickly confirmed that this was working just fine, but the handbrake light still wouldn’t go out. I won’t go into the whole long, sorry saga here but I can say I spent about 20 hours trying to track down how the handbrake light on the dash was finding ground elsewhere. Before I realised that when the engine runs, the light goes out. And that is supposed to be the case. And that’s what the owner’s manual says. Did I say I’m not an auto electrician??
And you read that right. Yes! The engine runs! Apologies for the terrible video but I wasn’t expecting this (genuine first!) test fire to go quite so well.
https://www.youtube.com/watch?v=ODiQPZ3jgPw
So what else have I done?
In place of where the fusebox once was is a coolant bottle. This moves the weight of the full coolant bottle back to behind the front turrets. The E30 bottle won’t fit here, so I thought about various aftermarket bottles and couldn’t guarantee that any of those would fit either. Then I saw the Rover 75 bottle in my friend’s k-series engine’d MG Midget. That looked like the perfect size and shape.
They are cheap as chips and as an added bonus, it uses BMW expansion tank caps and has the same inlets/outlets as the E30 item. So that is now what resides in my engine bay. I’ve fitted the radiator and I’ve done almost all the plumbing so it’s not that far away from being filled with coolant.
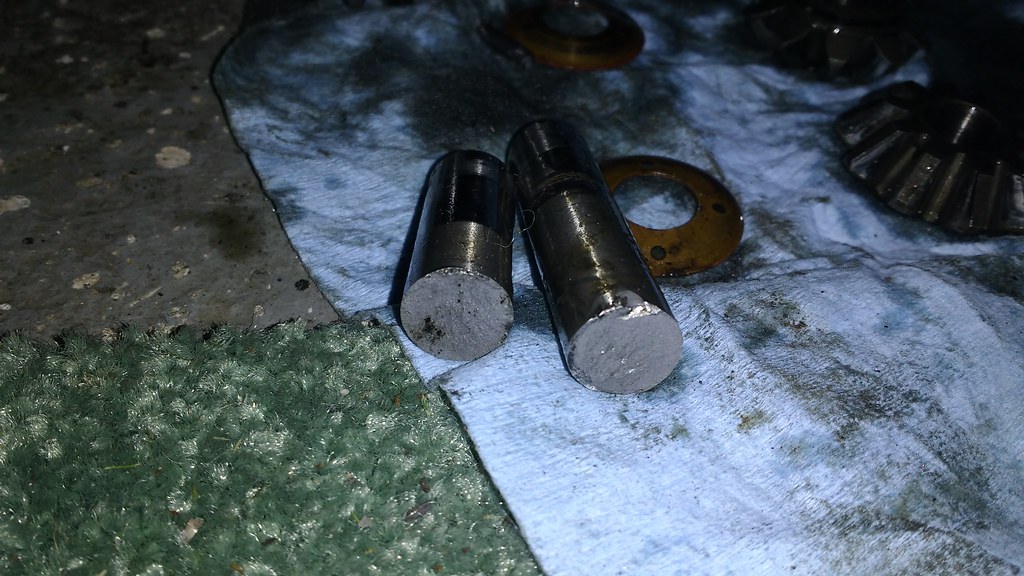
While on the subject of my friend’s k-midget, he took that on its first track outing last month and after half a day of fun, it grenade its diff in quite spectacular fashion. Here are some photos from when we diagnosed the diff failure then pulled it to inspect the damage.
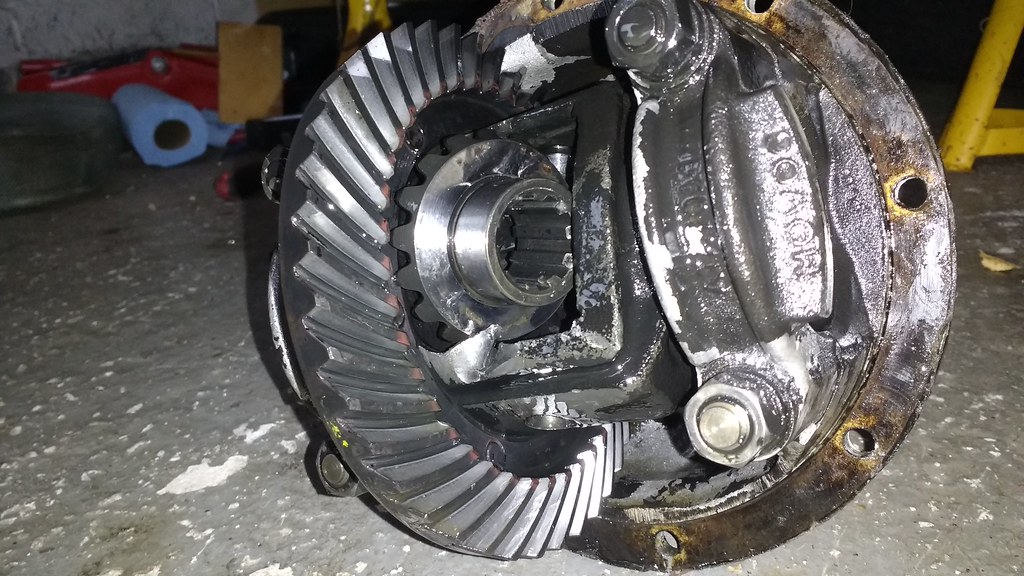
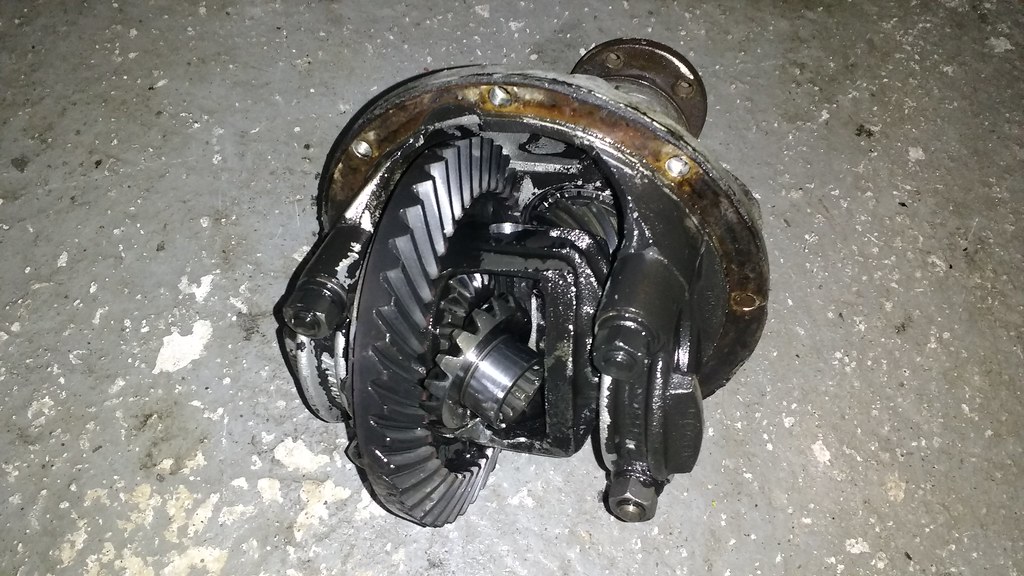
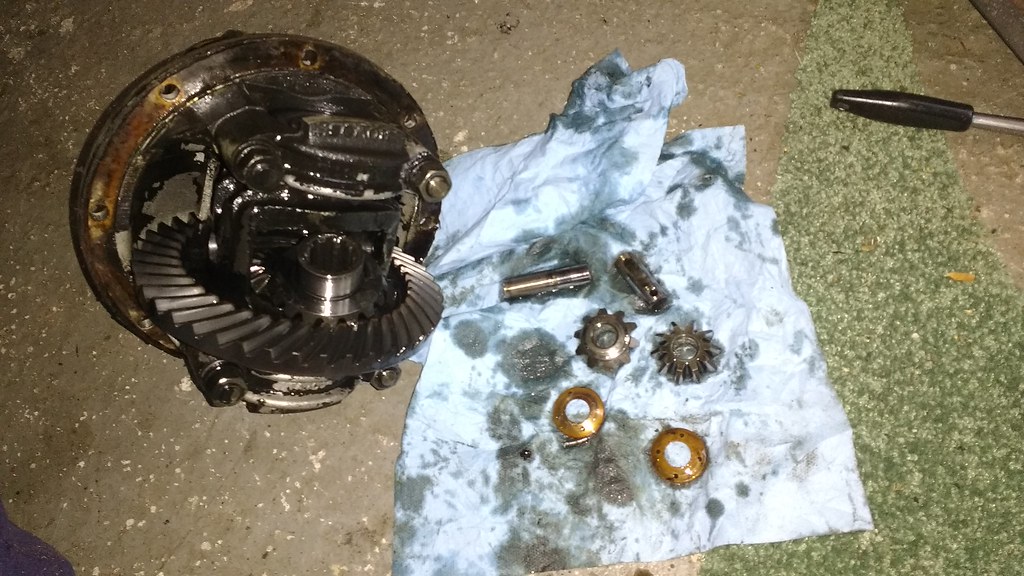
And the responsible component…
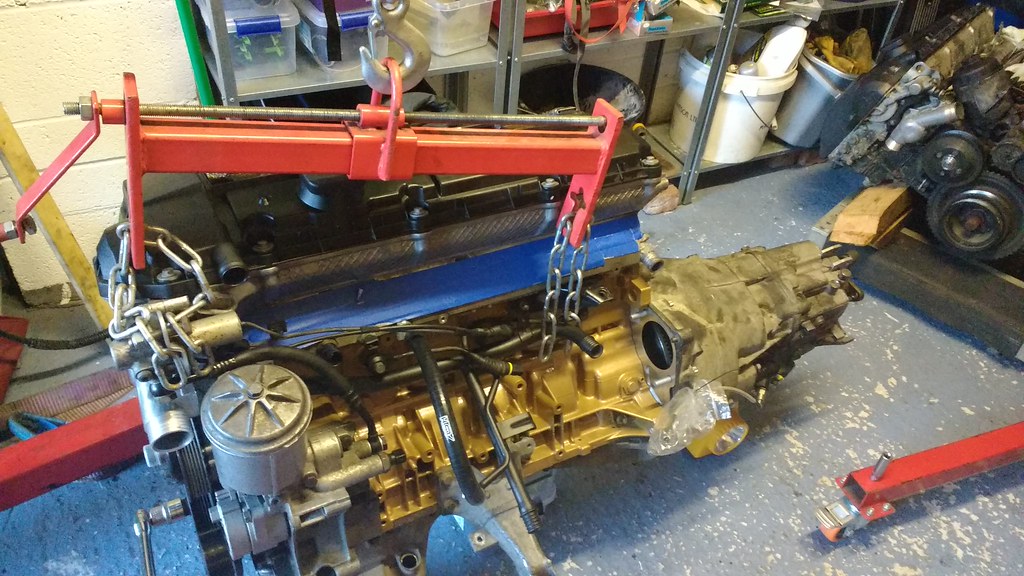
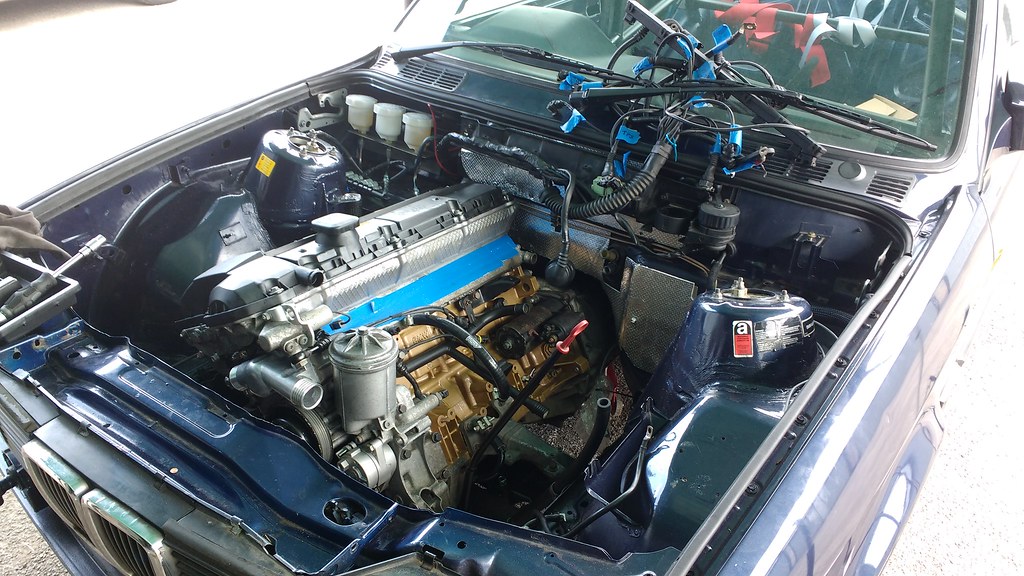
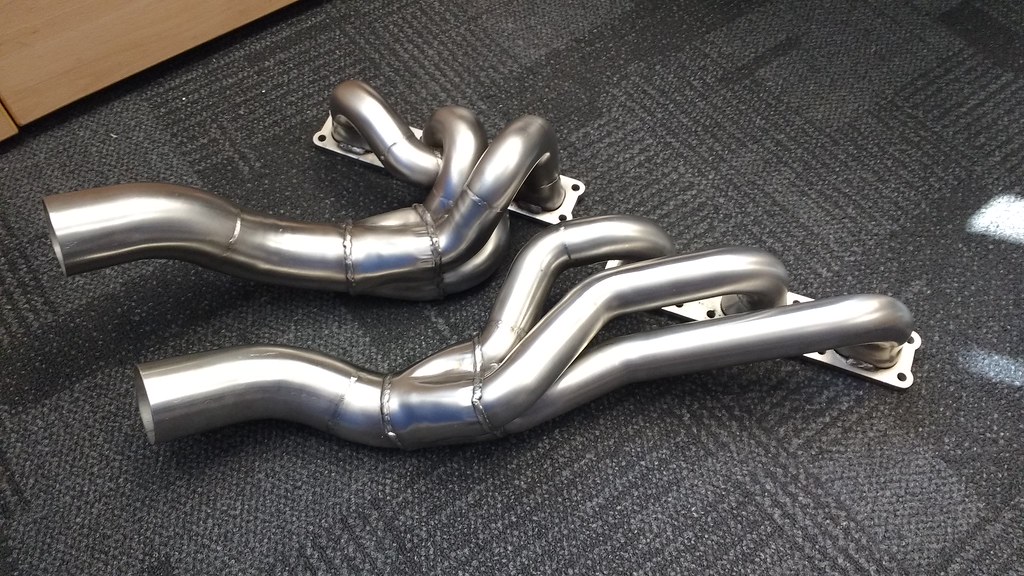
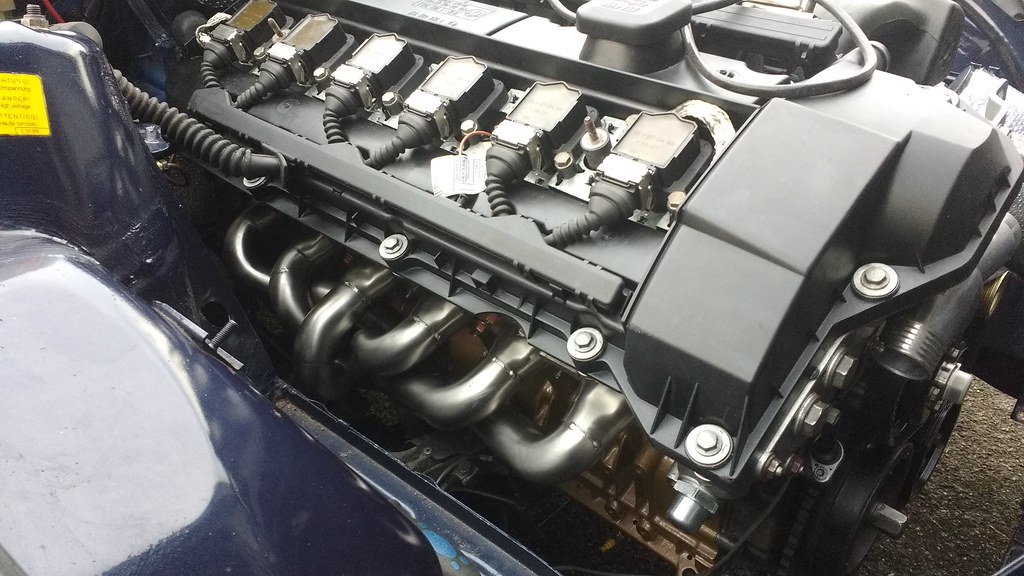
So, in addition to the aforementioned engine upgrades and again, to get the best out of it, I’ve sold on the standard M52 exhaust manifold and the E30 325i exhaust system that was on it. This has been replaced with a Fritz Bitz manifold and full system. The manifold is tubular with equal length headers and the system is twin 60 mm throughout with a resonator located just after the downpipes. Fitting the manifold was a saga and it needed the steering linkage splitting for clearance, but not it’s all back together there’s plenty room. I’ve fitted the system best I can for now (on my own, working with the car on stands) but it looks like it’s on the piss a little bit. So I’ll get the MOT man to sort that out when it goes for its test.
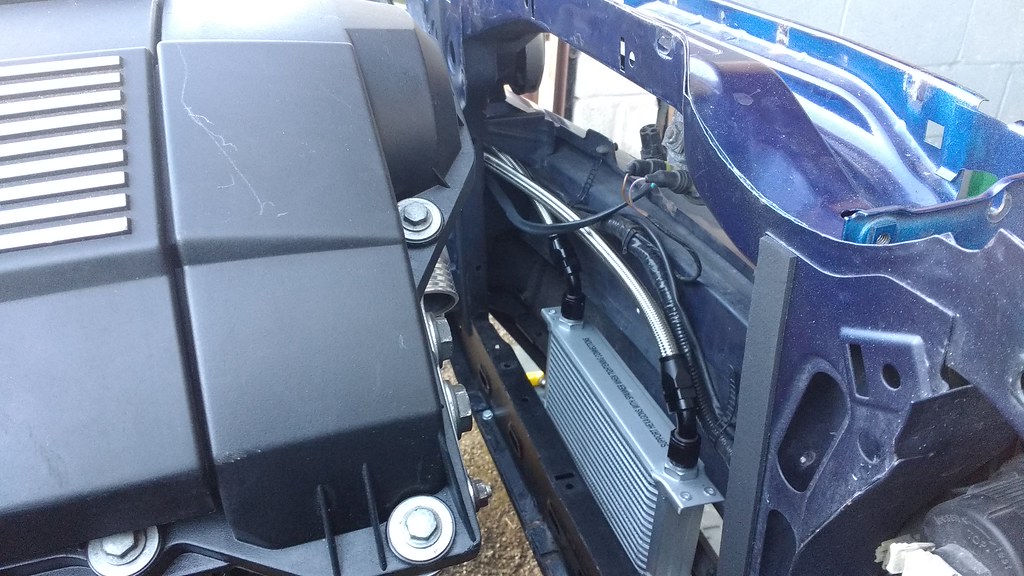
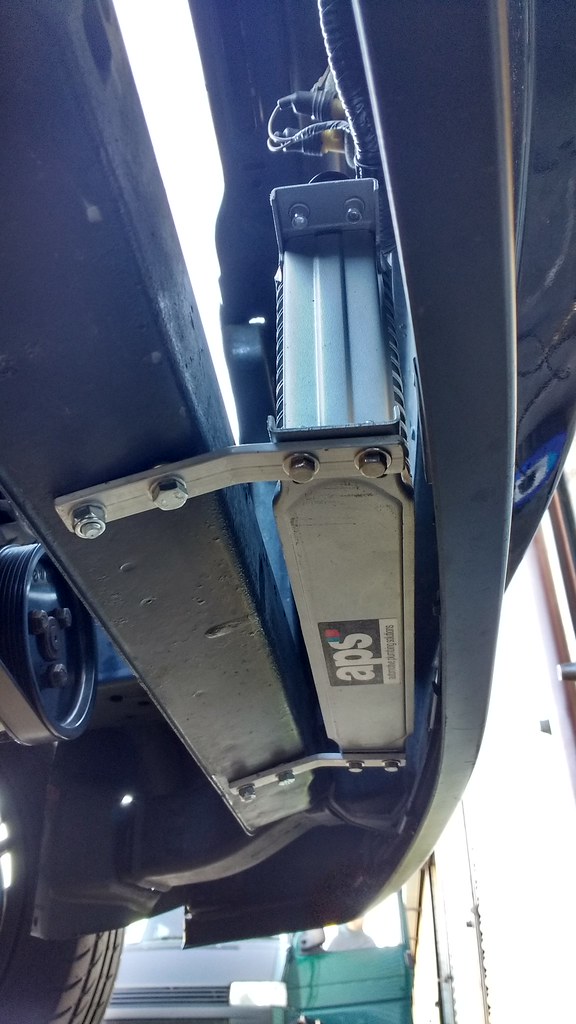
The oil cooler is fitted ahead of the front cross member using some DIY 4 mm thick aluminium brackets. I ordered PTFE lines with stainless steel braid along with the required JIC compression fittings from Torques UK and made them up at home.
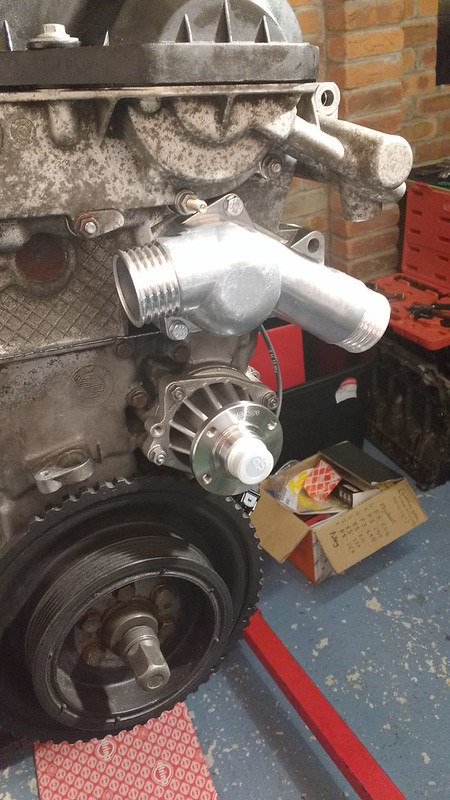
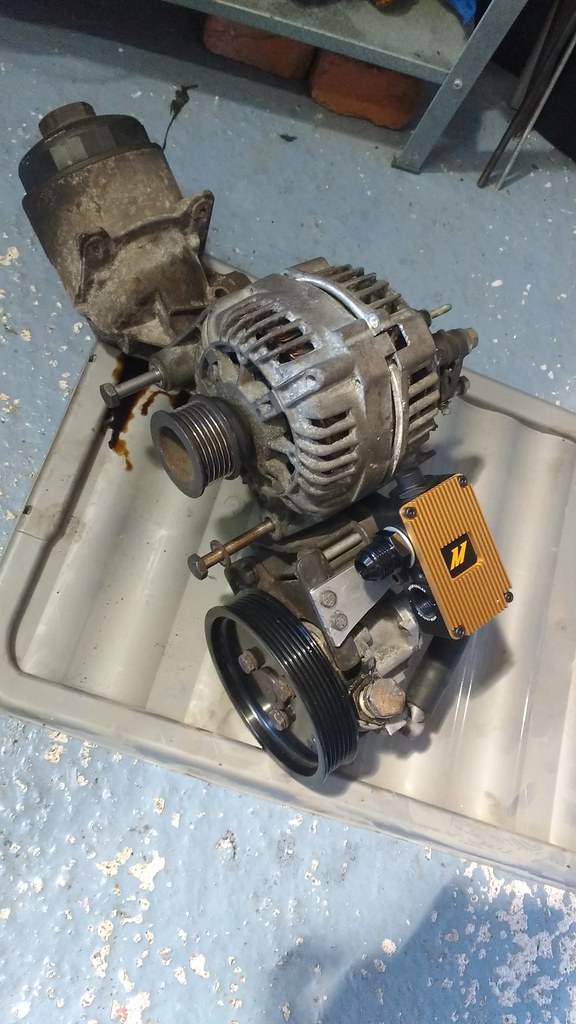
The oil thermostat is a Mishimoto item and an aluminium bracket is all that’s required to mount that nicely to the side of the PAS pump. The M52 PAS pump did need some spacers to mount to the M50 oil filter housing to ensure that the auxiliary belt pulleys all stayed nicely in line but that wasn’t a big task. Here’s a pic of the thermostat fitting mocked up on a spare oil filter housing.
The oil cooler will remain un-plumbed until the engine is run in, then I’ll fit the sandwich plate take-off etc during the first oil change. But I did need to fit the oil cooler and thermostat lines before fitting the rad as it’s so tight up front. I’ve also got an SPA duel oil temperature/pressure gauge wired in, fused and located next to the ignition panel. I liked this as the backlighting colours are selectable – the red backlight option is about as close to the E30 instrument cluster as I’ll get.
Other little jobs I’ve tackled include:
• Making some poly radiator mounts.
• Fitting the chassis-mounted DTM style shifter and isolating poly trans mounts to prevent transmission movement.
• Removing the crash structure from the front bumper (about 8kg) and making new bumper mounts
• Rebuilding the heater valve with a new o-ring, seeing as the old one was weeping slightly.
• Taking out the old steel, threaded steering rack spacers and replacing with proper unthreaded aluminium spacers and new bolts/locking nuts. Believe me, doing this with the engine out was hard enough as the threaded spacers had seized onto the bolts and were near impossible to get a hold of. Glad I tackled it as I didn’t want to have to deal with them further down the line with the engine in situ, should I have to address any future steering rack issues.
So what’s left on the car?
I still need to permanently fit the fusebox (behind where the glovebox once was) and tidy up the wiring. There’s the plumbing to finish and coolant to fill. Doorcards and seats to fit. Extinguisher to plumb in, Aerocatch bonnet pins to fit and a few other little niggles to sort before it goes off for an MOT. But it isn’t that far away from being driveable.
Following an MOT, it’s time to break in the engine before dropping the oil, attaching the cooler and getting it mapped. Then there’s the suspension and brake upgrades to sort! I have a set of Z3M KW 2-way Clubsports to go on along with the adjustable lower control arms, tie rods and H&R anti-roll bars. I’ll outsource all of that and get it aligned and corner-weighted at the same time. Yokohama AD08Rs will be going on it for dual road/track duty (probably sticking with 205/45/16 for now) and I’m hoping to get a set of proper wheels for it too – keeping the current ones as spares with some road rubber on them.
The brakes – I have Carbon Lorraine RC5+ front pads to replace the OEM E36 M3 ones and some custom made backplates with brake cooling ducts. I’ll get EBC Bluestuff pads for the rear and be done with it, making sure I flush the old fluid through before the first trackday.
I’ll try to update again before that happens!
This thread is long overdue an update. Between work, married life and trying to progress the car, I’ve not had a lot of time for updates. I’ve also been a bit distracted by driving around in this.
Anyway, now as the evenings draw in I have to find other ways of entertaining myself on the dark evenings. Time to update the build thread!
I also apologise for this being a bit text heavy. I’ve been so preoccupied with cracking on with the project that I haven’t taken many pictures – and those pictures and videos I have taken aren’t the best!
Anyway. Let’s at least start with the best bit. The engine.
I figured as I’d put so much time and money into it – and that I only really wanted to map it once – I moved on the M54 inlet cam and opted for a pair of cams from Just Deutsch. These are M52 regrinds specifically developed for stroked engines. I won’t reveal lift & duration here, I’ll just say for now that they aren’t too far from the US S52 cams, but modified to yield more mid-range torque. These were accompanied by larger 24lb fuel injectors – plug and play into the M52 fuel rail – also supplied by Just Deutsch.
With a large bore throttle body and 6-paddle sprung clutch by Helix attached, it was time to lift out the old lump and drop in the new. Hopefully the new engine will be good for about 260 bhp and 250lbft of torque, but we’ll see. It needs to run first, right? We’ll return to that point later.
Onto electrics - I think the last thing I talked about before going AWOL was fusebox relocation. So how did that go? “Not swimmingly” is the most apt phrase I think. Electrical work took me so much longer than planned. I lost days cutting, splicing, routing and taping and almost lost the will to live. But after weekends spent on my knees in the footwell (Ooh-er…), the time had come to test it.
The dashboard was in. The ignition panel and FIA master switch were wired up. All the modular loom connectors were attached to the fusebox which, for this purpose, was hastily laid on top of an old toolbox in the passenger footwell. The fire extinguisher was primed and ready. I connected the battery, turned the key to “accessory” and went through the list of tests.
It turns out three things didn’t work as they were supposed to.
1) The heater box didn’t work. At all.
2) The indicators were behaving strangely. Front/rear indicators on both sides worked fine off the stalk. But the side indicators didn’t work. Then with the hazard light switch on, ONLY the side indicators worked. Nothing from the front/rear indicators.
3) The handbrake light on the dash didn’t go out when the handbrake was released.
So it turned out that 1) and 2) were simple issues to deal with. The heater box only gets power in “run”. Checked that – it works, job done. The indicators – The hazard light is wired into the dash loom and the indicator switch, the body loom. The right wires had to be spliced in the right places and I’d forgotten to do this. Once that was done, I had 6 working indicator lamps. Number 3) – oh my.
First port of call was the switch on the handbrake. I quickly confirmed that this was working just fine, but the handbrake light still wouldn’t go out. I won’t go into the whole long, sorry saga here but I can say I spent about 20 hours trying to track down how the handbrake light on the dash was finding ground elsewhere. Before I realised that when the engine runs, the light goes out. And that is supposed to be the case. And that’s what the owner’s manual says. Did I say I’m not an auto electrician??
And you read that right. Yes! The engine runs! Apologies for the terrible video but I wasn’t expecting this (genuine first!) test fire to go quite so well.
https://www.youtube.com/watch?v=ODiQPZ3jgPw
So what else have I done?
In place of where the fusebox once was is a coolant bottle. This moves the weight of the full coolant bottle back to behind the front turrets. The E30 bottle won’t fit here, so I thought about various aftermarket bottles and couldn’t guarantee that any of those would fit either. Then I saw the Rover 75 bottle in my friend’s k-series engine’d MG Midget. That looked like the perfect size and shape.
They are cheap as chips and as an added bonus, it uses BMW expansion tank caps and has the same inlets/outlets as the E30 item. So that is now what resides in my engine bay. I’ve fitted the radiator and I’ve done almost all the plumbing so it’s not that far away from being filled with coolant.
While on the subject of my friend’s k-midget, he took that on its first track outing last month and after half a day of fun, it grenade its diff in quite spectacular fashion. Here are some photos from when we diagnosed the diff failure then pulled it to inspect the damage.
And the responsible component…
So, in addition to the aforementioned engine upgrades and again, to get the best out of it, I’ve sold on the standard M52 exhaust manifold and the E30 325i exhaust system that was on it. This has been replaced with a Fritz Bitz manifold and full system. The manifold is tubular with equal length headers and the system is twin 60 mm throughout with a resonator located just after the downpipes. Fitting the manifold was a saga and it needed the steering linkage splitting for clearance, but not it’s all back together there’s plenty room. I’ve fitted the system best I can for now (on my own, working with the car on stands) but it looks like it’s on the piss a little bit. So I’ll get the MOT man to sort that out when it goes for its test.
The oil cooler is fitted ahead of the front cross member using some DIY 4 mm thick aluminium brackets. I ordered PTFE lines with stainless steel braid along with the required JIC compression fittings from Torques UK and made them up at home.
The oil thermostat is a Mishimoto item and an aluminium bracket is all that’s required to mount that nicely to the side of the PAS pump. The M52 PAS pump did need some spacers to mount to the M50 oil filter housing to ensure that the auxiliary belt pulleys all stayed nicely in line but that wasn’t a big task. Here’s a pic of the thermostat fitting mocked up on a spare oil filter housing.
The oil cooler will remain un-plumbed until the engine is run in, then I’ll fit the sandwich plate take-off etc during the first oil change. But I did need to fit the oil cooler and thermostat lines before fitting the rad as it’s so tight up front. I’ve also got an SPA duel oil temperature/pressure gauge wired in, fused and located next to the ignition panel. I liked this as the backlighting colours are selectable – the red backlight option is about as close to the E30 instrument cluster as I’ll get.
Other little jobs I’ve tackled include:
• Making some poly radiator mounts.
• Fitting the chassis-mounted DTM style shifter and isolating poly trans mounts to prevent transmission movement.
• Removing the crash structure from the front bumper (about 8kg) and making new bumper mounts
• Rebuilding the heater valve with a new o-ring, seeing as the old one was weeping slightly.
• Taking out the old steel, threaded steering rack spacers and replacing with proper unthreaded aluminium spacers and new bolts/locking nuts. Believe me, doing this with the engine out was hard enough as the threaded spacers had seized onto the bolts and were near impossible to get a hold of. Glad I tackled it as I didn’t want to have to deal with them further down the line with the engine in situ, should I have to address any future steering rack issues.
So what’s left on the car?
I still need to permanently fit the fusebox (behind where the glovebox once was) and tidy up the wiring. There’s the plumbing to finish and coolant to fill. Doorcards and seats to fit. Extinguisher to plumb in, Aerocatch bonnet pins to fit and a few other little niggles to sort before it goes off for an MOT. But it isn’t that far away from being driveable.
Following an MOT, it’s time to break in the engine before dropping the oil, attaching the cooler and getting it mapped. Then there’s the suspension and brake upgrades to sort! I have a set of Z3M KW 2-way Clubsports to go on along with the adjustable lower control arms, tie rods and H&R anti-roll bars. I’ll outsource all of that and get it aligned and corner-weighted at the same time. Yokohama AD08Rs will be going on it for dual road/track duty (probably sticking with 205/45/16 for now) and I’m hoping to get a set of proper wheels for it too – keeping the current ones as spares with some road rubber on them.
The brakes – I have Carbon Lorraine RC5+ front pads to replace the OEM E36 M3 ones and some custom made backplates with brake cooling ducts. I’ll get EBC Bluestuff pads for the rear and be done with it, making sure I flush the old fluid through before the first trackday.
I’ll try to update again before that happens!

Bit late to the party but just stumbled across this build.
I used to own this very car back in the late 90's / early 00's, nice to see someone giving it a lot of love.
Brings back some good memories, 1st RWD car, lowered too much and rain was a good combo... That and going through at least 2 sets of rear tyres a year :-)
I used to own this very car back in the late 90's / early 00's, nice to see someone giving it a lot of love.
Brings back some good memories, 1st RWD car, lowered too much and rain was a good combo... That and going through at least 2 sets of rear tyres a year :-)
cadlon said:
Bit late to the party but just stumbled across this build.
I used to own this very car back in the late 90's / early 00's, nice to see someone giving it a lot of love.
Brings back some good memories, 1st RWD car, lowered too much and rain was a good combo... That and going through at least 2 sets of rear tyres a year :-)
Hi Cadlon! Awesome, you're the second person to come along and say they used to own this car. I wonder if you sold it to the chap I bought it off? I remember buying it off a chap in Stretford in Manchester. It bears very little resemblance to that vehicle now though...I used to own this very car back in the late 90's / early 00's, nice to see someone giving it a lot of love.
Brings back some good memories, 1st RWD car, lowered too much and rain was a good combo... That and going through at least 2 sets of rear tyres a year :-)
So once more, I've not posted in a long time. I'll keep this one short and post pictures - and videos - to save your eyes! So, short version of the story.
Engine was in. It ran. Radiator and all was bolted up and off it went for an MOT, which it passed first time with no advisories. In the meantime, I drove this thing a couple of times as part of the BMW Cup Scholarship competition (which I didn’t win). The winner has gone on to do very well for himself though, so the exercise served its purpose and for me, it was at least the opportunity to get some affordable track time with my own car off the road.
So, back to the E30. First oil change from mineral to synthetic after 50 miles - I had issues with the oil cooler thermostat in that position. Every time the engine was revved, it caused the -an fittings to unscrew! So I bought a Mocal one with cast male fittings and bolted it to the wing. Made up some pipes using braided PTFE line and fittings from Torques UK. The end product worked great.
Had a few teething problems - minor oil leaks, chasing cooling leaks, delays on parts but got there in the end and in May it went for live mapping at Chipwizards. Again, a few issues meant two visits (ECU versions and whatnot) but in the end it made a healthy 259 bhp and 252 lbft.
Top mounts wise, I went for Kmac to replace the cr&ppy ones that came from Poland and when they arrived, they bolted straight up to the KW Coilovers. They took an age to arrive on back order from Aus. Nice, sturdy bits of kit though and dead easy to adjust. I had the suspension aligned and cornerweighted.
A set of Braid wheels with 205/50/16 R888r tyres finished the job for dry use, with same size R1Rs on the original black wheels for changeable/road/wet use. The Braid wheels are awesome - loads of brake clearance, light, supposedly very strong and custom made with the correct offset.
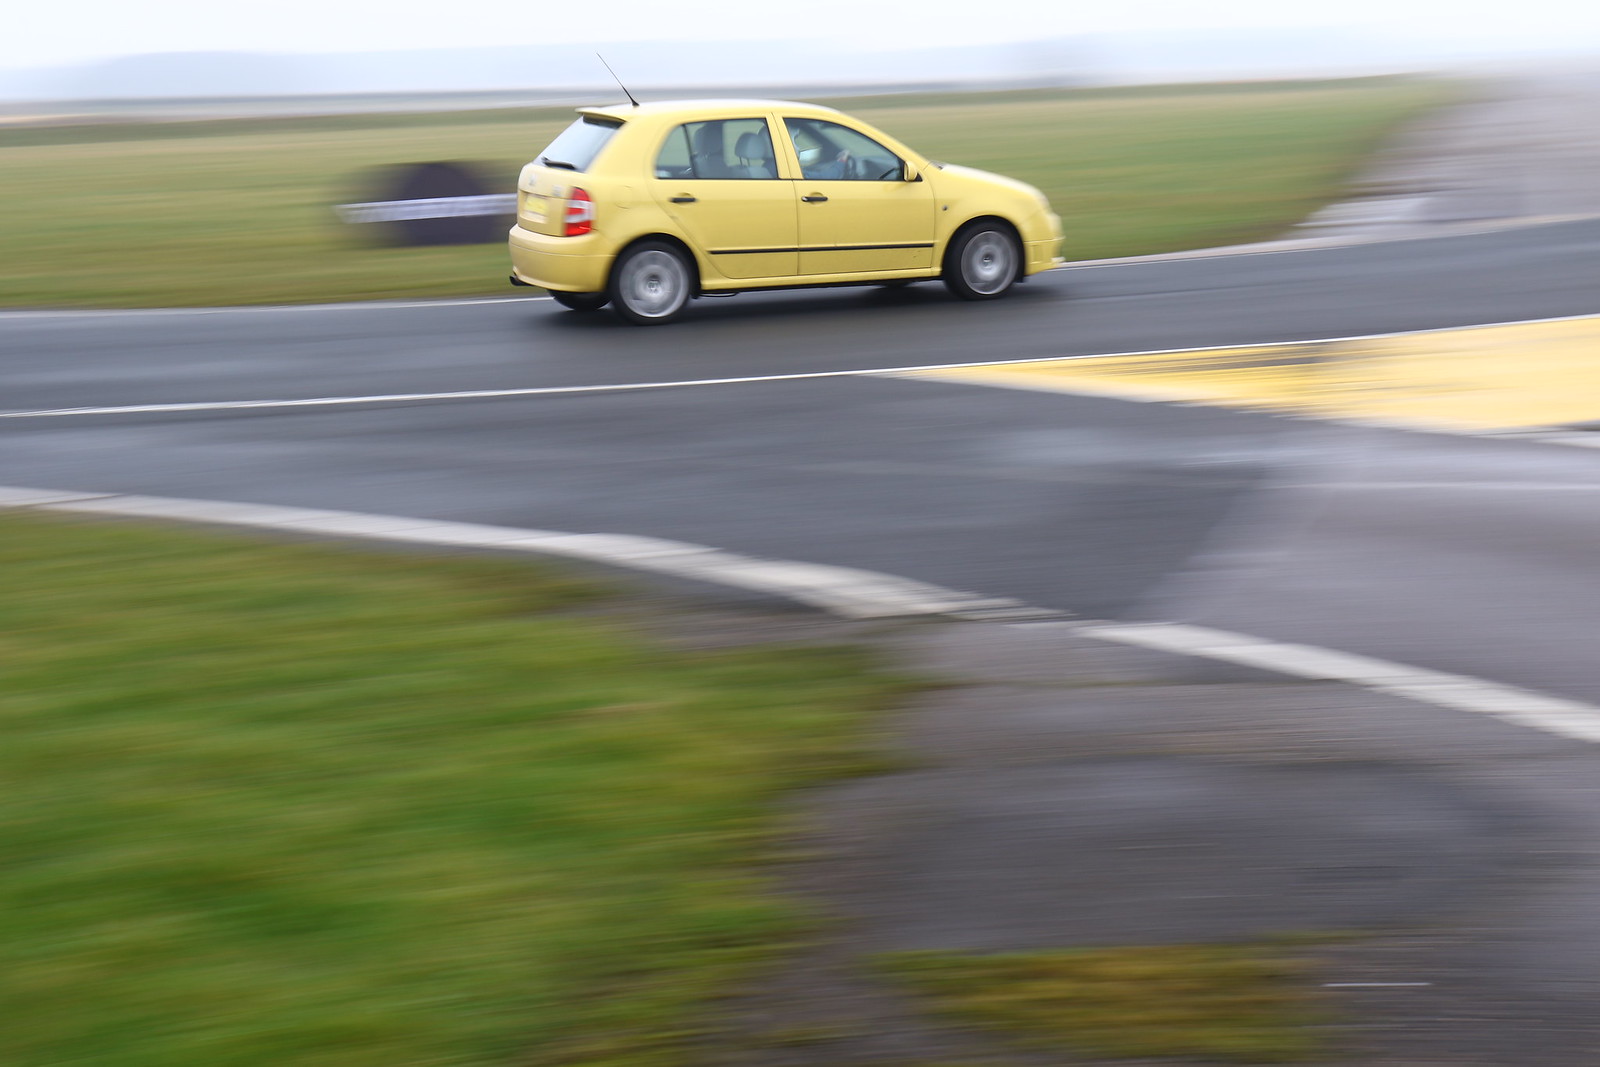
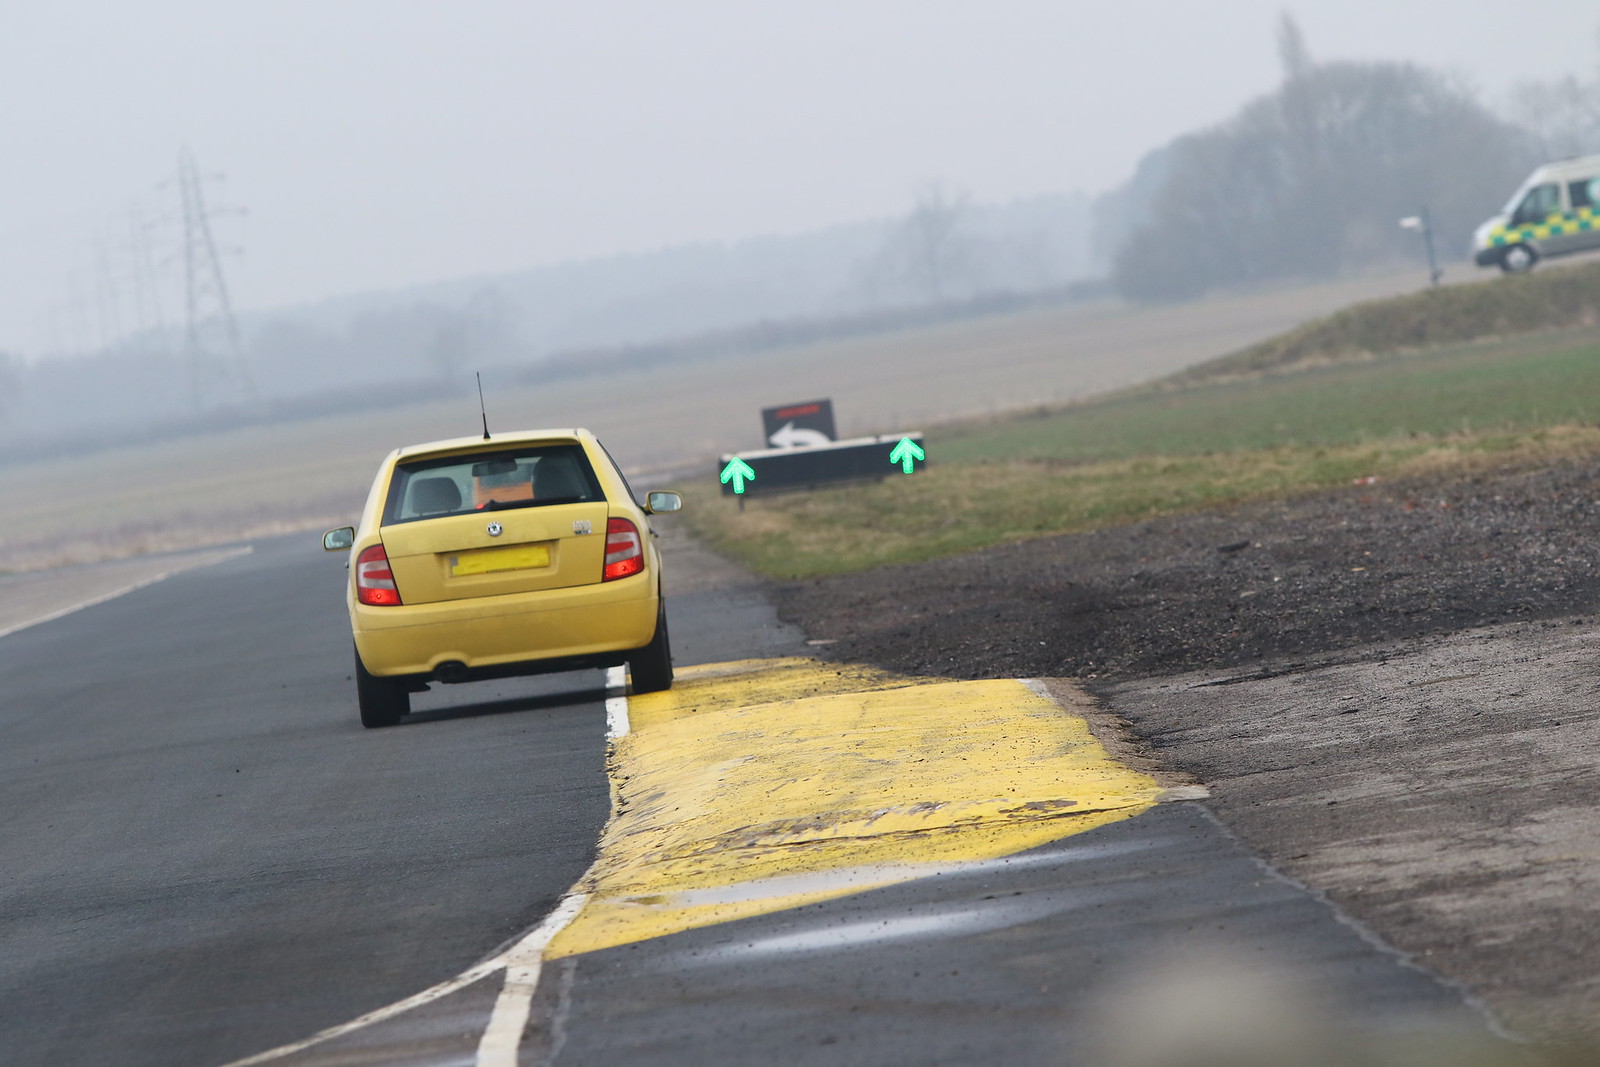
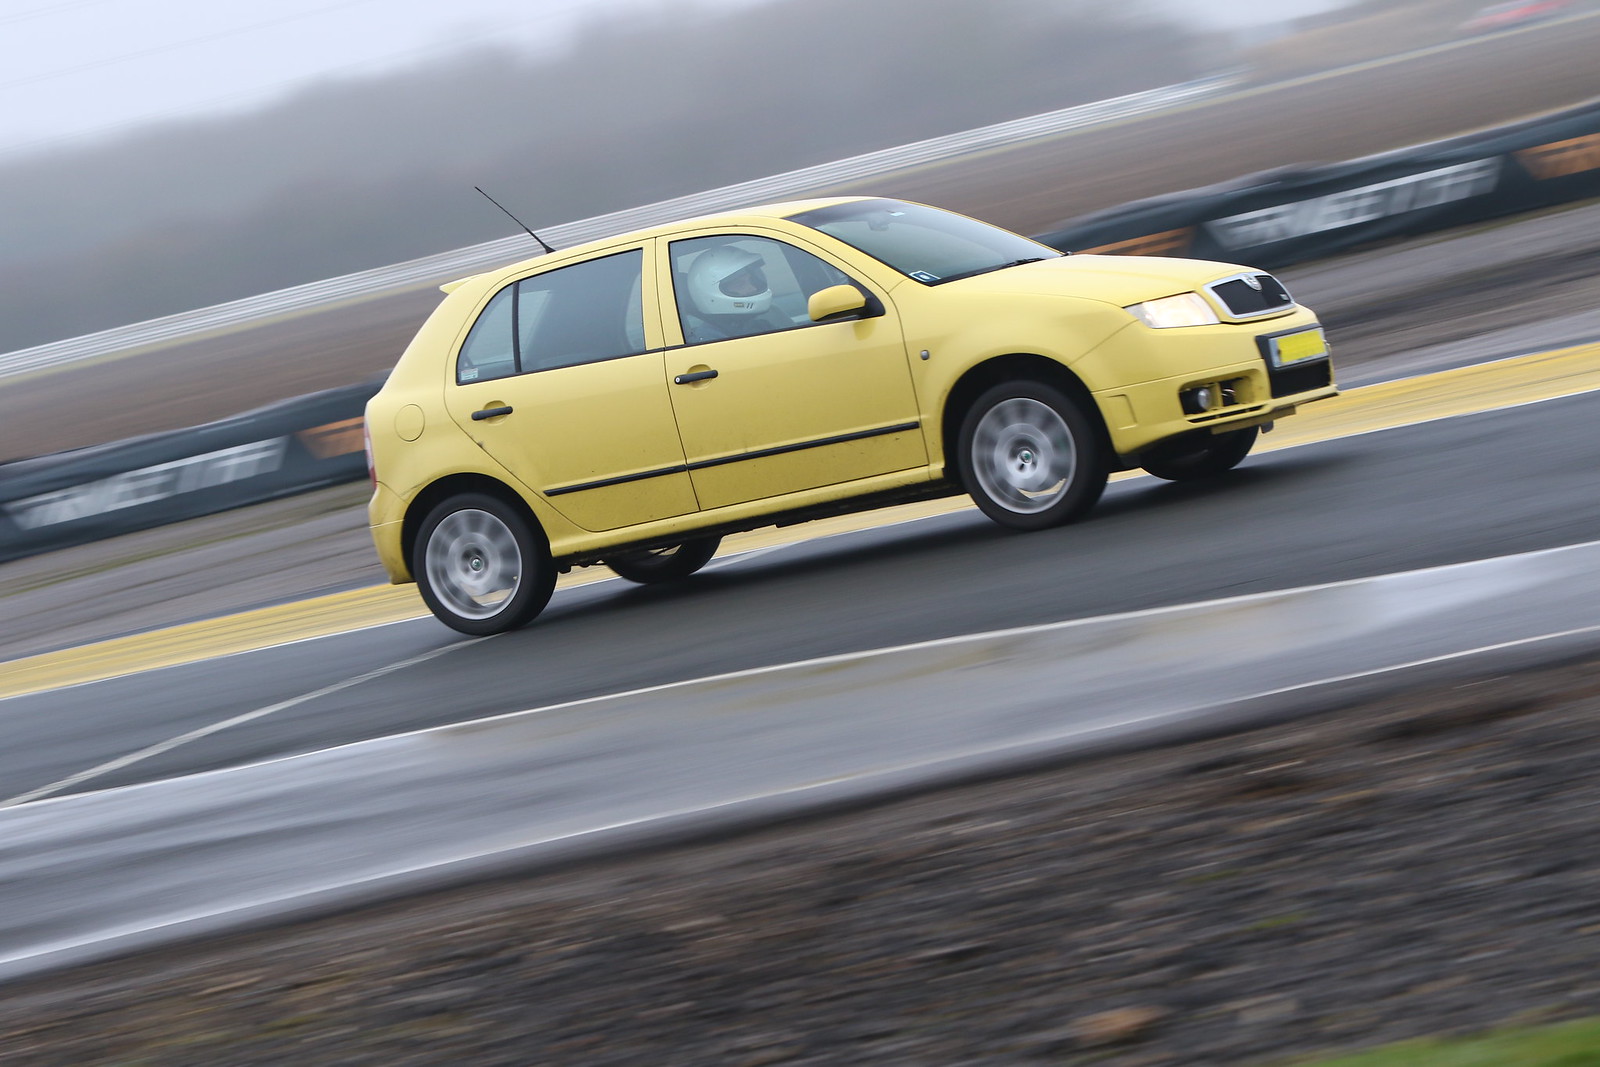
So all of the delays and teething problems meant I missed the first trackday I had booked in March. The Fabia went and did its duty. Not all that quick and a bit roly poly, but fun enough and did the trackday plus the 240 mile round trip on one tank of fuel
However, with one more oil change, the BMW was done in the nick of time for the trackday in June. I set off, with some trepidation, on the 120 mile trip to Blyton park, about 500 miles showing on the ODO with the new engine.
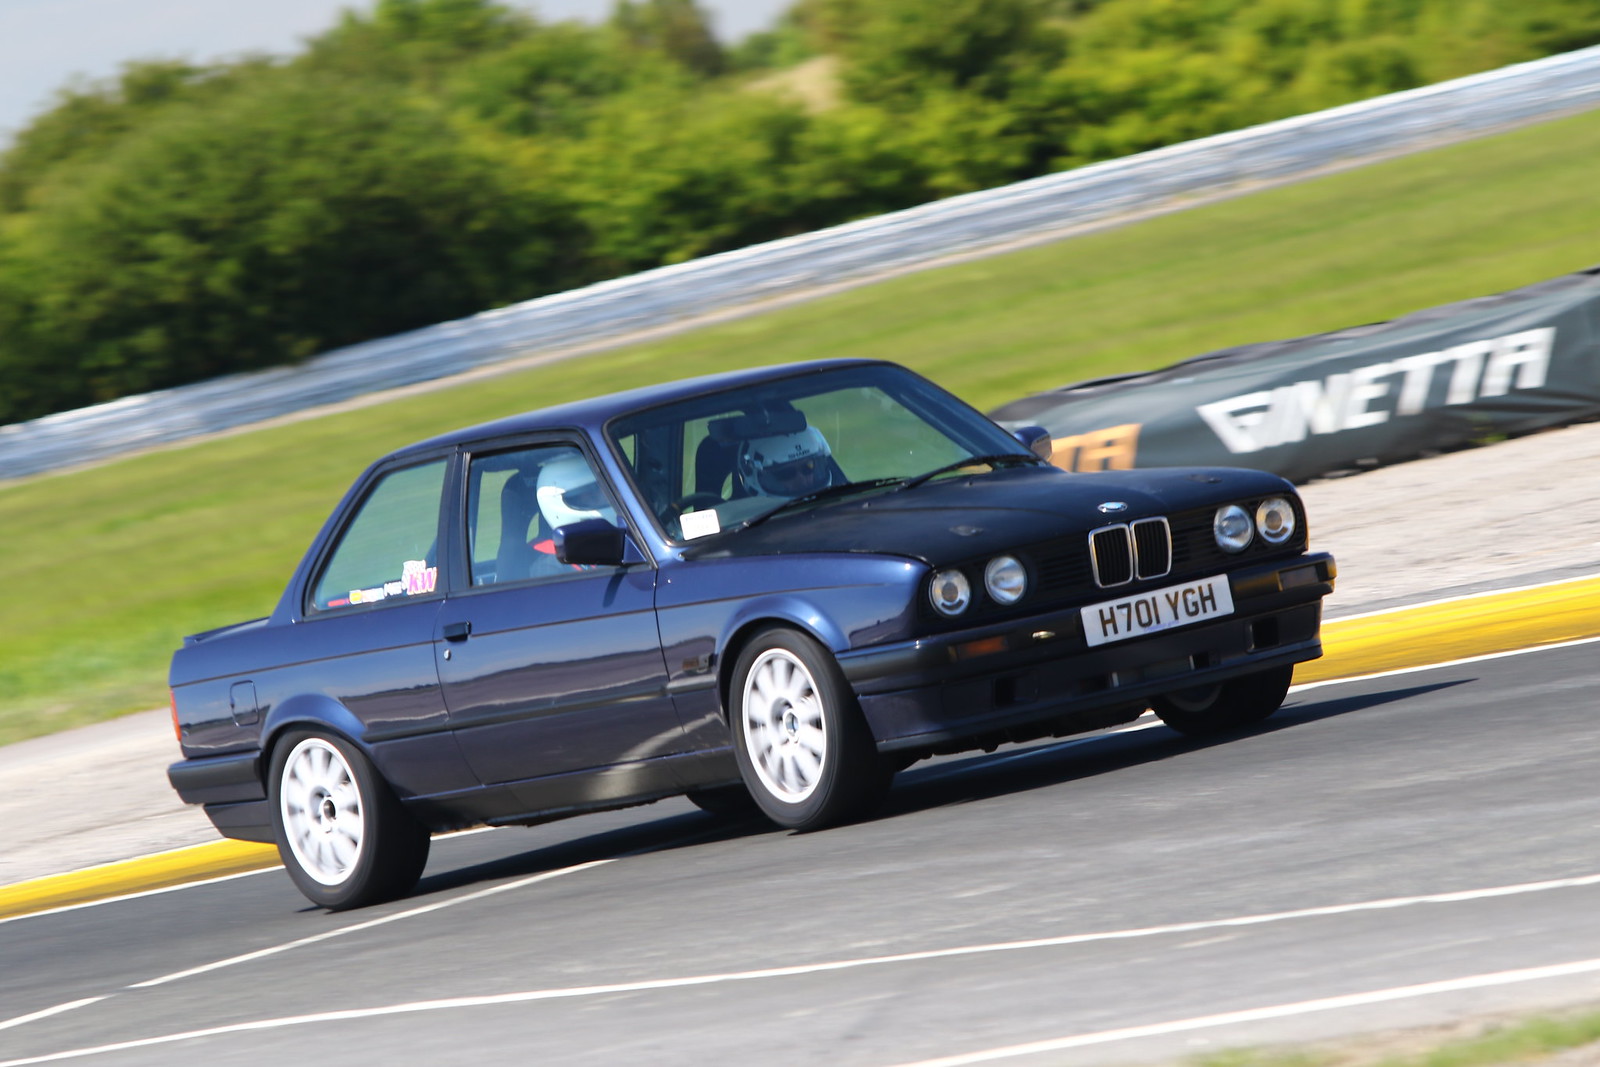
And the car was awesome. I mean, really, really good. Very well balanced. Stacks of grip and just epic on the brakes – which were there every time I wanted them. It pulled well of course, but the handling and brakes outshone the engine. Aside from tyre pressures, I didn’t change anything because I wanted to get a feel for it as it was. But already, first time out in the car my best lap was in the 1:16s. I think there’s some to come from it too.
And the obligatory video: https://www.youtube.com/watch?v=JlnbHRHnCM8&t=...
Problems? Only minor really. On right handers, there was fuel coming out of the fuel tank breather and filling the carbon cannister near the tank – which then proceeded to drip when the car was sat in the paddock. And there was still a bit of water temperature creep, but I guess that can be expected on a hot day. The breather issue has since been easily fixed with a 1-way fuel rollover valve.
Then onto Oulton Park. I did 110 track miles in the car in 30 degrees, sun blazing – and it never missed a beat. It did feel a little bit skittish at the rear when braking hard from speed as the pace began to pick up in the morning, but a click of rear damper rebound and a slight reduction in rear brake bias seemed to sort that. Again, a bit of water temperature creep was there but the oil temperature didn’t exceed 107c all day. Best lap was a 2:06, with the optimal laps being in the 2:05’s. I was being cautious into some of the faster corners and my driving needs a lot of work with regards to maintaining momentum in the wiggly bits though! More to come from me and the car for sure, but it does have pace.


Two videos this time. Firstly, a video from one of the sessions with data overlay: https://www.youtube.com/watch?v=B7JmaP7Sg5Q
And then, my friend brought a 3D camera with him, so it would’ve been a shame not to try it out! So on this video you can look around the car as if you were sat on the dash. Skip to about 3 minutes in for the start of a flying lap: https://www.youtube.com/watch?v=cIVtDoLSZGY&t=...
So, with about 1200 miles on the new engine now, I’m pleased with how it’s going. We’ll see how it performs over the next 2 or 3 trackdays as the year runs out. Once I have a little more faith that all is well, I’ll tear apart the old 2.8 and begin building a matching spare engine I think. I would also very much like to revisit the Nordschleife and try out Spa for size too. We’ll see how budgets and time work out next year.
Another day, another trackday. Blyton Park again this time. A short post however, as there's no much to report!
The car has, aside from standard pre/post trackday checks, required no work doing on it whatsoever the past few times out, which is a blessing. Blyton was the same fare again. About 130 track miles covered over the course of the day, on top of the 240 mile return trip and the car was faultless. With lower ambient temperatures, the water and oil temperatures remained perfectly stable and I could give the car death for 15-20 minutes or more with no problem at all.
I struggled for clear laps for much of the day but I wasn't too bothered as I was having a blast. I didn't even set up the camera & racechrono until late afternoon. But this was my clearest session of the day and, after looking at the videos later, recorded my fastest lap.
Here's a video of a few of those laps, the fastest starting at about 9:10. https://www.youtube.com/watch?v=5kb0UQjU9No
Apologies for the lack of posting activity once more. But there's not been much to report. I'm still doing trackdays, the car is still providing trouble free service.
I did the BMW Car Club trackday at Oulton Park in November. What a great day! Driving standards were great, the number of cars was well controlled and plenty of track time was had. Rain was forecast for some of the day so I had fitted my spare wheels with R1Rs in anticipation, but short of a couple of minor drizzle showers, it stayed dry all day. Looking at the data later, my best lap was a 2:05; still being conservative in the quicker corners too as I'm continuing to get used to the car. I'm really pleased with this sort of pace on a car which I drive to the track, do pretty much nothing to except adjust tyre pressures, drive all day, readjust pressures then drive home.
https://www.youtube.com/watch?v=Mi_8qGRzUIQ
Following that day, the car was parked up all winter. I had an oil sample sent of for analysis, which without going into too much detail, indicated a wear index of 0. Hopefully this means the new engine is running in nicely. The oil had also done 4 trackdays and the chemistry index was "borderline", suggesting that 4-5 trackdays is about the limit I can do on one oil change. I changed the engine oil and filter, the differential oil, and rebuilt the front brake calipers as the piston dust seals were starting to perish. Interestingly, after 4 trackdays the amount of wear on the Carbon Lorraine RC5+ pads is really good. Loads of material left on them.
Next time out was 11th June at Oulton Park again in torrential rain! First time driving this car in properly wet conditions and much learning was had. It was pouring down all day so the bonnet stayed down and I didn't even bother fiddling with tyre pressures. I parked near the cafe and disappeared inside for a brew between sessions. Car was faultless once again. Not fast though, slithering around with opposite lock on at as little as 30 mph!
https://youtu.be/E2bAhdMXdYY
In other news, after nearly 13 years of faithful service, the yellow Fabia daily driver has made way for a new workhorse. I've been struggling with the Fabia's lack of load space and lack of long-range refinement for some time but with it being so reliable and cheap to run, it was hard for me to justify getting rid of a new car for the sake of something new. But after begging help from mates with vans and estate cars and removing all the seats from the car except the driver's seat to get something back from Ikea, I thought it was time to stop beating about the bush and just get something bigger. With a manual, diesel estate car in mind that I hoped to get another 10 years out of, I looked at a VW GTD Golf, Seat Leon FR, Mondeo TDCi, BMW 320D, Volvo V60, Audi A4 Avant - and settled on an Octavia vRS. A 2015 plate in nardo grey with the 184 PS common rail diesel engine. For the price, it just seemed to tick all of the boxes with respect to refinement, performance, economy, build quality, running costs and load space; being much bigger than either the Golf or the Leon.

If it serves me as well as the Fabia has over the years, I'll be a happy man
I did the BMW Car Club trackday at Oulton Park in November. What a great day! Driving standards were great, the number of cars was well controlled and plenty of track time was had. Rain was forecast for some of the day so I had fitted my spare wheels with R1Rs in anticipation, but short of a couple of minor drizzle showers, it stayed dry all day. Looking at the data later, my best lap was a 2:05; still being conservative in the quicker corners too as I'm continuing to get used to the car. I'm really pleased with this sort of pace on a car which I drive to the track, do pretty much nothing to except adjust tyre pressures, drive all day, readjust pressures then drive home.
https://www.youtube.com/watch?v=Mi_8qGRzUIQ
Following that day, the car was parked up all winter. I had an oil sample sent of for analysis, which without going into too much detail, indicated a wear index of 0. Hopefully this means the new engine is running in nicely. The oil had also done 4 trackdays and the chemistry index was "borderline", suggesting that 4-5 trackdays is about the limit I can do on one oil change. I changed the engine oil and filter, the differential oil, and rebuilt the front brake calipers as the piston dust seals were starting to perish. Interestingly, after 4 trackdays the amount of wear on the Carbon Lorraine RC5+ pads is really good. Loads of material left on them.
Next time out was 11th June at Oulton Park again in torrential rain! First time driving this car in properly wet conditions and much learning was had. It was pouring down all day so the bonnet stayed down and I didn't even bother fiddling with tyre pressures. I parked near the cafe and disappeared inside for a brew between sessions. Car was faultless once again. Not fast though, slithering around with opposite lock on at as little as 30 mph!
https://youtu.be/E2bAhdMXdYY
In other news, after nearly 13 years of faithful service, the yellow Fabia daily driver has made way for a new workhorse. I've been struggling with the Fabia's lack of load space and lack of long-range refinement for some time but with it being so reliable and cheap to run, it was hard for me to justify getting rid of a new car for the sake of something new. But after begging help from mates with vans and estate cars and removing all the seats from the car except the driver's seat to get something back from Ikea, I thought it was time to stop beating about the bush and just get something bigger. With a manual, diesel estate car in mind that I hoped to get another 10 years out of, I looked at a VW GTD Golf, Seat Leon FR, Mondeo TDCi, BMW 320D, Volvo V60, Audi A4 Avant - and settled on an Octavia vRS. A 2015 plate in nardo grey with the 184 PS common rail diesel engine. For the price, it just seemed to tick all of the boxes with respect to refinement, performance, economy, build quality, running costs and load space; being much bigger than either the Golf or the Leon.
If it serves me as well as the Fabia has over the years, I'll be a happy man
Edited by motorhole on Wednesday 19th June 12:58
So, I'm going to take the opportunity to have a quick 2019 wrap-up and a look ahead to what I would like to do in 2020.
2019 high points:
Reliability. The E30 has been absolutely bob on all year and it's taken some real canings. Particularly one day at Donington - where it drove there, got thrashed all day and drove back in horrendous traffic, all fault free. The only issue I have had is I managed to snap an exhaust bracket somewhere along the line.
Pace: Again, the car has been really good, especially as I'm just rocking up to the track, adjusting the tyre pressures and driving. Kept up with plenty of more - admittedly less aggressively driven - exotic stuff. Looking at videos, it's running 2:05's round Oulton and 1:15s round Blyton at the moment, on full treads. And I'm pretty certain there's more in it.
New daily: The new daily is proving great. Comfortable, economical, loads of space for tools and track car crap. And fast enough to be entertaining when I want it to be. I even work out of the back of it at my lockup, the boot is such a convenient tool shelf!
2019 low points:
Not a lot to be honest. I only managed to do 4 trackdays and I would have liked to have done more I guess. And every one was tarred by wet weather at some point on the day - way there, way back, on track - necessitating full treads. The R888Rs saw no action in 2019 at all.
What am I doing in 2020
So I've figured that the limiting factor for the car is understeer in medium-high speed bends. I'm going to try and dial that out. Tyres show bluing on the outer edge suggesting more camber is required and I suspect I'm getting toe-in with suspension compression. I intend to add more camber, measure the bump steer and correct if necessary and drop the whole car by 10 mm or so, then see what difference that makes. And I would like to get more than 4 trackdays in!
Hope to see some of you out there
motorhole said:
What am I doing in 2020
So I've figured that the limiting factor for the car is understeer in medium-high speed bends. I'm going to try and dial that out. Tyres show bluing on the outer edge suggesting more camber is required and I suspect I'm getting toe-in with suspension compression. I intend to add more camber, measure the bump steer and correct if necessary and drop the whole car by 10 mm or so, then see what difference that makes. And I would like to get more than 4 trackdays in!
It's been a while since I was looking at E30's suspension information but in the back of my mind I remember seeing some references to very strange consequences with rear end geometry when lowered too much.......So I've figured that the limiting factor for the car is understeer in medium-high speed bends. I'm going to try and dial that out. Tyres show bluing on the outer edge suggesting more camber is required and I suspect I'm getting toe-in with suspension compression. I intend to add more camber, measure the bump steer and correct if necessary and drop the whole car by 10 mm or so, then see what difference that makes. And I would like to get more than 4 trackdays in!
It was something to do with the trailing arm pick up points being not in alignment and getting worse with lowering but I might be wrong.
Gassing Station | Readers' Cars | Top of Page | What's New | My Stuff