Scratch built car
Discussion


406highlander said:
Damn, those are some properly fat tyres! How much does a set of those go for?
Really amazing job you're doing on your scratch-built car.
Seeing the wire guides you're using to lay the skin of the car on to simply reminds me of wireframe graphics in 80s computer games (before computers were powerful enough for shaded 3D graphics). Ticking my "computer nostalgia" and "build porn" boxes all at once.
Cheers, not cheap around the £350 mark. AndyReally amazing job you're doing on your scratch-built car.
Seeing the wire guides you're using to lay the skin of the car on to simply reminds me of wireframe graphics in 80s computer games (before computers were powerful enough for shaded 3D graphics). Ticking my "computer nostalgia" and "build porn" boxes all at once.
ceebmoj said:
The frount looks a bit like an AC 3000ME to me, was it an inspiration or just a cowincidence?
Credit for the grill goes to my daughter since I had made up the frame when she came into the garage for a chat and I ask her which way round and what angle the grill should be. So the front grill is the way of my daughter so no AC more Bec’s. Cheers Andy Edited by ceebmoj on Monday 10th August 21:04
Juggsy1 said:
Andy. Just discovered and read this build over the last couple of days. Absolutely awesome is all I can say.
Outstanding through and through.
I know it's probably more work than you'd want on your plate at the moment but have you considered posting this on Mankey Monkey Motors forum. They'd love this they would. Various forum members there doing very similar things to this. Just a thought,
Mark
Looks like a good car forum but time is always a problem. Cheers AndyOutstanding through and through.
I know it's probably more work than you'd want on your plate at the moment but have you considered posting this on Mankey Monkey Motors forum. They'd love this they would. Various forum members there doing very similar things to this. Just a thought,
Mark
Juggsy1 said:
Isn't it a always.  Well in that case would you object if I post a link to your build write up on the MMM forum. As I said they'd love this although I'm willing to bet that both forums share members anyway. Can't just be me.
Hi Mark, no problem regarding the link from PH to MMM forum. I will have a good look around MM when I have more time. Cheers Andy Well in that case would you object if I post a link to your build write up on the MMM forum. As I said they'd love this although I'm willing to bet that both forums share members anyway. Can't just be me. G600 said:
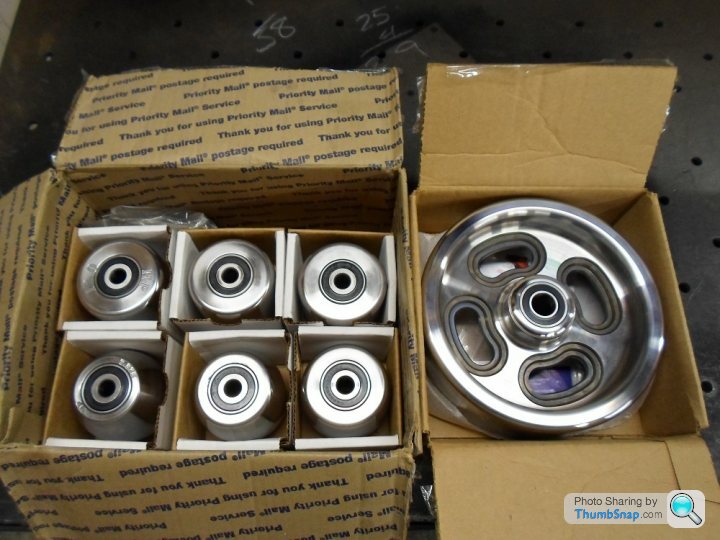
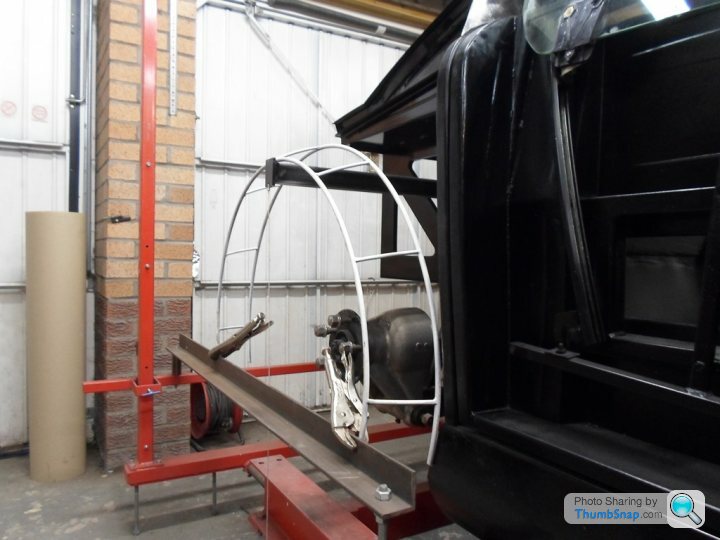
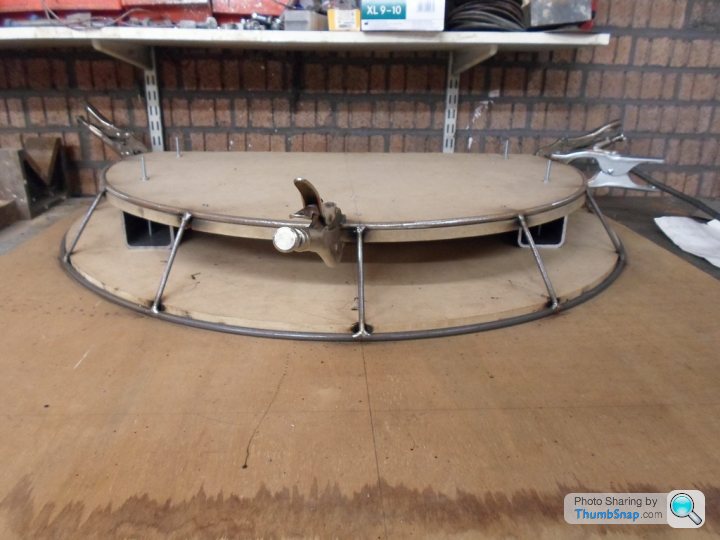
Great work so far, working in aircraft sheet metal myself I'm particularly interested in the bodywork, I saw the home built English wheel (do you have different wheels? The one I have at work only has one set which can be a problem on tighter parts) but what other tools are you using? Do you have a shrinker/stretcher, bead roller etc?
I have six lower wheels and one upper wheel (see picture) and I have a foot operated shrinker/stretcher and a powered bead roller (only me so it had to be powered) If you have any tips please let me know.Cheers Andy
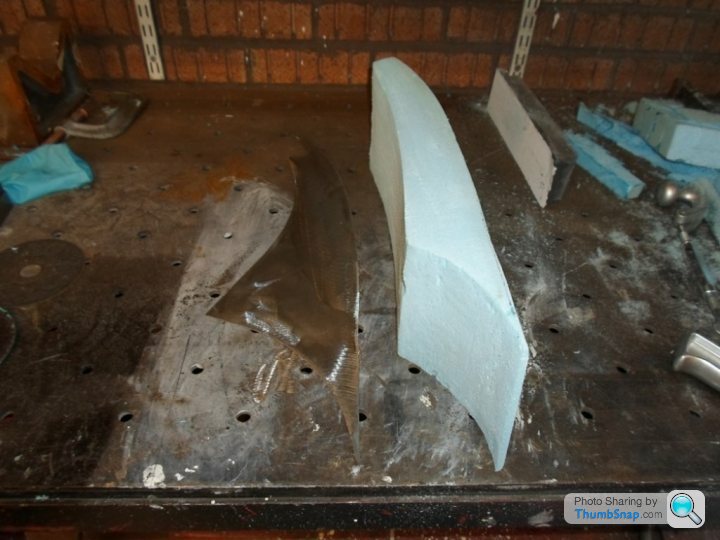
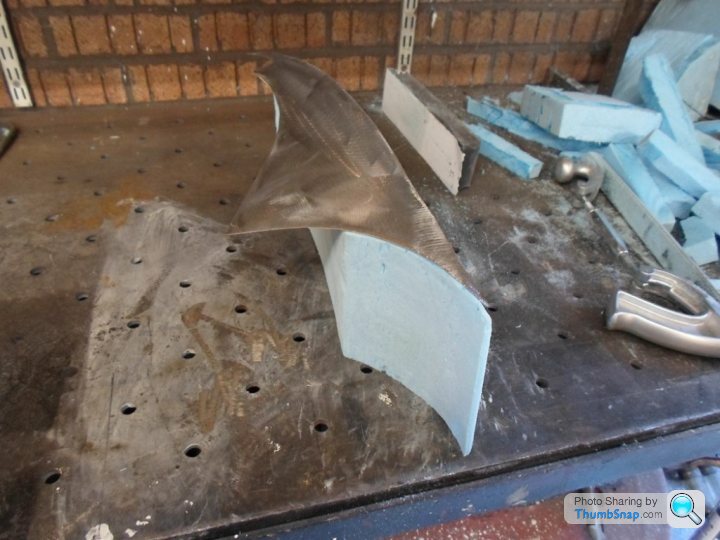
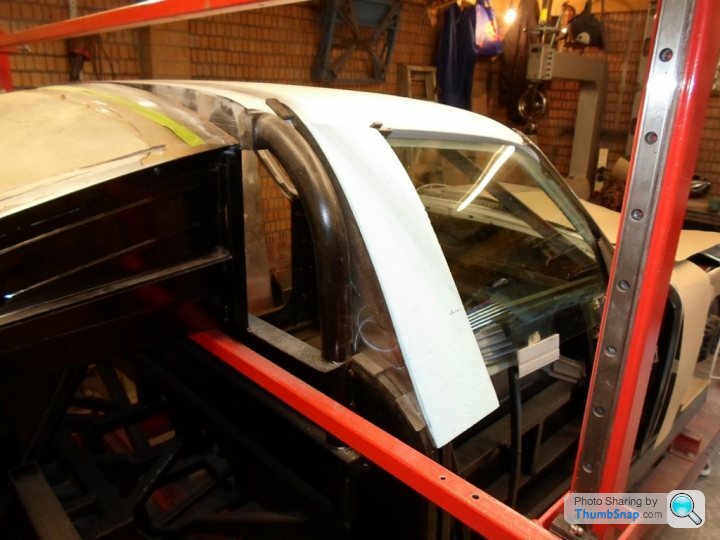
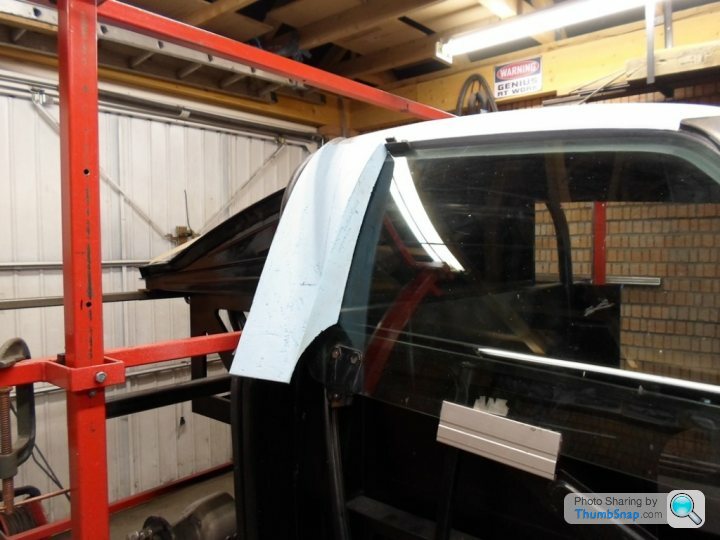
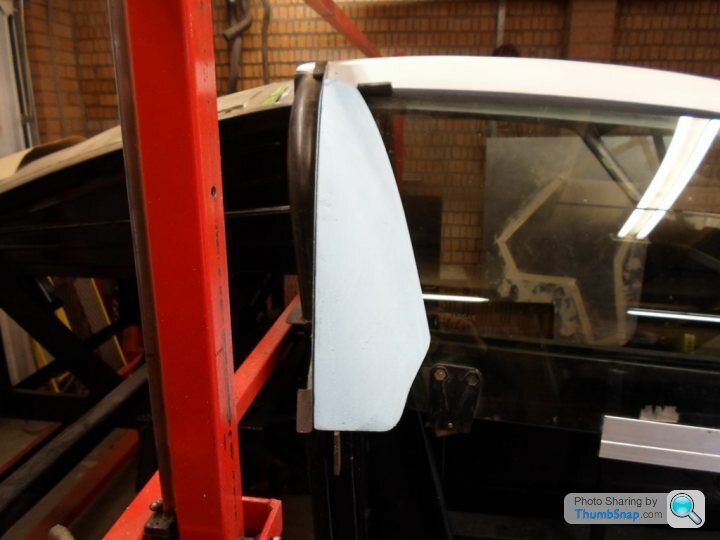
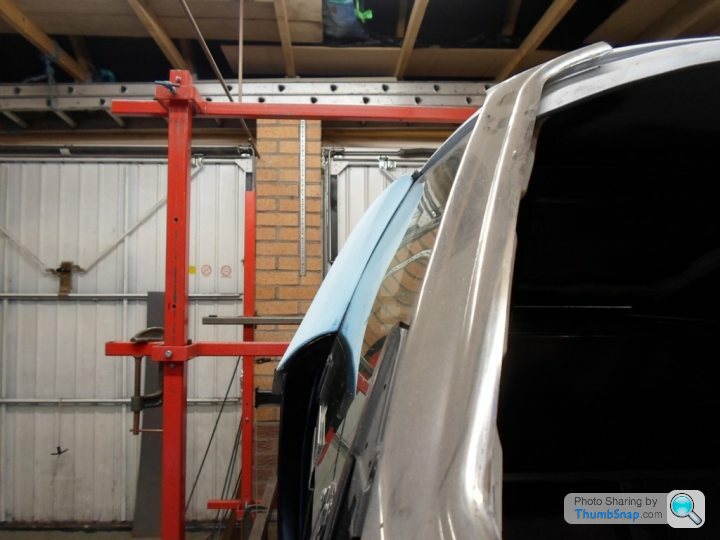
I started work on the templates for the side air inlet for the rear brakes. The lower part of the backing plate will accommodate a 50mm ID fitting which connects to the air pipe which feeds cool air over the brakes (one each side). The blue foam was cut and shaped to fit the backing plate and the curve of the window. Once I like the shape of the foam template a metal will be made and this will be fitted to the door with the air vents cut into it. Andy
_Neal_ said:
Storer said:
Andy
Good to see you are able to get back into the workshop.
If you are building a road car I would not worry about brake cooling too much because if you have good size discs it is highly unlikely you will see high brake temperatures.
Disc diameter and car weight will tend to dictate if brake temperatures are an issue. Now would be the time to engineer the possibility out.
Even on track with racing pads my Ultima has never suffered from brake fade with vented steel discs.
If you want it for the looks that's fine too.
Paul
Isn't the concern here that the rear discs will be inboard rather than conventionally-mounted? Good to see you are able to get back into the workshop.
If you are building a road car I would not worry about brake cooling too much because if you have good size discs it is highly unlikely you will see high brake temperatures.
Disc diameter and car weight will tend to dictate if brake temperatures are an issue. Now would be the time to engineer the possibility out.
Even on track with racing pads my Ultima has never suffered from brake fade with vented steel discs.
If you want it for the looks that's fine too.
Paul
Good to see you back at it OP!


Thanks guy’s
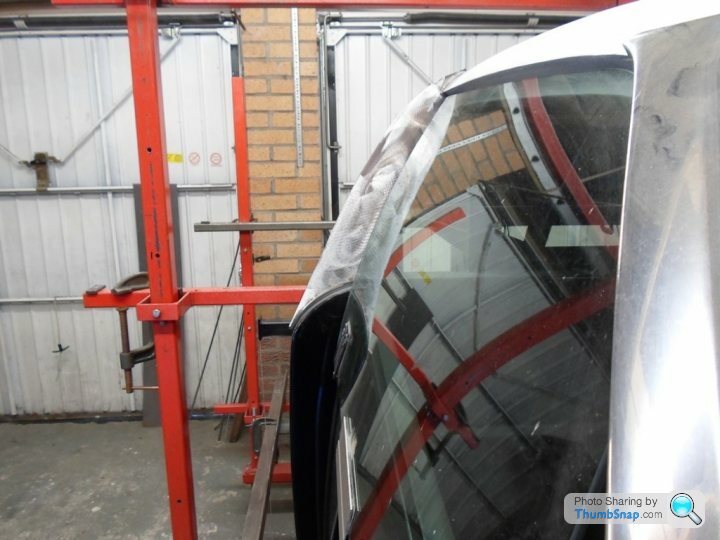
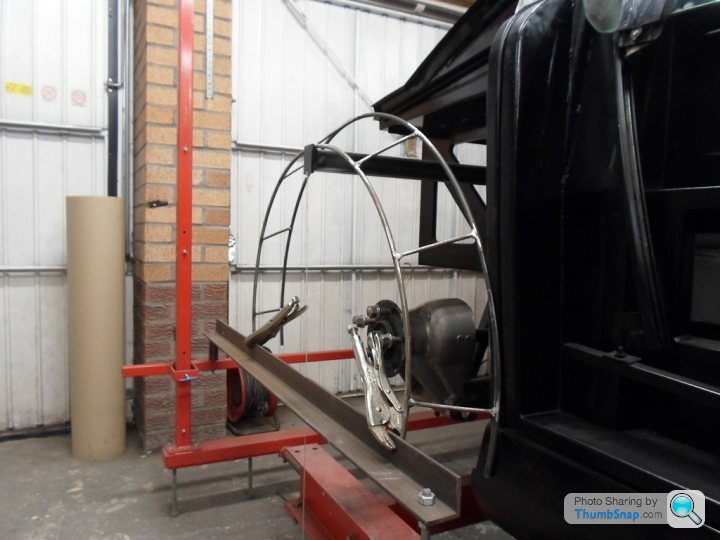
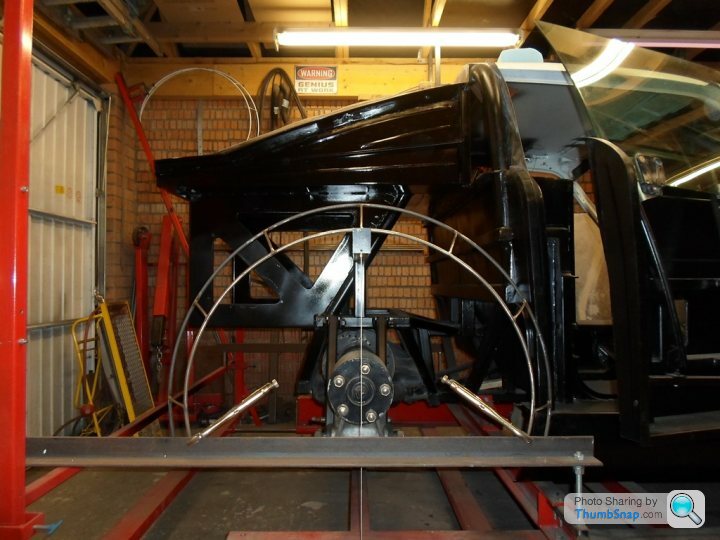
For those who can remember I put the first set of frames for the front arches onto the rear and made a new set for the front (first picture). Now I am working on the rear of the car the slope of the frame on the old arches looked to shallow and would not blend in as well with the rest of the rear panels so I made a new frame with a greater slope. Andy
PS (fatbutt) I am working on the rear side so I can get a picture of the general arrangement.
Thanks for still having an interest in the project. Other commitments have delayed progress so no updates. I been looking at the design over the last few months and think it needs to be a bit more way out (all in my head). It’s interesting when you have been away from a project and then revisit and think changes need to be made, all good. Andy

Evening all,
Well after a bit of a break I through I better check the garage to see if the project car was still in there, and it was. So after a bit of a sort out in the garage, some new tooIs and a new heater. I then started to have a look at where I was up too. Anyway to cut a long story short I need to enter the “land of the redo”
So what I did not like:
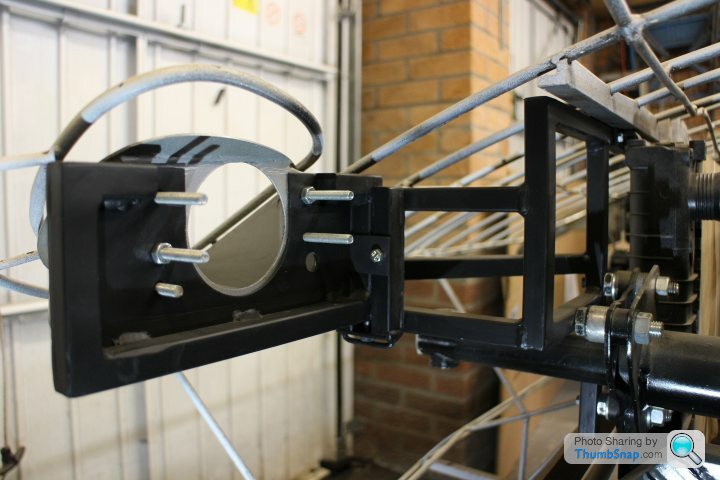
• Headlight mounting bracket. Reason; cannot adjust the headlights in the vertical plane which I think will be handy fitting the headlight units into the bonnet cut outs.
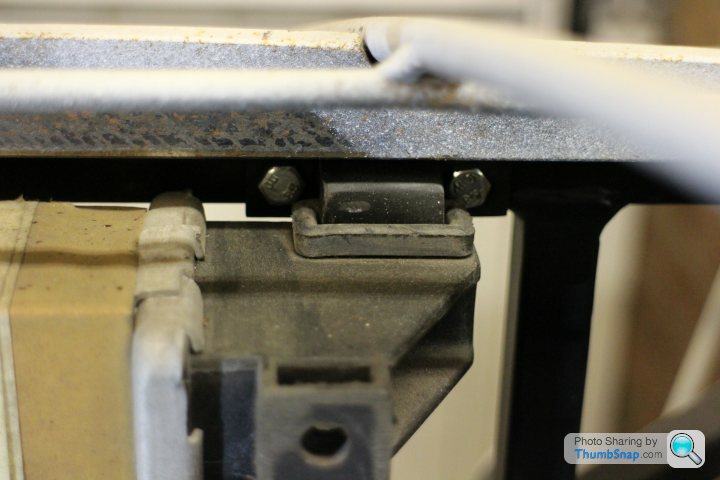
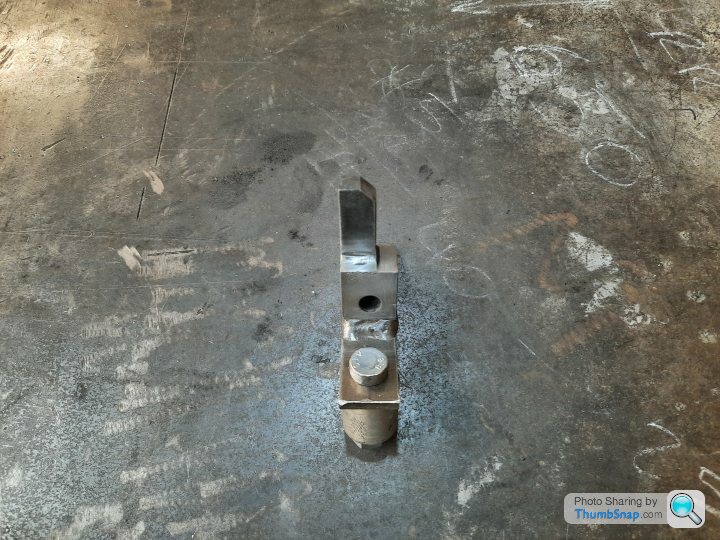
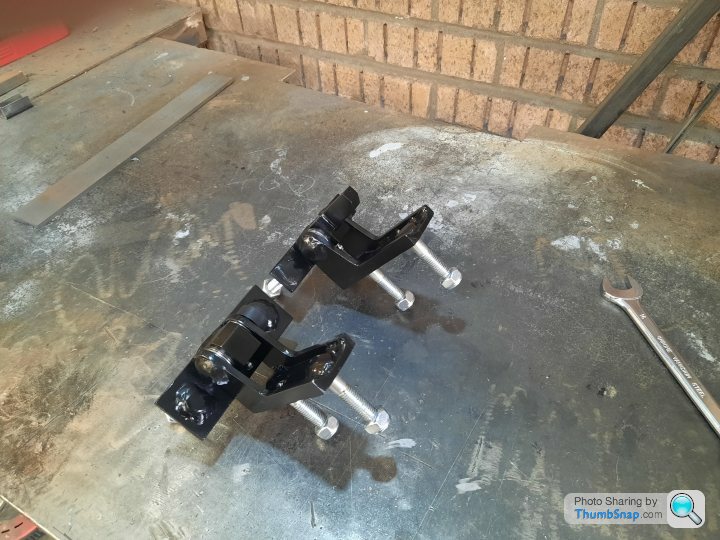
• Single door hinge. Reason; wear to pin/maintenance difficulties.
• Shape of what door skin will look like (once made). The shape is mainly determined by the inner door frame end sections, and it’s to basic and needs to be far more complex in shape and the design needs to flow from the door into lower part of the front wing (air vent behind the front wheel etc.).
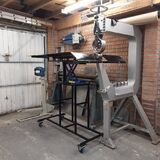
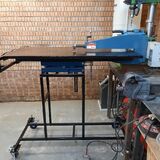
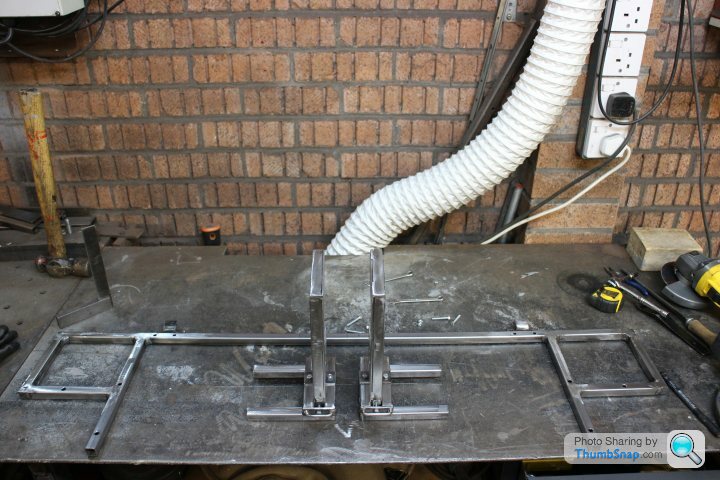
However, one of the problems using the English wheel by yourself is you can only wheel relatively small panels. It really needs two people to put a low crown in say a door skin. So to get around this problem I have built a support platform. Its adjustable so as the crown starts to form in the sheet steel you can lower the platform by 1mm or 2mm at a time to keep the panel supported. The surface of the platform top is steel so its steel on steel so low friction, unpainted but I do put a drop of oil on the top to lubricate it but mainly to keep the rust at bay. Also by removing the top sheet it doubles up as a bead roller table.
Now I just need to make something for the car!
Well after a bit of a break I through I better check the garage to see if the project car was still in there, and it was. So after a bit of a sort out in the garage, some new tooIs and a new heater. I then started to have a look at where I was up too. Anyway to cut a long story short I need to enter the “land of the redo”
So what I did not like:
• Headlight mounting bracket. Reason; cannot adjust the headlights in the vertical plane which I think will be handy fitting the headlight units into the bonnet cut outs.
• Single door hinge. Reason; wear to pin/maintenance difficulties.
• Shape of what door skin will look like (once made). The shape is mainly determined by the inner door frame end sections, and it’s to basic and needs to be far more complex in shape and the design needs to flow from the door into lower part of the front wing (air vent behind the front wheel etc.).
However, one of the problems using the English wheel by yourself is you can only wheel relatively small panels. It really needs two people to put a low crown in say a door skin. So to get around this problem I have built a support platform. Its adjustable so as the crown starts to form in the sheet steel you can lower the platform by 1mm or 2mm at a time to keep the panel supported. The surface of the platform top is steel so its steel on steel so low friction, unpainted but I do put a drop of oil on the top to lubricate it but mainly to keep the rust at bay. Also by removing the top sheet it doubles up as a bead roller table.
Now I just need to make something for the car!
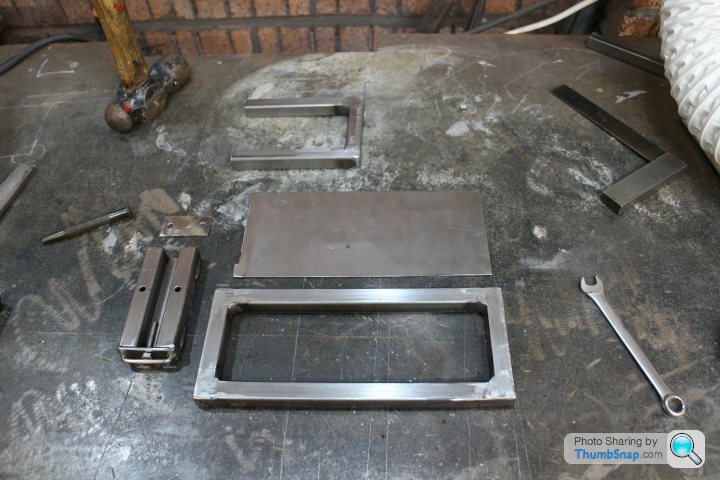
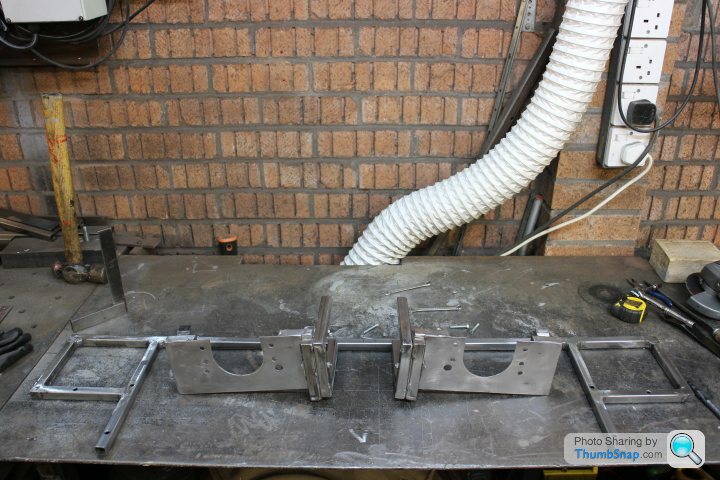

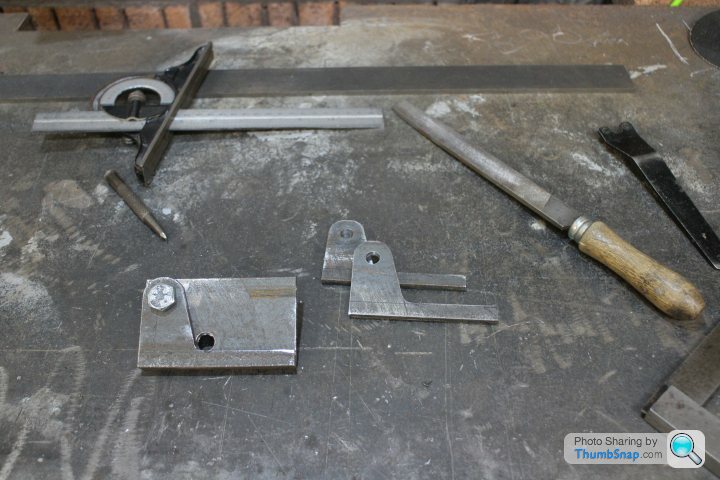
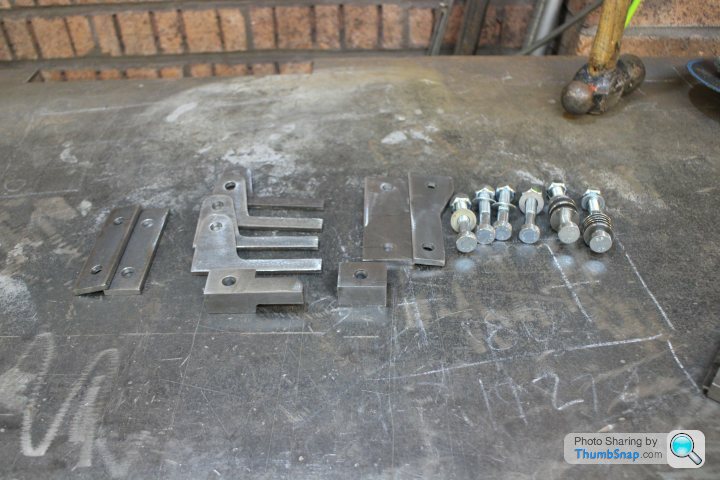
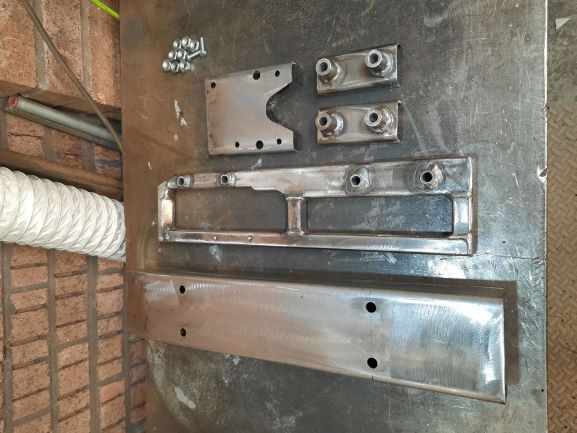
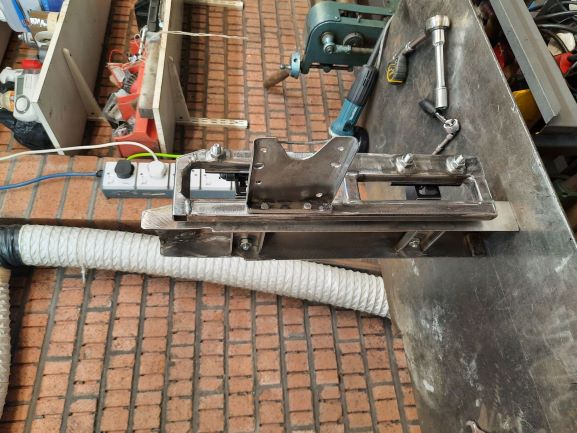
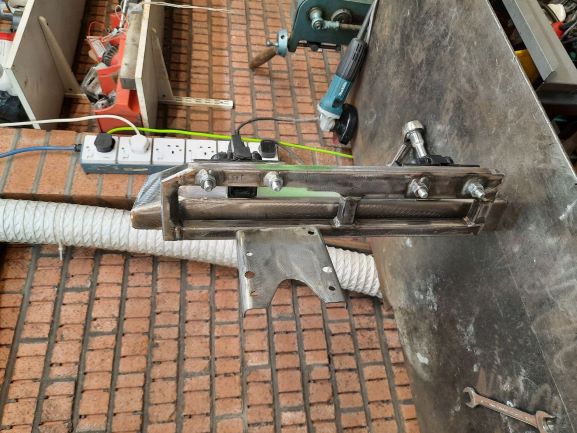
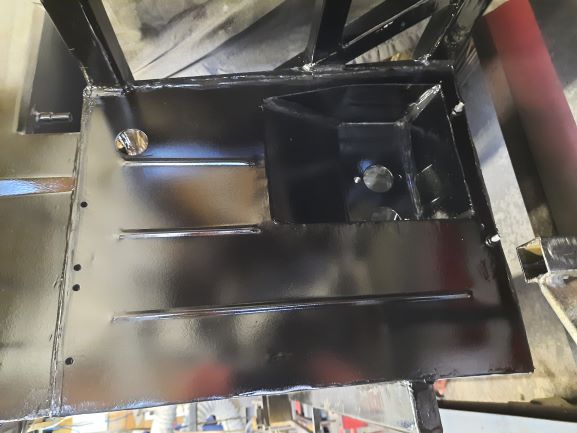
The next stage was to make the new door post, front inner door frame and the electric window motor support plate. The side impact beams will now be move to the outside of the door frame to make maintenance simpler when working on the electric windows. Beams will be made of CDS steel tube and they will link the front/back inner door frames together. Andy
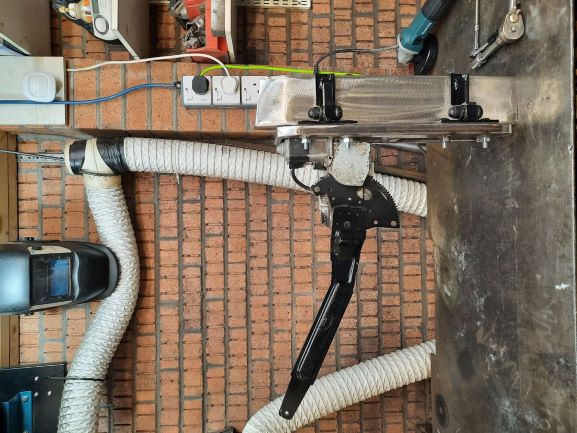
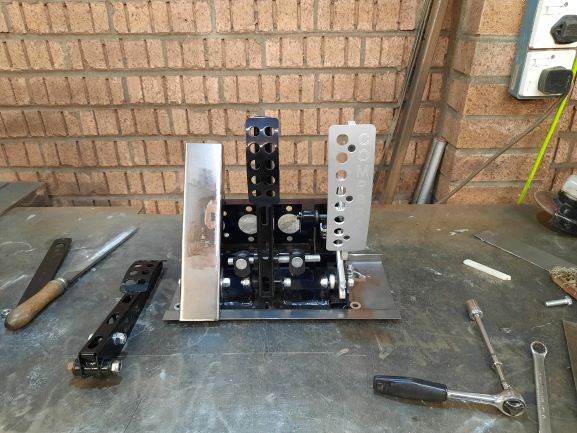
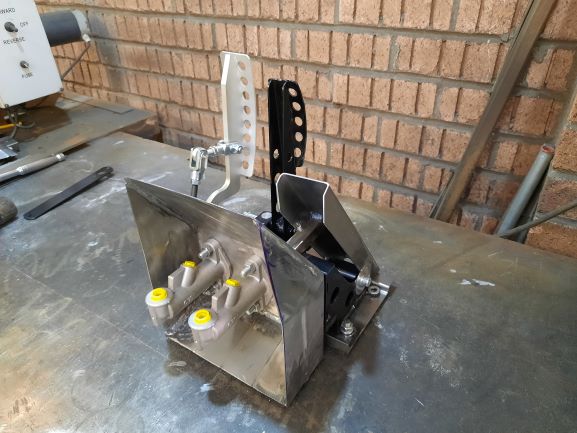
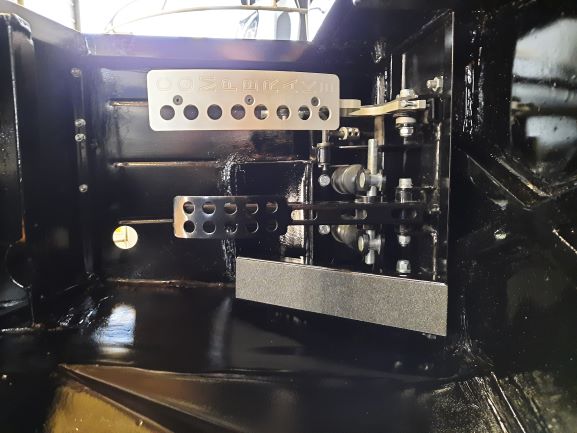
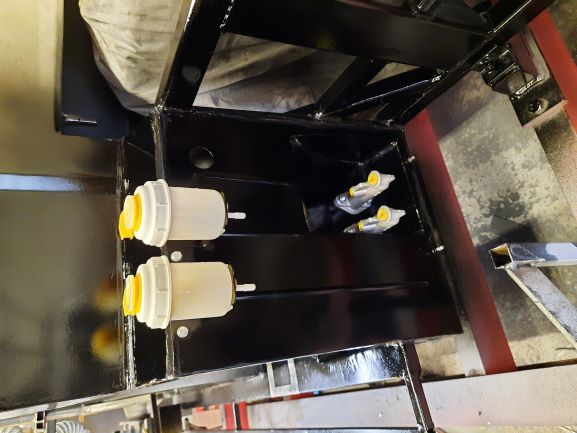
Before installing the new door post it made sense to sort out the pedal box while I had more access to the footwell area. Since the gearbox is an auto I removed the clutch pedal on the pedal box and replace it with a foot rest. I wanted the option to go manual (just in case) so there is space for a clutch master cylinder next to the brake master cylinders.
Gassing Station | Readers' Cars | Top of Page | What's New | My Stuff