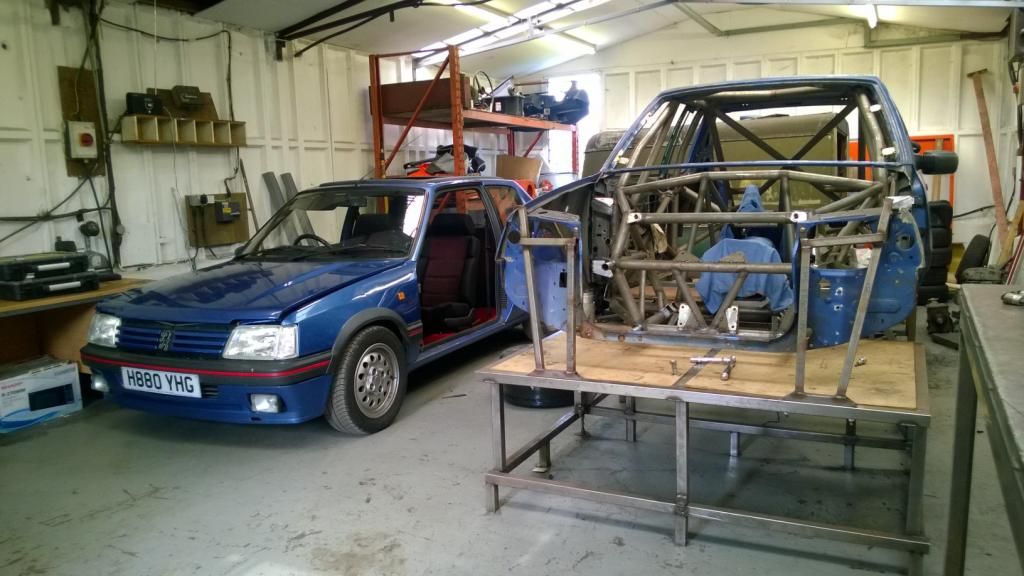
Peugeot 205 Saloon Libre - RWD Space-Frame Silhouette Racer
Discussion


Soooooo.. It's been almost a month since my last update! I moved house a couple of weeks back so got caught up in all the monotonous bullcrap that generally accompanies such things, then spent a week at the 'ring for DN10!
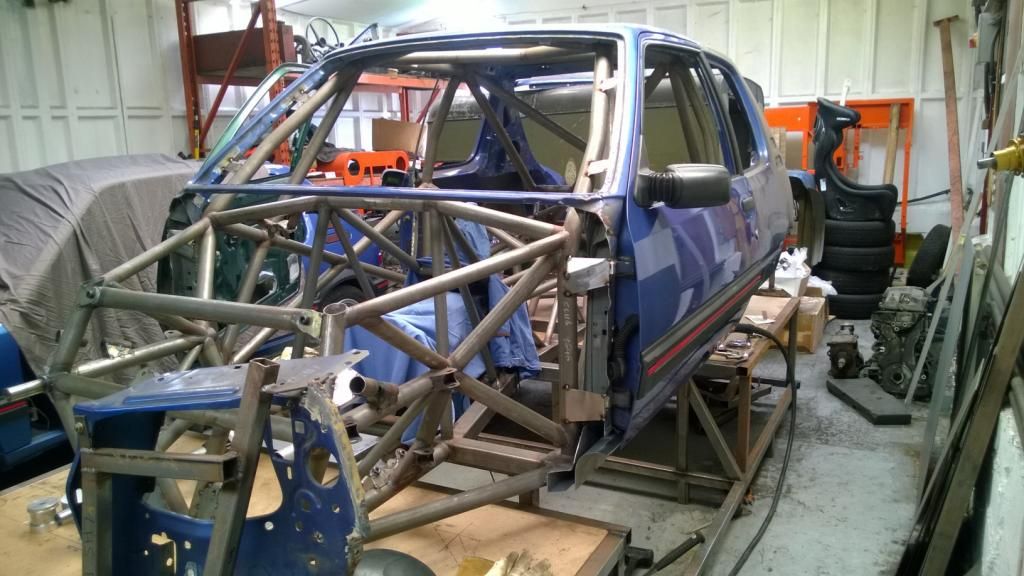
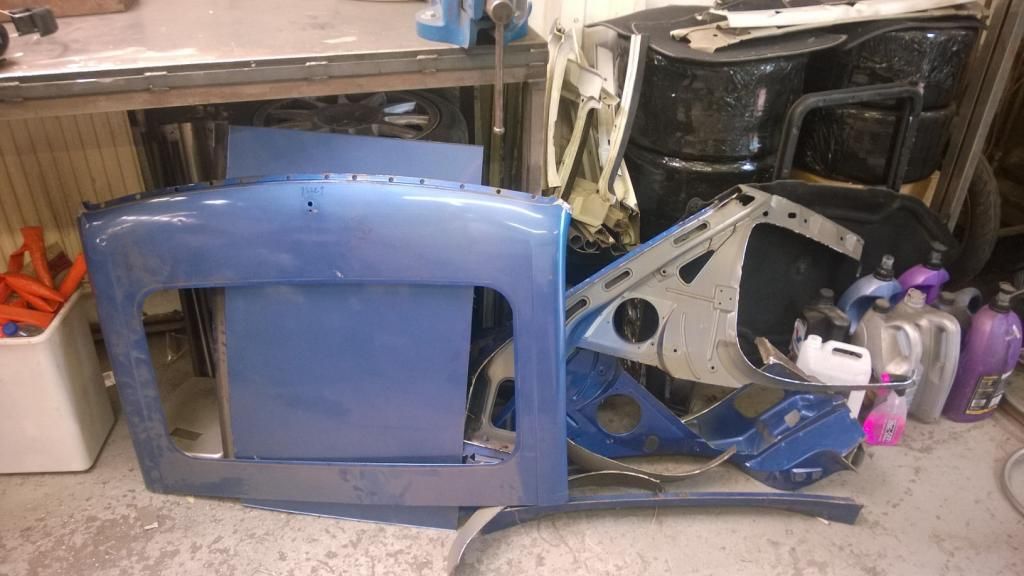
I'm about to go full steam ahead in to the bodywork, so yesterday I trimmed the non-sunroof skin that I've had kicking around for.. about a year. Removing all the.. everything.. from it, leaving me with just the skin.
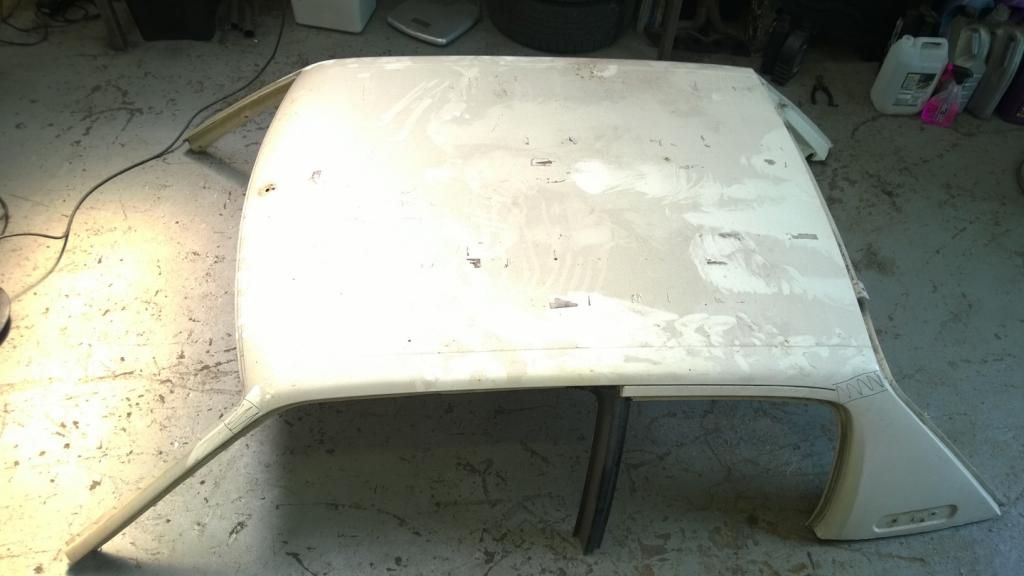
Since I'll be moulding the skin, I couldn't go drilling out spot welds from the top, which would have been easy. Instead, I had to trim everything and remove spot welds from underneath, making the whole process a lot more fiddly.
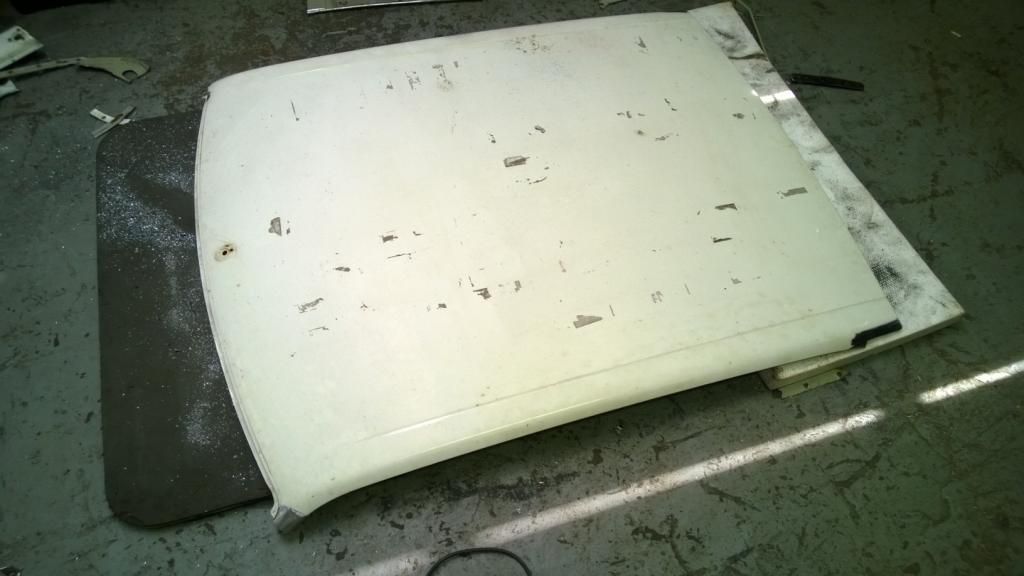
Anyway.. with that done, I drilled / chopped the sunroof skin off my shell and binned it.
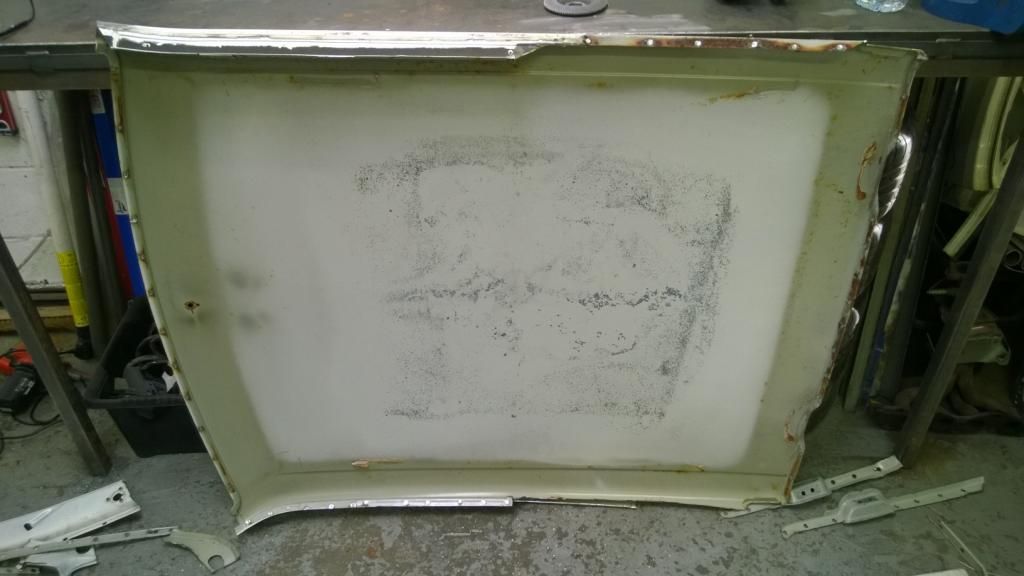
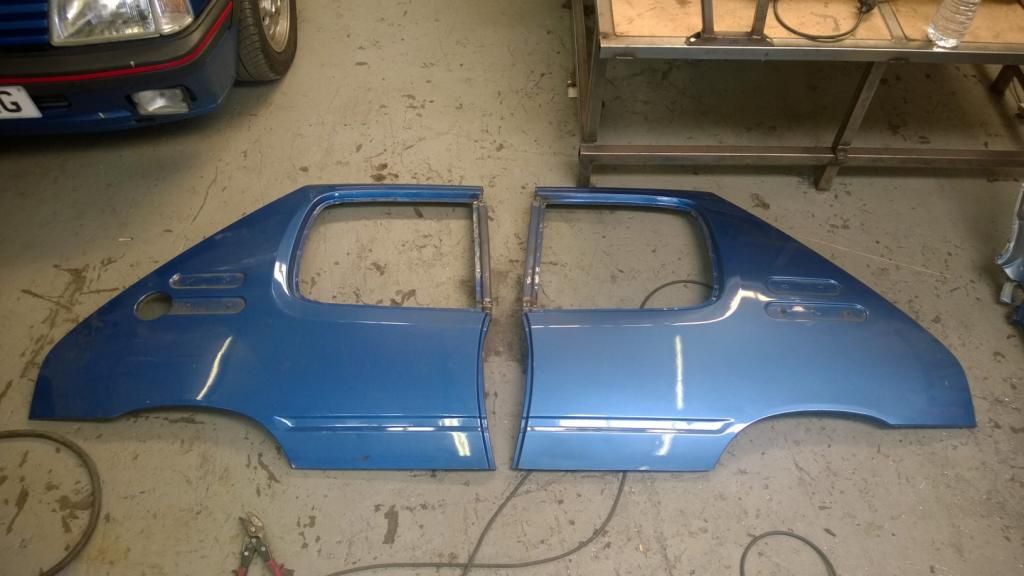
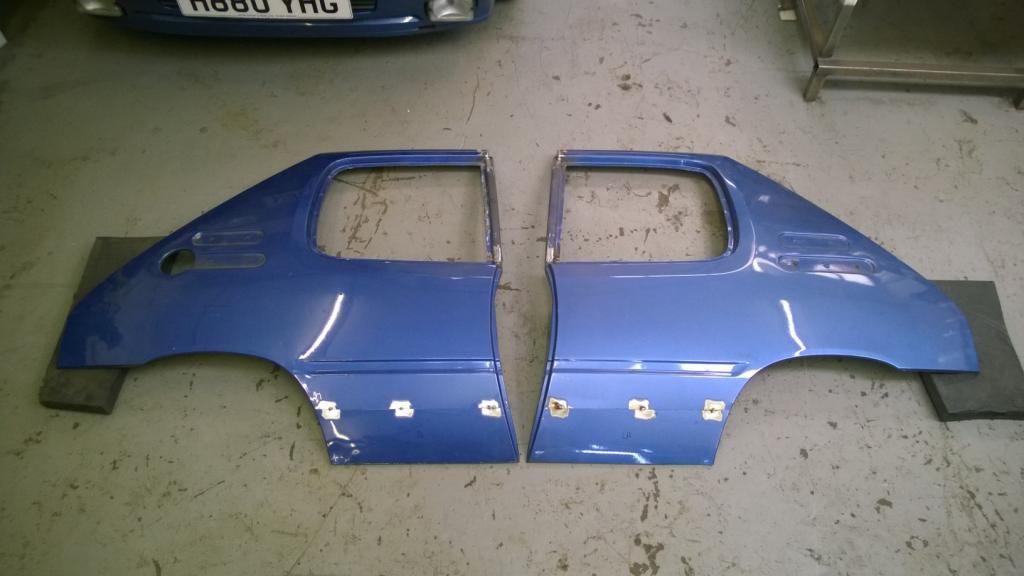
Then today I set about trimming the rear quarter panels from my rear shell half. These were the only bits I wanted to keep, so was pretty liberal with the grinder on everything else!
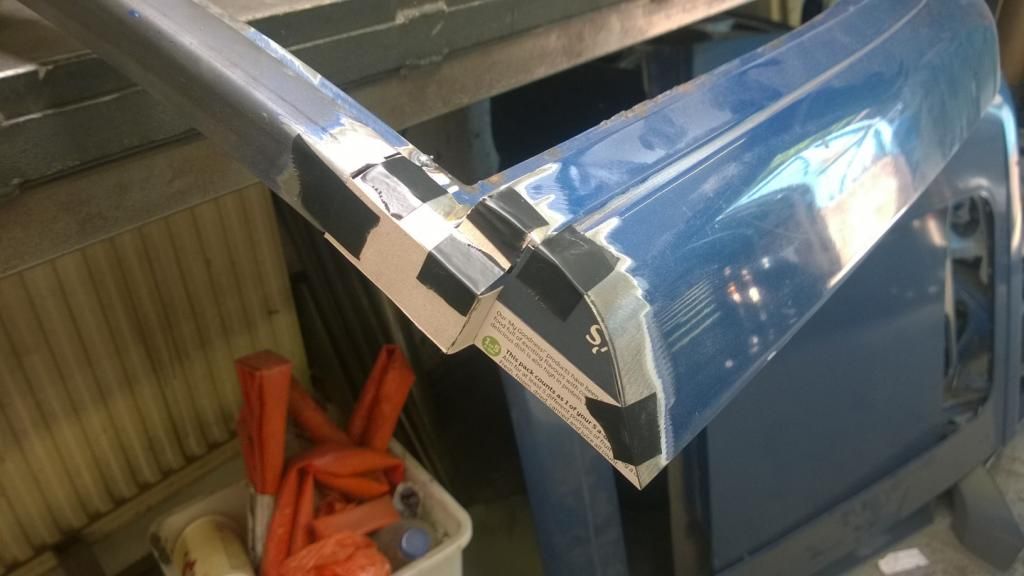
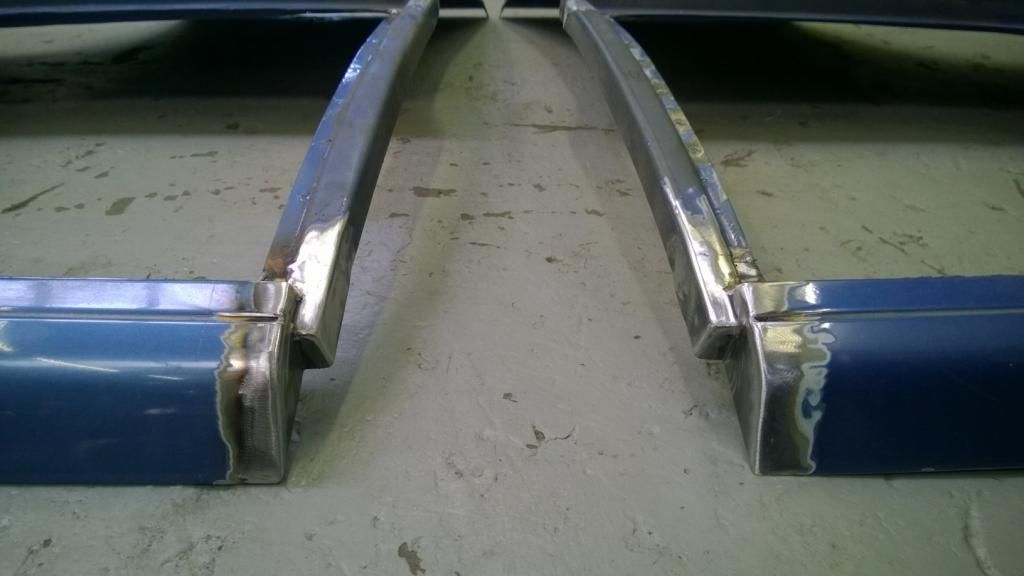
The following bit will make sense later, but I needed to tidy up the tops of the quarter panels, above the doors, as this is where the roof join will be.
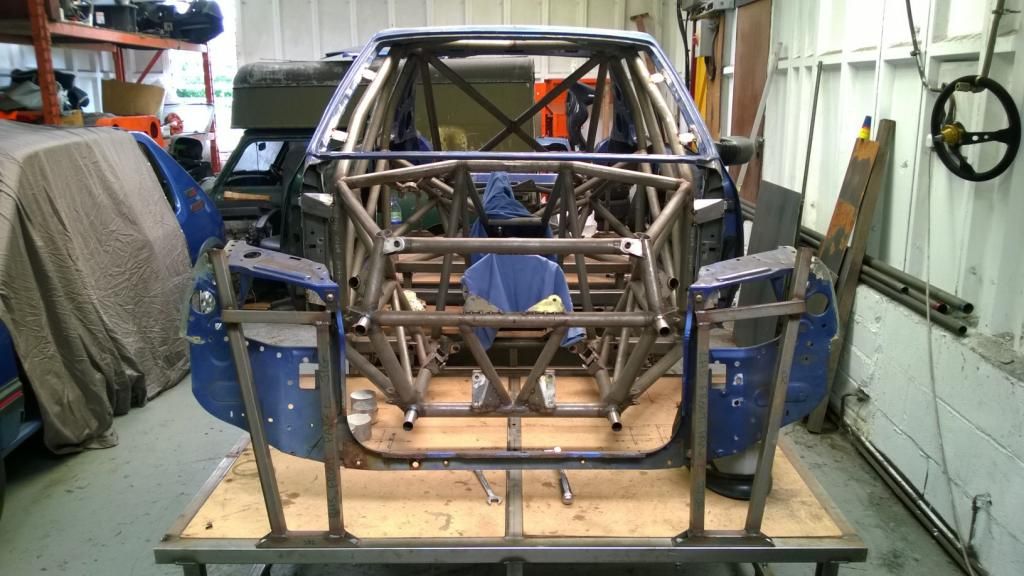
A little bit of Cardboard Aided Design..
Then replicated in steel and welded up.
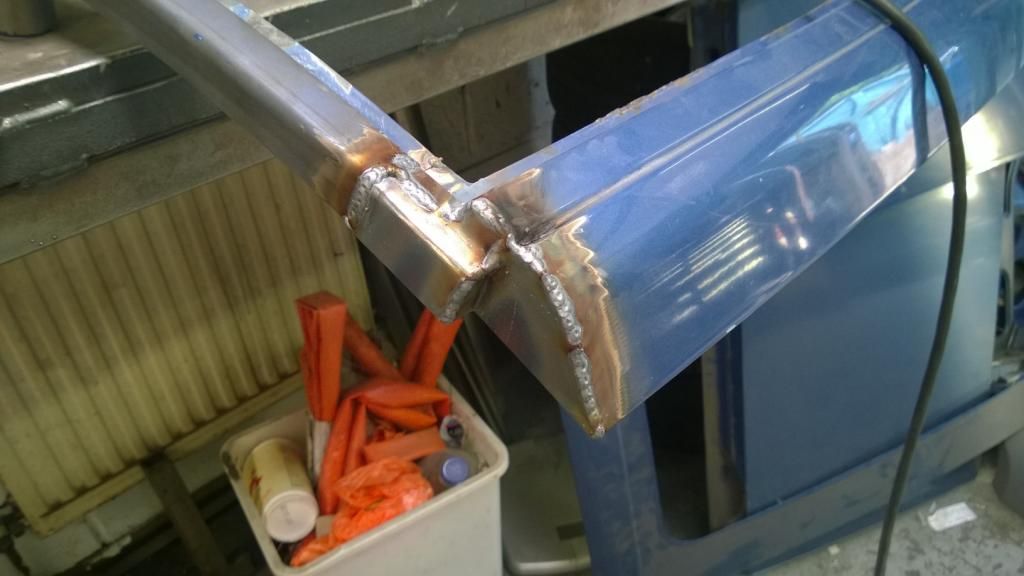
Finally, dressed the welds back to a nice radius.
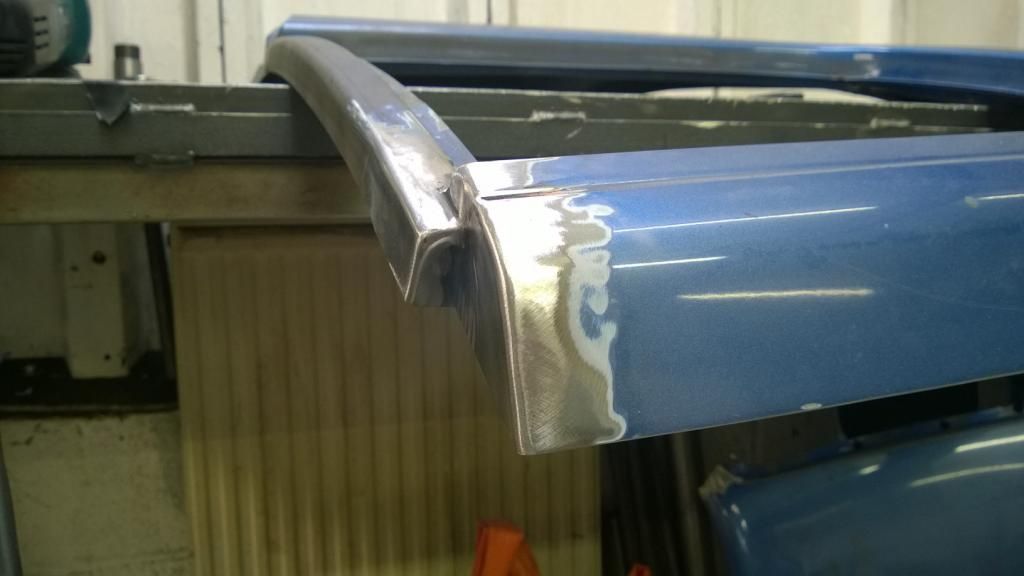
The last thing to do was tack on the lower parts that I had cut off ages ago. I wish I had never done it, to be honest, but plans change and my idea for the rear body is much better now than it was then!
And all done.
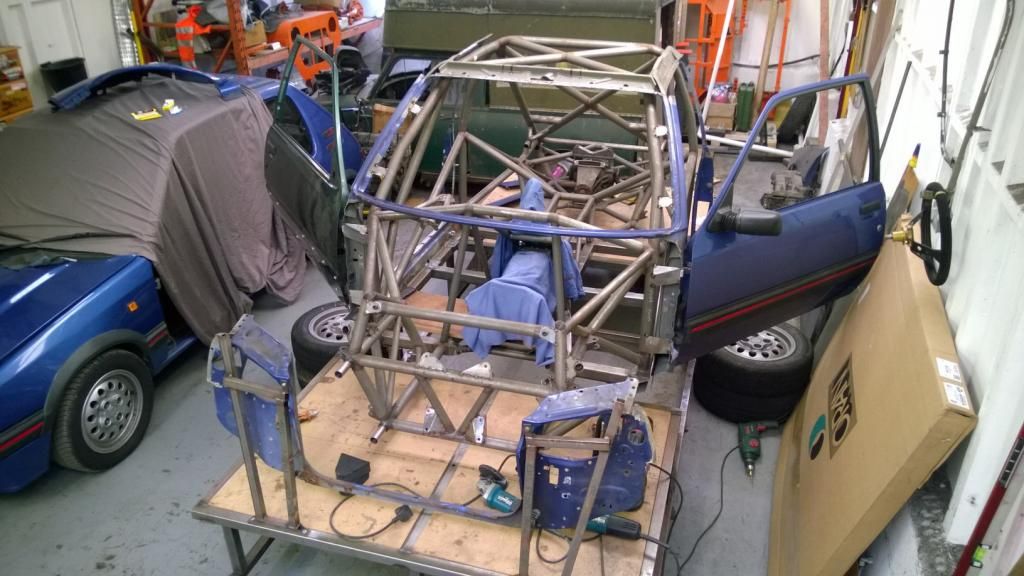
Things will hopefully be pretty fast-paced from here.. I have a deadline for September, whereby I want the chassis in powder coat and the bodywork all done ready to be reproduced in carbon!
I'm about to go full steam ahead in to the bodywork, so yesterday I trimmed the non-sunroof skin that I've had kicking around for.. about a year. Removing all the.. everything.. from it, leaving me with just the skin.
Since I'll be moulding the skin, I couldn't go drilling out spot welds from the top, which would have been easy. Instead, I had to trim everything and remove spot welds from underneath, making the whole process a lot more fiddly.
Anyway.. with that done, I drilled / chopped the sunroof skin off my shell and binned it.
Then today I set about trimming the rear quarter panels from my rear shell half. These were the only bits I wanted to keep, so was pretty liberal with the grinder on everything else!
The following bit will make sense later, but I needed to tidy up the tops of the quarter panels, above the doors, as this is where the roof join will be.
A little bit of Cardboard Aided Design..
Then replicated in steel and welded up.
Finally, dressed the welds back to a nice radius.
The last thing to do was tack on the lower parts that I had cut off ages ago. I wish I had never done it, to be honest, but plans change and my idea for the rear body is much better now than it was then!
And all done.
Things will hopefully be pretty fast-paced from here.. I have a deadline for September, whereby I want the chassis in powder coat and the bodywork all done ready to be reproduced in carbon!
CamMoreRon said:
Thanks chap!
I ruined my phone last week so can't take any pictures unless I manage to find the charge lead for my digi camera. The front bodywork is on now.. looks bloody awesome.
I hope you find the charge lead then! Love this thread and can't wait to see more. Amazing project and very very impressive!I ruined my phone last week so can't take any pictures unless I manage to find the charge lead for my digi camera. The front bodywork is on now.. looks bloody awesome.

Thanks chaps.
It was late last night and I needed feeding so here's the detail I missed out:
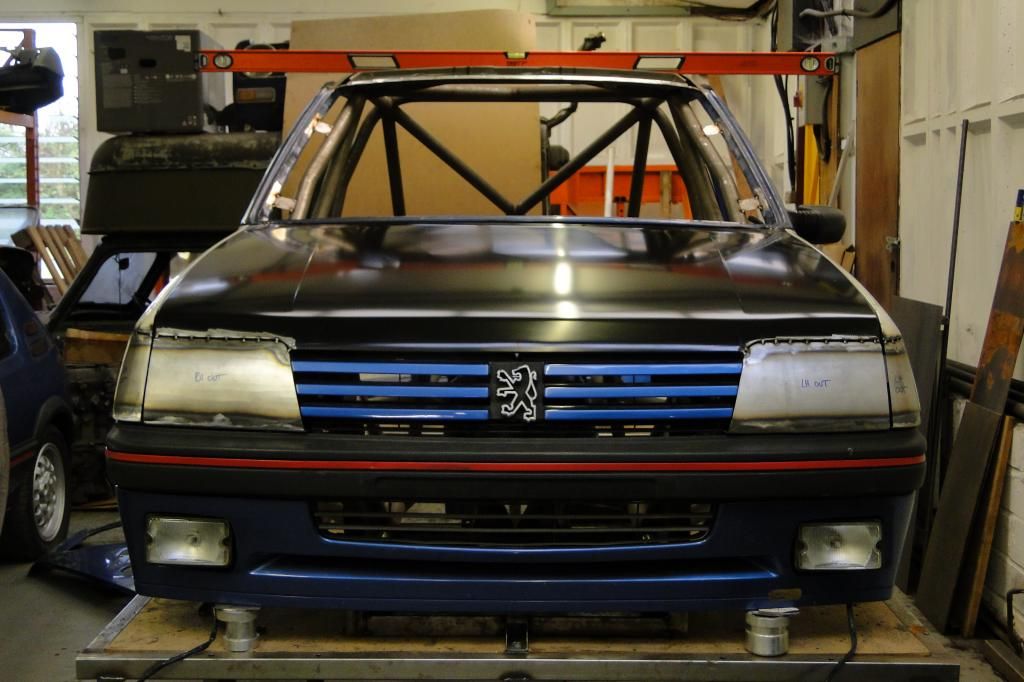
During the week I fiddled aroung getting the wings and bonnet aligned and then tacked them on to the jig, then borrowed the bumper / valance from my resto GTI and bolted it on to get the lower line of grille & lights right. I temporarily stuck the grille in place with my glue gun to get the headlamp voids.
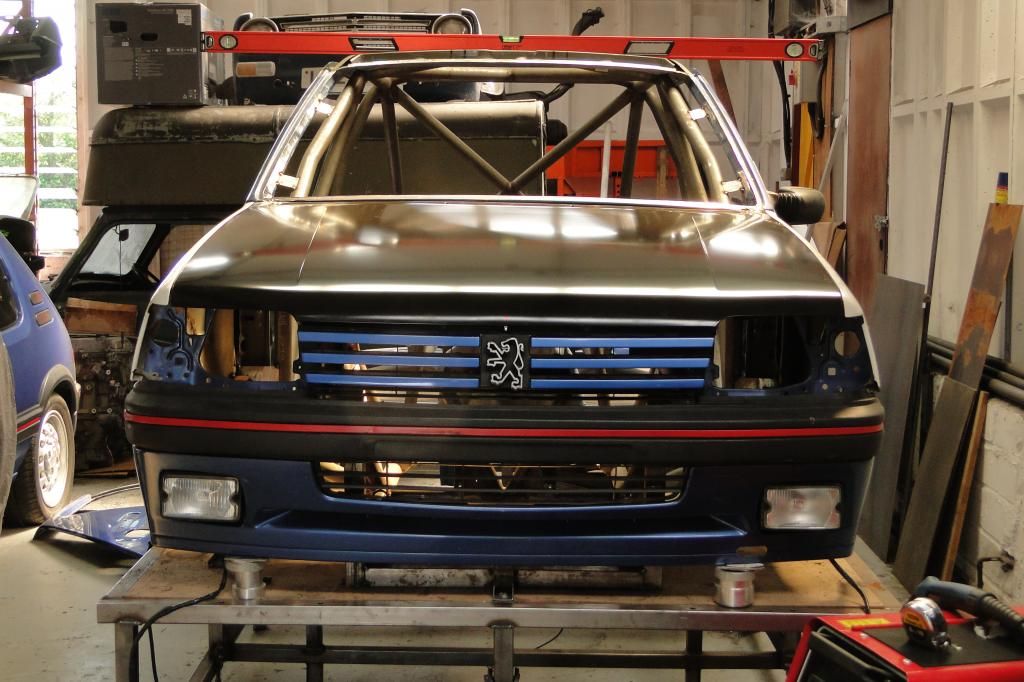
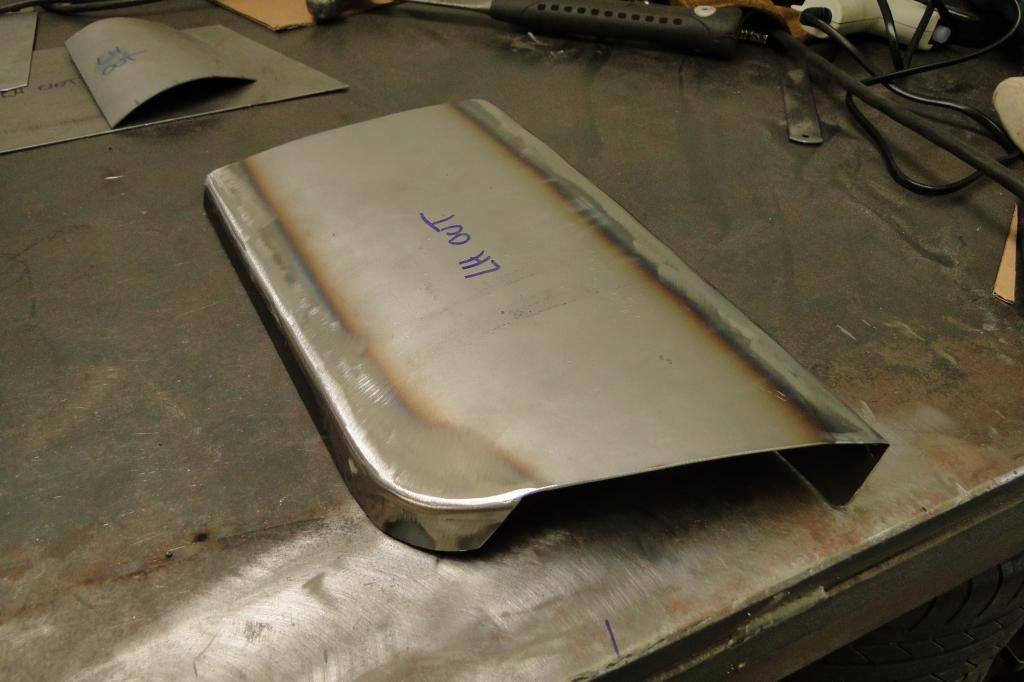
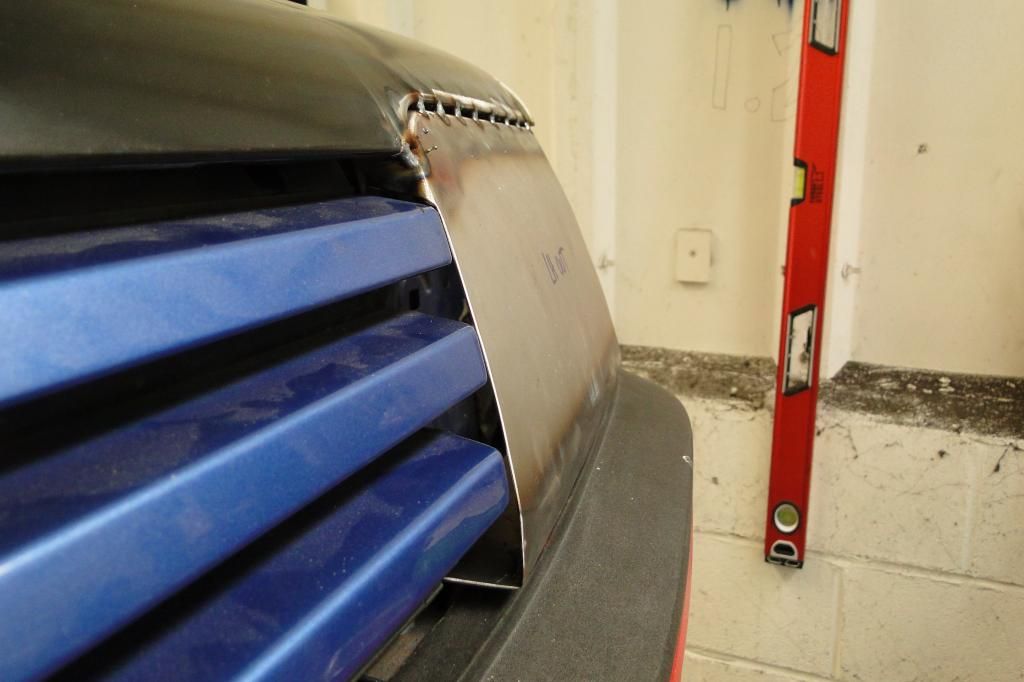
Then made some rough cardboard templates for the light / indicator blanks, and used the standard parts as patterns to get the form right. I don't have any sheet metal forming tools yet, so had to make do with some 3" bar stock in the vice, a mallet, and a stack of welding gloves to form the compound curve.

Then welded some flanges to them for stiffness.
And tacked them to the bonnet.
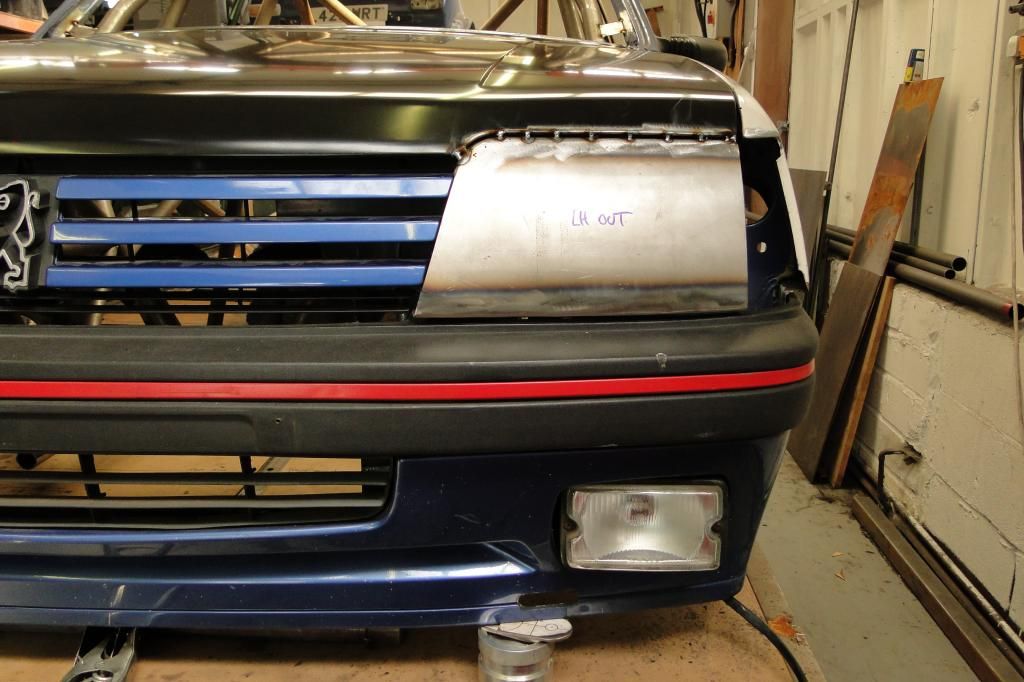
Difficult to see, but they have a very slight compound curve.
Then a similar story with the indicator blanks.
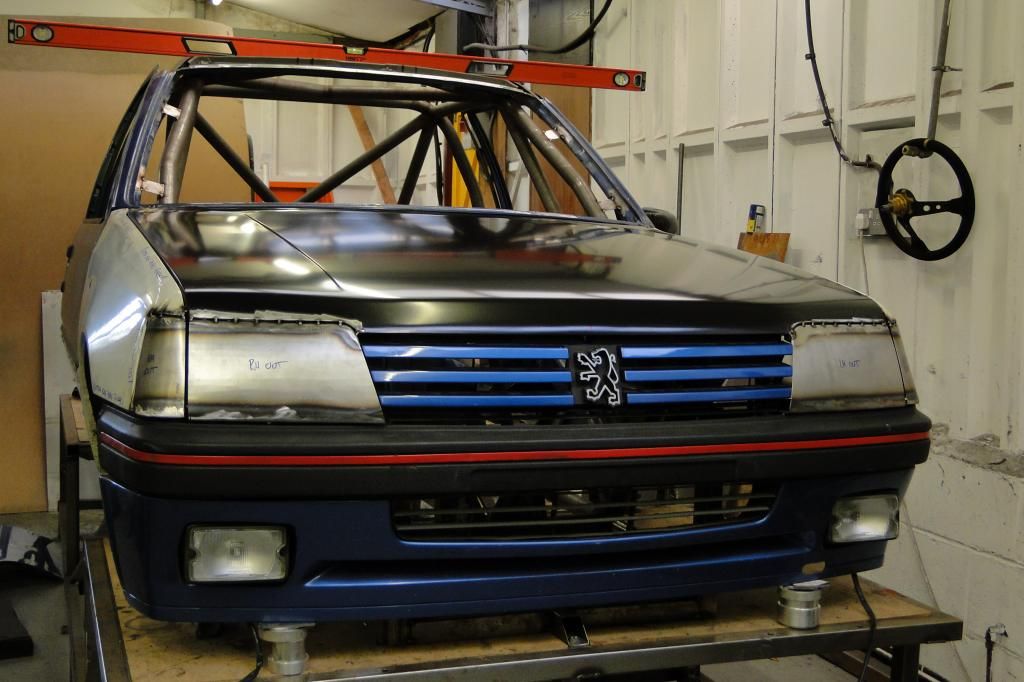
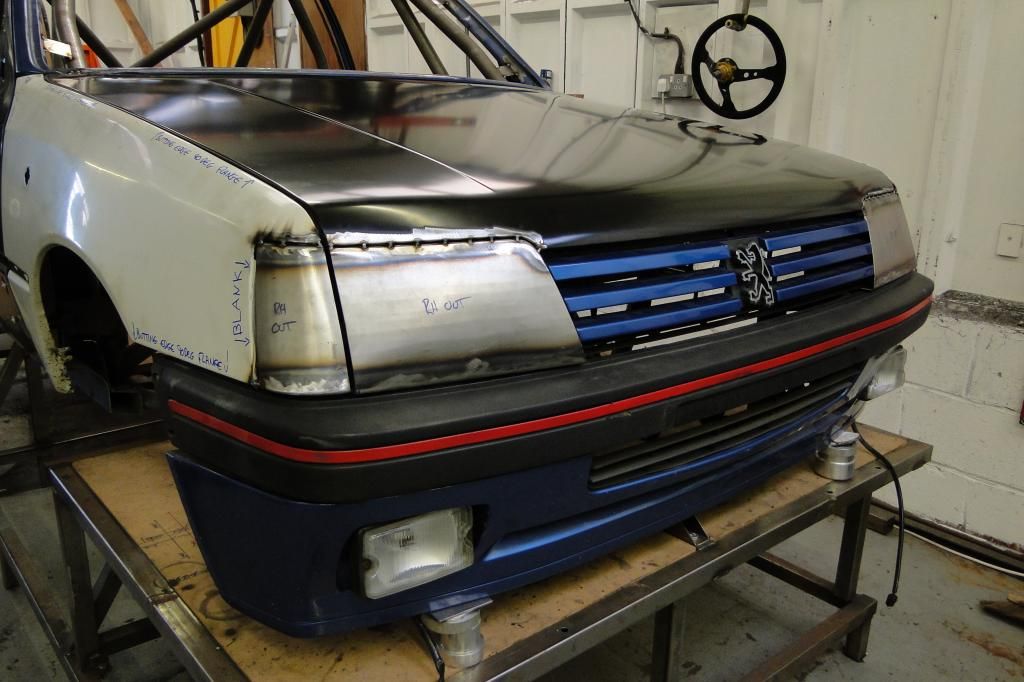
Not perfect, by any means, but they're as close as I could get! They'll need a skim of filler anyway as the pattern bonnet's shape doesn't quite match the wings.
It was late last night and I needed feeding so here's the detail I missed out:
During the week I fiddled aroung getting the wings and bonnet aligned and then tacked them on to the jig, then borrowed the bumper / valance from my resto GTI and bolted it on to get the lower line of grille & lights right. I temporarily stuck the grille in place with my glue gun to get the headlamp voids.
Then made some rough cardboard templates for the light / indicator blanks, and used the standard parts as patterns to get the form right. I don't have any sheet metal forming tools yet, so had to make do with some 3" bar stock in the vice, a mallet, and a stack of welding gloves to form the compound curve.
Then welded some flanges to them for stiffness.
And tacked them to the bonnet.
Difficult to see, but they have a very slight compound curve.
Then a similar story with the indicator blanks.
Not perfect, by any means, but they're as close as I could get! They'll need a skim of filler anyway as the pattern bonnet's shape doesn't quite match the wings.
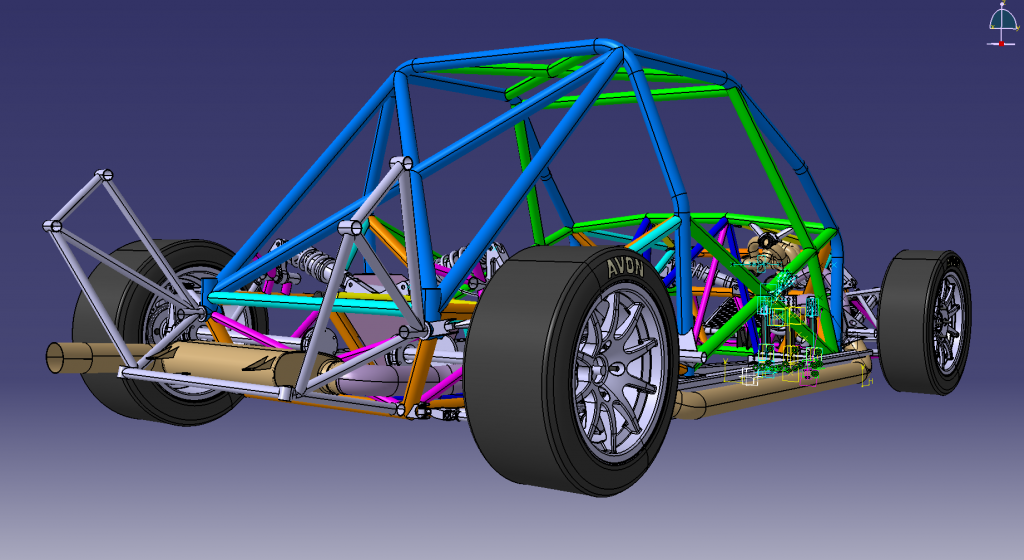
It won't be a flip front as such, but the front end will be removable in one piece for best access to everything. Engine access will be a bit tricky as it's so far under the windscreen, but I'll have the trans tunnel panels removable so you can get to things at the top / back of the engine. Any major work will be an engine-out job to do properly, but that's just how it is!
Gassing Station | Readers' Cars | Top of Page | What's New | My Stuff