Peugeot 205 Saloon Libre - RWD Space-Frame Silhouette Racer
Discussion


I have considered it, and asked a few times when ordering the big components.. a couple of places have agreed to knock a percentage off and some haven't.
I'm not a businessman really.. so I haven't really thought about approaching anyone for funding; I wouldn't know where to start. Maybe I should sort out a Kickstarter campaign?
I'm not a businessman really.. so I haven't really thought about approaching anyone for funding; I wouldn't know where to start. Maybe I should sort out a Kickstarter campaign?
PureSilver said:
I've followed this thread on 205gtidrivers and uphillracers, and I'm very happy to have found it here on PH because it is MENTAL HOW GOOD IT IS.
Thanks sausage  .
.SANDING SIT-REP:
Still making piles of dust at the moment, but not much left to do! Quarter panels are one of the last body parts left to smooth. Nearly got them finished.. it's been a bit of a job.
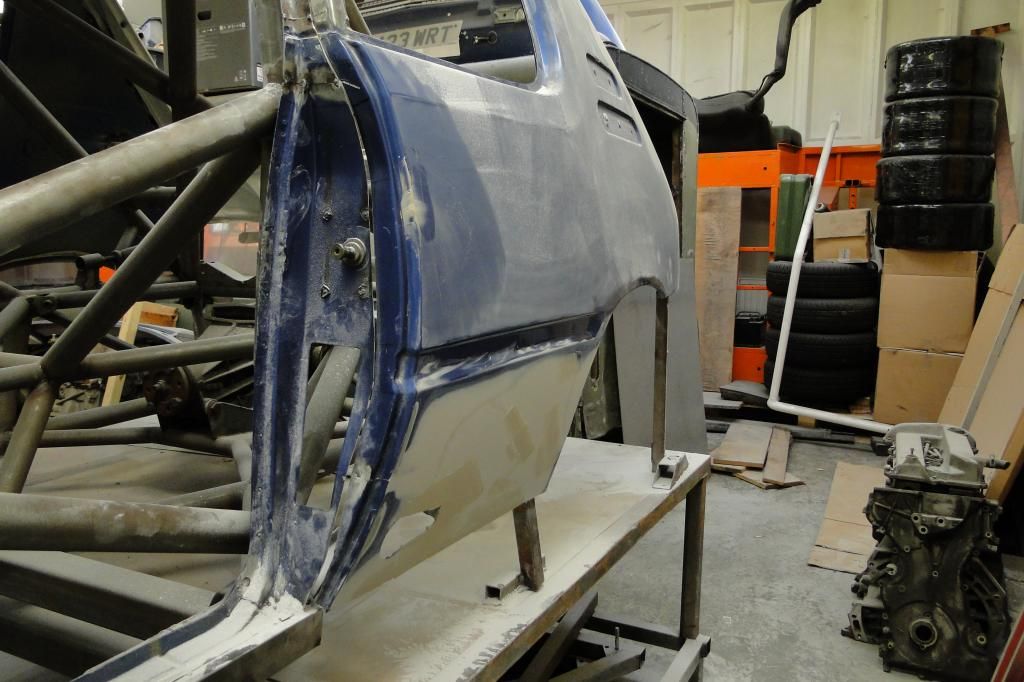
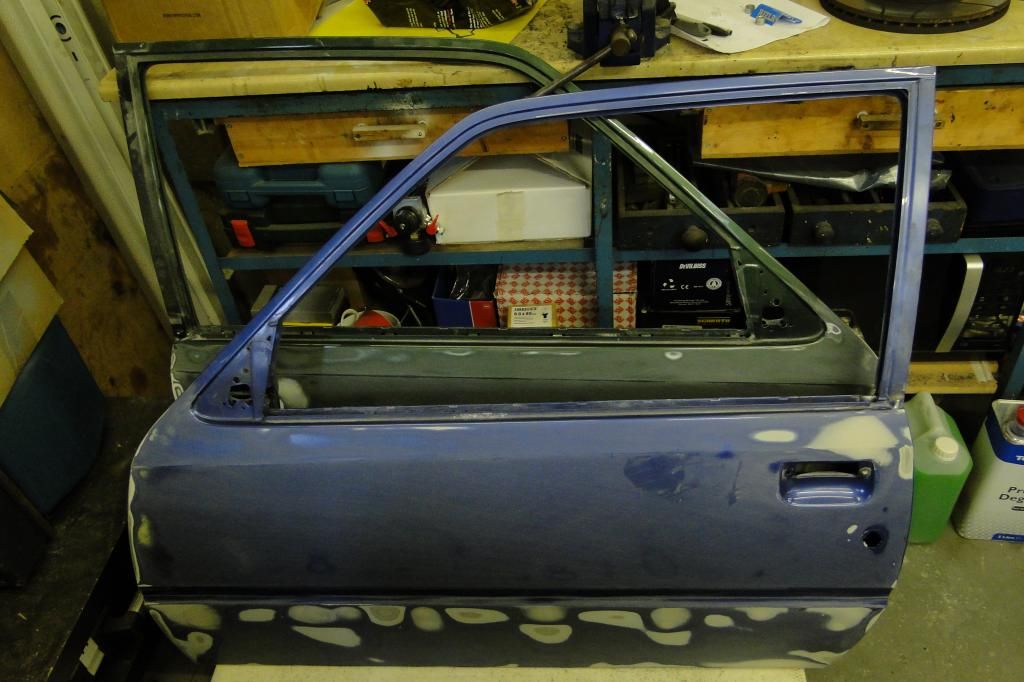
Moved on to the doors.. the green one was supposedly the good one, but the colour seems to have hidden a whole load of defects, so it had taken a lot of work!

The blue one was in much better condition, but it was donated by my mint GTI so that isn't much of a surprise. (It'll be painted and go back on, don't worry.)
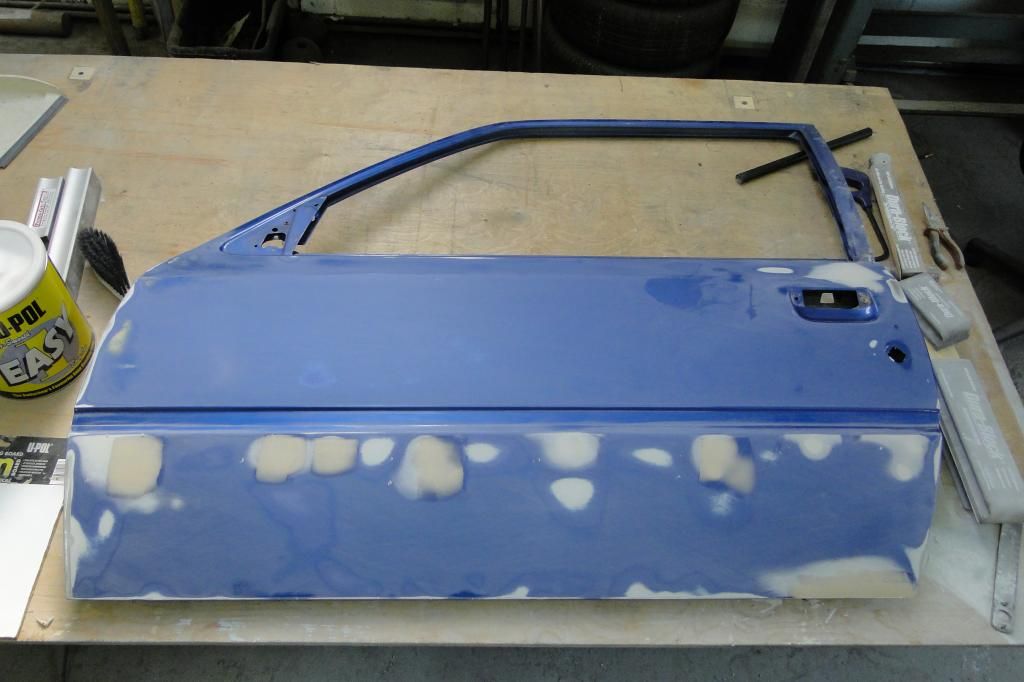
In cade anyone was wondering, a bare 205 door is 11.8kg. My carbon ones should come in a lot less.
Edited by CamMoreRon on Sunday 28th September 19:44
What I still can't get my head around is that these are panels that won't be used other than to take moulds from! For a car used in Motorsport!
It's a phenomenal amount of work and an amazingly high standard for something most likely to be covered in stickers and likely to take knocks and bumps.
Endless kudos to you my friend.
It's a phenomenal amount of work and an amazingly high standard for something most likely to be covered in stickers and likely to take knocks and bumps.
Endless kudos to you my friend.
Are "half" doors allowed? IE the only bit of the door that actually opens is the top half, from the crease line upwards. This way, the lower bit gets left behind, but more importantly means you can use large aero exit tunnels from behind the front wheels, as you fixed "sill" area is now about 12" tall and not just 3" tall!!
Often rules say "std silhouette from wheel centers upwards" for example, giving lots of freedom below that line to optimise aero and weight etc?

Like on this Trophy racer^^^^ ;-)
Often rules say "std silhouette from wheel centers upwards" for example, giving lots of freedom below that line to optimise aero and weight etc?
Like on this Trophy racer^^^^ ;-)
Edited by anonymous-user on Monday 29th September 00:19
Tiger Tim said:
What I still can't get my head around is that these are panels that won't be used other than to take moulds from! For a car used in Motorsport!
It's a phenomenal amount of work and an amazingly high standard for something most likely to be covered in stickers and likely to take knocks and bumps.
Endless kudos to you my friend.
Thanks very much. It's a phenomenal amount of work and an amazingly high standard for something most likely to be covered in stickers and likely to take knocks and bumps.
Endless kudos to you my friend.
I think if I was just doing steel panels then I wouldn't bother with any of this, but 205 bodywork is so rippled and cheaply made that it would look horrible in carbon. If a job's worth doing, it's worth overdoing. I want the car to be very clean, so I won't plaster it with stickers.. It'll be a show piece for setting up my business, so will just have a few logos here & there.

Max_Torque said:
Are "half" doors allowed? IE the only bit of the door that actually opens is the top half, from the crease line upwards. This way, the lower bit gets left behind, but more importantly means you can use large aero exit tunnels from behind the front wheels, as you fixed "sill" area is now about 12" tall and not just 3" tall!!
Often rules say "std silhouette from wheel centers upwards" for example, giving lots of freedom below that line to optimise aero and weight etc?
I think that might be a bit much for an 80's matchbox! Often rules say "std silhouette from wheel centers upwards" for example, giving lots of freedom below that line to optimise aero and weight etc?
It'd be very nice on something a bit more shapely, like the pic you posted. I've thought quite a bit about how nice it would be to have a proper aero underbody at the front - like an LMP1, where they have a front wing and then flow is split and sent out down the sides / out the top - but then remember it's a 205.
The next thing I do will have a lot more aero consideration from the start.
CamMoreRon said:
It'd be very nice on something a bit more shapely, like the pic you posted. I've thought quite a bit about how nice it would be to have a proper aero underbody at the front - like an LMP1, where they have a front wing and then flow is split and sent out down the sides / out the top - but then remember it's a 205.
The DTM cars from a few years ago had some pretty extreme front underbody work before it got banned. It's always hard to get front load when you can have large diffusers and wings. By contrast for a single seater often it's the other way around, not many flat surface at the front other than the front wing, and the tyres spinning ruin things for the rest of the car.Superb work, you must have a very wide range of skills.
Yeah in CFD it has been really tricky to get front downforce.. I'm going to have to ditch the twin element rear wing and just do a large single element, which should help the front a bit. I separated the wing & body as you suggested and the front end does make plenty of downforce, it just all gets taken off because the wing is so effective!
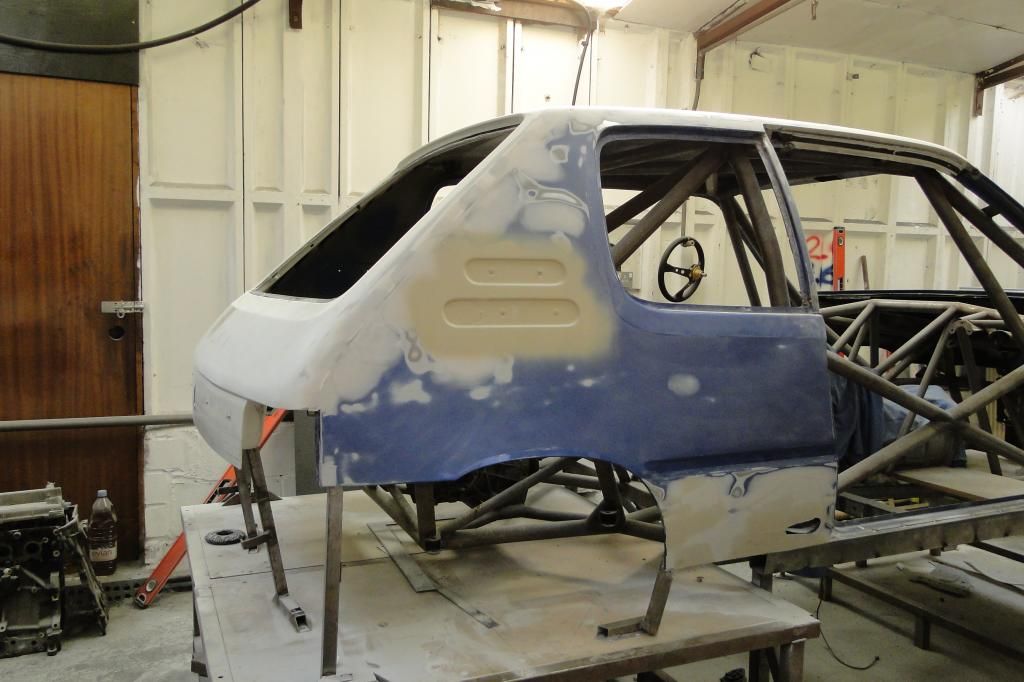
So it's been a while since the last update! Not much has been changing visually as it's all filling and sanding at the moment, but I've reached the milestone where the body is now completely smooth and ready for paint prep! It's all been blocked with 120 grit, and I'll go over it with 240 over the next week to get it ready for primer.
Today I did the last little bits of filler.. firstly smoothing the roof join to the A-pillar, then blocking the roof.
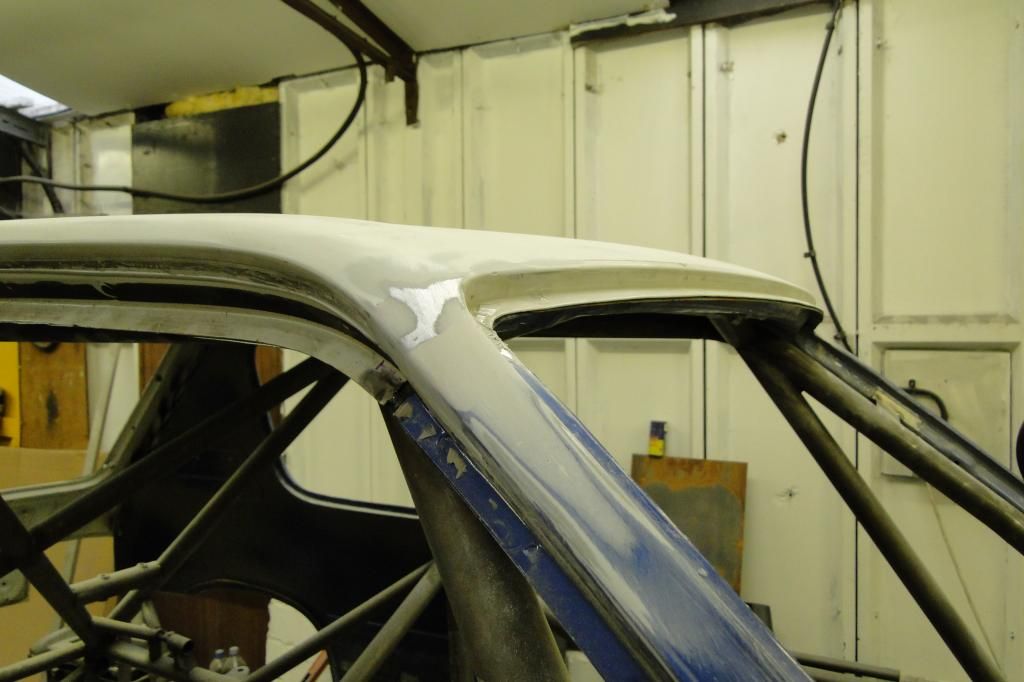
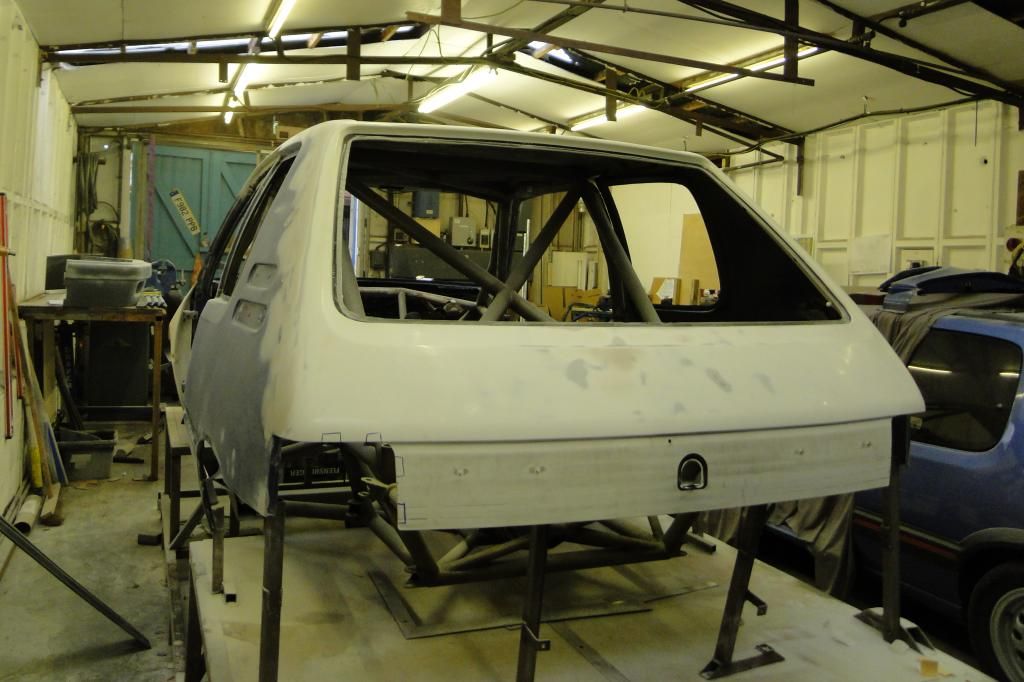
Quarter panels are now completely smoothed, as is the tailgate.
And the doors are completely smoothed.
So the next step is high-build, then lots and lots of blocking! I'm just going to take moulds off the finished primer, sanded to 1200 grit, as the moulds don't need a polished finish.
After some thought and discussion with people with experience I've decided to make the panels in several parts and bond them together. The risk of dry spots when trying to infuse such a large part would make doing it in one go unsuitable. So the moulds will be made in several parts with joins where I want the "panel gaps", and each panel can be made out of its respective mould piece.
Over the next couple of weeks I'll be sorting out the paint booth and installing air lines.
So it's been a while since the last update! Not much has been changing visually as it's all filling and sanding at the moment, but I've reached the milestone where the body is now completely smooth and ready for paint prep! It's all been blocked with 120 grit, and I'll go over it with 240 over the next week to get it ready for primer.
Today I did the last little bits of filler.. firstly smoothing the roof join to the A-pillar, then blocking the roof.
Quarter panels are now completely smoothed, as is the tailgate.
And the doors are completely smoothed.
So the next step is high-build, then lots and lots of blocking! I'm just going to take moulds off the finished primer, sanded to 1200 grit, as the moulds don't need a polished finish.
After some thought and discussion with people with experience I've decided to make the panels in several parts and bond them together. The risk of dry spots when trying to infuse such a large part would make doing it in one go unsuitable. So the moulds will be made in several parts with joins where I want the "panel gaps", and each panel can be made out of its respective mould piece.
Over the next couple of weeks I'll be sorting out the paint booth and installing air lines.

Yeah, especially if you're a bodywork noob like me! Amazing how quickly it goes from "almost there" to "totally burnt through, need another coat". Those Dura-Blocks make such a difference.. I can't imagine how much longer it would have taken if I was still using wood blocks. I'm going to put 4 coats of high-build on so there's plenty to block down. I've got it pretty smooth with the filler, but no doubt all sorts of undulations will show when I start blocking paint.
CamMoreRon said:
Yeah, especially if you're a bodywork noob like me! Amazing how quickly it goes from "almost there" to "totally burnt through, need another coat". Those Dura-Blocks make such a difference.. I can't imagine how much longer it would have taken if I was still using wood blocks. I'm going to put 4 coats of high-build on so there's plenty to block down. I've got it pretty smooth with the filler, but no doubt all sorts of undulations will show when I start blocking paint.
One issue with doing the patterns in a non-gloss coat is that it tends to hide poor surfacing. Reflective surfaces (polished/gloss ones) show up lines of reflections as "contours", making it easy to see where your pattern is a bit wobbly!Gassing Station | Readers' Cars | Top of Page | What's New | My Stuff