My BMW M3 Evolution Imola Individual GT2 Journal
Discussion


UPDATE:
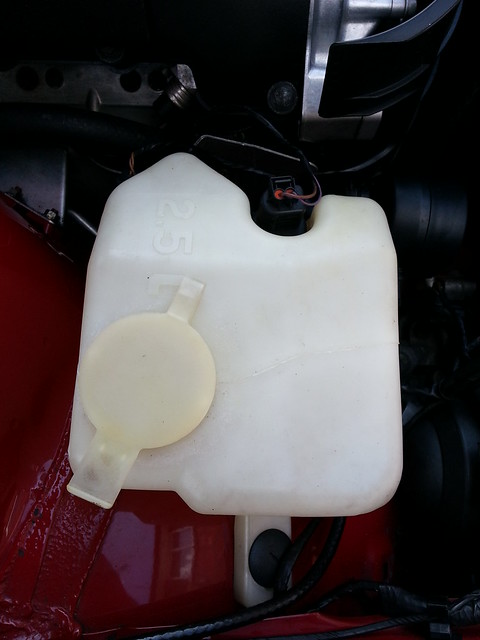
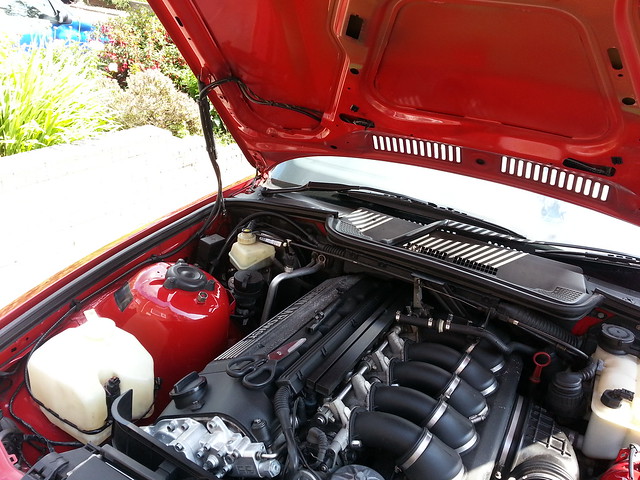
I decided I would clean the washer bottle and fit to the car no thanks to the mice.
This is what it was like before
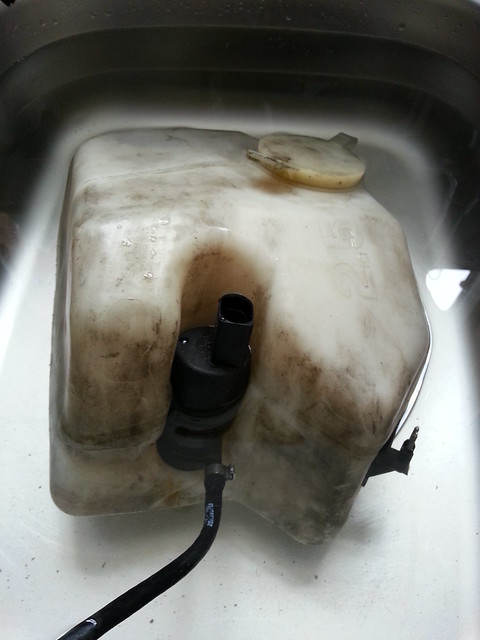
20140614_145243 by mboon, on Flickr
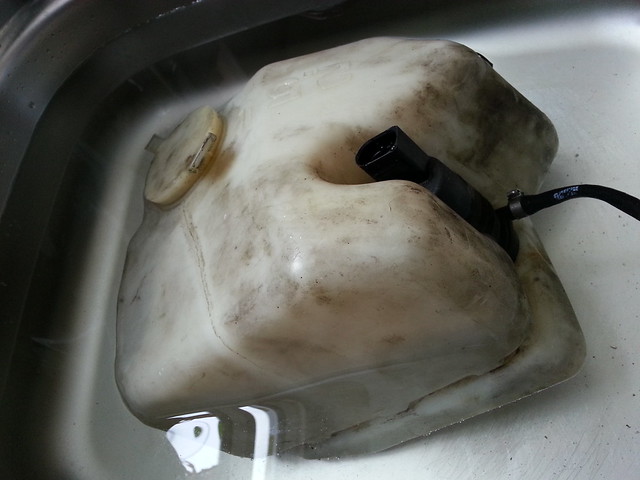
20140614_145248 by mboon, on Flickr
And after a bit of elbow grease
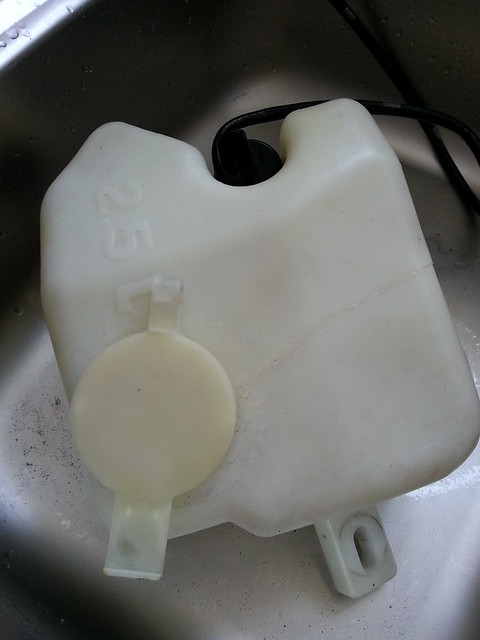
20140614_150243 by mboon, on Flickr
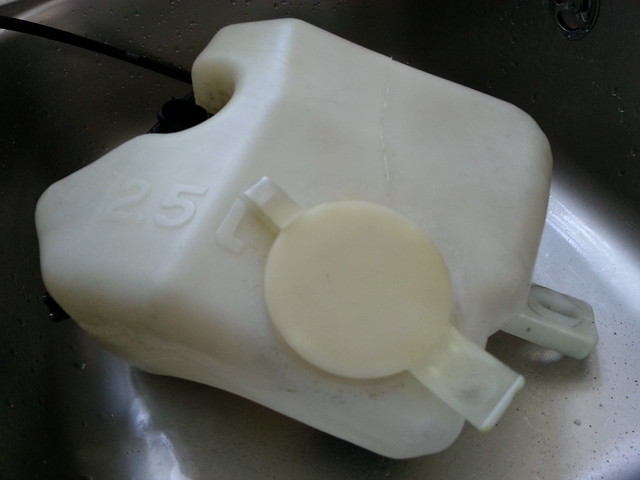
20140614_150248 by mboon, on Flickr
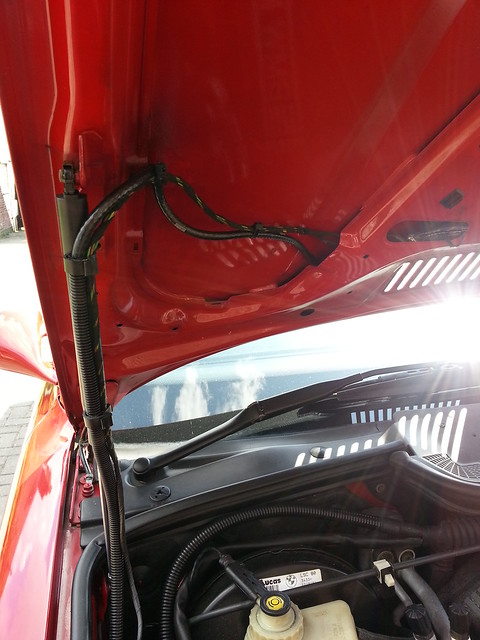
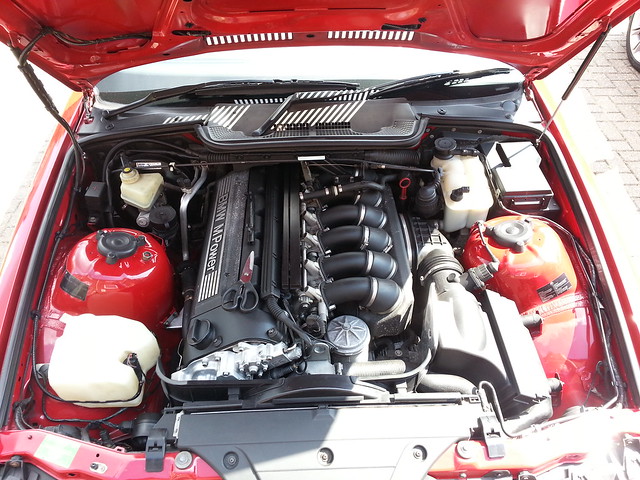
Time to fit it back on the car
20140614_151853 by mboon, on Flickr
20140614_151859 by mboon, on Flickr
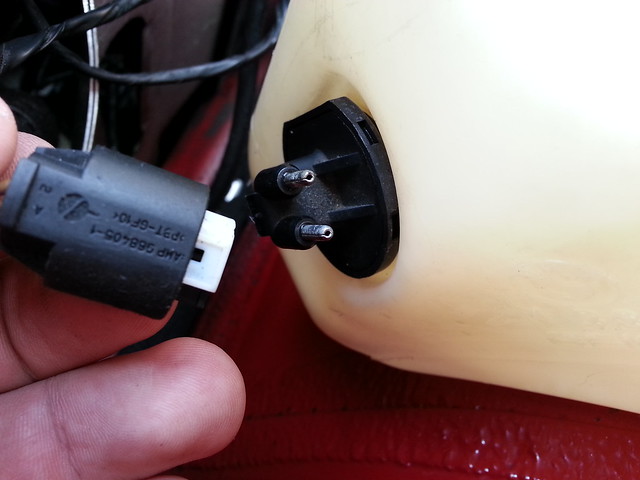
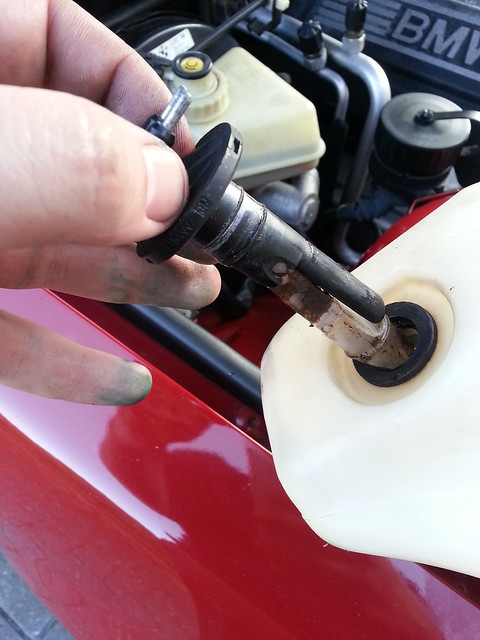
And as per bloody usual, nothing goes straight forward... Wrong connector on the sensor... Any ideas how to get around this? Can I replace just the sensor on the washer bottle or is it another washer bottle needed?
20140614_151930 by mboon, on Flickr
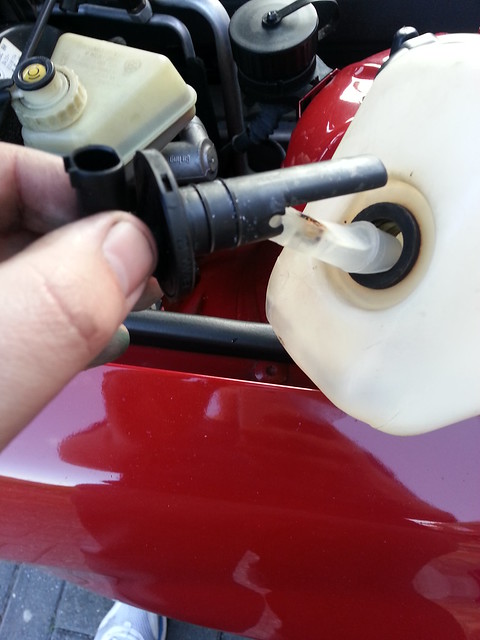
Replacing the actual pipework was alot easier than I thought it was going to be. Just removed the pipework from the washer jets and gently pulled it out, pushed the new one back in which was easy and plugged it in. Had to use a couple cable ties to hold the cables up where the under bonnet cover would of have been.
Not put any water in it yet, making sure the connectors are 100% dry before I try that.
Just one a couple more things under the bonnet and we are done.
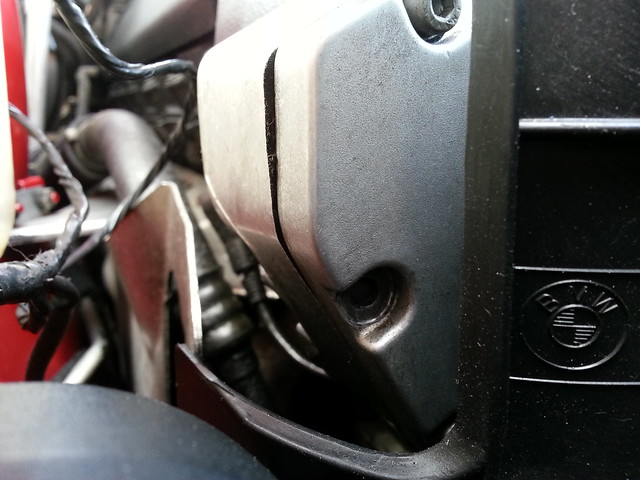
Can anyone tell me if this is supposed to have a bolt in?
This is the left hand side of the vanos
20140614_152005 by mboon, on Flickr
Getting there now
20140614_152249 by mboon, on Flickr
20140614_152254 by mboon, on Flickr
I decided I would clean the washer bottle and fit to the car no thanks to the mice.
This is what it was like before
20140614_145243 by mboon, on Flickr
20140614_145248 by mboon, on Flickr
And after a bit of elbow grease
20140614_150243 by mboon, on Flickr
20140614_150248 by mboon, on Flickr
Time to fit it back on the car
20140614_151853 by mboon, on Flickr
20140614_151859 by mboon, on Flickr
And as per bloody usual, nothing goes straight forward... Wrong connector on the sensor... Any ideas how to get around this? Can I replace just the sensor on the washer bottle or is it another washer bottle needed?
20140614_151930 by mboon, on Flickr
Replacing the actual pipework was alot easier than I thought it was going to be. Just removed the pipework from the washer jets and gently pulled it out, pushed the new one back in which was easy and plugged it in. Had to use a couple cable ties to hold the cables up where the under bonnet cover would of have been.
Not put any water in it yet, making sure the connectors are 100% dry before I try that.
Just one a couple more things under the bonnet and we are done.
Can anyone tell me if this is supposed to have a bolt in?
This is the left hand side of the vanos
20140614_152005 by mboon, on Flickr
Getting there now
20140614_152249 by mboon, on Flickr
20140614_152254 by mboon, on Flickr
UPDATE:
OK been working hard on cars this weekend/week. Our 330i Sport had an alternator fail, so replaced that, noticed the Oil filter housing gasket pissing oil so replaced that, replaced the power stearing cap o ring and checked the car over.
After doing all of that in one evening, I get a phone call the day after from my mum telling me her alternator had failed on her E39!!! So removed that and waiting for the parts to arrive.
So between this I have managed to do a couple little bits to the GT.
I started with ordering
5 x vanos cover bolts
3 x o rings for the power stearing caps (One for our E46, the GT and my mums E39)
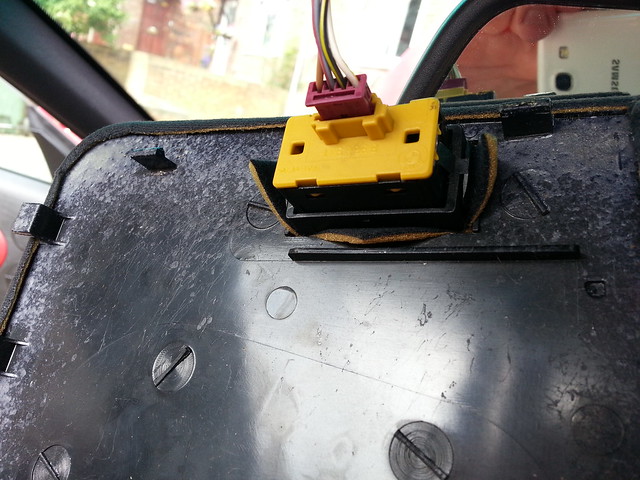
I fitted the washer bottle and found the sensor was incorrect, removed the old one from the old washer bottle
Removing the old one
20140618_185843 by mboon, on Flickr
Replacing with the new one
20140618_185911 by mboon, on Flickr
And the sign I wanted...
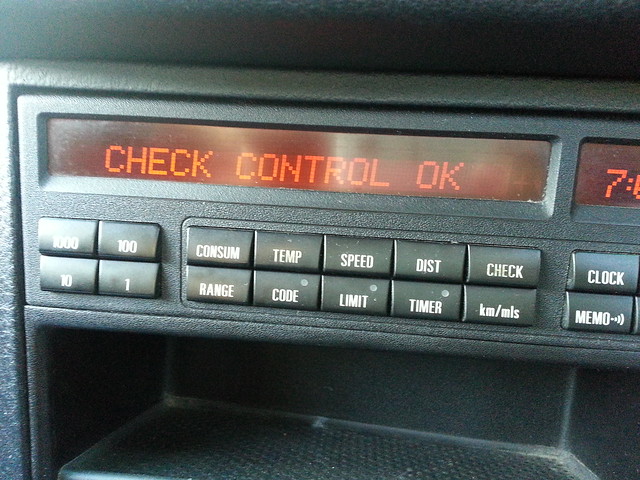
20140618_190358 by mboon, on Flickr
So that clears any errors on the check control.
Next up was the vanos bolt, sadly this has snapped off in the housing. It has snapped quiet far out so should be able to remove the casing and get a pair of plyers on the end of the bolt and turn it out.
Pics of the vanos bolts (I expected these to be bigger, and the o rings)
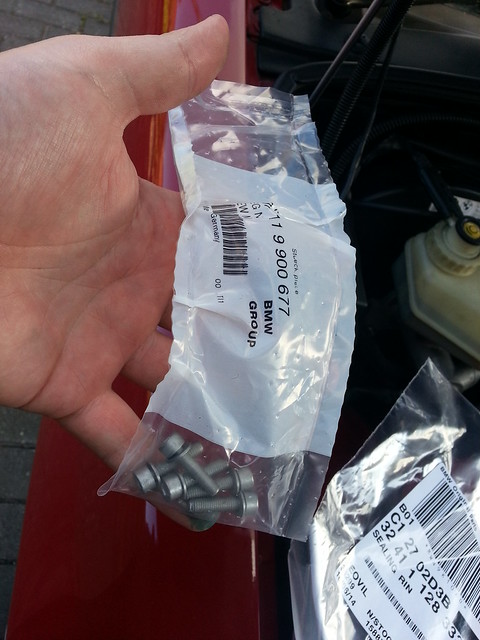
20140618_183855 by mboon, on Flickr

20140618_183825 by mboon, on Flickr
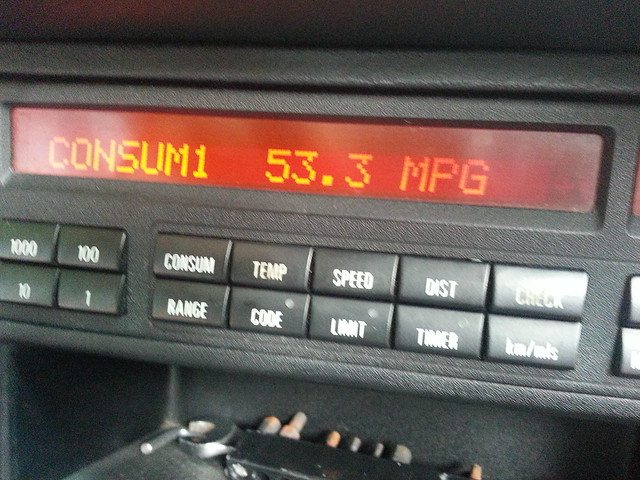
A cheeky little MPG shot...

20140618_190352 by mboon, on Flickr
My little girl riding shot gun with me
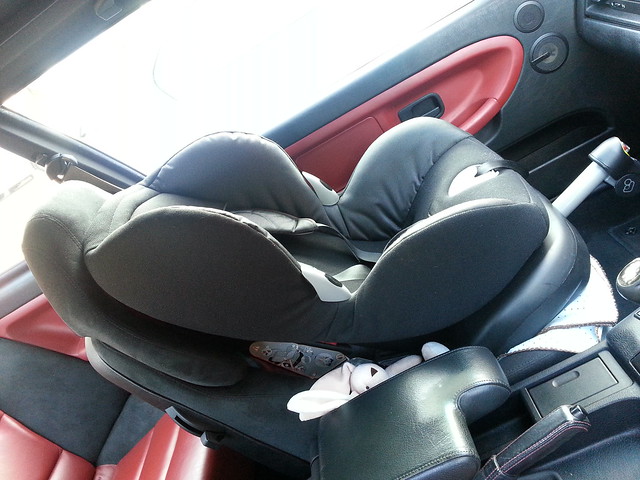
20140618_190443 by mboon, on Flickr
Brave with these seats as well haha
And a couple shots of our BMWs being worked on
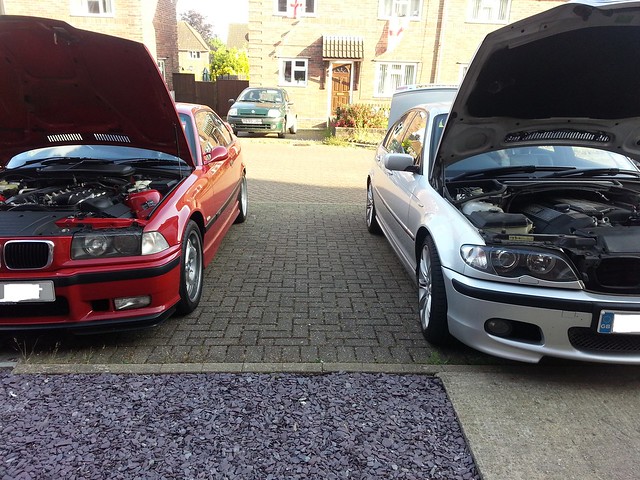
20140618_190519 by mboon, on Flickr
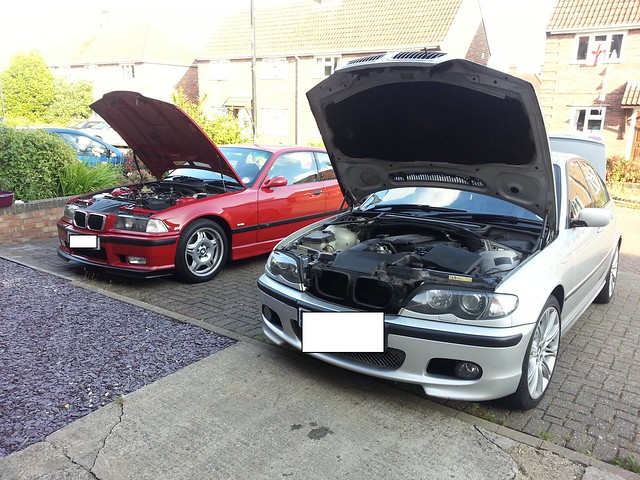
20140618_190509 by mboon, on Flickr
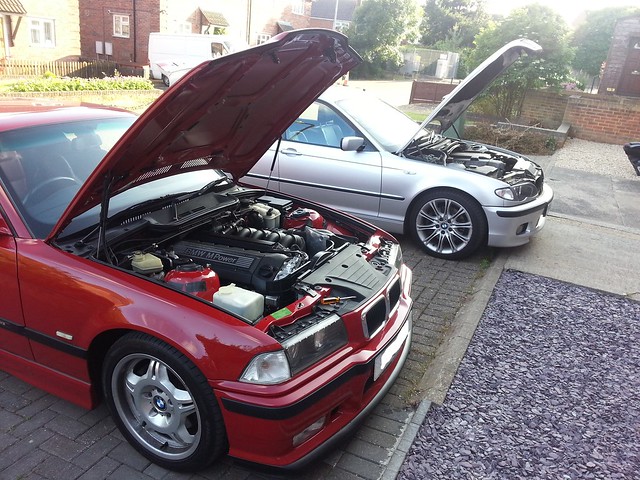
20140618_190457 by mboon, on Flickr
And at last, I have got all the spare parts and cleaning stuff out of the boot
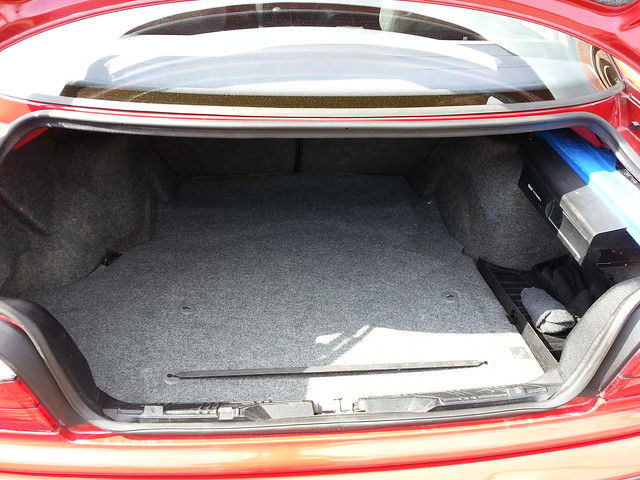
20140614_163714 by mboon, on Flickr
I have still got to fit the power stearing cap o ring to stop that from leaking and clean the area.
Car needs a clean now as has been used a bit more because the Mrs car broke down. Cleaned and going back in the garage
OK been working hard on cars this weekend/week. Our 330i Sport had an alternator fail, so replaced that, noticed the Oil filter housing gasket pissing oil so replaced that, replaced the power stearing cap o ring and checked the car over.
After doing all of that in one evening, I get a phone call the day after from my mum telling me her alternator had failed on her E39!!! So removed that and waiting for the parts to arrive.
So between this I have managed to do a couple little bits to the GT.
I started with ordering
5 x vanos cover bolts
3 x o rings for the power stearing caps (One for our E46, the GT and my mums E39)
I fitted the washer bottle and found the sensor was incorrect, removed the old one from the old washer bottle
Removing the old one
20140618_185843 by mboon, on Flickr
Replacing with the new one
20140618_185911 by mboon, on Flickr
And the sign I wanted...
20140618_190358 by mboon, on Flickr
So that clears any errors on the check control.
Next up was the vanos bolt, sadly this has snapped off in the housing. It has snapped quiet far out so should be able to remove the casing and get a pair of plyers on the end of the bolt and turn it out.
Pics of the vanos bolts (I expected these to be bigger, and the o rings)
20140618_183855 by mboon, on Flickr
20140618_183825 by mboon, on Flickr
A cheeky little MPG shot...
20140618_190352 by mboon, on Flickr
My little girl riding shot gun with me
20140618_190443 by mboon, on Flickr
Brave with these seats as well haha
And a couple shots of our BMWs being worked on
20140618_190519 by mboon, on Flickr
20140618_190509 by mboon, on Flickr
20140618_190457 by mboon, on Flickr
And at last, I have got all the spare parts and cleaning stuff out of the boot
20140614_163714 by mboon, on Flickr
I have still got to fit the power stearing cap o ring to stop that from leaking and clean the area.
Car needs a clean now as has been used a bit more because the Mrs car broke down. Cleaned and going back in the garage
UPDATE:
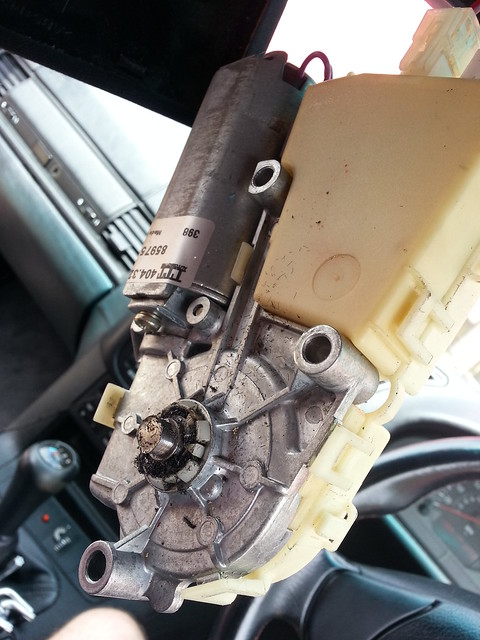
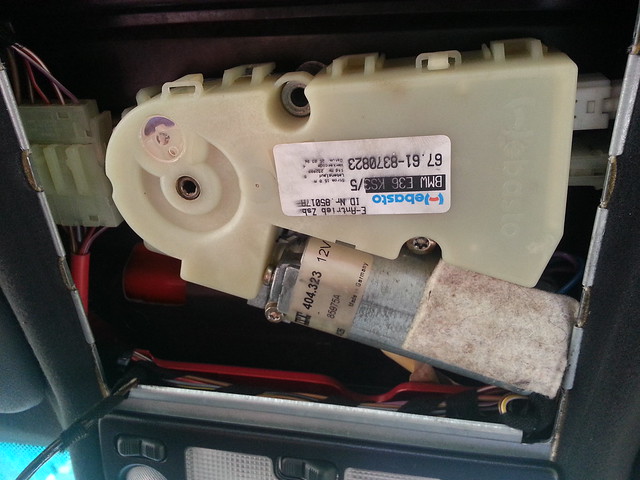
OK one of the things that was not working... and that list is getting much smaller now, was the sunroof.
I cleaned the car and was in a "tinkering mood" so pulled the panel down on the sunroof motor cover and found the switch was not plugged in. Something in my head said text the previous owner and ask if this has been disconnected for a reason but in the end just went for it
20140620_114109 by mboon, on Flickr
So plugged in, ignition on and pressed the buttom. Sunroof opened fine, closed fine, tilted fine. I thought this is spot on, must of just worked itself loose!! Wrong. Openeded it again and it clicked just before it fully closed, tilted the sunroof again and it opened about 1/2 an inch and stopped. Motor was still spinning but had come loose and clicking. I put the allan key in just to make sure and turned, nothing moved. Thought the cable had snapped or something and it was a sunroof out job.
Old motor

20140620_114113 by mboon, on Flickr
I removed the old motor and found my problem
20140620_123502 by mboon, on Flickr
This should be on the spindle
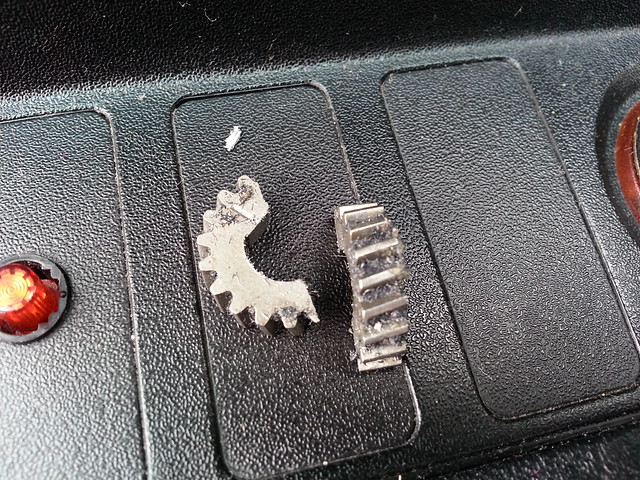
20140620_123512 by mboon, on Flickr
And should sit in the hole on the left and spin the cables to make the sunroof move
20140620_123506 by mboon, on Flickr
So I thought I would try the scrap yard as I wanted the car to be secure incase I wanted to use it... on the way to the scrap yard, this happened
20140620_135938 by mboon, on Flickr
Admittedly I was hardly accelerating and reset when in motion but when I got back it was still around 36mpg which was nice. This Evo is more economical than our 330i.
So found my part in a touring which had a E46 on its roof and paid £10 Happy days! I also found a E38 (I think) 728i with 4 pot Brembo calipers on... anyone know if these will fit straight on the E36 M3? They looked really big! I liked.
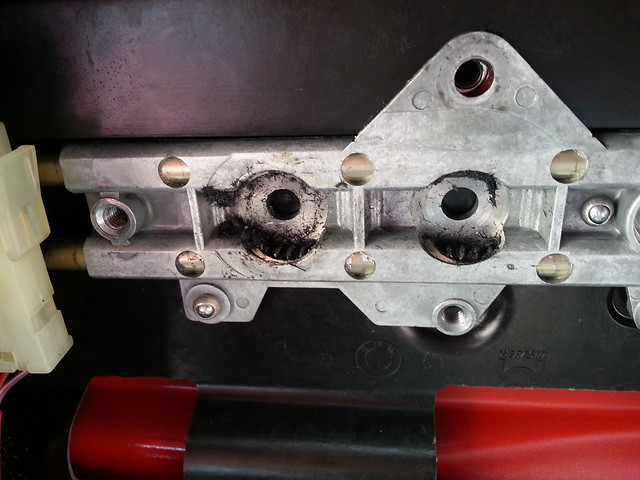
Got home and fitted the part on the off chance it still worked (Expected to remove the cog and put onto my motor) and low and behold, it worked!
Plugged it all back in and bolted to position and made sure I was closing the roof just in case and it worked spot on I opened it right up and closed again and it made the clunk/metal on metal sound again about an inch before closing so left it closed and disconnected the button again, might just replace the cartridge at some point. It is not a priority at the moment.
New/old part fitted
20140620_141833 by mboon, on Flickr
And it opened
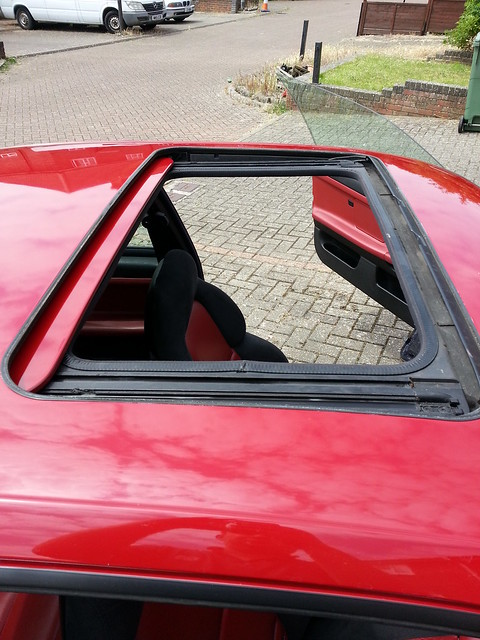
20140620_114059 by mboon, on Flickr
And a couple from up above
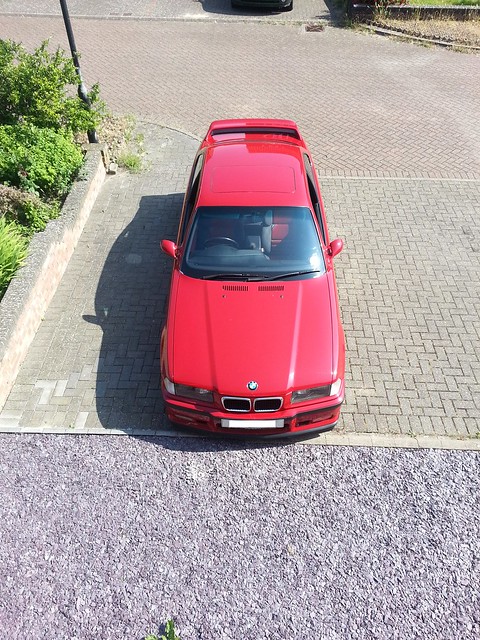
20140620_161607 by mboon, on Flickr
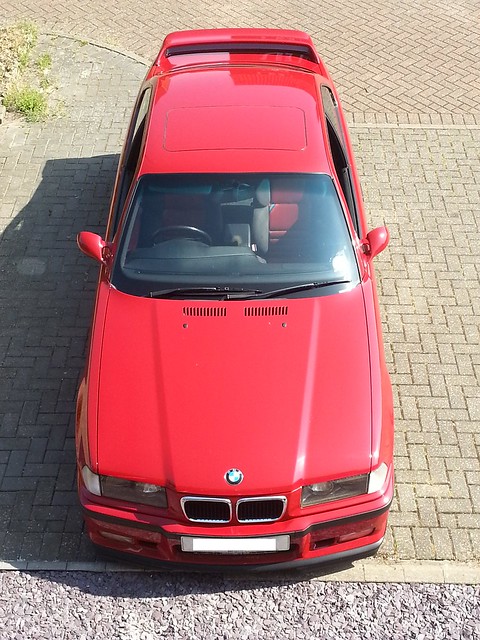
20140620_161625 by mboon, on Flickr
Thanks
Mark
OK one of the things that was not working... and that list is getting much smaller now, was the sunroof.
I cleaned the car and was in a "tinkering mood" so pulled the panel down on the sunroof motor cover and found the switch was not plugged in. Something in my head said text the previous owner and ask if this has been disconnected for a reason but in the end just went for it
20140620_114109 by mboon, on Flickr
So plugged in, ignition on and pressed the buttom. Sunroof opened fine, closed fine, tilted fine. I thought this is spot on, must of just worked itself loose!! Wrong. Openeded it again and it clicked just before it fully closed, tilted the sunroof again and it opened about 1/2 an inch and stopped. Motor was still spinning but had come loose and clicking. I put the allan key in just to make sure and turned, nothing moved. Thought the cable had snapped or something and it was a sunroof out job.
Old motor
20140620_114113 by mboon, on Flickr
I removed the old motor and found my problem
20140620_123502 by mboon, on Flickr
This should be on the spindle
20140620_123512 by mboon, on Flickr
And should sit in the hole on the left and spin the cables to make the sunroof move
20140620_123506 by mboon, on Flickr
So I thought I would try the scrap yard as I wanted the car to be secure incase I wanted to use it... on the way to the scrap yard, this happened
20140620_135938 by mboon, on Flickr
Admittedly I was hardly accelerating and reset when in motion but when I got back it was still around 36mpg which was nice. This Evo is more economical than our 330i.
So found my part in a touring which had a E46 on its roof
and paid £10 Happy days! I also found a E38 (I think) 728i with 4 pot Brembo calipers on... anyone know if these will fit straight on the E36 M3? They looked really big! I liked.Got home and fitted the part on the off chance it still worked (Expected to remove the cog and put onto my motor) and low and behold, it worked!
Plugged it all back in and bolted to position and made sure I was closing the roof just in case and it worked spot on
I opened it right up and closed again and it made the clunk/metal on metal sound again about an inch before closing so left it closed and disconnected the button again, might just replace the cartridge at some point. It is not a priority at the moment.New/old part fitted
20140620_141833 by mboon, on Flickr
And it opened
20140620_114059 by mboon, on Flickr
And a couple from up above
20140620_161607 by mboon, on Flickr
20140620_161625 by mboon, on Flickr
Thanks
Mark

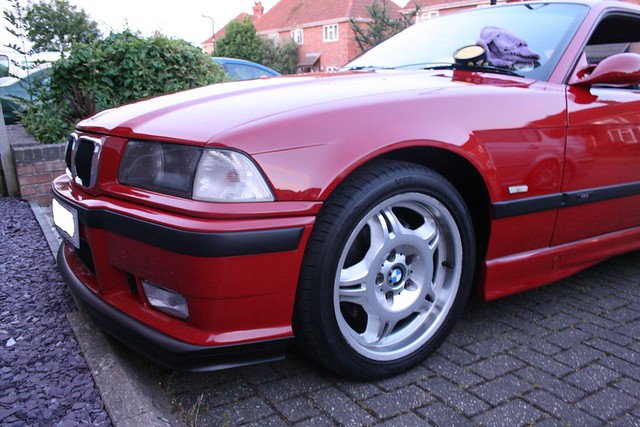

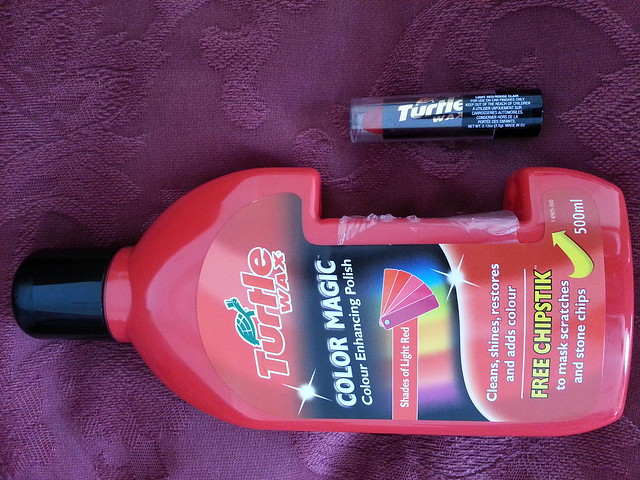
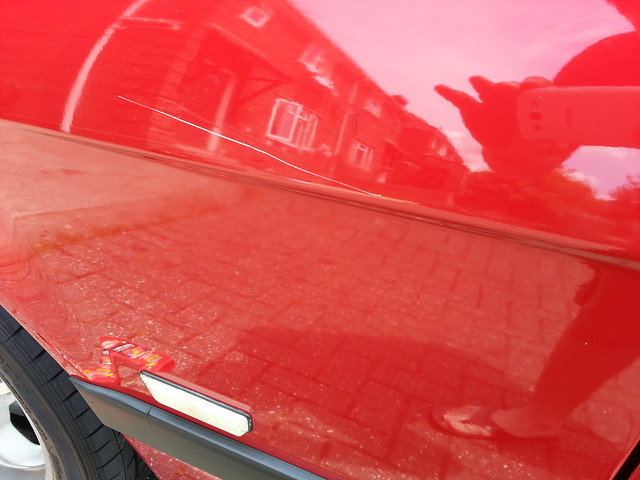
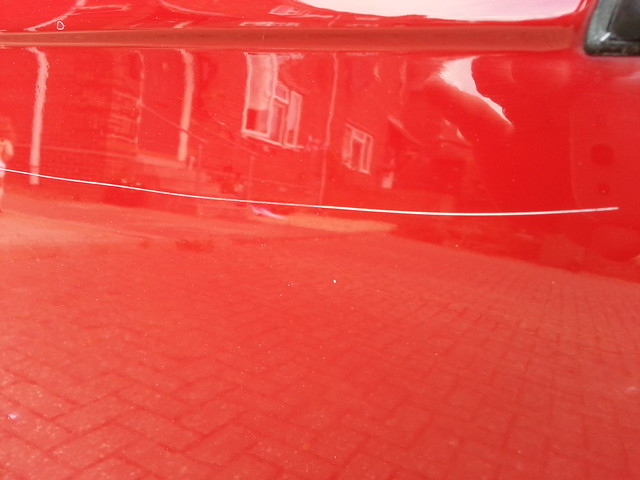
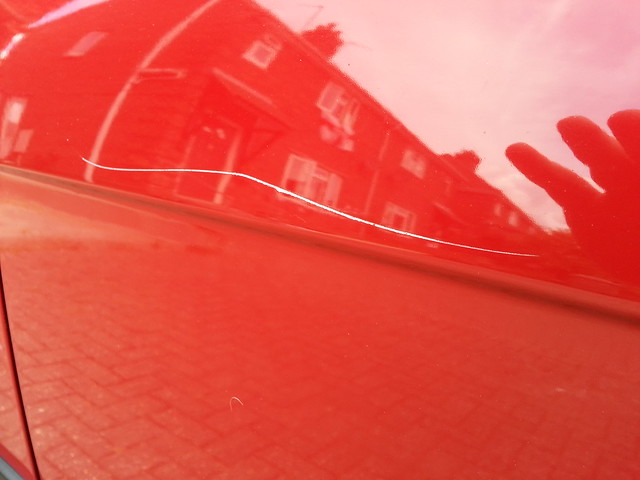
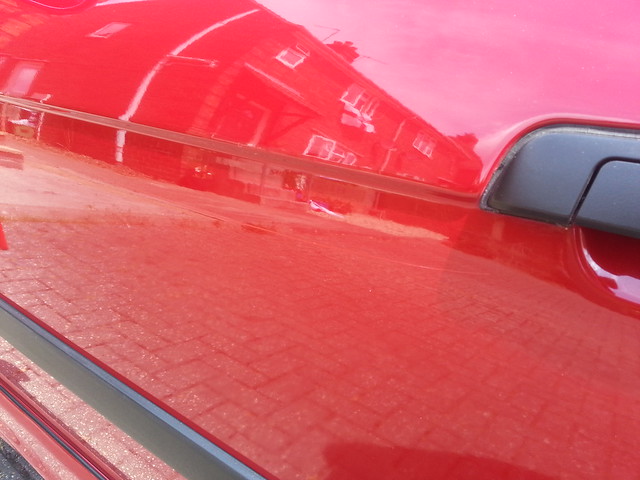
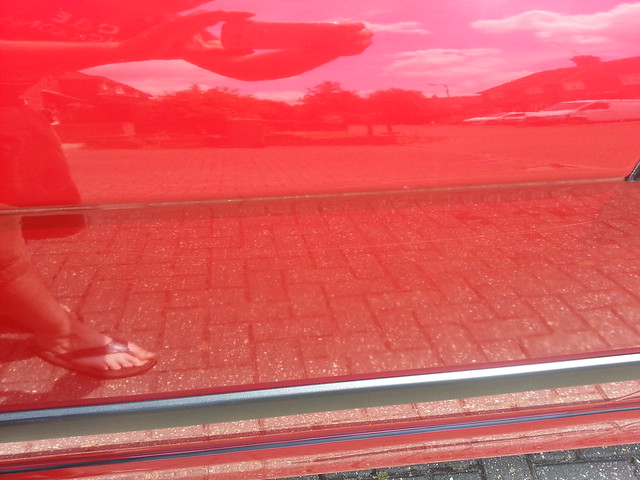
As we all know the car had been keyed in previous ownership and this has been driving me crazy. If I end up keeping the car I think it will get a full respray and new rubbers/seals etc.
So the scratch started off like this across the passanger front wing, door and rear quater. Down to the metal and I polished the car which has put white residue into the mark and made it look even worse.
Went to Halfrauds and found some of this stuff.
20140622_122400 by mboon, on Flickr
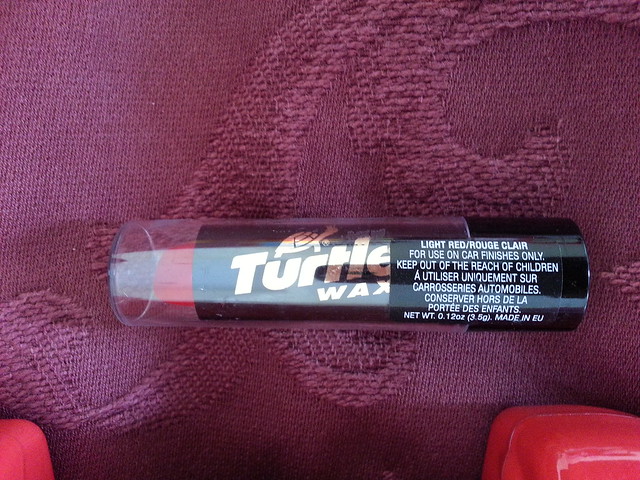
20140622_122404 by mboon, on Flickr
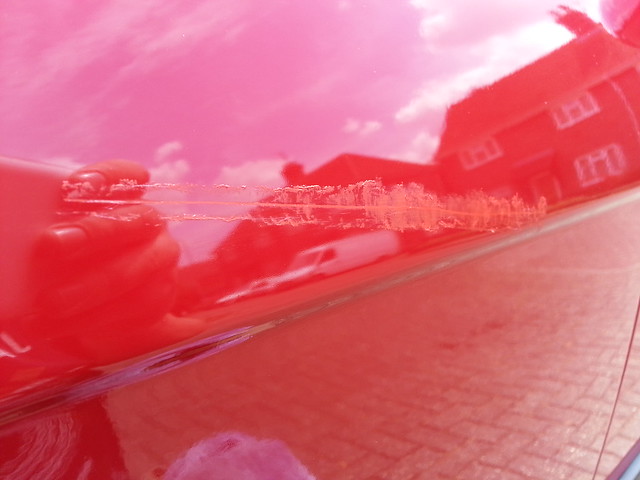
Some photos of the key mark
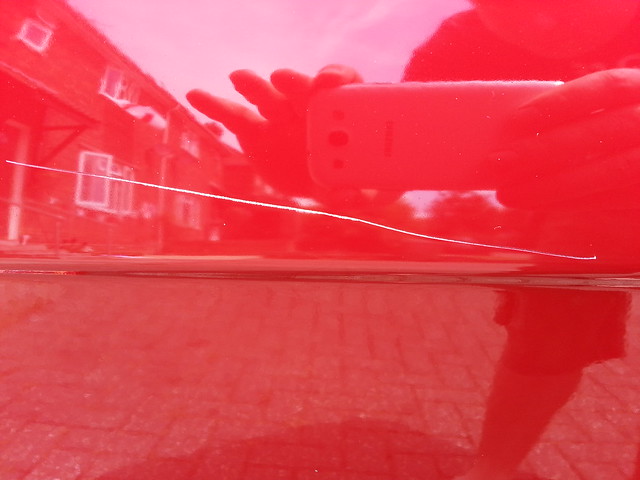
20140622_122448 by mboon, on Flickr
20140622_122455 by mboon, on Flickr

20140622_123119 by mboon, on Flickr
20140622_123124 by mboon, on Flickr
20140622_123146 by mboon, on Flickr
This was the first stage, putting the lipstick wax into the key mark
20140622_122814 by mboon, on Flickr
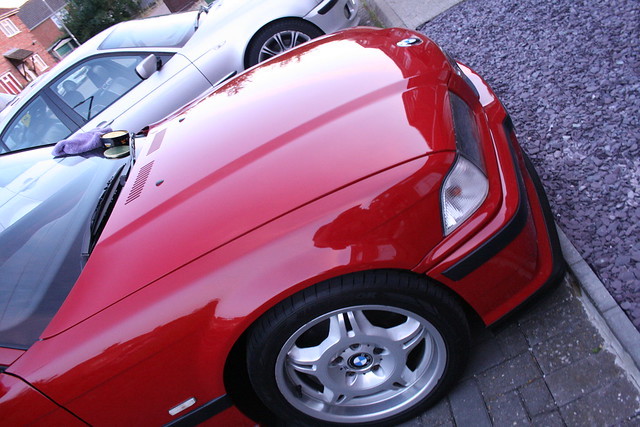
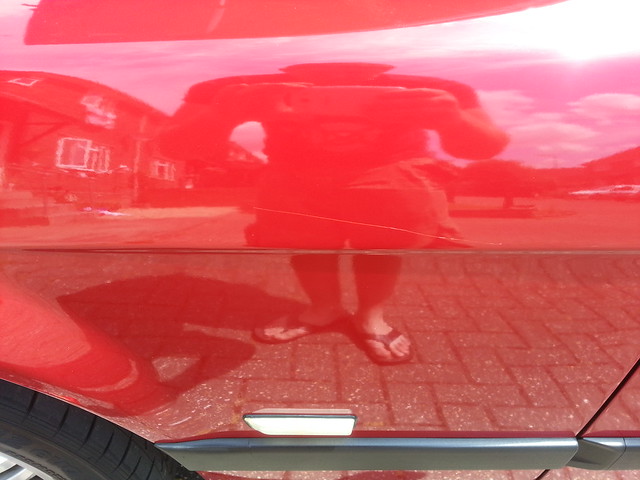
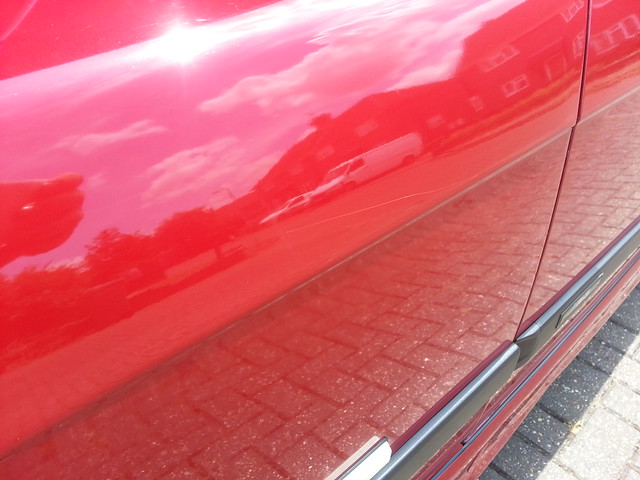
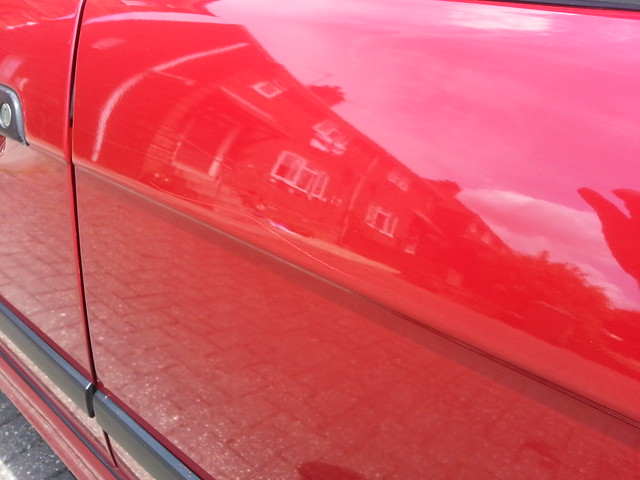
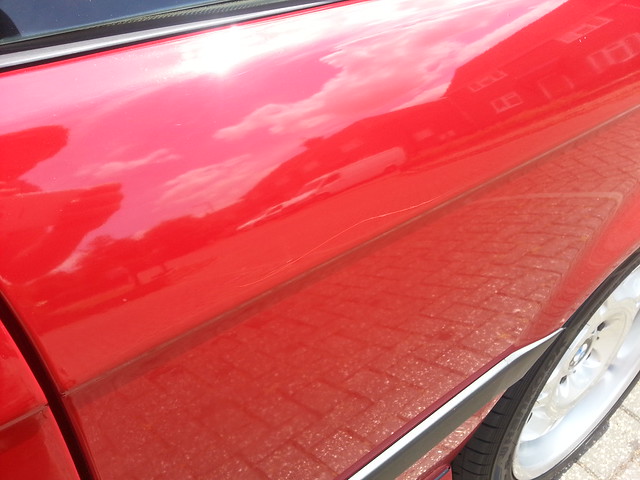
And this was after a filled the marks and used the red polish over the top
Front wing
20140622_123742 by mboon, on Flickr
20140622_124134 by mboon, on Flickr
Door
20140622_124147 by mboon, on Flickr
20140622_124141 by mboon, on Flickr
Rear quater
20140622_124202 by mboon, on Flickr
20140622_124158 by mboon, on Flickr
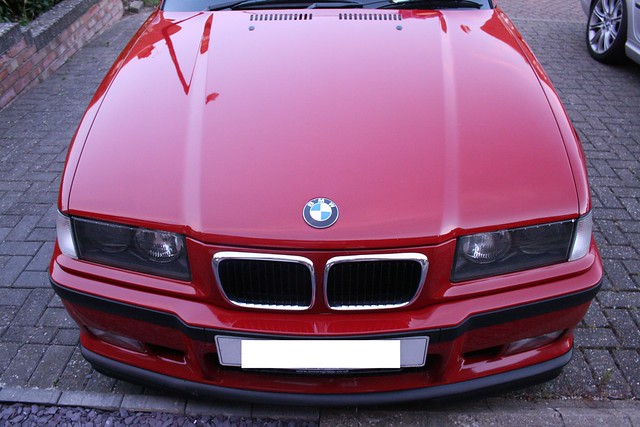
Overall
20140622_124216 by mboon, on Flickr
20140622_124232 by mboon, on Flickr
Not bad for a tenner
So the scratch started off like this across the passanger front wing, door and rear quater. Down to the metal and I polished the car which has put white residue into the mark and made it look even worse.
Went to Halfrauds and found some of this stuff.
20140622_122400 by mboon, on Flickr
20140622_122404 by mboon, on Flickr
Some photos of the key mark
20140622_122448 by mboon, on Flickr
20140622_122455 by mboon, on Flickr
20140622_123119 by mboon, on Flickr
20140622_123124 by mboon, on Flickr
20140622_123146 by mboon, on Flickr
This was the first stage, putting the lipstick wax into the key mark
20140622_122814 by mboon, on Flickr
And this was after a filled the marks and used the red polish over the top
Front wing
20140622_123742 by mboon, on Flickr
20140622_124134 by mboon, on Flickr
Door
20140622_124147 by mboon, on Flickr
20140622_124141 by mboon, on Flickr
Rear quater
20140622_124202 by mboon, on Flickr
20140622_124158 by mboon, on Flickr
Overall
20140622_124216 by mboon, on Flickr
20140622_124232 by mboon, on Flickr
Not bad for a tenner
Update:
Been away for a week and come back to a flat battery. Had a feeling it was on its last legs and it didnt charge enough to turn her over. So purchased a new one

Upgraded to the S4 as it was better all round.
Old

New

Started and took for a run.
Also took these photos for a guy who wanted to compare.

Cheers
Mark
So my passenger door stopped working from the inside and out. The door was locked and pulling the internal handle would lift the lock button but it would not stay up and the door would not open.
This means the door cannot be opened... great fun!
This was down to a lock actuator which had gone faulty causing the door to stay double locked so could not be opened with this attached. Removing the actuator means you can use the door again but no central locking or double locking will work. You have to unlock and lock the door from the inside. But tgis means you can get the thing open again
Anyway, start by removing the door card.
there are two hex screws holding the door card in place. Remove the two little covers near the internal handle and undo the screws.
if yours is a GT like mine or has the optiinal side airbags remeber to remove the Airbag badge next to the airbag flap and remove the extra screw. A small screw driver to prize this badge off works.
once these have been removed its time to get physical.
I started by getting my fingers under the front bottom part of the door card and giving a sharp pull, you will hear the clips either break or pull out.
gently work your way around the door card until the whole bottom and sides pull away from the door.
Now you need to pull the top of the door card out towards you. 9/10 times you will pull the glue on the top of the door card and leave the brackets attached to the car. You can glue these back on.
remove any speaker cables etc (GT2 has the extra HK setup so remove all before pulling away) now the door card should pull out gently. Set this to one side
next up is the plastic membrain that keeps the damp etc out. Do your best to pull this away without wripping. Not.easy as the glue is very strong. Do this around the lock mechanism.
Now you should see the lock and mech, its a pain to see etc but doable. The part we need to change is the lock actuator. This is a black box with one cable coming out. Leave the cable attached and push the actuator up away from the lock. It should just push up with a few clcicks and eventually come away. Pull this out of the door and gently remove the cable (push the cable grip down and this should release)
Once this is off the door should now unlock and open.
replace with a new item and put back together.
these are some photos of mine in progress
Removing the door card

Whats behind the door card. Remove the left hand side of the door membrane

This is where the actuator sits (it has been removed in this photo)

The wiring loom that plugs into the actuator

And the actuator itself

And the end product. A door that actually opens again!!!

Now on the hunt for an actuator. Waiting for prices to come back.
Hope this helps someone, was a dick trying to get the door card off with expensive limited edition seats in the way. But certainly a DIY
Well its been a while.
I have done nothing but drive the car. Probably put a good 600 miles on her recently with not a single wash.
As you can imagine, its pretty horrible!!
So thought I would give it a quick clean last night before I took it out on another long run
Before


After


The car has been faultless. Averaging 26MPG as well. Pulls hard and well but also shuts up when you put her in 6th and hit the motorways. It really is a credit to BMW just how good these cars are.
You have two types of this wheel
the non staggered which should have BMW Motorsport on the outside and BMW stamprd on the insude.
The ones above are the stagged fitment of the motorsport. No writting on the face but three numbers next to the valve and BMW part number (different for front and back) stamped on the inside.
loTs of fakes going around. Side by side it is obvious.
hope this helps
Gassing Station | Readers' Cars | Top of Page | What's New | My Stuff