Mini 1275 rebuild
Discussion


Finally worked out how to resize the images so can now carry on posting. 
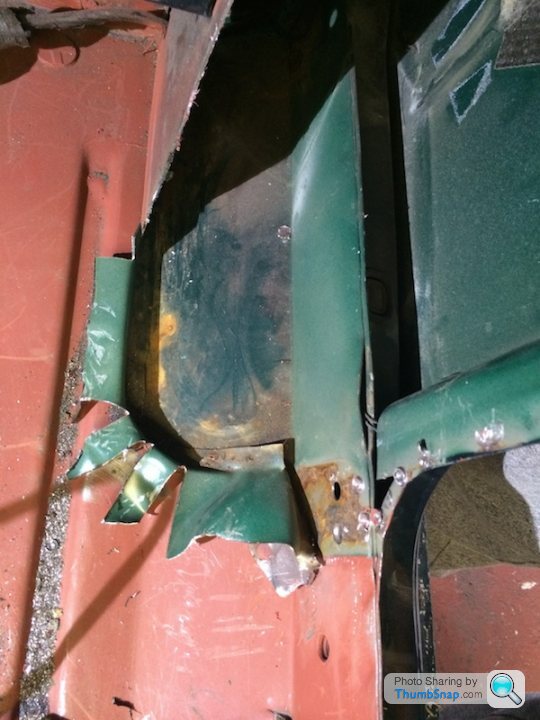
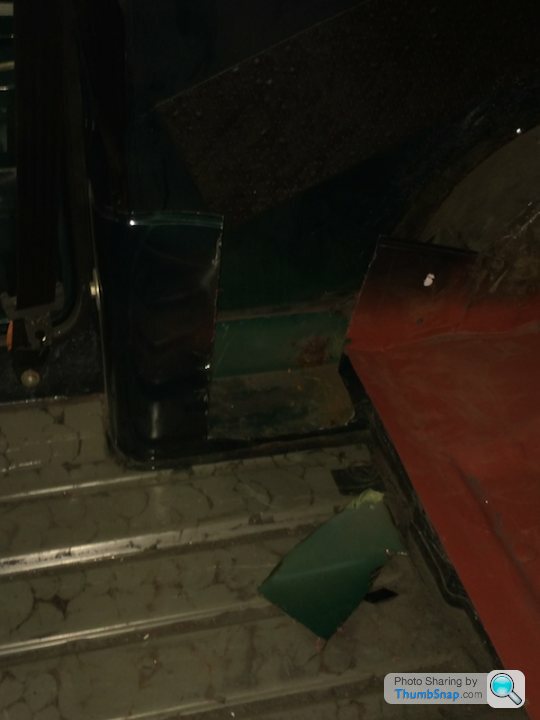
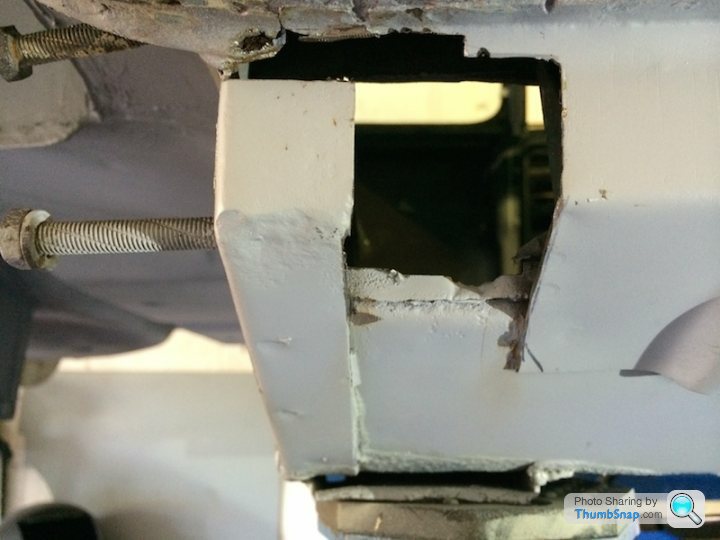
The drivers side rear valance closing panel was a bit of a state so chopped it out for fitment of a new one....getting the thing out was a pig to say the least which in the end prompted me to get an air hammer.
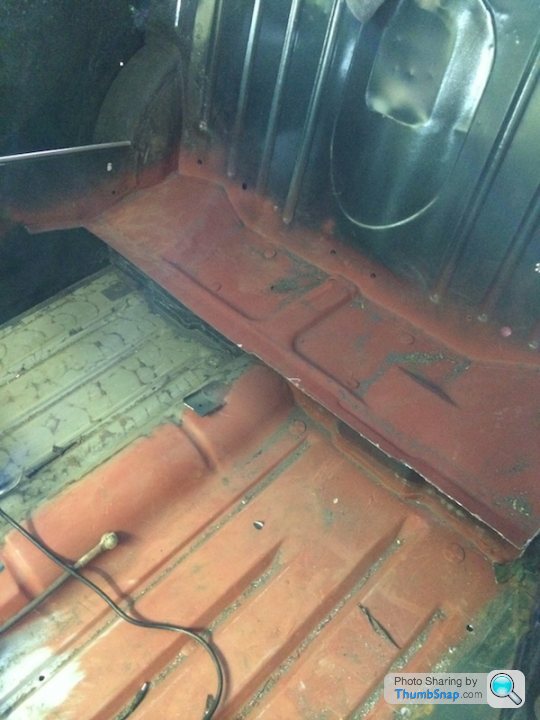
It was then on to the job of cutting out the rear bins and seat squab so that the roll cage can be fitted at a later date.
I looked everywhere but just couldn't find any close enough pictures or write ups on how it's done and didn't really want to make it up as I went along. All write ups just seemed to show the before and after pictures with no explanation at all. Then a guy on 'The Mini Forum' was able to point me in the right direction and provided some close up pics for me to look at, so was very grateful to him. Hopefully my pics may be of some help if somebody is thinking of doing the same thing.
So this is the way I tackled it anyway. Apparently according to some people who's write ups I've read, the whole job should take about an hour.....yeah right O
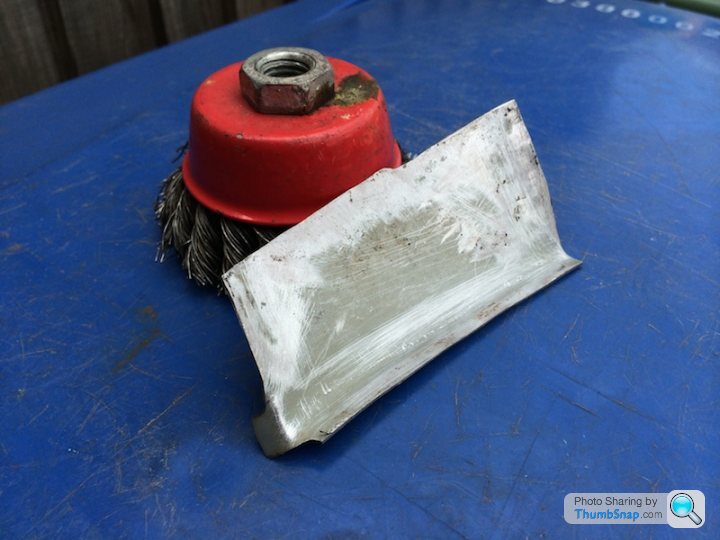
First drill out the spot welds using a spot weld drill bit....... when you can find them that is. Just when you think you have got them all, you can bet your life there's another just around the corner gripping on for grim death.
Then using the grinder with a cut off disk I cut down half the bin exposing more spot welds connecting the bin to the floor. I managed on a few occasions to drill straight through the floor with the drill bit so not the easiest thing to get just right but it is effective and does the job.
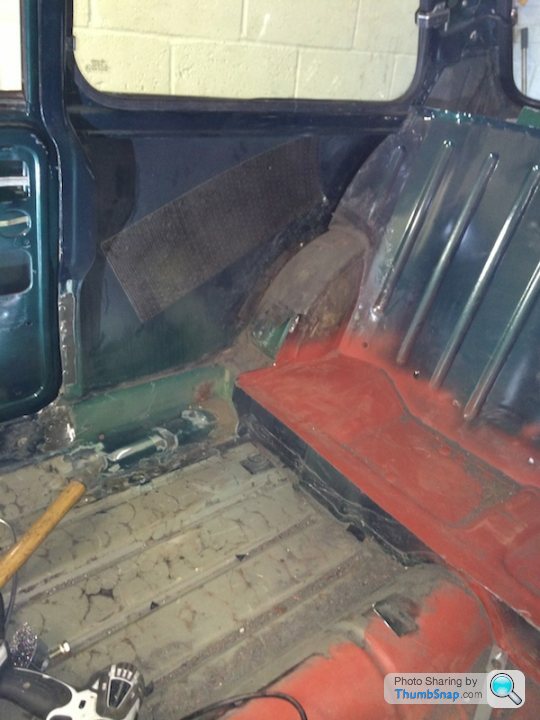
It was then just a matter of cutting around for a basic shape of what I wanted.
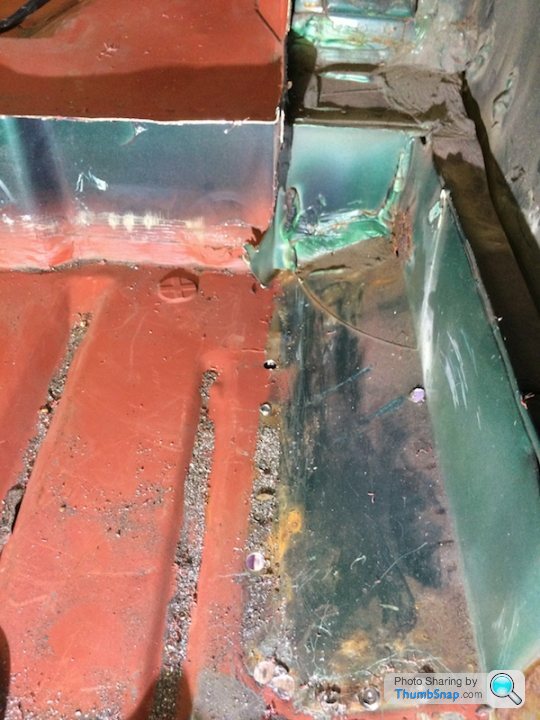
This pic shows the amount of over hang I have at the moment, this will be cut down when I tidy it all up
Then just cut straight across the seat squab.
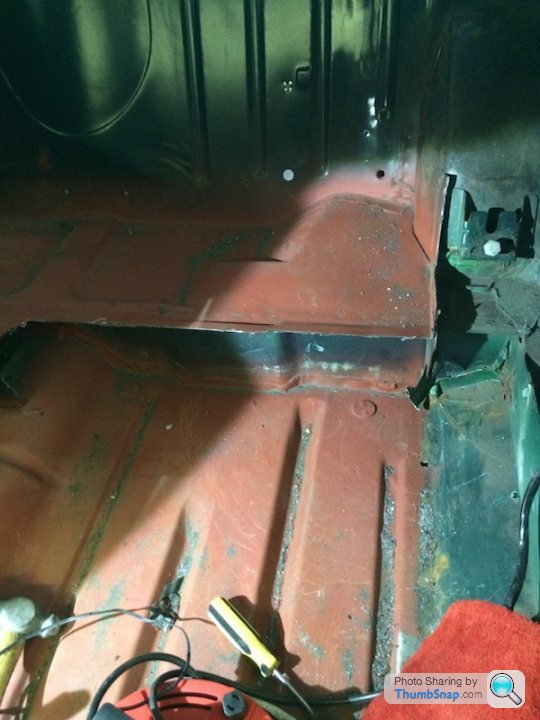
Rinse and repeat

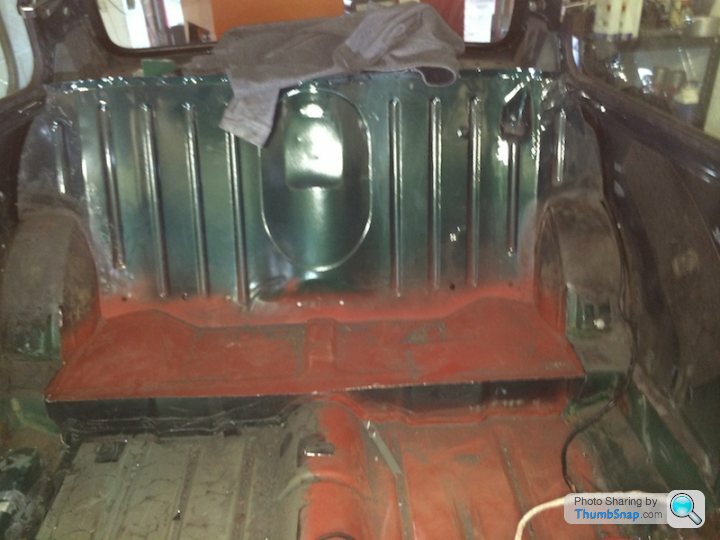
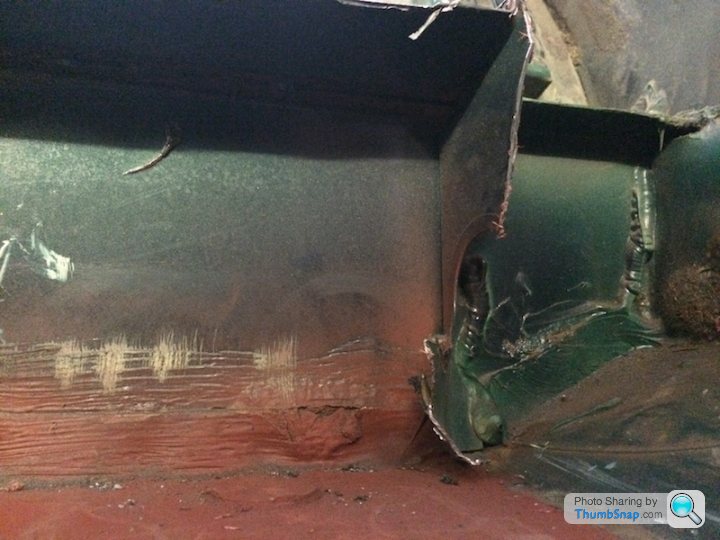
Another pic showing the under cut I have at the moment before tidying up.

And this is where I am at the moment.
I have a holiday this week so hopefully able to get out in the garage for some more fun and games.
The drivers side rear valance closing panel was a bit of a state so chopped it out for fitment of a new one....getting the thing out was a pig to say the least which in the end prompted me to get an air hammer.
It was then on to the job of cutting out the rear bins and seat squab so that the roll cage can be fitted at a later date.
I looked everywhere but just couldn't find any close enough pictures or write ups on how it's done and didn't really want to make it up as I went along. All write ups just seemed to show the before and after pictures with no explanation at all. Then a guy on 'The Mini Forum' was able to point me in the right direction and provided some close up pics for me to look at, so was very grateful to him. Hopefully my pics may be of some help if somebody is thinking of doing the same thing.
So this is the way I tackled it anyway. Apparently according to some people who's write ups I've read, the whole job should take about an hour.....yeah right O
First drill out the spot welds using a spot weld drill bit....... when you can find them that is. Just when you think you have got them all, you can bet your life there's another just around the corner gripping on for grim death.
Then using the grinder with a cut off disk I cut down half the bin exposing more spot welds connecting the bin to the floor. I managed on a few occasions to drill straight through the floor with the drill bit so not the easiest thing to get just right but it is effective and does the job.
It was then just a matter of cutting around for a basic shape of what I wanted.
This pic shows the amount of over hang I have at the moment, this will be cut down when I tidy it all up
Then just cut straight across the seat squab.
Rinse and repeat
Another pic showing the under cut I have at the moment before tidying up.
And this is where I am at the moment.
I have a holiday this week so hopefully able to get out in the garage for some more fun and games.
Edited by Westy Pre-Lit on Saturday 7th June 18:52
SteellFJ said:
Love it! love it alot, cannot wait to see this finished.
hope to own anrestore one of these in time for the boys being able to drive, gives me 10 years to get going!!
Thanks hope to own anrestore one of these in time for the boys being able to drive, gives me 10 years to get going!!

It'll probably take me about that length of time to finish it as well.

Edited by Westy Pre-Lit on Saturday 7th June 18:53
Have a few days off this week so today was able to get into the garage for some more fun and games.
My neighbour also had the day off, so he kindly came out to give me a hand with welding up the holes I'd previously cut out in the passenger side sill. As said before under normal circumstances the sill would really need to be changed but I wanted to use it to get some experience with welding again.
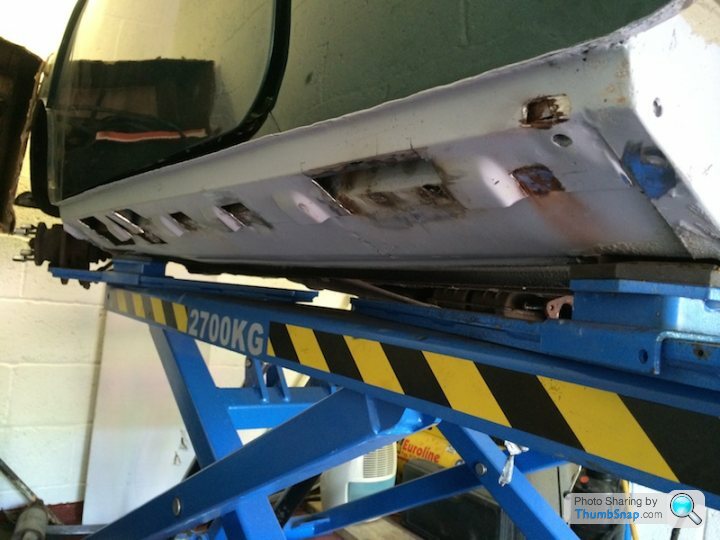
This is what the sill looked like at the start of play
We then had a go at filling a few holes.
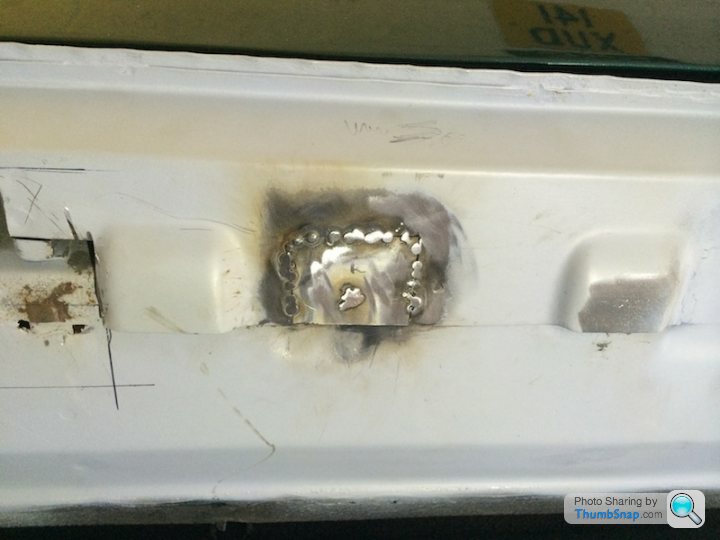
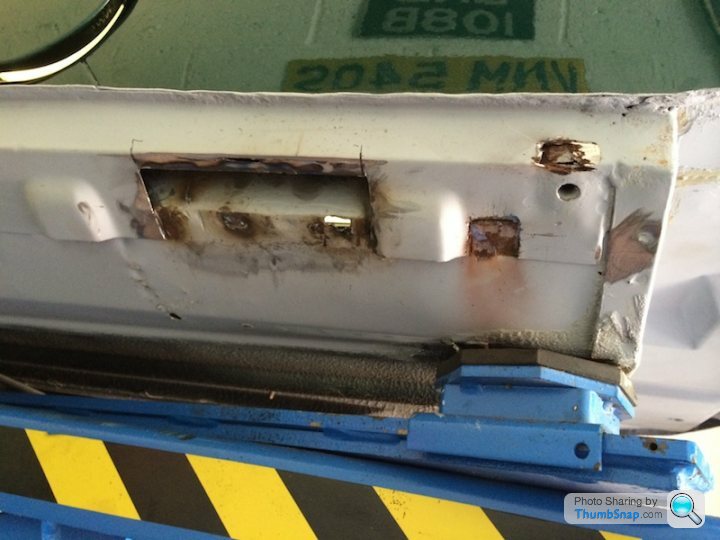
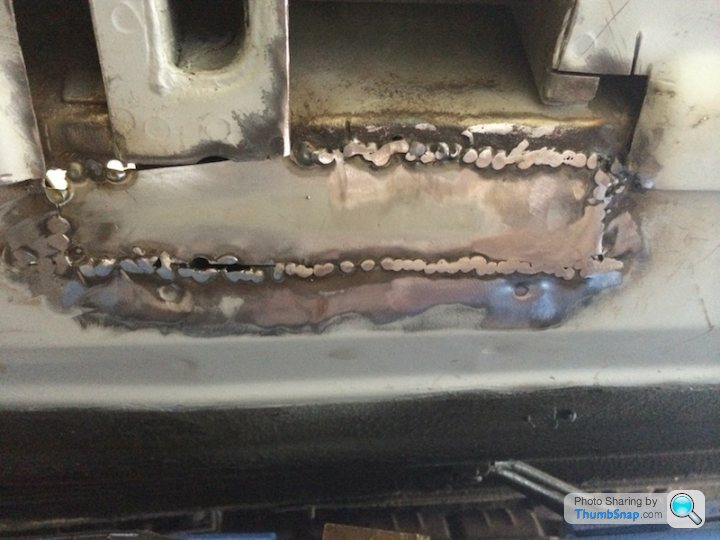
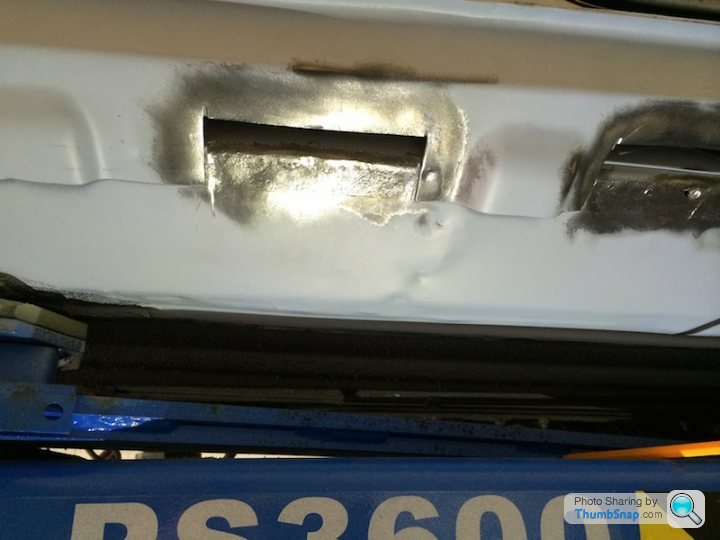
Then it was onto this one which was one of the largest holes in the sill
What happened at this point I'm not going to show because I ballsed it up, so it got a bit little bit bigger.

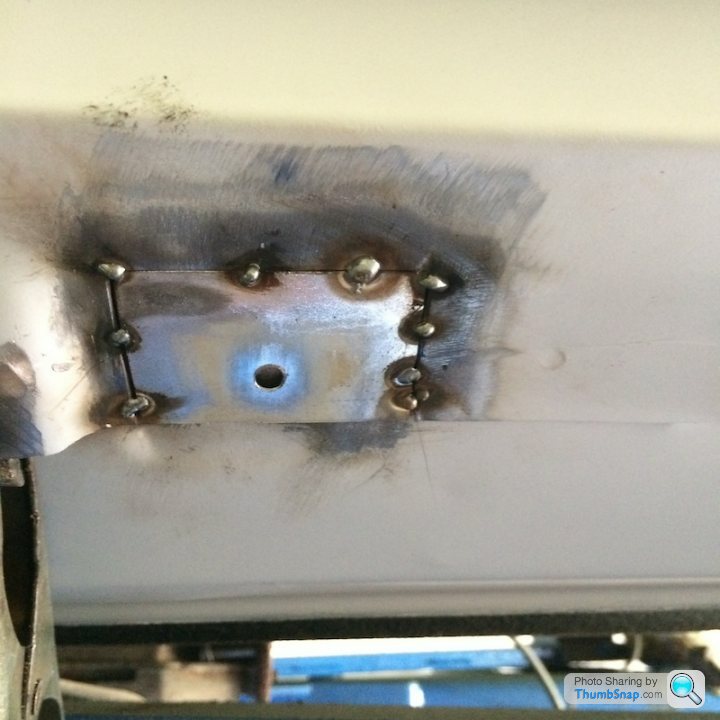
My neighbour then tacked the new plate in for me.....
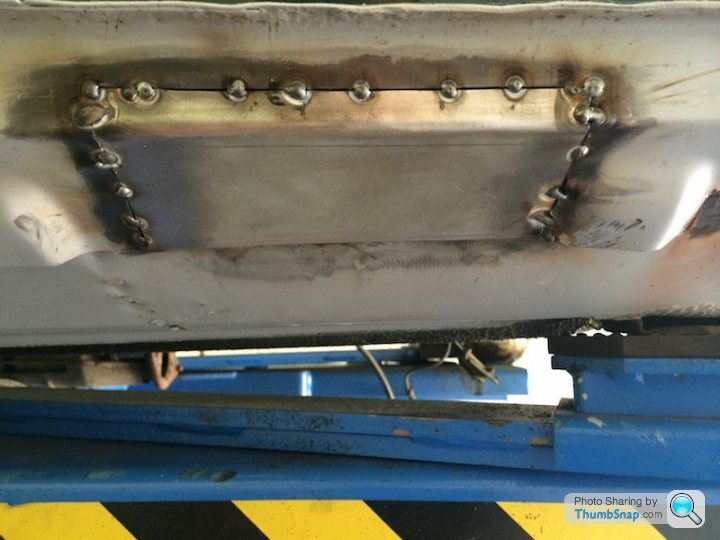
...and having to pick his son up from school left me on my own to fend for myself......
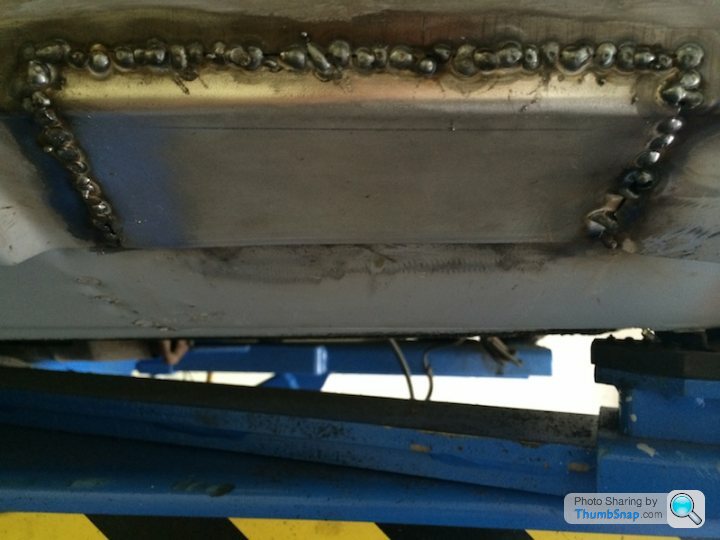
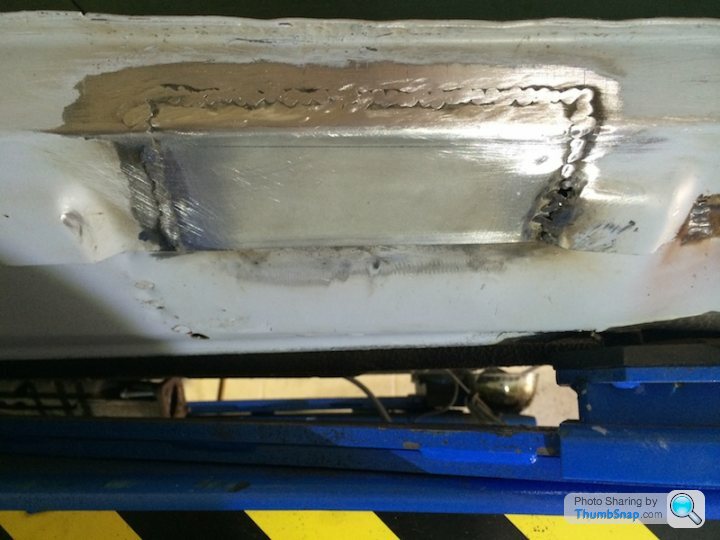
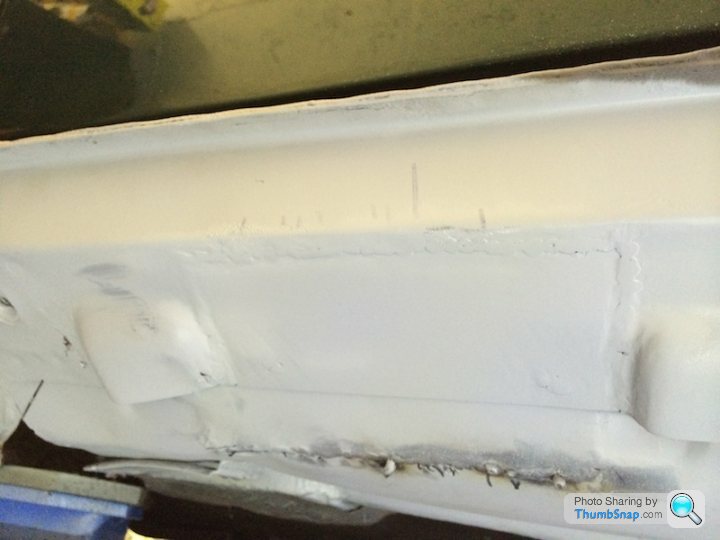
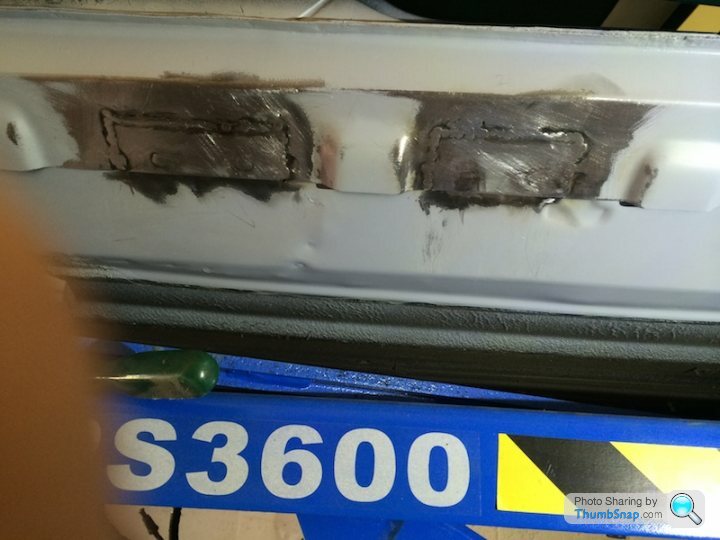
I had to leave a few bits on it as I was blowing holes and making a small area worse, so for now I cleaned it up as best I can until my neighbour can take a look in the morning. Apart from that I'm really happy with how the patch has turned out so far.

My neighbour also had the day off, so he kindly came out to give me a hand with welding up the holes I'd previously cut out in the passenger side sill. As said before under normal circumstances the sill would really need to be changed but I wanted to use it to get some experience with welding again.
This is what the sill looked like at the start of play
We then had a go at filling a few holes.
Then it was onto this one which was one of the largest holes in the sill
What happened at this point I'm not going to show because I ballsed it up
, so it got a bit little bit bigger.My neighbour then tacked the new plate in for me.....
...and having to pick his son up from school left me on my own to fend for myself......
I had to leave a few bits on it as I was blowing holes and making a small area worse, so for now I cleaned it up as best I can until my neighbour can take a look in the morning. Apart from that I'm really happy with how the patch has turned out so far.
- ****Arselickin' hat on*******
Thanks Pixel-Snapper
Have always admired the skill and workmanship that goes into some of the amazing builds on this and other forums, but now I can hopefully look at them and yours in a totally different light. I must admit I didn't realise ( forgot ) how long it can take to just do a small relatively easy repair patch, let alone a more complicated section or full panel........before we started I thought it was going to be one of them "five minute" Jobs and we would be done and dusted in a few days.
A small welded patch might not mean much to some, but for me to get a patch to a nearly finished state without blowing a load of holes, with enough weld to hold the dam thing in place and not potentially ruining hours of work within a few seconds because my hand slipped or I held the trigger for a split second longer, was a right mission to say the least....hopefully it should get easier
I'm welding Mr S, I'm welding ......... infact I'm welding so good, I iz gonna weld you up good and propaaaa boy !
Today is a bank holiday and a day off work yaaahhhhhhh, so this morning decided to go to a car/bike show held every year just around the corner from where I live. Unfortunately as per usual for a typical bank holiday it's raining.
Sadly due to the weather it was a poor turn out, so after having a chat and coffee with few friends and getting completely soaked through, decided to call it a day after just a few hours.
So it's left me with a bit of time to sort out and post a few more pics of progress so far.
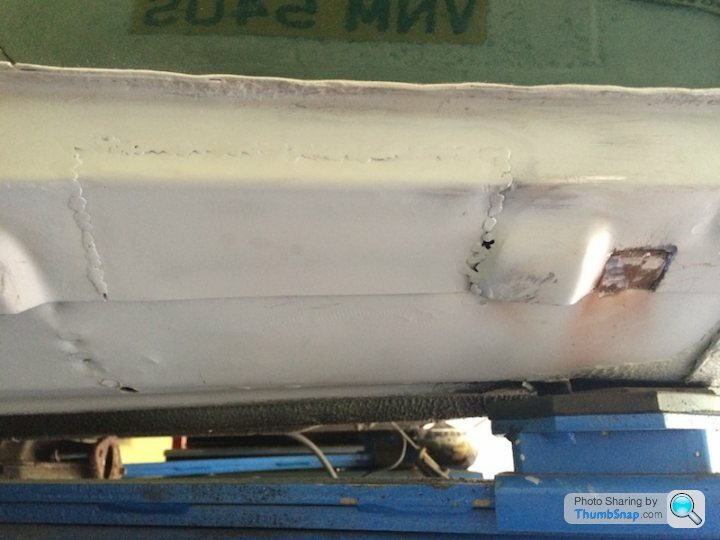
This was probably the worst area of the near side sill which had just been filled straight over. The floor previously had a patch put in but I wasn't happy with the way it was done, so cut it out.
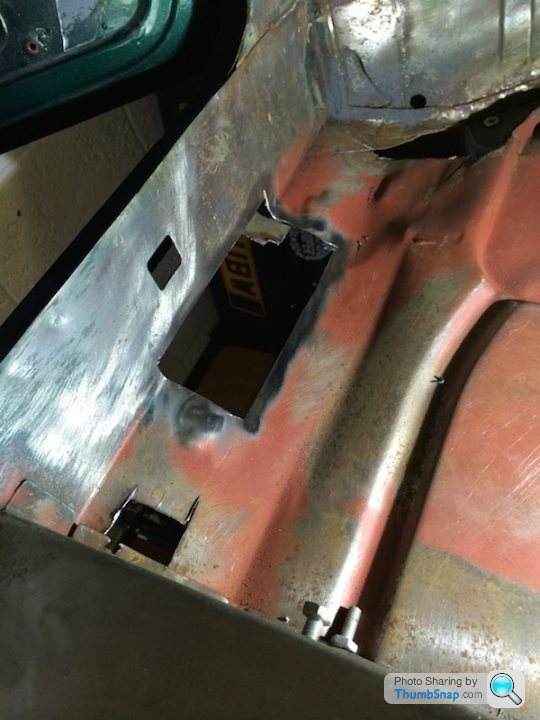
Inside the car with the old patch removed.
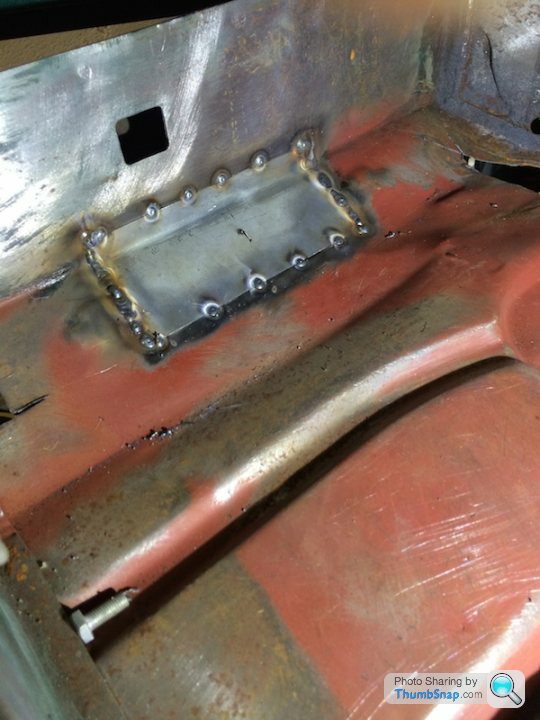
New patch tacked in.
Then it was on to this bit which seemed to take forever and proved pretty awkward for me.
Unfortunately I didn't take many pics at this point so this is the only one I have to show for my efforts.
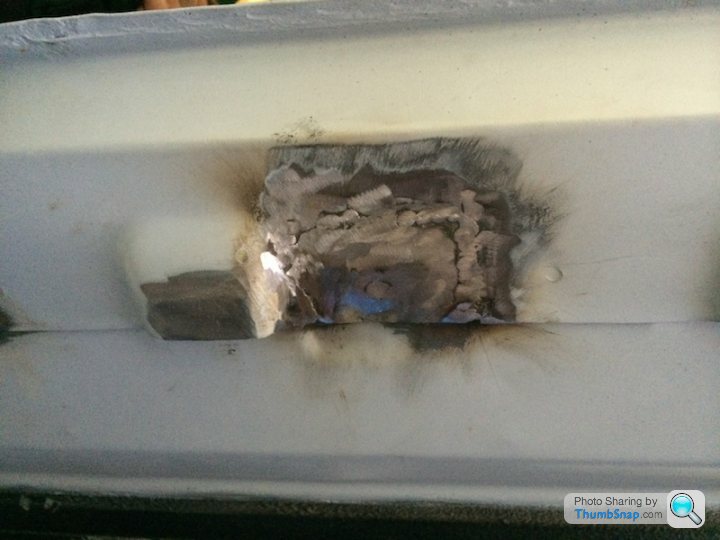
After countless hours of work and a final clean up of all the welds etc, this is what I have ended up with. Am really happy with how it's turned out and doesn't look to bad to be honest, any imperfections should be covered by stone chip and paint.

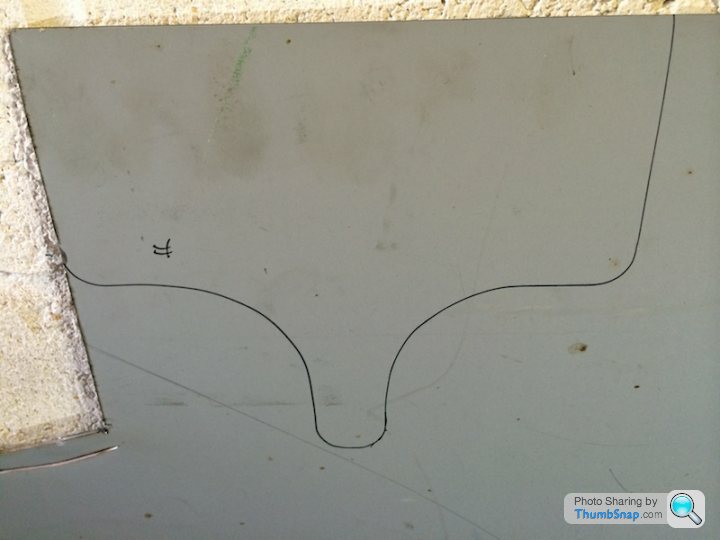
At this point I decided I wanted a rest from rotted out sills, so tackled the rear seat shelf again to get the final shape.
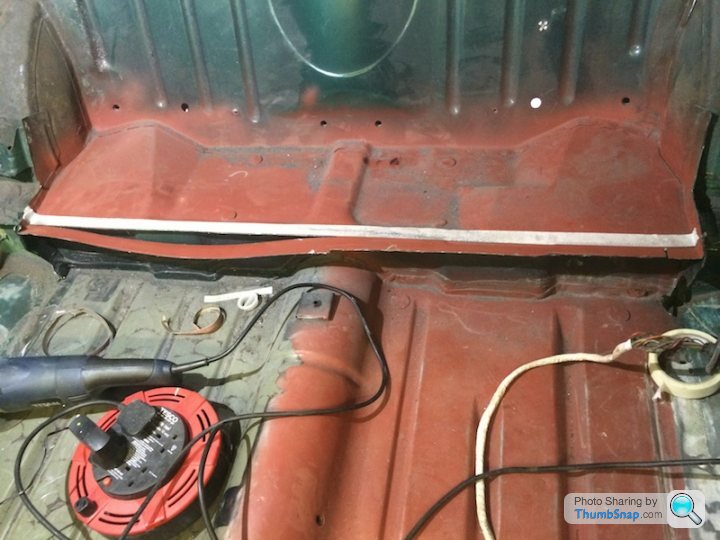

I didn't flush off the lip as there looked to be a spot welded seam, I thought to best leave well alone and just tidied up the edges.
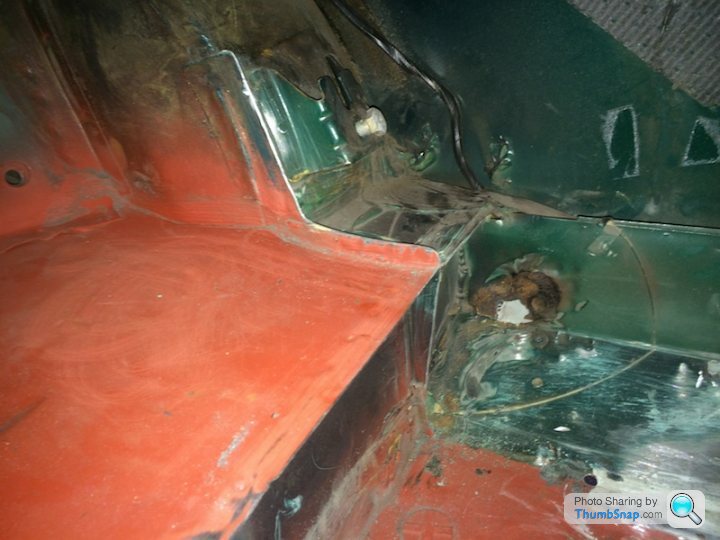
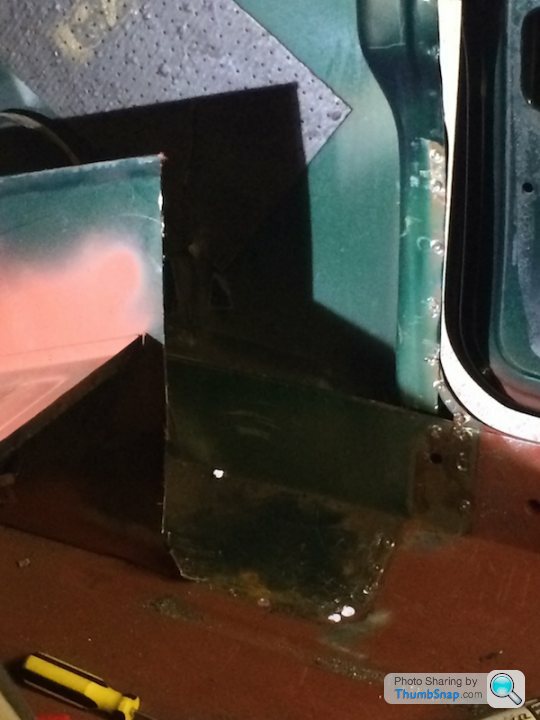
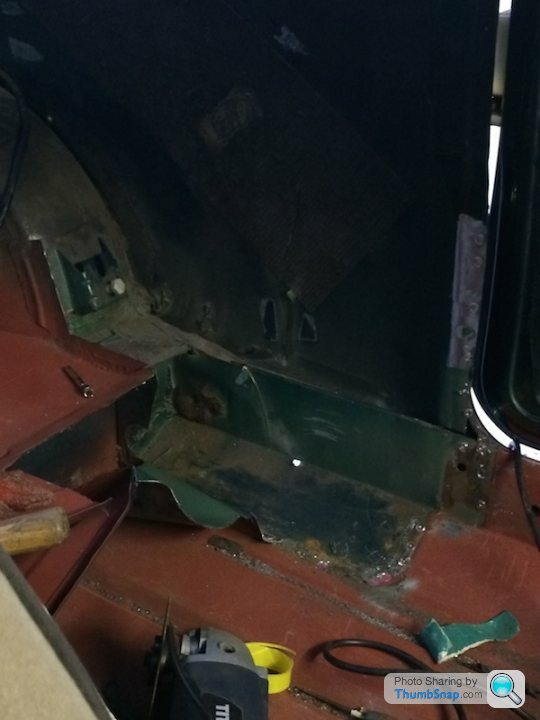
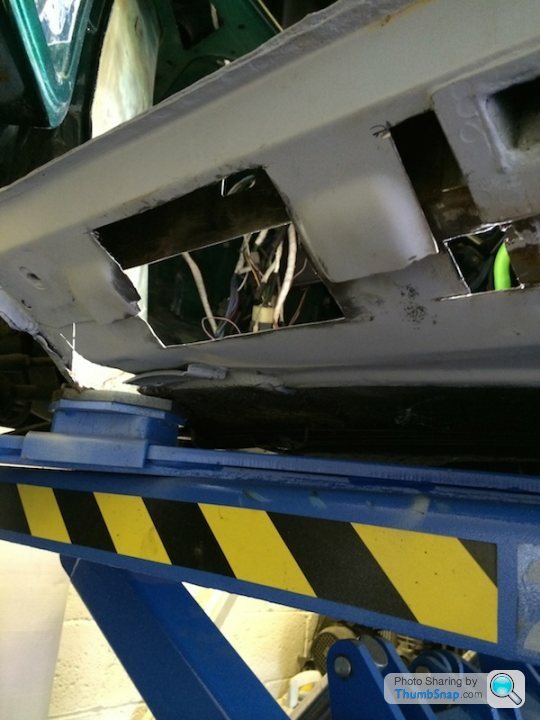
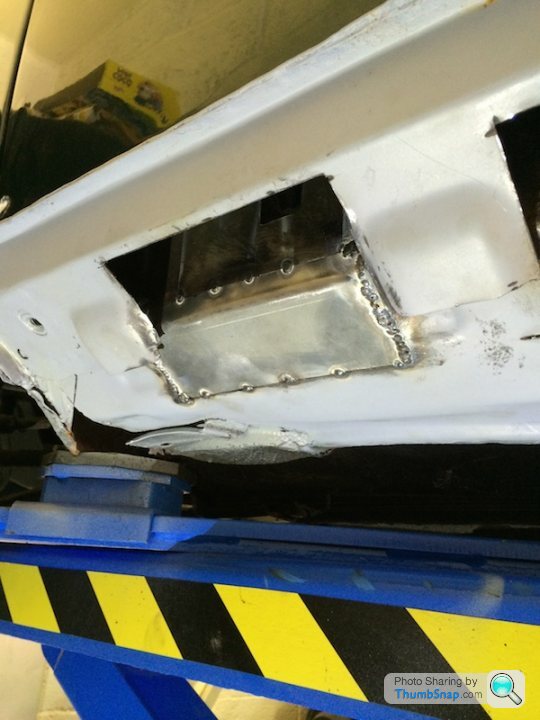
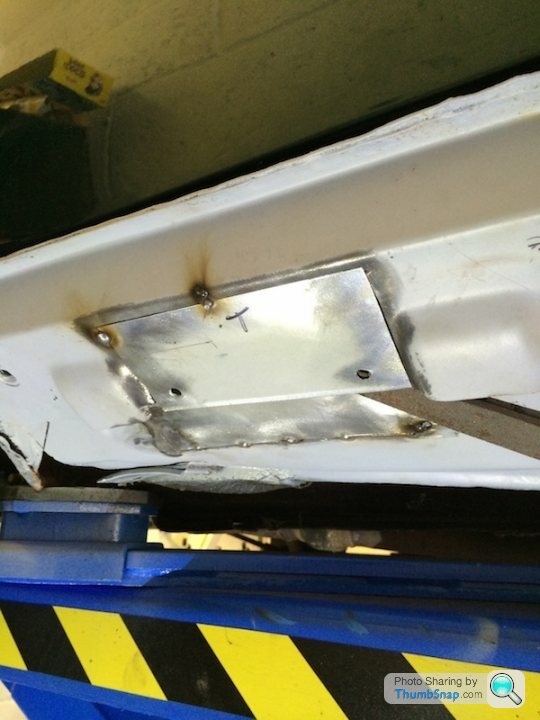
Having removed the rear Storage bins I was left with this area which just looked nasty and unfinished.
So made up a plate to tidy up the area and maybe add a little strength back.

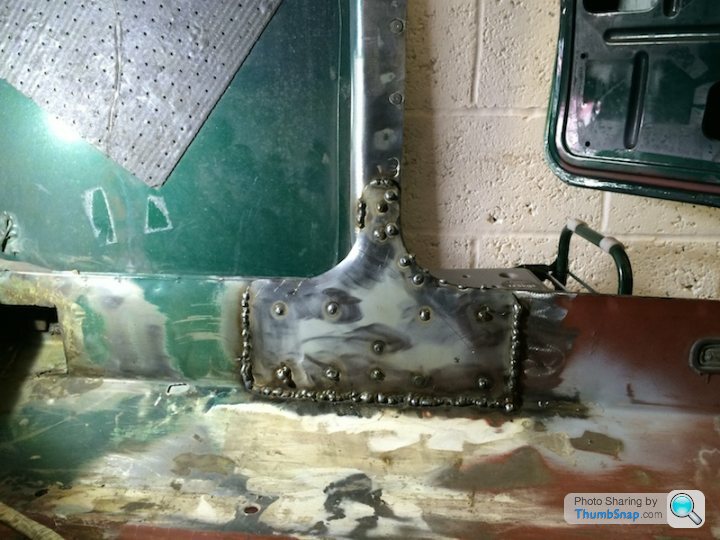
Finished, the rounded off parts do look a bit out of shape in the picture, on the car they are shaped to suit and look fine.......he says in a convincing manner

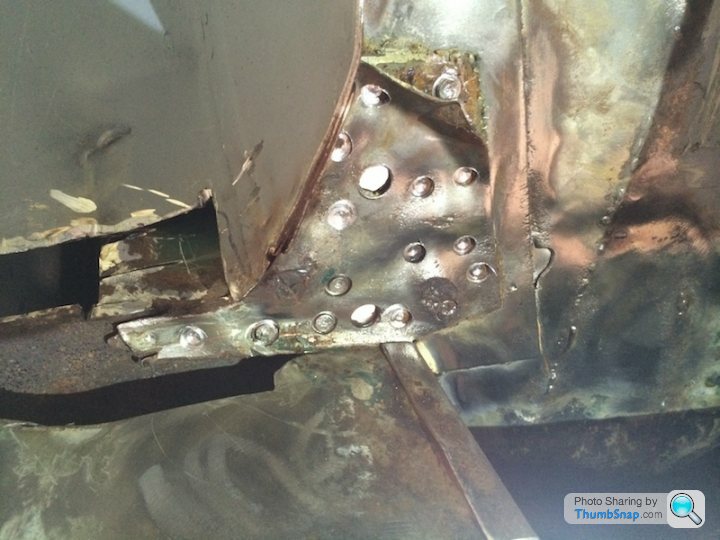
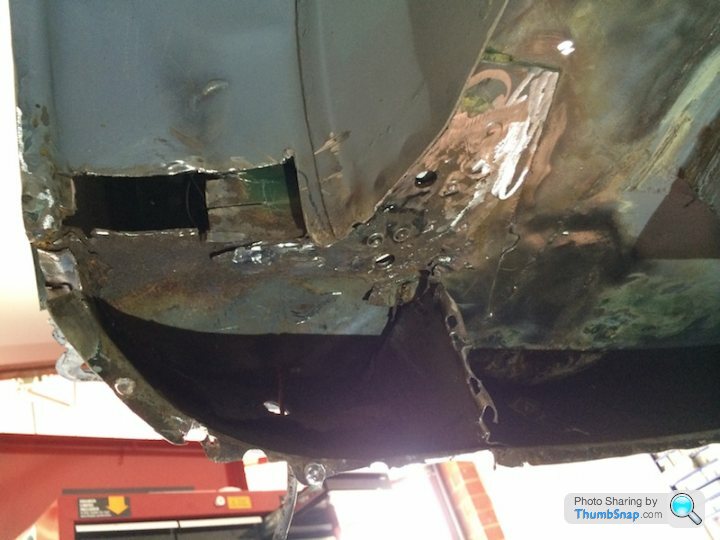
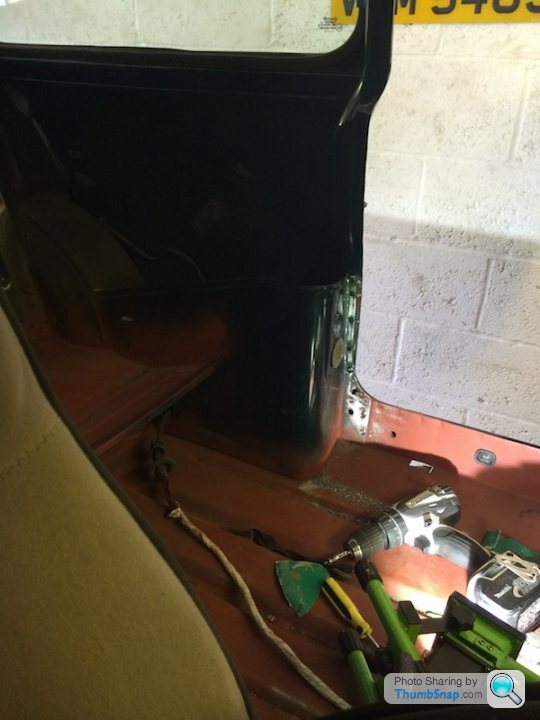
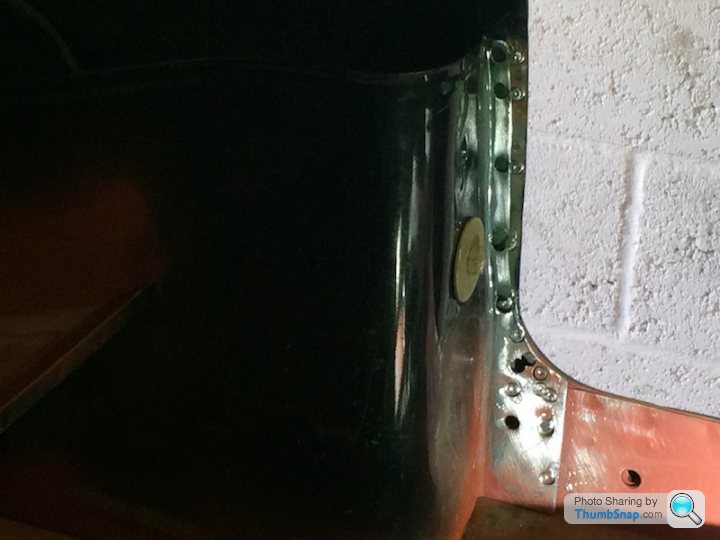
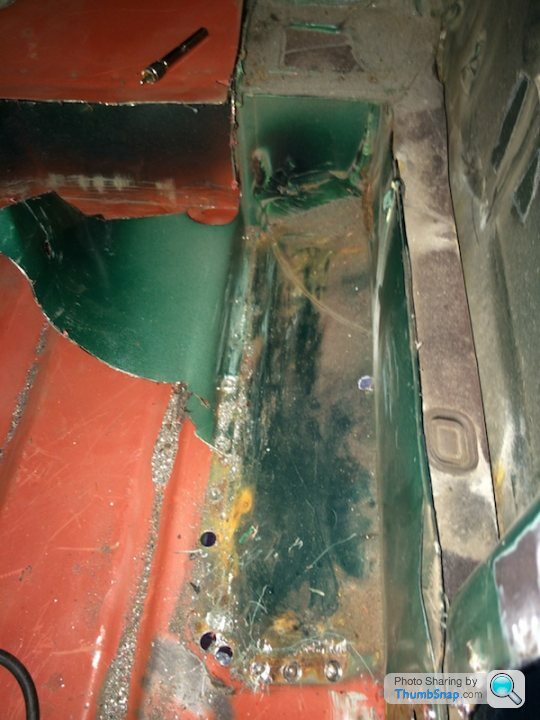
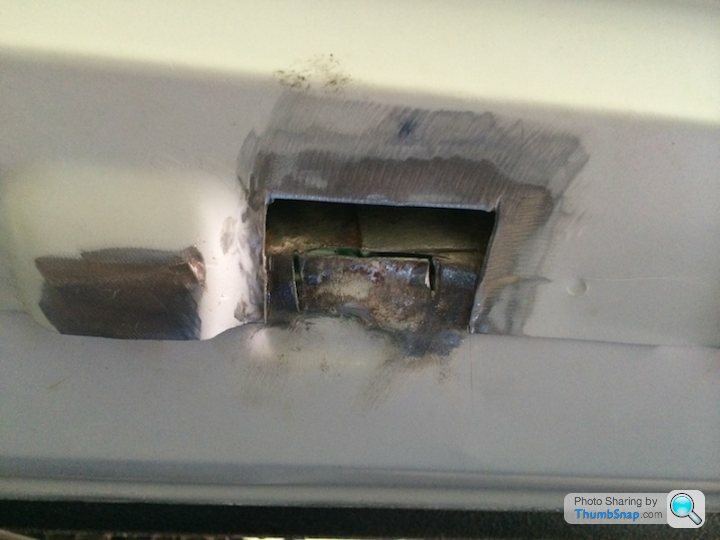
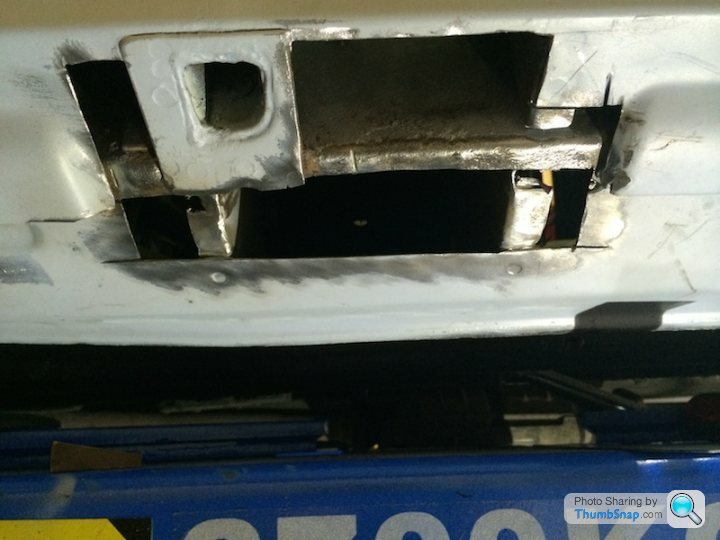
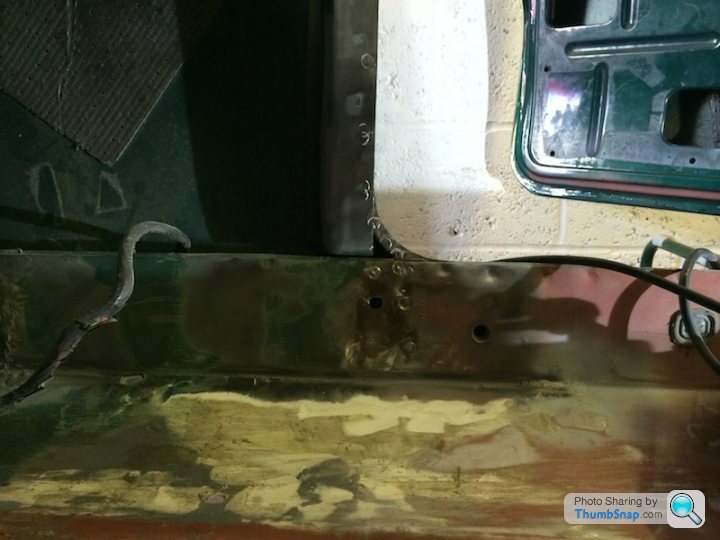
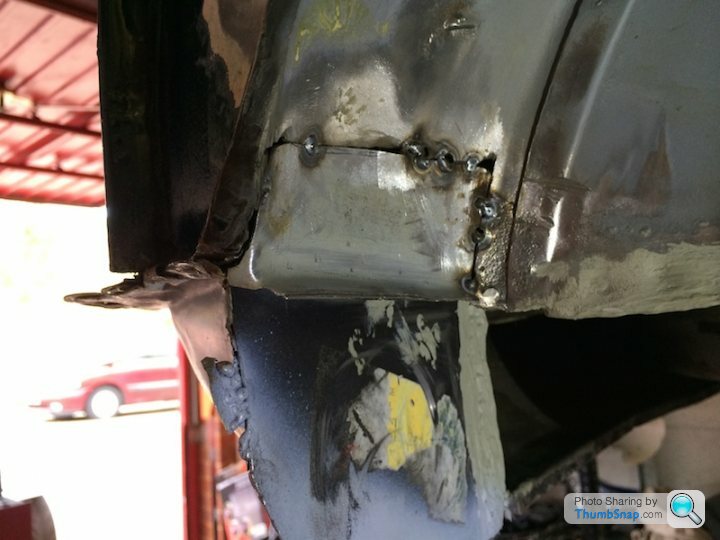
It was then onto the off side rear closing panel (cut out pics shown earlier in the thread)
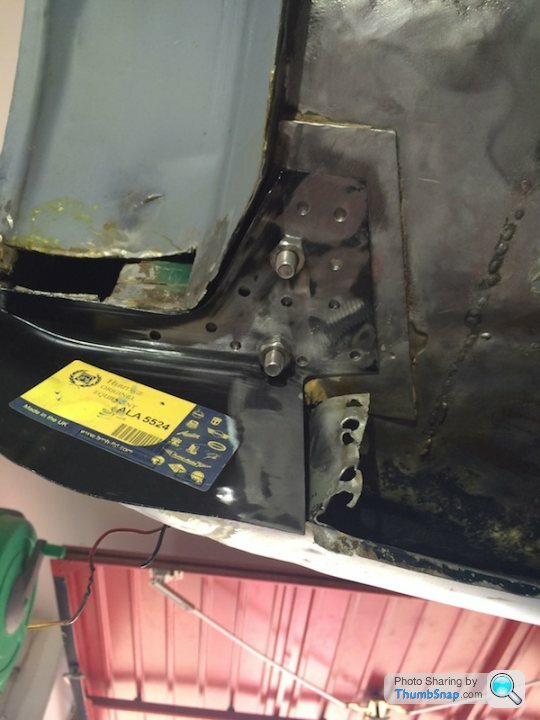
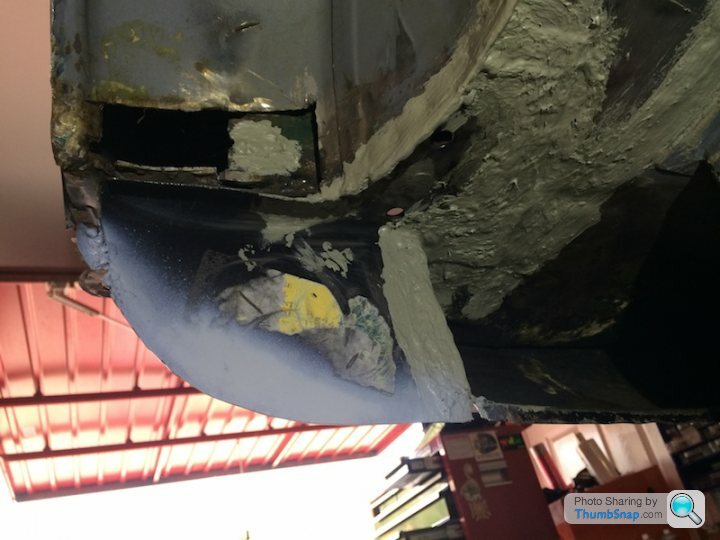
This area is now actually finished but for some reason these four pics are all I can find.
The Drivers side sill for more endless patch work...ho hum.
To be continued..............
Did anybody else make it to the Detling IMM show a few weeks back ?
Went with the ol' man on sunday and had a really enjoyable day out, got loads of ideas what I want to do go with the car now.
Needless to say came back with a van full of goodies including a few carbon bits which I will post up later.
Today is a bank holiday and a day off work yaaahhhhhhh, so this morning decided to go to a car/bike show held every year just around the corner from where I live. Unfortunately as per usual for a typical bank holiday it's raining.
Sadly due to the weather it was a poor turn out, so after having a chat and coffee with few friends and getting completely soaked through, decided to call it a day after just a few hours.
So it's left me with a bit of time to sort out and post a few more pics of progress so far.
This was probably the worst area of the near side sill which had just been filled straight over. The floor previously had a patch put in but I wasn't happy with the way it was done, so cut it out.
Inside the car with the old patch removed.
New patch tacked in.
Then it was on to this bit which seemed to take forever and proved pretty awkward for me.
Unfortunately I didn't take many pics at this point so this is the only one I have to show for my efforts.
After countless hours of work and a final clean up of all the welds etc, this is what I have ended up with. Am really happy with how it's turned out and doesn't look to bad to be honest, any imperfections should be covered by stone chip and paint.
At this point I decided I wanted a rest from rotted out sills, so tackled the rear seat shelf again to get the final shape.
I didn't flush off the lip as there looked to be a spot welded seam, I thought to best leave well alone and just tidied up the edges.
Having removed the rear Storage bins I was left with this area which just looked nasty and unfinished.
So made up a plate to tidy up the area and maybe add a little strength back.
Finished, the rounded off parts do look a bit out of shape in the picture, on the car they are shaped to suit and look fine.......he says in a convincing manner
It was then onto the off side rear closing panel (cut out pics shown earlier in the thread)
This area is now actually finished but for some reason these four pics are all I can find.
The Drivers side sill for more endless patch work...ho hum.
To be continued..............
Did anybody else make it to the Detling IMM show a few weeks back ?
Went with the ol' man on sunday and had a really enjoyable day out, got loads of ideas what I want to do go with the car now.
Needless to say came back with a van full of goodies including a few carbon bits
which I will post up later.Edited by Westy Pre-Lit on Friday 29th August 22:32
The IMM show at Detling proved to be a little damaging to the pocket.
Before the show I had already decided to repair the boot floor with patches and then make good, I had also spent many hours taking the underside of the boot floor back to bare metal so had already invested a lot of time into it, I wasn't really looking at or interested in any other options to be honest.
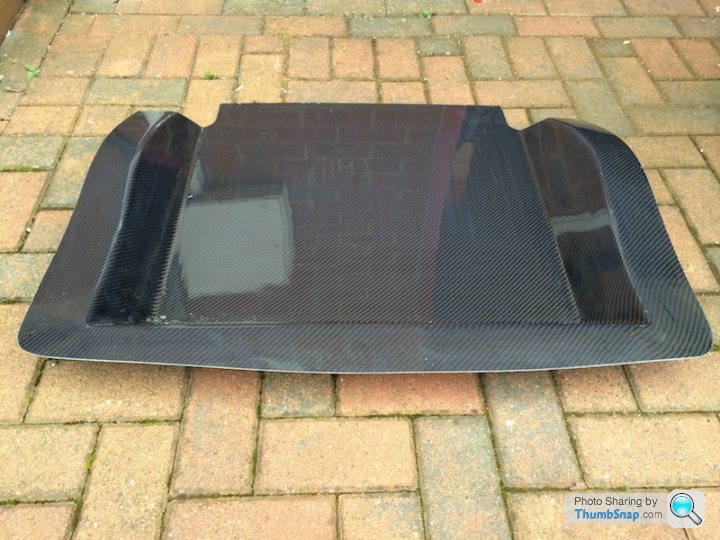
Anyway, whilst mooching about the show, the ol' man spotted a lovely looking race car. so we went over to take a peek and noticed it had a carbon boot floor fitted. Having spoken to the builder of the car and with a little coaxing, I finally managed to convince myself that installing a flat carbon boot floor ( one just so happened to be sitting next to his car and was for sale ) would eventually be a cheaper, easier and less time consuming route and anyway a circular aluminium fuel tank designed to sit in the wheel well can prove to be double the cost of the more common rectangular ones so would pay for itself over the long run. That's my excuse anyway and I'm sticking to it, the fact I'm sucker for a bit of carbon doesn't come into the equation
A few more bits of shiny shiny, I now have an incentive to get the subframe sorted.

Oh I Nearly forgot to post this.
Whilst at the show last week, we walked past a 'China smash stall' and my friends kids couldn't resist a go at smashing a few plates. As they took aim, I spotted this poor thing placed right in the middle of the stall and was being unfairly targeted by all the nasty kids. I had to walk way with my friends laughing at it's imminent demise, in the end I could take the pain no more and saved it from it's ugly fate.
Before the show I had already decided to repair the boot floor with patches and then make good, I had also spent many hours taking the underside of the boot floor back to bare metal so had already invested a lot of time into it, I wasn't really looking at or interested in any other options to be honest.
Anyway, whilst mooching about the show, the ol' man spotted a lovely looking race car. so we went over to take a peek and noticed it had a carbon boot floor fitted. Having spoken to the builder of the car and with a little coaxing, I finally managed to convince myself that installing a flat carbon boot floor ( one just so happened to be sitting next to his car and was for sale ) would eventually be a cheaper, easier and less time consuming route and anyway a circular aluminium fuel tank designed to sit in the wheel well can prove to be double the cost of the more common rectangular ones so would pay for itself over the long run. That's my excuse anyway and I'm sticking to it, the fact I'm sucker for a bit of carbon doesn't come into the equation
A few more bits of shiny shiny, I now have an incentive to get the subframe sorted.
Oh I Nearly forgot to post this.
Whilst at the show last week, we walked past a 'China smash stall' and my friends kids couldn't resist a go at smashing a few plates. As they took aim, I spotted this poor thing placed right in the middle of the stall and was being unfairly targeted by all the nasty kids. I had to walk way with my friends laughing at it's imminent demise, in the end I could take the pain no more and saved it from it's ugly fate.
Edited by Westy Pre-Lit on Saturday 30th August 09:29
I reckon by my rate it'll probably take about 3 years or so, having to do lot of grinding work at the moment so need to pick my times as I don't want to upset the neighbours. I do say to them to let me know if I annoying them with the noise and so far they have all be very good, hopefully that doesn't change.

pingu393 said:
Hooli said:
Welding, plastering & painting - all things that I can't do
It's the same with all three. Practise on scrap first before doing it for real. I always forget this rule and get the second weld spot-on and re-doing the first one.
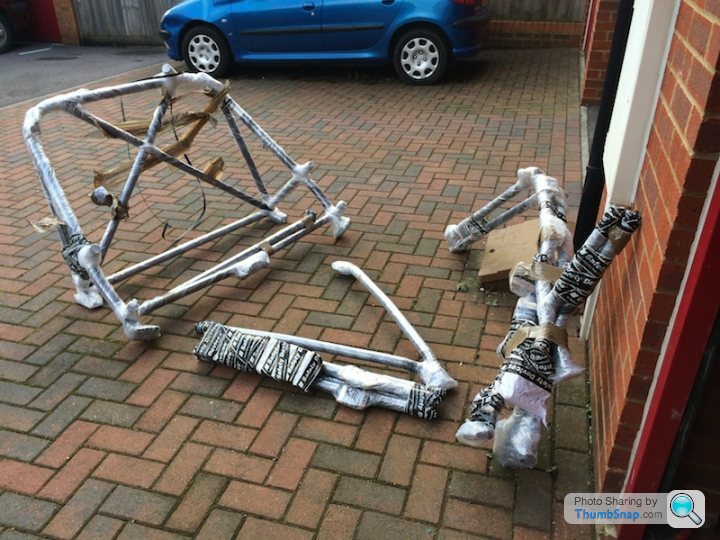
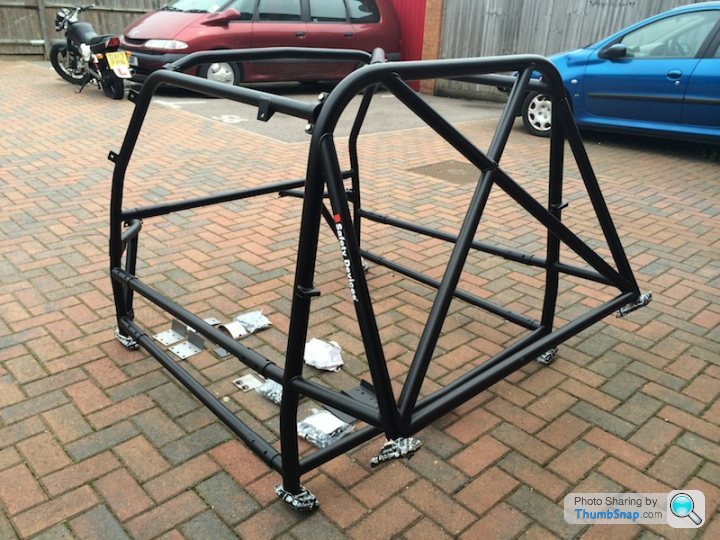
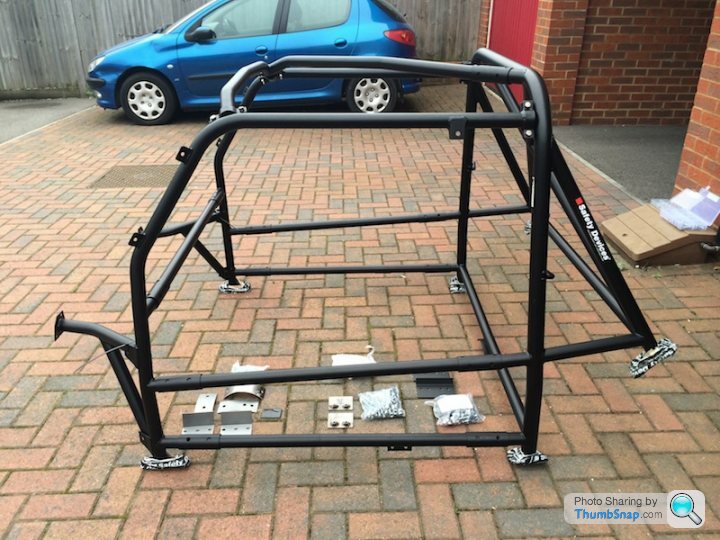
Had few hours free today so went and had a play in the garage again. Wanted to take a break from welding this weekend so decided to unwrap the cage and make sure everything is there........in other words I wanted to see what it looked like.
It's a Safety Devices Cage supplied by Mini Spares and I must say I'm really happy with the way it was delivered and packaged, the overall quality is very good so I'm well pleased with it. Took me about 1.5 hours just to unwrap it all and an hour to do a mock up fit.
It's a Safety Devices Cage supplied by Mini Spares and I must say I'm really happy with the way it was delivered and packaged, the overall quality is very good so I'm well pleased with it. Took me about 1.5 hours just to unwrap it all and an hour to do a mock up fit.
Edited by Westy Pre-Lit on Saturday 6th September 21:36
Gassing Station | Readers' Cars | Top of Page | What's New | My Stuff