Titivating my Mercedes 124
Discussion


ian316 said:
Good top of range ones like cabs and coupes will always make good money, A diesel saloon like mine was never going to make sense going forward the way they're witch hunting the diesels these days, So it was a new mot and gone for me still a sad day a 3ltr petrol coupe would have had the money spent without doubt
Who are you looking to persuade here, Ian? 'Cause we're not buying it. Mad to sell!Bit of an update. Slowly but surely it is all going back together. The only thing I am slightly cheesed off about is that on one side the grommets have been painted over. Anyway, all significant rust was cut out. Any minor rust was treated. Then two coats of zinc primer, three coats epoxy mastic, three coats stone chip, three coats paint. The fixings will be given a clear protective wax as well.
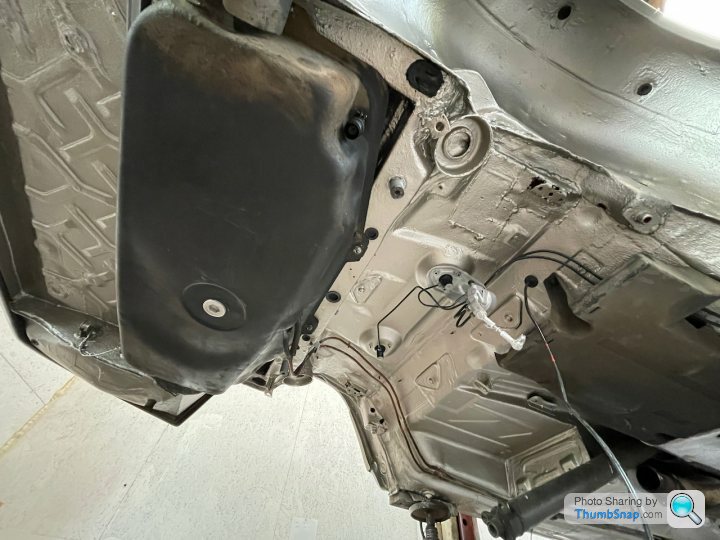
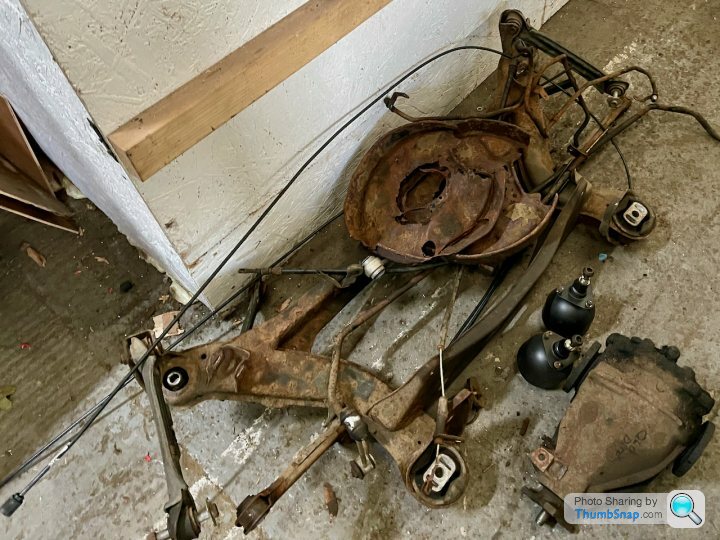
On the suspension, all pipework is new, all bushings and links are new, the subframe is freshly powder coated, the spheres are new, lots of new accessories, everything else aqua-blasted and painted. It is looking like new under there.
New anti-roll bar and accessories:

These brackets are NLA so new ones have been fabricated. Pretty neat:

New spheres and pipes:

Sub-frame going back together:

Sparkling new underside. New tank filter visible. Old one wasn't actually too bad.

On the suspension, all pipework is new, all bushings and links are new, the subframe is freshly powder coated, the spheres are new, lots of new accessories, everything else aqua-blasted and painted. It is looking like new under there.
New anti-roll bar and accessories:
These brackets are NLA so new ones have been fabricated. Pretty neat:
New spheres and pipes:
Sub-frame going back together:
Sparkling new underside. New tank filter visible. Old one wasn't actually too bad.


We've been back on the road for a couple of weeks now and the car is back in daily service, approaching 418,000 miles. I am very pleased with the underside repair works. There are three snagging issues. One of the seat belts for the flip up boot seats has been reinstalled with a twist; the offside rear seat back latch is very stiff and squeaks like hell; and the replacement diff did not cure the whirring from the driveline. I will busy myself fixing the first two when time allows. The latter is either the prop shaft carrier bearing or the gearbox output shaft bearing: I will have the former replaced first.
The "new" diff is good. It is so long since I drove the car, I cannot tell whether there is a performance deficit. I think it is slightly slower but it cruises significantly faster, resulting in 3 points on the licence the other day. The speedo also under-reads by about 3mph. I have a correct replacement speedo head which I want to get serviced and cleaned and also have the mileage adjusted... upwards by 200k.
Next job is to get the wings replaced and have all bits and bobs of rust on the body dealt with. The main issue will be the windscreen aperture which needs de-rusting and rust-proofing before a new screen is installed. It is never ending. Oh and I want to get the driver's seat bolster repaired.
Anyways, I came back to the office the other night to find the car had made friends with a passing 190:
Some work.
New prop shaft carrier bearing cured the driveline whirring noise. Phew.
New wiper motor installed. Last week the wiper fuse blew and it seemed to be running slow. I've had the linkage lubricated, too.
Nothing else to report. I'd sourced a new vacuum pump as it is 175k miles since the current one was installed and the last one gave out at 250k miles but I completely forgot to give it to the man to install.
The visible bodywork needs tending to quite urgently. The windscreen aperture is rusty and needs repair as the screen has cracked. Both front wings need replacement. And there are various scabs on the body that I'd like to see fixed. More expense.

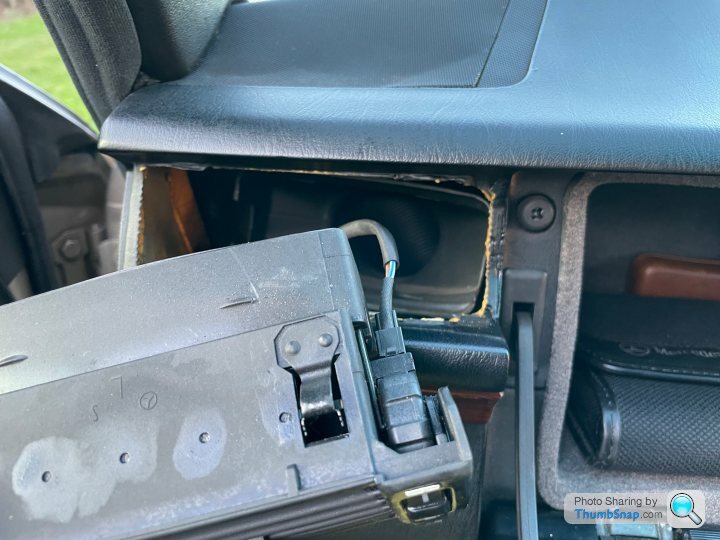
The illumination if the fan speed control and driver's side temperature control ceased to work; likewise the passenger side air vent thumb wheel Taking advantage of some sudden free time I set about fixing them. It was surprisingly easy. The fan and temperature control share the same little 1.2V bulb, its light distributed by means of a curious clear plastic circle. The air vent has a 0.4V bulb.
Pull off the fan speed and air distribution knobs with pliers, the jaws protected by a cloth. Undo the 24mm nuts found underneath. The wood trim then hides upwards.
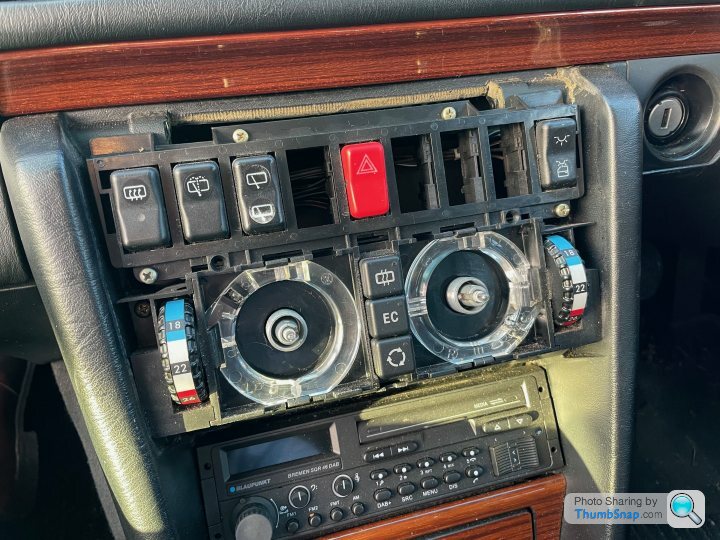
There is no need to go further but I wanted to remove the control unit to my desk to have a look at it.
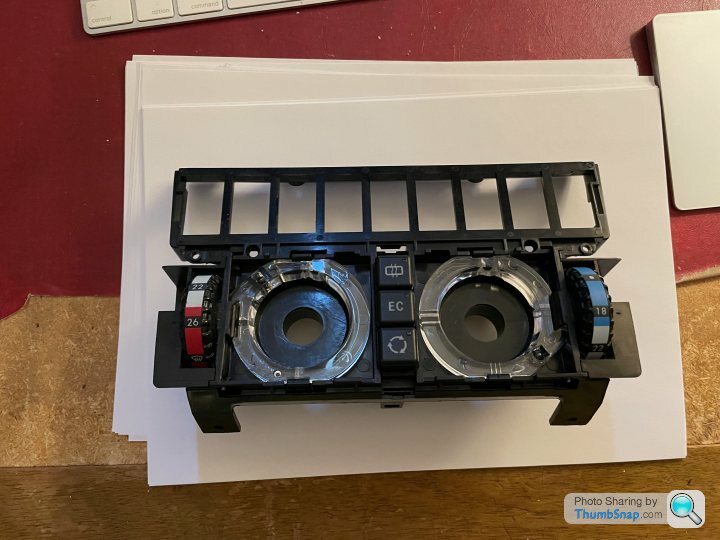
The clear plastic things just clip in and out. The tiny bulbs likewise.
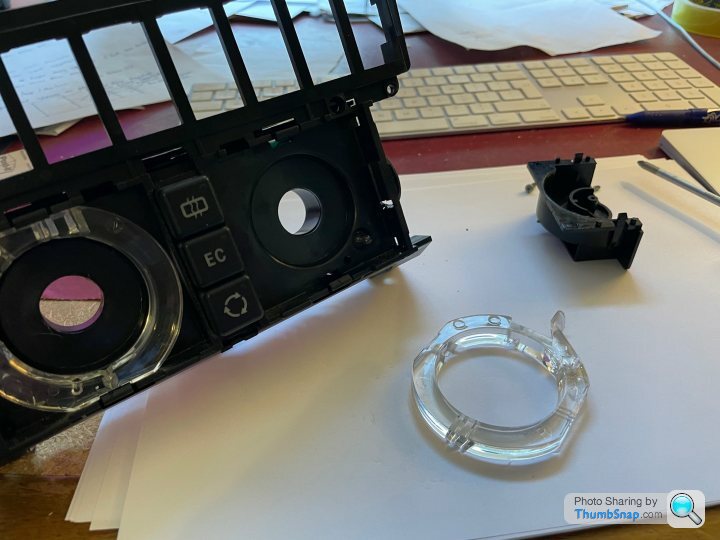

The air vent is removed by carefully prying up some tiny clips. The bulb just pulls in and out.
I took the opportunity to clean all the dust and gunk out of the revealed nooks and crannies. All in all a 15 minute job.
Pull off the fan speed and air distribution knobs with pliers, the jaws protected by a cloth. Undo the 24mm nuts found underneath. The wood trim then hides upwards.
There is no need to go further but I wanted to remove the control unit to my desk to have a look at it.
The clear plastic things just clip in and out. The tiny bulbs likewise.
The air vent is removed by carefully prying up some tiny clips. The bulb just pulls in and out.
I took the opportunity to clean all the dust and gunk out of the revealed nooks and crannies. All in all a 15 minute job.
bolidemichael said:
What is the appeal and function of a leather topped desk? Is it, as you say, solely for comfort when handwriting?
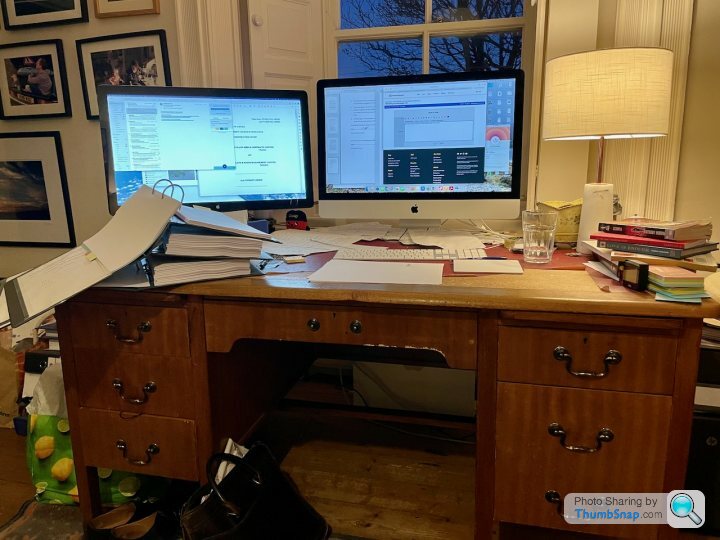
They are simply beautiful things to have and to work at. The leather top is for writing on: more comfortable and the pen does not damage the surface. I rather fancy any of these (although the latter has a beautiful timber top which would call for a leather desk mat at a mere £675 from the ever-so-reasonably-priced Smythson of Bond Street). Asking prices range from £2k to £3k although I find with antiques one can usually get 25 to 33% off. The middle one is my favourite. And the most expensive.


A great DIY success this evening.
Earlier today my steering started rattling as if there was a pebble in it. The noise was at the top of the steering column. The steering still worked and the wheel was on solid. It felt like there was something loose in the wheel hub itself. So I removed the airbag, a new one for me, and, sure enough, a bolt from within had come loose and was rattling around in there.
The airbag is quite easy to remove. First disconnect the battery. Then unscrew it from the back of the steering wheel. There are two Torx T27 screws, one on each side. Top tip: extend the steering column before disconnecting the battery. Needless to say, I didn't. This was the hardest part of the job. My screwdriver was a bit too long and it was tricky to find the screw head.

That done, pull off the red plug from the centre of the airbag and carry the airbag unit to your garage as if it were a hand grenade. Reflect on how it never bothers you when it is smack in front of your chops all day long.

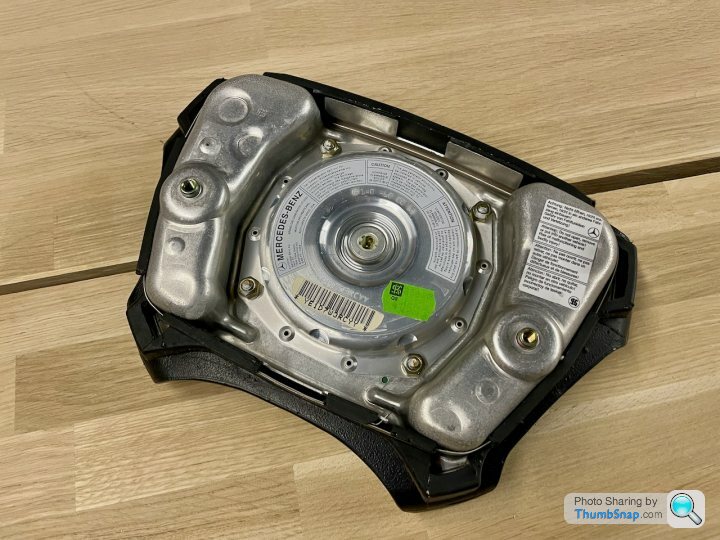
Then spot stray bolt. Replace it and tighten. Check the others and tighten them.

Put everything back together. Start the engine from the passenger seat with the front doors open, just in case. Smiles with satisfaction when the airbag light stays off and the car works perfectly without rattling. Be amazed that it took only 20minutes. Then realise that the clock doesn't keep time with the battery disconnected. It took an hour.
Earlier today my steering started rattling as if there was a pebble in it. The noise was at the top of the steering column. The steering still worked and the wheel was on solid. It felt like there was something loose in the wheel hub itself. So I removed the airbag, a new one for me, and, sure enough, a bolt from within had come loose and was rattling around in there.
The airbag is quite easy to remove. First disconnect the battery. Then unscrew it from the back of the steering wheel. There are two Torx T27 screws, one on each side. Top tip: extend the steering column before disconnecting the battery. Needless to say, I didn't. This was the hardest part of the job. My screwdriver was a bit too long and it was tricky to find the screw head.
That done, pull off the red plug from the centre of the airbag and carry the airbag unit to your garage as if it were a hand grenade. Reflect on how it never bothers you when it is smack in front of your chops all day long.
Then spot stray bolt. Replace it and tighten. Check the others and tighten them.
Put everything back together. Start the engine from the passenger seat with the front doors open, just in case. Smiles with satisfaction when the airbag light stays off and the car works perfectly without rattling. Be amazed that it took only 20minutes. Then realise that the clock doesn't keep time with the battery disconnected. It took an hour.
harrykul said:
Q. Did you retrofit the electric steering column, and was it difficult? I had one in my first 124, and would quite like to have it on the current one...
No, it was already on the car. The electric steering column looks completely different to the regular item and a ball ache to retrofit but what do I know?
Gassing Station | Readers' Cars | Top of Page | What's New | My Stuff