Ferrari F430 Spider
Discussion


mwstewart said:
Thanks very much for the link.
Those mounts are actually a really bad idea because thermal expansion in the M3 system results in longitudinal growth of approx 30mm. The OEM mounts are designed to accommodate that and of course the vertical movement & vibrations transmitted from the engine. The Hack mounts provide a very small degree of vibration isolation - in exhaust terms a very small - and don’t allow for any movement whatsoever. The increased stress placed on the exhaust itself is considerable. Throw into the mix some heat, aggressive driving, varying degrees of worn engine/gearbox mounts, and you have a recipe for exhaust system component failiure.
The F430 Challenge exhaust I am using weighs a third of the E46 rear silencer so in my application the OEM BMW mounts are actually over-specced. I expect new mounts to last years and years. Incidentally one of the F430’s design issues was the exhaust mounting system. It is near solid and does not allow for much thermal expansion. It is the reason the standard manifolds and mounting brackets fail with regularity.
Thanks for the comprehensive reply Those mounts are actually a really bad idea because thermal expansion in the M3 system results in longitudinal growth of approx 30mm. The OEM mounts are designed to accommodate that and of course the vertical movement & vibrations transmitted from the engine. The Hack mounts provide a very small degree of vibration isolation - in exhaust terms a very small - and don’t allow for any movement whatsoever. The increased stress placed on the exhaust itself is considerable. Throw into the mix some heat, aggressive driving, varying degrees of worn engine/gearbox mounts, and you have a recipe for exhaust system component failiure.
The F430 Challenge exhaust I am using weighs a third of the E46 rear silencer so in my application the OEM BMW mounts are actually over-specced. I expect new mounts to last years and years. Incidentally one of the F430’s design issues was the exhaust mounting system. It is near solid and does not allow for much thermal expansion. It is the reason the standard manifolds and mounting brackets fail with regularity.

16M rear anti-roll bar
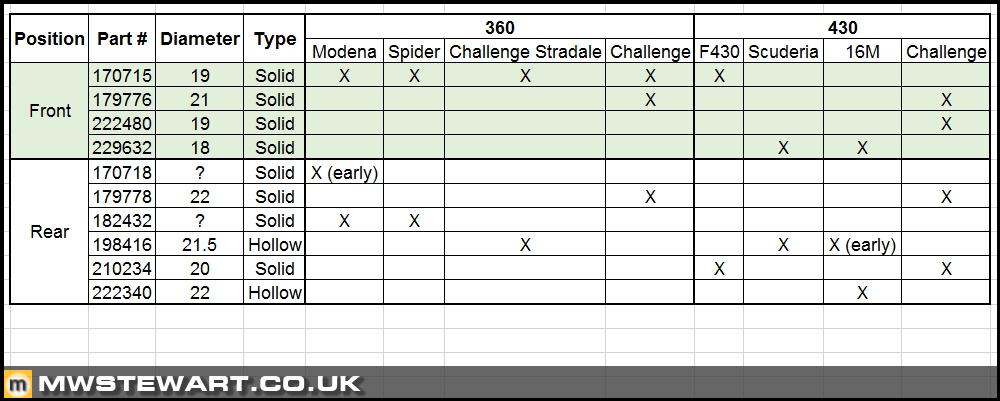
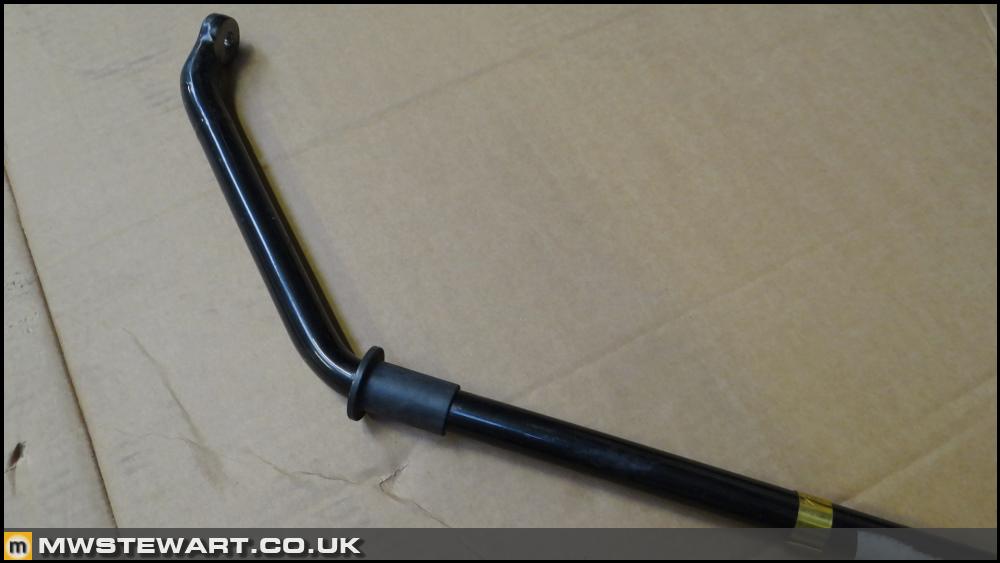
A number of ARBs have been produced for the 360/430 platform and I've documented them in a table for reference. My starting point is always the 16M and I discovered that the first cars were fitted with the Challenge Stradale/Scuderia 21.5mm hollow rear bar, then at some time into the production run a 16M specific hollow bar was produced at 22mm diameter. Unfortunately it's approximately twice the cost of the 21.5mm bar, but I've gone with it.
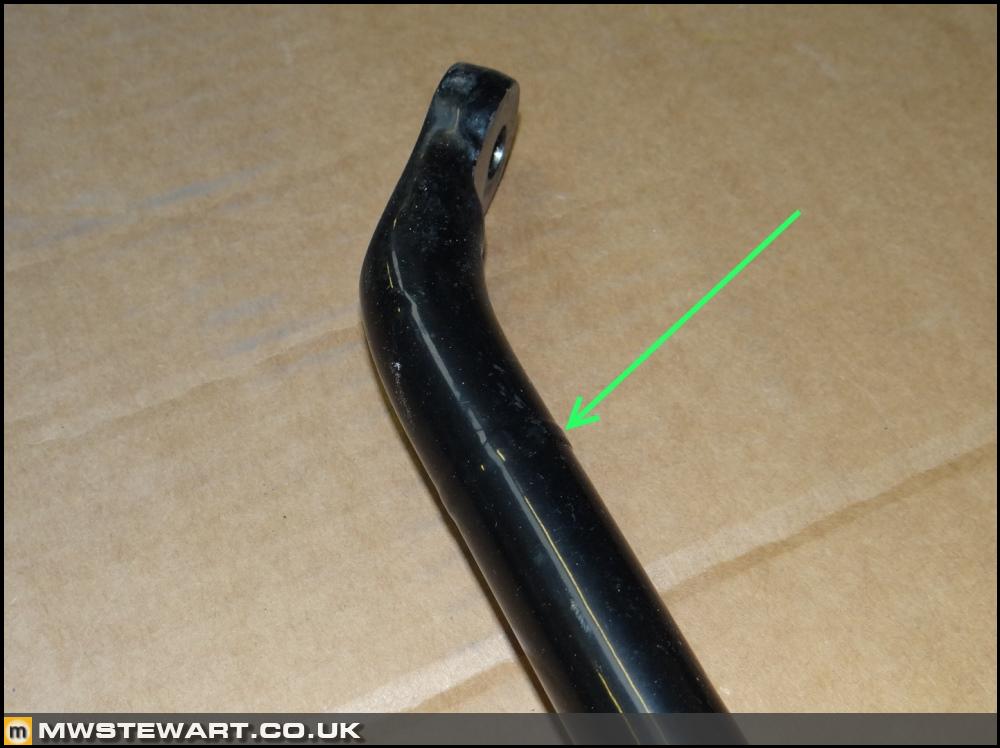
The later rear ARBs featured a plastic bush collar rather than machined aluminium. I noticed this on my original bar.
This photo shows the weld between the hollow tube sections.
I've gone with new OEM bushes and drop links.
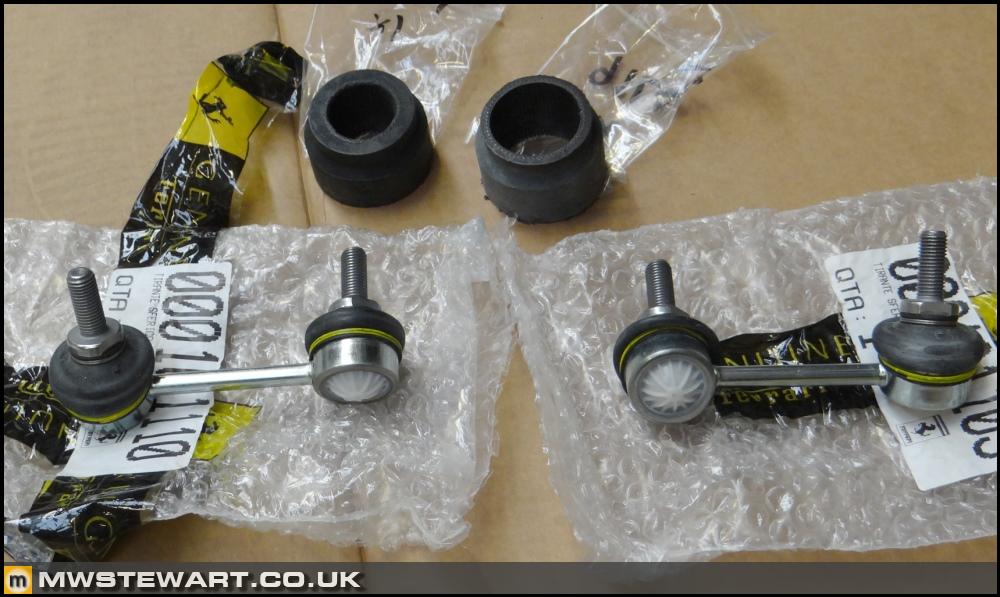
The rear ARB is an absolute doddle to fit. I really like how it's integrated with the chassis members on each side and also how the mountings are designed such that the bushes remain the same part regardless of bar diameter. I took a tip from Voicey's blog and used red rubber grease on the contact areas. I've not used it before but it seems a decent product.
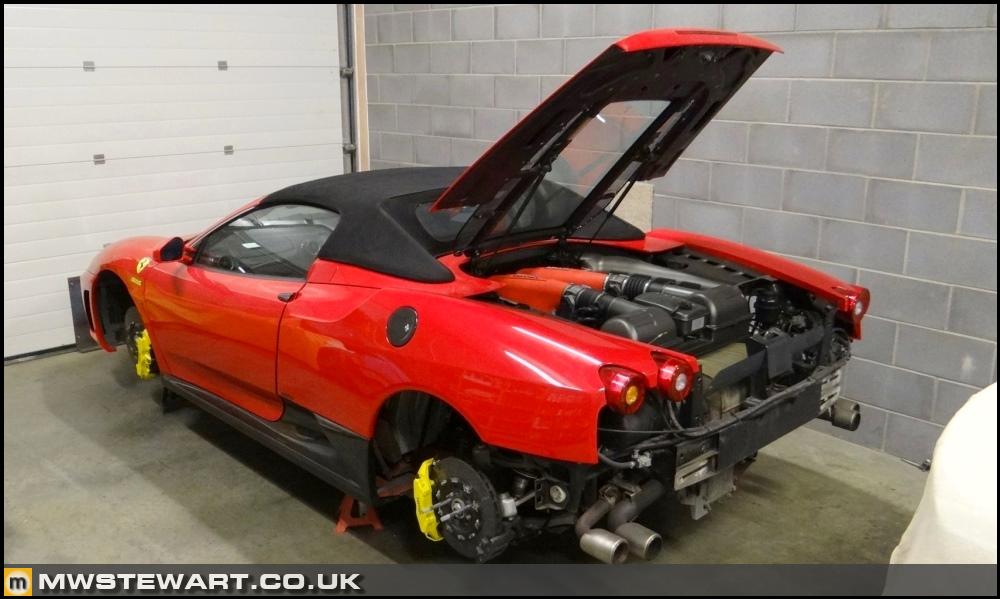
Standard exhaust removal
The standard exhaust has gone for two reasons: 1) I don't like the sound or the effect the valves have on driving, and 2) I want a lighter solution that suits the exhaust outlet positions on the Scuderia rear bumper.
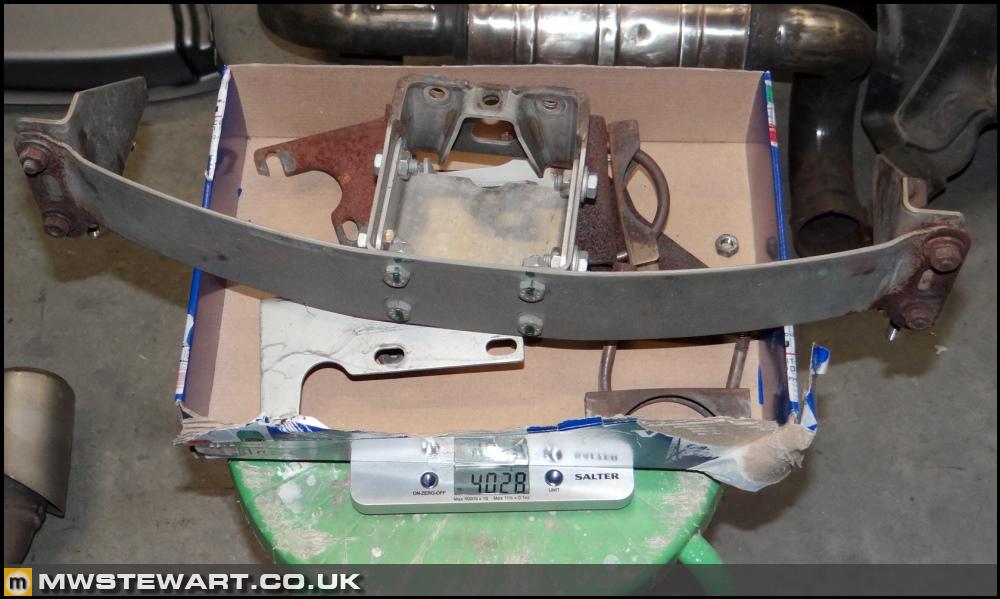
In preparation for the new exhaust I've also removed the standard fixing brackets & fastenings ready for replacement by a bespoke mounting solution. The weight of the original components is as photographed.
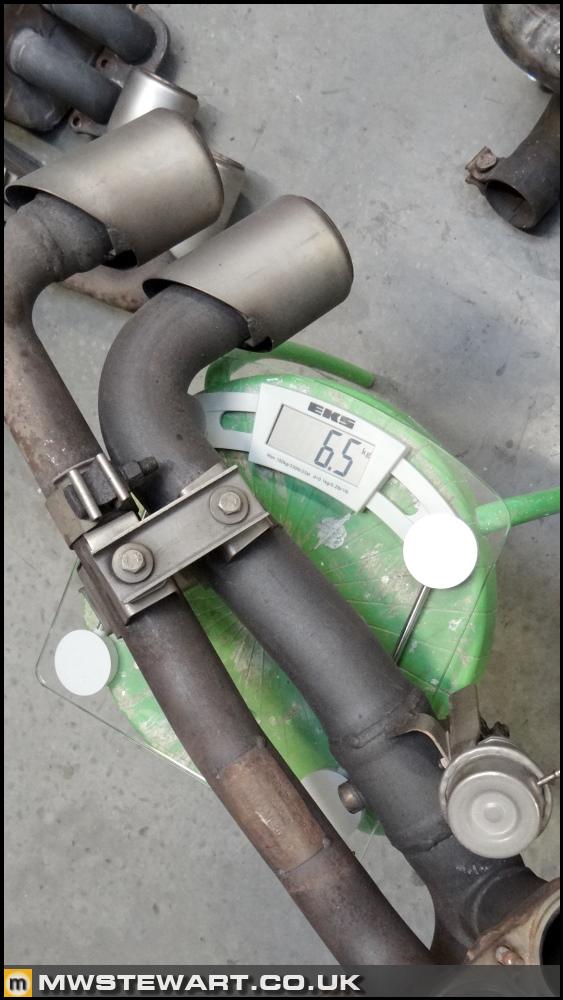
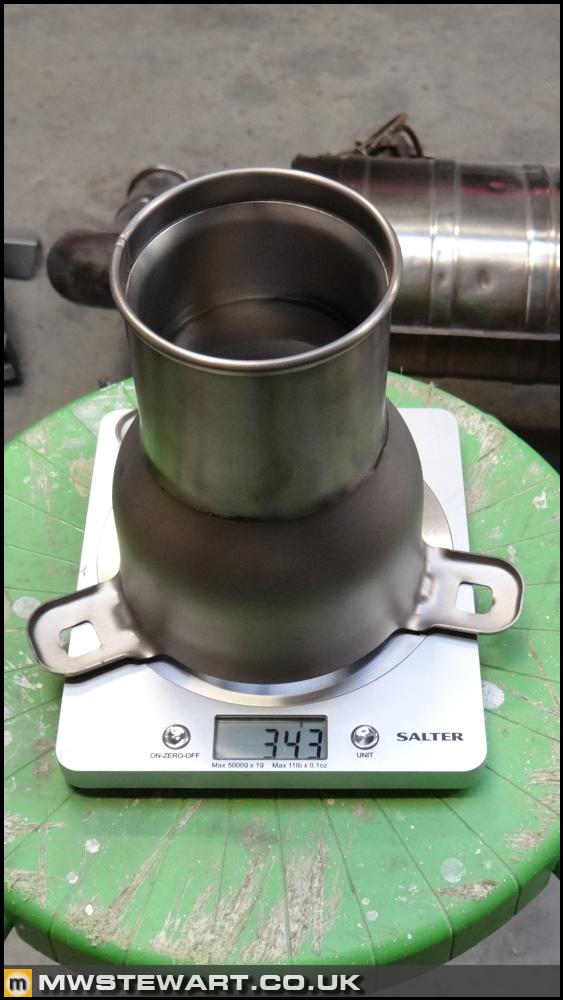
The F430 tailpipe sections are very heavy, but The Challenge (and Scuderia) systems make do without them hence shed quite a bit of weight. I have the optional titanium tips which save further over the standard Scuderia stainless tips and as the photo shows, I will go from 13kg total to just 686 grammes!
I also removed the silencer and weighed it at 12.8kg. Four of the six mounting nuts & studs snapped off which is something that also happened on my last car. I'm not reusing the standard silencer but if I was I fix the issue by grinding off the welded studs and replacing with stainless bolts and copper nuts.
More on component weights and comparisons to follow once I've finished fabrication.
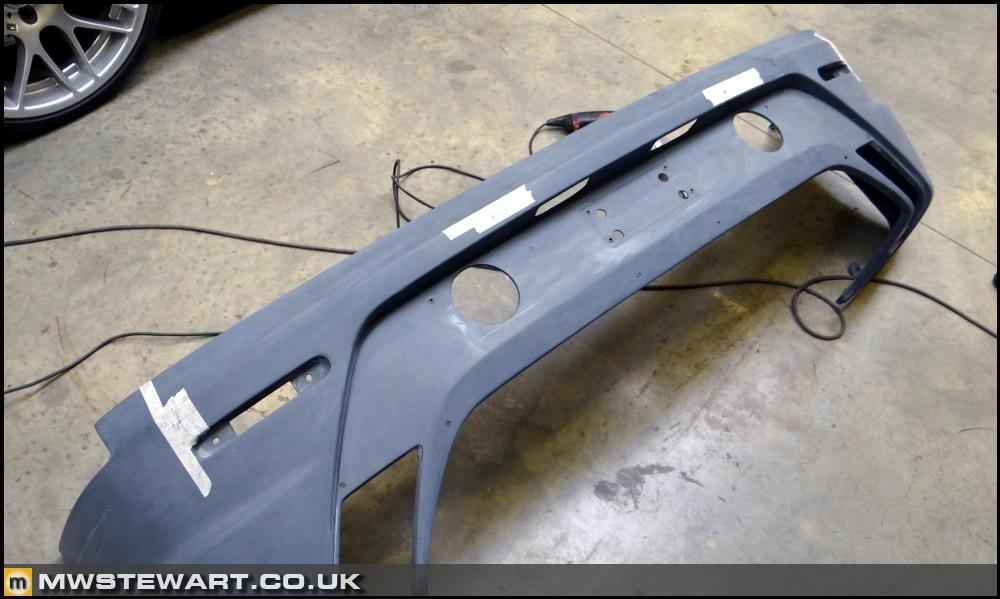
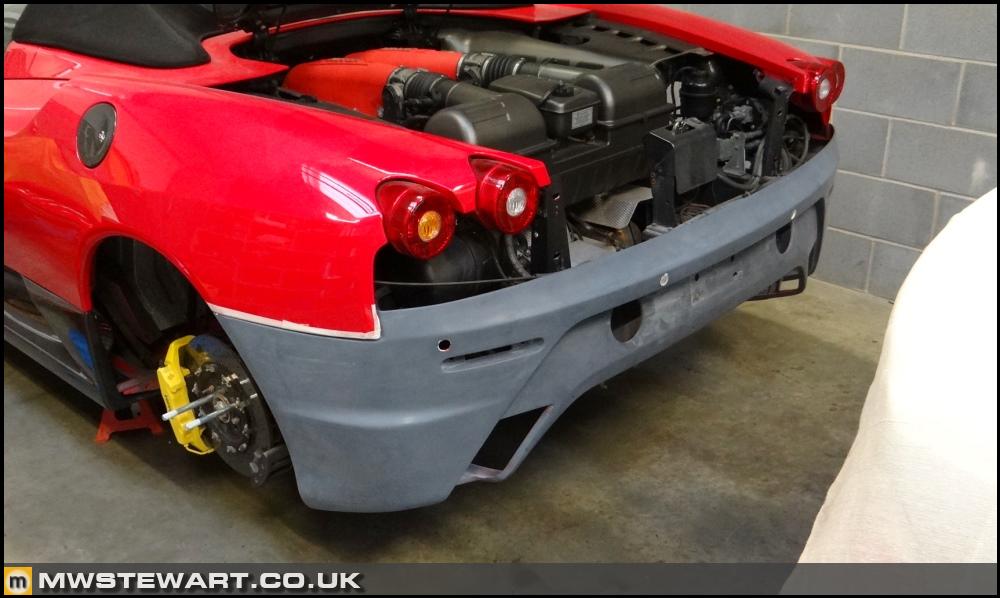
Scuderia rear bumper - PDC conversion
To the best of my knowledge I don't believe that the Scuderia models were offered with parking sensors as an option but having driven my car over Europe last year there were some situations where I found them useful hence I will retain the OEM front and rear system on my car. I took a photo to show the starting point for the rear end conversion.

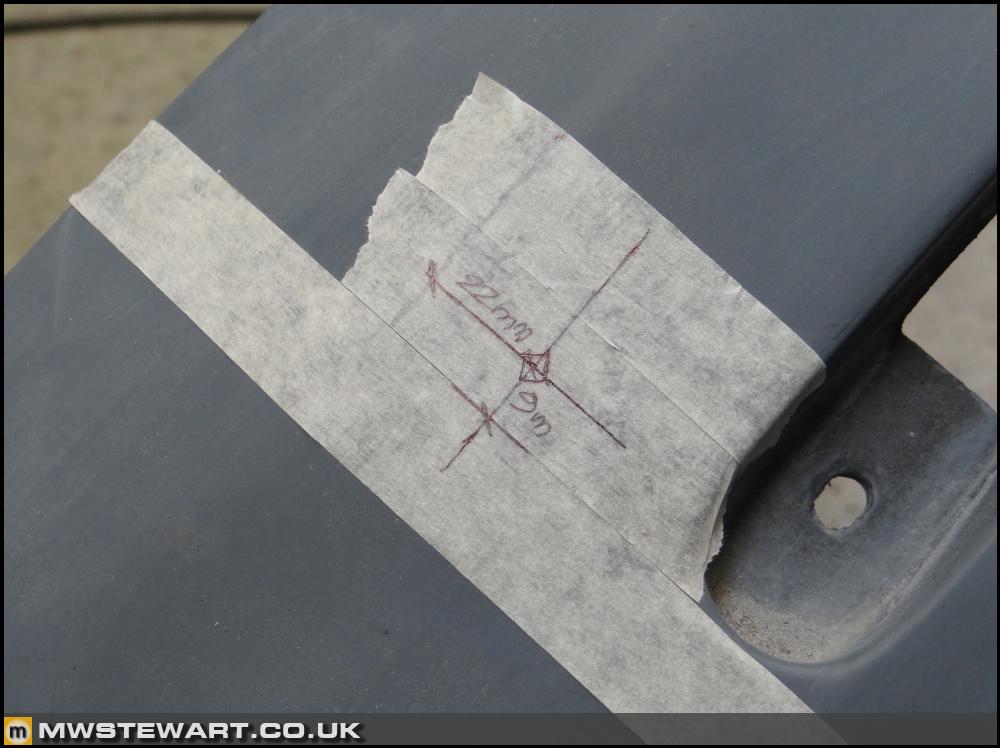
My Dad marked out the OEM F430 sensor positions on the Scuderia bumper.
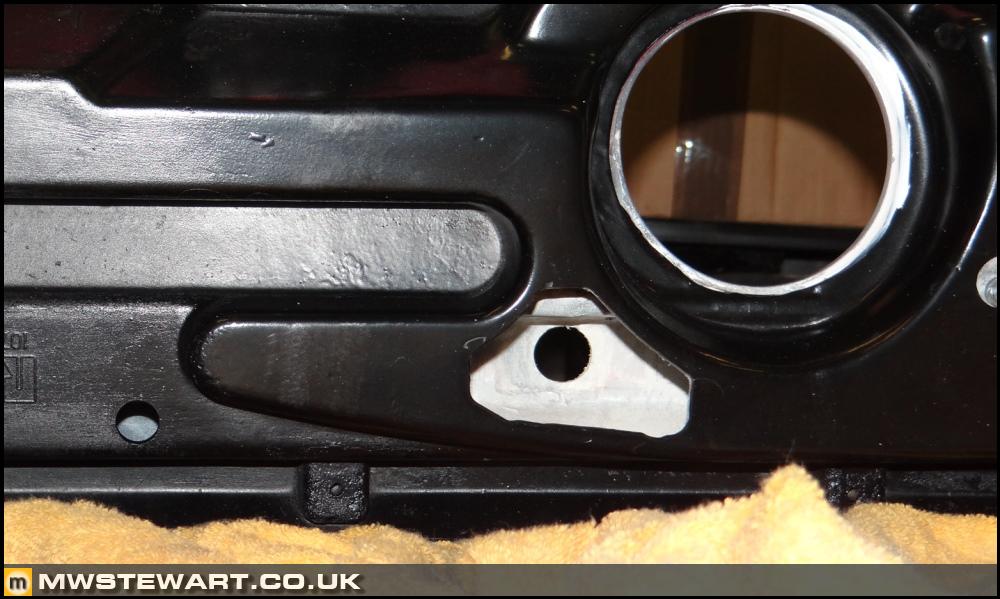
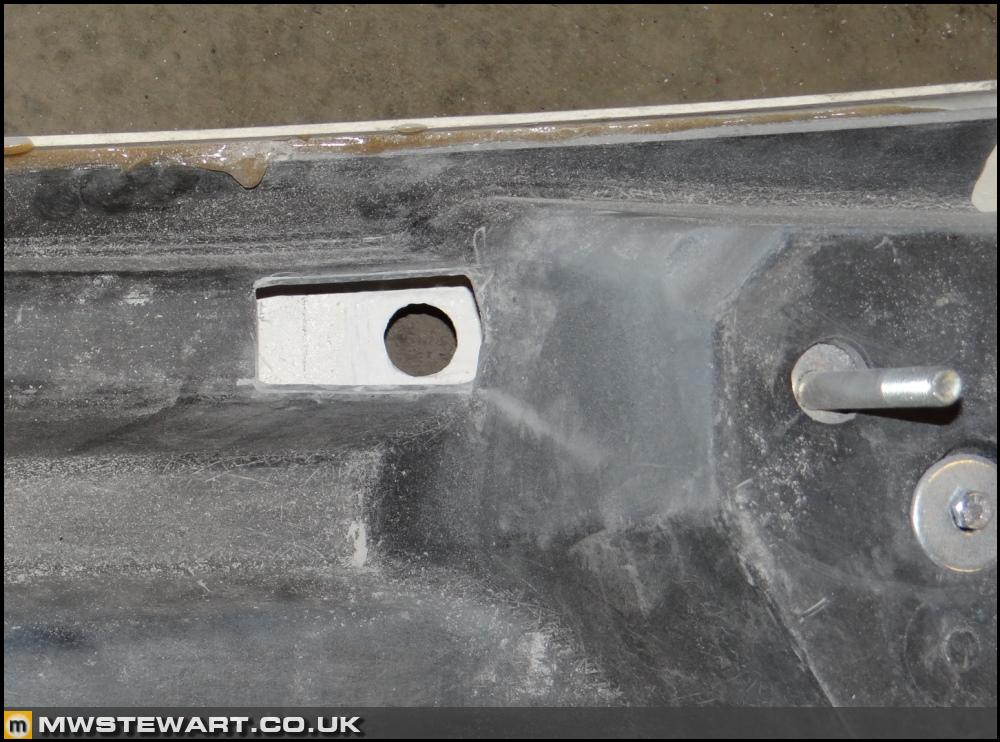
I modified the rear bumper reinforcement to allow space to access the sensor mounts. This is how Ferrari did it on my standard bumper. Interestingly, the Scuderia reinforcement was actually pre-drilled with pilot holes for parking sensor access holes so it seems that Ferrari were ready to consider them as an option for the Scuderia.
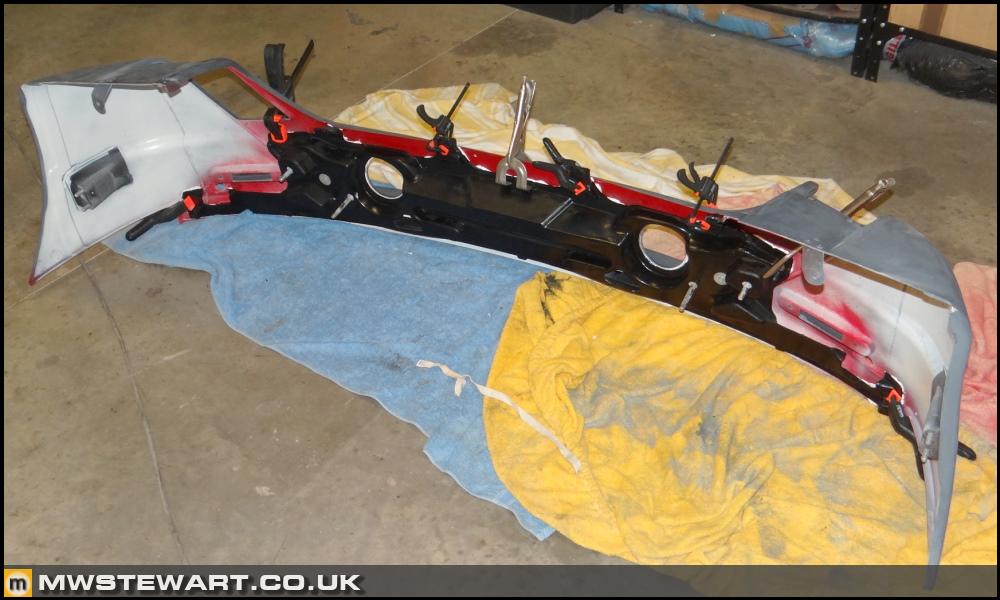
I had removed the reinforcement panel to make a better job of the bumper; it allowed me to position the parking sensor mounts liberated from my standard bumper and work the rear of the bumper to get a perfectly flush fit for the sensors on the exterior face. Here's a photo showing the reinforcement panel being clamped back onto the bumper cover whilst the construction adhesive set.
With the bumper work finished I had a test fit, and once happy I marked the position for the new exhaust tailpipes.
Scuderia front bumper - PDC conversion
I followed a similar approach with the front bumper and ensured that the parking sensor mounts sat flush with the exterior face.
The Scuderia bumper is known for cracking around the fin on the air outlet on each side. It's a really silly piece of manufacturing/design because there's hardly any material supporting the join. I've attempted to mitigate the risk of cracking by filling the end of the moulding with epoxy and providing a support structure on the bumper itself.

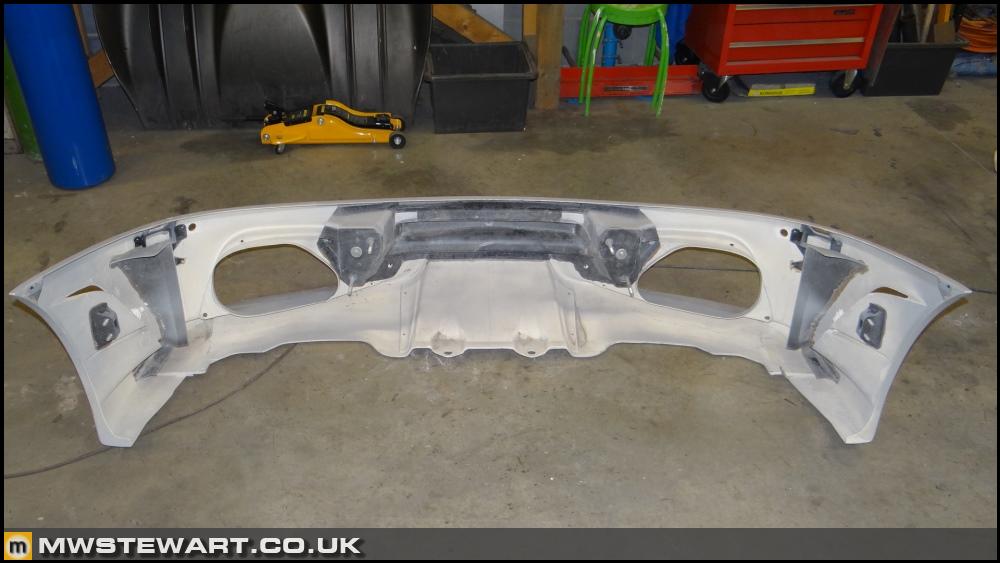
Photo to show front bumper complete.
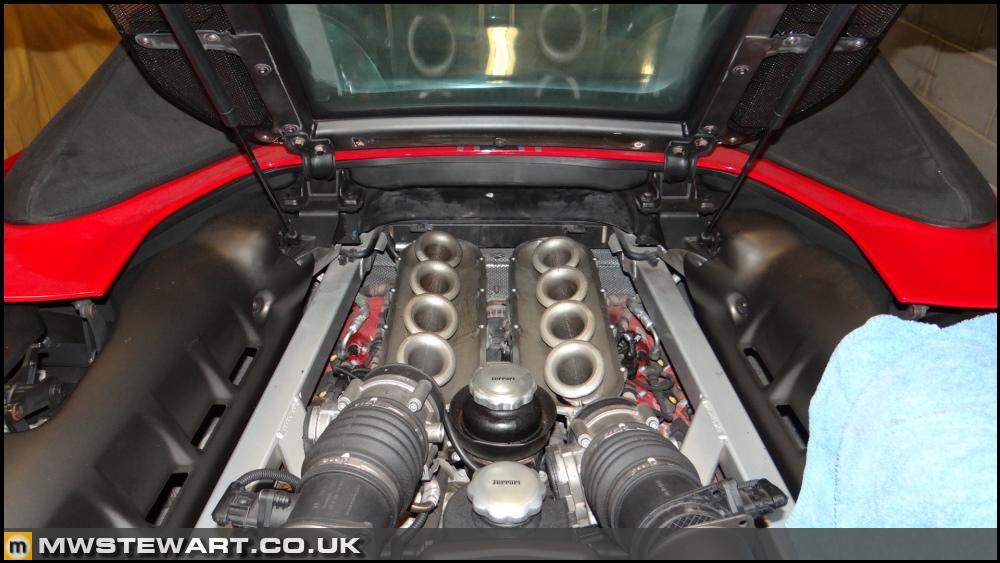
Inlet manifolds and plenum chamber removed
I have removed the inlet manifolds and plenum chambers. The standard aluminium plenum will be replaced by a carbon version and at the same time I'm taking the opportunity to have the manifold runners "ported" - I used inverted commas because this will be more of a finishing job than a fundamental change to their shape. Before starting I took a photo of the engine bay as-is.

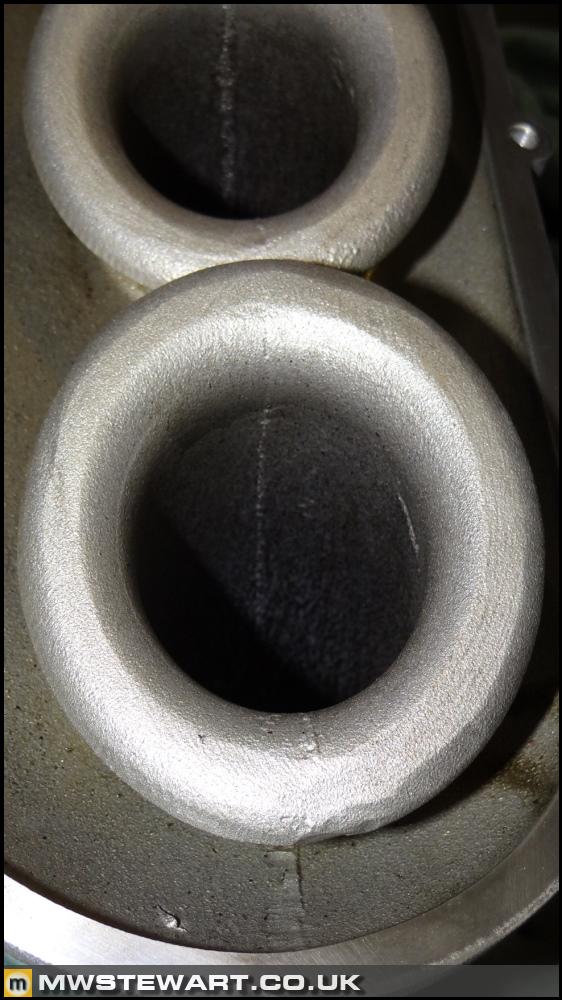
Here the plenum chamber has been removed with the manifolds left in the car revealing the bell mouth for each port.
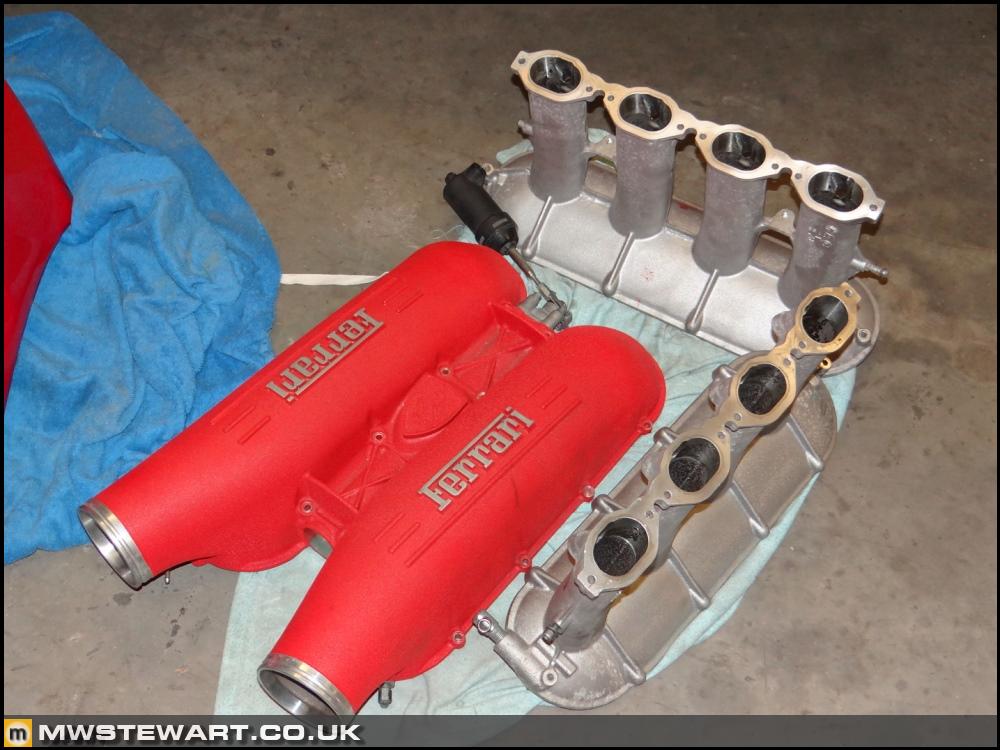
Plenum and manifold runners removed/together. Access to the manifold and plenum bolts on Spider isn't great and especially not when it's one foot in the air on axle stands. The gaskets used in these later cars are thin steel coated with a sealing surface and are very efficient at slicing fingers! I'm going to mount the standard plenum chamber on my garage wall as a piece of art.
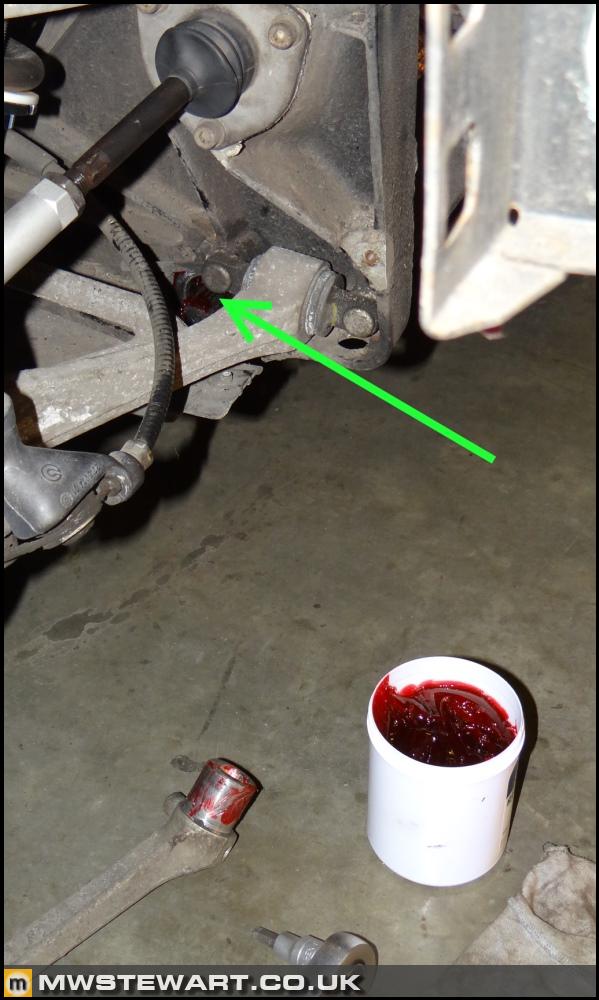
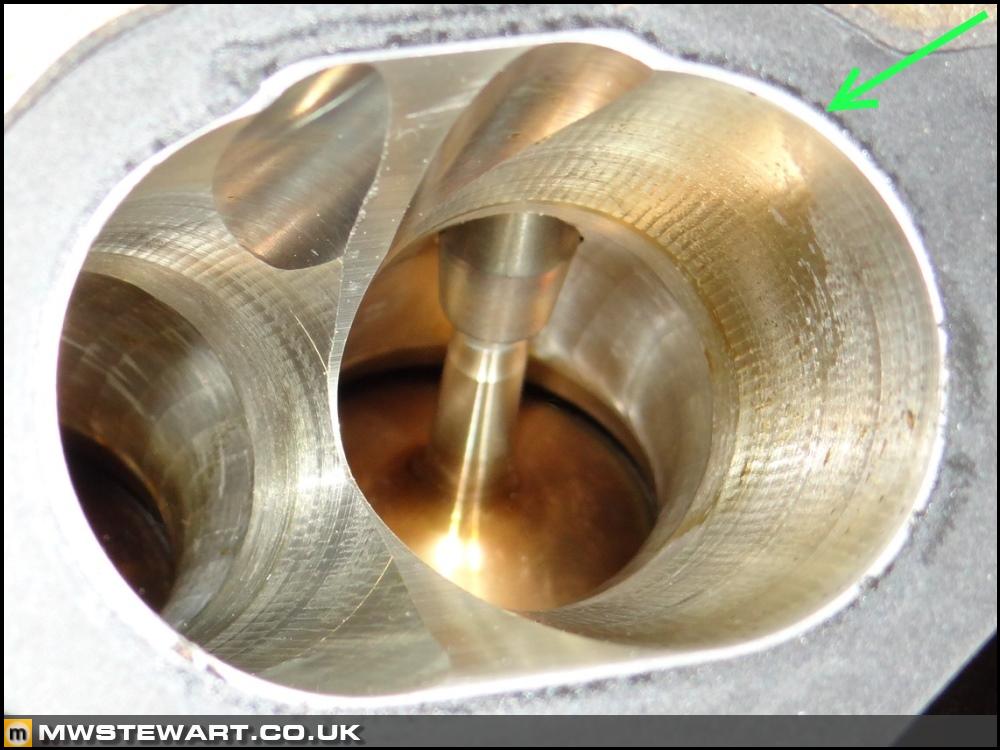
The ports are a thing of beauty; CNC finished at the factory and they appear matched to their respective inlet manifold. Like suspension Ferrari really seem to concentrate their efforts in this area. The green arrow shows the match between ports and gasket which is really very good and yes, there is scope for optimisation, but because the OEM job is so good the heads would need to come off for matching and if doing so I would want to dowel the manifolds to the head to ensure it was worthwhile. I have big plans for the engine but that will come later, so there won’t be internal engine work at this stage.
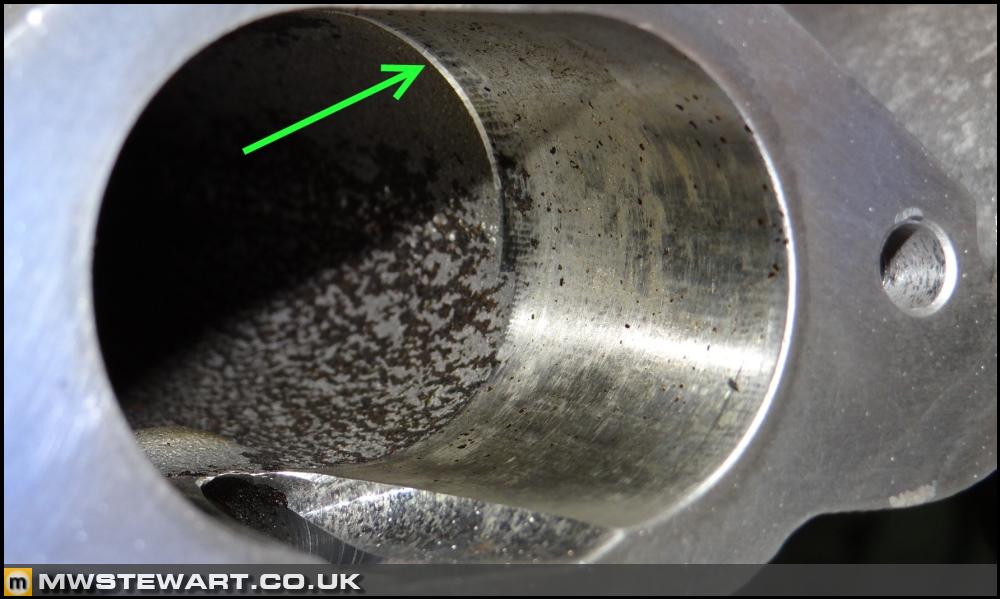
The manifold runners appear to be cast with a smaller port opening at the head flange end that extends 30mm up into each runner. It appears Ferrari use this area to take up any manufacturing tolerances when the head and manifold are CNC finished. On my car the machine work is offset by around 1mm hence there's a 1mm step on both sides. I've asked for this to be smoothed out as part of the port work that's been commissioned.
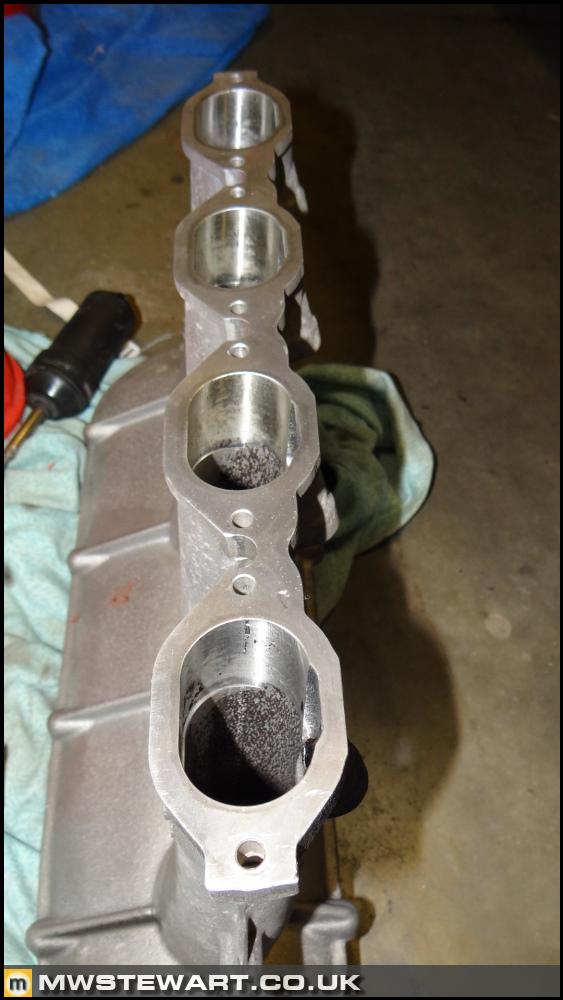
The bell mouths are another area that will be subject to work. Ferrari have a history of hand finishing this area of the manifold on their more limited run cars and I believe that extends to the Scuderia. I will emulate that here and extend the finish to within the manifold runners upstream of each injector.
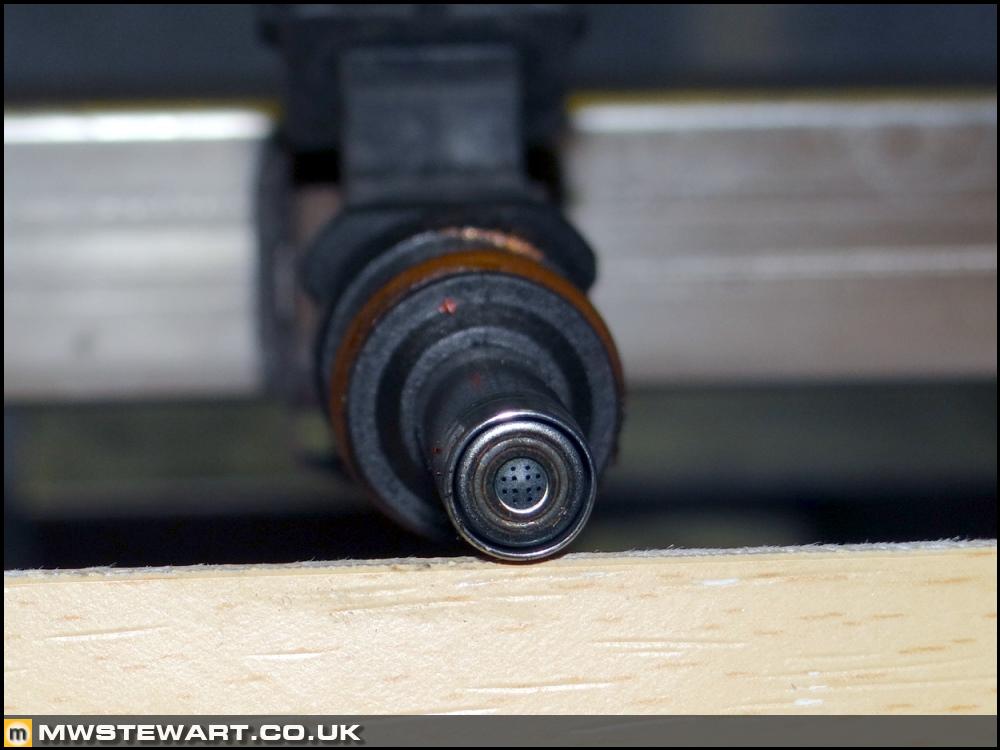
I took the opportunity to photograph one of the extended nozzle injectors that were first fitted to the F430 Challenge cars and later MY08 F430 then Scuderia models. I've not come across an injector nozzle with so many spray holes.
Scuderia electronics research – Part 3
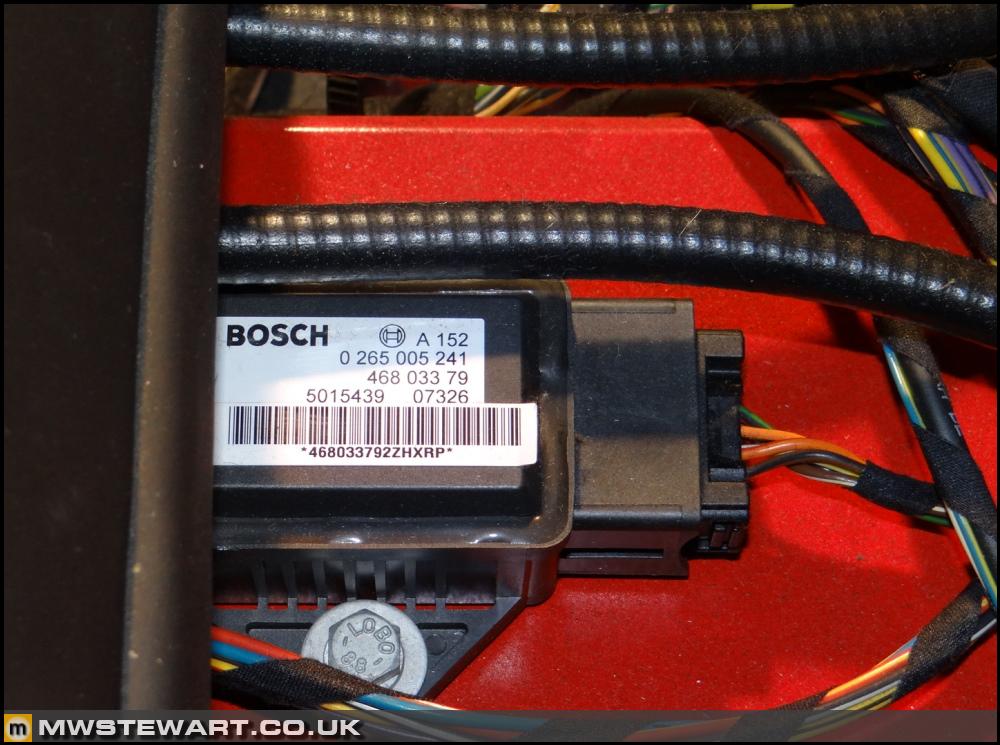
My car has the standard F430 ABS module and the analogue yaw sensor. This means I need to decide on the most efficient and maintainable way to upgrade the car to the later ABS system. This will be part of tranche two that I’ll start to work on later this year – in the meantime I’m going to finish the car to the spec I had in mind ready for summer i.e. everything documented so far minus Superfast 2 and the other Scuderia electronics. I can drive and enjoy the car over the summer and continue my research at leisure.
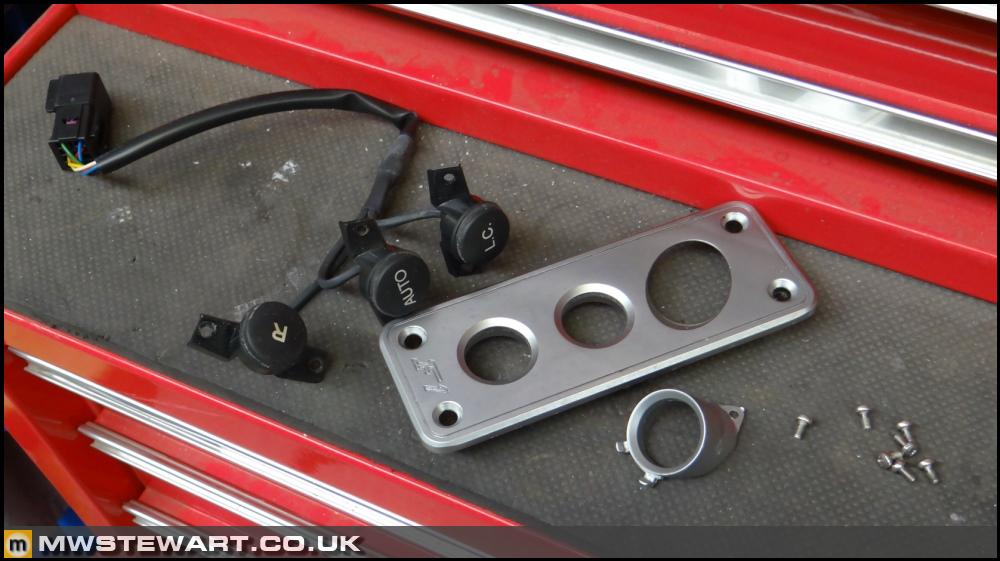
F1 panel
Given the amount of options my car came with i.e. lots of carbon the F1 control panel stood out as the only silver/alloy finish part left in the interior. In view of that I've decided to have it sprayed to match the wheels and other grey accents on the car.
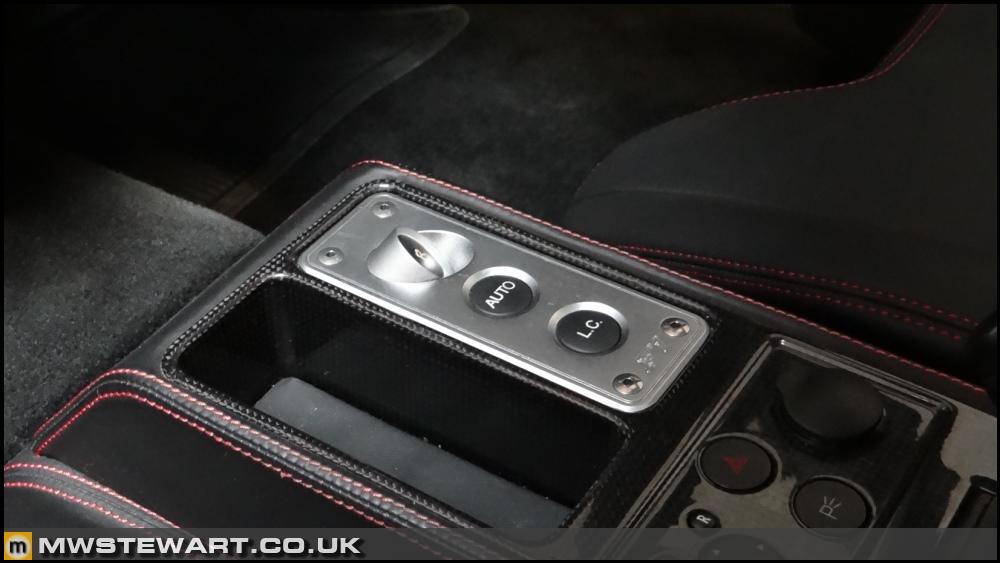
Photo to show the panel removed and disassembled. I degreased it then used a scotch pad to get a decent key for some etch primer. It's now with the body shop to paint along with the bumpers.
A number of ARBs have been produced for the 360/430 platform and I've documented them in a table for reference. My starting point is always the 16M and I discovered that the first cars were fitted with the Challenge Stradale/Scuderia 21.5mm hollow rear bar, then at some time into the production run a 16M specific hollow bar was produced at 22mm diameter. Unfortunately it's approximately twice the cost of the 21.5mm bar, but I've gone with it.
The later rear ARBs featured a plastic bush collar rather than machined aluminium. I noticed this on my original bar.
This photo shows the weld between the hollow tube sections.
I've gone with new OEM bushes and drop links.
The rear ARB is an absolute doddle to fit. I really like how it's integrated with the chassis members on each side and also how the mountings are designed such that the bushes remain the same part regardless of bar diameter. I took a tip from Voicey's blog and used red rubber grease on the contact areas. I've not used it before but it seems a decent product.
Standard exhaust removal
The standard exhaust has gone for two reasons: 1) I don't like the sound or the effect the valves have on driving, and 2) I want a lighter solution that suits the exhaust outlet positions on the Scuderia rear bumper.
In preparation for the new exhaust I've also removed the standard fixing brackets & fastenings ready for replacement by a bespoke mounting solution. The weight of the original components is as photographed.
The F430 tailpipe sections are very heavy, but The Challenge (and Scuderia) systems make do without them hence shed quite a bit of weight. I have the optional titanium tips which save further over the standard Scuderia stainless tips and as the photo shows, I will go from 13kg total to just 686 grammes!
I also removed the silencer and weighed it at 12.8kg. Four of the six mounting nuts & studs snapped off which is something that also happened on my last car. I'm not reusing the standard silencer but if I was I fix the issue by grinding off the welded studs and replacing with stainless bolts and copper nuts.
More on component weights and comparisons to follow once I've finished fabrication.
Scuderia rear bumper - PDC conversion
To the best of my knowledge I don't believe that the Scuderia models were offered with parking sensors as an option but having driven my car over Europe last year there were some situations where I found them useful hence I will retain the OEM front and rear system on my car. I took a photo to show the starting point for the rear end conversion.
My Dad marked out the OEM F430 sensor positions on the Scuderia bumper.
I modified the rear bumper reinforcement to allow space to access the sensor mounts. This is how Ferrari did it on my standard bumper. Interestingly, the Scuderia reinforcement was actually pre-drilled with pilot holes for parking sensor access holes so it seems that Ferrari were ready to consider them as an option for the Scuderia.
I had removed the reinforcement panel to make a better job of the bumper; it allowed me to position the parking sensor mounts liberated from my standard bumper and work the rear of the bumper to get a perfectly flush fit for the sensors on the exterior face. Here's a photo showing the reinforcement panel being clamped back onto the bumper cover whilst the construction adhesive set.
With the bumper work finished I had a test fit, and once happy I marked the position for the new exhaust tailpipes.
Scuderia front bumper - PDC conversion
I followed a similar approach with the front bumper and ensured that the parking sensor mounts sat flush with the exterior face.
The Scuderia bumper is known for cracking around the fin on the air outlet on each side. It's a really silly piece of manufacturing/design because there's hardly any material supporting the join. I've attempted to mitigate the risk of cracking by filling the end of the moulding with epoxy and providing a support structure on the bumper itself.
Photo to show front bumper complete.
Inlet manifolds and plenum chamber removed
I have removed the inlet manifolds and plenum chambers. The standard aluminium plenum will be replaced by a carbon version and at the same time I'm taking the opportunity to have the manifold runners "ported" - I used inverted commas because this will be more of a finishing job than a fundamental change to their shape. Before starting I took a photo of the engine bay as-is.
Here the plenum chamber has been removed with the manifolds left in the car revealing the bell mouth for each port.
Plenum and manifold runners removed/together. Access to the manifold and plenum bolts on Spider isn't great and especially not when it's one foot in the air on axle stands. The gaskets used in these later cars are thin steel coated with a sealing surface and are very efficient at slicing fingers! I'm going to mount the standard plenum chamber on my garage wall as a piece of art.
The ports are a thing of beauty; CNC finished at the factory and they appear matched to their respective inlet manifold. Like suspension Ferrari really seem to concentrate their efforts in this area. The green arrow shows the match between ports and gasket which is really very good and yes, there is scope for optimisation, but because the OEM job is so good the heads would need to come off for matching and if doing so I would want to dowel the manifolds to the head to ensure it was worthwhile. I have big plans for the engine but that will come later, so there won’t be internal engine work at this stage.
The manifold runners appear to be cast with a smaller port opening at the head flange end that extends 30mm up into each runner. It appears Ferrari use this area to take up any manufacturing tolerances when the head and manifold are CNC finished. On my car the machine work is offset by around 1mm hence there's a 1mm step on both sides. I've asked for this to be smoothed out as part of the port work that's been commissioned.
The bell mouths are another area that will be subject to work. Ferrari have a history of hand finishing this area of the manifold on their more limited run cars and I believe that extends to the Scuderia. I will emulate that here and extend the finish to within the manifold runners upstream of each injector.
I took the opportunity to photograph one of the extended nozzle injectors that were first fitted to the F430 Challenge cars and later MY08 F430 then Scuderia models. I've not come across an injector nozzle with so many spray holes.
Scuderia electronics research – Part 3
My car has the standard F430 ABS module and the analogue yaw sensor. This means I need to decide on the most efficient and maintainable way to upgrade the car to the later ABS system. This will be part of tranche two that I’ll start to work on later this year – in the meantime I’m going to finish the car to the spec I had in mind ready for summer i.e. everything documented so far minus Superfast 2 and the other Scuderia electronics. I can drive and enjoy the car over the summer and continue my research at leisure.
F1 panel
Given the amount of options my car came with i.e. lots of carbon the F1 control panel stood out as the only silver/alloy finish part left in the interior. In view of that I've decided to have it sprayed to match the wheels and other grey accents on the car.
Photo to show the panel removed and disassembled. I degreased it then used a scotch pad to get a decent key for some etch primer. It's now with the body shop to paint along with the bumpers.

Thanks gents.
Max, that's a nice offer, especially given your expertise. Thanks.
I've only driven the car back from the dealer so far Straight to the workshop! Phase one will be finished for the end of May then I'll start using it; it's on display in the FoC area at Silverstone Classic and will be going on a Eurotrip over the summer.
The drop links are OE Ferrari and 65 a side. An almost 'normal' price!
Max, that's a nice offer, especially given your expertise. Thanks.
I've only driven the car back from the dealer so far
Straight to the workshop! Phase one will be finished for the end of May then I'll start using it; it's on display in the FoC area at Silverstone Classic and will be going on a Eurotrip over the summer.The drop links are OE Ferrari and 65 a side. An almost 'normal' price!
TheJimi said:
Are you literally on the phone to the insurer every time you fit a new part?
When I see stuff like this when someone is changing or adding new bits every week, it does make me wonder htf it works with insurance.
No, it's done in stages. My cars are off the road when I work on them as I can't see it working otherwise.When I see stuff like this when someone is changing or adding new bits every week, it does make me wonder htf it works with insurance.
Hi Mark,
I was realy surprised (shocked) at the high heat levels surrounding the air intake filter hsgs, the base and what it must do for charge temperatures.I noted in an earlier post that you are going to get the header tank and the filter assembly box ceramic coated - will that include the aluminium filter covers or are you replacing them with carbon equivalents? - I may have missed your intentions in a previous post.
ATB
Alan
kingkongsfinger said:
Just went I thought it could not get any better....it does !!!
Champion Fettler
Champion Fettler
triple5 said:
Love threads like this, top stuff 
Thanks both!berksboy26 said:
Hi Mark,
I was realy surprised (shocked) at the high heat levels surrounding the air intake filter hsgs, the base and what it must do for charge temperatures.I noted in an earlier post that you are going to get the header tank and the filter assembly box ceramic coated - will that include the aluminium filter covers or are you replacing them with carbon equivalents? - I may have missed your intentions in a previous post.
ATB
Alan
Hi Alan,I was realy surprised (shocked) at the high heat levels surrounding the air intake filter hsgs, the base and what it must do for charge temperatures.I noted in an earlier post that you are going to get the header tank and the filter assembly box ceramic coated - will that include the aluminium filter covers or are you replacing them with carbon equivalents? - I may have missed your intentions in a previous post.
ATB
Alan
Me too. It's always struck me as an area that at least warrants a heat shield. I don't expect heat protection to make a difference to performance at high speed due to the volume of air flowing through the box, but at moderate to low speeds, especially in the summer and after periods in traffic, I'd expect it help maintain consistent performance.
I am going to replace the covers with carbon fibre versions that will enable me to use larger MAF sensors, not really because I am worried about heat in them; looking at the thermal image it doesn't look as if the covers suffer too badly with heat soak. If keeping with the standard lids I'd probably leave them as is along with the header tank, in order to maintain the paint match with the rest of the engine bay (my header tank will have a carbon cover).
Cheers,
Mark
Gassing Station | Readers' Cars | Top of Page | What's New | My Stuff