Ferrari F430 Spider
Discussion


My car was missing the cover set it was supplied with new which sadly isn't unusual; many people keep the torch, covers, and even tool kits and sell them separately to the car. An act of peasantry, in my humble opinion 
I've picked up a 16M car cover set. The Spider covers are different for a start as they aren't lined underneath the hood area in order to prevent red bobbles on the hood fabric, and the 16M set is also unique because the seat covers are specific to the Scuderia type.
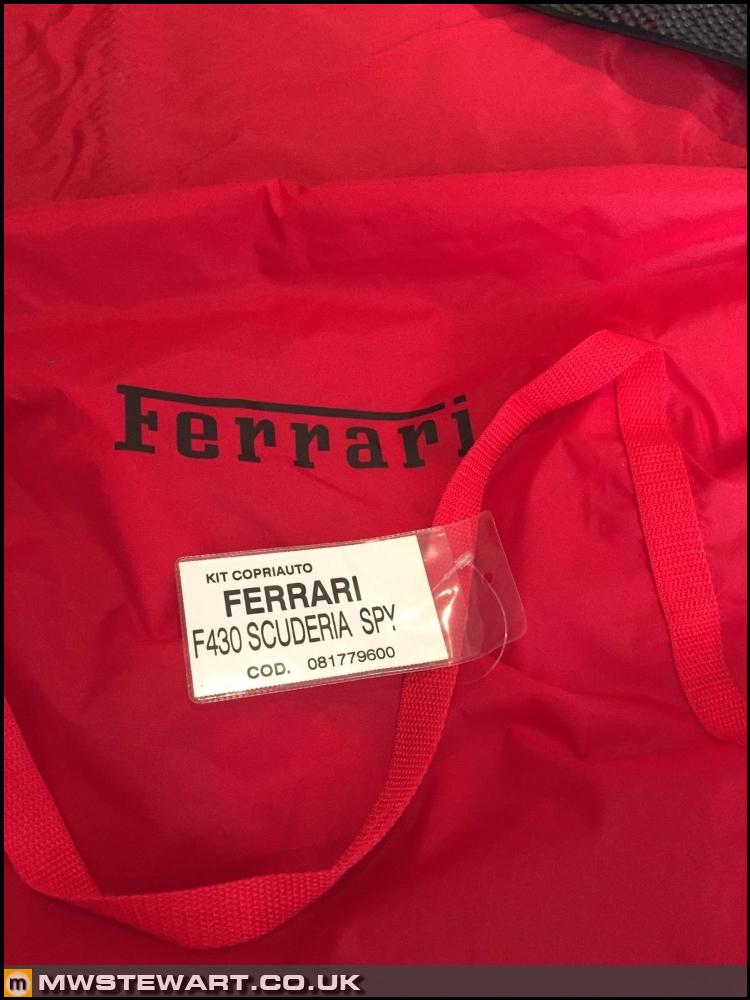
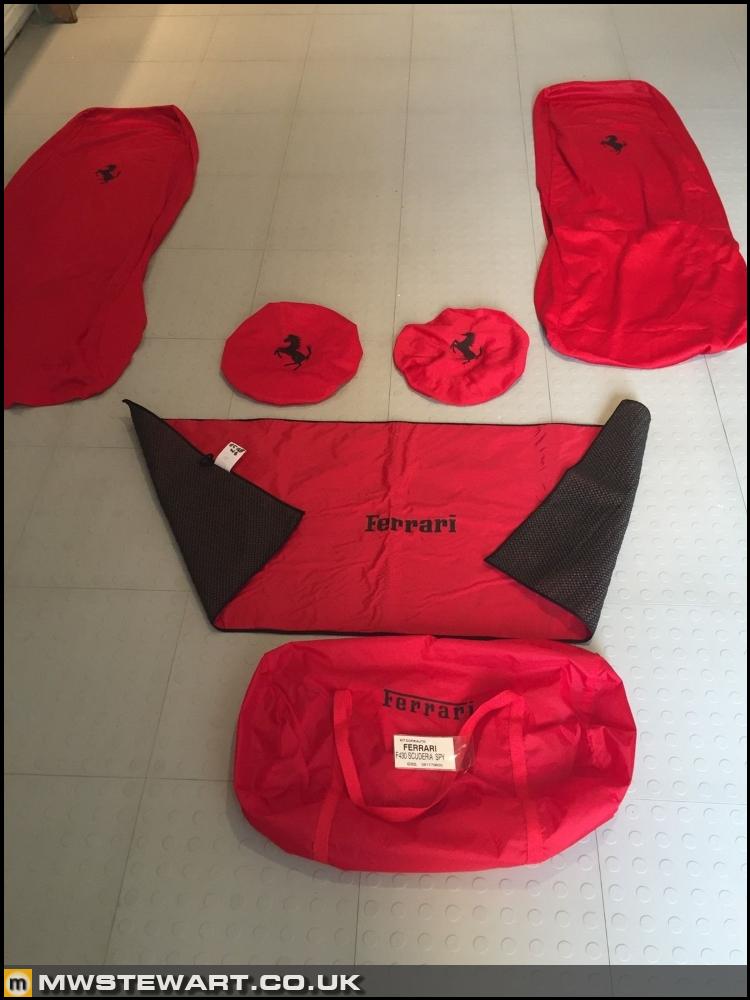
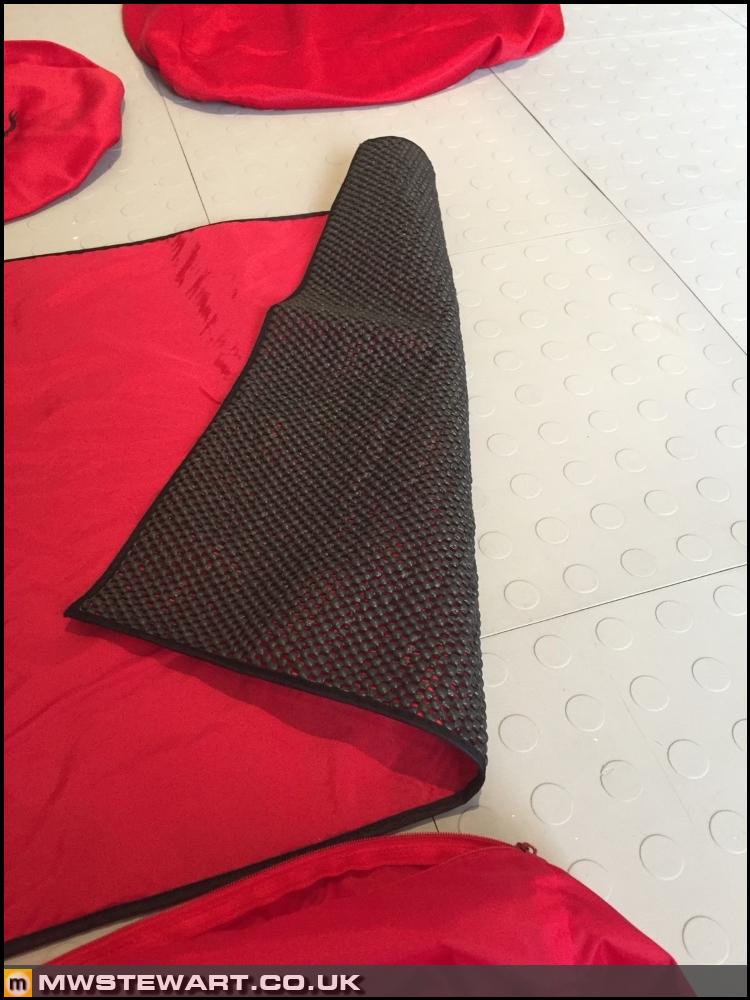
The kit came with a windscreen/dashboard cover which I haven’t seen before.
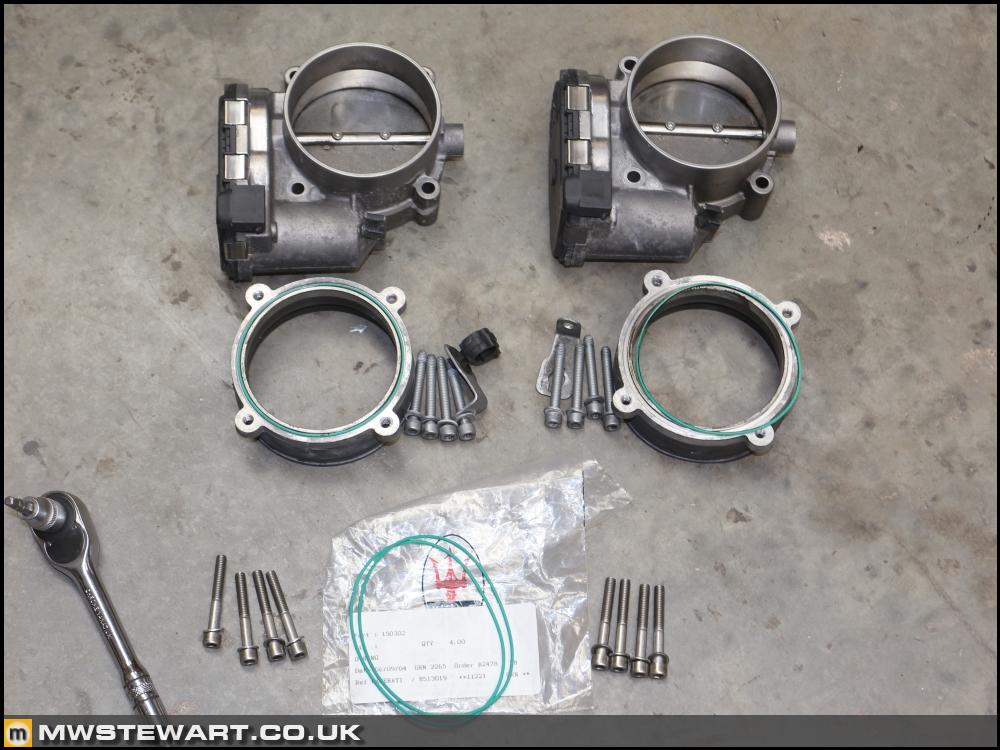
The throttle bodies are generic Bosch but Ferrari have added their own casting piece to the rear incorporating a rubber boot to secure them to the plenum chamber. I’ve taken the opportunity to replace the O ring sealing those to the TBs and also swap the fittings for stainless versions.
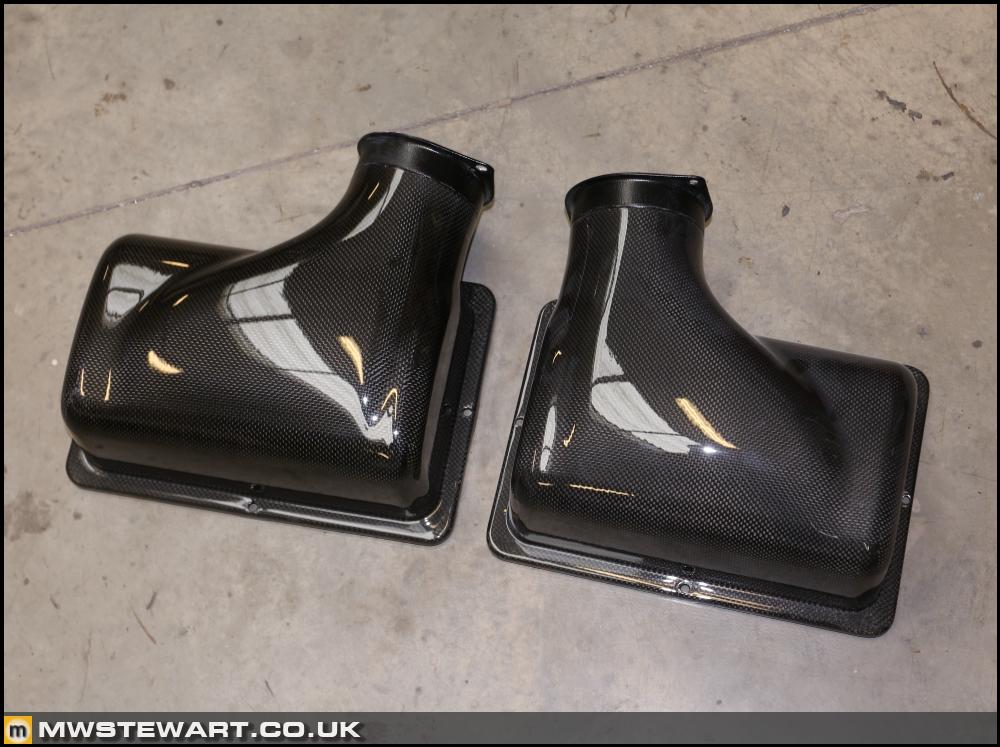
A couple of weeks ago I bought some OE Scuderia carbon air box lids but as soon as they arrived I sent them to my painter. Here they are back with me sporting a new coat of lacquer; the stuff Ferrari use on their carbon is really poor quality so it's always good to renew it with a quality two pack product.
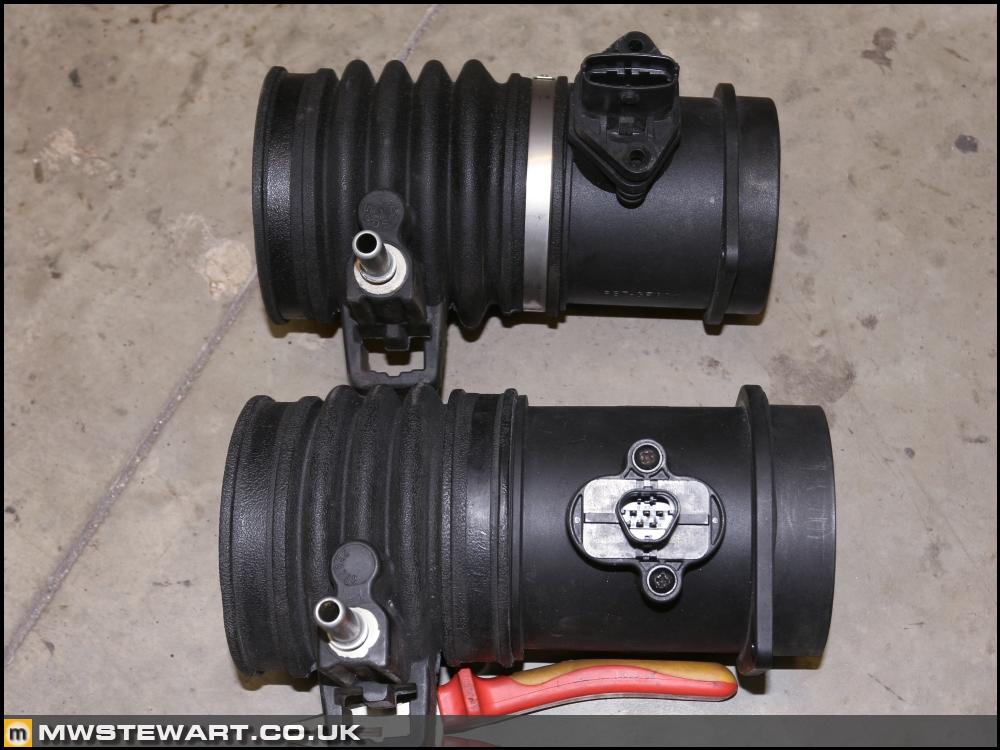
I have mentioned before that the Scuderia uses different MAF sensors, bodies, and connecting bellows. The bodies are 90mm vs the F430 85mm and the sensor elements themselves are also different. I did not want to make wiring modifications to my car at this stage to suit the Scuderia sensors plus risk issues arising from a different MAF sensor and scaling in the ECU calibration, so I researched and bought a pair of alternative 90mm MAFs which could house my existing F430 sensor elements.
In addition to a 5mm increase in ID the length of the Scuderia MAF and bellows is also different, and the Scuderia air boxes are different to suit. The Scuderia parts are at the bottom of the photo.
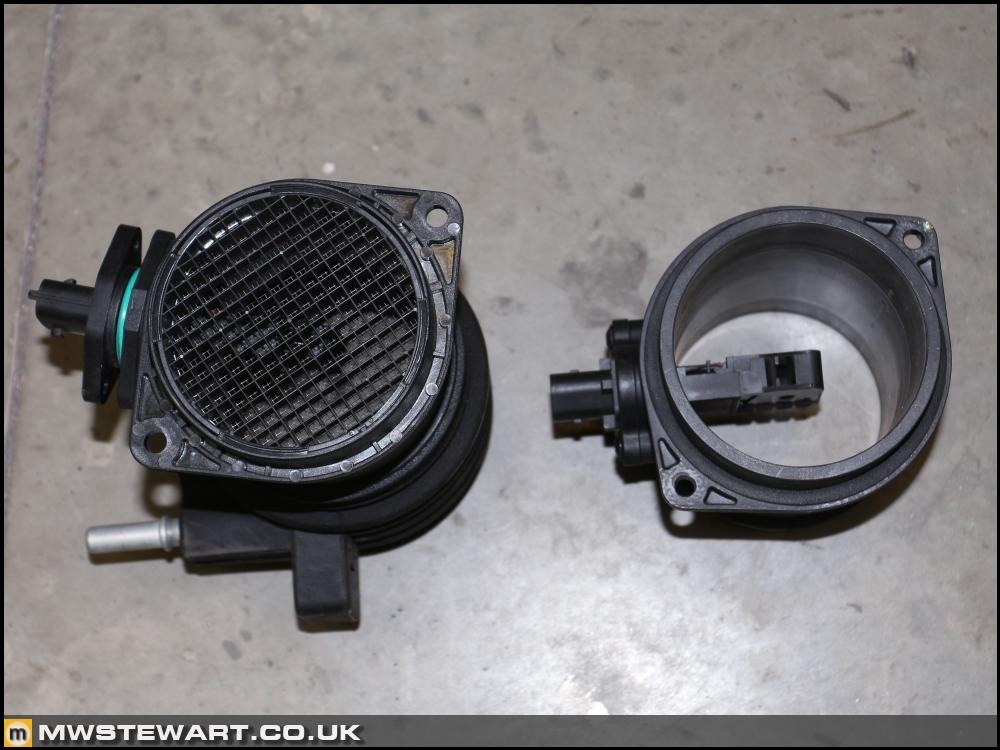
The F430 MAFs have a screen to promote laminar flow over the sensor elements but the Scuderia MAFs do not. I have a strong suspicion the F430 requires these screens because of the disruptive noise attenuation flutes on the air box covers just ahead of the MAF. The Scuderia has a much improved transition from air box to MAF so is unlikely to require the screen so I took the decision to remove it from the new MAFs.
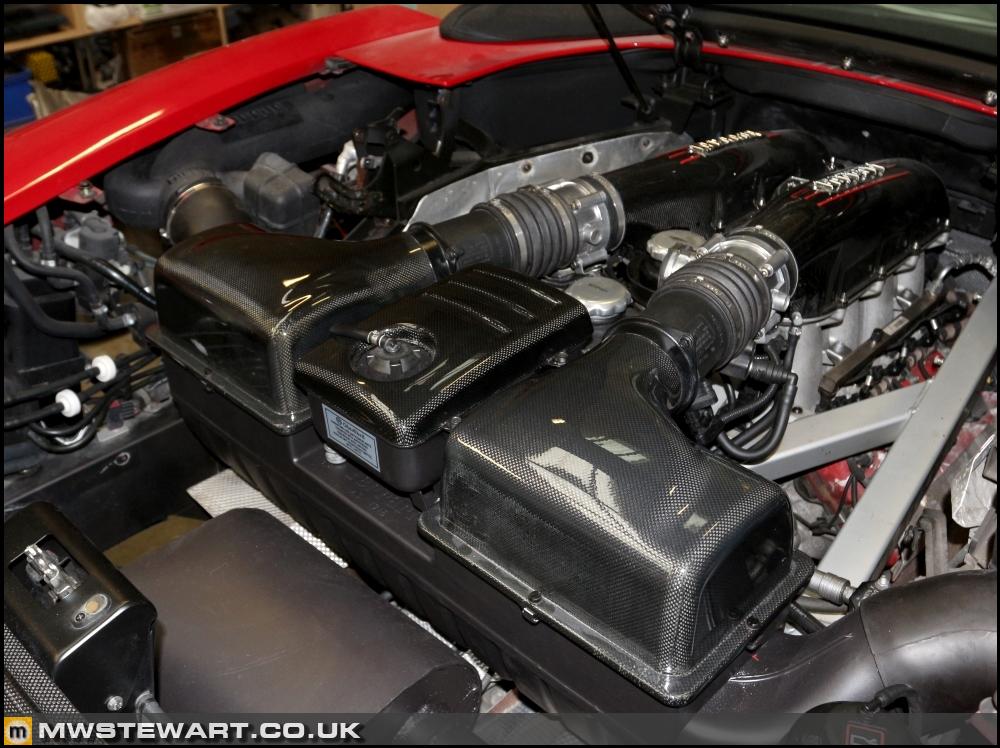
TBs, bellows, MAFs, and lids fitted.
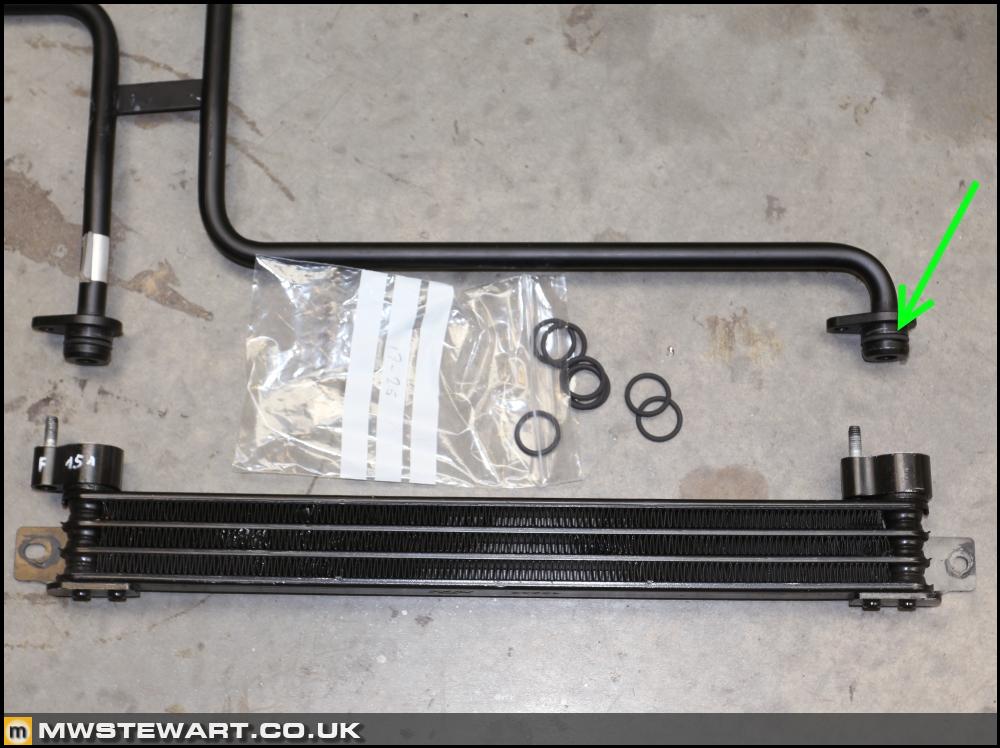
According to Eurospares the oil seals for the Scuderia PAS cooler are discontinued which if correct is pretty shocking. I had to find an alternative to get the car ready for the end of July and determined 17mm ID 3mm thick Viton O rings were correct.
I've picked up a 16M car cover set. The Spider covers are different for a start as they aren't lined underneath the hood area in order to prevent red bobbles on the hood fabric, and the 16M set is also unique because the seat covers are specific to the Scuderia type.
The kit came with a windscreen/dashboard cover which I haven’t seen before.
The throttle bodies are generic Bosch but Ferrari have added their own casting piece to the rear incorporating a rubber boot to secure them to the plenum chamber. I’ve taken the opportunity to replace the O ring sealing those to the TBs and also swap the fittings for stainless versions.
A couple of weeks ago I bought some OE Scuderia carbon air box lids but as soon as they arrived I sent them to my painter. Here they are back with me sporting a new coat of lacquer; the stuff Ferrari use on their carbon is really poor quality so it's always good to renew it with a quality two pack product.
I have mentioned before that the Scuderia uses different MAF sensors, bodies, and connecting bellows. The bodies are 90mm vs the F430 85mm and the sensor elements themselves are also different. I did not want to make wiring modifications to my car at this stage to suit the Scuderia sensors plus risk issues arising from a different MAF sensor and scaling in the ECU calibration, so I researched and bought a pair of alternative 90mm MAFs which could house my existing F430 sensor elements.
In addition to a 5mm increase in ID the length of the Scuderia MAF and bellows is also different, and the Scuderia air boxes are different to suit. The Scuderia parts are at the bottom of the photo.
The F430 MAFs have a screen to promote laminar flow over the sensor elements but the Scuderia MAFs do not. I have a strong suspicion the F430 requires these screens because of the disruptive noise attenuation flutes on the air box covers just ahead of the MAF. The Scuderia has a much improved transition from air box to MAF so is unlikely to require the screen so I took the decision to remove it from the new MAFs.
TBs, bellows, MAFs, and lids fitted.
According to Eurospares the oil seals for the Scuderia PAS cooler are discontinued which if correct is pretty shocking. I had to find an alternative to get the car ready for the end of July and determined 17mm ID 3mm thick Viton O rings were correct.

Zombie said:
Even using the existing MAF sensors, surely a bigger dia sensor housing will screw up the air flow reading? - The element in my 3.2 GTA is the same as a 1.0 Meriva but it uses a different i.e. bigger dia housing...
Id think the same, im guessing a remap might be in order. (which might be a good idea to make the best of the changed inlet and exhaust tracts)mwstewart said:
Thanks all.
Adaptations will take care of the 5mm diameter increase. I'm going for a remap eventually but have a few more parts to change first.
True, the lambdas and the ping sensors will pick up a leaner mix and manufacturers maps tend to have a large amount of leeway.Adaptations will take care of the 5mm diameter increase. I'm going for a remap eventually but have a few more parts to change first.
- I built a 156 with a 3.2l in it and ran it on the standard engine management (2.5l) with no issues - it was making about 280bhp, 85bhp over standard.
Zombie said:
True, the lambdas and the ping sensors will pick up a leaner mix and manufacturers maps tend to have a large amount of leeway.
- I built a 156 with a 3.2l in it and ran it on the standard engine management (2.5l) with no issues - it was making about 280bhp, 85bhp over standard.
That is impressive!- I built a 156 with a 3.2l in it and ran it on the standard engine management (2.5l) with no issues - it was making about 280bhp, 85bhp over standard.
OP what an amazing thread. I've dipped into PH a few times over the years to read posts as a guest but this thread needed another 'well done' so I have now registered. Over the course of today I have read the whole 41 pages (a rare lazy Sunday for me) - fascinating stuff as i've never seen anyone do this level of build on such an exotic car. Keep it up, i'm looking forward to the next updates!
Podie said:
Do you ever sleep? Updates to this thread seem to be early in the morning or late at night!
Sometimes Jules Sunley said:
OP what an amazing thread. I've dipped into PH a few times over the years to read posts as a guest but this thread needed another 'well done' so I have now registered. Over the course of today I have read the whole 41 pages (a rare lazy Sunday for me) - fascinating stuff as i've never seen anyone do this level of build on such an exotic car. Keep it up, i'm looking forward to the next updates!
Thank you very much.Scuderia electronics research – Part 4
The Scuderia cluster arrived back from FAI and I had a bit of a game with customs along the way: the declaration form didn't make it clear this was a return consignment so I was charged import duty on the value of the clusters rather than the work carried out. There was a £400 difference between the two!
I fitted the Scuderia cluster to test its various functions and all were OK, and the recorded mileage being correct. The engine starts and rev counter works, too, so FAI did good! Changing Manettino position is recognised on the cluster as a beep which tells me the drive mode CAN words are the same between F430 and Scuderia but the Scuderia cluster won’t communicate over CAN with the F430 ABS module, so obviously the next stage is to retrofit that. I already have the new wiring looms I just need the digital lat/long yaw sensor.
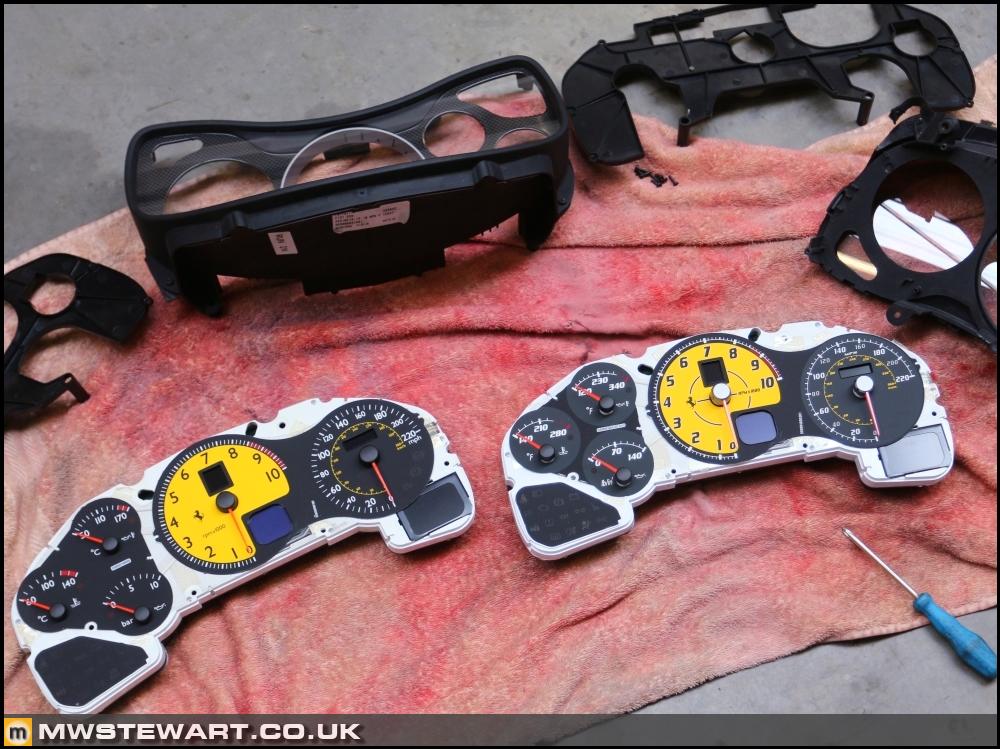
The ABS work will come under phase 2 of the project, so on the mean time I disassembled both clusters and swapped the dial faces and needles, then refitted the original F430 cluster to give me the Scuderia look.
Rosso instrument cluster cowl
Fitted and from the drivers’ seat it looks good, and will look even better once I find a Scuderia steering wheel to be trimmed in matching Rosso. I will be very pleased with the overall look.
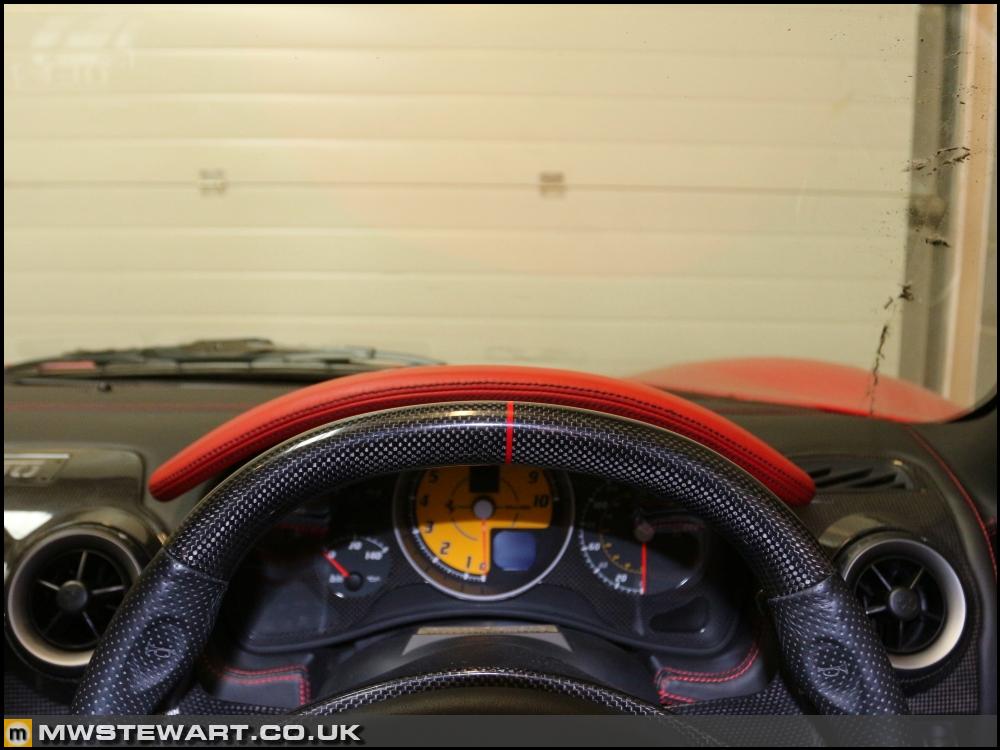
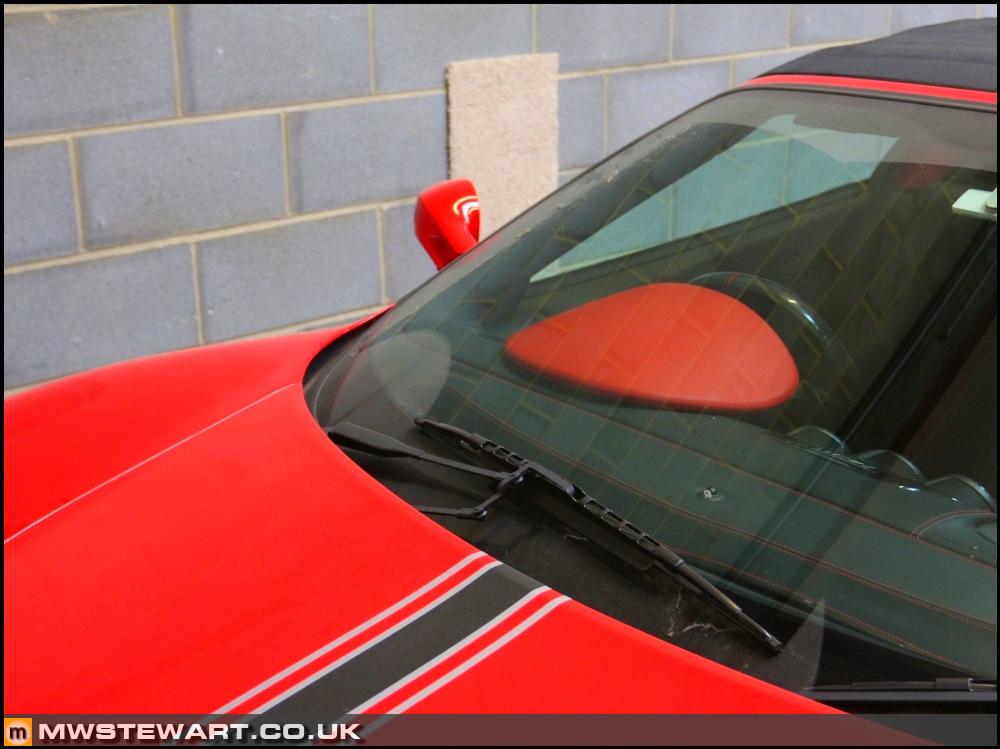
The problem was from outside the car the OEM Rosso leather looks a dirty shade of red against the Rosso Corsa paintwork, so for now I've removed the new cowl and refitted the original but ordered some leather samples to choose a shade that better matches the paint. I’ll have the replacement retrimmed when I find a Scuderia wheel.
Scuderia PAS cooler
F430 (top) and Scuderia (bottom). The Scuderia cooler is a bar and plate type which provides more cooling capacity than the F430 tube type. Unfortunately a few parts are on back order via Eurospares and one of those was the rear bracket for the new PAS cooler, so my Dad tried his hand at fabrication and made the bracket. It fits perfectly.
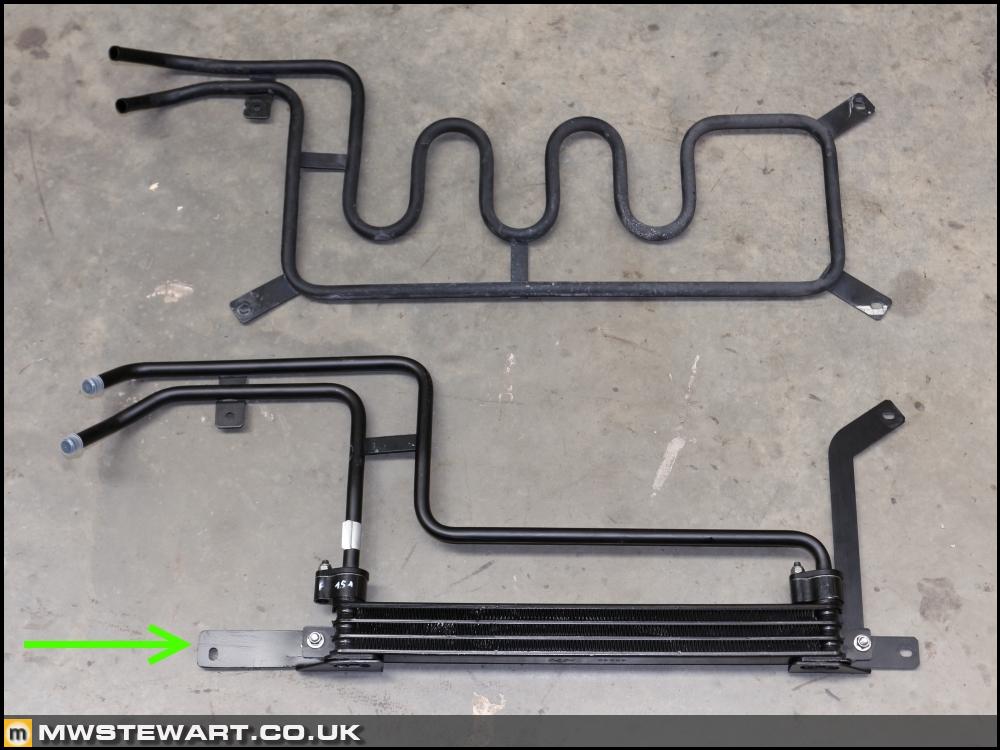
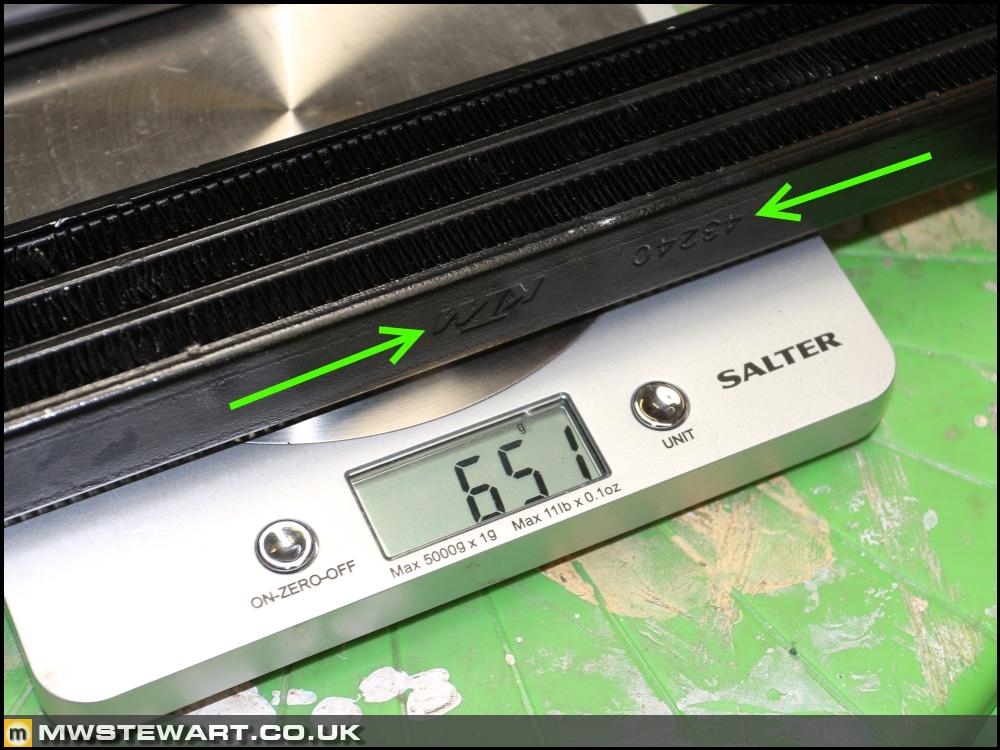
The Scuderia cooler is a KTM part and perhaps from one of their four stroke bikes. I searched online for the reference 43240 but didn’t return anything.
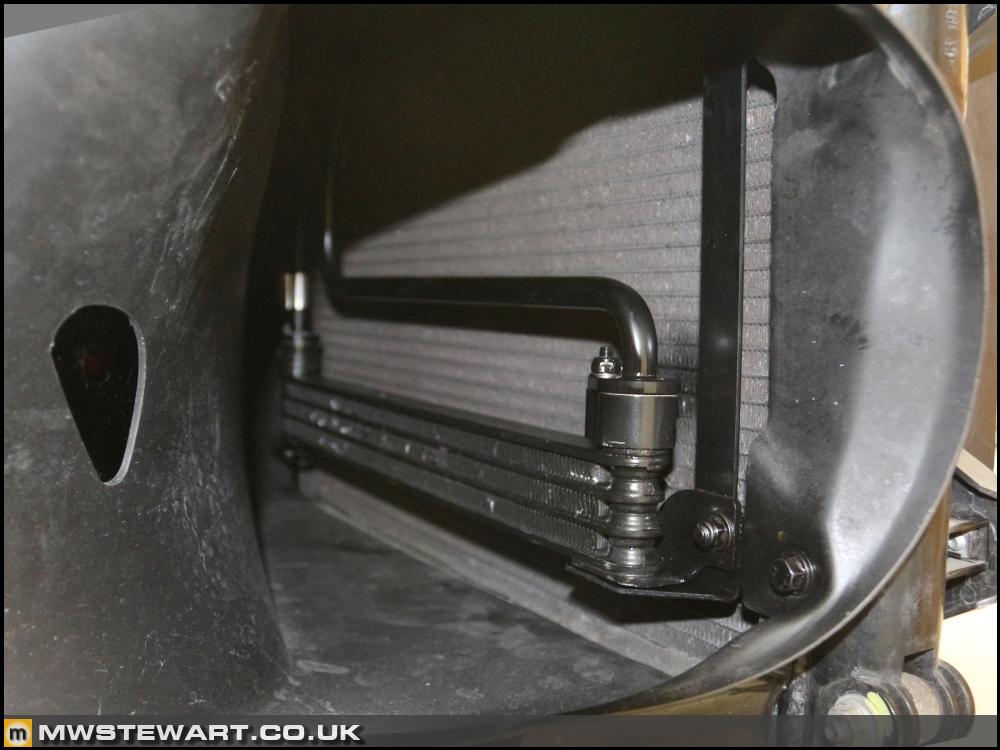
Scuderia PAS cooler fitted with RH radiator pack and Scuderia duct.
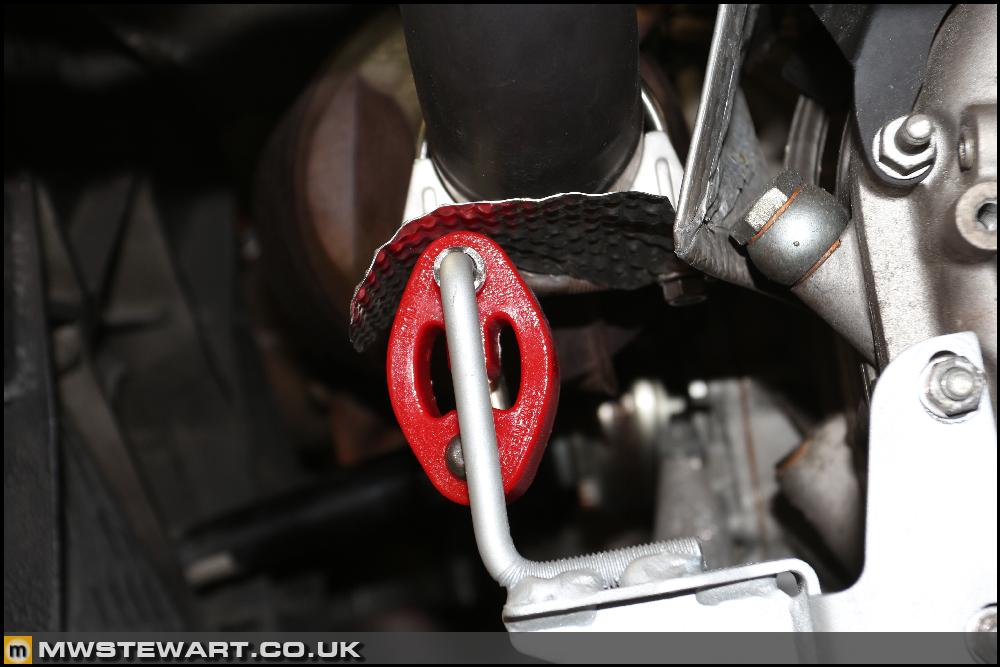
Catalytic converter mount heat shields
I had some spare Nimbus laying around from a previous project so decided for the sake of 20 minutes I would fabricate some heat shields for the cat mounts.
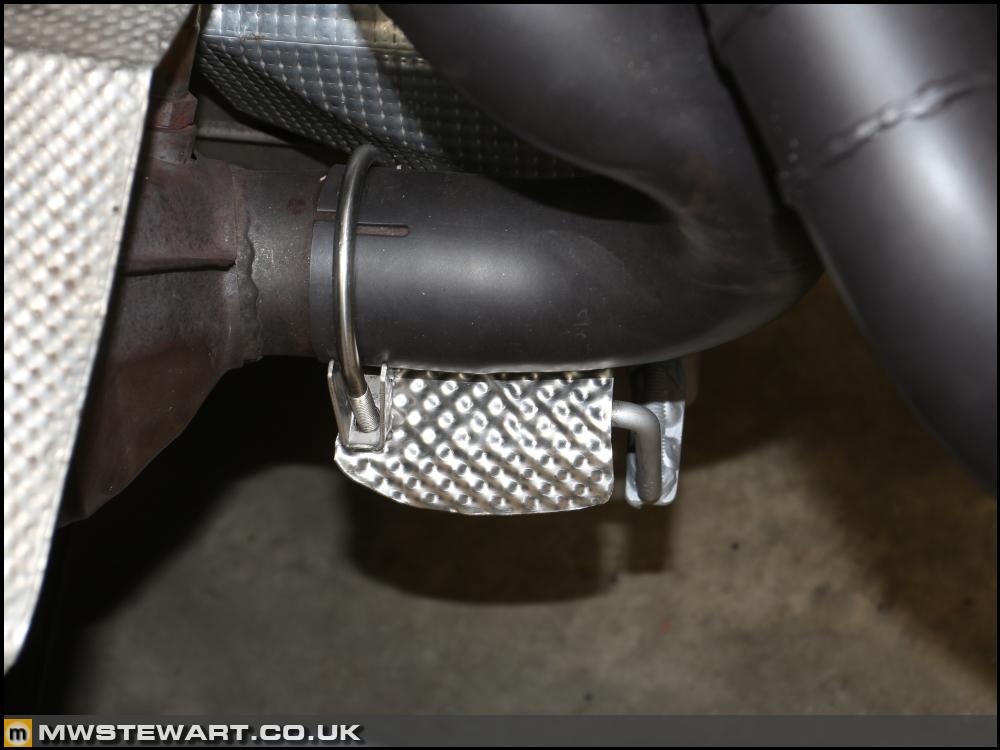
On each side the new shields butt up to the existing gearbox shields.
Rear bumper finishing details
As previously stated some of my parts are still on back order. The Scuderia bumper is fitted with a large grille covering the black painted area around the exhausts, but the time has come where I want the car back on the road so I'm going to have to compromise by running without it.

The grille covers a cooling aperture on each side of the bumper and of course the holes that it is fastened through.
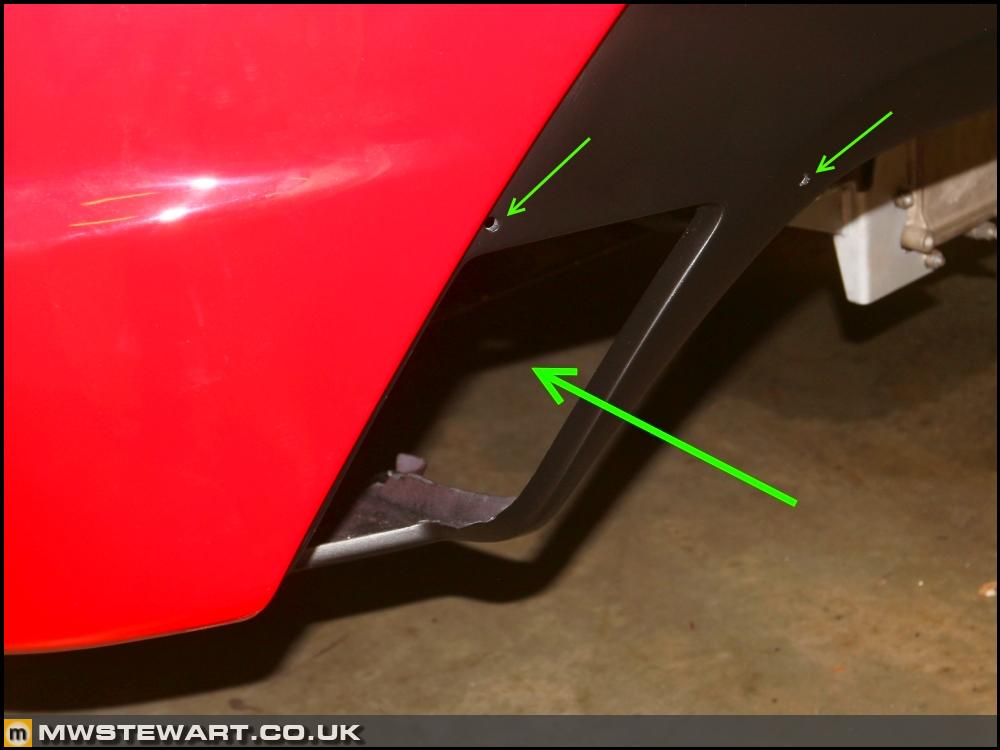
I’ve fabricated a couple of grilles for the cooling apertures and have on order some 6mm blanking plugs for the fastening holes. The grilles are secured with stainless fastenings to some of the OE grille Rivnuts and the upper sections is held with butyl tape. There compound curves in the Scuderia grille so it would have taken more time than I have available to fabricate an acceptable temporary version.
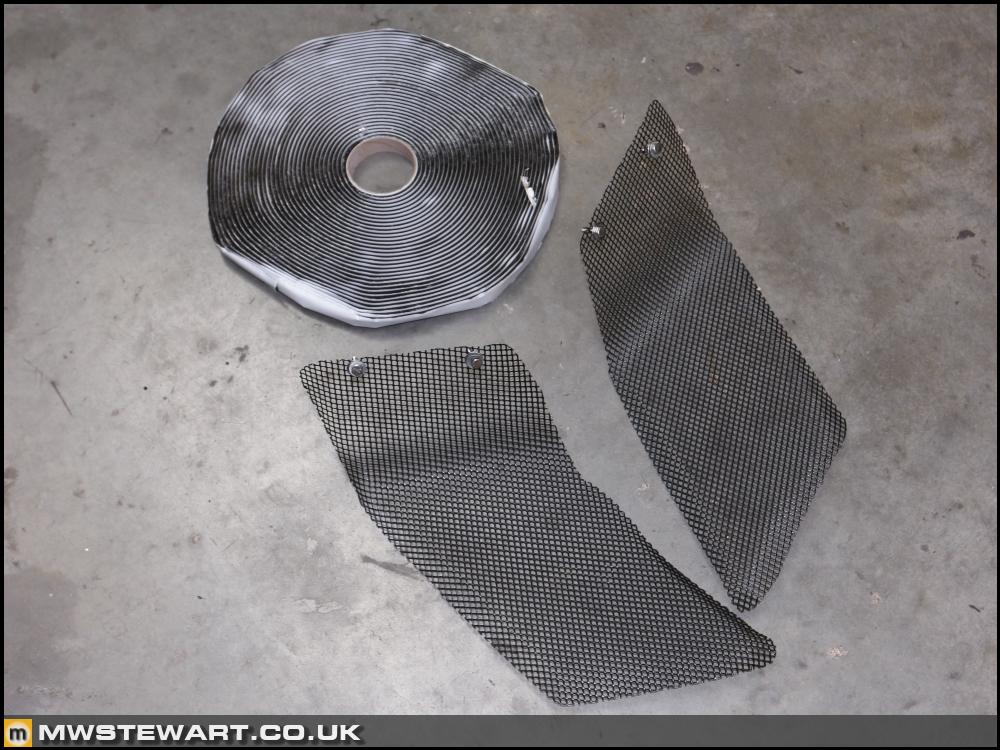
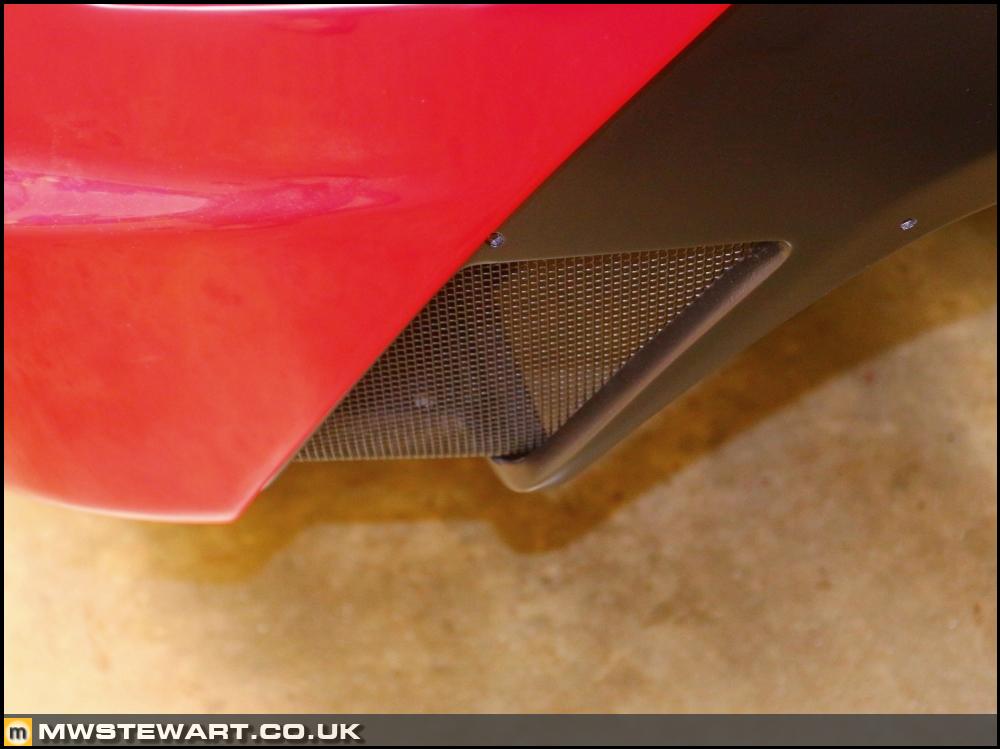
New grilles fitted. Blanking plugs to be fitted when they arrive.
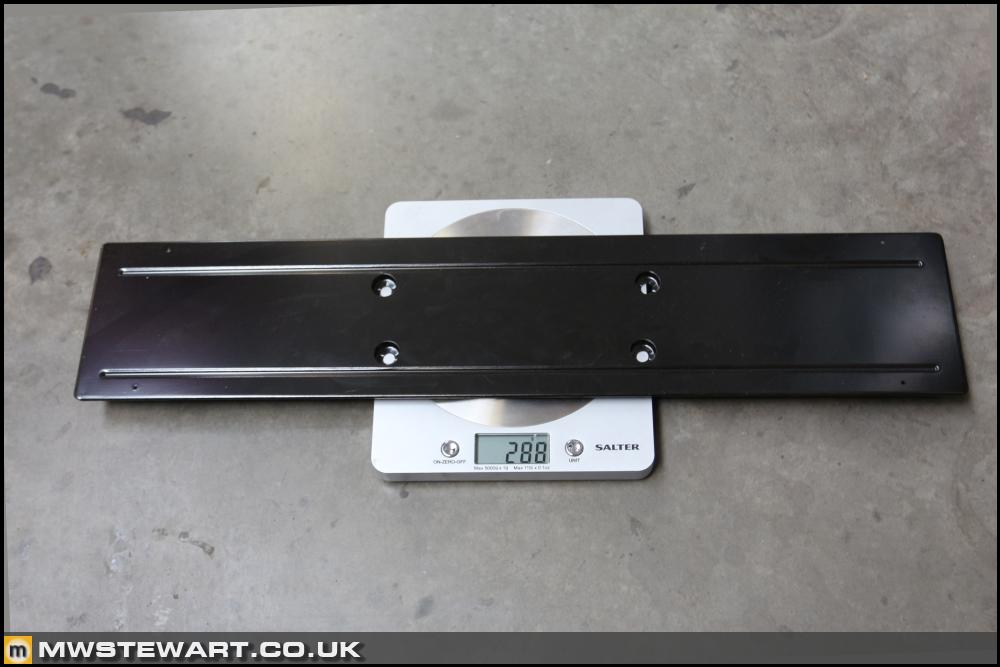
The rear number plate is usually mounted to a plinth - which I bought new - but after some experimentation I found I actually preferred the plate mounted directly to the bumper itself.
Rear end final assembly
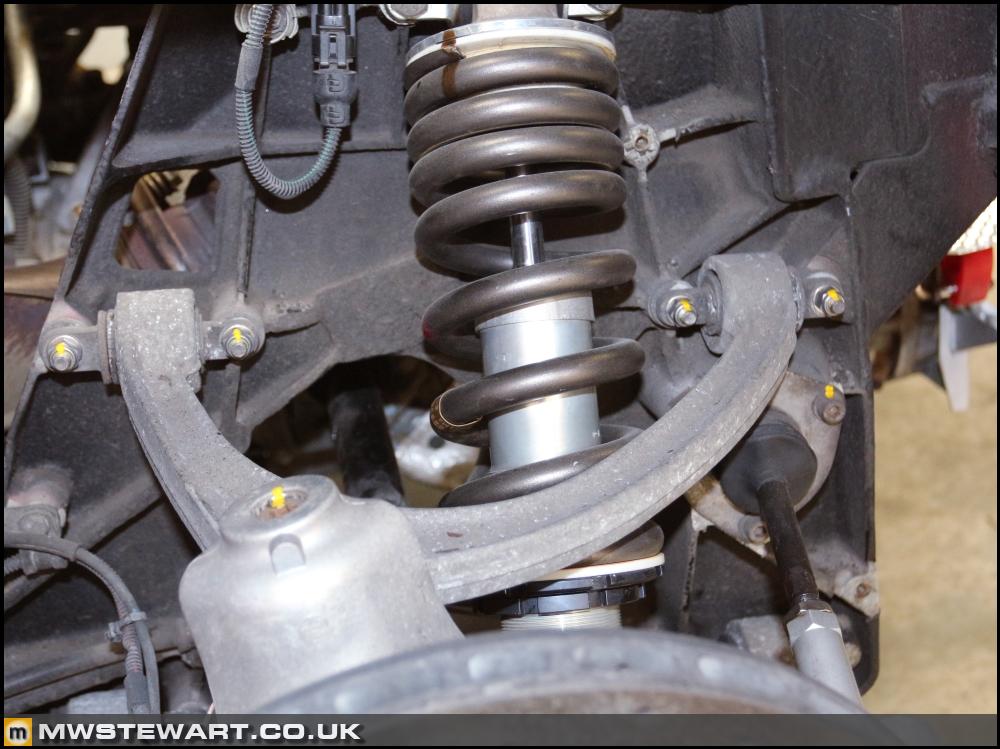
I've been around the car checking torque settings for all suspension nuts and bolts then marking them with Torque Seal once checked. I'm glad I did because some of the lower arm to chassis nuts were out by a fair bit.
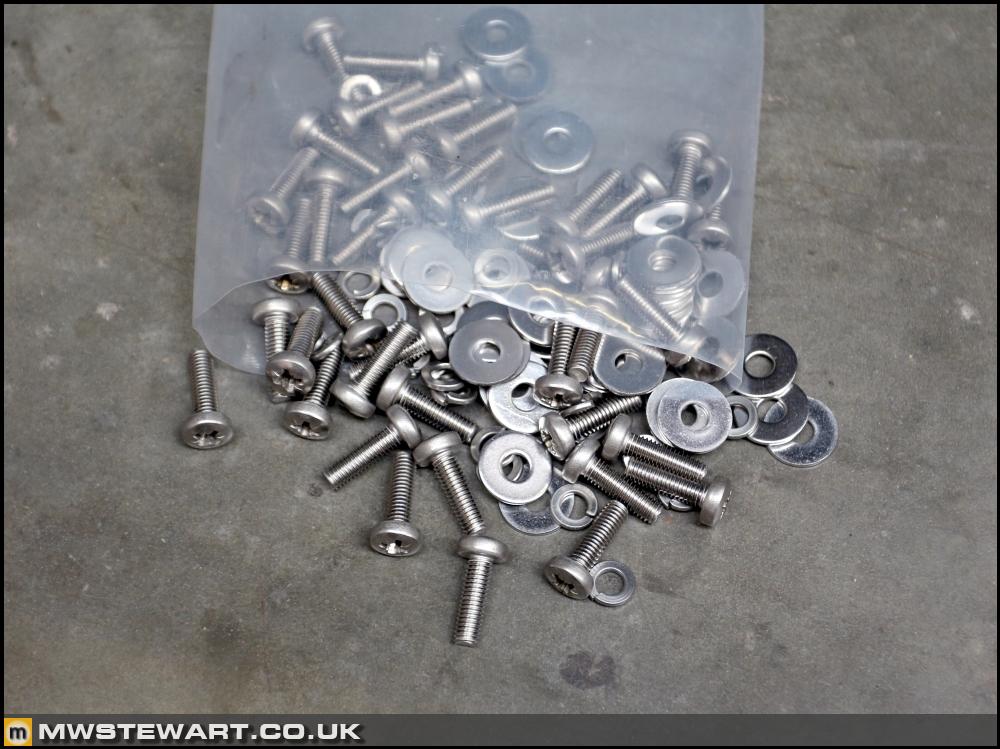
I've replaced the wheelarch liner fastenings with stainless versions; I kept the pan head as per OE.
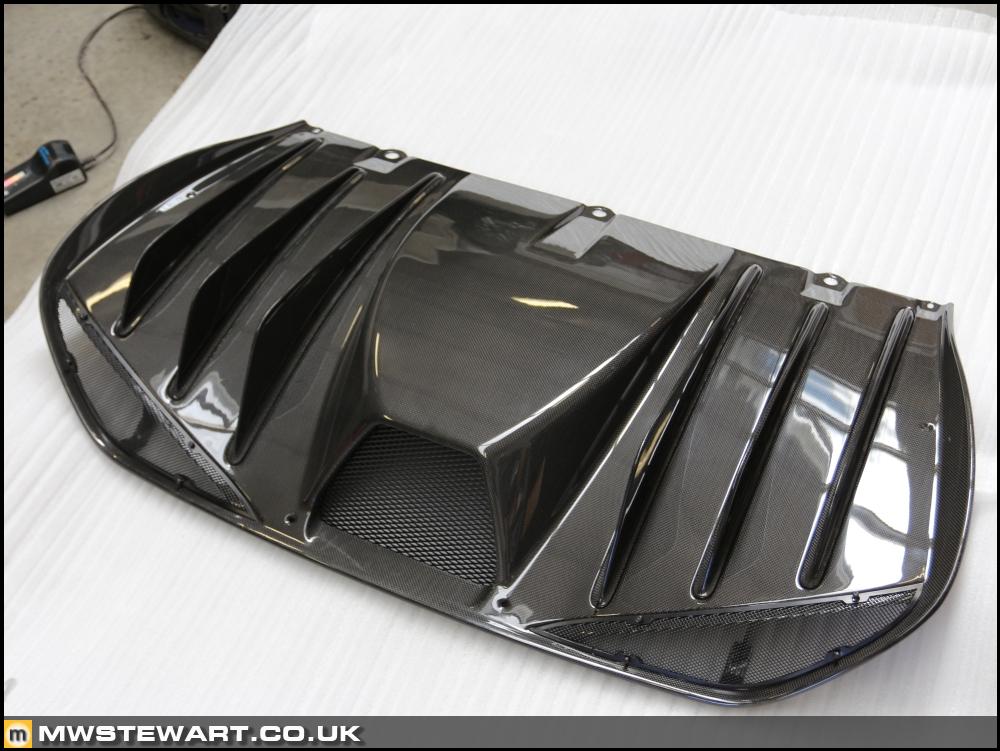
The carbon rear diffuser is ready to go on but I ran out of time this week.
Front bumper
I previously ordered some 3mm ABS Textured Sheet and Dad kindly made some skid plates from it. I've affixed them with construction gel tape used for securing aluminium cladding to buildings and motorhomes. I did not want to use bolts because in the worst case scenario I'd rather the skid plates were damaged or even ripped off rather than the risk damage to the bumper itself.
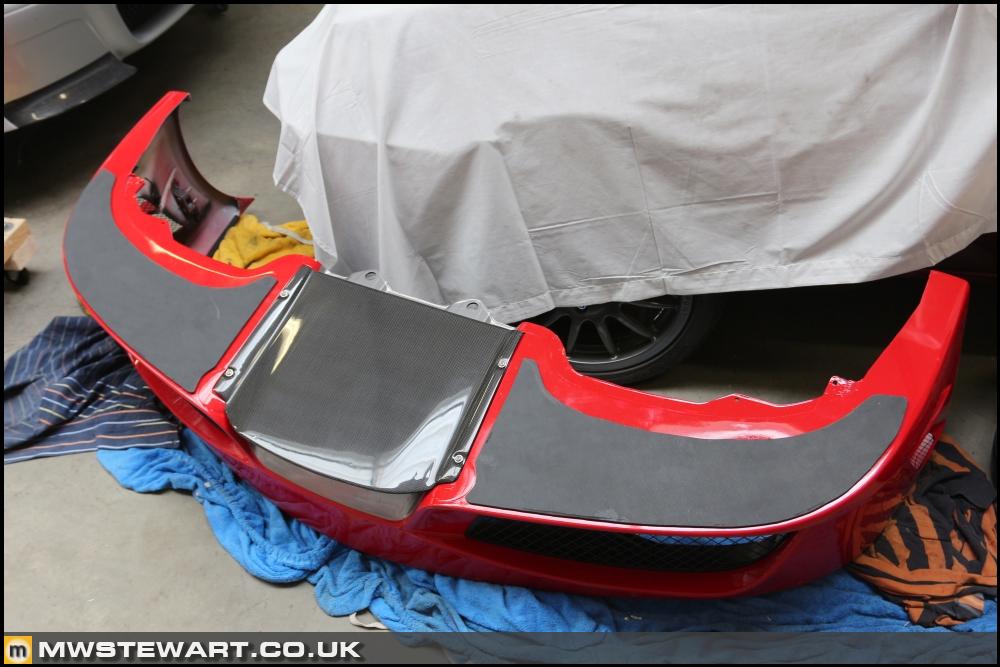
Headlamps
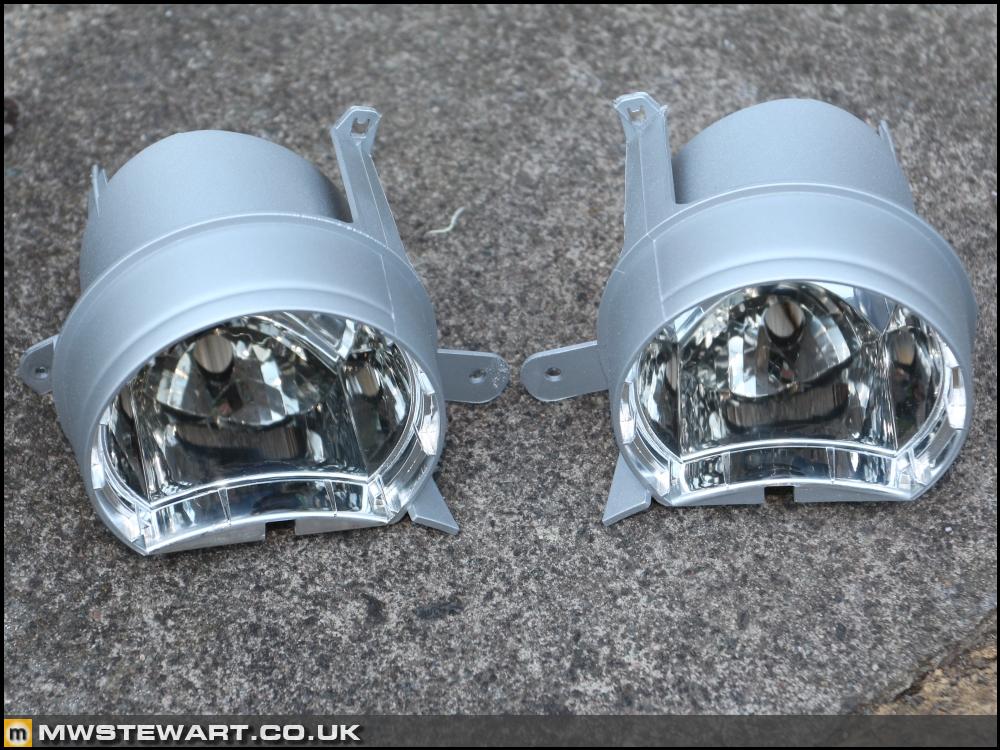
I have a couple of changes for the headlamps: 1) de-chrome the light pods, and 2) make clear indicator lenses.
Indicator pods sprayed. These required careful masking as obviously the internal chrome must remain to reflect light from the bulb. I used a scotch pad to key the existing surface.
The Scuderia cluster arrived back from FAI and I had a bit of a game with customs along the way: the declaration form didn't make it clear this was a return consignment so I was charged import duty on the value of the clusters rather than the work carried out. There was a £400 difference between the two!
I fitted the Scuderia cluster to test its various functions and all were OK, and the recorded mileage being correct. The engine starts and rev counter works, too, so FAI did good! Changing Manettino position is recognised on the cluster as a beep which tells me the drive mode CAN words are the same between F430 and Scuderia but the Scuderia cluster won’t communicate over CAN with the F430 ABS module, so obviously the next stage is to retrofit that. I already have the new wiring looms I just need the digital lat/long yaw sensor.
The ABS work will come under phase 2 of the project, so on the mean time I disassembled both clusters and swapped the dial faces and needles, then refitted the original F430 cluster to give me the Scuderia look.
Rosso instrument cluster cowl
Fitted and from the drivers’ seat it looks good, and will look even better once I find a Scuderia steering wheel to be trimmed in matching Rosso. I will be very pleased with the overall look.
The problem was from outside the car the OEM Rosso leather looks a dirty shade of red against the Rosso Corsa paintwork, so for now I've removed the new cowl and refitted the original but ordered some leather samples to choose a shade that better matches the paint. I’ll have the replacement retrimmed when I find a Scuderia wheel.
Scuderia PAS cooler
F430 (top) and Scuderia (bottom). The Scuderia cooler is a bar and plate type which provides more cooling capacity than the F430 tube type. Unfortunately a few parts are on back order via Eurospares and one of those was the rear bracket for the new PAS cooler, so my Dad tried his hand at fabrication and made the bracket. It fits perfectly.
The Scuderia cooler is a KTM part and perhaps from one of their four stroke bikes. I searched online for the reference 43240 but didn’t return anything.
Scuderia PAS cooler fitted with RH radiator pack and Scuderia duct.
Catalytic converter mount heat shields
I had some spare Nimbus laying around from a previous project so decided for the sake of 20 minutes I would fabricate some heat shields for the cat mounts.
On each side the new shields butt up to the existing gearbox shields.
Rear bumper finishing details
As previously stated some of my parts are still on back order. The Scuderia bumper is fitted with a large grille covering the black painted area around the exhausts, but the time has come where I want the car back on the road so I'm going to have to compromise by running without it.
The grille covers a cooling aperture on each side of the bumper and of course the holes that it is fastened through.
I’ve fabricated a couple of grilles for the cooling apertures and have on order some 6mm blanking plugs for the fastening holes. The grilles are secured with stainless fastenings to some of the OE grille Rivnuts and the upper sections is held with butyl tape. There compound curves in the Scuderia grille so it would have taken more time than I have available to fabricate an acceptable temporary version.
New grilles fitted. Blanking plugs to be fitted when they arrive.
The rear number plate is usually mounted to a plinth - which I bought new - but after some experimentation I found I actually preferred the plate mounted directly to the bumper itself.
Rear end final assembly
I've been around the car checking torque settings for all suspension nuts and bolts then marking them with Torque Seal once checked. I'm glad I did because some of the lower arm to chassis nuts were out by a fair bit.
I've replaced the wheelarch liner fastenings with stainless versions; I kept the pan head as per OE.
The carbon rear diffuser is ready to go on but I ran out of time this week.
Front bumper
I previously ordered some 3mm ABS Textured Sheet and Dad kindly made some skid plates from it. I've affixed them with construction gel tape used for securing aluminium cladding to buildings and motorhomes. I did not want to use bolts because in the worst case scenario I'd rather the skid plates were damaged or even ripped off rather than the risk damage to the bumper itself.
Headlamps
I have a couple of changes for the headlamps: 1) de-chrome the light pods, and 2) make clear indicator lenses.
Indicator pods sprayed. These required careful masking as obviously the internal chrome must remain to reflect light from the bulb. I used a scotch pad to key the existing surface.
Sorry if this has already been posted, your old car repaired and for sale...
http://www.ebay.co.uk/itm/2006-FERRARI-F430-SPIDER...
http://www.ebay.co.uk/itm/2006-FERRARI-F430-SPIDER...
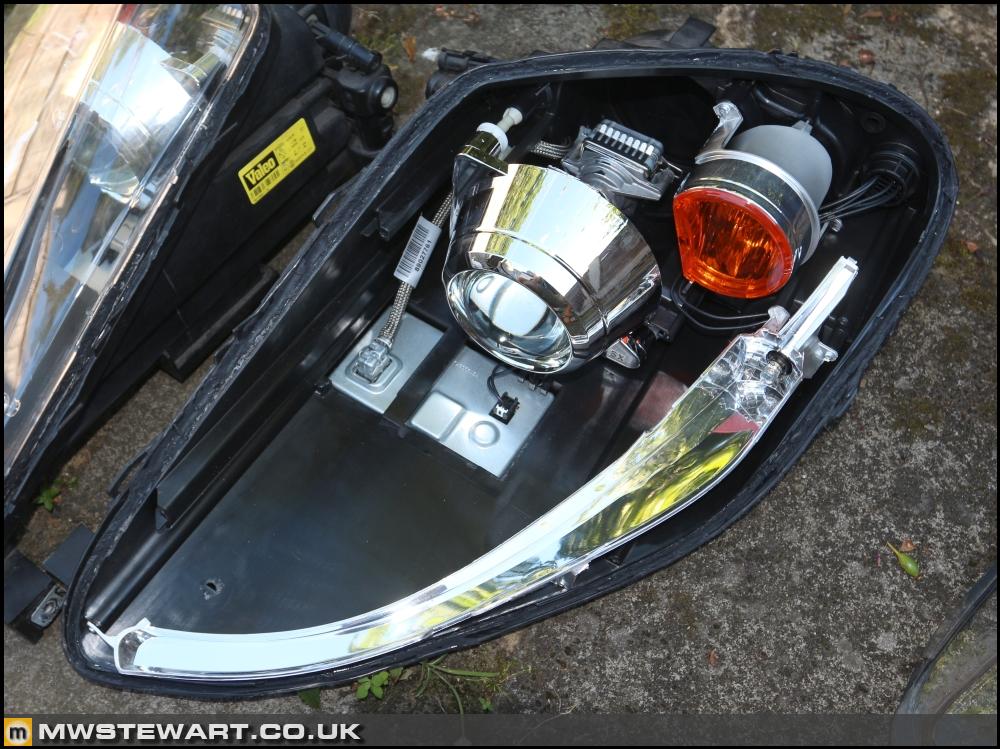
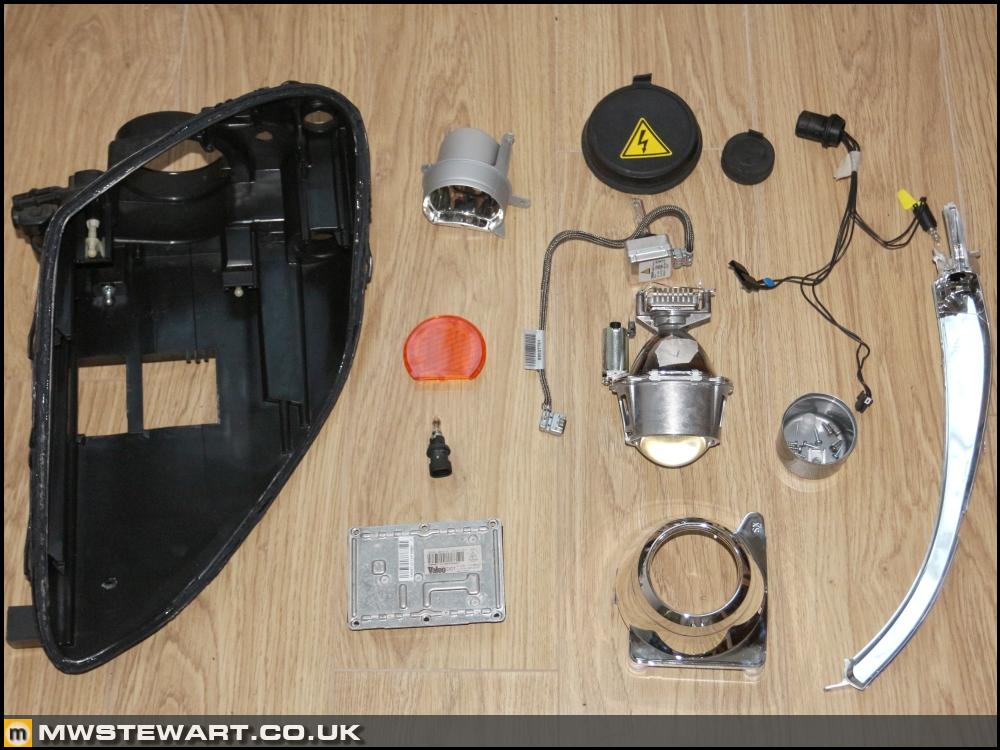
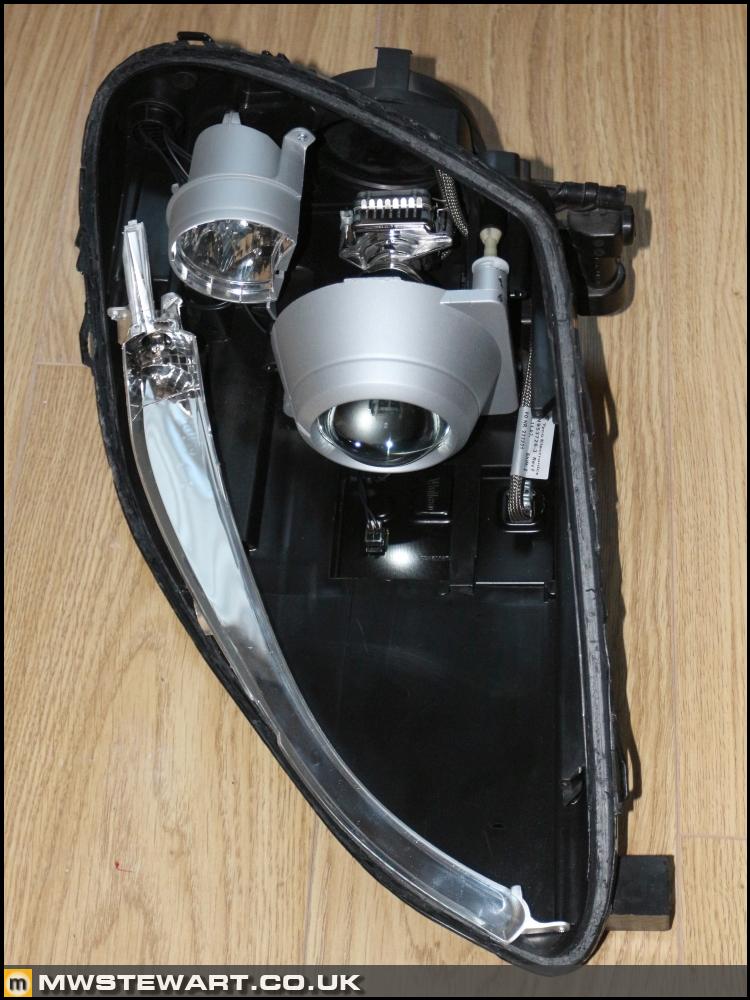
I spent some time on the headlamps in the garden this eve after a nice BBQ. I was beginning to think summer wouldn't arrive! Anyway, I found it best to completely strip the headlamps to finish them. Once stripped, I could remove the last traces of the original sealant, and it also gave me an opportunity to clean the projector lenses.
RH headlamp completed ready for the Scud Ing Swiss ILUAL43 'Ultimate Version' DRL to be fitted.
I'm still waiting for the carbon headlamp inserts from Stoian at Parts3000. I sent my originals off at the beginning of June and the carbon versions were supposed to be manufactured in 20 days, but there have been problems. I don't know if I will receive them in time to get the car on the road, which is frustrating, so I'm starting to think about a contingency plan.
willfinch36 said:
Sorry if this has already been posted, your old car repaired and for sale...
http://www.ebay.co.uk/itm/2006-FERRARI-F430-SPIDER...
I just saw this also. http://www.ebay.co.uk/itm/2006-FERRARI-F430-SPIDER...
The exhaust alignment leaves much to be desired!

Gassing Station | Readers' Cars | Top of Page | What's New | My Stuff