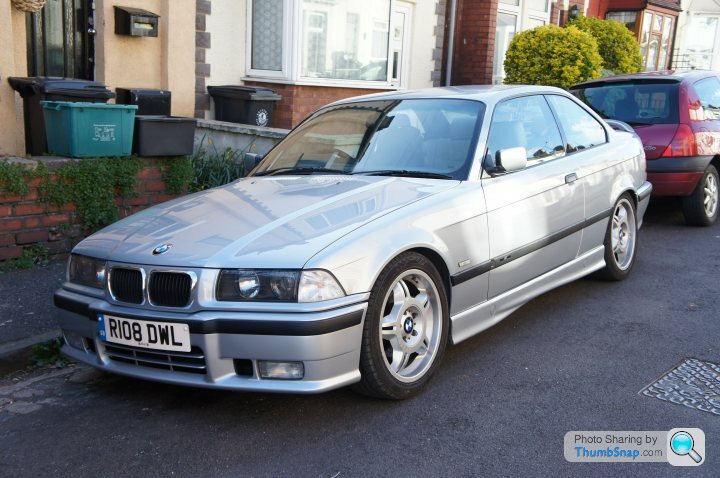
Yet another rescued E36 328i M Sport project...
Discussion


I love seeing interesting cars being rescued and this one's coming together very well and looking good , congratulations.
I have to say that way back at the beginning I was shocked at the amount of filler/fibreglass that had been applied to the NS arch especially as the previous photo showed the arch tacked on.
You say that it was seam welded but I do hope that you have proof positive that they were . I'm restoring an early E24 and have replaced both inner and outer arches ( all work done by myself ) and even though I stitch welded the arches correctly to minimise the panel warping ( and it still did .....) the finishing required no more than 2mm filler over the linished repair at the deepest point.
I cannot understand why any bodyshop would apply copious quantities of filler material on to a repair that only takes expensive time to remove again to acheive the correct contour . The fact you say that fibreglass was used sets alarm bells ringing. I see no reason for the use of fibreglass on a repair like this .
I sincerely hope that no problems occur on either of the arches but I've never seen that approach before .
This is not meant to be a criticism of your work. I wish you good luck and please keep the updates coming.
Here's mine during and after .


Edit .
On looking at your photos again I see that the tacked arch is the OS whereas the fibreglassed arch is the NS , did you get photos of the NS during repair ?
Edited by steely dan on Tuesday 30th December 21:27
Theoldfm said:
There may be a lot of filler in that arch, but I am sure that it will be ok and very surprised if it did crack - looking at the whole thread I would say that this is turning into a really lovely car - not another 328i sport lost at all... Don't be so mean!
thanks for that! I was really P****d off with some of the comments 'dumped' on my thread by one or two individuals, who seem more intent on being negative and destructive, rather than offering constructive criticism...Was considering deleting the whole thing...

RickBristol said:
thanks for that! I was really P****d off with some of the comments 'dumped' on my thread by one or two individuals, who seem more intent on being negative and destructive, rather than offering constructive criticism...
Was considering deleting the whole thing...
Why are you throwing your toys out of your pram?Was considering deleting the whole thing...
You have put some pictures up of some pretty shoddy work. Expect it to be commented on.
The finished article I'm sure looks fine but you will be having problems with that.
steely dan said:
I love seeing interesting cars being rescued and this one's coming together very well and looking good , congratulations.
............
On looking at your photos again I see that the tacked arch is the OS whereas the fibreglassed arch is the NS , did you get photos of the NS during repair ?
Thanks again for some positive support!............
On looking at your photos again I see that the tacked arch is the OS whereas the fibreglassed arch is the NS , did you get photos of the NS during repair ?
They were both done in the same fashion.
When you take on something like this - I've never taken on a restoration project before - there are a lot of fairly steep learning curves to negotiate. Only since it has been pointed out that the definition of the rear arches had been somewhat lost by the use of too much fiberglass, I now realise that I should have been more in control of what the guys at the bodyshop were doing. With a lot going on at the same time, and having only had limited opportunities to visit the bodyshop, it can be easy to miss things.
Anyway, these threads are supposed to be for people recording the projects they are working on, not a shooting gallery.
Edited by RickBristol on Friday 2nd January 13:59
Good for you, well said. There is constructive criticism and there is slagging someone's pride and joy. As you say, it's a learning curve. If your arches cause a problem in the future, then it's a pain in the backside. I'm sure that most of us have been bitten in the past by work that we have paid for and turned out not to quite be what we expected.
At the end of the day, it's your car, you enjoy it. If people have concerns or warnings for you, there are ways of saying it.
Keep going with it and this thread going.
At the end of the day, it's your car, you enjoy it. If people have concerns or warnings for you, there are ways of saying it.
Keep going with it and this thread going.
Escy said:
To be fair, I commented at the time about the standard of the work from the body shop when you 1st posted the pictures of the prep being done. You dismissed my comments, you could have taken them on board and raised the issue with the guys doing the work before it'd been painted.
How many years have you been doing bodywork then ?Escy said:
I've prepped a couple of my own cars (in a bodyshop so picked up on how things should be done) and i've welded in arches in the past, not going to make out i'm an expert but i've got a decent idea.
Fair comment, but does anybody on here really believe that the arches have only been tacked on and then glassed over ? looks a decent job, done in a proper oven, I doubt the body shop skimped on fitting them.And don't forget most of the bridging filler would have been ground off before final filling and on to primer.
RickBristol said:
Well, whether you lot are interested or not, I have managed to secure a 3:15 ratio limited slip diff, from an E36 325i, for £128 including VAT and delivery!!! Has also been looked-at, by someone in-the-know, to evaluate that it should work without exploding...
BTW, why are people trying to sell these things on e-bay for £300 - £400??? The guy I'm buying mine from has plenty of them; they aren't even that rare!?!?!??? I can, however, understand that a refurbed race-ready M3 diff could cost you a hefty £1,000 +
I have also bought a set of brand new BMW diff mounting bushes, direct from BMW, for £45 including VAT. So, job's a good un...
My mechanic mate will fit them, next weekend, and do a spot of welding for the rear passenger side jacking-point, as was found to have a little hole...
Rick - have emailed you, but can you put me in touch with your diff supplier - after one asap for my 323 touring.BTW, why are people trying to sell these things on e-bay for £300 - £400??? The guy I'm buying mine from has plenty of them; they aren't even that rare!?!?!???
I can, however, understand that a refurbed race-ready M3 diff could cost you a hefty £1,000 +I have also bought a set of brand new BMW diff mounting bushes, direct from BMW, for £45 including VAT. So, job's a good un...
My mechanic mate will fit them, next weekend, and do a spot of welding for the rear passenger side jacking-point, as was found to have a little hole...
Edited by RickBristol on Thursday 9th October 20:07
Well, its been quite a while... My mate from Southampton eventually turned-up yesterday with most of the remaining parts for the car.
First up is the genuine 328 2.93 ratio L.S.D. that we managed to aquire for £200! The guy that we got it from reckons that it locks-up well and has no clonking or grinding noises.

Even still, you can see in the above picture that it has a missing output flange... My mate assures me that one of my originals will serve as a replacement.
I started the day by removing the old bushes...
This was a lot easier and took a lot less time than I expected.

The replacements...
However, we were unable to find a supplier that had any of the correct diff oil in stock. And given the daunting task of trying to correctly press-in the new bushes
I made a call to my mechanic, and he happily agreed to take care of the fitting for us. So a couple of weeks before this is done...
First up is the genuine 328 2.93 ratio L.S.D. that we managed to aquire for £200! The guy that we got it from reckons that it locks-up well and has no clonking or grinding noises.
Even still, you can see in the above picture that it has a missing output flange... My mate assures me that one of my originals will serve as a replacement.
I started the day by removing the old bushes...
This was a lot easier and took a lot less time than I expected.
The replacements...
However, we were unable to find a supplier that had any of the correct diff oil in stock. And given the daunting task of trying to correctly press-in the new bushes
I made a call to my mechanic, and he happily agreed to take care of the fitting for us. So a couple of weeks before this is done...
Edited by RickBristol on Sunday 12th April 13:29
Next, we got the car up in the air

And set about putting on the Bilstein B10 front suspension parts

And after a lot of grunting, and much use of a careful selection of expletives, we managed to get the old suspension off of the car...

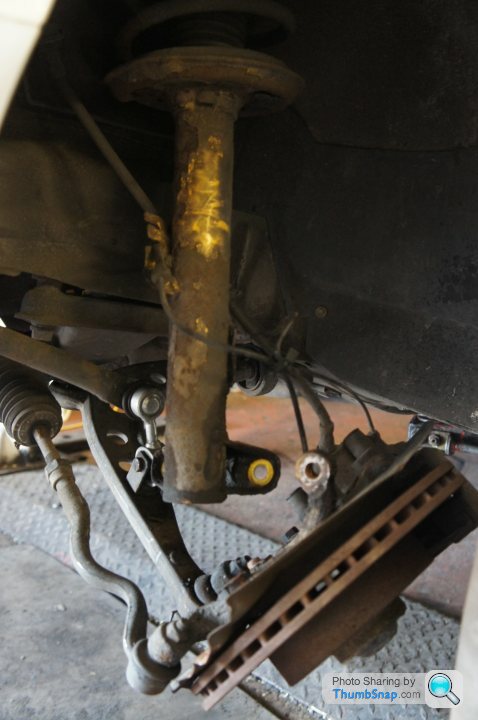

Here you can see the remnants of the yellow paint that - as far as I'm aware - show that the car originally had the sports suspension upgrade when manufactured.
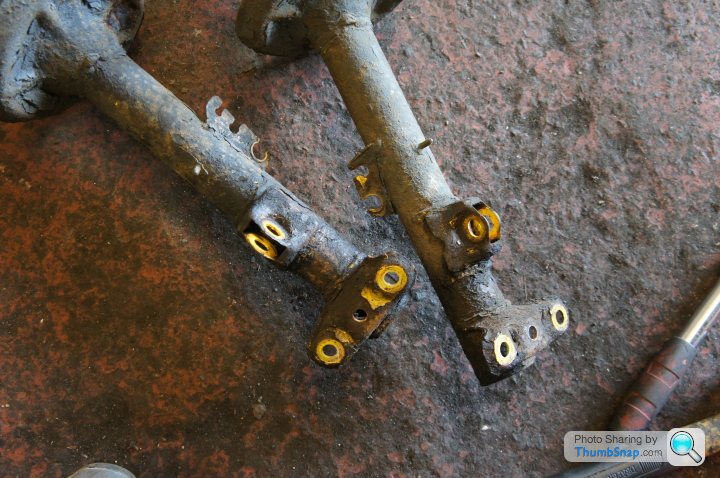
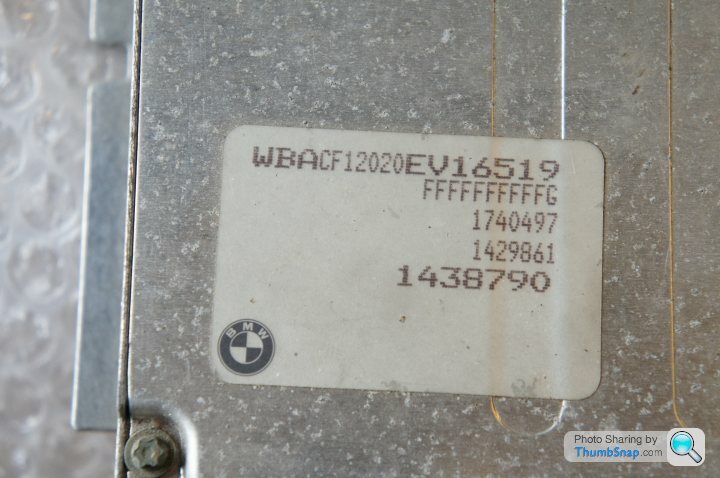
This ties-up with the original build spec that I managed to get from BMW - using the car's VIN code...
Code Optional Equipment
...
S704A M Sports suspension
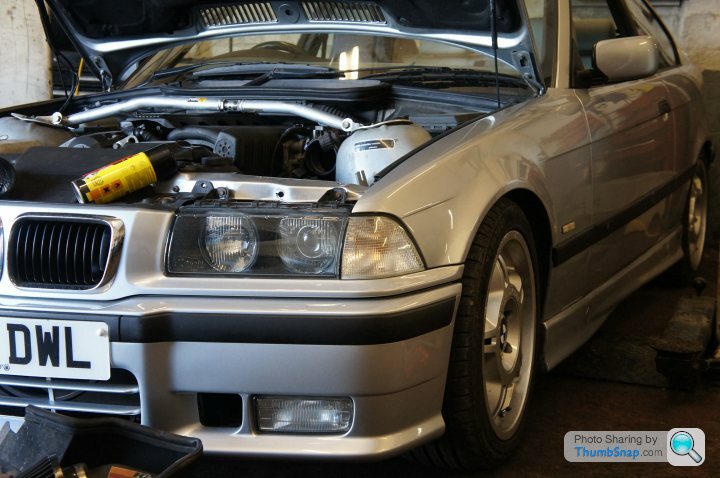
The suspension now fitted - in this picture you can also see the new drop-links that I had fitted a couple of weeks earlier

Look how much difference a 60mm drop in suspension height makes...

However, this did cause some issues with removing the car from the lift... We had to use a couple of jacks so that we could remove the lift arms from under the car, as it was so much lower...
And set about putting on the Bilstein B10 front suspension parts
And after a lot of grunting, and much use of a careful selection of expletives, we managed to get the old suspension off of the car...
Here you can see the remnants of the yellow paint that - as far as I'm aware - show that the car originally had the sports suspension upgrade when manufactured.
This ties-up with the original build spec that I managed to get from BMW - using the car's VIN code...
Code Optional Equipment
...
S704A M Sports suspension
The suspension now fitted - in this picture you can also see the new drop-links that I had fitted a couple of weeks earlier
Look how much difference a 60mm drop in suspension height makes...
However, this did cause some issues with removing the car from the lift... We had to use a couple of jacks so that we could remove the lift arms from under the car, as it was so much lower...
Edited by RickBristol on Sunday 12th April 13:58
Moving on...
The next task was fitting of the cold air induction kit and heat shield.

I manged to get this second-hand kit for less than a hundred quid to boot!
Out with the old...
And after giving the MAF a good clean with the help of some electrical contact cleaner, the kit took no time at all to instal

The next task was fitting of the cold air induction kit and heat shield.
I manged to get this second-hand kit for less than a hundred quid to boot!
Out with the old...
And after giving the MAF a good clean with the help of some electrical contact cleaner, the kit took no time at all to instal
Next, we replaced the ECU, EWS and the key chip... This is the re-mapped DME

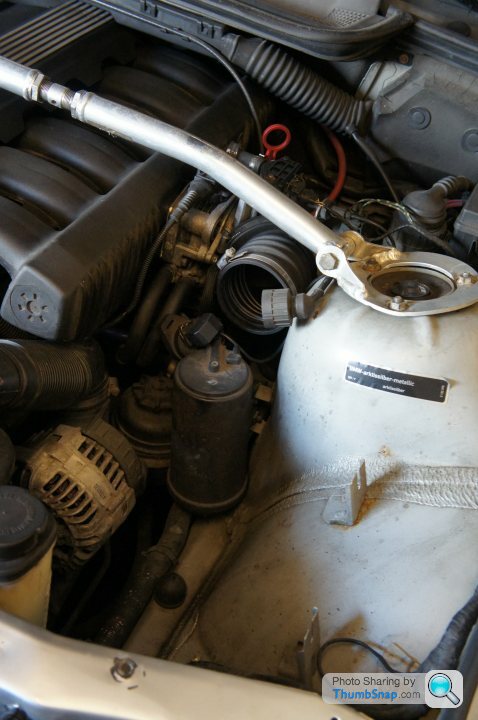
So we had to access the old DME here...

And the place that it lives in - in the engine bay bulk-head...


We then had to replace the ECU, located behgind the glove box...

It's amazing how much stuff has been crammed behind the glove box

So we had to access the old DME here...
And the place that it lives in - in the engine bay bulk-head...
We then had to replace the ECU, located behgind the glove box...
It's amazing how much stuff has been crammed behind the glove box
Edited by RickBristol on Monday 18th May 11:31

Been a few weeks since my last update but eventually got my LSD sorted and fitted last week, so here goes...
Here is the little beauty, complete with the correct Castrol Syntrax 75W-140 LSD oil and new bushes.

The usual story, up in the air she goes...

Interestingly, the guys only detached the anti-sway bar in order to be able to gain sufficient access to remove the old diff. I had previously 'Googled' this process - out of curiosity - and found You Tube videos where others had removed the rear exhaust etc.

The mechanic also checked the sub-frame mounting points, in order to determine if any welding needed to be done, before installing the new diff.
It was given a clean bill of health, just had a little surface rust. Good news indeed!
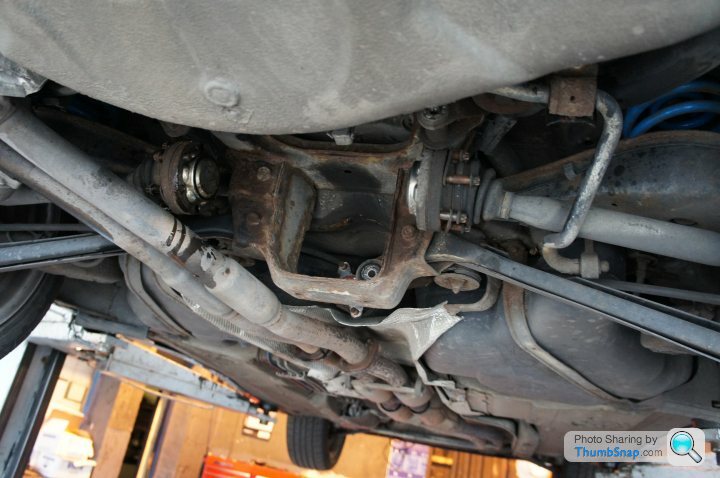
On the ground the old open diff - on the left - and my new LSD - on the right - looked identicle, until I turned the input flanges and could see the difference in output shaft rotation.

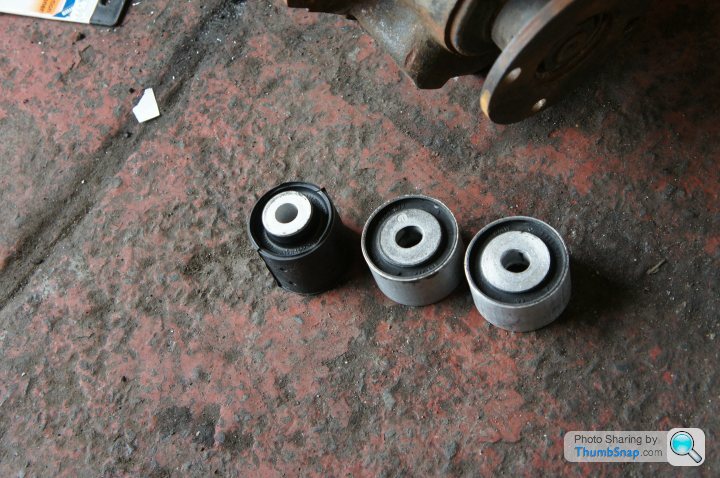
The guys now moved onto removing the old bushes from the LSD.


They then pressed the new bushes into place with the help of a bench-vice.


New bushes now fitted.

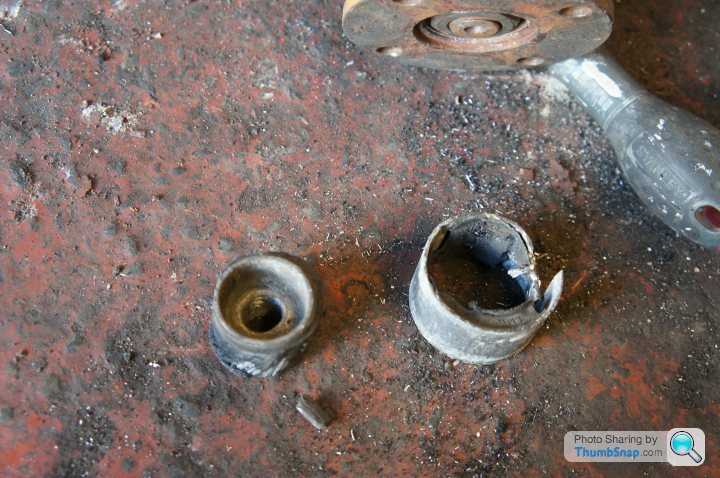
The bush mounted in the sub-frame proved to be difficult and time consuming to remove. In the pic below, the mechanic is using an 'air-hammer' to try and remove the bush.
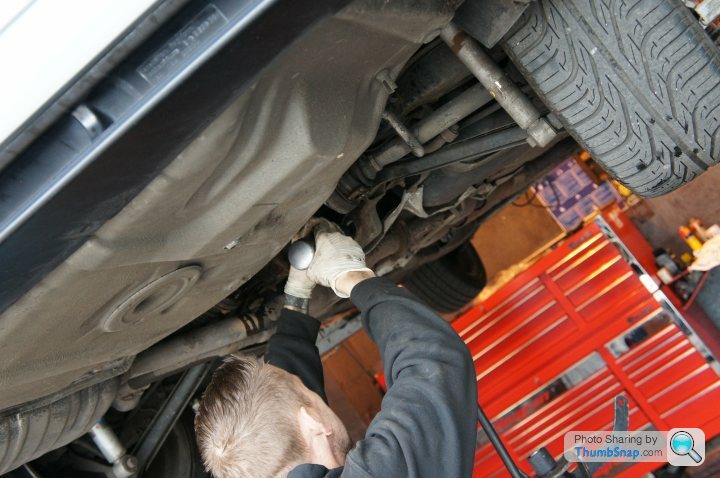
Gone!

The remains of the old sub-frame bush.

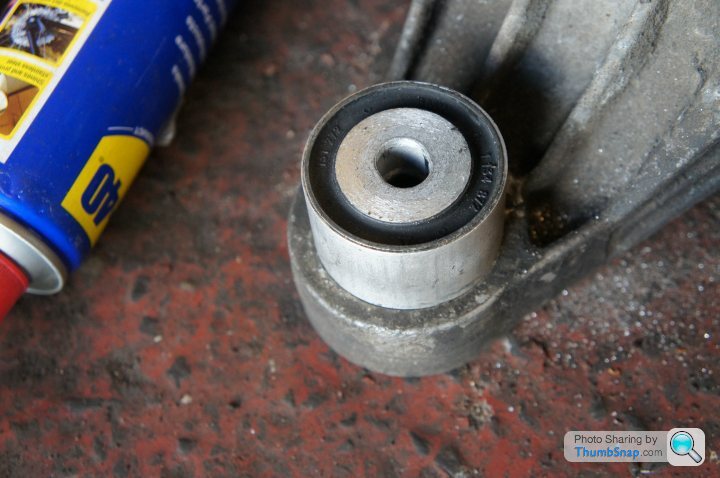
Installing the new sub-frame bush.

The new sub-frame bush now fitted.

Next, the new LSD gets a steam clean, so that the mechanic can check for possible oil seal leaks, before installing on the car.

And even gets a blow-dry...

Now the guys start installing the LSD onto the car.


The LSD casing had been adapted to accept a long through-bolt for the sub-frame mounting, instead of the original that just threaded into the diff casing.

This had to be shortened as it was too long to instal


And now it can be fitted through the diff casing and sub-frame mounting points.

After re-attaching the sway bar.

The job is done!

The mechanic also re-attatched the loose heat shield.

And the result of all this work, and money spent???
Can definitely notice the extra grip, when you put your foot down hard! And accelerates more agressively from standing still/ out of bends...
However, I would love to have a pic of the car doing a 'midnight' doughnut in the local Tescos car park, but after a lucky escape, involving a recent speeding incident have decided to play it cool for a while. Anyway, don't think my Pirelli 6000s would appreciate the rough treatment...
Here is the little beauty, complete with the correct Castrol Syntrax 75W-140 LSD oil and new bushes.
The usual story, up in the air she goes...
Interestingly, the guys only detached the anti-sway bar in order to be able to gain sufficient access to remove the old diff. I had previously 'Googled' this process - out of curiosity - and found You Tube videos where others had removed the rear exhaust etc.
The mechanic also checked the sub-frame mounting points, in order to determine if any welding needed to be done, before installing the new diff.
It was given a clean bill of health, just had a little surface rust. Good news indeed!
On the ground the old open diff - on the left - and my new LSD - on the right - looked identicle, until I turned the input flanges and could see the difference in output shaft rotation.
The guys now moved onto removing the old bushes from the LSD.
They then pressed the new bushes into place with the help of a bench-vice.
New bushes now fitted.
The bush mounted in the sub-frame proved to be difficult and time consuming to remove. In the pic below, the mechanic is using an 'air-hammer' to try and remove the bush.
Gone!
The remains of the old sub-frame bush.
Installing the new sub-frame bush.
The new sub-frame bush now fitted.
Next, the new LSD gets a steam clean, so that the mechanic can check for possible oil seal leaks, before installing on the car.
And even gets a blow-dry...
Now the guys start installing the LSD onto the car.
The LSD casing had been adapted to accept a long through-bolt for the sub-frame mounting, instead of the original that just threaded into the diff casing.
This had to be shortened as it was too long to instal
And now it can be fitted through the diff casing and sub-frame mounting points.
After re-attaching the sway bar.
The job is done!
The mechanic also re-attatched the loose heat shield.
And the result of all this work, and money spent???
Can definitely notice the extra grip, when you put your foot down hard! And accelerates more agressively from standing still/ out of bends...
However, I would love to have a pic of the car doing a 'midnight' doughnut in the local Tescos car park, but after a lucky escape, involving a recent speeding incident
have decided to play it cool for a while. Anyway, don't think my Pirelli 6000s would appreciate the rough treatment... Edited by RickBristol on Monday 18th May 12:53
While the car was in the garage I had a new in-line fuel filter fitted.

Interestingly, the mechanic reckoned that the one on the car had never been changed!

The new filter being installed.

And the protective cover being re-fitted.

Well, after we had previously cleaned the MAF sensor a few weeks ago, when the cold air induction kit was fitted - see previous post above - I was hoping that this would be the last step in sorting out the on-going fuelling issue - the car seems slightly starved of fuel and splutters a bit when I accelerate after driving slowly. But this was not to be!!! AND, 'Bunny-hops' aren't cool, when you're pulling away from the lights...
Looks like I'm going to have to shell-out another seventy pounds or so and take the car to the local BMW dealer to get some diagnostics done...
I'll update this particular post with the result of this, once I've had it done...
Interestingly, the mechanic reckoned that the one on the car had never been changed!
The new filter being installed.
And the protective cover being re-fitted.
Well, after we had previously cleaned the MAF sensor a few weeks ago, when the cold air induction kit was fitted - see previous post above - I was hoping that this would be the last step in sorting out the on-going fuelling issue - the car seems slightly starved of fuel and splutters a bit when I accelerate after driving slowly. But this was not to be!!!
AND, 'Bunny-hops' aren't cool, when you're pulling away from the lights... Looks like I'm going to have to shell-out another seventy pounds or so and take the car to the local BMW dealer to get some diagnostics done...
I'll update this particular post with the result of this, once I've had it done...
Just took a little diversion to look at a couple of other interesting threads...
E36 328, soft top, £575, What's the worst that could happen? (Thread here)
and
BMW E36 M3 3.0 Track Toy (Thread here)
As TroubledSoul commented on his M3 thread, begining to worry that I'm talking to myself here...
Anyone out there, or have I dissapeared into obscurity???
Anyway, as I commmented before on this thread - the main purpose of doing this, is to have a record of all I've done to this car, should I ever decide to sell it - given that I bought the car with no document history what-so-ever...
I use my threads on here for exactly the same reason.
I also now keep 2 spreadsheets for each car I have, one detailing expenditure (parts bought, date, cost and mileage when bought) to support the receipts / invoices I gather and the second details the work I carry out (date, what work is done, mileage when work done)
I keep every receipt / invoice, laminate them and put them in date order in a binder - come sale time its a guaranteed deal clincher - last 11 cars I have sold have all been within £50 of asking price and all to the first person to view

Gassing Station | Readers' Cars | Top of Page | What's New | My Stuff