Saab 9-5 Aero - winter hack!
Discussion


No worries macp.
It was a consideration I made myself, a high mileage manual needing a clutch vs an auto box that could be expensive if it did go wrong.
Mine only thumps into D when cold (maybe partly due to the increased idle rpm), once warm it doesn't thump at all, and is OK in R also. The noise I can hear, the jury is still out on whether this is engine or drivetrain related - something I need to investigate further, and more than likely, something & nothing, lol!! I do tend to listen & look for problems with new cars!!
But, with the journey I had at the weekend, I am so glad I bought the auto. In a car with an even slightly heavy clutch, it would have been tiring!!!
If I start to get any shifting issues, then I will deal with as necessary. Worst case I will have to source a used transmission or stump up for a recon one.
It's a shame that this particular asin warner box can be a little problematic, as I say, one of my old 850's had an earlier AW box and it had been to the moon and back without the slightest of autobox issues!
Fingers crossed I will be lucky!
You know I forgot I owned two Volvo`s later on both with auto boxes and they gave no trouble in fact I had the oil changed in the second an S70R and it really improved the smoothness of the box.I also think I read somewhere that a guy paid £300 for a recon box and another £300 to get it fitted to his 9-5 Aero.It could also be the infamous valve block but replacement is only about £450.For that kind of cost it aint worth worrying about is it.
Edited by macp on Wednesday 12th November 18:57
K321 said:
i found a quick way to make the car get more boost
remove the top vacuum tube from the boost control valve and then plug the loose tube
the car will go faster...accelerate quicker
i have 02 aero saloon manual stg3
That just means the EVAP system is goosed and that you're getting the power you're suppose to.remove the top vacuum tube from the boost control valve and then plug the loose tube
the car will go faster...accelerate quicker
i have 02 aero saloon manual stg3
K321 said:
robatron
no it makes all the aeros go faster
doesnt matter if its goosed or not
it takes one minute to do so i recommend it
if it doesnt work all you got to do is reattach the tube again
its worked for me and 3 others i know
No, it bypasses the EVAP system if its gone to sno it makes all the aeros go faster
doesnt matter if its goosed or not
it takes one minute to do so i recommend it
if it doesnt work all you got to do is reattach the tube again
its worked for me and 3 others i know
 t. If you tried the bolt mod on a brand new aero it'd make no difference. It just the one way valves giving up the ghost.
 Indeed, the 'bolt mod' just masks a problem with the one way valves in the evap system.
In the later (2004 on I think) cars the pipework is different so less of a problem. Believe there is still one way valve clost to the TB that can be a problem though.
EDIT - yep, as below...
http://www.uksaabs.co.uk/UKS/viewtopic.php?f=3&...
In the later (2004 on I think) cars the pipework is different so less of a problem. Believe there is still one way valve clost to the TB that can be a problem though.
EDIT - yep, as below...
http://www.uksaabs.co.uk/UKS/viewtopic.php?f=3&...
Well the 9-5 has been plodding along nicely - nothing exciting happening at the moment, poo weather and short days mean I haven't had much time of late - but still itching to give the car a good detail & polish the lights.
I had noticed a bit of extra noise when under load since I have had the car. I initially thought it was just that the B235R sounded a bit coarse, but it seems others on here disagreed.
After a lot of stop start driving in London the other weekend I had convinced myself it was noise from the autobox, but after yet more careful listening I am not so sure.
I'm wondering if it is induction related, it is coming from right hand side of engine (as a passenger it is not that noticable) and I have a subtle knock/loose sound from that area over bumps - so wondering if the airbox is loose/broken. It does sound more of an induction growl at higher revs, and only makes the noise under load. Hopefully get chance to have a look tomorrow.
Flickering headlamp was sorted with a new lamp, so no dramas there.
Still need to sort the xenon levelling fault out, either the sensors need recalibrating after a link arm was replaced, or one of the sensors is duff. Anyone with a Tech2 close to Sudbury, Suffolk that could read the codes for me? I may well buy a Tech2 unit in time, but a bit of an outlay just to diagnose my xenon fault, lol!!
There hasn't really been much to report over the last couple of months - Sven has been plodding along as only a practical family car can - albeit with a bit of shove if you fancy it!
My other half has been using it daily whilst she has tucked the S2000 up in the garage for the winter. I personally think my 944 deserves that spot in the garage, but you have to let the ladies have their own way every once in a while
Ever since we had the car, very occasionally it wouldn't start - taking a couple of turns of the key, or holding it in the start position for a few seconds before it would crank.
A couple of times last week it was very stubborn, taking lots of attempts to get it to go. The starter and battery had been replaced by previous owner for same issue, but from what I gather, the Neutral Safety switch is often the culprit for this problem.
So on a very cold Sunday, myself full of cold - I decided I would strip it down.
So with the battery & tray out of the way you can see the switch sitting on top of gearbox:
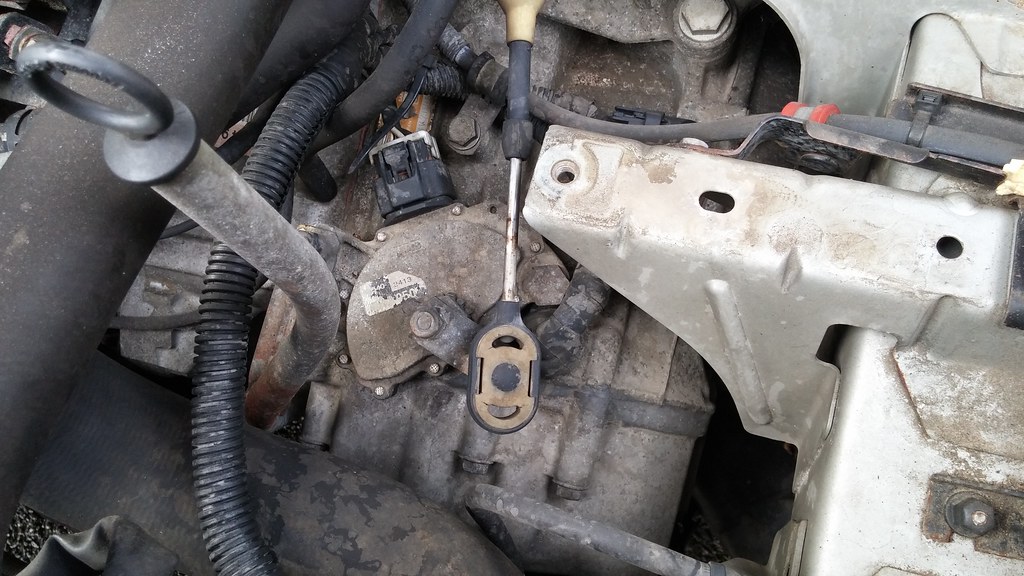 20150118_115311 by Hallsy01, on Flickr
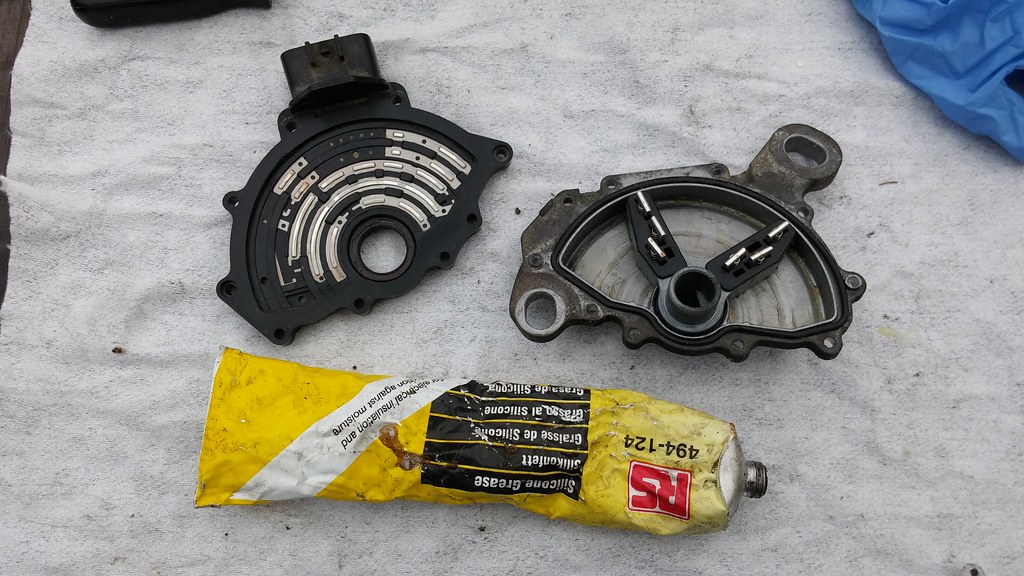
Once removed I drilled out the rivets and split the switch:
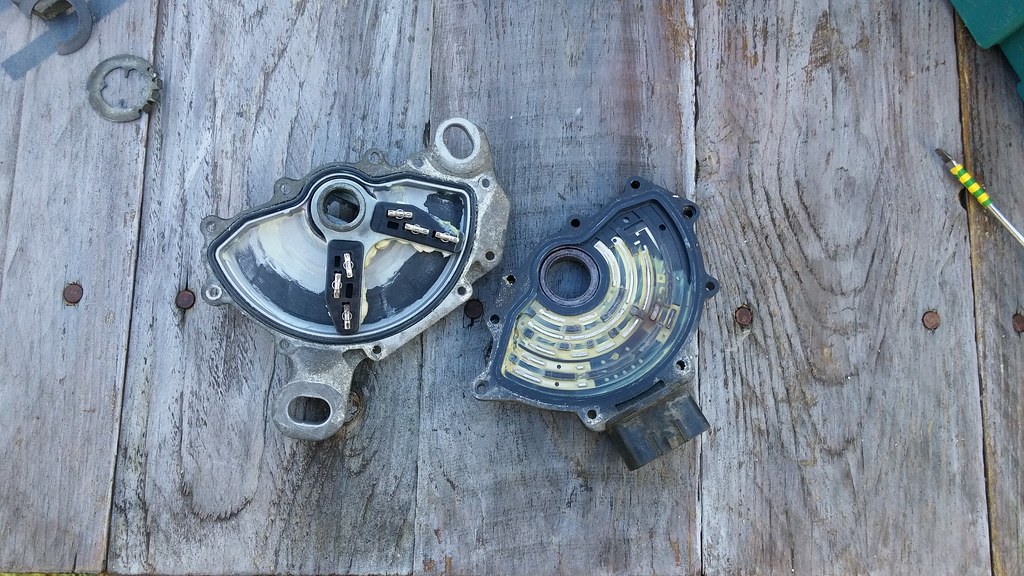 20150118_125741 by Hallsy01, on Flickr
 20150118_125755 by Hallsy01, on Flickr
 20150118_125807 by Hallsy01, on Flickr
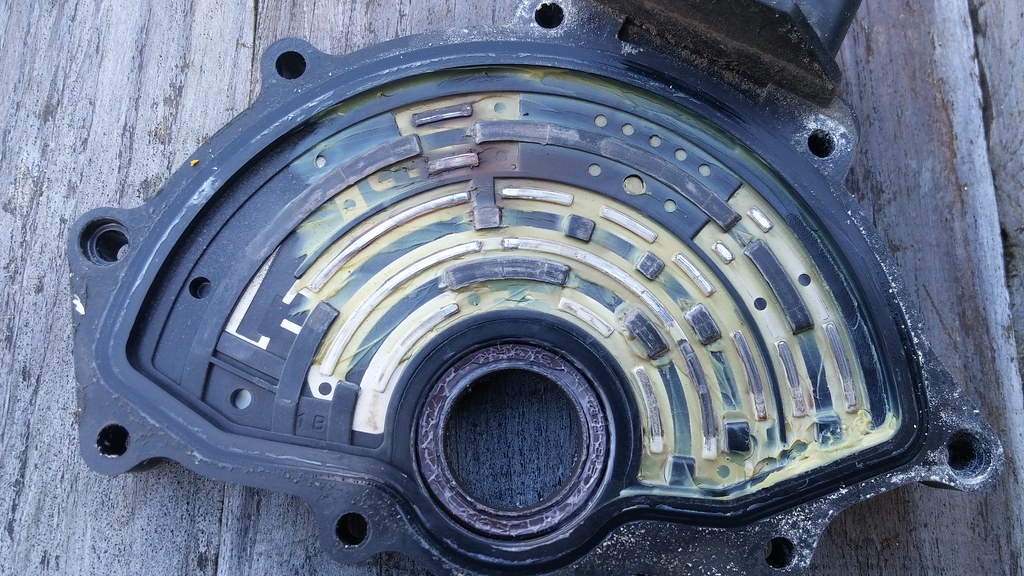
As you can see, it seems that these have a lot of grease in them from the factory and it finds its way onto the contacts.
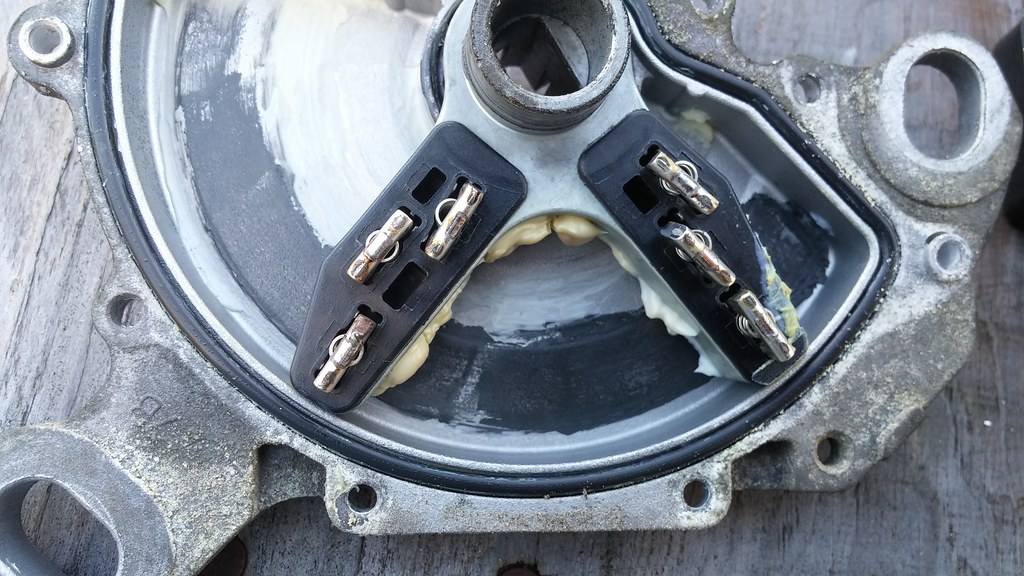
So I cleaned the contacts with contact cleaner, lightly greased the metal housing and spindle where it rotates, and used a smear of silicone grease on the electrical contacts. I also stretched the springs a little.
 20150118_134044 by Hallsy01, on Flickr
 20150118_135337 by Hallsy01, on Flickr
When reassembling, ideally I would have used some M3 x 16mm machine screws, but I didn't any to hand so had to use M4, and so drill the rivet holes out a touch.
With the switch refitted, I checked that the reverse lights were on at correct time, etc - but in the case of re-using the old switch it is easy to align with the witness marks on the gearbox.
And since then it has been started first time, every time..............until yesterday
My other half said she stopped of at the pet shop to get some dog food and when she tried to restart it took a few attempts.
If you look at the picture above, it does look like one pair of contacts had a bit more wear than the others (brown marks around them - possibly from arcing), so maybe a clean and re-grease wasn't enough. If I hadn't have been full of cold I would probably have spent longer cleaner the contacts up with some scotchbrite!!
So I think for now, I need to bypass the switch to definitely rule out the NSS, and if that proves it, either strip switch again and try flatting off & polishing the contacts - or just bite the bullet and buy a new one. I'm just a bit worried about bypassing the switch and my other half accidentally starting in Drive, but I doubt that would happen due to the P lock on the ignition.
I did hear quite a loud bang from the engine bay on my test drive after refitting the NSS and when I started to clear my tools away I realised I was missing a 13mm socket - yep, you guessed it, under the bonnet!! I went back to the spot where I had heard the bang and sure enough, if it was laying next to the kerb - bonus!! I hate losing tools!
My other half has been using it daily whilst she has tucked the S2000 up in the garage for the winter. I personally think my 944 deserves that spot in the garage, but you have to let the ladies have their own way every once in a while
Ever since we had the car, very occasionally it wouldn't start - taking a couple of turns of the key, or holding it in the start position for a few seconds before it would crank.
A couple of times last week it was very stubborn, taking lots of attempts to get it to go. The starter and battery had been replaced by previous owner for same issue, but from what I gather, the Neutral Safety switch is often the culprit for this problem.
So on a very cold Sunday, myself full of cold - I decided I would strip it down.
So with the battery & tray out of the way you can see the switch sitting on top of gearbox:
20150118_115311 by Hallsy01, on FlickrOnce removed I drilled out the rivets and split the switch:
20150118_125741 by Hallsy01, on Flickr20150118_125755 by Hallsy01, on Flickr20150118_125807 by Hallsy01, on FlickrAs you can see, it seems that these have a lot of grease in them from the factory and it finds its way onto the contacts.
So I cleaned the contacts with contact cleaner, lightly greased the metal housing and spindle where it rotates, and used a smear of silicone grease on the electrical contacts. I also stretched the springs a little.
20150118_134044 by Hallsy01, on Flickr20150118_135337 by Hallsy01, on FlickrWhen reassembling, ideally I would have used some M3 x 16mm machine screws, but I didn't any to hand so had to use M4, and so drill the rivet holes out a touch.
With the switch refitted, I checked that the reverse lights were on at correct time, etc - but in the case of re-using the old switch it is easy to align with the witness marks on the gearbox.
And since then it has been started first time, every time..............until yesterday
My other half said she stopped of at the pet shop to get some dog food and when she tried to restart it took a few attempts.
If you look at the picture above, it does look like one pair of contacts had a bit more wear than the others (brown marks around them - possibly from arcing), so maybe a clean and re-grease wasn't enough. If I hadn't have been full of cold I would probably have spent longer cleaner the contacts up with some scotchbrite!!
So I think for now, I need to bypass the switch to definitely rule out the NSS, and if that proves it, either strip switch again and try flatting off & polishing the contacts - or just bite the bullet and buy a new one. I'm just a bit worried about bypassing the switch and my other half accidentally starting in Drive, but I doubt that would happen due to the P lock on the ignition.
I did hear quite a loud bang from the engine bay on my test drive after refitting the NSS and when I started to clear my tools away I realised I was missing a 13mm socket - yep, you guessed it, under the bonnet!! I went back to the spot where I had heard the bang and sure enough, if it was laying next to the kerb - bonus!! I hate losing tools!
Great Write-up! have had a few 'gearbox fault' episodes on my 9 3, normally when pressing on in the corners, I put this down to the engine mounts being very slack, especially the one nearest the switch (LH front),
Now that I have replaced the mounts I have only had one occurrence, so i have changed the gearbox oil - we will see what happens! If it happens again I will take a look at the switch
BTW if you haven't done it yet, drain and refill the gearbox, it only costs about £35 in oil and takes about 20 minutes, but the difference it makes is HUGE!! Put a post on the UKS oils thread to get a recommendation of which one to order
Haven't updated this for ages, but have had a few little bits to do on the old girl.
Sadly, after the cleaning of the neutral safety switch the intermittent starting problem got worse again.
So back in March I looked at the circuit diagram and set about working out what was wrong. I bypassed the neutral safety switch just to be sure, I had seen various write ups online, but most of them seemed to have different fuseboard layouts.
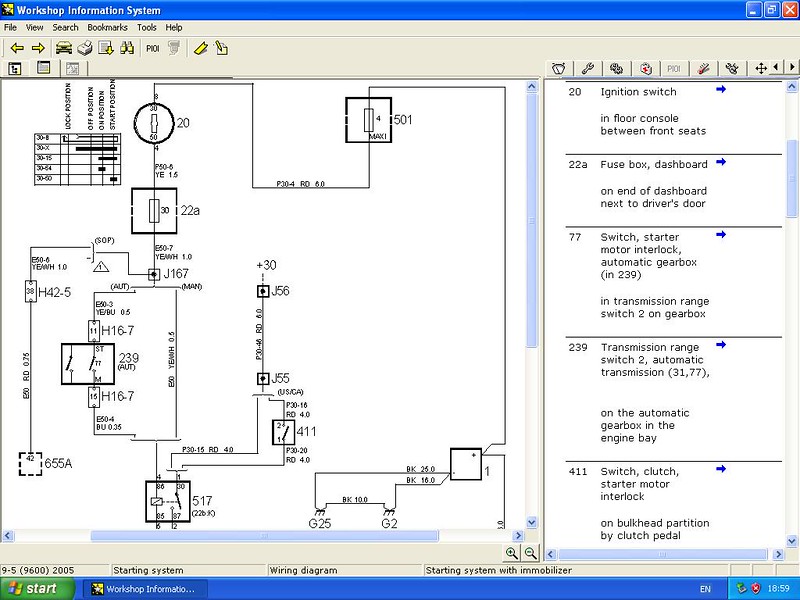 NSS circuit 1 by Hallsy01, on Flickr
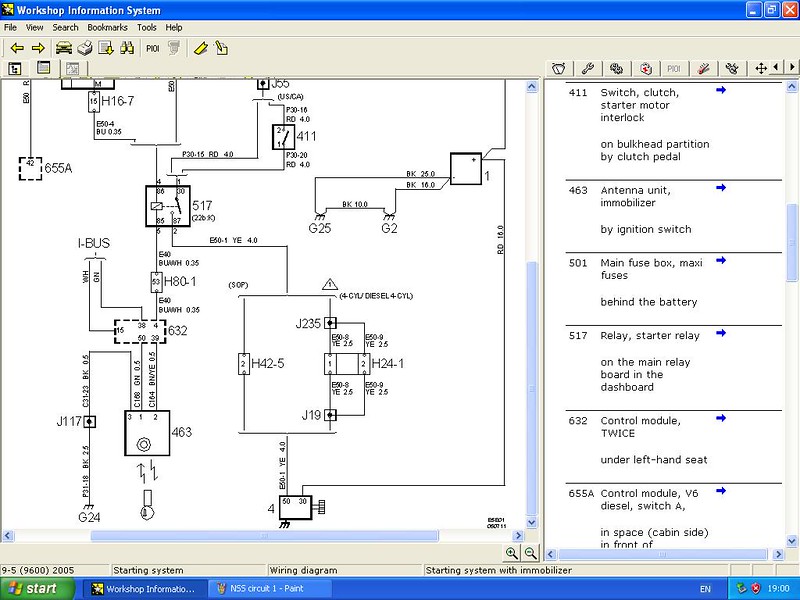 NSS circuit 2 by Hallsy01, on Flickr
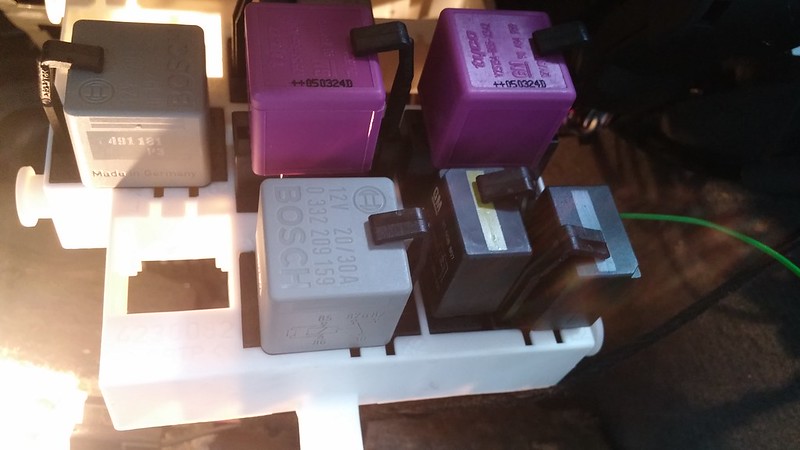
So, as you can see, the circuit is fed after the ignition switch via fuse 30, so I linked from here directly to the coil of the starter relay, from this point the circuit grounds via the immobiliser circuit. I wedged the cable at fuse 30 and soldered directly onto the relay (grey on in the pic below)...
 20150204_101054 by Hallsy01, on Flickr
 20150204_100816 by Hallsy01, on Flickr
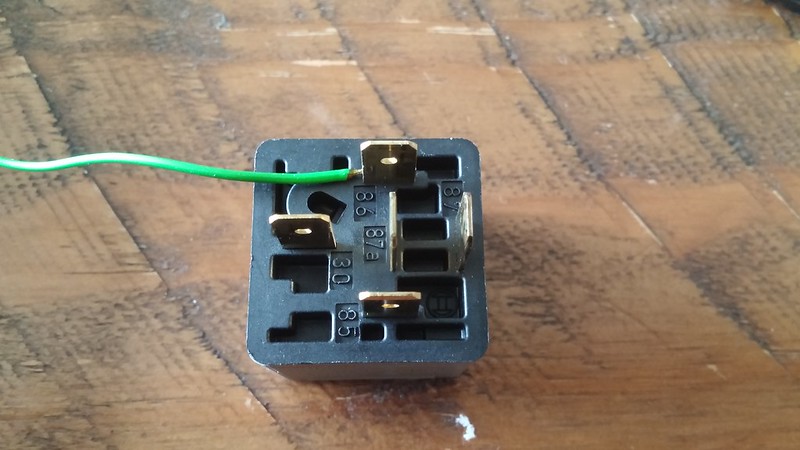 20150204_100449 by Hallsy01, on Flickr
So, tried again, after a few goes it failed to start. So at least I know the neutral switch is definitely fine. Checked voltage at F30 when cranking to see if it's a case of no ground (via immob) or low voltage from battery. After a bit of probing it seems that the voltage was a little low at just under 11v. The problem was worse during the really cold months, perhaps when battery voltage was a little low it wasn't enough to pull the relay in.
I checked voltage at battery and the maxi fuse in engine bay, all OK.
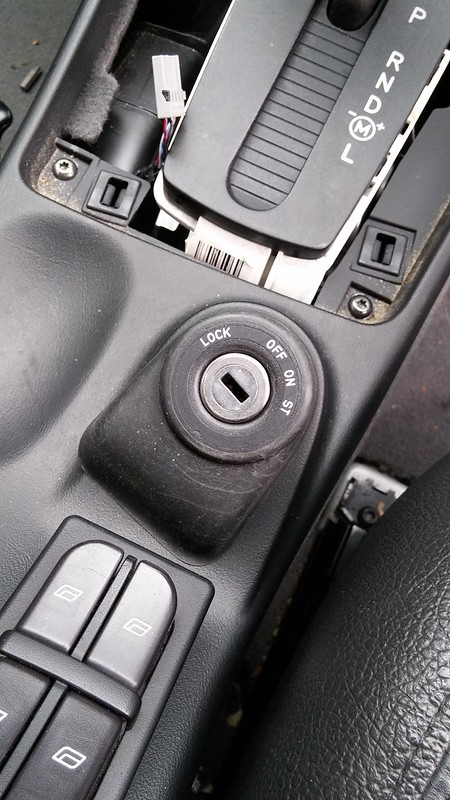
So, must be high resistance across the ignition switch. This would have been a nice and easy job..........if it wasn't a Saab, lol!!
So - for anyone interested, this is how I removed the ignition switch on an Auto 9-5....
Remove the ash tray by pulling it straight out, then remove the housing by releasing the two clips at the bottom with a small screwdriver, then it should pull free from the upper clips:
 20150318_103822 by Hallsy01, on Flickr
Then prise up the selector surround, mine was pretty tight, but start in this corner and gently pull it straight up working around, I had to use a screwdriver in a couple of places to get it to unclip:
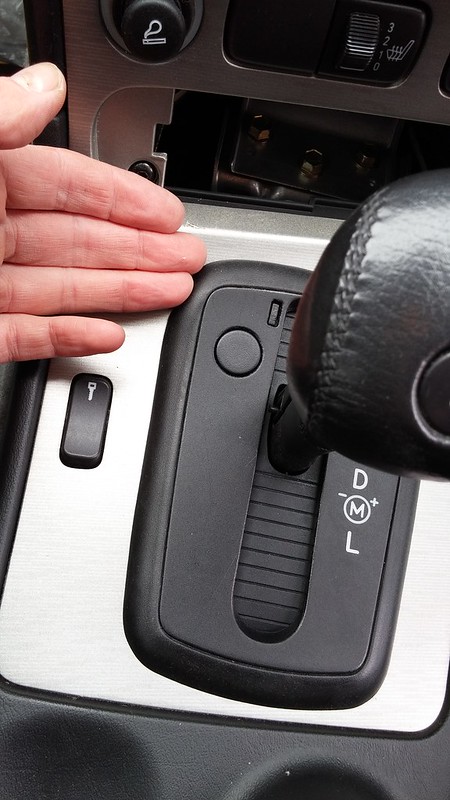 20150318_103646 by Hallsy01, on Flickr
Remove the two torx screws here and pull the trim down and towards you, then unclip the wiring from any switches in the centre trim, also the central locking switch:
 20150318_103445 by Hallsy01, on Flickr
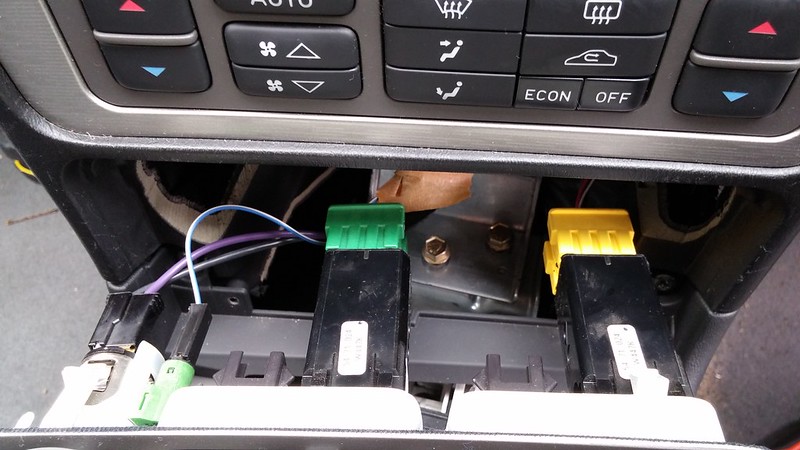 20150318_102932 by Hallsy01, on Flickr
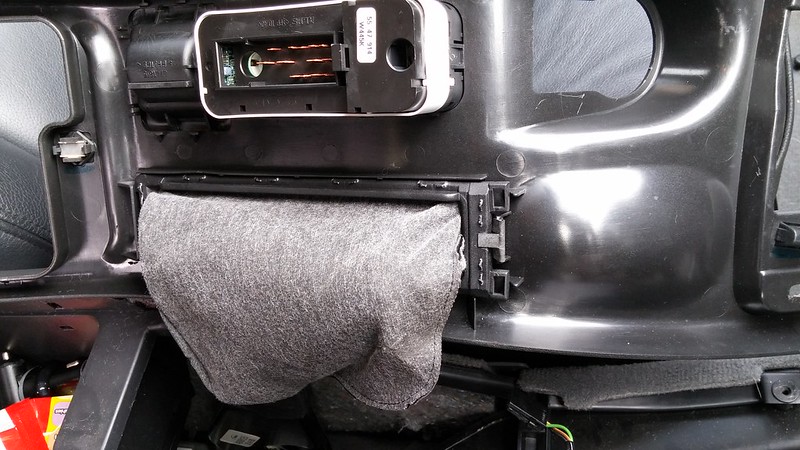
Then lift the arm rest and remove the torx screw for the rear vent trim, then pull the trim straight up from behind, release any wiring connectors and remove trim. With the trim removed you can remove the two torx screw for the armrest hinge, and also remove this:
 20150318_102646 by Hallsy01, on Flickr
 20150318_102124 by Hallsy01, on Flickr
Now rotate the ignition switch surround and pull it upwards, remove the electrical connector:
 20150318_102430 by Hallsy01, on Flickr
At this point you should release the clips for the power window switches, pull these up and release the electrical connectors. I did this when I had the centre trim released and it is very tight to get your hand underneath to release them, much easier to pull the switch up and release before removing the centre trim. Release the clip on the end, then rotate the connector towards the other end to release:
 20150318_101139 by Hallsy01, on Flickr]
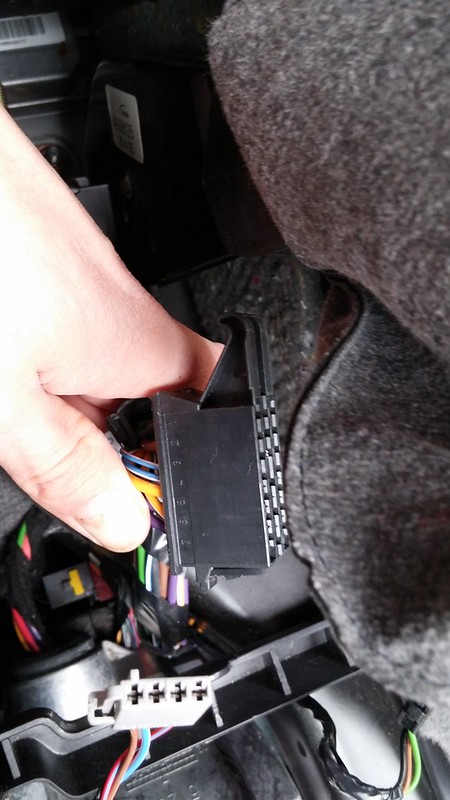 20150318_101134 by Hallsy01, on Flickr
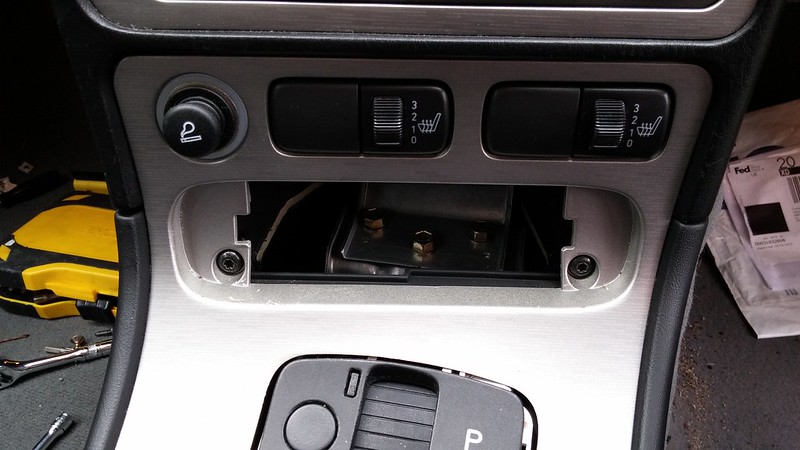
Now remove the two torx screws at the front of the centre trim and pull it upwards, once high enough release the handbrake gaitor trim:
 20150318_102118 by Hallsy01, on Flickr
 20150318_101011 by Hallsy01, on Flickr
 20150317_131603 by Hallsy01, on Flickr
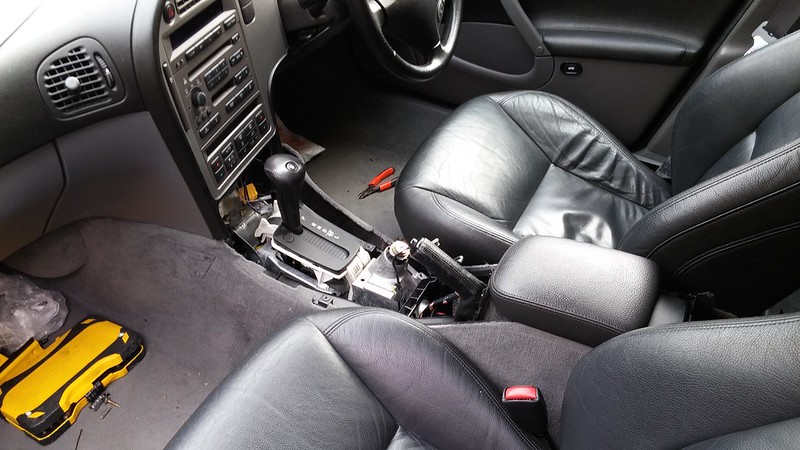
At this point I removed the passenger seat to make it easier to get to the screws that hold the side panel in place and also the ventilation pipework.
 20150317_130625 by Hallsy01, on Flickr
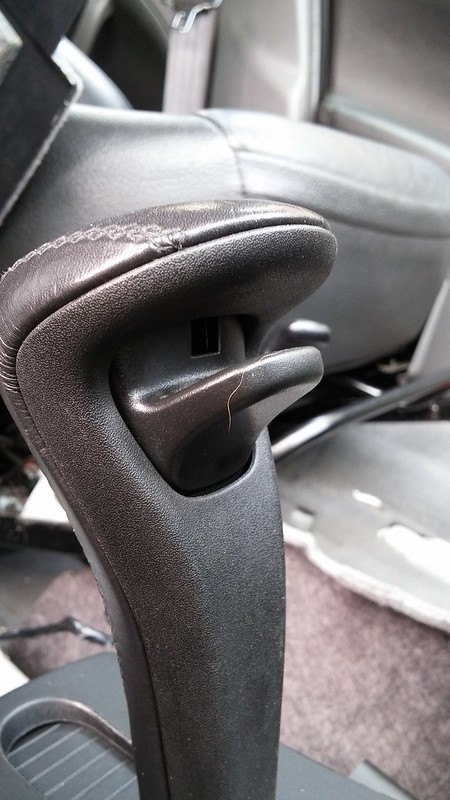
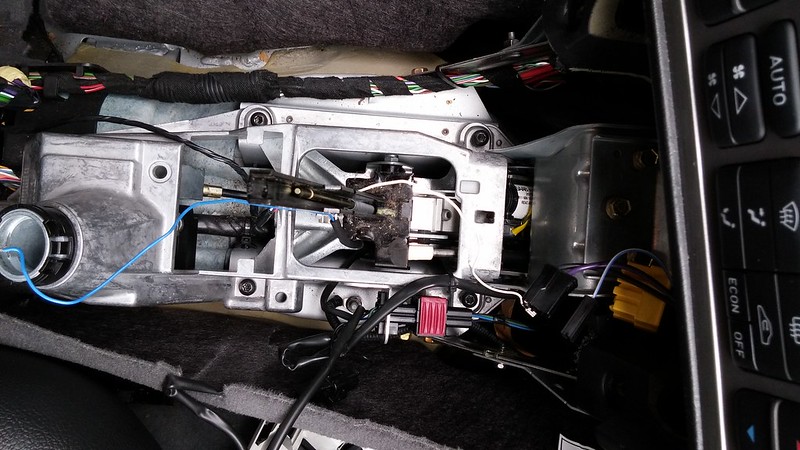
Now it's time to remove the shifter housing. Put it into a position to allow you to remove the small torx screw in the front. Now separate the housing, remove the circlip for the lock mechanism and pull the rear part away to reveal the sport button switch. On some models this is soldered, on others it is spade terminals. Make a note of how the cables are routed, as if you route them incorrectly they will be pinched when you reassemble.
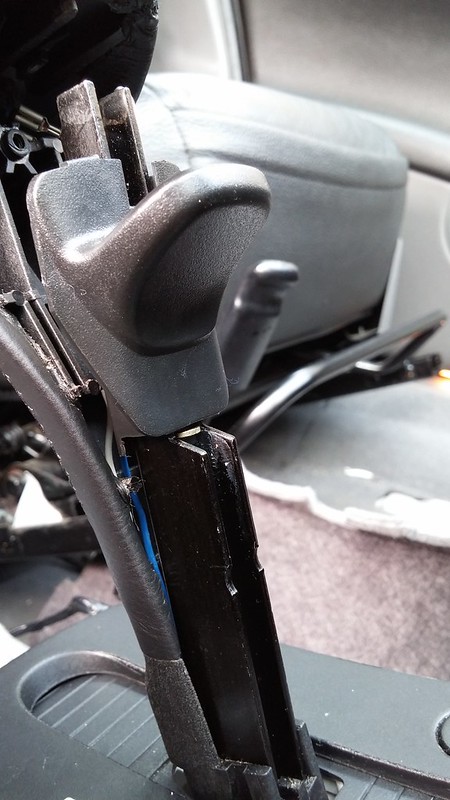
With the wiring and lock mech released you can now remove the other half of the shifter housing:
 20150317_122210 by Hallsy01, on Flickr
 20150317_121605 by Hallsy01, on Flickr
 20150317_121437 by Hallsy01, on Flickr
 20150317_121431 by Hallsy01, on Flickr
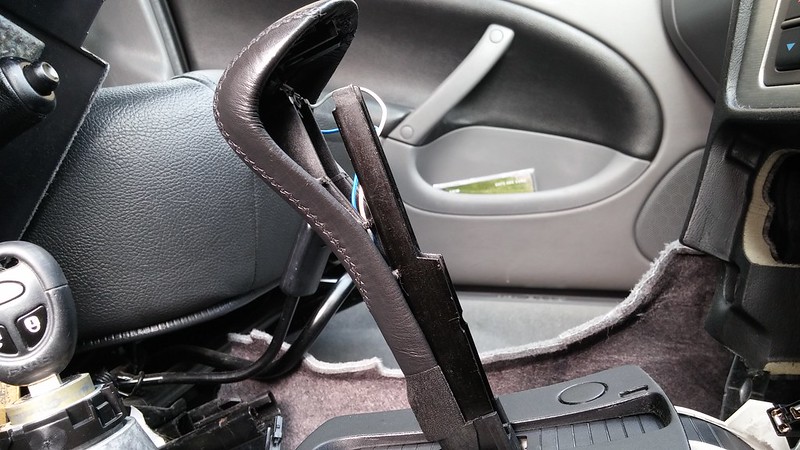
Now you need to remove the white part of the shifter assembly, carefully release the clip at the front, making sure you don't lose the spring. Becareful releasing this part as it is easy to break the plastic. You may also need to release the electrical connector down the right hand side and cut some ty-raps:
 20150317_120536 by Hallsy01, on Flickr
 20150317_120341 by Hallsy01, on Flickr
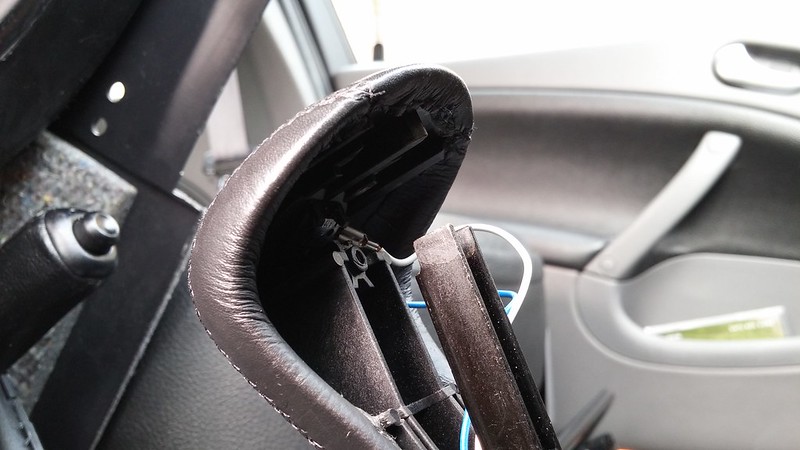
At this point if you have any prolems with your shifter window you can strip it down, I had a problem with the illumination, it had cracked and was not moving with the shifter, so I stripped it down to repair:
 20150317_113405 by Hallsy01, on Flickr
Almost ready to remove the metal housing that holds the ignition switch, first we need to release the key barrell. Move the key to the on position, then using something like a small allen key, release the clip on the barrell via the small hole as shown here, then pull the barrell upwards:
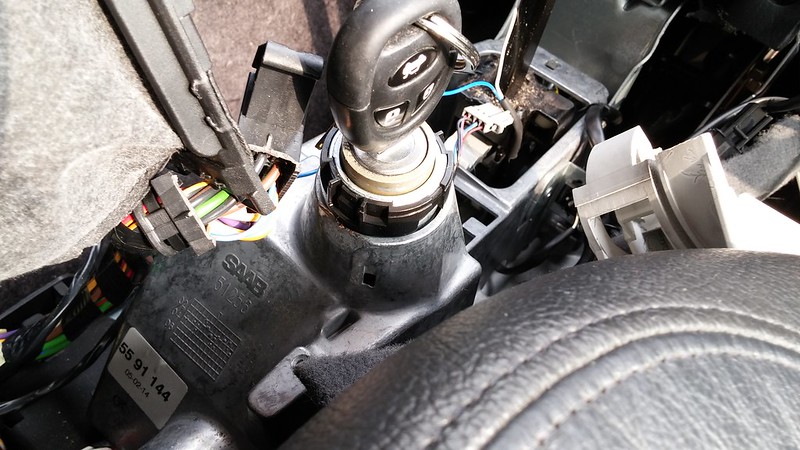 20150317_114201 by Hallsy01, on Flickr
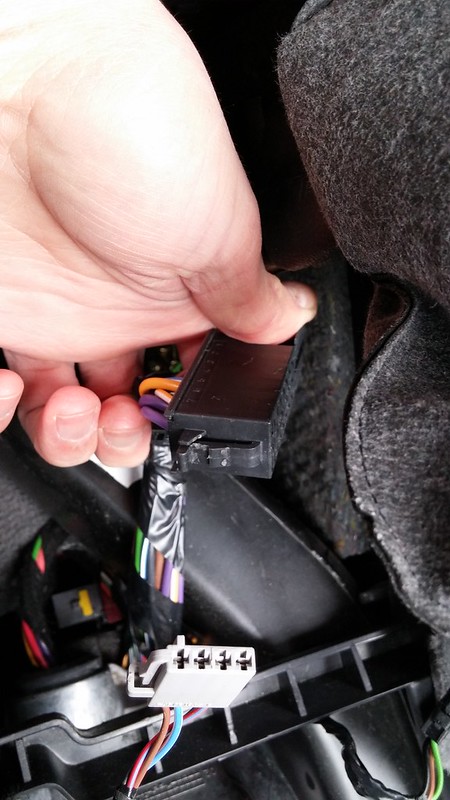
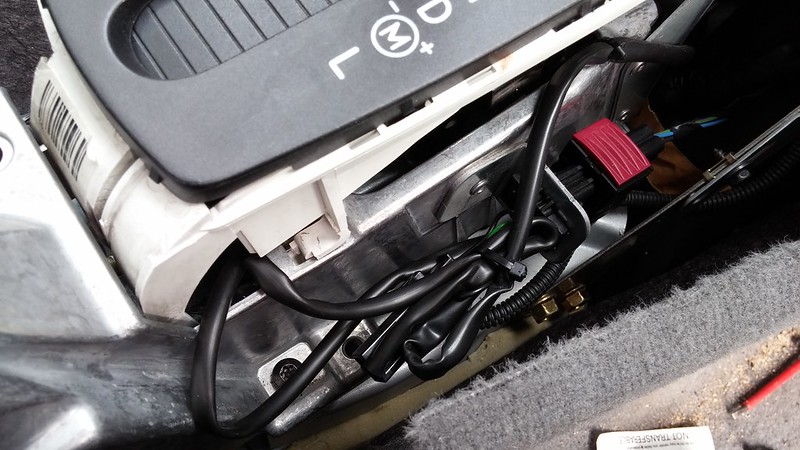
Now unbolt the three bolts at the front of metal assembly, and then the four torx screws at the base, removing the ventialtion pipe as necessary, then turn the assembly on it's side. Now you can see the ignition switch!! Release the connector and remove the two torx screws that hold the switch in place:
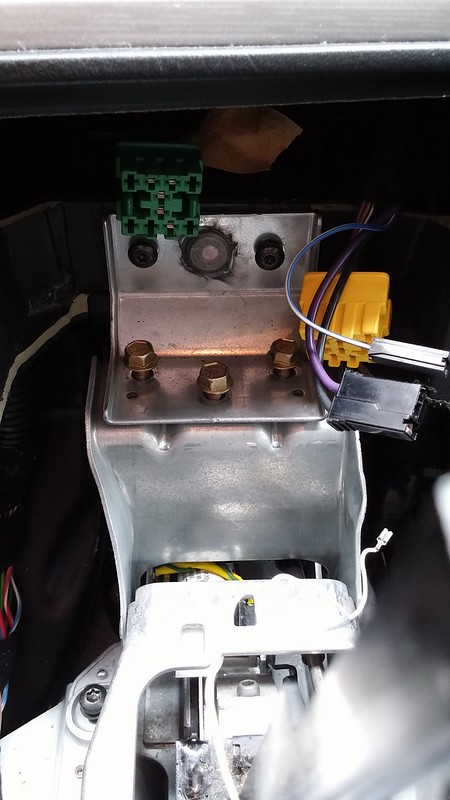 20150317_110737 by Hallsy01, on Flickr
 20150317_110725 by Hallsy01, on Flickr
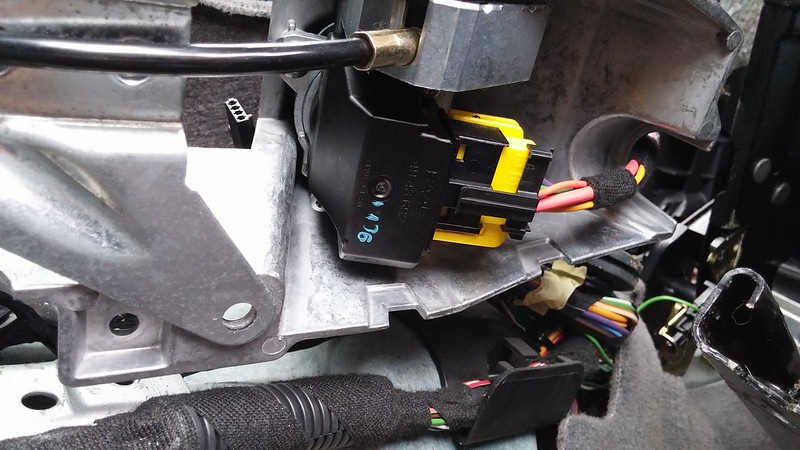 20150317_110101 by Hallsy01, on Flickr
In fairness, it doesn't take too long, once I had worked out how it all came out, it was much quicker to put it all back.
These notes are from memory, so don't take them as gospel, but it should help as a bit of a guide
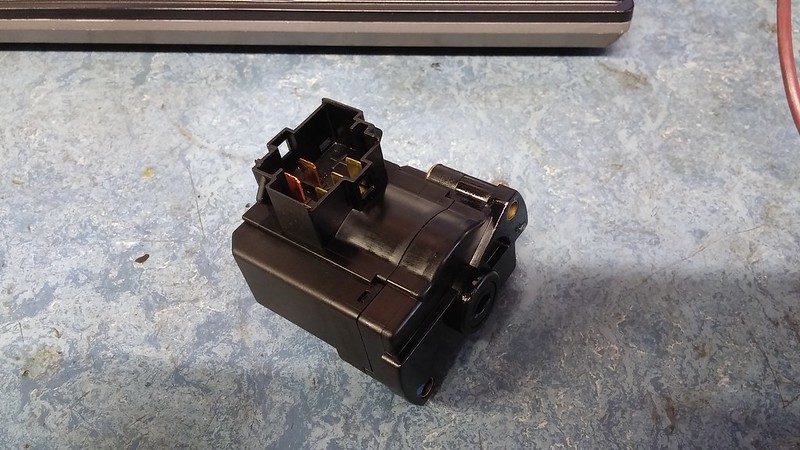
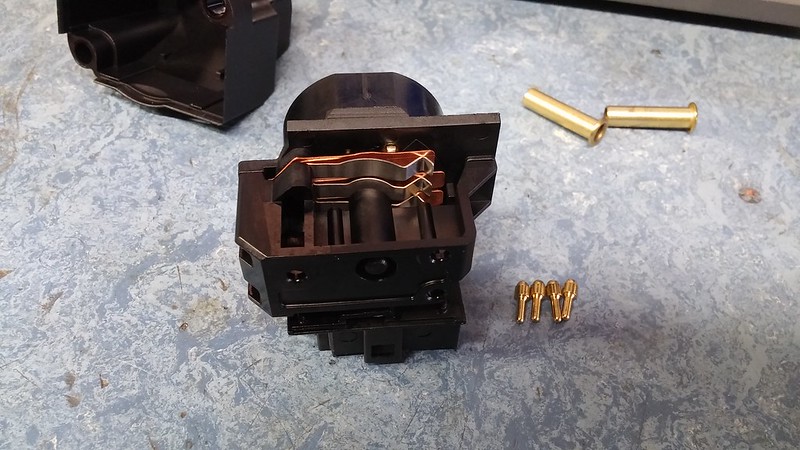
So, with the switch removed, it was time to test it.
The circuit diagram above shows the switch pattern for each key position.
My switch seemed pretty good, but did have a slight high resistance in the starting position.
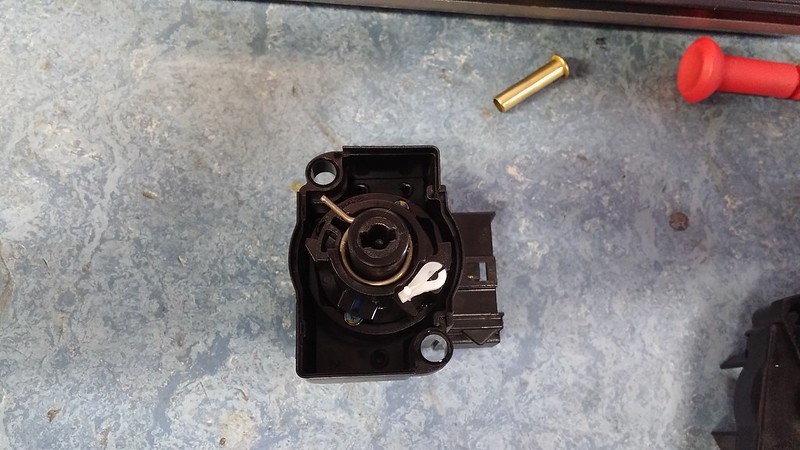
I stripped the switch down and found some very minor carbon build up on one set of contacts. I cleaned these up with a fibreglass pen, and lubricated all contacts with contact lube.
Reassembled the switch, and all positions checked out
 20150316_133632 by Hallsy01, on Flickr
 20150316_135011 by Hallsy01, on Flickr
 20150316_135025 by Hallsy01, on Flickr
 20150316_141356 by Hallsy01, on Flickr
 20150316_142145 by Hallsy01, on Flickr
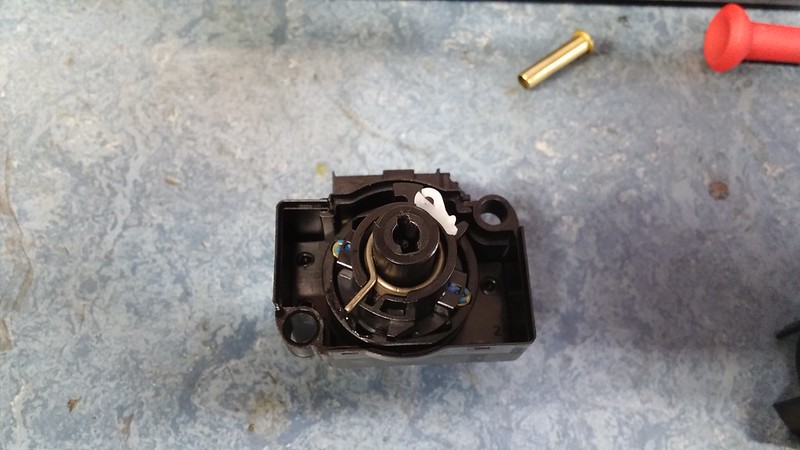
Once cleaned up, just make sure you reassemble it the same way it came apart!!
Then in typical Haynes fashion, reassembly is the reverse of diassembly - just make sure the ignition switch is orientated properly with the barrel, and make sure you take care routing the cables for the Sport button.
Hopefully this might help someone, and maybe save the cost of a new ignition switch.
Touching wood I have not had any issues since (I did this back in March).
Sadly, after the cleaning of the neutral safety switch the intermittent starting problem got worse again.
So back in March I looked at the circuit diagram and set about working out what was wrong. I bypassed the neutral safety switch just to be sure, I had seen various write ups online, but most of them seemed to have different fuseboard layouts.
NSS circuit 1 by Hallsy01, on FlickrNSS circuit 2 by Hallsy01, on FlickrSo, as you can see, the circuit is fed after the ignition switch via fuse 30, so I linked from here directly to the coil of the starter relay, from this point the circuit grounds via the immobiliser circuit. I wedged the cable at fuse 30 and soldered directly onto the relay (grey on in the pic below)...
20150204_101054 by Hallsy01, on Flickr20150204_100816 by Hallsy01, on Flickr20150204_100449 by Hallsy01, on FlickrSo, tried again, after a few goes it failed to start. So at least I know the neutral switch is definitely fine. Checked voltage at F30 when cranking to see if it's a case of no ground (via immob) or low voltage from battery. After a bit of probing it seems that the voltage was a little low at just under 11v. The problem was worse during the really cold months, perhaps when battery voltage was a little low it wasn't enough to pull the relay in.
I checked voltage at battery and the maxi fuse in engine bay, all OK.
So, must be high resistance across the ignition switch. This would have been a nice and easy job..........if it wasn't a Saab, lol!!
So - for anyone interested, this is how I removed the ignition switch on an Auto 9-5....
Remove the ash tray by pulling it straight out, then remove the housing by releasing the two clips at the bottom with a small screwdriver, then it should pull free from the upper clips:
20150318_103822 by Hallsy01, on FlickrThen prise up the selector surround, mine was pretty tight, but start in this corner and gently pull it straight up working around, I had to use a screwdriver in a couple of places to get it to unclip:
20150318_103646 by Hallsy01, on FlickrRemove the two torx screws here and pull the trim down and towards you, then unclip the wiring from any switches in the centre trim, also the central locking switch:
20150318_103445 by Hallsy01, on Flickr20150318_102932 by Hallsy01, on FlickrThen lift the arm rest and remove the torx screw for the rear vent trim, then pull the trim straight up from behind, release any wiring connectors and remove trim. With the trim removed you can remove the two torx screw for the armrest hinge, and also remove this:
20150318_102646 by Hallsy01, on Flickr20150318_102124 by Hallsy01, on FlickrNow rotate the ignition switch surround and pull it upwards, remove the electrical connector:
20150318_102430 by Hallsy01, on FlickrAt this point you should release the clips for the power window switches, pull these up and release the electrical connectors. I did this when I had the centre trim released and it is very tight to get your hand underneath to release them, much easier to pull the switch up and release before removing the centre trim. Release the clip on the end, then rotate the connector towards the other end to release:
20150318_101139 by Hallsy01, on Flickr]20150318_101134 by Hallsy01, on FlickrNow remove the two torx screws at the front of the centre trim and pull it upwards, once high enough release the handbrake gaitor trim:
20150318_102118 by Hallsy01, on Flickr20150318_101011 by Hallsy01, on Flickr20150317_131603 by Hallsy01, on FlickrAt this point I removed the passenger seat to make it easier to get to the screws that hold the side panel in place and also the ventilation pipework.
20150317_130625 by Hallsy01, on FlickrNow it's time to remove the shifter housing. Put it into a position to allow you to remove the small torx screw in the front. Now separate the housing, remove the circlip for the lock mechanism and pull the rear part away to reveal the sport button switch. On some models this is soldered, on others it is spade terminals. Make a note of how the cables are routed, as if you route them incorrectly they will be pinched when you reassemble.
With the wiring and lock mech released you can now remove the other half of the shifter housing:
20150317_122210 by Hallsy01, on Flickr20150317_121605 by Hallsy01, on Flickr20150317_121437 by Hallsy01, on Flickr20150317_121431 by Hallsy01, on FlickrNow you need to remove the white part of the shifter assembly, carefully release the clip at the front, making sure you don't lose the spring. Becareful releasing this part as it is easy to break the plastic. You may also need to release the electrical connector down the right hand side and cut some ty-raps:
20150317_120536 by Hallsy01, on Flickr20150317_120341 by Hallsy01, on FlickrAt this point if you have any prolems with your shifter window you can strip it down, I had a problem with the illumination, it had cracked and was not moving with the shifter, so I stripped it down to repair:
20150317_113405 by Hallsy01, on FlickrAlmost ready to remove the metal housing that holds the ignition switch, first we need to release the key barrell. Move the key to the on position, then using something like a small allen key, release the clip on the barrell via the small hole as shown here, then pull the barrell upwards:
20150317_114201 by Hallsy01, on FlickrNow unbolt the three bolts at the front of metal assembly, and then the four torx screws at the base, removing the ventialtion pipe as necessary, then turn the assembly on it's side. Now you can see the ignition switch!! Release the connector and remove the two torx screws that hold the switch in place:
20150317_110737 by Hallsy01, on Flickr20150317_110725 by Hallsy01, on Flickr20150317_110101 by Hallsy01, on FlickrIn fairness, it doesn't take too long, once I had worked out how it all came out, it was much quicker to put it all back.
These notes are from memory, so don't take them as gospel, but it should help as a bit of a guide
So, with the switch removed, it was time to test it.
The circuit diagram above shows the switch pattern for each key position.
My switch seemed pretty good, but did have a slight high resistance in the starting position.
I stripped the switch down and found some very minor carbon build up on one set of contacts. I cleaned these up with a fibreglass pen, and lubricated all contacts with contact lube.
Reassembled the switch, and all positions checked out
20150316_133632 by Hallsy01, on Flickr20150316_135011 by Hallsy01, on Flickr20150316_135025 by Hallsy01, on Flickr20150316_141356 by Hallsy01, on Flickr20150316_142145 by Hallsy01, on FlickrOnce cleaned up, just make sure you reassemble it the same way it came apart!!
Then in typical Haynes fashion, reassembly is the reverse of diassembly - just make sure the ignition switch is orientated properly with the barrel, and make sure you take care routing the cables for the Sport button.
Hopefully this might help someone, and maybe save the cost of a new ignition switch.
Touching wood I have not had any issues since (I did this back in March).
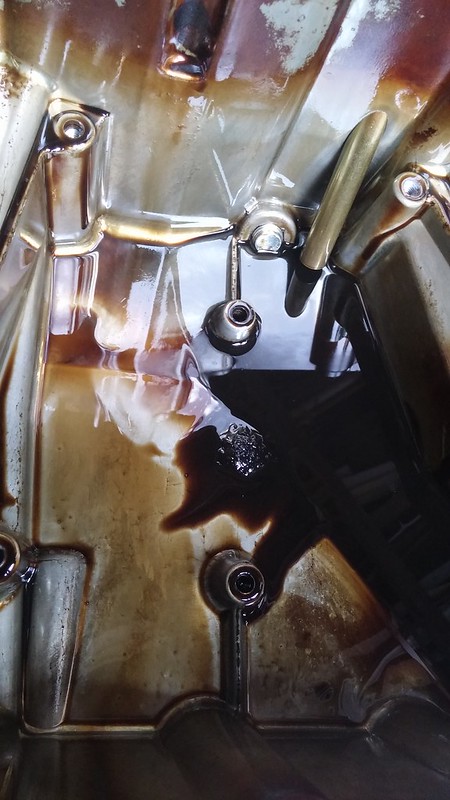
Then that little niggle in the back of my head kicked in, the car was due an oil service, circa 100k miles - time for a sump drop.
Now my car is a 2005 car, so has the updated PCV and 'should' be OK, but for the sake of a bit of extra time I knew I would feel better knowing it was done and OK.
Many of you have written the book on how this is done, all went smoothly, downpipe came off easilly with the aid of plus gas and gently working the nuts (ooo errr), and the sump just about dropped out once the gearbox was jacked up a bit.
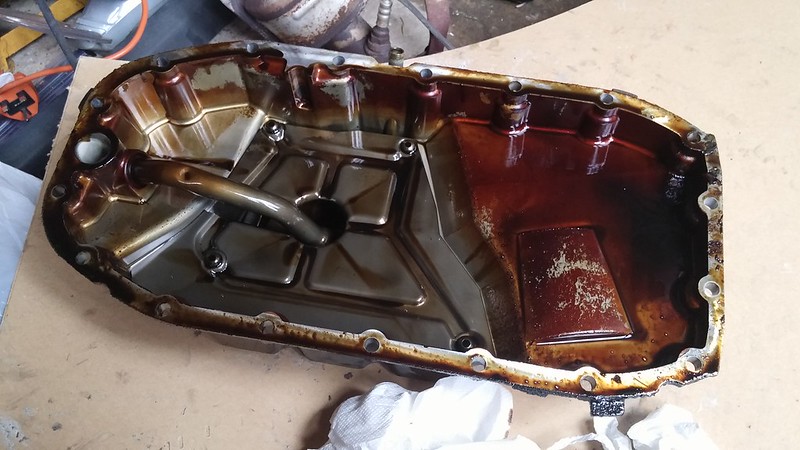
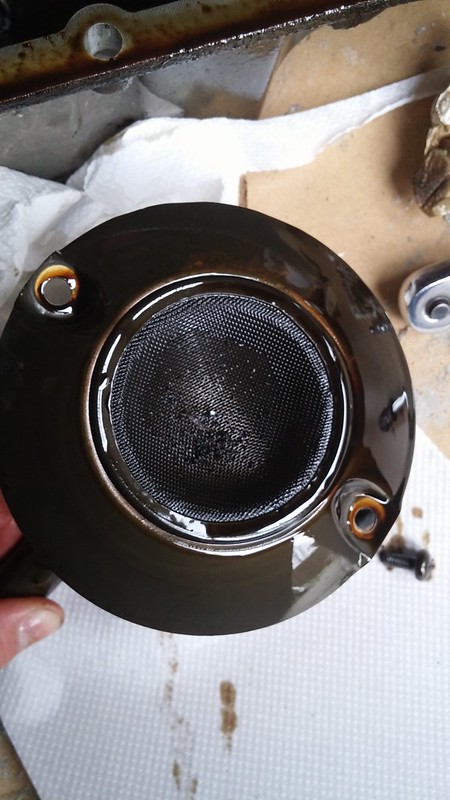
With it removed it was fairly clean, and I didn't really have anything to worry about. Just some plasticy deposits under the strainer:
 20150324_150557 by Hallsy01, on Flickr
 20150324_151055 by Hallsy01, on Flickr
 20150324_151105 by Hallsy01, on Flickr
So a through clean up of the sump, baffle and strainer followed. I used a degreaser that we were given to trial at work, it works very well imo. Once clean the degreaser was washed away and everything lightly oiled. A new seal was fitted to the pickup tube:
 20150324_155300 by Hallsy01, on Flickr
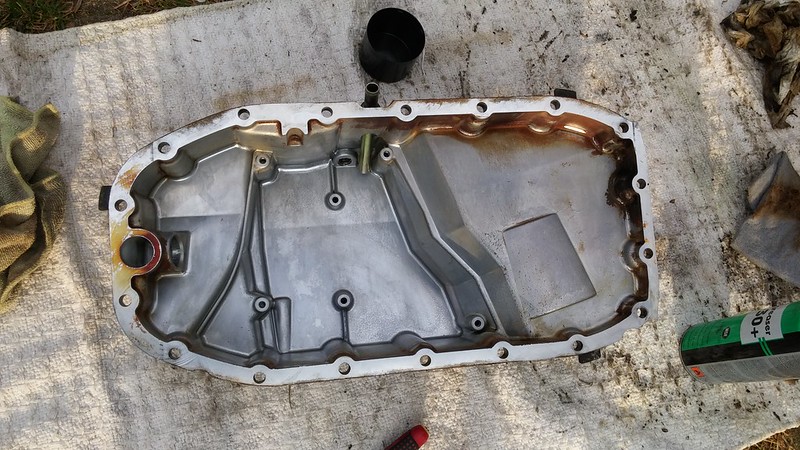 20150324_163809 by Hallsy01, on Flickr
My sump had a bit of an odd appearance in places, almost as if the surface of the aluminium had crazed. It wasn't loose at all, god knows how or why it happens, maybe it is down to the heat cycles??
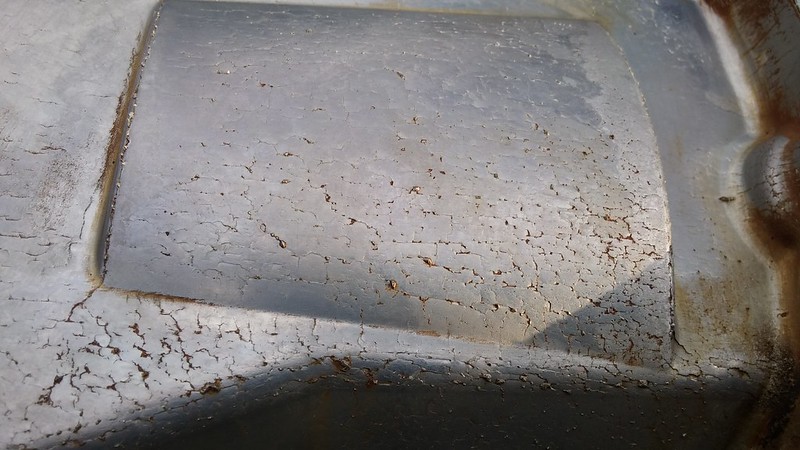 20150324_163819 by Hallsy01, on Flickr
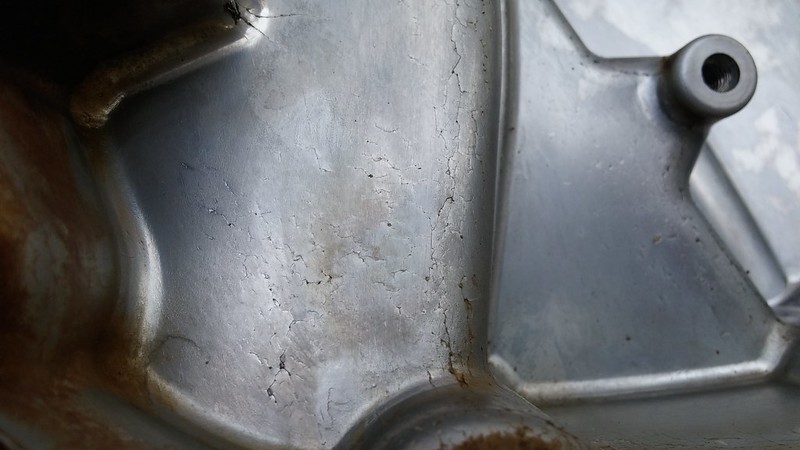 20150324_163828 by Hallsy01, on Flickr
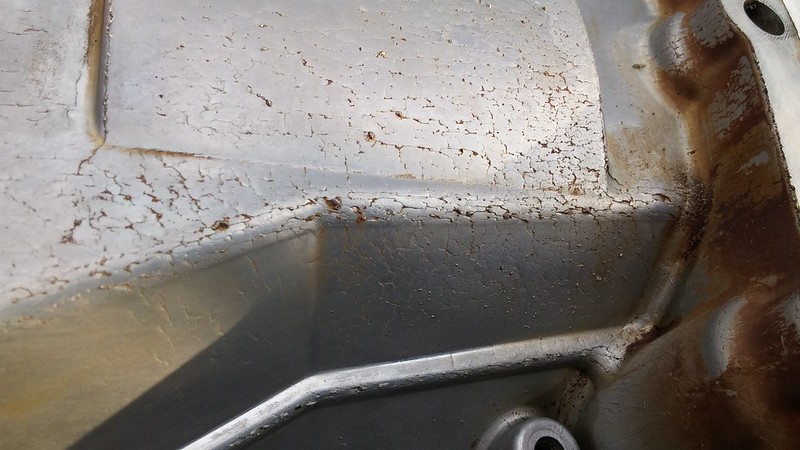 20150324_163843 by Hallsy01, on Flickr
Anyway, a couple of trial fits of the sump and then it was time to apply the sealant and re-assemble:
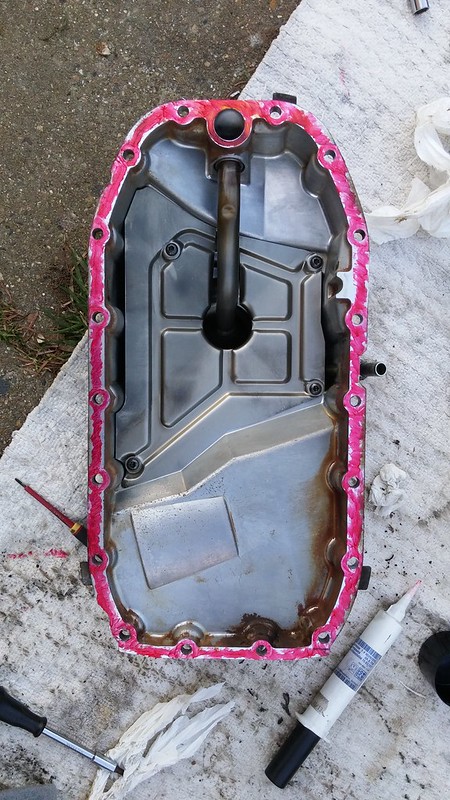 20150324_173312 by Hallsy01, on Flickr
All back together, fresh oil & filter, plugs out, fuel pump fuse out - crank........crank..........crank.......crank - no oil pressure
So it was all apart again and the transfer pipe pretty much fell out. Closer inspection told me that the seals were past their best!!
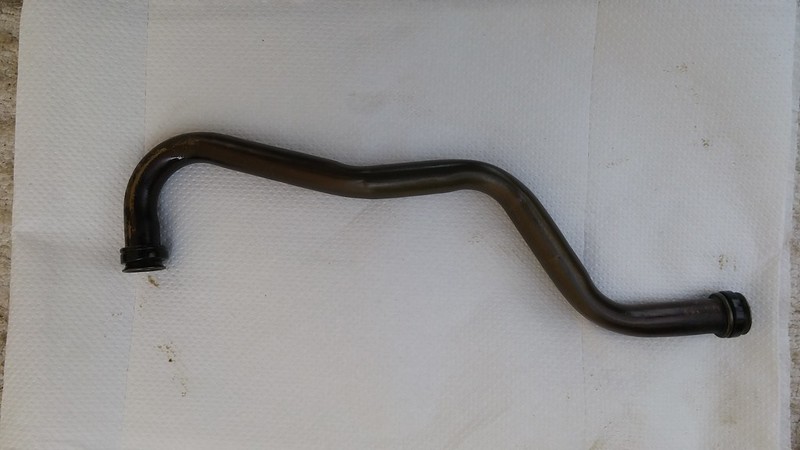 20150402_102415 by Hallsy01, on Flickr
 20150402_102426 by Hallsy01, on Flickr
A couple of seals were ordered for this and it was take two...
Same again - crank.....crank....crank - still no oil pressure. Bugger it, I put the plugs back in, fuel pump fuse back in, start her up - a couple of seconds of tapping and then silence (well, as quiet as you would expect!) - result
While I was under there I noticed that the torque mount is nackered, so I need to do this. I think I'm going to replace the serpentine belt and pulleys as I get quite a bit of belt noise until warm.
Now my car is a 2005 car, so has the updated PCV and 'should' be OK, but for the sake of a bit of extra time I knew I would feel better knowing it was done and OK.
Many of you have written the book on how this is done, all went smoothly, downpipe came off easilly with the aid of plus gas and gently working the nuts (ooo errr), and the sump just about dropped out once the gearbox was jacked up a bit.
With it removed it was fairly clean, and I didn't really have anything to worry about. Just some plasticy deposits under the strainer:
20150324_150557 by Hallsy01, on Flickr20150324_151055 by Hallsy01, on Flickr20150324_151105 by Hallsy01, on FlickrSo a through clean up of the sump, baffle and strainer followed. I used a degreaser that we were given to trial at work, it works very well imo. Once clean the degreaser was washed away and everything lightly oiled. A new seal was fitted to the pickup tube:
20150324_155300 by Hallsy01, on Flickr20150324_163809 by Hallsy01, on FlickrMy sump had a bit of an odd appearance in places, almost as if the surface of the aluminium had crazed. It wasn't loose at all, god knows how or why it happens, maybe it is down to the heat cycles??
20150324_163819 by Hallsy01, on Flickr20150324_163828 by Hallsy01, on Flickr20150324_163843 by Hallsy01, on FlickrAnyway, a couple of trial fits of the sump and then it was time to apply the sealant and re-assemble:
20150324_173312 by Hallsy01, on FlickrAll back together, fresh oil & filter, plugs out, fuel pump fuse out - crank........crank..........crank.......crank - no oil pressure
So it was all apart again and the transfer pipe pretty much fell out. Closer inspection told me that the seals were past their best!!
20150402_102415 by Hallsy01, on Flickr20150402_102426 by Hallsy01, on FlickrA couple of seals were ordered for this and it was take two...
Same again - crank.....crank....crank - still no oil pressure. Bugger it, I put the plugs back in, fuel pump fuse back in, start her up - a couple of seconds of tapping and then silence (well, as quiet as you would expect!) - result
While I was under there I noticed that the torque mount is nackered, so I need to do this. I think I'm going to replace the serpentine belt and pulleys as I get quite a bit of belt noise until warm.
I do try, lol!!
I've noticed of late that I have a bit of vibration at idle, and the engine hunts a tiny bit. Not sure if this normal for an auto idling in Drive, but it seems to be more noticable once warm, lower idle I guess.
I checked plugs and DI cassette, both look fine visually.
I know the front gearbox torque mount is nackered - so maybe that is causing the vibration?
I'm also getting the feeling of the car feeling a bit under damped - suspect the shocks are original and we'll past their best.
Debating whether to stick with Sachs or go for something better, maybe Bilstein B6 with stock springs? I do find the car a bit vague, especially compared to my other cars, but I don't want to make it harsh or crashy. Likewise I have a few bushes that need doing, considering Polybushes but again I don't want to make the car too harsh. In the short term I know I need to do the torque mount and RTA bushes - haven't checked subframe or wishbones as yet, but at 100k they must be getting tired.
That's the trouble with running three cars - there is always something to do!

Gassing Station | Readers' Cars | Top of Page | What's New | My Stuff