Volkswagen Corrado G60
Discussion


Years ago, I always used to hear Stealth VW mentioned on the Corrado Forum as the place for VR6 fettling. I don't know if that's still the case, but someone on the Corrado Forum will know... I've only used JMR for G60 stuff, but they do know what they're talking about in that field for sure.
@Tinkerton, no spare garage I'm afraid, in fact even my Corrado doesn't get room in the garage unfortunately. There are two other non-running car projects and some bikes taking up all the room. If I find some though, I'll let you know. Thanks very much for the tips on the top mounts too, very useful
Keep us posted on your 16vG60, I expect a thread shortly!
Cheers,
Tom
A little bit of minor fettling today, as other projects had reached a convenient stopping point (awaiting parts or between coats of paint). A few weeks ago, when starting the Corrado, it was reluctant to do so on the turn of the key....
I've had this before (on my first one) and hence had bought an ignition switch shortly after buying the car, knowing it was probably a 'when' not an 'if.' Fortunately I didn't need the emergency 'battery to starter motor' wire that I'd taken to carrying, but thought it best not to tempt fate.
I hate replacing the ignition switch, the last time I did it was a while ago and I'd forgotten the exact contortions required, remembering it only as a sod of a job. Glad my memory isn't failing at least.
In summary, you need to remove the plastic trim under the steering column, and then remove one screw to replace the ignition switch. Easy right? No, not really.
You can get a screwdriver up onto the screw, just not at the corrrect angle to undo it. Any screwdriver small enough will be too small to bite in the head effectively.
2 hours of head scratching, the sage advice of CazzaVR6 on the Corrado forum was used. It's a brass screw, use a flat bladed screwdriver and drift it out from the side. 10 minutes later, job jobbed. Half and hour after that, a gentle run in the sunshine.
Cooling system and top mounts planned for the end of May.....
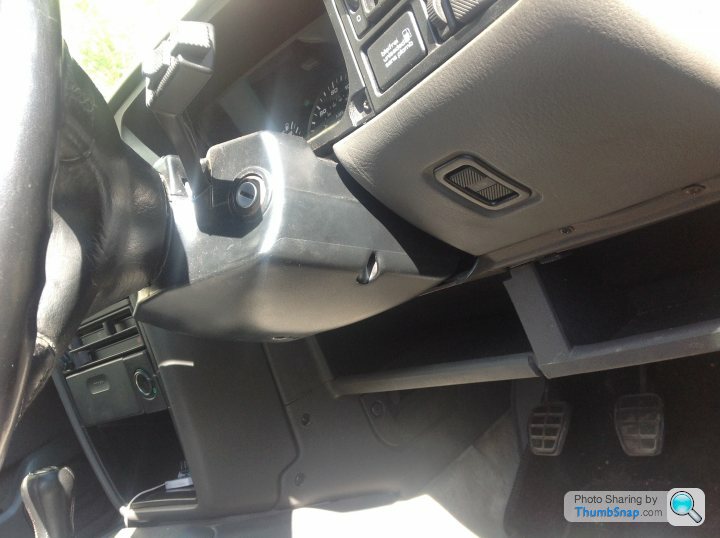
Just undo the three Phillips screws....
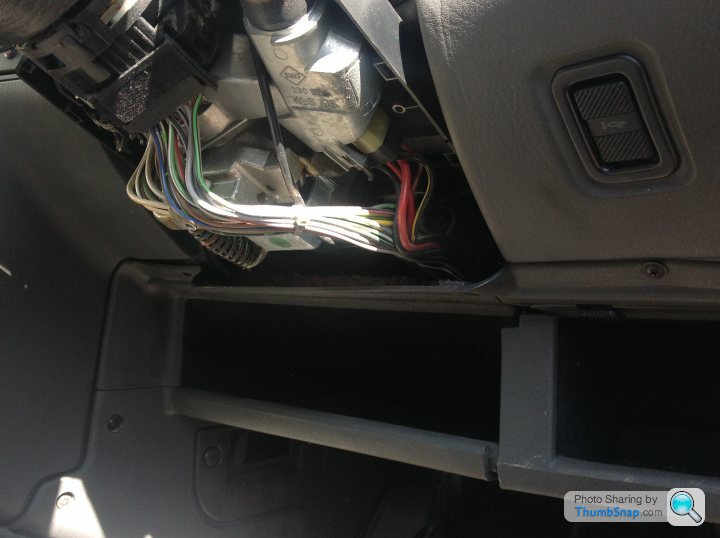
...and there's the switch. Just find the screw in here.... No fun at all.
Cheers,
Tom
I've had this before (on my first one) and hence had bought an ignition switch shortly after buying the car, knowing it was probably a 'when' not an 'if.' Fortunately I didn't need the emergency 'battery to starter motor' wire that I'd taken to carrying, but thought it best not to tempt fate.
I hate replacing the ignition switch, the last time I did it was a while ago and I'd forgotten the exact contortions required, remembering it only as a sod of a job. Glad my memory isn't failing at least.
In summary, you need to remove the plastic trim under the steering column, and then remove one screw to replace the ignition switch. Easy right? No, not really.
You can get a screwdriver up onto the screw, just not at the corrrect angle to undo it. Any screwdriver small enough will be too small to bite in the head effectively.
2 hours of head scratching, the sage advice of CazzaVR6 on the Corrado forum was used. It's a brass screw, use a flat bladed screwdriver and drift it out from the side. 10 minutes later, job jobbed. Half and hour after that, a gentle run in the sunshine.
Cooling system and top mounts planned for the end of May.....
Just undo the three Phillips screws....
...and there's the switch. Just find the screw in here.... No fun at all.
Cheers,
Tom
@daniboy123, sorry to hear of your loss, but nice to see another Yorkshire G60 fan, hopefully meet up with you and others at a show/meet somewhere. I usually make the Malton Breakfast meet in the autumn (although I was on the bike this year)
@aka_kerrly the track experience was excellent thanks. Really highlights the handling flaws of a standard FWD road car, which is exactly what I was after. Best place to find the limits is at a soaking wet Snetterton! The oil temperatures were fine, never really got higher than 100. I was determined to not take it out on track until I had the fitted the oil cooler, a decision that I'm glad about! Have seen temperatures of 120 on a steady dual carriageway run before firing it, it was always high on my list!
Will hopefully get some more work done on it before the Letter Man's trip this year....
Cheers,
Tom
daniboy123 said:
Sounds good. Ive not been to the malton breakfast meet before, does it attract a good gathering?. There was a run out over the yorkshire moors organised by the corrado club a few years back that i attended in my black vr6. Great fun!. My VR6 is now in need of attention but hopefully ill be back on the road soon with it  . Is your corrado on the road for this summer then?
Terribly sorry, I just realised I hadn't replied to your post, my apologies.. Is your corrado on the road for this summer then?Yes the Breakfast Meet usually attracts a good crowd, this year's was better than the last couple in my opinion though. It had a really good range of interesting high end stuff. Glad to hear your VR6 is coming along, how much more have got got to do?
My G60 is on the road year round...but I cycle most places in York, so it's mainly for the times 2 wheels aren't practical. As the work shed that was the Astra has just expired, it may be seeing a little more road though.
It was pressed into service today to do a spot of car shuffling as I have a mate coming down this week with his car to be worked on, and needed the garage space...
After a very pleasant day looking at cars hillclimbing at Harewood, it was time to do a job on the Corrado I'd been putting off for a while - the passenger window.
It's never been right, as it never fully returned to the closed position - enough to keep the rain out while moving, but I'm pretty sure it was contributing to water ingress in the cabin. More importantly though was the fact that if I forgot to not use it (or brief my passengers) then an unscheduled stop at the first layby had to be implemented, so that a both hand lift could fully put it back in the closed position.
I'd previously had a look, found nothing I could fix immediately and bought a secondhand window mechanism to get round to fitting at some point. That was today. There are some guides on the the Corrado Forum and VW Vortex which proved useful starts and I'm not planning on replicating those - this is just to document what I did (and what was different from the guides).
I'll be honest, it's a fiddly job, with lots of swearing, head scratching and manipulation of parts by touch...
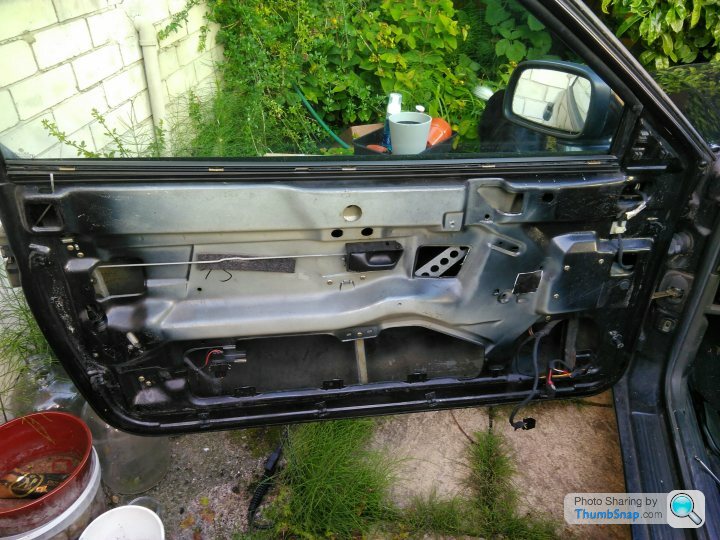
The door with the doorcard off
The rivets holding the window motor to the door....all seems simple, right? Just drill these 3 and the other 4 holding the upright that supports the window itself to remove the mechanism.
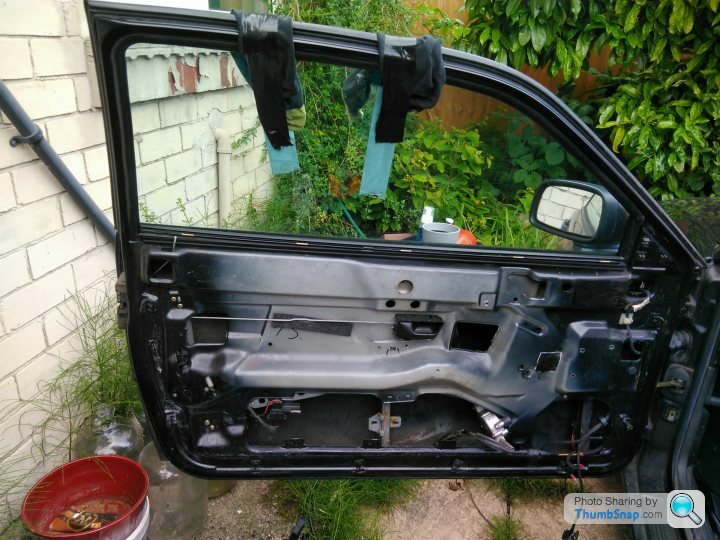
You need to move the window up and down quite a lot as part of the process in order to get the mechanism in, but stopping it dropping unexpectedly is a good idea.
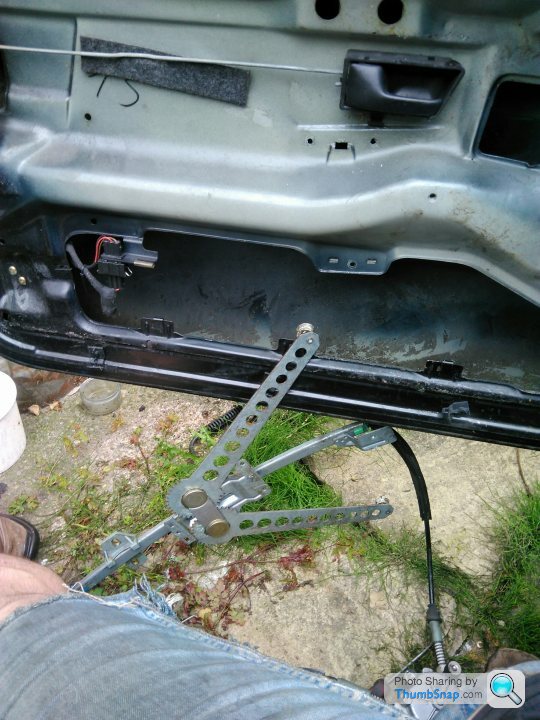
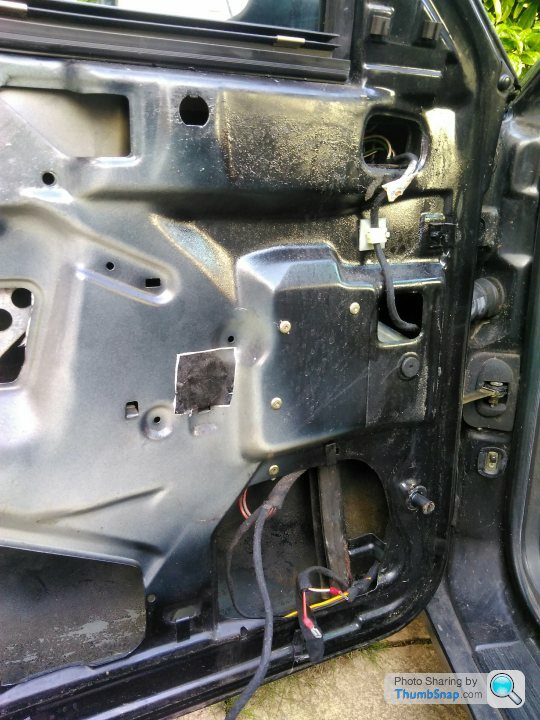
This makes it look easier than it was.... The entire metallic upright needs to be rotated by 45 degrees and fitted past the window without scratching it. It's worse putting the new one it, as you have to not break any of the plastic clips.
The guides have you clamp the rubber damping washers attached to the motor in a vice, and drill the metal washer off. I decided to practice on the old motor, it didn't go well. Effectively there is a stud in the body of the motor which holds the rubber washer into which the long rivet body is held. If you don't have any long rivets, you need to find a different solution...
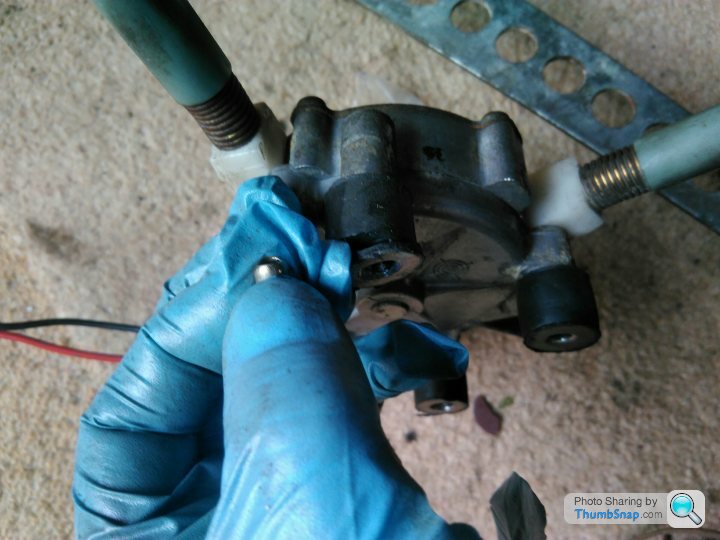
Here's the body of the long rivet that you're trying to get out.
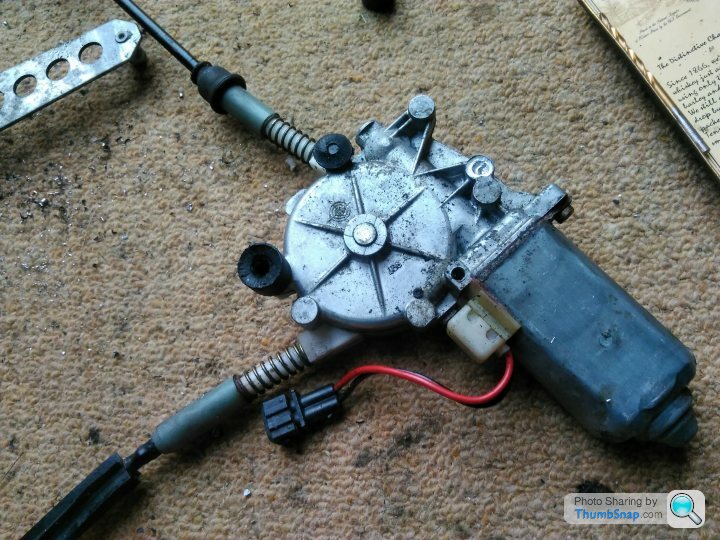
The alternative solution that I used was to take a sharp knife, cut under the metal washer without removing it completely, dig out the remains of the rivet that I had drilled the head off and install a captive nut in the body of the bush. Superglue puts the metal washer back on the bush. You're then left with a motor looking like this.
Which sits back into the door like this. The other four could be riveted back on OK as they don't need the longer rivets.
All in all, it took about 3 hours, most of that was down to the manipulation of the mechanism inside the door. I've yet to road test it to see if the whistle has gone, but the initial seating position of the window is much better than it was. Tomorrow will tell...
Cheers,
Tom
It's never been right, as it never fully returned to the closed position - enough to keep the rain out while moving, but I'm pretty sure it was contributing to water ingress in the cabin. More importantly though was the fact that if I forgot to not use it (or brief my passengers) then an unscheduled stop at the first layby had to be implemented, so that a both hand lift could fully put it back in the closed position.
I'd previously had a look, found nothing I could fix immediately and bought a secondhand window mechanism to get round to fitting at some point. That was today. There are some guides on the the Corrado Forum and VW Vortex which proved useful starts and I'm not planning on replicating those - this is just to document what I did (and what was different from the guides).
I'll be honest, it's a fiddly job, with lots of swearing, head scratching and manipulation of parts by touch...
The door with the doorcard off
The rivets holding the window motor to the door....all seems simple, right? Just drill these 3 and the other 4 holding the upright that supports the window itself to remove the mechanism.
You need to move the window up and down quite a lot as part of the process in order to get the mechanism in, but stopping it dropping unexpectedly is a good idea.
This makes it look easier than it was.... The entire metallic upright needs to be rotated by 45 degrees and fitted past the window without scratching it. It's worse putting the new one it, as you have to not break any of the plastic clips.
The guides have you clamp the rubber damping washers attached to the motor in a vice, and drill the metal washer off. I decided to practice on the old motor, it didn't go well. Effectively there is a stud in the body of the motor which holds the rubber washer into which the long rivet body is held. If you don't have any long rivets, you need to find a different solution...
Here's the body of the long rivet that you're trying to get out.
The alternative solution that I used was to take a sharp knife, cut under the metal washer without removing it completely, dig out the remains of the rivet that I had drilled the head off and install a captive nut in the body of the bush. Superglue puts the metal washer back on the bush. You're then left with a motor looking like this.
Which sits back into the door like this. The other four could be riveted back on OK as they don't need the longer rivets.
All in all, it took about 3 hours, most of that was down to the manipulation of the mechanism inside the door. I've yet to road test it to see if the whistle has gone, but the initial seating position of the window is much better than it was. Tomorrow will tell...
Cheers,
Tom
Good news - the whistle is fixed!
Bad news, I got a slow puncture 5 days before we're due to head off to Le Mans. Sound chaps at Just Tyres in York have another on order for me, and have plugged the hole as a short term measure (it's too close to the shoulder to entertain as a permanent repair.
I'm hoping that it arrives before Wednesday....still I have a spare and a an of tyre sealant
I also thought that the top mounts had been ignored for long enough, and decided to tackle them too. It's not too bad, it just needs 2 special tools, neither of which I have... I didn't know this before I set out of course.
You'll need: 18mm socket for the suspension strut to driveshaft housing, and a 22mm very slimline ring spanner and a 6mm allen key. You'll also need a 2 pronged (about 15mm apart) tool for unwinding the top mount to shock connection.
Alternatively, you'll need some bad language, knowledge of the laws of physics and an air driven impact wrench (22mm).
You'll also need spring compressors, regardless of your chosen method of removing the suspension strut.
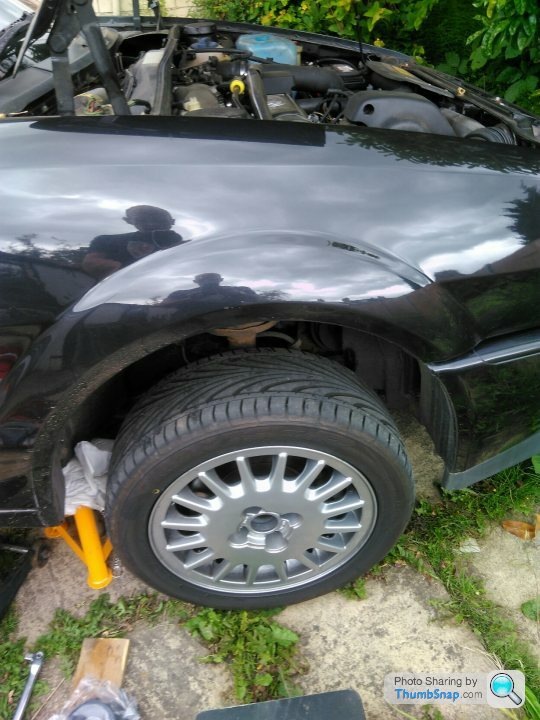
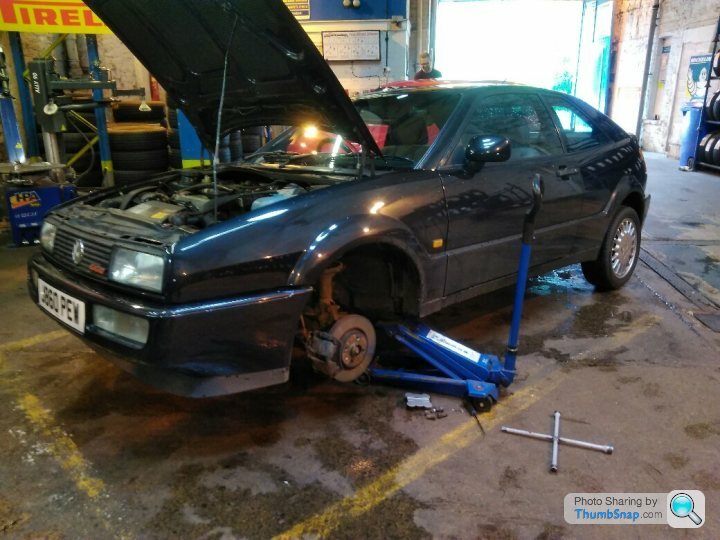
Up she goes

Spring compressors on
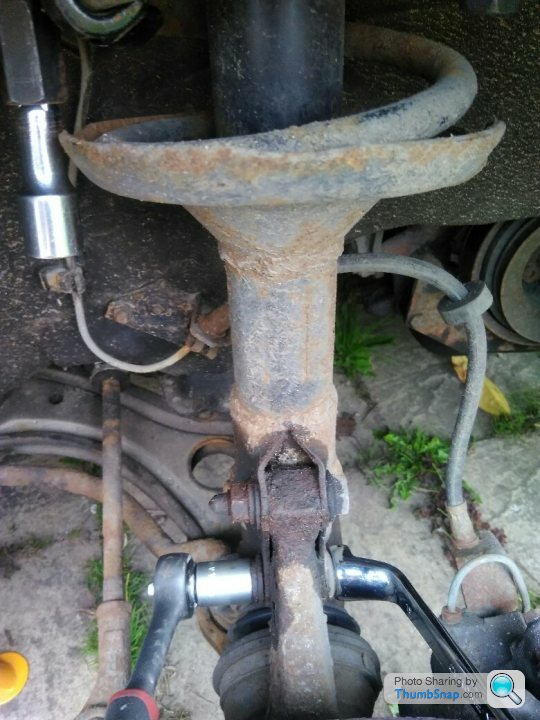
Undo these (18mm for the nut, 19mm for the bolt)
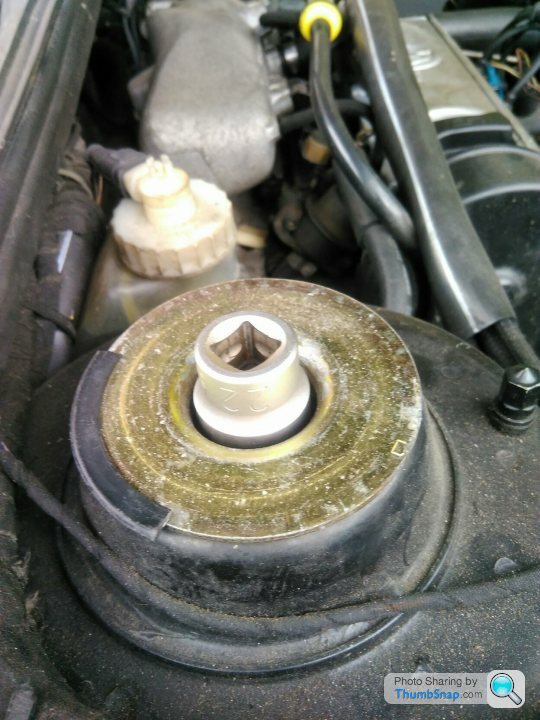
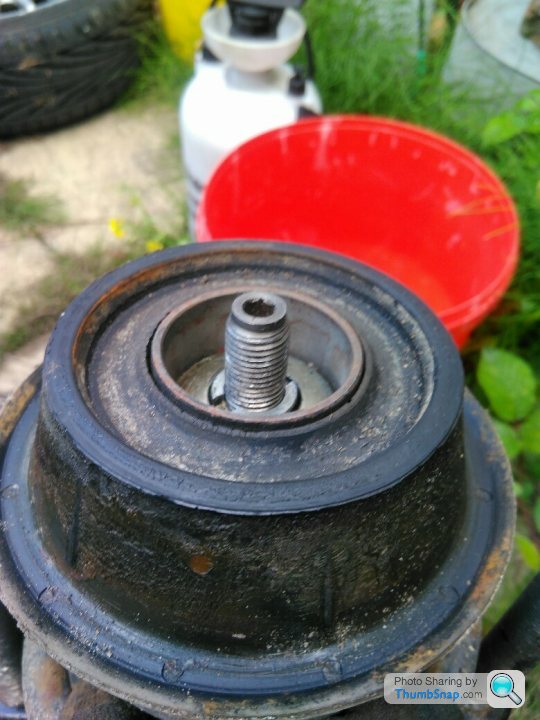
This wont work as the top of the shock rotates. A 22mm ring spanner that I went out and bought wont work either as it's too large to fit in the surround.
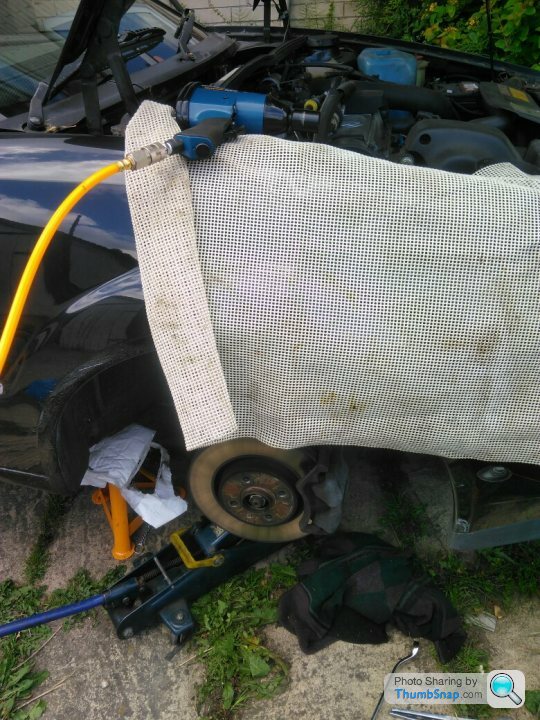
If you jack up the wishbone so the shell is holding everything in place though, the air gun will do it
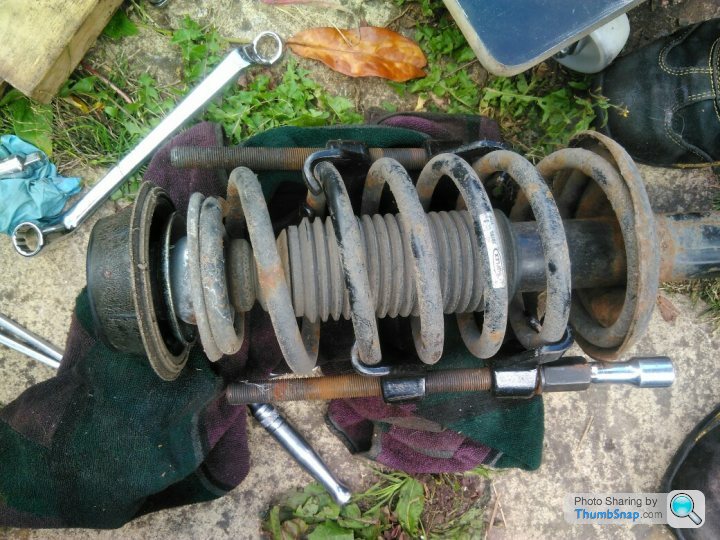
And this is what it looks like when it's out
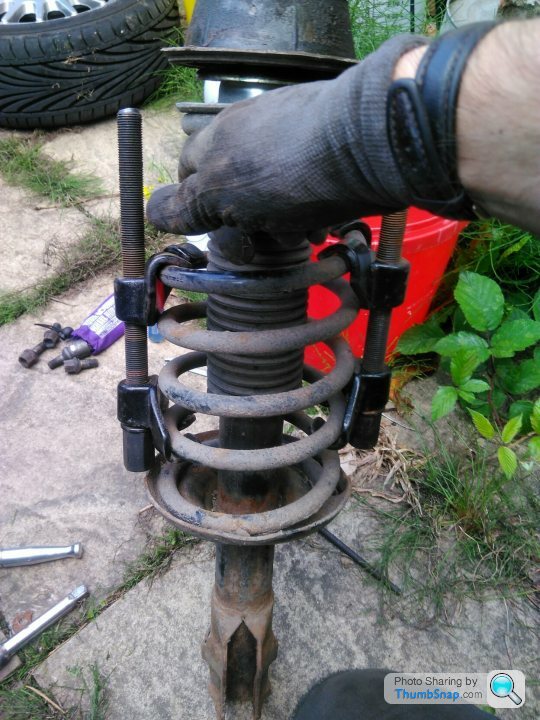
All nicely compressed.
In order to get the castellated nut out, you can improvise either by drifting it out (1 side needed this), or by using a pair or needle nose pliers to hold the nut in place, and the 6mm allen key/socket to remove the shock.
Refitting as they say, is the reverse of removal.... Tightening it up with the air gun made me feel rather dirty, I think the special tool is required just to make sure it's been done properly.
Hopefully get the wheel alignment done once the new tyre is on, then Le Mans or bust!
Cheers,
Tom
Bad news, I got a slow puncture 5 days before we're due to head off to Le Mans. Sound chaps at Just Tyres in York have another on order for me, and have plugged the hole as a short term measure (it's too close to the shoulder to entertain as a permanent repair.
I'm hoping that it arrives before Wednesday....still I have a spare and a an of tyre sealant
I also thought that the top mounts had been ignored for long enough, and decided to tackle them too. It's not too bad, it just needs 2 special tools, neither of which I have... I didn't know this before I set out of course.
You'll need: 18mm socket for the suspension strut to driveshaft housing, and a 22mm very slimline ring spanner and a 6mm allen key. You'll also need a 2 pronged (about 15mm apart) tool for unwinding the top mount to shock connection.
Alternatively, you'll need some bad language, knowledge of the laws of physics and an air driven impact wrench (22mm).
You'll also need spring compressors, regardless of your chosen method of removing the suspension strut.
Up she goes
Spring compressors on
Undo these (18mm for the nut, 19mm for the bolt)
This wont work as the top of the shock rotates. A 22mm ring spanner that I went out and bought wont work either as it's too large to fit in the surround.
If you jack up the wishbone so the shell is holding everything in place though, the air gun will do it
And this is what it looks like when it's out
All nicely compressed.
In order to get the castellated nut out, you can improvise either by drifting it out (1 side needed this), or by using a pair or needle nose pliers to hold the nut in place, and the 6mm allen key/socket to remove the shock.
Refitting as they say, is the reverse of removal.... Tightening it up with the air gun made me feel rather dirty, I think the special tool is required just to make sure it's been done properly.
Hopefully get the wheel alignment done once the new tyre is on, then Le Mans or bust!
Cheers,
Tom
Thanks for all the positive comments and also the tips on which top mounts to use next time (as I'm sure there'll be a next time....)
Sounds like the Mk3 ones may be worth a look as I can live with the front end up by 10mm if it means having to do this particular job fewer times!
The ones I fitted were the G60 ones from VW Heritage, so time will tell.
@Cambs_Stuart - if you get the opportunity, it's worth taking the plunge. There are faster, more reliable, prettier and more capable cars out there....but they can get under your skin in a way that I've yet to find any other car doing. Best if you don't mind wielding a spanner though.
@Tinkerton & @gforceg - thanks for the Le Mans wishes. This is my 4th regular Le Mans (3 Le Mans Classics too), and to anyone who's not been I recommend it. Most of the fun is in who you go with - like minded motorsport enthusiasts with a taste for beer and camping means you'll have a blast. If you want a more gentle taste of the atmosphere without the full madness, try the classic first. In terms of value for money, you can't beat it - with a cheap ferry you can get down there, in and back for about the same price as a F1 weekend at SIlverstone. If you can't be bothered with driving, the Eurostar/TGV combo is also very good value.
My only concern is that in the convoy I will be the oldest car there by 24 years and I haven't had time to fix the power steering leak, metallic plate under the radiator or change the coolant hoses. What could possibly go wrong
Cheers,
Tom
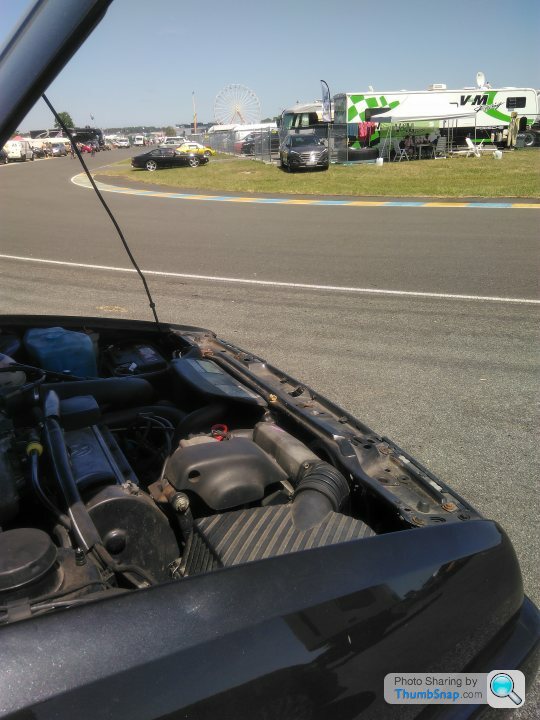
Made it down yesterday with no new issues, I'll take that as a result.
Some good plays on the French roads with friends and strangers alike, and a cracking convoy with a MK2 Scirocco (also J reg and in black) for a good few miles was a highlight. Especially as they were in the ferry queue with us!

Now in Maison Blanche with beer. Result!
Cheers,
Tom
Some good plays on the French roads with friends and strangers alike, and a cracking convoy with a MK2 Scirocco (also J reg and in black) for a good few miles was a highlight. Especially as they were in the ferry queue with us!
Now in Maison Blanche with beer. Result!
Cheers,
Tom
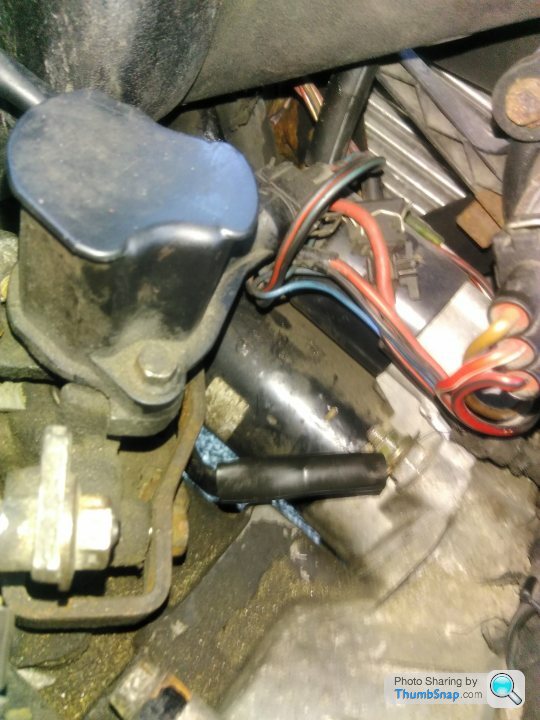
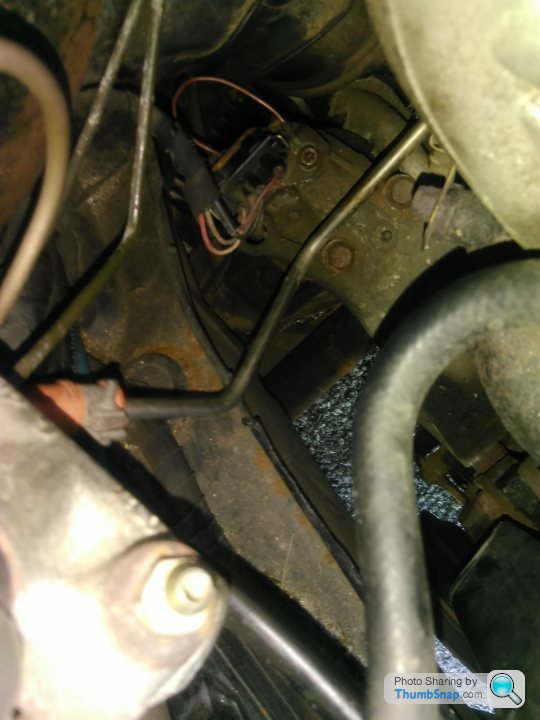
Inspired by the spirit of Le Mans, a little bit of tinkering went on while waiting for the race to start. I hate electrical gremlins, but a lot of them can be traced back to poor earths (especially on Suzuki's....).
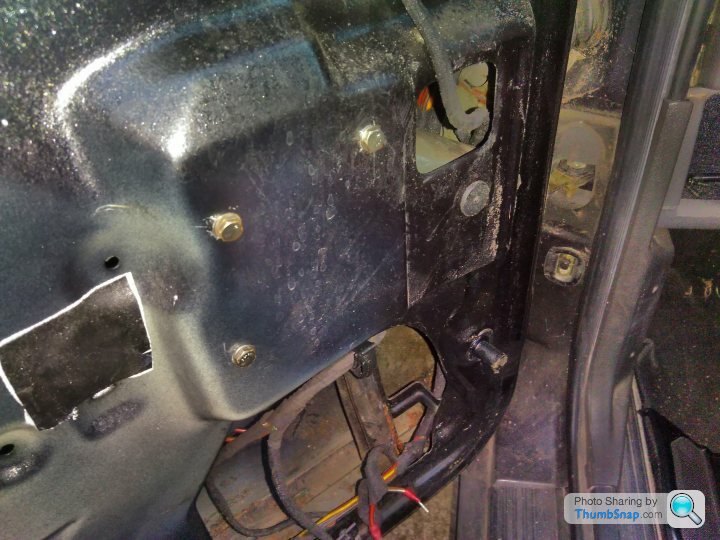
This being the case, in the heat of the midday sun, the other half and I cleaned all of the easily accessible earth points:
Behind the battery tray, attached to the starter motor and in front of the bulkhead on the driver's side by the engine mount.
A nice offer of assistance from one of the Carrera cup mechanics, and hopefully a trip that will stay where it's supposed to...
The trip back from Le Mans was mostly uneventful, the earth cleaning seemed to have fixed the trip resetting, and has had an improvement on the needle flicker... More work required on the less accessible earths I think.
Speaking of mostly uneventful and less accessible, somewhere North of Rouen, the temperature warning light came on. This was due to the coolant level bring low . A sealed system shouldn't use coolant, so it's got to be going somewhere, and coincidentally, there's a whiff of coolant in the cabin. Could this be the heater matrix...? Oh joy.
It's also using a bit of oil, so other possibilities should be considered as well... Not down on power, no sign of mayo in the oil, and no oil in the coolant. Excellent, so probably not the Head Gasket or the oil coolers then. Oh wait, there's a separate oil weep from the supercharger area, well we'll come back to that...
Now, about that heater matrix... A job that it seems according to the forum, is as much a pain in the arse as it is inevitable. This is my first in having had 4 Corrados though, do maybe I'm lucky.
Changing it is a doddle... Getting to it however, isn't.
You don't have to take the entire dashboard out, there are several good guides out there on various fora, but in a nutshell, the glove compartment and centre part of the dash need to come out.
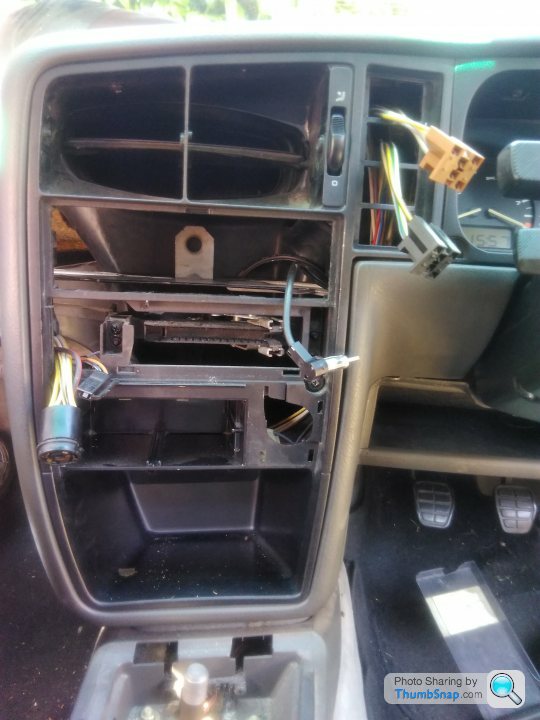
This isn't too bad, needing mostly a Phillips screwdriver and a new spine once you've finished lying upside down in the passenger footwell.
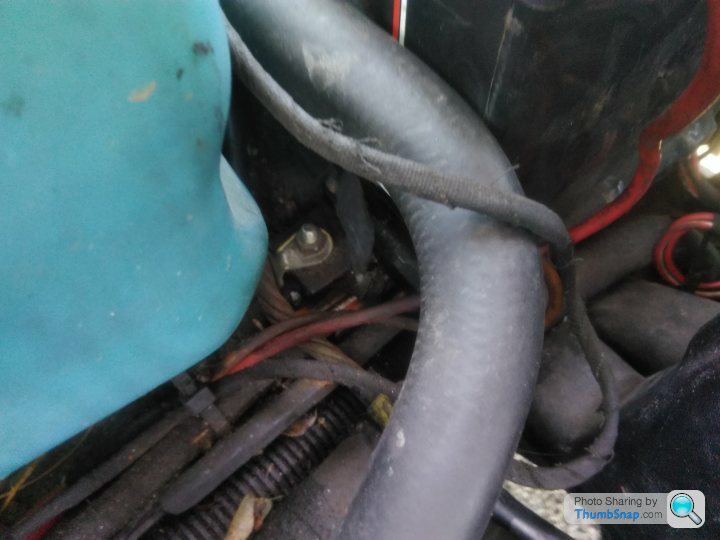
Once you've pulled a lot of the air ducting out, you can then remove the heater matrix hoses, and undo the bolts holding the heater matrix housing in place. This is the really difficult part.
There are 3 to remove, one which holds the fan motor assembly on and is behind the expansion tank.
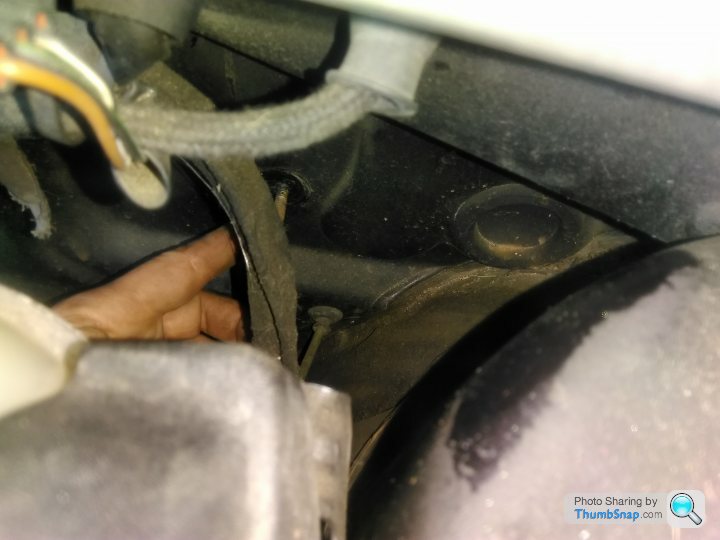
That's the easy one, the other two are practically in the centre of the engine bay, one in line with the coil, and one lower down in the heat shield. This bottom one is subject to road spray and is reluctant to be removed. If it turns in the plastic housing of the heater box, you'll need to get a 19mm spanner on the back.
This will involve contortion and bad language.
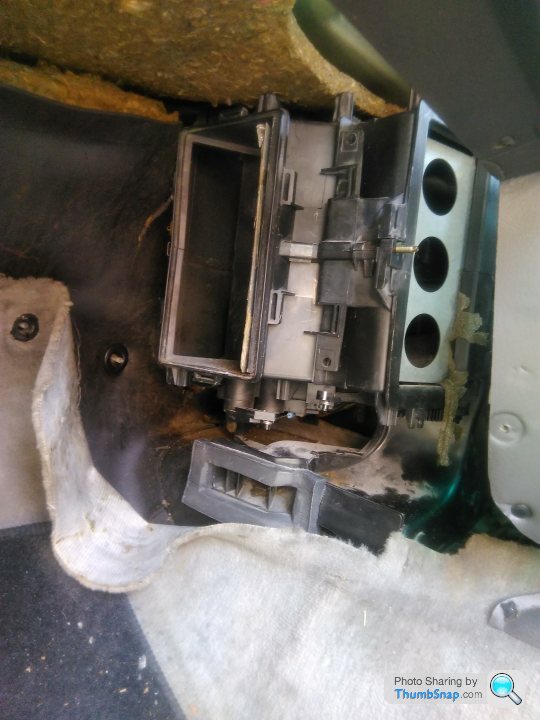
Eventually however, it will come out and then you can get at the matrix itself. Only to find that you've been sent one for a LHD vehicle that doesn't fit.
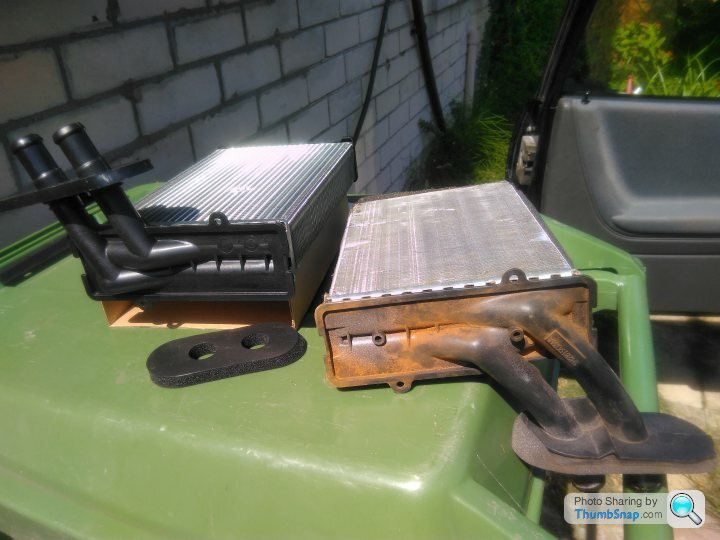
A quick trip to ECP later (who had one in stock unlike anywhere else) you can start reassembly....
That's today's job along with finishing installing the hoses, refilling the cooling system, checking for leaks and fixing a petrol leak that's I've found. Going to be a busy day!
Cheers,
Tom
Speaking of mostly uneventful and less accessible, somewhere North of Rouen, the temperature warning light came on. This was due to the coolant level bring low . A sealed system shouldn't use coolant, so it's got to be going somewhere, and coincidentally, there's a whiff of coolant in the cabin. Could this be the heater matrix...? Oh joy.
It's also using a bit of oil, so other possibilities should be considered as well... Not down on power, no sign of mayo in the oil, and no oil in the coolant. Excellent, so probably not the Head Gasket or the oil coolers then. Oh wait, there's a separate oil weep from the supercharger area, well we'll come back to that...
Now, about that heater matrix... A job that it seems according to the forum, is as much a pain in the arse as it is inevitable. This is my first in having had 4 Corrados though, do maybe I'm lucky.
Changing it is a doddle... Getting to it however, isn't.
You don't have to take the entire dashboard out, there are several good guides out there on various fora, but in a nutshell, the glove compartment and centre part of the dash need to come out.
This isn't too bad, needing mostly a Phillips screwdriver and a new spine once you've finished lying upside down in the passenger footwell.
Once you've pulled a lot of the air ducting out, you can then remove the heater matrix hoses, and undo the bolts holding the heater matrix housing in place. This is the really difficult part.
There are 3 to remove, one which holds the fan motor assembly on and is behind the expansion tank.
That's the easy one, the other two are practically in the centre of the engine bay, one in line with the coil, and one lower down in the heat shield. This bottom one is subject to road spray and is reluctant to be removed. If it turns in the plastic housing of the heater box, you'll need to get a 19mm spanner on the back.
This will involve contortion and bad language.
Eventually however, it will come out and then you can get at the matrix itself. Only to find that you've been sent one for a LHD vehicle that doesn't fit.
A quick trip to ECP later (who had one in stock unlike anywhere else) you can start reassembly....
That's today's job along with finishing installing the hoses, refilling the cooling system, checking for leaks and fixing a petrol leak that's I've found. Going to be a busy day!
Cheers,
Tom
aka_kerrly said:
Is your charger leaking oil from it's oil feed/return lines or do you suspect that the apex seals might be allowing a little oil to pass and it's leaking from charger outlet? A mate of mine was very close to removing his supercharger to be sent of for another rebuild before I found it was a tiny leak from the return pipe and the oil was getting splashed up the side of the charger making it look like it was coming out of the casing.
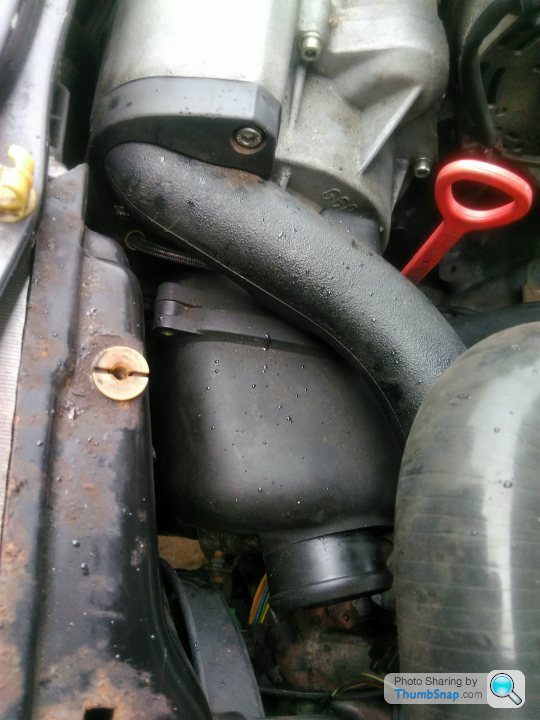
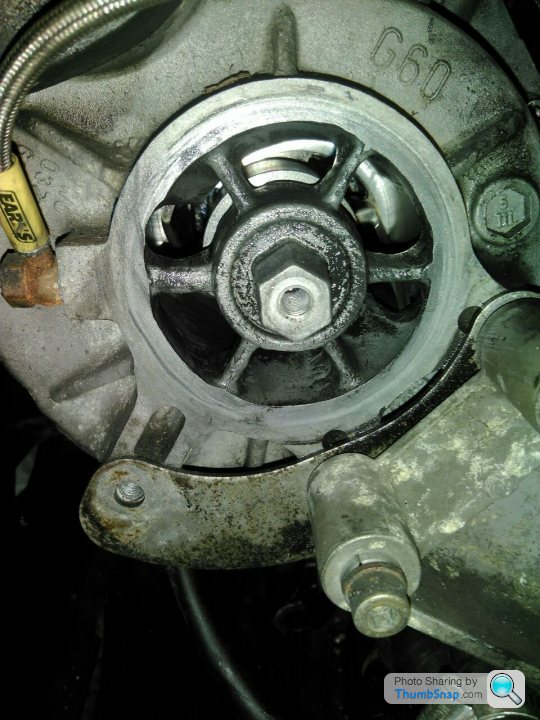
Hmmm... Thanks, that's useful, I'll take a close look at the feed and return lines. They were new braided ones fitted a few years back, so I hope it's not them! My theory is at the moment is that the leak is coming from between the body of the charger, and the charger outlet. This is largely because, like any good session of car maintenance, moving something out the way to give you better access to something else had to happen.
In this case, it was the charger outlet in the way of accessing the last two really tricky hoses in front of the block. However, I can't remove the charger outlet as one of the bolts (the hardest one to get at) seems to have been cross threaded and is merrily spinning in the charger housing. If it's not clamped together properly, oil that's getting past the seals may be leaking from there.
Getting it out may be tricky, certainly adds a new level of complication! Next step is to remove the radiator for better access, at least it's not full of coolant yet!
On the plus side, the dash is back together (mostly) and tomorrow, the new workhorse will be collected, so the fact that the Corrado remains up on axle stands is less of an issue!
I may even start a new thread for what will be the youngest car in the family (by 2 years....)
Cheers,
Tom
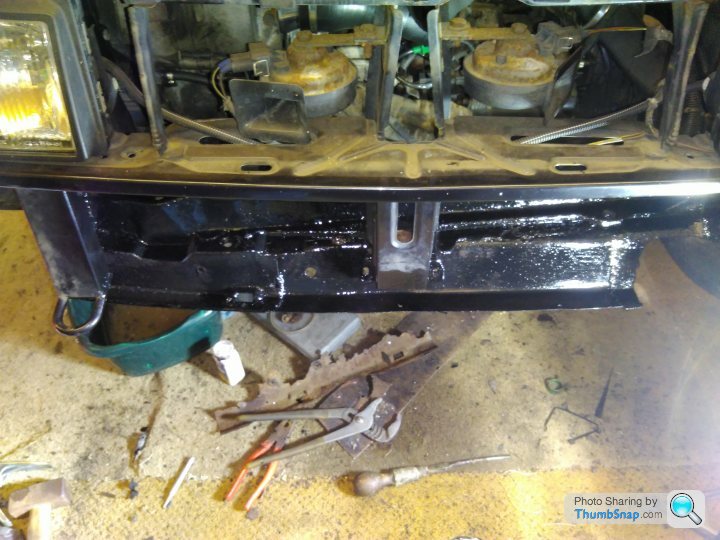
After a round of car Tetris and with the temporary relocation of the Morris, there was finally room in the garage to get the Corrado in. As it's been off the road since August, this couldn't come soon enough, as I can finally get into the guts of the engine bay to finish off what I started (and start a lot more stuff).
Now I'm finally undercover, I can take the bumper off to give me better access to the difficult to get to heater hoses:
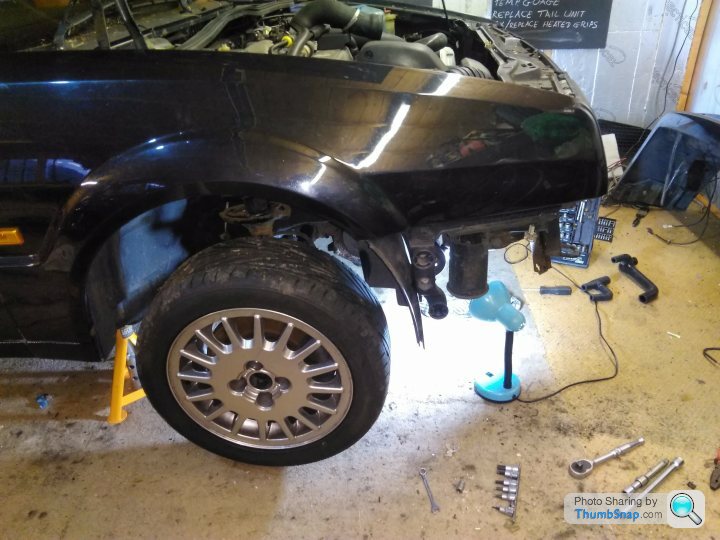
They're in here somewhere....
although it has to be said, that they might have actually built the contents of the engine bay around these two hoses.... I don't want to have to take the supercharger out, but I might have to.

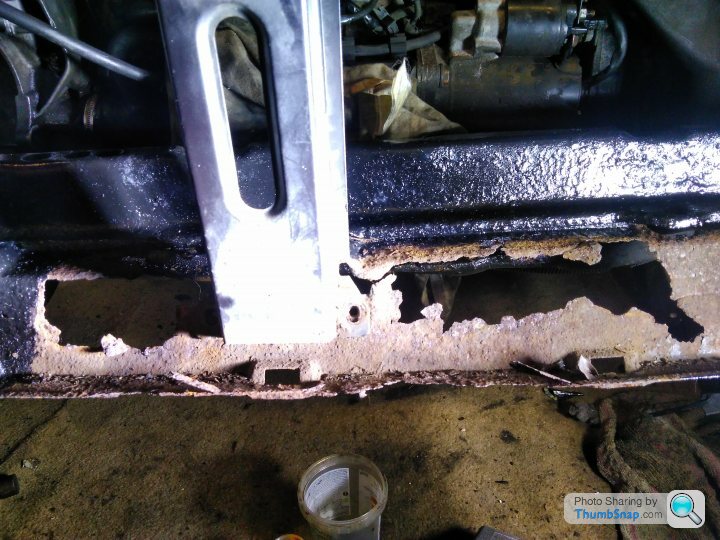
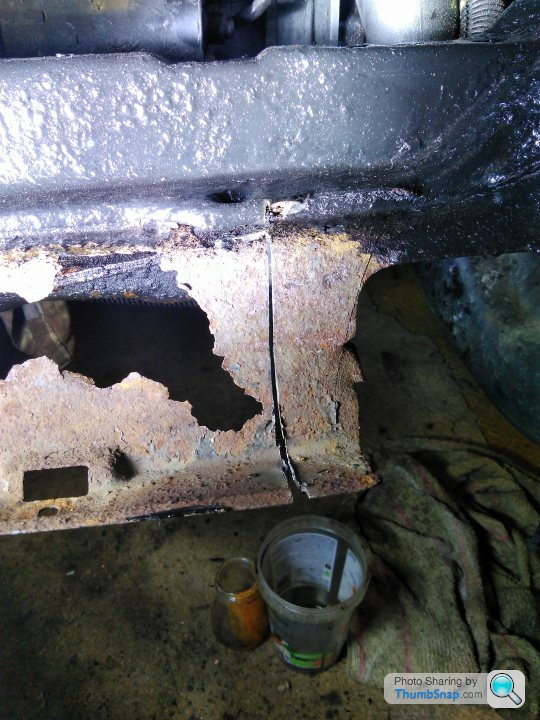
If I ever get the hoses changed, then I will get round to sorting out the power steering arrangement (i.e. re-designing the way it goes through the front cross member) and sorting out the said cross member. This currently has more holes than a colander, and most of them aren't supposed to be there.....

Time to fire up the space heater and get stuck in!
Cheers,
Tom
Now I'm finally undercover, I can take the bumper off to give me better access to the difficult to get to heater hoses:
They're in here somewhere....
although it has to be said, that they might have actually built the contents of the engine bay around these two hoses.... I don't want to have to take the supercharger out, but I might have to.
If I ever get the hoses changed, then I will get round to sorting out the power steering arrangement (i.e. re-designing the way it goes through the front cross member) and sorting out the said cross member. This currently has more holes than a colander, and most of them aren't supposed to be there.....
Time to fire up the space heater and get stuck in!
Cheers,
Tom
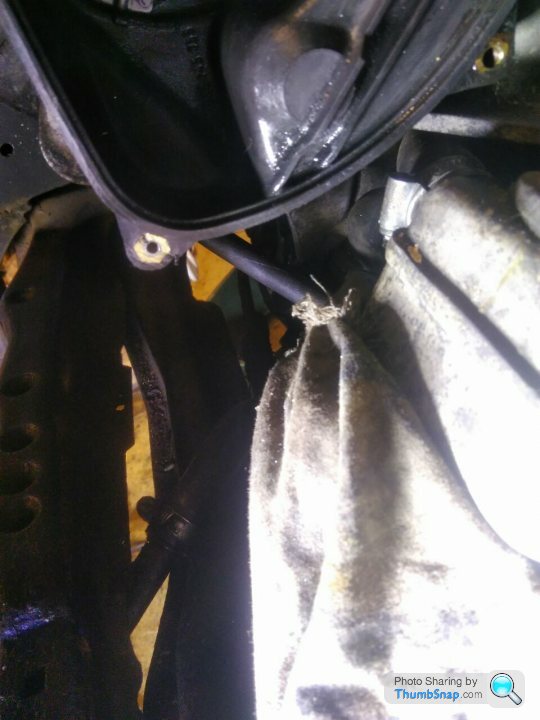
@tinkerton - I agreed, it's a daft design. The only reason for the power steering pipe to be routed through that section of the bulkhead is (as far as I can work out) for cooling purposes. I can see no other reason in terms of things it might interfere with, although a secondary reason might be to protect the metal pipe from damage.
That last reason is stretching the theory though, as it would be equally protected further back!
My plan is to cut out the rotten section of bulkhead and weld a new panel on (using scrap cut from the chassis of a 2CV....but that's another story). As part of this I'm going to replace the steel pipe that goes through the bulkhead with s copper one what will compensate for the lack of airflow by being able to shed the heat better.
Some very basic calculations show that 10mm ID copper pipe should take approximately 1100psi - if I drop to 8mm ID, then it will take 1400psi. Without knowing what the pressure rating or the internal diameters of the hoses and pipes are at present though, this is idle speculation!
Anyway, one job at a time - I managed to get the last of the old hoses off tonight with that best combination of mechanic tolls - mole grips and alcohol!
Went for a beer with a friend after work, then decided to get stuck in when I got home. The alcohol is an important factor in making you more relaxed about the sections of charger housing and engine mount that you're using as a pivot for the screwdriver to lever off the hoses! The mole grips are essential for holding open VW's original hose clamps and giving you both hands free for leverage! Made lots of notes so I don't forget what goes where too...
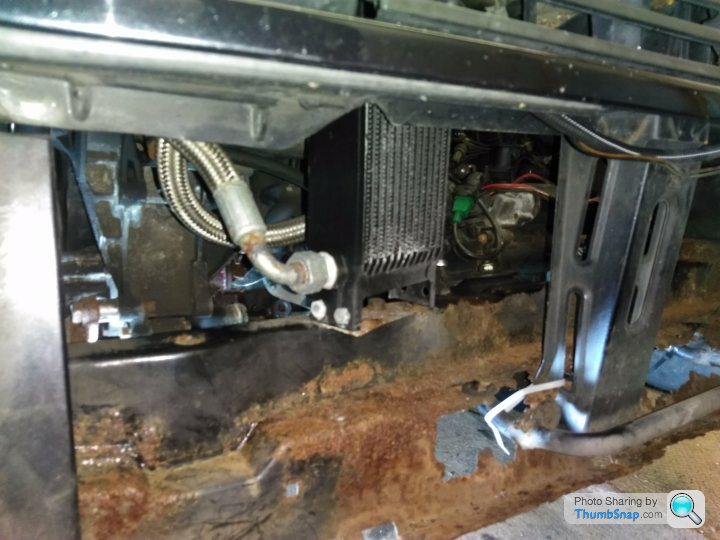
That doesn't stop access being a pain though... Had to take the oil cooler mountings out to get better wriggle room...
Glad I did though - look at the state of the old hose which appears to have been leaking.

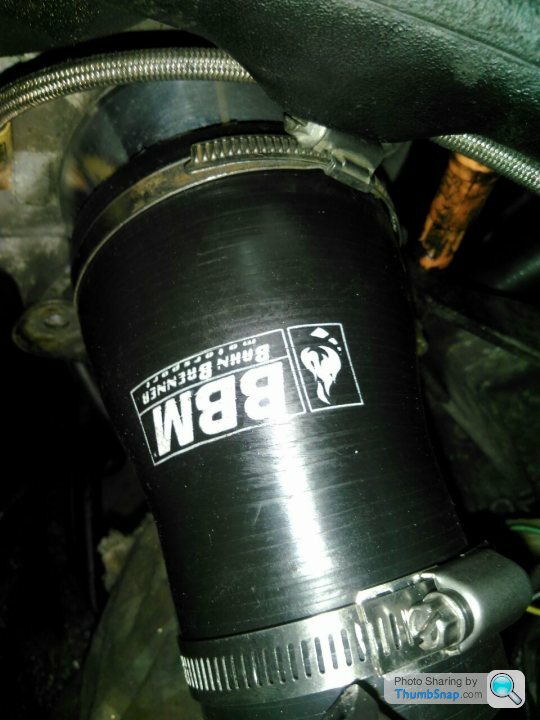
Compared to this silicone delight which will go back on.
The most important lesson is that learned from the NC30 - don't be afraid of doing up the new hose clamps TIGHT!
Otherwise what seems tight will spit its coolant out while queuing in traffic as the pressure builds and the previously tested watertight connection starts to leave....but then leaves no trace once it's cooled!
Cheers,
Tom
That last reason is stretching the theory though, as it would be equally protected further back!
My plan is to cut out the rotten section of bulkhead and weld a new panel on (using scrap cut from the chassis of a 2CV....but that's another story). As part of this I'm going to replace the steel pipe that goes through the bulkhead with s copper one what will compensate for the lack of airflow by being able to shed the heat better.
Some very basic calculations show that 10mm ID copper pipe should take approximately 1100psi - if I drop to 8mm ID, then it will take 1400psi. Without knowing what the pressure rating or the internal diameters of the hoses and pipes are at present though, this is idle speculation!
Anyway, one job at a time - I managed to get the last of the old hoses off tonight with that best combination of mechanic tolls - mole grips and alcohol!
Went for a beer with a friend after work, then decided to get stuck in when I got home. The alcohol is an important factor in making you more relaxed about the sections of charger housing and engine mount that you're using as a pivot for the screwdriver to lever off the hoses! The mole grips are essential for holding open VW's original hose clamps and giving you both hands free for leverage! Made lots of notes so I don't forget what goes where too...
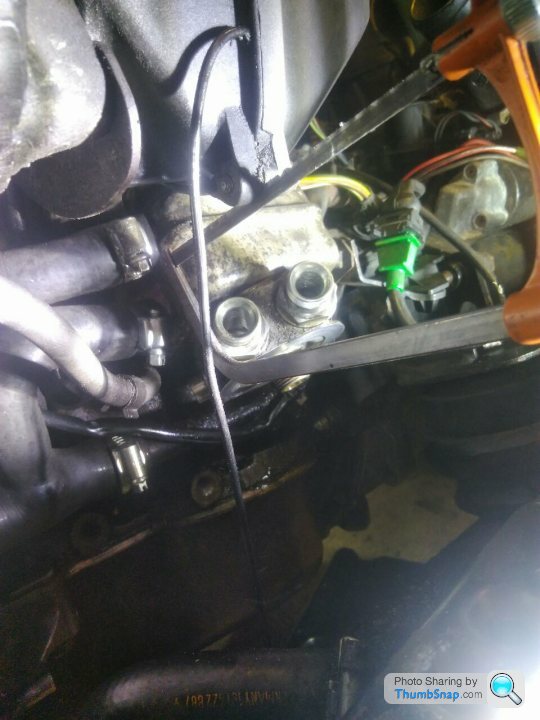
That doesn't stop access being a pain though... Had to take the oil cooler mountings out to get better wriggle room...
Glad I did though - look at the state of the old hose which appears to have been leaking.
Compared to this silicone delight which will go back on.
The most important lesson is that learned from the NC30 - don't be afraid of doing up the new hose clamps TIGHT!
Otherwise what seems tight will spit its coolant out while queuing in traffic as the pressure builds and the previously tested watertight connection starts to leave....but then leaves no trace once it's cooled!
Cheers,
Tom
Silicone a delight to put back on.... Not really if I'm honest. More like a total an utter pain in the backside. I thought getting them off was hard (it was), but putting them back on was no fun either.
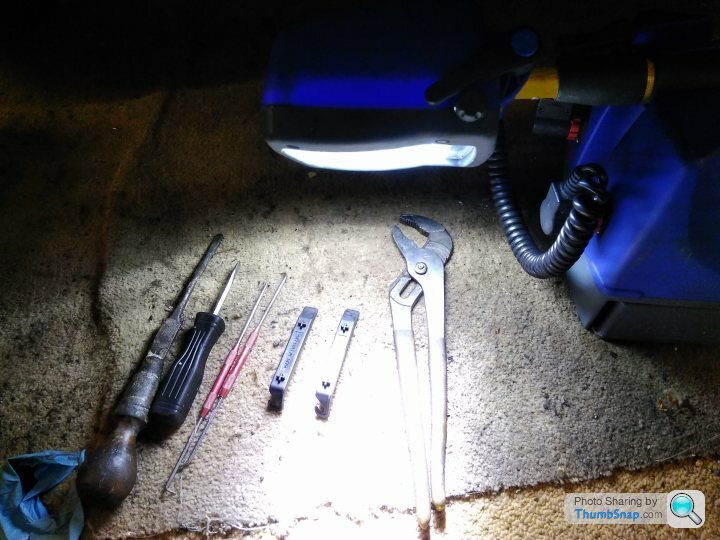
A selection of tools was required (harsh language not shown)
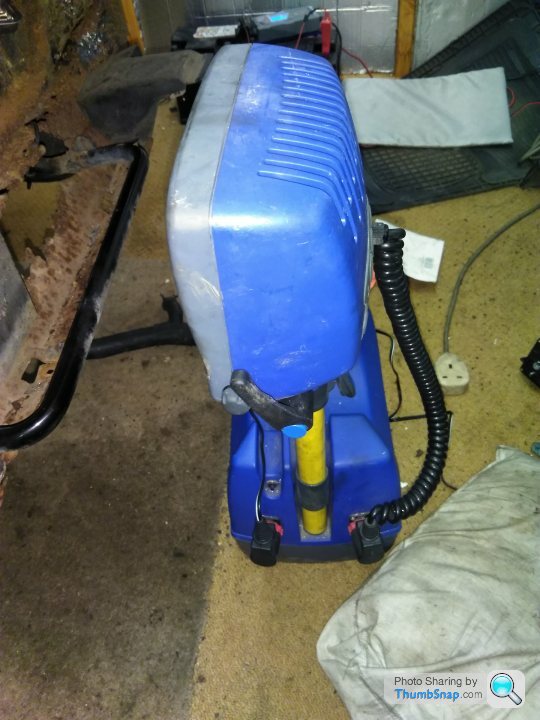
Decent lighting is also important... This handy thing is actually from work, but is flawed as the lead acid battery no longer retains charge for more than about 1 minute. Not much use on track for an 8-hour shift, but less of a problem when you have a 240v supply to run it live. It was going to be disposed of, so I'm glad to make use of it!
2 hoses down, many more so go. However, before I get carried away, I think that I may do the other things that will benefit from the improved access (power steering, valance etc.). Just need some time to make it happen!

Cheers,
Tom
A selection of tools was required (harsh language not shown)
Decent lighting is also important... This handy thing is actually from work, but is flawed as the lead acid battery no longer retains charge for more than about 1 minute. Not much use on track for an 8-hour shift, but less of a problem when you have a 240v supply to run it live. It was going to be disposed of, so I'm glad to make use of it!
2 hoses down, many more so go. However, before I get carried away, I think that I may do the other things that will benefit from the improved access (power steering, valance etc.). Just need some time to make it happen!
Cheers,
Tom
Slow progress on the Corrado front, but progress nonetheless.
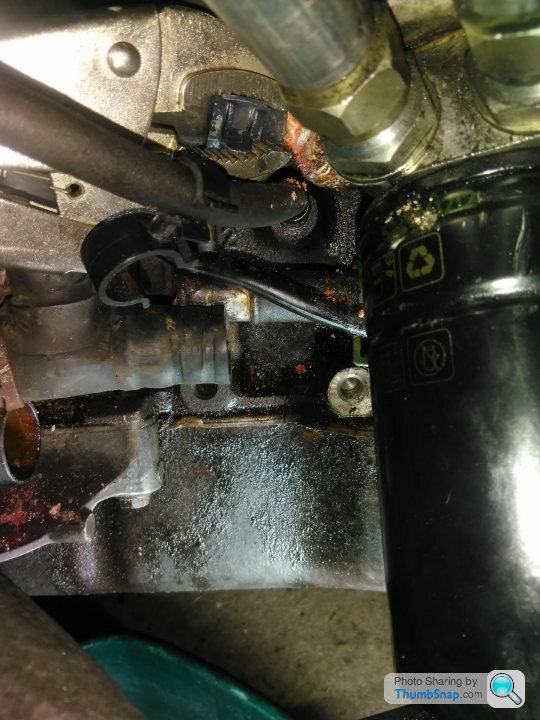
Having got the two most difficult hoses back on and secured, I wanted to turn my attention to sorting out the stripped bolt in the plastic housing, and a few other matters.
The bolt, ah yes, the bolt. 10mm head and spinning freely. I tried pliers, mole grips, pliers AND mole grips, a 10mm ratchet spanner with a punch pushing from the end, putting the punch on it and knocking it out of the hole. All of which failed. It was stripped enough to spin, but not so stripped you could punch it out.
I then did what I should have done in the first place, but was nervous of damaging the housing. I deployed a hacksaw between the slight gap in the two halves of the housing, and cut the blasted thing in half:
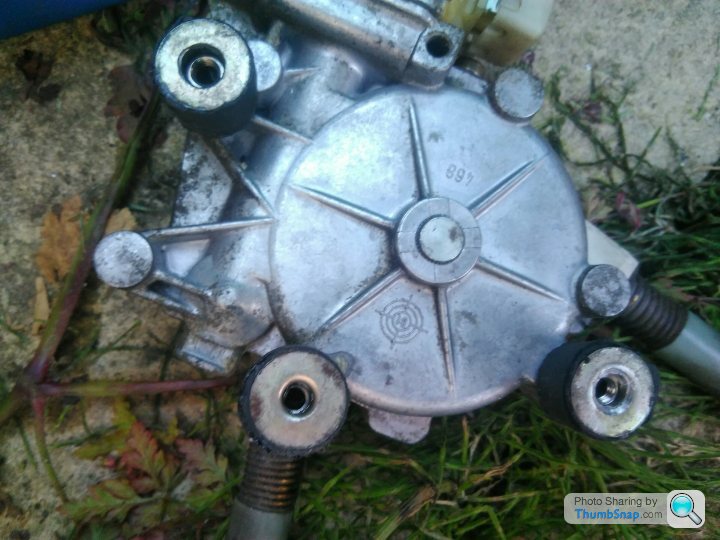
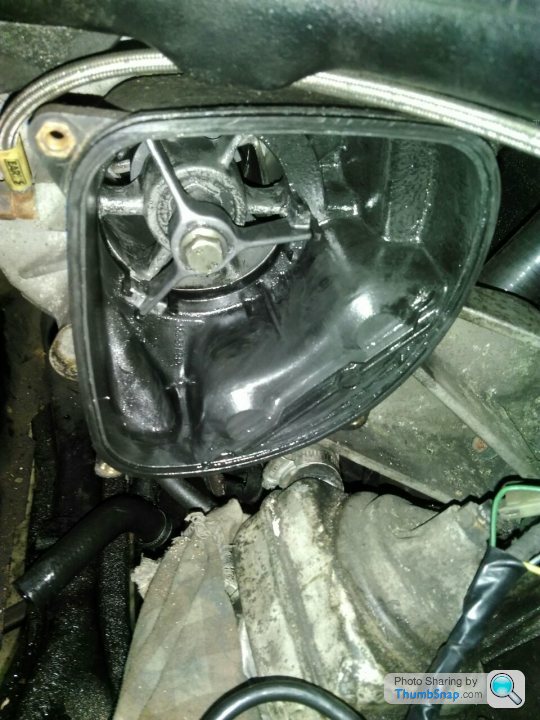
That revealed how it should all fit together, and the outlet for the supercharger:
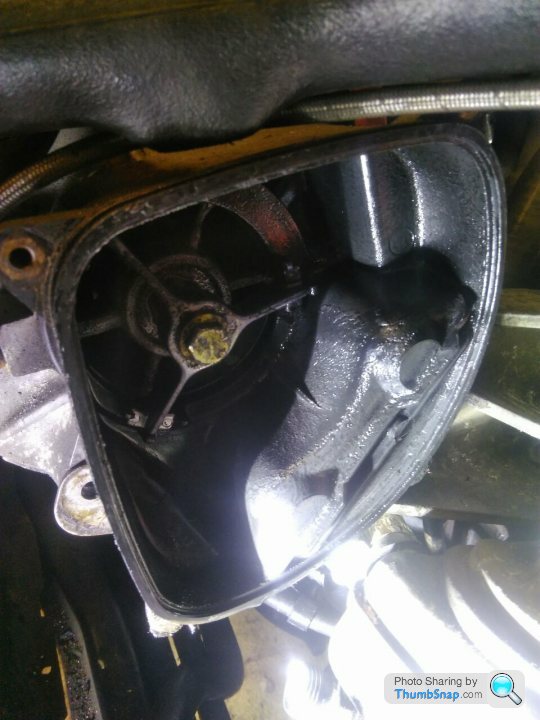
The housing is two plastic halves attached to the end of the charger. The halves are held together by 4 no. 10mm headed bolts, which pass through sleeve inserts in the outermost parts, and into nuts, which were presumably put in as part of the injection moulding. If this clamping effect isn't enough, there's a rubber o-ring (which has seen better days in my case) between the two halves.
When one of the bolts fails to unscrew, and you have to take a hacksaw to it, the remnamts look like this:
You can then drill the remaining shank of the bolt out. It pays to be careful though, as you'll generate a lot of heat in the nut, and can melt the plastic surround slightly, causing the nut to then spin freely.... That will require some thought to fix.
Before I made this final error (and I'd been so careful up to that point to drill a little and then let the heat dissipate) , I took some time to tidy up minor wiring loom bits...while waiting for the heat to dissipate:

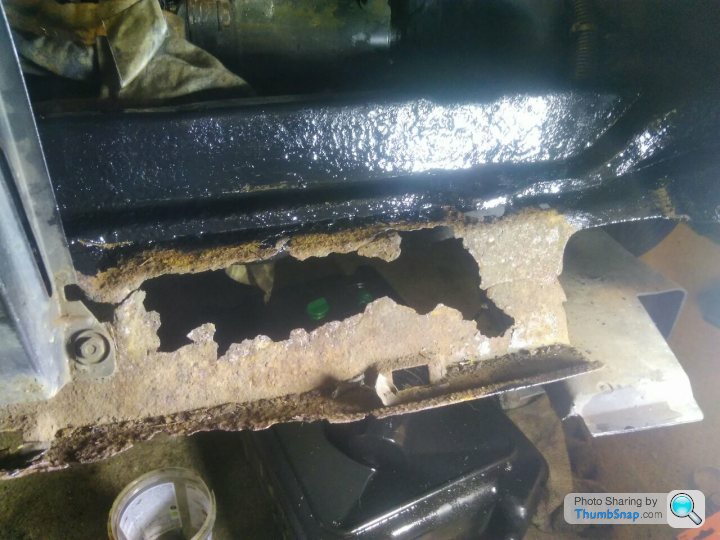
I also splashed a load of k-rust around the slightly crusty looking bits of the front cross member, let it work its magic, then slapped a coat of Hammerite straight to metal paint on it:


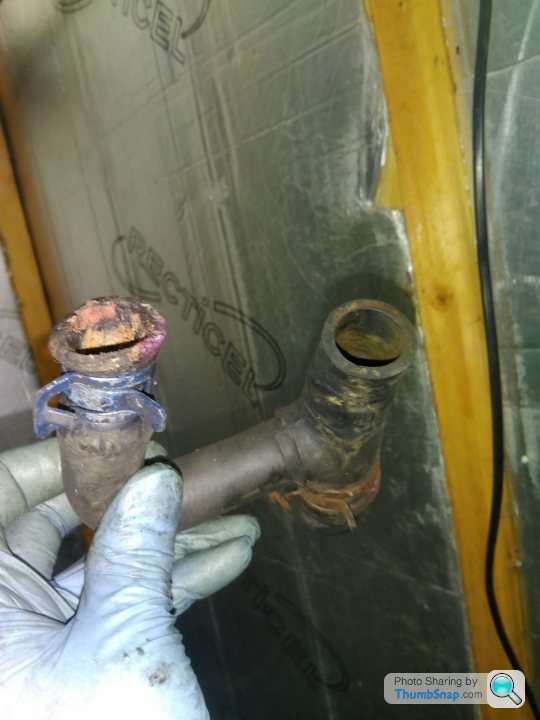
By this point, I'd also managed to remove the power steering cooling pipe that passes through the front valance, and measured it. It seems to be a 12mm internal diamter, 16mm external diameter steel tube. The wall thickness surprised me slightly, I have to say. Looking at the hoses, and doing a bit of reading online, I've concluded that this is subject to about 400psi max, rather than the high pressure output from the pump of over 1000psi. This should make sourcing a replacement piece of pipe or hose that little bit easier...
Once I get the bits for that (a trip to Pirtek or similar), I can then get the front valance welded up and start putting this part of it back together! Just need another day off.....
Having got the two most difficult hoses back on and secured, I wanted to turn my attention to sorting out the stripped bolt in the plastic housing, and a few other matters.
The bolt, ah yes, the bolt. 10mm head and spinning freely. I tried pliers, mole grips, pliers AND mole grips, a 10mm ratchet spanner with a punch pushing from the end, putting the punch on it and knocking it out of the hole. All of which failed. It was stripped enough to spin, but not so stripped you could punch it out.
I then did what I should have done in the first place, but was nervous of damaging the housing. I deployed a hacksaw between the slight gap in the two halves of the housing, and cut the blasted thing in half:
That revealed how it should all fit together, and the outlet for the supercharger:
The housing is two plastic halves attached to the end of the charger. The halves are held together by 4 no. 10mm headed bolts, which pass through sleeve inserts in the outermost parts, and into nuts, which were presumably put in as part of the injection moulding. If this clamping effect isn't enough, there's a rubber o-ring (which has seen better days in my case) between the two halves.
When one of the bolts fails to unscrew, and you have to take a hacksaw to it, the remnamts look like this:
You can then drill the remaining shank of the bolt out. It pays to be careful though, as you'll generate a lot of heat in the nut, and can melt the plastic surround slightly, causing the nut to then spin freely.... That will require some thought to fix.
Before I made this final error (and I'd been so careful up to that point to drill a little and then let the heat dissipate) , I took some time to tidy up minor wiring loom bits...while waiting for the heat to dissipate:
I also splashed a load of k-rust around the slightly crusty looking bits of the front cross member, let it work its magic, then slapped a coat of Hammerite straight to metal paint on it:
By this point, I'd also managed to remove the power steering cooling pipe that passes through the front valance, and measured it. It seems to be a 12mm internal diamter, 16mm external diameter steel tube. The wall thickness surprised me slightly, I have to say. Looking at the hoses, and doing a bit of reading online, I've concluded that this is subject to about 400psi max, rather than the high pressure output from the pump of over 1000psi. This should make sourcing a replacement piece of pipe or hose that little bit easier...
Once I get the bits for that (a trip to Pirtek or similar), I can then get the front valance welded up and start putting this part of it back together! Just need another day off.....
No days off, but a little progress this weekend nonetheless. Prompted by re-reading parts of this thread, I made the mistake of typing 'RSR G60' into a certain online auction site.
Well, I wasn't happy with the old silencer box, I've not stayed entirely OE as I've got an oil cooler, it will make taking the charger out easier in future....and it was shiny.
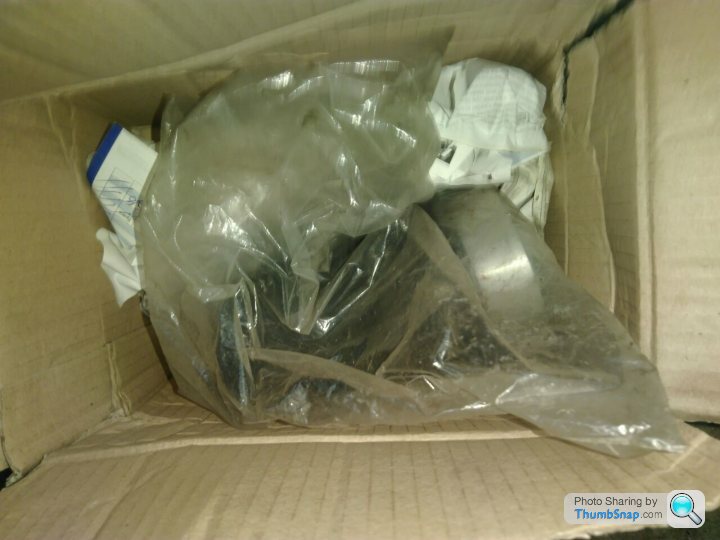
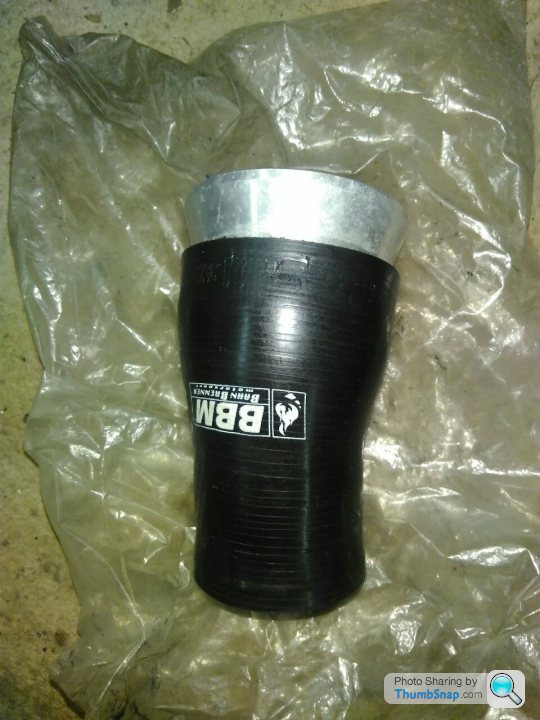
Not shiny enough though for a part that will never normally be seen of course (I just couldn't resist) and so it got a little Autosol. I don't normally do bling in an engine bay, I'll go a long way to avoid it normally....but hell:

Out came the old remains of the silencer box (I was nervous about shearing off this bolt in the charger, but it came out OK thankfully).
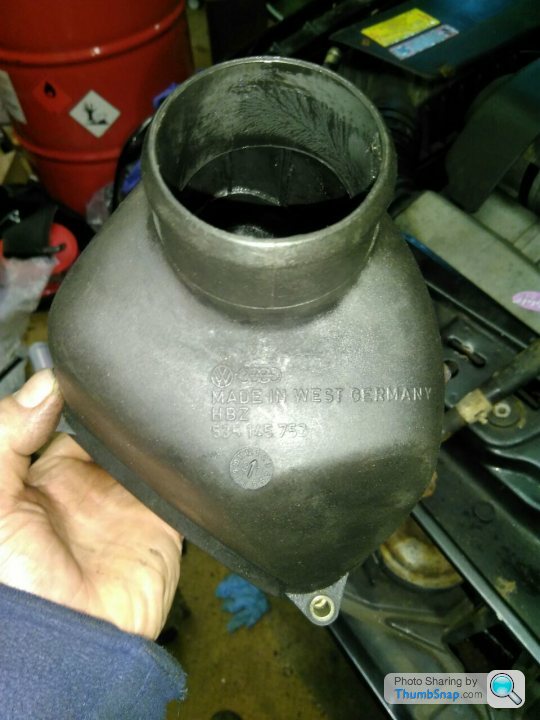
I'll keep this in the spares pile in case I want to return it to standard:
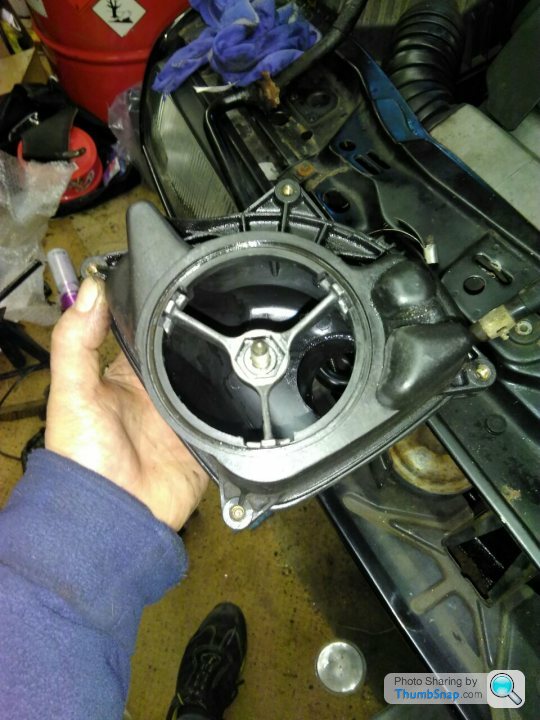
That's what the outlet of the charger looks like with no silencer:
For now, with a new stainless bolt, on it goes:
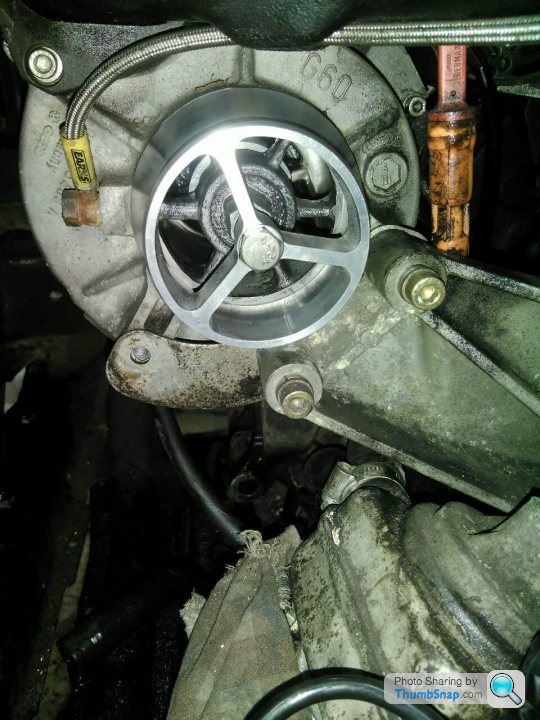
Mocked up (there's still more of the welding and the power steering to be done first):
I'd like to thank/blame the other contributors to the thread for making me aware of the bling
Well, I wasn't happy with the old silencer box, I've not stayed entirely OE as I've got an oil cooler, it will make taking the charger out easier in future....and it was shiny.
Not shiny enough though for a part that will never normally be seen of course (I just couldn't resist) and so it got a little Autosol. I don't normally do bling in an engine bay, I'll go a long way to avoid it normally....but hell:
Out came the old remains of the silencer box (I was nervous about shearing off this bolt in the charger, but it came out OK thankfully).
I'll keep this in the spares pile in case I want to return it to standard:
That's what the outlet of the charger looks like with no silencer:
For now, with a new stainless bolt, on it goes:
Mocked up (there's still more of the welding and the power steering to be done first):
I'd like to thank/blame the other contributors to the thread for making me aware of the bling
Excellent stuff, sounds like getting it was a positive thing then, glad to be able to justify it to myself still further!
It cost me £100 including postage which on the surface seems steep for a machined piece of alloy and some silicone hose. As with all of these things though, it's actually cheap once you factor in the design costs, the pretty specialist nature of what the thing actually is etc....
I was idly contemplating the advantages of tapering the square section that the air must flow over as it leaves the charger in order to offer a more streamlined profile. I'm not sure I want to invest that much time and effort though!
ManOpener said:
And if you get bored of the original G-Lader and the increasing rebuild frequency as you go down pulley sizes, you could always drop in one of the BBM Lysholm chargers
I've seen other people take that route and fair play to them, but it's not for me. I've contemplated the smaller pulley, but I'm likely to keep it as standard for now at least. It will certainly always have a G-Lader - in my mind, that makes our what it is!There's not much point in throwing too much money at it in order to chase acceleration and speed. It will never be able to compete with that of 2 wheels no matter how much I spend....
Sympathetic mods to make it a more enjoyable drive is the way forward.
Cheers,
Tom
Spent most of today helping a mate with a 2CV engine rebuild, but did make a little bit of progress on the Corrado earlier.
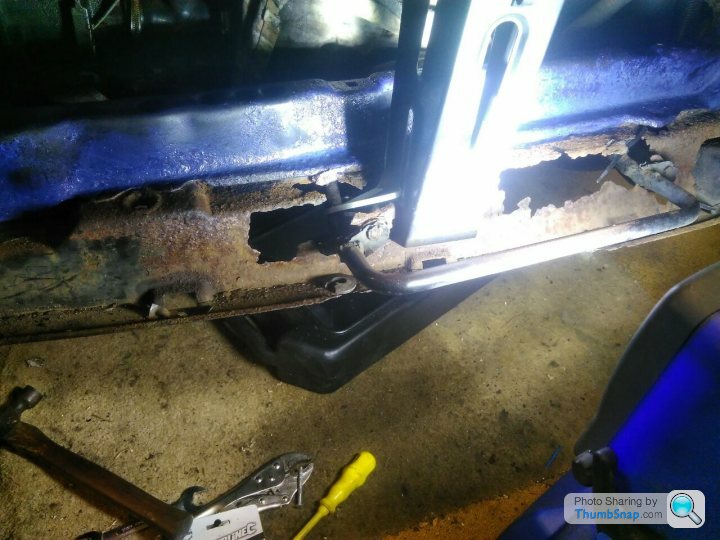
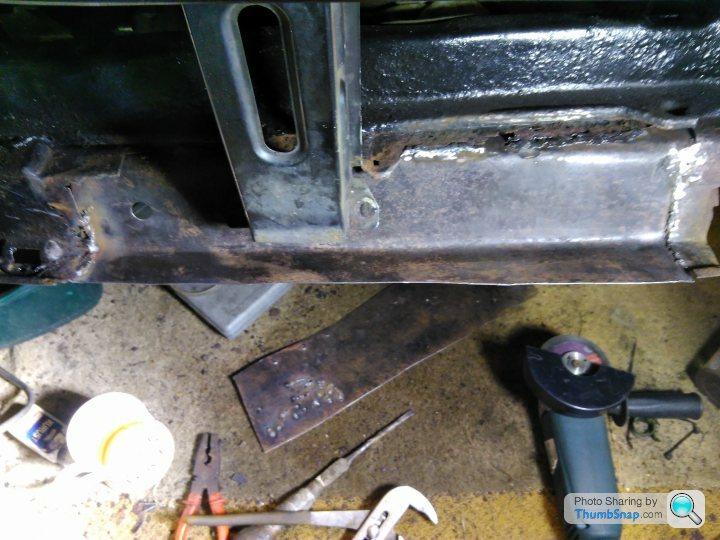
With better access to the front valance, the grinder came out to remove the rusty bits.
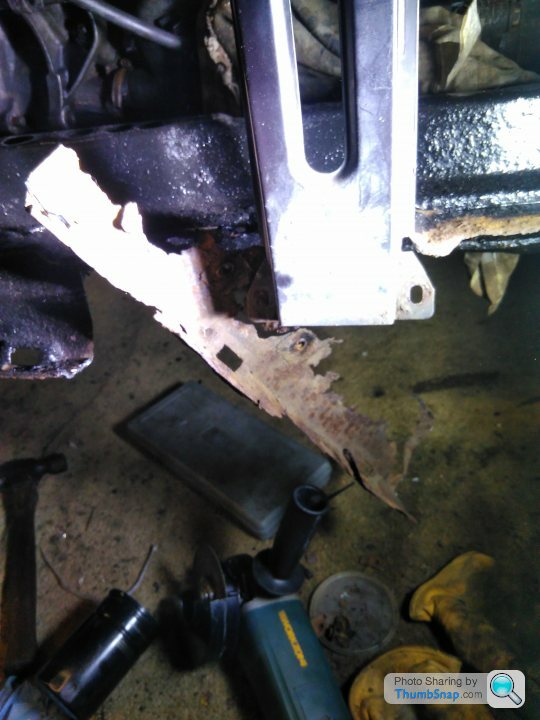
Leaving an empty space:

The same mate's old 2CV chassis generously donated the metal for the replacement:
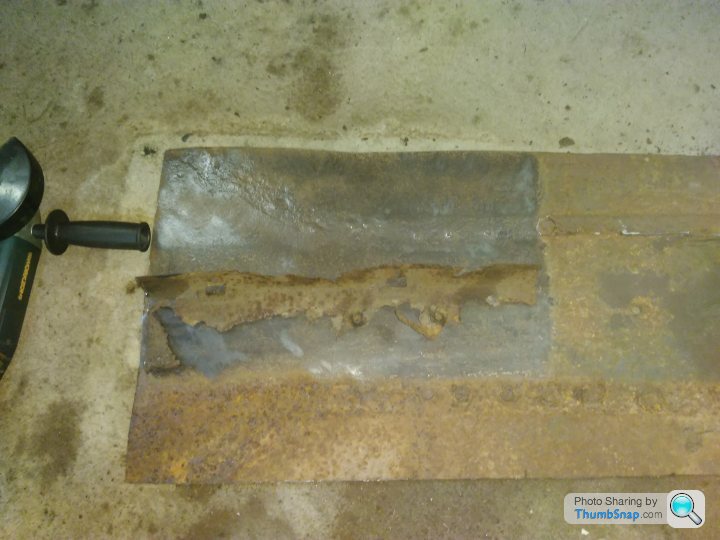
Which with some help from a vice was cut and bent into shape:
Next stop, welding and more cutting...
With better access to the front valance, the grinder came out to remove the rusty bits.
Leaving an empty space:
The same mate's old 2CV chassis generously donated the metal for the replacement:
Which with some help from a vice was cut and bent into shape:
Next stop, welding and more cutting...
- CAVEAT*
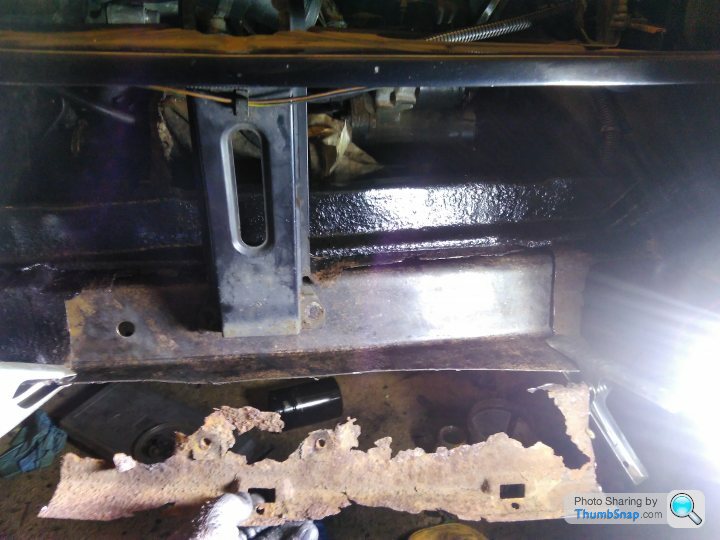
However, I can bodge together non-structural stuff to replace rusty parts. With that being the case, I made a little more progress today.
Behold the bodge....
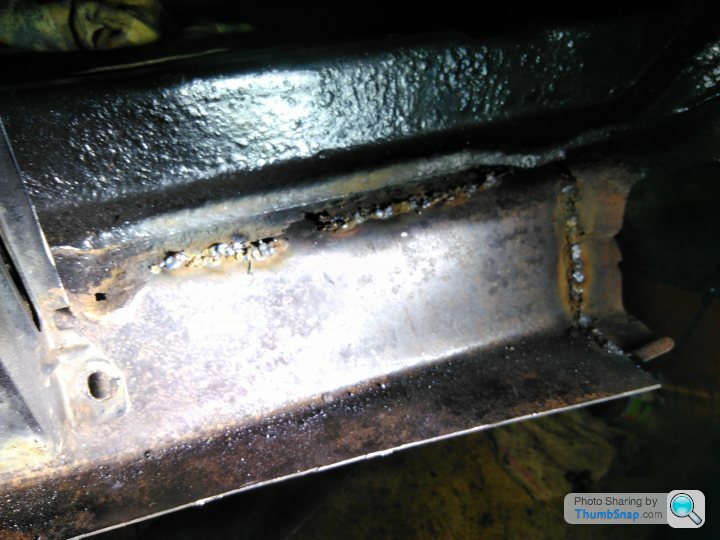
A little bit of grinding later though, it was...still as bad, but with shiny bits:
However, as it's purpose is to direct airflow into the radiator and align (but not support) the front chin spoiler, I can live without a seamless perfect weld.
Just as well really.
It passed the 'wiggle it about vigorously' test and all of the surrounding metal moves as well. That's enough for me to apply the Hammerite.
Everything looks better when hidden under a coat of Hammerite!
In all seriousness though, it will now fulfill its intended purpose, and is protected against the elements. Next step will be starting to bolt bits back together and getting the power steering diverted...
Gassing Station | Readers' Cars | Top of Page | What's New | My Stuff