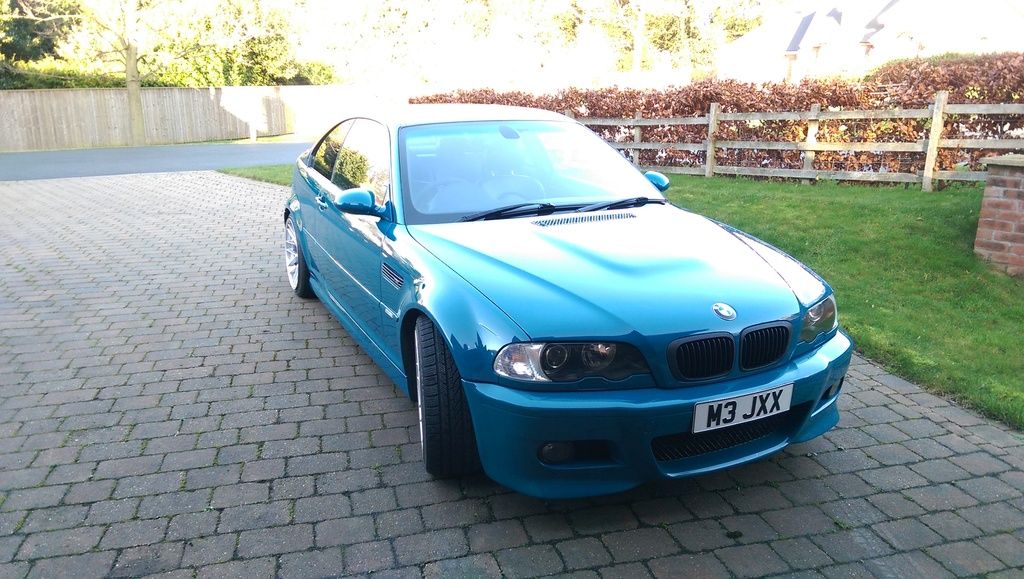
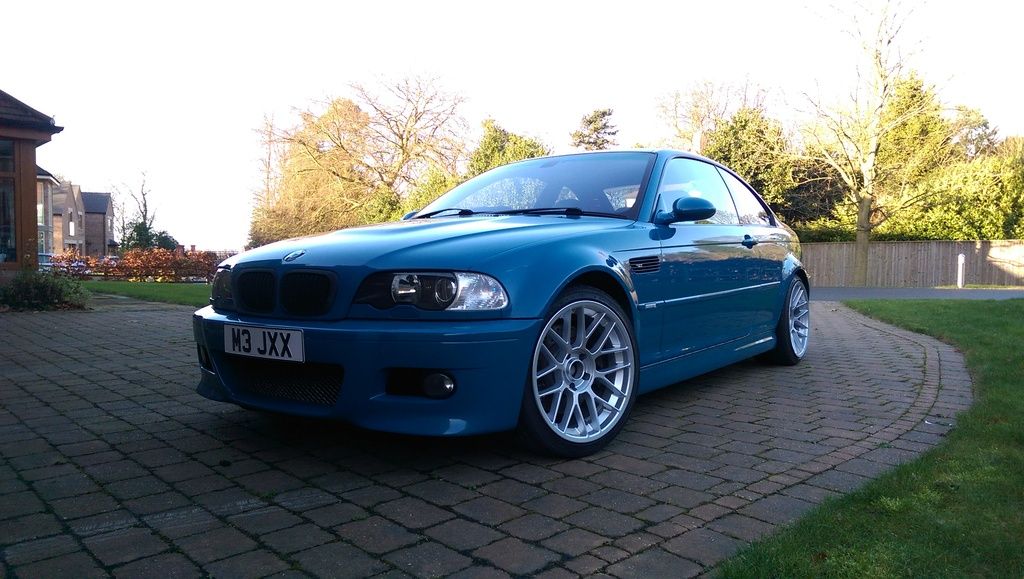
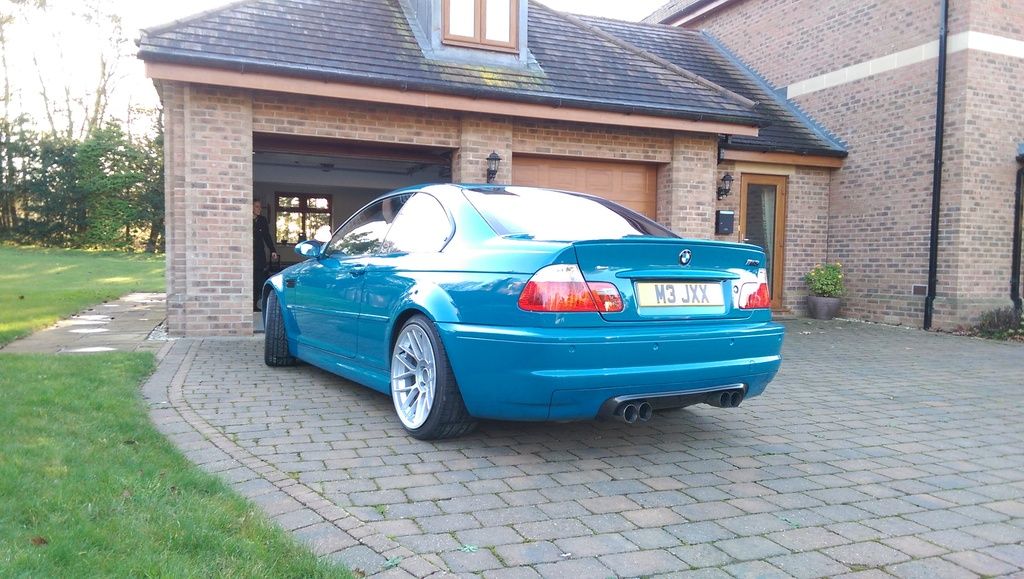
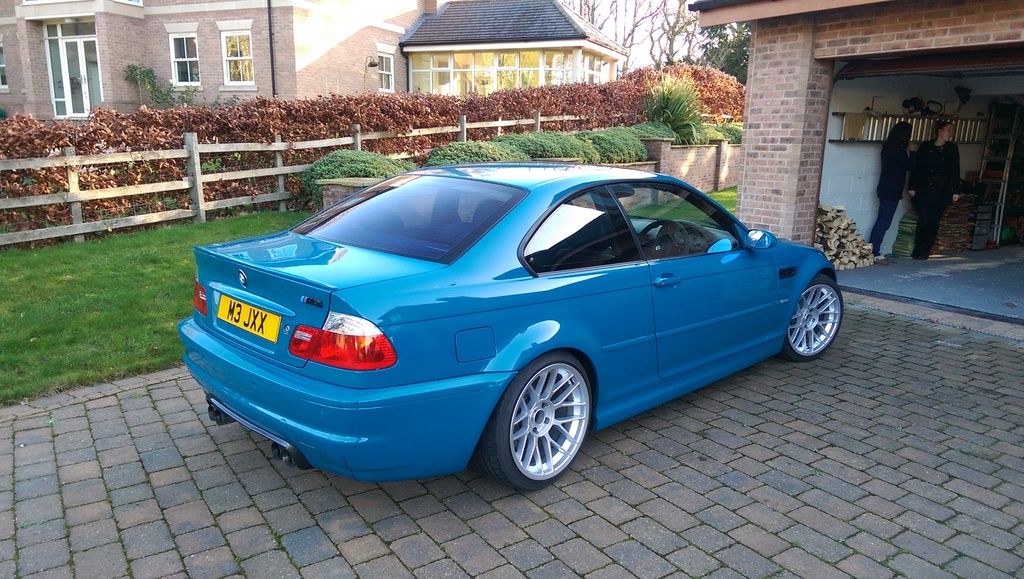
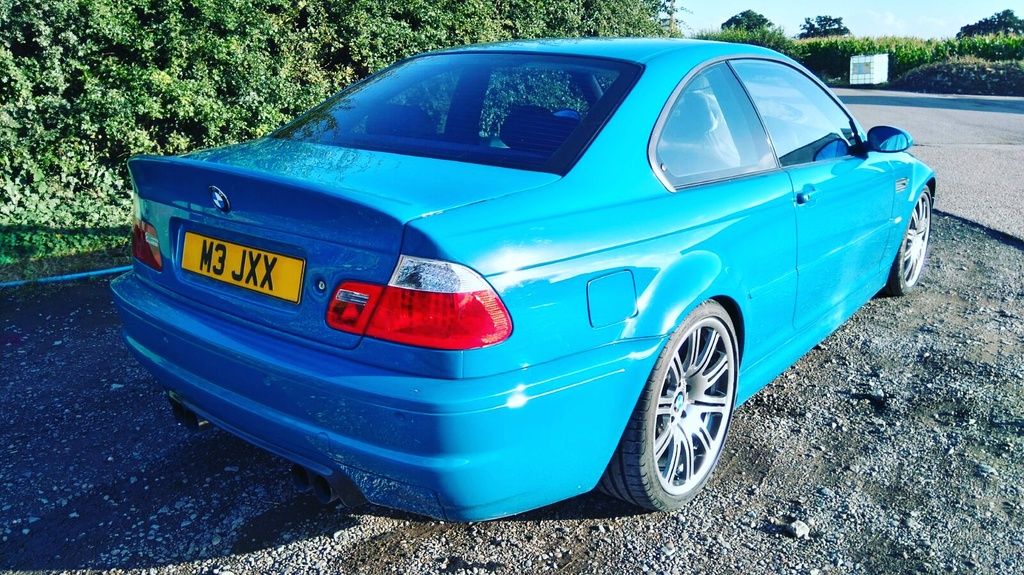
Jimbo's E46 M3 LSB
Discussion


Right, as I finally got round to collating all my pictures and writing some words to remind me of what I have done, I thought I'd update this as well.
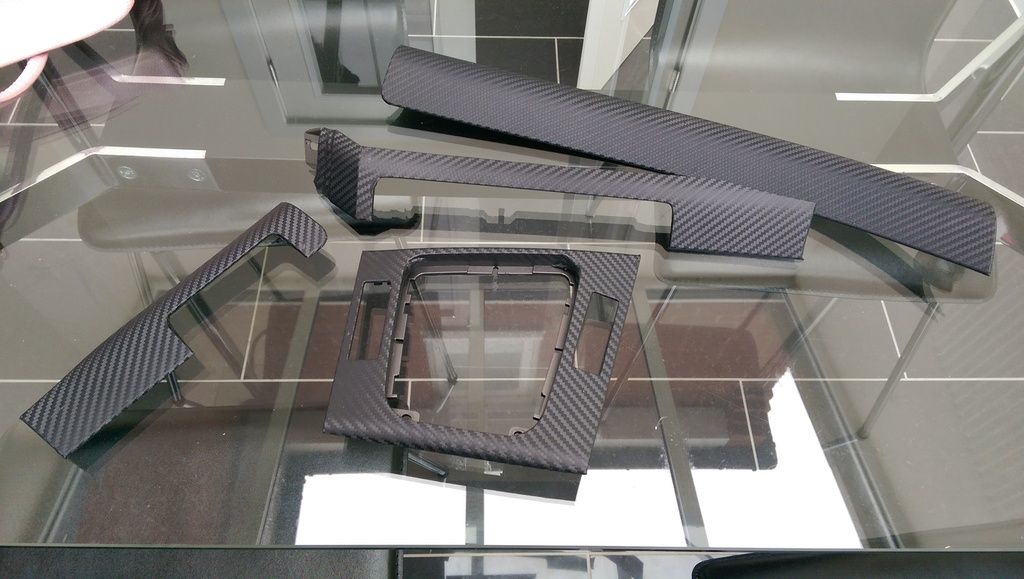
The carbon vinyl interior was annoying me, just didn't look right and cheapened the car I felt. It was a 2D non glossy wrap, and whilst wrapped very well, I wasn't keen. Splashed out a bit on these:
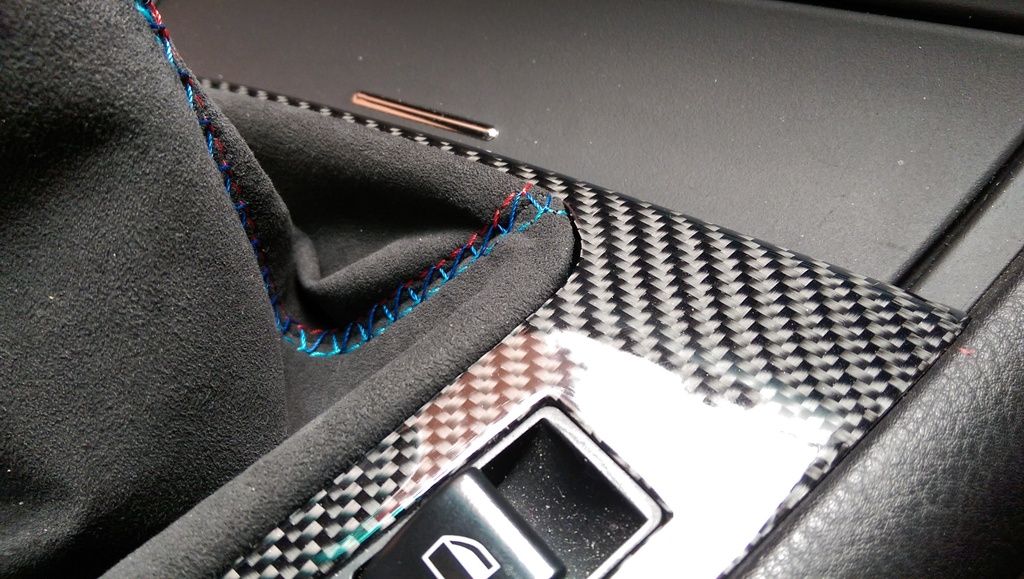
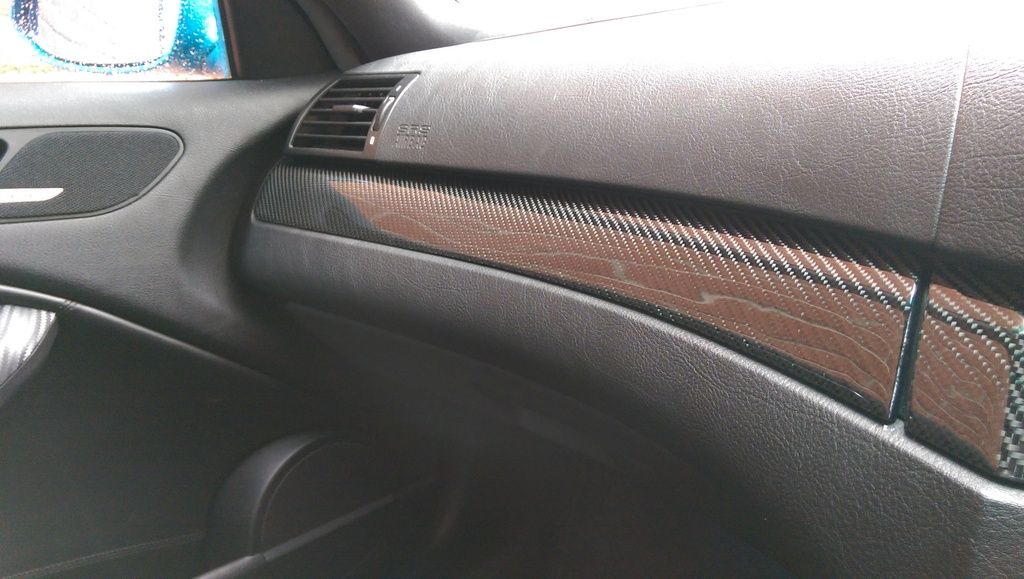
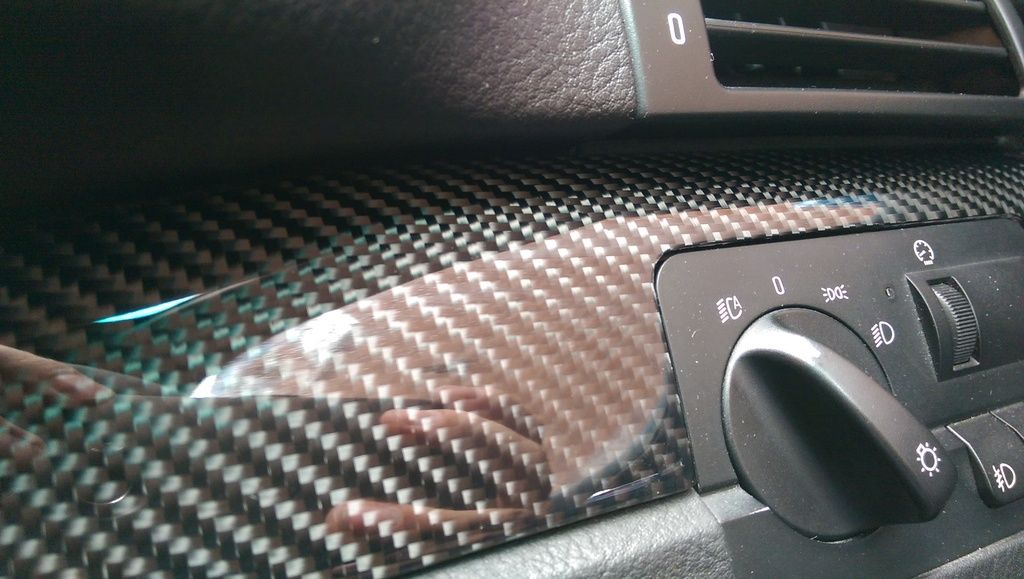
you can see the difference here:
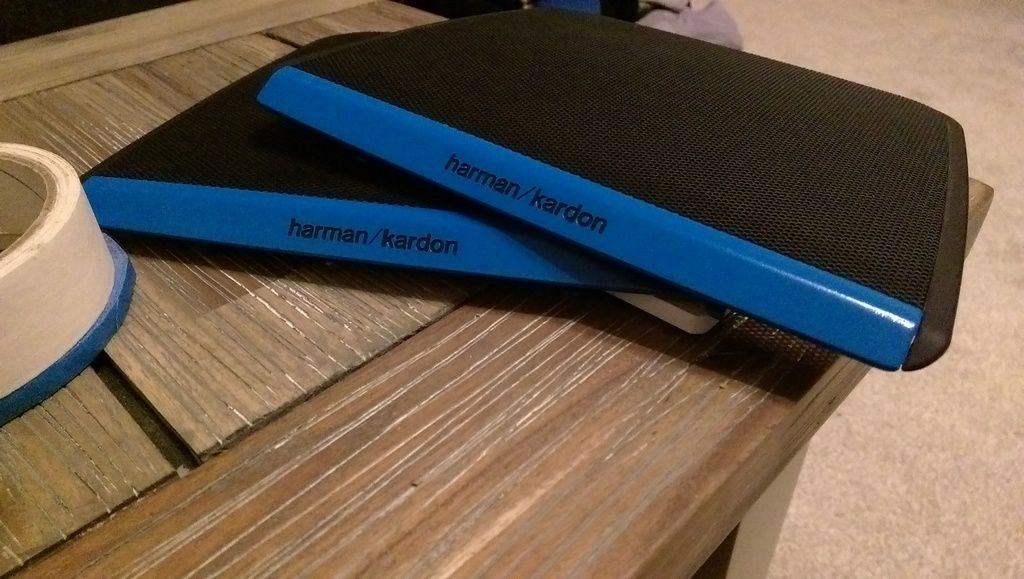
I also replaced the knackered front speakers, which were really expensive Focal units in the doors (sadly no longer working) and some crap looking tweeters on the dash - replaced with HK mids and tweeters (and crossovers) - and re-integrated the tweeters to the door pull area as standard.
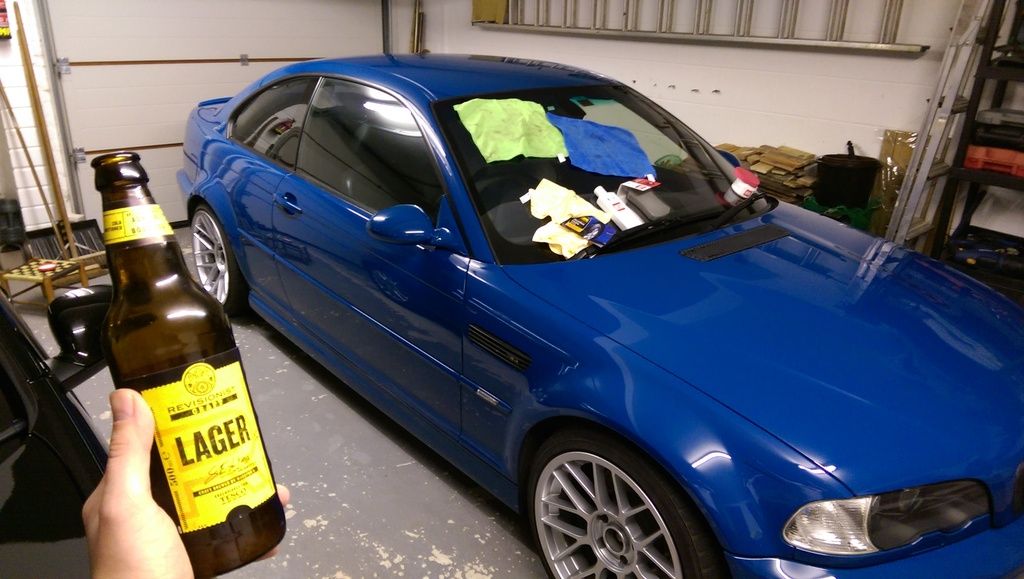
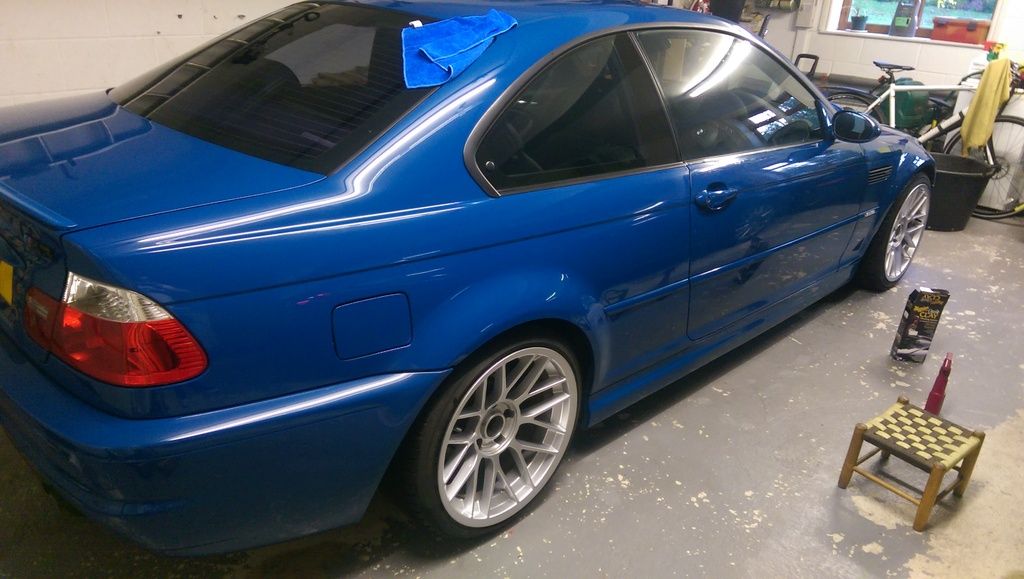
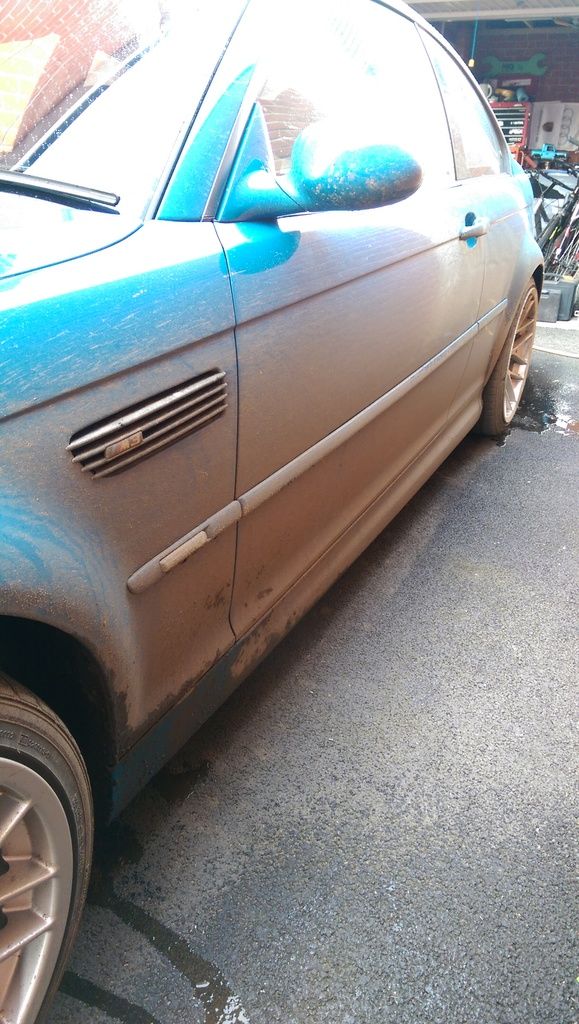
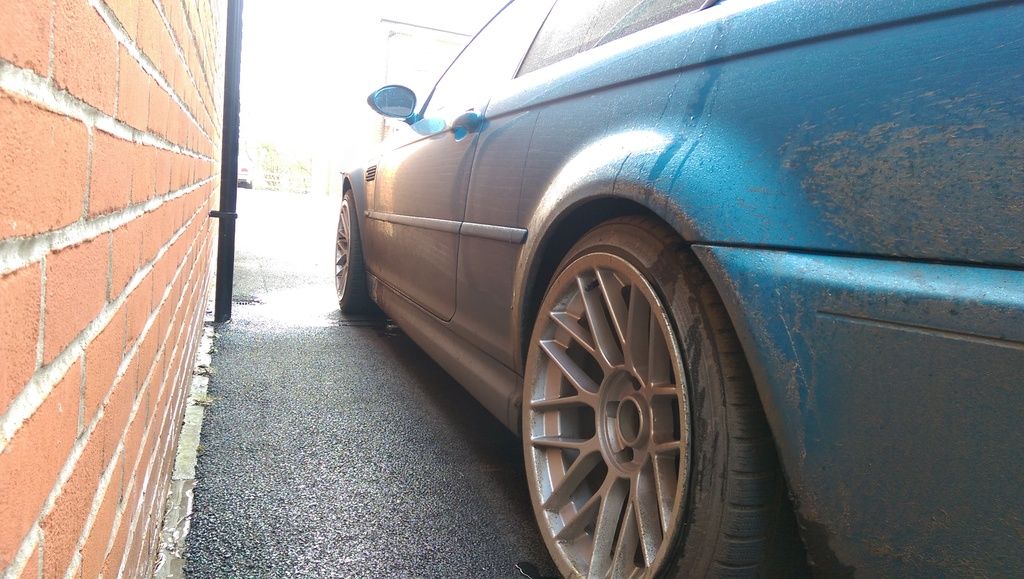
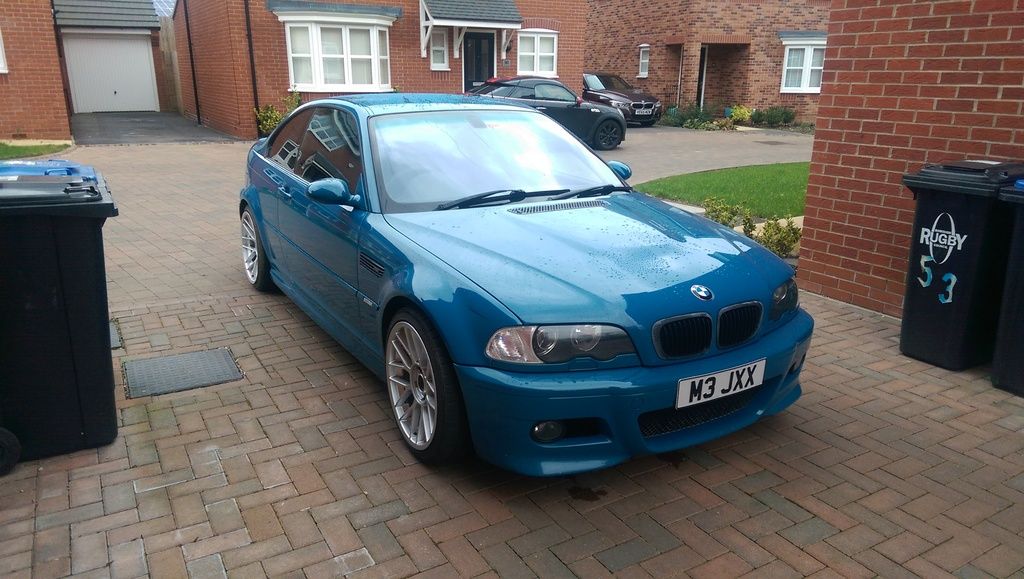
At Christmas I was at my parents for a week, with a nice warm decent sized garage I gave it a proper clean and detail - 2 full days. Snowfoamed/washed/clayed/washed/polished twice (Autoglym SRP) and then 2 coats of HD wax, was pretty pleased when it was all done and out in the sunshine:
I'd also picked up some CM wheels BBS RC reps from here, complete with winters. I think I'm going to wear these tyres out this winter then refurb and run them as summers, really like the look of them (just a shame about the stretch on the back...)
Forgot that whilst I fitted the heated seats from an M3Cutter member, it took me quite a while to find the right heated seat switch panel (car originally had HK and no blind) but after some time I got a bargain so ordered the proper seat loom (and downloaded the seat heating instructions from BMW - yes a proper retrofit guide) and installation although time consuming to get the wires routed properly, was actually very straight forward.
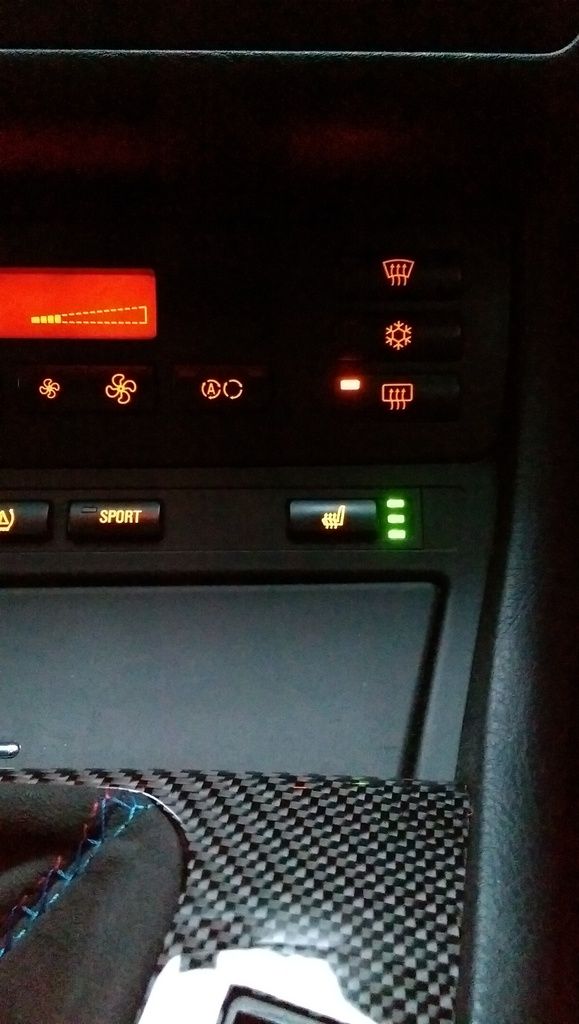
Nice toasty arses all round. As this was the first car I've had with leather, this was the one thing I noticed straightaway in winter, this was a great mod.
also forgot when I bought the wheels I got a monumental b king for polishing/sealing them in the house but it was about 3 degrees outside so bugger doing them in the garage! :thumbsup:

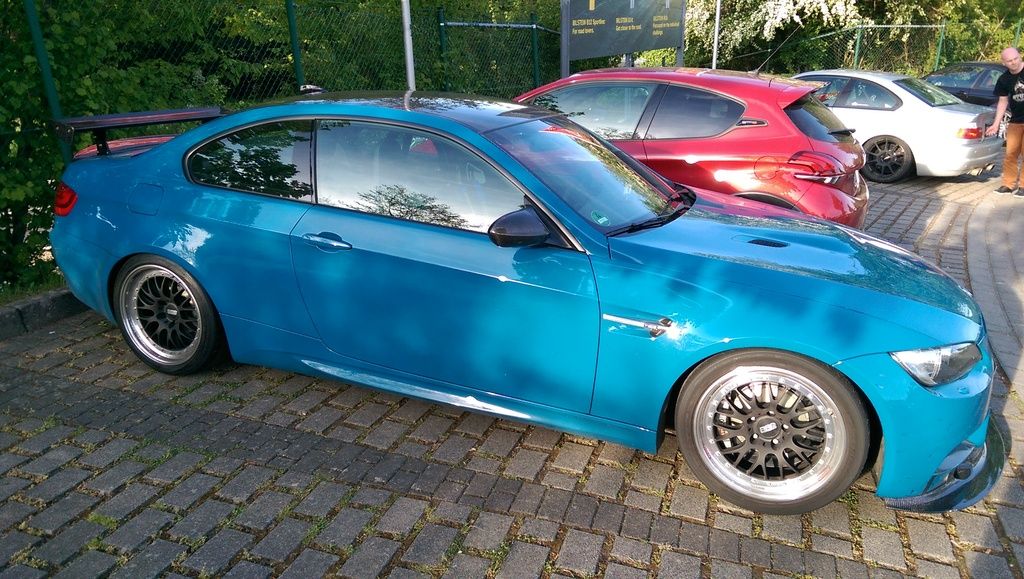
When I first fitted them - really like these:

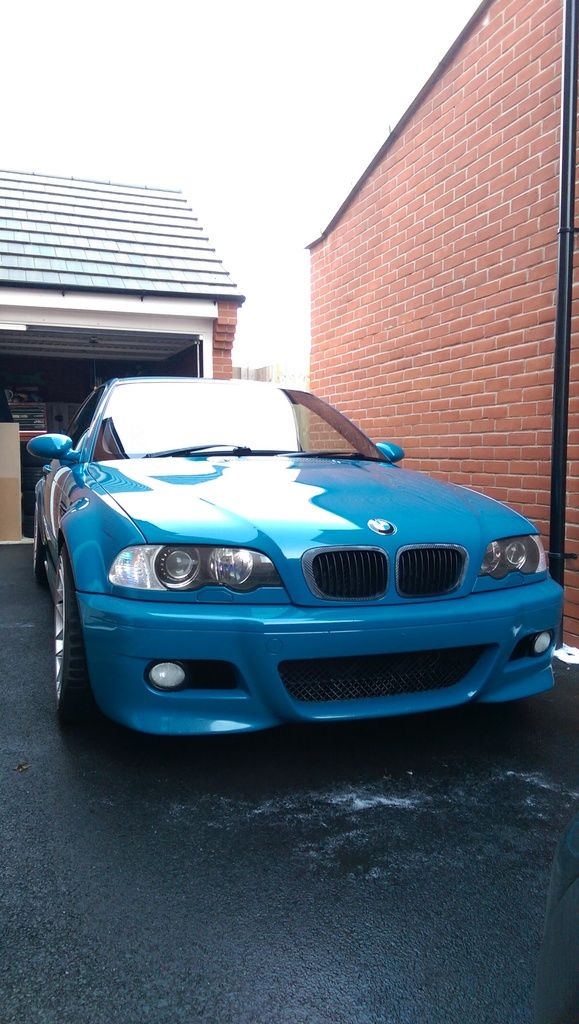
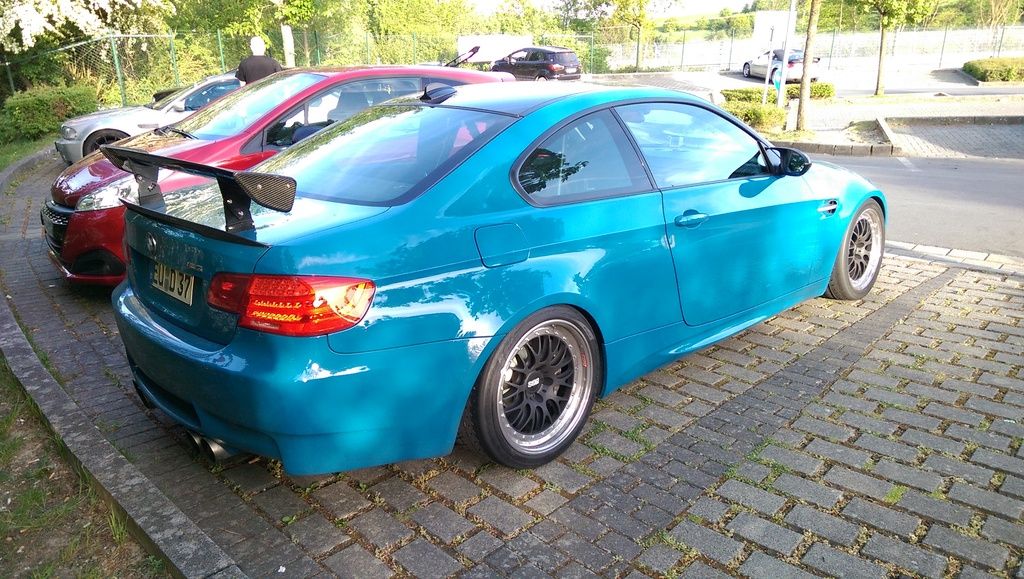
Love how LSB changes in different lights. This was during the mega Christmas clean:
[CENTER][SIZE="5"][COLOR="DeepSkyBlue"]2016:[/COLOR][/SIZE][/CENTER]
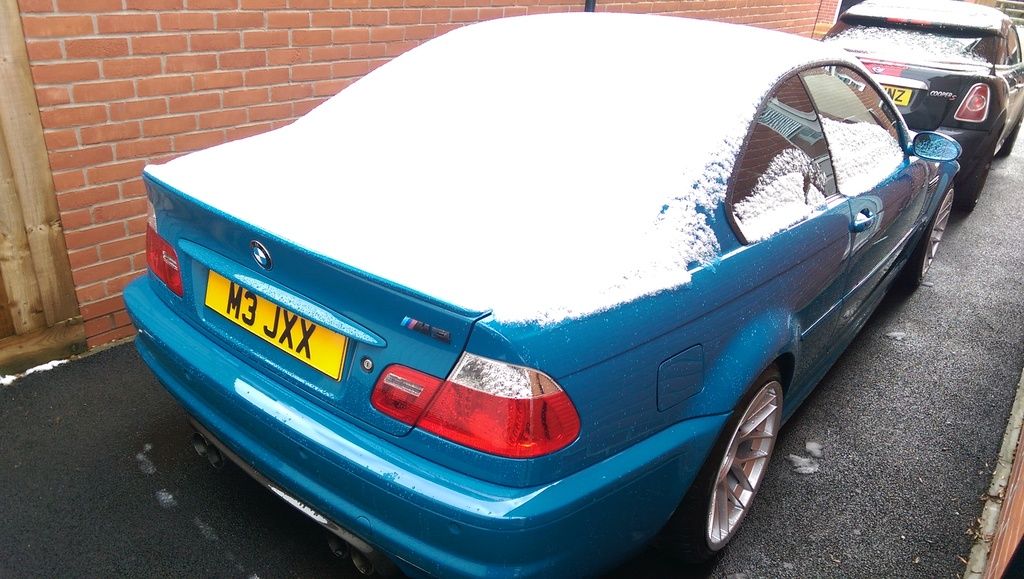
Managed to put the winter tyres to use for ONE day all winter :
:
One particularly wet week of commuting :
:
But (after the most careful cleaning I've ever done) it came up good again:
Then it flooded and I lost my number plate and ripped off the front undertray - Still haven't refitted this and haven't really noticed any change.

So drove round for a week or so like a 17 year old:
Quite liked it, but just doesn't look right to me, I was quite paranoid about getting a tug as well, so refitted the old (non-pressed) plate as a stand in...
The carbon vinyl interior was annoying me, just didn't look right and cheapened the car I felt. It was a 2D non glossy wrap, and whilst wrapped very well, I wasn't keen. Splashed out a bit on these:


you can see the difference here:

I also replaced the knackered front speakers, which were really expensive Focal units in the doors (sadly no longer working) and some crap looking tweeters on the dash - replaced with HK mids and tweeters (and crossovers) - and re-integrated the tweeters to the door pull area as standard.
At Christmas I was at my parents for a week, with a nice warm decent sized garage I gave it a proper clean and detail - 2 full days. Snowfoamed/washed/clayed/washed/polished twice (Autoglym SRP) and then 2 coats of HD wax, was pretty pleased when it was all done and out in the sunshine:


I'd also picked up some CM wheels BBS RC reps from here, complete with winters. I think I'm going to wear these tyres out this winter then refurb and run them as summers, really like the look of them (just a shame about the stretch on the back...)
Forgot that whilst I fitted the heated seats from an M3Cutter member, it took me quite a while to find the right heated seat switch panel (car originally had HK and no blind) but after some time I got a bargain so ordered the proper seat loom (and downloaded the seat heating instructions from BMW - yes a proper retrofit guide) and installation although time consuming to get the wires routed properly, was actually very straight forward.

Nice toasty arses all round. As this was the first car I've had with leather, this was the one thing I noticed straightaway in winter, this was a great mod.
also forgot when I bought the wheels I got a monumental b
king for polishing/sealing them in the house but it was about 3 degrees outside so bugger doing them in the garage! :thumbsup:
When I first fitted them - really like these:

Love how LSB changes in different lights. This was during the mega Christmas clean:


[CENTER][SIZE="5"][COLOR="DeepSkyBlue"]2016:[/COLOR][/SIZE][/CENTER]
Managed to put the winter tyres to use for ONE day all winter
:
One particularly wet week of commuting
:

But (after the most careful cleaning I've ever done) it came up good again:

Then it flooded and I lost my number plate and ripped off the front undertray
- Still haven't refitted this and haven't really noticed any change.
So drove round for a week or so like a 17 year old:

Quite liked it, but just doesn't look right to me, I was quite paranoid about getting a tug as well, so refitted the old (non-pressed) plate as a stand in...
Edited by Mr.Jimbo on Tuesday 10th October 09:29
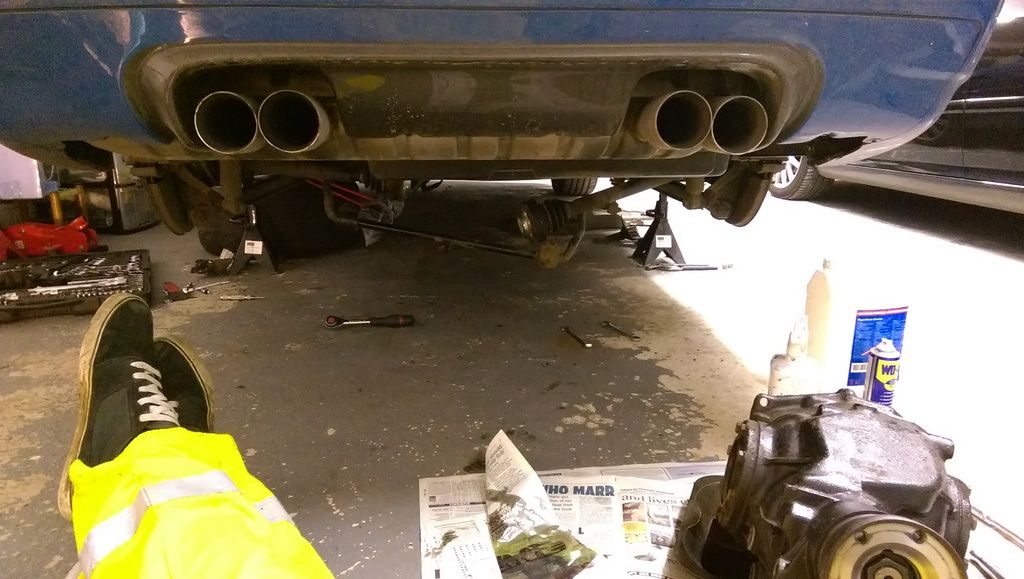
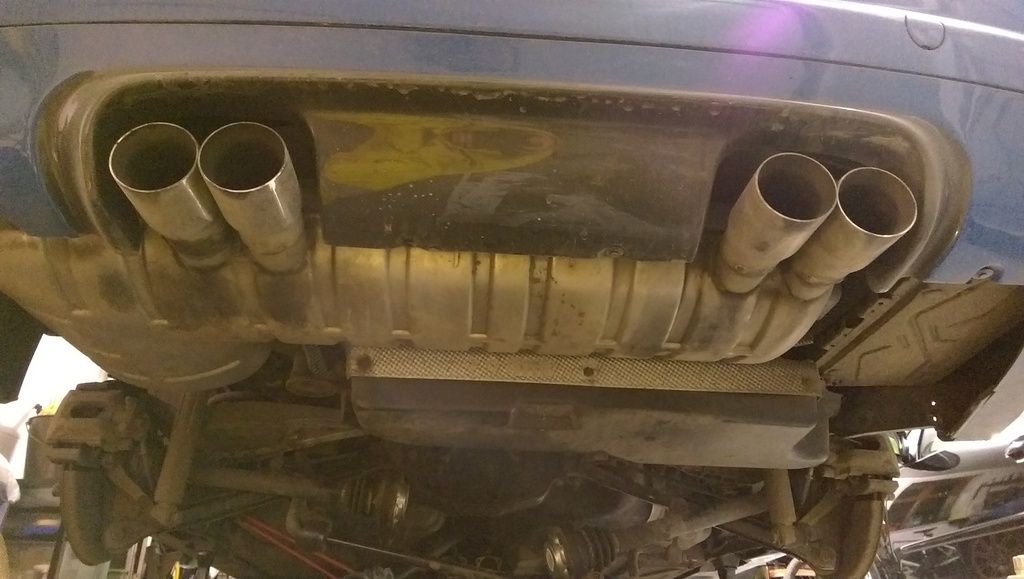
Now, I'd fitted an OEM backbox with Euro tips (again purchased off M3cutters for a steal) sometime ago, and was pleased (hated the milltek drone and it was falling to bits when I removed the backbox - it was light and that was the only positive I found - apart from the sweet snarl on heel/toe downshifts, that was nice actually  ) but I kept the Milltek centre as it was on the car. I wanted the rasp back, so found a supersprint non-res centre pipe cheap enough (again on M3Cutters) and went about fitting that:
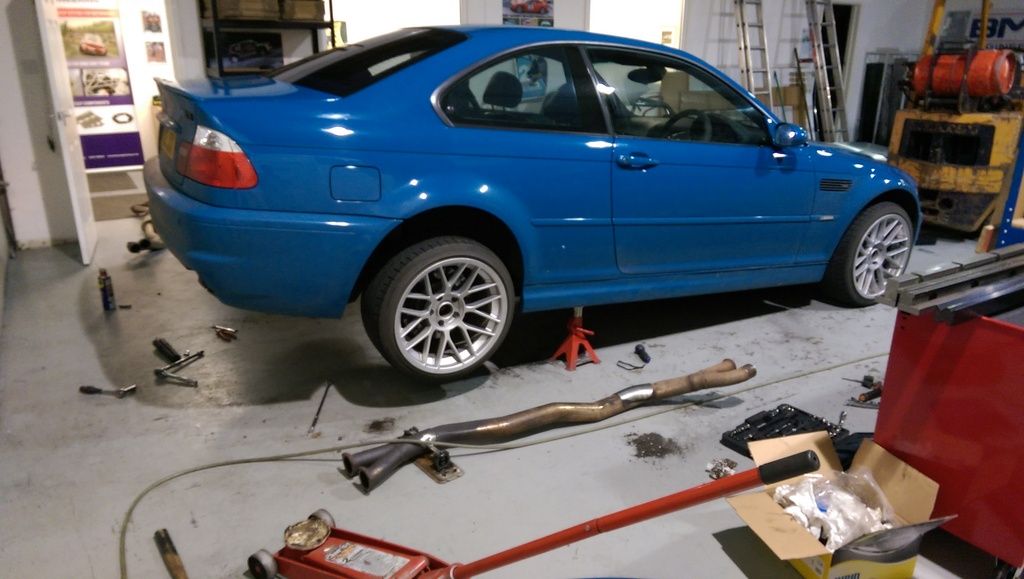
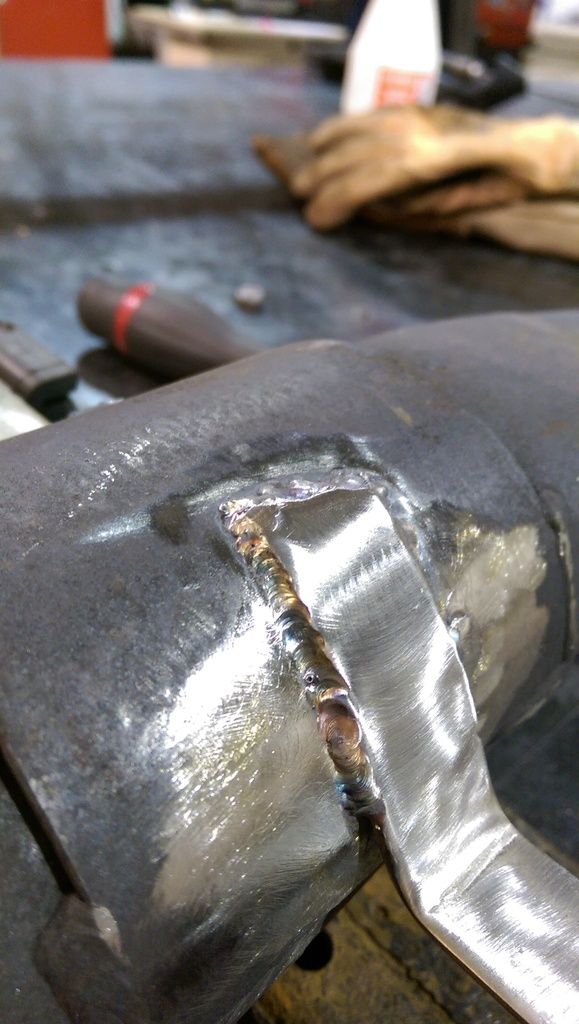
Luckily I had the use of a mates garage because it was snowing HARD, and it took me about 9 hours, was an absolute bh. First off I had to fabricate and weld on a new bracket that someone had lopped off - luckily I know how to weld and aforementioned garage manufactures rollcages so no bother there (I don't weld often so it isn't pretty, but it's strong  )
)
Then the fun started. I got new gaskets, rubbers and some of the i6 automotive clamps and set about fitting the centre pipe.
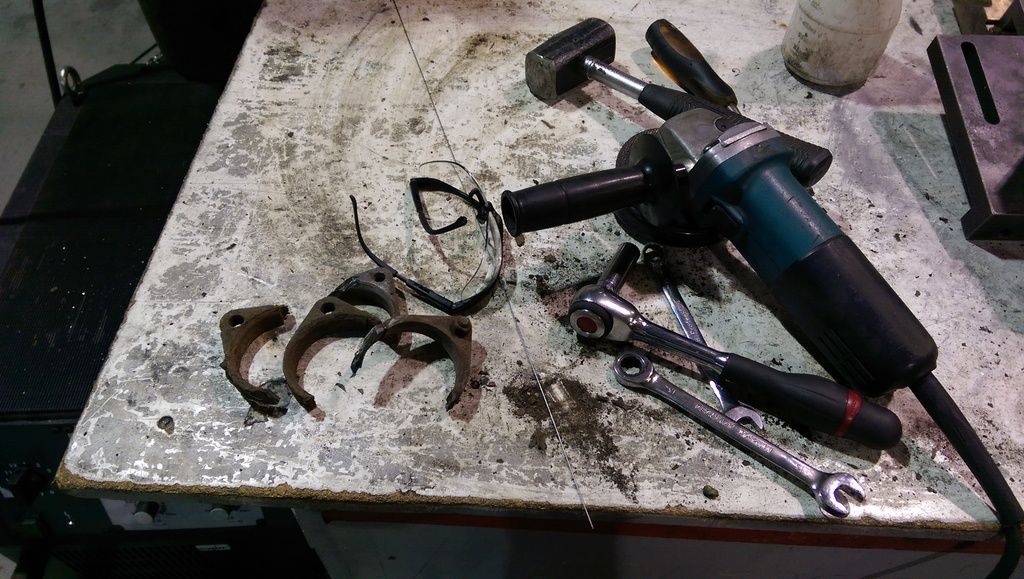
The Cat to centre fixing bolts were an absolute bh due to access, and then one of the new clamps was too small. Despite having lots of air tools and grinders/belt sanders it took an age of gently fettling material away to get it to fit. Old clamps and essential tools of the trade:
Got it done and what a difference, lovely rasp, supercar type howl in the midrange and just 100% better all round, which I'm ****ing glad about given the absolute **** of a job this turned out to be.
One thing that always irked me a bit was the faded HK speaker surrounds for the back speakers, they're only painted plastic (to look like brushed Ali) and I think someone had either rubbed them a bit hard or used a strong chemical on them at some point - so colour coded them:
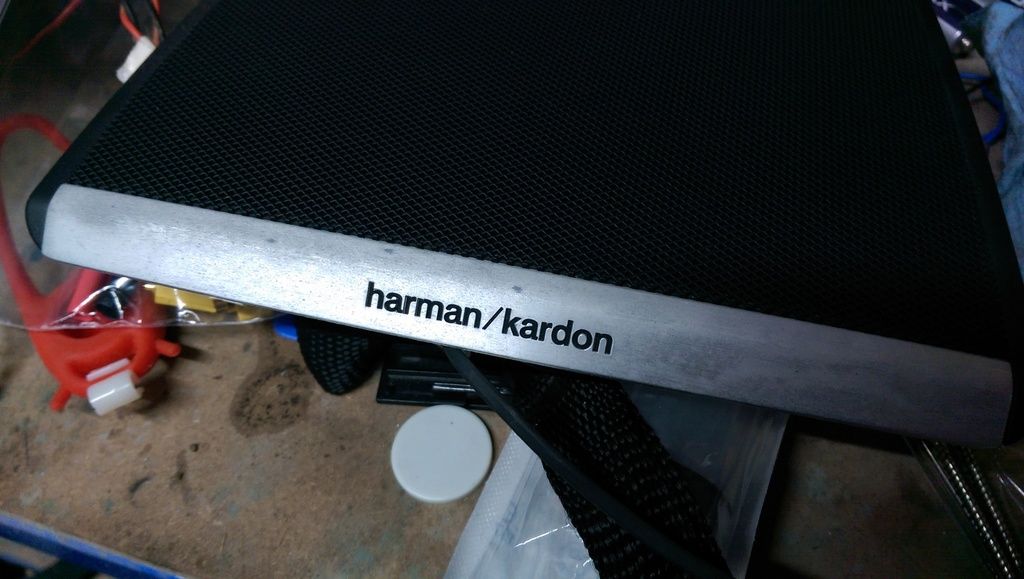
Painting the black Harmon Kardon letters were tricky
Next up: Rear subframe!
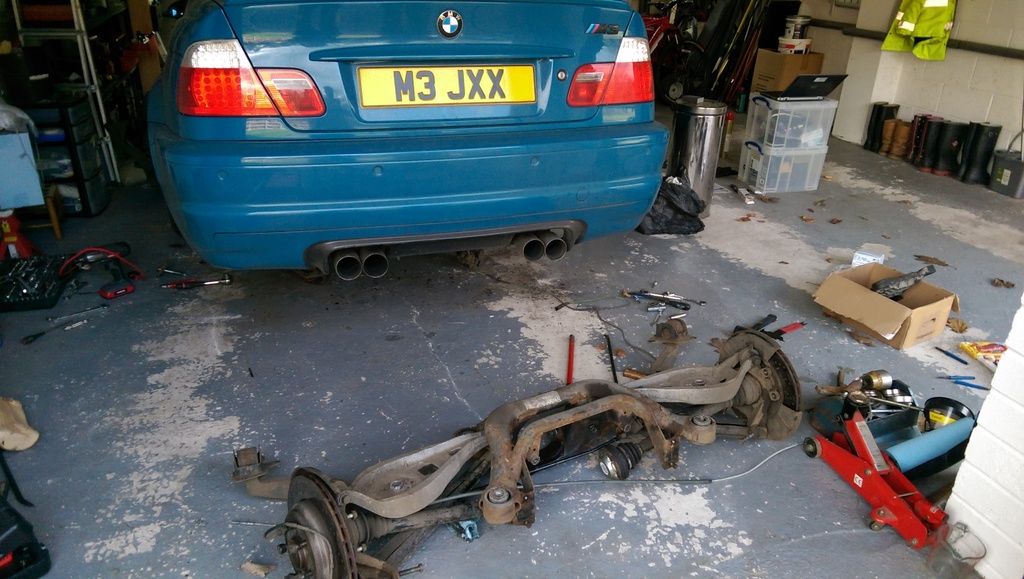
SO then, subframe and rear diff. I'd noticed a while ago that the diff input seal was leaking. Shame as that's the hardest to get to. Anyway, planned it so that over easter, 4 days off at Mum and Dad's in a proper garage, piece of piss no? All new polybushes were ordered, diff seals, rear diff cover (as it includes the bushes and I didn't want to polybush the diff itself for NVH) and a new front bush/bolts all round. Oh and that ****ing really expensive diff oil Friction modified super modified plus @ £110 for 1.5 litres
The job was long and quite arduous, but just because a few things went wrong. It's very much a case of disassembly just to get at things, nothing is very specialist. Begin with axle stands on highest setting, and make sure you're happy with where it is, it's not going anywhere for a few days!
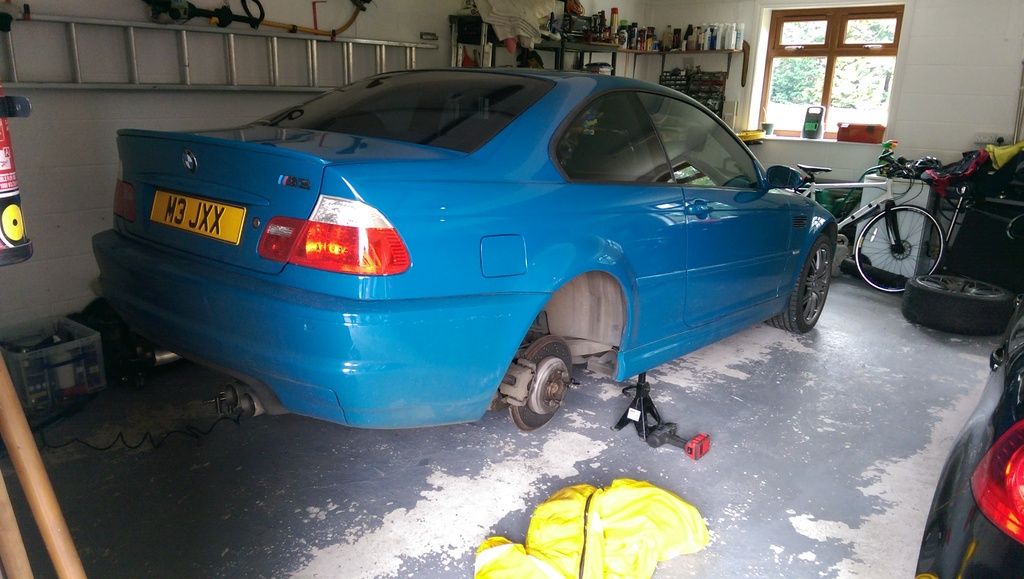
Remove exhaust, driveshaft bolts and very precariously drop diff out of subframe. Admire handiwork.
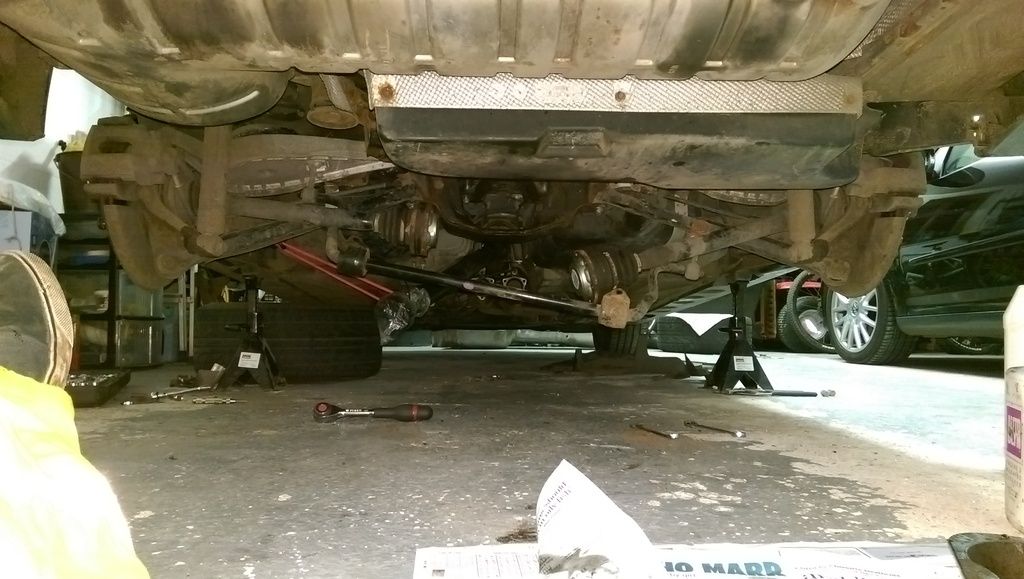
We did it this way, as I wanted to get the diff done and sorted before I looked at dropping the subframe, so that's what we did. Input flange off (marking the locking nut/input shaft before undoing and counting the turns to remove just in case)
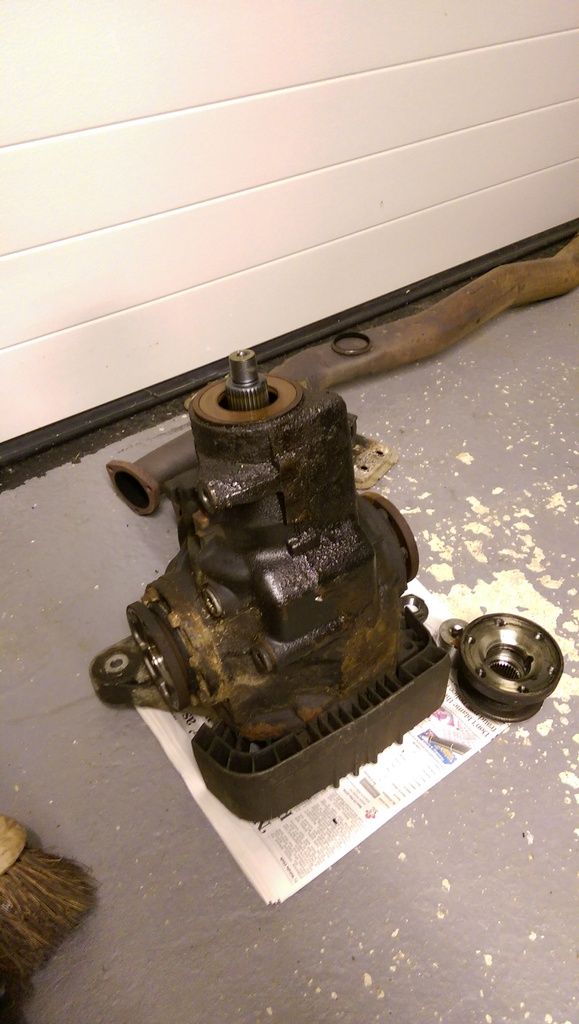
Remove rear cover and drain what's left of the oil - using firewood if you wish as a makeshift stand:
Examine car from odd angle whilst you have a cuppa - only cats and drunks must ever normally see an M3 from this angle
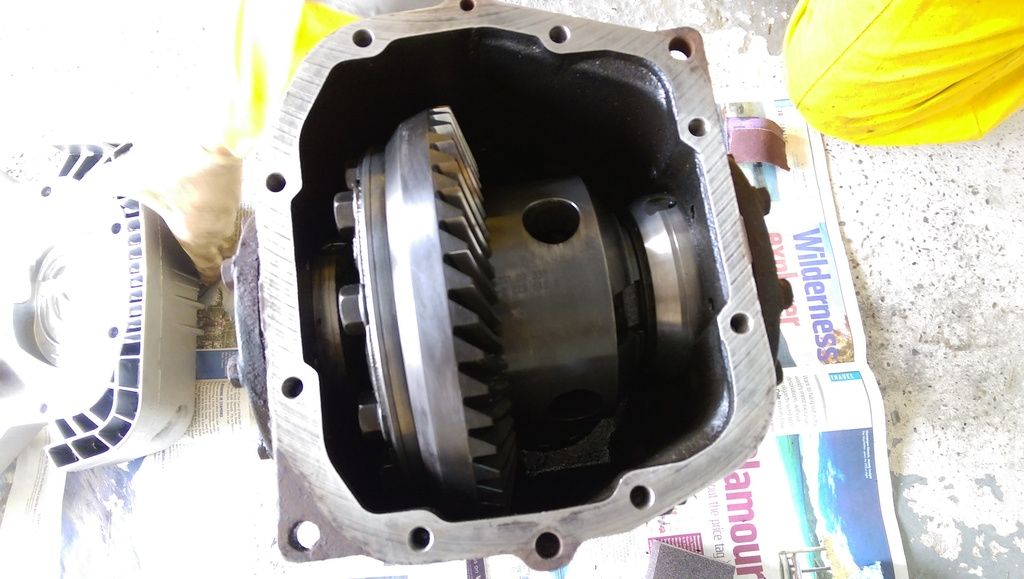
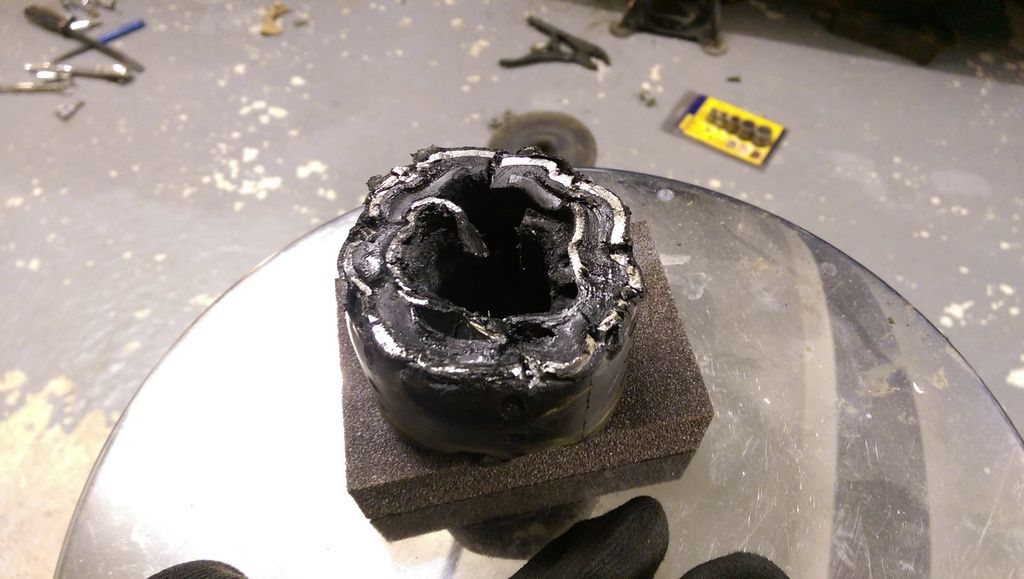
Remove old seals and fastidiously clean diff and internals. Inspect (i.e. poke about, not knowing what you're really doing) for several minutes, a furrowed brow and concerned humming noises are completely optional, but encouraged:
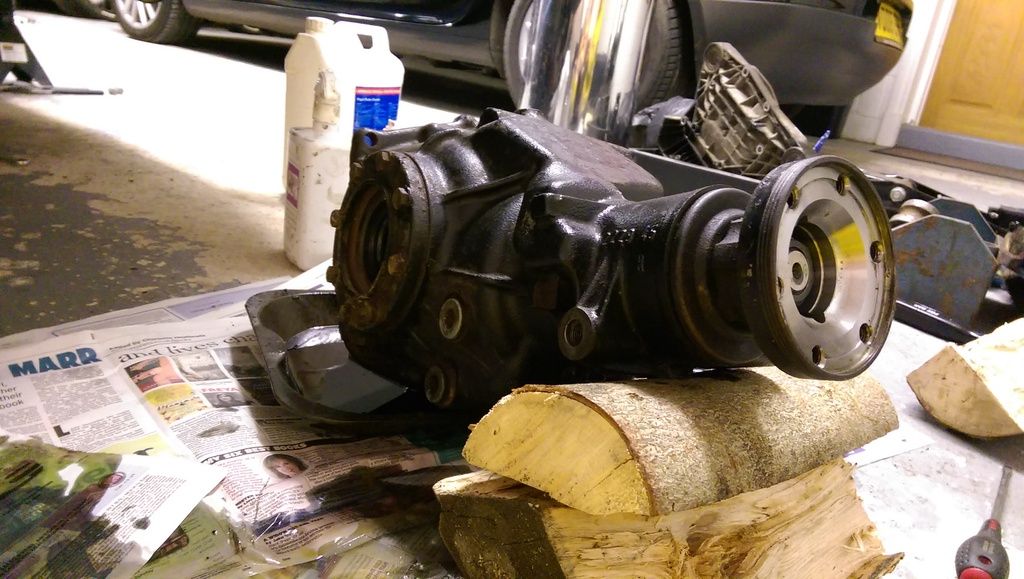
Realise several months later that you didn't take a picture of the new diff re-assembled which is a shame as it looked really quite good. I scraped/cleaned the two mounting faces and used grey loctite RTV for the cover to case joint. Annoyingly, you can knock the output shaft seals in too far, as I did, we kind of thought there would be a stop or shoulder but no. this will become relevant soon.
With Diff full of world's most expensive diff oil and preening itself outside the car for a change, you become encouraged, reckless even! Off with the subframe!
Now one thing to note here, 2nd top tip (1st being not knocking your seals in too tight and never eating yellow snow) - if you're going to do both these jobs (i.e. diff and subframe) - leave diff in subframe and lower the two together. Not only is access better but the shape of the subframe means without a diff it's really quite tricky to lower down out of the car safely as there's a massive hole now just where your CofG is (subframe CofG).
Onto the bushes - fnarr fnarr:
3/4 of these were fine. Yes they were tight, I'd even say they put up an admirable effort, well done chaps but you're just not quite strong enough to withstand M14 allthread and various sockets.
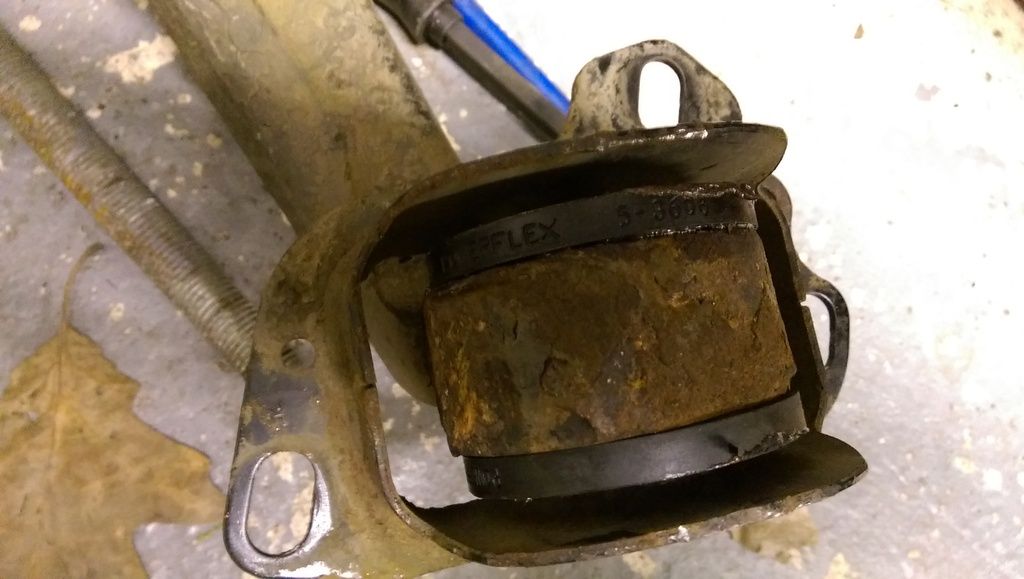
Chap nearest the filler flap (drivers side front, I think) however, jesus. He was a right bd. The others took a bit of grunting, then popped out without issue. This one took drilling, sawing, filing, LOTs of swearing, heat EVERYTHING before it shifted. I was genuinely worried about writing the subframe off on more than one occasion. Even sawing through the outer shell didn't get it off first time.

This was (THING NUMBER 1) that slowed us down. Much tea was consumed during labour, and many beers were had to celebrate it's removal from the frame.
During victory beers, lubricate and fit polybushes. Making sure to remark how you wish the old ones were this easy! Retire to fire/beer fridge to have a drink and think about how you wish you'd painted the subframe and diff casing before re-assembly.
Day 4:
Admire handiwork
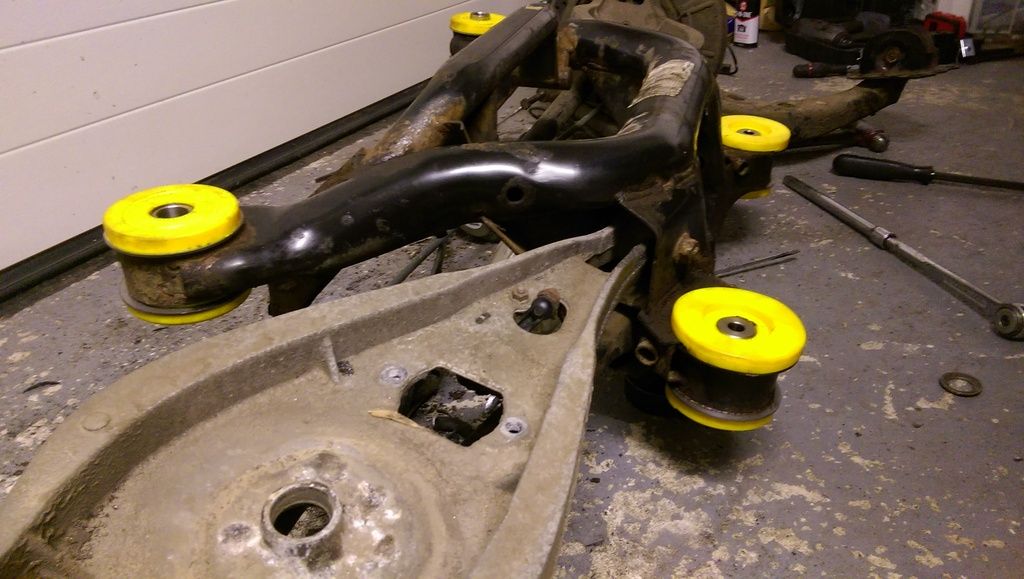
I found out here that my car actually had Powerflex RTABs before, but I took them out to inspect/regrease them and found them dry, hole was slightly ovalised and some monkey had chobbled off a massive area inside to make them fit, so fitted my new ones as I had them.
Refitting of all of this is the reverse of disassembly as they say, but not if, like me, you:
(THING NUMBER 2) Go to tighten the first bolt (47Nm for the rear diff mount bolt) and find your torque wrench is shagged so have to walk down to Halfords and replace under warranty
and
(THING NUMBER 3) Find you've inadvertently damaged the drivers side damper thread in buggering about with the bush the night before. Threaded straight into the trailing arm so no chance of just obtaining a new one Hence take a panicked trip to get a helicoil kit (luckily the motor industry, well my bit, takes odd easters where we work good Friday and have Tuesday off - so things are open) from Cromwell's 56!! miles away (only kit in the country )
to repair.
Also, as I mentioned above, the cat to centre section bolts are a real pain to do, so we tried lowering the cat sections. One bolt here was seized solid, so I redid it and just accepted my future contained a lot of grazed knuckles and profanity. I also forgot to re-install the pre-cat exhaust gas temperature sensor (THING NUMBER 4!!) I also discovered at this point, far too late, it's possible with the M3 exhaust clamps to 'time' your centre pipe, and by that, I mean time it's position. Time it in fact so perfectly that it's resting on the V brace without you realising. That was a ****ing loud journey home.
When you've finished and managed to clean 4 days worth of oil and grime off yourself, and thanked your Dad for his efforts (:thumbsup::thumbsup and packed all your tools and things and bits/bobs/girlfriend into the car - just ask yourself - did you refit that EGT sensor? Nope? Back you go skippy! 
To be fair, I have no idea to this day why I thought about that, I'd test driven it, thought it was a bit loud but it was only when I sat down to have a last cup of tea before driving home I just thought "EGT sensor!"
Anyway, remember I said I knocked a seal in too far? Yup. All that nice new expensive diff oil is now decorated all up the passenger side boot floor and smelling lovely as it burns off the exhaust... ****.
So the next weekend after not driving it for a couple of days waiting for the seal to arrive, and hours before we flew off on Holiday I was on the drive re-doing the passenger side It would have to be the side with the exhaust, V brace in the way etc etc...
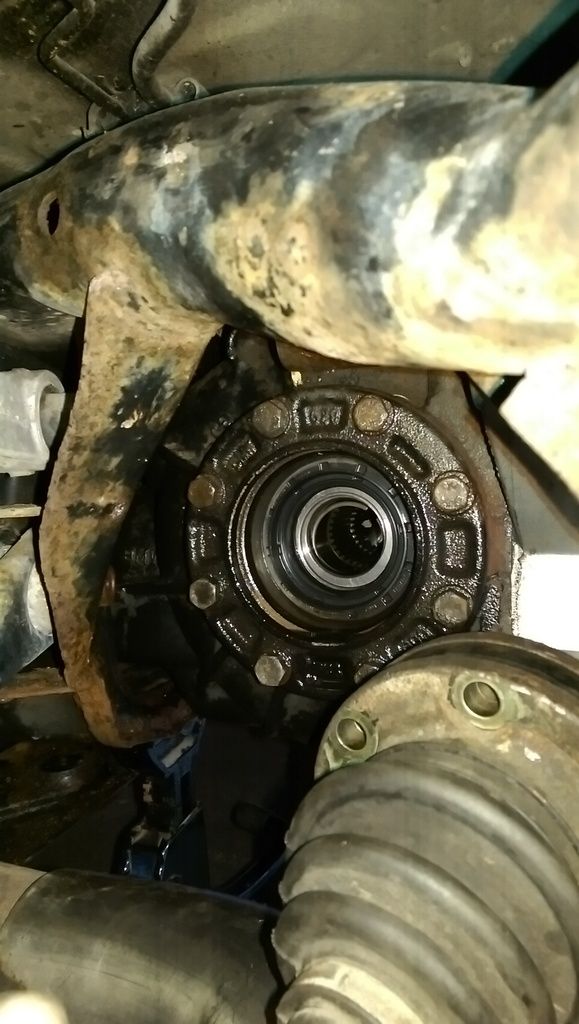
You can see here that the seal (black rubbing on seal face) was only 5mm or so too far in, ARSE!
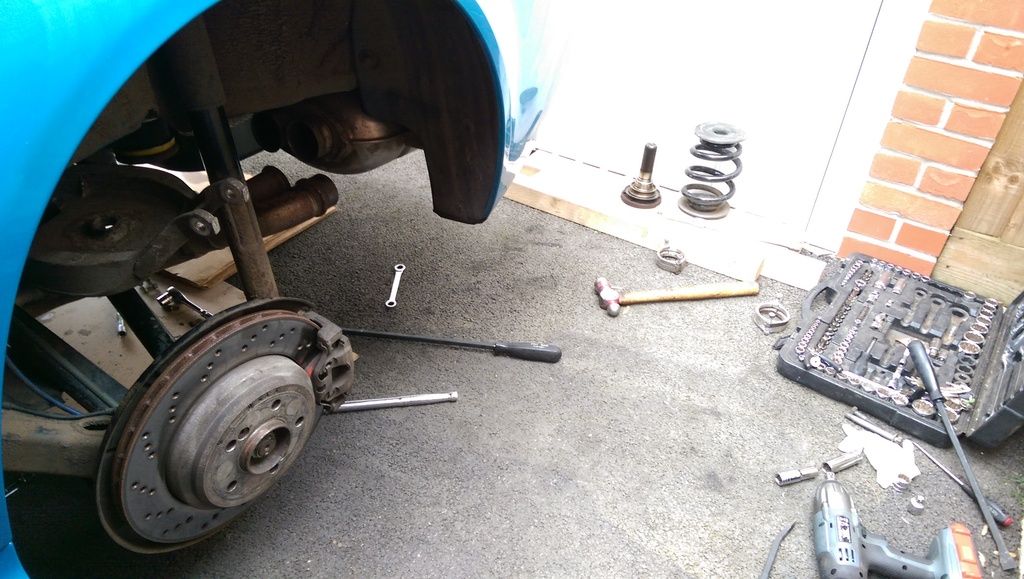
No nice big warm clean garage here, no, just a newbuild garage you struggle to get a HotWheels in for a big plastic wheel change
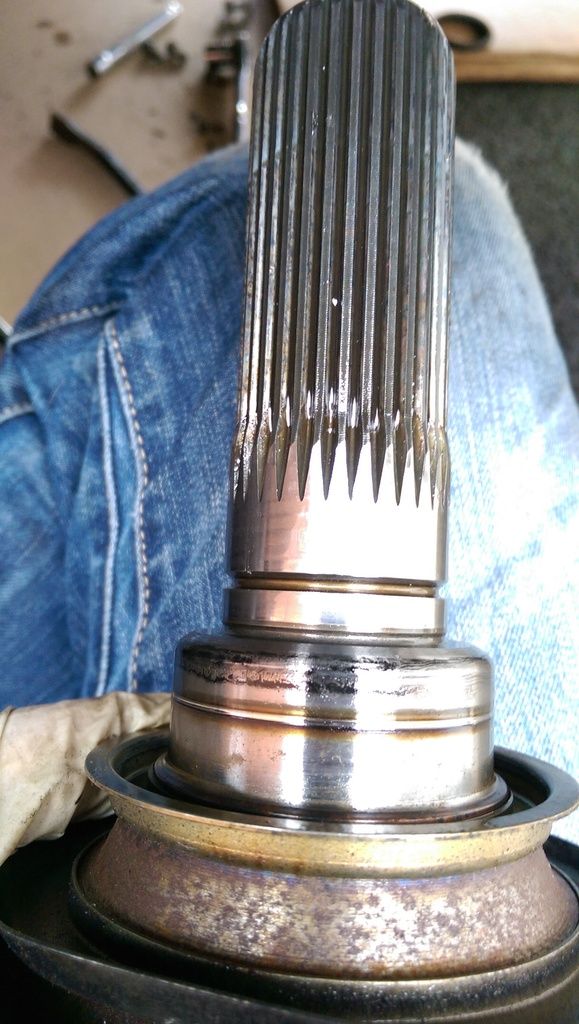
I found that with it being the longer output flange, you have to not only line it up with the passenger side splines in the diff, but also the drivers side. As it's a fine spline this can take some time and buggering around, as I found out.
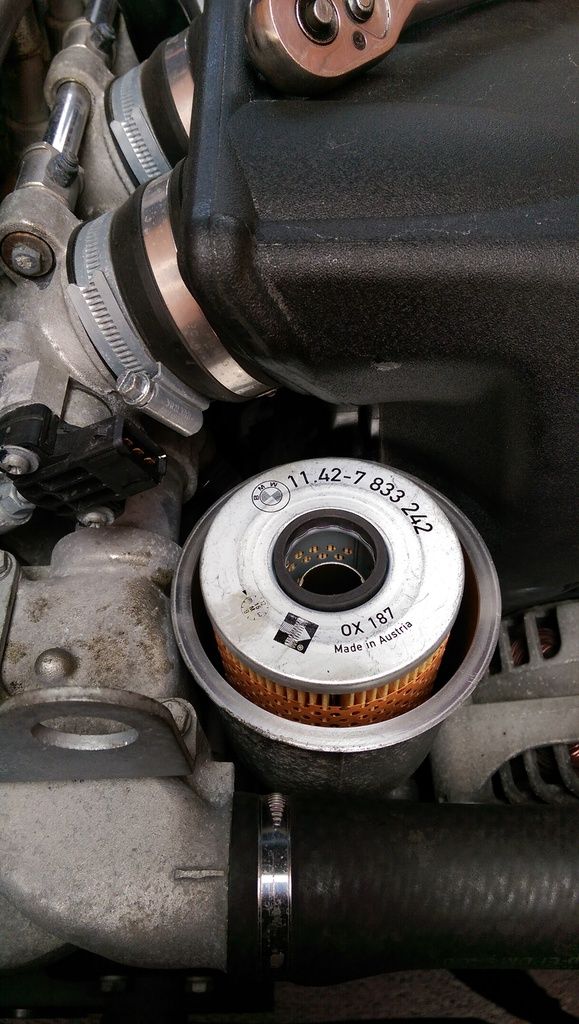
Got it done, and then it was time for an oil service (I don't mean it took me that long that it timed out, just a coincidence)

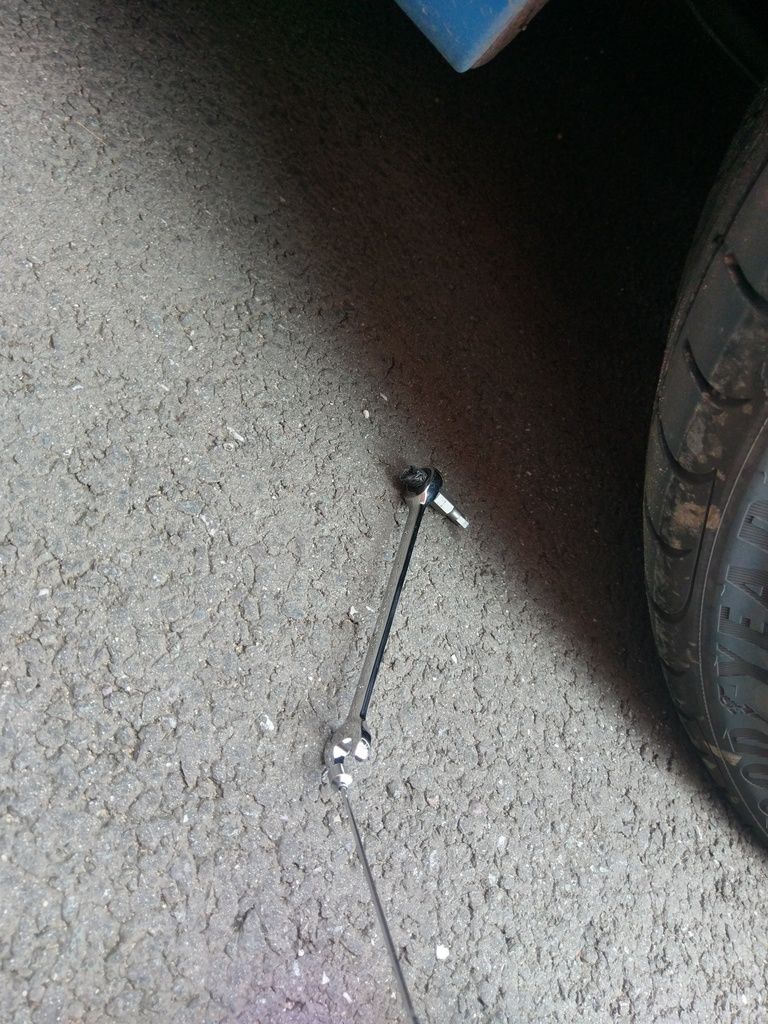
And then recently my Exhaust cam sensor packed in, well, I changed it recently, the engine light had been on for a few months but it drove fine (just kangarooed a bit more cold and fuel economy down a smidge I thought) but the new one really made a difference, much smoother. I was hesitating on getting it as it's £120 odd, and I couldn't be sure if it was this or the VANOS. Fitted it and straight away the engine light stayed off and the car was much smoother. I did write a DIY, but in reality it's quite easy (the Yanks all seem to struggle if you read on the American forums, must be all that soft beer they have.)
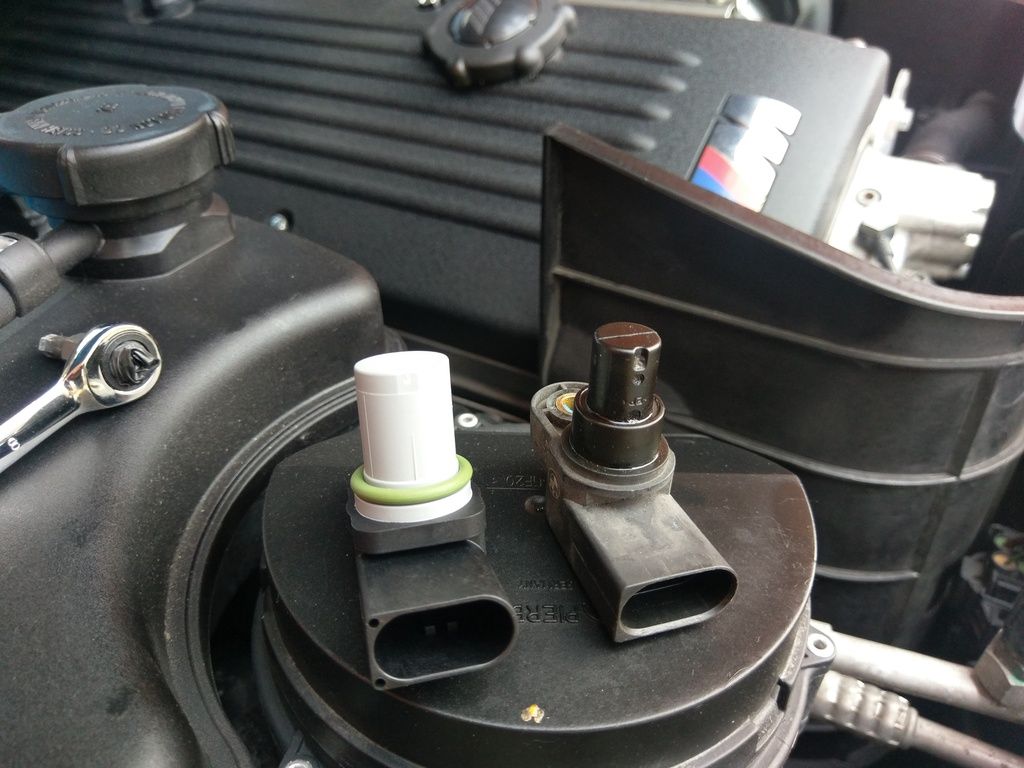
Why you should always have a magnet on a stick:
And that friends, is about it, mechanically. For now.
The VANOS needs attention and I'm beginning to wonder about the bottom end, might refresh the bearing shells...
) but I kept the Milltek centre as it was on the car. I wanted the rasp back, so found a supersprint non-res centre pipe cheap enough (again on M3Cutters) and went about fitting that:
Luckily I had the use of a mates garage because it was snowing HARD, and it took me about 9 hours, was an absolute b
h. First off I had to fabricate and weld on a new bracket that someone had lopped off - luckily I know how to weld and aforementioned garage manufactures rollcages so no bother there (I don't weld often so it isn't pretty, but it's strong )
Then the fun started. I got new gaskets, rubbers and some of the i6 automotive clamps and set about fitting the centre pipe.
The Cat to centre fixing bolts were an absolute b
h due to access, and then one of the new clamps was too small. Despite having lots of air tools and grinders/belt sanders it took an age of gently fettling material away to get it to fit. Old clamps and essential tools of the trade:
Got it done and what a difference, lovely rasp, supercar type howl in the midrange
and just 100% better all round, which I'm ****ing glad about given the absolute **** of a job this turned out to be. One thing that always irked me a bit was the faded HK speaker surrounds for the back speakers, they're only painted plastic (to look like brushed Ali) and I think someone had either rubbed them a bit hard or used a strong chemical on them at some point - so colour coded them:


Painting the black Harmon Kardon letters were tricky
Next up: Rear subframe!
SO then, subframe and rear diff. I'd noticed a while ago that the diff input seal was leaking. Shame as that's the hardest to get to. Anyway, planned it so that over easter, 4 days off at Mum and Dad's in a proper garage, piece of piss no? All new polybushes were ordered, diff seals, rear diff cover (as it includes the bushes and I didn't want to polybush the diff itself for NVH) and a new front bush/bolts all round. Oh and that ****ing really expensive diff oil
Friction modified super modified plus @ £110 for 1.5 litres The job was long and quite arduous, but just because a few things went wrong. It's very much a case of disassembly just to get at things, nothing is very specialist. Begin with axle stands on highest setting, and make sure you're happy with where it is, it's not going anywhere for a few days!

Remove exhaust, driveshaft bolts and very precariously drop diff out of subframe. Admire handiwork.


We did it this way, as I wanted to get the diff done and sorted before I looked at dropping the subframe, so that's what we did. Input flange off (marking the locking nut/input shaft before undoing and counting the turns to remove just in case)

Remove rear cover and drain what's left of the oil - using firewood if you wish as a makeshift stand:

Examine car from odd angle whilst you have a cuppa - only cats and drunks must ever normally see an M3 from this angle

Remove old seals and fastidiously clean diff and internals. Inspect (i.e. poke about, not knowing what you're really doing) for several minutes, a furrowed brow and concerned humming noises are completely optional, but encouraged:

Realise several months later that you didn't take a picture of the new diff re-assembled which is a shame as it looked really quite good. I scraped/cleaned the two mounting faces and used grey loctite RTV for the cover to case joint. Annoyingly, you can knock the output shaft seals in too far, as I did, we kind of thought there would be a stop or shoulder but no. this will become relevant soon.
With Diff full of world's most expensive diff oil and preening itself outside the car for a change, you become encouraged, reckless even! Off with the subframe!

Now one thing to note here, 2nd top tip (1st being not knocking your seals in too tight and never eating yellow snow) - if you're going to do both these jobs (i.e. diff and subframe) - leave diff in subframe and lower the two together. Not only is access better but the shape of the subframe means without a diff it's really quite tricky to lower down out of the car safely as there's a massive hole now just where your CofG is (subframe CofG).
Onto the bushes - fnarr fnarr:
3/4 of these were fine. Yes they were tight, I'd even say they put up an admirable effort, well done chaps but you're just not quite strong enough to withstand M14 allthread and various sockets.
Chap nearest the filler flap (drivers side front, I think) however, jesus. He was a right b
d. The others took a bit of grunting, then popped out without issue. This one took drilling, sawing, filing, LOTs of swearing, heat EVERYTHING before it shifted. I was genuinely worried about writing the subframe off on more than one occasion. Even sawing through the outer shell didn't get it off first time.

This was (THING NUMBER 1) that slowed us down. Much tea was consumed during labour, and many beers were had to celebrate it's removal from the frame.
During victory beers, lubricate and fit polybushes. Making sure to remark how you wish the old ones were this easy! Retire to fire/beer fridge to have a drink and think about how you wish you'd painted the subframe and diff casing before re-assembly.
Day 4:
Admire handiwork


I found out here that my car actually had Powerflex RTABs before, but I took them out to inspect/regrease them and found them dry, hole was slightly ovalised and some monkey had chobbled off a massive area inside to make them fit, so fitted my new ones as I had them.
Refitting of all of this is the reverse of disassembly as they say, but not if, like me, you:
(THING NUMBER 2) Go to tighten the first bolt (47Nm for the rear diff mount bolt) and find your torque wrench is shagged so have to walk down to Halfords and replace under warranty
and
(THING NUMBER 3) Find you've inadvertently damaged the drivers side damper thread in buggering about with the bush the night before. Threaded straight into the trailing arm so no chance of just obtaining a new one
Hence take a panicked trip to get a helicoil kit (luckily the motor industry, well my bit, takes odd easters where we work good Friday and have Tuesday off - so things are open) from Cromwell's 56!! miles away (only kit in the country )to repair.
Also, as I mentioned above, the cat to centre section bolts are a real pain to do, so we tried lowering the cat sections. One bolt here was seized solid, so I redid it and just accepted my future contained a lot of grazed knuckles and profanity. I also forgot to re-install the pre-cat exhaust gas temperature sensor (THING NUMBER 4!!) I also discovered at this point, far too late, it's possible with the M3 exhaust clamps to 'time' your centre pipe, and by that, I mean time it's position. Time it in fact so perfectly that it's resting on the V brace without you realising. That was a ****ing loud journey home.
When you've finished and managed to clean 4 days worth of oil and grime off yourself, and thanked your Dad for his efforts (:thumbsup::thumbsup
and packed all your tools and things and bits/bobs/girlfriend into the car - just ask yourself - did you refit that EGT sensor? Nope? Back you go skippy! To be fair, I have no idea to this day why I thought about that, I'd test driven it, thought it was a bit loud but it was only when I sat down to have a last cup of tea before driving home I just thought "EGT sensor!"
Anyway, remember I said I knocked a seal in too far? Yup. All that nice new expensive diff oil is now decorated all up the passenger side boot floor and smelling lovely as it burns off the exhaust... ****.
So the next weekend after not driving it for a couple of days waiting for the seal to arrive, and hours before we flew off on Holiday I was on the drive re-doing the passenger side
It would have to be the side with the exhaust, V brace in the way etc etc... 
You can see here that the seal (black rubbing on seal face) was only 5mm or so too far in, ARSE!

No nice big warm clean garage here, no, just a newbuild garage you struggle to get a HotWheels in for a big plastic wheel change

I found that with it being the longer output flange, you have to not only line it up with the passenger side splines in the diff, but also the drivers side. As it's a fine spline this can take some time and buggering around, as I found out.
Got it done, and then it was time for an oil service (I don't mean it took me that long that it timed out, just a coincidence)


And then recently my Exhaust cam sensor packed in, well, I changed it recently, the engine light had been on for a few months but it drove fine (just kangarooed a bit more cold and fuel economy down a smidge I thought) but the new one really made a difference, much smoother. I was hesitating on getting it as it's £120 odd, and I couldn't be sure if it was this or the VANOS. Fitted it and straight away the engine light stayed off and the car was much smoother. I did write a DIY, but in reality it's quite easy (the Yanks all seem to struggle if you read on the American forums, must be all that soft beer they have.)

Why you should always have a magnet on a stick:

And that friends, is about it, mechanically. For now.
The VANOS needs attention and I'm beginning to wonder about the bottom end, might refresh the bearing shells...
Edited by Mr.Jimbo on Tuesday 10th October 09:31
And thus - the reason for the mechanical work...
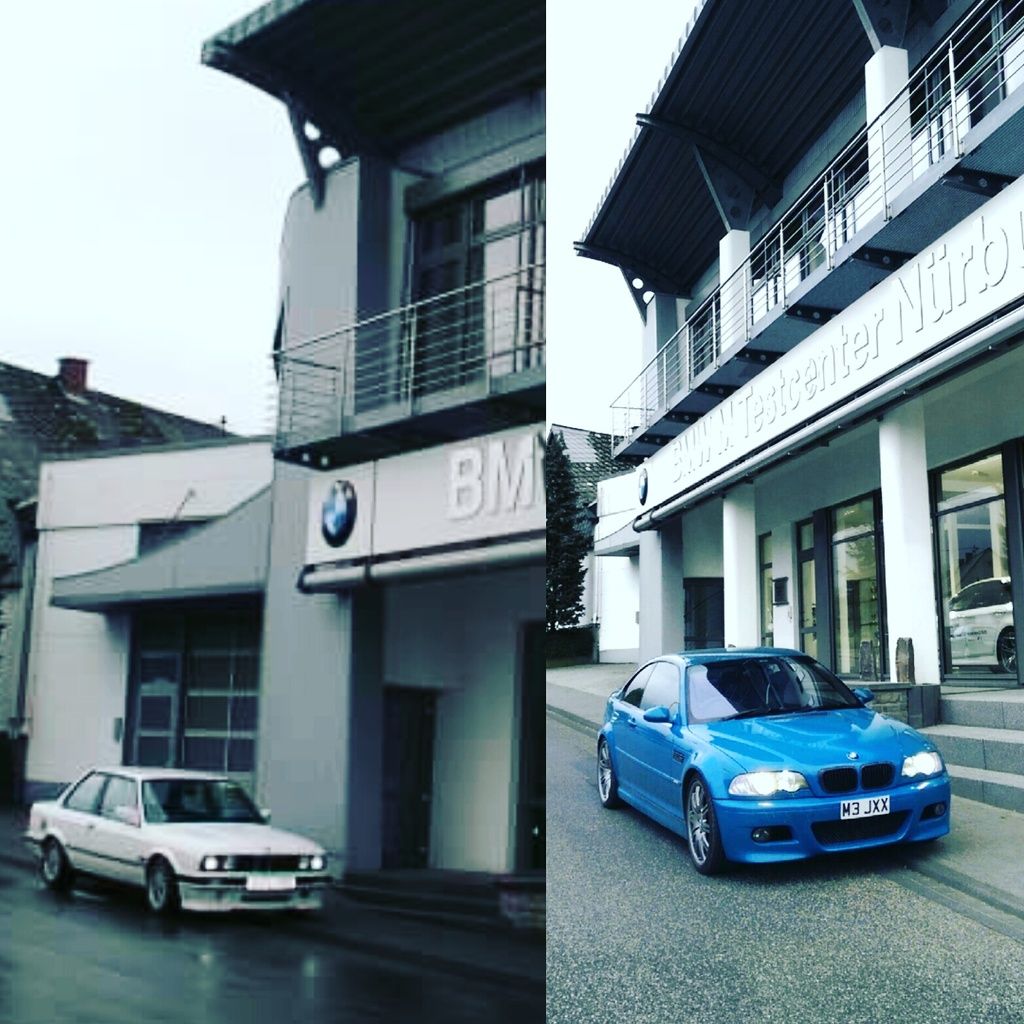
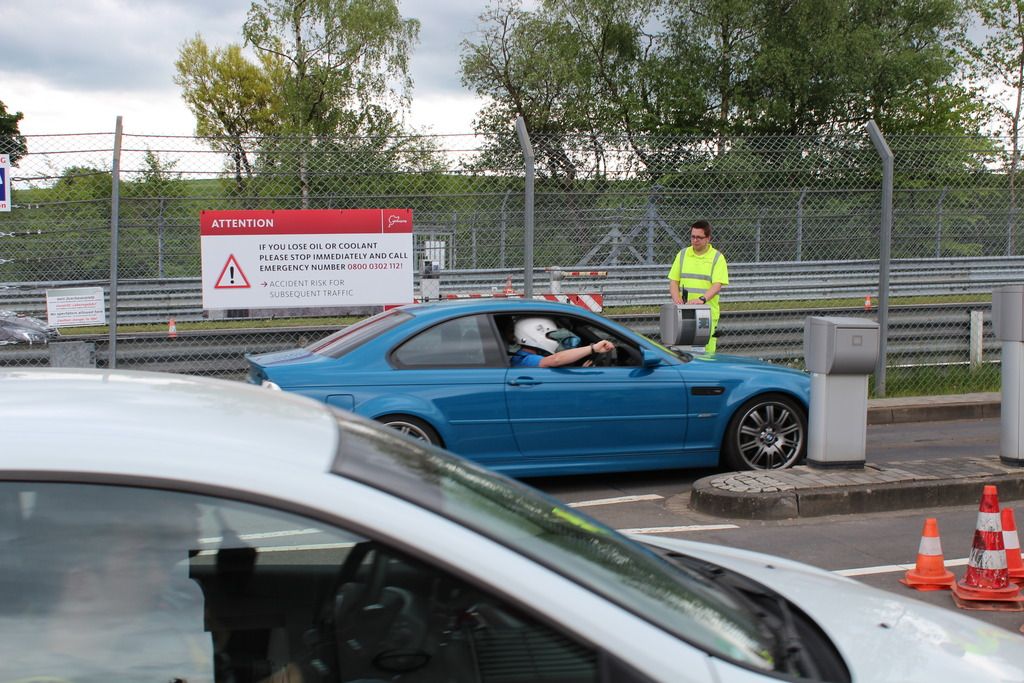
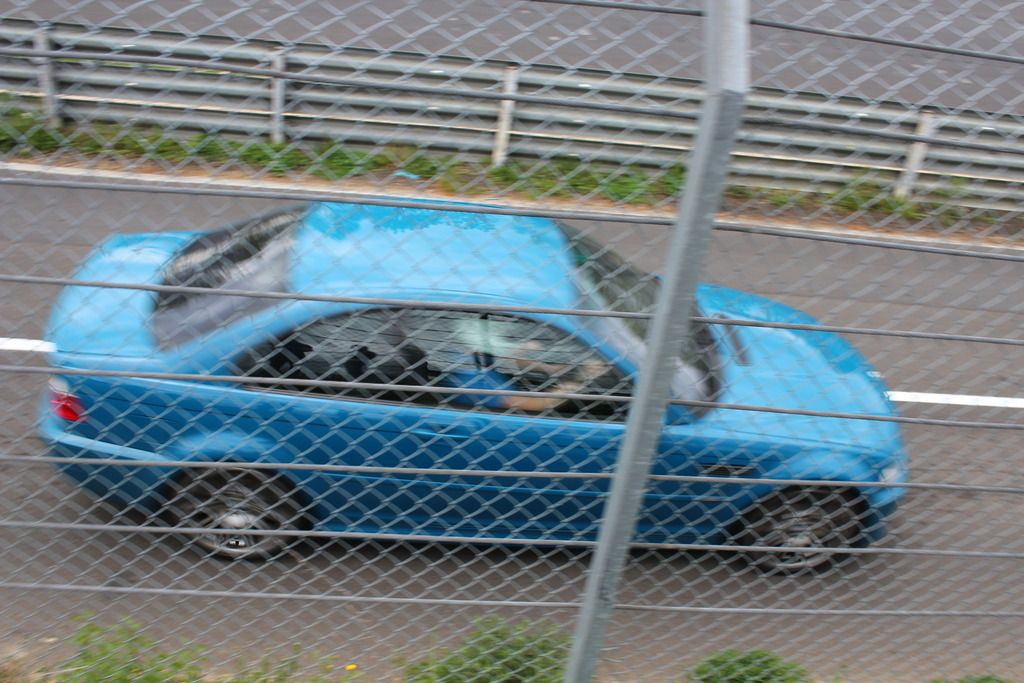
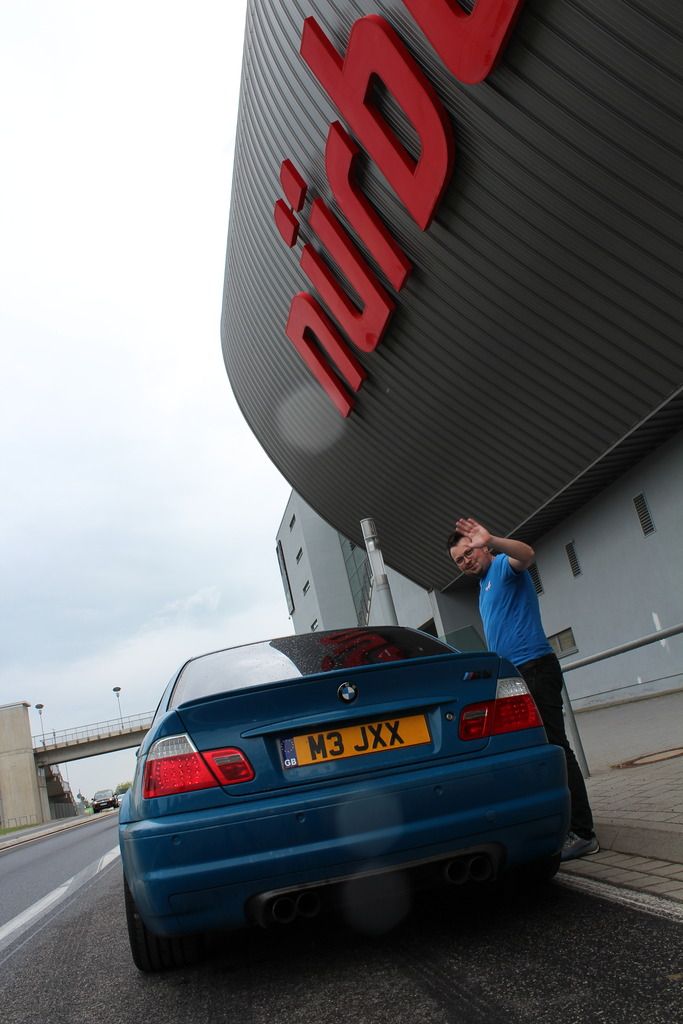
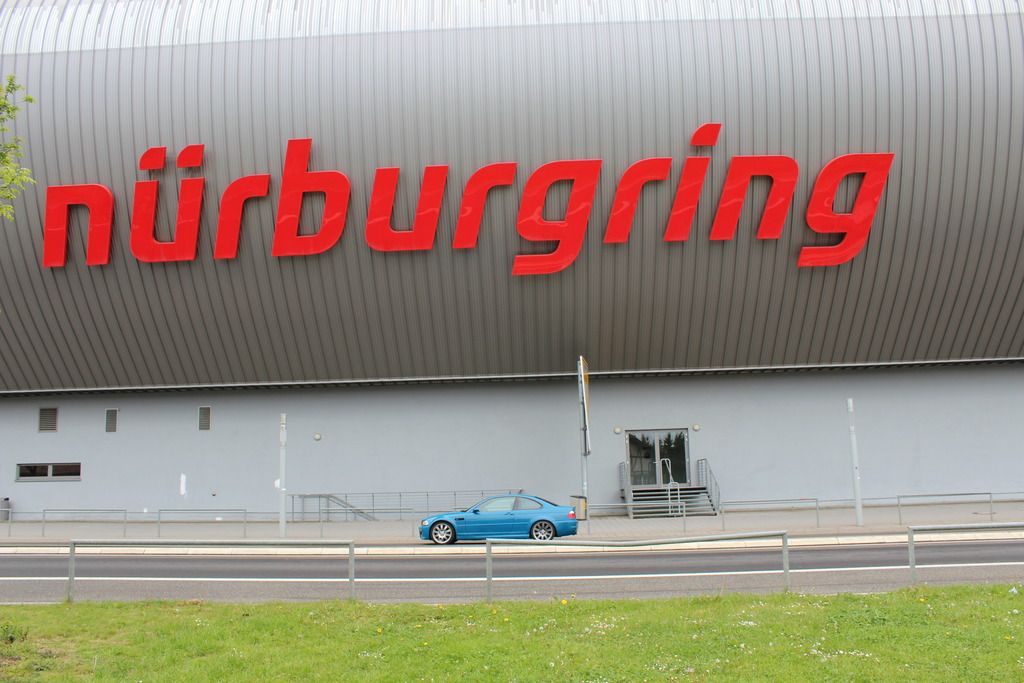
The subframe and diff jobs were all in preparation for a Nurburgring trip a colleague and mate of mine organised. We went out for a 4 day weekend, with Friday night TF, and Sat/Sun all day. I have been out there a couple of times working in the pits at VLN races, including a class win for our team in the 2012 24hr in D3T class (and first Diesel overall) but only been once for pleasure and that was in my E30 318iS 6 years ago.
First of all got some new tyres fitted as the rears were low - Goodyear Eagle F1 Assymetric 2's - just rolls off the tongue. I was replacing Falken FK452s which came with them, having done the fronts previously, really like these.
They're slightly wider than the Falkens as they have a kerbing lip (which if you look close I could have used ages ago!) which I think looks much better, no stretch here.
After a nightmare journey stuck in traffic around Belgium, Eurotunnel delays and breakdowns we finally arrived Friday night - missed the evening TF, but was fed up of driving by then!
With my mate's E36:
The next day, driving from Adenau up to the 'Ring itself, view from another mate's 350z:

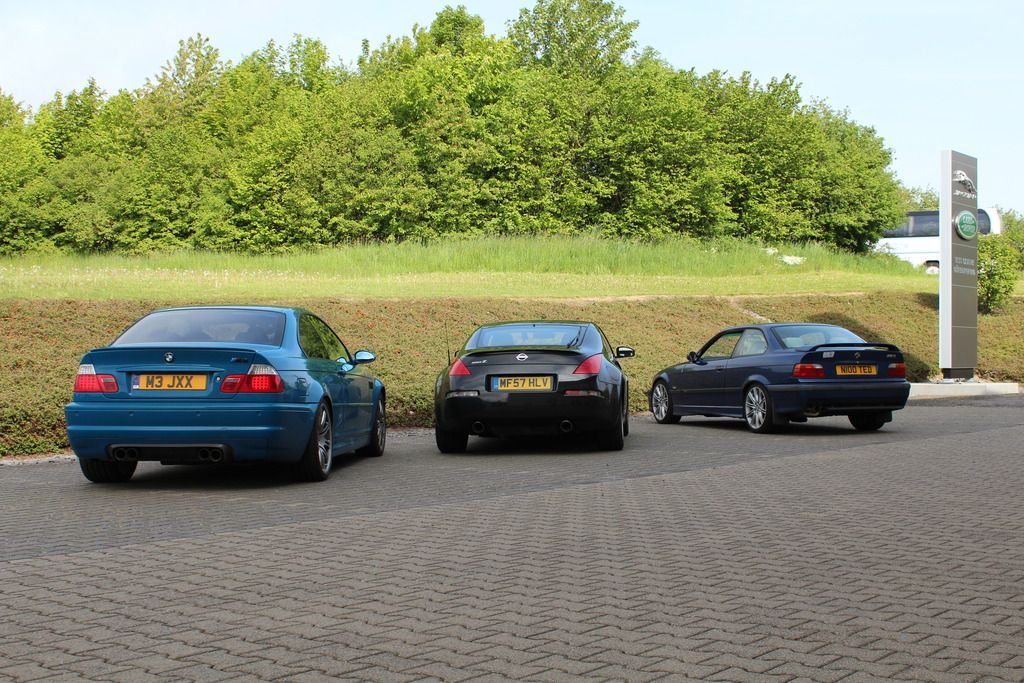
Parked up at the JLR testcentre (as we all work for JLR, left bags etc here for the day)
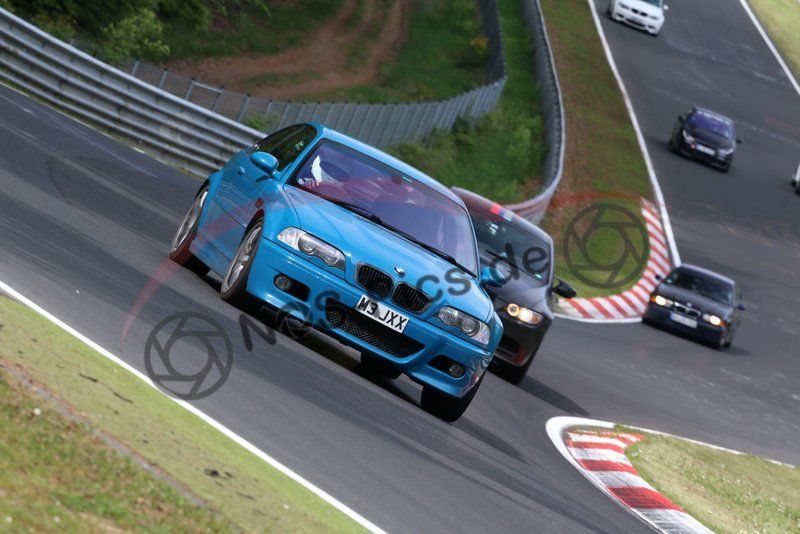
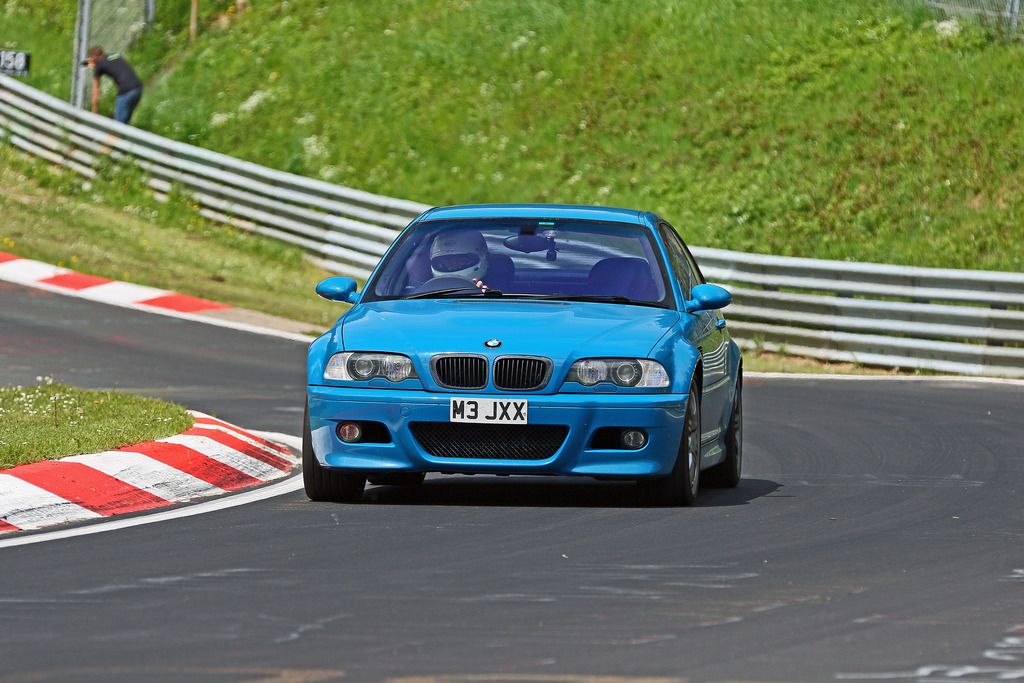
And then spent two days lapping the best track in the world! Conditions were awesome, just a shame my brakes fell off after about 1/3rd of a lap, lots of juddering and no confidence thereafter meant that a 9:27 was the best I managed. Very pleased with lines etc, just want to see what decent brakes might net me. (ignore my mate Rich rabbiting on!)
[YOUTUBE] https://www.youtube.com/watch?v=71lFkP0c68c[/YOUTUBE]
Few pics from ring Photographers:

Parked next to an amazing beast of an M3 at the end of Saturday:

My German is schiebe, his English was not good but the message was clear "lots of nights im der garage!" Full E92 running gear, real aero, properly sorted bit of kit.
End of day 1:
Nice LSB E92:
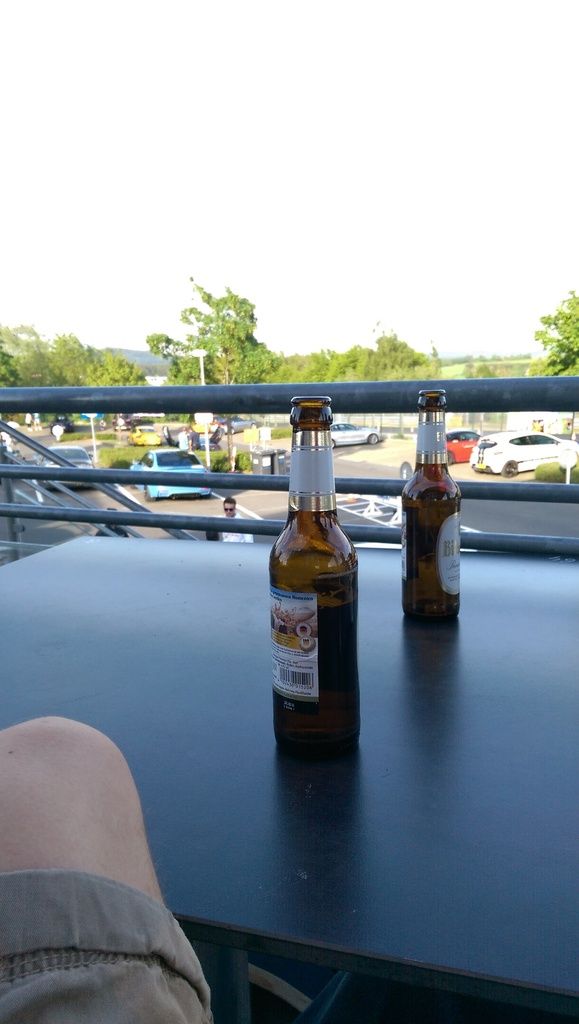
All the necessities:


Nice Yas Marina(?) M4
My favourite picture of the whole weekend:
Really good trip, will definitely be back again soon. Happened to meet some guys I had met before from the M3cutters website, I also had lots of people coming up and having a good look at the car, with some nice comments. Notably an american chap who has just ordered an F82 in Laguna Seca, had a nice long chat, it's the kind of place you can lose hours talking to like minded car enthusiasts, love that.
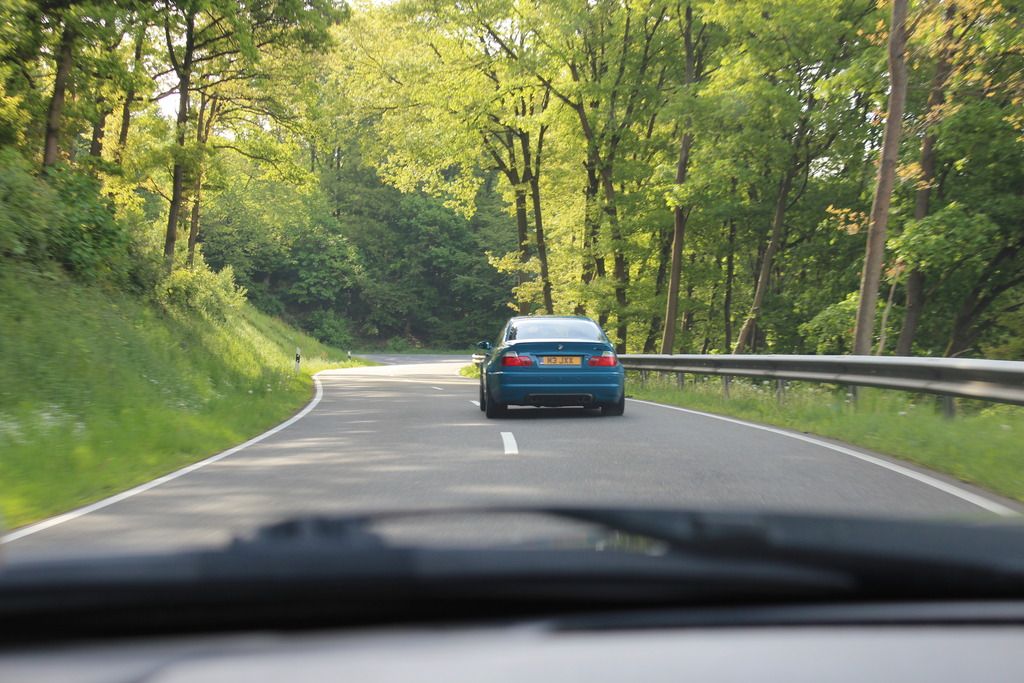
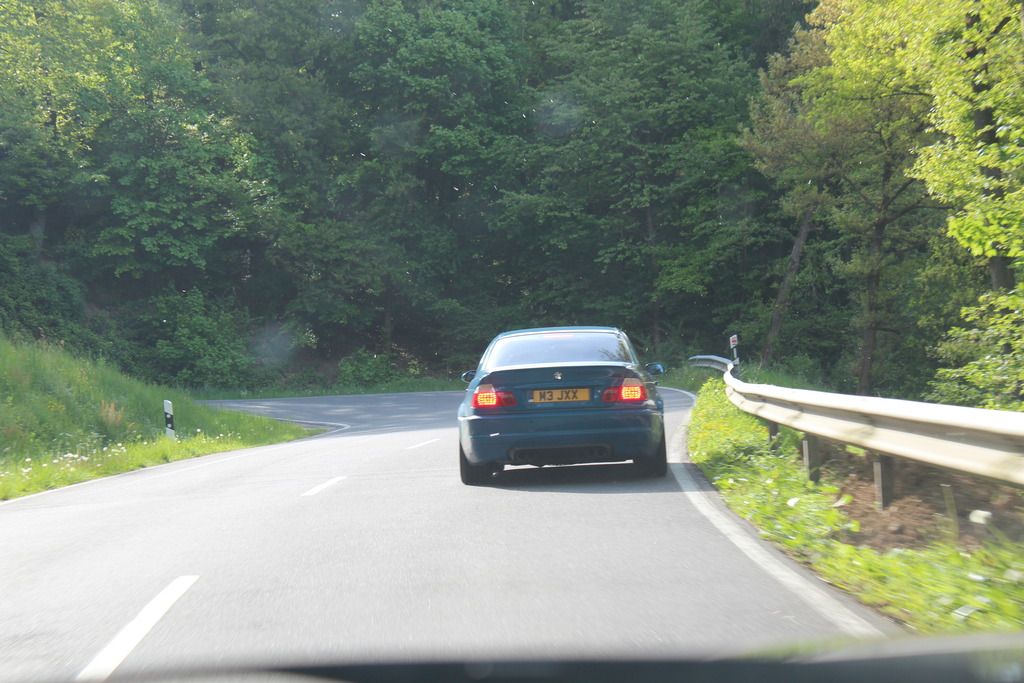
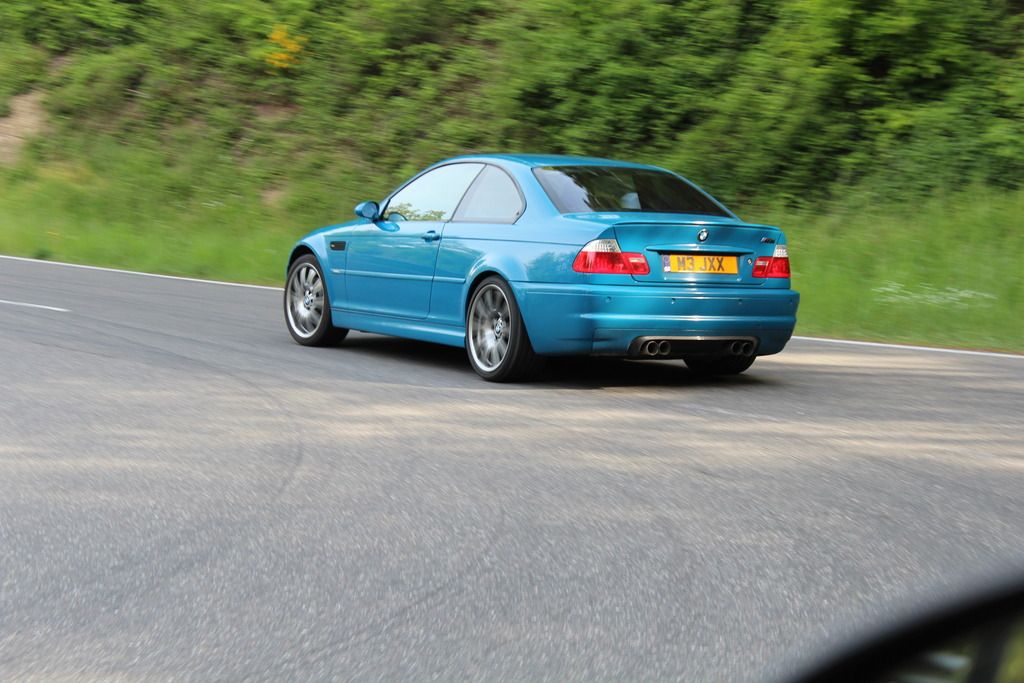
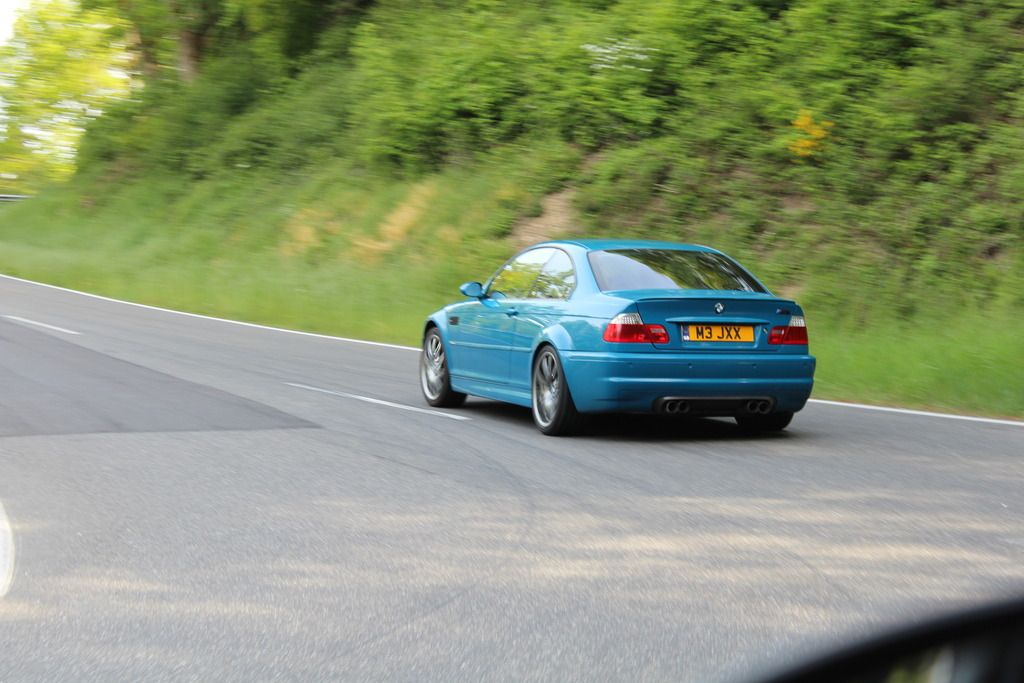
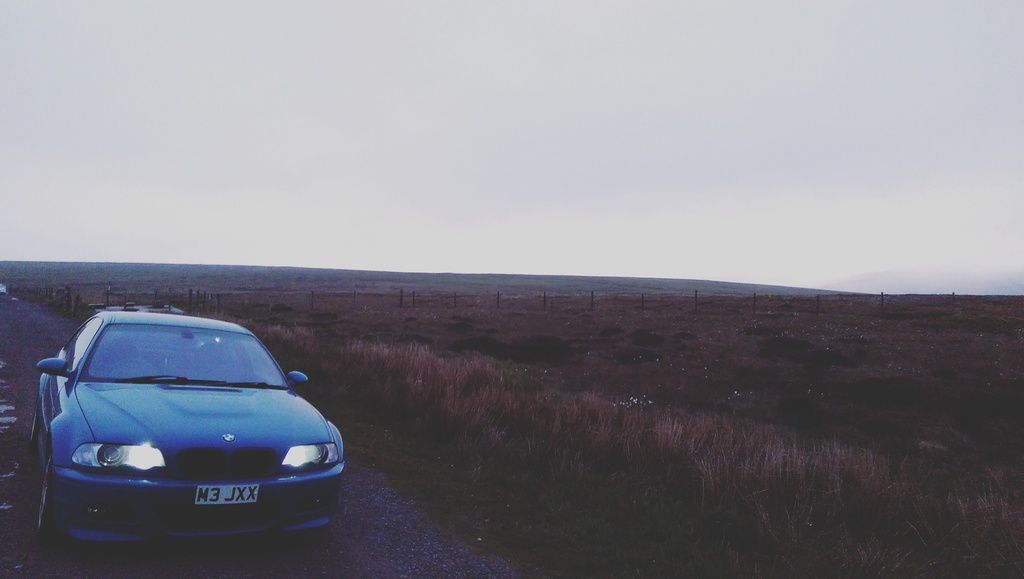
Finally a random pic from a drive across the Snake pass whilst visiting my Folks:
The subframe and diff jobs were all in preparation for a Nurburgring trip a colleague and mate of mine organised. We went out for a 4 day weekend, with Friday night TF, and Sat/Sun all day. I have been out there a couple of times working in the pits at VLN races, including a class win for our team in the 2012 24hr in D3T class (and first Diesel overall
) but only been once for pleasure and that was in my E30 318iS 6 years ago.
First of all got some new tyres fitted as the rears were low - Goodyear Eagle F1 Assymetric 2's - just rolls off the tongue. I was replacing Falken FK452s which came with them, having done the fronts previously, really like these.


They're slightly wider than the Falkens as they have a kerbing lip (which if you look close I could have used ages ago!) which I think looks much better, no stretch here.

After a nightmare journey stuck in traffic around Belgium, Eurotunnel delays and breakdowns we finally arrived Friday night - missed the evening TF, but was fed up of driving by then!

With my mate's E36:

The next day, driving from Adenau up to the 'Ring itself, view from another mate's 350z:


Parked up at the JLR testcentre (as we all work for JLR, left bags etc here for the day)

And then spent two days lapping the best track in the world! Conditions were awesome, just a shame my brakes fell off after about 1/3rd of a lap, lots of juddering and no confidence thereafter meant that a 9:27 was the best I managed. Very pleased with lines etc, just want to see what decent brakes might net me. (ignore my mate Rich rabbiting on!)
[YOUTUBE] https://www.youtube.com/watch?v=71lFkP0c68c[/YOUTUBE]
Few pics from ring Photographers:


Parked next to an amazing beast of an M3 at the end of Saturday:

My German is schiebe, his English was not good but the message was clear "lots of nights im der garage!" Full E92 running gear, real aero, properly sorted bit of kit.

End of day 1:

Nice LSB E92:


All the necessities:


Nice Yas Marina(?) M4

My favourite picture of the whole weekend:
Really good trip, will definitely be back again soon. Happened to meet some guys I had met before from the M3cutters website, I also had lots of people coming up and having a good look at the car, with some nice comments. Notably an american chap who has just ordered an F82 in Laguna Seca, had a nice long chat, it's the kind of place you can lose hours talking to like minded car enthusiasts, love that.
Finally a random pic from a drive across the Snake pass whilst visiting my Folks:

Edited by Mr.Jimbo on Tuesday 10th October 11:23

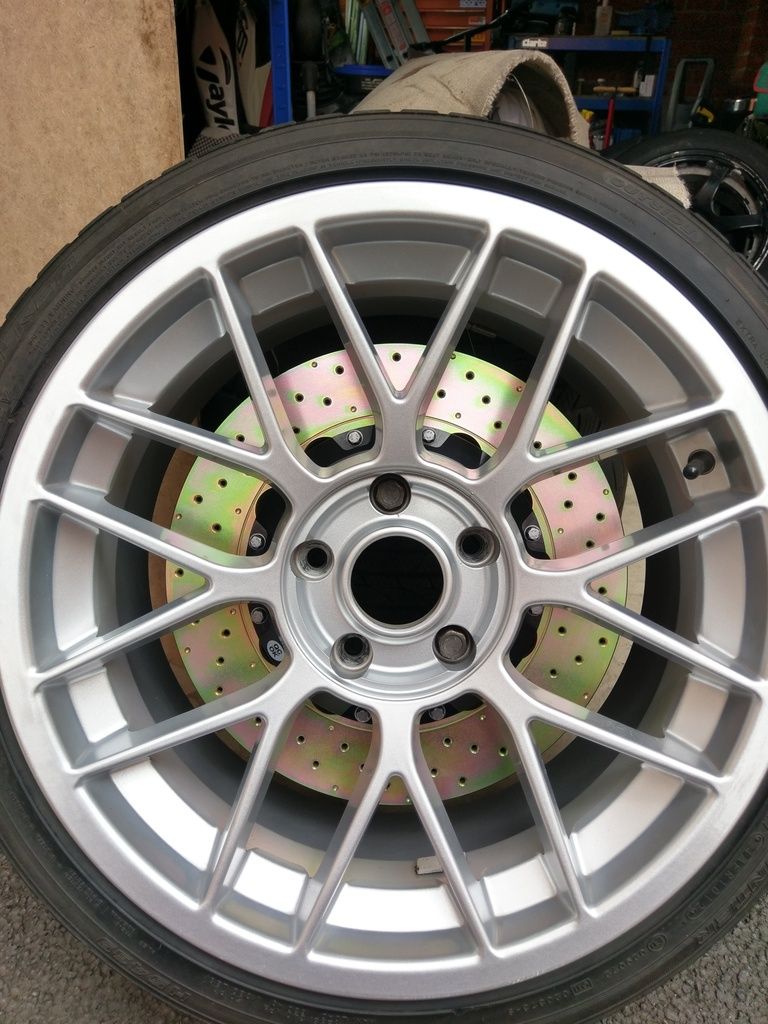
These ought to sort it, arrived this week but the car is away having some bodywork done at the moment (which I'll show off when done) but I'm quite content with them not being on the car just yet, quite enjoying just ogling them, really nice bits of kit. They're all sealed up now so will hopefully stay quite pretty.
D2 6 Pots with 356x32mm discs & Bluestuff NDX pads (for reference the standard car has 1 pot calipers with 325x28mm - car came with red stuffs) - bit of overkill but I've never liked the appearance of the stock brakes, and decent pads (i.e. endless/pagid RS29s) are big bucks. So with judicious ManMaths(tm) I reasoned that these were suitable
 About half the price of AP's or Brembos, but very good reviews and decent pad availability.
e21Mark said:
Really fancy an E46 M3 in LSB, once I get a bit too old/fat to climb in and out of the E30. They look great.
See I really fancy an E30 to go with this one, but haven't got the room. Miss my E30 a lot.Edited by Mr.Jimbo on Thursday 11th August 10:18
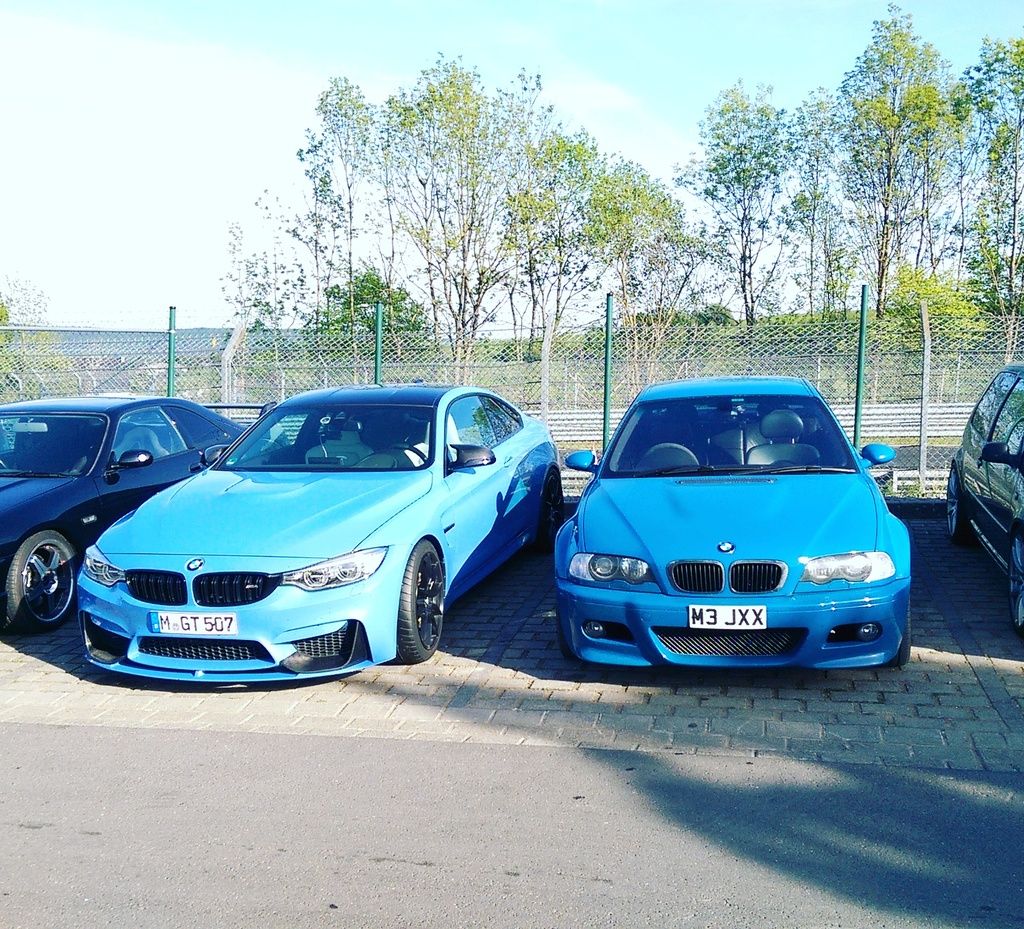
I'd recommend them, these are 18x8.5 et24 front, 18x10 et20 rears. Fitment is very good, it's just a shame the rear tyres on these when I bought them have some stretch, with a 275 on there I think it'll be a lot better.
I could be interested in parting with these (as I'm after some Apexes) - drop me a PM
I could be interested in parting with these (as I'm after some Apexes) - drop me a PM
Next Steps then...
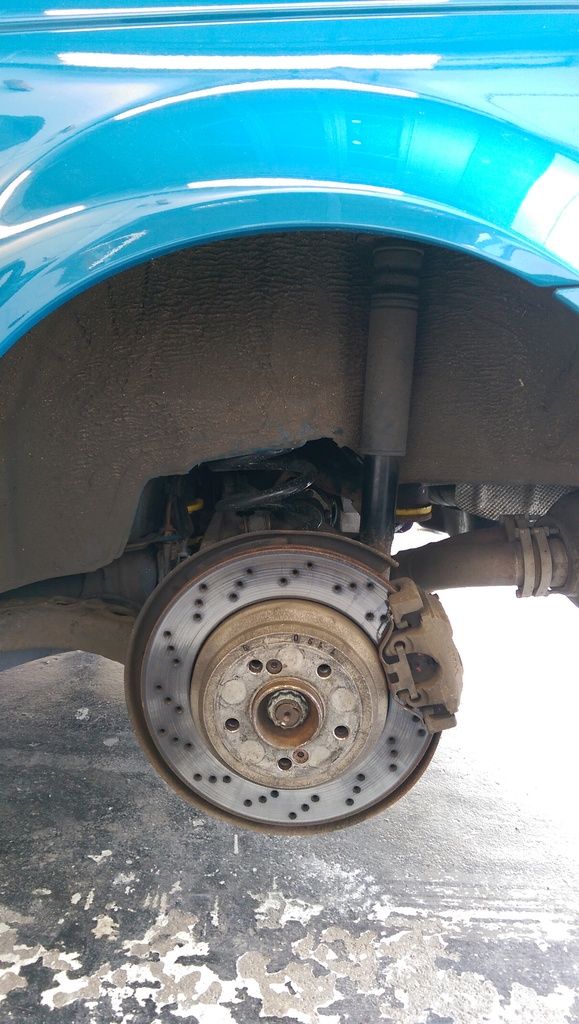
After the Nurburgring I was really pleased with the car, balance felt good, enough power, nicely adjustable up to the limit, the only thing letting the whole experience down was the OEM brakes. I'd fitted new discs previously (about a year ago now) as the old Performance Friction 2 piece Ally hats corroded and basically fell apart, not very impressed.
Armed with a bonus from work, some heavy man maths and an idea in the back of my head about looks (I know, shouldn't be high on the list for brakes but I'm a sucker for shiny new bits) I ordered these from Martin at Racebitz
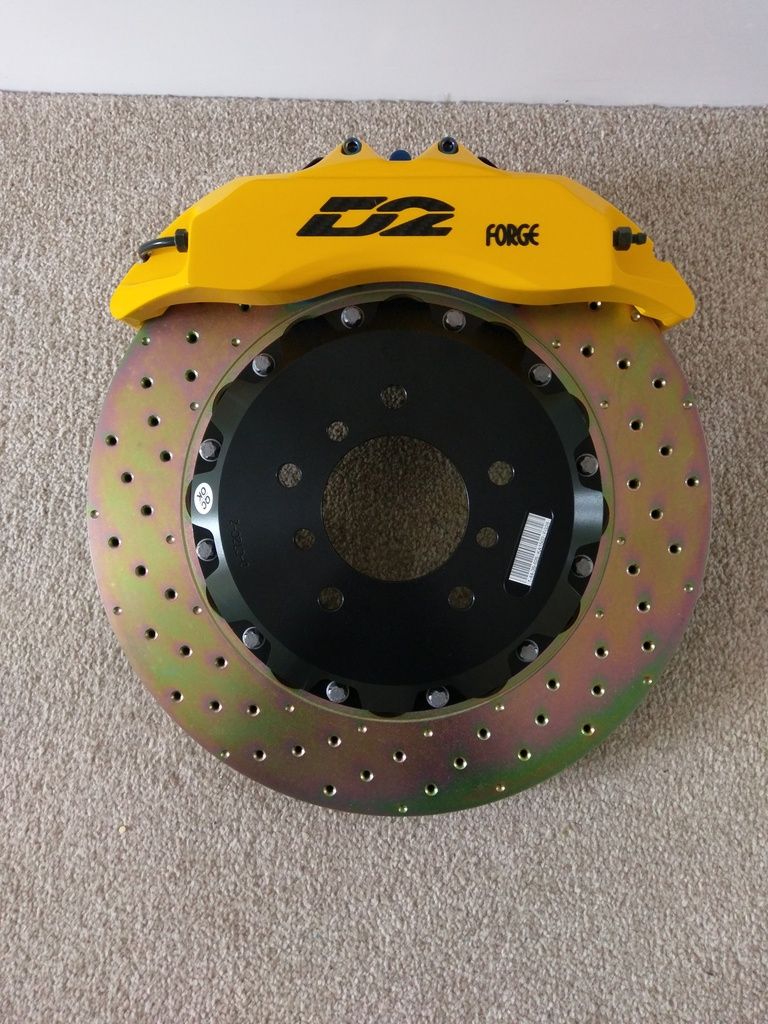
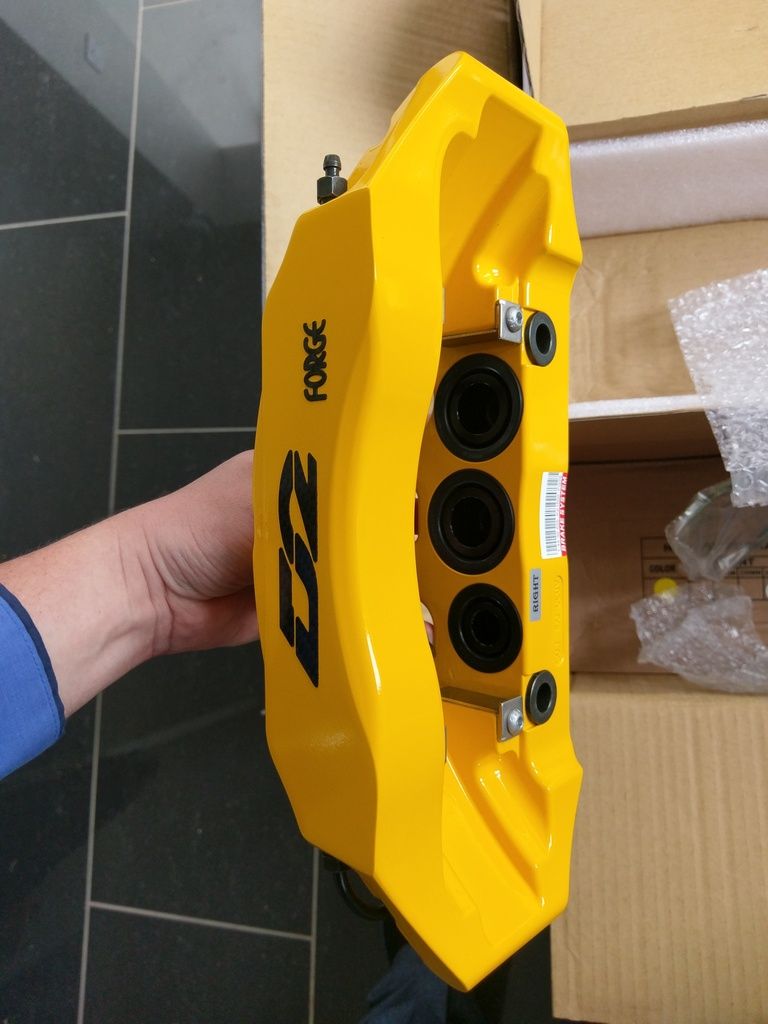
- D2 356mm 6 pot kit with fixed discs
Also uprated the pads and went for Bluestuff NDX, had these on my old Impreza, was very impressed with them. Apart from a bit of Delay on D2's end just because the yellow's weren't in stock I couldn't have been happier with Martin, even emailing me answering daft questions I had in the evenings, great bloke to deal with.
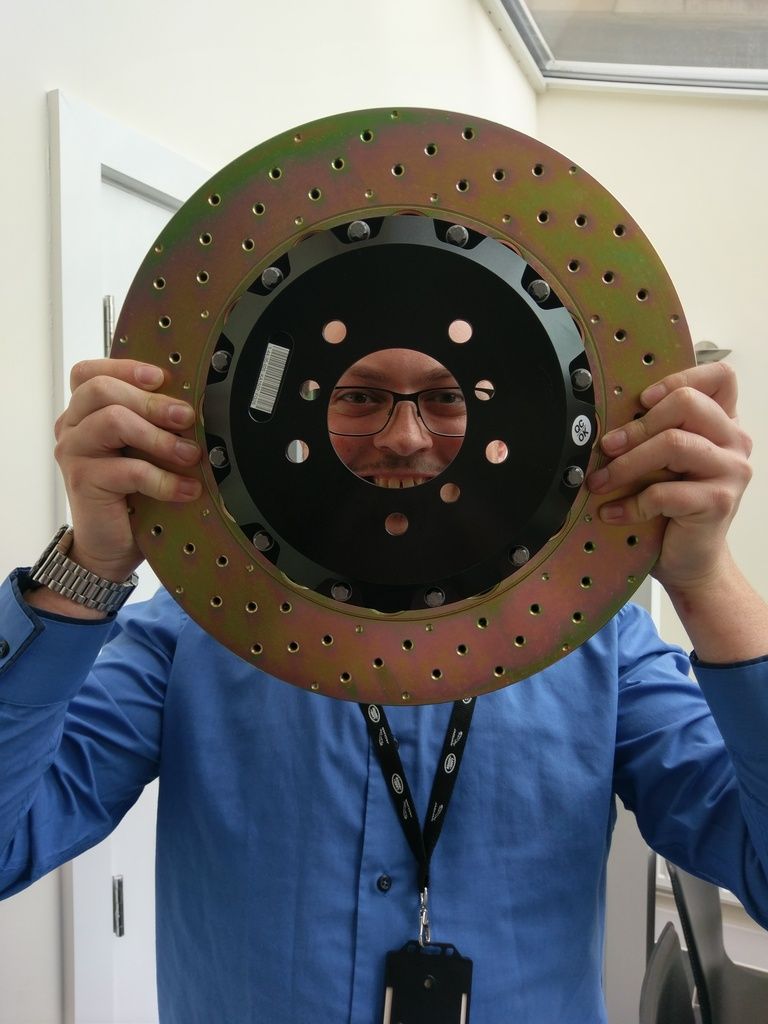
Messing about with them, the discs are simply huge!
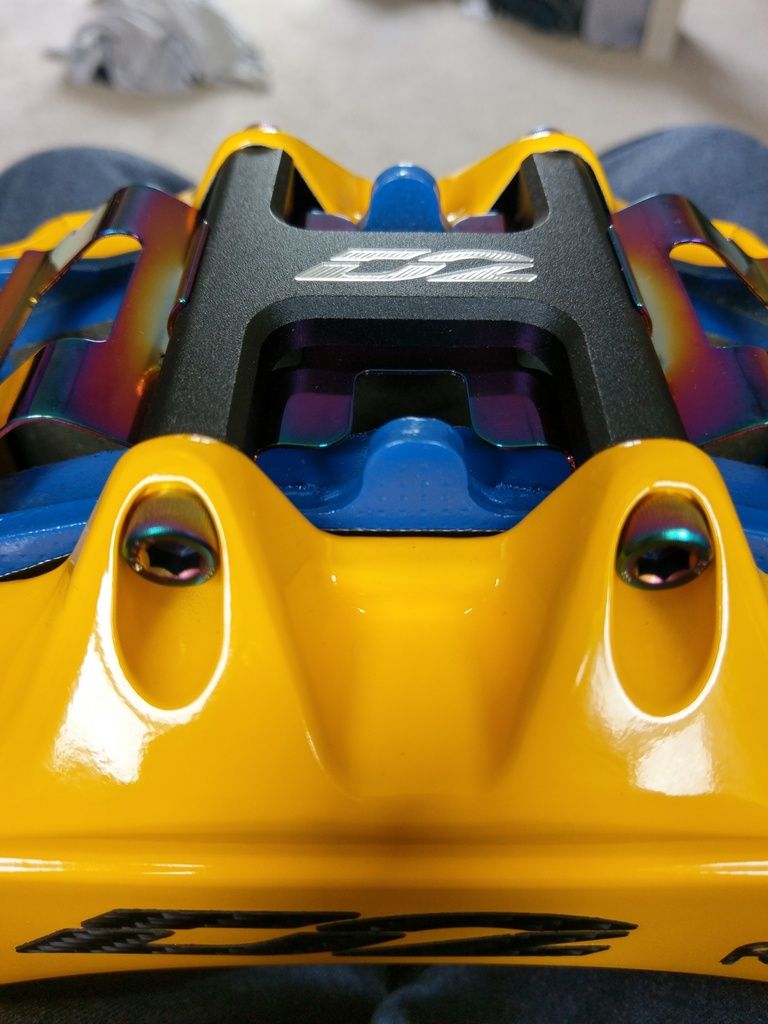
All protected and sealed with Carbon Collective Platinum Wheels, they're ready to go on - I've had them out the box a few times just to ogle them. Also appear to not need redrilling for the wheel hub spigots anymore!
Quick check they fit under the 18"ers, plenty of room for caliper as well.
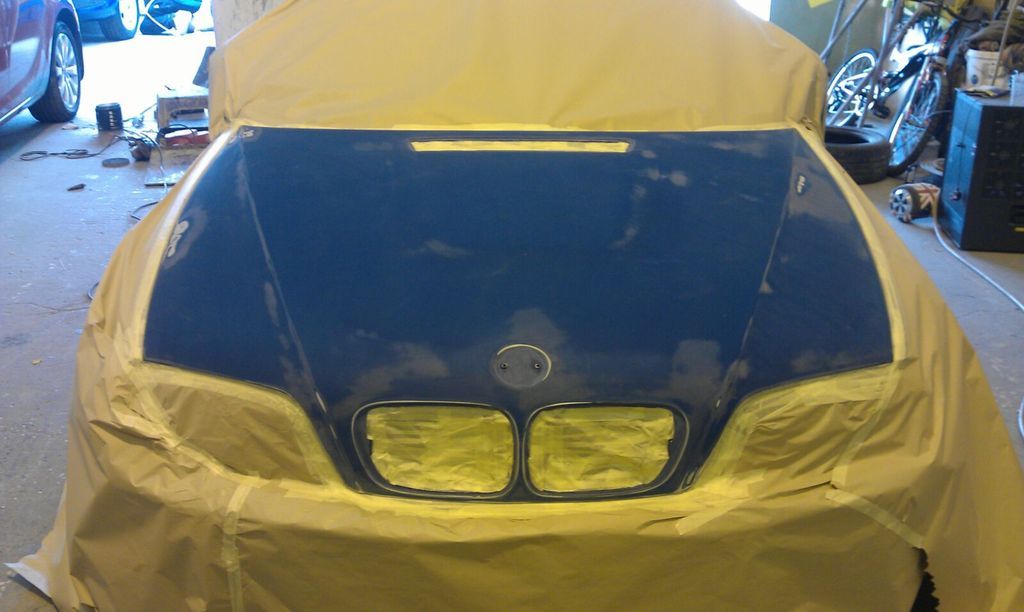
Alas, the car is at the bodyshop right now...
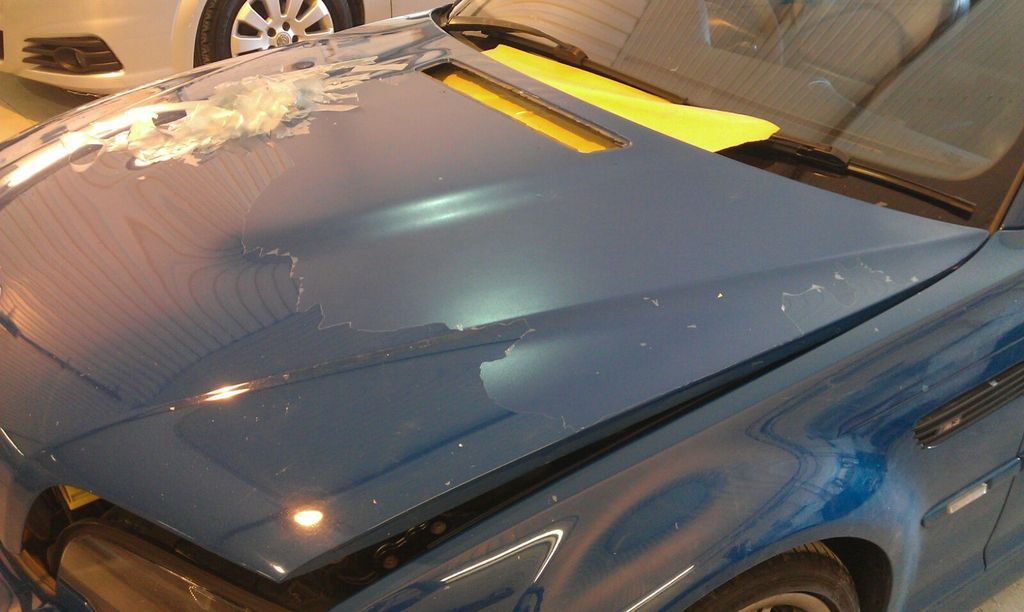
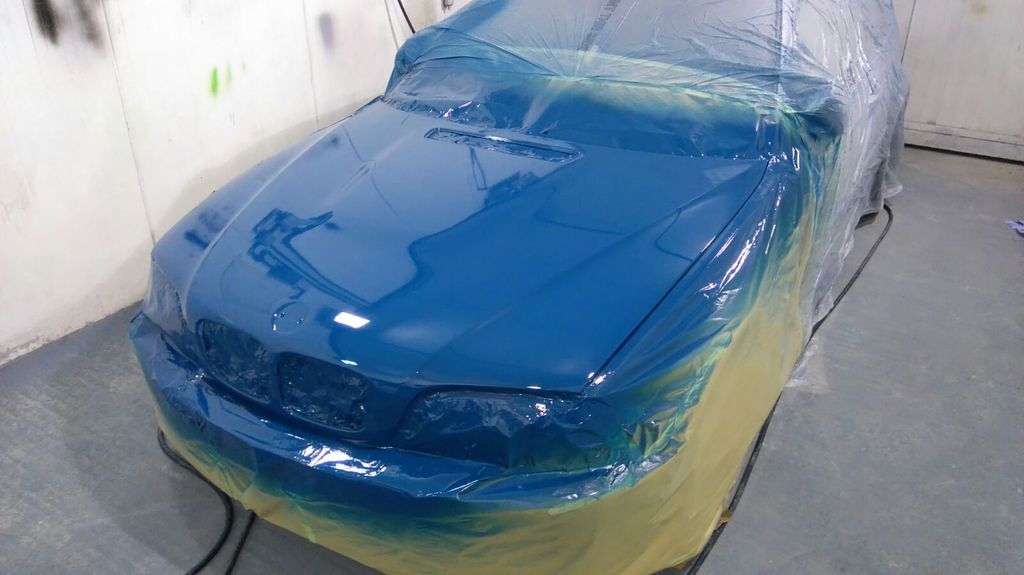
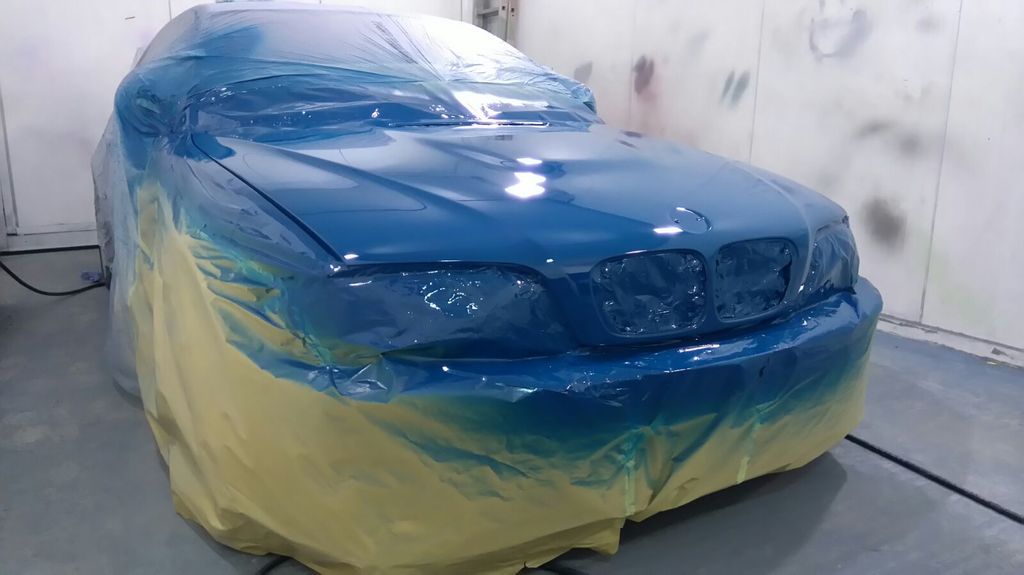
The bonnet had some strange lacquer peel from when I bought it, which had slowly grown. Now it wasn't this bad, Mark (painter) has chipped the old lacquer off here, but it let the car down and I'd wanted it sorting for a long while. Also had the usual stonechips on the front so this will tidy the car up no end.
Rubbed down:
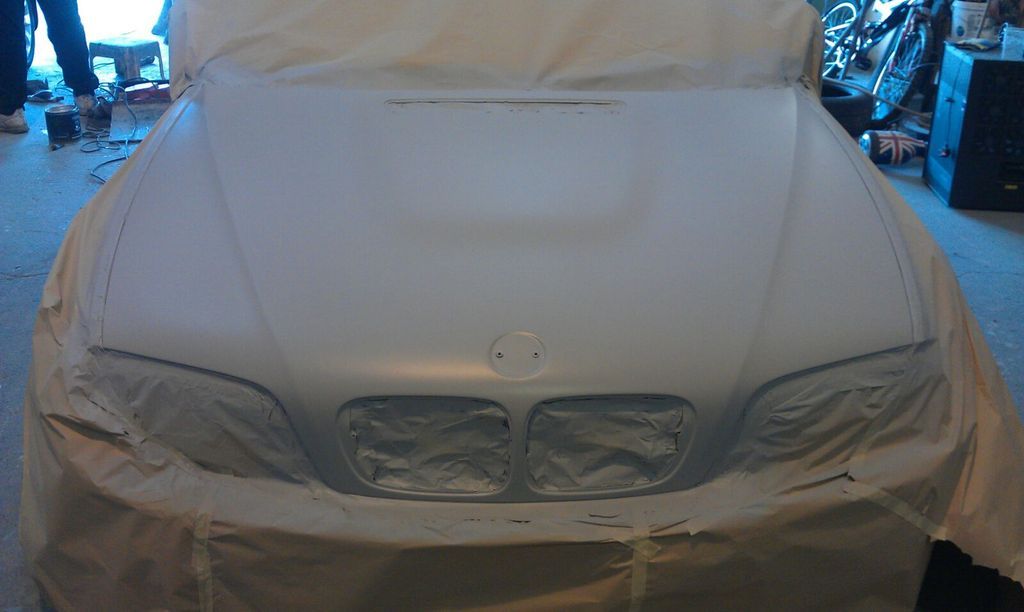
Aaaaand primer!
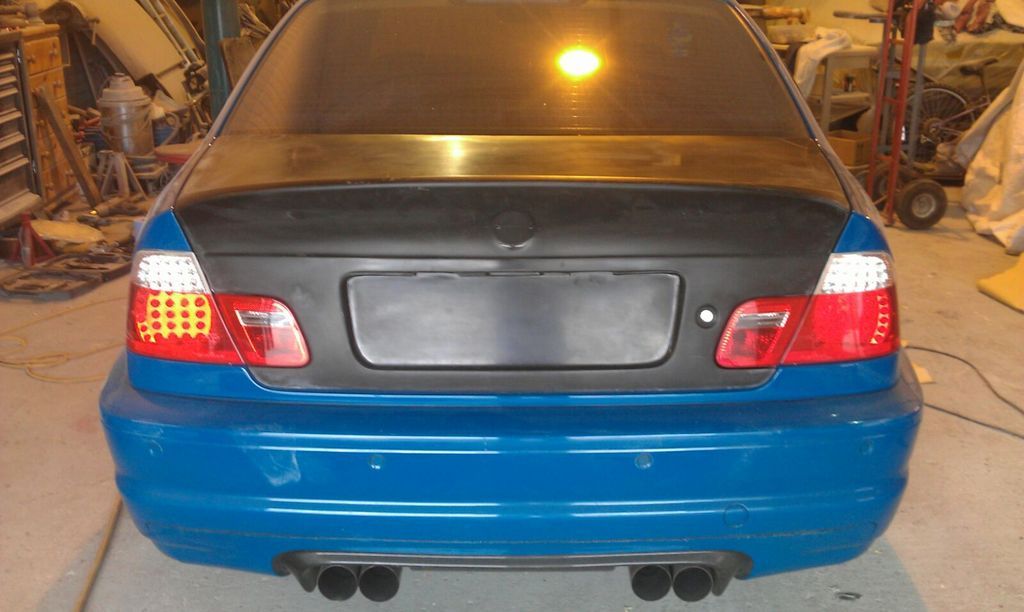
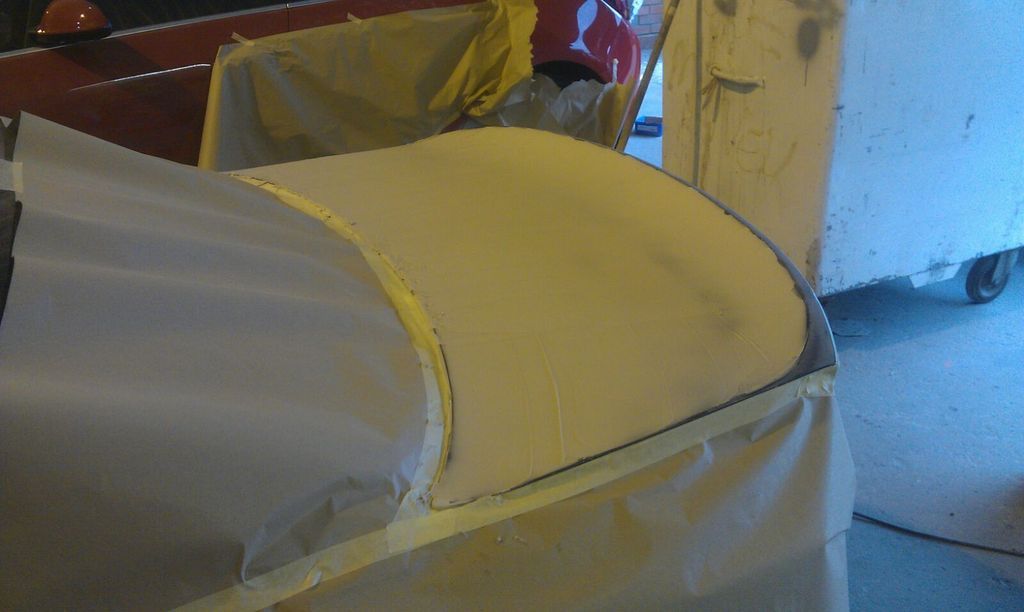
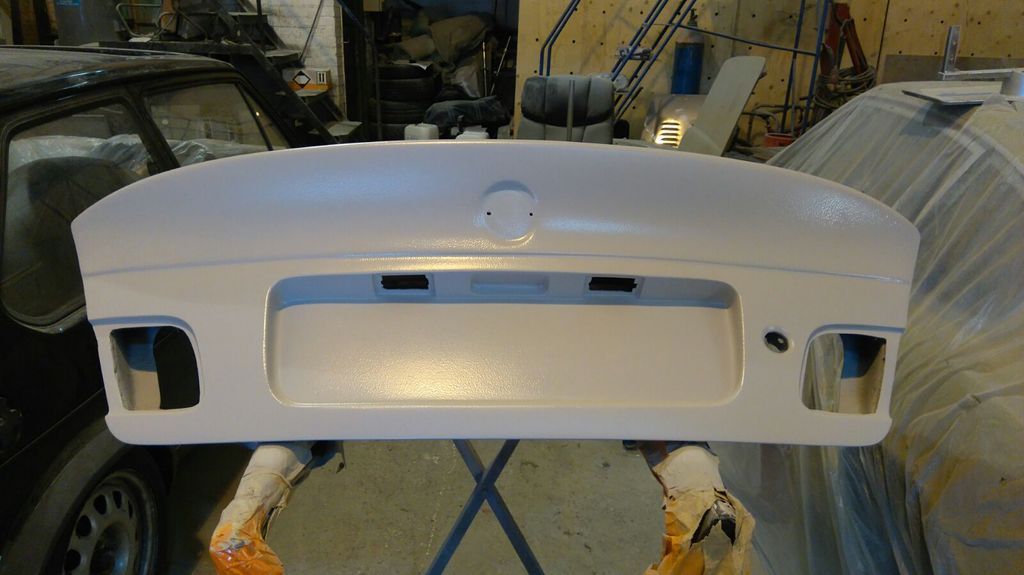
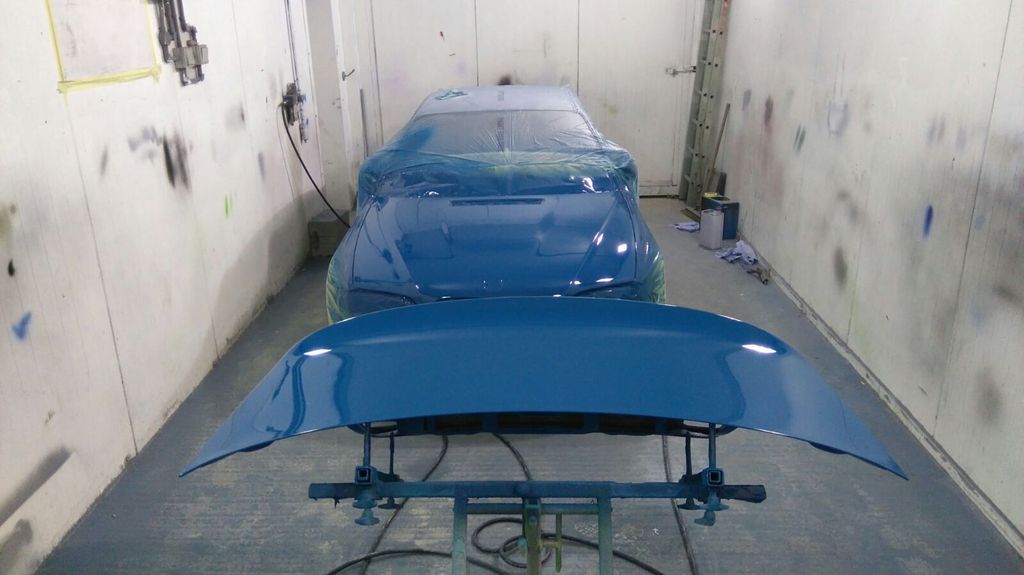
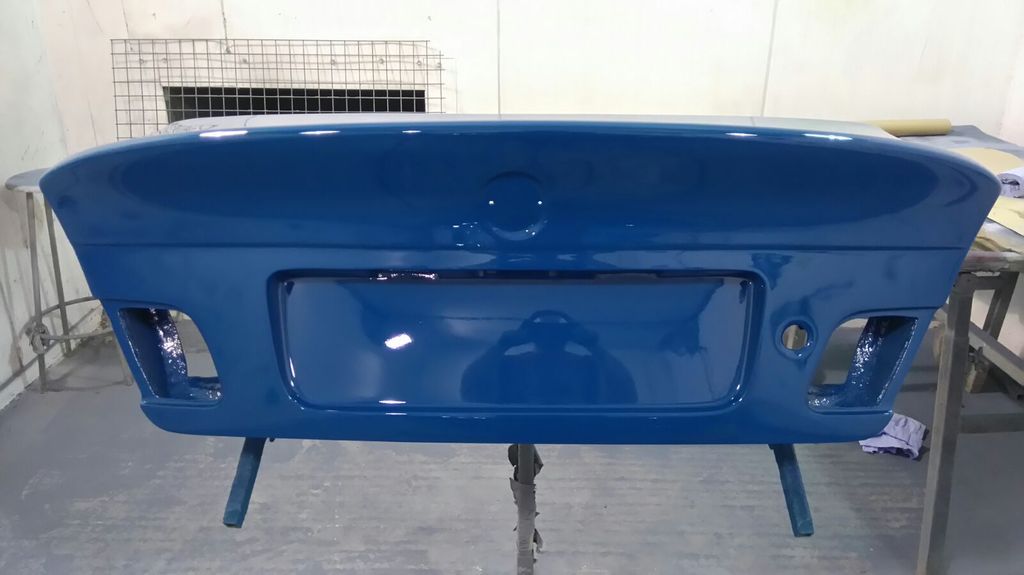
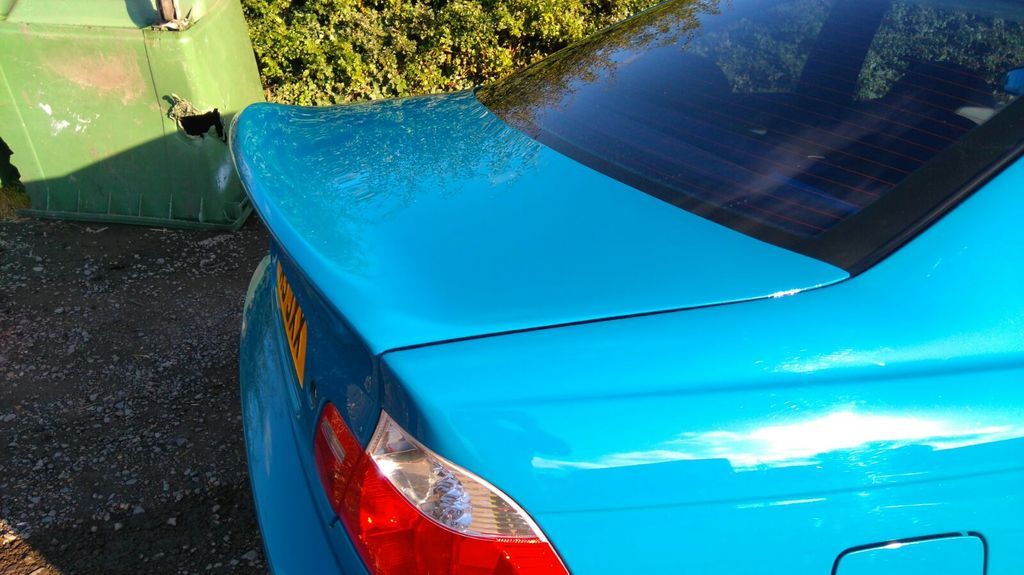
The OEM rear spoiler (which I've since found isn't OEM at all and made in CF!) had some awful paint blistering and was coming right off in places. This had always irked me, and the general paint on the boot wasn't good. So a LONG time ago now, I bought a fibreglass CSL boot from a fellow M3cutter, who I ended up bumping into in May at the Nurburgring, anyway, quality seemed good, I just didn't know a local painter at that point, so it sat in my garage for ages, until now...
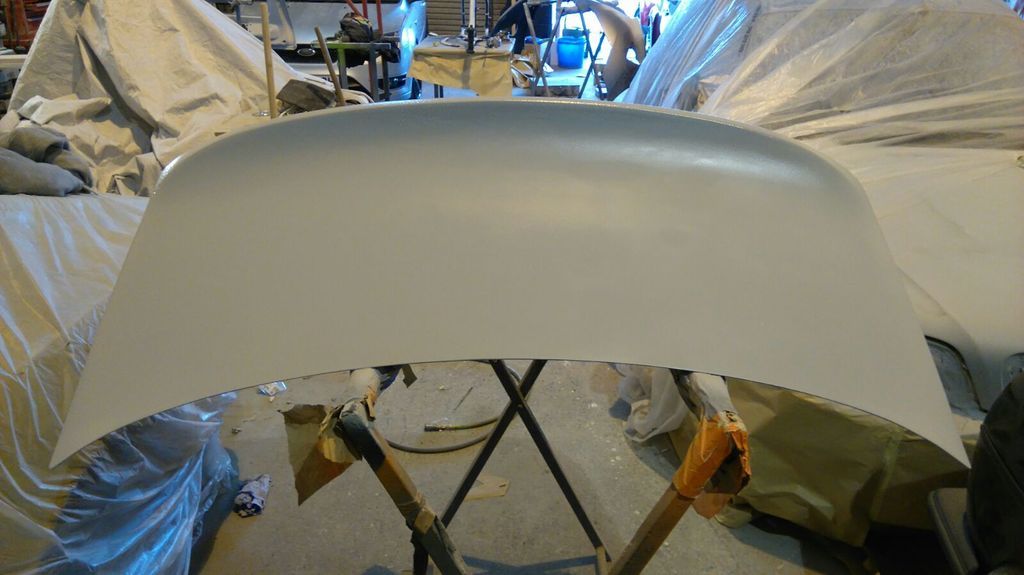
Being Fibreglass it took some fettling (I had it on the car myself to check fitment shortly after I got it and was pleased with the fit) but as ever it wasn't flat so Mark has had some decent work to do getting the profiles right, he's a real perfectionist and I think it will show:

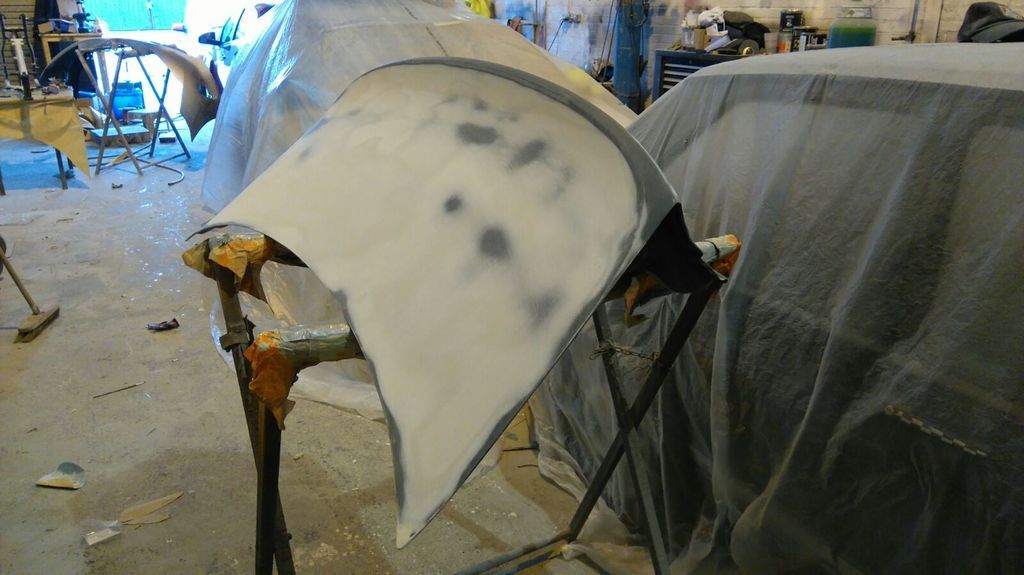
In Primer ready to rub down:
Super super excited to get the car back (which sadly won't be in time for this weekend's BMW festival at Gaydon) and get the brakes fitted as well I bought a front plate plinth a while back and modded it for the narrower front plate, but didn't do a very good job, will get another and send to Mark for a proper job when I get the front bumper/wings done.
But first my credit card needs a rest!
After the Nurburgring I was really pleased with the car, balance felt good, enough power, nicely adjustable up to the limit, the only thing letting the whole experience down was the OEM brakes. I'd fitted new discs previously (about a year ago now) as the old Performance Friction 2 piece Ally hats corroded and basically fell apart, not very impressed.
Armed with a bonus from work, some heavy man maths and an idea in the back of my head about looks (I know, shouldn't be high on the list for brakes but I'm a sucker for shiny new bits) I ordered these from Martin at Racebitz
- D2 356mm 6 pot kit with fixed discs
Also uprated the pads and went for Bluestuff NDX, had these on my old Impreza, was very impressed with them. Apart from a bit of Delay on D2's end just because the yellow's weren't in stock I couldn't have been happier with Martin, even emailing me answering daft questions I had in the evenings, great bloke to deal with.

Messing about with them, the discs are simply huge!

All protected and sealed with Carbon Collective Platinum Wheels, they're ready to go on - I've had them out the box a few times just to ogle them. Also appear to not need redrilling for the wheel hub spigots anymore!
Quick check they fit under the 18"ers, plenty of room for caliper as well.

Alas, the car is at the bodyshop right now...

The bonnet had some strange lacquer peel from when I bought it, which had slowly grown. Now it wasn't this bad, Mark (painter) has chipped the old lacquer off here, but it let the car down and I'd wanted it sorting for a long while. Also had the usual stonechips on the front so this will tidy the car up no end.
Rubbed down:

Aaaaand primer!

The OEM rear spoiler (which I've since found isn't OEM at all and made in CF!) had some awful paint blistering and was coming right off in places. This had always irked me, and the general paint on the boot wasn't good. So a LONG time ago now, I bought a fibreglass CSL boot from a fellow M3cutter, who I ended up bumping into in May at the Nurburgring, anyway, quality seemed good, I just didn't know a local painter at that point, so it sat in my garage for ages, until now...

Being Fibreglass it took some fettling (I had it on the car myself to check fitment shortly after I got it and was pleased with the fit) but as ever it wasn't flat so Mark has had some decent work to do getting the profiles right, he's a real perfectionist and I think it will show:


In Primer ready to rub down:


Super super excited to get the car back (which sadly won't be in time for this weekend's BMW festival at Gaydon) and get the brakes fitted as well
I bought a front plate plinth a while back and modded it for the narrower front plate, but didn't do a very good job, will get another and send to Mark for a proper job when I get the front bumper/wings done.But first my credit card needs a rest!
Edited by Mr.Jimbo on Saturday 13th August 23:43
Edited by Mr.Jimbo on Tuesday 10th October 11:24
I am a little envious of this thread. Fair play for sorting out alot of the stuff yourself and getting it back to shape. Will you be servicing it yourself or giving it to a specialist?
Working at JLR, I take it you are based somewhere in the Midlands? If so, there are a few of us about.
I almost bought an LSB Manual M3, as it looked superb. The miles were a smidge higher than yours but it has replica LSB wheels and the more I looked at the car on the photos the more I didn't like the look of it considering:
-It was all of the way in Northern Ireland
-The 'mint' leather interior didn't look that great
-All 4 corners had 'Zeta' tyres on, despite the guy saying it lived next to a 911 in his garage.
I've ended up settling on THIS as it was a cut above the rest of the cars I saw. So far I can agree with alot of what you say about the drive. But Jesus, they're not cheap to run at all by a long shot! I thought a 944 Turbo was pricey but these do seem to raise the bar! OTOH they are a very quick GT esque car it seems.
Like you did, I also need a pair of rears, which are FK453s. I am considering the MPSSs or Goodyear Asymmetric 3s for the grip, life and as you said, rim protection ; the latter is non existant with the Falkens, and like you've I have kerbed another wheel when someone decided to cut a corner alot in town. I'm thinking I'll get the MPSSs but the Goodyears are very good on my dad's Mondeo 2.5T.
Working at JLR, I take it you are based somewhere in the Midlands? If so, there are a few of us about
.I almost bought an LSB Manual M3, as it looked superb. The miles were a smidge higher than yours but it has replica LSB wheels and the more I looked at the car on the photos the more I didn't like the look of it considering:
-It was all of the way in Northern Ireland
-The 'mint' leather interior didn't look that great
-All 4 corners had 'Zeta' tyres on, despite the guy saying it lived next to a 911 in his garage.
I've ended up settling on THIS as it was a cut above the rest of the cars I saw. So far I can agree with alot of what you say about the drive. But Jesus, they're not cheap to run at all by a long shot! I thought a 944 Turbo was pricey but these do seem to raise the bar! OTOH they are a very quick GT esque car it seems.
Like you did, I also need a pair of rears, which are FK453s. I am considering the MPSSs or Goodyear Asymmetric 3s for the grip, life and as you said, rim protection ; the latter is non existant with the Falkens, and like you've I have kerbed another wheel when someone decided to cut a corner alot in town
. I'm thinking I'll get the MPSSs but the Goodyears are very good on my dad's Mondeo 2.5T. Thanks. I really like the topaz blue, but all the ones for sale whilst I was looking had grey leather, which I was dead set against. Saying that, I quite often think my car is a bit too dark inside so you can't win!  they do look good if you do a twin tone black/grey but it's a lot of effort. I'd love LSB leather accents but the whole LSB interior is a bit too much for me, especially the rear bench being all blue.
Regards the tyres I wish I'd left the fronts on longer as I got another 10k out of the rears! The Goodyear's really look much better than the falkens and I really like how the tyre drives, nice breakaway, outstanding wet grip and don't go off very much in the dry even at the nurburgring in 28 degrees. Had them in my RB5, though not in assymetric form. I'm sure I read the 3 was an overall improvement from the 2 but haven't tried them myself.
Yes at JLR Whitley, there are about 4 just in the carpark outside the office, even parked next to an LSB one the other Friday. I've done the oil service myself but will get the inspections seen to by a specialist I think. Probably combine it with a VANOS overhaul but might do that myself. I'm quite handy just don't have the space (hence going to mum and dads or mates workshop) which puts me off. Probably saved me quite a bit of cash though thinking about it
they do look good if you do a twin tone black/grey but it's a lot of effort. I'd love LSB leather accents but the whole LSB interior is a bit too much for me, especially the rear bench being all blue.Regards the tyres I wish I'd left the fronts on longer as I got another 10k out of the rears! The Goodyear's really look much better than the falkens and I really like how the tyre drives, nice breakaway, outstanding wet grip and don't go off very much in the dry even at the nurburgring in 28 degrees. Had them in my RB5, though not in assymetric form. I'm sure I read the 3 was an overall improvement from the 2 but haven't tried them myself.
Yes at JLR Whitley, there are about 4 just in the carpark outside the office, even parked next to an LSB one the other Friday. I've done the oil service myself but will get the inspections seen to by a specialist I think. Probably combine it with a VANOS overhaul but might do that myself. I'm quite handy just don't have the space (hence going to mum and dads or mates workshop) which puts me off. Probably saved me quite a bit of cash though thinking about it
I must be an oddball. I didn't mind a grey leather interior (but I've previously had cars with beige before!) but I did not want a black interior at all. Memories of my old Mondeo being boiling inside and the AC needing to be cranked up were part of the reason as well my 944 Turbo with a Midnight blue interior (rear near black) was roasting during the summer of 2013 despite the windows being open and the sunroof panel off ; AC didn't work. I did want a sunroof however!
The AS3s on my dad's Mondeo 2.5T seem fine, certainly as good as the AS2s that were on there. They also lasted quite some time.
Ah yes, Whitley. You may see my Midnight blue example there soon; my old man is borrowing it, but it desperately needs a clean! I take it there is a Red '02 M3 there as well?
P.S: I am loving the mods. I am trying to stay away from doing anything to mine with it needing:
-2 new tyres
-A front end respray (well, just the wings, but while you are there...)
-An Inspection ; I am still on the fence as to whether to take it to a specialist or not.
I think the grey leather might look good clean but I saw a really filthy example that put me off. Missed an Avus blue example with extendended white (not cream) leather, that really was a beautiful combo but bet it was a bh to keep clean.
I made the terrible mistake of telling everyone that this car would stay standard, I'm eating those words Not going too mad but it's pricey enough.
Not seen the Imola one, there is James' Topaz track car, an LSB track car, another LSB and several black and silver ones about, where are you based?
Cheers,
James
h to keep clean.I made the terrible mistake of telling everyone that this car would stay standard, I'm eating those words
Not going too mad but it's pricey enough.Not seen the Imola one, there is James' Topaz track car, an LSB track car, another LSB and several black and silver ones about, where are you based?
Cheers,
James
Great read dude, I was at the 'ring last week so good to see some familiar roads and read your review, I haven't watched your vid as you put in a better time than me so I can't bring myself to
After the trip I've got some plans for mine also, your brakes have made me moist so think I may need to include those in my plan. Keep the updates coming
After the trip I've got some plans for mine also, your brakes have made me moist so think I may need to include those in my plan. Keep the updates coming
squareflops said:
Great read dude, I was at the 'ring last week so good to see some familiar roads and read your review, I haven't watched your vid as you put in a better time than me so I can't bring myself to
After the trip I've got some plans for mine also, your brakes have made me moist so think I may need to include those in my plan. Keep the updates coming
Thanks After the trip I've got some plans for mine also, your brakes have made me moist so think I may need to include those in my plan. Keep the updates coming
I was pleased with anything sub 10 minutes, think an 8.30 might be on the cards with decent brakes and some more practice. Obviously haven't tried the D2s yet but just from looking at them I think I'd recommend them, very well made.Edited by Mr.Jimbo on Saturday 13th August 23:46
Butter Face said:
Those brakes are epic. I'm thinking of upgrading the brakes on my Civic so if they're good enough for an M3!
Paintwork looks great too.
Thanks, let's hope they work as well as they look Paintwork looks great too.
I keep meaning to pop down and see the car, paintwork should be dome early this week so may just wait and see it finished.
I'll have some new mirror glass on the way soon, as the original ones have suffered the usual milking that they all seem to be afflicted with. Helpfully a guy on M3cutters supplies cheap replacements
Had these through from the painter last night, can't wait until Sat morning when I pick the car up
Really happy with these (though I haven't seen it in person) - I'm just convinced now that the bumpers and wings will want doing sooner rather than later as this will show them up now! I'm more than a bit worried I'm going to catch the bug and have the whole car done...


Really happy with these (though I haven't seen it in person) - I'm just convinced now that the bumpers and wings will want doing sooner rather than later as this will show them up now! I'm more than a bit worried I'm going to catch the bug and have the whole car done...
Edited by Mr.Jimbo on Tuesday 10th October 11:25
Update from last week - Picked the car up, well impressed. Rushed it home for a coat of HD wax and wired up the e92 number plate lights.
Really happy with how it came out. The bonnet has made a much bigger difference than I thought, didn't really realise how flat the paint was before.
Bit of a Pedant's update today, the toolkit in the boot has never been complete, and I actually got round to sourcing a set of water pump pliers for it. Found a pair that looked in good condition (and turned out to be better than I thought!) on eBay for a good price (some places want £30 for them!) - so at £7.50 delivered these arrived today and the OCD bit of me is pleased the toolkit is complete now
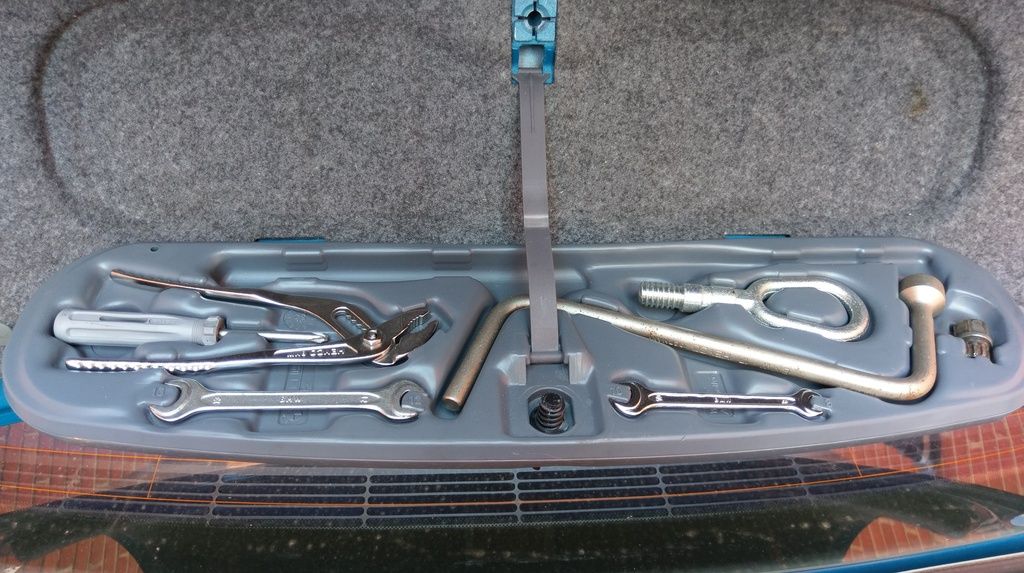
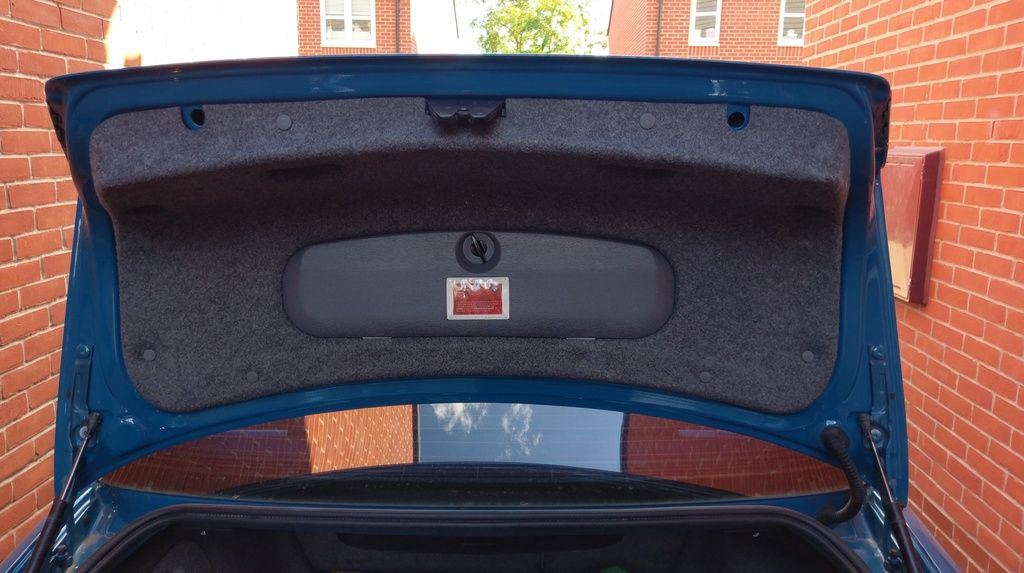
One part of the replica CSL boot is it appears to be modelled on a regular M3 boot internally, has all the same ribs etc, and thus mounting for the toolkit, which even though I never use, I like that it's there (it's also making the boot struts a bit more effective, it opened quite fast with just the FG lid on!)
(need to get the little rubber grommets back from the painter)
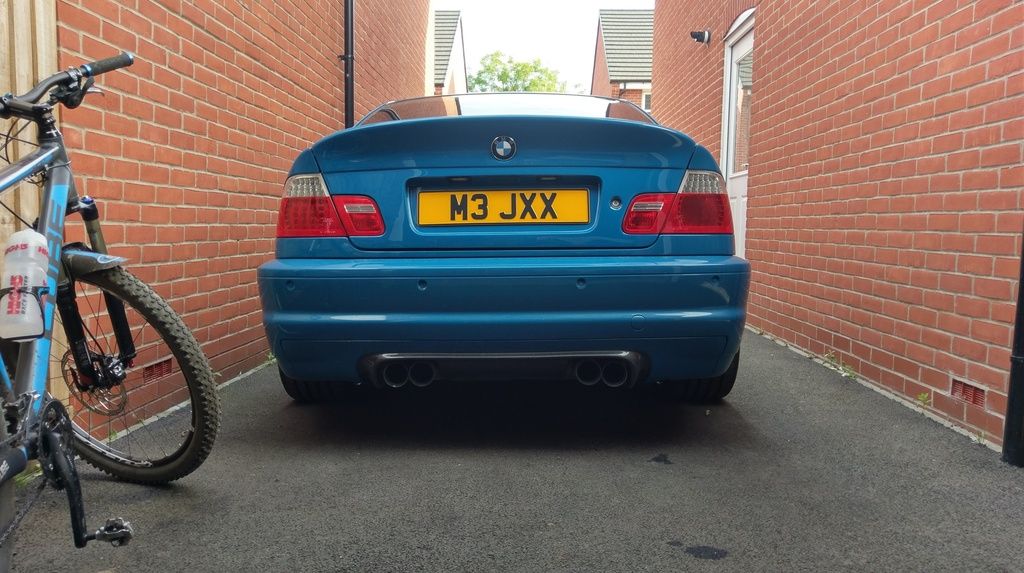
and just a quick pic from the other day when I was getting the bike out
Need to get the brakes fitted, next job


Really happy with how it came out. The bonnet has made a much bigger difference than I thought, didn't really realise how flat the paint was before.
Bit of a Pedant's update today, the toolkit in the boot has never been complete, and I actually got round to sourcing a set of water pump pliers for it. Found a pair that looked in good condition (and turned out to be better than I thought!) on eBay for a good price (some places want £30 for them!) - so at £7.50 delivered these arrived today and the OCD bit of me is pleased the toolkit is complete now

One part of the replica CSL boot is it appears to be modelled on a regular M3 boot internally, has all the same ribs etc, and thus mounting for the toolkit, which even though I never use, I like that it's there (it's also making the boot struts a bit more effective, it opened quite fast with just the FG lid on!)
(need to get the little rubber grommets back from the painter)

and just a quick pic from the other day when I was getting the bike out

Need to get the brakes fitted, next job
Sometimes an older M3 seems attainable, a good idea even. And then I see a thread like this and realise without "a particular set of skills" and some industry contacts, an affordable example is would be nothing short of ruinous. Fair play to you though, there is little as satisfying as working on your own p&j. I'm no fan of LSB, Silverstone Blue is my favourite but I've enjoyed reading about your various trials and tribulations. Fair play to your missus too as you seem to spend every family holiday period under the car! That's a keeper.
Gassing Station | Readers' Cars | Top of Page | What's New | My Stuff