A tale of three discoveries (4x4 and V8 content)
Discussion


Update time. 
Just a few small changes for this one. First of which was some more fiddling with the LPG system, this time involving the indicator which was just placed in the centre console by the lazy "professional" installer.

Does the job OK. But meant when ever the fold out cup holders were in use, you couldn't see how much fuel was in the tank.

So I decided it needed moving. And the new spot that took my fancy, was in the bank of 6 switches in the dash, just to the right of the climate control.

If you remember back to one of my previous updates, I removed the rear SLS system. Which meant the off road mode button was now redundant, and could be swapped for the LPG indicator, which just happens to be the perfect size.

Much better.
Next up, the battery.
The old one hadn't given up, but it was getting on a bit, the terminals were quite corroded, and I simply didn't want to run it through another winter.
So I got a new replacement, and decided to spend a little more and go for a TD5 spec battery. It's larger, with more amp/hours and cranking power, than the V8 comes with.

No pictures of it fitted, but I'm sure you can imagine what it looks like with two wires connected to the top.
Last change for this update was a bit of a fix, as fatty here managed to bend one of the side steps when I was getting in!
Here it is removed to inspect the damage.

Looking underneath, it was easy to see why it had given up. In typical Land Rover fasion, it had slowly disintigrated.

And the passenger side wasnt much better.

And yes, I had noticed this before when I did the body lift etc... but they had been put on the to-do list and forgotten about.
Anyway, it didn't take too long to cut out the rusted support (As let's face it, there wasnt much left to cut out! ) and weld in some spare box section from the garage.

And with a quick coat of etch primer and underseal, they are as good as new.

Thanks for reading.
Just a few small changes for this one. First of which was some more fiddling with the LPG system, this time involving the indicator which was just placed in the centre console by the lazy "professional" installer.
Does the job OK. But meant when ever the fold out cup holders were in use, you couldn't see how much fuel was in the tank.
So I decided it needed moving. And the new spot that took my fancy, was in the bank of 6 switches in the dash, just to the right of the climate control.
If you remember back to one of my previous updates, I removed the rear SLS system. Which meant the off road mode button was now redundant, and could be swapped for the LPG indicator, which just happens to be the perfect size.
Much better.
Next up, the battery.
The old one hadn't given up, but it was getting on a bit, the terminals were quite corroded, and I simply didn't want to run it through another winter.
So I got a new replacement, and decided to spend a little more and go for a TD5 spec battery. It's larger, with more amp/hours and cranking power, than the V8 comes with.
No pictures of it fitted, but I'm sure you can imagine what it looks like with two wires connected to the top.
Last change for this update was a bit of a fix, as fatty here managed to bend one of the side steps when I was getting in!
Here it is removed to inspect the damage.
Looking underneath, it was easy to see why it had given up. In typical Land Rover fasion, it had slowly disintigrated.
And the passenger side wasnt much better.
And yes, I had noticed this before when I did the body lift etc... but they had been put on the to-do list and forgotten about.
Anyway, it didn't take too long to cut out the rusted support (As let's face it, there wasnt much left to cut out!
) and weld in some spare box section from the garage.And with a quick coat of etch primer and underseal, they are as good as new.
Thanks for reading.
Edited by JordanTurbo on Friday 9th September 15:19
Edited by JordanTurbo on Friday 9th September 16:56
Oh, and I just had a look at my previous post about the headlight conversion. And realised I didn't mention anything about fitting the side marker strips.
Basically the facelift headlights have an amber reflector at the side of the light unit. North American Discoverys had a bulb behind it to illuminate it with the side lights but, for whatever reason, Land Rover decided not to include that feature on British and European models.
I wanted to include the markers in my headlights, and bought two LED strips. Which I fitted when I was doing the Xenon bits. You can just about see them illuminated in this picture:

At night they give a more general glow across the whole strip.

As far as wiring them up went, I wanted to something a little different. Something that probably won't come as a surprise to anyone who has seen the halo DRLs on my e36 328i.
As well as coming on with the side lights as normal, I also wanted them to work as indicators as well. So they are connected to both the side light and indicator circuits. With the indicator overriding the side light function whenever it is used. Here is a video to show the result:
CLICK ME
I'm very happy with the way they work. The only change I want to make is to convert the standard indicator bulb from halogen to LED, so that they light up instantly the same as the markers and get rid of the slight timing mismatch.
Thanks for reading (again )
Basically the facelift headlights have an amber reflector at the side of the light unit. North American Discoverys had a bulb behind it to illuminate it with the side lights but, for whatever reason, Land Rover decided not to include that feature on British and European models.
I wanted to include the markers in my headlights, and bought two LED strips. Which I fitted when I was doing the Xenon bits. You can just about see them illuminated in this picture:
At night they give a more general glow across the whole strip.
As far as wiring them up went, I wanted to something a little different. Something that probably won't come as a surprise to anyone who has seen the halo DRLs on my e36 328i.
As well as coming on with the side lights as normal, I also wanted them to work as indicators as well. So they are connected to both the side light and indicator circuits. With the indicator overriding the side light function whenever it is used. Here is a video to show the result:
CLICK ME
I'm very happy with the way they work. The only change I want to make is to convert the standard indicator bulb from halogen to LED, so that they light up instantly the same as the markers and get rid of the slight timing mismatch.
Thanks for reading (again
)Edited by JordanTurbo on Friday 9th September 23:16
Thanks guys
I shall get onto writing the next update ASAP. In the mean time, here's a teaser


The lense is held on with sealant and some plastic tabs. Just put it in the oven at about 100°c then, after 5-10 minutes take it out and gently try to prise the lense out. If it's still stuck pop it back in for a bit longer.
Be gentle with the lense when you pull it off as it's only plastic and can crack. And when it comes to refitting, use a Butyl based sealant so they can be split the same way in future if required.
I shall get onto writing the next update ASAP. In the mean time, here's a teaser
Lorne1 said:
Great work here. Can I ask how you split the headlights?
The oven when the wife was out The lense is held on with sealant and some plastic tabs. Just put it in the oven at about 100°c then, after 5-10 minutes take it out and gently try to prise the lense out. If it's still stuck pop it back in for a bit longer.
Be gentle with the lense when you pull it off as it's only plastic and can crack. And when it comes to refitting, use a Butyl based sealant so they can be split the same way in future if required.
Hi guys. Time for another large update.
This time fitting some tasty new bits, in the form of a set of Hedman long tube exhaust headers.


And a pair of braided flexi sections and clamps to get them fitted the way I wanted.


As you can imagine. I wasted no time in getting the Disco up in the air ready for surgery.

To reveal the old standard system.

Didn't take long to remove the old stuff. No rusty or stubborn studs/nuts as everything had been off at the engine rebuild. (Engine bay needs a clean though)

And old vs new.


As you can probably tell from the above pictures, the plan was to re-use the existing "Y" section from the standard exhaust, and mate it to the new manifolds/flexis.
So the old exhaust was cut just behind the standard cats, which would now be fully removed to make way for the larger aftermarket manifolds.

Now when I say "remove the cats"..... they hadn't really had any catalytic function for a while.


Before I decided to go for the Hedmans, I was tempted to fit a set of P38 Range Rover manifolds in place of the standard D2 ones. They are a better design than the standard cast efforts, but after buying a set I quickly realised they would not fit inbetween the Discovery chassis rails.

Here is a comparison pic between the Discovery cast manifolds, the P38 tubular "shorties" and the Hedman full long tube headers.

So, onto fitting.
Manifolds test fitted to check clearance.


No worries there, so moved onto joining them to the rest of the exhaust system. And quickly realised it would need some work to get them to meet nicely.

So after a couple of hours of measureing, marking, cutting and tack welding, I had something that would work well.
** please excuse the lense flare in some of the upcoming pictures. A stray spark from either my welder or grinder, had managed to land on the camera lense of my phone while it was sat on my the work bench, and cracked it. **
**


I decided to just use the slip joints and clamps on the flexi sections, and totally do away with the ball and socket arrangement on the headers.
So these were perminently welded at required angle.

And then the rest of the modified Y-section was welded up. To leave me with a finished exhaust ready to fit.


That was refitted properly with gaskets (sorry forgot to take pics) and then I thought I may as well move onto releasing some more sound from the rest of the system while I had the tools out.
The big center silencer was removed.

The front and rear flanges were then cut off, and the small standard rear silencer was removed too.

These three parts were then welded together. To create a new center section. :mrgreen:


And you may be wondering what silencer is fitted at the back.....
Ermm.....

So the exhaust system from front to back, currenty consists of:
> Hedman long tube headers
> Decat
> Standard Y-section
> Small centre silencer
> Turn down rear pipe in place of silencer.
So yer. It's quite loud.
Here is a quick phone vid of how it sounds at the moment. I do have another with the go-pro on the back, but it's on the laptop at home.
https://www.youtube.com/watch?v=Y-du4rFcqxo
That's all for tonight.
As always thanks for reading, and all comments welcome.
This time fitting some tasty new bits, in the form of a set of Hedman long tube exhaust headers.
And a pair of braided flexi sections and clamps to get them fitted the way I wanted.
As you can imagine. I wasted no time in getting the Disco up in the air ready for surgery.
To reveal the old standard system.
Didn't take long to remove the old stuff. No rusty or stubborn studs/nuts as everything had been off at the engine rebuild. (Engine bay needs a clean though)
And old vs new.
As you can probably tell from the above pictures, the plan was to re-use the existing "Y" section from the standard exhaust, and mate it to the new manifolds/flexis.
So the old exhaust was cut just behind the standard cats, which would now be fully removed to make way for the larger aftermarket manifolds.
Now when I say "remove the cats"..... they hadn't really had any catalytic function for a while.
Before I decided to go for the Hedmans, I was tempted to fit a set of P38 Range Rover manifolds in place of the standard D2 ones. They are a better design than the standard cast efforts, but after buying a set I quickly realised they would not fit inbetween the Discovery chassis rails.
Here is a comparison pic between the Discovery cast manifolds, the P38 tubular "shorties" and the Hedman full long tube headers.
So, onto fitting.
Manifolds test fitted to check clearance.
No worries there, so moved onto joining them to the rest of the exhaust system. And quickly realised it would need some work to get them to meet nicely.
So after a couple of hours of measureing, marking, cutting and tack welding, I had something that would work well.
** please excuse the lense flare in some of the upcoming pictures. A stray spark from either my welder or grinder, had managed to land on the camera lense of my phone while it was sat on my the work bench, and cracked it.
**I decided to just use the slip joints and clamps on the flexi sections, and totally do away with the ball and socket arrangement on the headers.
So these were perminently welded at required angle.
And then the rest of the modified Y-section was welded up. To leave me with a finished exhaust ready to fit.
That was refitted properly with gaskets (sorry forgot to take pics) and then I thought I may as well move onto releasing some more sound from the rest of the system while I had the tools out.
The big center silencer was removed.
The front and rear flanges were then cut off, and the small standard rear silencer was removed too.
These three parts were then welded together. To create a new center section. :mrgreen:
And you may be wondering what silencer is fitted at the back.....
Ermm.....
So the exhaust system from front to back, currenty consists of:
> Hedman long tube headers
> Decat
> Standard Y-section
> Small centre silencer
> Turn down rear pipe in place of silencer.
So yer. It's quite loud.
Here is a quick phone vid of how it sounds at the moment. I do have another with the go-pro on the back, but it's on the laptop at home.
https://www.youtube.com/watch?v=Y-du4rFcqxo
That's all for tonight.
As always thanks for reading, and all comments welcome.
Edited by JordanTurbo on Wednesday 14th September 10:32
Better late than never. Here's the other video that I mentioned.
It's from my Gopro and outside the car, so much better quality than the first mobile phone one above.
https://www.youtube.com/watch?v=GsgzLhtlOro
It's from my Gopro and outside the car, so much better quality than the first mobile phone one above.
https://www.youtube.com/watch?v=GsgzLhtlOro
Cheers guys.
I'm really pleased with it, although I do have a slightly larger volume aftermarket silencer (still straight through) to swap for the little Land Rover one.

Not to make it too much quieter. Just to hopfully give the sound a bit more depth and tone, as at the moment it's quite raw and unrefined, if that makes sense.
I'm really pleased with it, although I do have a slightly larger volume aftermarket silencer (still straight through) to swap for the little Land Rover one.
Not to make it too much quieter. Just to hopfully give the sound a bit more depth and tone, as at the moment it's quite raw and unrefined, if that makes sense.
Update time.
Done a couple of bits recently. First one to replace the power steering box, as it was weeping a bit from the bottom seal. Got a good used box from a Landy forum member, and some new genuine fluid lines to go on at the same time while I had the system drained.

Old corroded pipes out.

New shiney pipes in.

Also decided to re-use the rubber mounts from the old pipes. Put them round a few spots where the pipes are prone to chaffing, so I have no issues later on.

While I was in there, I gave the arches a good jet wash out. Very happy with how my suspension parts are holding out, even with the off road use that my Disco gets whenever we have the chance. The Terrafirma dampers in the center are 3+ years old, and the coils are about a year old, still looking and performing good as new.

Since everything at the front end was apart, I took the chance to do a mod that I had been meaning to do for a while. Upgrading the standard Discovery air con fan, to the larger twin setup from the P38 shape Range Rover.

Won't make much difference over winter, but should help keep the engine temps nice and stable when the weather warms back up.
First up was to make some brackets to it could attach to the original fan mounts.

Then it just slotted in nicely with a little fettling of the air con dryer mounts.

Lastly, was a more fun mod at the other end.
As I've posted before, I have a 2" box reciever hitch in place of the original "farm plough" style tow bar and step. Which is normally fitted with a big tailgating deterrent.... I mean tow hook

Works great off road pulling people around, but less so for Ashton my 6 year old son, who normally uses the 6/7th row seats and struggled to climb in and out.
I wanted to make a removable step that would live in the hitch day to day, but still give the option of swapping back to the hook when we go playing. So I got had a measure up, and go some steel box to suit. Then set about cutting it into the appropriate parts.

Which would slot together something like so.

And out came Mr Mig.

Some more cutting/welding/grinding done. To remove the angle at the top and box in the ends of the step.


Happy with the shape, it had a couple of coats of zinc primer

Then a top coat of satin black and some grip tape on the treading surface. Finished.


And fitted.


Really happy with how it's turned out. Fits spot on and does exactly as it should, no more lifting the boy in and out any more.
That's all for now. Thanks for reading, and comments welcome as always.
Done a couple of bits recently. First one to replace the power steering box, as it was weeping a bit from the bottom seal. Got a good used box from a Landy forum member, and some new genuine fluid lines to go on at the same time while I had the system drained.
Old corroded pipes out.
New shiney pipes in.
Also decided to re-use the rubber mounts from the old pipes. Put them round a few spots where the pipes are prone to chaffing, so I have no issues later on.
While I was in there, I gave the arches a good jet wash out. Very happy with how my suspension parts are holding out, even with the off road use that my Disco gets whenever we have the chance. The Terrafirma dampers in the center are 3+ years old, and the coils are about a year old, still looking and performing good as new.
Since everything at the front end was apart, I took the chance to do a mod that I had been meaning to do for a while. Upgrading the standard Discovery air con fan, to the larger twin setup from the P38 shape Range Rover.
Won't make much difference over winter, but should help keep the engine temps nice and stable when the weather warms back up.
First up was to make some brackets to it could attach to the original fan mounts.
Then it just slotted in nicely with a little fettling of the air con dryer mounts.
Lastly, was a more fun mod at the other end.
As I've posted before, I have a 2" box reciever hitch in place of the original "farm plough" style tow bar and step. Which is normally fitted with a big tailgating deterrent.... I mean tow hook
Works great off road pulling people around, but less so for Ashton my 6 year old son, who normally uses the 6/7th row seats and struggled to climb in and out.
I wanted to make a removable step that would live in the hitch day to day, but still give the option of swapping back to the hook when we go playing. So I got had a measure up, and go some steel box to suit. Then set about cutting it into the appropriate parts.
Which would slot together something like so.
And out came Mr Mig.
Some more cutting/welding/grinding done. To remove the angle at the top and box in the ends of the step.
Happy with the shape, it had a couple of coats of zinc primer
Then a top coat of satin black and some grip tape on the treading surface. Finished.
And fitted.
Really happy with how it's turned out. Fits spot on and does exactly as it should, no more lifting the boy in and out any more.
That's all for now. Thanks for reading, and comments welcome as always.
Slashmb said:
Just read from the start.
Epic thread. Well done that man.
Wish I had the knowledge to do something like this.
Any idea what you have spent in total on the current one?
Thankyou. Epic thread. Well done that man.
Wish I had the knowledge to do something like this.
Any idea what you have spent in total on the current one?
Not sure how much I've spent in total on the current Discovery, I normally try to ignore that side of my projects
Obviously there is a good chunk in the engine build, but I don't mind that. Being a common Rover V8, I see it as a bit of an investment that I can keep for future projects.
My plan is to run the Disco until I've had enough of it, then break it for spares. Sell all the good bits that I've fitted over the years, but not the engine.
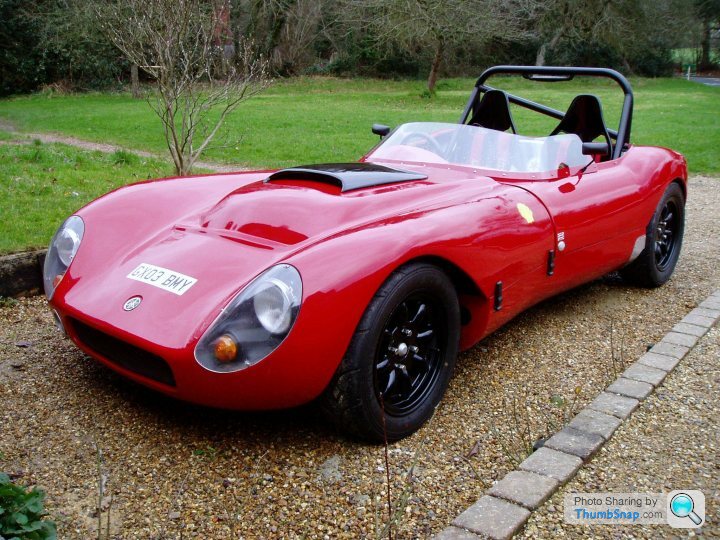
The V8 can then be partialy rebuilt to suit use in a car - new Inlet manifold with shorter runners, probably individual throttle bodies, fast road spec cam, aftermarket management etc... Then the plan is to slot it into a kit car

Currently top of the list is somthing like a Fisher Fury or Sylva Phoenix


HarryW said:
And perhaps a different cam as I don't doubt the Disco one is a stump puller for more low down torque that sports car revvy...
JordanTurbo said:
The V8 can then be partialy rebuilt to suit use in a car - new Inlet manifold with shorter runners, probably individual throttle bodies, fast road spec cam aftermarket management etc... Then the plan is to slot it into a kit car
Yes, the current cam is very much aimed at low down grunt.
I would definatly swap it for something more suited to a sports car application
JordanTurbo said:
HarryW said:
And perhaps a different cam as I don't doubt the Disco one is a stump puller for more low down torque that sports car revvy...
JordanTurbo said:
The V8 can then be partialy rebuilt to suit use in a car - new Inlet manifold with shorter runners, probably individual throttle bodies, fast road spec cam aftermarket management etc... Then the plan is to slot it into a kit car
Yes, the current cam is very much aimed at low down grunt.
I would definatly swap it for something more suited to a sports car application
Update time. Done some more exhaust work recently.
As you'll probably remember from previous posts. When I fitted my Hedmans, I fitted the old rear box in place of the centre silencer.

It was only temporary though, and I bought a new silencer to replace it. Still a straight through design, but with a bit more volume for a slightly more refined tone.
With the old box removed, the new one could be mocked up.


Happy with fittment, it was taken off to be welded properly.

Along with the new silencer, I also bought a Wideband AFR gauge and sensor to keep an eye on the fueling since fitting the long tubes.

The only problem was that the illumination was yellow which wouldn't match the factory Land Rover green.

I couldn't have that now, so I got some green acetate film to lay over the display.

The standard tinted dial was cut out

And the green was stick to the back.

With the view from the front like so.

So when powered back up. The gauge looks like this.

With that done it was back onto the exhaust to sort out fittment of the O2 sensor.
A hole was drilled ready for the threaded bung to be welded on.

The bung itself was shortened and contoured, to match the exhaust tubing and set the correct depth of the sensor.

And with that welded up, the two parts of the exhaust were ready to be refitted.

But before that there was some work to be done on the transmission, but that's an update for tomorrow.
Thanks for reading
As you'll probably remember from previous posts. When I fitted my Hedmans, I fitted the old rear box in place of the centre silencer.
It was only temporary though, and I bought a new silencer to replace it. Still a straight through design, but with a bit more volume for a slightly more refined tone.
With the old box removed, the new one could be mocked up.
Happy with fittment, it was taken off to be welded properly.
Along with the new silencer, I also bought a Wideband AFR gauge and sensor to keep an eye on the fueling since fitting the long tubes.
The only problem was that the illumination was yellow which wouldn't match the factory Land Rover green.
I couldn't have that now, so I got some green acetate film to lay over the display.
The standard tinted dial was cut out
And the green was stick to the back.
With the view from the front like so.
So when powered back up. The gauge looks like this.
With that done it was back onto the exhaust to sort out fittment of the O2 sensor.
A hole was drilled ready for the threaded bung to be welded on.
The bung itself was shortened and contoured, to match the exhaust tubing and set the correct depth of the sensor.
And with that welded up, the two parts of the exhaust were ready to be refitted.
But before that there was some work to be done on the transmission, but that's an update for tomorrow.
Thanks for reading
Gassing Station | Readers' Cars | Top of Page | What's New | My Stuff