Discussion


Right the money has now been saved for the turbo swap. I also got a few odd bits done in the meantime..
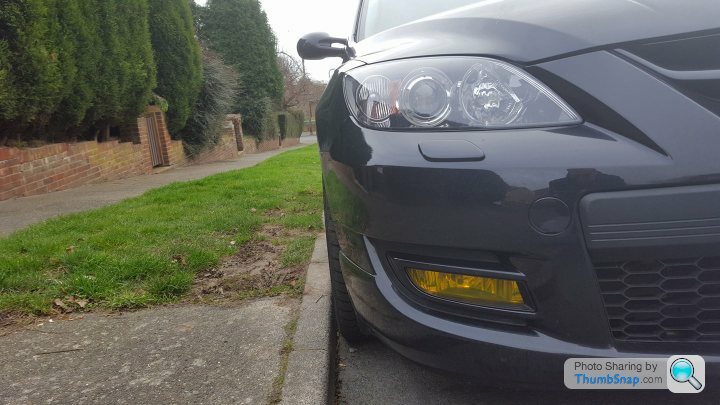
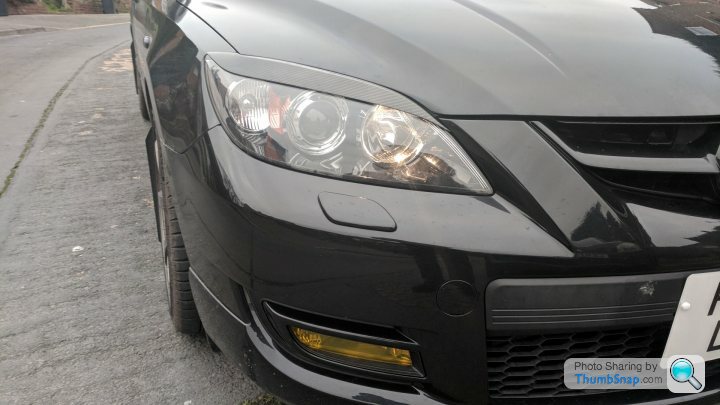
Yellow fogs:
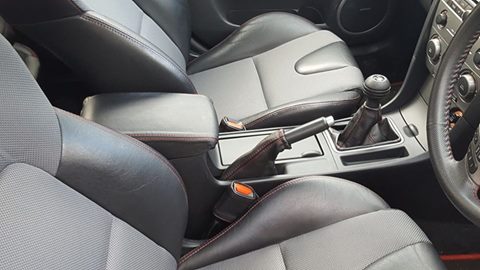
Added some additional leather to the interior. This took a bit of work to fit correct.
Before:
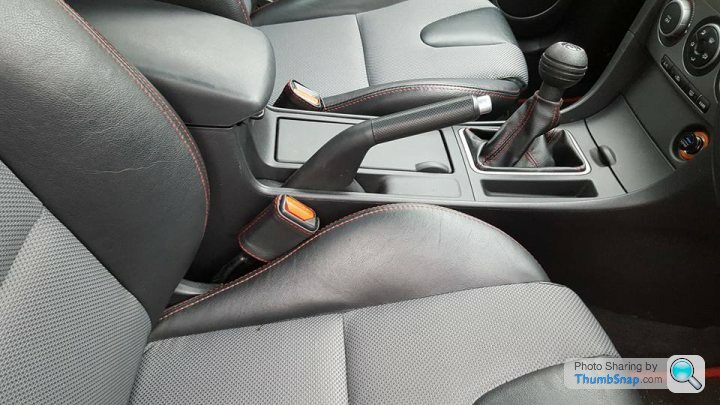
After:
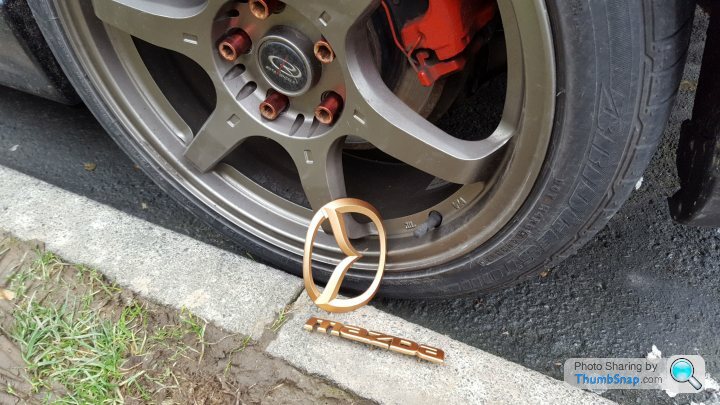
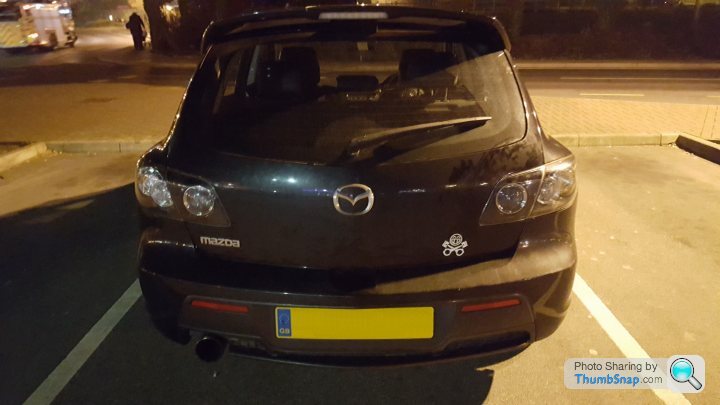
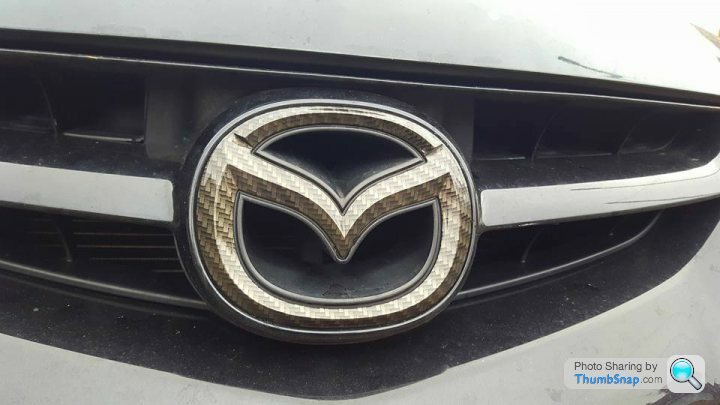
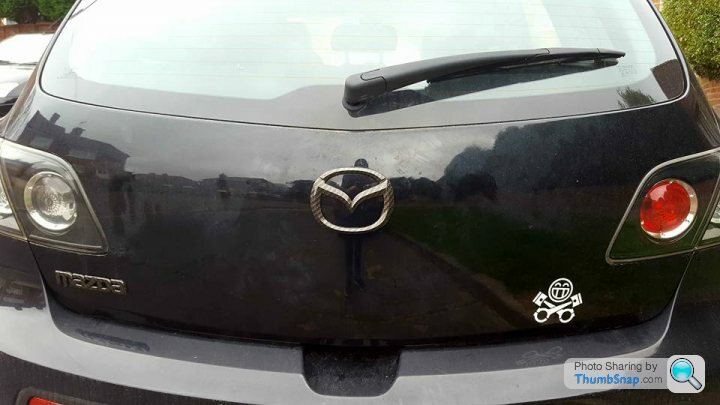
I plastidipped my rear badges bronze but quickly changed them back as they look more copper then bronze:
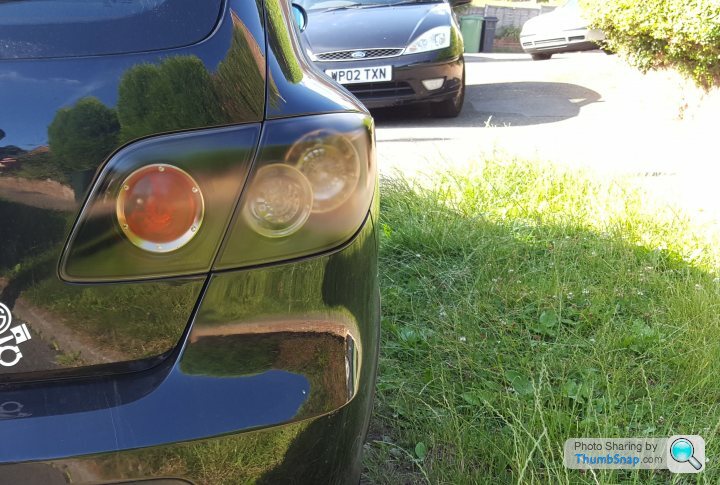
Clear rear light but removed as didn't fit correct:
I also tried fitting an RX8 vent but they don't fit either
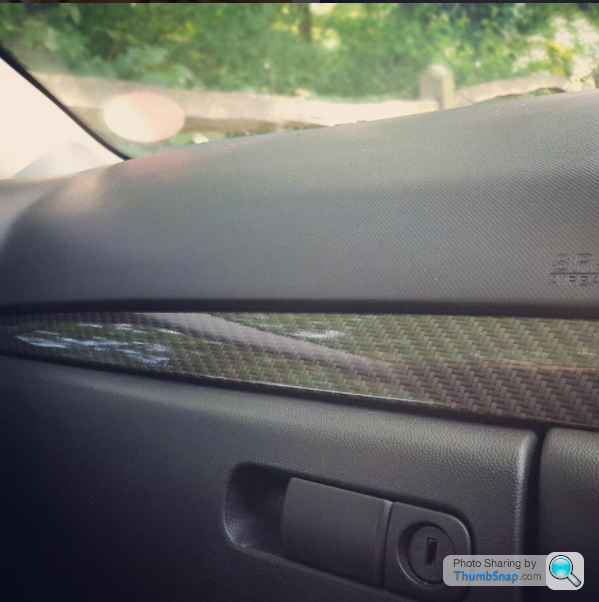
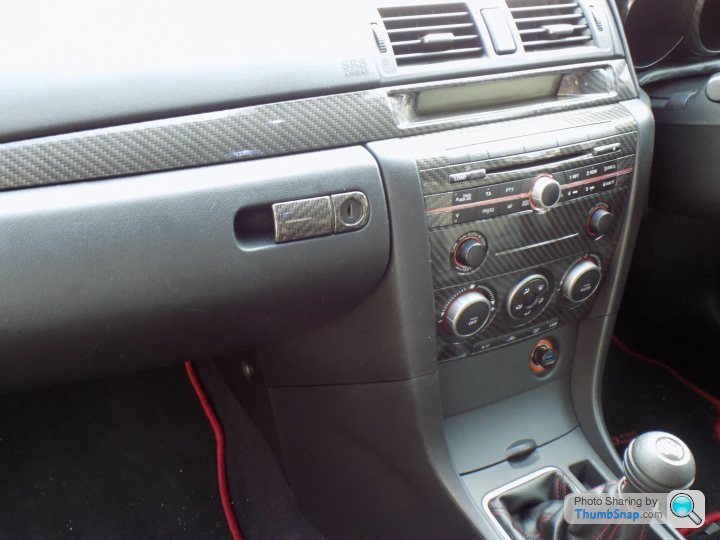
Thought about leather trimming the bottom half of the dash maybe one day:

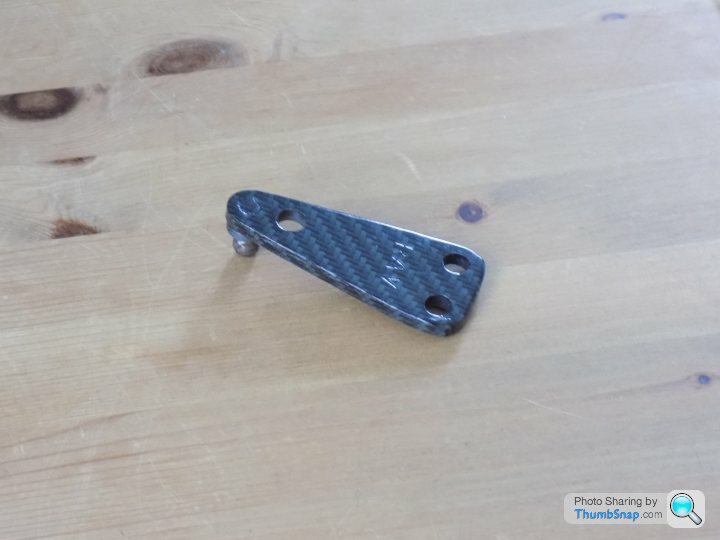
EBCS test fitting:
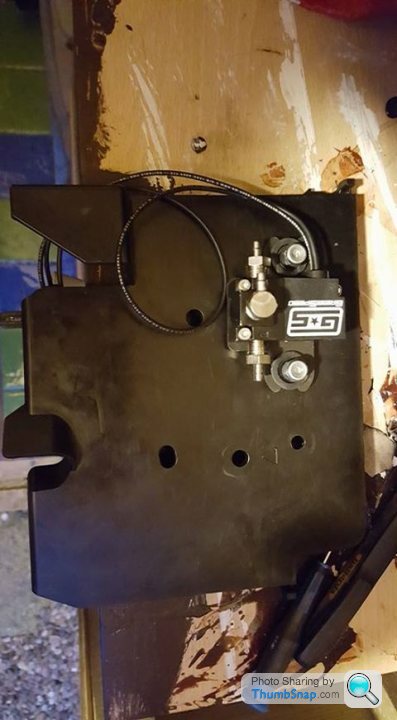
Next jobs are to get the badges hydro dipped carbon fibre/bronze and the battery lid, panel and the fuse box cover a normal carbon fibre colour. This is just to see what it looks like before I consider doing other car parts plus I need to get the panel behind the EBCS done before it gets permanently fitted when the new turbo goes on..
Yellow fogs:
Added some additional leather to the interior. This took a bit of work to fit correct.
Before:
After:
I plastidipped my rear badges bronze but quickly changed them back as they look more copper then bronze:
Clear rear light but removed as didn't fit correct:
I also tried fitting an RX8 vent but they don't fit either
Thought about leather trimming the bottom half of the dash maybe one day:
EBCS test fitting:
Next jobs are to get the badges hydro dipped carbon fibre/bronze and the battery lid, panel and the fuse box cover a normal carbon fibre colour. This is just to see what it looks like before I consider doing other car parts plus I need to get the panel behind the EBCS done before it gets permanently fitted when the new turbo goes on..
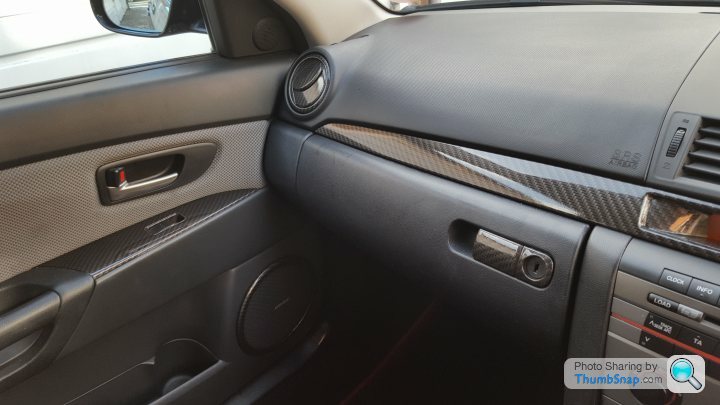
A bit more leather and some hydro dipping done:
 [url]
[url]
 |http://thumbsnap.com/ZfHlkn2l[/url][url]
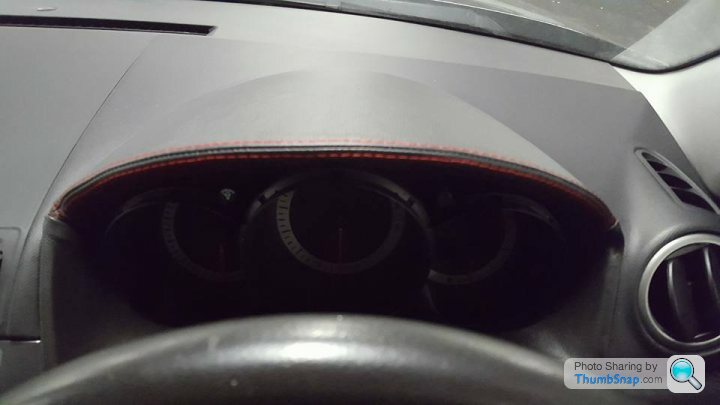
The leather speedo surround was fiddly to fit but it looks 100% better than oem
 |http://thumbsnap.com/x9I1SnrD[/url][url]
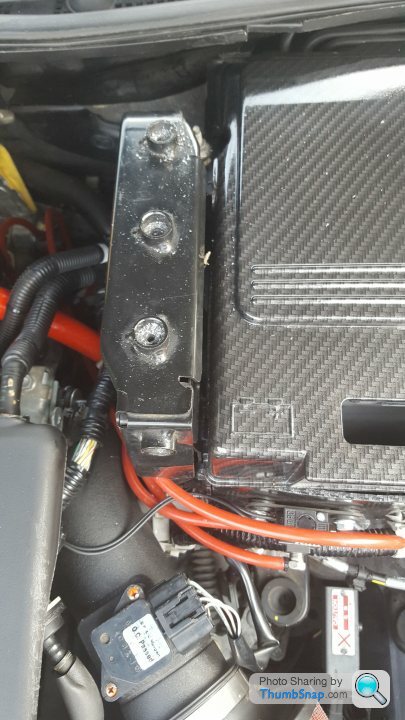
The battery box lid isn't 100% perfect so may get it re-done. The fuse box will be done but had to get a spare cover 1st.
 |http://thumbsnap.com/BjJfZaln[/url]
Still not too happy with the gear changes so will switch to the above gearbox oil shortly. I also removed the seatbelt covers as they are getting annoying. More importantly it's time to get the car booked in for the turbo change!!
[url]|http://thumbsnap.com/ZfHlkn2l[/url][url]The leather speedo surround was fiddly to fit but it looks 100% better than oem
|http://thumbsnap.com/x9I1SnrD[/url][url]The battery box lid isn't 100% perfect so may get it re-done. The fuse box will be done but had to get a spare cover 1st.
|http://thumbsnap.com/BjJfZaln[/url]Still not too happy with the gear changes so will switch to the above gearbox oil shortly. I also removed the seatbelt covers as they are getting annoying. More importantly it's time to get the car booked in for the turbo change!!
I also got the car cleaned for the 1st time in ages. Got a few fancy shots done with a new camera I got myself:
 [url]
[url]
 |http://thumbsnap.com/EzrKNK8J[/url][url]
 |http://thumbsnap.com/swFT7agu[/url][url]
|http://thumbsnap.com/EzrKNK8J[/url]
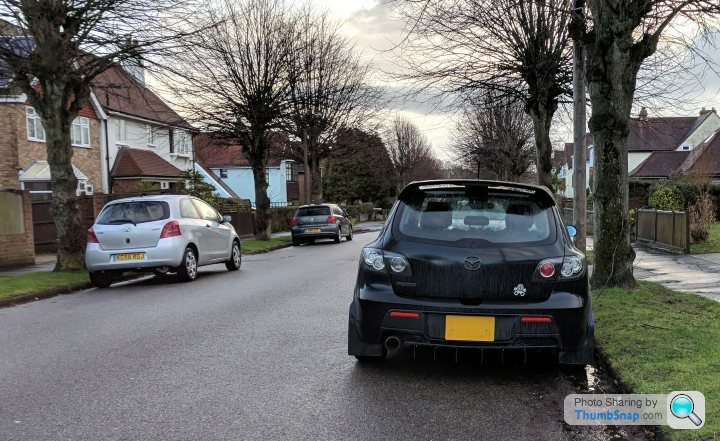
The car isn't looking much like a sleeper anymore..
[url]|http://thumbsnap.com/EzrKNK8J[/url][url]|http://thumbsnap.com/swFT7agu[/url][url]|http://thumbsnap.com/EzrKNK8J[/url]The car isn't looking much like a sleeper anymore..
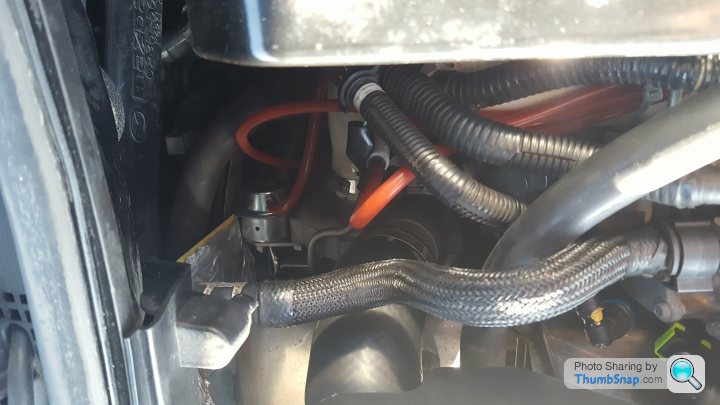
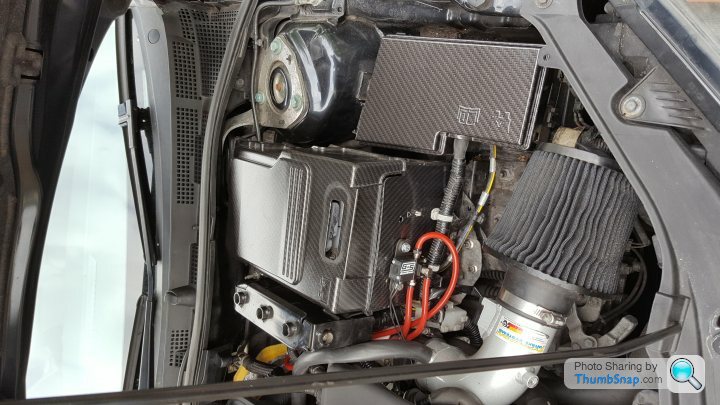
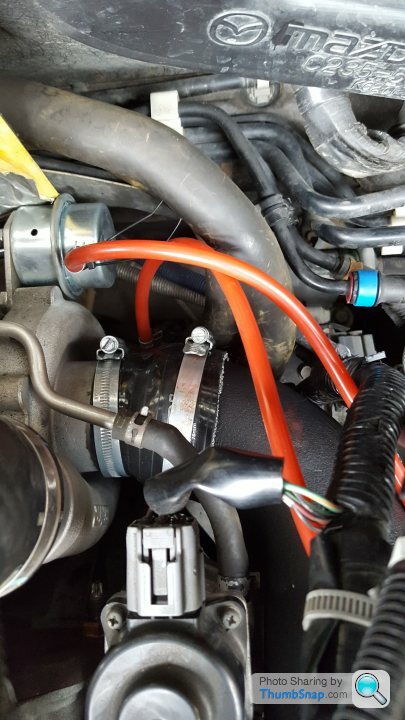
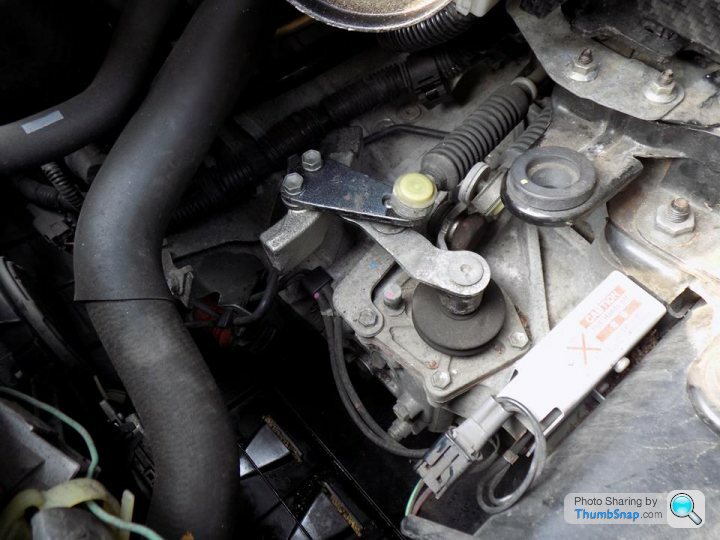
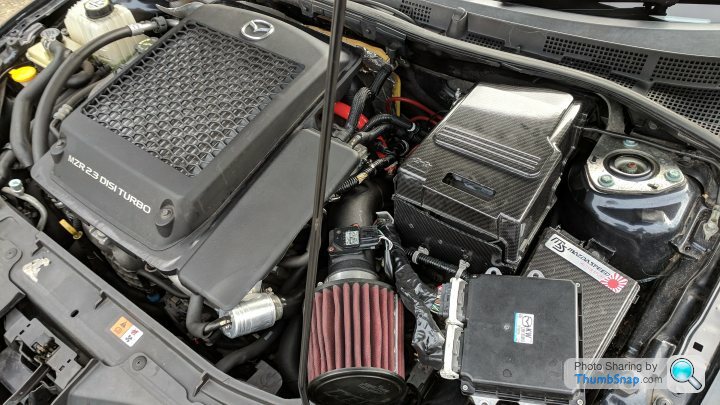
BNR S3 turbo now fitted along with the Grimmspeed boost controller. I also managed to get a Forge V2 Recirc valve at a reasonable price!
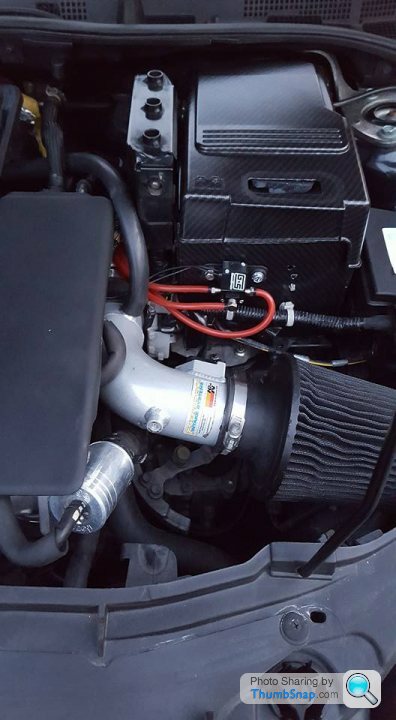
The red lines are now all clamped/tied down since the below was taken..
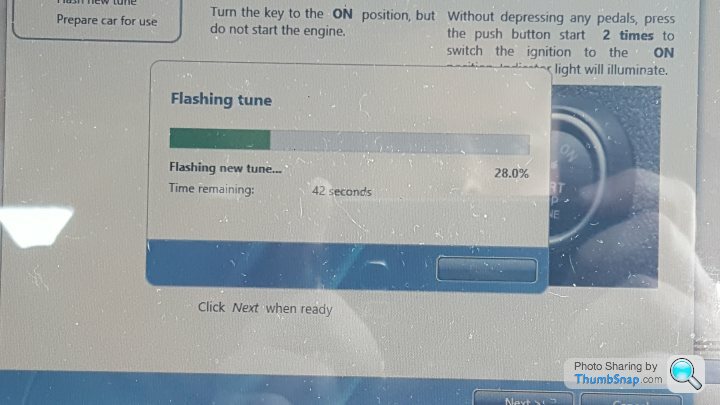
New base map added:
A picture of the old K04 turbo:
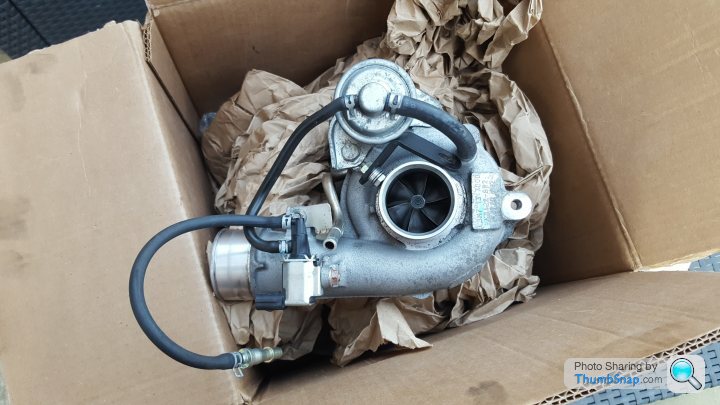
The car feels much better to drive now - no more smoke worries and more power on tap!!
Now time to get some more logs and to get some more mapping done..
The red lines are now all clamped/tied down since the below was taken..
New base map added:
A picture of the old K04 turbo:
The car feels much better to drive now - no more smoke worries and more power on tap!!
Now time to get some more logs and to get some more mapping done..
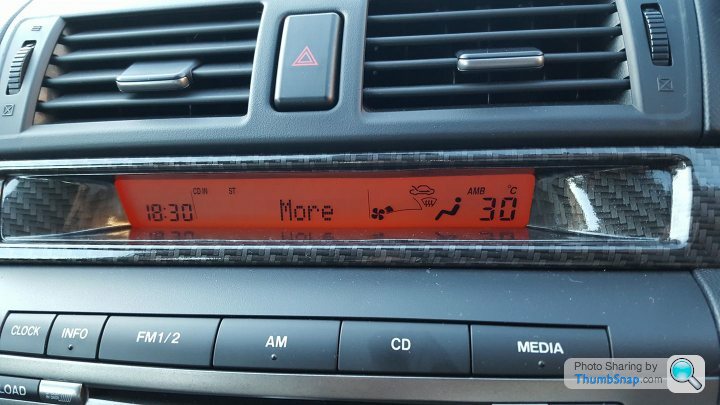
I decided to make the car a bit more interesting so got some more dipping done. There's a bit of an odd bow in the display surround so I might change this at a later date.:
 [url]
[url]
 |https://thumbsnap.com/MnAKC1lU[/url][url]
 |https://thumbsnap.com/SEMwmFo8[/url][url]
 |https://thumbsnap.com/2iKlM1RR[/url]
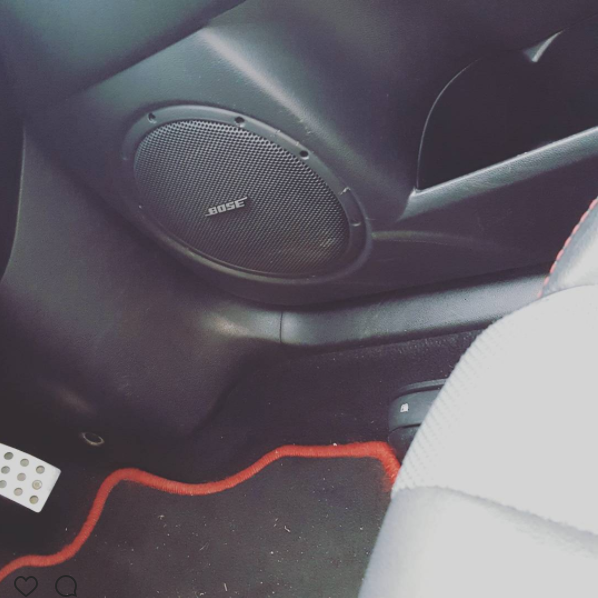
I plan to get the speaker surrounds done next - here's a picture of them removed - please excuse the Instagram filter as Photobuckets taking ages to load:
I'm also going to get the battery tray re-done so it has some more shine to match the fuse box cover.
Mapping is going well. I found a pic that shows the differences in turbo size. The far left is the stock K04, with the BNR S3 in the middle and BNR S4 on the right:
I did notice a jolt under boost on a spirited drive. This could be down to the fuel I was using at the time (BP 97) or a boost leak. By chance someone mentioned there was a filter for sale on Ebay for £135. The price was very cheap for what it is so here it is:
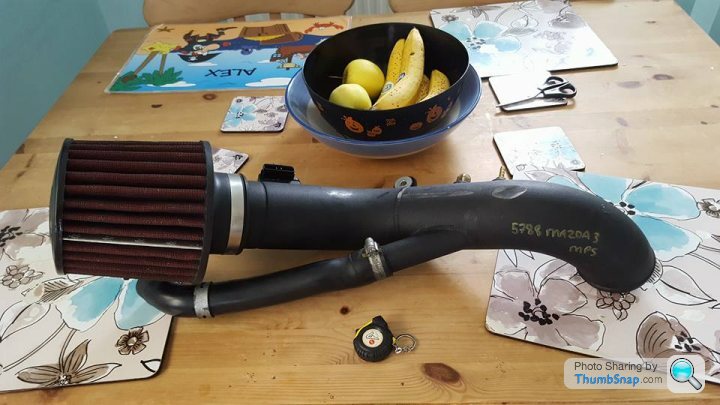
It turns out to be a 3" HTP intake and includes the MAF housing. These usually retail for well over £300. It's a one piece intake so less chances of boost leaks. My current intake is 2.5" so it may also give me a small increase in power. The only thing it didn't come with is a reducer pipe for the turbo so I have one on order along with an EGR delete kit.
I've done a few more cosmetic bits as can't spent too much as have a holiday coming up. I turned my attention to the lights. One of the front ones was starting to yellow so I thought some eye brow things may cover them up. Here's a test fit:
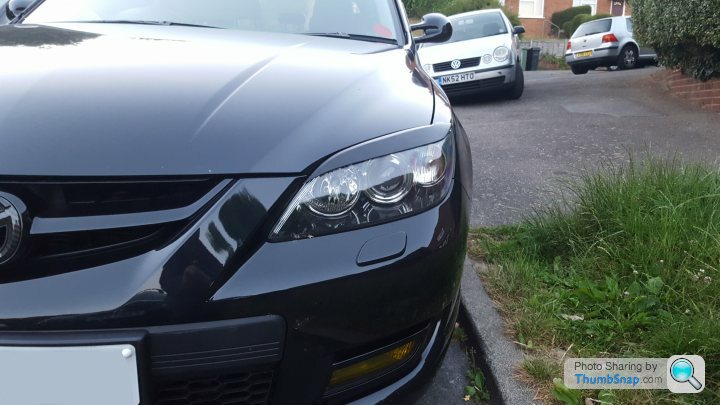
In their current state they are just unpainted black fibreglass so I'm going to get them dipped the same colour as the badges. I had another look at the lights and one's too yellow to just cover up so I had a go at restoring it with an off the shelf kit:
Before:
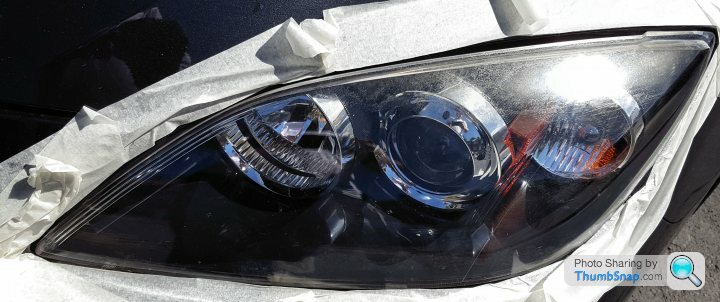
During:

After:
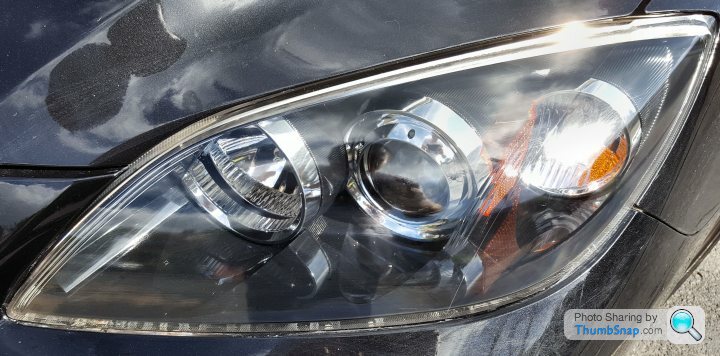
It was my 1st attempt at something like this and was all done by hand. The finish isn't perfect so I may go over them again another time to try and clear out some of the remaining marks.
I also wanted to do something with the rear lights and decided a light tint would make them look a bit nicer. I started with some fly eye stuff but didn't like the finish so that's confined to the middle brake light for now:
 |https://thumbsnap.com/2NHYNWr6[/url]
I took some brave pills and bought some tinting spay:

5 layers later (still drying off):
 [url]
[url]
It's an improvement but there's like a frost effect at the moment so when it dries out I'll attempt to smooth it out with some t-cut wax/polish. If it still looks naff then I will revert back to OEM and get a tinting company to lightly tint them for me at a later date.
I had a bit of spare time this weekend so also fitted the front mud flaps I bought a while ago. The rears will be added at a later date as you have to take the wheels off to do them ones.They were a complete nightmare to fit but they're on now!!
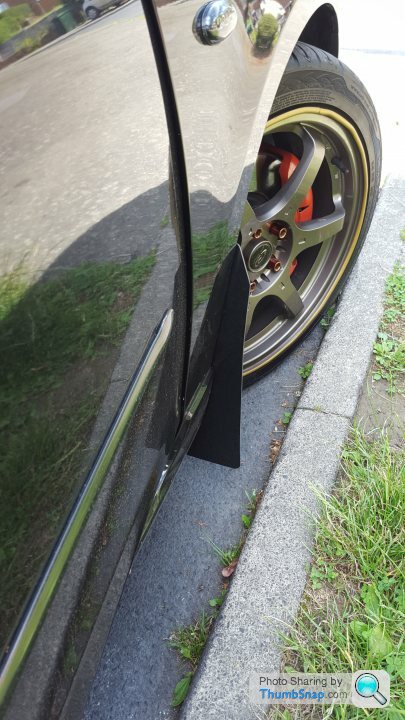
Hopefully they will stop some further stones or grit from flicking up and marking the paintwork..
[url]|https://thumbsnap.com/MnAKC1lU[/url][url]|https://thumbsnap.com/SEMwmFo8[/url][url]|https://thumbsnap.com/2iKlM1RR[/url]I plan to get the speaker surrounds done next - here's a picture of them removed - please excuse the Instagram filter as Photobuckets taking ages to load:
I'm also going to get the battery tray re-done so it has some more shine to match the fuse box cover.
Mapping is going well. I found a pic that shows the differences in turbo size. The far left is the stock K04, with the BNR S3 in the middle and BNR S4 on the right:
I did notice a jolt under boost on a spirited drive. This could be down to the fuel I was using at the time (BP 97) or a boost leak. By chance someone mentioned there was a filter for sale on Ebay for £135. The price was very cheap for what it is so here it is:
It turns out to be a 3" HTP intake and includes the MAF housing. These usually retail for well over £300. It's a one piece intake so less chances of boost leaks. My current intake is 2.5" so it may also give me a small increase in power. The only thing it didn't come with is a reducer pipe for the turbo so I have one on order along with an EGR delete kit.
I've done a few more cosmetic bits as can't spent too much as have a holiday coming up. I turned my attention to the lights. One of the front ones was starting to yellow so I thought some eye brow things may cover them up. Here's a test fit:
In their current state they are just unpainted black fibreglass so I'm going to get them dipped the same colour as the badges. I had another look at the lights and one's too yellow to just cover up so I had a go at restoring it with an off the shelf kit:
Before:
During:
After:
It was my 1st attempt at something like this and was all done by hand. The finish isn't perfect so I may go over them again another time to try and clear out some of the remaining marks.
I also wanted to do something with the rear lights and decided a light tint would make them look a bit nicer. I started with some fly eye stuff but didn't like the finish so that's confined to the middle brake light for now:
|https://thumbsnap.com/2NHYNWr6[/url]I took some brave pills and bought some tinting spay:
5 layers later (still drying off):
[url]It's an improvement but there's like a frost effect at the moment so when it dries out I'll attempt to smooth it out with some t-cut wax/polish. If it still looks naff then I will revert back to OEM and get a tinting company to lightly tint them for me at a later date.
I had a bit of spare time this weekend so also fitted the front mud flaps I bought a while ago. The rears will be added at a later date as you have to take the wheels off to do them ones.They were a complete nightmare to fit but they're on now!!
Hopefully they will stop some further stones or grit from flicking up and marking the paintwork..
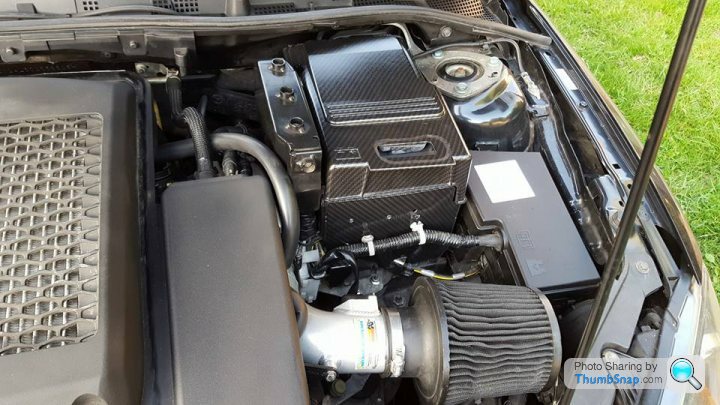
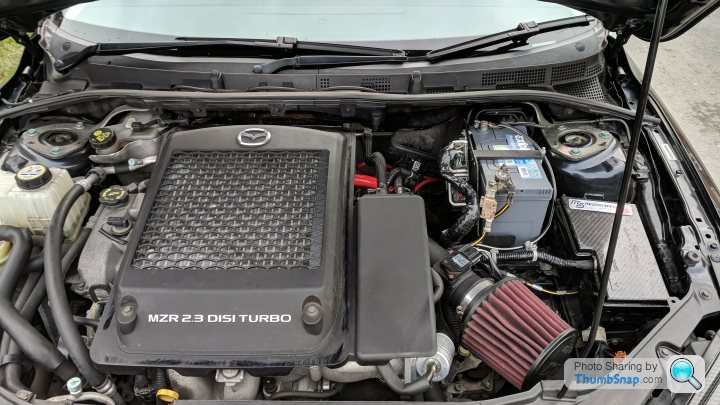
Time to fit the intake. Getting the old one out wasn't so bad as it separates into pieces:

Fitting the new one though..
Being one piece and and an inch wider proved problematic. Due to the weather not being on my side a job I thought may take a few hours took most of the day
Here's a comparison of old and new together:

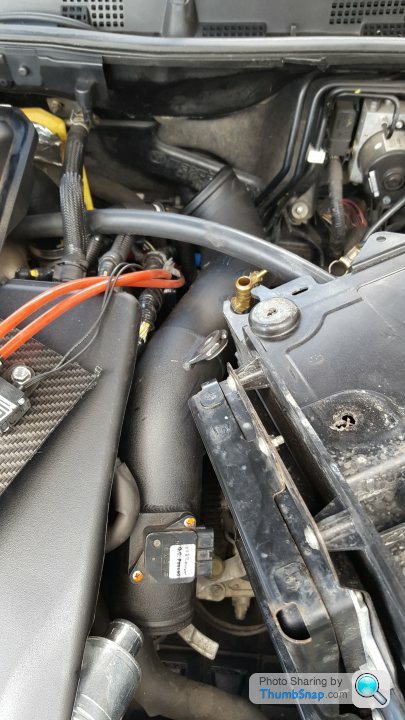
It turns out that the reducer pipe I got was too long so it needed to be cut down. In fact a lot of the pipes/lines were now at the wrong size so I ended up cutting them down. These included the piper going to the rocker at the top of the engine from the intake, one of the lines going to the boost controller and the tube that connects the intake to the forge v2.
After a poor attempt of cutting and slicing my thumb in the process - here's a questionable reducer pipe:
Hopefully it won't cause any boost leaks but it's on there very tight. I'll replace it with a proper one when I get the chance.
Most of the space issues are down to the ECU being securely stuck to the battery box with rivets. If it just unclipped then life would be so much easier..
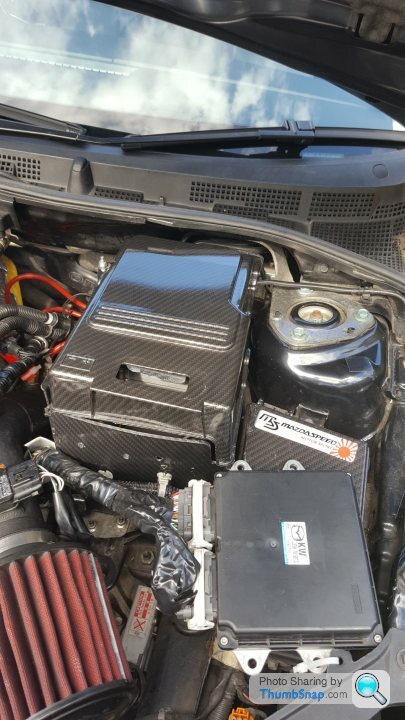
All fitted:
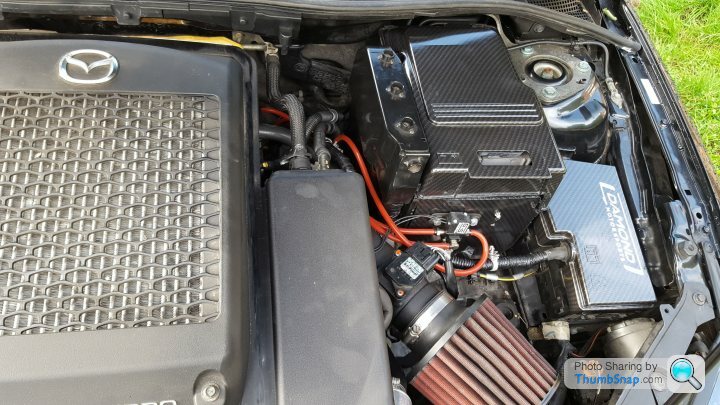
I just need to do the 40 mile run in and give it some ecu logs now it's been flashed with new maf settings. Touch wood there will be no boost leaks and a little more power I used a virtual dyno on a previous run and it calculated the power to be 311bhp!! You might notice that the battery box has moved a bit. I drilled out the underneath to give some more clearence as it was evident the last owner of the intake had it scrub against the ECU cover.
I'm now going to add an ecu relocation kit and smaller battery tray to my future mods list. I can then get a garage to fit the VVT kit along with catch cans, an EGR removal kit and the small battery/ecu relocation at the same time to save me doing it.. It will then assist if I decide to go big turbo later on down the line.
Fitting the new one though..
Being one piece and and an inch wider proved problematic. Due to the weather not being on my side a job I thought may take a few hours took most of the day
Here's a comparison of old and new together:
It turns out that the reducer pipe I got was too long so it needed to be cut down. In fact a lot of the pipes/lines were now at the wrong size so I ended up cutting them down. These included the piper going to the rocker at the top of the engine from the intake, one of the lines going to the boost controller and the tube that connects the intake to the forge v2.
After a poor attempt of cutting and slicing my thumb in the process - here's a questionable reducer pipe:
Hopefully it won't cause any boost leaks but it's on there very tight. I'll replace it with a proper one when I get the chance.
Most of the space issues are down to the ECU being securely stuck to the battery box with rivets. If it just unclipped then life would be so much easier..
All fitted:
I just need to do the 40 mile run in and give it some ecu logs now it's been flashed with new maf settings. Touch wood there will be no boost leaks and a little more power
I used a virtual dyno on a previous run and it calculated the power to be 311bhp!! You might notice that the battery box has moved a bit. I drilled out the underneath to give some more clearence as it was evident the last owner of the intake had it scrub against the ECU cover.I'm now going to add an ecu relocation kit and smaller battery tray to my future mods list. I can then get a garage to fit the VVT kit along with catch cans, an EGR removal kit and the small battery/ecu relocation at the same time to save me doing it.. It will then assist if I decide to go big turbo later on down the line.
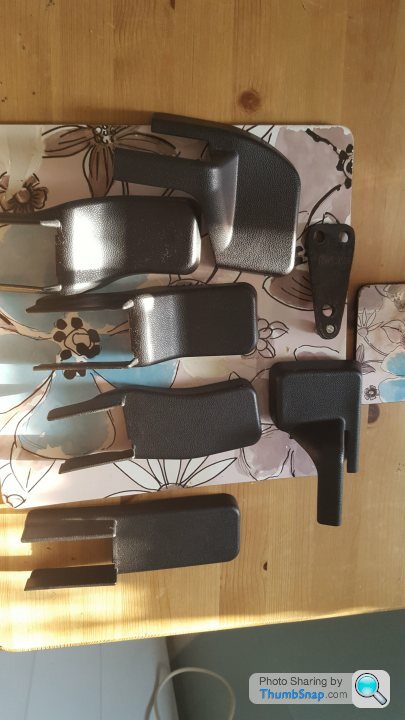
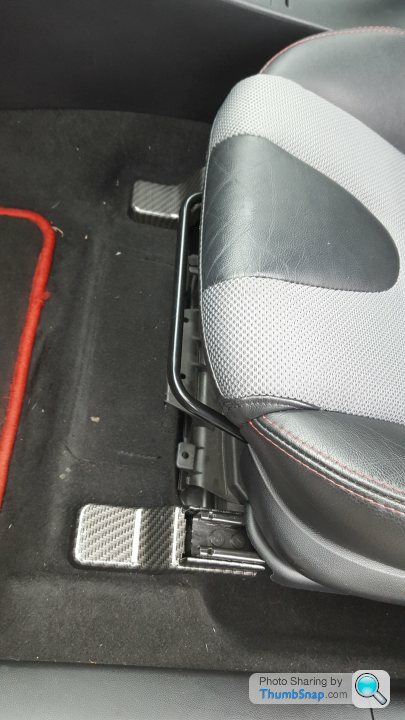
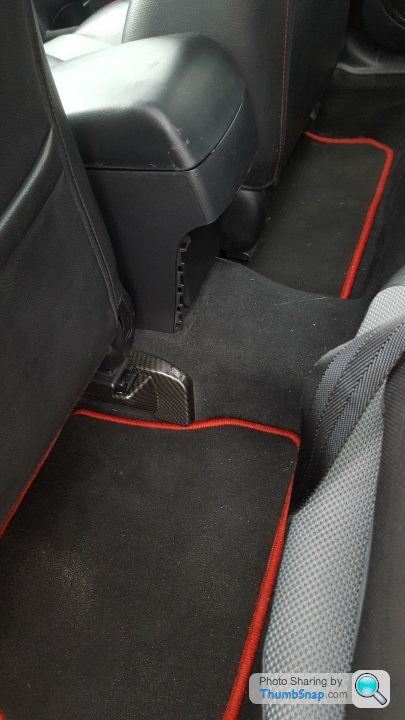
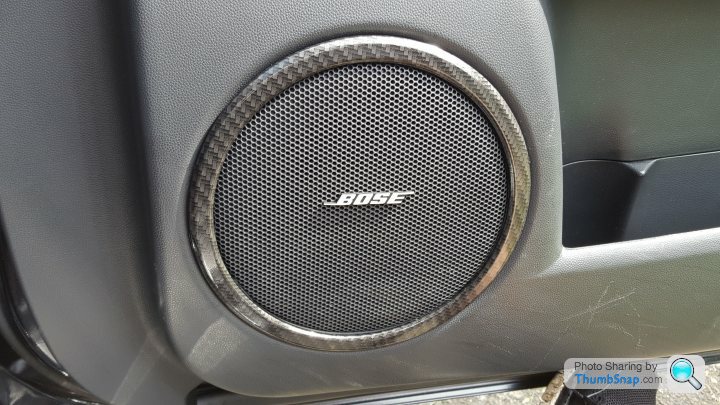
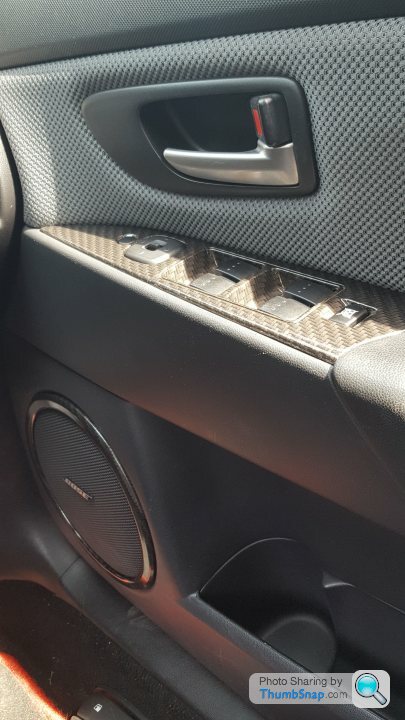
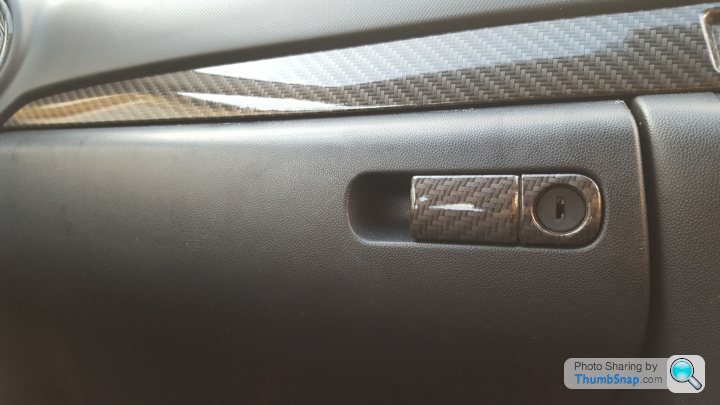
I got some more parts dipped - this time it was the window switches, glove box handle and some plastics under the seats. The speaker surrounds were a pain to put back and there's a slight issue with one of the trims under the seats but it's not really noticable:
Under seat trim taken off:
Finished pics:
Speaker surround:
Switches and other bits:
 [url]
[url]
 |https://thumbsnap.com/0tTNZDDh[/url]
Under seat trim taken off:
Finished pics:
Speaker surround:
Switches and other bits:
[url]|https://thumbsnap.com/0tTNZDDh[/url]I did originally have a black coupler for the intake but change it to a red one - this caused problems as the intake now rubbed on the ecu case and I kept having trouble with the clips and had a potential boost leak so I ended up changing it back. One issue with the Europe MPS is that the ecu is stuck to the battery tray and you can't easily detach it so every time I need to get to the intake I have to keep the battery tray in the engine bay with the ECU attached and wiggle it around. This was a massive PITA so it was time for some action.
1st off it's time to drill out the rivets (I've never drilled out rivets before):

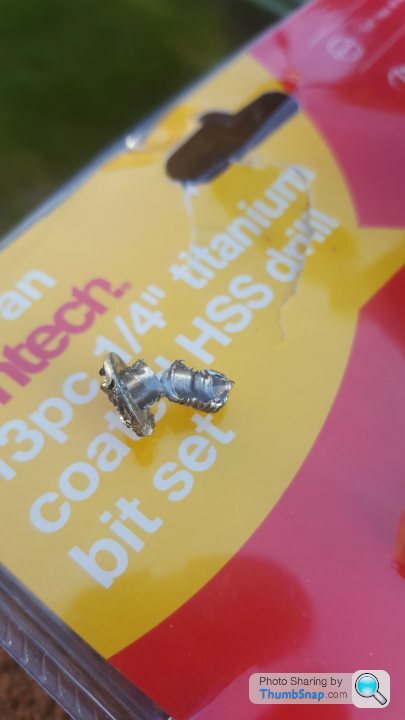
There were a few rivets that were a pain but generally it went ok.. better than I thought it would be
Partial liberation:

i also moved the boost controller nearer to the turbo so it's a bit more tucked away. I did find a really good place for the ECU but there's a risk of the wires catching and rubbing when the bonnet was shut down:

I ended up placing the ecu on the fuse box for now:
Luckily shortly after doing this Corksport announced a new battery tray that fits a 51r battery and relocates the ECU to the battery tray - I plan to get this in the future and get the fuse box re-dipped as I kind of scratched it getting annoyed with the battery tray. Now it's so much easier to get access to the intake and turbo - a job such as removing and re-fitting an intake that took me a good few hours now can be done in around 45 mins!!
1st off it's time to drill out the rivets (I've never drilled out rivets before):
There were a few rivets that were a pain but generally it went ok.. better than I thought it would be
Partial liberation:
i also moved the boost controller nearer to the turbo so it's a bit more tucked away. I did find a really good place for the ECU but there's a risk of the wires catching and rubbing when the bonnet was shut down:
I ended up placing the ecu on the fuse box for now:
Luckily shortly after doing this Corksport announced a new battery tray that fits a 51r battery and relocates the ECU to the battery tray - I plan to get this in the future and get the fuse box re-dipped as I kind of scratched it getting annoyed with the battery tray. Now it's so much easier to get access to the intake and turbo - a job such as removing and re-fitting an intake that took me a good few hours now can be done in around 45 mins!!
Edited by maxdb on Friday 22 September 22:12
A few more fixes and wip:
I got another crack in the front tyre and I seem to have a slow puncture in one of the rears so I shelled out on a set of 4 PS4's!!I ordered a difference size tyre this time - 225/40/18 (the ones on the car are the standard fitment 215/45/18's). Whilst I do like the Rainsports the sidewalls don't appear to be very strong. I mounted a kerb at low speed to stop some numpty running into me head on down my road and it managed to put a chunk in it. Hopefully the PS4's will hold up better. Currently they're stored in the kitchen with some other car bits:


What I plan to do is swap the tyres over and keep 2 old tyres so they can be fitted to my old wheels for when I decide to refurb the ones currently on the car.
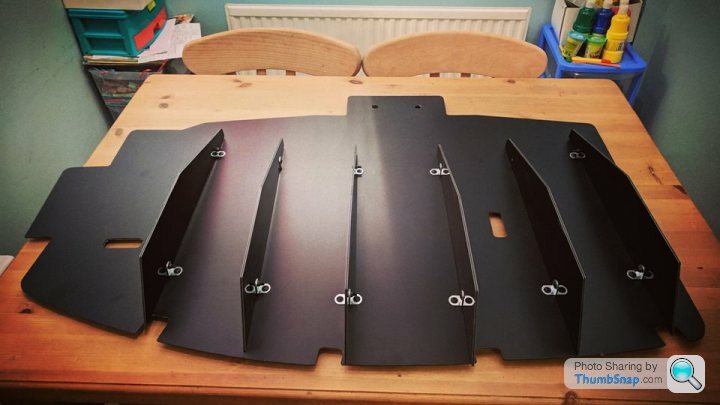
I've stopped using rimblades as they keep falling off after a while and the glue makes a mess. I managed to win some new Alloy Gators from Ebay so I'll give them a try. The under tray under the car was also bowing where it's obviously scraped on something and unclipped itself. Luckily I had some bolts that had the right fitment laying about in my shed so now it looks a bit more normal underneath. I also removed the tint on the rear lights as I didn't like the results they gave. Pic of the under tray fixed:

Some more interior stripping before they are sent off for more dipping:

I got another crack in the front tyre and I seem to have a slow puncture in one of the rears so I shelled out on a set of 4 PS4's!!I ordered a difference size tyre this time - 225/40/18 (the ones on the car are the standard fitment 215/45/18's). Whilst I do like the Rainsports the sidewalls don't appear to be very strong. I mounted a kerb at low speed to stop some numpty running into me head on down my road and it managed to put a chunk in it. Hopefully the PS4's will hold up better. Currently they're stored in the kitchen with some other car bits:
What I plan to do is swap the tyres over and keep 2 old tyres so they can be fitted to my old wheels for when I decide to refurb the ones currently on the car.
I've stopped using rimblades as they keep falling off after a while and the glue makes a mess. I managed to win some new Alloy Gators from Ebay so I'll give them a try. The under tray under the car was also bowing where it's obviously scraped on something and unclipped itself. Luckily I had some bolts that had the right fitment laying about in my shed so now it looks a bit more normal underneath. I also removed the tint on the rear lights as I didn't like the results they gave. Pic of the under tray fixed:
Some more interior stripping before they are sent off for more dipping:
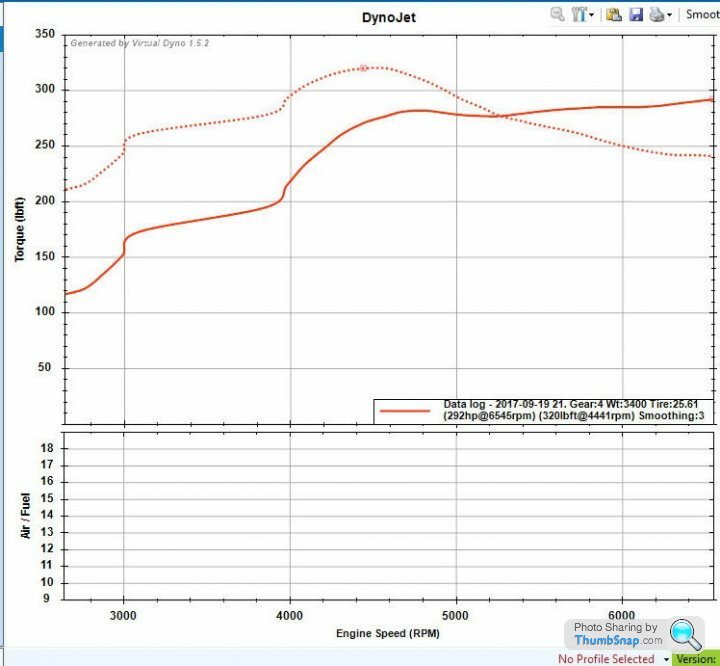
Mapping:
Before I fitted the 3" intake I got a log of the 2.5" intake in action and run it through Virtual Dyno. The figures aren't probably the most accurate but it gives you a good idea on the difference it makes. The figures are calculated at the wheels so I add 10% to account for transmission loss - most people say the transmission loss is between 8% and 12% on these cars so I just go for a middle figure.
Before:

I note smoothing was set to 1 in the above picture so really it should be a few hp less than shown.
After fitting the 3" intake:
After I fitted the intake I was expecting more and it did seem to be a bit of a let down and the above shows why. There must've been a boost leak issue or an issue with the MAF or maybe even tyre pressurs so I got in touch with my tuner and got to work again with the intake and re-done the tyres (back one had low pressure). The result was much better this time!!
Next steps:
The car's getting booked in to fit the new tyres, alloy gators and rear mudflaps along with changing the gearbox oil and fitting the front splitter as I want to get this all done before winter.
The stereo will be smoothed and dipped in a few weeks - I decided to try and keep the original stereo as I get to keep all the original display that way and it doesn't sound too bad either.
After this it will be time to get the catch cans and PCV plate and get this fitted. I've still got an EGR delete to do as well. As the car edges nearer 50k I'm going to get the VVT done within the next 12 months. I'm going to do the brakes soon as the rears are getting low - I may look into getting a big brake kit next year depending on how much cash I have left over..
Before I fitted the 3" intake I got a log of the 2.5" intake in action and run it through Virtual Dyno. The figures aren't probably the most accurate but it gives you a good idea on the difference it makes. The figures are calculated at the wheels so I add 10% to account for transmission loss - most people say the transmission loss is between 8% and 12% on these cars so I just go for a middle figure.
Before:
I note smoothing was set to 1 in the above picture so really it should be a few hp less than shown.
After fitting the 3" intake:
After I fitted the intake I was expecting more and it did seem to be a bit of a let down and the above shows why. There must've been a boost leak issue or an issue with the MAF or maybe even tyre pressurs so I got in touch with my tuner and got to work again with the intake and re-done the tyres (back one had low pressure). The result was much better this time!!
Next steps:
The car's getting booked in to fit the new tyres, alloy gators and rear mudflaps along with changing the gearbox oil and fitting the front splitter as I want to get this all done before winter.
The stereo will be smoothed and dipped in a few weeks - I decided to try and keep the original stereo as I get to keep all the original display that way and it doesn't sound too bad either.
After this it will be time to get the catch cans and PCV plate and get this fitted. I've still got an EGR delete to do as well. As the car edges nearer 50k I'm going to get the VVT done within the next 12 months. I'm going to do the brakes soon as the rears are getting low - I may look into getting a big brake kit next year depending on how much cash I have left over..
Thanks for all the comments - I thought I might get slated when it comes to mudflaps and light tinting at least
Today I had the following:
- Had the tyres changed
- New rear brakes and pads
- Added the rear mud flaps
- Added the rubber splitter (needs some finishing touches)
- Had the gear box oil changed to the Ford stuff
- Tried and failed fitting the alloy gators
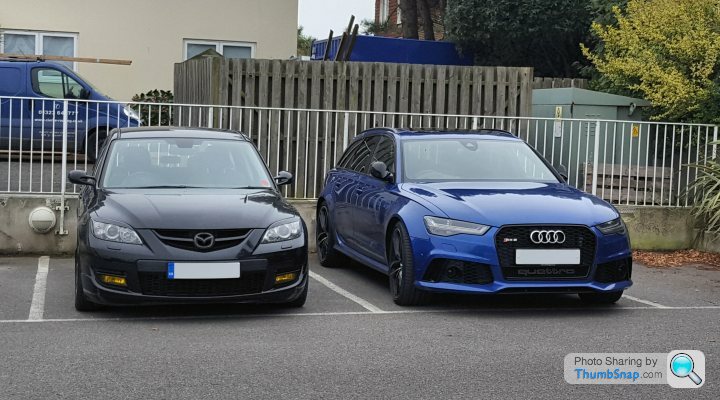
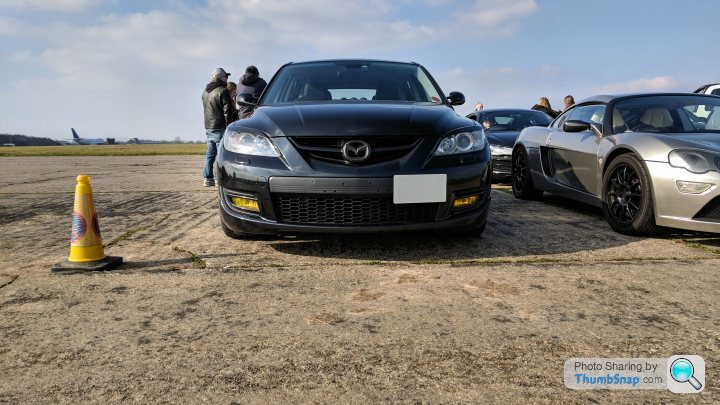
Prior to today I spotted an RS6 in a car park so thought I would be cheeky and park next to it. I couldn't believe the size of the RS6 compared to the MPS:
Back to today..
The Ford gearbox oil is a definate improvement over the Motul I had in there before - it feels smoother in the gear changes and sounds slightly less noisy. Although they still need running in the PS4's feel awesome! It's chucked it down this evening but it feels like you are almost driving in the dry. The extra tyre width helps and it does feel less crashy on the bumps now and there's less stretch on the tyres so the rims should have a little bit more protection. I kept the old tyres for spare but to be honest they're past their due date..
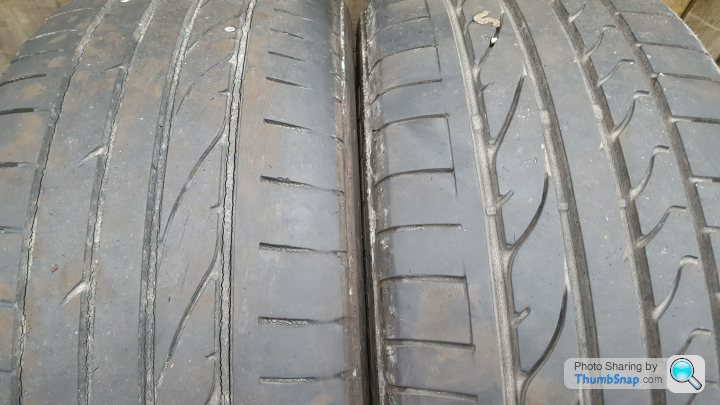
The rear left has a slow puncture and is a lot more worn then the rear right also in the pic. I suspect this may be either a tracking issue or the fact the tyre was running on low psi due to punctures. Here's a close up on the rear left tyre:

Moral of the story - always look after your tyres and act on them quick if somethings up !!
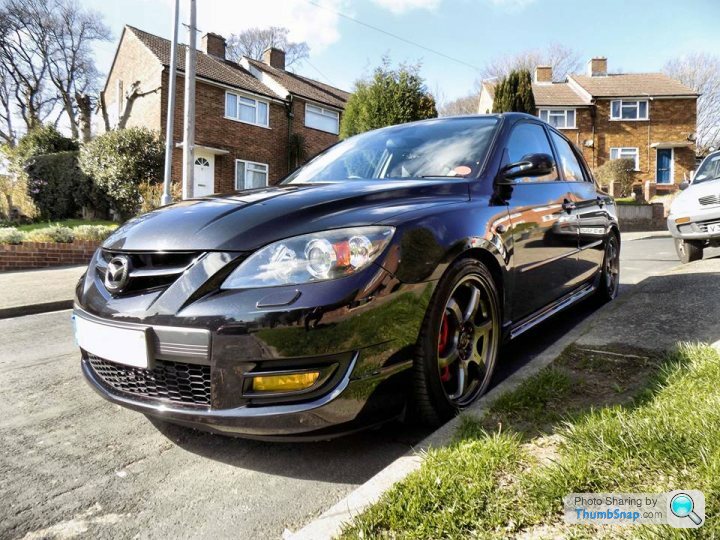
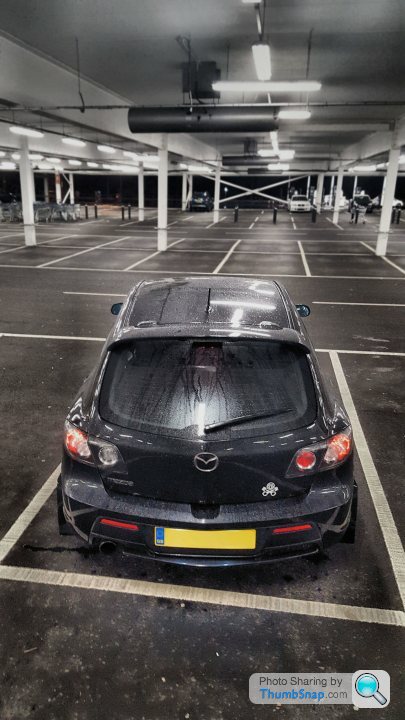
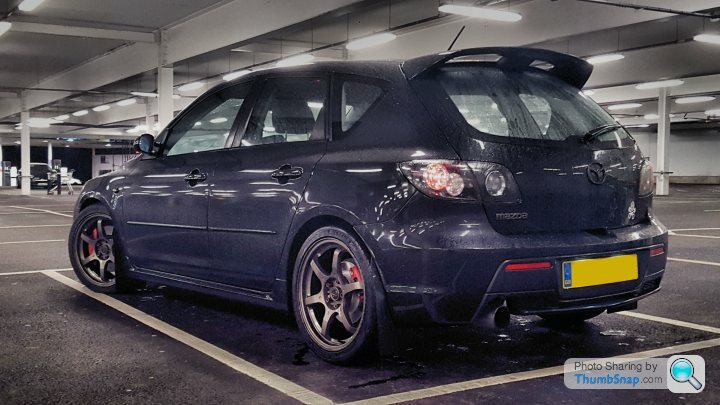
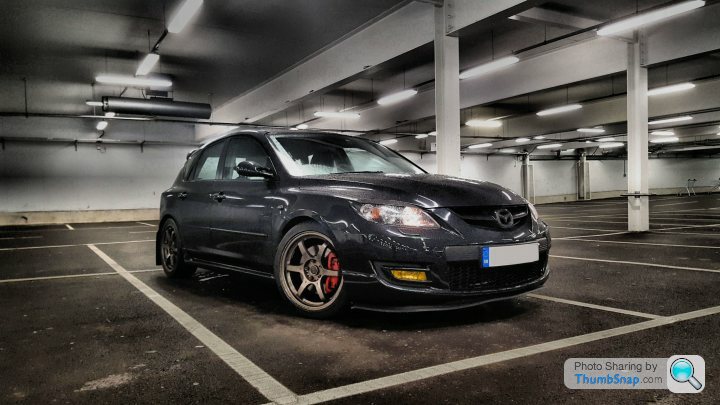
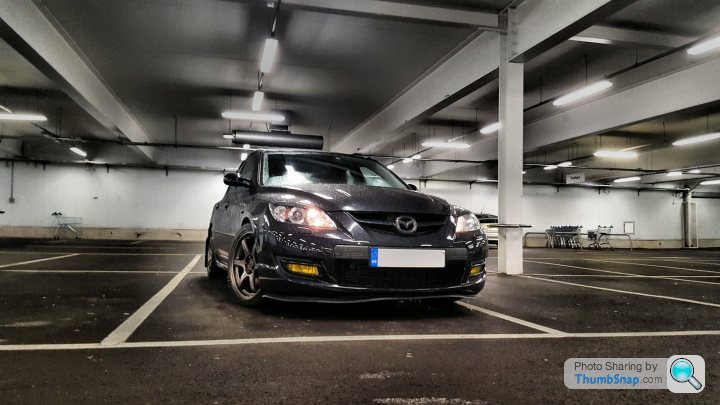
I thought it would be fun to find a lit up car park to show some updated pics of the outside of the car with the splitter and rear mudflaps fitted. I did a bit of tarting up in Paint Shop Pro X :
Today I had the following:
- Had the tyres changed
- New rear brakes and pads
- Added the rear mud flaps
- Added the rubber splitter (needs some finishing touches)
- Had the gear box oil changed to the Ford stuff
- Tried and failed fitting the alloy gators
Prior to today I spotted an RS6 in a car park so thought I would be cheeky and park next to it. I couldn't believe the size of the RS6 compared to the MPS:
Back to today..
The Ford gearbox oil is a definate improvement over the Motul I had in there before - it feels smoother in the gear changes and sounds slightly less noisy. Although they still need running in the PS4's feel awesome! It's chucked it down this evening but it feels like you are almost driving in the dry. The extra tyre width helps and it does feel less crashy on the bumps now and there's less stretch on the tyres so the rims should have a little bit more protection. I kept the old tyres for spare but to be honest they're past their due date..
The rear left has a slow puncture and is a lot more worn then the rear right also in the pic. I suspect this may be either a tracking issue or the fact the tyre was running on low psi due to punctures. Here's a close up on the rear left tyre:
Moral of the story - always look after your tyres and act on them quick if somethings up !!
I thought it would be fun to find a lit up car park to show some updated pics of the outside of the car with the splitter and rear mudflaps fitted. I did a bit of tarting up in Paint Shop Pro X
:Smokin Donut said:
Well done good effort and read. Keep up the work!
Thanks Bright Halo said:
I see that your MPS being an aero has the same mirrors as fitted to a couple of the special editions of RX8. PZ and Evolve. I think they are made by Hagen or something like that?
Just wondered how you get on with them as although they look great I found them to be totally pants with loads of blind spot area when I had them on my PZ.
I'm not sure on the exact make - vision is more limited as they're smaller then standard but they're fully adjustable so I don't find them too bad to use.Just wondered how you get on with them as although they look great I found them to be totally pants with loads of blind spot area when I had them on my PZ.
Podie said:
Looks great. Like the hydrodipped interior parts, and good you haven’t gone mental on that front. Extra leather parts work nicely too.
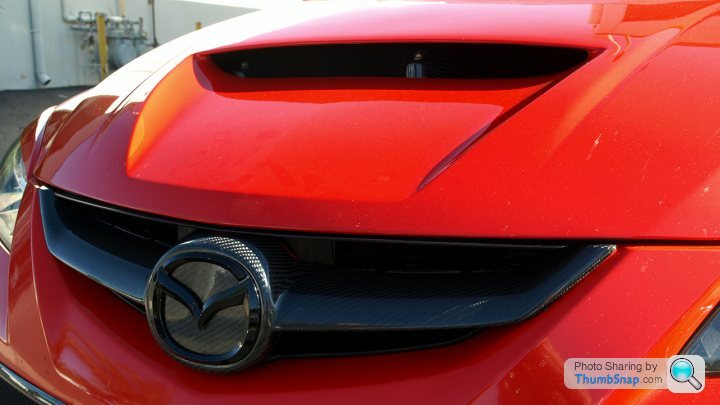
Was it the Mk2 that had the bonnet with the intake?
Only suggestion I could make is to get a LHD reversing light and chrome fog bulb, so all the rear lights are clear.
It is indeed the MK2 that comes with the bonnet vent. They do make an aftermarket bonnet vent for the mk1 but it's $995.00 + postage etc so it might be cheaper to go custom. Here's an idea on how they look:Was it the Mk2 that had the bonnet with the intake?
Only suggestion I could make is to get a LHD reversing light and chrome fog bulb, so all the rear lights are clear.
I did try the reversing light but it rubbed like hell and was really annoying due to the noise so I had to take it off - it did look nice though. I do plan to get the rear lights tinted at some point so the fog light is less noticeable. In other news the splitter did fall off so I'm going to get another one and make sure it's screwed into the bumper!
Edited by maxdb on Friday 29th September 22:15

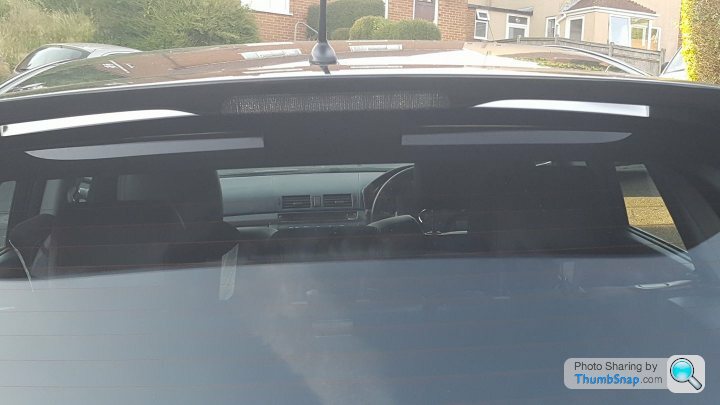
Rear wiper deleted for the cleaner look - not to everyones tastes but I kept the old parts in case I change my mind. The old one didn't do a great job.
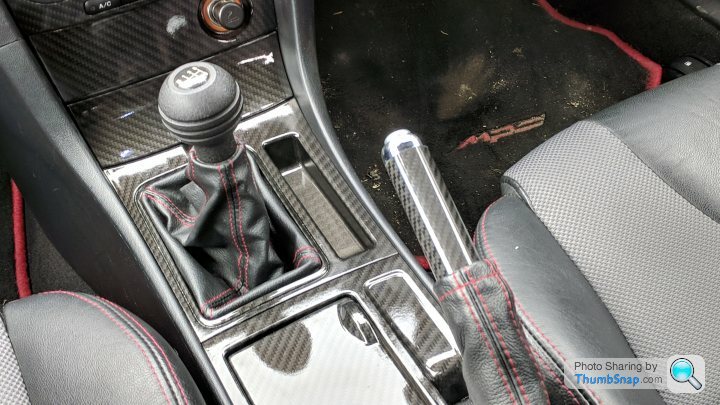
I also got the shift plate back from the dippers but silly me got the wrong side dipped!! I also managed to drop the shifter weight and in a panic put it back on the wrong way..
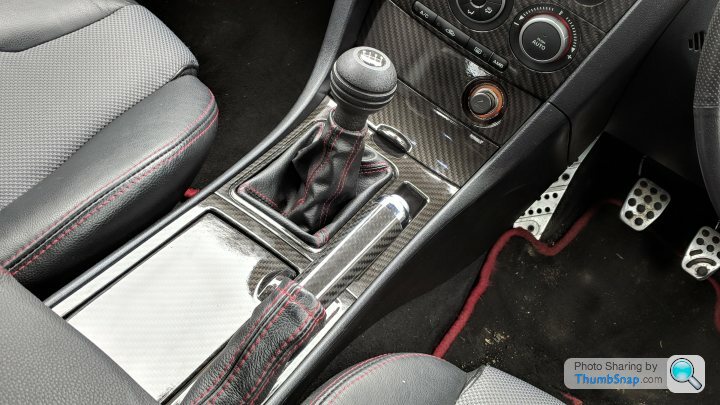
After the realisation of my mistake I put the shifter weight back the right way and it made a massive improvement. The gear change was a lot better but due to the shorter throw it made going from 3rd to 2nd a lot harder. I removed the reverse lockout gate and it's so much better and smoother too! The reverse lockout gate is good for stock but I would advise getting one if you are intending to have a short shifter.
There's a little bit of difference for gears 2,4 and 6 but you can tell the throw is much shorter for gears 1, 3 and 5. I must say that was £20 well spent.
I got the stereo and heater panels back from the dippers. the stereo covers aren't perfect and tbh I'm not sure on the top bit as it's quite shiney and almost a bit too much. Maybe I will change it with an Eonon unit after all. My mobile phone broke so the pictures aren't the usual quality at the moment. Here's a pic of the stereo:

The next part for dipping are the steering wheel controls..

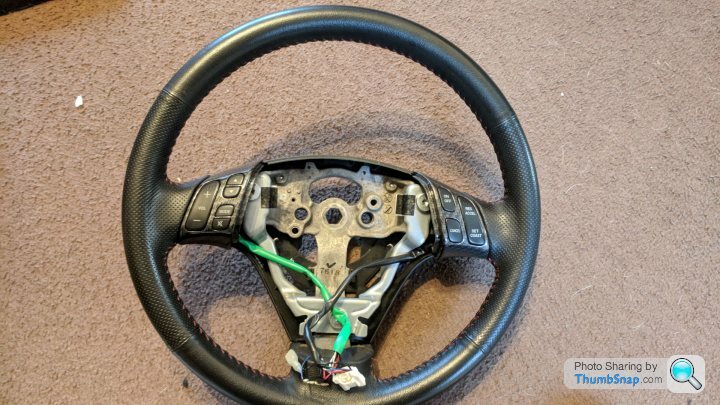
The wheel and airbag has to come off:
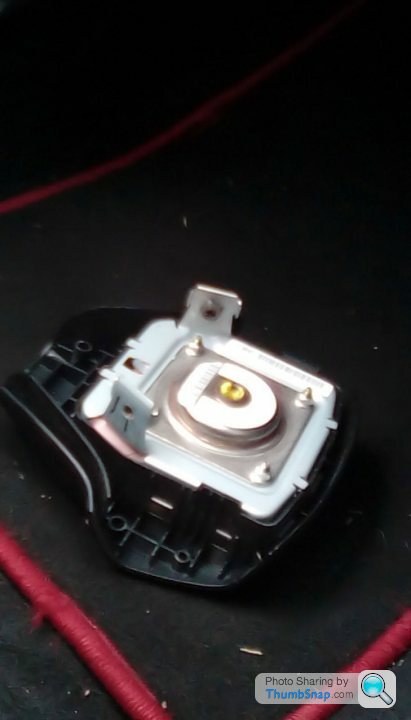
All the parts stripped down:

As you can see in the blurry pic the volume and main cruise control buttons cannot come out the plastic as they are moulded in. Hopefully this shouldn't be an issue when it comes to getting them dipped.
I don't have spares so I've put the wheel back like this:

It all runs fine - I'll just have to miss some of the wheel controls for a while..
I got another MOT due in February so I decided to get some more bits done before-hand. Fingers crossed it will pass again ok but i have a feeling it might fial on bushes or similar but only time will tell..
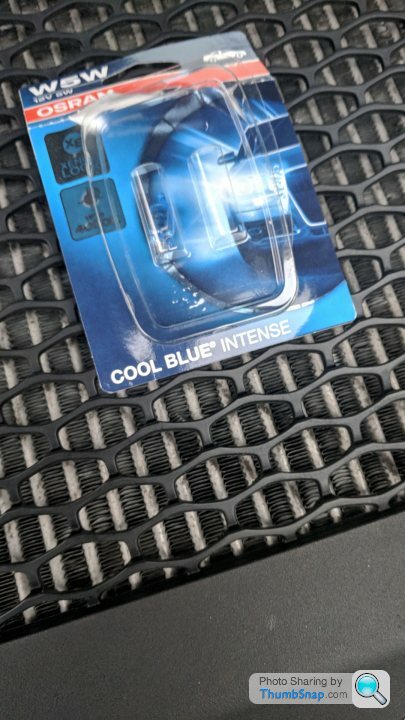
Side lights:
The standard ones were a bit rubbish so I did replace them with some LED ones - they were good but due to them being LED they left the sidelight illumination on faintly on the dash when they were off (they faded out after a while with the ignition off). I decided to replace them with some Osram Cool Blue Intense and despite the blue bulbs they put out a nicer white light:
Next was the plates - I've seen a few MPS's with square plates and some of them looked ok. I got myself a 13x6.5 plate for the rear and 13x7 for the front. Unfortunately I don't have a decent pic of the rear so here's one of the front:

I'm not keen on the front so might go smaller - maybe a 13x6 or a 12x6 but I want to keep the plates legal. The new square plates gave me an opportunity to remove the number plate holder at the front. Eventually the plastic above the grill with the lovely holes in will be smoothed over and painted/dipped etc.
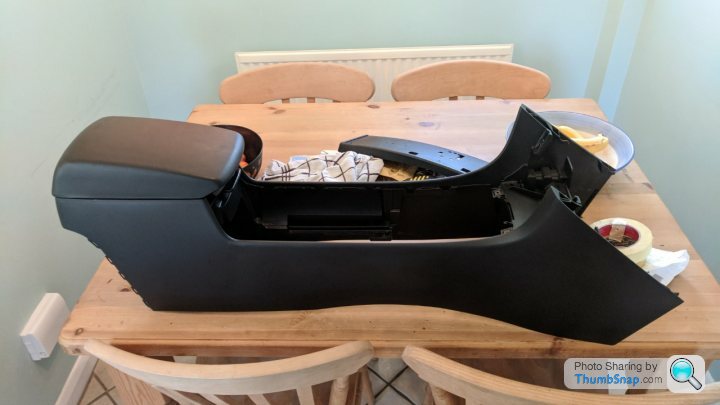
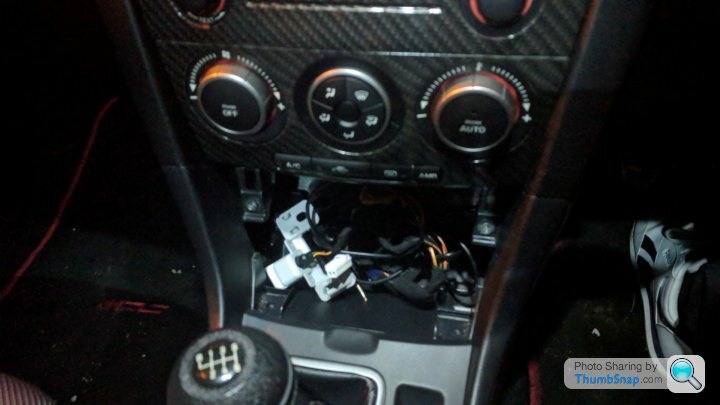
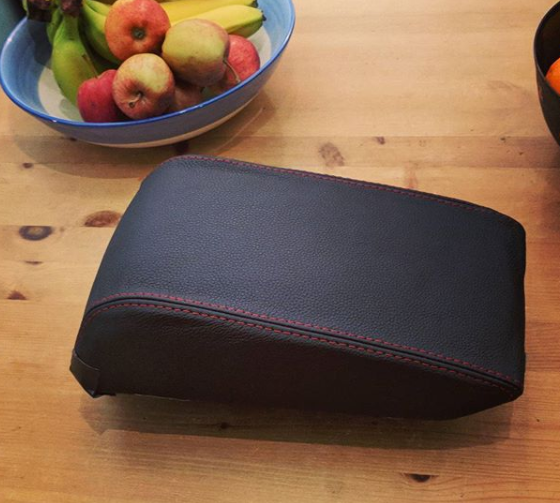
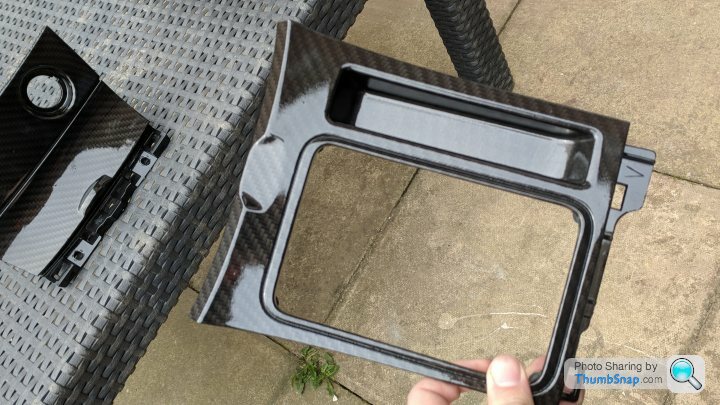
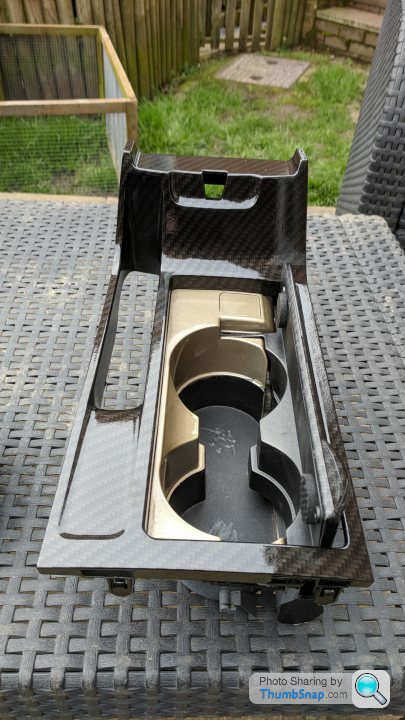
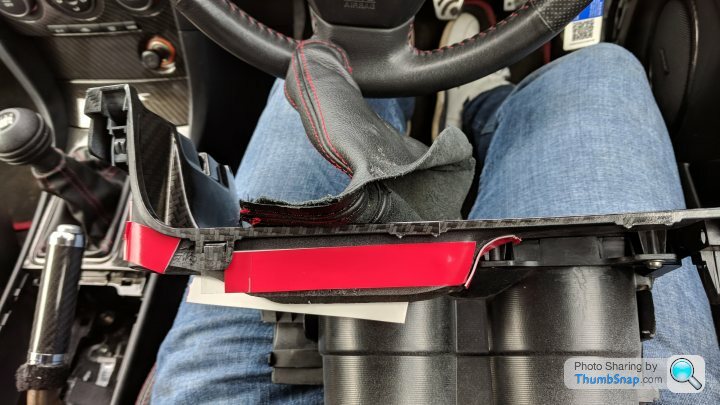
Going back to the interior I decided to remove the centre console out so I can take out the armrest lid. Here it is on the kitchen table in it's full glory:
The tray then comes out from underneath giving you access to the arm rest:
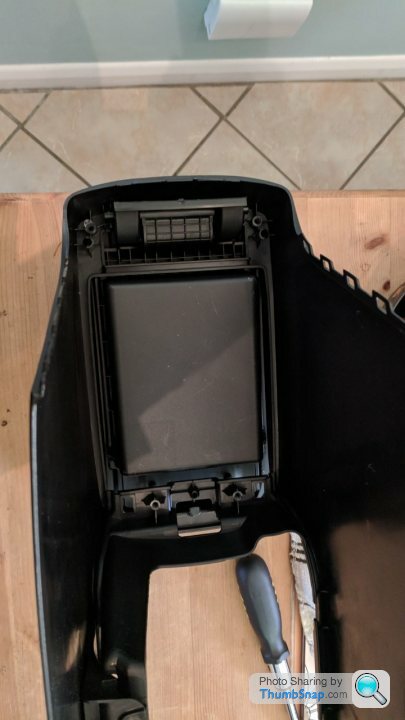
I've ordered a new cover, which this time I won't end up cutting it after getting annoyed Once it comes I can fit it without it being connected to the car and get it all lined up etc.
Staying with the interior mods i got the wheel controls back from the dippers. Unfortunatly I noticed a minor imperfection on one after I put it back together so I may get it re-done at some point. Here they are ready to go back together:
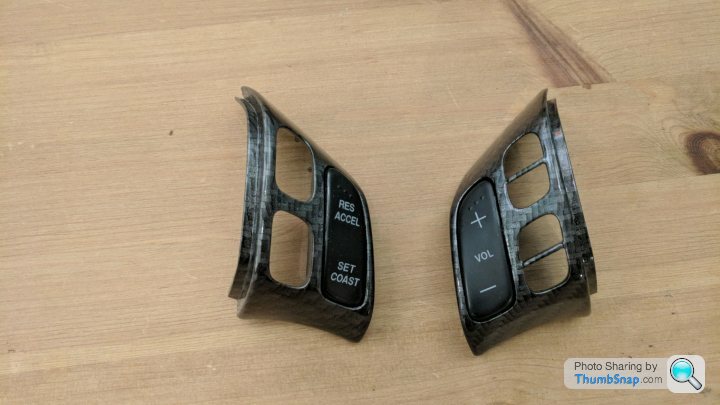
Switches back on:
Wheel back on:
By chance someone was selling a pod gauge I was after. They're quite pricey (about £240 imported from the states) and hard to come by so when one come up for sale in the UK for £80 I had to get it. Luckily I didn't take any pics of it being fitted to save you some boredom but I did have to remove the on and off switches for the vents as the pod doesn't have the holes for them. You might ask why I fitted them to no gauges? I just did it so it will encourage me to get some as everytime I see the blank holes it will bug me I plan to get some volt, boost and oil temp guages but for the oil temp you need a spin on oil conversion..
There's not much left to get dipped now - for the cabin it's just the ash tray, gear knob and handbrake surrounds. I thought I would get the ashtray done now then after the MOT i'll get the other 2 done so save lots of wires, cables being exposed. Ashtray tear down:
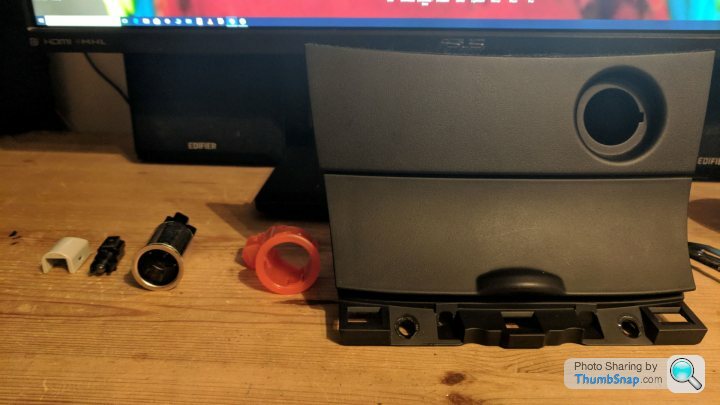
It was a right pain to get it apart due to a certain clip but some gentle persuation got it apart:
I just have a nice blank hole to look at for the next week or so!!
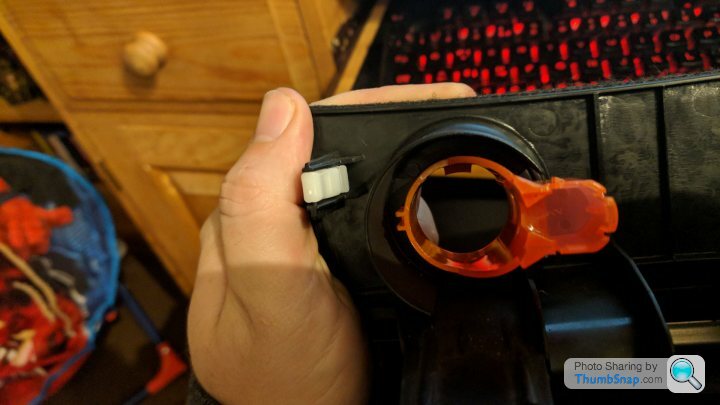
Another unintended mod was a small battery tray. Again someone was selling it cheap so I picked it up at a bargain price!! it also means I can move the ECU again to a better location and the smaller battery will allow me to run upto a 4" intake, which will help me if I decide to go for a bigger turbo later on down the line. Battery test fit:
I had lots of issues and headaches when it come to choosing a small battery. Most people - even in the UK call them a 51r battery. What an earth is a 51r battery? Eventually after some research it turned out to be a UK 156 battery, The measurements 237 x 127 x 227mm fit the box ok if you are wondering
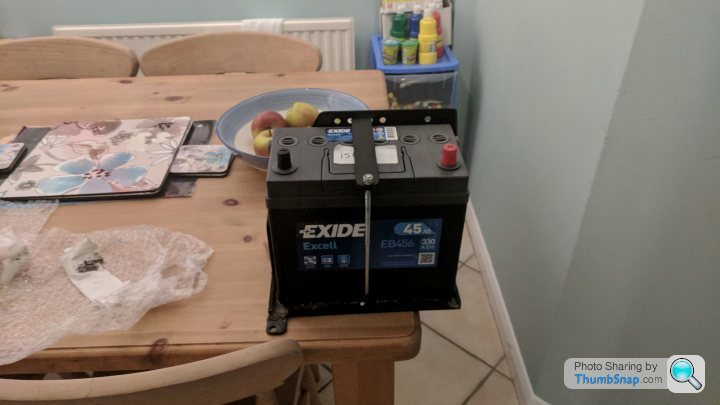
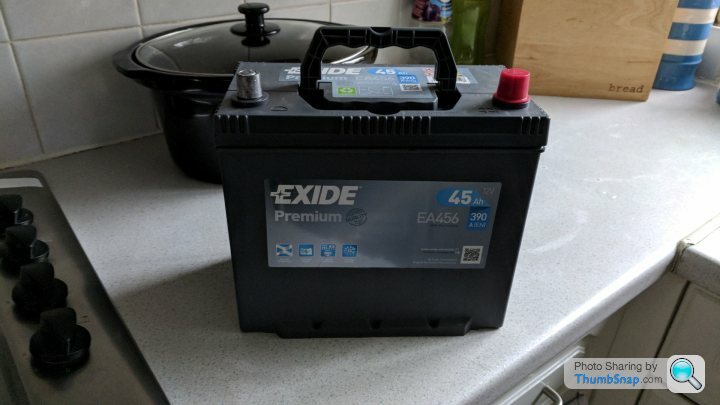
The next issue was the CCA. Most of the batteries only have a CCA of 330 and given the car needs around 420a this is too low. I ended up taking it back and getting one with a 390 CCA as it's nearer to the 420a:
What I didn't realise is that it had legs and therefore it didn't fit in the tray. This left me with some choices:
- Take back the battery yet again
- Mod the battery box so it fits
- Mod the battery so it fits
I chose to:

Chop the legs of the battery with a saw!!
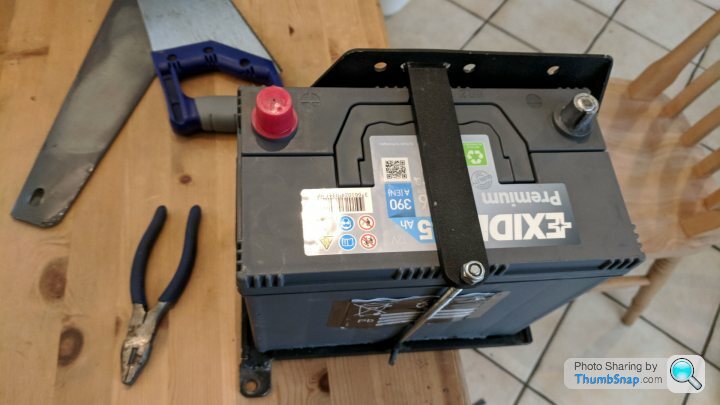
It fits now though!!
Next mods:
- Fit the small battery to the car once the weather is a bit nicer
- More interior work!
- Fit a rear diffuser I just bought!
- Fit a resonator delete pipe once it comes
Side lights:
The standard ones were a bit rubbish so I did replace them with some LED ones - they were good but due to them being LED they left the sidelight illumination on faintly on the dash when they were off (they faded out after a while with the ignition off). I decided to replace them with some Osram Cool Blue Intense and despite the blue bulbs they put out a nicer white light:
Next was the plates - I've seen a few MPS's with square plates and some of them looked ok. I got myself a 13x6.5 plate for the rear and 13x7 for the front. Unfortunately I don't have a decent pic of the rear so here's one of the front:
I'm not keen on the front so might go smaller - maybe a 13x6 or a 12x6 but I want to keep the plates legal. The new square plates gave me an opportunity to remove the number plate holder at the front. Eventually the plastic above the grill with the lovely holes in will be smoothed over and painted/dipped etc.
Going back to the interior I decided to remove the centre console out so I can take out the armrest lid. Here it is on the kitchen table in it's full glory:
The tray then comes out from underneath giving you access to the arm rest:
I've ordered a new cover, which this time I won't end up cutting it after getting annoyed
Once it comes I can fit it without it being connected to the car and get it all lined up etc.Staying with the interior mods i got the wheel controls back from the dippers. Unfortunatly I noticed a minor imperfection on one after I put it back together so I may get it re-done at some point. Here they are ready to go back together:
Switches back on:
Wheel back on:
By chance someone was selling a pod gauge I was after. They're quite pricey (about £240 imported from the states) and hard to come by so when one come up for sale in the UK for £80 I had to get it. Luckily I didn't take any pics of it being fitted to save you some boredom but I did have to remove the on and off switches for the vents as the pod doesn't have the holes for them. You might ask why I fitted them to no gauges? I just did it so it will encourage me to get some as everytime I see the blank holes it will bug me
I plan to get some volt, boost and oil temp guages but for the oil temp you need a spin on oil conversion..There's not much left to get dipped now - for the cabin it's just the ash tray, gear knob and handbrake surrounds. I thought I would get the ashtray done now then after the MOT i'll get the other 2 done so save lots of wires, cables being exposed. Ashtray tear down:
It was a right pain to get it apart due to a certain clip but some gentle persuation got it apart:
I just have a nice blank hole to look at for the next week or so!!
Another unintended mod was a small battery tray. Again someone was selling it cheap so I picked it up at a bargain price!! it also means I can move the ECU again to a better location and the smaller battery will allow me to run upto a 4" intake, which will help me if I decide to go for a bigger turbo later on down the line. Battery test fit:
I had lots of issues and headaches when it come to choosing a small battery. Most people - even in the UK call them a 51r battery. What an earth is a 51r battery? Eventually after some research it turned out to be a UK 156 battery, The measurements 237 x 127 x 227mm fit the box ok if you are wondering
The next issue was the CCA. Most of the batteries only have a CCA of 330 and given the car needs around 420a this is too low. I ended up taking it back and getting one with a 390 CCA as it's nearer to the 420a:
What I didn't realise is that it had legs and therefore it didn't fit in the tray. This left me with some choices:
- Take back the battery yet again
- Mod the battery box so it fits
- Mod the battery so it fits
I chose to:
Chop the legs of the battery with a saw!!
It fits now though!!
Next mods:
- Fit the small battery to the car once the weather is a bit nicer
- More interior work!
- Fit a rear diffuser I just bought!
- Fit a resonator delete pipe once it comes
MOT and service time came and went - a pass and no advisories for the 3rd year running!!
I got the EGR delete kit fitted at the same time so the kits no longer laying around. It gives a very slight increase (1 maybe) mpg and put the engine light on but with the Versatuner software i have I deleted and blocked the error code so I'm now engine light free.
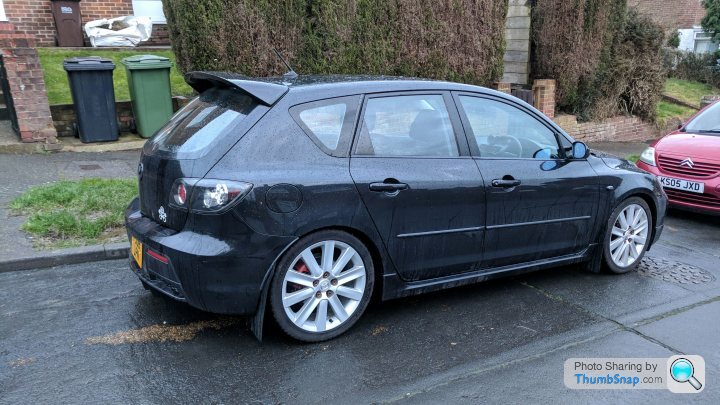
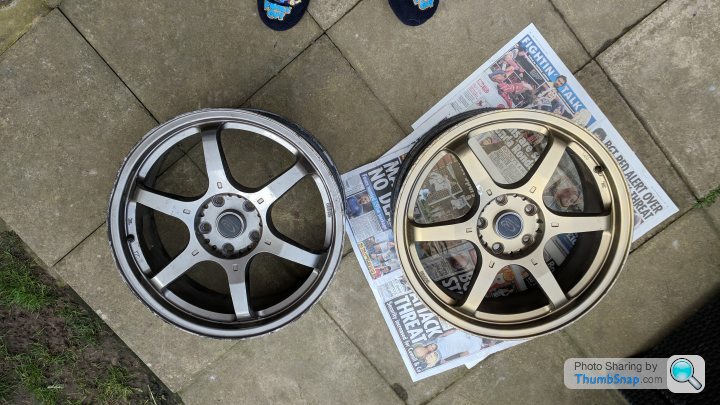
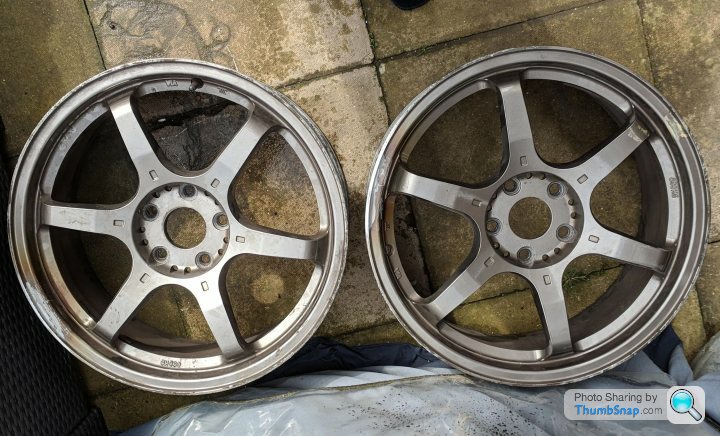
Sadly I hit a big pothole in the dark so the wheels took another hit:

It was quite a hit so I've swapped my stock wheels over so I could assess the damage:
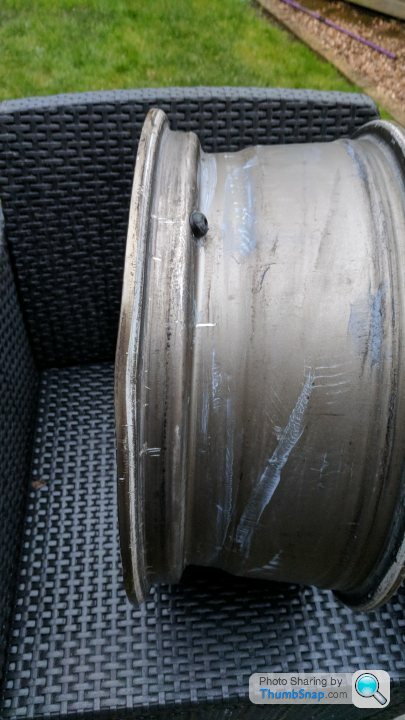
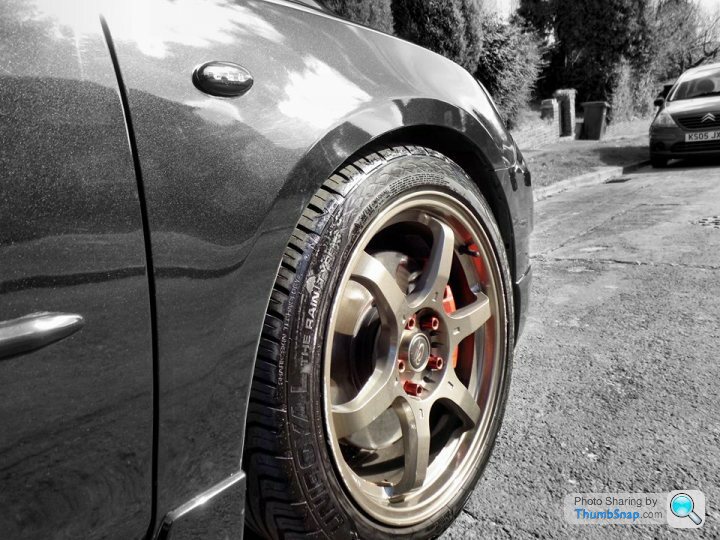
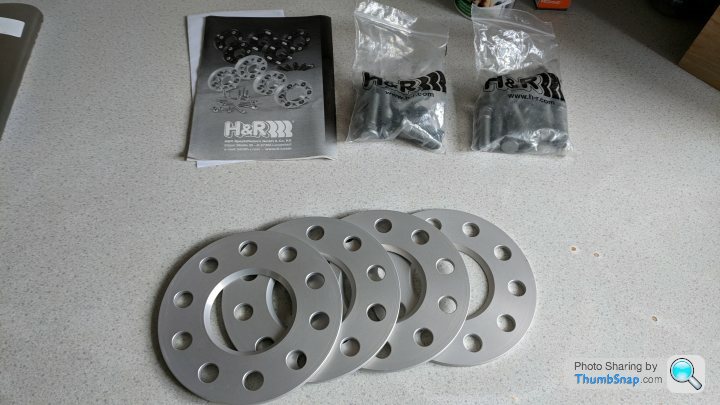
Given the state of the wheels I feel they would benefit from a refurb. The current lug nuts are getting a bit rusty and corroded so I've ordered some red closed spline nuts to replace the current ones - these should arrive shortly. On the off chance I asked if anyone on the owners group had any hubcentric spacers going spare and as if my magic some 5mm hubcentric spacers arrived:
The bronze wheels can look a bit dull in certain light so i thought a colour change would be nice. I bought some gold plastidip on Ebay to get an idea on what it would be like and I was sold by it. Please note there was no prep and just a spay over to get an idea on the colour. These will be getting done properly once I have the money saved up:
Moving away from the wheels I got the small battery tray fitted - out with the old:
In with the new:
I just need to finish relocating the ECU but the cold weathers putting me off doing this at the moment. I might put the ECU back on the fusebox cover but make it neater but it doesn't take much for these engine bays to look untidy.
The rear diffuser all assembled:
Fitted:

Some people add colour to them to make then stand out but I've decided to keep it black. Here's another pic in a different light:
I'm currently looking at spoiler extensions but there's nothing I like apart from the one DG Motorsports make across the pond. I better get saving. I just want the rear spoiler to be a tad more aggressive but not too OTT. I got the resonator and centre box delete pipe fitted at the same time. The car sounds much better and it has added character. It's a bit louder but not over the top for me. It's now much easier to make the exhuast pop and bang but i don't think it pops any flames with the stock downpipe (need to confirm!!) I don't think there's any need for any more exhaust changes apart from swapping the downpipe over at a later stage.
I bought a new armrest cover. It still needs a bit of work/adjusting but I will do that when the weathers a bit warmer in the spring. I took the whole thing off this time
I also wasn't keen on the square front number plate - it seemed to big in the centre so I thought I would try my luck with a 12x6 plate. After numerous adjustments I got to this:
The grill will later be smoothed other and hydrodipped in carbon fibre but I may go for a darker colour. The car also could benefit from a front splitter as it's looking rather high up. I better get saving..
I got the EGR delete kit fitted at the same time so the kits no longer laying around. It gives a very slight increase (1 maybe) mpg and put the engine light on but with the Versatuner software i have I deleted and blocked the error code so I'm now engine light free.
Sadly I hit a big pothole in the dark so the wheels took another hit:
It was quite a hit so I've swapped my stock wheels over so I could assess the damage:
Given the state of the wheels I feel they would benefit from a refurb. The current lug nuts are getting a bit rusty and corroded so I've ordered some red closed spline nuts to replace the current ones - these should arrive shortly. On the off chance I asked if anyone on the owners group had any hubcentric spacers going spare and as if my magic some 5mm hubcentric spacers arrived:
The bronze wheels can look a bit dull in certain light so i thought a colour change would be nice. I bought some gold plastidip on Ebay to get an idea on what it would be like and I was sold by it. Please note there was no prep and just a spay over to get an idea on the colour. These will be getting done properly once I have the money saved up:
Moving away from the wheels I got the small battery tray fitted - out with the old:
In with the new:
I just need to finish relocating the ECU but the cold weathers putting me off doing this at the moment. I might put the ECU back on the fusebox cover but make it neater but it doesn't take much for these engine bays to look untidy.
The rear diffuser all assembled:
Fitted:
Some people add colour to them to make then stand out but I've decided to keep it black. Here's another pic in a different light:
I'm currently looking at spoiler extensions but there's nothing I like apart from the one DG Motorsports make across the pond. I better get saving. I just want the rear spoiler to be a tad more aggressive but not too OTT. I got the resonator and centre box delete pipe fitted at the same time. The car sounds much better and it has added character. It's a bit louder but not over the top for me. It's now much easier to make the exhuast pop and bang but i don't think it pops any flames with the stock downpipe (need to confirm!!) I don't think there's any need for any more exhaust changes apart from swapping the downpipe over at a later stage.
I bought a new armrest cover. It still needs a bit of work/adjusting but I will do that when the weathers a bit warmer in the spring. I took the whole thing off this time
I also wasn't keen on the square front number plate - it seemed to big in the centre so I thought I would try my luck with a 12x6 plate. After numerous adjustments I got to this:
The grill will later be smoothed other and hydrodipped in carbon fibre but I may go for a darker colour. The car also could benefit from a front splitter as it's looking rather high up. I better get saving..
Thesprucegoose said:
Are the underside of these flat? Is the diffuser just for show? You might be better off on the bonnet putting a vent at the rear of it. Looks good nice cars.
It's just for show really as the back looks high up off the ground without it - the cars just normal underneath Thesprucegoose said:
Wasn't sure, what are the running costs like?
The tax is the worst bit as the MK1s are £546 a year if you pay monthly. The MK2 is a lot less than this as it has slightly lower emissions. The insurance isn't too bad at £450 a year with all mods declared. Fuel wise I average 25mpg and use Tesco 99 which is about 121.9 a litre down here.Service parts are just at typical prices really - places like ecp sell the filters etc. The springs are harder to come by as it's an aero but aftermarket kits are available. It has a dmf but single conversion kits are available and the shell helix ultra oil that's recommend can be had for about £25 for 5 litres when there's a deal on.

It's probably best to ignore what I say when it comes to next steps as I usually go about doing things randomly
Wheels and handling:
The wheels have come back unbent (I had another with slight lip damage I thought I would get done at the same time:
They have now been sent off to be painted!
During the colder wet weather I've noticed the suspension go a bit creaky and knocky and with it being sporadic I guessed it may be bush related. As the money was there to be spent I thought it would be a good opportunity to upgrade both the front and rear anti roll cars with upated 27mm Whiteline items alond with some adjustable drop links. Here's an example of what the originals look like:

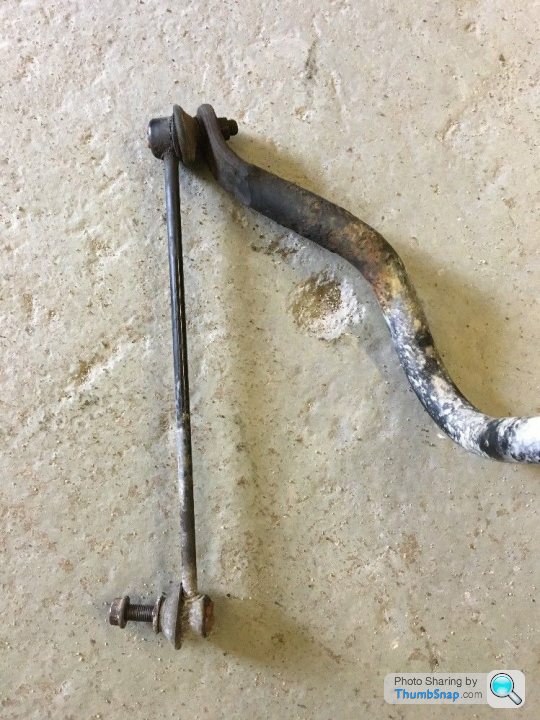
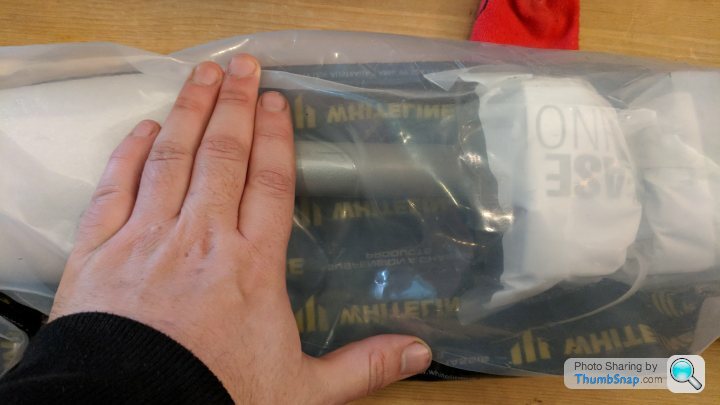
The uprated ones are nice and chunky!
 |
|
Annoyingly the knocking has stopped a bit so these will be fitted at a later date - the full kit worked out cheaper then just getting front and rear drop links and an anti roll bar. They're also 2 point adjustable so it should make the car more fun on cornering..
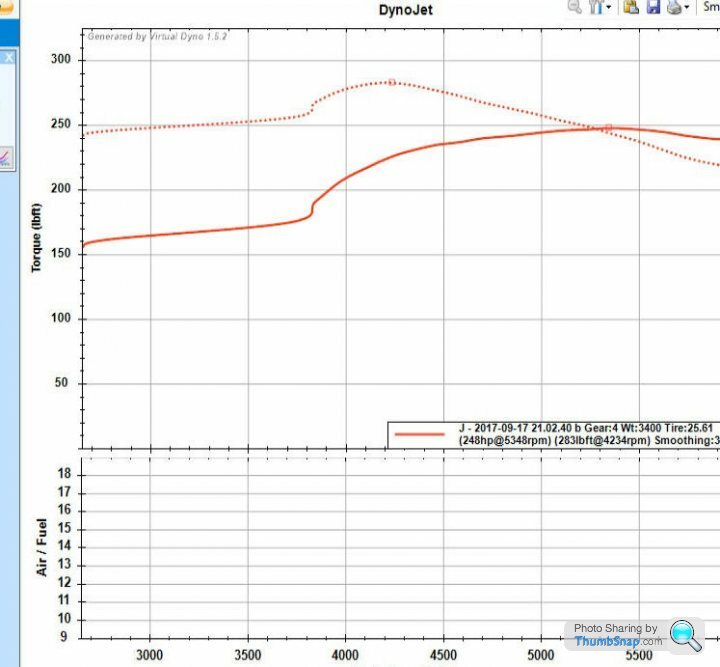
Mapping:
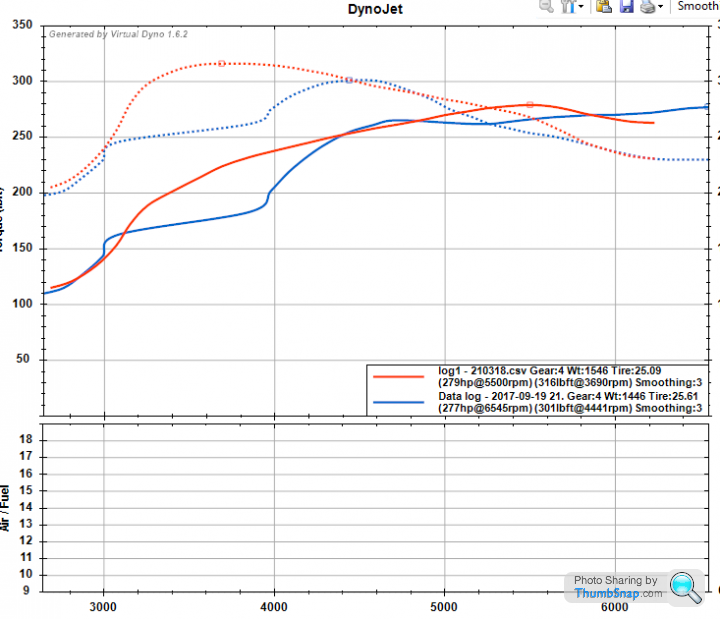
A new log and map revision has been done. As you can see from the above - the power band looks neater. Since this log I've now disabled SWAS (Steering Wheel Angle Sensor) on Versatune. What Swas does is chuck extra fuel into the engine when turning, which reduces the power output. Disabling this therefore cuts this down so the engine can put out more power when cornering. I've given it a little test and it does seem to make a difference.
Visual:
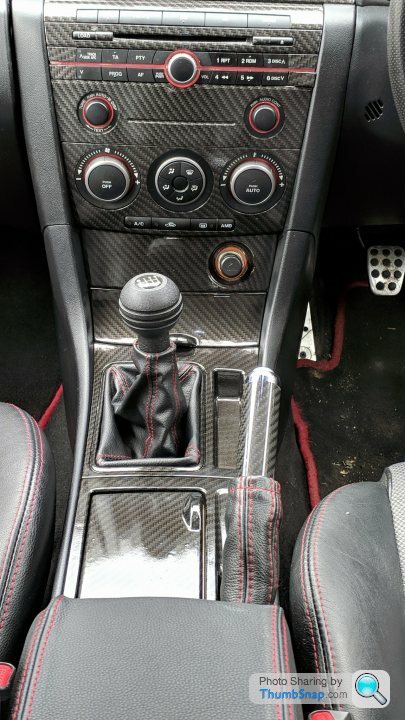
The final bits of the interior hydrodipping has now been done:
Astray re-assembled:

Gulzar will be proud!!
Please note I've finished this part off yet - I thought it would be fun to give the car an "easter egg" and add something a little bit different, which can be hidden away when needed
A bit of special double sided tape to put the handbrake gator back:
Here it is all back together:
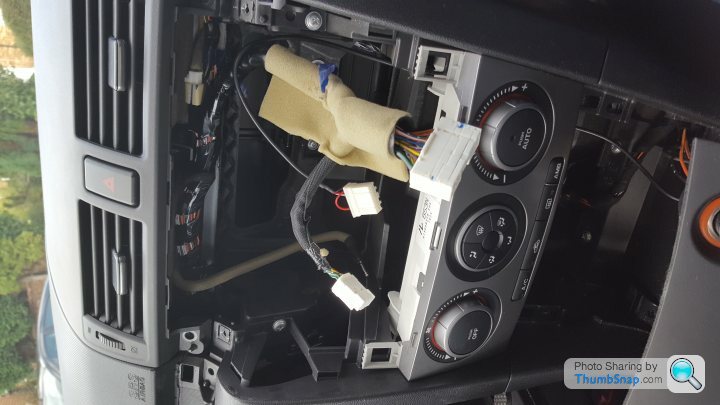
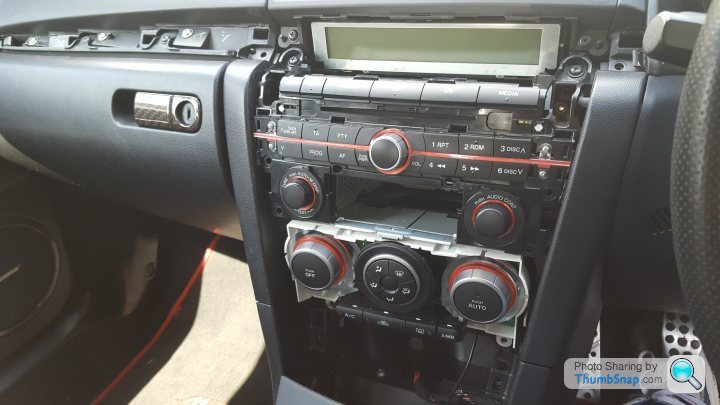
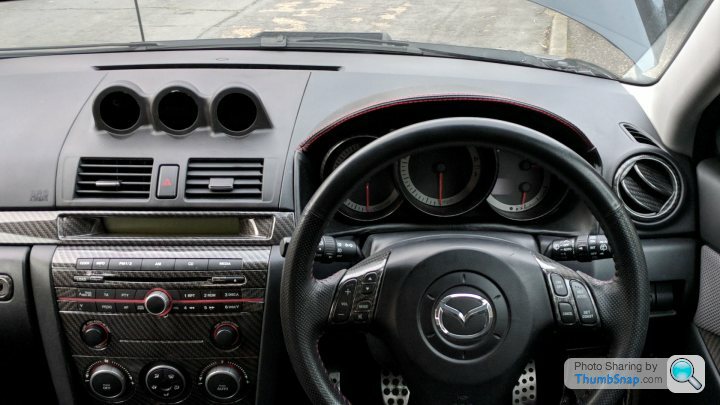
A further back shot does show a rather lot of carbon fibre so I'm going to try and tone it down a little with some plastic parts from a plain Mazda 3 Stereo.
Currently it looks like:
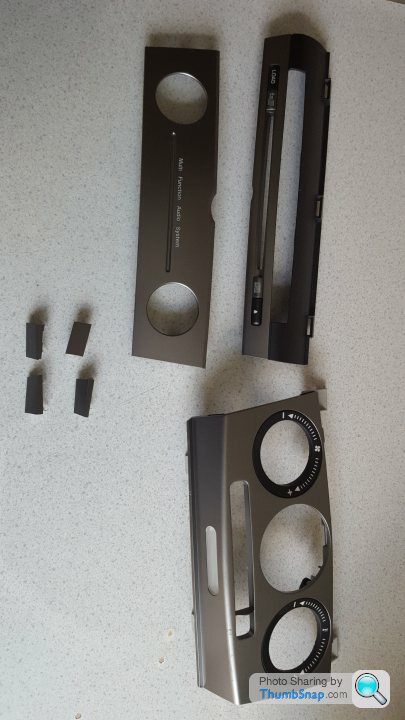
The plastic I have in mind:
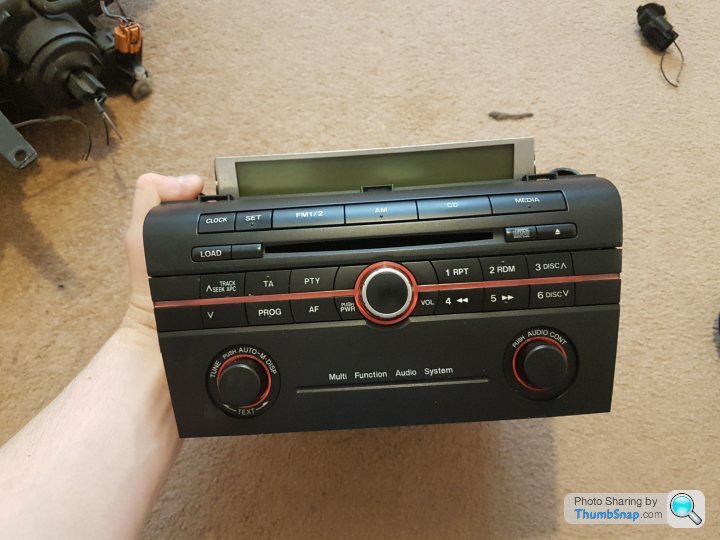
I just want it less shiny on the top but will have to wait and see what it will come out like. If this fails then I will end up getting an Eonon unit. When sitting inside the cabin it doesn't look so bad close up. The botton carbon fibre effect is slightly darker to give it some contrast. I might look at doing the info display surround the same shade to give that a bit more contrast too.
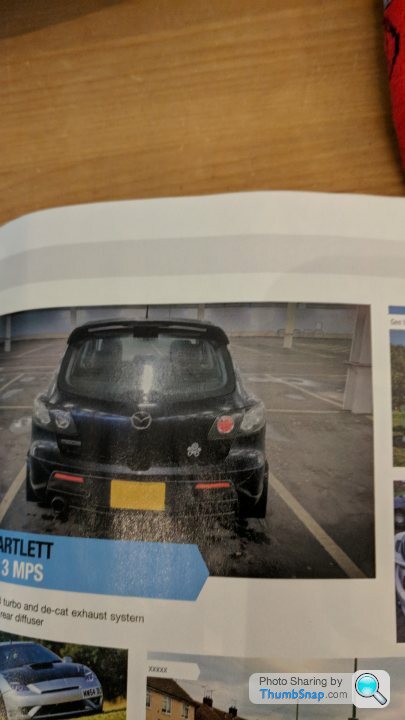
On a side note the car did make it into the back of Aprils issue of Banzai magazine complete with PH sticker
 |
|
Wheels and handling:
The wheels have come back unbent (I had another with slight lip damage I thought I would get done at the same time:
They have now been sent off to be painted!
During the colder wet weather I've noticed the suspension go a bit creaky and knocky and with it being sporadic I guessed it may be bush related. As the money was there to be spent I thought it would be a good opportunity to upgrade both the front and rear anti roll cars with upated 27mm Whiteline items alond with some adjustable drop links. Here's an example of what the originals look like:
The uprated ones are nice and chunky!
|Annoyingly the knocking has stopped a bit so these will be fitted at a later date - the full kit worked out cheaper then just getting front and rear drop links and an anti roll bar. They're also 2 point adjustable so it should make the car more fun on cornering..
Mapping:
A new log and map revision has been done. As you can see from the above - the power band looks neater. Since this log I've now disabled SWAS (Steering Wheel Angle Sensor) on Versatune. What Swas does is chuck extra fuel into the engine when turning, which reduces the power output. Disabling this therefore cuts this down so the engine can put out more power when cornering. I've given it a little test and it does seem to make a difference.
Visual:
The final bits of the interior hydrodipping has now been done:
Astray re-assembled:
Gulzar will be proud!!
Please note I've finished this part off yet - I thought it would be fun to give the car an "easter egg" and add something a little bit different, which can be hidden away when needed
A bit of special double sided tape to put the handbrake gator back:
Here it is all back together:
A further back shot does show a rather lot of carbon fibre so I'm going to try and tone it down a little with some plastic parts from a plain Mazda 3 Stereo.
Currently it looks like:
The plastic I have in mind:
I just want it less shiny on the top but will have to wait and see what it will come out like. If this fails then I will end up getting an Eonon unit. When sitting inside the cabin it doesn't look so bad close up. The botton carbon fibre effect is slightly darker to give it some contrast. I might look at doing the info display surround the same shade to give that a bit more contrast too.
On a side note the car did make it into the back of Aprils issue of Banzai magazine complete with PH sticker
| Gassing Station | Readers' Cars | Top of Page | What's New | My Stuff