3rd Time Lucky; E36 M3 Evolution Saloon
Discussion


Great, cheers guys.
I can't believe people hate the wheel but I didn't even think about what it looked like when I bought it
I sure as hell didn't buy it for the looks, I bought it to replace the bus sized wheel and because it was brand new and fairly cheap! It's a functional purchase for sure.
I think I would rather just buy new spacers than bother milling the others. It's not a massive issue. Booked in for the geo and coilover setup finally, that should be happening on the 27th of July. 10mm spacers would probably be a perfect medium but unless they come with extended bolts, I'd be a bit nervous about using them. I will look into what's available.
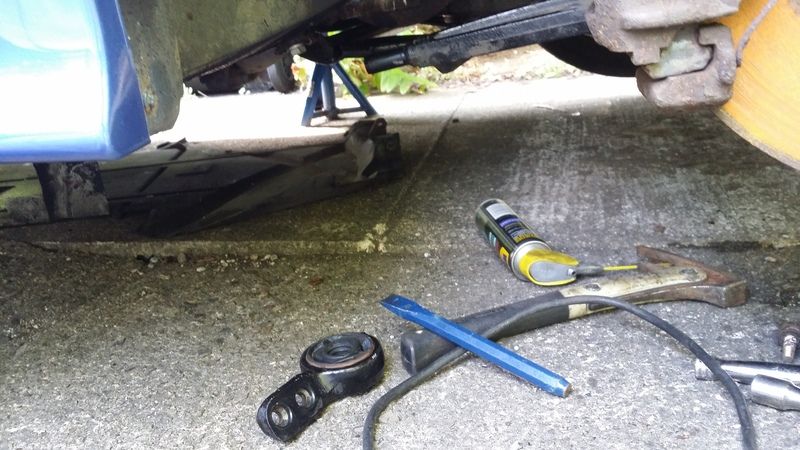
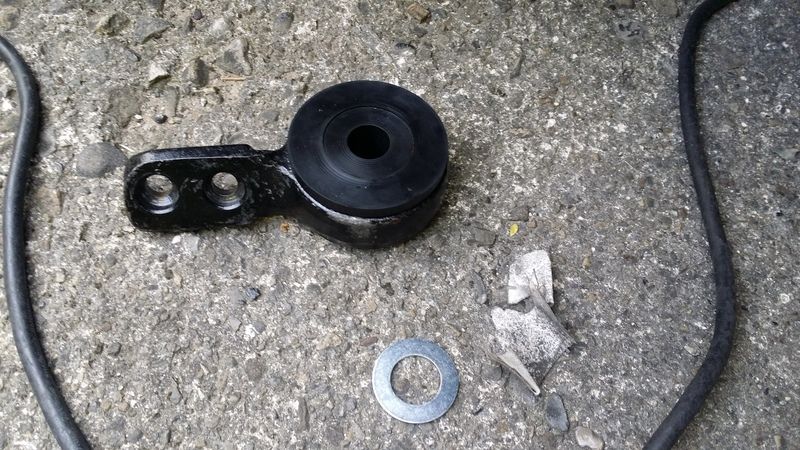
Christ, what a day yesterday was.
I decided to tackle the adjusting of the front coilovers and fit the front wishbone bushes at the same time. Yesterday taught me a huge lesson in not tackling a job without the correct tool. I managed to get one of the bushes off by hand and although it took quite some effort, I thought fair enough if it saves me buying a gear puller.
So I moved onto the other side. Oh dear god, I wish I hadn't started. It took me hours and hours of trying to twist the bugger off and I ended up giving up late on, with grazed arms, sore hands, etc. etc.
Tonight I arrived home with a three pronged puller and I took the bloody thing off in seconds. I'm absolutely fuming with myself for yesterday!
But nevertheless, progress has been made.
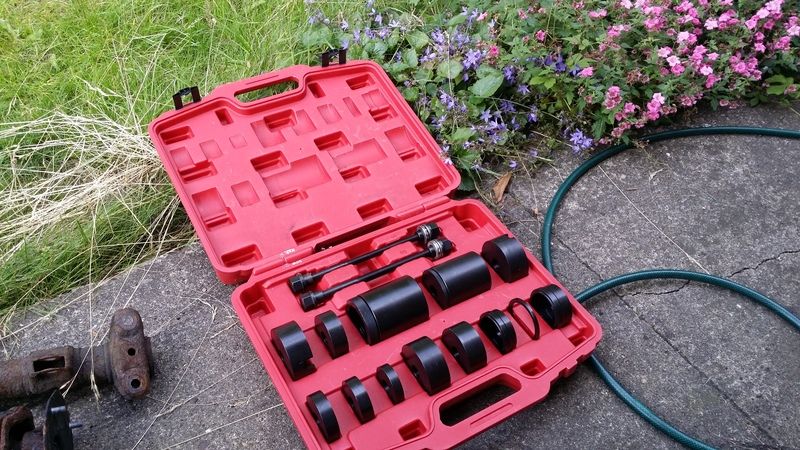
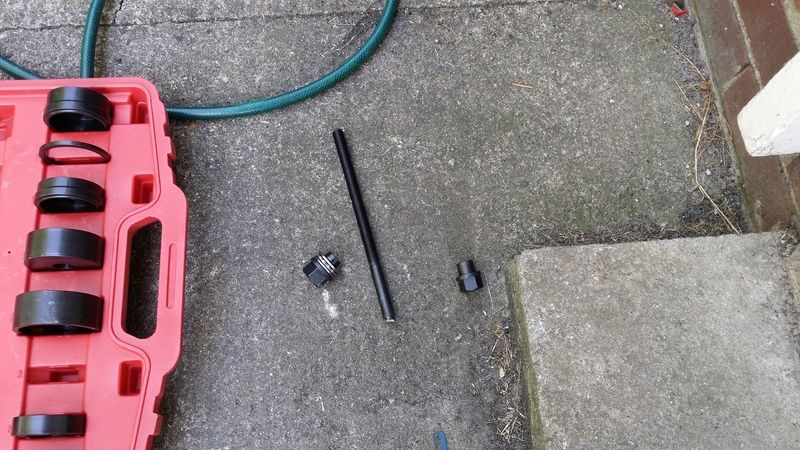
Unfortunately, the bush removal kit I have also got broken yesterday. I got too enthusiastic and had the threaded bar that goes through the middle the wrong way up. When the nut reached the end of the thread and I gave it some welly, it sheared. Luckily there are two threaded bars but it really grates that I've broken one through my own carelessness. I don't know who makes the kit so I doubt I will get a replacement if the other goes at some point.
Anyway, here are some photos of the job:
![]()
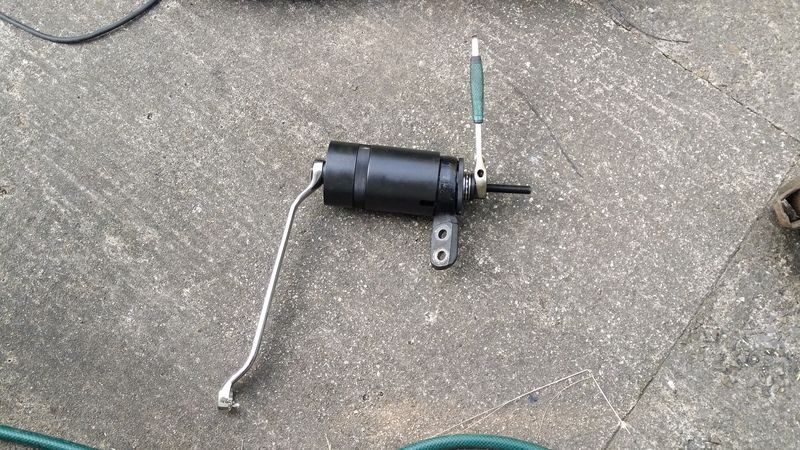


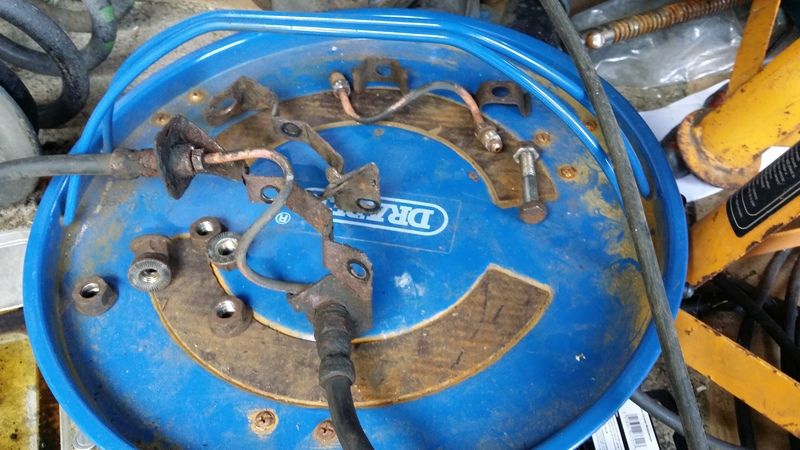
Also found out that the water bottle is bloody leaking around the washer jet pump. This has obviously been going on for years as it has caused a serious bit of rust below it which will also need fixing:

But yeah, onwards and upwards. Next job is to fit the rear trailing arm bushes and the rear coilovers. Hopefully will start this on Weds. Car is pencilled in for the coilover setup and geo on the 27th and hopefully a quote for the required welding. I might make it to a track by August at this rate!
I wanted to change the front wishbones for new items, but have decided that I need to focus on getting on track before this year is lost completely. The wishbones can be a winter job.
I decided to tackle the adjusting of the front coilovers and fit the front wishbone bushes at the same time. Yesterday taught me a huge lesson in not tackling a job without the correct tool. I managed to get one of the bushes off by hand and although it took quite some effort, I thought fair enough if it saves me buying a gear puller.
So I moved onto the other side. Oh dear god, I wish I hadn't started. It took me hours and hours of trying to twist the bugger off and I ended up giving up late on, with grazed arms, sore hands, etc. etc.
Tonight I arrived home with a three pronged puller and I took the bloody thing off in seconds. I'm absolutely fuming with myself for yesterday!
But nevertheless, progress has been made.
Unfortunately, the bush removal kit I have also got broken yesterday. I got too enthusiastic and had the threaded bar that goes through the middle the wrong way up. When the nut reached the end of the thread and I gave it some welly, it sheared. Luckily there are two threaded bars but it really grates that I've broken one through my own carelessness. I don't know who makes the kit so I doubt I will get a replacement if the other goes at some point.
Anyway, here are some photos of the job:
Also found out that the water bottle is bloody leaking around the washer jet pump. This has obviously been going on for years as it has caused a serious bit of rust below it which will also need fixing:
But yeah, onwards and upwards. Next job is to fit the rear trailing arm bushes and the rear coilovers. Hopefully will start this on Weds. Car is pencilled in for the coilover setup and geo on the 27th and hopefully a quote for the required welding. I might make it to a track by August at this rate!
I wanted to change the front wishbones for new items, but have decided that I need to focus on getting on track before this year is lost completely. The wishbones can be a winter job.
So Sunday was horrendous.
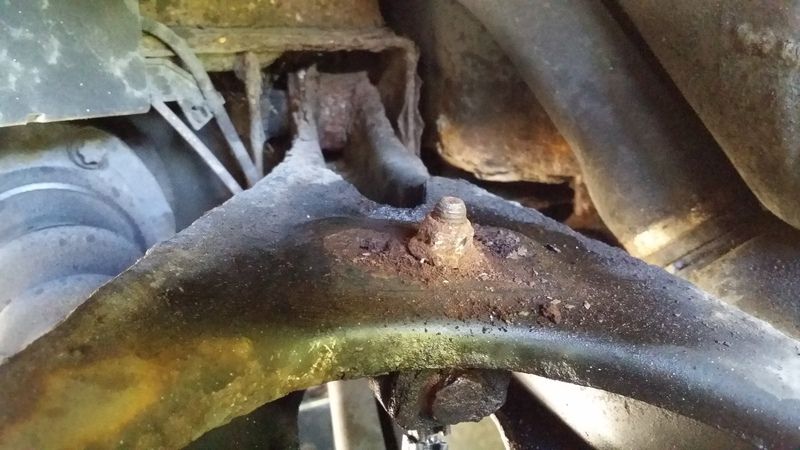
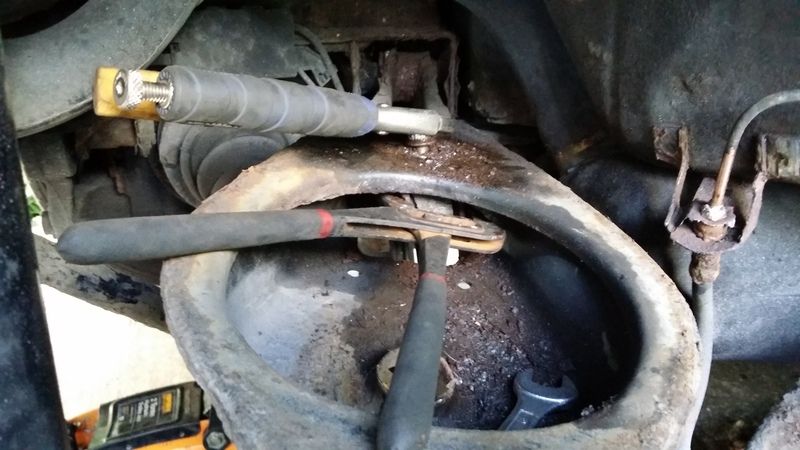
I decided to get on and do my RTABs. I also wanted to fit the rear shocks and springs. This was not to be. Basically, I looked at the bracket for the brake pipes on the trailing arms. The small 10mm bolts looked a little suspect, but I decided to have a go at them.
After the first one slipped the spanner right off, I thought f k it, I'll do my braided lines and just disconnect the brake hoses at the union higher up.
Well that was easier said than done! The blasted things were rusted to holy hell. Wire brushing the nuts just couldn't bring them back to how they should be. The flare nut wrench was useless on them and so it was time for the trusty mole grips. These basically disintegrated the nut and no amount of effort or swearing could move it. It's done.
I took a look at the other side, and found a rusted, non nut shaped nut there also. I didn't even bother messing with it.
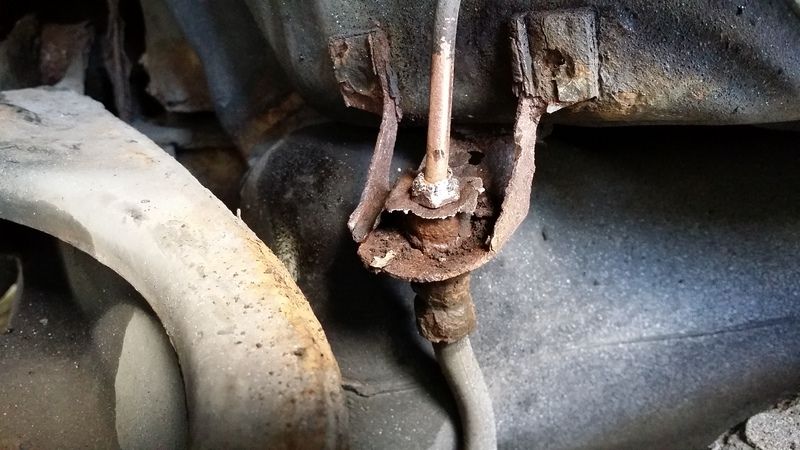
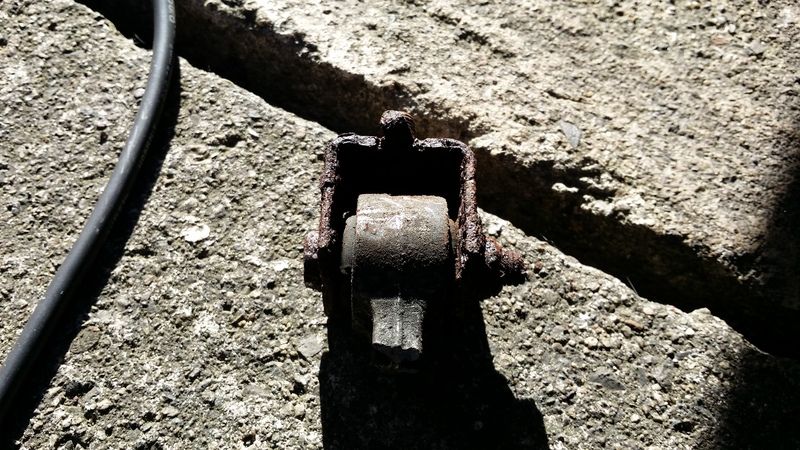
As if that wasn't enough, the driver's side rear droplink was found snapped in two. Removing the drop links was huge fun.
I decided to get the brackets off at the top too as they looked like they were going to be tough to unbolt. The nuts on the tops of the brackets both needed grips as they were too rusty and the spanners and sockets couldn't bite on them.
To top it all off, a bracket that the handbrake cable runs through right next to the front subframe bush completely disintegrated. That looks like a replaceable part under normal circumstances, but the nut for that also looks quite screwed. I predict another disintegration or a good ol' fashioned shearing when I attempt to remove it.
All in all a really stty day and no real progress to speak of, more a step backwards.
SO..... There's been a rethink. I've had to accept that there's just too much to do to keep clinging to the idea of getting the car on track this summer. It's a far bigger job than I thought at the start and it needs a major root and branch overhaul. I've reached a turning point here and I either go all out or I keep trying to patch holes (quite literally in some cases!) and limp on.
As a result of this, I am now going to take the rear subframe assembly off seeing as the rear suspension is already off and the RTABs still need doing. It seems like the best time in the long run. I can then check on and remedy any rust and seal it all up and get the bushes done here.
As a further consequence of this, I am switching from Powerflex Black to Strongflex yellow bushes for this build. These are 90 Shore and so stronger than Powerflex purple but a touch less than the black series at 95 Shore. They are less than half the price and I feel it's a worthwhile sacrifice.
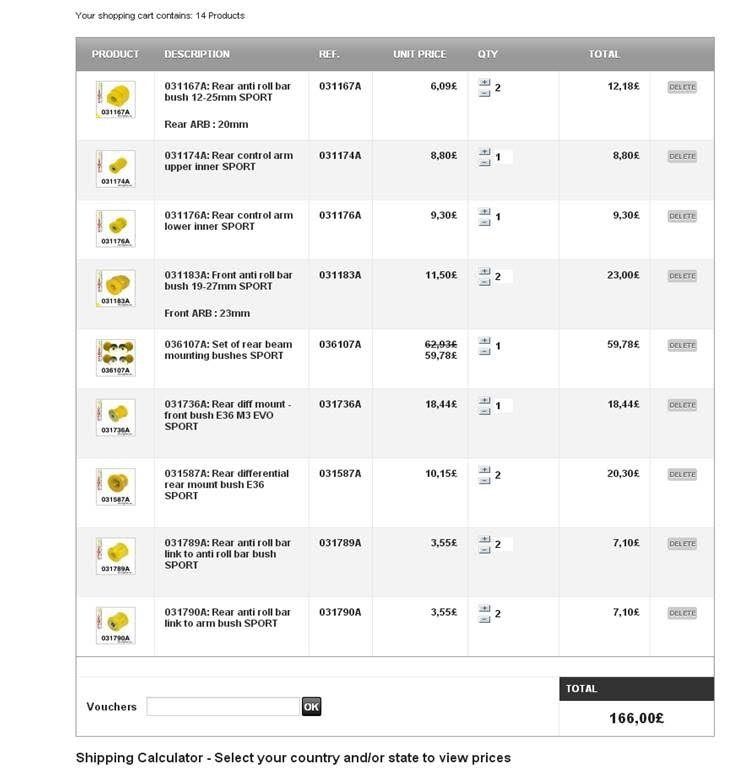
I am all set to order the following:
And today I bought this (terrible photo!):
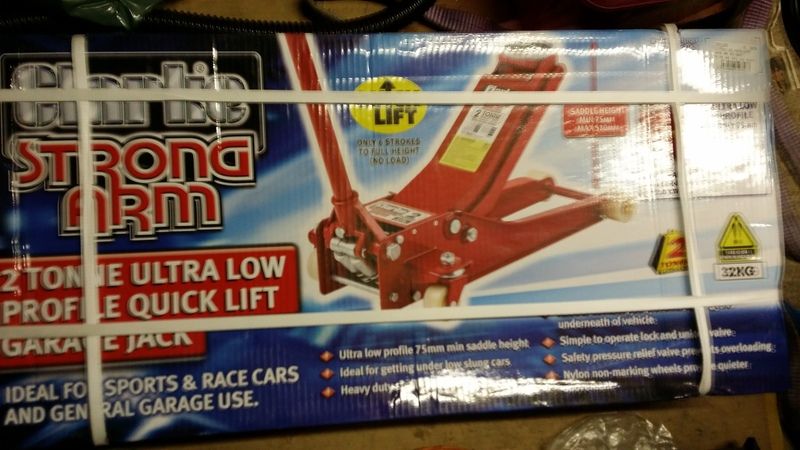
A high lift, low entry jack. This will really help me and will be a nice step up from the crappy little £30 trolley jacks I use now.
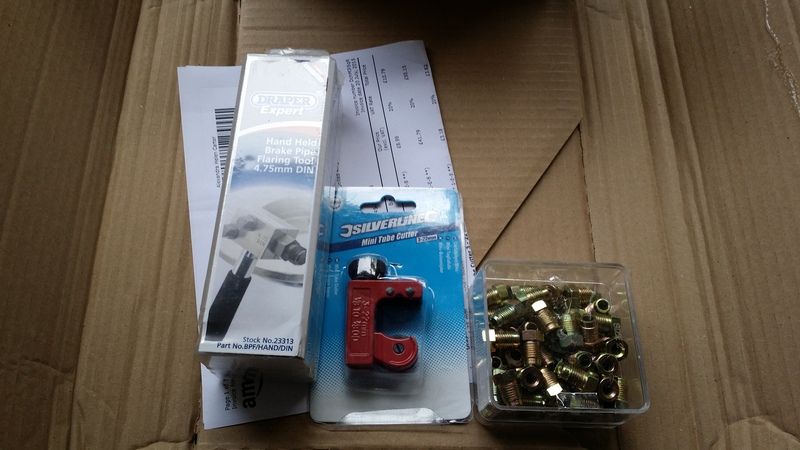
I also ordered new rear drop links and a lower temp switch from a 318is so that I can do the viscous fan delete. New nuts and bolts and other whatnots are also on the way as part of the rear overhaul.
I plan to cut the brake pipes and flare them with new nuts. I've bought this for the job:
http://www.amazon.co.uk/Draper-Expert-23313-Hand-H...
Anyway, enough waffling. Yesterday it felt like the end of the world, today it feels like I have to just keep going and the reward will come if I stop putting the pressure on myself and take it one step at a time.
Some pics of the carnage:
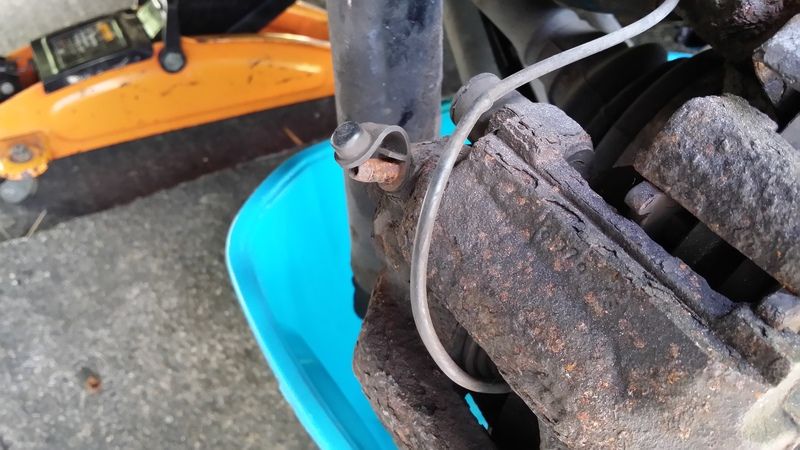
I decided to get on and do my RTABs. I also wanted to fit the rear shocks and springs. This was not to be. Basically, I looked at the bracket for the brake pipes on the trailing arms. The small 10mm bolts looked a little suspect, but I decided to have a go at them.
After the first one slipped the spanner right off, I thought f
k it, I'll do my braided lines and just disconnect the brake hoses at the union higher up.Well that was easier said than done! The blasted things were rusted to holy hell. Wire brushing the nuts just couldn't bring them back to how they should be. The flare nut wrench was useless on them and so it was time for the trusty mole grips. These basically disintegrated the nut and no amount of effort or swearing could move it. It's done.
I took a look at the other side, and found a rusted, non nut shaped nut there also. I didn't even bother messing with it.
As if that wasn't enough, the driver's side rear droplink was found snapped in two. Removing the drop links was huge fun.
I decided to get the brackets off at the top too as they looked like they were going to be tough to unbolt. The nuts on the tops of the brackets both needed grips as they were too rusty and the spanners and sockets couldn't bite on them.
To top it all off, a bracket that the handbrake cable runs through right next to the front subframe bush completely disintegrated. That looks like a replaceable part under normal circumstances, but the nut for that also looks quite screwed. I predict another disintegration or a good ol' fashioned shearing when I attempt to remove it.
All in all a really s
tty day and no real progress to speak of, more a step backwards. SO..... There's been a rethink. I've had to accept that there's just too much to do to keep clinging to the idea of getting the car on track this summer. It's a far bigger job than I thought at the start and it needs a major root and branch overhaul. I've reached a turning point here and I either go all out or I keep trying to patch holes (quite literally in some cases!) and limp on.
As a result of this, I am now going to take the rear subframe assembly off seeing as the rear suspension is already off and the RTABs still need doing. It seems like the best time in the long run. I can then check on and remedy any rust and seal it all up and get the bushes done here.
As a further consequence of this, I am switching from Powerflex Black to Strongflex yellow bushes for this build. These are 90 Shore and so stronger than Powerflex purple but a touch less than the black series at 95 Shore. They are less than half the price and I feel it's a worthwhile sacrifice.
I am all set to order the following:
And today I bought this (terrible photo!):
A high lift, low entry jack. This will really help me and will be a nice step up from the crappy little £30 trolley jacks I use now.
I also ordered new rear drop links and a lower temp switch from a 318is so that I can do the viscous fan delete. New nuts and bolts and other whatnots are also on the way as part of the rear overhaul.
I plan to cut the brake pipes and flare them with new nuts. I've bought this for the job:
http://www.amazon.co.uk/Draper-Expert-23313-Hand-H...
Anyway, enough waffling. Yesterday it felt like the end of the world, today it feels like I have to just keep going and the reward will come if I stop putting the pressure on myself and take it one step at a time.
Some pics of the carnage:
Cheers, just hoping the bushes don't take too long to come.
Luckily I noticed that I only had 1 of each in my basket for the rear control arms before I ordered! Changed that to 2. Almost £200 but hugely cheaper than Powerflex. I read a few reviews which satisfied me that they were worth going for.
I think that I will also look into giving the brake calipers a proper refurb and paint too seeing as I'm going to do all of this properly now.
Something arrived today!
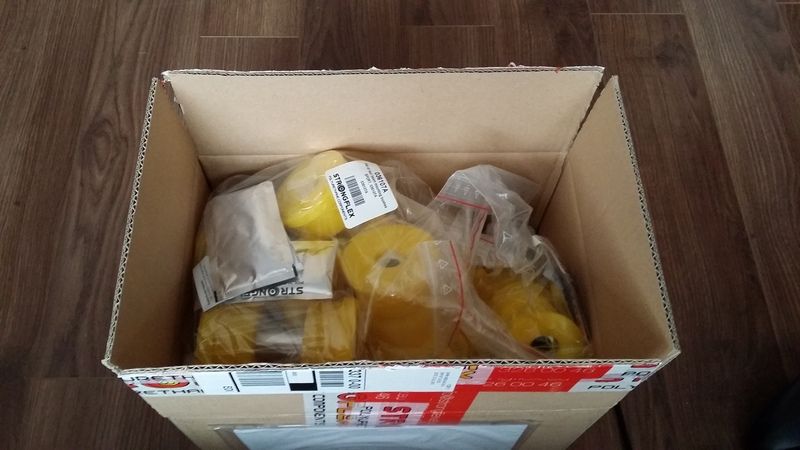
My comprehensive set of Strongflex 90 shA bushes. Subframe, diff, rear arms, rear drop links, ARBs etc. The hard work will soon start! I actually have a few things to do before I start removing the rear axle though. I need to build my shed and free up a bit of space in the garage. The rear axle will need somewhere to sit while it's off the car.
I'm hoping that after this weekend I can really get stuck into this and make quick progress with it, but who knows how long it will end up taking?!
The thing I'm actually most eager to get to is the chassis above the subframe so that I can really check the rust situation up there and rust proof it if all is well.
I think that I should probably take the whole lot apart, get the diff carrier stripped and painted, even if it's just with Hammerite and it might be pertinent to do the diff seals etc. I haven't decided yet, but it's one of those jobs that seems like it should be done when an opportunity presents itself.
So yesterday I found out that my work contract is being ended 2 months early, due to a lack of workload coming in. Not the best news, and all my money is tied up in the M3 instead of savings currently!
If I end up stuck at home for a couple of weeks, progress will certainly speed up, but it's not a nice situation to be in. I hope to find a new contract fairly quickly.....
If I end up stuck at home for a couple of weeks, progress will certainly speed up, but it's not a nice situation to be in. I hope to find a new contract fairly quickly.....
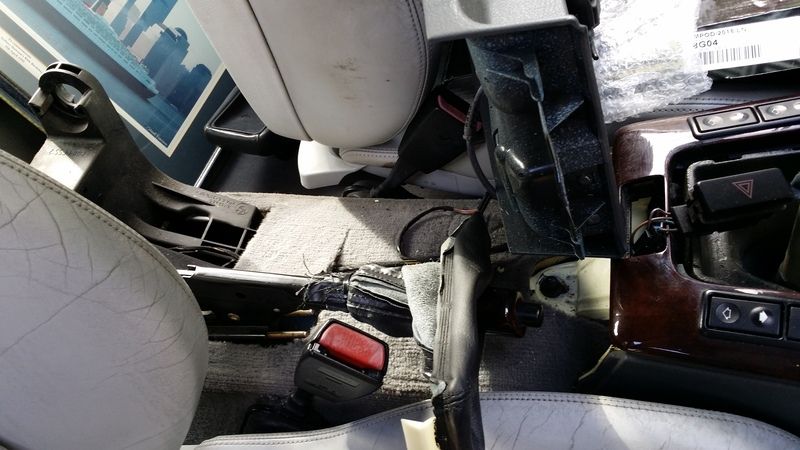
Yesterday saw me attempt the rear axle removal!
Started off OK, took the centre console apart to get at the handbrake cables. I had been advised that pulling them through to the outside was the best way to disconnect them, as taking them off at the hub end is a nightmare.
So, as I've mentioned before, the terrible state of the nuts on the brake lines meant cutting the hard lines. They are already copper on this car, so I aim to reflare and re-nut. Hopefully I will get the hang of this on the practice pieces I have.
The bolts that hold the brake lines to the rear trailing arms were also unwilling to play ball, so I had to use some extractor nuts on them. But they came off in the end. Unfortunately the hard lines on the brackets have the same problem as the ones on the car and while I was able to undo one of them with grips, the other needs cutting off. I'm not sure if I can reflare these and just reshape them enough to stretch them out a bit so that they can be reused. I do hope so.
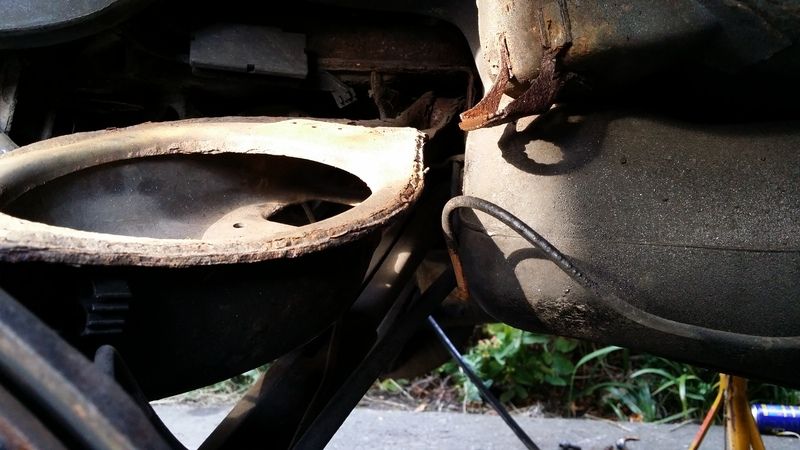
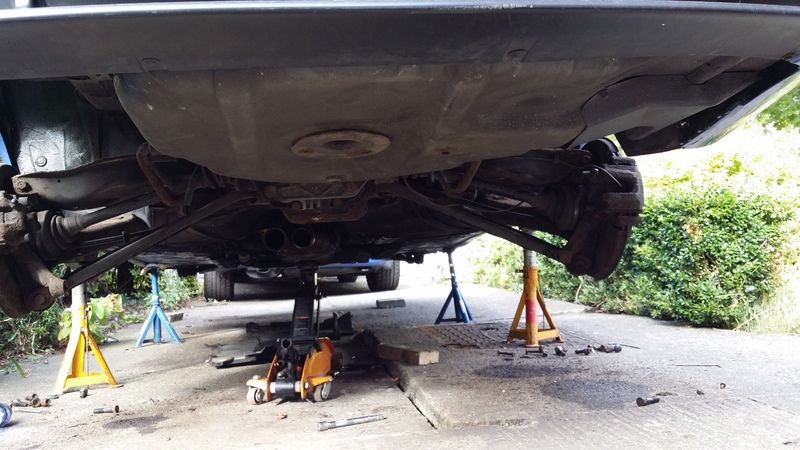
Dropped the exhaust:
I knew that the ABS sensors weren't going to come out of the hubs, and indeed the bolts on them don't look too clever. I imagine if these end up needing to be replaced, it will be taken to a specialist and they can drill it out etc. for me. For now, I simply unplugged the loom connectors instead.
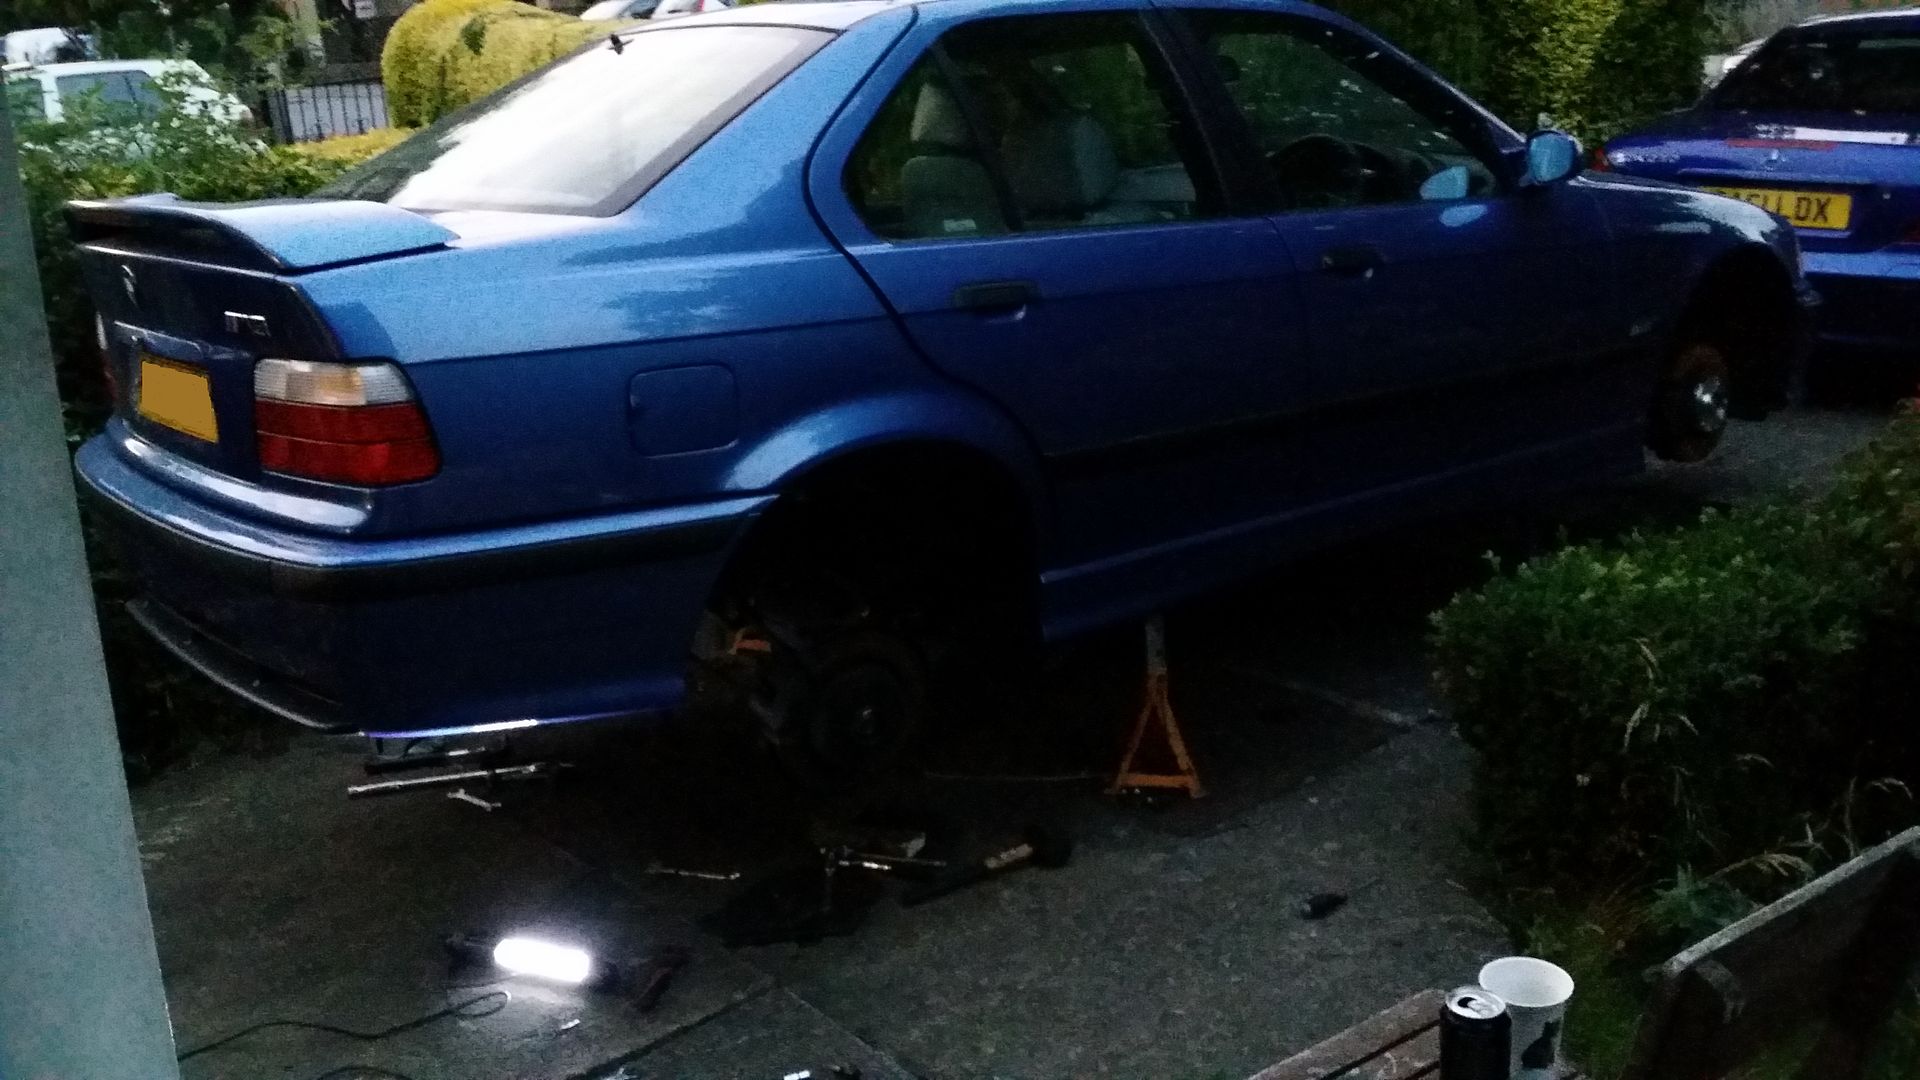
I started to lose the light as I came into the home stretch:
I moved onto the trailing arm bolts and had a hell of a time with them. Most of them were very difficult to undo, but not impossible, although I did have my breaker bar bent with a nice curve to it a few times. The worst one, it just would not move. It claimed the life of my impact gun! After much on and off with the gun, trying to get it to turn, the gun blew. Great. So everything after that was by hand. Thankfully after much sweating and swearing, the bolt gave and I was able to remove it. I will be replacing all of these bolts!
I then got underneath the car and undid the 6 propshaft to diff nuts. I kept coming out, putting the car in gear then undoing two of them. Them taking it out of gear, turning the prop and repeat.
I was all set to drop the subframe finally. With some trepidation I got under the car, sprayed the nuts/bolts with release agent and set about the task. 20 years of crud and crap made its presence felt and I had to hammer sockets on, going down 1mm at a time until I found the correct sizes and knocked the crud off the nuts/bolts.
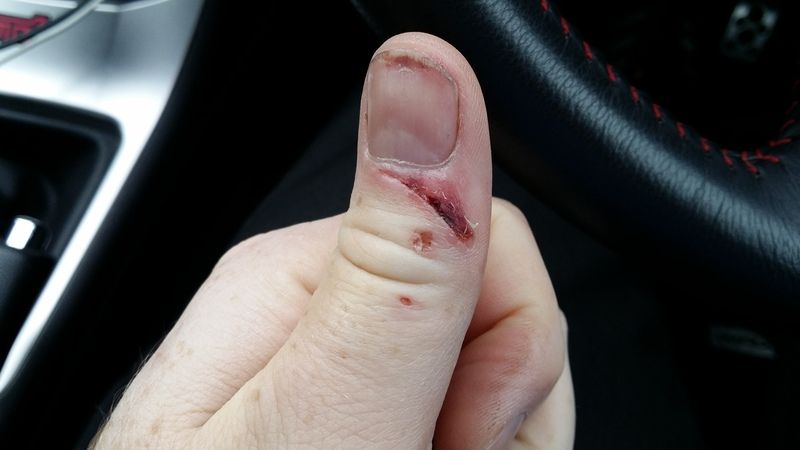
I found that I was able to turn all four of them and was delighted! It was about to happen! Then disaster struck.
One of the sockets I'd had to hammer on was properly stuck. I started to really wrench at it with the ratchet so that it might come off the bolt.
Well, come off it did. And my thumb went hard into the side of the jack, splitting it right across the front and down to the side. It was bleeding like mad.
After cleaning it and putting a big plaster on, I went out to continue but I soon realised that I didn't feel quite right! I cleared up the tools and resigned myself to leaving the axle loosened but in place.
I'll get under there tonight and drop it. I'm happy that progress has been made but I am gutted I wasn't able to complete the job last night. I'm dying to see up under the subframe because I need to know the condition of the shell up there. If it's good, I'll clean it up and carry on. If it's bad it might mean having to consider a reshell. I don't want that to be the case so my fingers are firmly crossed on this one.
Started off OK, took the centre console apart to get at the handbrake cables. I had been advised that pulling them through to the outside was the best way to disconnect them, as taking them off at the hub end is a nightmare.
So, as I've mentioned before, the terrible state of the nuts on the brake lines meant cutting the hard lines. They are already copper on this car, so I aim to reflare and re-nut. Hopefully I will get the hang of this on the practice pieces I have.
The bolts that hold the brake lines to the rear trailing arms were also unwilling to play ball, so I had to use some extractor nuts on them. But they came off in the end. Unfortunately the hard lines on the brackets have the same problem as the ones on the car and while I was able to undo one of them with grips, the other needs cutting off. I'm not sure if I can reflare these and just reshape them enough to stretch them out a bit so that they can be reused. I do hope so.
Dropped the exhaust:
I knew that the ABS sensors weren't going to come out of the hubs, and indeed the bolts on them don't look too clever. I imagine if these end up needing to be replaced, it will be taken to a specialist and they can drill it out etc. for me. For now, I simply unplugged the loom connectors instead.
I started to lose the light as I came into the home stretch:
I moved onto the trailing arm bolts and had a hell of a time with them. Most of them were very difficult to undo, but not impossible, although I did have my breaker bar bent with a nice curve to it a few times. The worst one, it just would not move. It claimed the life of my impact gun! After much on and off with the gun, trying to get it to turn, the gun blew. Great. So everything after that was by hand. Thankfully after much sweating and swearing, the bolt gave and I was able to remove it. I will be replacing all of these bolts!
I then got underneath the car and undid the 6 propshaft to diff nuts. I kept coming out, putting the car in gear then undoing two of them. Them taking it out of gear, turning the prop and repeat.
I was all set to drop the subframe finally. With some trepidation I got under the car, sprayed the nuts/bolts with release agent and set about the task. 20 years of crud and crap made its presence felt and I had to hammer sockets on, going down 1mm at a time until I found the correct sizes and knocked the crud off the nuts/bolts.
I found that I was able to turn all four of them and was delighted! It was about to happen! Then disaster struck.
One of the sockets I'd had to hammer on was properly stuck. I started to really wrench at it with the ratchet so that it might come off the bolt.
Well, come off it did. And my thumb went hard into the side of the jack, splitting it right across the front and down to the side. It was bleeding like mad.
After cleaning it and putting a big plaster on, I went out to continue but I soon realised that I didn't feel quite right! I cleared up the tools and resigned myself to leaving the axle loosened but in place.
I'll get under there tonight and drop it. I'm happy that progress has been made but I am gutted I wasn't able to complete the job last night. I'm dying to see up under the subframe because I need to know the condition of the shell up there. If it's good, I'll clean it up and carry on. If it's bad it might mean having to consider a reshell. I don't want that to be the case so my fingers are firmly crossed on this one.
Edited by TroubledSoul on Monday 17th August 11:36
Edited by TroubledSoul on Sunday 31st January 23:17
Oh my goodness, what an evening I had!
But it's out!

Honestly, it was far tougher than I expected, plus it fell off the jack to boot. That wasn't part of the plan, and I had to drag it out from under the car.
Separating the prop from the diff flange was a nightmare. Stuff I've read online makes it sound easy; it's not. I ended up resorting to a few whacks with the lump hammer which did the trick. By then however, I'd lowered the axle a bit to try and create some wiggle room. I ended up with the prop CV on an awkward angle and I was having to rotate it a bit at a time and tap a chisel in between the two bits to fully separate it. Plus it was full of that awful CV grease/oil that got all over the tools and me!
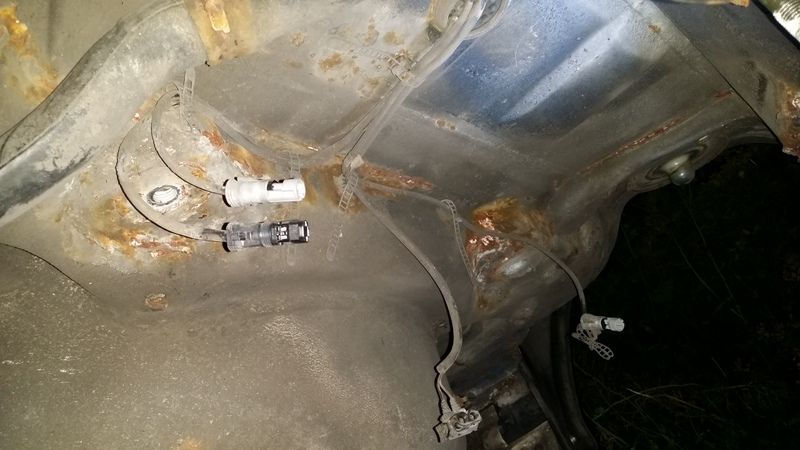
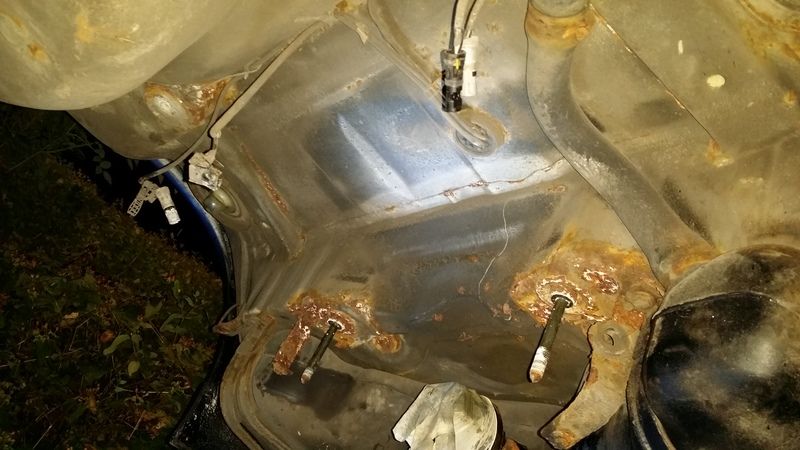
But the really good news is that the underside isn't bad at all above the subframe. It's actually pretty good other than the subframe mounting points, but even they are only afflicted with surface rust, as flakey as it is. I did my best Norman Bates on any rusty bits I could find with a screwdriver and nothing gave even a hint of giving way. To say I am pleased is an understatement!
A couple of (admittedly poor) photos:
Oh an here's my lovely thumb!:
So good progress. The next challenge will be to get the subrframe and diff apart and get those bushes out. Then I can start rubbing it all down and paint it up.
I need to decide whether to paint all of the underbody around that area above the subrframe now, or whether to try and paint only around the mounting points. I suspect rubbing the whole area down and using Hammerite spray paint is my best bet. Should I seal it with lacquer or something after that?
I'm also wondering whether to risk the dodgy looking bolts that hold in the fuel tank, as I can see some scabbing up there but don't know if they would survive a removal attempt......
Until next time!
But it's out!
Honestly, it was far tougher than I expected, plus it fell off the jack to boot. That wasn't part of the plan, and I had to drag it out from under the car.
Separating the prop from the diff flange was a nightmare. Stuff I've read online makes it sound easy; it's not. I ended up resorting to a few whacks with the lump hammer which did the trick. By then however, I'd lowered the axle a bit to try and create some wiggle room. I ended up with the prop CV on an awkward angle and I was having to rotate it a bit at a time and tap a chisel in between the two bits to fully separate it. Plus it was full of that awful CV grease/oil that got all over the tools and me!
But the really good news is that the underside isn't bad at all above the subframe. It's actually pretty good other than the subframe mounting points, but even they are only afflicted with surface rust, as flakey as it is. I did my best Norman Bates on any rusty bits I could find with a screwdriver and nothing gave even a hint of giving way. To say I am pleased is an understatement!
A couple of (admittedly poor) photos:
Oh an here's my lovely thumb!:
So good progress. The next challenge will be to get the subrframe and diff apart and get those bushes out. Then I can start rubbing it all down and paint it up.
I need to decide whether to paint all of the underbody around that area above the subrframe now, or whether to try and paint only around the mounting points. I suspect rubbing the whole area down and using Hammerite spray paint is my best bet. Should I seal it with lacquer or something after that?
I'm also wondering whether to risk the dodgy looking bolts that hold in the fuel tank, as I can see some scabbing up there but don't know if they would survive a removal attempt......
Until next time!

TheAngryDog said:
Nice work, you earned your beer last night!
Personally given that you have really good access to everything, I'd deal with the rusty bits, hammerite and then do some undersealing. It would be silly not to with everything out of the way imo.
You mean drop the tank and get up under there too? I may yet do that. I'm not sure which underseal to use after I paint it, but I'd like something quite easy to apply. Personally given that you have really good access to everything, I'd deal with the rusty bits, hammerite and then do some undersealing. It would be silly not to with everything out of the way imo.
I'm a bit apprehensive about those bolts for the fuel tank. Shearing anything would be a disaster, as would rounding them and being unable to remove them.
I'm going to be very busy under there with a wire brush drill bit and some wire wool!
The biggest problem with this car is that the previous owner has caked the rest of the underside in thick, sticky underseal and covered rust up instead of seeking to remedy it.
I'd like to remove some of this, at least in areas that show signs of stuff being covered up that needs treating. I just don't know if it's really possible/practical with this stuff.
The amount of time it's taking is frustrating, but it's also quite exciting piecing it together.
I guess you have to remember that many of those fittings have been there for 20+years. When I stripped an old motorbike some years ago I found out how helpful an overnight soak in WD40 was before I resorted to Mole Grips, drilling out, taps and dies then the angle grinder (maybe not near the tank though!) But so many times I didn't want to wait for things to soak, I just wanted to get on!
Looked at one of these a year or so ago up for about £6,000 - it looked good and the description was promising but I bottled it, so fair play to you for saving one! 4 door M3's aren't exactly plentiful!
Would love to do something like this myself but an allocated parking space isn't an ideal working environment.
Keep going - it will surely all be worth it.
Gassing Station | Readers' Cars | Top of Page | What's New | My Stuff