3rd Time Lucky; E36 M3 Evolution Saloon
Discussion


Oh my goodness, what an evening I had!
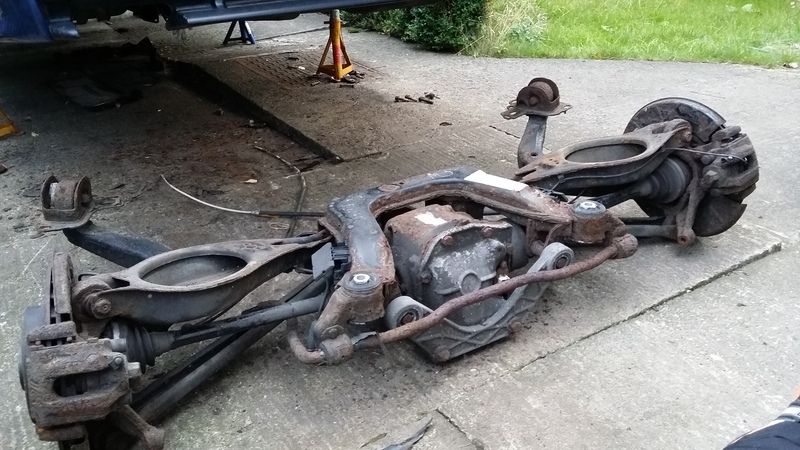
But it's out!

Honestly, it was far tougher than I expected, plus it fell off the jack to boot. That wasn't part of the plan, and I had to drag it out from under the car.
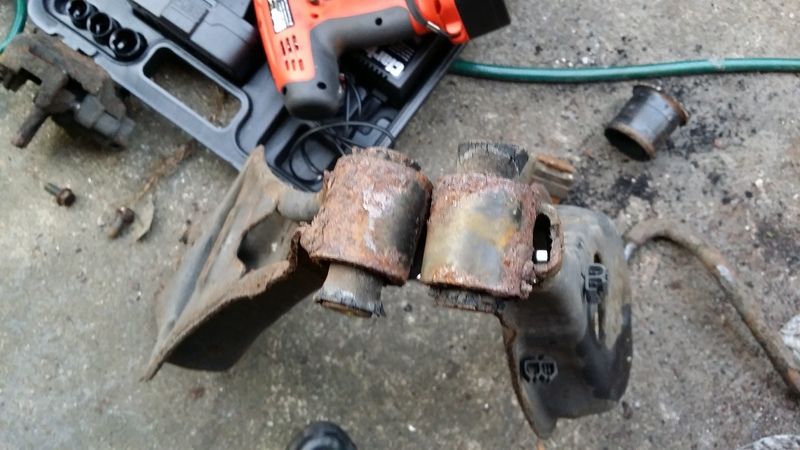
Separating the prop from the diff flange was a nightmare. Stuff I've read online makes it sound easy; it's not. I ended up resorting to a few whacks with the lump hammer which did the trick. By then however, I'd lowered the axle a bit to try and create some wiggle room. I ended up with the prop CV on an awkward angle and I was having to rotate it a bit at a time and tap a chisel in between the two bits to fully separate it. Plus it was full of that awful CV grease/oil that got all over the tools and me!
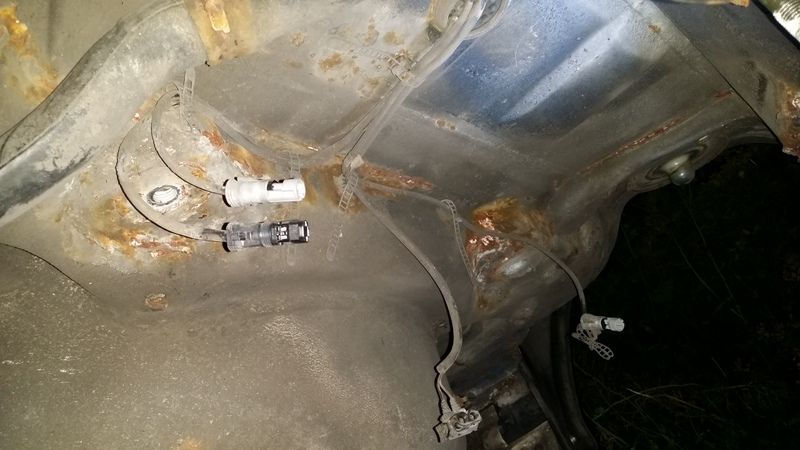
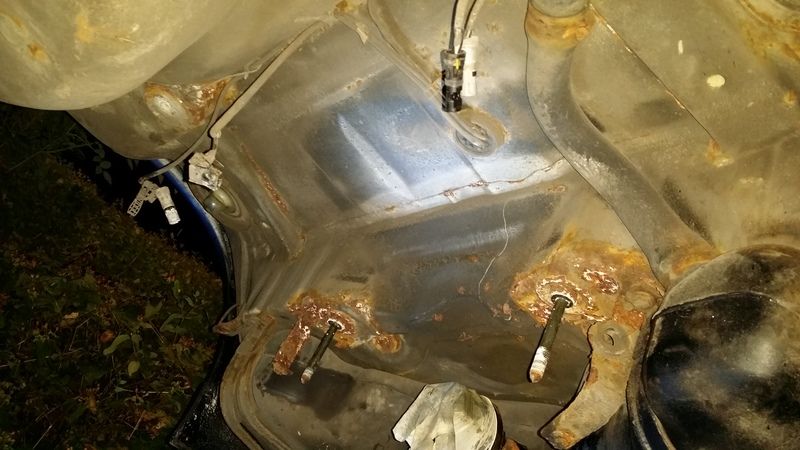
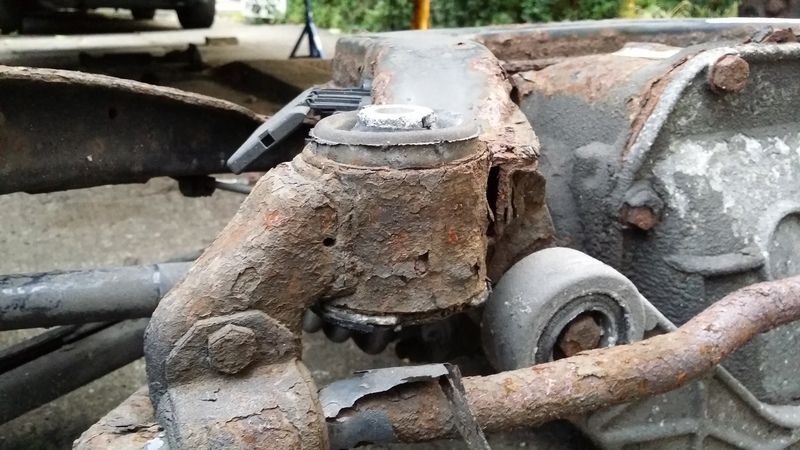
But the really good news is that the underside isn't bad at all above the subframe. It's actually pretty good other than the subframe mounting points, but even they are only afflicted with surface rust, as flakey as it is. I did my best Norman Bates on any rusty bits I could find with a screwdriver and nothing gave even a hint of giving way. To say I am pleased is an understatement!
A couple of (admittedly poor) photos:
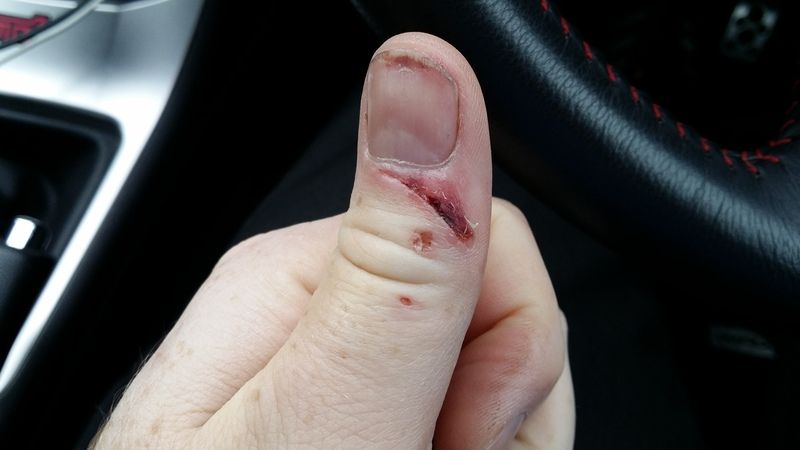
Oh an here's my lovely thumb!:
So good progress. The next challenge will be to get the subrframe and diff apart and get those bushes out. Then I can start rubbing it all down and paint it up.
I need to decide whether to paint all of the underbody around that area above the subrframe now, or whether to try and paint only around the mounting points. I suspect rubbing the whole area down and using Hammerite spray paint is my best bet. Should I seal it with lacquer or something after that?
I'm also wondering whether to risk the dodgy looking bolts that hold in the fuel tank, as I can see some scabbing up there but don't know if they would survive a removal attempt......
Until next time!
But it's out!
Honestly, it was far tougher than I expected, plus it fell off the jack to boot. That wasn't part of the plan, and I had to drag it out from under the car.
Separating the prop from the diff flange was a nightmare. Stuff I've read online makes it sound easy; it's not. I ended up resorting to a few whacks with the lump hammer which did the trick. By then however, I'd lowered the axle a bit to try and create some wiggle room. I ended up with the prop CV on an awkward angle and I was having to rotate it a bit at a time and tap a chisel in between the two bits to fully separate it. Plus it was full of that awful CV grease/oil that got all over the tools and me!
But the really good news is that the underside isn't bad at all above the subframe. It's actually pretty good other than the subframe mounting points, but even they are only afflicted with surface rust, as flakey as it is. I did my best Norman Bates on any rusty bits I could find with a screwdriver and nothing gave even a hint of giving way. To say I am pleased is an understatement!
A couple of (admittedly poor) photos:
Oh an here's my lovely thumb!:
So good progress. The next challenge will be to get the subrframe and diff apart and get those bushes out. Then I can start rubbing it all down and paint it up.
I need to decide whether to paint all of the underbody around that area above the subrframe now, or whether to try and paint only around the mounting points. I suspect rubbing the whole area down and using Hammerite spray paint is my best bet. Should I seal it with lacquer or something after that?
I'm also wondering whether to risk the dodgy looking bolts that hold in the fuel tank, as I can see some scabbing up there but don't know if they would survive a removal attempt......
Until next time!
TheAngryDog said:
Nice work, you earned your beer last night!
Personally given that you have really good access to everything, I'd deal with the rusty bits, hammerite and then do some undersealing. It would be silly not to with everything out of the way imo.
You mean drop the tank and get up under there too? I may yet do that. I'm not sure which underseal to use after I paint it, but I'd like something quite easy to apply. Personally given that you have really good access to everything, I'd deal with the rusty bits, hammerite and then do some undersealing. It would be silly not to with everything out of the way imo.
I'm a bit apprehensive about those bolts for the fuel tank. Shearing anything would be a disaster, as would rounding them and being unable to remove them.
I'm going to be very busy under there with a wire brush drill bit and some wire wool!
The biggest problem with this car is that the previous owner has caked the rest of the underside in thick, sticky underseal and covered rust up instead of seeking to remedy it.
I'd like to remove some of this, at least in areas that show signs of stuff being covered up that needs treating. I just don't know if it's really possible/practical with this stuff.
The amount of time it's taking is frustrating, but it's also quite exciting piecing it together.
Mr Tidy said:
I guess you have to remember that many of those fittings have been there for 20+years. When I stripped an old motorbike some years ago I found out how helpful an overnight soak in WD40 was before I resorted to Mole Grips, drilling out, taps and dies then the angle grinder (maybe not near the tank though!) But so many times I didn't want to wait for things to soak, I just wanted to get on!
Looked at one of these a year or so ago up for about £6,000 - it looked good and the description was promising but I bottled it, so fair play to you for saving one! 4 door M3's aren't exactly plentiful!
Would love to do something like this myself but an allocated parking space isn't an ideal working environment.
Keep going - it will surely all be worth it.
Cheers, it will be worth it, it's just a very long road. Looked at one of these a year or so ago up for about £6,000 - it looked good and the description was promising but I bottled it, so fair play to you for saving one! 4 door M3's aren't exactly plentiful!
Would love to do something like this myself but an allocated parking space isn't an ideal working environment.
Keep going - it will surely all be worth it.
I have taps, bolt extractors, WD40 etc. You just can't tackle a job like this without them! I didn't expect to have to flare brake lines for the first time when I started this though....
I get that the wheel is bad but it's a track car and is the right shape and size. I needed a flat bottomed wheel and it wasn't expensive. If it does my head in once I'm using it, I'll change it

jonah35 said:
Argh, that steering wheel has devalued the car by £2k
What did you pay for the car op? How much have you spent on parts/mods?
I'm always interested in threads like these because I often reckon that it would be better to buy a better, lower mileage more original car in the first place but I could be wrong
Good choice of car
Hi Jonah, basically the car cost me £4.5k. Having got to grips with it now, I'd say it should have been under £4k, but hey ho. The way the guy has undersealed it made it look like it had had things done properly etc. but we now know that's not really the case!What did you pay for the car op? How much have you spent on parts/mods?
I'm always interested in threads like these because I often reckon that it would be better to buy a better, lower mileage more original car in the first place but I could be wrong
Good choice of car
But the main thing here is; this is a track build, not a restoration as such. It's had a blow over by the looks of it to tart it up a bit and in all fairness other than a couple of tiny bits of overspray in just one or two areas, they haven't done a bad job. But the thing I have to accept is that it's going to get beaten, battered and bruised so spending extra on a mint example just made no sense.
I could have done without the rust under the wing and the underseal bodge but the truth is, that's the worst of it. Now I've dropped the subframe and can see it all, I've no longer got any worries about that.
If I had spent say, £6.5k on a minter then I would still have had to change:
Suspension
All bushes
Steering rack
Brake hoses
Seats
and so on. Then I'd have had to see it get beaten up on track knowing that I destroyed a minter that deserved preservation. I couldn't do that. I had the money and could have bought such a car had I wanted.
I do hope that makes sense though?
As for costs, wow, let's have a think:
Car: £4.5k
THAT steering wheel: £60 new from DT
HSD Monopros, used but only for 2k miles: £450
Used braided brake hoses: £50
New silicone plenum hoses: £110
Bonnet struts: £35
Momo E36 airbag steering boss: £40
Z3 steering rack: £70
Z3 rear strut reinforcement plates: £15
Powerflex Black RTABs: £60 ish I think
Powerflex black front wishbone bushes: £55 ish I think (can't for the life of me remember for these)
Strongflex rear axle bushes, complete set + front ARB bushes: £200
Dave F induction kit: £Free, taken off other car
Scorpion exhaust: £Free, taken off other car
Low entry, high lift jack to do rear axle work: £200
Aux belts: £20
Spark plugs: £40
Fuel filter: £8-10
Oil filter: £8-£10
Oil: £30 (Just bought Triple QX from ECP for the first change as a flush)
Underbody X-Brace: £50
Assorted nuts, bolts, seals etc. from BMW probably £100
And there's likely some things I have forgotten and there is more to spend on seats, cage, welding, geo, fire extinguisher etc.
But that's the beauty of having a long term project. It's definitely cheaper buying a car all done, but you won't know it inside out nor will you have the fun of building it, which for me is important.
TheAllSeeingPie said:
Isn't this supposed to be a cheap track car? If so the wheel looks fine if it's the right size/shape the OP wants. I'd prefer he spent his money on performance than trinkets 
Indeed! 
Possibly not so cheap anymore, but still..... I can't wait to take it for its first track outing, however far away that might be just now.

M3John said:
 ^
^I had mine done by him. Absolutely superb work and finish!
Just been amassing part numbers for new nuts and bolts for the rear axle. I think I am going to take my brave pills and try to get those fuel tank bolts out when I'm done refurbing the axle assembly. I'll get right under there, clean it and rust proof it.
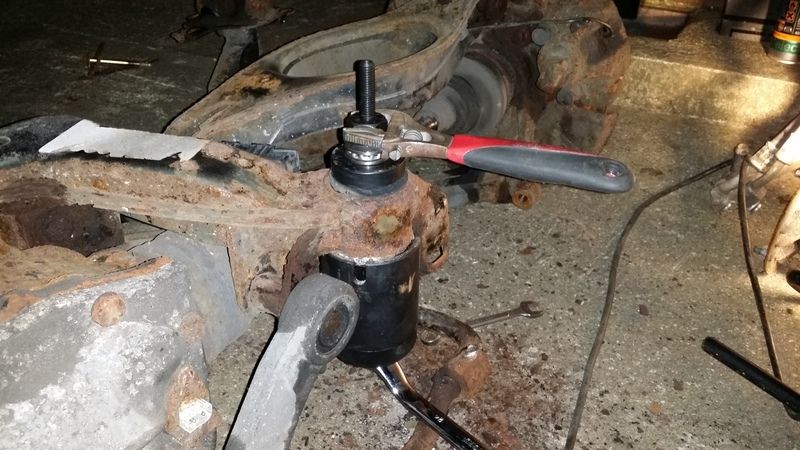
Minor update; I have made a start on the subframe bushes. But I got a bit eager and should have really separated the subframe from everything else first. I think I will do this before I attempt the get the front two out, although I did give them a bit of abuse last night
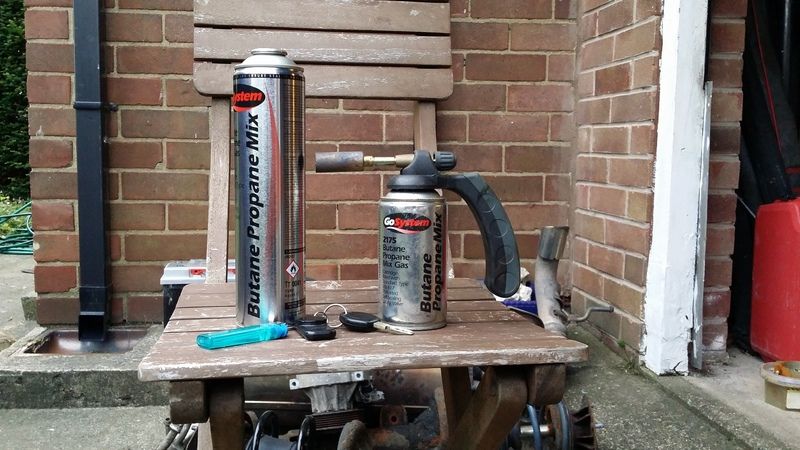
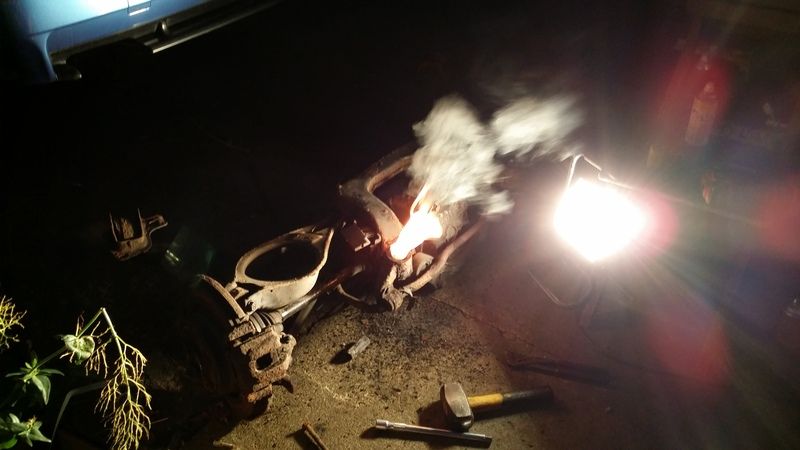
So, everybody on the forums says to burn the bushes out, it's easy etc. So how come when I try, it takes all night and they don't really burn out, they just burn a lot but still don't want to budge?
I ended up burning them, a lot. Then I drilled a few holes through, burnt them some more than managed to remove the metal sleeve in the centre with a bit of brute force, a lump hammer and a socket extension bar. Then I burnt them some more.
Once that was done, I removed them with a bush removal tool. I've read that you can't do these the same way as something like the RTABs because there's less metal around them and they won't take the pressure, and this is why I didn't use the bush tool from the off. With the centres all burned out, the removal was actually fairly easy.
I just wish I had not lost the use of my impact gun, as I would have taken the subframe off first had I had that still. Then I could have done this without worrying about the heat making the inner CV boots brittle, which I honestly didn't consider before I started. They do seem OK but I guess time will tell!
Pics:
More firepower needed!
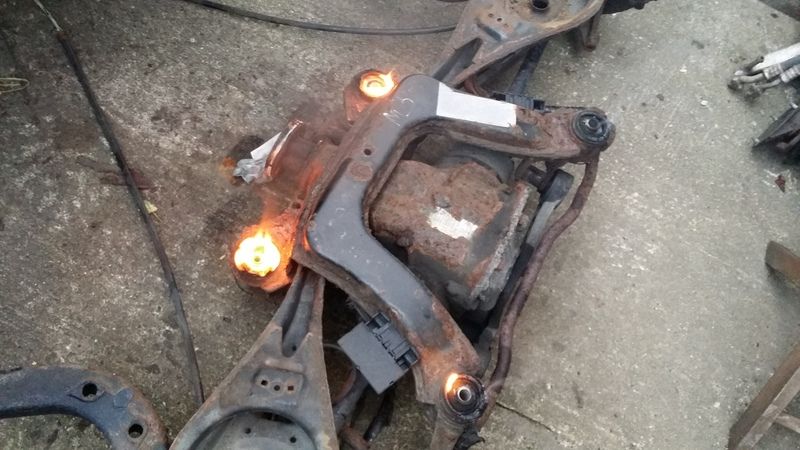
Unfortunately I had a bit of a fight with the ARB brackets. One of them, the nut and bolt came off easily, no hassle at all really but for a bit of crud on the bolt. The other, well it was pretty much welded in place and wasn't interested. I managed to whack my sore thumb right on the wound when trying to undo this and the socket slipped off.
That made me a little angry, so out came the grinder!
I ground the top of the bolt off and then hammered away with a screwdriver to get the bracket off of the subframe. More new bits to buy!
I'm slightly annoyed because the grinder grazed the anti roll bar twice. The direction I had to use it in meant that it was always trying to move down towards the bar. Luckily it genuinely is just a couple of grazes so shouldn't actually affect it. I think my pride is more hurt than the bar!
I'm learning a lot as I go, and I think I will take the axle assembly apart next, before trying to do any more bushes. I'm glad I did what I did last night because even though it took me hours, it's time saved when I next dedicate a full day to it on a weekend and means I'll get that bit further ahead. I can't be angry about that.
I still feel a million miles away from getting her on the road, but things are still moving and that's the main thing.
I have discovered a pair of rear trailing arms for sale with new wheel bearings and hub ball joints in for a ton, and the ball joints alone will cost me £76 plus the effort of changing them, so I may buy these arms....
As always, thanks for reading.
So, everybody on the forums says to burn the bushes out, it's easy etc. So how come when I try, it takes all night and they don't really burn out, they just burn a lot but still don't want to budge?
I ended up burning them, a lot. Then I drilled a few holes through, burnt them some more than managed to remove the metal sleeve in the centre with a bit of brute force, a lump hammer and a socket extension bar. Then I burnt them some more.
Once that was done, I removed them with a bush removal tool. I've read that you can't do these the same way as something like the RTABs because there's less metal around them and they won't take the pressure, and this is why I didn't use the bush tool from the off. With the centres all burned out, the removal was actually fairly easy.
I just wish I had not lost the use of my impact gun, as I would have taken the subframe off first had I had that still. Then I could have done this without worrying about the heat making the inner CV boots brittle, which I honestly didn't consider before I started. They do seem OK but I guess time will tell!
Pics:
More firepower needed!
Unfortunately I had a bit of a fight with the ARB brackets. One of them, the nut and bolt came off easily, no hassle at all really but for a bit of crud on the bolt. The other, well it was pretty much welded in place and wasn't interested. I managed to whack my sore thumb right on the wound when trying to undo this and the socket slipped off.
That made me a little angry, so out came the grinder!
I ground the top of the bolt off and then hammered away with a screwdriver to get the bracket off of the subframe. More new bits to buy!
I'm slightly annoyed because the grinder grazed the anti roll bar twice. The direction I had to use it in meant that it was always trying to move down towards the bar. Luckily it genuinely is just a couple of grazes so shouldn't actually affect it. I think my pride is more hurt than the bar!
I'm learning a lot as I go, and I think I will take the axle assembly apart next, before trying to do any more bushes. I'm glad I did what I did last night because even though it took me hours, it's time saved when I next dedicate a full day to it on a weekend and means I'll get that bit further ahead. I can't be angry about that.
I still feel a million miles away from getting her on the road, but things are still moving and that's the main thing.
I have discovered a pair of rear trailing arms for sale with new wheel bearings and hub ball joints in for a ton, and the ball joints alone will cost me £76 plus the effort of changing them, so I may buy these arms....
As always, thanks for reading.
M3John said:
This ^
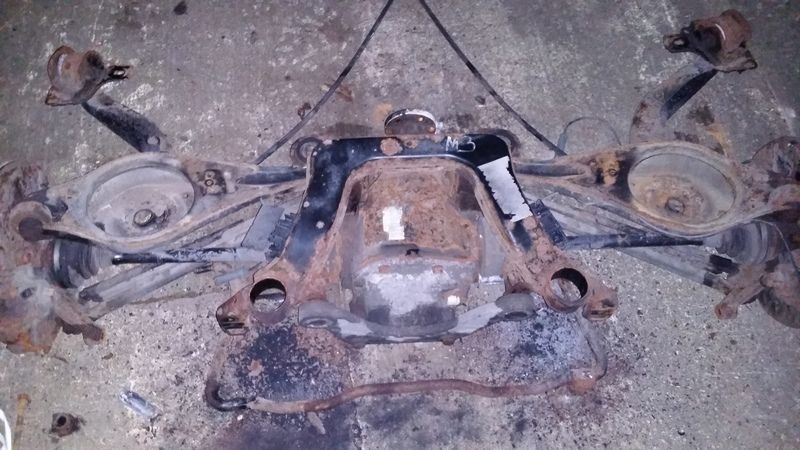
I'm looking at that subframe though and praying that you rub it down and give it a nice coat of Hammerite before it goes back on.
Cheers guys. I'm looking at that subframe though and praying that you rub it down and give it a nice coat of Hammerite before it goes back on.
Oh god yes! You don't go to all the trouble of getting the bloody thing off then do half a job!

No, I plan to strip it and get it all rubbed down, Kurust it and paint it. I need to rub it down to verify it's still all solid. The only question right now is whether to use a drill or grinder with the wire brush attachment.
Picked up a pair of Goodyear Eagle F1's for the front today, so I now have those to put on all round to replace the Infinitys.
I'd be very interested to know what people think regarding rubbing down the subframe. I'm thinking of using a drill and a wire brush attachment, but I'd be interested in whether I might be better off with a grinder and wire brush attachment or a flapper disc etc.? Obviously I don't want anything that will wear any of it away, hence my apprehension at using the grinder options.
I'd be very interested to know what people think regarding rubbing down the subframe. I'm thinking of using a drill and a wire brush attachment, but I'd be interested in whether I might be better off with a grinder and wire brush attachment or a flapper disc etc.? Obviously I don't want anything that will wear any of it away, hence my apprehension at using the grinder options.
Sf_Manta said:
You can get a wire brush attachment for the angle grinder, it won't remove any material but it will take it back to bare metal and prep it for paint in one hit.
Obviously best to have decent safety gear; proper goggles (not the glasses type), a mask gloves and overalls when you do it, as it'll flick rust and crud all over the place.
Trust me, you don't want to get bits of metal taken out your eyes, I've had it twice and it's not pleasant!
Cheers, yeah I bought the goggles and mask already Obviously best to have decent safety gear; proper goggles (not the glasses type), a mask gloves and overalls when you do it, as it'll flick rust and crud all over the place.
Trust me, you don't want to get bits of metal taken out your eyes, I've had it twice and it's not pleasant!
I figured that when I am on my back under the car, I don't want to be wire brushing rust with no facial protection!I've seen the wire brushes for the grinder where the brushes stick straight out so it's effectively flat. is that the type you'd recommend or should I be looking for the ones that a more like the drill type but for the grinder?
jmcc42uk said:
Hey, nice work. How did you get on re-flareing the brake lines?
Just reading back, I realised I had never responded to this, so apologies. I still haven't got to that part is the short answer!So, as for my rustproofing, will this do?
http://www.halfords.com/motoring/paints-body-repai...
There's also this, but not sure of the difference?:
http://www.halfords.com/motoring/paints-body-repai...
I am aiming to get some blue Hammerite spray and do the underside bits with that once rubbed down. Subframe, I am not sure. Could just do it black again or could do it something more interesting? Not sure if there's any point really, but I am thinking about it.
Plans for this weekend include attending a meet with the Subaru and getting to grips with this thing. Hopefully I will complete the subframe bush removal, split the subframe from the rest and start tackling all the rust, both on the car and on the subframe. I would like to get the fuel tank dropped too, but we'll see. One step at a time. I don't want to take that off until the rust is dealt with in the areas already accessible.
EDIT: Do I need this? My plan was to wire brush, Kurust, then paint with the Hammerite direct to metal. No plans to use primer currently as they say you don't need it. I am wondering if I should Wire brush, use the gel stuff, then Kurust, then paint?
Any benefit?
Edited by TroubledSoul on Wednesday 2nd September 12:08
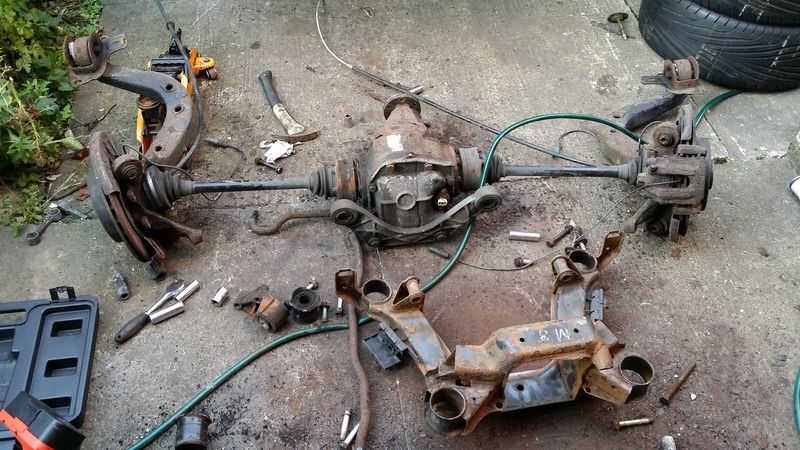
Well progress is currently too slow for my liking, but I did get the subframe apart yesterday and I have removed the bushes and started to strip the rust off of it.
[img]http://img.photobucket.com/albums/v600/jamesc1982/M3%20Track%20Car/20150906_190112.jpg/img]
Not that happy with the drill/wire brush thus far. I don't feel it's shifting the tough stuff well enough. There are a lot of bits that seem almost welded on that just don't move when having a go at them this way. I may have to try one of the grinder solutions. Any suggestions welcome. Is it worth applying the Deox stuff at this point or should that only be done once everything has been as well stripped back as possible?
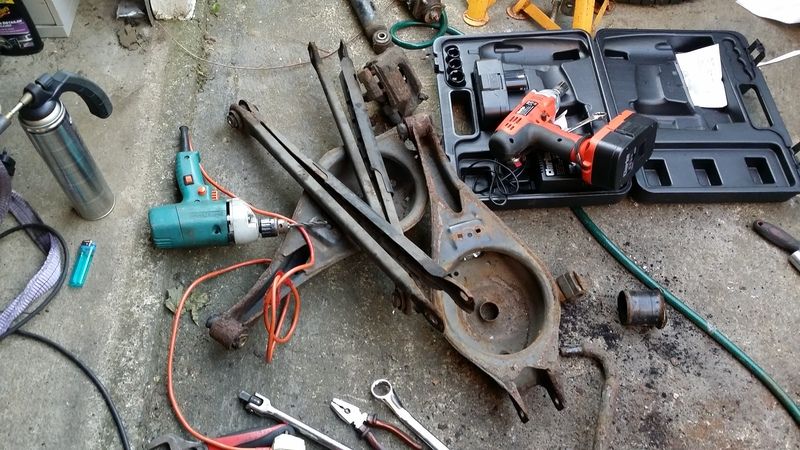
Got the rear arms off. The bushes look like they will be very tough to remove. Not entirely sure how to do this as yet.....
[img]http://img.photobucket.com/albums/v600/jamesc1982/M3%20Track%20Car/20150906_190112.jpg/img]
Not that happy with the drill/wire brush thus far. I don't feel it's shifting the tough stuff well enough. There are a lot of bits that seem almost welded on that just don't move when having a go at them this way. I may have to try one of the grinder solutions. Any suggestions welcome. Is it worth applying the Deox stuff at this point or should that only be done once everything has been as well stripped back as possible?
Got the rear arms off. The bushes look like they will be very tough to remove. Not entirely sure how to do this as yet.....
Sf_Manta said:
Was thinking more the cup style, have used these before on various cars (Mainly classic Opels and BMWs), just don't lean into it too hard, let the brush do the work and it's fine.
Would recommend after wire brushing, hanging the parts on wire (washing line style! ) and cleaning with brake cleaner, then zinc primer then hammerite or some kind of decent paint.
As for the camber arms (lower rear arms) Toss the folded steel items and plump for something like this:
http://www.driftworks.com/driftworks-rear-camber-a...
Cheap but a decent upgrade and allows for ease of adjustment. A tip would be to disassemble the arms once you've got them, coat the threads in motorbike chain lube as it's high cling grease and reassemble and install. Means even if the grease comes off the exposed threads, it shouldn't seize up solid.
I did this trick on my coilovers on the E30 i had some time ago, and the locking collars didn't seize up.
Not entirely sure yet about those camber arms, I've had some in the past that always seemed to work themselves loose where the locking nut is. Would recommend after wire brushing, hanging the parts on wire (washing line style!
) and cleaning with brake cleaner, then zinc primer then hammerite or some kind of decent paint.As for the camber arms (lower rear arms) Toss the folded steel items and plump for something like this:
http://www.driftworks.com/driftworks-rear-camber-a...
Cheap but a decent upgrade and allows for ease of adjustment. A tip would be to disassemble the arms once you've got them, coat the threads in motorbike chain lube as it's high cling grease and reassemble and install. Means even if the grease comes off the exposed threads, it shouldn't seize up solid.
I did this trick on my coilovers on the E30 i had some time ago, and the locking collars didn't seize up.
I've just ordered some Silkolene Pro Chain Lube for the coilovers to keep them in good order. I'll probably have to undo all of the locking collars on them to get the lube underneath them and then tighten back up I guess.
I've also ordered some 75w-140 diff oil and some Red Line D4 gearbox oil.
A few days ago I bought a couple of wire cup brushes for the grinder and I'm hoping to have the subframe and all four suspension arms completely stripped back and painted up by the end of the weekend. Here's hoping!
I'd like to do the same for the diff, but I am not removing the half shafts so it will be a bit fiddly. I do now need to take the trailing arms off as I have bought some more that have almost new spherical joints and wheel bearings already installed. I'm just a bit worried that with the whole assembly now off the car, I may struggle to undo the hub nuts....
I have a long list of new nuts and bolts to order from BMW and need to start keeping a better note of them because I keep buying bits then they get put to one side because I can't do the job yet and then I forget what they were for!
I am going to start getting more stuff done during the week now because once we reach winter it will be a nightmare. I've been there numerous times before.
I also want to buy the new front wishbones at an eye watering £330 the pair but there's no stock of one of them in Germany until mid October....
Gassing Station | Readers' Cars | Top of Page | What's New | My Stuff