3rd Time Lucky; E36 M3 Evolution Saloon
Discussion


M3John said:
This ^
I'm looking at that subframe though and praying that you rub it down and give it a nice coat of Hammerite before it goes back on.
Cheers guys. I'm looking at that subframe though and praying that you rub it down and give it a nice coat of Hammerite before it goes back on.
Oh god yes! You don't go to all the trouble of getting the bloody thing off then do half a job!

No, I plan to strip it and get it all rubbed down, Kurust it and paint it. I need to rub it down to verify it's still all solid. The only question right now is whether to use a drill or grinder with the wire brush attachment.
Good work!
I've been avoiding the subframe bushes so far, too scared to look lol.
Regarding the brake lines, if your lines don't reach you can cut a bit off then add a male and female connecter and an extra bit of line to extend the line, saves a lot of hassle with replacing full lines. You should be able to get them from any motor factors.
My rears were a nightmare, i replaced the lot from the rear fuel tank connector backwards.
Picked up a pair of Goodyear Eagle F1's for the front today, so I now have those to put on all round to replace the Infinitys.
I'd be very interested to know what people think regarding rubbing down the subframe. I'm thinking of using a drill and a wire brush attachment, but I'd be interested in whether I might be better off with a grinder and wire brush attachment or a flapper disc etc.? Obviously I don't want anything that will wear any of it away, hence my apprehension at using the grinder options.
I'd be very interested to know what people think regarding rubbing down the subframe. I'm thinking of using a drill and a wire brush attachment, but I'd be interested in whether I might be better off with a grinder and wire brush attachment or a flapper disc etc.? Obviously I don't want anything that will wear any of it away, hence my apprehension at using the grinder options.
You can get a wire brush attachment for the angle grinder, it won't remove any material but it will take it back to bare metal and prep it for paint in one hit.
Obviously best to have decent safety gear; proper goggles (not the glasses type), a mask gloves and overalls when you do it, as it'll flick rust and crud all over the place.
Trust me, you don't want to get bits of metal taken out your eyes, I've had it twice and it's not pleasant!
Obviously best to have decent safety gear; proper goggles (not the glasses type), a mask gloves and overalls when you do it, as it'll flick rust and crud all over the place.
Trust me, you don't want to get bits of metal taken out your eyes, I've had it twice and it's not pleasant!
Sf_Manta said:
You can get a wire brush attachment for the angle grinder, it won't remove any material but it will take it back to bare metal and prep it for paint in one hit.
Obviously best to have decent safety gear; proper goggles (not the glasses type), a mask gloves and overalls when you do it, as it'll flick rust and crud all over the place.
Trust me, you don't want to get bits of metal taken out your eyes, I've had it twice and it's not pleasant!
Cheers, yeah I bought the goggles and mask already Obviously best to have decent safety gear; proper goggles (not the glasses type), a mask gloves and overalls when you do it, as it'll flick rust and crud all over the place.
Trust me, you don't want to get bits of metal taken out your eyes, I've had it twice and it's not pleasant!
I figured that when I am on my back under the car, I don't want to be wire brushing rust with no facial protection!I've seen the wire brushes for the grinder where the brushes stick straight out so it's effectively flat. is that the type you'd recommend or should I be looking for the ones that a more like the drill type but for the grinder?
jmcc42uk said:
Hey, nice work. How did you get on re-flareing the brake lines?
Just reading back, I realised I had never responded to this, so apologies. I still haven't got to that part is the short answer!So, as for my rustproofing, will this do?
http://www.halfords.com/motoring/paints-body-repai...
There's also this, but not sure of the difference?:
http://www.halfords.com/motoring/paints-body-repai...
I am aiming to get some blue Hammerite spray and do the underside bits with that once rubbed down. Subframe, I am not sure. Could just do it black again or could do it something more interesting? Not sure if there's any point really, but I am thinking about it.
Plans for this weekend include attending a meet with the Subaru and getting to grips with this thing. Hopefully I will complete the subframe bush removal, split the subframe from the rest and start tackling all the rust, both on the car and on the subframe. I would like to get the fuel tank dropped too, but we'll see. One step at a time. I don't want to take that off until the rust is dealt with in the areas already accessible.
EDIT: Do I need this? My plan was to wire brush, Kurust, then paint with the Hammerite direct to metal. No plans to use primer currently as they say you don't need it. I am wondering if I should Wire brush, use the gel stuff, then Kurust, then paint?
Any benefit?
Edited by TroubledSoul on Wednesday 2nd September 12:08
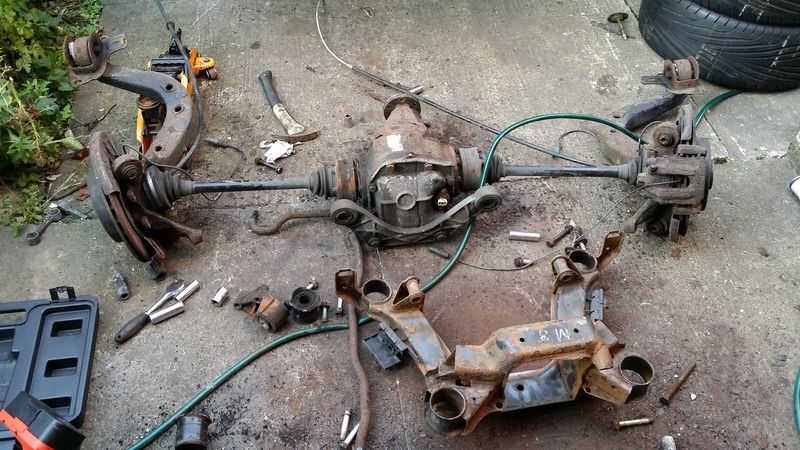
Well progress is currently too slow for my liking, but I did get the subframe apart yesterday and I have removed the bushes and started to strip the rust off of it.
[img]http://img.photobucket.com/albums/v600/jamesc1982/M3%20Track%20Car/20150906_190112.jpg/img]
Not that happy with the drill/wire brush thus far. I don't feel it's shifting the tough stuff well enough. There are a lot of bits that seem almost welded on that just don't move when having a go at them this way. I may have to try one of the grinder solutions. Any suggestions welcome. Is it worth applying the Deox stuff at this point or should that only be done once everything has been as well stripped back as possible?
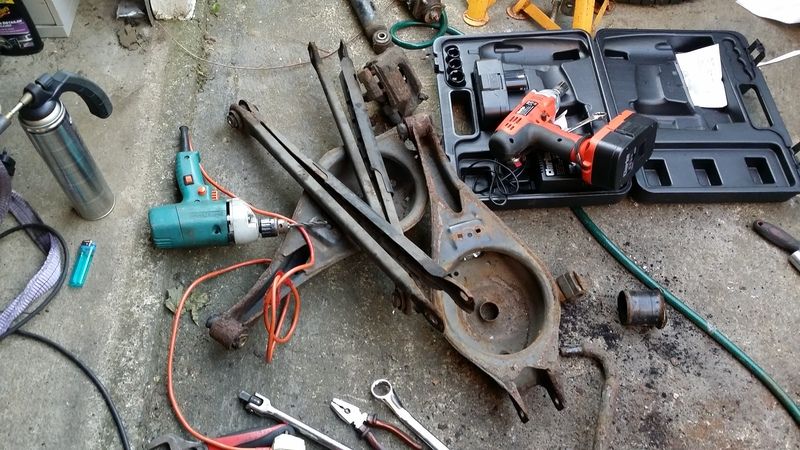
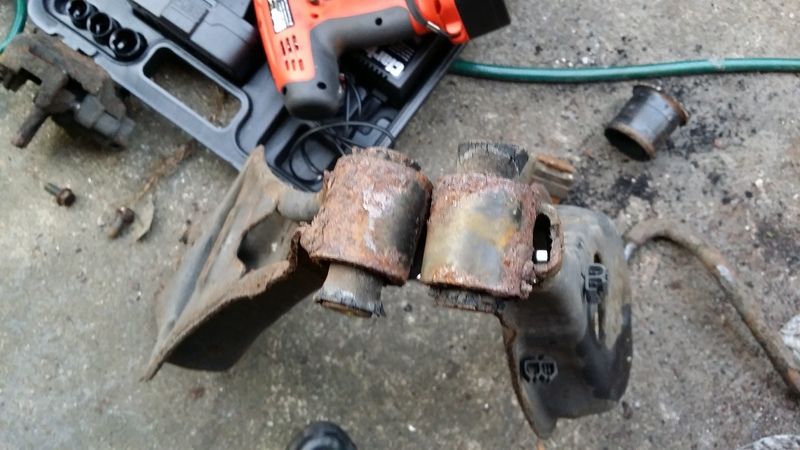
Got the rear arms off. The bushes look like they will be very tough to remove. Not entirely sure how to do this as yet.....
[img]http://img.photobucket.com/albums/v600/jamesc1982/M3%20Track%20Car/20150906_190112.jpg/img]
Not that happy with the drill/wire brush thus far. I don't feel it's shifting the tough stuff well enough. There are a lot of bits that seem almost welded on that just don't move when having a go at them this way. I may have to try one of the grinder solutions. Any suggestions welcome. Is it worth applying the Deox stuff at this point or should that only be done once everything has been as well stripped back as possible?
Got the rear arms off. The bushes look like they will be very tough to remove. Not entirely sure how to do this as yet.....
I'd get as much of the rush off as possible before applying the deox. The better the prep the better chance it has.
Re the bushes, If you can cut the protruding inserts off then get a hole cutter for a drill you should be able to cut a decent sized hole through the middle and then use a saw blade or something to cut into what is left of the Bush so you can remove it.
Re the bushes, If you can cut the protruding inserts off then get a hole cutter for a drill you should be able to cut a decent sized hole through the middle and then use a saw blade or something to cut into what is left of the Bush so you can remove it.
TroubledSoul said:
Sf_Manta said:
You can get a wire brush attachment for the angle grinder, it won't remove any material but it will take it back to bare metal and prep it for paint in one hit.
Obviously best to have decent safety gear; proper goggles (not the glasses type), a mask gloves and overalls when you do it, as it'll flick rust and crud all over the place.
Trust me, you don't want to get bits of metal taken out your eyes, I've had it twice and it's not pleasant!
Cheers, yeah I bought the goggles and mask already Obviously best to have decent safety gear; proper goggles (not the glasses type), a mask gloves and overalls when you do it, as it'll flick rust and crud all over the place.
Trust me, you don't want to get bits of metal taken out your eyes, I've had it twice and it's not pleasant!
I figured that when I am on my back under the car, I don't want to be wire brushing rust with no facial protection!I've seen the wire brushes for the grinder where the brushes stick straight out so it's effectively flat. is that the type you'd recommend or should I be looking for the ones that a more like the drill type but for the grinder?
Would recommend after wire brushing, hanging the parts on wire (washing line style!
 ) and cleaning with brake cleaner, then zinc primer then hammerite or some kind of decent paint.
As for the camber arms (lower rear arms) Toss the folded steel items and plump for something like this:
http://www.driftworks.com/driftworks-rear-camber-a...
Cheap but a decent upgrade and allows for ease of adjustment. A tip would be to disassemble the arms once you've got them, coat the threads in motorbike chain lube as it's high cling grease and reassemble and install. Means even if the grease comes off the exposed threads, it shouldn't seize up solid.
I did this trick on my coilovers on the E30 i had some time ago, and the locking collars didn't seize up.
Sf_Manta said:
Was thinking more the cup style, have used these before on various cars (Mainly classic Opels and BMWs), just don't lean into it too hard, let the brush do the work and it's fine.
Would recommend after wire brushing, hanging the parts on wire (washing line style!) and cleaning with brake cleaner, then zinc primer then hammerite or some kind of decent paint.
As for the camber arms (lower rear arms) Toss the folded steel items and plump for something like this:
http://www.driftworks.com/driftworks-rear-camber-a...
Cheap but a decent upgrade and allows for ease of adjustment. A tip would be to disassemble the arms once you've got them, coat the threads in motorbike chain lube as it's high cling grease and reassemble and install. Means even if the grease comes off the exposed threads, it shouldn't seize up solid.
I did this trick on my coilovers on the E30 i had some time ago, and the locking collars didn't seize up.
Not entirely sure yet about those camber arms, I've had some in the past that always seemed to work themselves loose where the locking nut is. Would recommend after wire brushing, hanging the parts on wire (washing line style!
) and cleaning with brake cleaner, then zinc primer then hammerite or some kind of decent paint.As for the camber arms (lower rear arms) Toss the folded steel items and plump for something like this:
http://www.driftworks.com/driftworks-rear-camber-a...
Cheap but a decent upgrade and allows for ease of adjustment. A tip would be to disassemble the arms once you've got them, coat the threads in motorbike chain lube as it's high cling grease and reassemble and install. Means even if the grease comes off the exposed threads, it shouldn't seize up solid.
I did this trick on my coilovers on the E30 i had some time ago, and the locking collars didn't seize up.
I've just ordered some Silkolene Pro Chain Lube for the coilovers to keep them in good order. I'll probably have to undo all of the locking collars on them to get the lube underneath them and then tighten back up I guess.
I've also ordered some 75w-140 diff oil and some Red Line D4 gearbox oil.
A few days ago I bought a couple of wire cup brushes for the grinder and I'm hoping to have the subframe and all four suspension arms completely stripped back and painted up by the end of the weekend. Here's hoping!
I'd like to do the same for the diff, but I am not removing the half shafts so it will be a bit fiddly. I do now need to take the trailing arms off as I have bought some more that have almost new spherical joints and wheel bearings already installed. I'm just a bit worried that with the whole assembly now off the car, I may struggle to undo the hub nuts....
I have a long list of new nuts and bolts to order from BMW and need to start keeping a better note of them because I keep buying bits then they get put to one side because I can't do the job yet and then I forget what they were for!
I am going to start getting more stuff done during the week now because once we reach winter it will be a nightmare. I've been there numerous times before.
I also want to buy the new front wishbones at an eye watering £330 the pair but there's no stock of one of them in Germany until mid October....
TroubledSoul said:
Sf_Manta said:
Was thinking more the cup style, have used these before on various cars (Mainly classic Opels and BMWs), just don't lean into it too hard, let the brush do the work and it's fine.
Would recommend after wire brushing, hanging the parts on wire (washing line style!) and cleaning with brake cleaner, then zinc primer then hammerite or some kind of decent paint.
As for the camber arms (lower rear arms) Toss the folded steel items and plump for something like this:
http://www.driftworks.com/driftworks-rear-camber-a...
Cheap but a decent upgrade and allows for ease of adjustment. A tip would be to disassemble the arms once you've got them, coat the threads in motorbike chain lube as it's high cling grease and reassemble and install. Means even if the grease comes off the exposed threads, it shouldn't seize up solid.
I did this trick on my coilovers on the E30 i had some time ago, and the locking collars didn't seize up.
Not entirely sure yet about those camber arms, I've had some in the past that always seemed to work themselves loose where the locking nut is. Would recommend after wire brushing, hanging the parts on wire (washing line style!
) and cleaning with brake cleaner, then zinc primer then hammerite or some kind of decent paint.As for the camber arms (lower rear arms) Toss the folded steel items and plump for something like this:
http://www.driftworks.com/driftworks-rear-camber-a...
Cheap but a decent upgrade and allows for ease of adjustment. A tip would be to disassemble the arms once you've got them, coat the threads in motorbike chain lube as it's high cling grease and reassemble and install. Means even if the grease comes off the exposed threads, it shouldn't seize up solid.
I did this trick on my coilovers on the E30 i had some time ago, and the locking collars didn't seize up.
I've just ordered some Silkolene Pro Chain Lube for the coilovers to keep them in good order. I'll probably have to undo all of the locking collars on them to get the lube underneath them and then tighten back up I guess.
I've also ordered some 75w-140 diff oil and some Red Line D4 gearbox oil.
A few days ago I bought a couple of wire cup brushes for the grinder and I'm hoping to have the subframe and all four suspension arms completely stripped back and painted up by the end of the weekend. Here's hoping!
I'd like to do the same for the diff, but I am not removing the half shafts so it will be a bit fiddly. I do now need to take the trailing arms off as I have bought some more that have almost new spherical joints and wheel bearings already installed. I'm just a bit worried that with the whole assembly now off the car, I may struggle to undo the hub nuts....
I have a long list of new nuts and bolts to order from BMW and need to start keeping a better note of them because I keep buying bits then they get put to one side because I can't do the job yet and then I forget what they were for!
I am going to start getting more stuff done during the week now because once we reach winter it will be a nightmare. I've been there numerous times before.
I also want to buy the new front wishbones at an eye watering £330 the pair but there's no stock of one of them in Germany until mid October....
As for the nuts coming undone on the camber arms. I'd put in some Locktite 243 (Blue) thread-lock to keep them from undoing, or if that's not strong enough, go for the 2701 (green) which is the strong stuff.
Good call on the chain lube, should work a treat.
Went to BMW yesterday, priced up the nuts and bolts to renew all of them on the rear axle: £180!
For nuts and bolts!
Even the parts guy said it was mental He did change it to a trade sale for me as I've had a few bits from him now, and it came down a tad to £168, but still.... I'll have to inspect everything and decide if any of it can be reused. Some bolts have been damaged by hammering on sockets because of the crud and rust on them.
I do have a lot of jobs to get done in the meantime, but I wanted to focus on the rear axle and get it all done over the next two weekends. Money is a bit tighter this month than I would have liked so extra spending is out. I'm still needing seats, harnesses, a bit of welding, geo, making up a couple of new brake pipes, fitting the braided lines, buying and fitting the caliper refurb kit, fitting the new silicone plenum hoses, fitting the 325TDS oil cooler, viscous fan delete and so on.
At the moment it really feels like it is never going to end....
For nuts and bolts!
Even the parts guy said it was mental
He did change it to a trade sale for me as I've had a few bits from him now, and it came down a tad to £168, but still.... I'll have to inspect everything and decide if any of it can be reused. Some bolts have been damaged by hammering on sockets because of the crud and rust on them.I do have a lot of jobs to get done in the meantime, but I wanted to focus on the rear axle and get it all done over the next two weekends. Money is a bit tighter this month than I would have liked so extra spending is out. I'm still needing seats, harnesses, a bit of welding, geo, making up a couple of new brake pipes, fitting the braided lines, buying and fitting the caliper refurb kit, fitting the new silicone plenum hoses, fitting the 325TDS oil cooler, viscous fan delete and so on.
At the moment it really feels like it is never going to end....
Well I found someone with a pair of the front wishbones in UK stock and have purchased them this morning. Hopefully they'll come around mid week.
This lunchtime I got on and tackled the subframe, but have made limited progress. The wire cup brush on the grinder is definitely the right tool for the job and it's worked well thus far. The grinder died, however!
So another one of those needs to be picked up.
I decided to get under the car and tackle the rust with the drill and wire brush. I've managed to make good progress there and had an endless amount of crap flaking off and falling all over me! I definitely need to move the fuel tank and the filler neck pipe. That whole area wants rubbing down really. Most of it's fine but just has slight scabbing. I'd rather do it all properly.
I think I will have to get in there with the grinder to really clear back to bare metal in a couple of places.
The rain and the ground being soaked has hampered me today but it's all brightened up now so hopefully tomorrow will be better!
Had a bit of time with the car this weekend but I haven't made anywhere near the progress I'd hoped by now.
I've bought a set of brand new front wishbones and they are ready to go on. In the end I just bit the bullet on these. Cost me well over £300
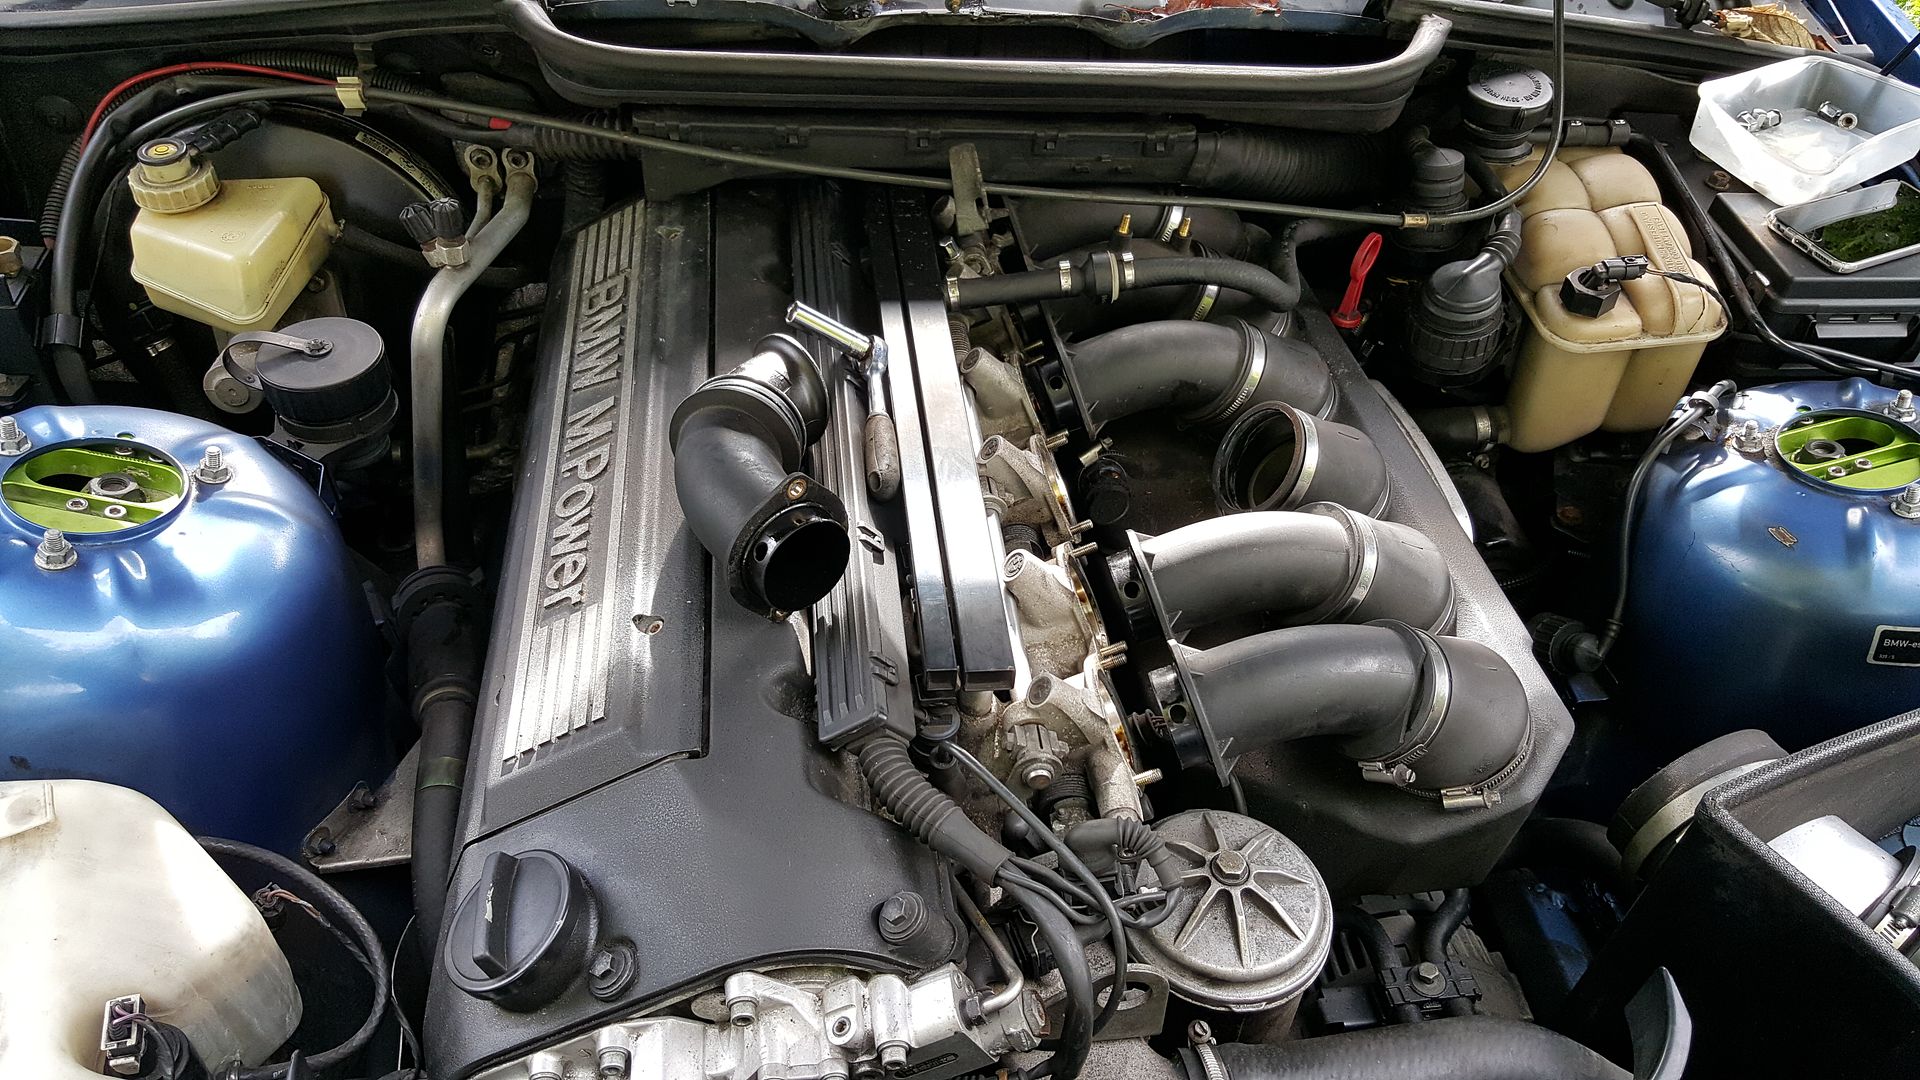
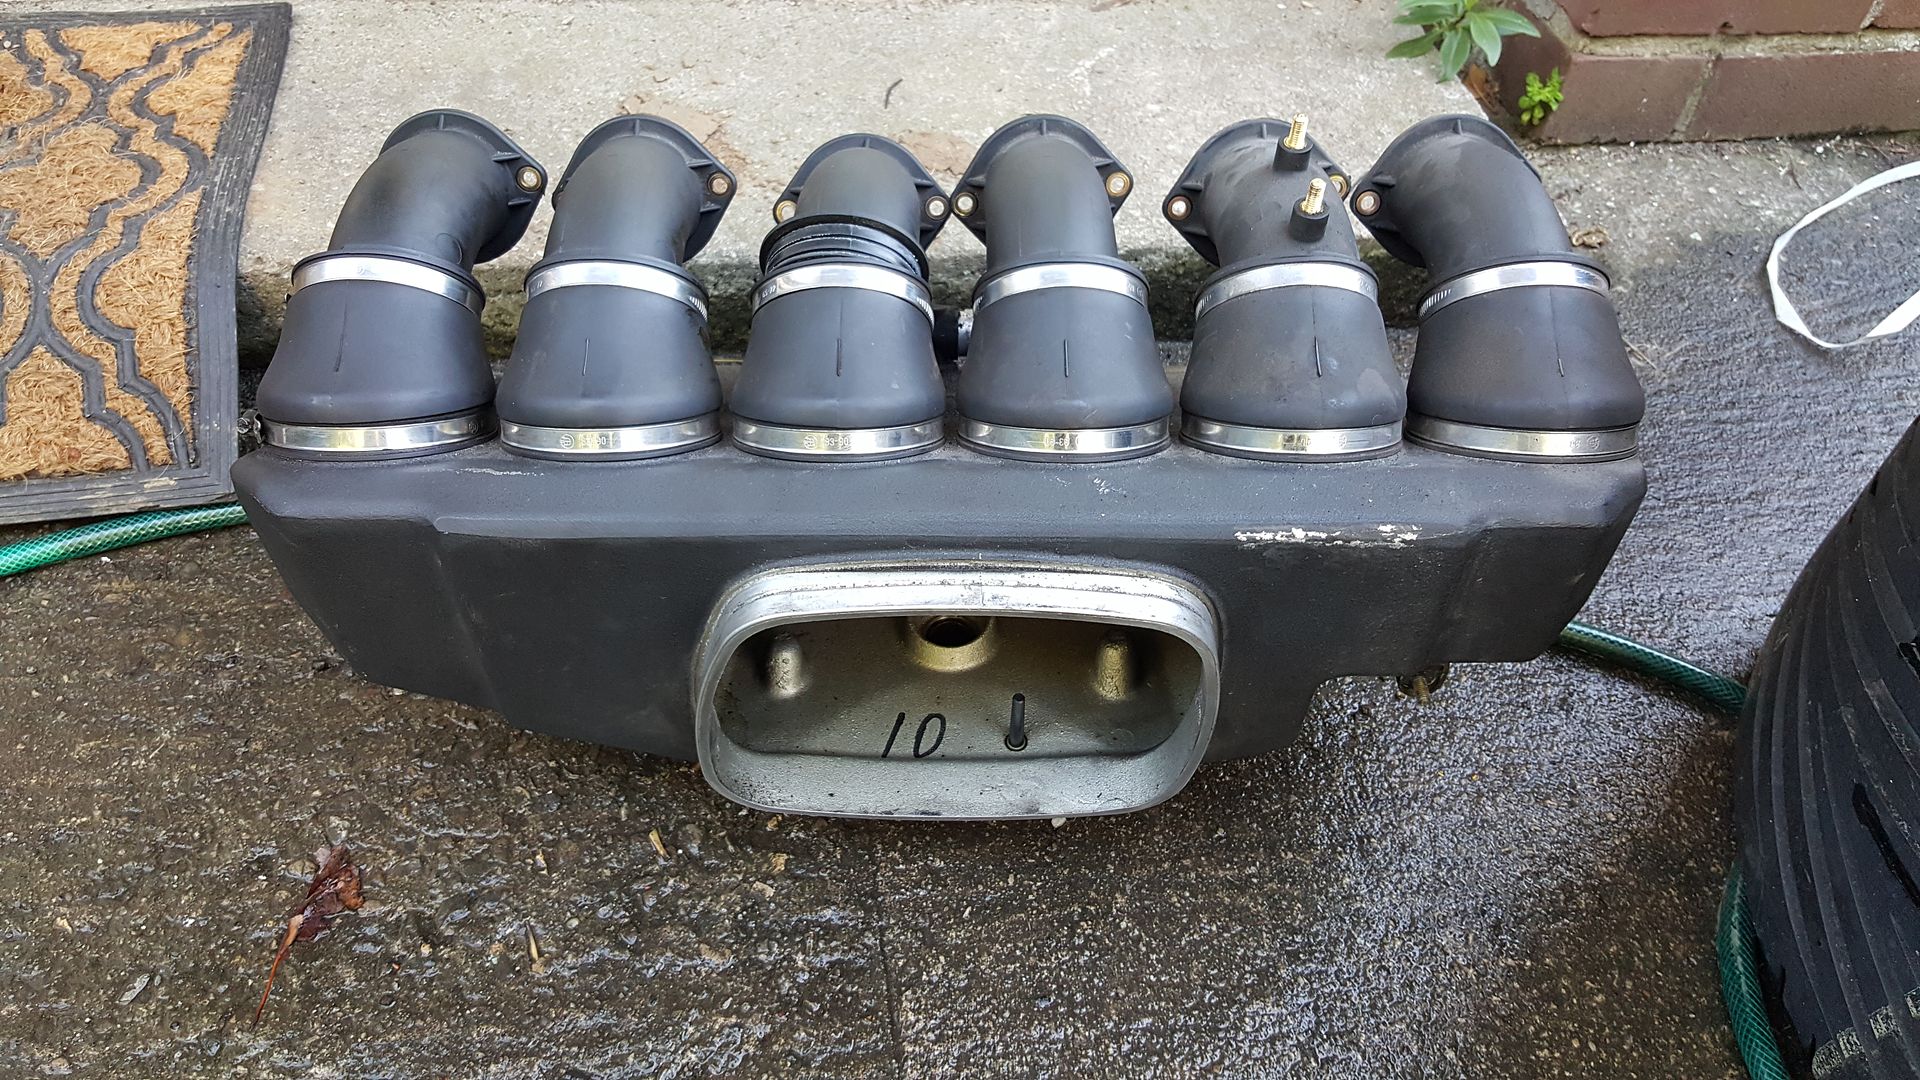
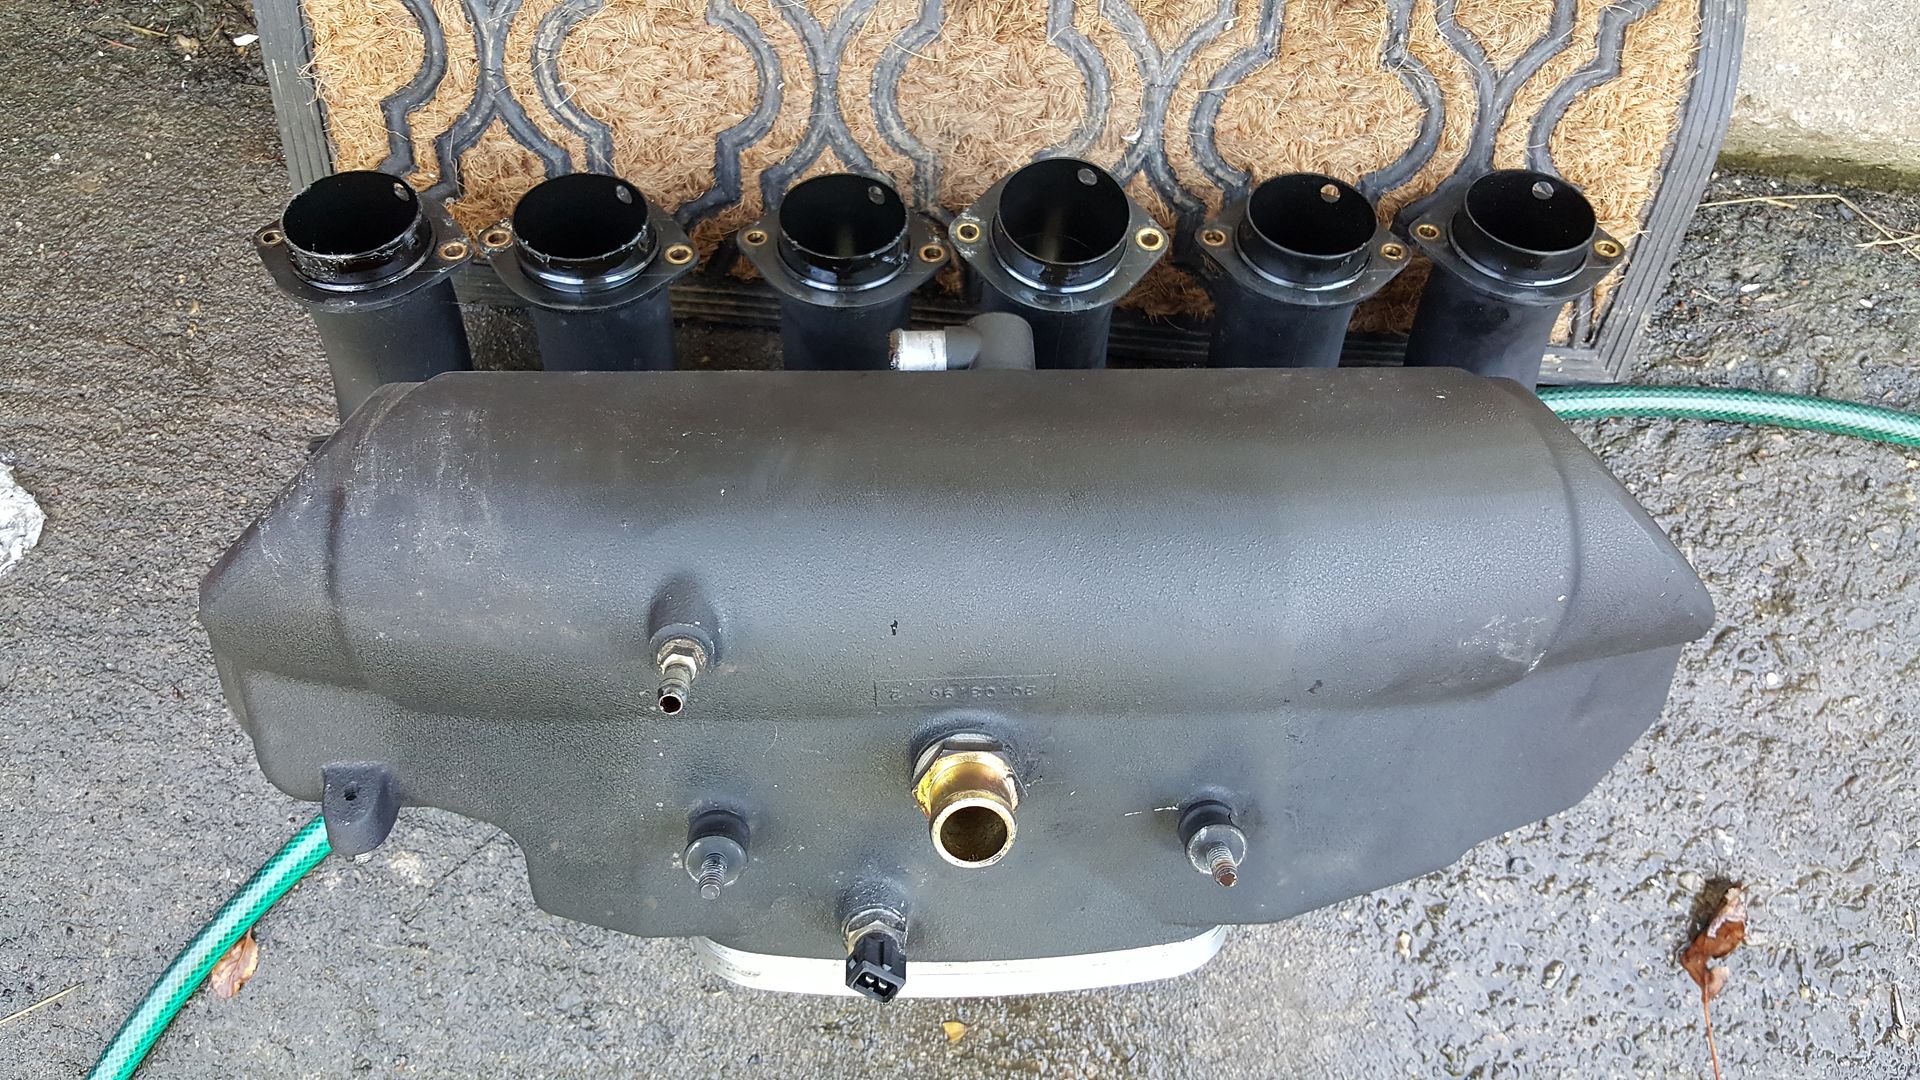
Due to it being extremely wet and it raining hard on Monday, I switched focus to the engine bay, where I needed to replace the plenum rubber hoses. As is seemingly always the case with this car though, doing one job has led to discovering more work to do. I removed the plenum, which was a bloody hard battle thanks to a knackered jubilee clip on a hose underneath it:
A few pics of the process:

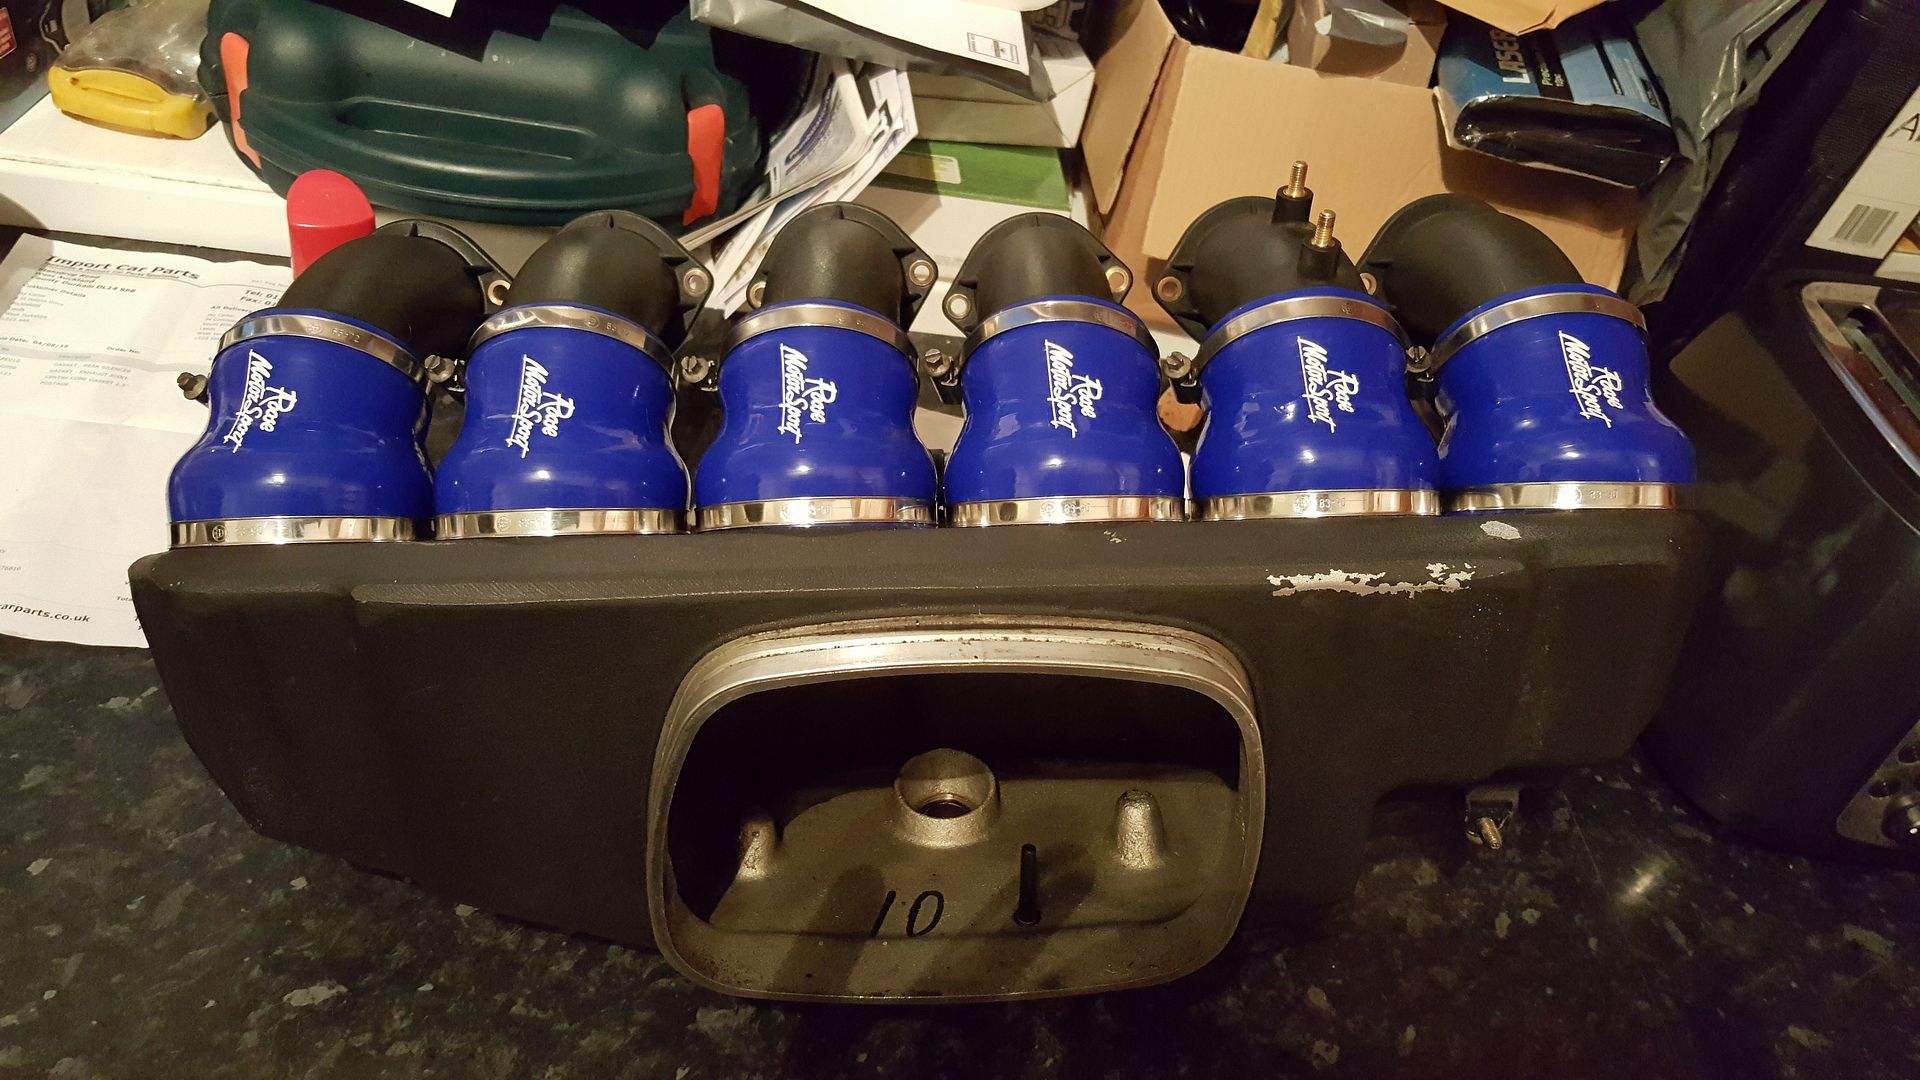
Looks pretty good There was a cracked bit on the first hard pipe so that was also replaced during the process but I forgot to photo that.
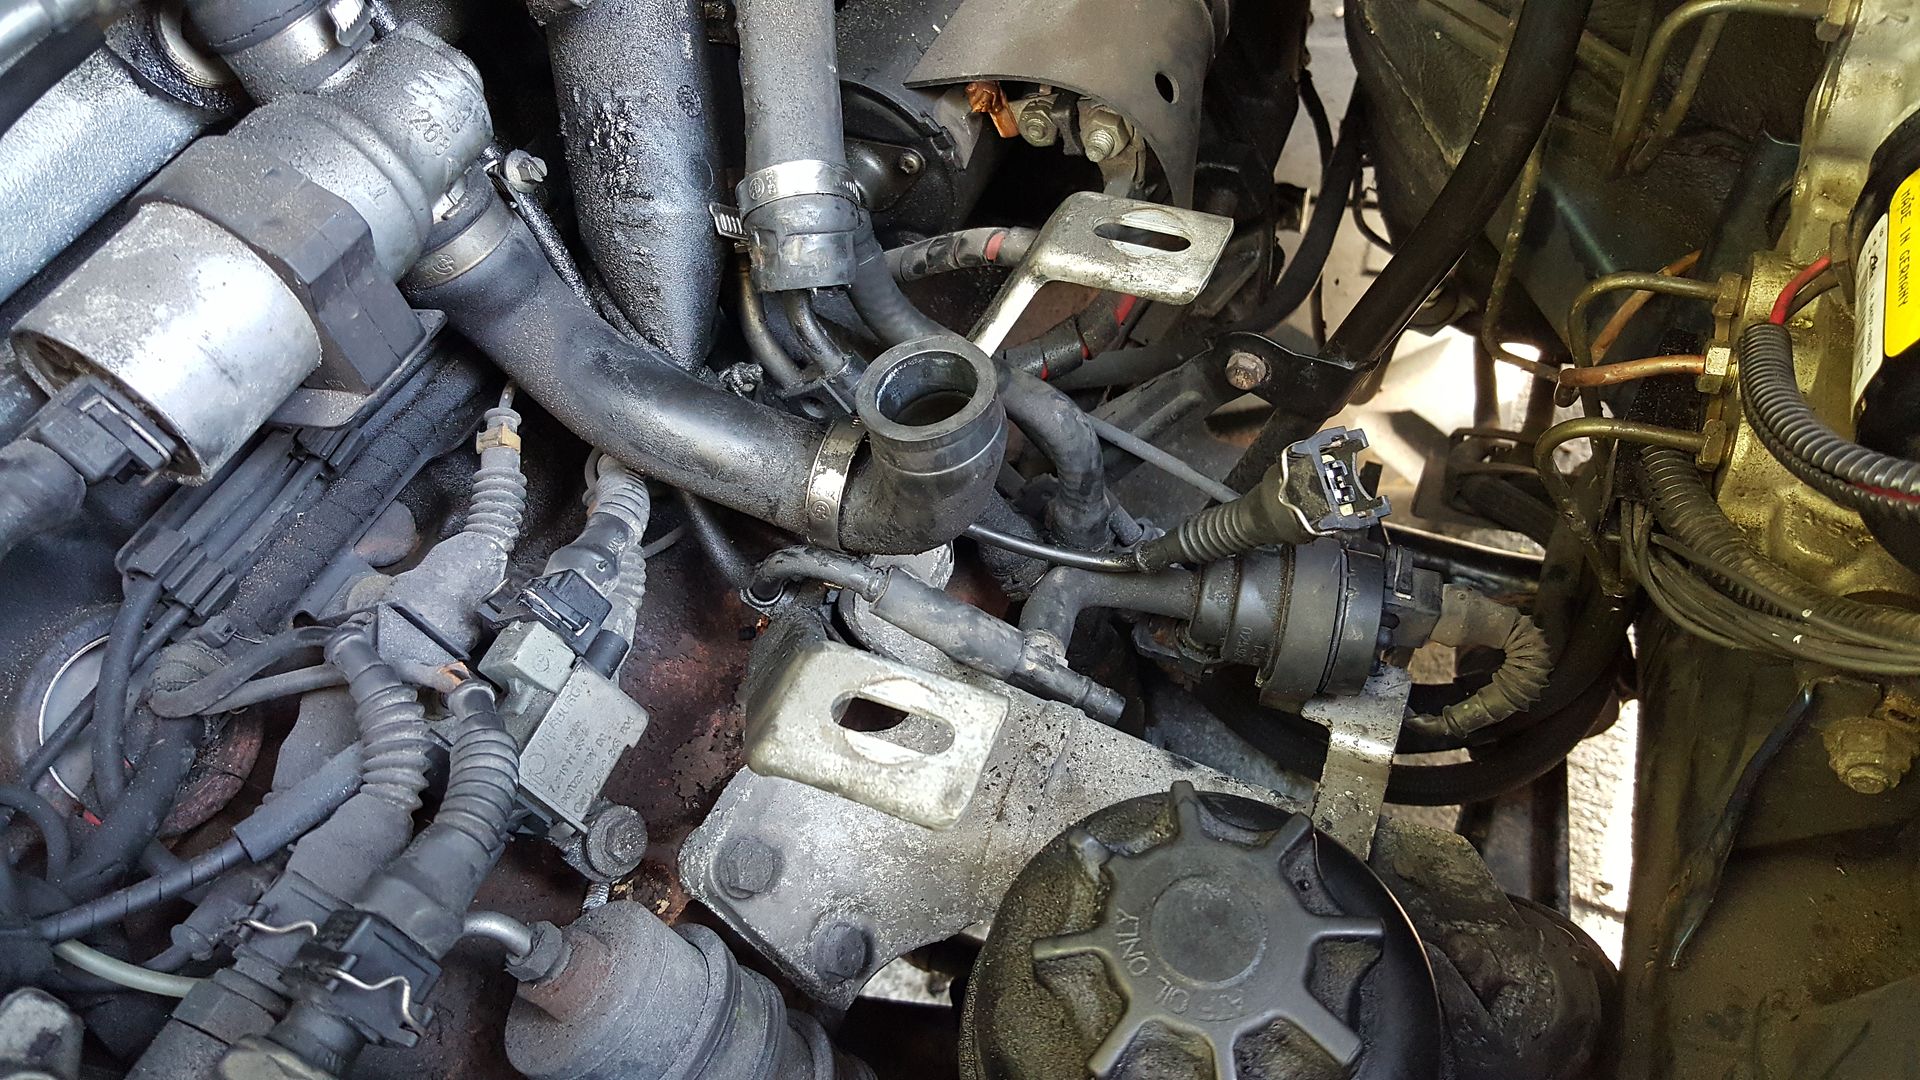
I was going to put the plenum back on, but an inspection of the hoses beneath it revealed this:
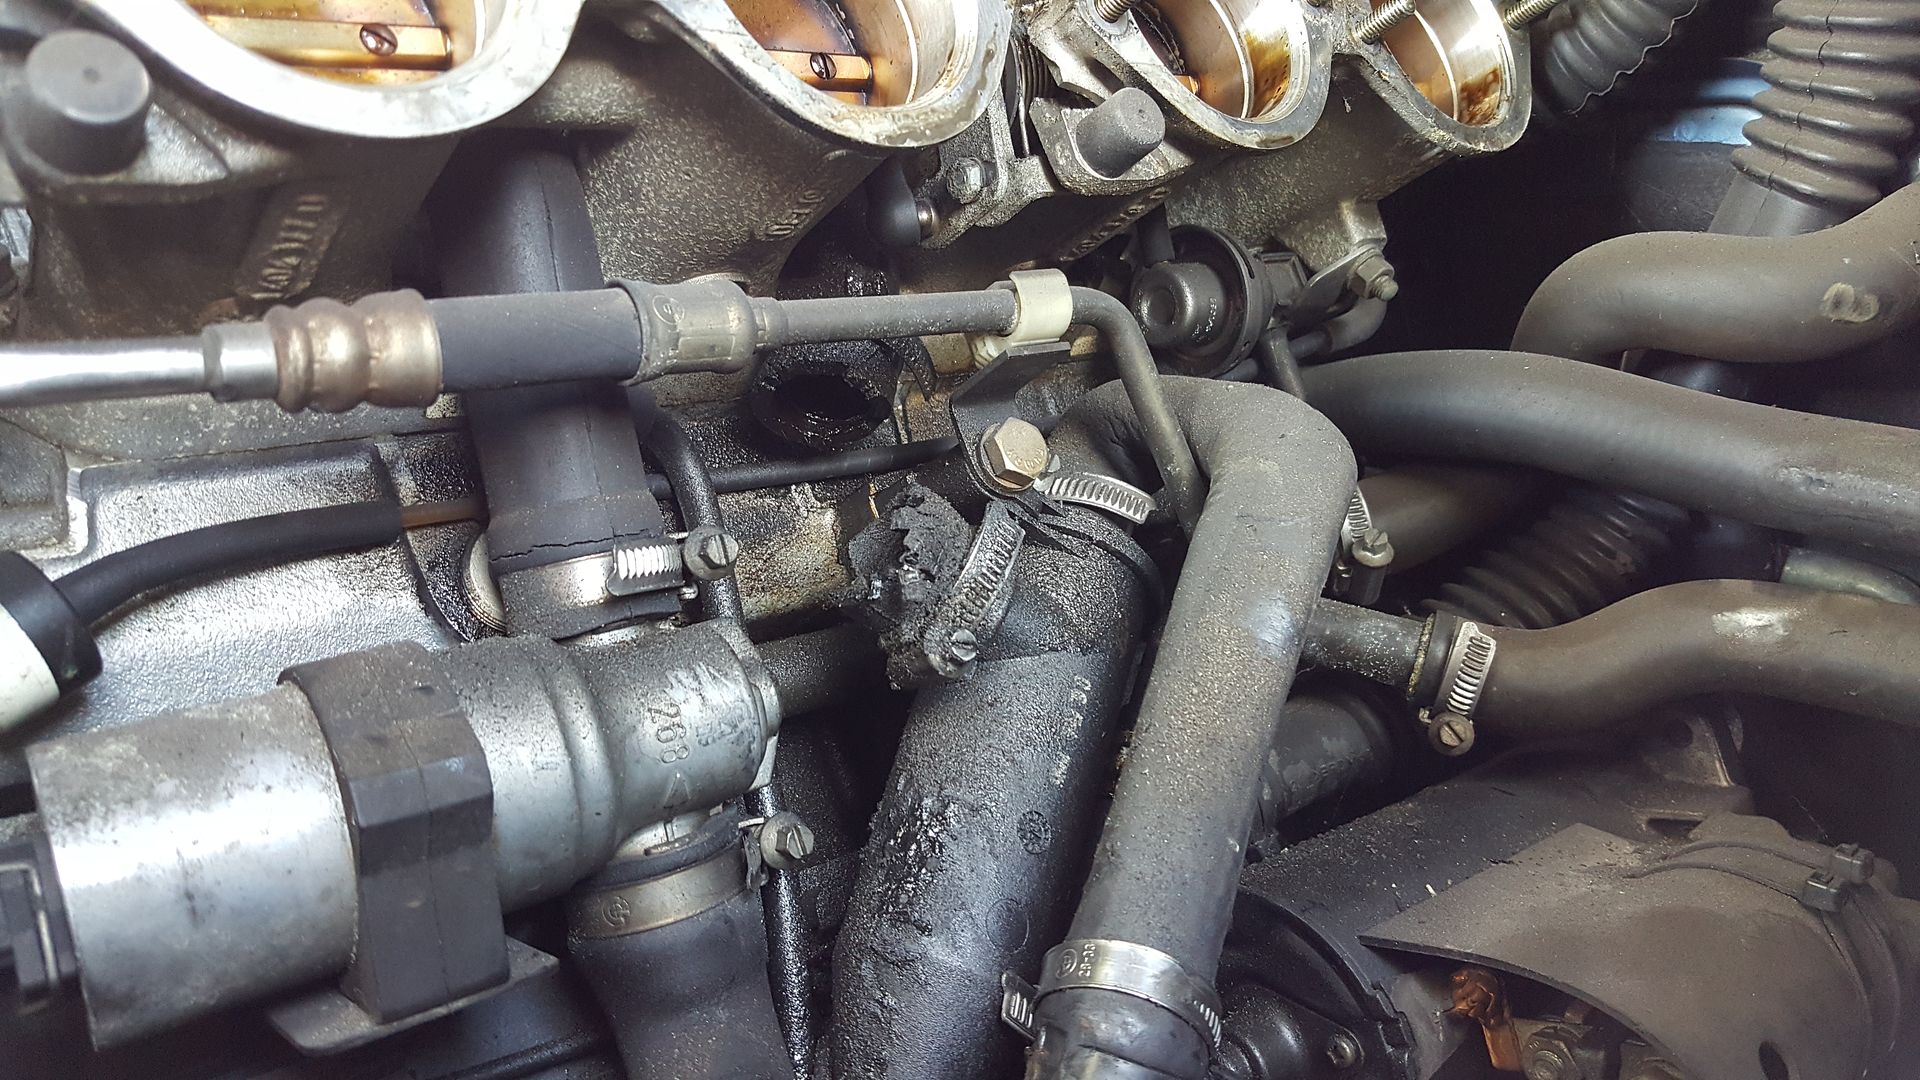
I priced up a number of hoses with BMW as there is also a crack around one coming from the ICV and there's a really odd squishy pipe from the oil separator that feels like it would benefit from replacement. The quote, with discount, came back around £70!! Then there's the frayed throttle cable I discovered.....
The cost of the rubber pipes is crazy, so I have again decided to bite the bullet and will soon be ordering a full silicone hose kit. My worry is that replacing the rubber pipes with rubber could see me having to do them again at some point in the future, and if there are any I have missed I would have to take everything apart again to replace them. Screw that.
So I am going to splash out the princely sum of £270 on a hose set. And seeing as I have the plenum off, I am going to replace the FPR and clean the ICV.
This is already a long update, but the fun doesn't stop there! Oh no, I have also been back under the car and now I have a wire cup brush and a new grinder after a session with the subframe killed my old one!
I bought a Bosch Professional one this time, to replace the £20 thing I bought from Halfords or Wilco many moons ago!
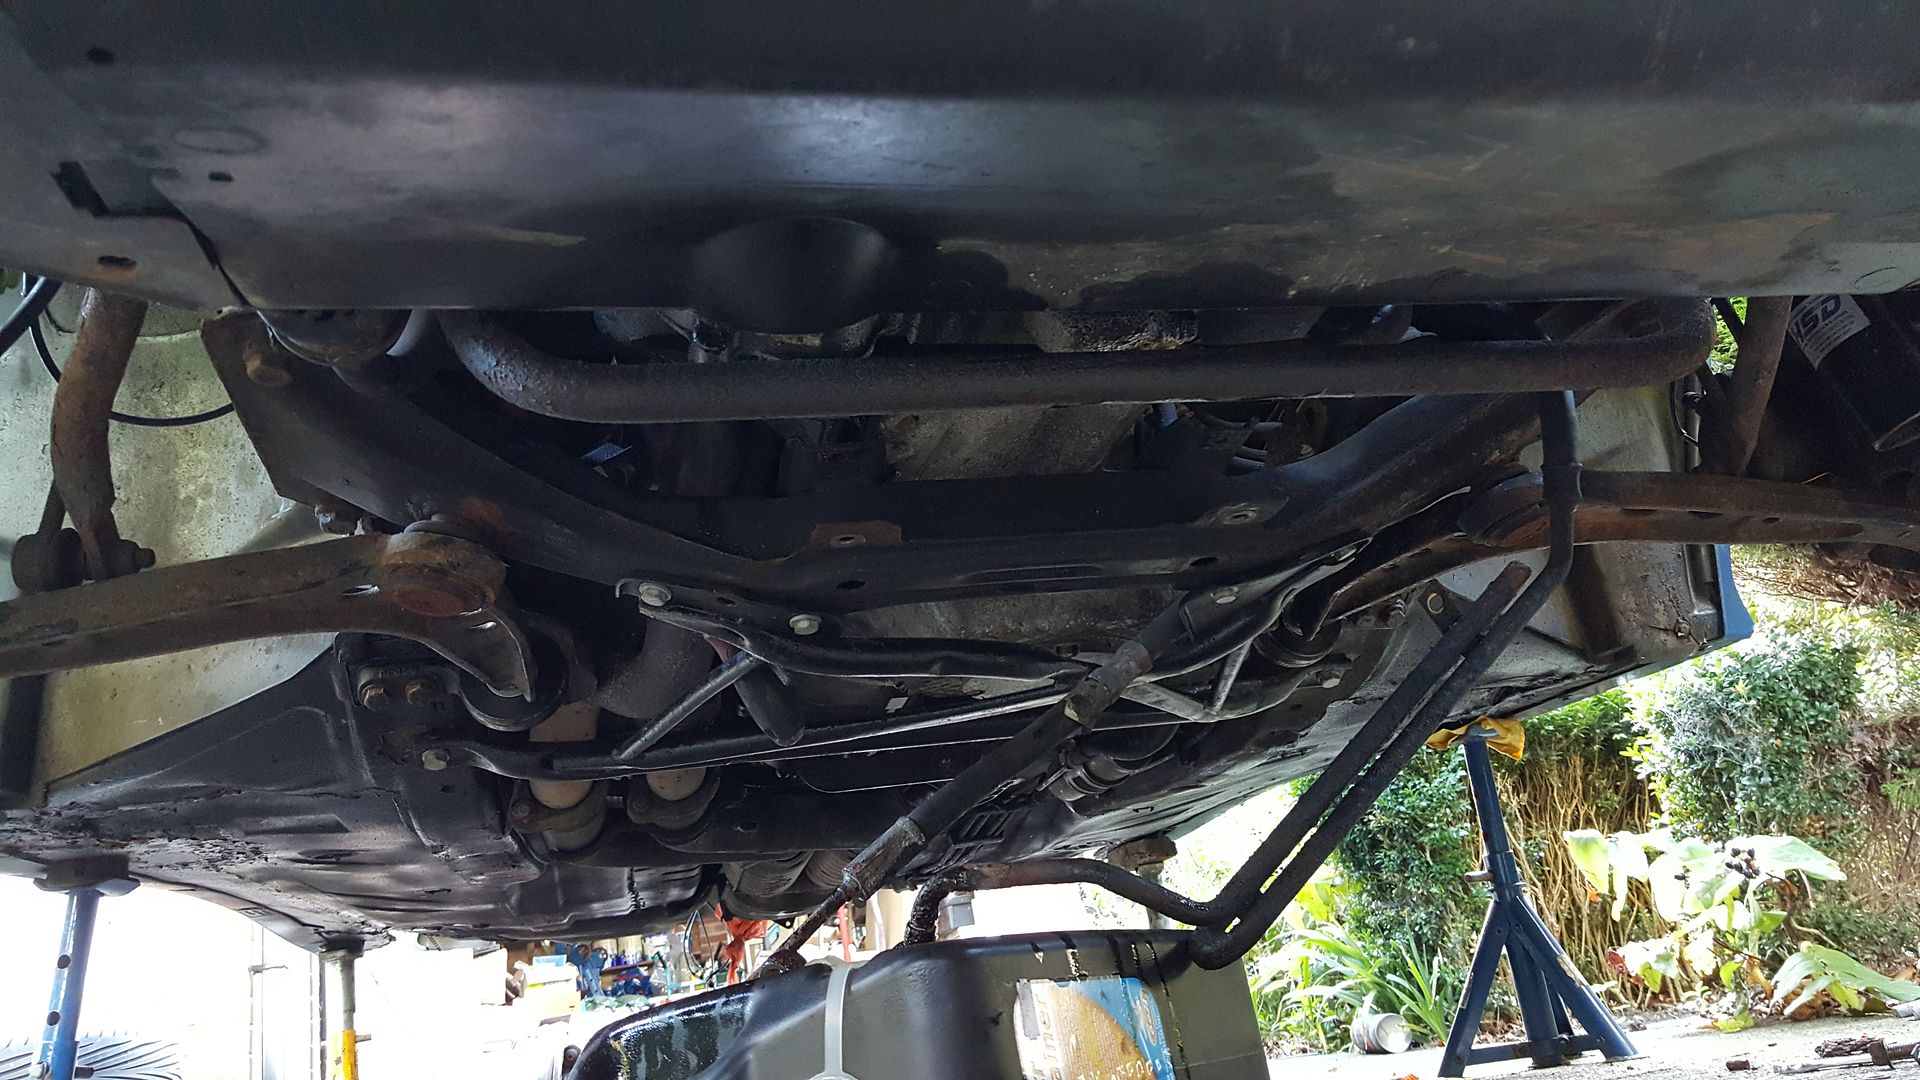
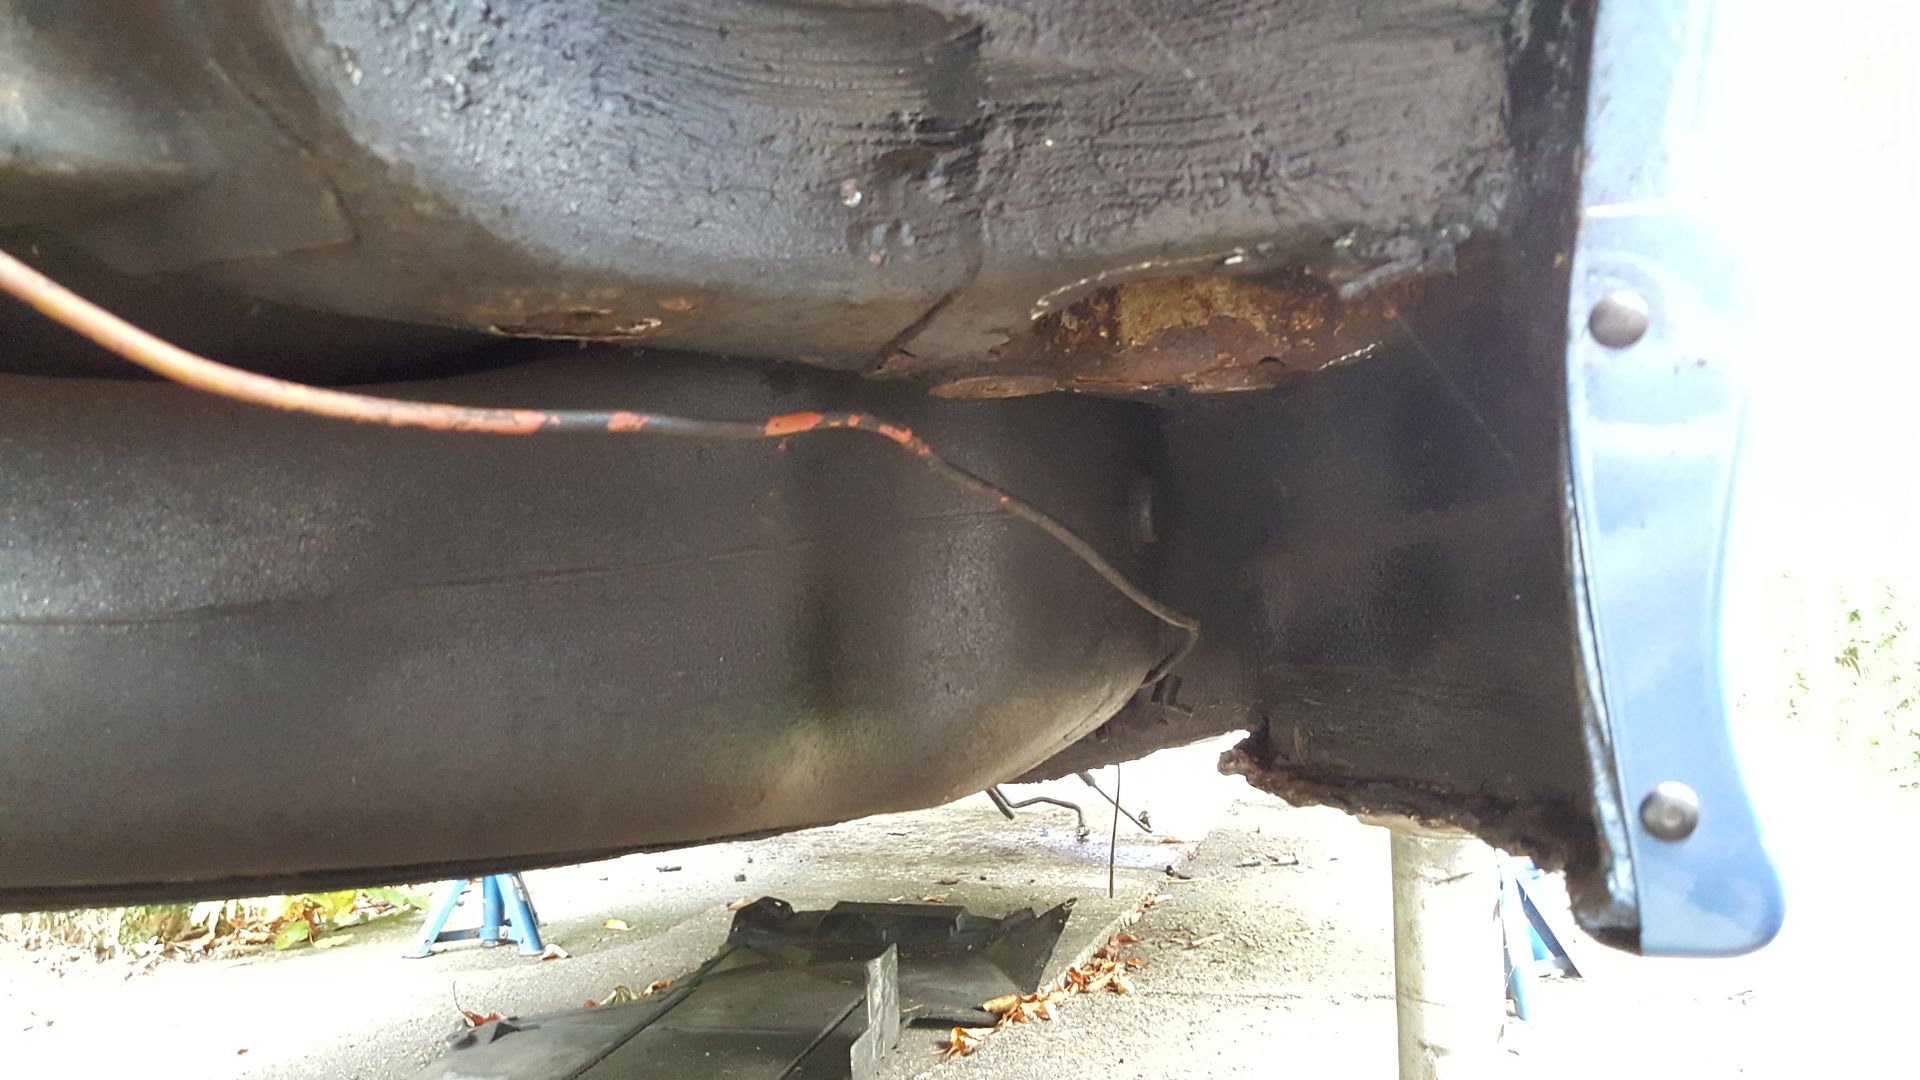
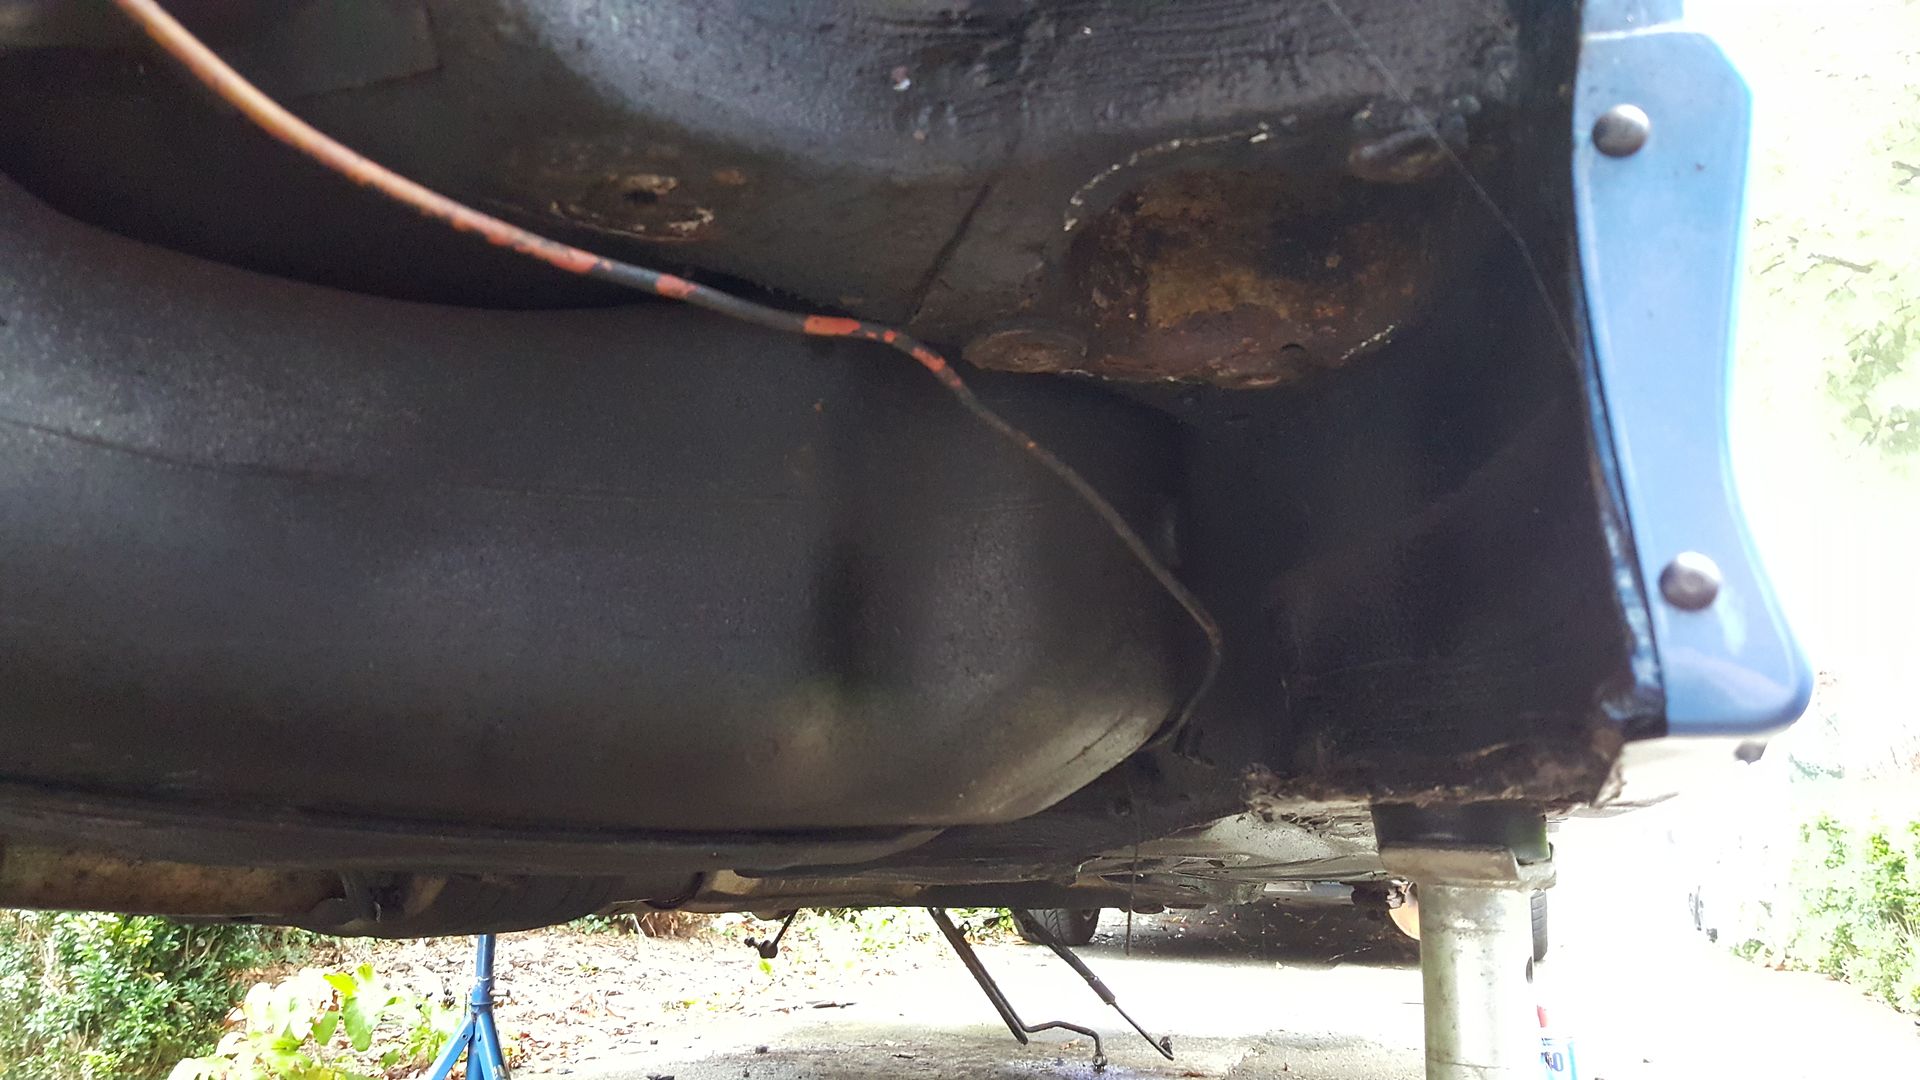
So underneath the car, I have been cleaning it up. I still haven't dropped the tank yet but I will. Here's the underside:
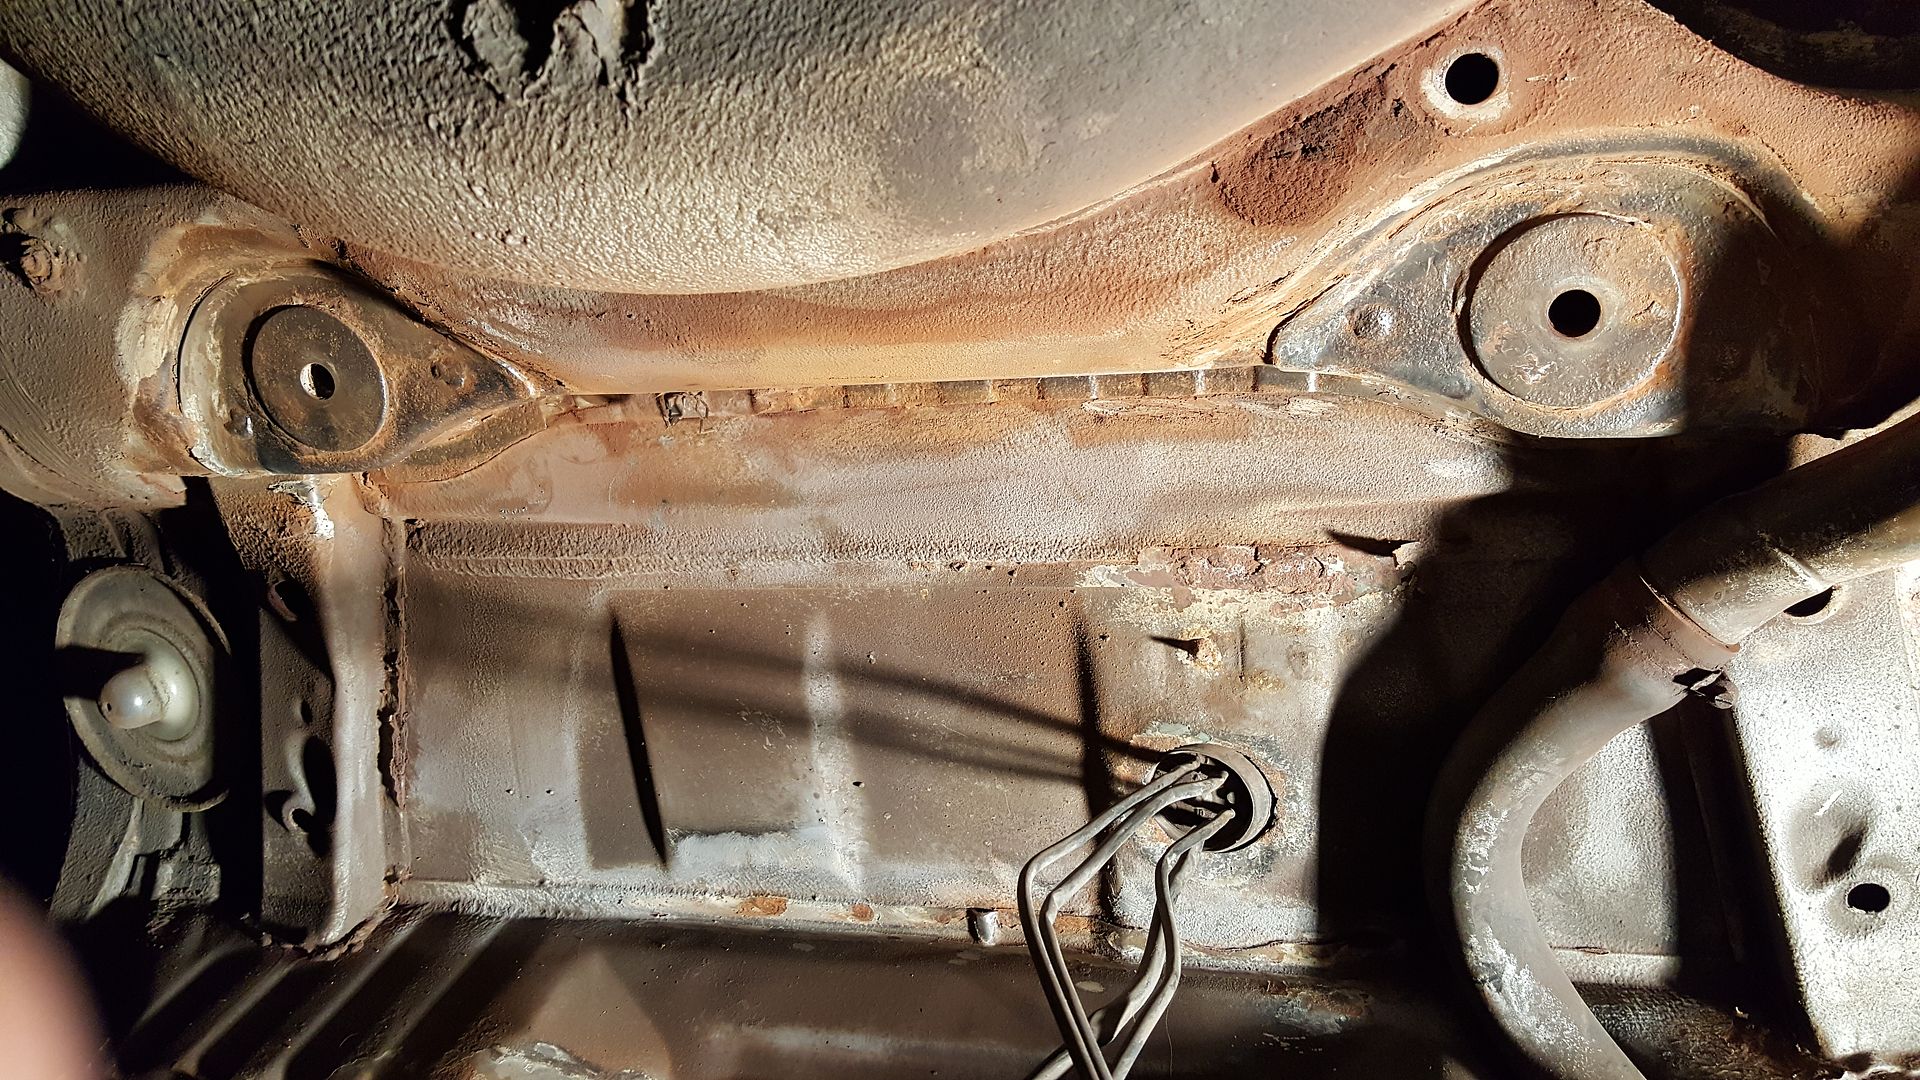
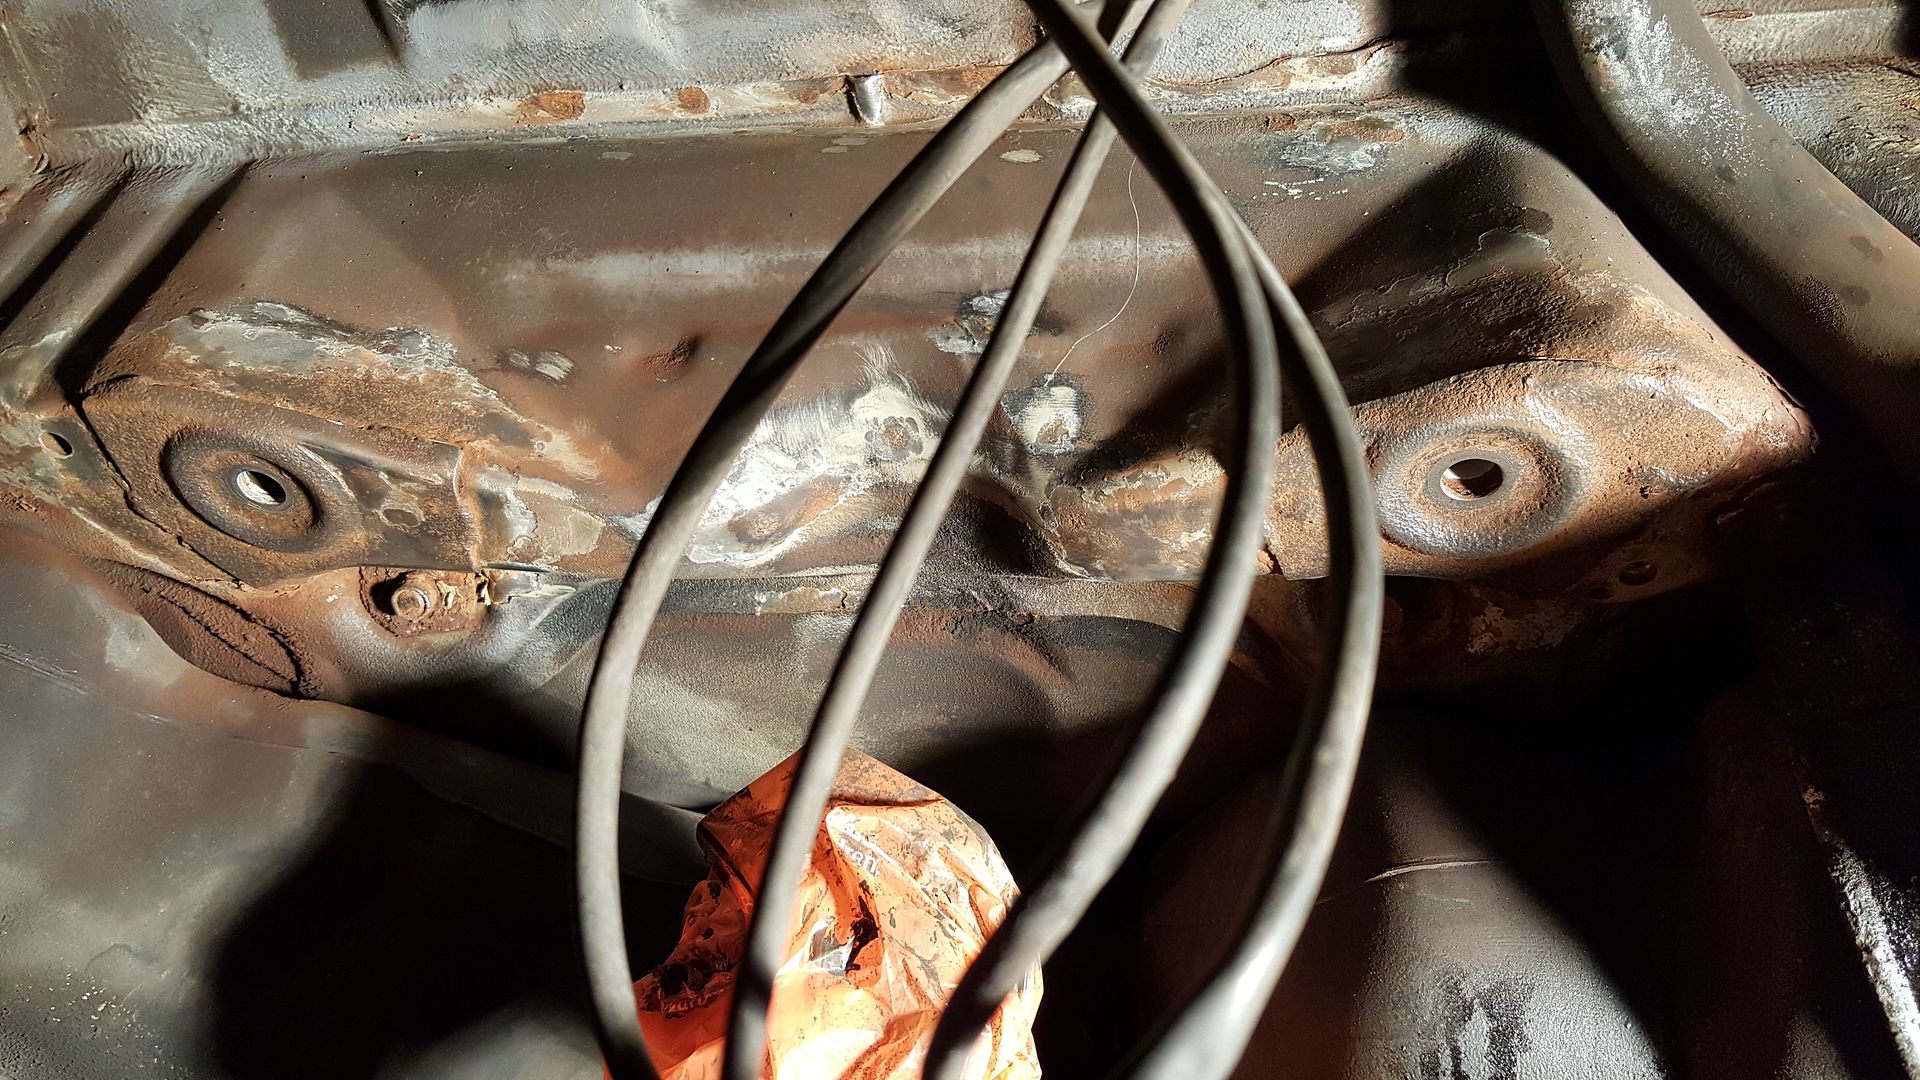
Looking a lot better around the subframe mountings now! Ready for some Bilt Hamber Deox.
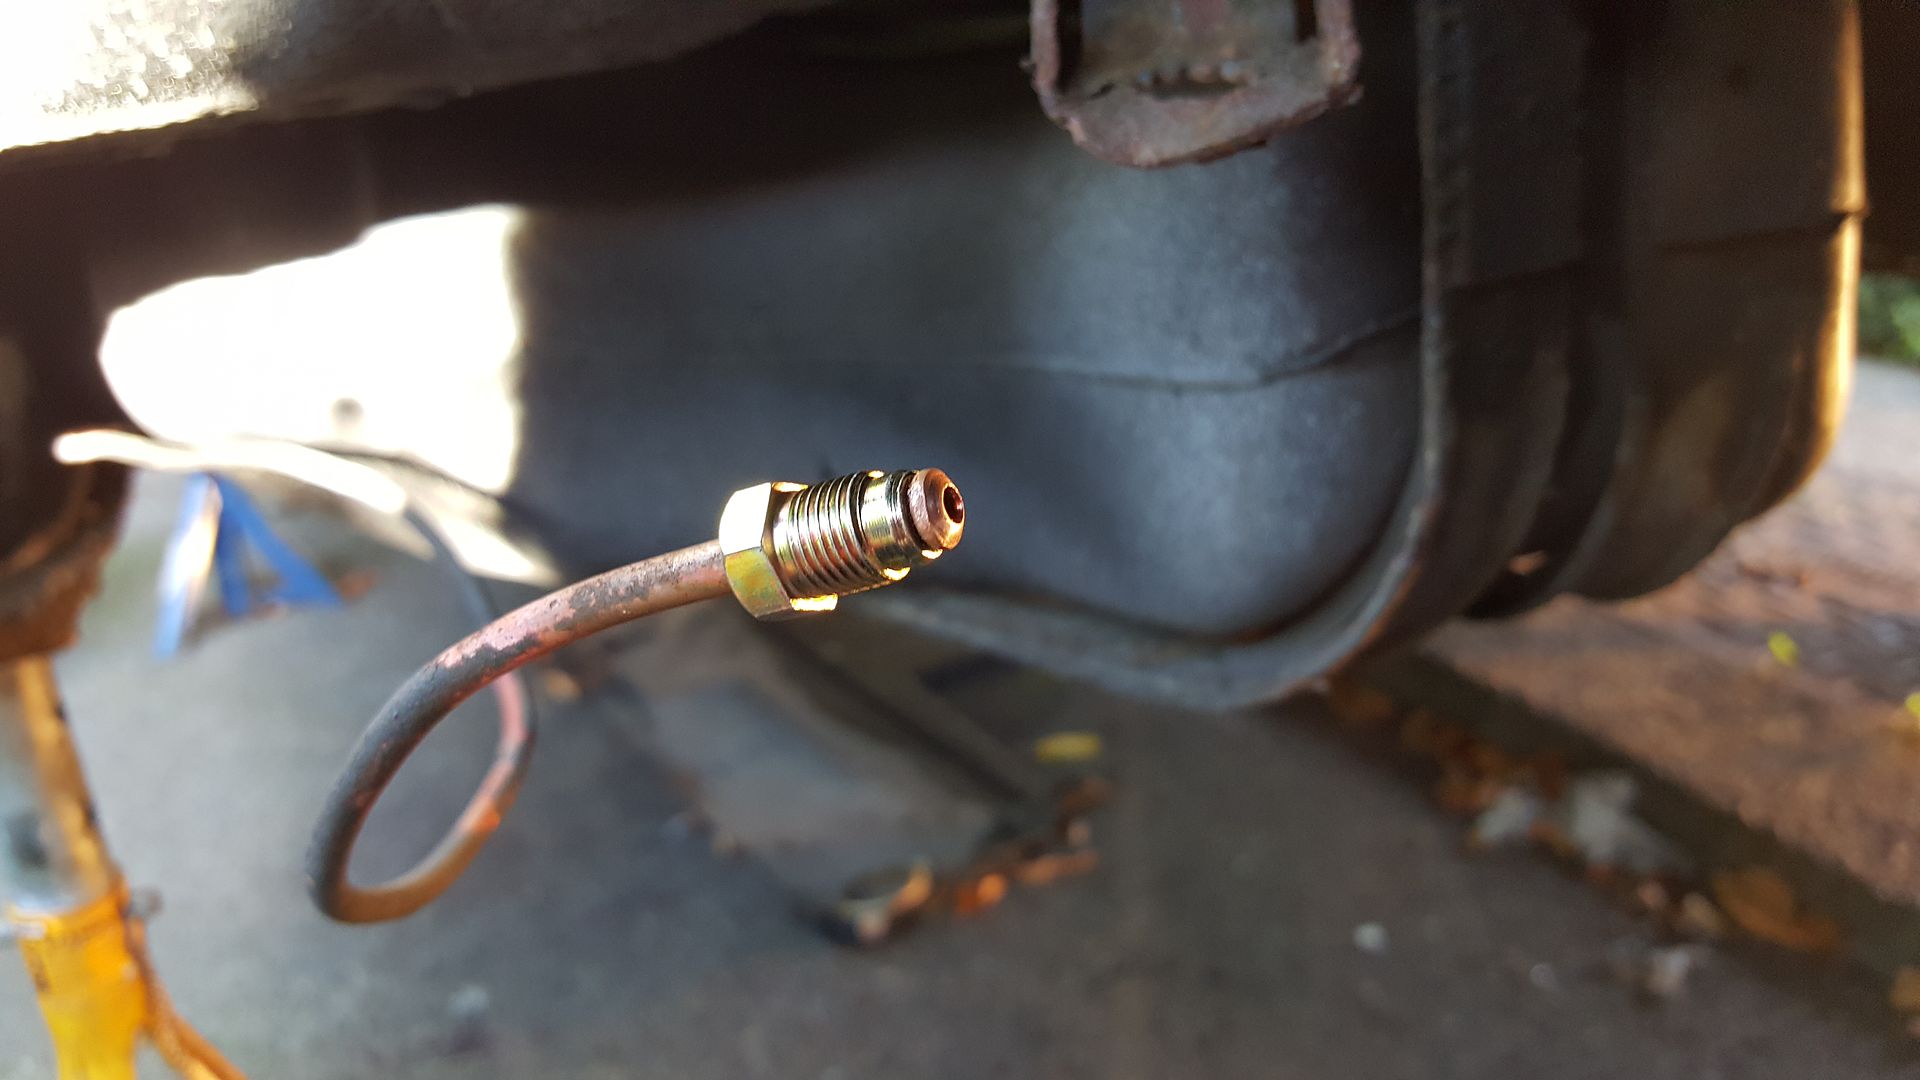
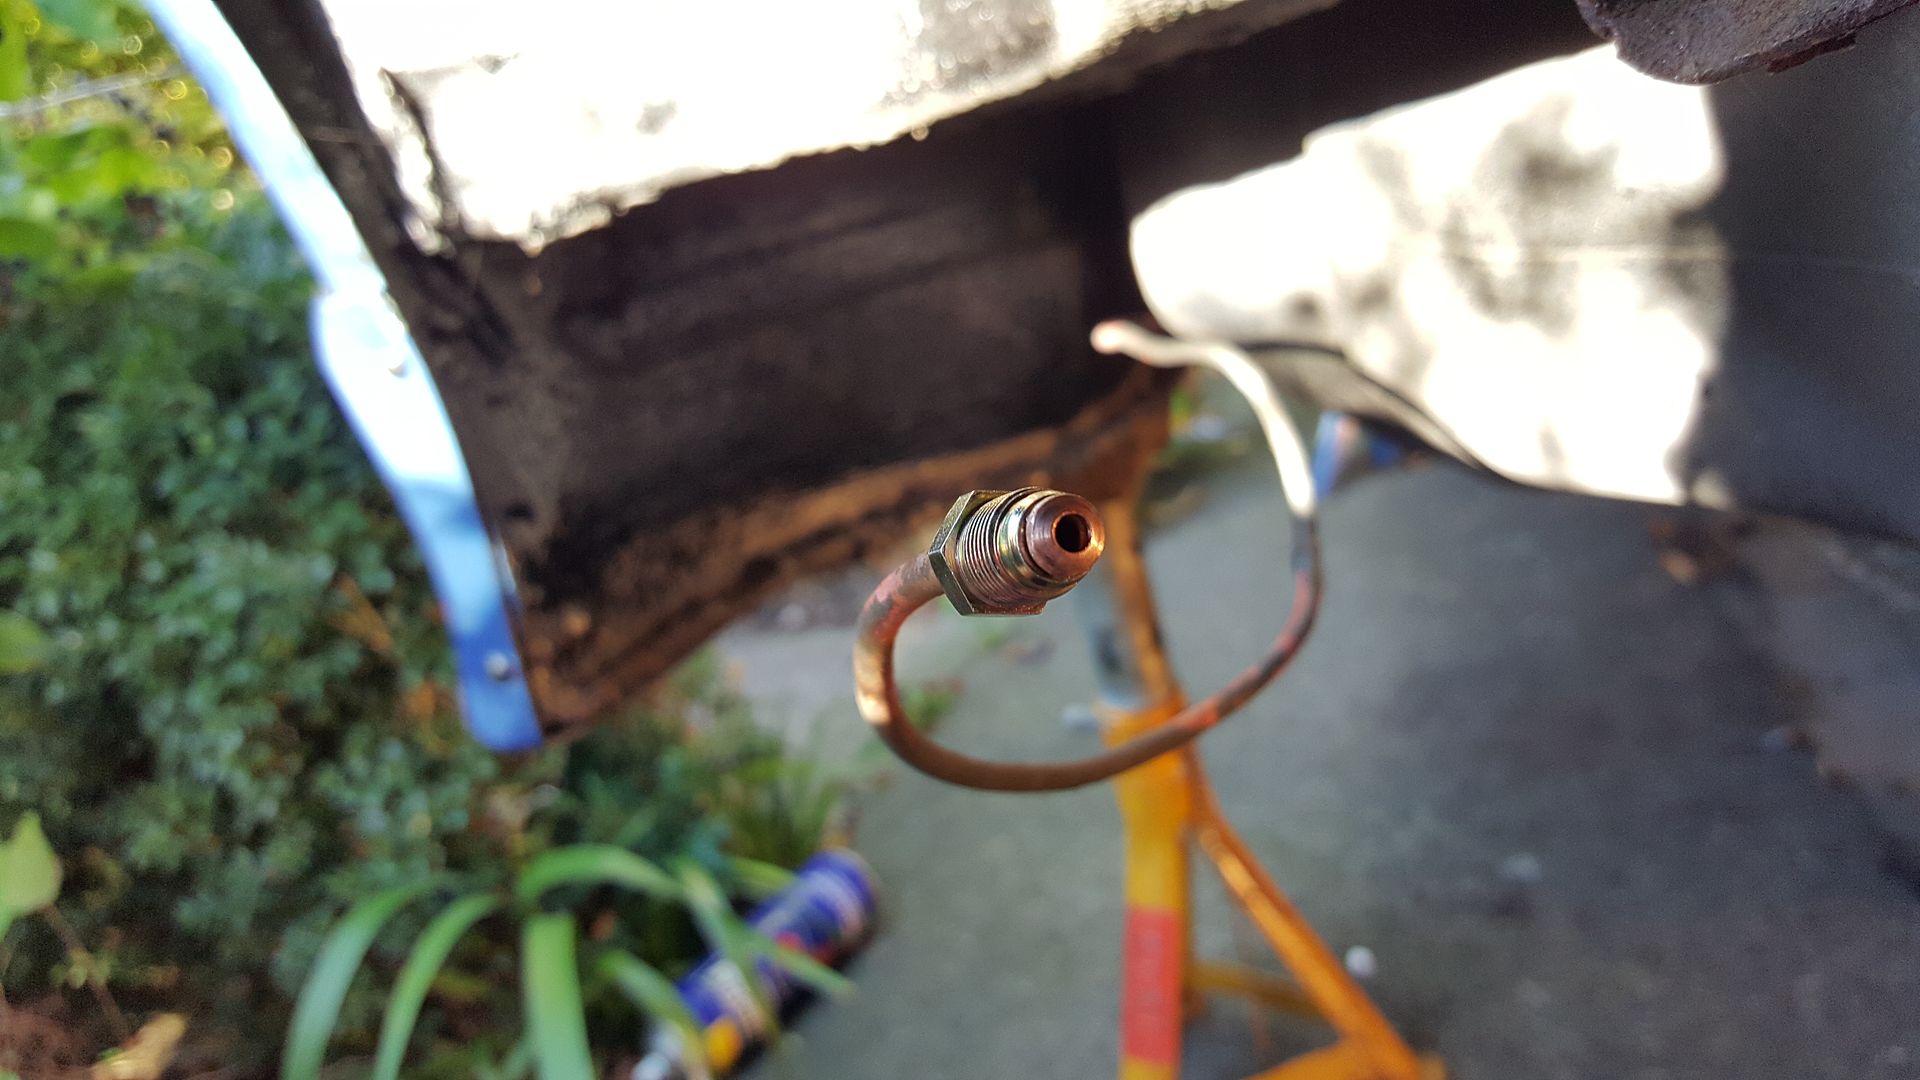
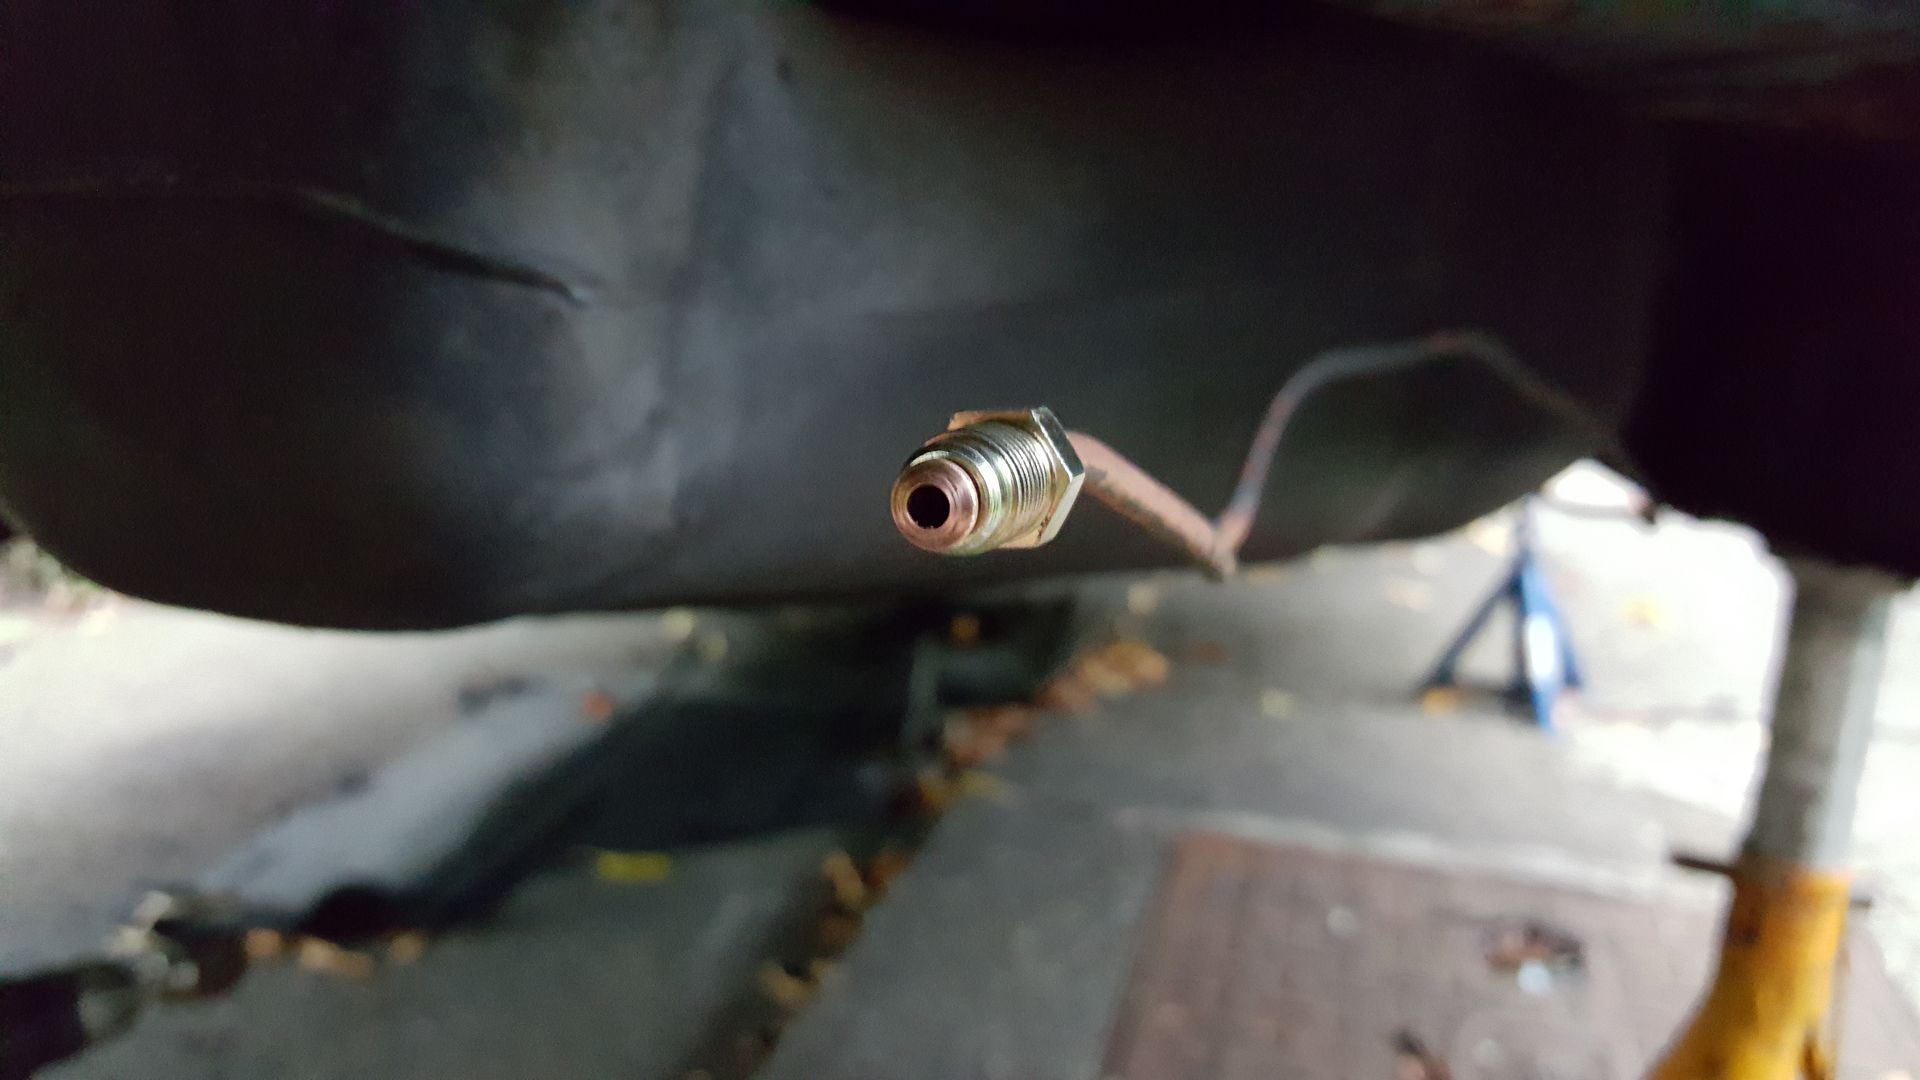
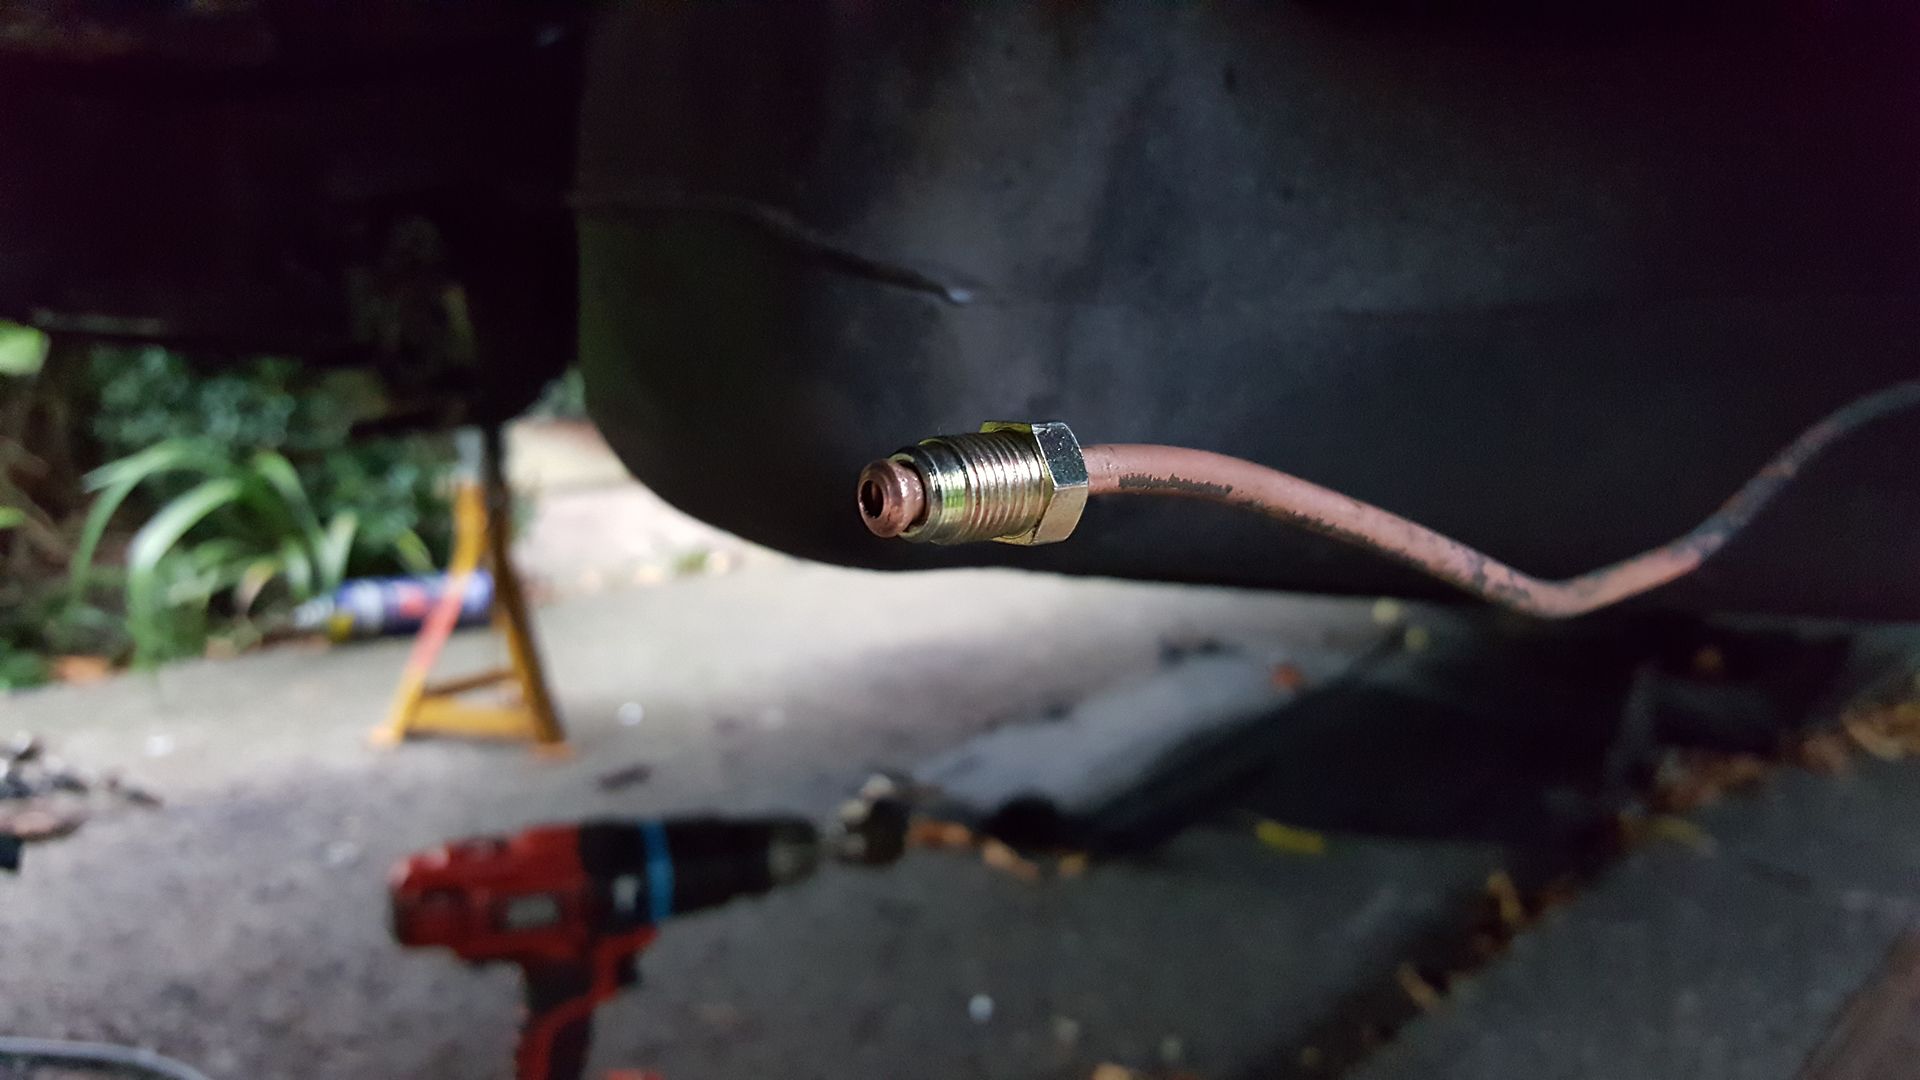
While I was out there, i decided to attempt to reflare the rear brake lines. Now, my first practise attempt was spot on. I thought "wow, this is quite easy" and then went on to do each side twice, cutting off more pipe than I really wanted. It's probably touch and go no as to whether they are still long enough. I will probably try and get them attached to the braided lines and let those hang loose before the tank goes back up just in case....
Now these have turned out pretty well, my only concern is a bit of scoring in the ends of them. I worry that the scored bits of pipe might actually crack when bolted to the flexi lines. Only one way to find out really but will be a massive hassle if the car is all back together and I find out there's an issue.
Pics:
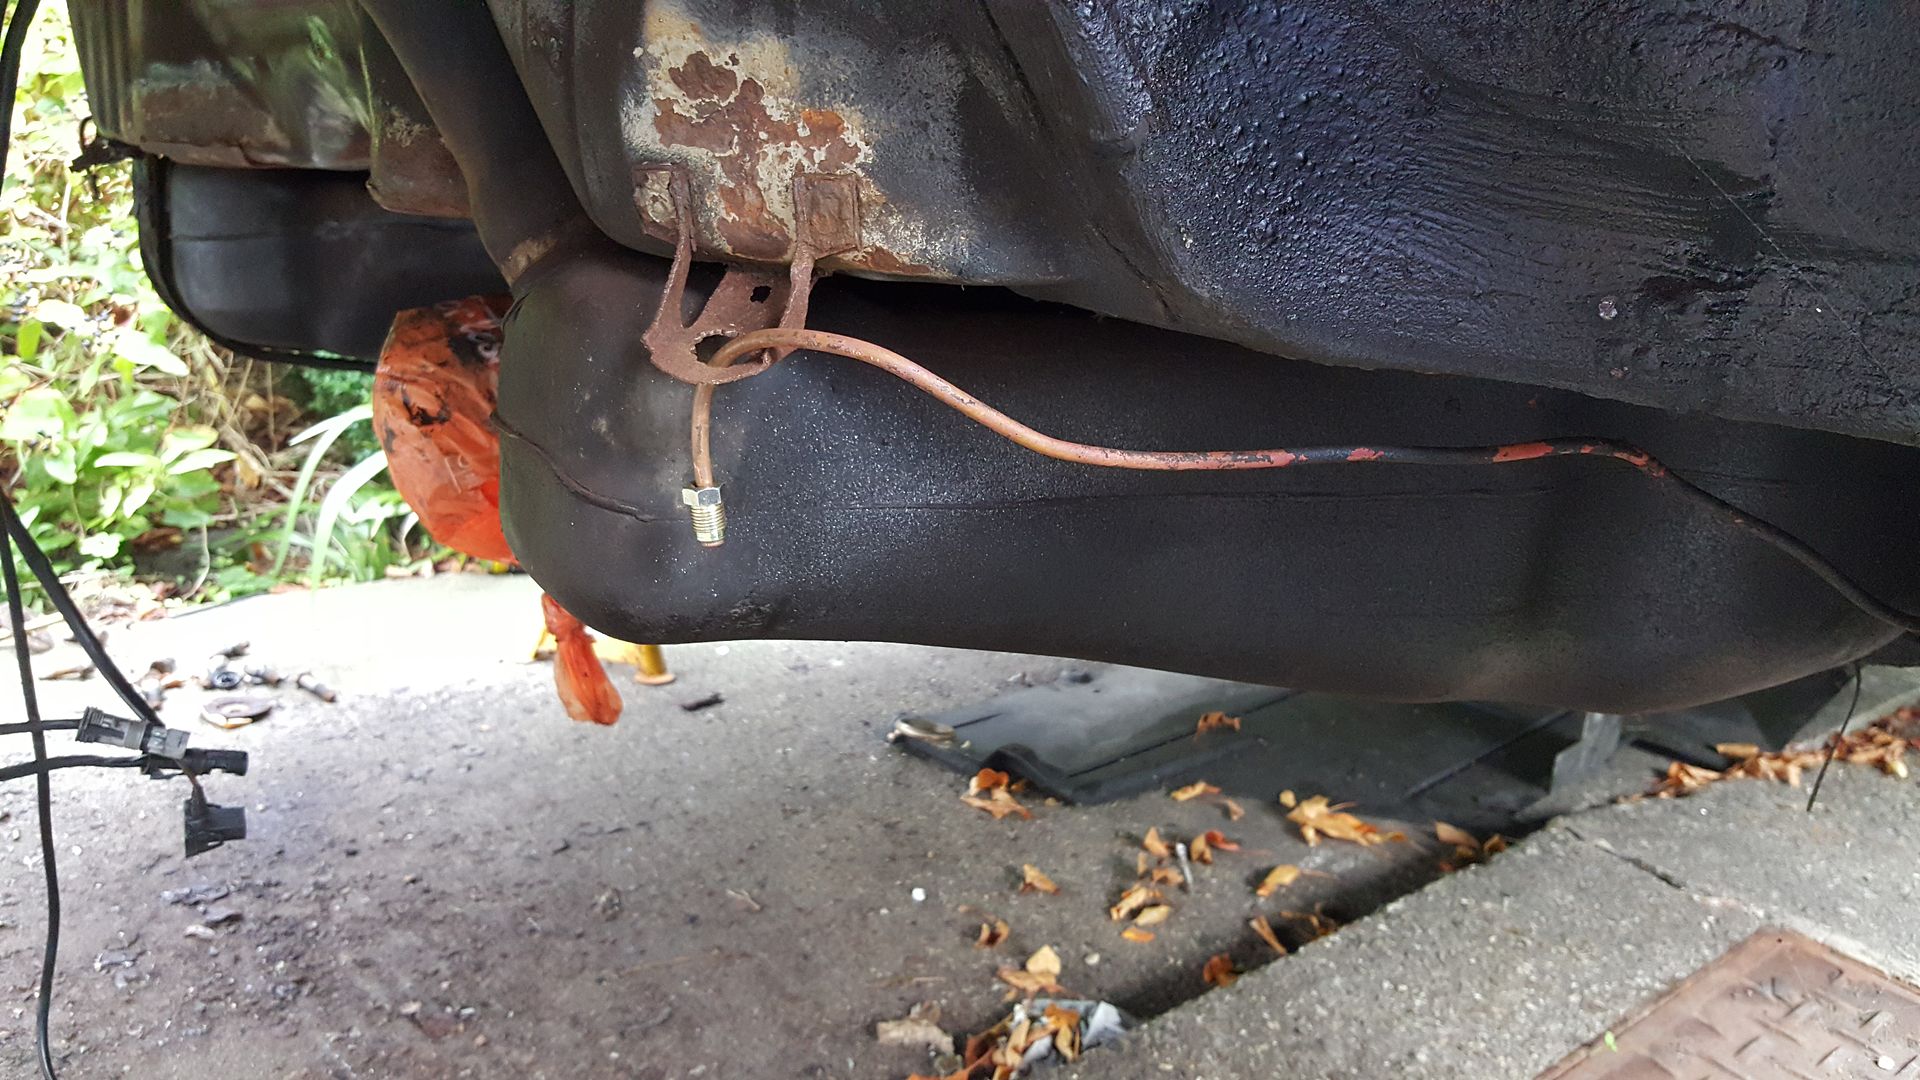
I have also had the rear bench out to start the process of dropping the tank but I can't seem to get the hose off the right hand side pump unit yet. Covered in dirt it was:

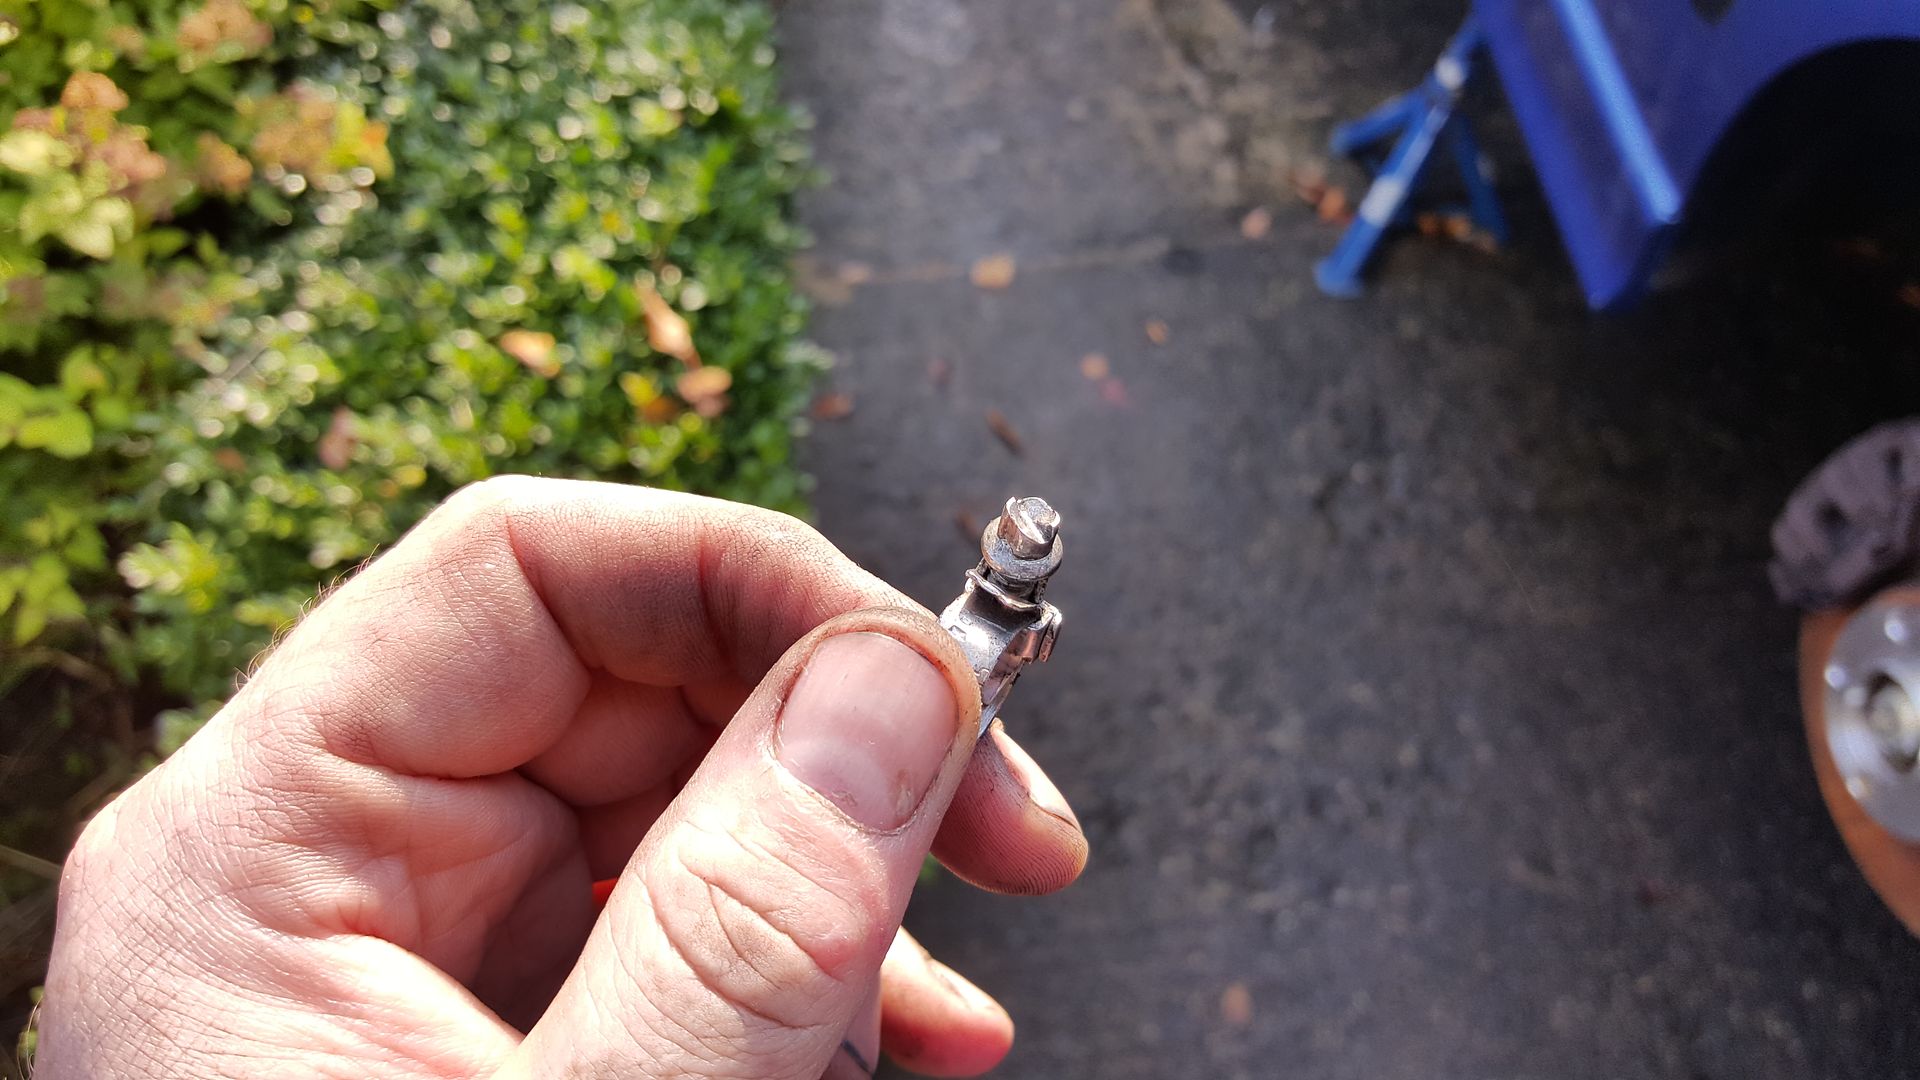
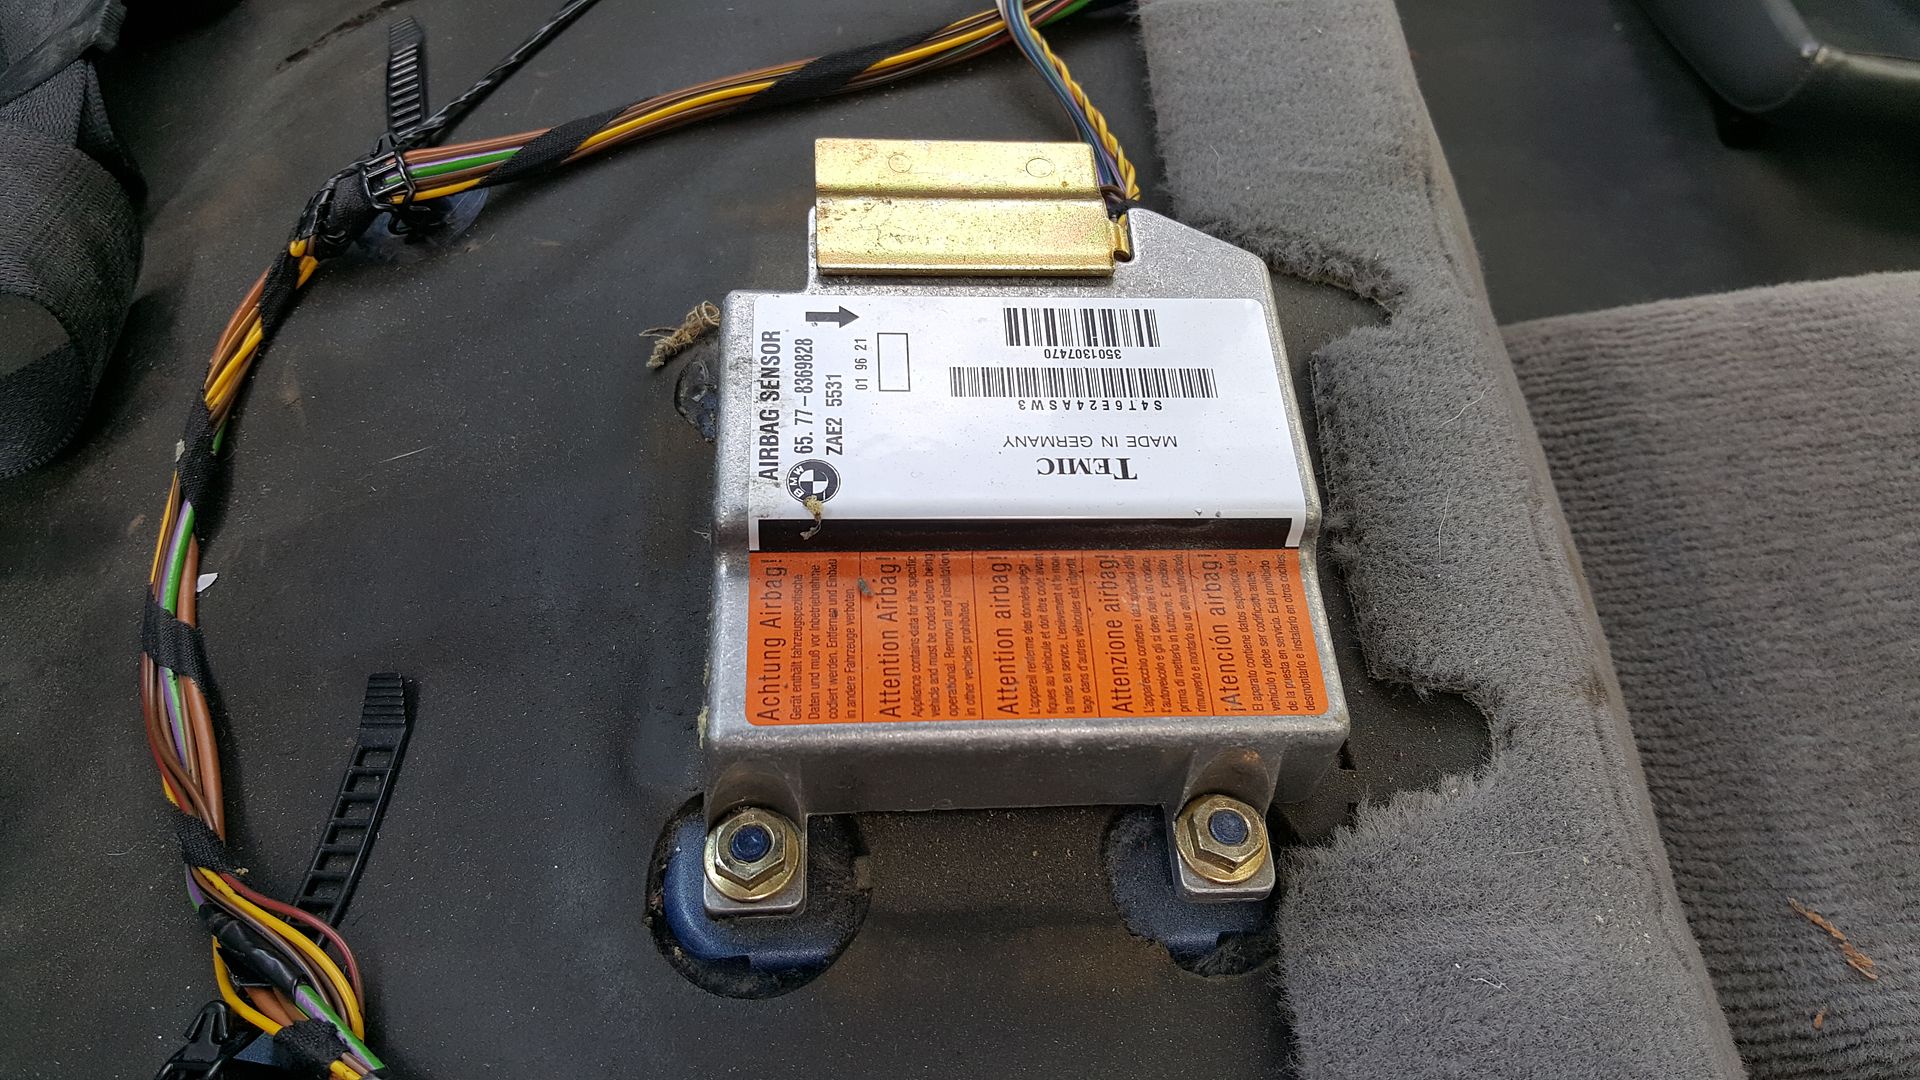
Found an airbag sensor under the back seat?!:
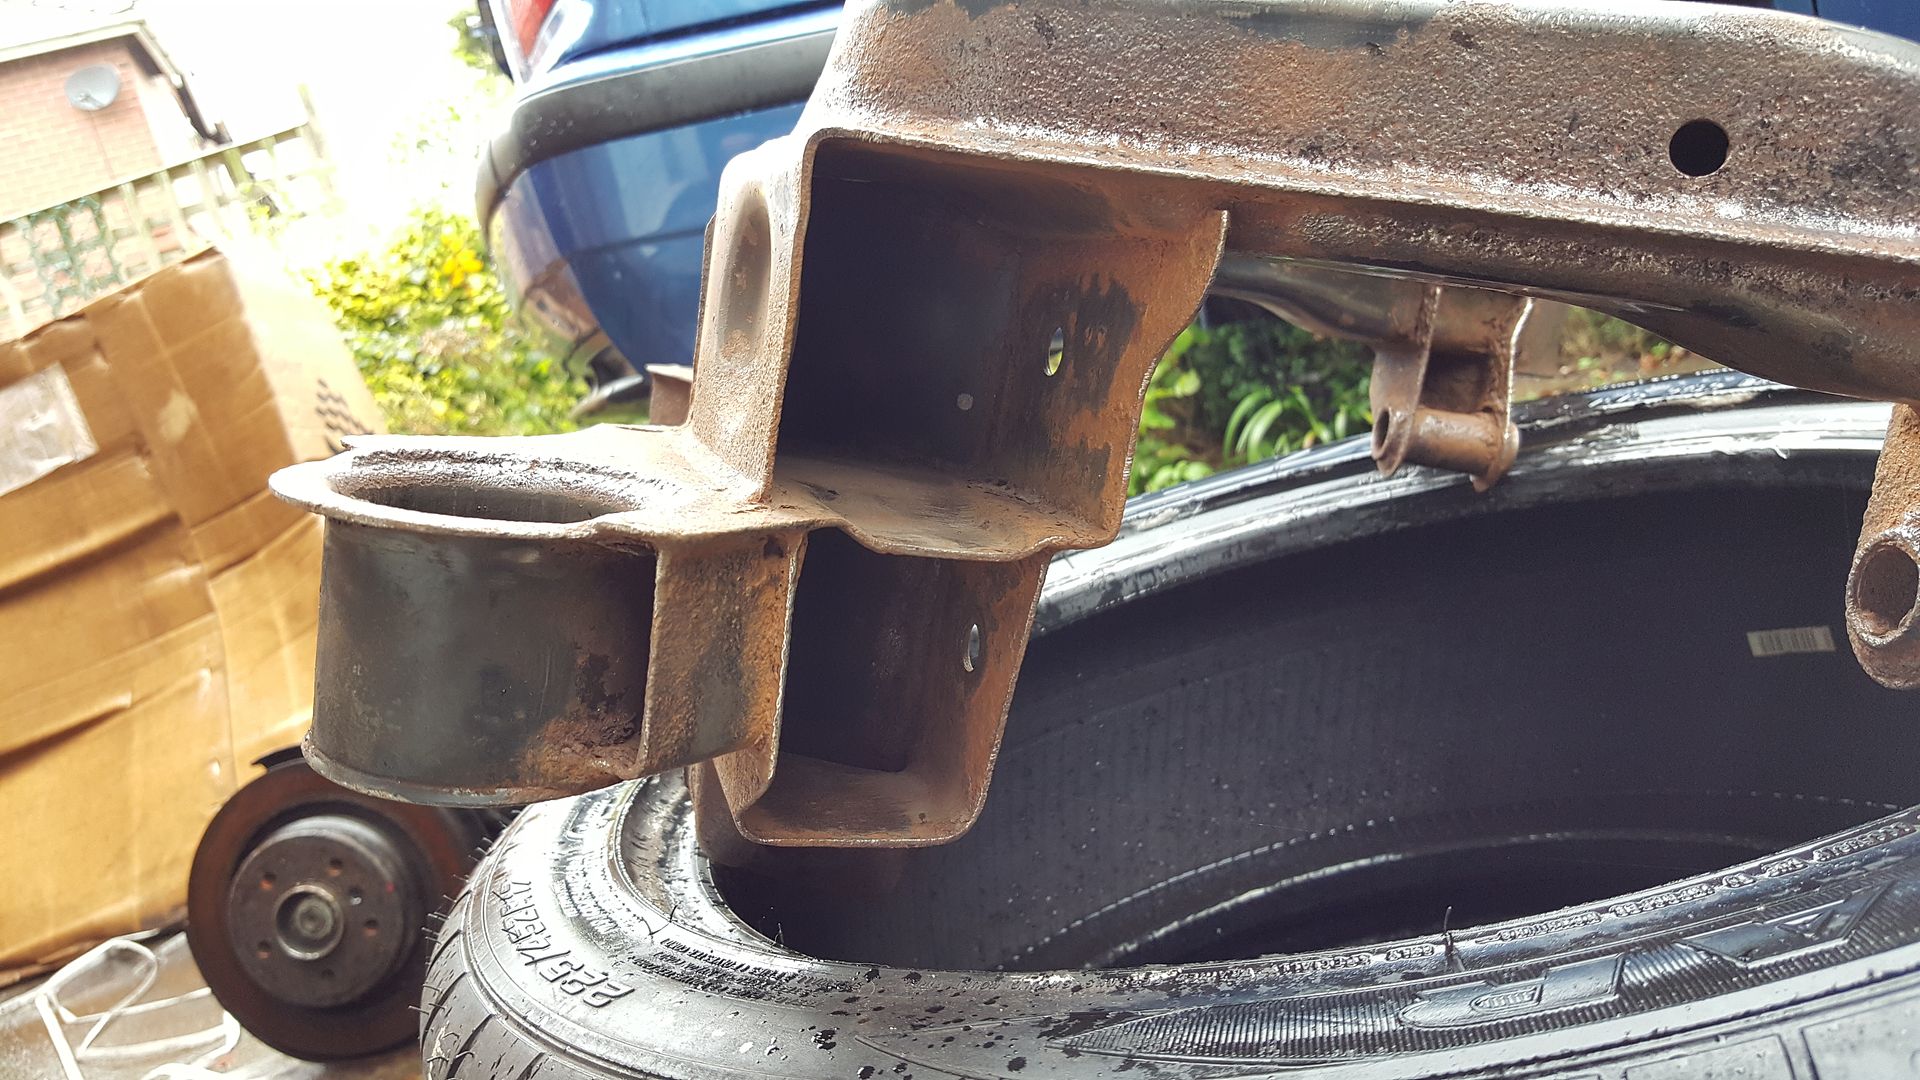
Here's that subframe I have been working on. It's very pitted and I am a bit concerned by a small gap I found on one side of the bush housing that the other side doesn't have. It does sort of look like it was made that way but I need to see another to know for sure. Obviously if it has lost a tiny bit of metal then I want it repaired. If it hasn't, then I can get on with painting it up and refurbing it:
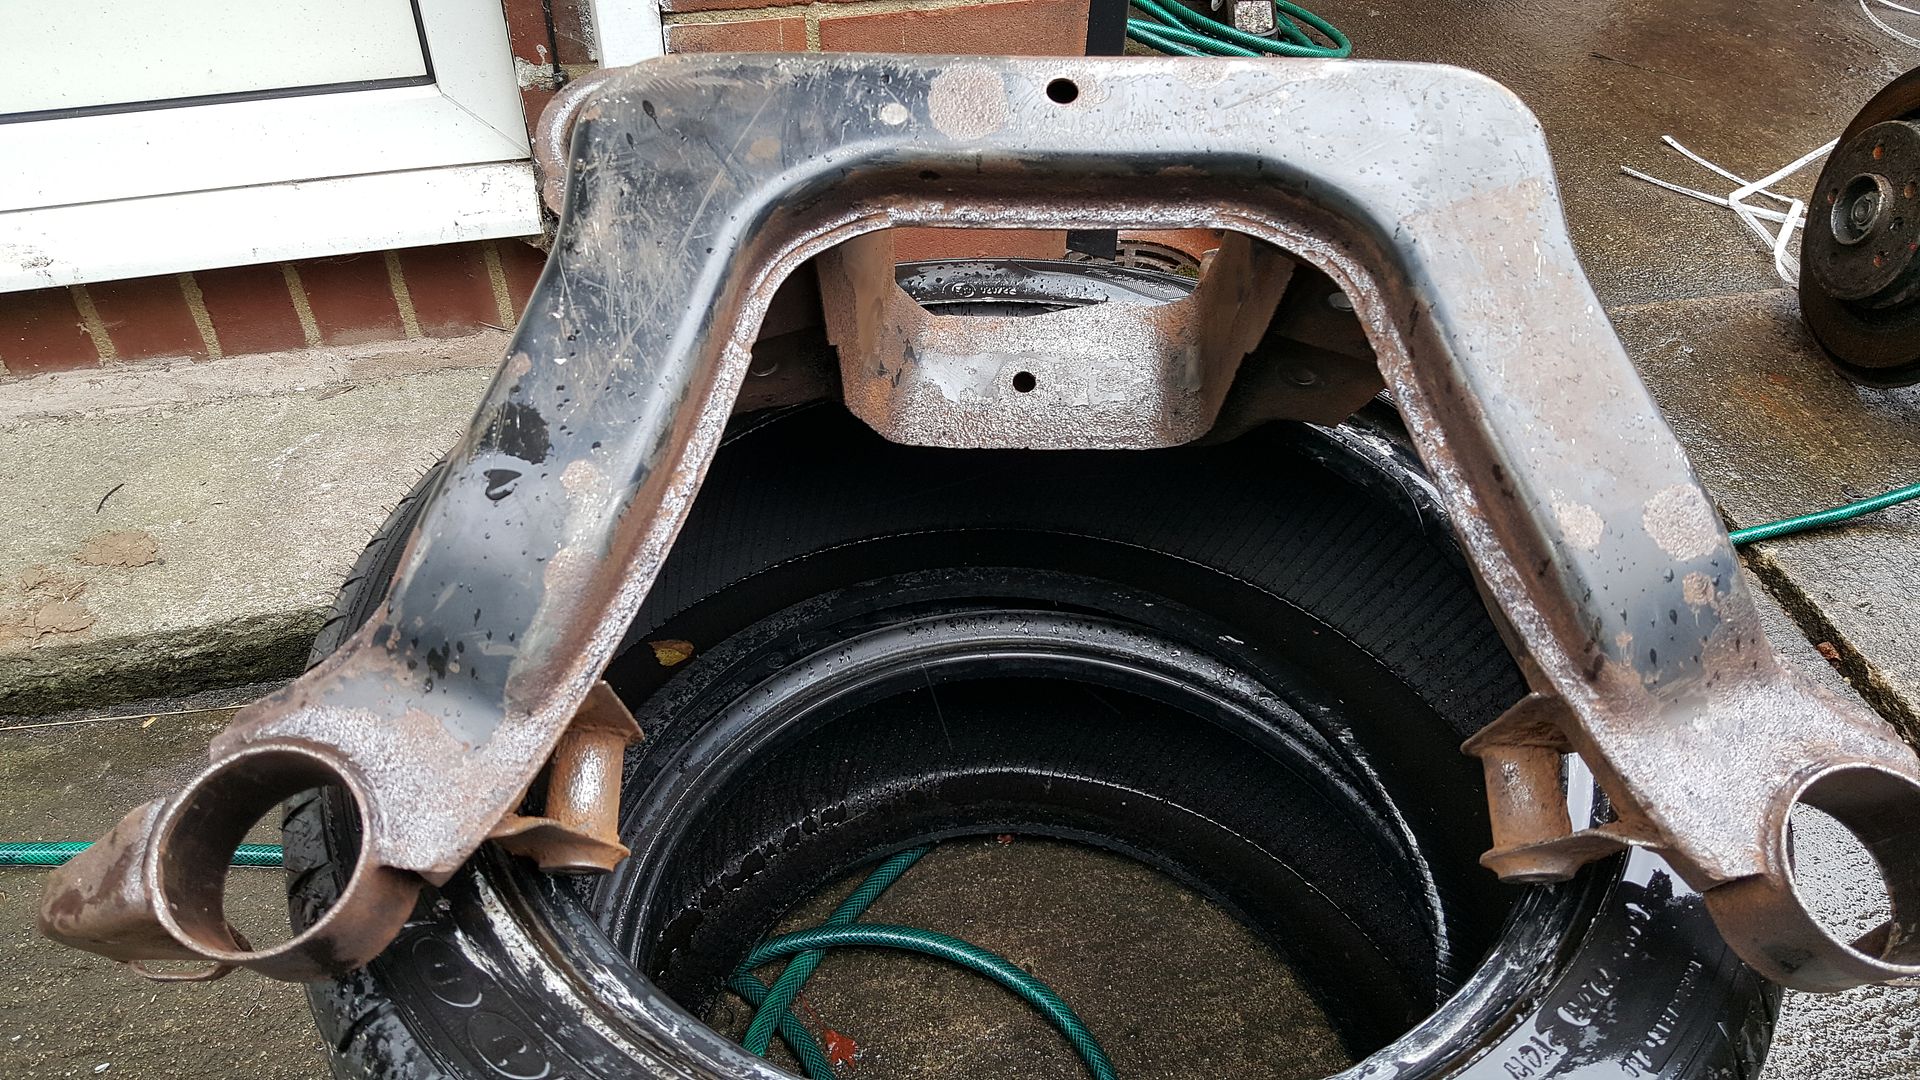
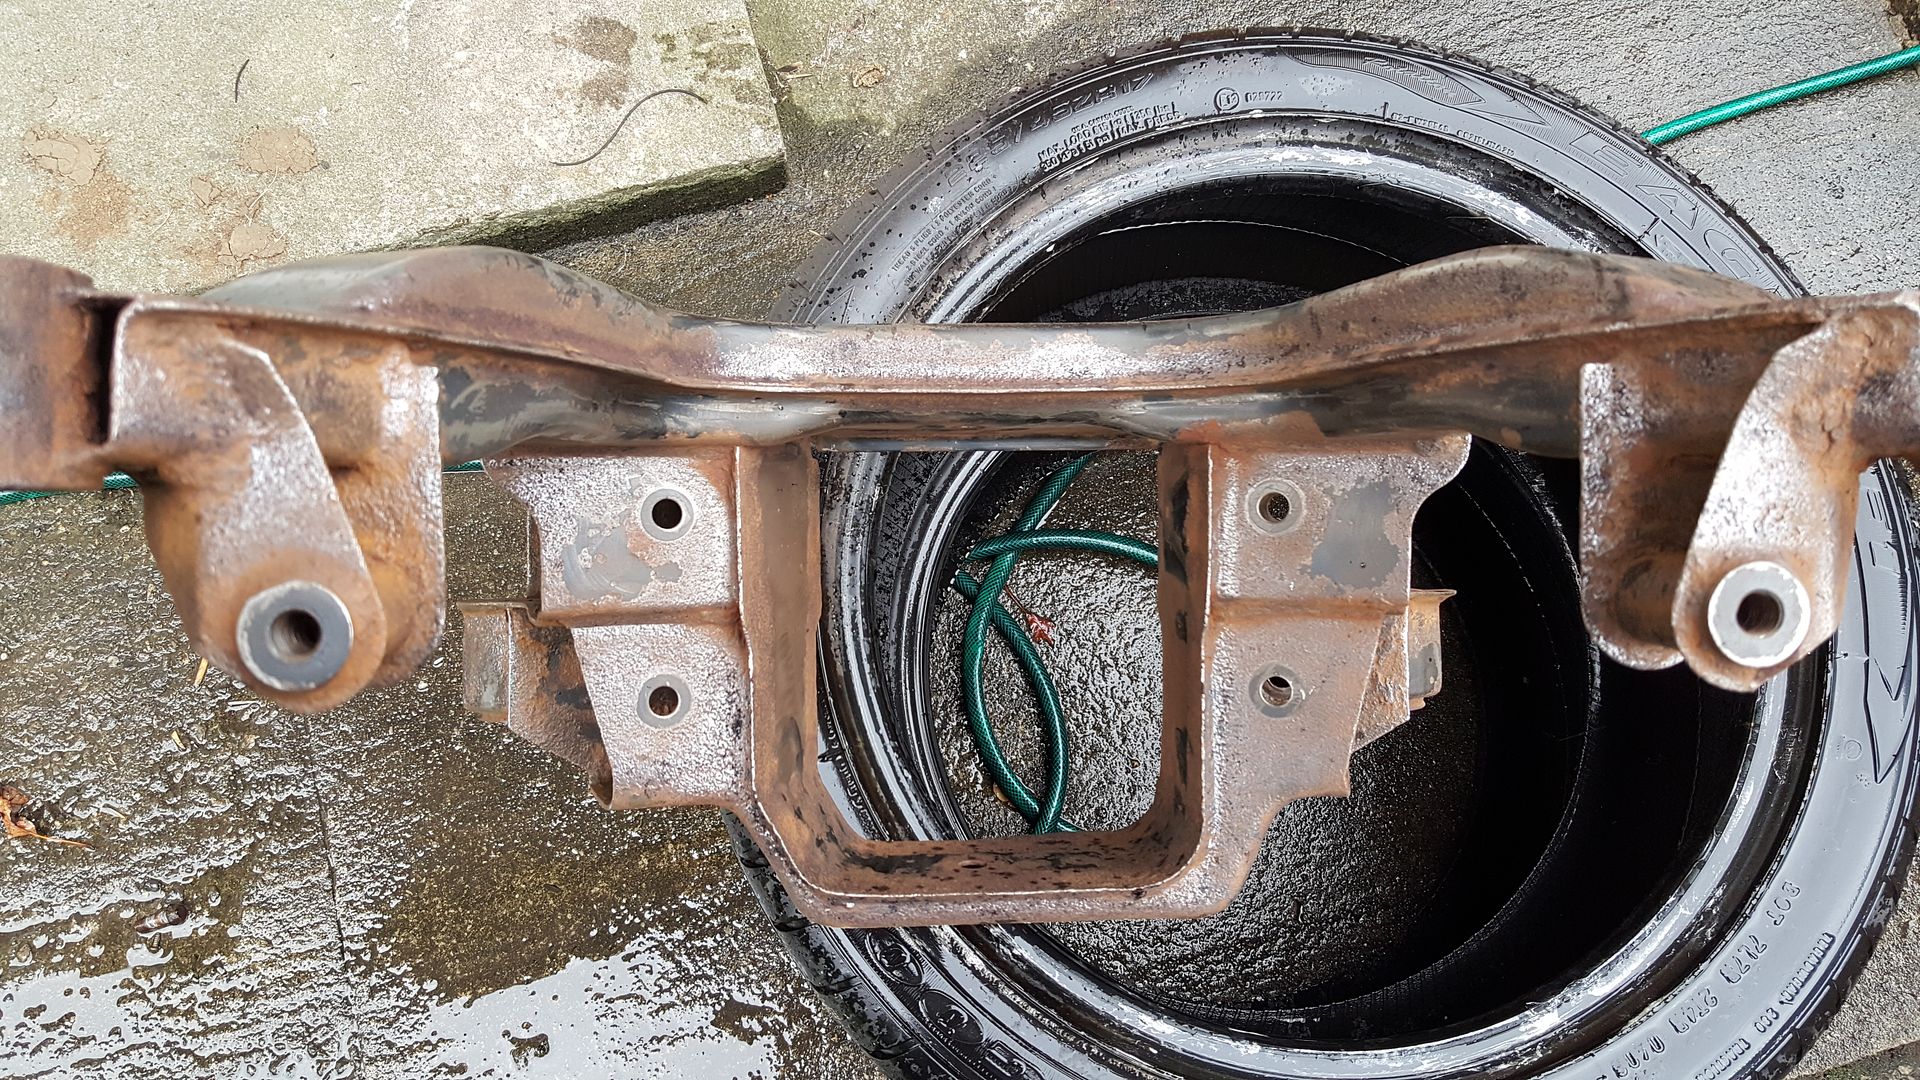
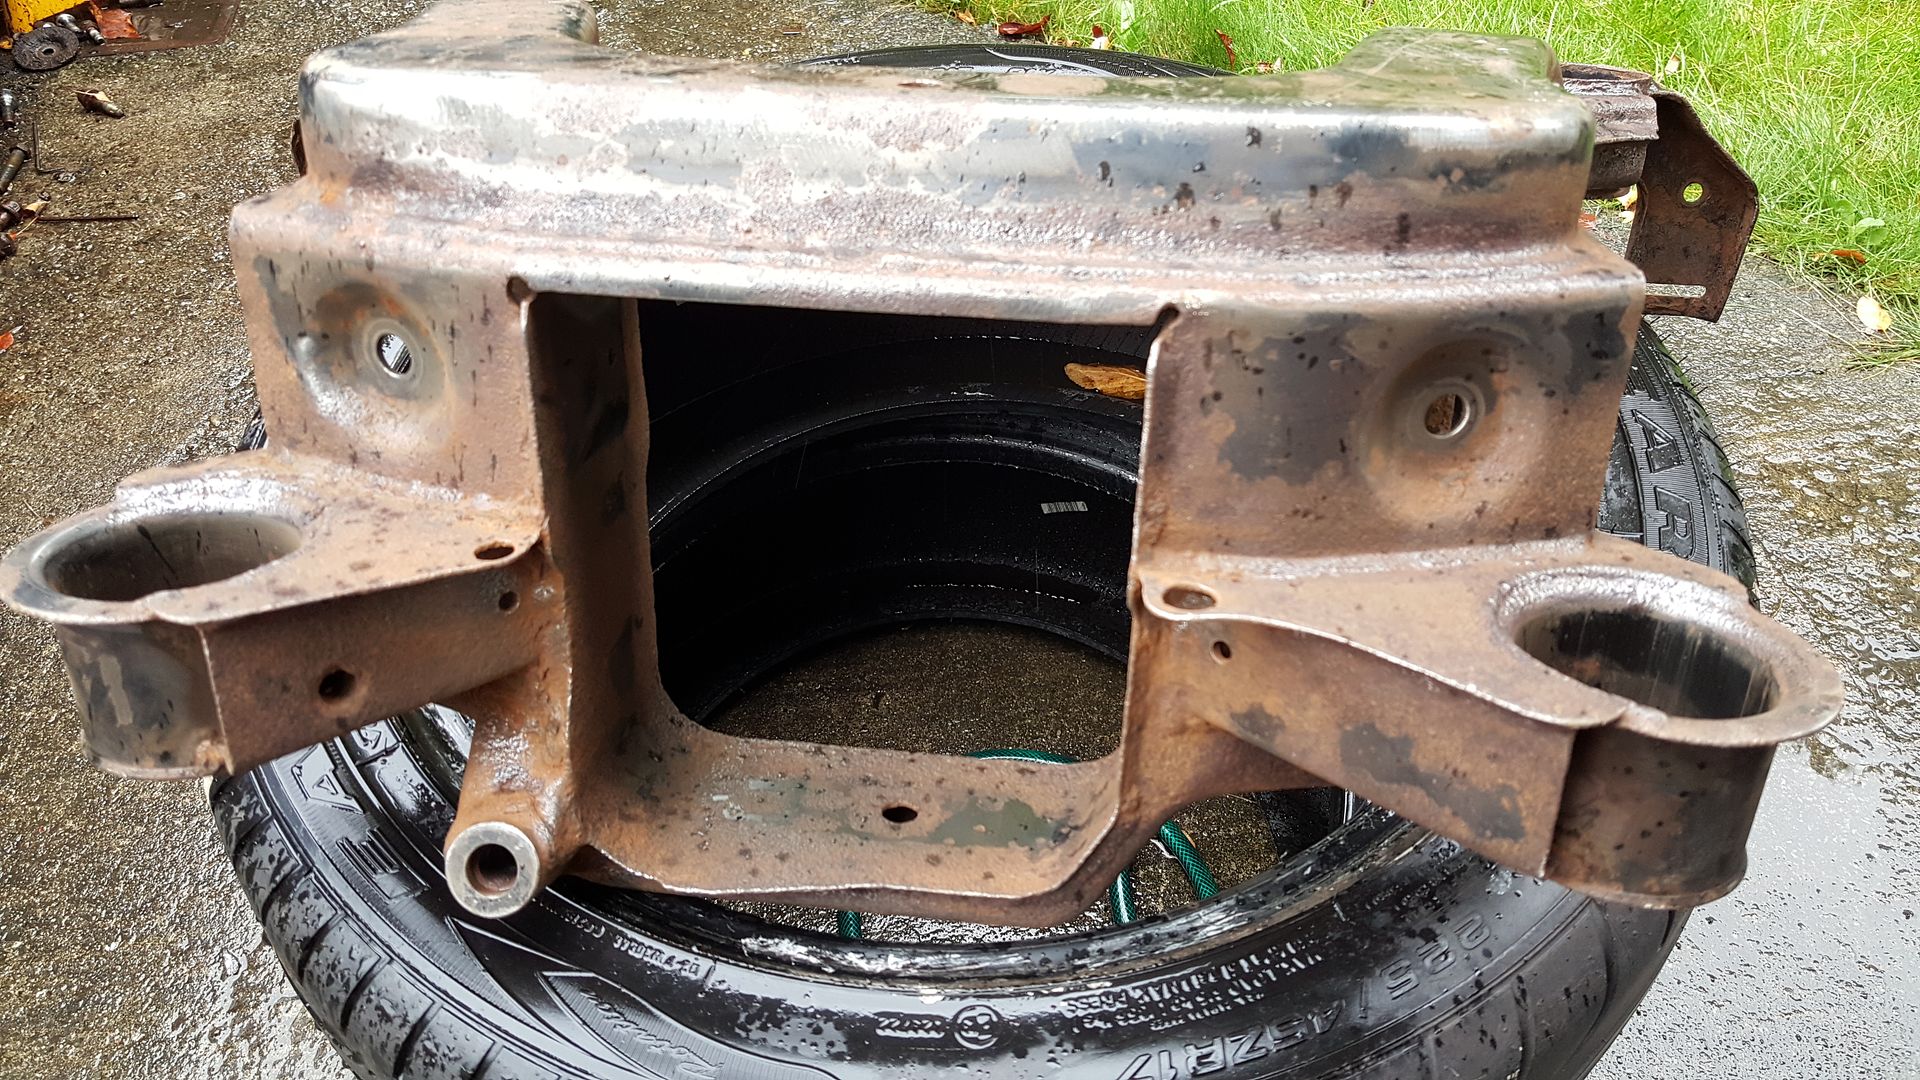
The bit I'm not sure about:

If you're still here, apologies for the long update! Just a lot to show. Even after all that though, I still feel like I aren't making progress as I have a bunch of jobs underway but haven't really completed any for a while....
But I'll keep going. The threat of having to work almost exclusively in the cold and wet soon is a great motivator!
I've bought a set of brand new front wishbones and they are ready to go on. In the end I just bit the bullet on these. Cost me well over £300
Due to it being extremely wet and it raining hard on Monday, I switched focus to the engine bay, where I needed to replace the plenum rubber hoses. As is seemingly always the case with this car though, doing one job has led to discovering more work to do. I removed the plenum, which was a bloody hard battle thanks to a knackered jubilee clip on a hose underneath it:
A few pics of the process:
Looks pretty good
There was a cracked bit on the first hard pipe so that was also replaced during the process but I forgot to photo that. I was going to put the plenum back on, but an inspection of the hoses beneath it revealed this:
I priced up a number of hoses with BMW as there is also a crack around one coming from the ICV and there's a really odd squishy pipe from the oil separator that feels like it would benefit from replacement. The quote, with discount, came back around £70!! Then there's the frayed throttle cable I discovered.....
The cost of the rubber pipes is crazy, so I have again decided to bite the bullet and will soon be ordering a full silicone hose kit. My worry is that replacing the rubber pipes with rubber could see me having to do them again at some point in the future, and if there are any I have missed I would have to take everything apart again to replace them. Screw that.
So I am going to splash out the princely sum of £270 on a hose set. And seeing as I have the plenum off, I am going to replace the FPR and clean the ICV.
This is already a long update, but the fun doesn't stop there! Oh no, I have also been back under the car and now I have a wire cup brush and a new grinder after a session with the subframe killed my old one!
I bought a Bosch Professional one this time, to replace the £20 thing I bought from Halfords or Wilco many moons ago!
So underneath the car, I have been cleaning it up. I still haven't dropped the tank yet but I will. Here's the underside:
Looking a lot better around the subframe mountings now! Ready for some Bilt Hamber Deox.
While I was out there, i decided to attempt to reflare the rear brake lines. Now, my first practise attempt was spot on. I thought "wow, this is quite easy" and then went on to do each side twice, cutting off more pipe than I really wanted. It's probably touch and go no as to whether they are still long enough. I will probably try and get them attached to the braided lines and let those hang loose before the tank goes back up just in case....
Now these have turned out pretty well, my only concern is a bit of scoring in the ends of them. I worry that the scored bits of pipe might actually crack when bolted to the flexi lines. Only one way to find out really but will be a massive hassle if the car is all back together and I find out there's an issue.
Pics:
I have also had the rear bench out to start the process of dropping the tank but I can't seem to get the hose off the right hand side pump unit yet. Covered in dirt it was:
Found an airbag sensor under the back seat?!:
Here's that subframe I have been working on. It's very pitted and I am a bit concerned by a small gap I found on one side of the bush housing that the other side doesn't have. It does sort of look like it was made that way but I need to see another to know for sure. Obviously if it has lost a tiny bit of metal then I want it repaired. If it hasn't, then I can get on with painting it up and refurbing it:
The bit I'm not sure about:
If you're still here, apologies for the long update! Just a lot to show. Even after all that though, I still feel like I aren't making progress as I have a bunch of jobs underway but haven't really completed any for a while....
But I'll keep going. The threat of having to work almost exclusively in the cold and wet soon is a great motivator!
Well I haven't yet managed to find out how to release the fuel tank hose and the replacement subframe I was going to buy has ended up falling through as I found a dodgy repair on it
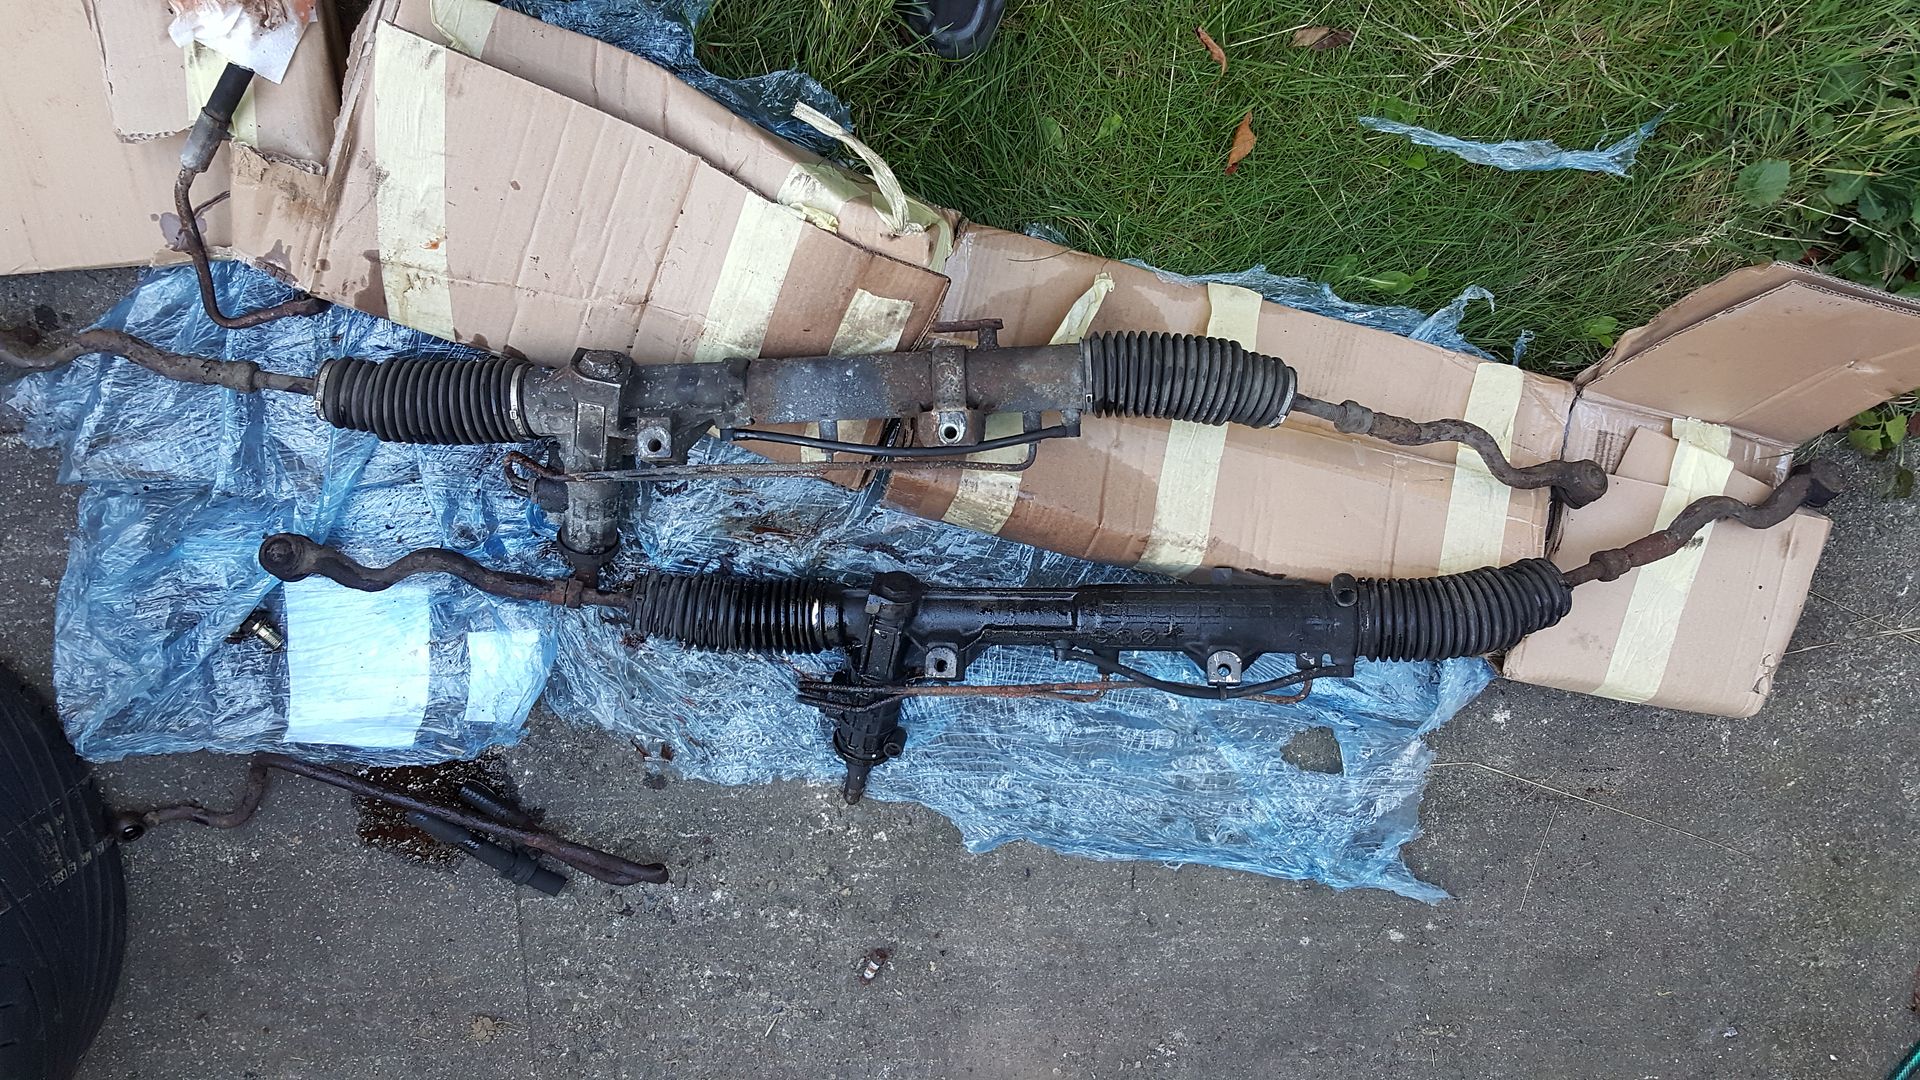
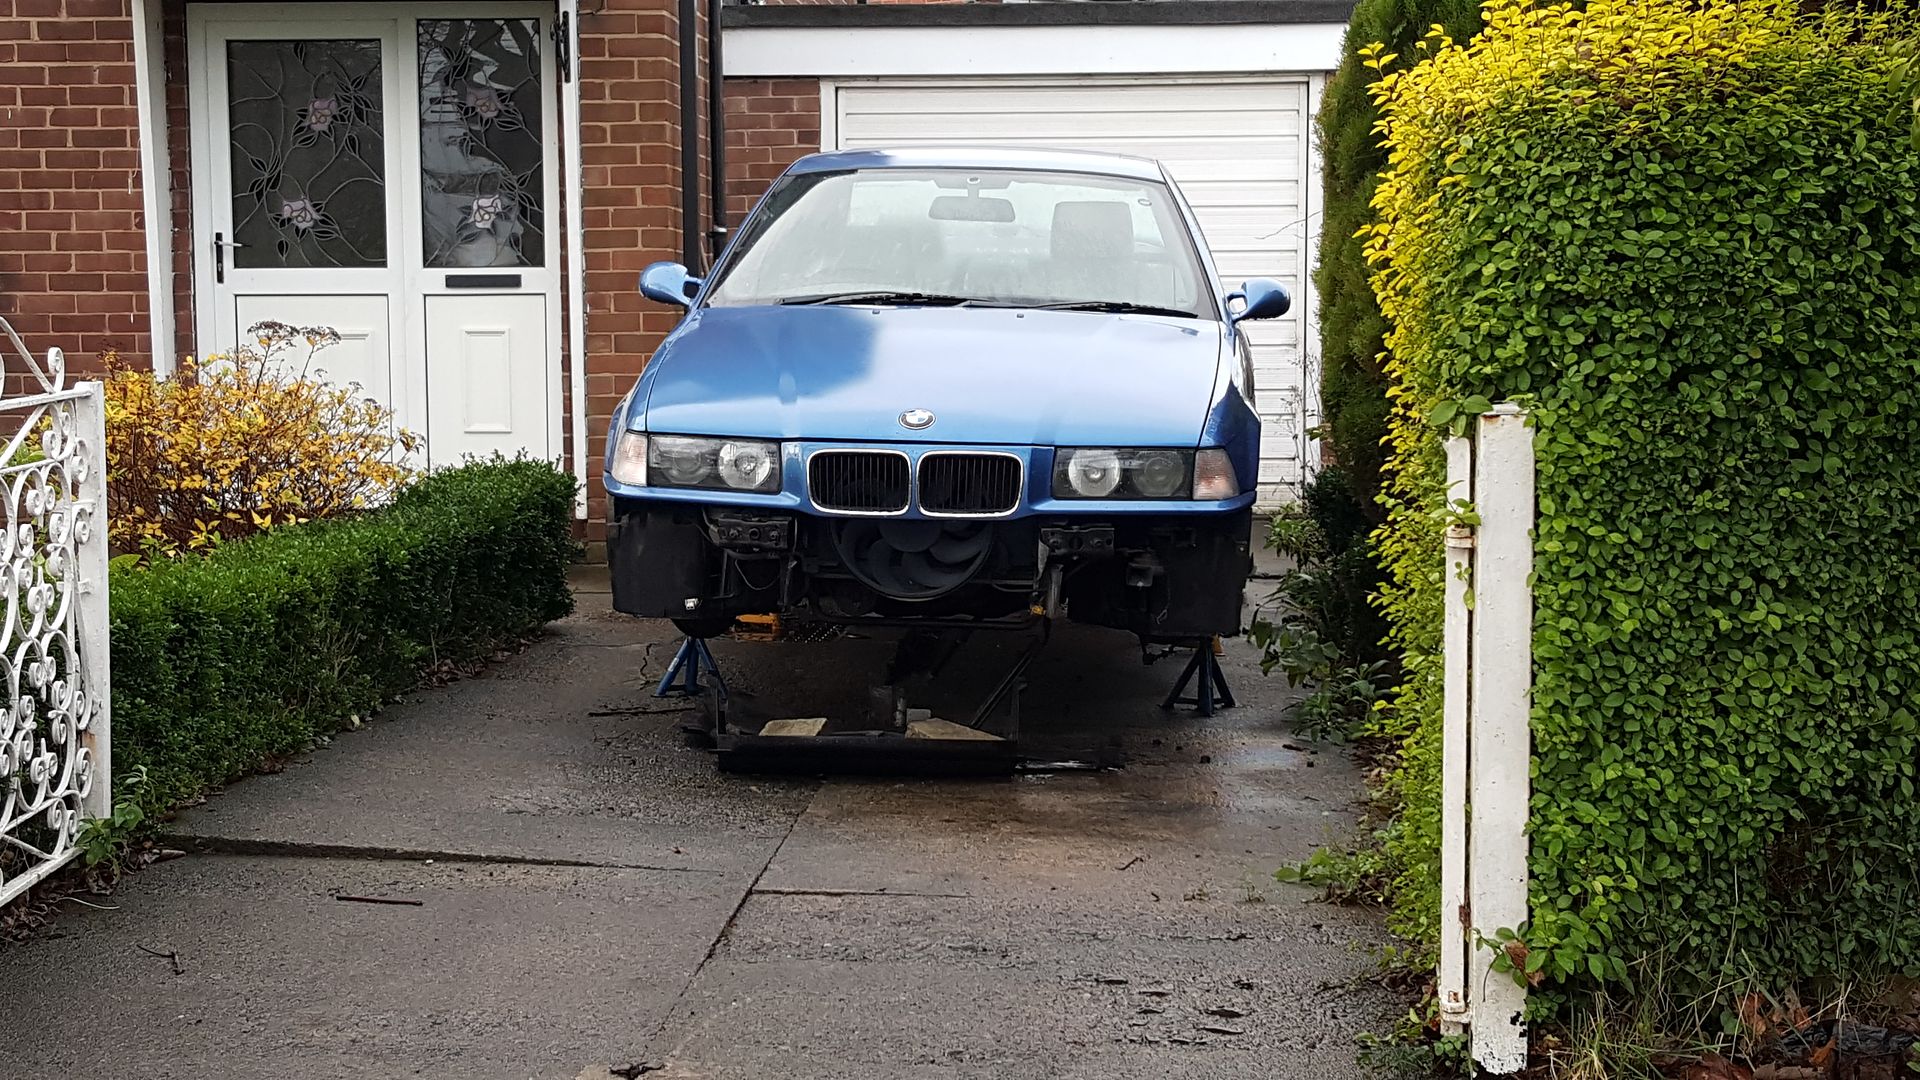
I decided to spend yesterday afternoon doing some of the other jobs. First I removed the steering rack:
Z3 and M3 racks side by side:
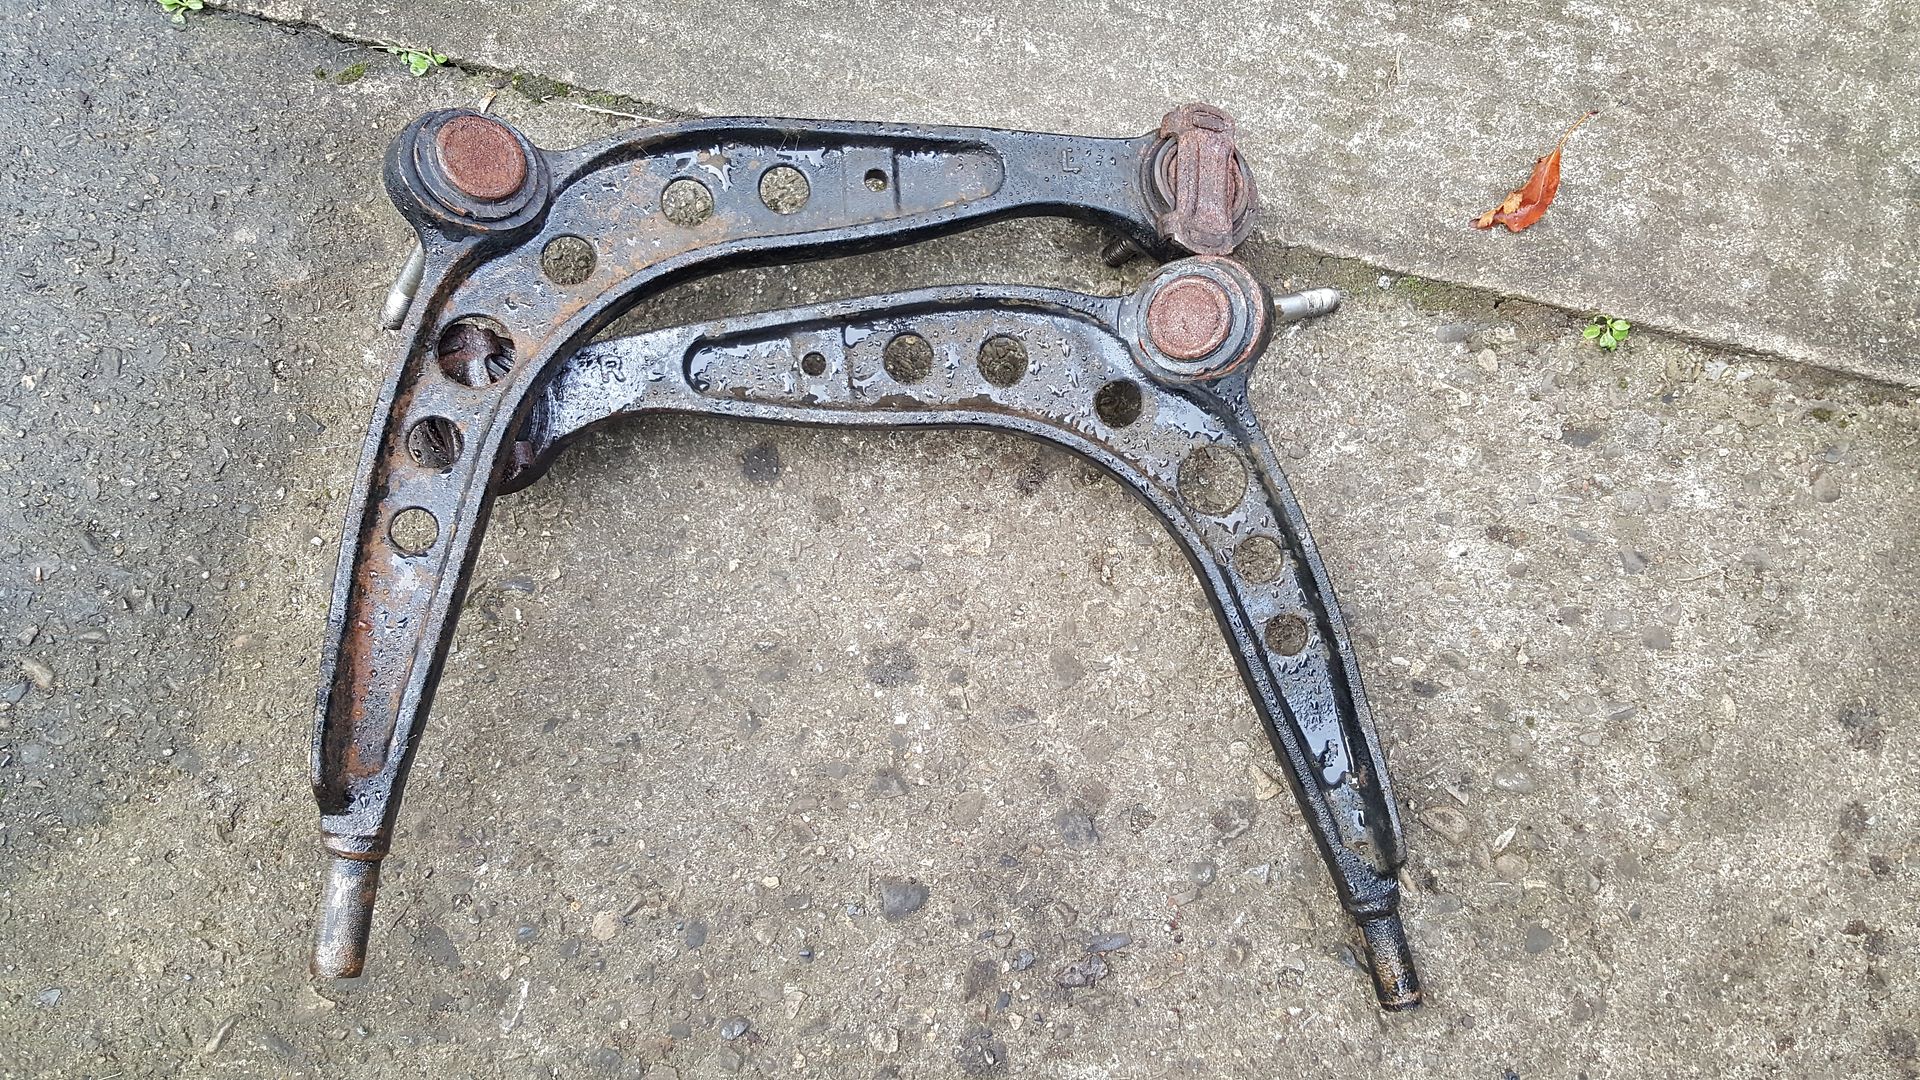
Then I removed the front wishbones:
Had a go with the pipe bender on the rear brake pipes:
Unfortunately I've realised that whoever replaced the rear pipes hasn't done so properly. They should go up and over the fuel tank, but they do not. I'm going to try and route them the correct way once I drop the tank, but I suspect that there may not be enough length left in the pipes to do this.....
Ran out of daylight by the time I had done these jobs, so next is to fit the Z3 rack and get the proper M3 Evo wishbones on as the car was sporting the wrong ones!
I decided to spend yesterday afternoon doing some of the other jobs. First I removed the steering rack:
Z3 and M3 racks side by side:
Then I removed the front wishbones:
Had a go with the pipe bender on the rear brake pipes:
Unfortunately I've realised that whoever replaced the rear pipes hasn't done so properly. They should go up and over the fuel tank, but they do not. I'm going to try and route them the correct way once I drop the tank, but I suspect that there may not be enough length left in the pipes to do this.....
Ran out of daylight by the time I had done these jobs, so next is to fit the Z3 rack and get the proper M3 Evo wishbones on as the car was sporting the wrong ones!
Wow, last update in September! has it really been that long?
Not a huge amount has happened since then unfortunately, although parts have continued to arrive. I managed to really hurt my middle finger and have been waiting for the nail to stop being purple, peel off and start to regrow etc. before trying to do any more work!
I now have my AKG gearbox mounts, UUC engine mounts, AKG alloy steering coupler bushing etc. and I have sourced a second front crossmember so that I may have that one powdercoated and the reinforcement plates I bought welded in. Then I can switch the old one out for it.
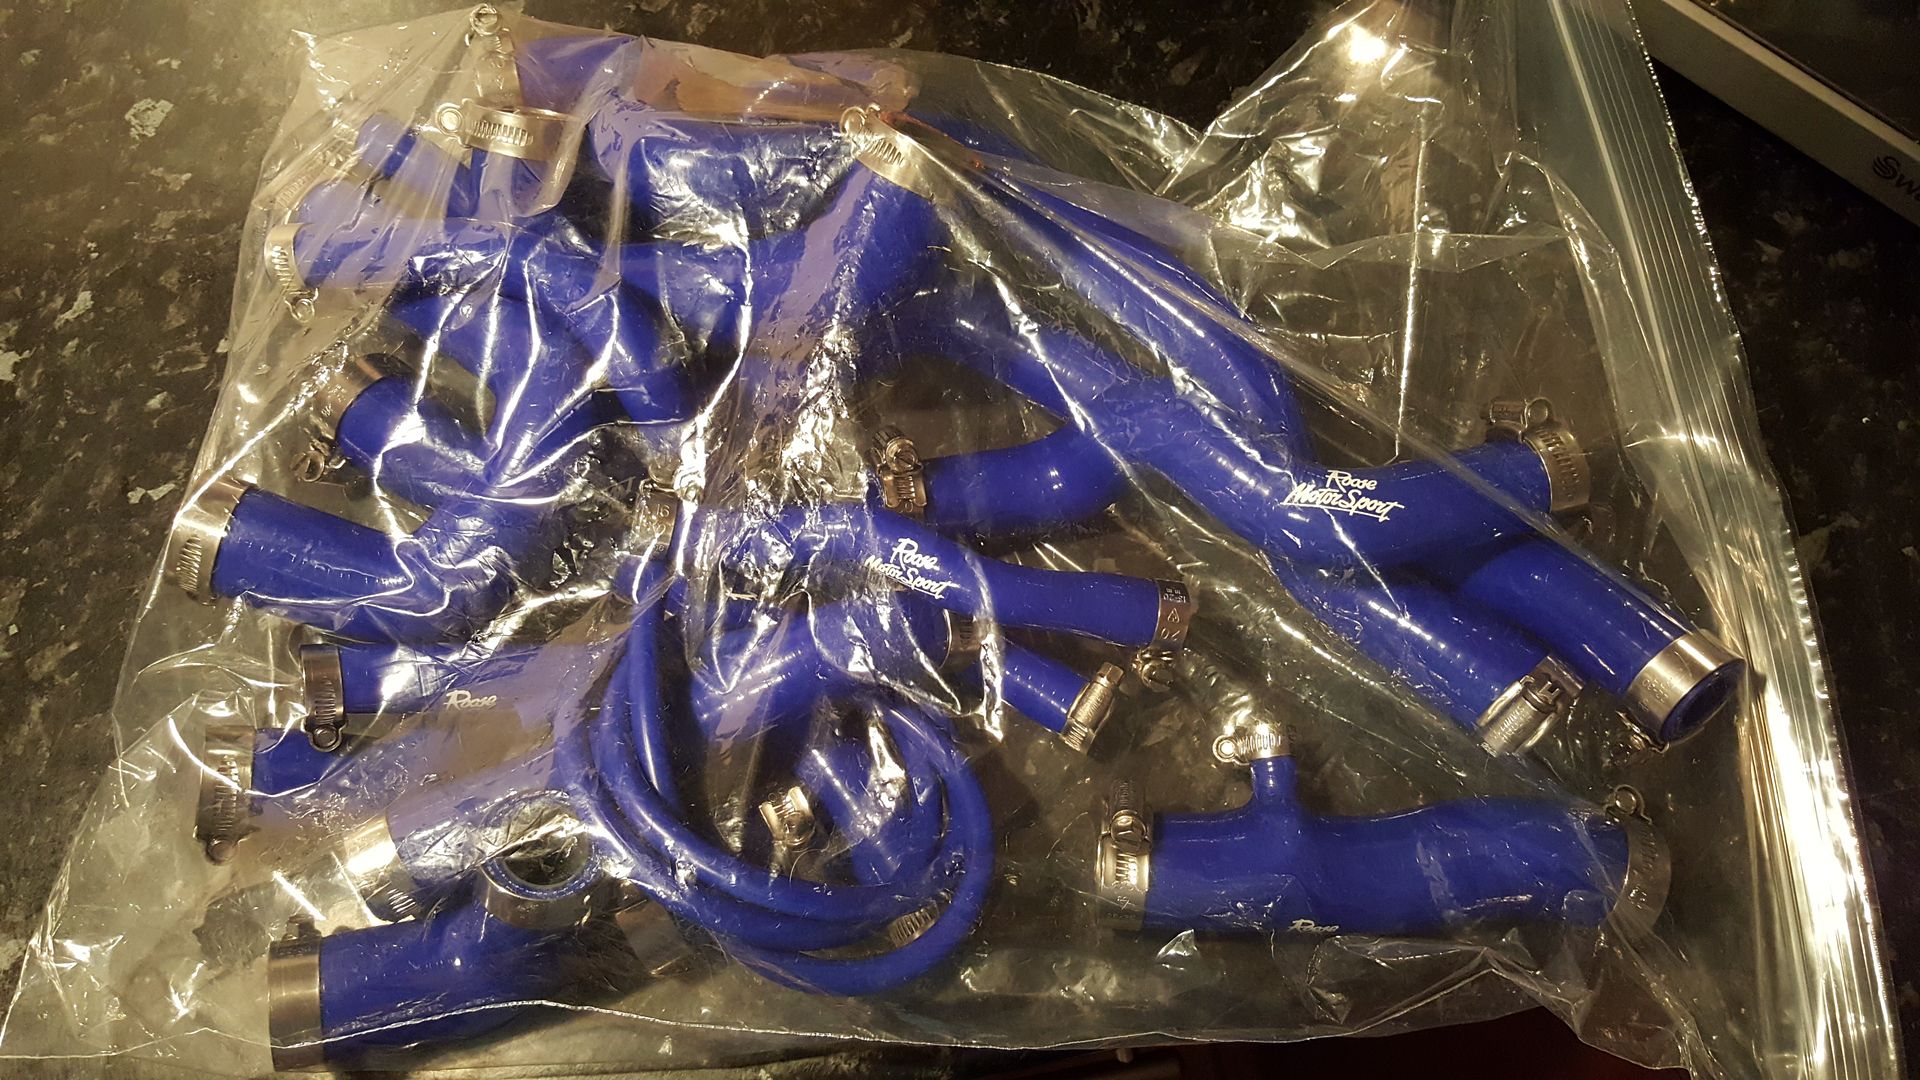
I've actually been looking into the engine and things the car needs refreshing due to the mileage and have bought a kit to replace the Vanos solenoid seals and the filter screw etc. The hoses have arrived:
I've ordered a water pump, will buy a thermostat tomorrow and already have all the belts etc. and I have the plugs. Current plan is to finish the oil cooler swap which was unsuccessfully started the other night, then fit the BM Sport oil thermostat blank (https://www.bmsport.com/product/engine-oil-thermostat-blank/), fit the new FPR which I ordered as preventative maintenance and then put the new hoses on and get the inlet back on. At that point, I shall do a compression test because the next step would be to buy and fit new ARP rod bolts and King race bearings. I don't want to go to the trouble of doing that if the engine isn't tip top to start with. I should have done this when I first got the car, but hindsight etc. etc.
Once that little lot is done I plan to get the crossmember swapped, fit the new front wishbones and engine mounts etc.
The oil diverter is an interesting bit of kit and I only learned about it a week ago. Basically it blocks off the thermostat in the filter housing and makes the oil spend more of its time in the cooler. Much better for track work.
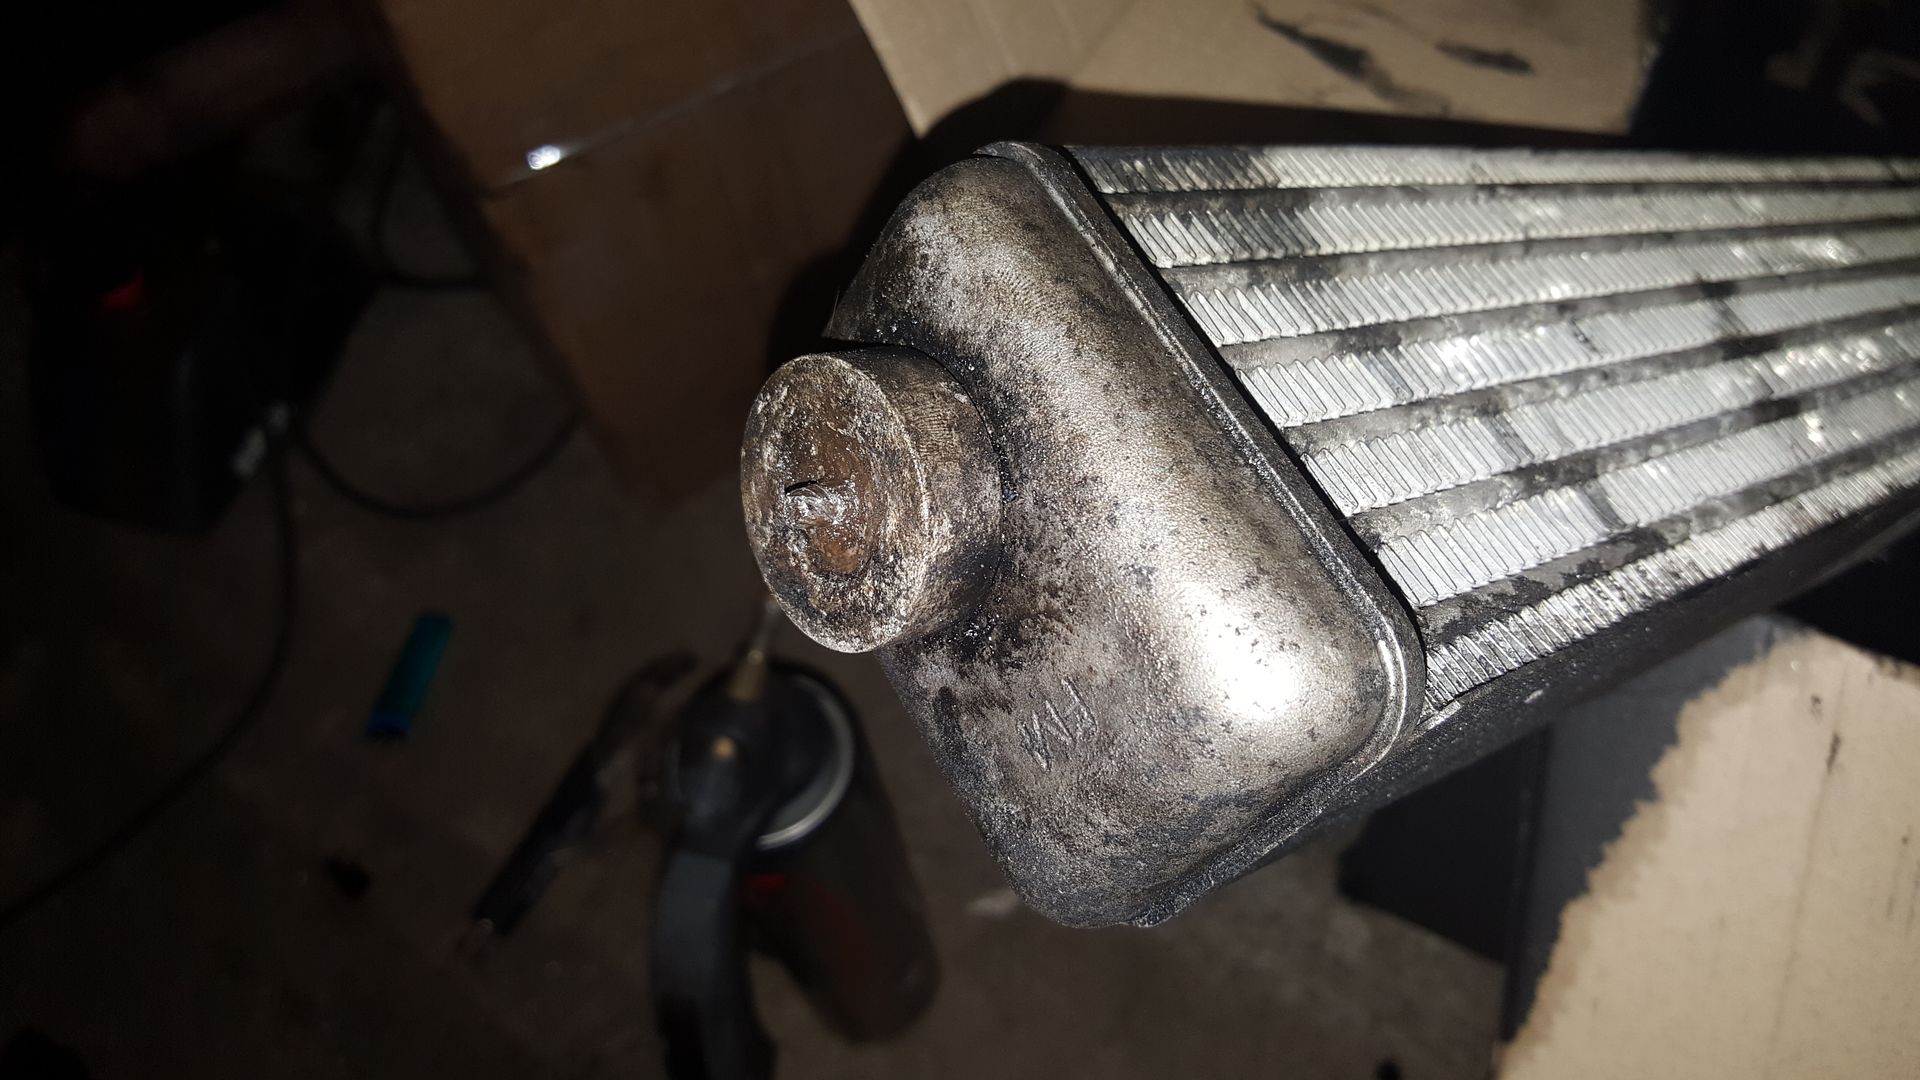
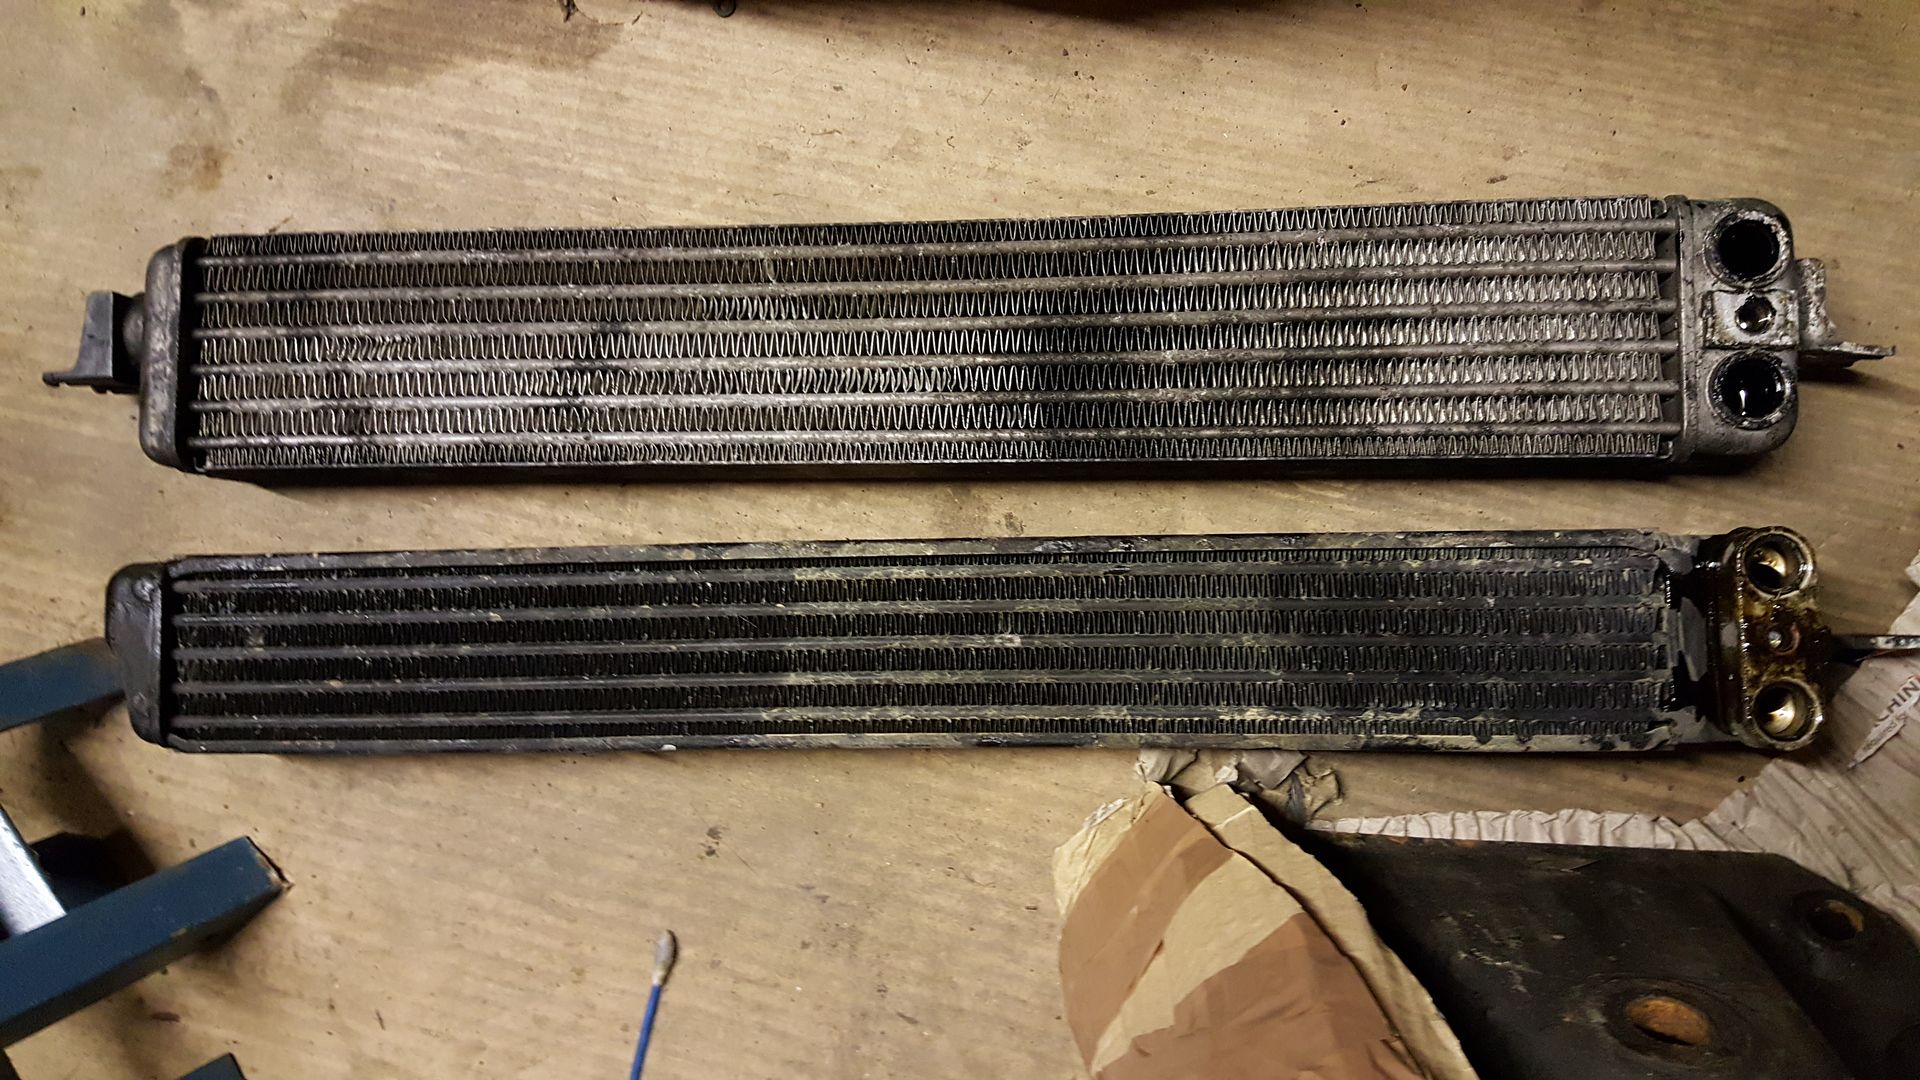
Unfortunately the 325 TDS oil cooler I bought months ago has turned out to have a snapped bolt in the mounting bracket. I'm pretty annoyed about it and attempts to remove it have failed.
Hopefully I'll have another in the next few days. If all goes well and this bloody weather calms down, I should make decent progress this coming weekend. Fingers crossed. I've drawn up a spreadsheet of everything the car still needs from now to completion, and it comes to around £4k of spending! Luckily it doesn't need that to be useable for track days and I have a provisional "ont he road" date of the end of Feb in mind for this. Give or take a month!
As things stand just now....
Until next time!
Not a huge amount has happened since then unfortunately, although parts have continued to arrive. I managed to really hurt my middle finger and have been waiting for the nail to stop being purple, peel off and start to regrow etc. before trying to do any more work!
I now have my AKG gearbox mounts, UUC engine mounts, AKG alloy steering coupler bushing etc. and I have sourced a second front crossmember so that I may have that one powdercoated and the reinforcement plates I bought welded in. Then I can switch the old one out for it.
I've actually been looking into the engine and things the car needs refreshing due to the mileage and have bought a kit to replace the Vanos solenoid seals and the filter screw etc. The hoses have arrived:
I've ordered a water pump, will buy a thermostat tomorrow and already have all the belts etc. and I have the plugs. Current plan is to finish the oil cooler swap which was unsuccessfully started the other night, then fit the BM Sport oil thermostat blank (https://www.bmsport.com/product/engine-oil-thermostat-blank/), fit the new FPR which I ordered as preventative maintenance and then put the new hoses on and get the inlet back on. At that point, I shall do a compression test because the next step would be to buy and fit new ARP rod bolts and King race bearings. I don't want to go to the trouble of doing that if the engine isn't tip top to start with. I should have done this when I first got the car, but hindsight etc. etc.
Once that little lot is done I plan to get the crossmember swapped, fit the new front wishbones and engine mounts etc.
The oil diverter is an interesting bit of kit and I only learned about it a week ago. Basically it blocks off the thermostat in the filter housing and makes the oil spend more of its time in the cooler. Much better for track work.
Unfortunately the 325 TDS oil cooler I bought months ago has turned out to have a snapped bolt in the mounting bracket. I'm pretty annoyed about it and attempts to remove it have failed.
Hopefully I'll have another in the next few days. If all goes well and this bloody weather calms down, I should make decent progress this coming weekend. Fingers crossed. I've drawn up a spreadsheet of everything the car still needs from now to completion, and it comes to around £4k of spending! Luckily it doesn't need that to be useable for track days and I have a provisional "ont he road" date of the end of Feb in mind for this. Give or take a month!
As things stand just now....
Until next time!
Gassing Station | Readers' Cars | Top of Page | What's New | My Stuff