Civic Type R EP3 - JDM
Discussion


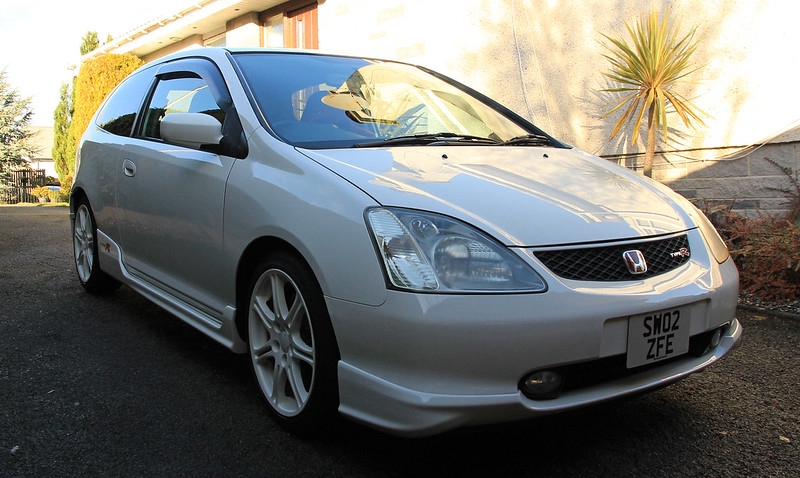
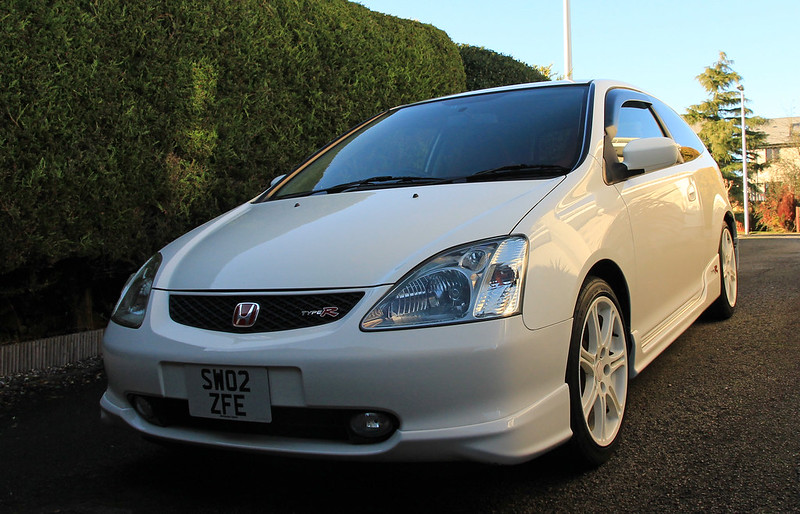
I finally have it - picked it up on Saturday. Almost exactly 5 months after the day of the auction.
First impressions .... its great fun and I'm really going to enjoy it. I like it better than the DC5 we had believe it or not. I never liked having to climb in and out of that car. This is just a DC5 in a different suit and more practical with it.
Mechanically its spot on - no problems to report.
Got home on Saturday and started on the interior straight away. 3 hours with Meguiars interior cleaner, a bucket of warm water and a cloth.
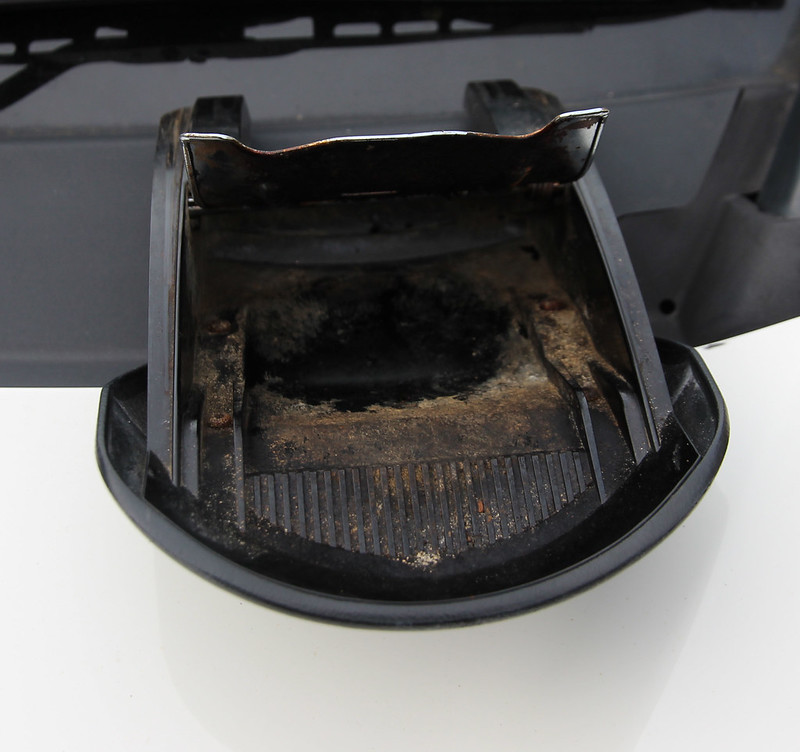
Yuck - ashtray gone thrown in the bin. Nice second hand one ordered for £8.
 IMG_6069a by Ross Davidson, on Flickr
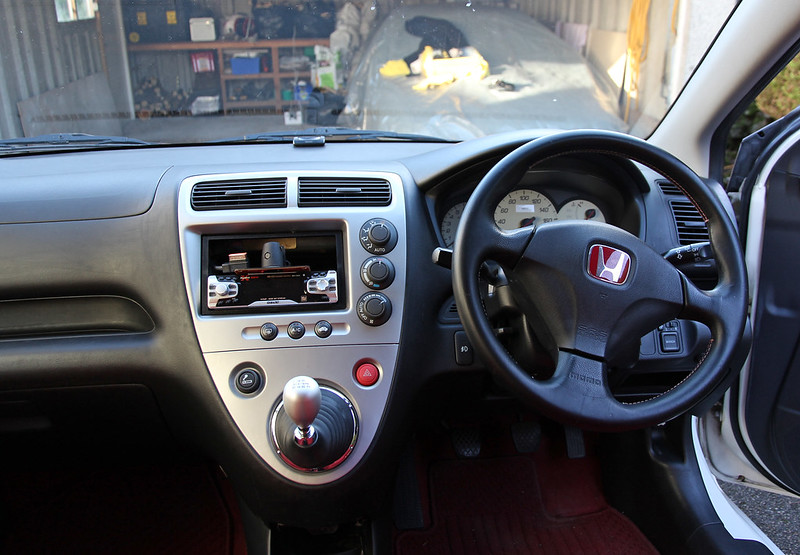
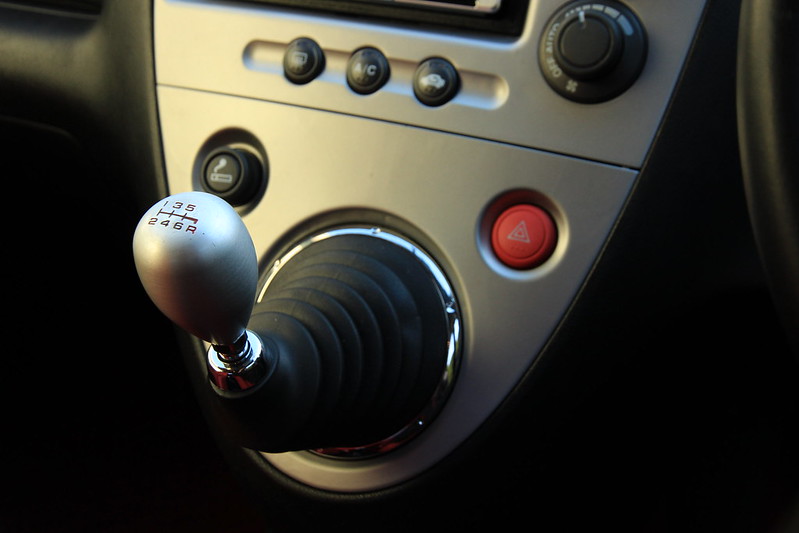
I did all the plastics in the car and all of the dash - ignore the mats!
 IMG_6088a by Ross Davidson, on Flickr
The dash is way better, but I'll do another half hour on it, as its not quite there
 IMG_6089a by Ross Davidson, on Flickr
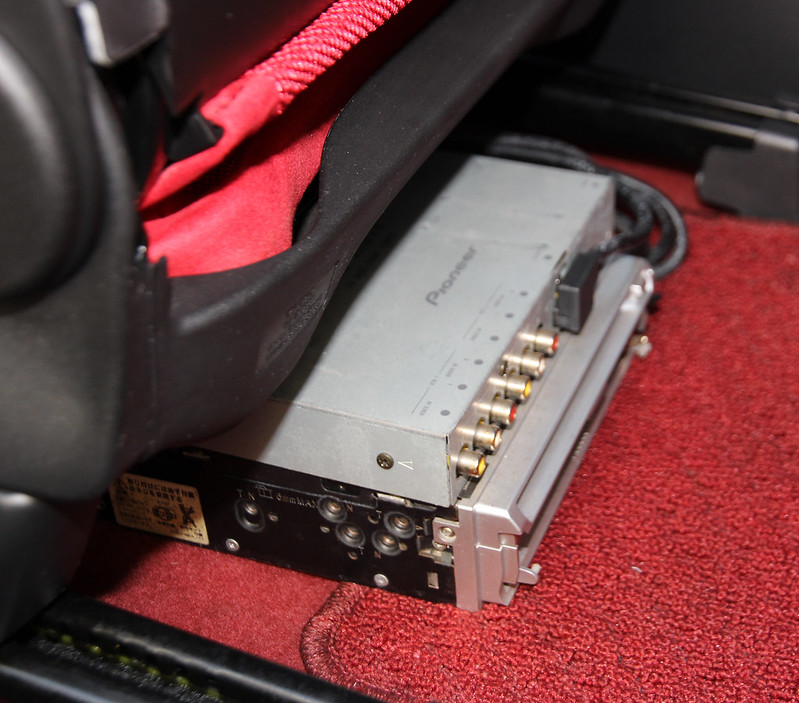
Under the passenger seat.. f k knows what it does, but its getting ditched!
 IMG_6072a by Ross Davidson, on Flickr
 IMG_6091a by Ross Davidson, on Flickr
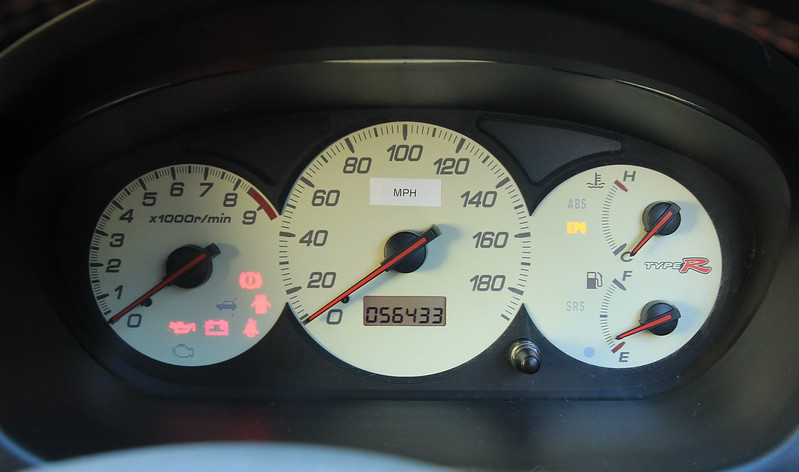
Not overly pleased with the giant MPH sticker, but loving the low km reading
 IMG_6092a by Ross Davidson, on Flickr
 IMG_6095 by Ross Davidson, on Flickr
Doors are mint
 IMG_6093a by Ross Davidson, on Flickr
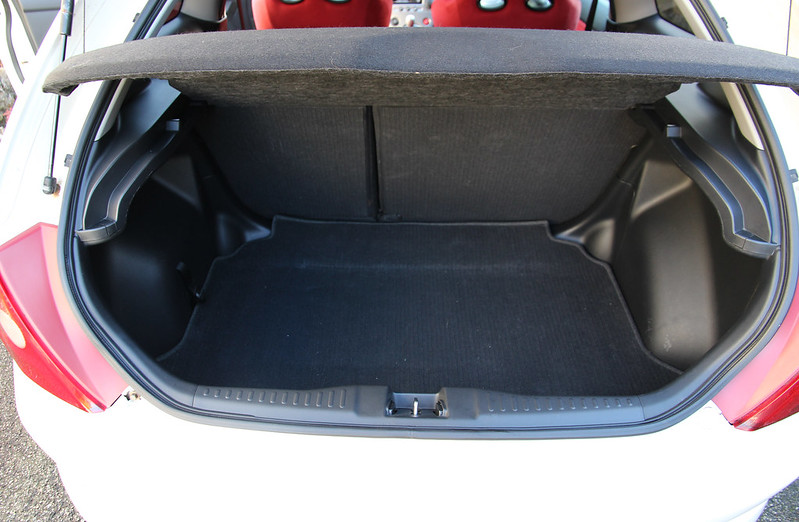
Tidy boot area
 IMG_6075a by Ross Davidson, on Flickr
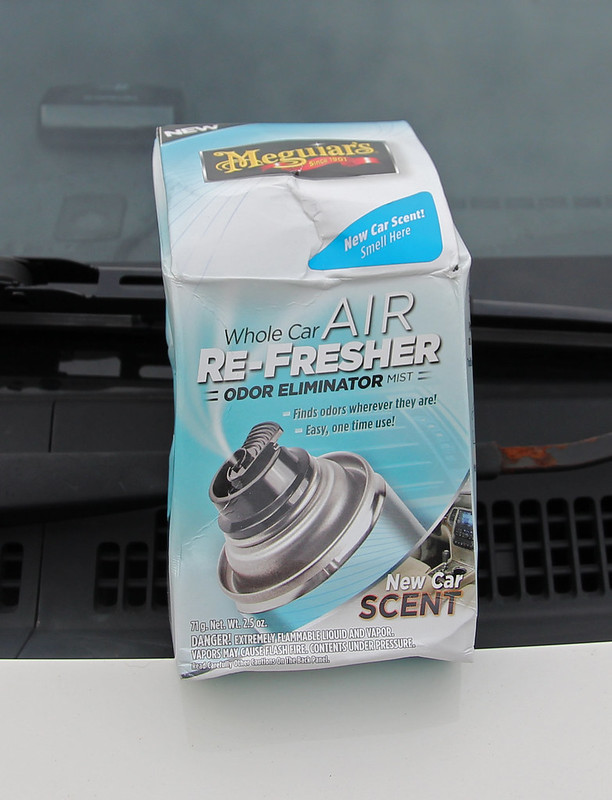
Thanks to the poster above's suggestions, I replaced the cabin filters and set off this Meguiars air freshener "bomb" while the engine and fans were running. Its mental - you press the lever at the top and the entire can discharges into the interior in one go. Its done a great job so far - smell of smoke gone.
 IMG_6070a by Ross Davidson, on Flickr
If the smoke smell comes back, I'll get the seats and carpets steam cleaned and set off the clobberizer bomb after that!
Exterior was tackled today...
First impressions .... its great fun and I'm really going to enjoy it. I like it better than the DC5 we had believe it or not. I never liked having to climb in and out of that car. This is just a DC5 in a different suit and more practical with it.
Mechanically its spot on - no problems to report.
Got home on Saturday and started on the interior straight away. 3 hours with Meguiars interior cleaner, a bucket of warm water and a cloth.
Yuck - ashtray gone thrown in the bin. Nice second hand one ordered for £8.
IMG_6069a by Ross Davidson, on FlickrI did all the plastics in the car and all of the dash - ignore the mats!
IMG_6088a by Ross Davidson, on FlickrThe dash is way better, but I'll do another half hour on it, as its not quite there
IMG_6089a by Ross Davidson, on FlickrUnder the passenger seat.. f
k knows what it does, but its getting ditched!IMG_6072a by Ross Davidson, on FlickrIMG_6091a by Ross Davidson, on FlickrNot overly pleased with the giant MPH sticker, but loving the low km reading
IMG_6092a by Ross Davidson, on FlickrIMG_6095 by Ross Davidson, on FlickrDoors are mint
IMG_6093a by Ross Davidson, on FlickrTidy boot area
IMG_6075a by Ross Davidson, on FlickrThanks to the poster above's suggestions, I replaced the cabin filters and set off this Meguiars air freshener "bomb" while the engine and fans were running. Its mental - you press the lever at the top and the entire can discharges into the interior in one go. Its done a great job so far - smell of smoke gone.
IMG_6070a by Ross Davidson, on FlickrIf the smoke smell comes back, I'll get the seats and carpets steam cleaned and set off the clobberizer bomb after that!
Exterior was tackled today...
Edited by rossub on Monday 16th November 17:05
I took the day off work today to do the outside as the forecast was favourable. Mid November and 6c here - but dry at least.
One job that was deffo getting done today was removing the fecking antennas - I was embarrassed driving around with them. Was dreading it, but went as follows...
The antennas themselves just unscrewed
 IMG_6067a by Ross Davidson, on Flickr
...and I cut the wires where they went behind the tail light - happy days
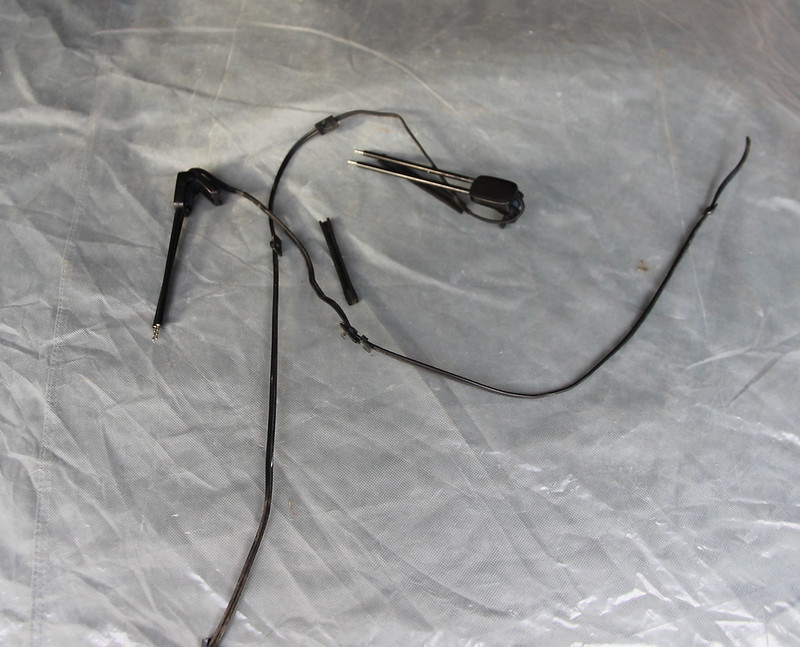 IMG_6068a by Ross Davidson, on Flickr
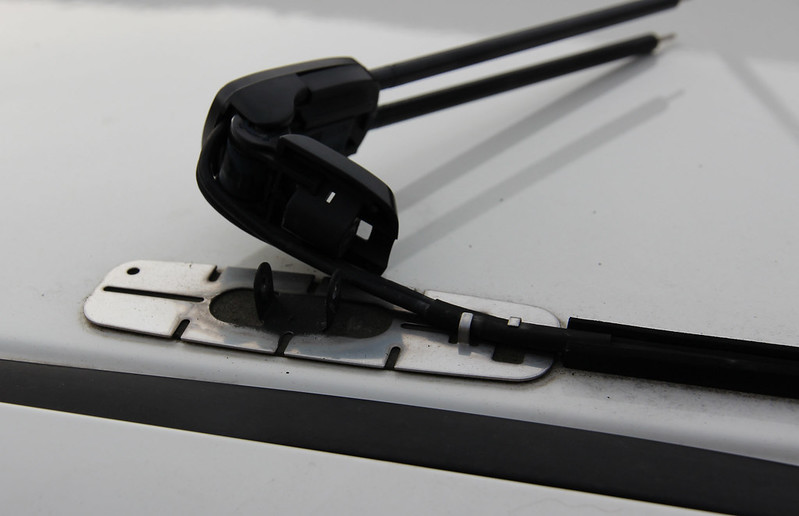
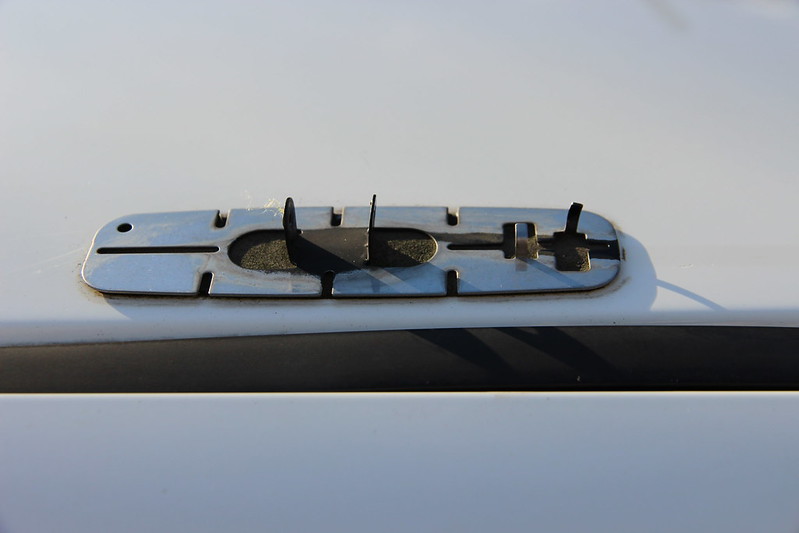
But I still had the brackets to deal with that were stuck rock solid onto the car.
 IMG_6074 by Ross Davidson, on Flickr
Heated them for a bit with a hair drier and was able to prise them off with a flat blade screwdriver - result
Sticky mess left behind though
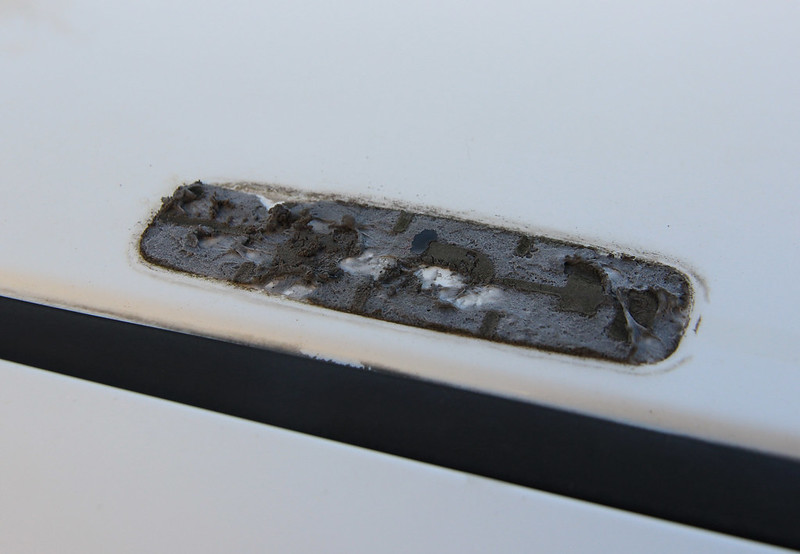 IMG_6118a by Ross Davidson, on Flickr
A bit of perseverance with a combination of Screwdriver, Tardis, T-cut and clay bar and bingo - the fkers are gone for good! Only very minor paint blemishes left.
 IMG_6120a by Ross Davidson, on Flickr
One job that was deffo getting done today was removing the fecking antennas - I was embarrassed driving around with them. Was dreading it, but went as follows...
The antennas themselves just unscrewed
IMG_6067a by Ross Davidson, on Flickr...and I cut the wires where they went behind the tail light - happy days
IMG_6068a by Ross Davidson, on FlickrBut I still had the brackets to deal with that were stuck rock solid onto the car.
IMG_6074 by Ross Davidson, on FlickrHeated them for a bit with a hair drier and was able to prise them off with a flat blade screwdriver - result
Sticky mess left behind though
IMG_6118a by Ross Davidson, on FlickrA bit of perseverance with a combination of Screwdriver, Tardis, T-cut and clay bar and bingo - the f
kers are gone for good! Only very minor paint blemishes left.IMG_6120a by Ross Davidson, on FlickrForgot to say - I drove the car in really wet weather on Sunday and the Dunlops on the car tried to kill me. It was entertaining sliding around every roundabout at very slow speeds, but ultimately I decided they had to go.
Its a shame, as there's a lot of tread on them.
So I ordered 4 Goodyear Eagle F1 Assymetric 2s. Found them online for £80 a corner delivered - fantastic price.
I may as well get the wheels refurbed at the same time to save me the £60 fitting charge for the tyres from the local garage
Its a shame, as there's a lot of tread on them.
So I ordered 4 Goodyear Eagle F1 Assymetric 2s. Found them online for £80 a corner delivered - fantastic price.
I may as well get the wheels refurbed at the same time to save me the £60 fitting charge for the tyres from the local garage
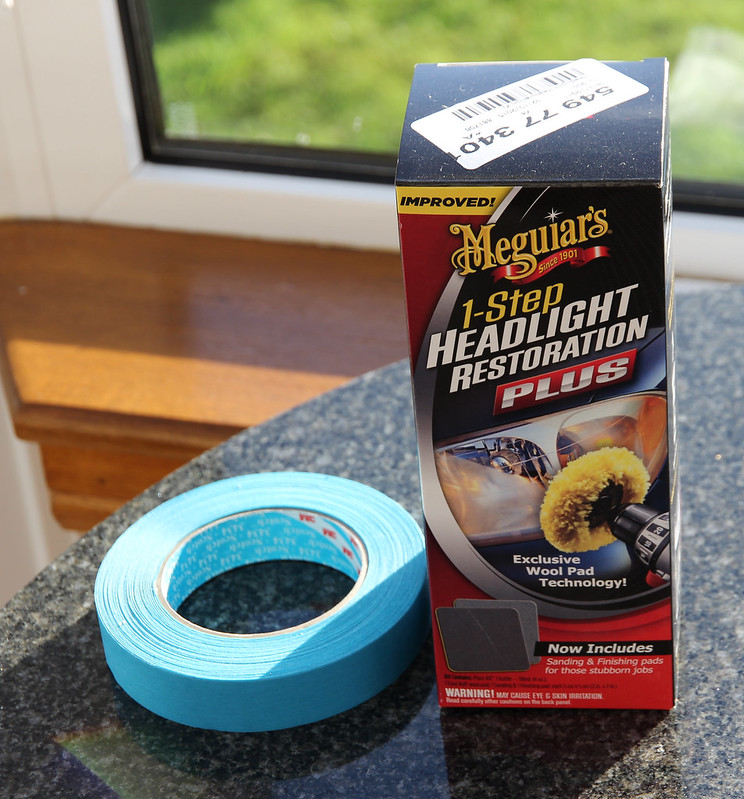
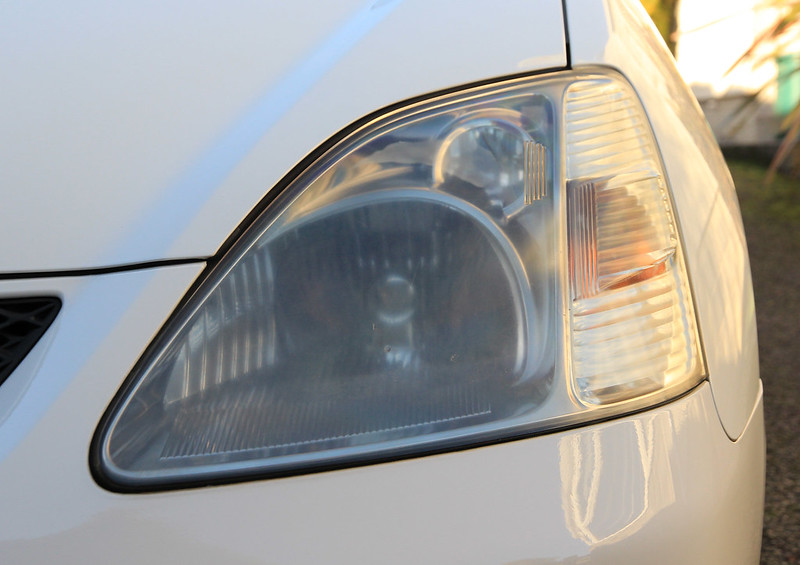
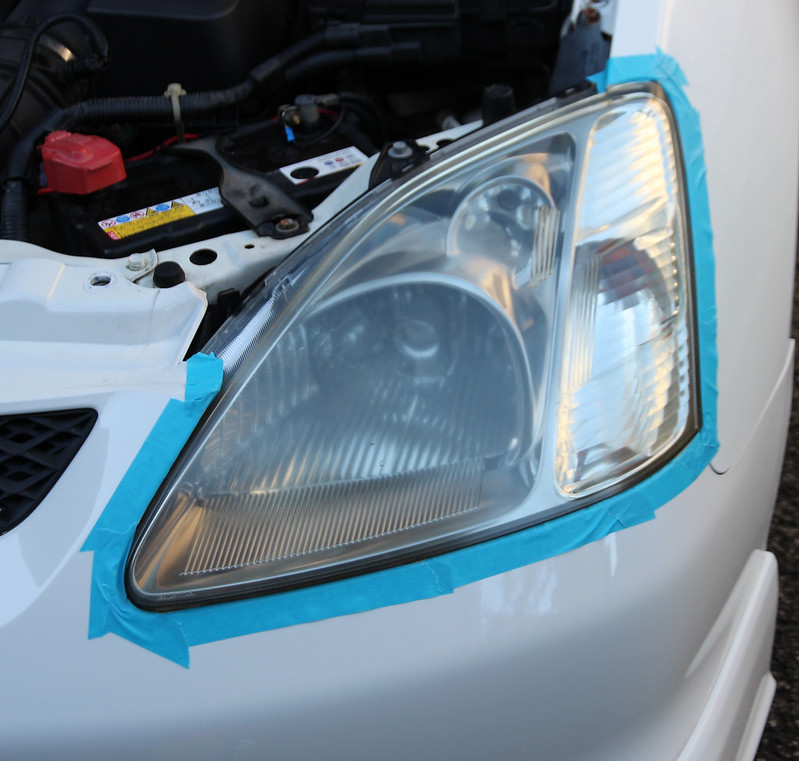
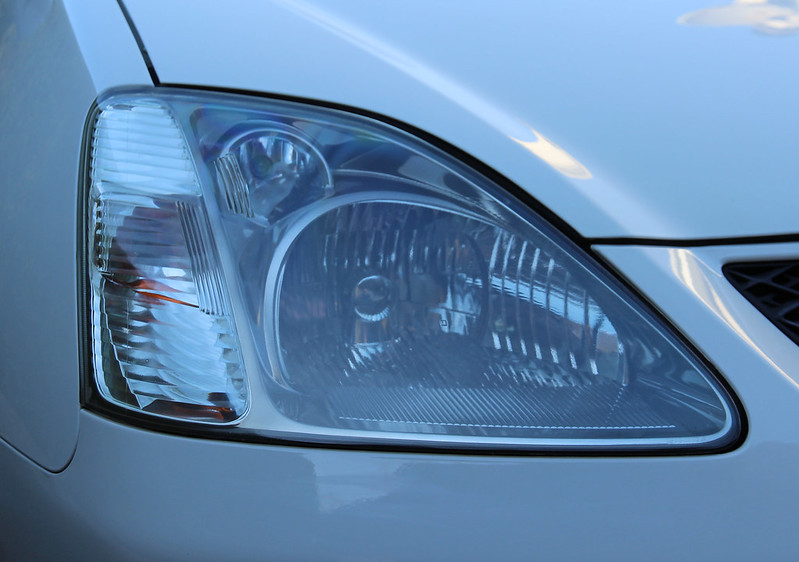
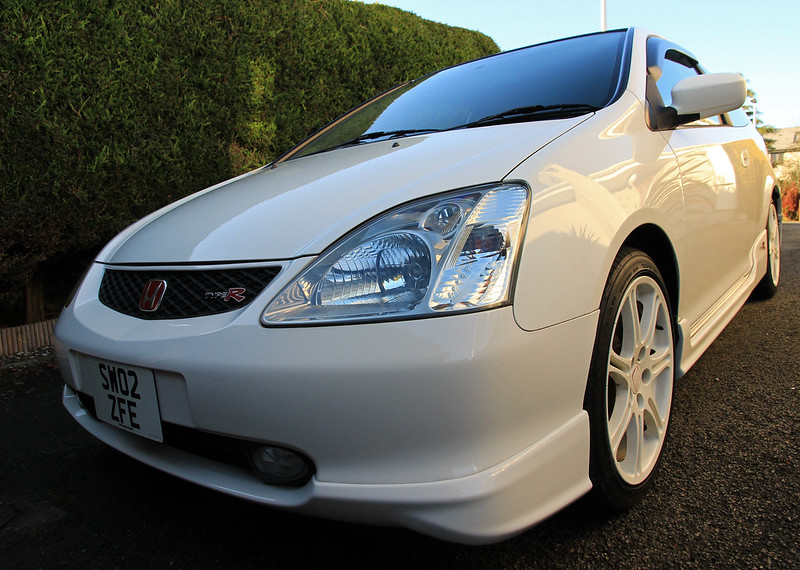
Another job for today was the horrible headlights. If you look back at earlier pics - they really let it down. Cloudy as hell and one was off coloured.
I was dubious about this stuff working as the problem looked to be deep in the lens to me. Anyway nothing tried, nothing gained and worth the £20 if it works.
 IMG_6099a by Ross Davidson, on Flickr
Tools at the ready
 IMG_6108a by Ross Davidson, on Flickr
Pretty st I think you'll agree
 IMG_6084a by Ross Davidson, on Flickr
 IMG_6083a by Ross Davidson, on Flickr
Nice car - shame about the lights
 IMG_6087a by Ross Davidson, on Flickr
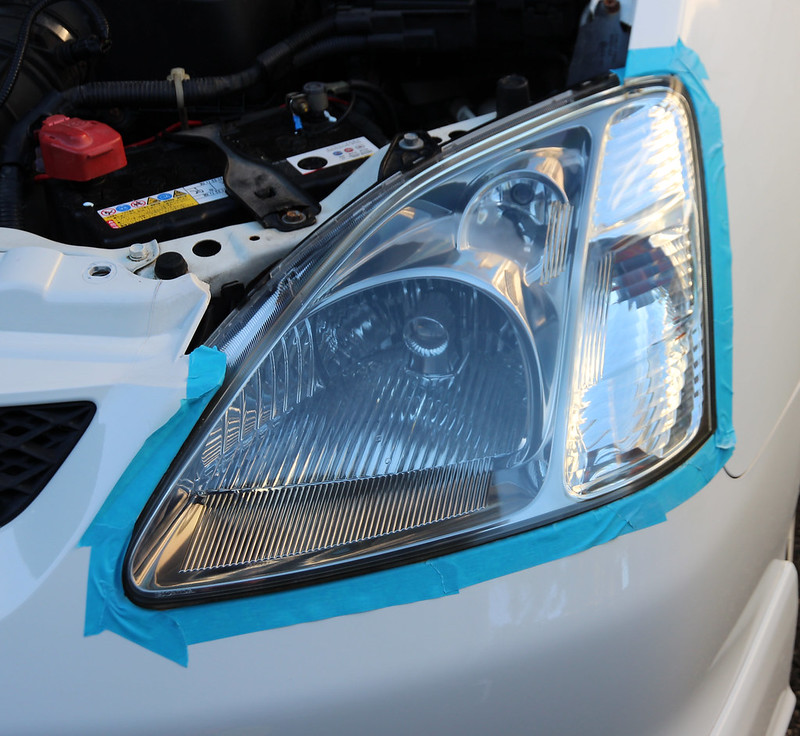
Prepped
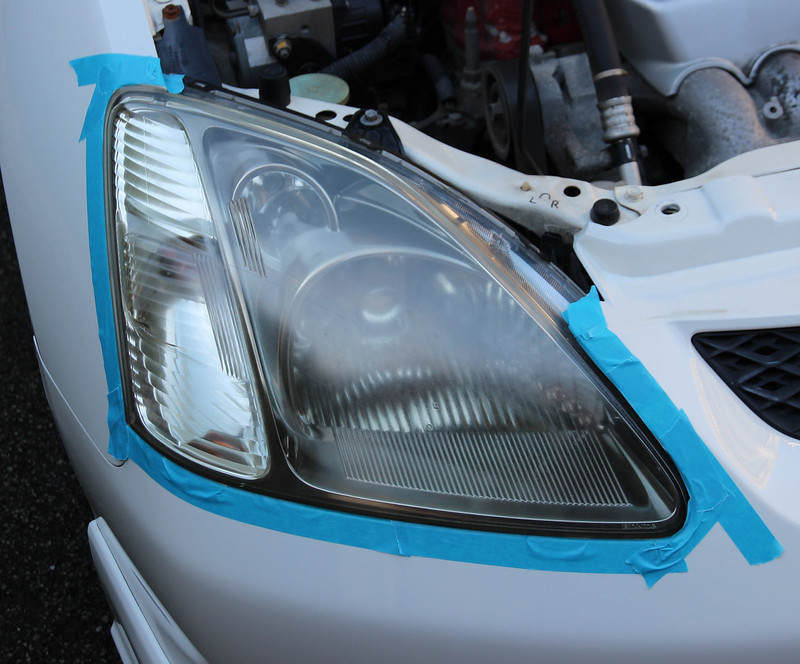 IMG_6101a by Ross Davidson, on Flickr
 IMG_6106a by Ross Davidson, on Flickr
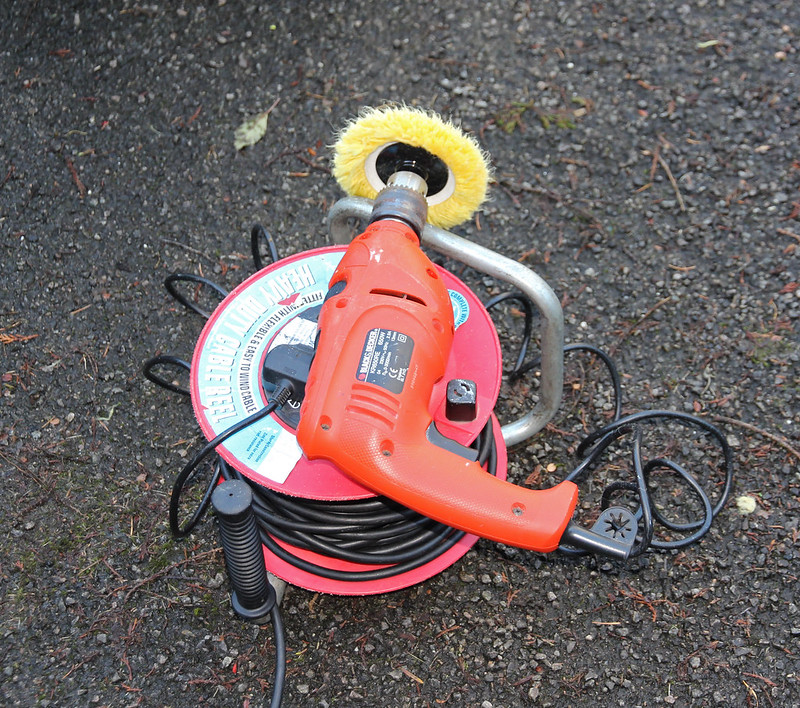
Literally just 5 minutes or so with the mop attachment that comes in the kit on the variable speed drill!
Holy st - I think you'll agree.
One side done
 IMG_6102a by Ross Davidson, on Flickr
 IMG_6103a by Ross Davidson, on Flickr
and the other
 IMG_6107a by Ross Davidson, on Flickr
 IMG_6112a by Ross Davidson, on Flickr
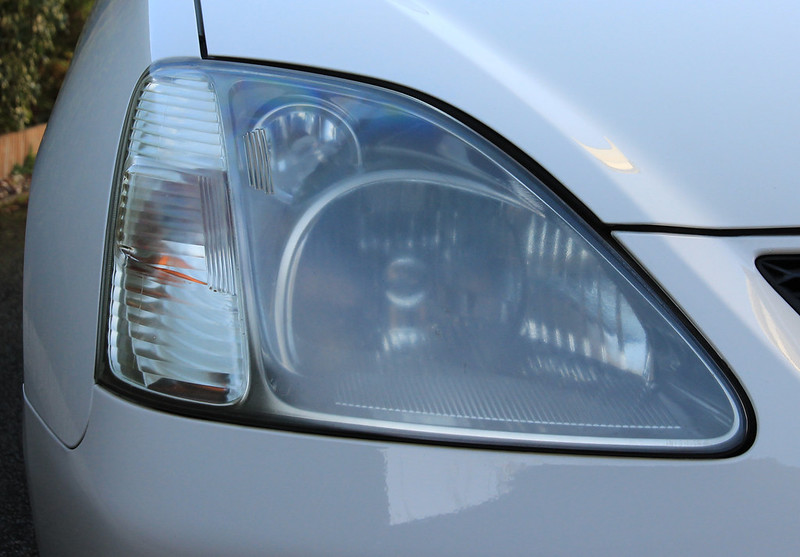
They're absolutely like new - unbelievable and for £20. I've ordered some sealant for them for another £12. Should hopefully last a while with that on.
There's enough in the Meguiars kit for at least another 2 headlights too if it needs done - bargain.
I was dubious about this stuff working as the problem looked to be deep in the lens to me. Anyway nothing tried, nothing gained and worth the £20 if it works.
IMG_6099a by Ross Davidson, on FlickrTools at the ready
IMG_6108a by Ross Davidson, on FlickrPretty s
t I think you'll agreeIMG_6084a by Ross Davidson, on FlickrIMG_6083a by Ross Davidson, on FlickrNice car - shame about the lights
IMG_6087a by Ross Davidson, on FlickrPrepped
IMG_6101a by Ross Davidson, on FlickrIMG_6106a by Ross Davidson, on FlickrLiterally just 5 minutes or so with the mop attachment that comes in the kit on the variable speed drill!
Holy s
t - I think you'll agree.One side done
IMG_6102a by Ross Davidson, on FlickrIMG_6103a by Ross Davidson, on Flickrand the other
IMG_6107a by Ross Davidson, on FlickrIMG_6112a by Ross Davidson, on FlickrThey're absolutely like new - unbelievable and for £20. I've ordered some sealant for them for another £12. Should hopefully last a while with that on.
There's enough in the Meguiars kit for at least another 2 headlights too if it needs done - bargain.
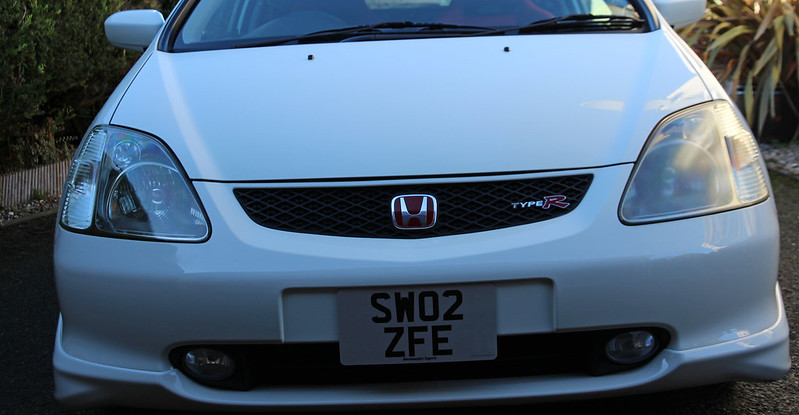
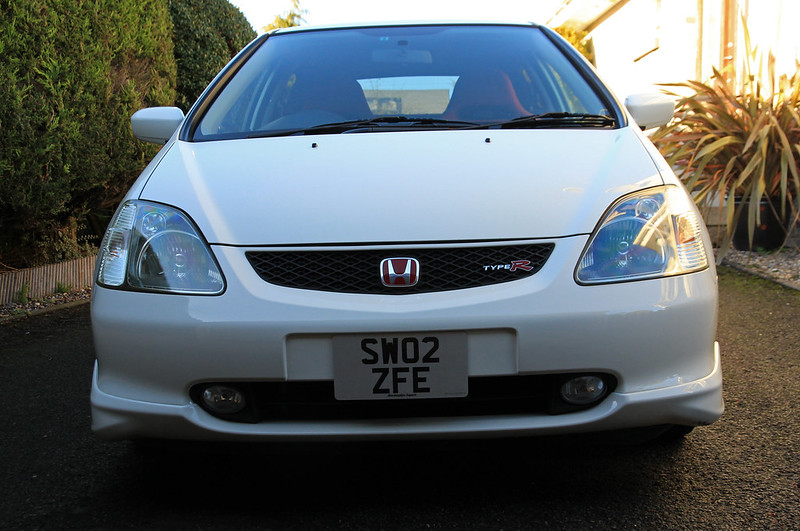
In amongst all of that, I clayed the whole car and then waxed it with Meguiars Tech Wax. Turns out it didn't need polishing as the paint is stunning. Most of the Championship White cars paint gets flat and oxidises over time, but this one is lovely - better even than the 2008 FD2 that the Mrs has!
I wanted to keep the Union Jack on the back - but for 2 reasons, I debadged it. First I couldn't be arsed telling people why I had a flag on the back and second I live in Scotland - wouldn't take much for some pro Independence tit to take a key to the car!
Final pics after all the work was done
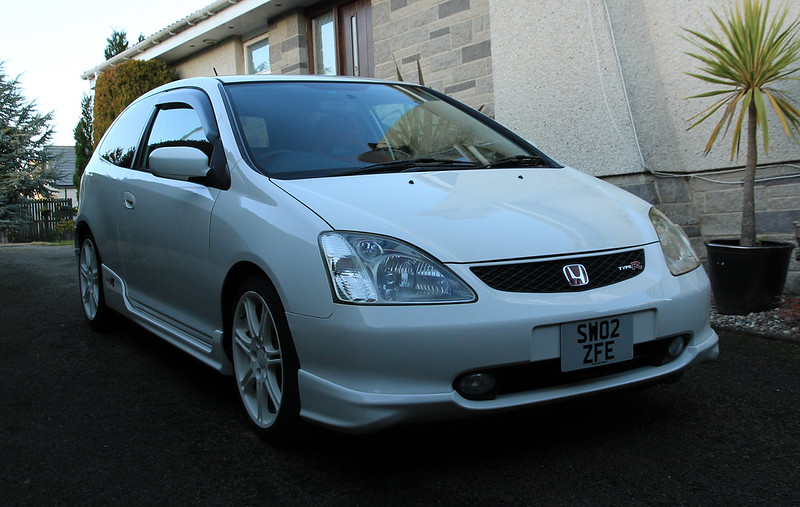 IMG_6124a by Ross Davidson, on Flickr
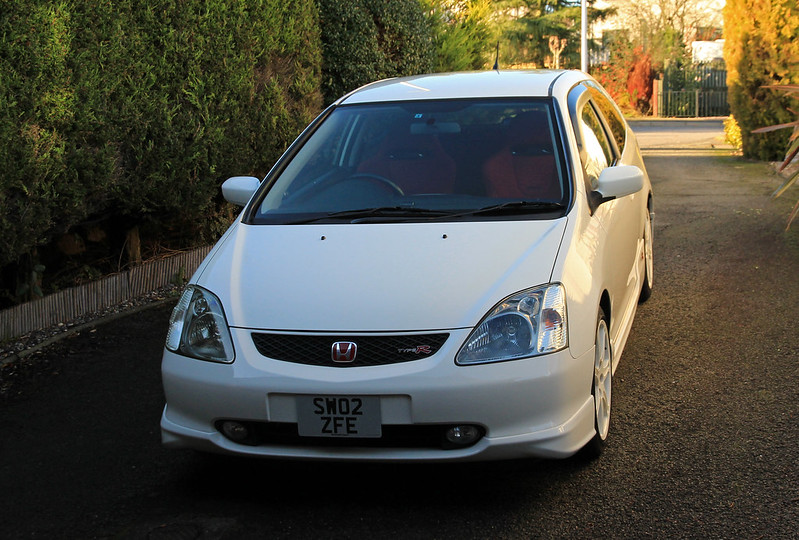 IMG_6115a by Ross Davidson, on Flickr
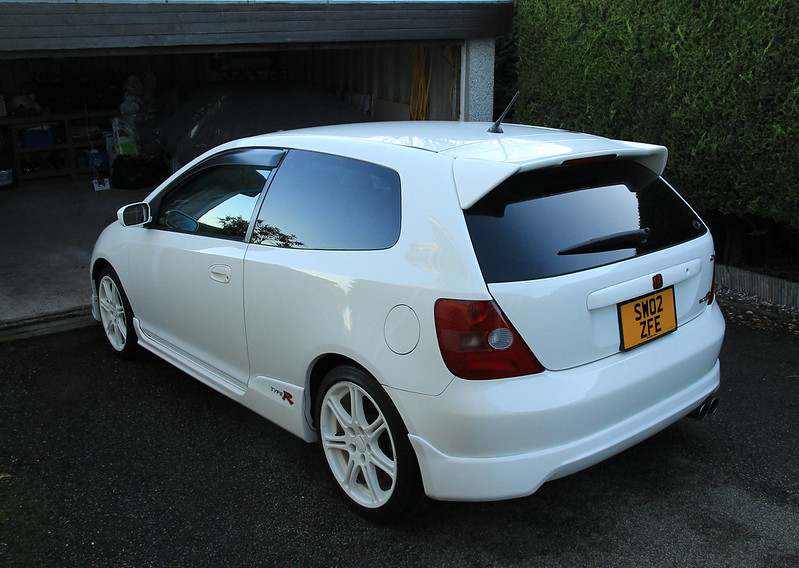 IMG_6122a by Ross Davidson, on Flickr
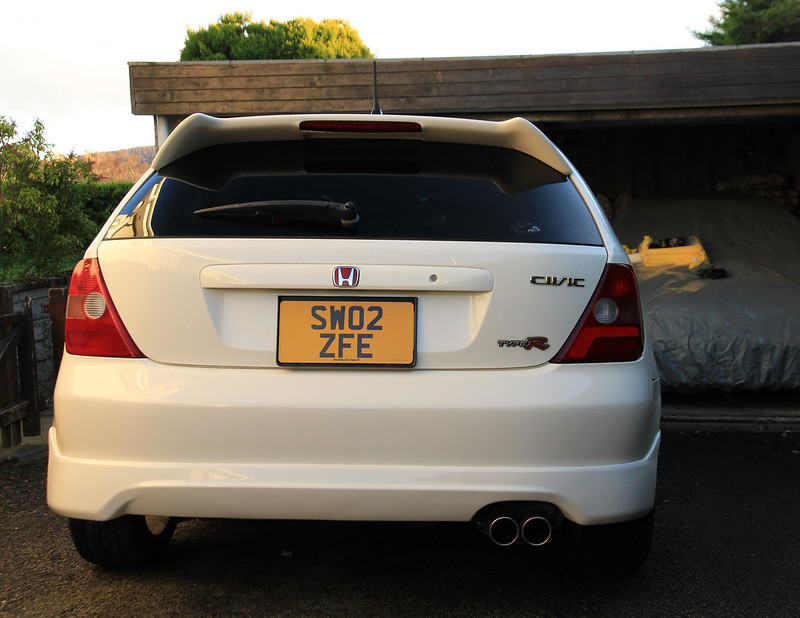 IMG_6119a by Ross Davidson, on Flickr
 IMG_6114a by Ross Davidson, on Flickr
 IMG_6113a by Ross Davidson, on Flickr
6 hours well spent today
I wanted to keep the Union Jack on the back - but for 2 reasons, I debadged it. First I couldn't be arsed telling people why I had a flag on the back and second I live in Scotland - wouldn't take much for some pro Independence tit to take a key to the car!
Final pics after all the work was done
IMG_6124a by Ross Davidson, on FlickrIMG_6115a by Ross Davidson, on FlickrIMG_6122a by Ross Davidson, on FlickrIMG_6119a by Ross Davidson, on FlickrIMG_6114a by Ross Davidson, on FlickrIMG_6113a by Ross Davidson, on Flickr6 hours well spent today
Thanks for the kind comments
Jobs still to do:
New wiper arms due to rust - £45 each from Honda!
Wheel refurb - they're nasty and you can't really tell from the photos
New H stickers on the way for centre caps. Hoping to fine sand the caps down, stick them on and clear lacquer.
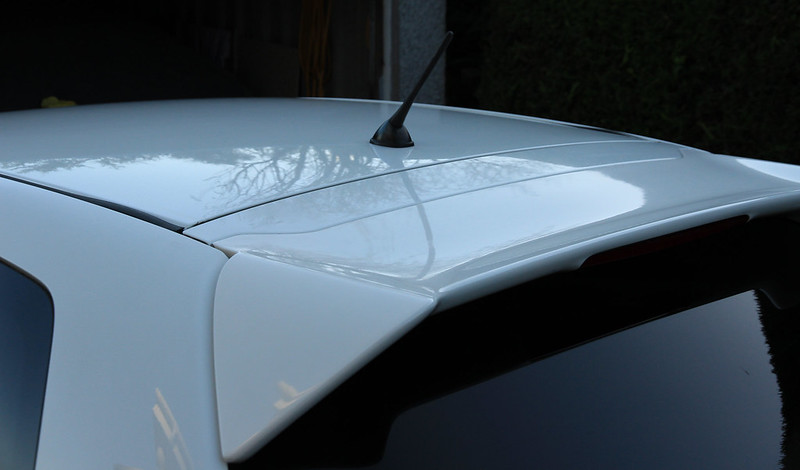
New gutter strips for the roof - they've buckled a bit in the Japanese sun
New door trim for the outside at the base of the windows - rubber perished
Paint calipers - probably not in winter!
Tempted to get a 'cheap' car related number plate - probably won't be able to resist.
Jobs still to do:
New wiper arms due to rust - £45 each from Honda!
Wheel refurb - they're nasty and you can't really tell from the photos
New H stickers on the way for centre caps. Hoping to fine sand the caps down, stick them on and clear lacquer.
New gutter strips for the roof - they've buckled a bit in the Japanese sun
New door trim for the outside at the base of the windows - rubber perished
Paint calipers - probably not in winter!
Tempted to get a 'cheap' car related number plate - probably won't be able to resist.
neilbauer said:
Whet do you seal them?
I've ordered this stuff http://www.amazon.co.uk/gp/product/B00A3S1RGU?psc=...
I didn't order it before, as I didn't know if the Meguiars stuff would work. Waste of money on the sealant if it didn't


Gassing Station | Readers' Cars | Top of Page | What's New | My Stuff