The "66 El Camino that I finally own" Thread
Discussion


99t said:
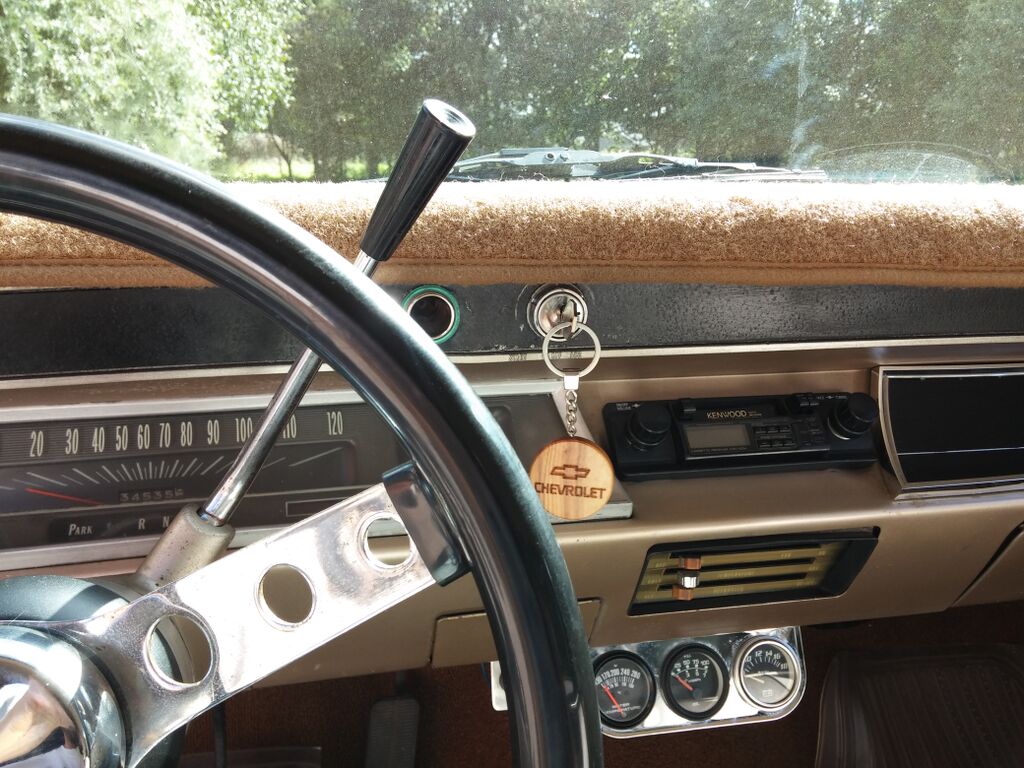
Cheers, yes I had looked at those and you're right the remanufactured ones are an even more unjustifiable (less justifiable?) price, especially given the acoustic environment concerned. This is a purely aesthetic purchase, I'll be happy if it lights up!! 
You can buy modern radios in an "old fashioned" style - something like these:
This might be something you can use to get the look along with a functioning stereo.
Edit to add a link which might be more helpful:
http://www.retrocarstuff.com/shop/classic-car-radi...
The prices aren't super crazy for a car stereo.

I discovered yesterday that the bed will hold three wheelie bins laying down (two lengthways and one across) with room to spare, which is nice and saved me dragging the buggers up the drive... 
...and no our drive isn't so long that dragging them is really an issue, and no I didn't make a special trip to find out, I was "just passing"!!
This morning was the first commute attempt and as I'm typing this from my desk let's say phase one was a success. A nice trouble-free run, 28 miles of country lanes, motorway and stop-start city traffic. Never missed a beat.
Couple of minor issues to look at:
The heater is rubbish. Not sure a thermostat is currently fitted as all coolant hoses seem to warm up simultaneously. The air comes through tepid fairly quickly but then stays tepid.
The speedometer was very noisy and bouncy for the first 20 miles or so, finally settled down so maybe just needs lubricating or perhaps a new cable?
Looking forward to the journey home, she drives really nicely.

Sorry no vids at the moment. Might shoot something when I get a chance but that may not be soon!
Anyway, Friday's commute was completed without incident, nice to have put some miles on her finally.
My commute is just under 60 miles round trip, reckon I used about £30 of petrol in doing so! So about 10mpg which is pretty bad for a 327!!
Don't get me wrong, I wasn't expecting mid-twenties, but mid-teens would have been reasonable.
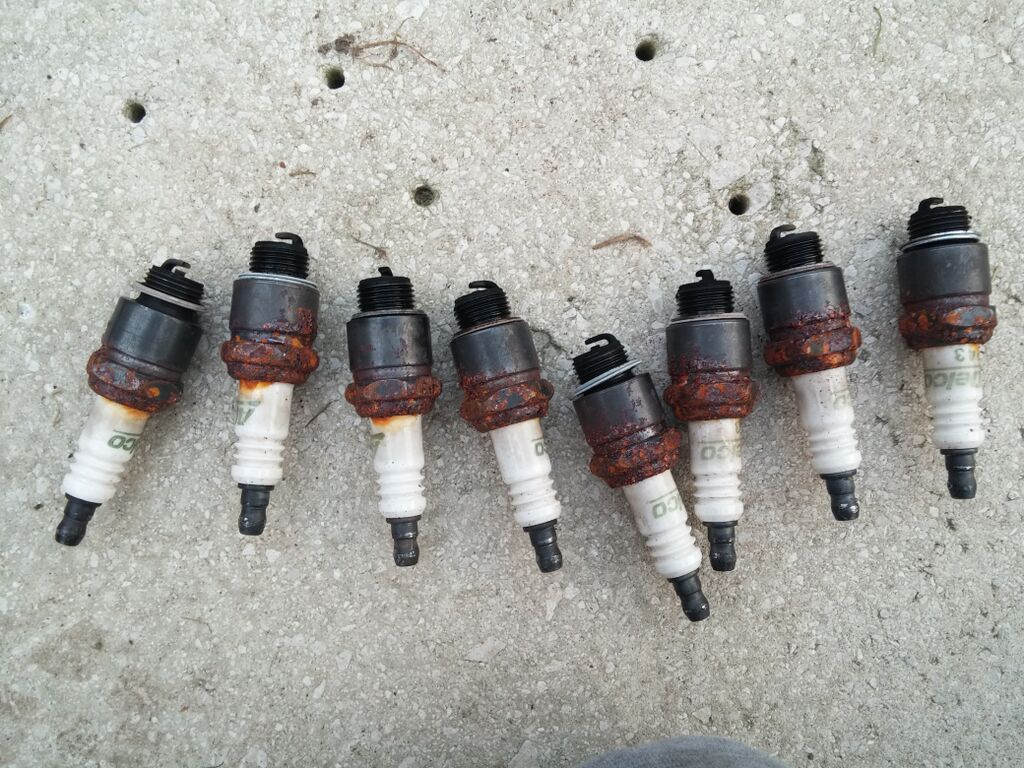
I didn't have much spare time at the weekend, but Sunday afternoon I set my Lidl oil extractor pump running whilst I tackled the spark plugs. It isn't the speediest pump in the world but by the time I'd changed all eight plugs (all straightforward) the sump was pretty much empty.
The oil that came out wasn't too bad but smelt quite strongly of petrol and the plugs look a bit on the sooty side..
Refilled the sump with a fairly cheap supermarket semi-synth which I will essentially use as a flush and then I'll drop it properly and do the filter too in a couple of weeks.
New plugs and oil resulted in a noticeably smoother idle (not that it was bad before) and an extra 5psi of cold oil pressure (again not that it was low before)
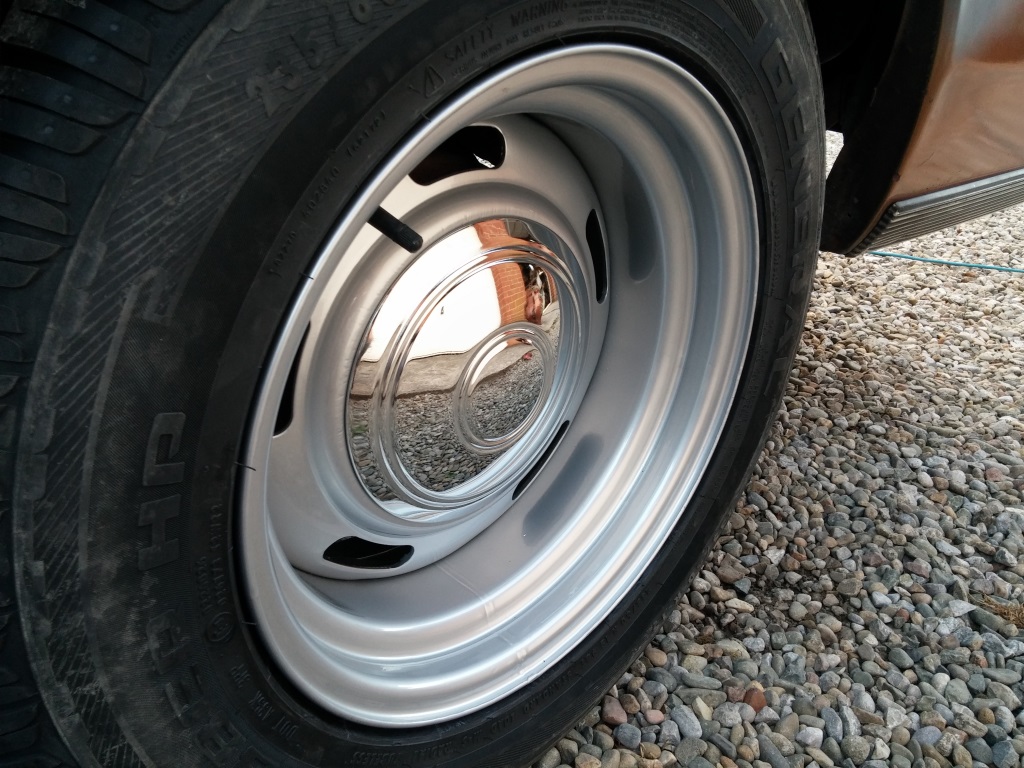
Final job was to pull the rear wheels off to take for powder coating and fitting the new tyres.
Out of curiousity I snapped one of the DOT date codes and looked it up
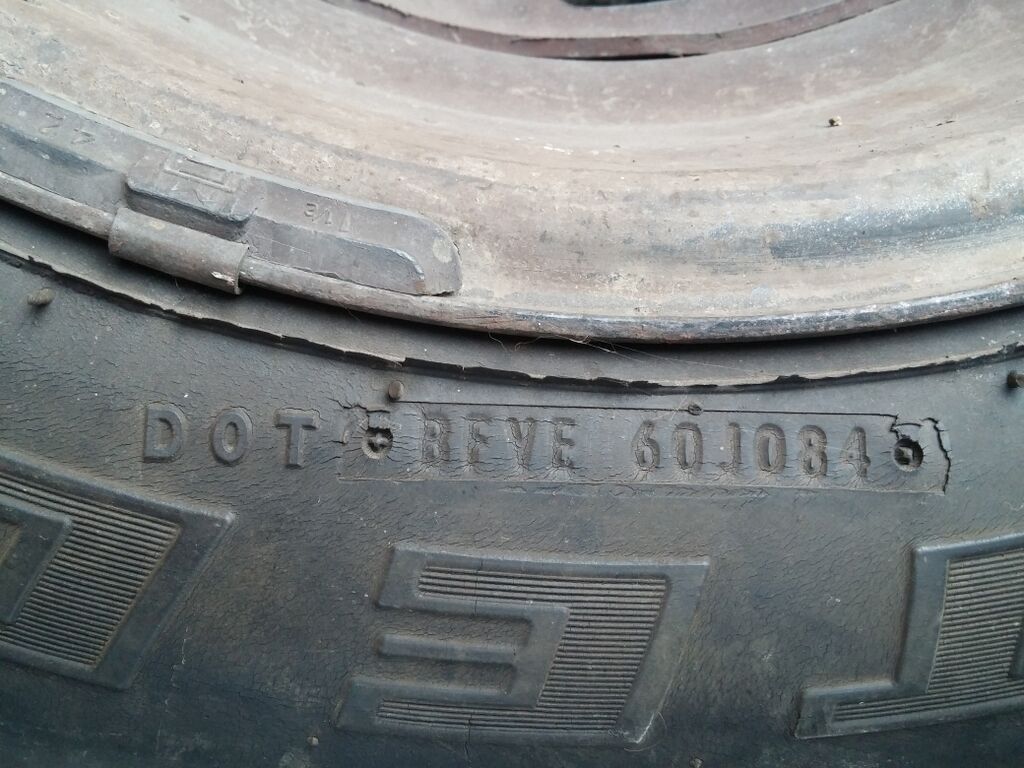
The code format means the tyre is pre-2000 manufacture, and the 084 is the 8th week of year 4. That means that it is either 1994 or 1984!!
No wonder the rubber felt a bit hard!
Anyway, Friday's commute was completed without incident, nice to have put some miles on her finally.
My commute is just under 60 miles round trip, reckon I used about £30 of petrol in doing so! So about 10mpg which is pretty bad for a 327!!
Don't get me wrong, I wasn't expecting mid-twenties, but mid-teens would have been reasonable.
I didn't have much spare time at the weekend, but Sunday afternoon I set my Lidl oil extractor pump running whilst I tackled the spark plugs. It isn't the speediest pump in the world but by the time I'd changed all eight plugs (all straightforward) the sump was pretty much empty.
The oil that came out wasn't too bad but smelt quite strongly of petrol and the plugs look a bit on the sooty side..
Refilled the sump with a fairly cheap supermarket semi-synth which I will essentially use as a flush and then I'll drop it properly and do the filter too in a couple of weeks.
New plugs and oil resulted in a noticeably smoother idle (not that it was bad before) and an extra 5psi of cold oil pressure (again not that it was low before)
Final job was to pull the rear wheels off to take for powder coating and fitting the new tyres.
Out of curiousity I snapped one of the DOT date codes and looked it up
The code format means the tyre is pre-2000 manufacture, and the 084 is the 8th week of year 4. That means that it is either 1994 or 1984!!
No wonder the rubber felt a bit hard!
99t said:
The oil that came out wasn't too bad but smelt quite strongly of petrol and the plugs look a bit on the sooty side..
Running seriously rich, then... Time to take the carb apart?[quote]Out of curiousity I snapped one of the DOT date codes and looked it up
The code format means the tyre is pre-2000 manufacture, and the 084 is the 8th week of year 4. That means that it is either 1994 or 1984!!
No wonder the rubber felt a bit hard!
That's definitely the only DOT code on the tyre - inner sidewall, no triangle. Seems the triangle was added in the 90's so it may well be that it is an 80's tyre!
Either way, agreed it is for the skip.
As for the carb, yes I'm going to take it to see a man with a rolling road who knows his Chevy V8's and carbs inside out. Should prove a worthwhile investment.
Either way, agreed it is for the skip.
As for the carb, yes I'm going to take it to see a man with a rolling road who knows his Chevy V8's and carbs inside out. Should prove a worthwhile investment.
jagracer said:
Are they the correct plugs for the engine, they seem to be a bit short reach going off your first post of the thread which says you have a 350 engine fitted not the original 327.
I've checked the engine codes now and reckon it is the original 327.The new plugs were listed for the 327 and are slightly longer reach. Seems to like them a little better anyway!

Got the rear wheels back on, think the powder coating came out quite nicely
Next job was to check for the cause of lack of warmth from the heater, suspected lack of thermostat - yup!
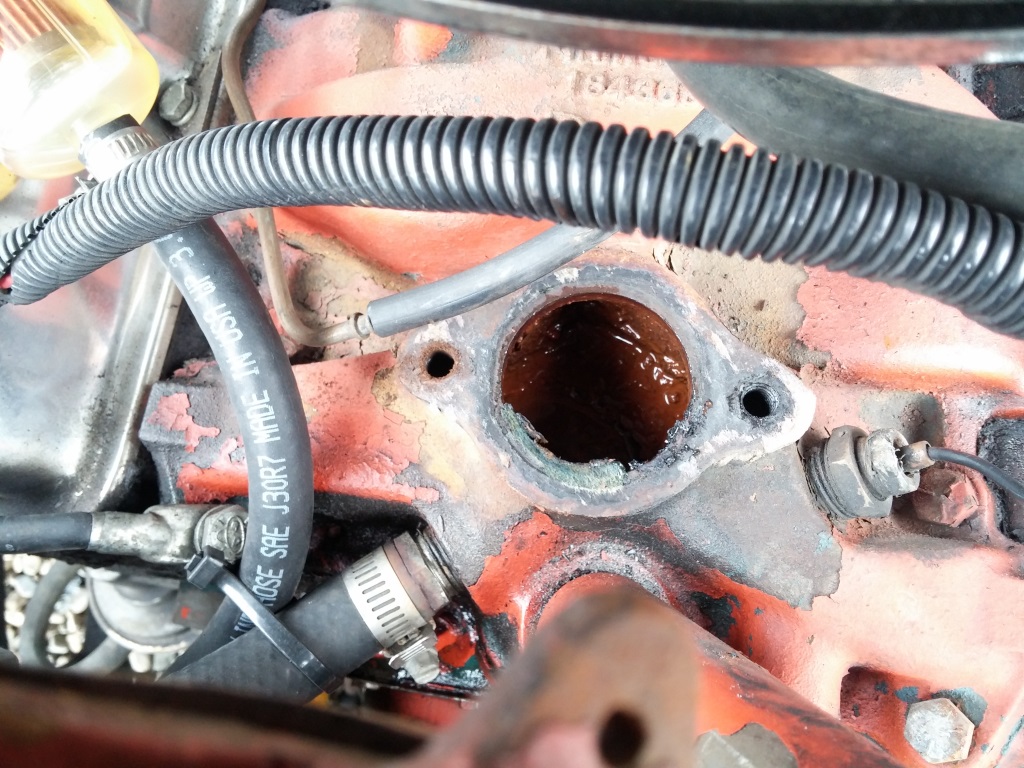
Strangely the coolant that came out in the initial drain didn't look too bad, but I wanted to be thorough so refilled with plain water and went for a drive. Just as well I did because each of the next five fills came out looking like this:
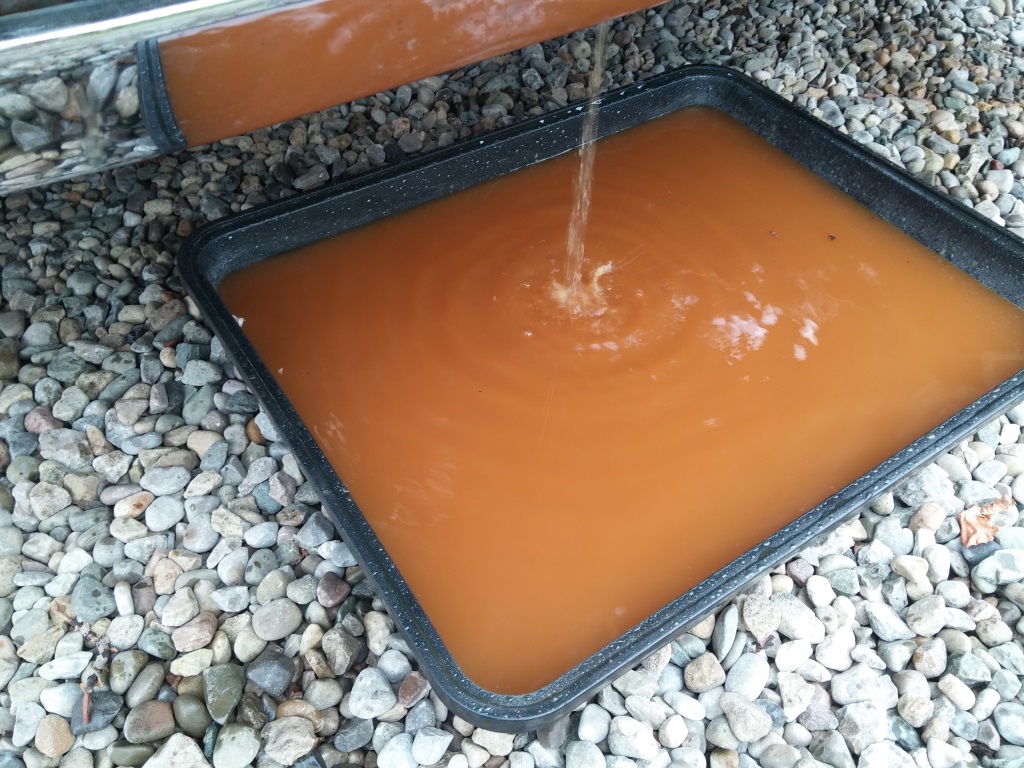
Eventually it drained pretty clear and I refilled with a decent anti-freeze mix. The heater now works and the temperature gauge now sits steady at an indicated 200F (195F 'stat)
In between coolant drain sessions I started stripping a test area of the load bed to see what the metal is like under the accumulated paint layers
Overview
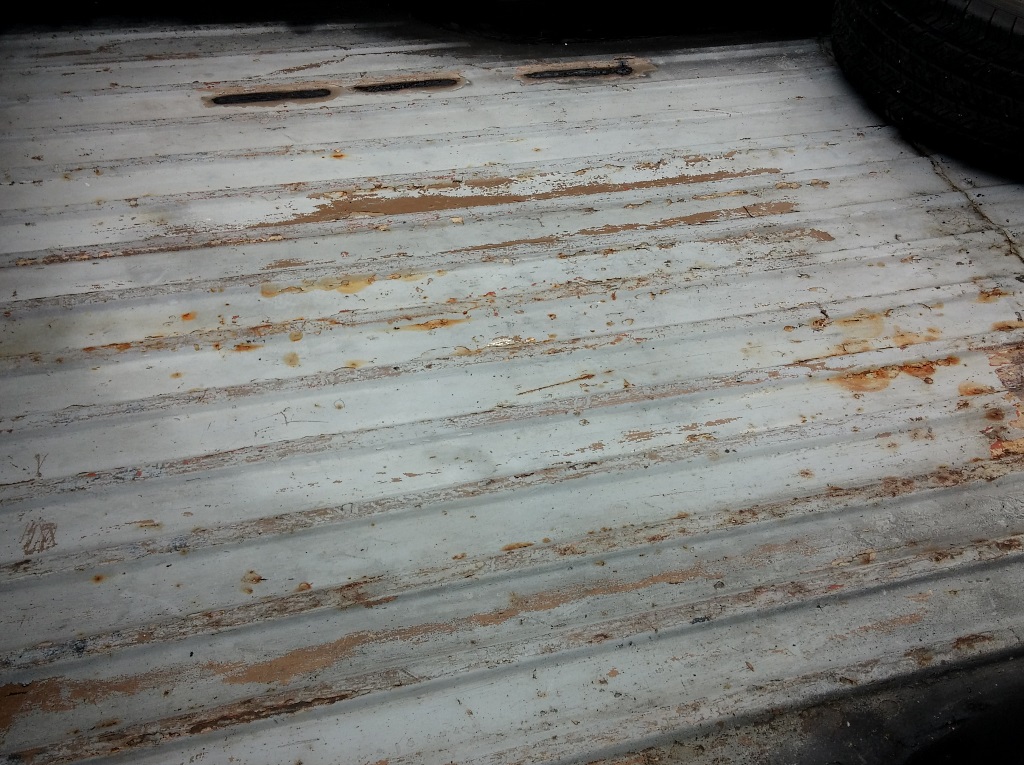
Closer
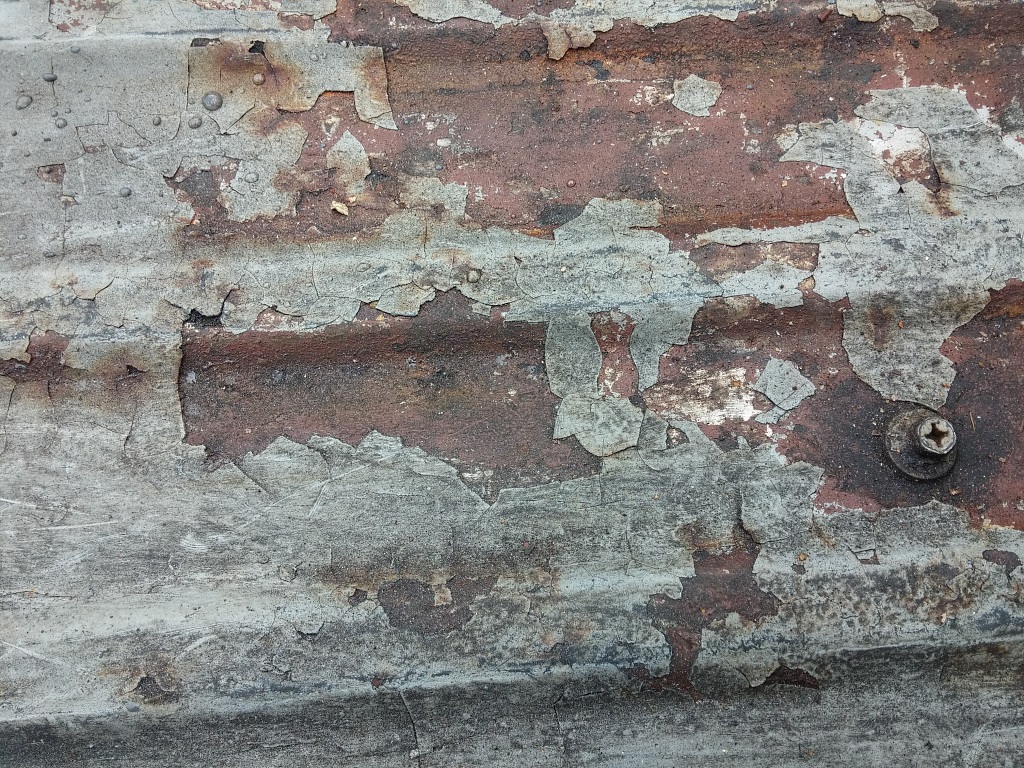
Used a hot air gun and scraper followed by finger sander to get to bare metal. Then a diamond bit on the Dremel to clean up the worst pitting. Finally a coat of acid and left to soak for a while with an occasional wire brushing.
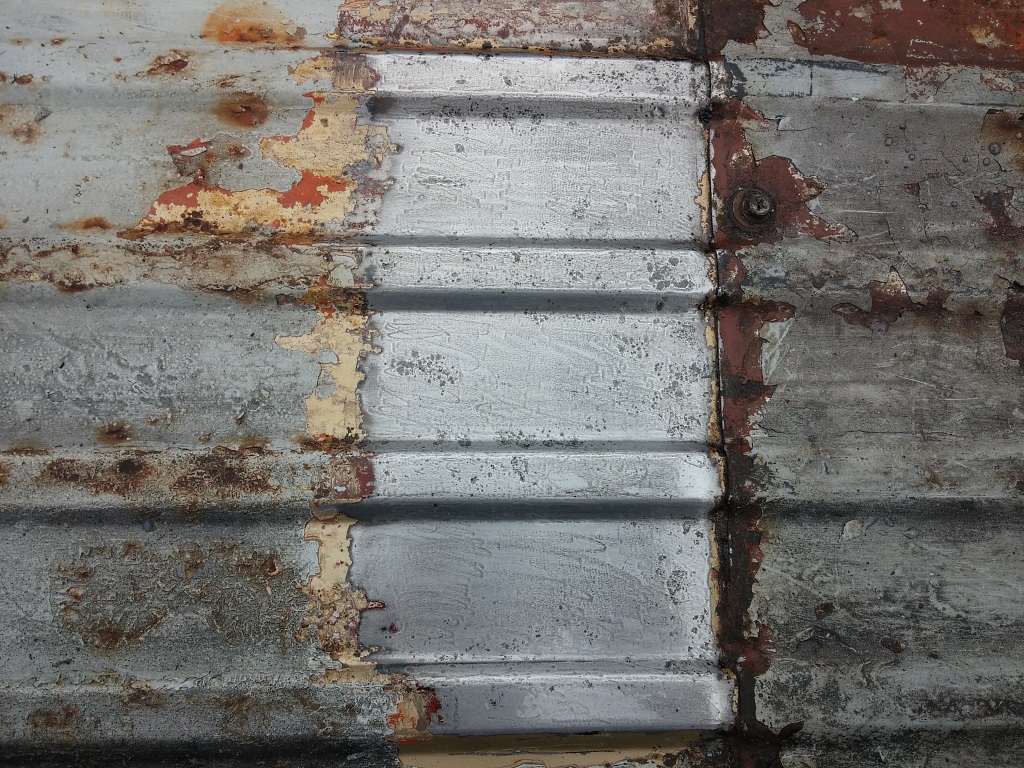
Once the worst of the pitting removed (without making any holes fortunately) coated with Hydrate 80 and then Electrox
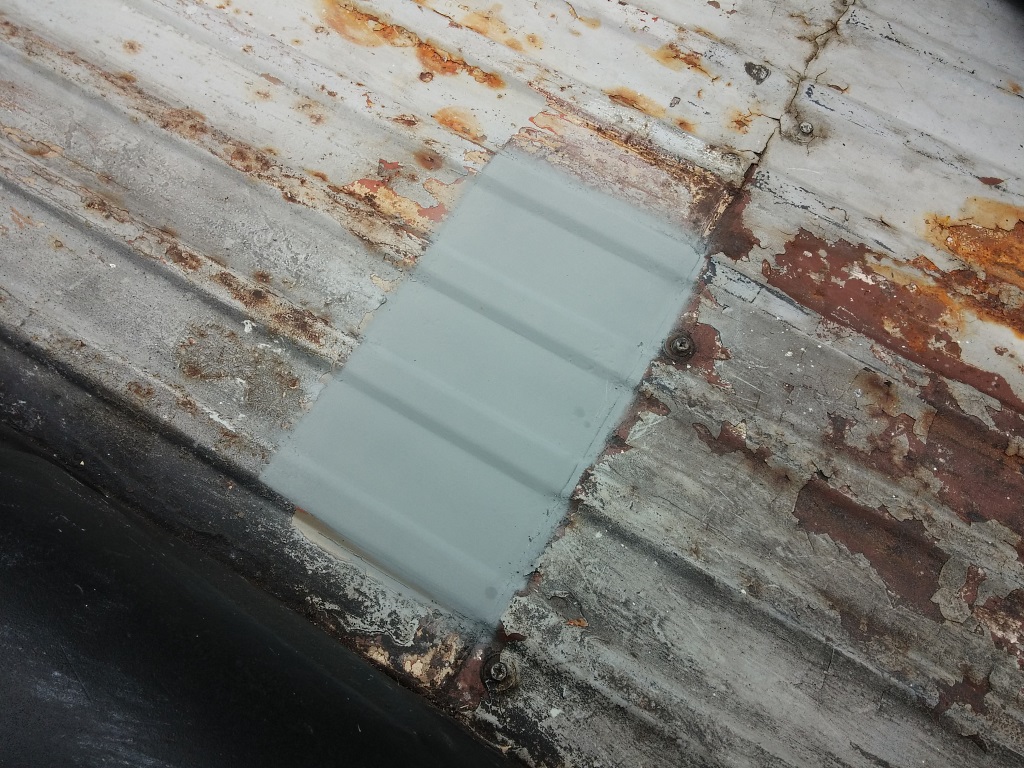
It is going to take quite a while to do the entire bed area though!! I'll get the removable section at the front (the top of the "smugglers box" where the screw heads are visible) blasted and powder coated matt black to save a bit of time, and the rest I'll cover with matt black epoxy bed liner once I've finished treating it as above...
Next job was to check for the cause of lack of warmth from the heater, suspected lack of thermostat - yup!
Strangely the coolant that came out in the initial drain didn't look too bad, but I wanted to be thorough so refilled with plain water and went for a drive. Just as well I did because each of the next five fills came out looking like this:
Eventually it drained pretty clear and I refilled with a decent anti-freeze mix. The heater now works and the temperature gauge now sits steady at an indicated 200F (195F 'stat)
In between coolant drain sessions I started stripping a test area of the load bed to see what the metal is like under the accumulated paint layers
Overview
Closer
Used a hot air gun and scraper followed by finger sander to get to bare metal. Then a diamond bit on the Dremel to clean up the worst pitting. Finally a coat of acid and left to soak for a while with an occasional wire brushing.
Once the worst of the pitting removed (without making any holes fortunately) coated with Hydrate 80 and then Electrox
It is going to take quite a while to do the entire bed area though!! I'll get the removable section at the front (the top of the "smugglers box" where the screw heads are visible) blasted and powder coated matt black to save a bit of time, and the rest I'll cover with matt black epoxy bed liner once I've finished treating it as above...
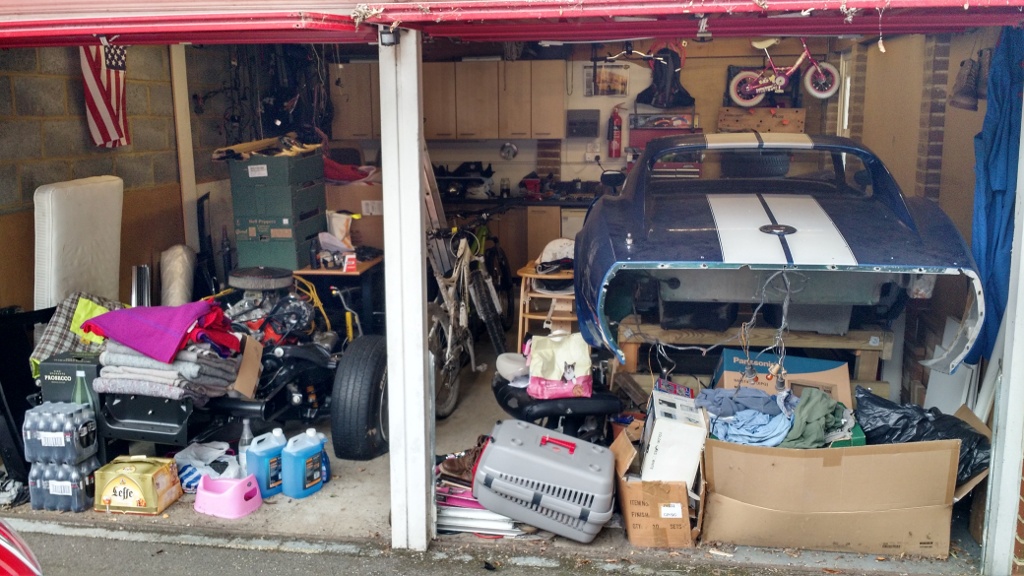
Bit of an overdue update. I've been busy reorganizing my garage so that I could get the Elk in alongside my long-term Saab 99 Turbo project for a bit of winter bodywork TLC.
The above sentence makes it sound like it should have been the mere work of a weekend to do, but in reality it involved:-
a) modifying the rotisserie that the Saab lives on to make mobile, turning it from two separate frames into one rigid one complete with deploy-able castors
b) relocating a lot of exceptionally overloaded shelving units, whilst reducing their number by about 50%, without disposing of anything that might remotely "come in handy".
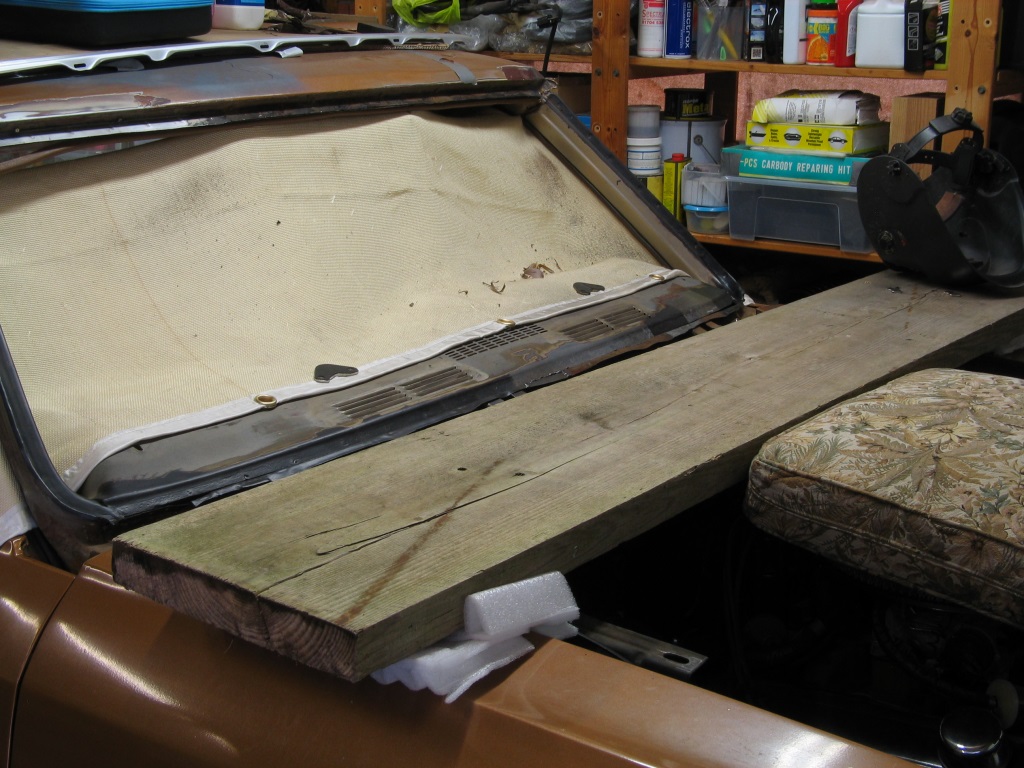
Finally, between Christmas and New Year sufficient space was achieved and after taking the Elk for a really nice run along the coast on the only half-decent day we had during the holidays, it was time to get stuck in...
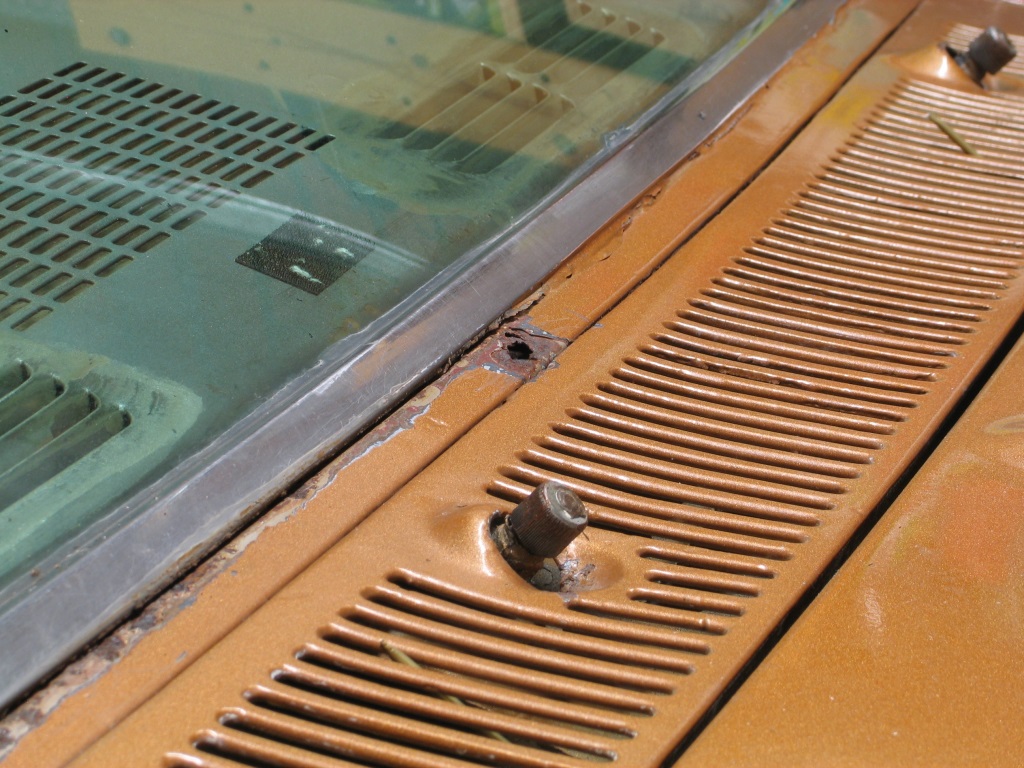
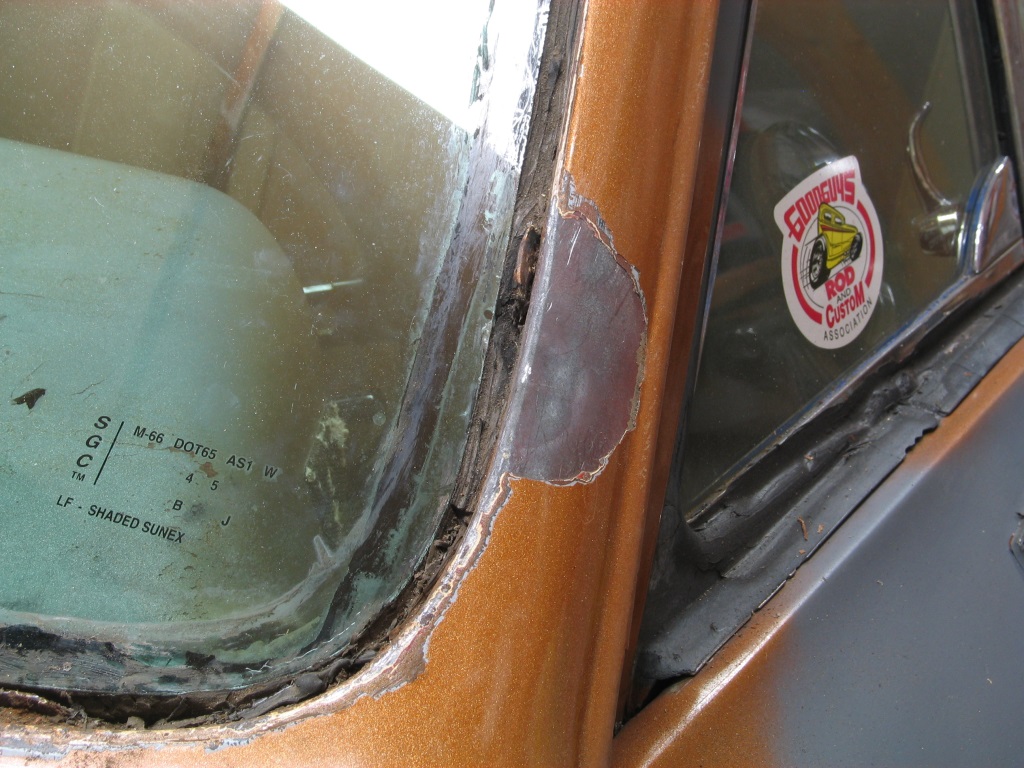
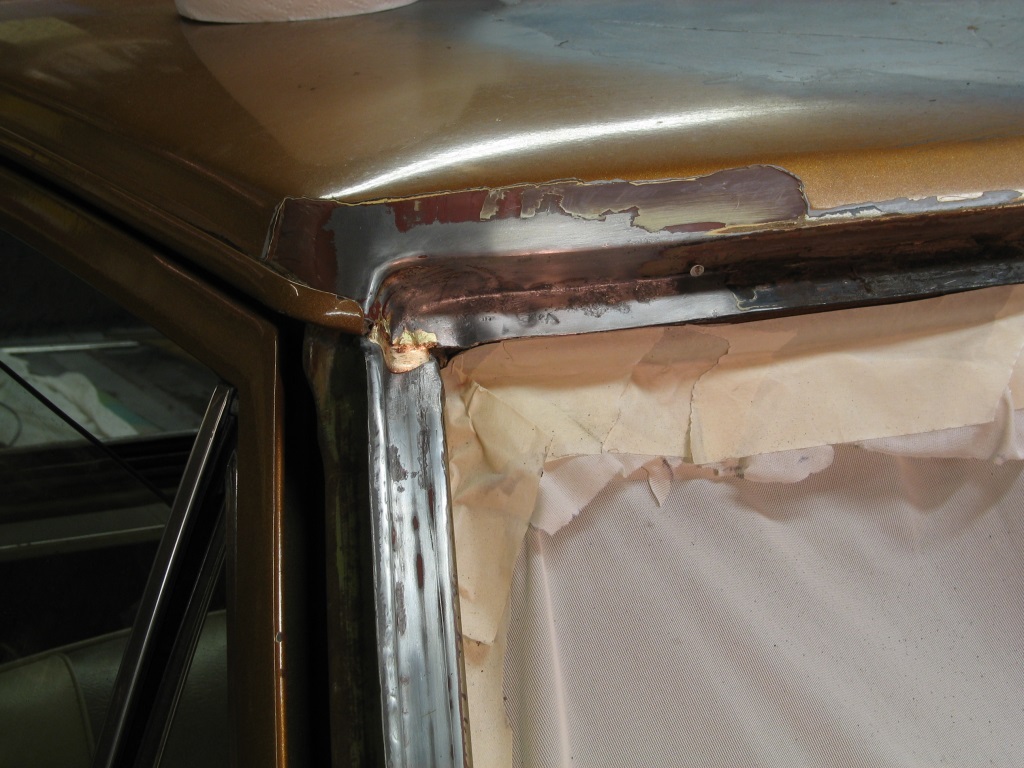
Fair to say the paint job is never going to win any awards - yes that is paint over silicon sealant and not exactly well masked off around the windscreen trim

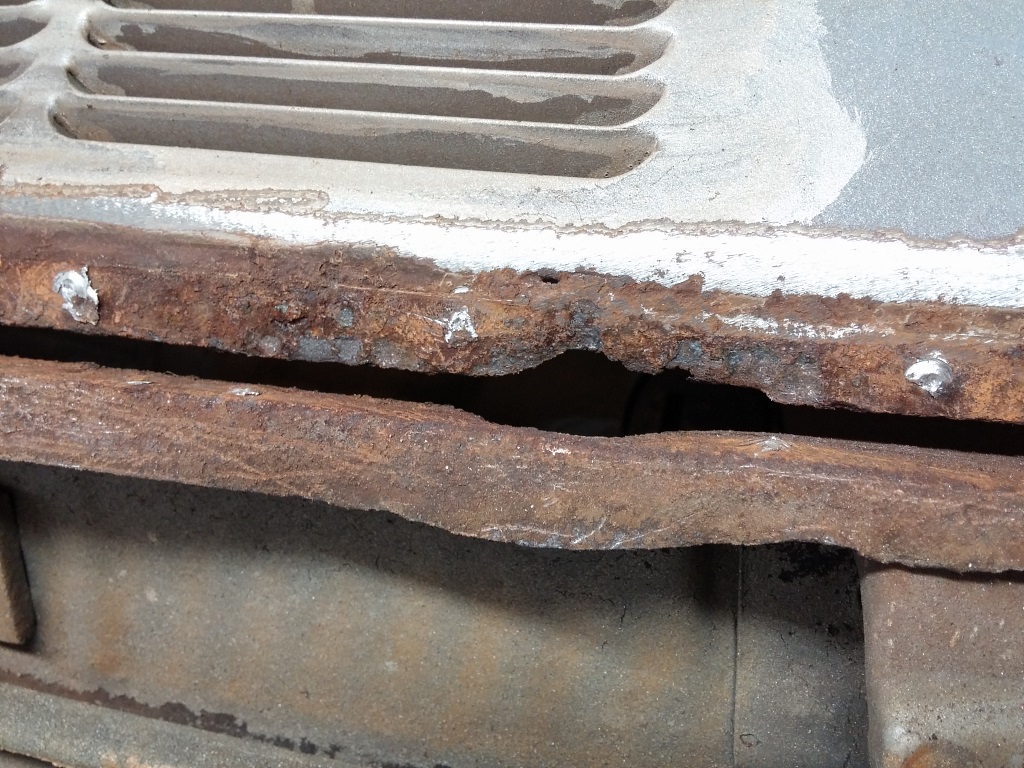
Rust hole in the top of the cowl area, below the screen
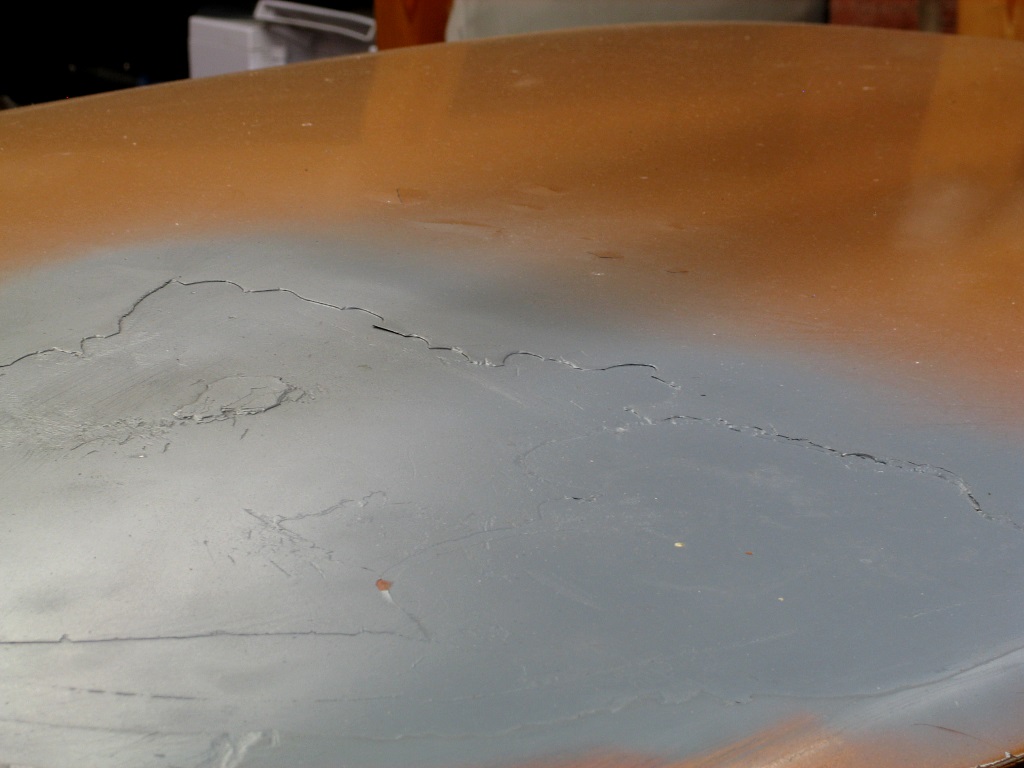
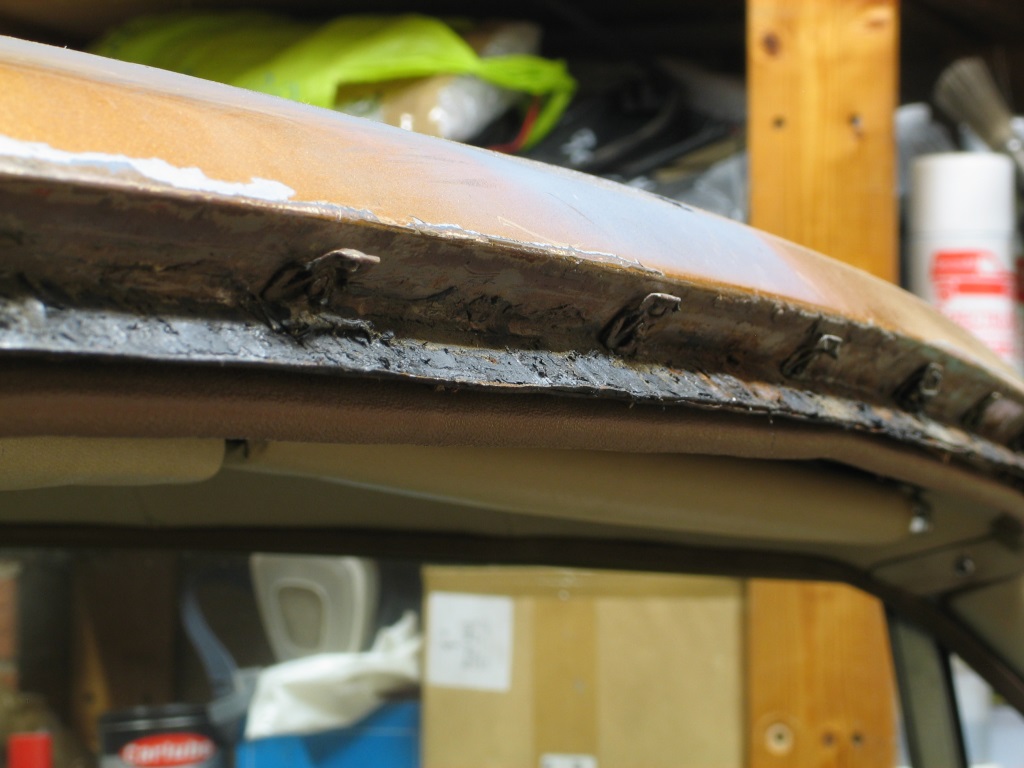
Roof of the cab, flaking paint which someone had started to remove and then apparently lost interest! Bare metal would seem the only sensible option.
Slowly and carefully removing the stainless trim, it was stuck on with a variety of silicon sealants, although most of the original fixing clips were also present and doing their job. Nice amount of crud under the trim too
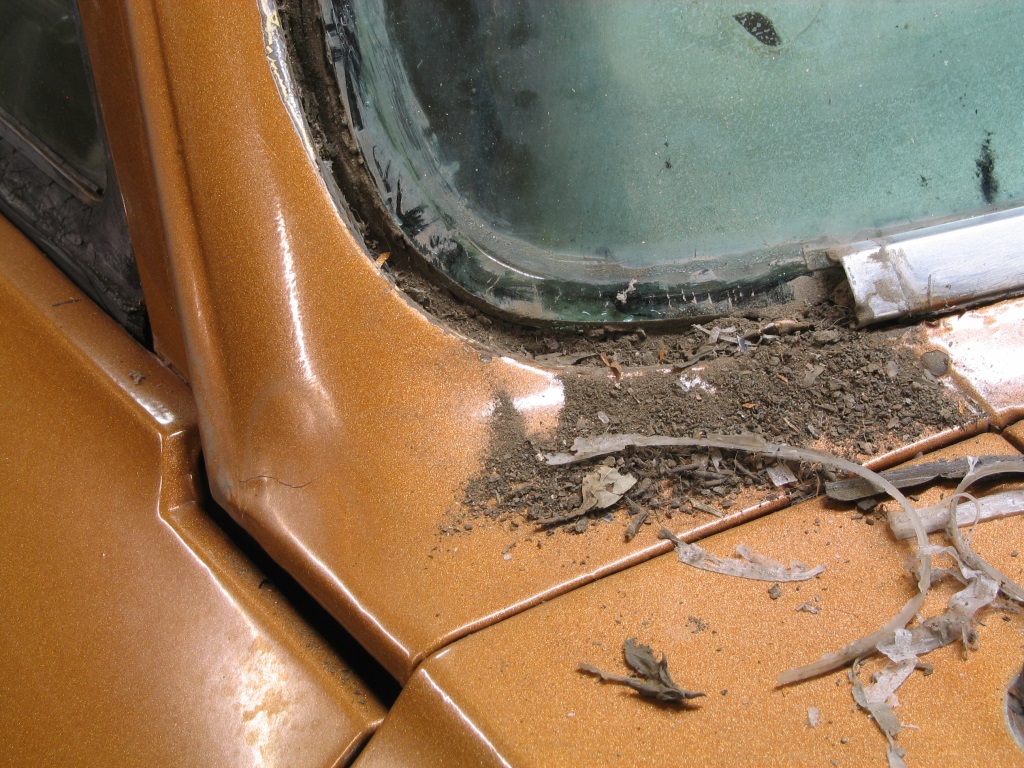
Paint adhesion not great, most of this came off with a piece of silicon!
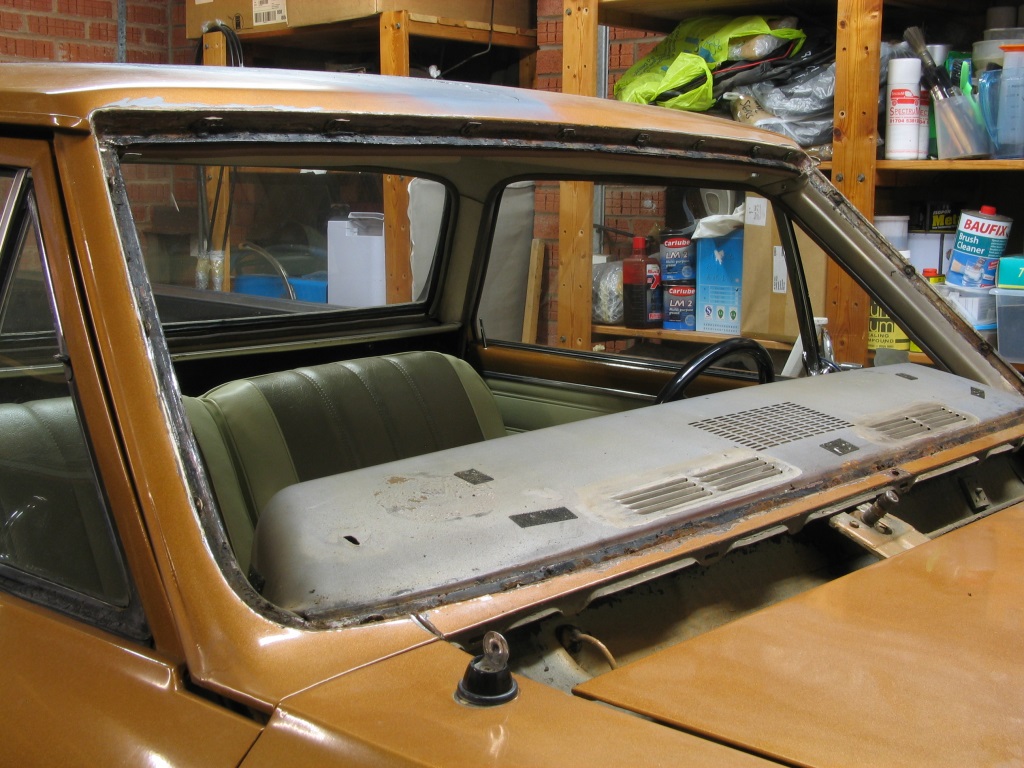
Trim removed, the bonded in screen could be cut out - quite easy as it was secured with proper Dum-Dum which stays soft despite being sticky as hell! My wallet breathed a sigh of relief when the screen came out intact!
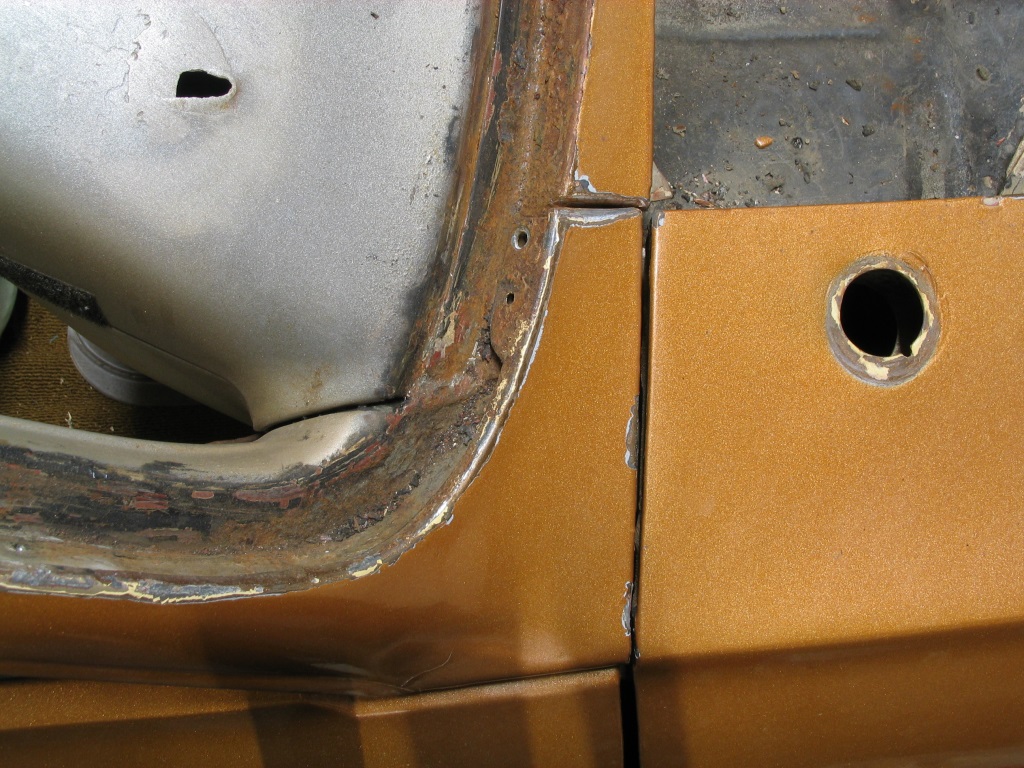
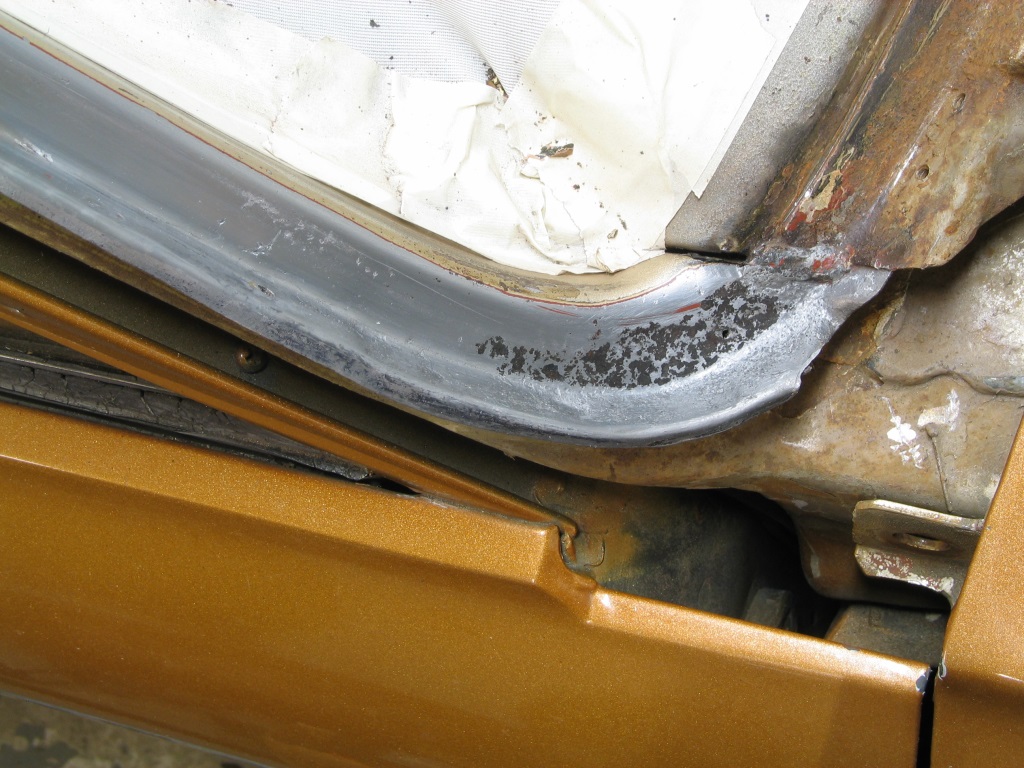
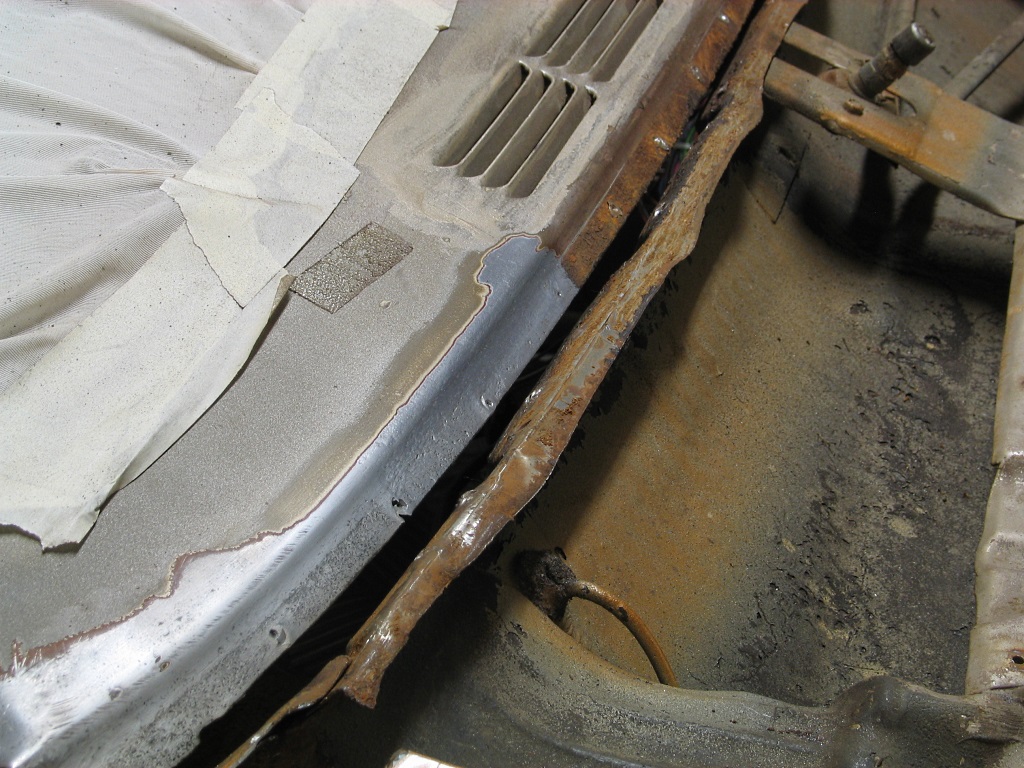
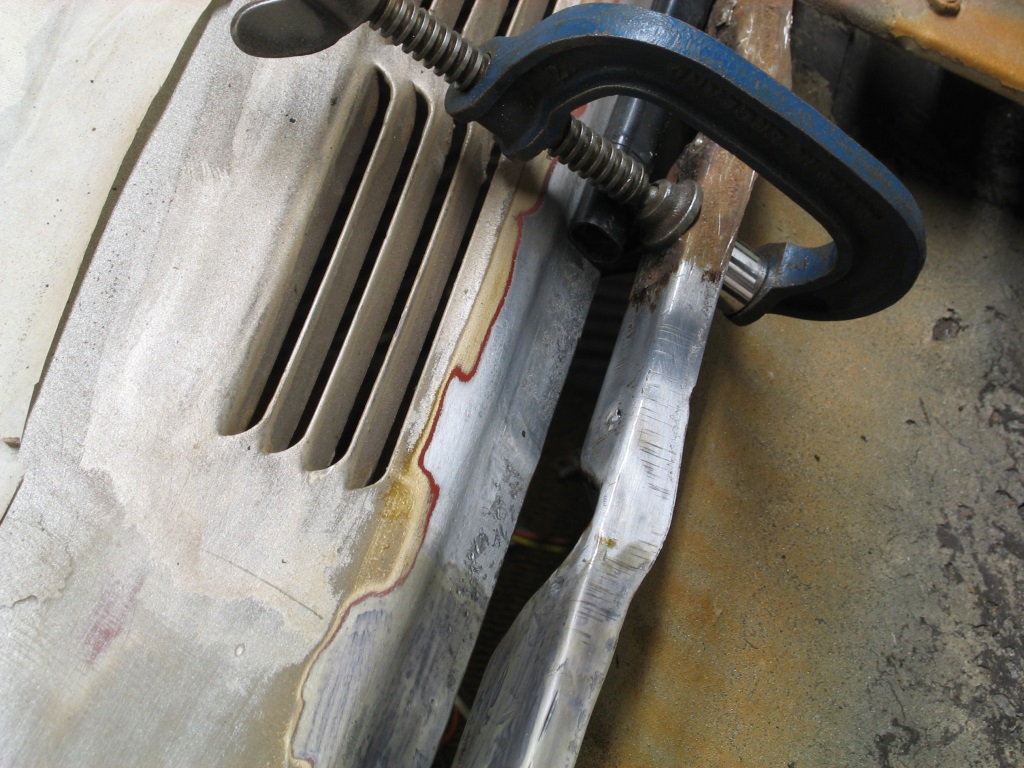
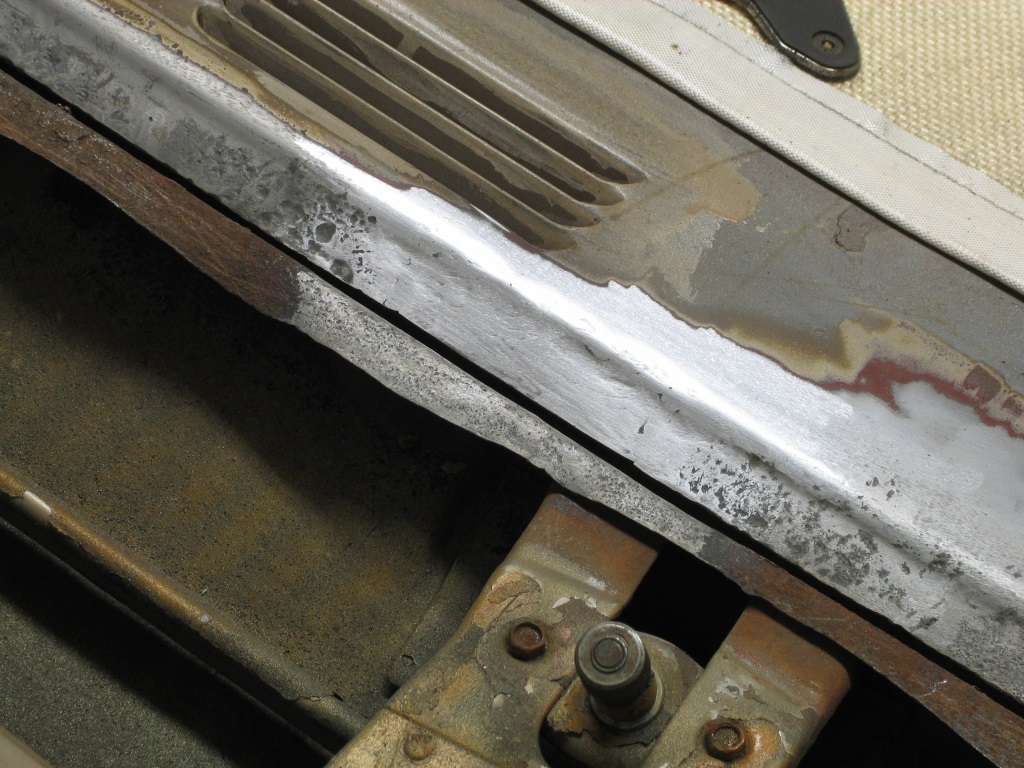
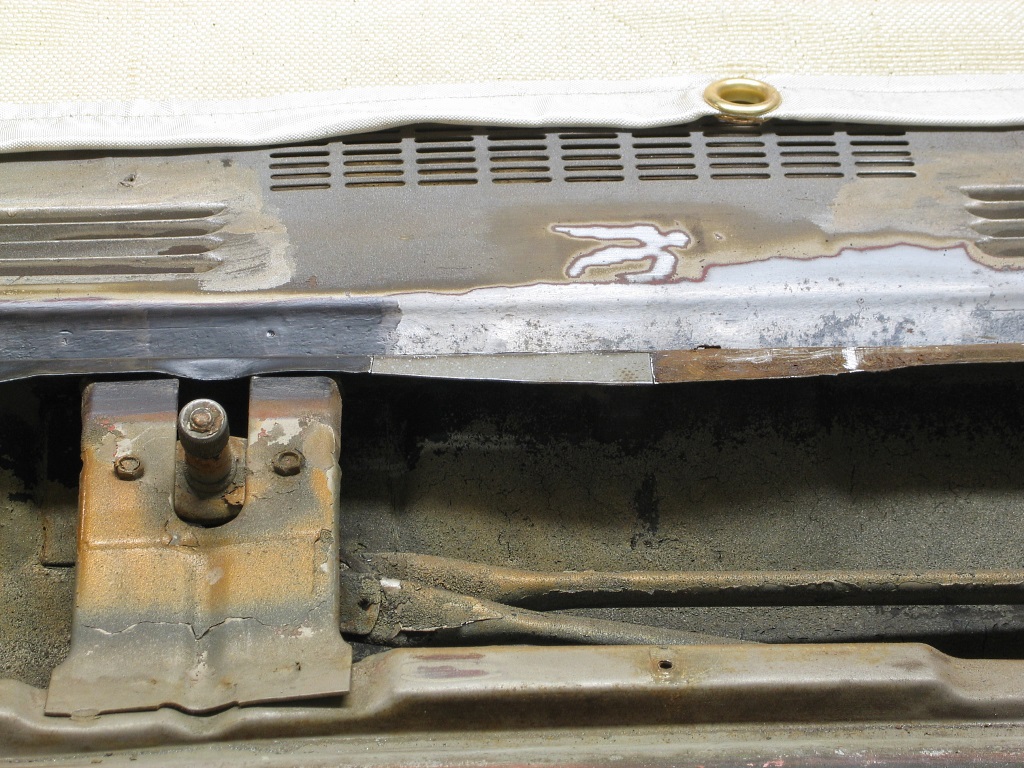
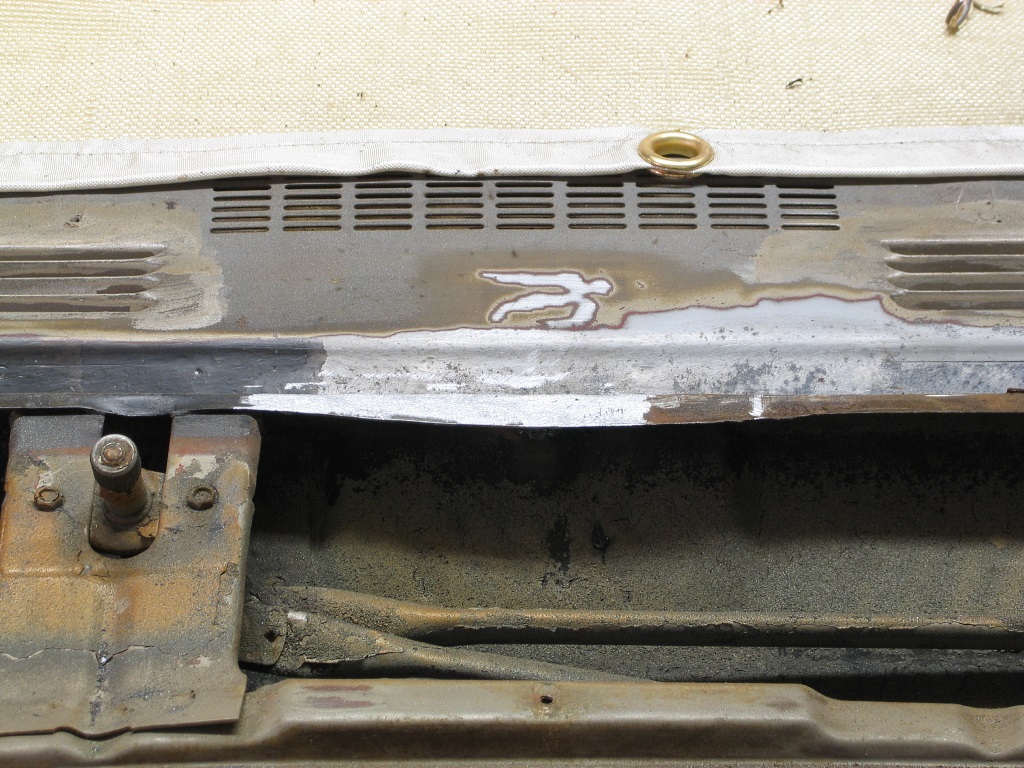
Lower screen channel looking exactly as expected. Repair section ordered.
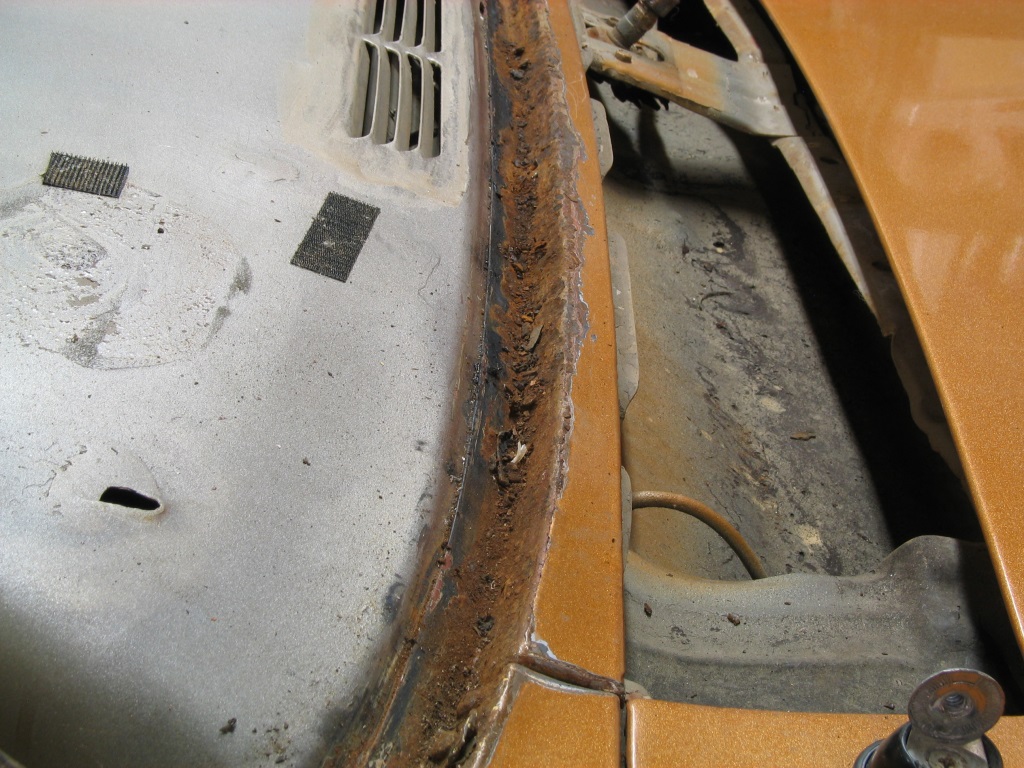
The rest of the screen channel is rock solid under the gunk, just needs a good clean.
The A-pillars have removable covers which need to come off to give proper access to the welds where the repair section will be let in.
Unfortunately, two of the A-pillar cover fixings are under the rear end of the front wings...
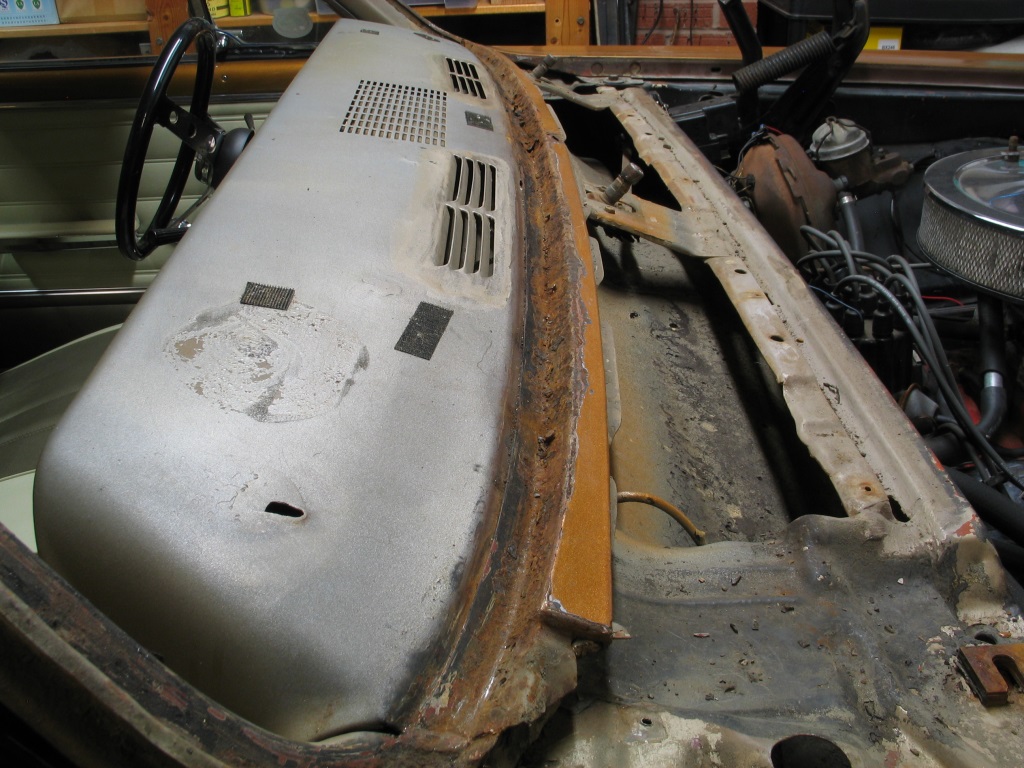
Which means that first the bonnet
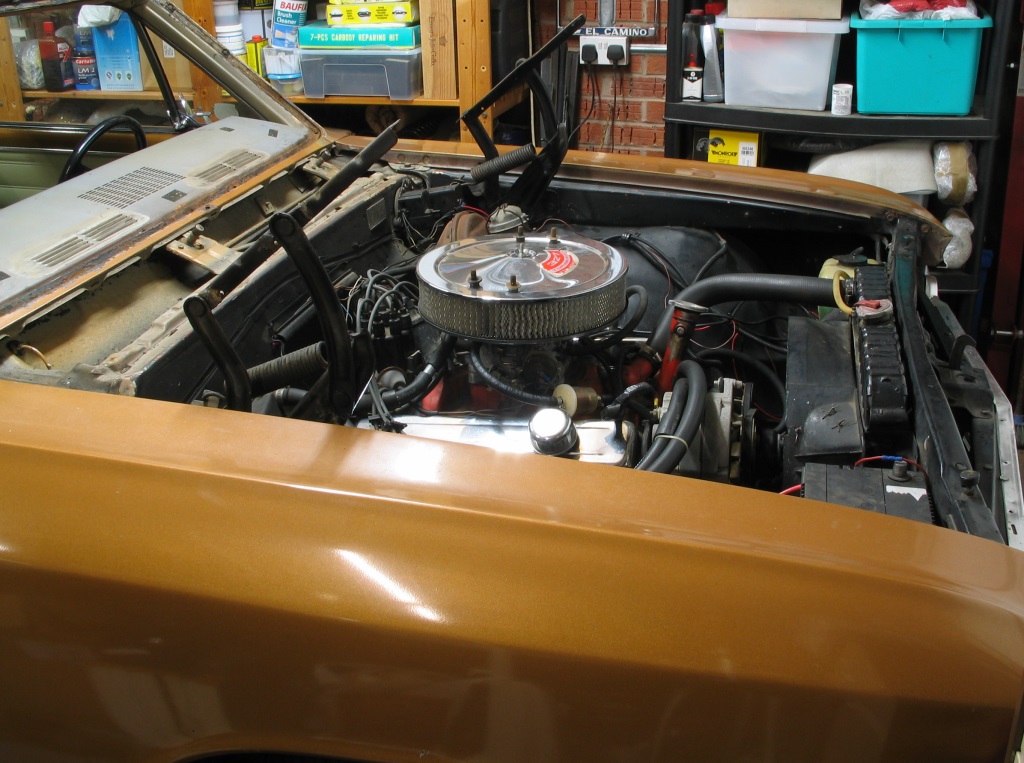
and then the wings need to come off
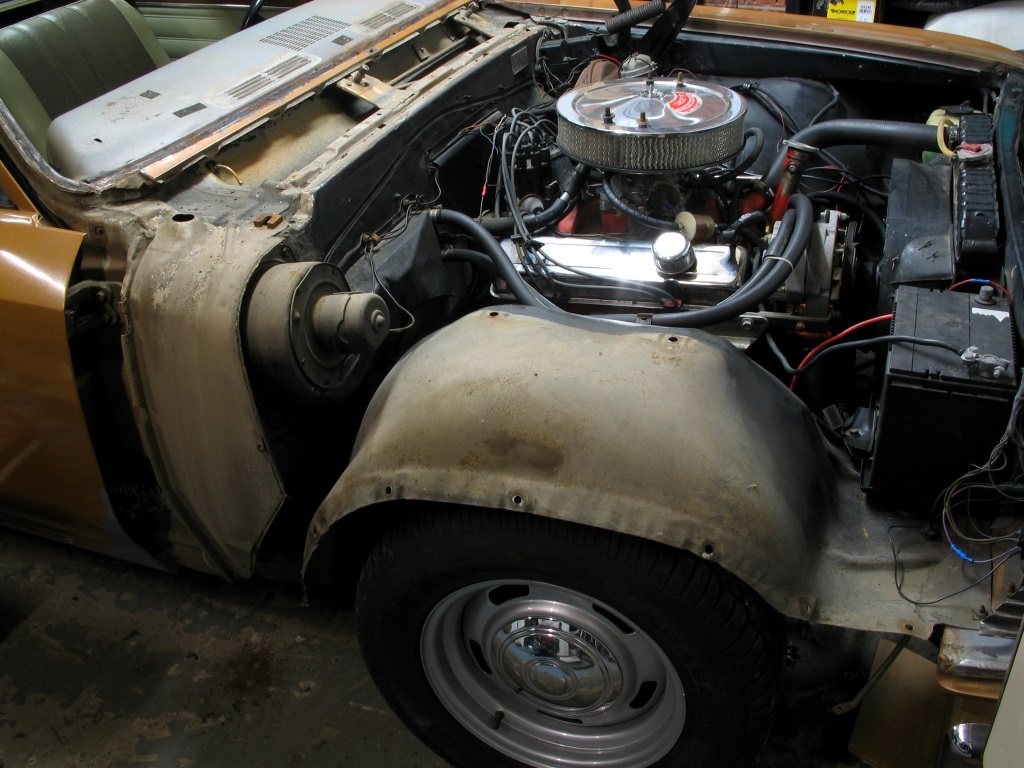
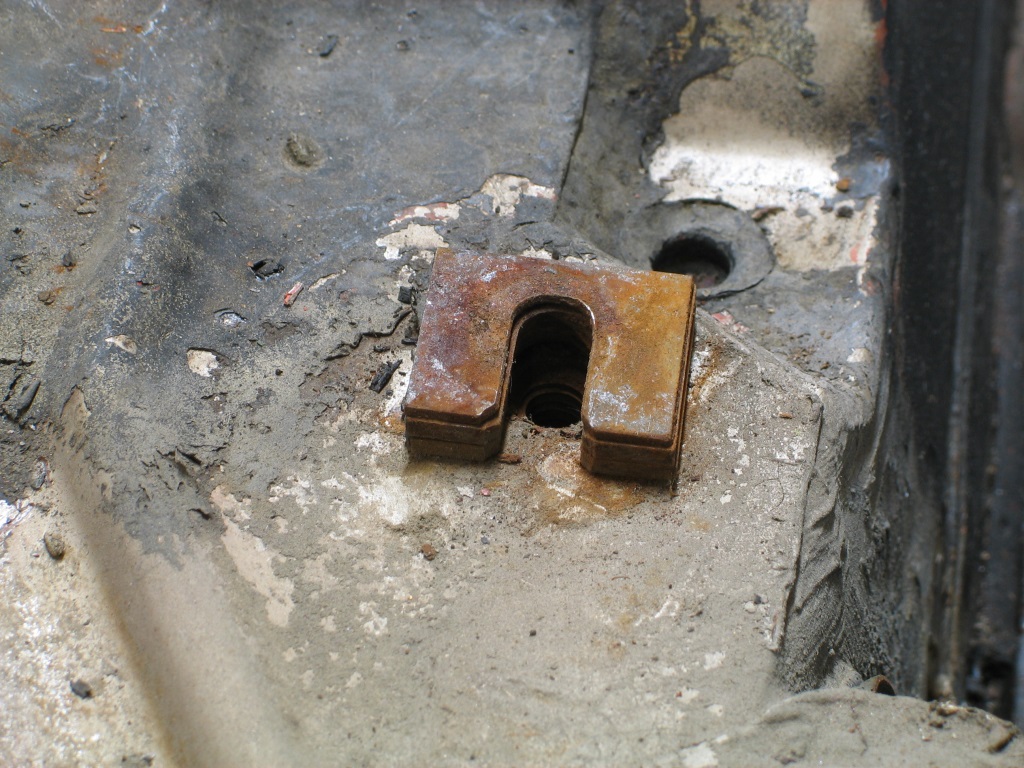
Taking care not to lose the high-tech body alignment shims!!
Hidden fixings can now be accessed..
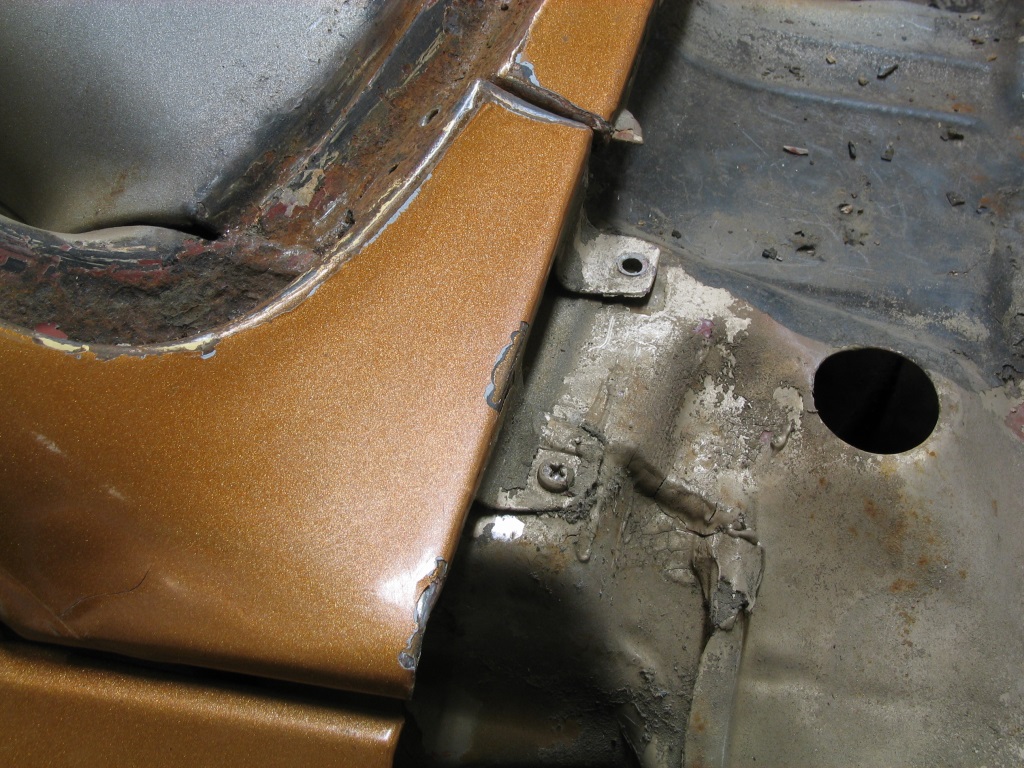
..and the A-pillar cover removed to give access to the factory welds
Now to rinse and repeat on the other side...!!
The above sentence makes it sound like it should have been the mere work of a weekend to do, but in reality it involved:-
a) modifying the rotisserie that the Saab lives on to make mobile, turning it from two separate frames into one rigid one complete with deploy-able castors
b) relocating a lot of exceptionally overloaded shelving units, whilst reducing their number by about 50%, without disposing of anything that might remotely "come in handy".
Finally, between Christmas and New Year sufficient space was achieved and after taking the Elk for a really nice run along the coast on the only half-decent day we had during the holidays, it was time to get stuck in...
Fair to say the paint job is never going to win any awards - yes that is paint over silicon sealant and not exactly well masked off around the windscreen trim
Rust hole in the top of the cowl area, below the screen
Roof of the cab, flaking paint which someone had started to remove and then apparently lost interest! Bare metal would seem the only sensible option.
Slowly and carefully removing the stainless trim, it was stuck on with a variety of silicon sealants, although most of the original fixing clips were also present and doing their job. Nice amount of crud under the trim too
Paint adhesion not great, most of this came off with a piece of silicon!
Trim removed, the bonded in screen could be cut out - quite easy as it was secured with proper Dum-Dum which stays soft despite being sticky as hell! My wallet breathed a sigh of relief when the screen came out intact!
Lower screen channel looking exactly as expected. Repair section ordered.
The rest of the screen channel is rock solid under the gunk, just needs a good clean.
The A-pillars have removable covers which need to come off to give proper access to the welds where the repair section will be let in.
Unfortunately, two of the A-pillar cover fixings are under the rear end of the front wings...
Which means that first the bonnet
and then the wings need to come off
Taking care not to lose the high-tech body alignment shims!!
Hidden fixings can now be accessed..
..and the A-pillar cover removed to give access to the factory welds
Now to rinse and repeat on the other side...!!
 king cool.
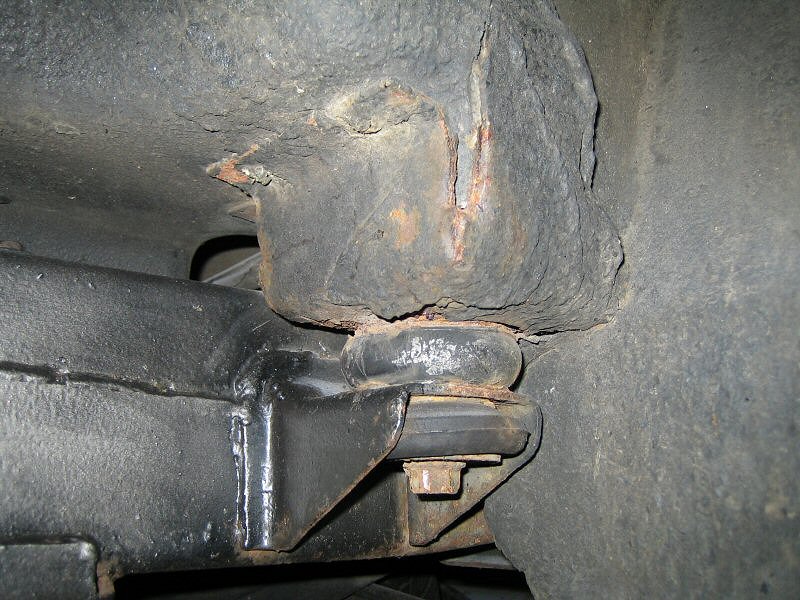

threadlock said:
But I'd recommend caution. What started out as a bit of a fettling project for me to fix a rotten body mount ... now looks like this, eight years later.
Yes, project creep is an ever-present danger and I am no stranger to it.My Saab 99 came as a complete running car needing some minor welding and now (after 12 years) looks like this...
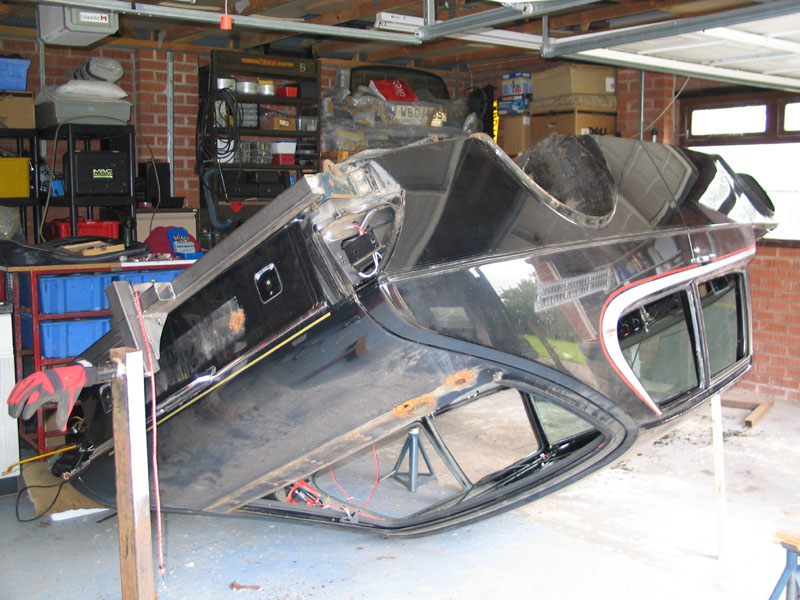

I am determined not to let the same happen here, although a little has already occurred!!

To be fair, after reading horror stories of firewall insulation smouldering for hours before bursting into flames, I didn't want to take any chances...
Although reluctant to strip the whole dash out, I knew some of the wiring additions were a bit iffy and it would give me a chance to sort them out.
Wasn't expecting some of the wiring to look like this though...
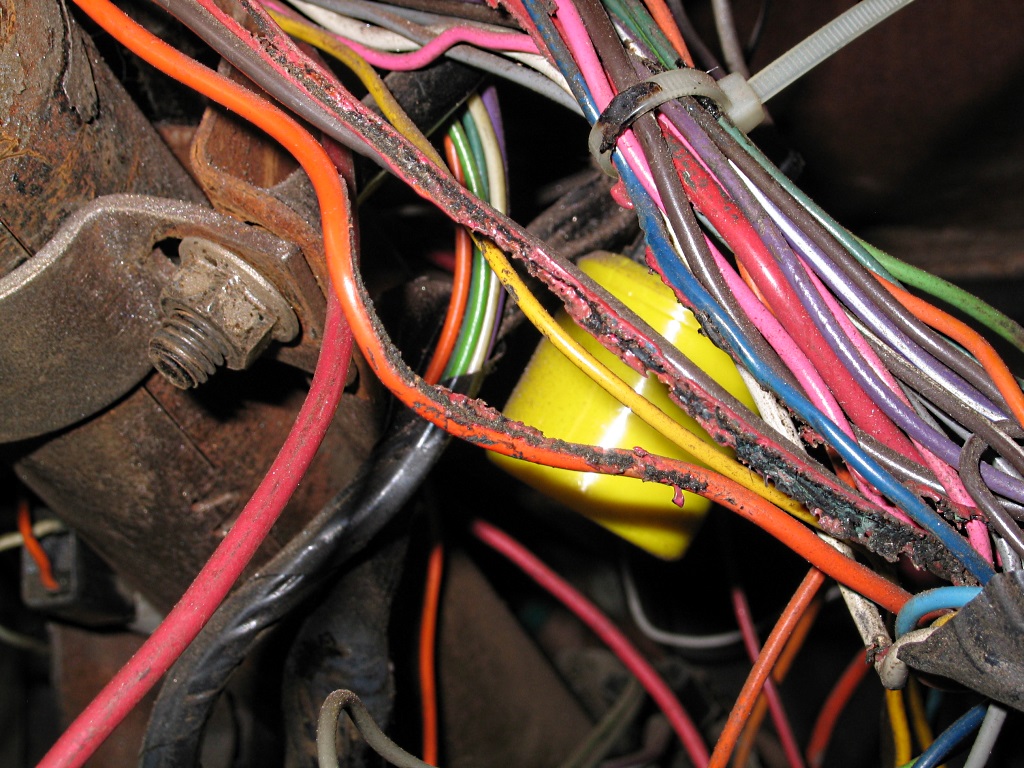
Duly added to the to-do list!
Stripping the screen surround area back to metal. Some minor pitting but mostly completely solid.
Small section at the bottom of the passenger side a bit too soft though
Cut that out and patched it. Repair section arrived and looks like it will fit nicely

Drilling out spot welds - screen frame to upper dash
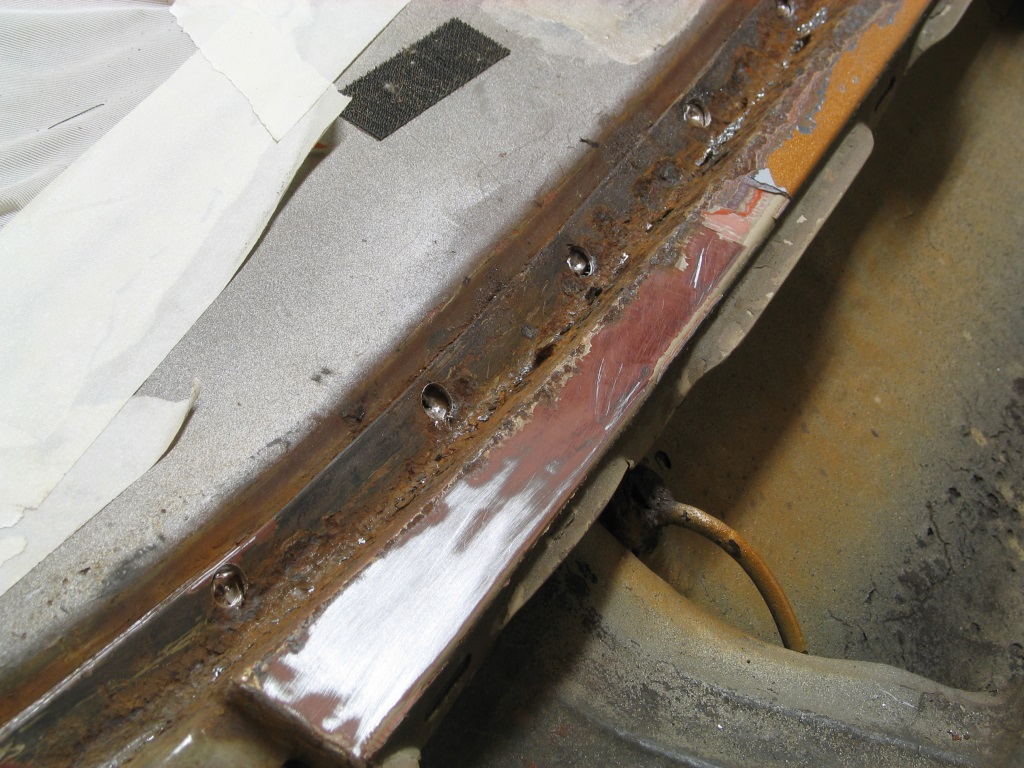
Second row of spot welds - screen frame to cowl, at ninety degrees to first row. Slicing off the lower section of the old panel allowed access to split the welds, it's not like I need to save the panel.
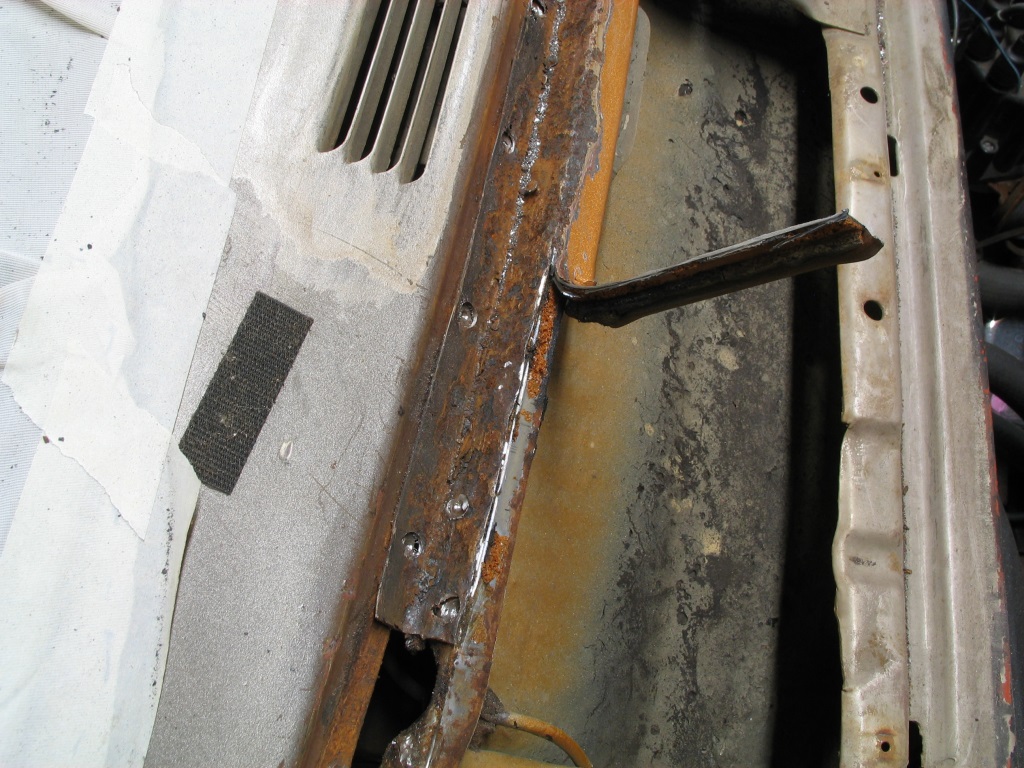
Working my way across, removing the old panel piece by piece

Completely removed
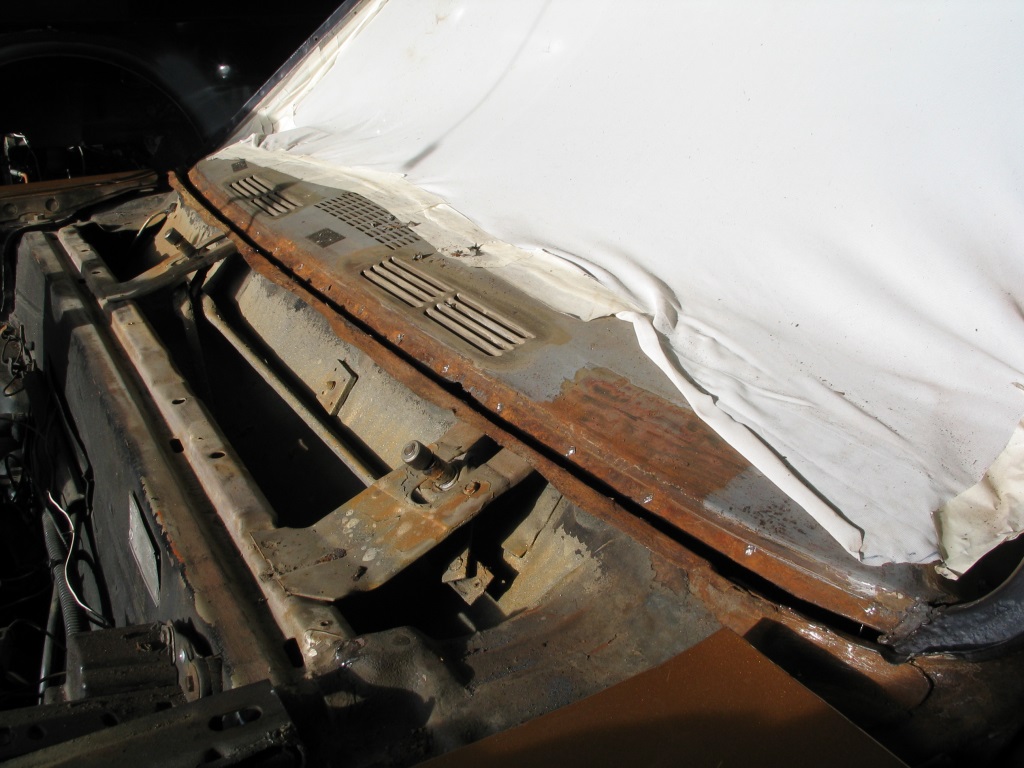
More fun cleaning back to bare metal before the new panel can be fitted
Got bored of cleaning rusty metal so gave the credit card a bit of a bashing for light relief!

Wasn't expecting some of the wiring to look like this though...
Duly added to the to-do list!Stripping the screen surround area back to metal. Some minor pitting but mostly completely solid.
Small section at the bottom of the passenger side a bit too soft though
Cut that out and patched it. Repair section arrived and looks like it will fit nicely
Drilling out spot welds - screen frame to upper dash
Second row of spot welds - screen frame to cowl, at ninety degrees to first row. Slicing off the lower section of the old panel allowed access to split the welds, it's not like I need to save the panel.
Working my way across, removing the old panel piece by piece
Completely removed
More fun cleaning back to bare metal before the new panel can be fitted
Got bored of cleaning rusty metal so gave the credit card a bit of a bashing for light relief!
Just a little update to say this is still ongoing!
I have to say that, although very solid indeed, there was quite a lot of surface rust around the windscreen aperture and under the now removed lower screen frame to scuttle closing panel, and it is taking forever to clean it all back to bare metal to a standard I'm happy with. I had hoped it would be back on the road by now but I'm a way off yet. Still, do it right, do it once an' all that!
So apologies if this is a bit of a boring update, hopefully it's not quite as mind-numbing as actually doing the de-rusting...
The nice shiny metal is there to be found
But three small areas were just too far gone to clean back.
Before
After
Reaching the middle of the base of the windscreen was quite a challenge for a sub-six-footer like me. Welded repairs in the middle were performed whilst balanced on this...
During
After. Came out all right considering!!
I'm not too far off being ready to weld the repair section in now but I want to treat the underside of the outer lip area before doing so as access to it will never be as good again. More metal cleaning then...
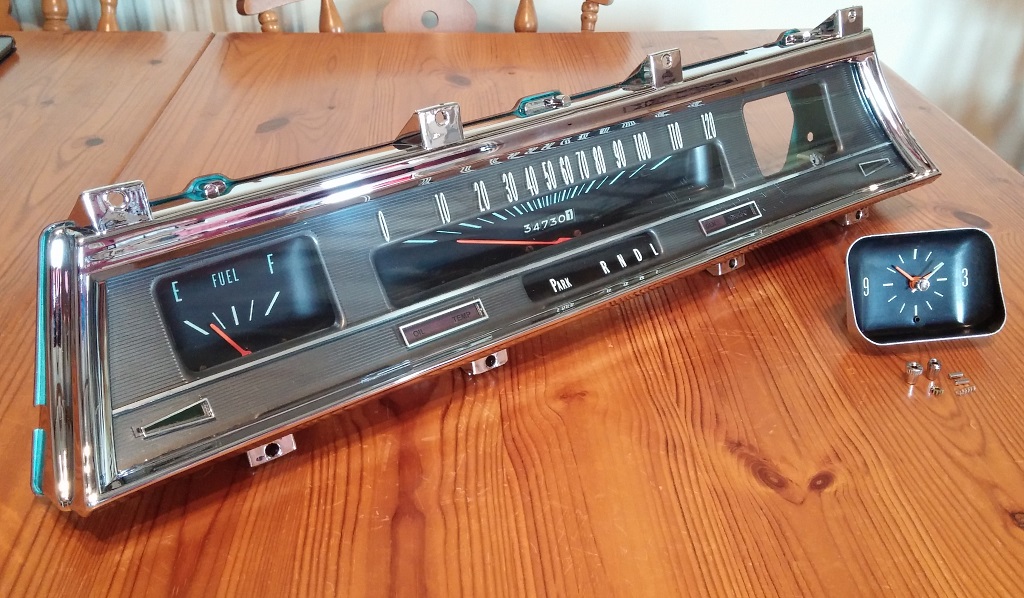
To help keep me sane between the de-rusting sessions, the instrument cluster has been fully stripped down and cleaned of an impressive amount (50 years' worth) of dust, sand and desiccated insects.
Everything bar the clock was working, and careful lubrication of the mechanism's pivot points appears to have brought this back to life as well The only difficulty I'm having is obtaining a replacement for the missing set stem, emails to various American clock specialists and a keen eye on eBay.com have yet to produce a result. I could always go with a complete replacement quartz mechanism, but am reluctant to do so whilst the original mechanism is still good.
Otherwise, foam seals have been renewed, as have the faded lenses for the warning lights. I was going to replace the main instrument lens too as it was gouged to hell around where the clock set stem and knob should have been, looks like someone used pliers and a screwdriver to prize it out, and not at all carefully.
However thought I'd try a perspex polishing kit before condemning it (basically wet and dry paper followed by plastic polish) and the results were amazing. Not concours perhaps but a genuinely massive improvement and more than good enough to put back on the car.
Chrome (plastic) trim renewed and it's looking pretty tidy i think.
I have to say that, although very solid indeed, there was quite a lot of surface rust around the windscreen aperture and under the now removed lower screen frame to scuttle closing panel, and it is taking forever to clean it all back to bare metal to a standard I'm happy with. I had hoped it would be back on the road by now but I'm a way off yet. Still, do it right, do it once an' all that!
So apologies if this is a bit of a boring update, hopefully it's not quite as mind-numbing as actually doing the de-rusting...
The nice shiny metal is there to be found
But three small areas were just too far gone to clean back.
Before
After
Reaching the middle of the base of the windscreen was quite a challenge for a sub-six-footer like me. Welded repairs in the middle were performed whilst balanced on this...
During
After. Came out all right considering!!
I'm not too far off being ready to weld the repair section in now but I want to treat the underside of the outer lip area before doing so as access to it will never be as good again. More metal cleaning then...
To help keep me sane between the de-rusting sessions, the instrument cluster has been fully stripped down and cleaned of an impressive amount (50 years' worth) of dust, sand and desiccated insects.
Everything bar the clock was working, and careful lubrication of the mechanism's pivot points appears to have brought this back to life as well
The only difficulty I'm having is obtaining a replacement for the missing set stem, emails to various American clock specialists and a keen eye on eBay.com have yet to produce a result. I could always go with a complete replacement quartz mechanism, but am reluctant to do so whilst the original mechanism is still good.Otherwise, foam seals have been renewed, as have the faded lenses for the warning lights. I was going to replace the main instrument lens too as it was gouged to hell around where the clock set stem and knob should have been, looks like someone used pliers and a screwdriver to prize it out, and not at all carefully.
However thought I'd try a perspex polishing kit before condemning it (basically wet and dry paper followed by plastic polish) and the results were amazing. Not concours perhaps but a genuinely massive improvement and more than good enough to put back on the car.
Chrome (plastic) trim renewed and it's looking pretty tidy i think.
Gassing Station | Readers' Cars | Top of Page | What's New | My Stuff