The "66 El Camino that I finally own" Thread
Discussion


Bit of progress over the weekend.
Headlights were straightforward, as Jim said, just needed to identify the side light feed wire (purple) and divert it to the bulb in the new light unit, and add an earth.
All nice and solid behind the headlight trim and light buckets.

I had to take a small section out of the light buckets to clear the sidelight bulb holder and wires - where the "U16" can be seen on the numberplate.
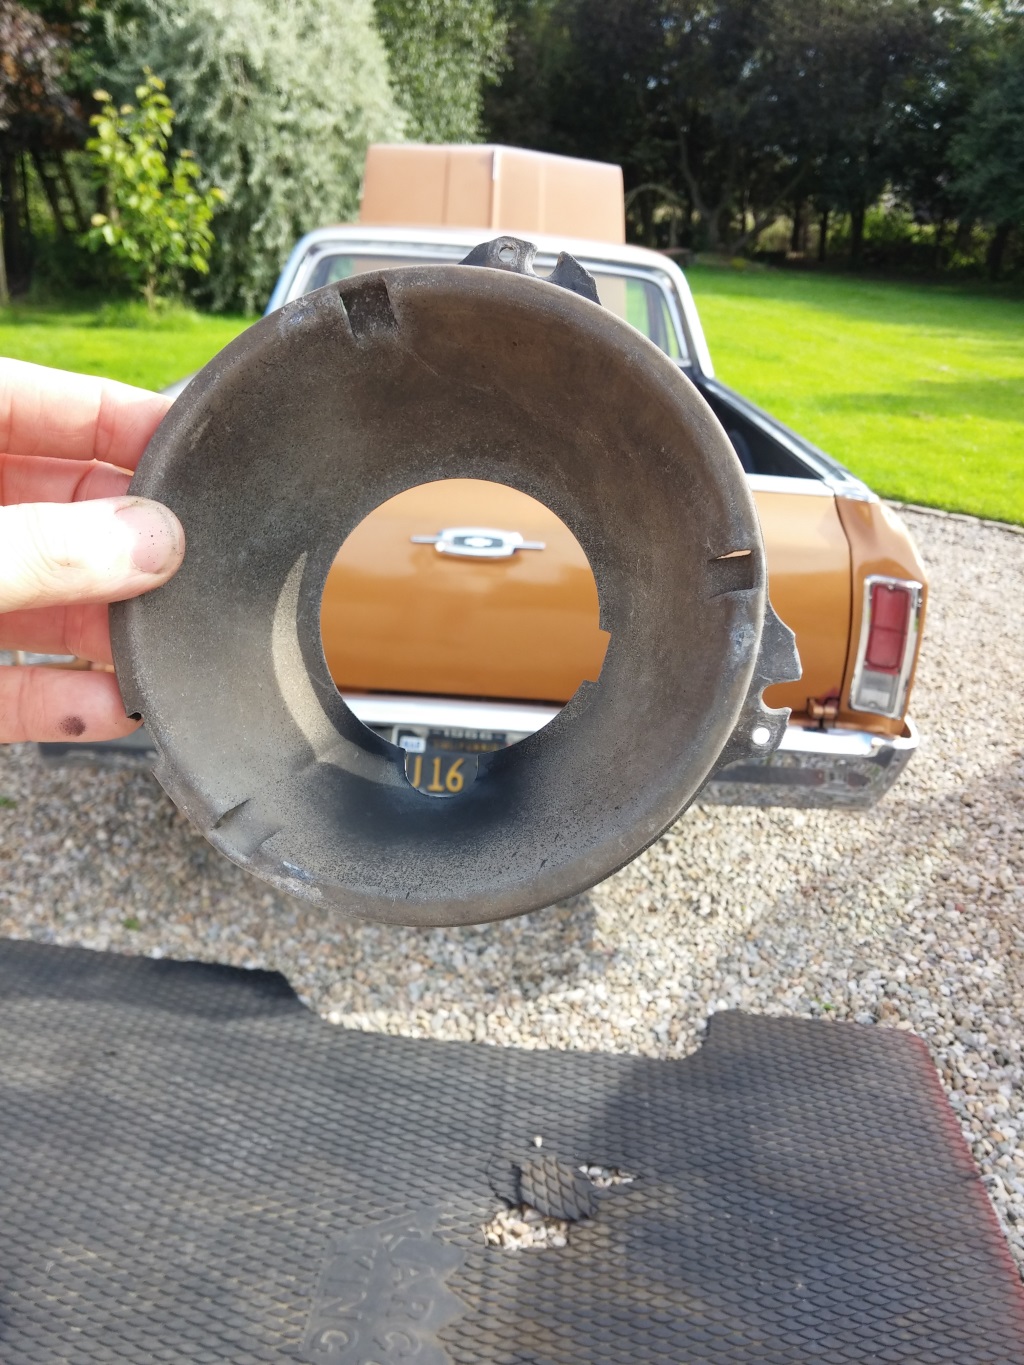
All refitted and working, side, dip and main on outer units plus main on inner ones - although these are still the original sealed beams for now.
The side light is on in this pic although it isn't very obvious in bright sunlight!

Next up was the play in the upper steering column bearing. A quick web search indicated that the bearing might not be as easy to get hold of as I expected - none of the usual sources seemed to list one and ebay didn't turn one up either.
However, reading around the subject, it appears that rather than being a plain bearing, it requires a pre-load on it to set the correct clearance - a bit like a conical wheel bearing but in this case tensioned by a spring between the wheel boss and the horn contact ring, which in turn is shaped to fit and press on the inner race.
Armed with this information I stripped the wheel and horn contact assembly, hoping perhaps that the spring would be a bit weak rather than the bearing worn out.
Instead I found the spring to be entirely absent!! Without the preload from the spring the bearing had easily 5mm lateral play so no wonder the upper column felt a bit rattly!
I raided my spare parts collection and found two possible springs of unknown origin, both the same size but one a bit stiffer than the other. Tried the soft one first, much better but still a bit of play. Stiffer one - perfect, no play at all

Cleaned and repacked the bearing and reassembled. All good!
However, I will confess I did have a bit of a panic during the above!!
I had to loosen the lower column clamp to free the wiring loom to give me some wriggle room, meaning the entire column could rotate. What I didn't know was that the split pin retaining the shift lever on the column shift was making a simultaneous bid for freedom.
Everything was thus aligned so that all it needed was for some schmuck to catch the shift lever with their arm for:
a) the column to rotate (putting the shift linkage out of position) and
b) the shift lever itself to drop off with a clunk and a twang that sounded much like a complicated linkage falling apart!!
My heart was down in the footwell at this point with visions of having to strip and rebuild and reset the entire column and linkage assembly. However I re-fitted the shift lever and rotated the column back to roughly where it was and tried to select all gears. A little further tweak to enable "L" to be selected and it all seems to be ok. Fingers crossed!
Headlights were straightforward, as Jim said, just needed to identify the side light feed wire (purple) and divert it to the bulb in the new light unit, and add an earth.
All nice and solid behind the headlight trim and light buckets.
I had to take a small section out of the light buckets to clear the sidelight bulb holder and wires - where the "U16" can be seen on the numberplate.
All refitted and working, side, dip and main on outer units plus main on inner ones - although these are still the original sealed beams for now.
The side light is on in this pic although it isn't very obvious in bright sunlight!
Next up was the play in the upper steering column bearing. A quick web search indicated that the bearing might not be as easy to get hold of as I expected - none of the usual sources seemed to list one and ebay didn't turn one up either.
However, reading around the subject, it appears that rather than being a plain bearing, it requires a pre-load on it to set the correct clearance - a bit like a conical wheel bearing but in this case tensioned by a spring between the wheel boss and the horn contact ring, which in turn is shaped to fit and press on the inner race.
Armed with this information I stripped the wheel and horn contact assembly, hoping perhaps that the spring would be a bit weak rather than the bearing worn out.
Instead I found the spring to be entirely absent!! Without the preload from the spring the bearing had easily 5mm lateral play so no wonder the upper column felt a bit rattly!
I raided my spare parts collection and found two possible springs of unknown origin, both the same size but one a bit stiffer than the other. Tried the soft one first, much better but still a bit of play. Stiffer one - perfect, no play at all
Cleaned and repacked the bearing and reassembled. All good!
However, I will confess I did have a bit of a panic during the above!!
I had to loosen the lower column clamp to free the wiring loom to give me some wriggle room, meaning the entire column could rotate. What I didn't know was that the split pin retaining the shift lever on the column shift was making a simultaneous bid for freedom.
Everything was thus aligned so that all it needed was for some schmuck to catch the shift lever with their arm for:
a) the column to rotate (putting the shift linkage out of position) and
b) the shift lever itself to drop off with a clunk and a twang that sounded much like a complicated linkage falling apart!!
My heart was down in the footwell at this point with visions of having to strip and rebuild and reset the entire column and linkage assembly. However I re-fitted the shift lever and rotated the column back to roughly where it was and tried to select all gears. A little further tweak to enable "L" to be selected and it all seems to be ok. Fingers crossed!
Thanks for the update Jim, yes I'm home today, currently waiting at Split airport.
There should be a few boxes of goodies waiting for me upon my return and I have a few more days off so she should be ready for an MOT pretty soon.
Before I left for hols I stripped and rebuilt the wiper motor and tried to fix the washer pump but the plastic cam that operates the pump from the wiper motor had split in two so not much I could do with that.
Re-greased and with an improved earth, the wipers now run about three times quicker than they did!
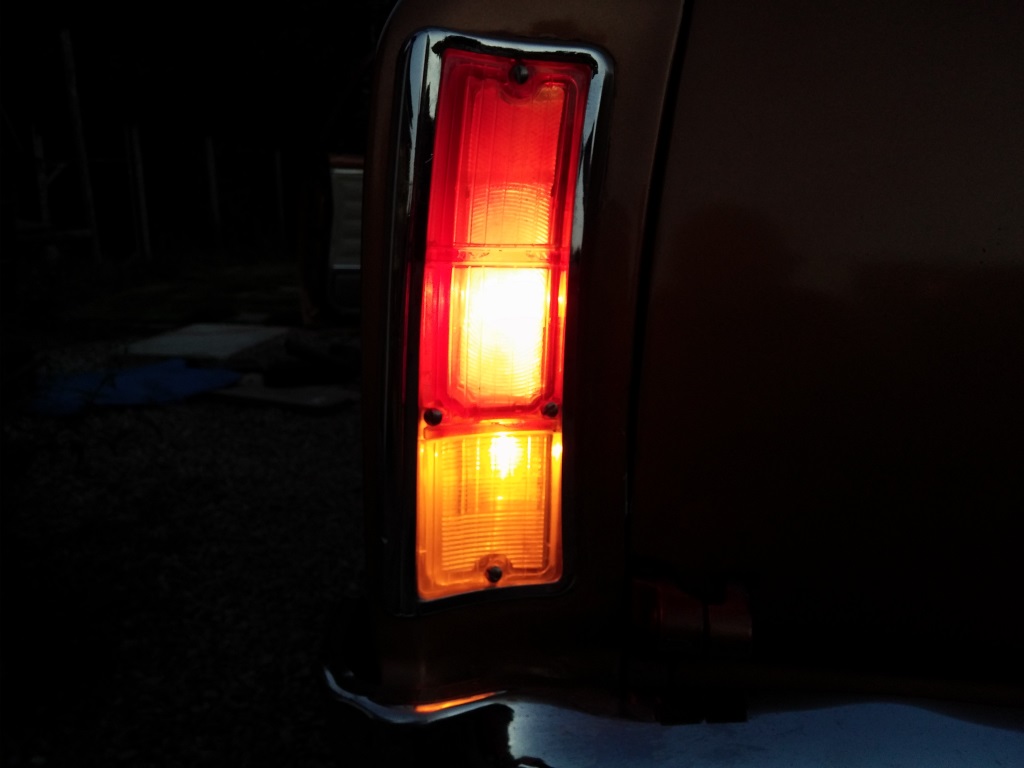
Before my holiday I had sorted the rear lights, taking the easy route for now of putting orange bulbs in the reversing lights and swapping the indicator feed to this bulb.
Brake lights remain on the same bulb as the tail lights but are now fed by a fresh wire direct from the brake light switch, thus bypassing the flasher relay that would otherwise give flashing red brake lights when indicating and braking.
This means I have no reversing lights for now, not the end of the world, but I am going to look into dual colour leds (amber / white) for the indicators to see if I can't reinstate them later.
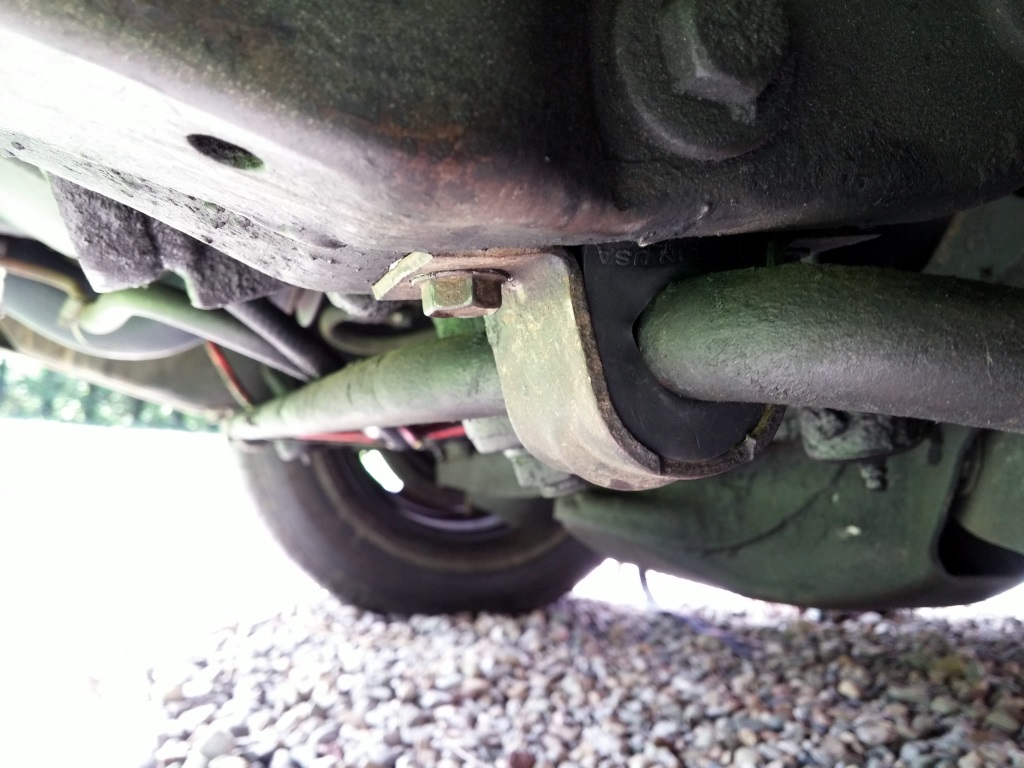
I also decided that the front anti-roll bar bushes had seen better days...
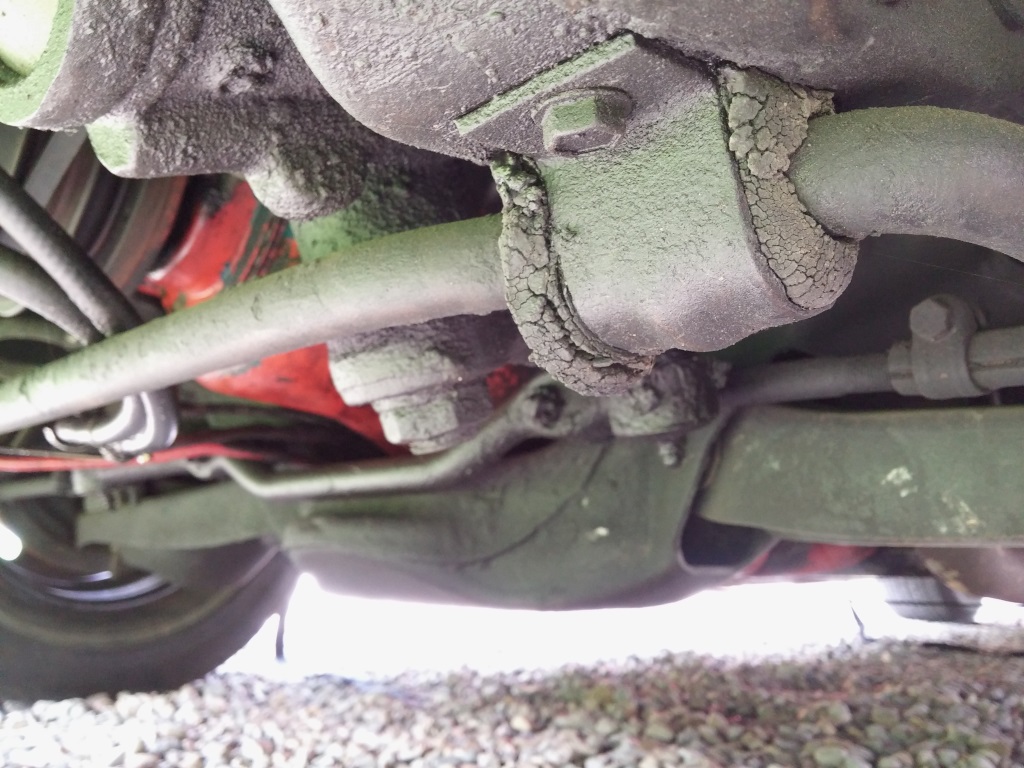
These were dirt-cheap from Rockauto and delivered very quickly too, bit of a difference!
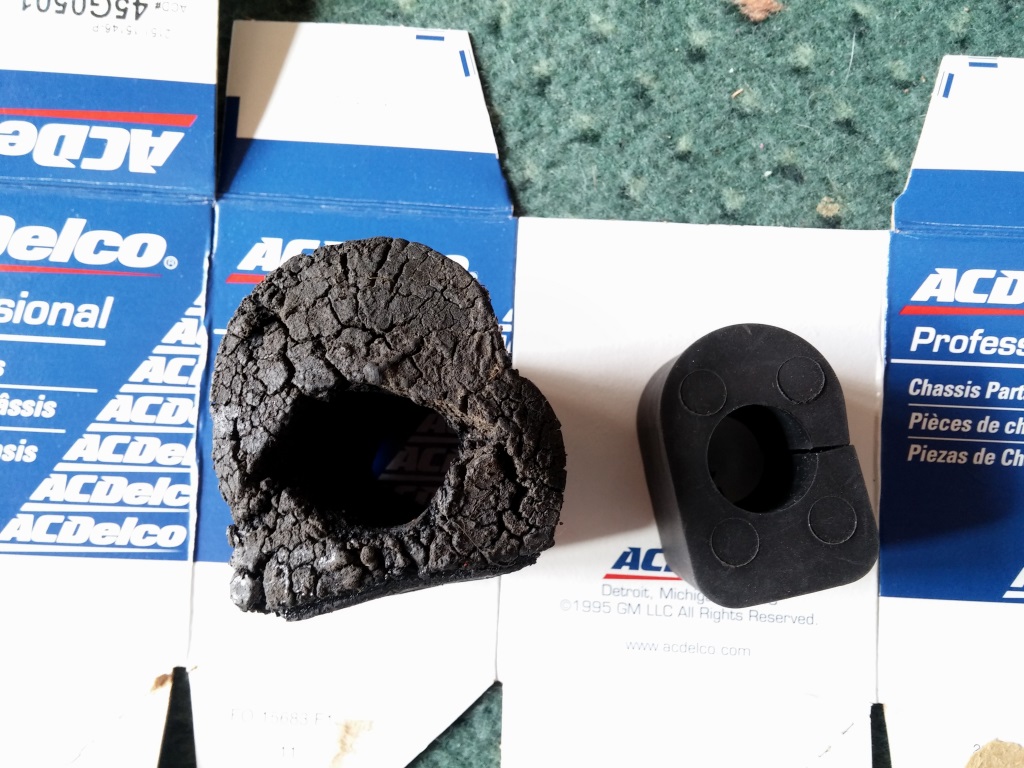
Easiest thing in the world to fit, didn't even need to jack the front up
I had become bored waiting for the correct windscreen washer parts I had ordered in early August, so made some washer jets from some thin brass tube with the end crimped to form an "8" shape and an electric pump I had knocking around. Does the job for MOT purposes and the proper stuff will probably arrive eventually....
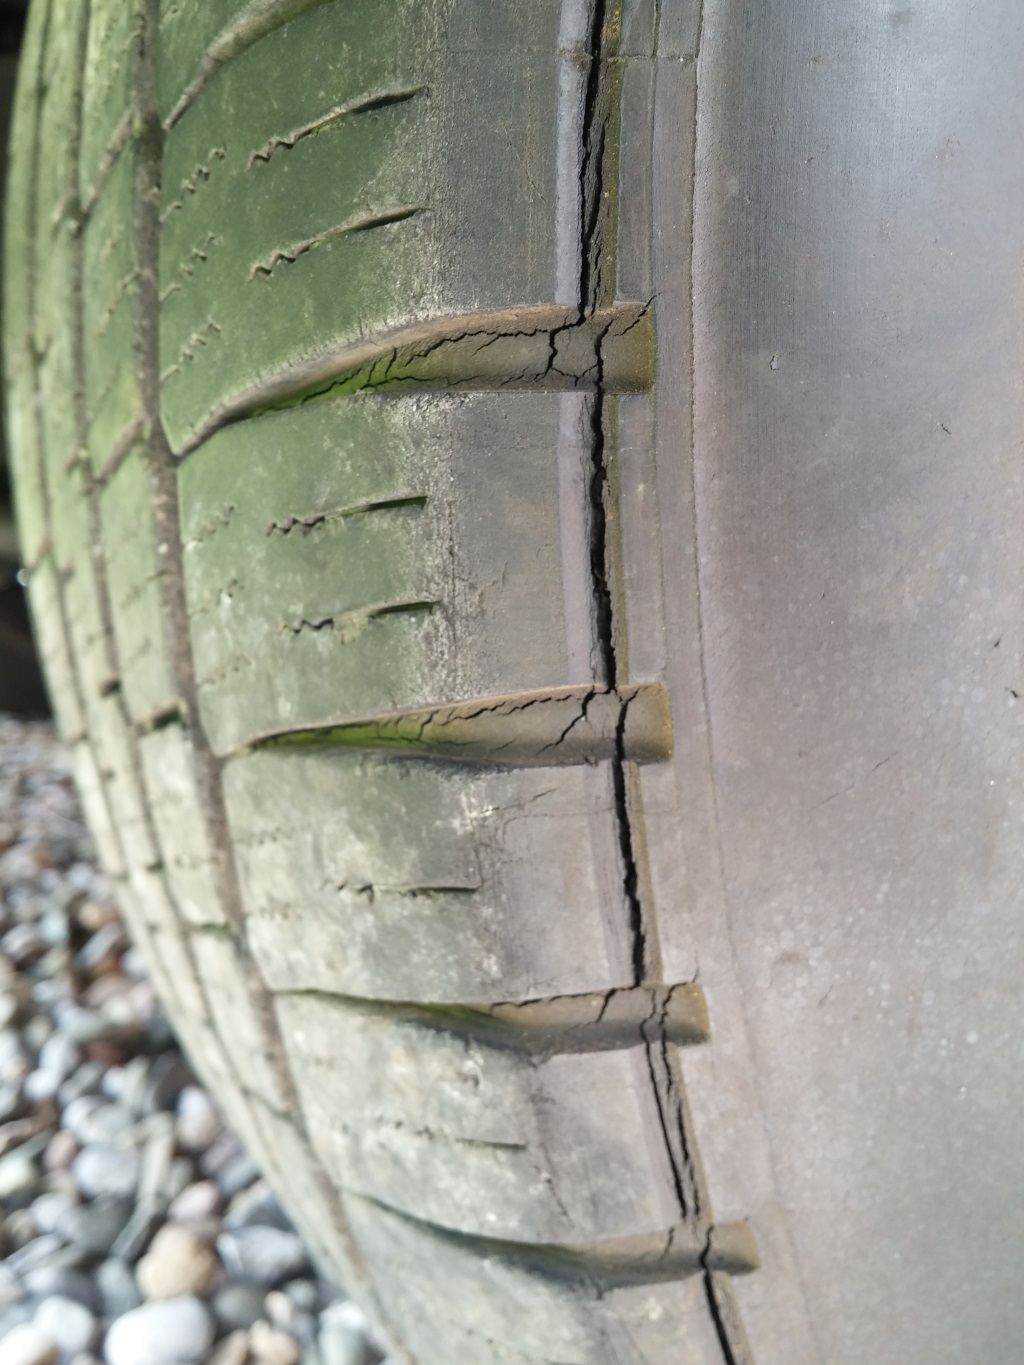
With working washers and legal lights I was impatient to get a definitive "to do" list so booked an MOT. I knew the front tyres would probably fail as they look like this
MOT was duly performed this morning and she failed.
Failure list:-
Front tyres
Battery insecure (I had forgotten to refit the clamp which was happily sitting on the workbench in the garage! )
)
Headlight aim low (I had forgotten to check the aim after fitting the new ones! )
)
So with a little less impatience on my part it would have been a very short list indeed!

Brake lights remain on the same bulb as the tail lights but are now fed by a fresh wire direct from the brake light switch, thus bypassing the flasher relay that would otherwise give flashing red brake lights when indicating and braking.
This means I have no reversing lights for now, not the end of the world, but I am going to look into dual colour leds (amber / white) for the indicators to see if I can't reinstate them later.
I also decided that the front anti-roll bar bushes had seen better days...
These were dirt-cheap from Rockauto and delivered very quickly too, bit of a difference!
Easiest thing in the world to fit, didn't even need to jack the front up
I had become bored waiting for the correct windscreen washer parts I had ordered in early August, so made some washer jets from some thin brass tube with the end crimped to form an "8" shape and an electric pump I had knocking around. Does the job for MOT purposes and the proper stuff will probably arrive eventually....
With working washers and legal lights I was impatient to get a definitive "to do" list so booked an MOT. I knew the front tyres would probably fail as they look like this
MOT was duly performed this morning and she failed.
Failure list:-
Front tyres
Battery insecure (I had forgotten to refit the clamp which was happily sitting on the workbench in the garage!
)Headlight aim low (I had forgotten to check the aim after fitting the new ones!
)So with a little less impatience on my part it would have been a very short list indeed!
I said:
Failure list:-
Front tyres
Battery insecure (I had forgotten to refit the clamp which was happily sitting on the workbench in the garage! )
Headlight aim low (I had forgotten to check the aim after fitting the new ones! )
It's been a slightly frustrating seven days waiting for new tyres to arrive, but I have finally had an email saying they've been delivered Front tyres
Battery insecure (I had forgotten to refit the clamp which was happily sitting on the workbench in the garage!
)Headlight aim low (I had forgotten to check the aim after fitting the new ones!
)The El Camino had 14" x 8" rallye rims on the front and 15" x 9" on the rear, and I felt this made the front look a little under-wheeled.
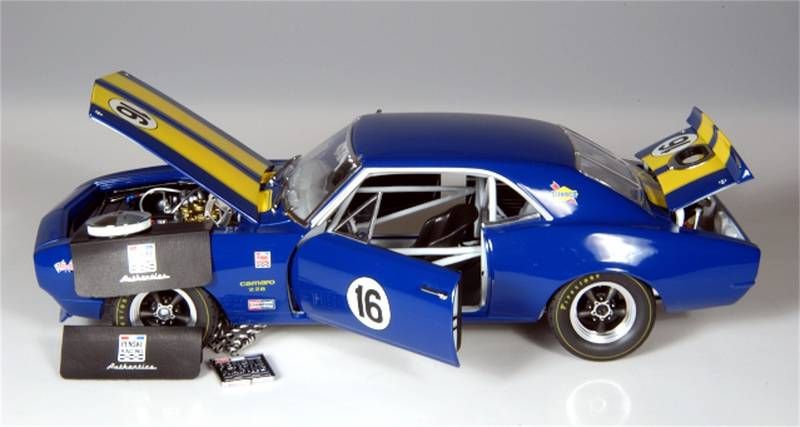
I have thus swapped the front rims with my Camaro project since it isn't going to be needing them any time soon. These are 15" x 8" in the same offset so should improve the looks without causing any clearance issues and have now been blasted and powder coated ready for the tyres...

I won't know until I go back to pick it up at 5pm!
Sadly there will be no cruising tonight, once I've got a ticket in my sticky mits, I need to send it and various other bits of paperwork off to DVLA and then wait some more for them to issue a registration....
I may not take the absolute most direct route back from the MOT station however!!
Sadly there will be no cruising tonight, once I've got a ticket in my sticky mits, I need to send it and various other bits of paperwork off to DVLA and then wait some more for them to issue a registration....
I may not take the absolute most direct route back from the MOT station however!!
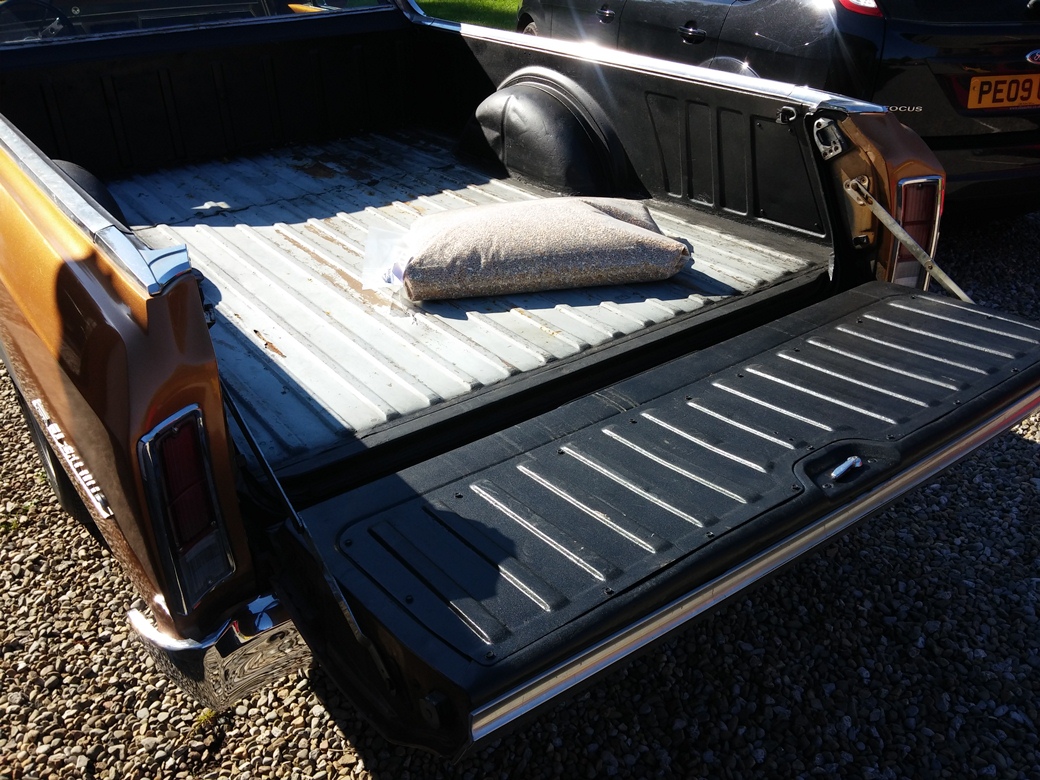
So fitted with cheap and nasty modern plates until my pressed metal black plates arrive, I finally ventured onto the road at the weekend!
First stop was to pick up some chicken food. Hmm, either I need a smaller pickup or we need to get more chickens!!
First impressions are good though, she drives well, quite soft on the suspension and a little more play in the steering than I would like, but comfortable, easy to drive and tracks straight and true with sufficient power to make its handling and braking abilities feel interesting!!
The rubber hose joining the fuel filler neck to the tank is rotten, so that is an urgent to-do item. I put a 5l can of fuel in for local pottering around and in doing so the joint at one end of it had a little weep, so I daren't fill the tank at the moment as that joint would be below the fuel level.
I figured 5l plus what was already in the tank (fumes to be fair) would be fine for the ten miles or so round trip I was planning on doing, so rather rashly I didn't take an additional can with me - something I regretted when she spluttered to a halt after about 8 miles! Fortunately Mrs 99t was willing(ish) to bring me another can full. 8 miles from 5l is a little less than I was expecting from a small block though!!
That's exactly what I thought as I set off on a ten mile round trip without any extra fuel!! 
The plugs are very black and sooty, but to be fair it has only shunted back and forth on choke for the last few months so that isn't too surprising. Does smell quite rich even once the choke shuts off though.
Once it has had a full service and the fuel pipe is fixed I'll probably take it to a place I've used before for a rolling road tune, they know their Chevy V8's and carb setups pretty well - think it will be a good investment...
Yes they are nice and Meccano-like to work on compared to modern stuff, no concealed clips or fancy fastenings, just good old nuts, bolts and screws - designed to be assembled by humans on the production line so access is generally decent without needing to be triple jointed or have reptilian hands!
Are you going to put a thread up on your dad's Dodge? Not enough DIY Yank threads on here IMHO (though some might disagree!!)
The Elk does have a couple of minor fluid leaks, one is ATF from the steering box. I'll add some seal restorer to the fluid to see if it helps as it leaks enough to leave some large drips when parked. Must say i have tried leak stop products before without success so not holding out great hopes...
The other leak is engine oil and is running down and forming an occasional drip on the bottom of the power cable between the battery and alternator. Not investigated to see where it is coming from yet, but it isn't much.
Following on from my earlier post:-
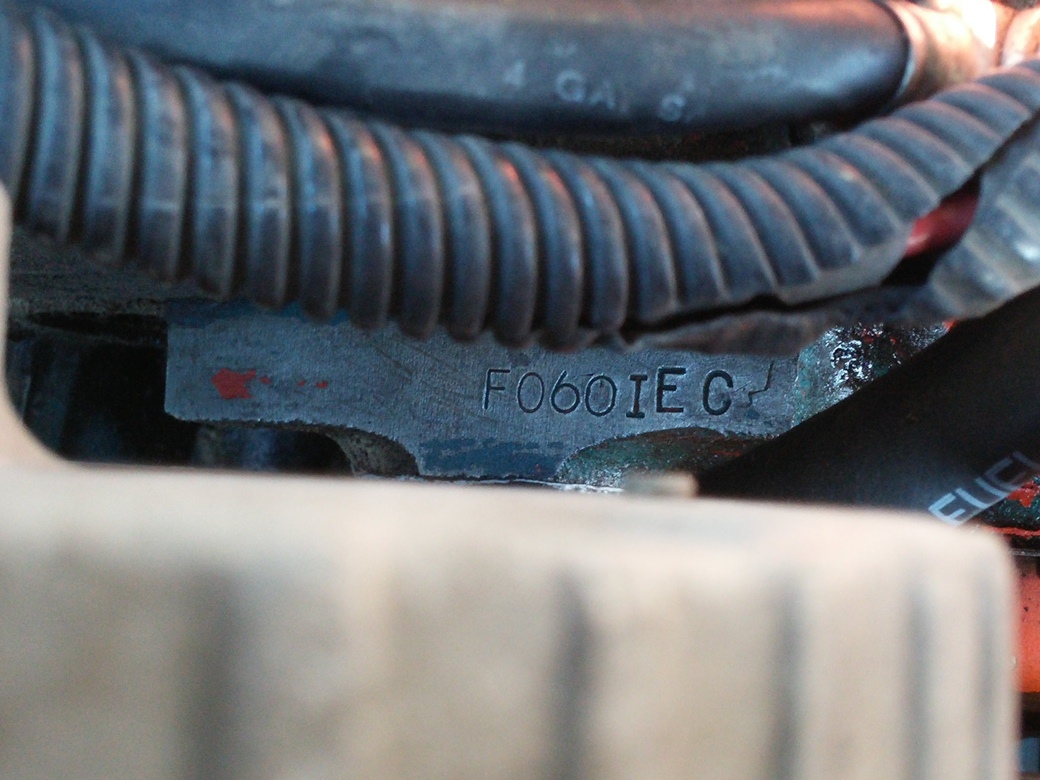
This should be read as F0601EC since "I" was often used instead of "1" in engine stampings for some reason.
This decodes as:
F - Flint engine plant
06 - June build date
01 - 1st day of the month engine build date
EC - 327 cubic inch, 275hp, powerglide transmission, A.I.R.
This all looks good as the 1st June engine build date ties in rather nicely with the vehicle assembly date of mid-June. The old girl is badged as a 327 and the badges are old and appear original, not repros. The transmission is undoubtedly a 2-speed Powerglide.
A.I.R stands for Air Injection Reactor system (smog pump as required for the first time in California in '66) as below and long since removed, thankfully!

So assuming the engine block has not been restamped at some point to make it appear original, then it might just be the original engine...
99t said:
Body trim tag
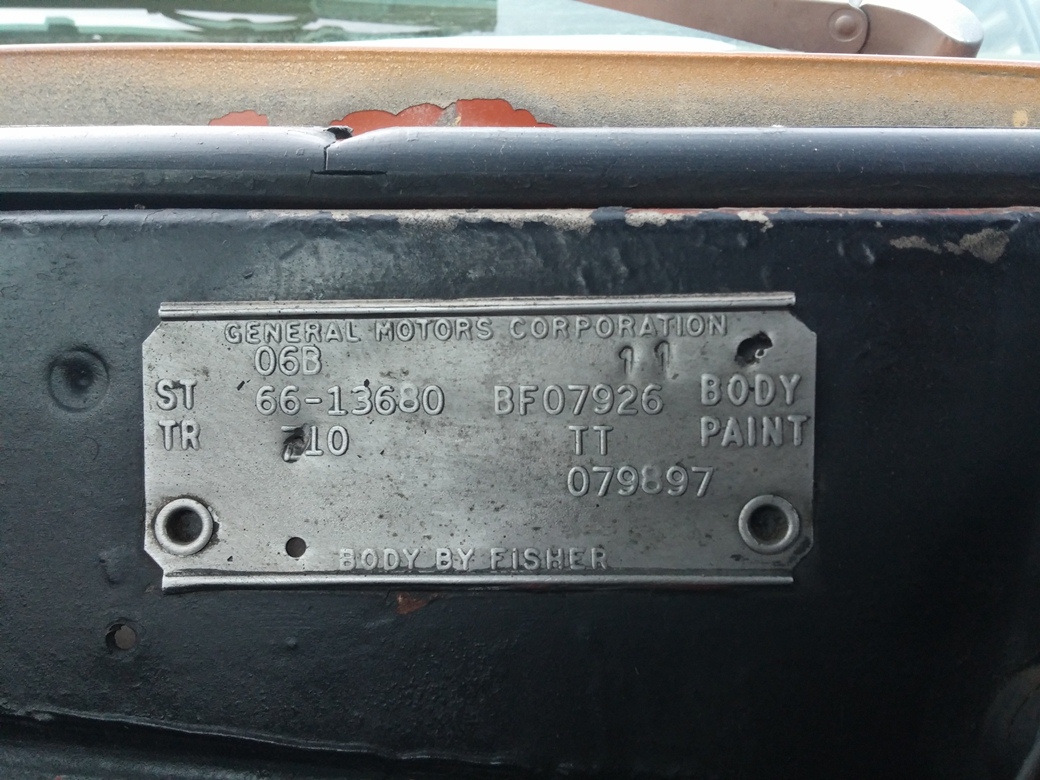
It decodes as follows:
06B - body manufactured second week of June, 1966
66-13680 - 1966 model, Malibu (base) series El Camino
BF07926 - Freemont, California plant and body production series number
710 - Medium Fawn interior, Light Fawn imitation leather (bench seat)
TT - Sandalwood Tan paint upper and lower (i.e. not two tone)
079897 - body broadcast sheet number
I finally got around to finding and decoding the engine stampIt decodes as follows:
06B - body manufactured second week of June, 1966
66-13680 - 1966 model, Malibu (base) series El Camino
BF07926 - Freemont, California plant and body production series number
710 - Medium Fawn interior, Light Fawn imitation leather (bench seat)
TT - Sandalwood Tan paint upper and lower (i.e. not two tone)
079897 - body broadcast sheet number
This should be read as F0601EC since "I" was often used instead of "1" in engine stampings for some reason.
This decodes as:
F - Flint engine plant
06 - June build date
01 - 1st day of the month engine build date
EC - 327 cubic inch, 275hp, powerglide transmission, A.I.R.
This all looks good as the 1st June engine build date ties in rather nicely with the vehicle assembly date of mid-June. The old girl is badged as a 327 and the badges are old and appear original, not repros. The transmission is undoubtedly a 2-speed Powerglide.
A.I.R stands for Air Injection Reactor system (smog pump as required for the first time in California in '66) as below and long since removed, thankfully!
So assuming the engine block has not been restamped at some point to make it appear original, then it might just be the original engine...
SPT28 said:
Always nice to find out.
Any immediate plans now you've lived with it for a bit or is tinkering and tidying the way forward for now?
Very much tinkering at the moment! I've got a list of things I want to do to make the old girl easy to live with and enjoyable to drive - not that she's in any way unpleasant to drive, just fixing minor annoyances, and tweaking things to personal taste really.Any immediate plans now you've lived with it for a bit or is tinkering and tidying the way forward for now?
For example:
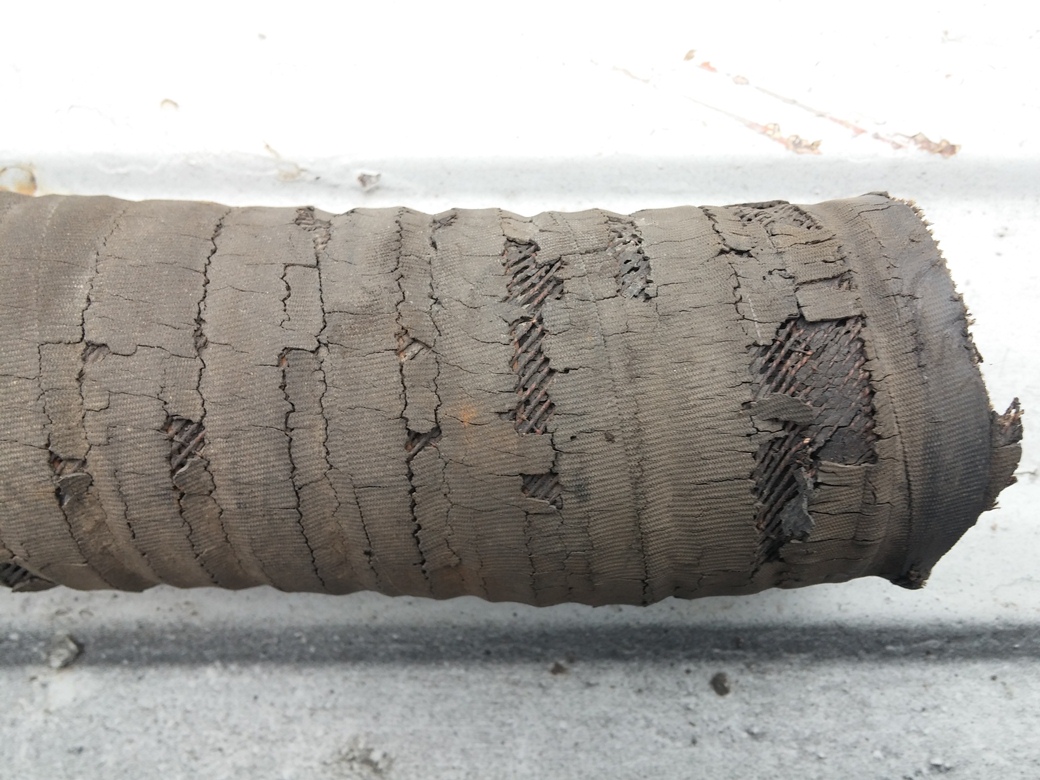
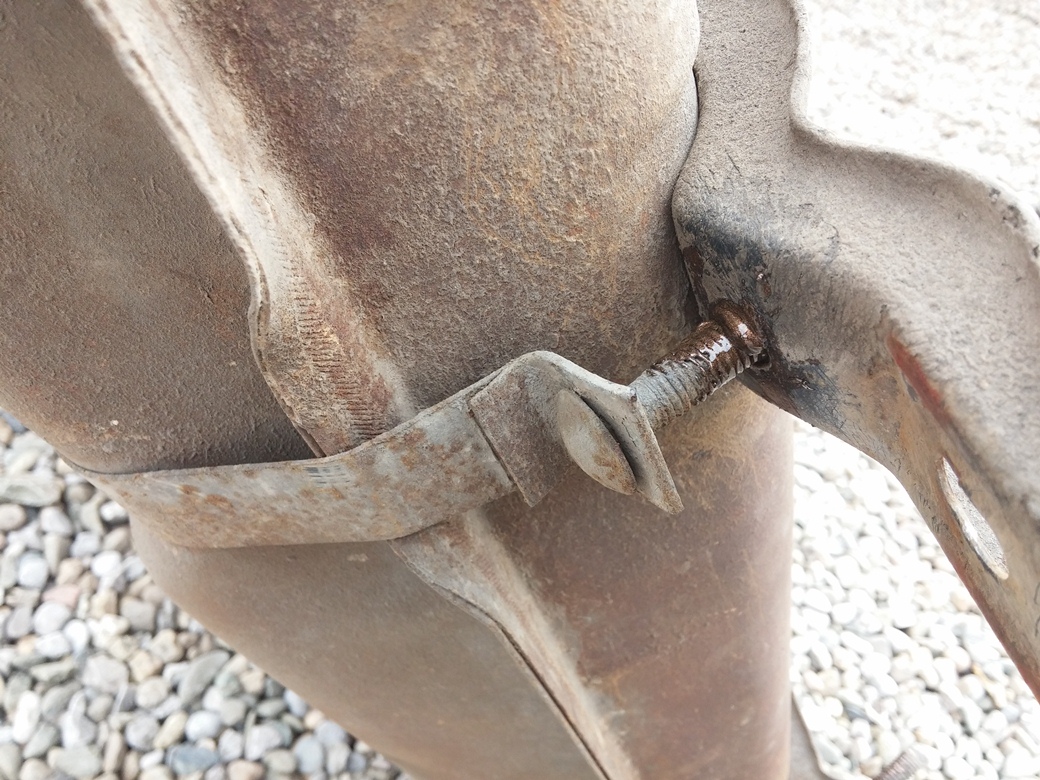
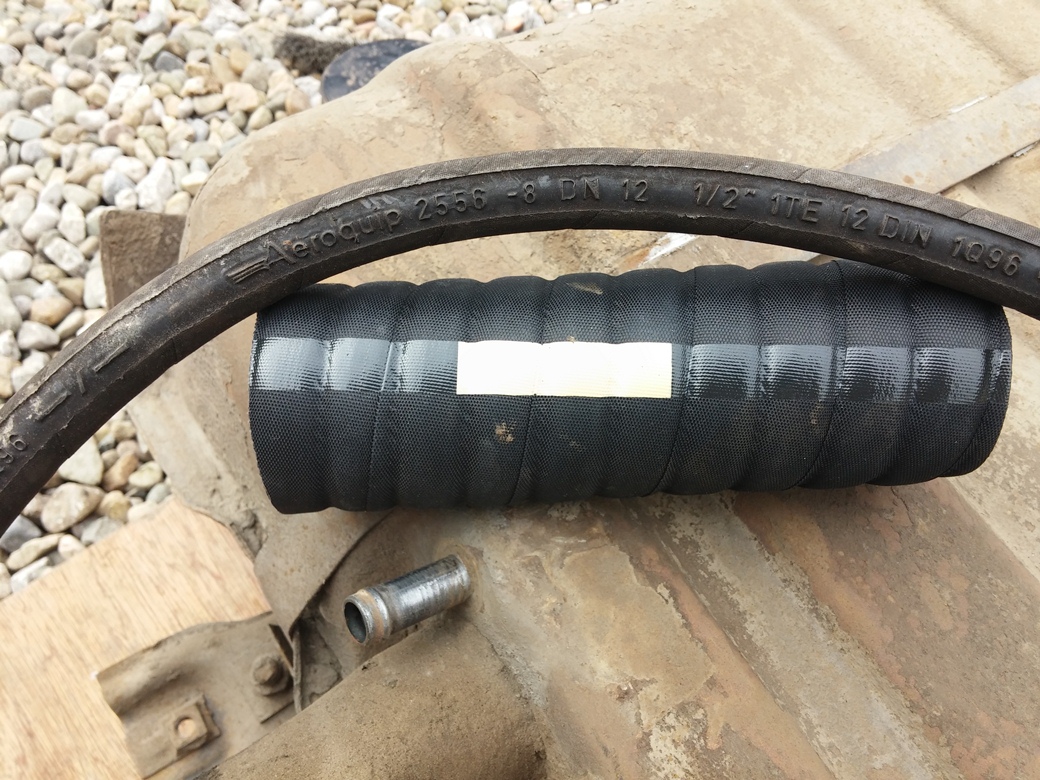
As you can see the fuel hose between the filler neck and tank wasn't in the best of shape and I harboured suspicions that the red breather line above it wasn't proper fuel hose either
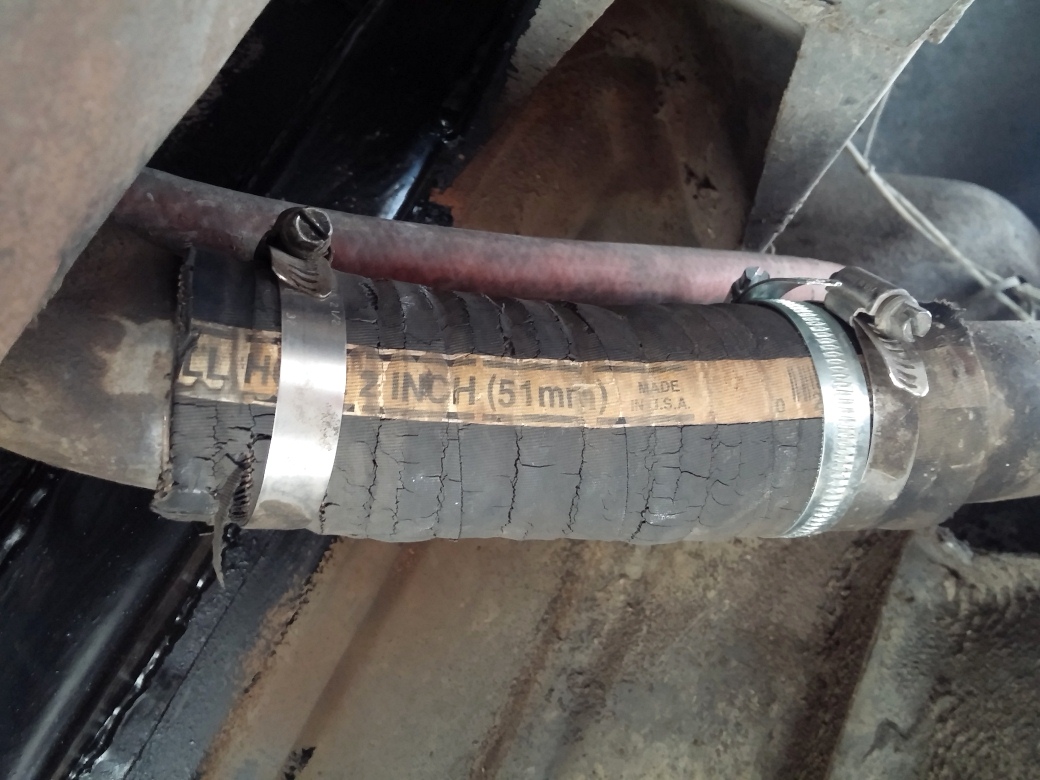
Once removed it looked even worse on the other side!
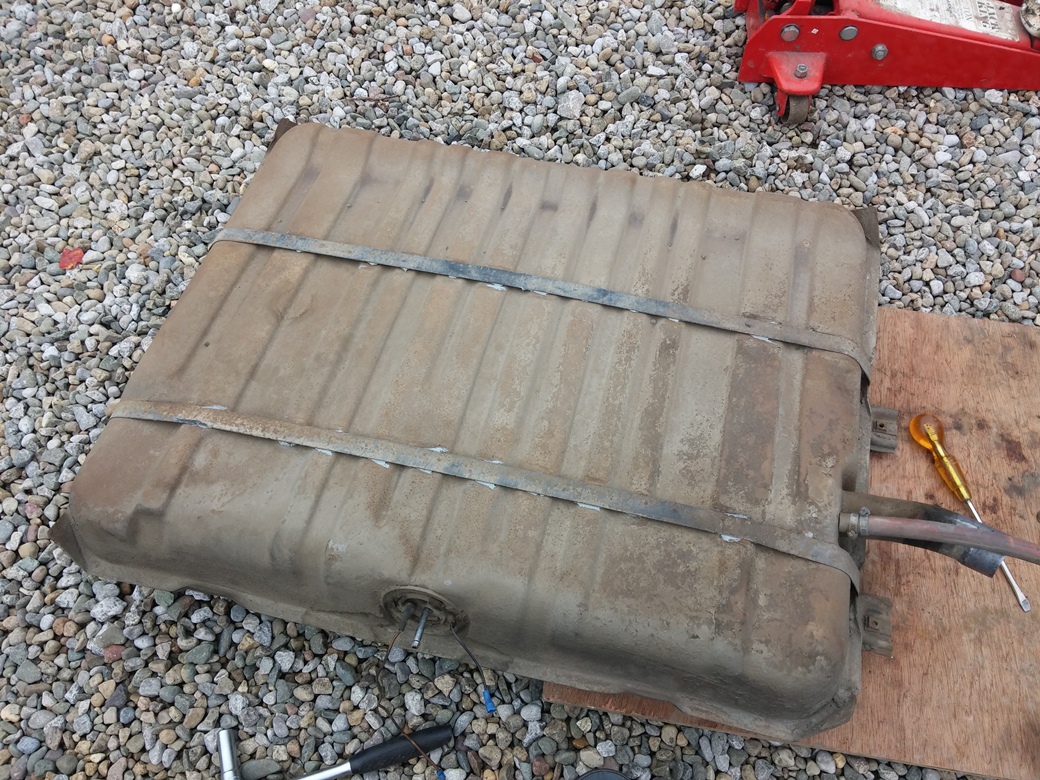
I wanted to drop the tank too, in order to try to resolve an annoying resonance from the tank straps when revving the engine.
Tank removal is dead easy on one of these, no need to jack up, just four bolts, 3 hoses and two electrical connectors, none of which put up any fight
Tank removed I loosened the strap tensioning nuts a bit and then copper-slipped them to death
Whilst the straps were loose I added some rubberised seam sealant between the metal of the straps and the metal of the tank, tightened the straps back down and removed the excess that oozed out.
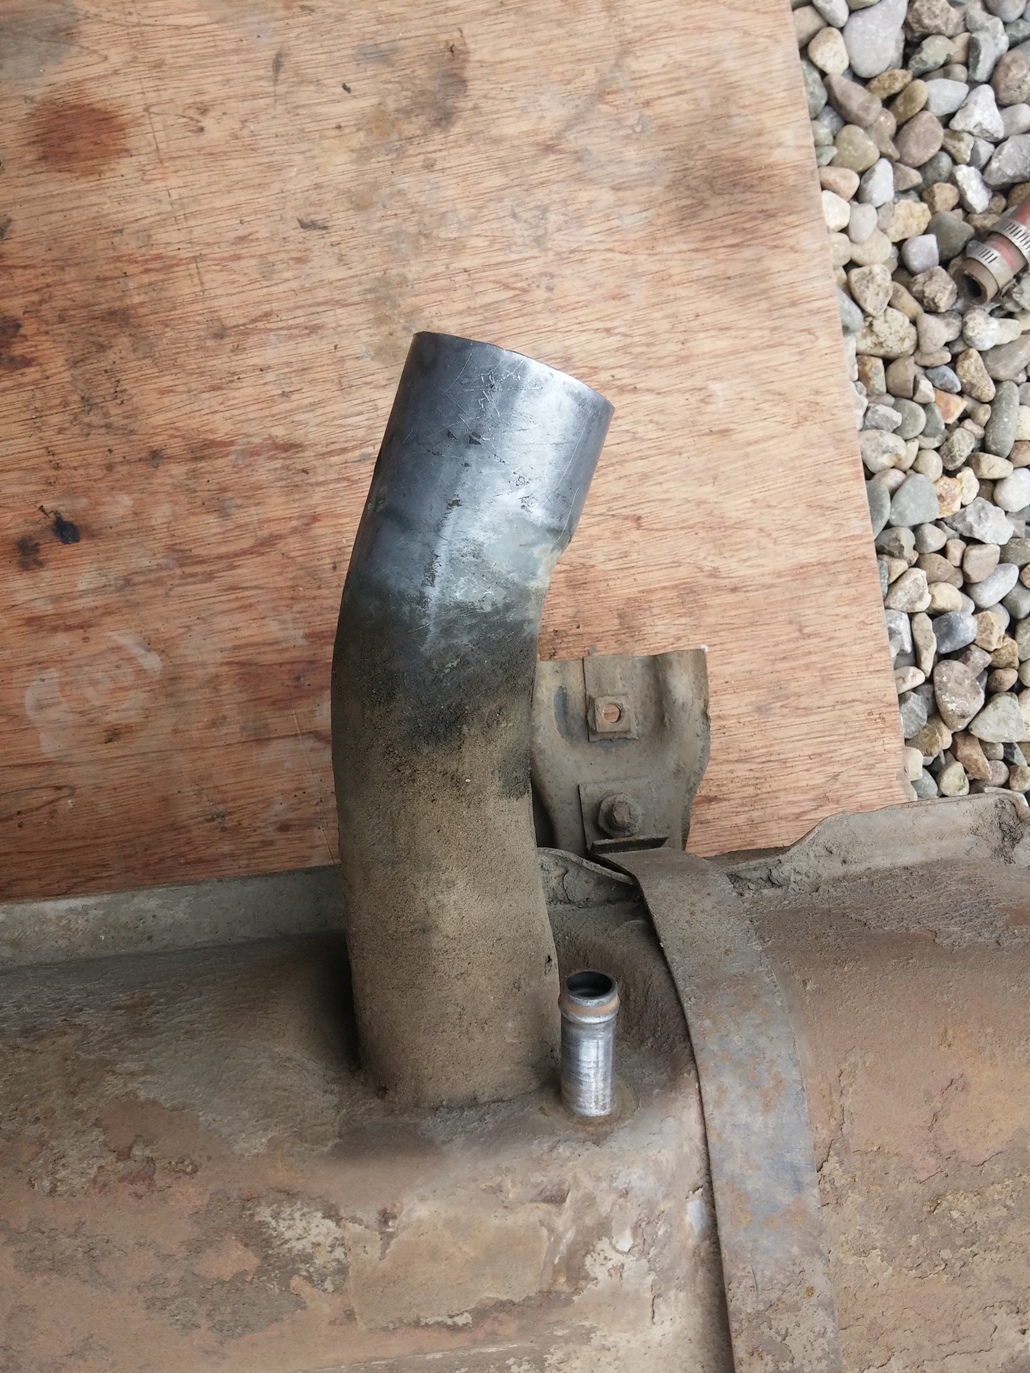
Nice clean connections on the tank, this is as they were, I've not cleaned them up at all...
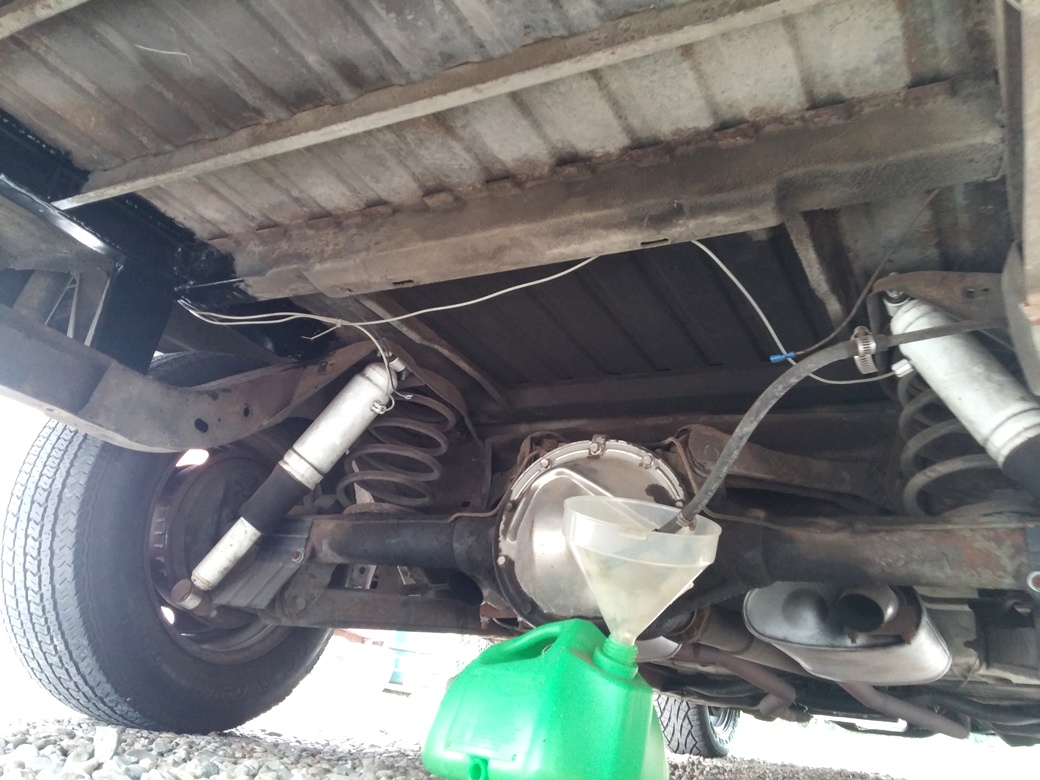
The big space that the tank had vacated - touch of surface rust but nothing much really. The fresh black paint is the new bed support Jim put in before I collected it, and a nice neat job it is too
New filler hose ready to fit, and found some proper fuel line to replace that red breather with - it was heater hose and was utterly destroyed internally.
All back together easily and I put a tentative £30 of fuel in whilst checking for leaks. All good and the annoying rattle / resonance from the tank straps has gone too. As a bonus, now it has more than 5l of fuel in the fuel gauge works too!
Oh eBay, you will be my undoing!
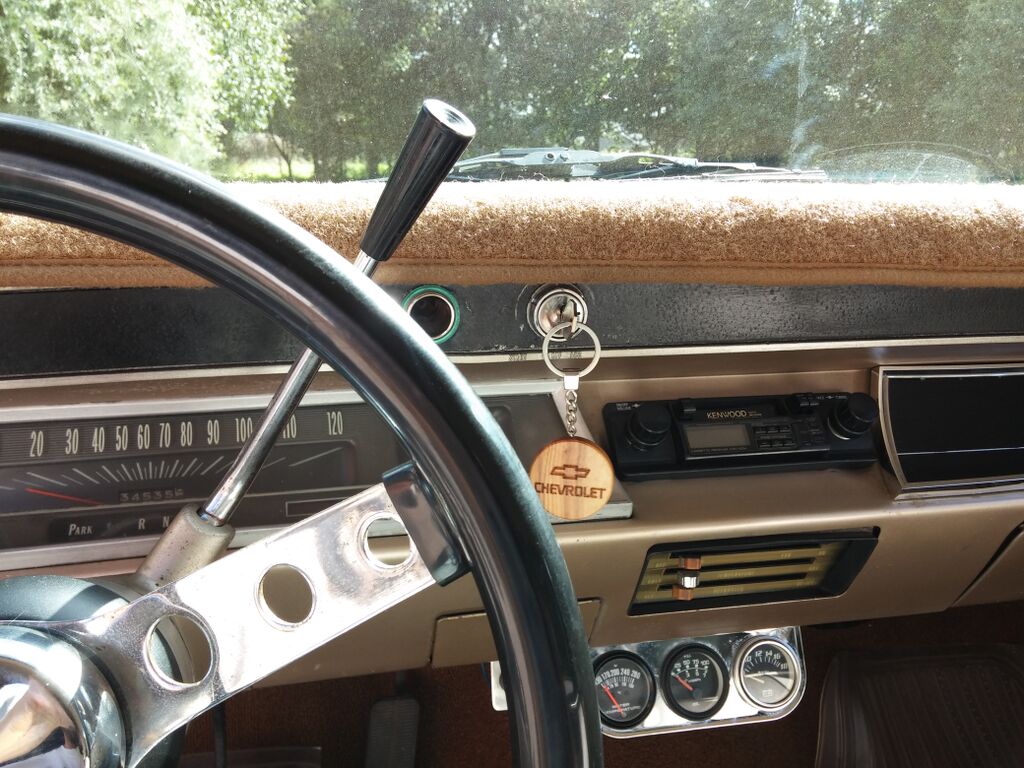
Just spent a totally unjustifiable amount of money on a 1966 AM radio that probably doesn't work! Granted a fair chunk of the outlay is shipping and duty...


It will look so much better in the middle of the dash than the (perfectly functional) 1990's slab of black plastic currently fitted.
I may consider a hidden ICE install at some point but for now V8 + fairly loud exhaust means "tunes" are not a high priority!
Just spent a totally unjustifiable amount of money on a 1966 AM radio that probably doesn't work! Granted a fair chunk of the outlay is shipping and duty...
It will look so much better in the middle of the dash than the (perfectly functional) 1990's slab of black plastic currently fitted.
I may consider a hidden ICE install at some point but for now V8 + fairly loud exhaust means "tunes" are not a high priority!
jagracer said:
I don't want to be telling you anything you may already know but there are a few companies (I've found) in the States that supply the old radios but brand new if you get my drift, with FM and AM bands, they are an unjustifiable amount of money at around $5-600. The original one in my Bel Air doesn't work although I think there are places in the UK that can remanufacture the insides to work with FM. My car also has a modern FM/CD slab stuck under the dash which sounds like it's connected to the original speakers and sounds awful and anyway I prefer listening to the engine.
Cheers, yes I had looked at those and you're right the remanufactured ones are an even more unjustifiable (less justifiable?) price, especially given the acoustic environment concerned. This is a purely aesthetic purchase, I'll be happy if it lights up!! 

I discovered yesterday that the bed will hold three wheelie bins laying down (two lengthways and one across) with room to spare, which is nice and saved me dragging the buggers up the drive... 
...and no our drive isn't so long that dragging them is really an issue, and no I didn't make a special trip to find out, I was "just passing"!!
This morning was the first commute attempt and as I'm typing this from my desk let's say phase one was a success. A nice trouble-free run, 28 miles of country lanes, motorway and stop-start city traffic. Never missed a beat.
Couple of minor issues to look at:
The heater is rubbish. Not sure a thermostat is currently fitted as all coolant hoses seem to warm up simultaneously. The air comes through tepid fairly quickly but then stays tepid.
The speedometer was very noisy and bouncy for the first 20 miles or so, finally settled down so maybe just needs lubricating or perhaps a new cable?
Looking forward to the journey home, she drives really nicely.
Gassing Station | Readers' Cars | Top of Page | What's New | My Stuff