My Very Cheap Mini One D Dooer Upper...
Discussion


Hrimfaxi said:
Another bookmarker here 
I really wish I had the mechanical know-how, that goes beyond general servicing and bits and bobs, to do something like this. Great thread!
It's nowhere near as hard as you think to do this sort of thing. I used to be a mechanic so it's second nature to me but my Brother is equally as capable and he's a Police Officer. He's watched me work on cars over the years, realised it's simple and just got on with it himself. I really wish I had the mechanical know-how, that goes beyond general servicing and bits and bobs, to do something like this. Great thread!
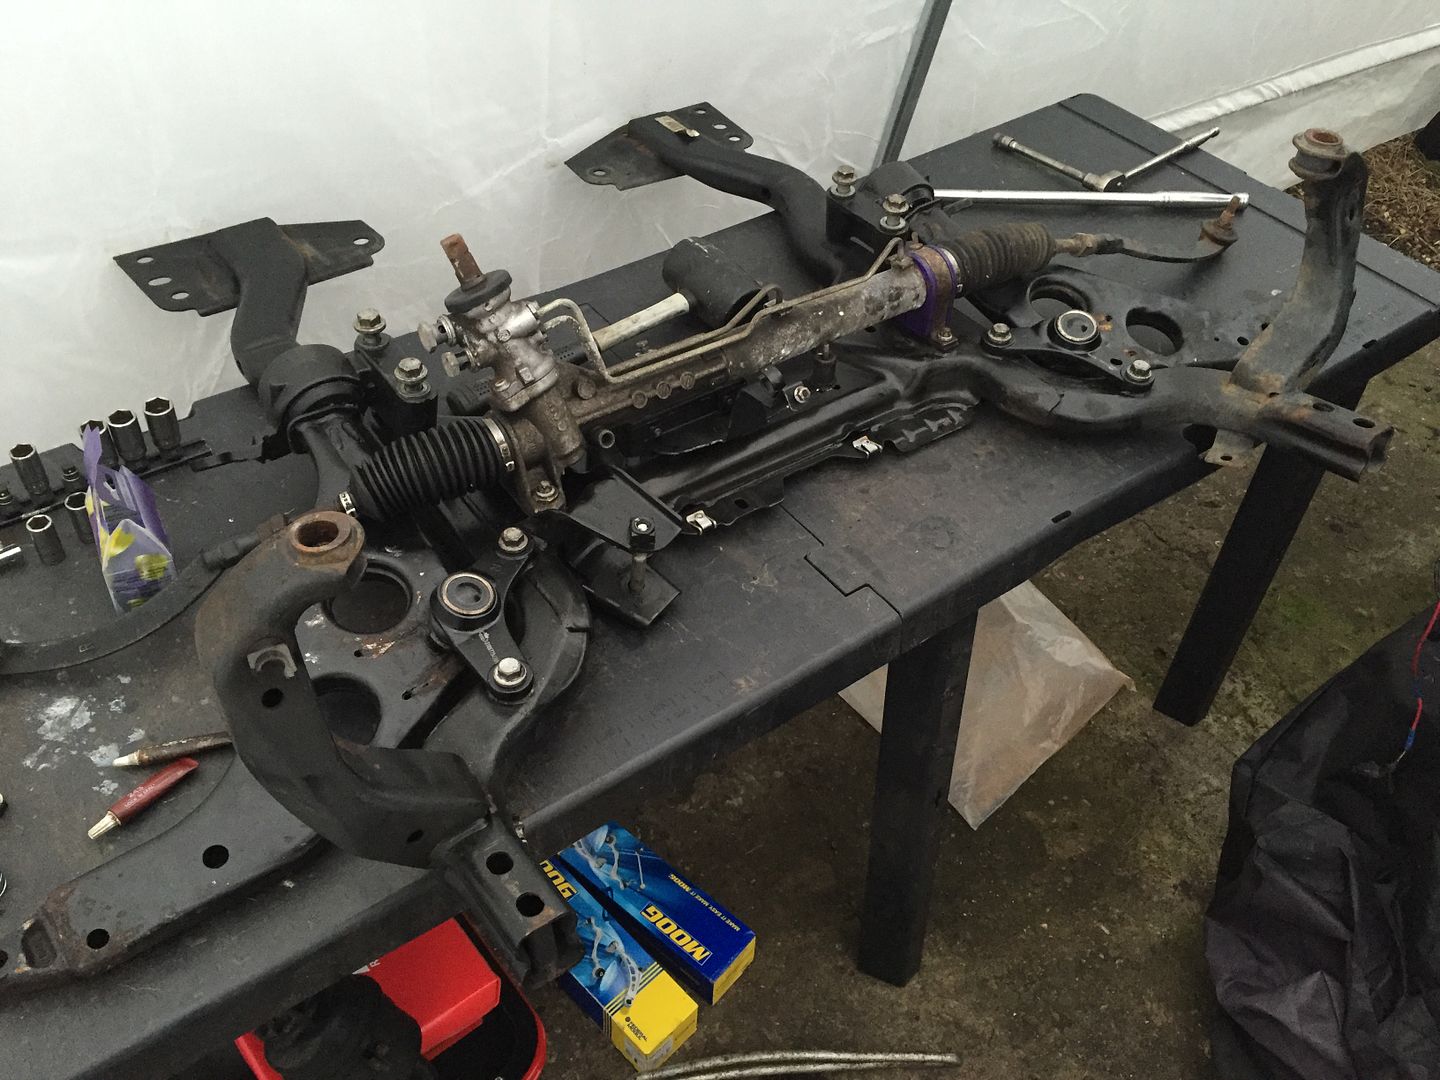
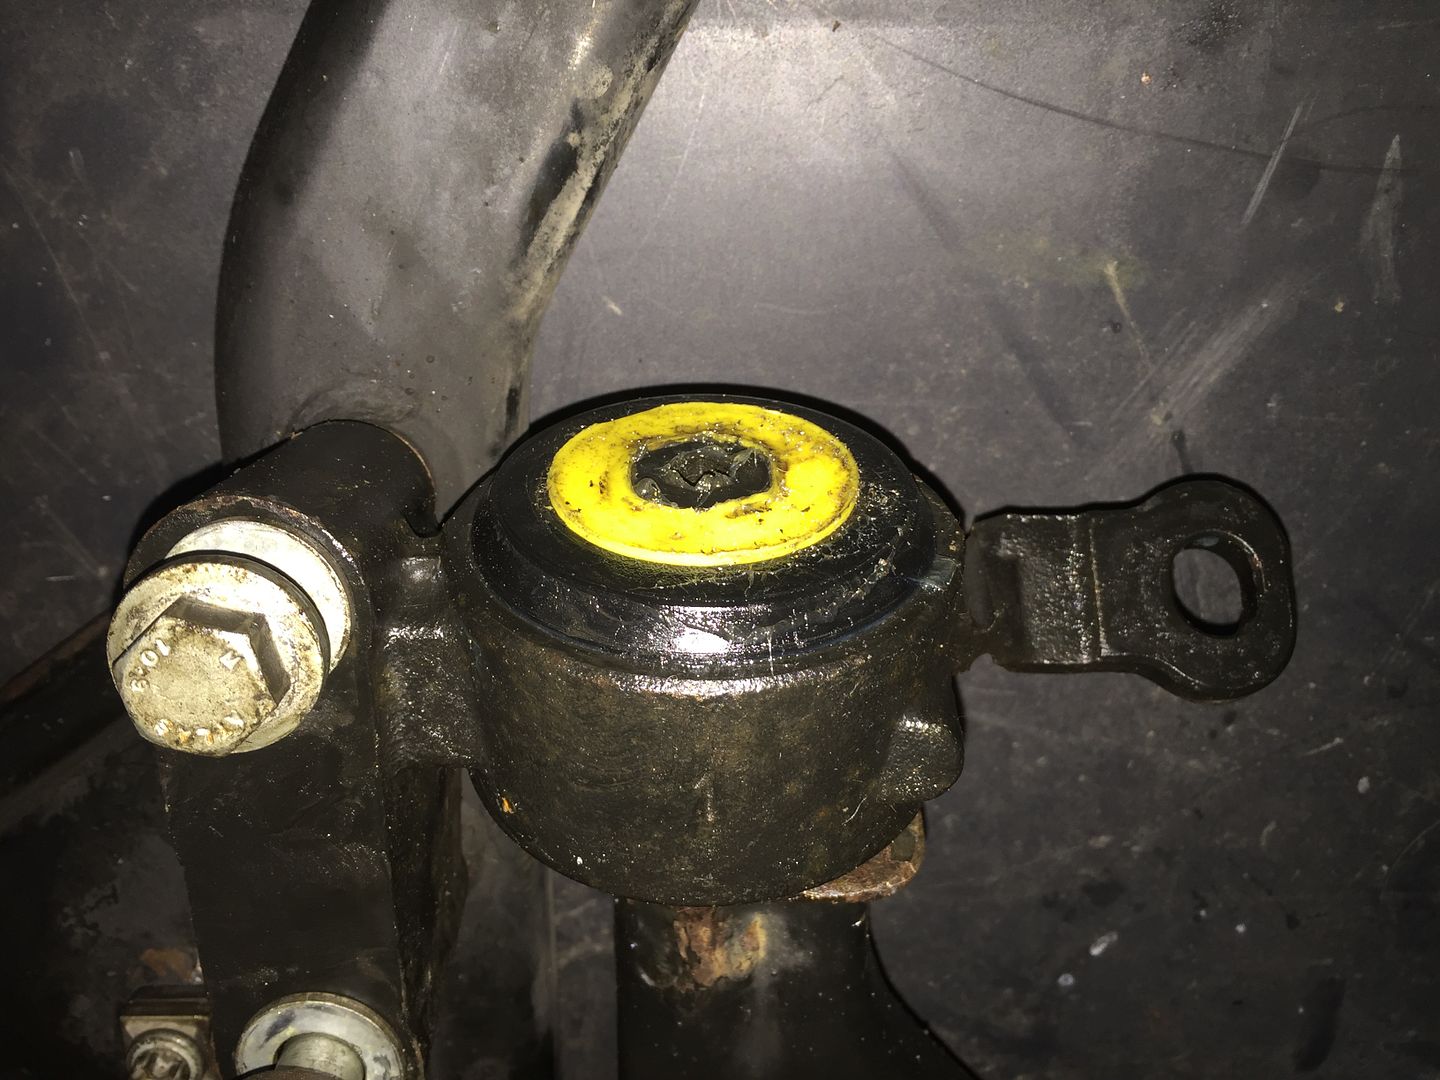
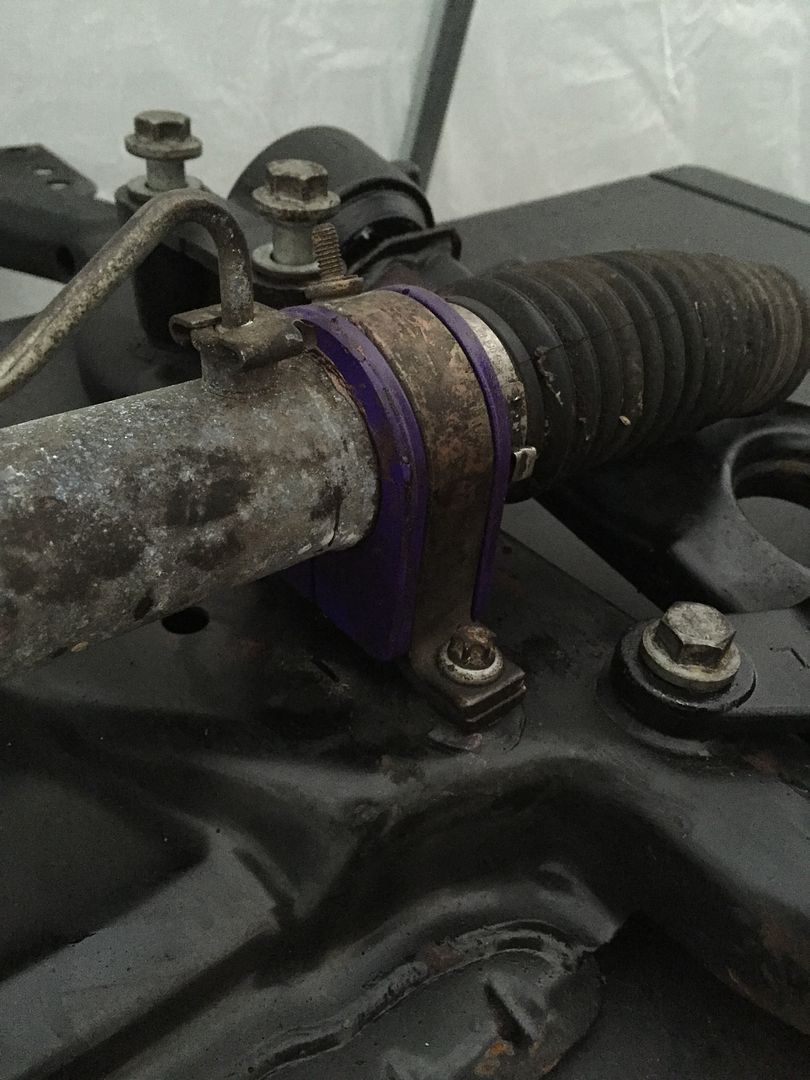
I managed to get out for an hour this afternoon while my Mum took my Daughter out. In that time I was able to get the subframe back together so it's almost ready to be bolted back on. I just need to clean up the PAS pipes that came off the old steering rack as they're covered in a thick layer of grease and then get them bolted up too. I could of gotten more done but it was the work Xmas party last night so I'm a bit delicate today hehe! See the very boring pics below of a reassembled subframe with poly bushes installed 


Due to utter laziness I my part I've done sod all to the car recently. On Sunday I figured I need to get out there and at least do something for an hour or so.
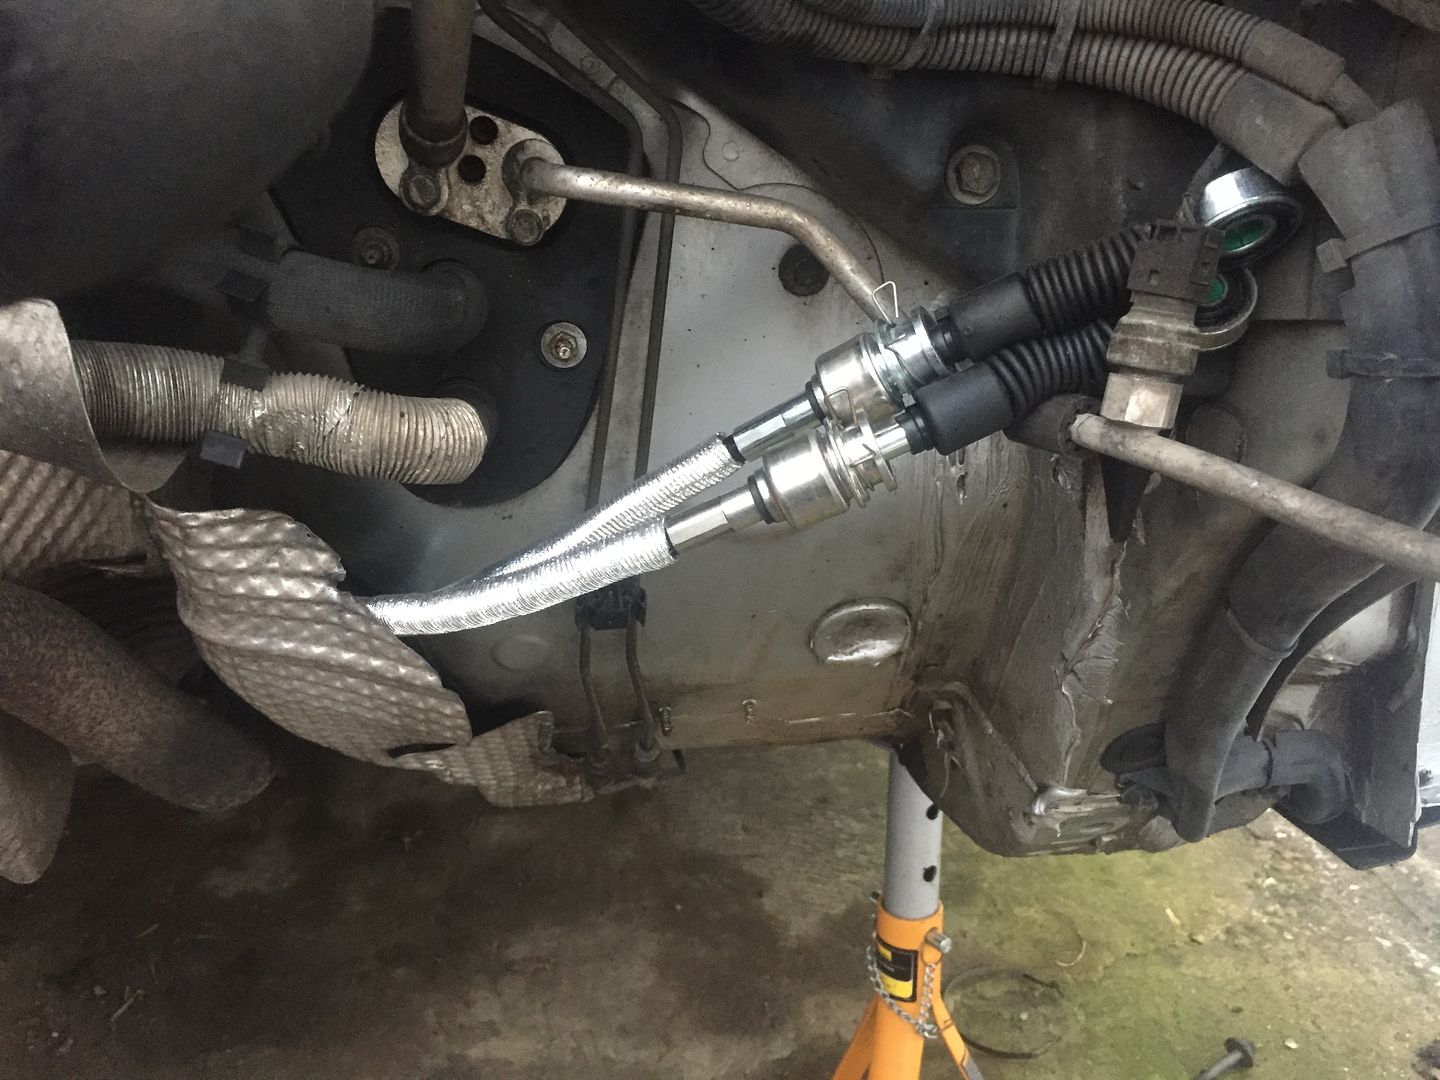
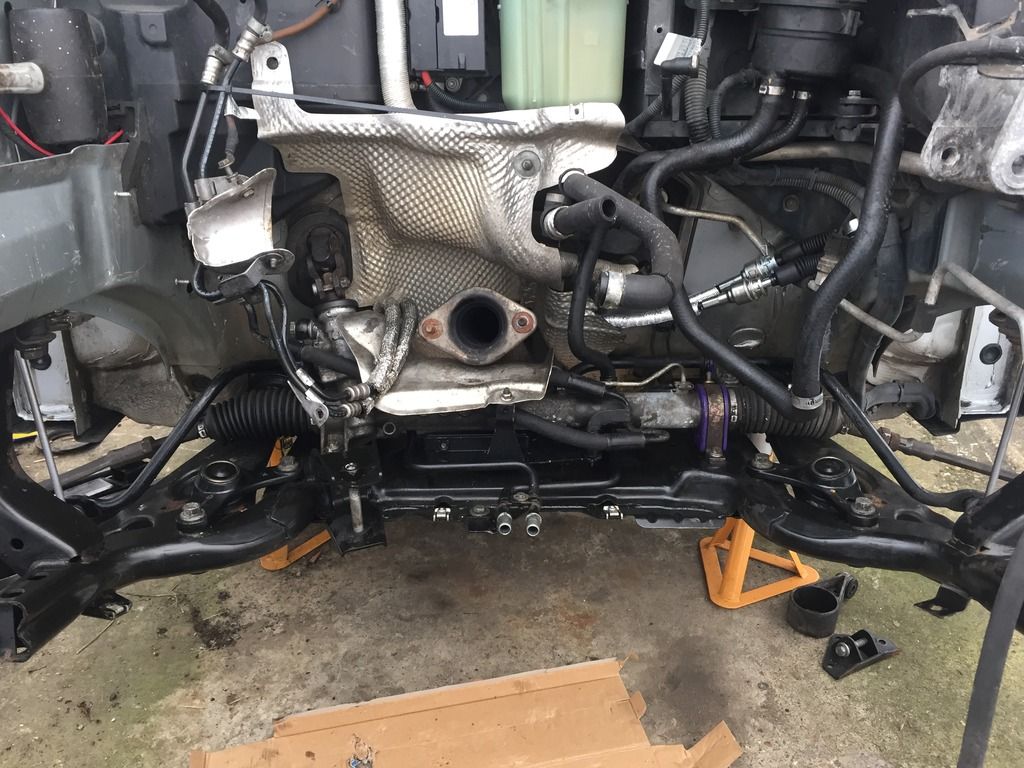
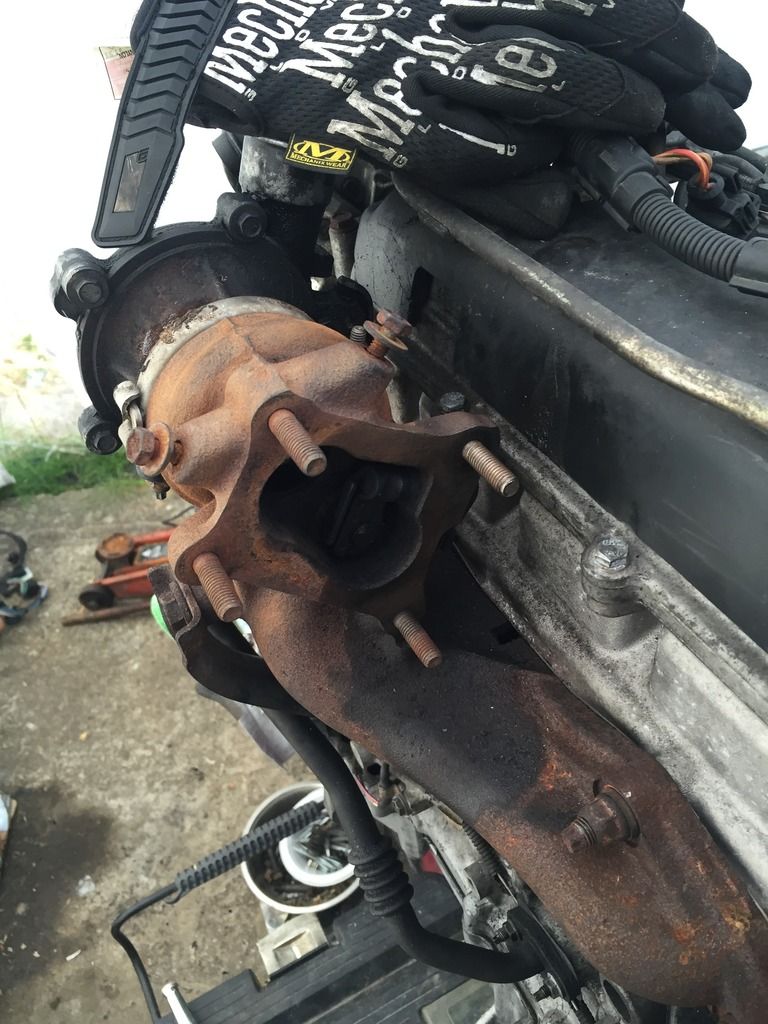
One thing that was very noticeable when driving the Mini home from collecting it was how stiff the gearchange was. I was really having to put a lot of effort in and even use both hand to get it into reverse. Once the engine was out I very quickly realised that the shifter cables were well and truly knackered. I was spraying WD40 down the conduits and brown rusty cack was flowing back out. I ordered 2 new (bloody expensive) cables from Mini and the put them in the car and forgot about them. I decided this was the job for Sunday and set about dropping the exhaust, the exhaust heat shield and finally the shifter box. It was surprisingly simple to get out (the lack of engine and subframe probably helped!) and if it hadn't been for the big piece of dirt that fell in my eye while I was under the car it would of been even simpler!
The cables unclipped from the box nice and easily and the new ones went back in even easier. Refitting was the reverse of removal (I could work for Haynes!) and everything was back together. Annoyingly I forgot to take many pictures so these will have to do
The shifter box with old cables removed. You'll notice the other on on the floor which had a short shifter fitted. Annoyingly the fittings are smaller on the diesel so the short shifter wouldn't fit
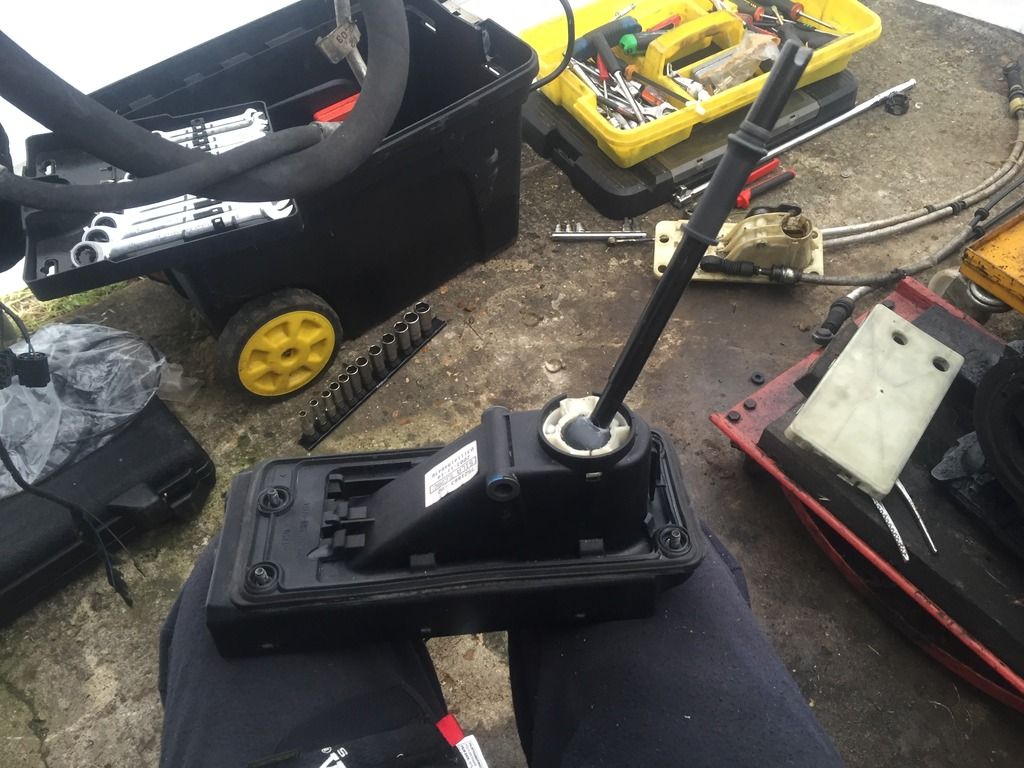
The cables all fitted up and ready for some nice smooth gear shifts.

The Don of Croy said:
It's the other 5% that'll kill you or ruin the finished project.
That's a good point actually. In my home spannering career I've had 2 cars fall on me and I've managed to knacker one other myself! Not bad statistics though considering I've owned over 40 cars in the last 13 years Sillyhatday said:
Good show. Just commenting to bookmark really.
Are these quite frugal on fuel? Would make sense if your using it as a daily in future
As far as I'm aware they're not too bad. They're woefully underpowered though with their raging 75bhp under the bonnet so a degree of heavy footedness is required a lot of the time, which isn't going to help it sip the fuel. Are these quite frugal on fuel? Would make sense if your using it as a daily in future
The plan was to get the subframe bolted back on this weekend so the car can be dropped back onto its wheels. Once that's done I can start replacing the gaskets on the engine ready for it to be bolted back in. Unfortunately I found out today that I'm going to be working this Saturday so that's put an end to that idea. I've got a family meal on Sunday so won't get any time this weekend
Today I ordered what I think are the last few bits I'll need to get the car up and running. I've got a few bits to make it look nice at the same time too I've also got a front mount intercooler sitting in my shed that was originally bought for my Mk1 Golf G60 project that never quite happened. I'm in two minds whether to fit it to the Mini while I'm at it so if I do decide to up the power at all it's one less thing to do.
Today I ordered what I think are the last few bits I'll need to get the car up and running. I've got a few bits to make it look nice at the same time too
I've also got a front mount intercooler sitting in my shed that was originally bought for my Mk1 Golf G60 project that never quite happened. I'm in two minds whether to fit it to the Mini while I'm at it so if I do decide to up the power at all it's one less thing to do.cheddar said:
I've already done a bit of looking around at remaps Definitely something to be done once it's all up and running again!jamiebae said:
This is one of the cars where I wouldn't have any concern remapping it - the transmission and other bits are lifter from the Cooper S (hence the 6 speed box) as the chocolate Rover gearbox in the One and Cooper couldn't take the torque from the Toyota sewing machine engine.
By the time I'm done with this there should be no reason why it can't handle any more power!Nothing car related today I'm afraid, but I have spent an hour out there today pinning the marquee down with another 12 sandbags! The bloody thing was trying to take off earlier so a quick trip to B&Q for some ballast and plenty of heavy lifting later and it's pinned down again and not going anywhere (fingers crossed!)
Evening ladies and gents,
Once again I must apologise for the long gap between updates. Life has just been getting in the way of me doing anything to the car recently. Thankfully though I had this week off work which meant I had 3 free days in that week to work on the Mini! YAY!
So, at the last (car related) update I'd managed to fit the new shifter cables. Exciting! My aim for this week was to have the car dropped back onto its wheels ready for the engine to go back in (once I've replaced all its gaskets).
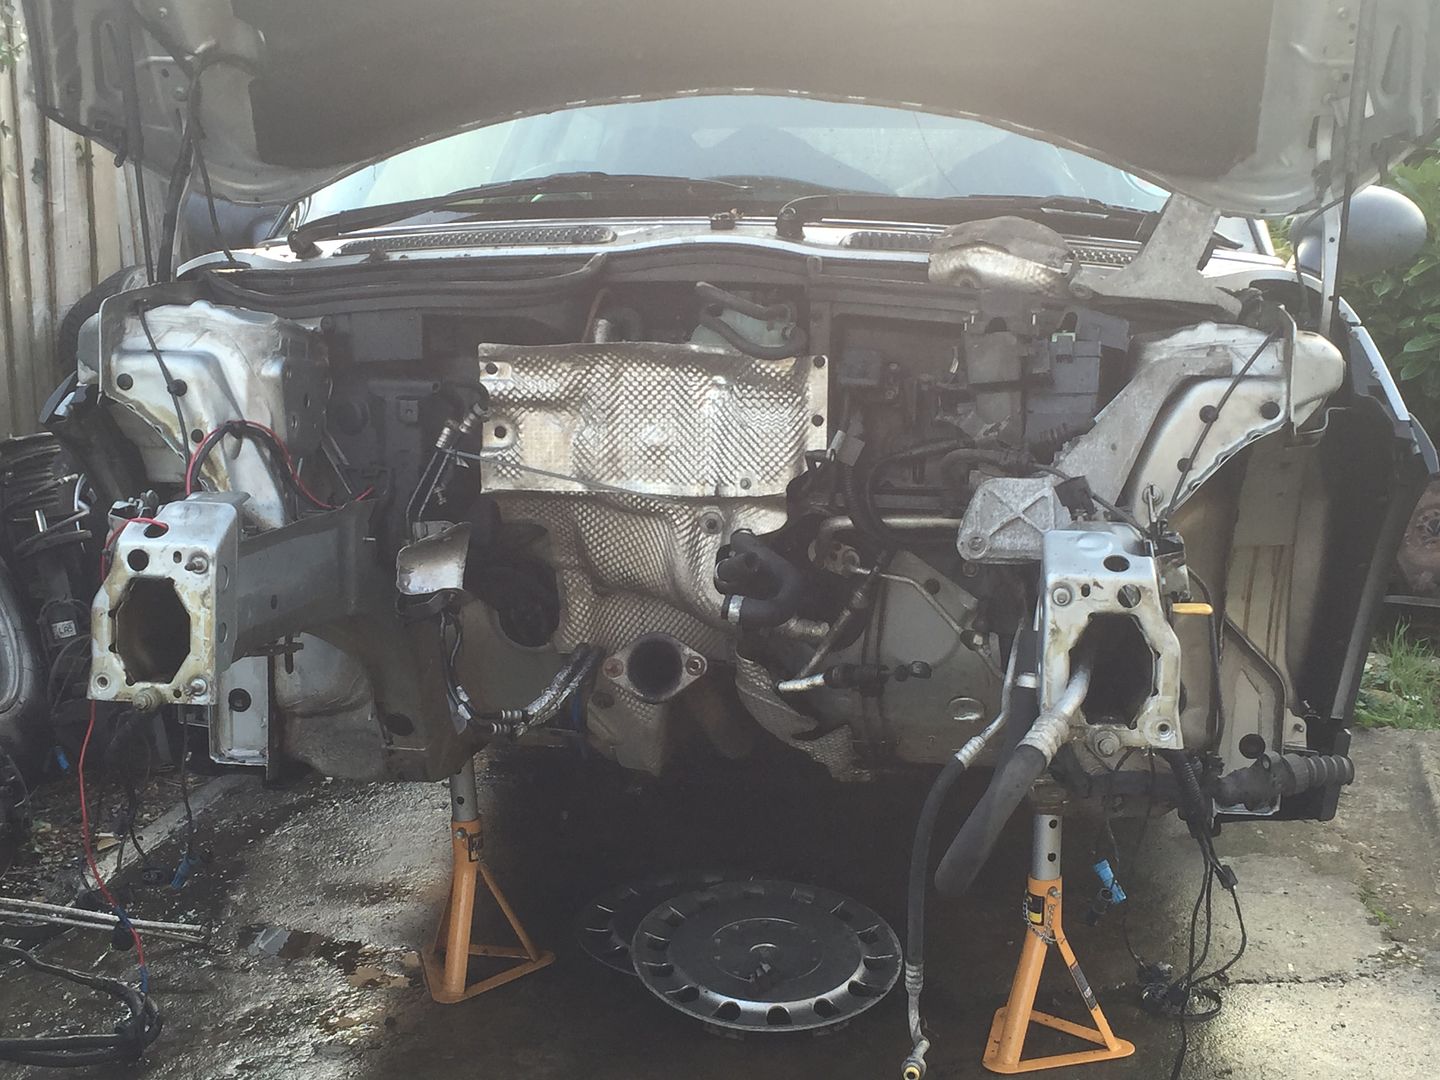
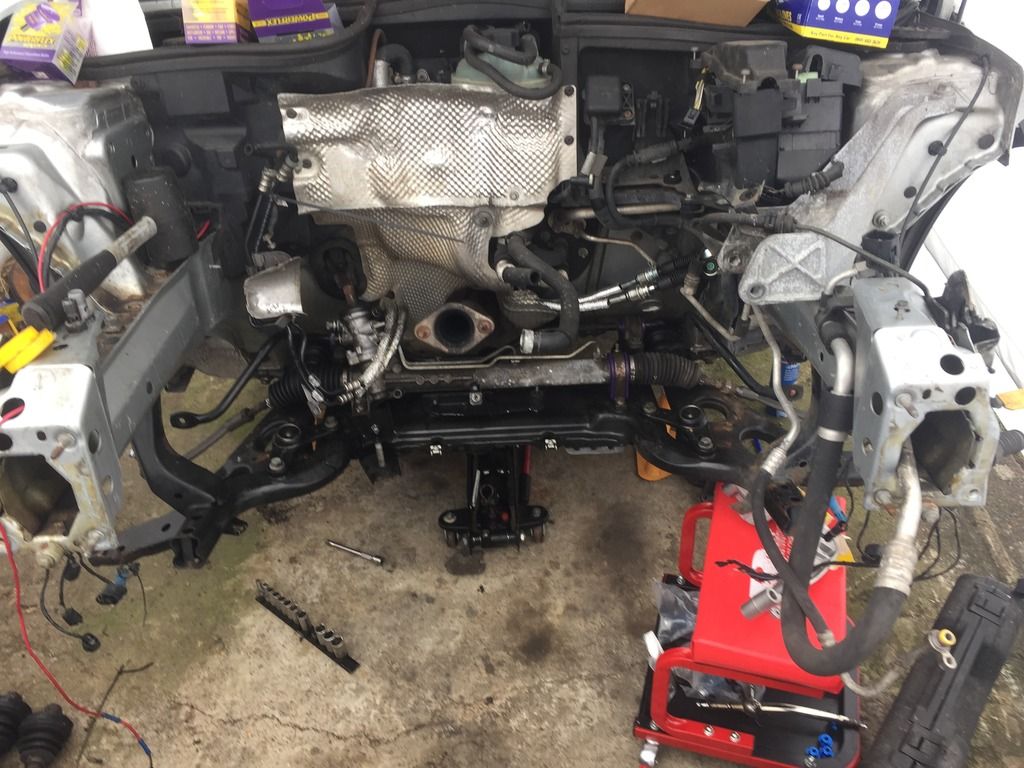
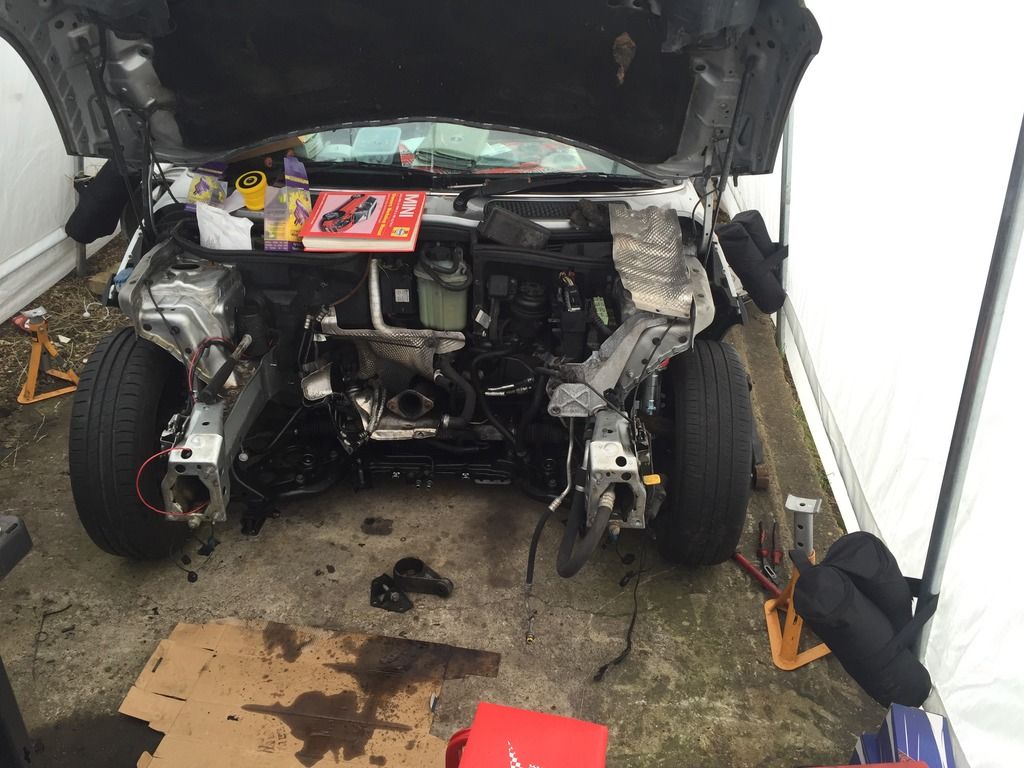
When I walked into the marquee on Monday morning I was faced with the car still on axle stands with no subframe, steering or suspension.
On the bench next to the car sat the subframe all bolted together and waiting to be fitted back on the car.
First things first, I fitted the anti roll bar to the subframe and then lock tited all the bolts and torqued them down. I then manhandled the subframe onto the floor and got the trolley jack positioned underneath. I forgot how heavy the subframe was when it had everything else attached to it! I thought I was going to fall over backwards as I lifted it up and then started to lose my balance!
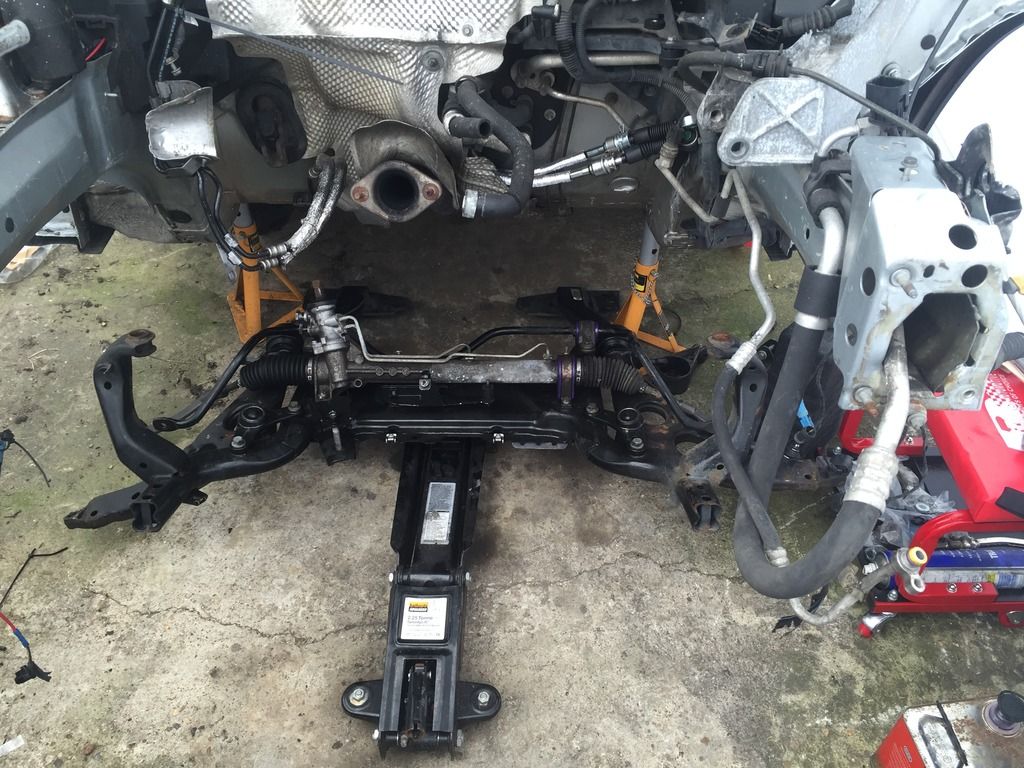
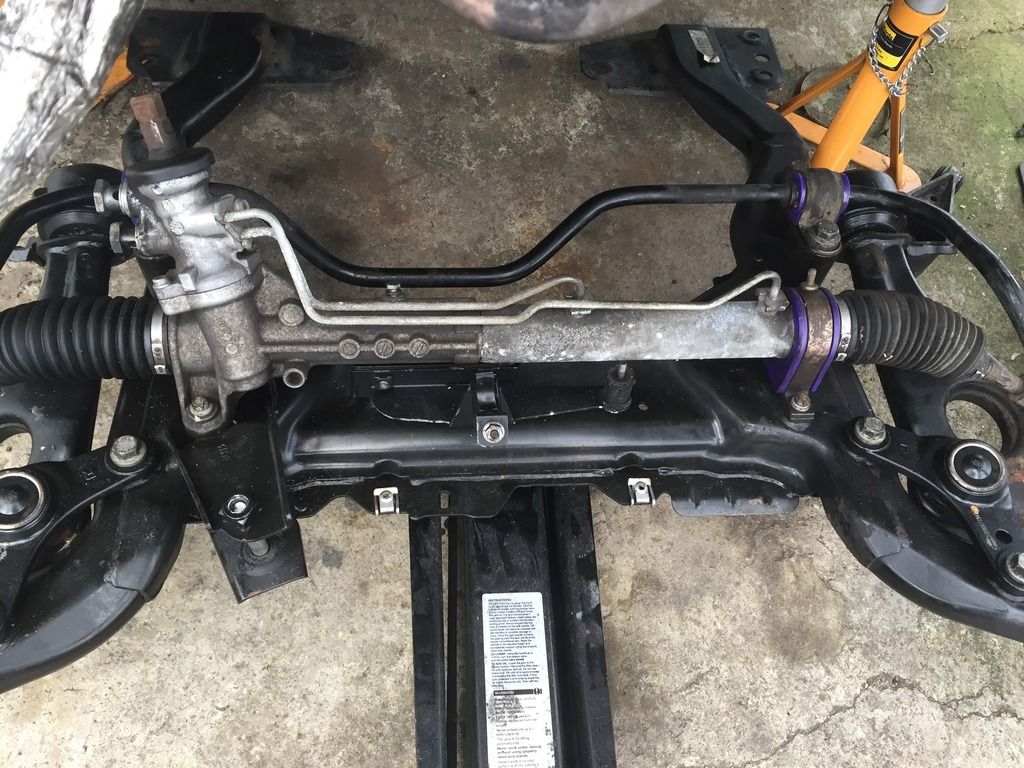
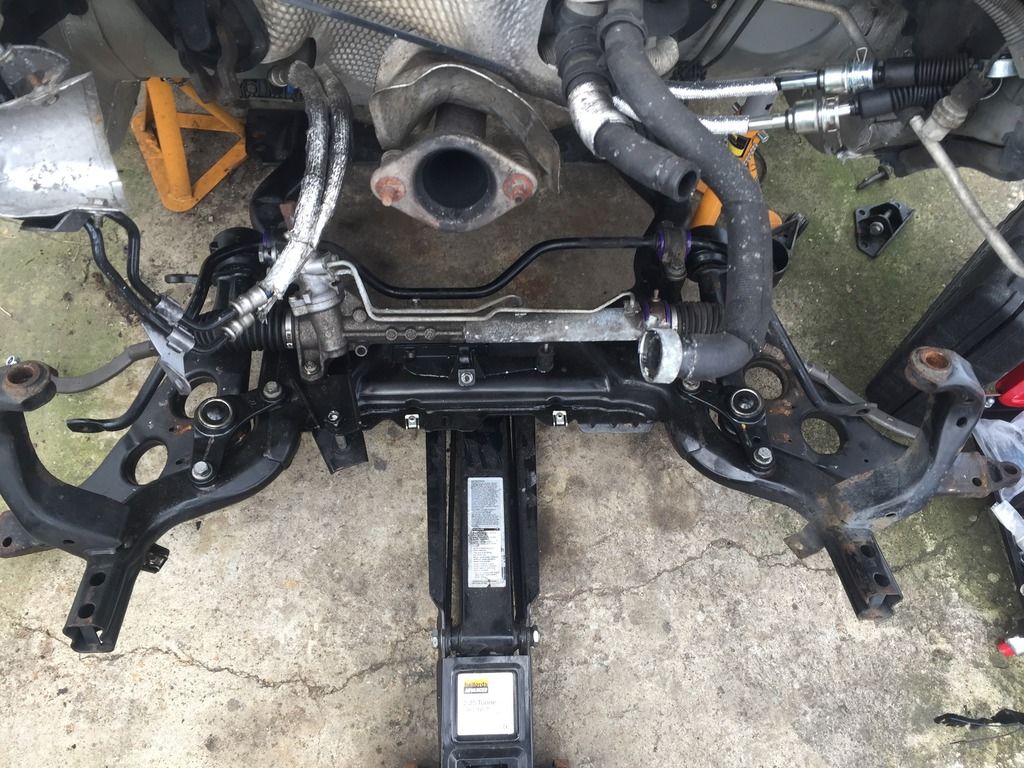
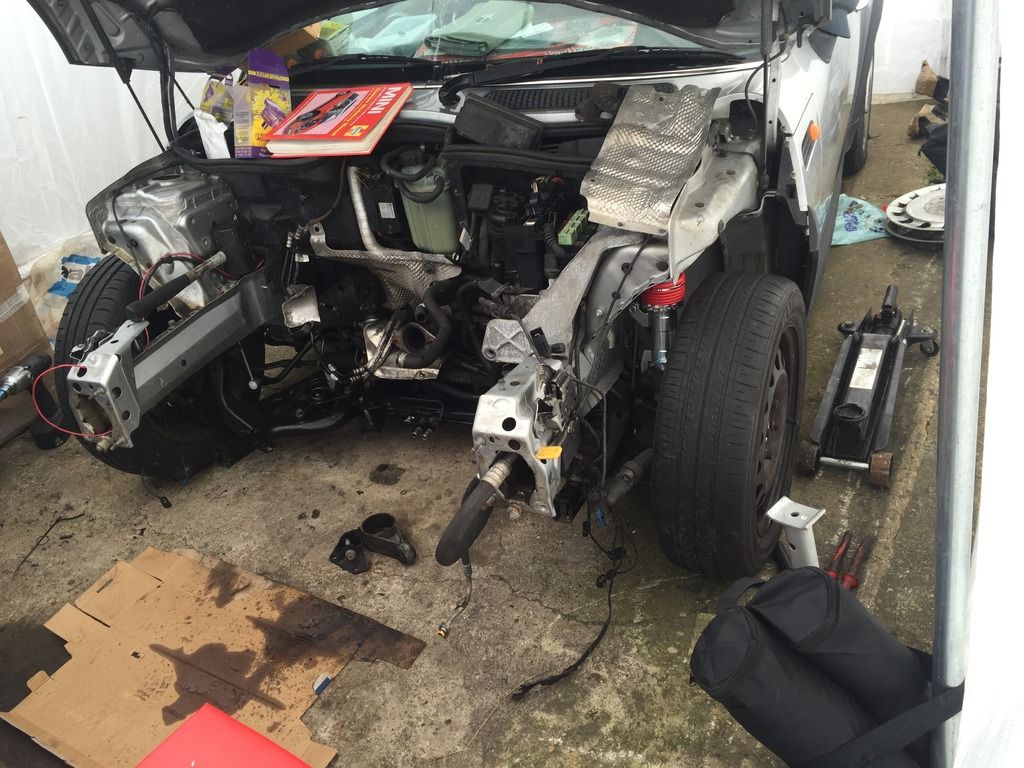
After some messing around trying to keep all four corners balanced whilst jacking it up I managed to finally get the subframe bolted back on
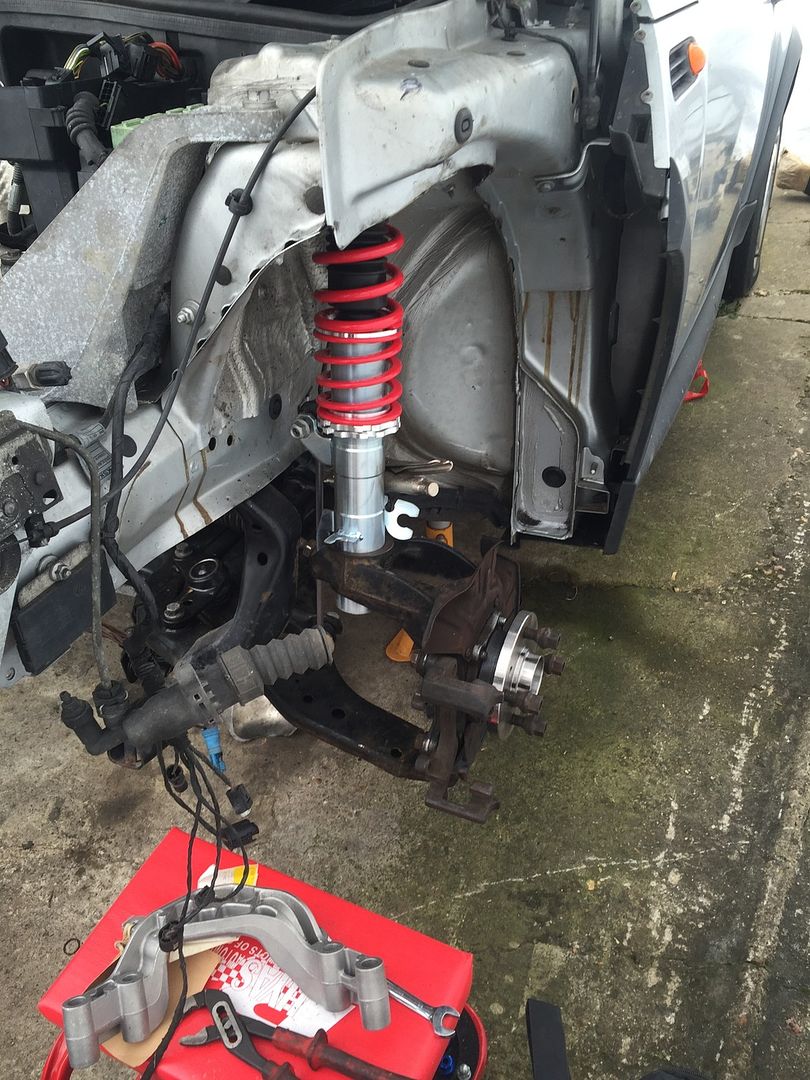
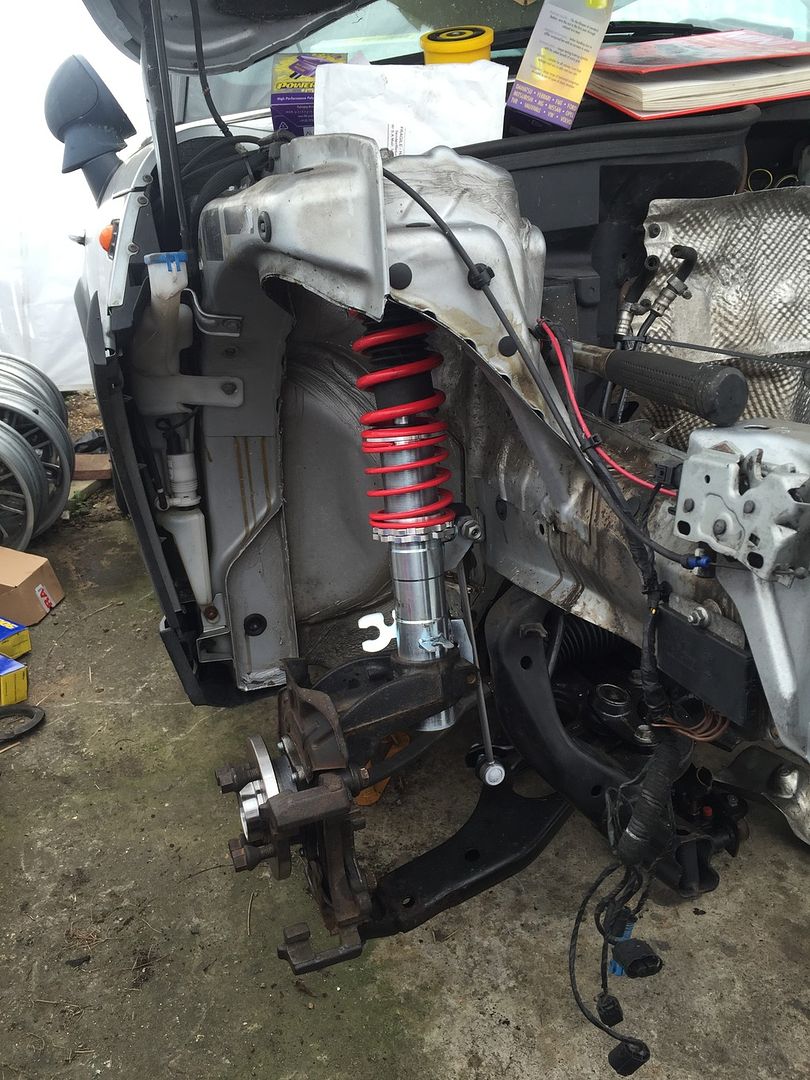
I figured the next step should be to build the front struts up and get them bolted on. This is where I hit a stumbling block. The bottom ball joints were seized solid in the hubs! I spent about half an hour trying to smash them out with a hammer and chisel but had no joy. I just couldn't hit them hard enough on the floor with my foot keeping them steady! So they got packed into the car and off I trotted to my old garage where I worked 10 years ago! Thankfully the owner and I are very good friends still and he doesn't even bat an eyelid when I come strolling in and start using his tools, vices etc. Now even with the hubs clamped into the vice these ball joints put up a hell of a fight! There was no way they ever would of come out hitting them on the floor! Anyway I got them both out and took full advantage of being in a proper workshop and cleaned the hubs up so the new joints and bearings would slide straight in when I got home. I said my goodbyes and off I trotted back home.
Once home I started to build the struts back up and decided I was going to use the coilovers after all. It's been a long time since I've lowered a car so why not! I'm so glad that I cleaned the hubs up at the workshop. Everything went back together so easily and it was actually an enjoyable thing to do


With both struts built up it was time to bolt them on. They went on with the greatest of ease and I even managed to do the tracking by eye so at least the wheels won't be pointing in opposite directions when they go back on! I only did the balljoints, track rods and drop links up finger tight as I'm going to have to undo them again to put the driveshafts back in.
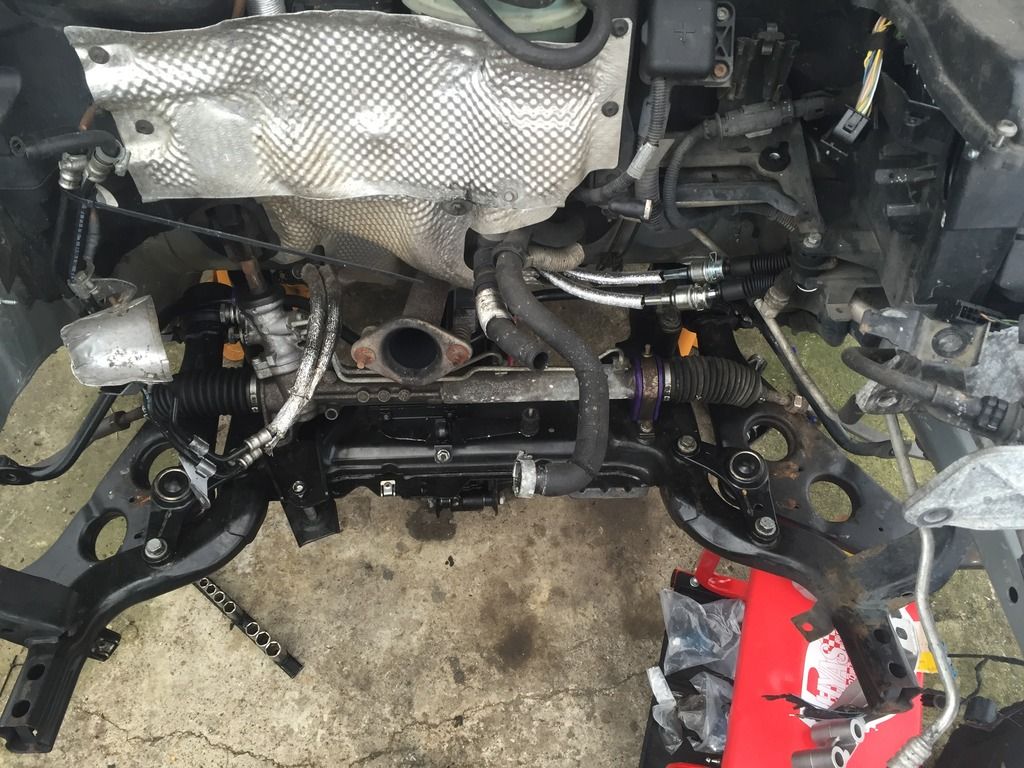
At this point I was all excited thinking it was time to bolt the wheels on and drop it on the floor! No. I still needed to reattach all the hydraulic lines for the power steering In theory this should be an easy job. In reality it's been 4 months since I took them off and I had no idea how they fitted back on! The Haynes manual I bought to get the correct torque settings for the suspension components and it doesn't cover the diesel Mini so has no information about the hydraulic power steering. Luckily there happens to be an online BMW/MINI parts catalogue with all the factory parts diagrams. A quick look on there and I had a much better idea of how to route everything. Happy that I'd routed it all properly, I bolted it all in, refitted the heat shields and stood back to admire a much more complete looking subframe.
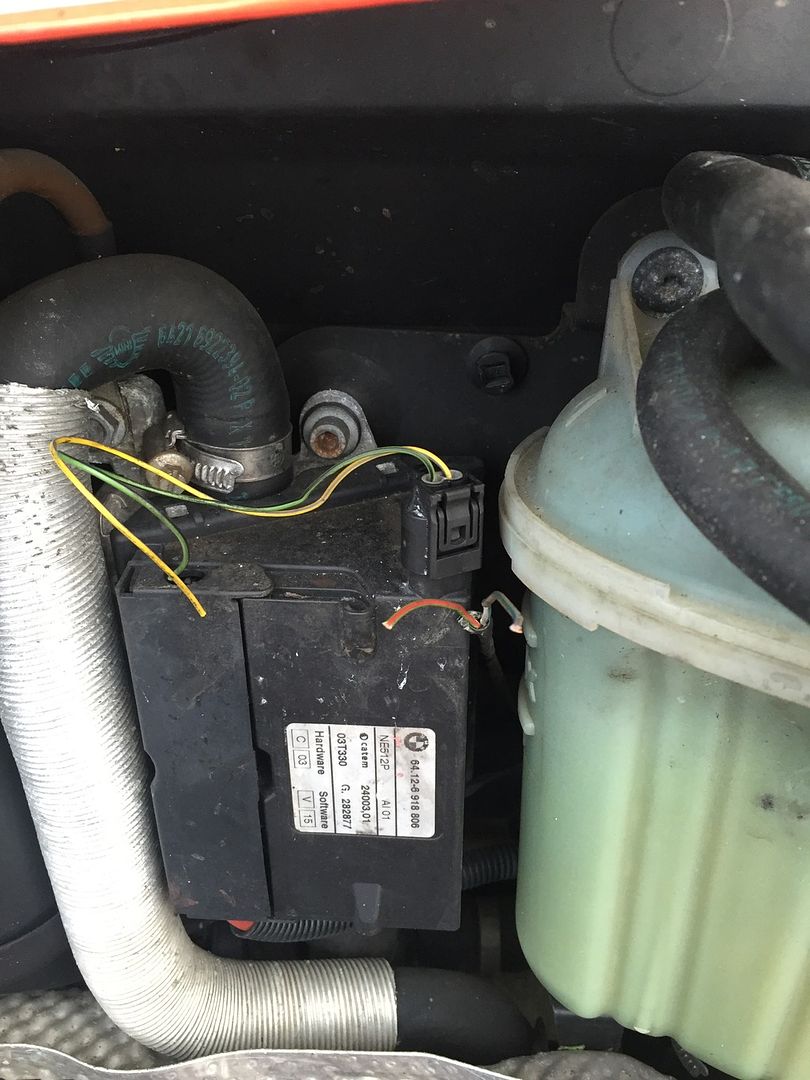
Now as a quick aside. When inspecting the engine bay after buying the car I noticed a lot of chewed wiring (mentioned previously in the thread). The majority of it was part of the engine loom which is being replaced, however one of the wires that had been eaten was coming out of a plug that was something to do with the heating system. No idea what it does but it must do something.
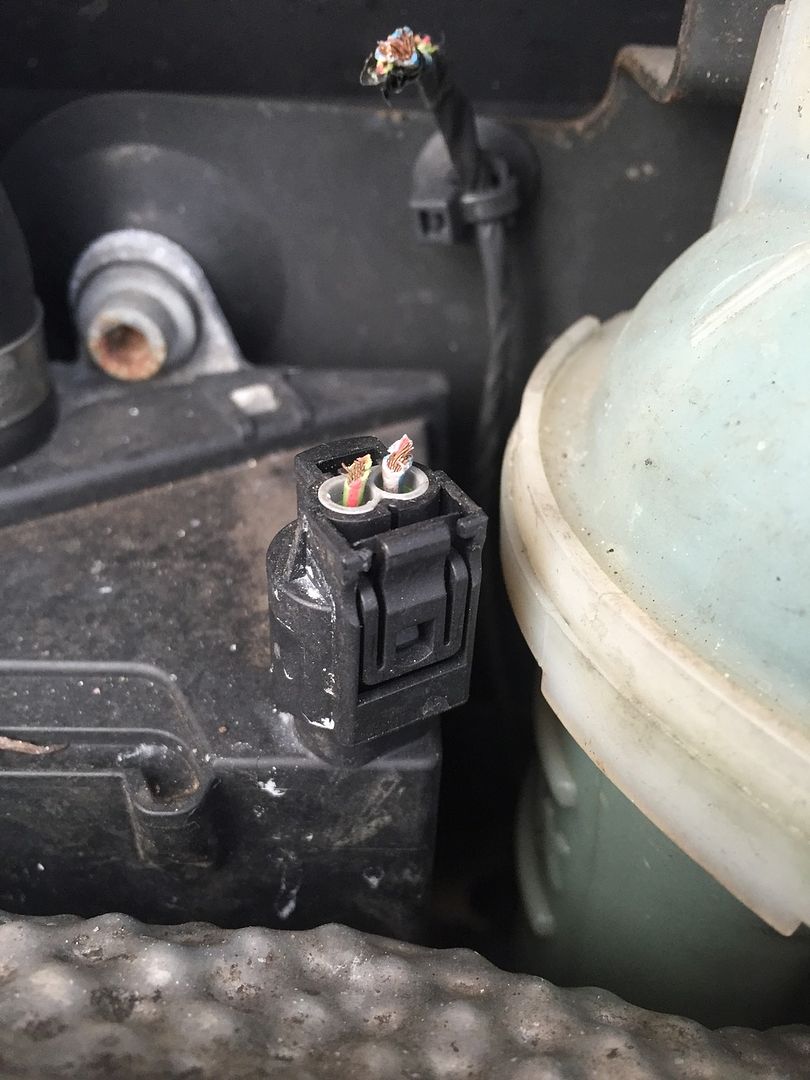
Anyway I decided to try stripping the plug down to replace the wires. Now wiring is definitely not my forte and I try and avoid it at all costs but I fancied seeing how the plug came apart so I gave it a go. It took about half an hour but I managed to rewire it and all I need to do is find my soldering iron to attach the new bit to the old bit and it'll be good as new
Finally though I was at the stage where the wheels could go back on (I know the car has no front brakes fitted and the suspension is only done up finger tight but none of that will happen until the engine goes back in anyway!).
That brings us to 3.30pm today when it was time to pack all my tools away, have a shower and go and pick my Daughter up for the weekend I'm very happy with the progress I've made this week and I'm ready to get the engine onto the stand so I can give it a bloody good degrease and start replacing all the gaskets!
I'll try not to leave such a big gap before the next update this time
Once again I must apologise for the long gap between updates. Life has just been getting in the way of me doing anything to the car recently. Thankfully though I had this week off work which meant I had 3 free days in that week to work on the Mini! YAY!
So, at the last (car related) update I'd managed to fit the new shifter cables. Exciting! My aim for this week was to have the car dropped back onto its wheels ready for the engine to go back in (once I've replaced all its gaskets).
When I walked into the marquee on Monday morning I was faced with the car still on axle stands with no subframe, steering or suspension.
On the bench next to the car sat the subframe all bolted together and waiting to be fitted back on the car.
First things first, I fitted the anti roll bar to the subframe and then lock tited all the bolts and torqued them down. I then manhandled the subframe onto the floor and got the trolley jack positioned underneath. I forgot how heavy the subframe was when it had everything else attached to it! I thought I was going to fall over backwards as I lifted it up and then started to lose my balance!
After some messing around trying to keep all four corners balanced whilst jacking it up I managed to finally get the subframe bolted back on
I figured the next step should be to build the front struts up and get them bolted on. This is where I hit a stumbling block. The bottom ball joints were seized solid in the hubs! I spent about half an hour trying to smash them out with a hammer and chisel but had no joy. I just couldn't hit them hard enough on the floor with my foot keeping them steady! So they got packed into the car and off I trotted to my old garage where I worked 10 years ago! Thankfully the owner and I are very good friends still and he doesn't even bat an eyelid when I come strolling in and start using his tools, vices etc. Now even with the hubs clamped into the vice these ball joints put up a hell of a fight! There was no way they ever would of come out hitting them on the floor! Anyway I got them both out and took full advantage of being in a proper workshop and cleaned the hubs up so the new joints and bearings would slide straight in when I got home. I said my goodbyes and off I trotted back home.
Once home I started to build the struts back up and decided I was going to use the coilovers after all. It's been a long time since I've lowered a car so why not! I'm so glad that I cleaned the hubs up at the workshop. Everything went back together so easily and it was actually an enjoyable thing to do
With both struts built up it was time to bolt them on. They went on with the greatest of ease and I even managed to do the tracking by eye so at least the wheels won't be pointing in opposite directions when they go back on! I only did the balljoints, track rods and drop links up finger tight as I'm going to have to undo them again to put the driveshafts back in.
At this point I was all excited thinking it was time to bolt the wheels on and drop it on the floor! No. I still needed to reattach all the hydraulic lines for the power steering
In theory this should be an easy job. In reality it's been 4 months since I took them off and I had no idea how they fitted back on! The Haynes manual I bought to get the correct torque settings for the suspension components and it doesn't cover the diesel Mini so has no information about the hydraulic power steering. Luckily there happens to be an online BMW/MINI parts catalogue with all the factory parts diagrams. A quick look on there and I had a much better idea of how to route everything. Happy that I'd routed it all properly, I bolted it all in, refitted the heat shields and stood back to admire a much more complete looking subframe. Now as a quick aside. When inspecting the engine bay after buying the car I noticed a lot of chewed wiring (mentioned previously in the thread). The majority of it was part of the engine loom which is being replaced, however one of the wires that had been eaten was coming out of a plug that was something to do with the heating system. No idea what it does but it must do something.
Anyway I decided to try stripping the plug down to replace the wires. Now wiring is definitely not my forte and I try and avoid it at all costs but I fancied seeing how the plug came apart so I gave it a go. It took about half an hour but I managed to rewire it and all I need to do is find my soldering iron to attach the new bit to the old bit and it'll be good as new
Finally though I was at the stage where the wheels could go back on (I know the car has no front brakes fitted and the suspension is only done up finger tight but none of that will happen until the engine goes back in anyway!).
That brings us to 3.30pm today when it was time to pack all my tools away, have a shower and go and pick my Daughter up for the weekend
I'm very happy with the progress I've made this week and I'm ready to get the engine onto the stand so I can give it a bloody good degrease and start replacing all the gaskets!I'll try not to leave such a big gap before the next update this time
Oh you'll probably notice that my motorbike has appeared in the marquee between updates! During one of the recent storms the wind blew it over and dented and scratched the tank I moved it into the marquee to save it from anymore damage but it has taken up a big chunk of my work space
I moved it into the marquee to save it from anymore damage but it has taken up a big chunk of my work space 
carinaman said:
Crikey, that's frightening just looking at the photos and reading it. Good work. Well done on managing to split that connector and not break it. Sorry your bike toppled over.
I was crapping it thinking I was going to destroy the connector! Thankfully it came apart quite easily and then it was pretty obvious what I had to do!I have a Mini (no pun intended) update!
I took this afternoon off work to try and find somewhere that could MOT my van (it ran out 2 months ago and I only realised yesterday!). Unfortunately because it's a registration month everywhere is booked solid! This however meant I had an afternoon free to work on the Mini. What made this even better was the fact that my Brother was off work too. This meant possibly being able to get the engine onto the stand today
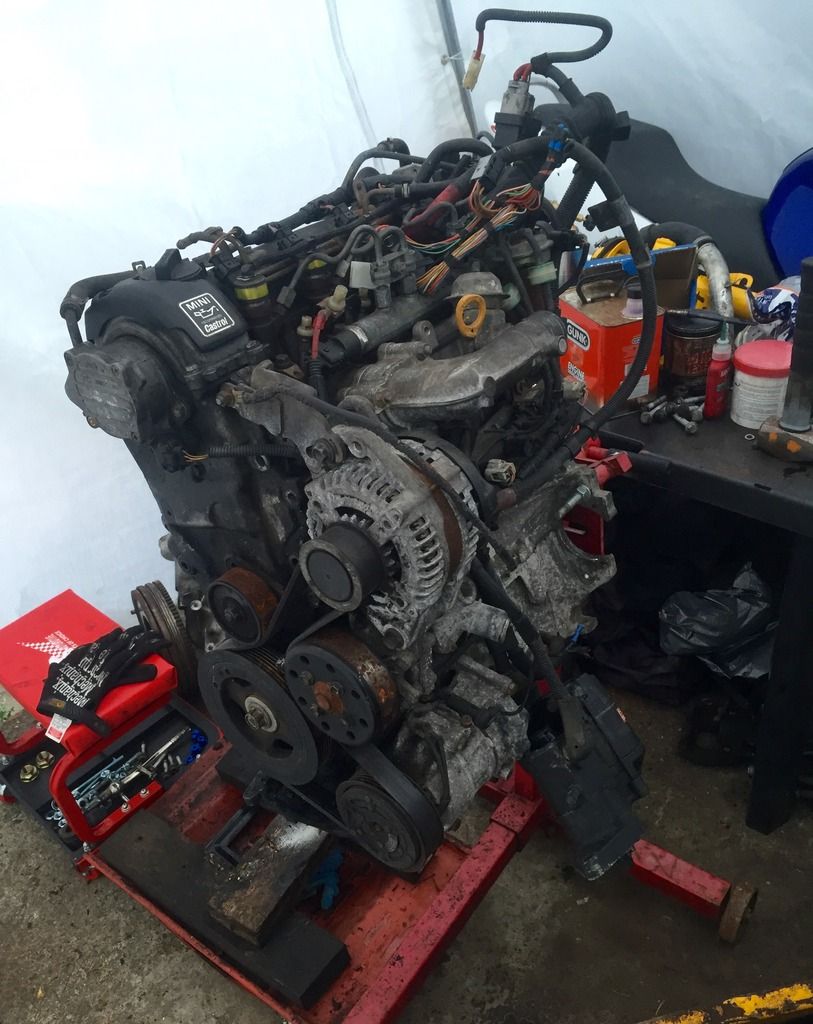
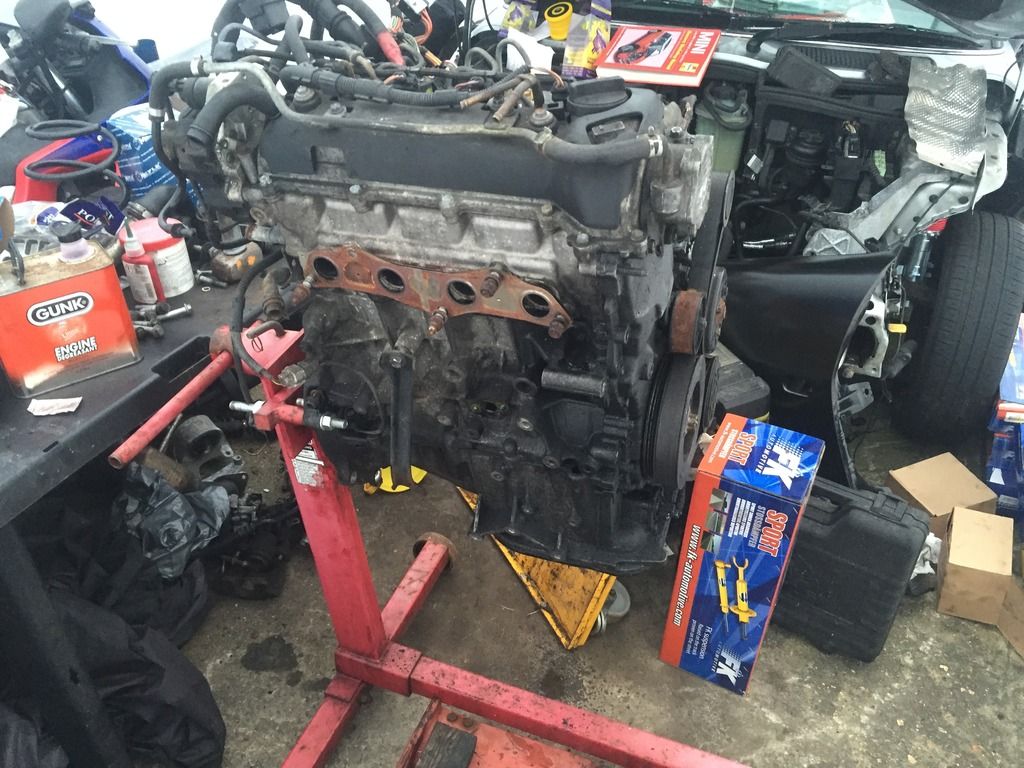
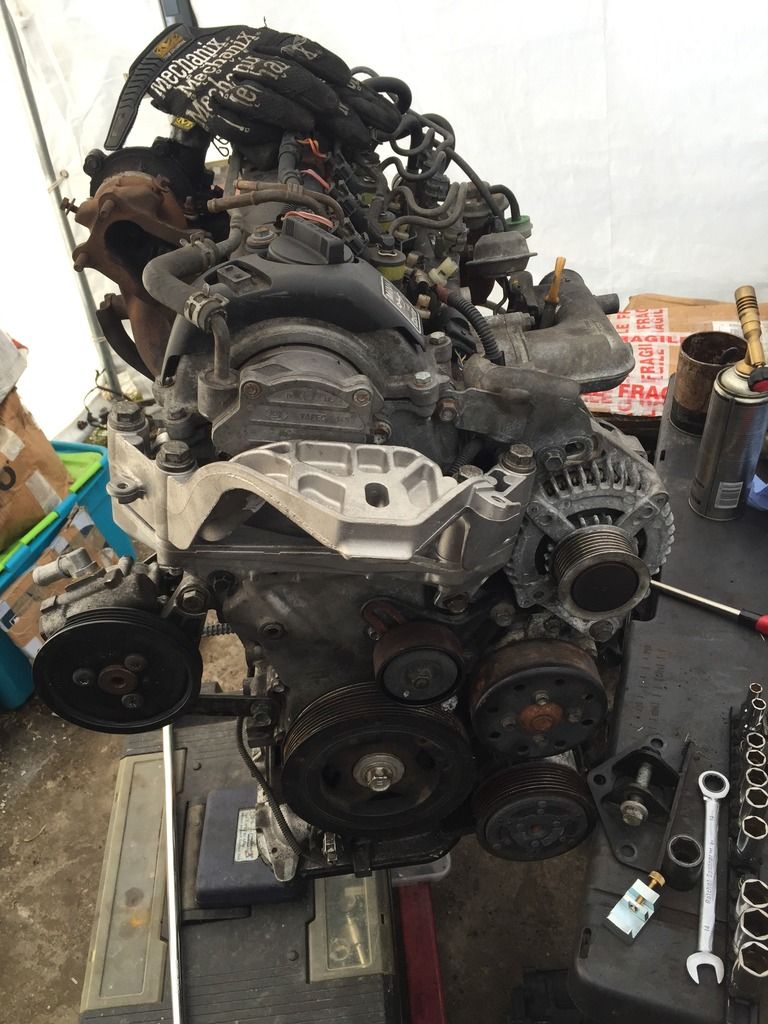
I started off by removing the gearbox, which took quite a bit of persuasion to release from its home nestled up against the engine. After using persuading stick number 3 (big rubber mallet) it eventually let go. While I was doing that my Brother removed the turbo and manifold to free up a bit of the weight. I also need to remove a snapped stud from the turbo before it all goes back together. The gearbox came off, I unbolted the clutch and gunned the flywheel off and sat back, amazed at how easy that stage had been! Unfortunately by thinking that I tempered fate and hit a problem The studs I use to mount engines onto the stand were too big to fit through the holes on the block! This meant a trip to Wickes to acquire some smaller ones. Thankfully Wickes is 5 minutes away and before we knew it we were bolting the bracket to the block and doing lots of warm up exercises to get ready to lift it onto the stand! We needn't have bothered as it was nowhere near as heavy as we were expecting and it slid into the stand with ease!
This is where we called it a day. I had to get ready to go out running (very new to all this exercise lark so trying to stick with it!) and my Brother was off out with some mates. I currently have no plans for Easter Sunday so I'm hoping to start replacing some of the gaskets! You'll all find out soon enough if I got round to it or not
I took this afternoon off work to try and find somewhere that could MOT my van (it ran out 2 months ago and I only realised yesterday!). Unfortunately because it's a registration month everywhere is booked solid! This however meant I had an afternoon free to work on the Mini. What made this even better was the fact that my Brother was off work too. This meant possibly being able to get the engine onto the stand today
I started off by removing the gearbox, which took quite a bit of persuasion to release from its home nestled up against the engine. After using persuading stick number 3 (big rubber mallet) it eventually let go. While I was doing that my Brother removed the turbo and manifold to free up a bit of the weight. I also need to remove a snapped stud from the turbo before it all goes back together. The gearbox came off, I unbolted the clutch and gunned the flywheel off and sat back, amazed at how easy that stage had been! Unfortunately by thinking that I tempered fate and hit a problem
The studs I use to mount engines onto the stand were too big to fit through the holes on the block! This meant a trip to Wickes to acquire some smaller ones. Thankfully Wickes is 5 minutes away and before we knew it we were bolting the bracket to the block and doing lots of warm up exercises to get ready to lift it onto the stand! We needn't have bothered as it was nowhere near as heavy as we were expecting and it slid into the stand with ease!This is where we called it a day. I had to get ready to go out running (very new to all this exercise lark so trying to stick with it!) and my Brother was off out with some mates. I currently have no plans for Easter Sunday so I'm hoping to start replacing some of the gaskets! You'll all find out soon enough if I got round to it or not


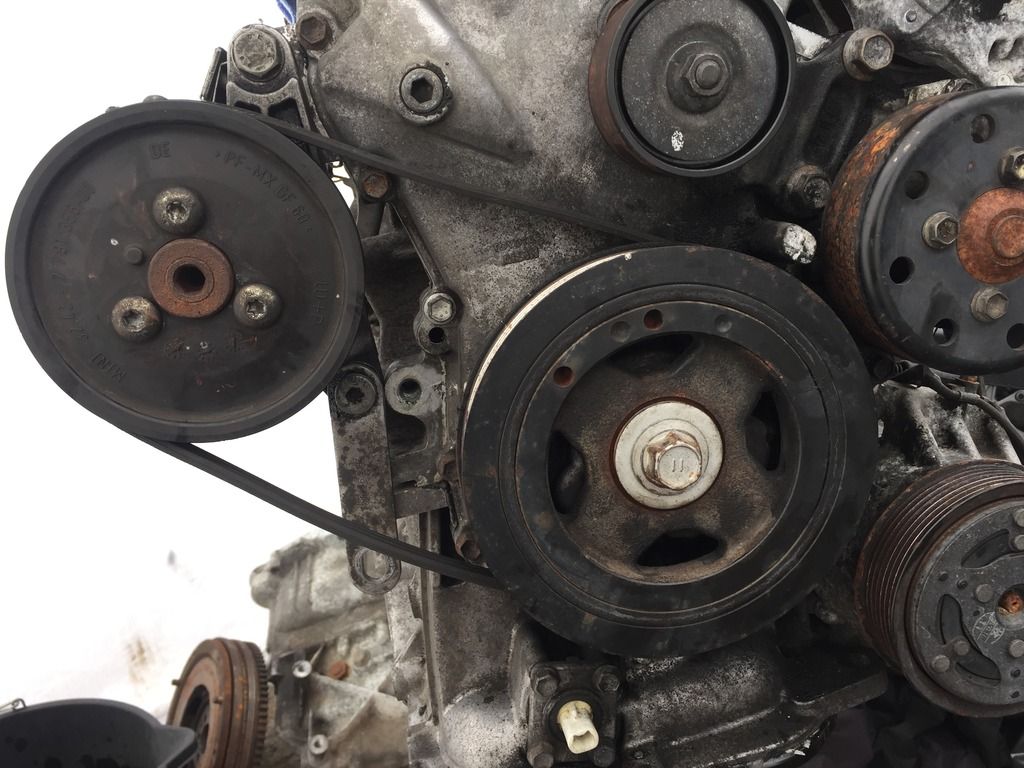
Once again I apologise for lack of updates, however I'm outside working on the car right now and I'm totally baffled at how to get the PAS belt on I had to cut the original one off because there's no tensioner for the pump.
This is what the belt looks like fitted without the tensioner bracket fitted.
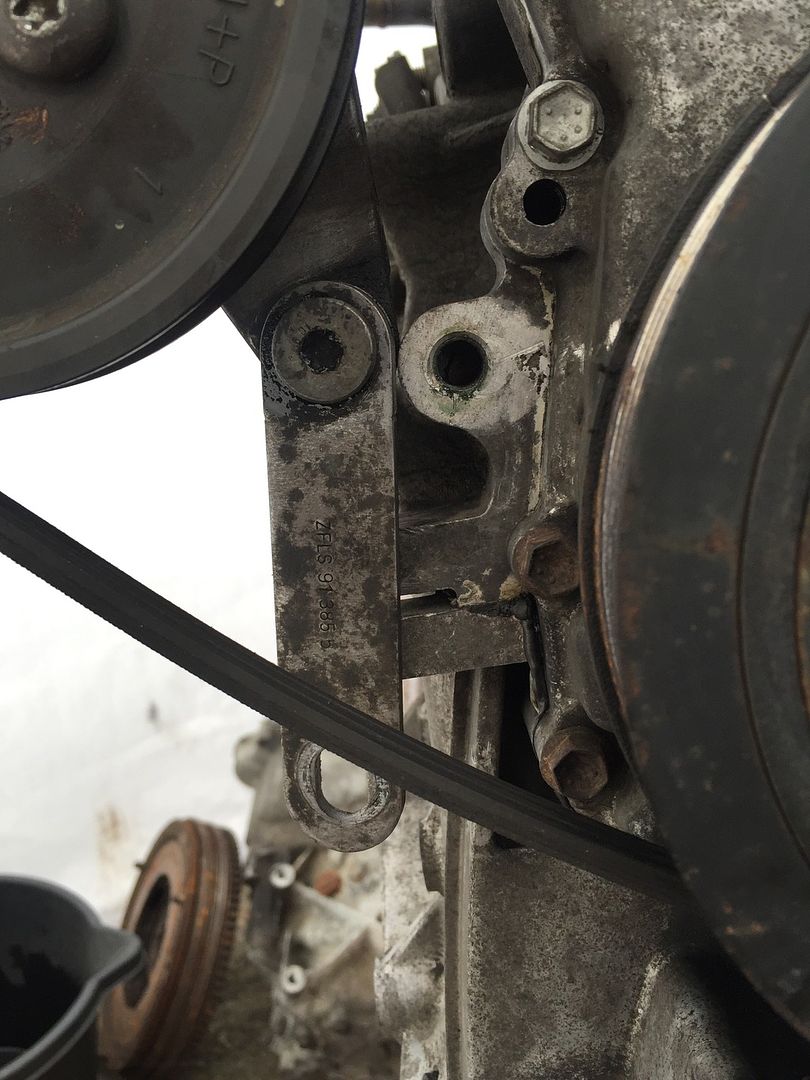
This is the tensioner bracket hanging down loose. The threaded hole to the right of it is where it's meant to bolt to! How the hell am I meant to stretch the belt that much??? I can only lever the pump about an inch away from the block with the belt fitted!!
I had to cut the original one off because there's no tensioner for the pump. This is what the belt looks like fitted without the tensioner bracket fitted.

This is the tensioner bracket hanging down loose. The threaded hole to the right of it is where it's meant to bolt to! How the hell am I meant to stretch the belt that much??? I can only lever the pump about an inch away from the block with the belt fitted!!

bungz said:
Glad to see you are sticking with it
To be honest I just want to get it on the road now. I've got a week off this week to completely gut my garden, put up all new fences and a new shed, so the marquee is now full of everything that was in the shed. It's just a never ending story right now!I'm going to be honest with you all. I've completely lost interest in this car! I've recently bought an XR2 race car and all I want to do is get this Mini done and out of the marquee so I can get the XR2 in there and start getting it ready to race next year!
I had the afternoon off work today to get some things done. They didn't take as long as expected so I headed into the marquee to crack on with the Mini. Now at the last update I was waiting for the stretchy belt tool to arrive. It arrived ages ago so I set to work fitting the PAS belt. It should be nice and simple. Slide the belt over the crank pulley, start to feed it over the PAS pulley and the clamp the belt to the pulley with the tool and turn the crank until the belt is on. Simple! Well actually no, it wasn't simple at all! I followed the (very basic) instructions and got as far as turning the crank, at which point the belt just started to slip. Then I tried turning the PAS pulley at the same time, which started pulling the belt on! Then as the belt was starting to look good a piece of the PAS pulley snapped where the belt was pulling on it! I honestly don't know who came up with this idea but its the most f king stupid piece of st idea I have ever come across! What the fk is wrong with a tensioner?!?!? I moved the tool to the other side of the pulley and tried again. I got to about the same point and the supposedly stretchy belt snapped!
At this point I started to lose my temper and almost gave up and went straight back inside. Then I decided there was other stuff I could do instead...
I decided to bolt the turbo back on with its new gaskets etc and then started removing the snapped stud. It was putting up a hell of a fight and just as I was about to admit defeat I found a knackered old 7mm socket that hammered nicely over the bit of leftover stud As if by magic the stud unwound itself and I cheered up a little! The shiny new one went in and that was another (small) job crossed off the list.
By now I had cheered up a little and decided to get a few more little bits done. I figured I may as well bolt on the shiny new (very expensive) engine mount brackets. If you remember back to when I first got the car, these had both snapped causing the engine to rock about when driving. It took all of 5 minutes to get them bolted up and the engine was one step closer to going back in the engine bay.
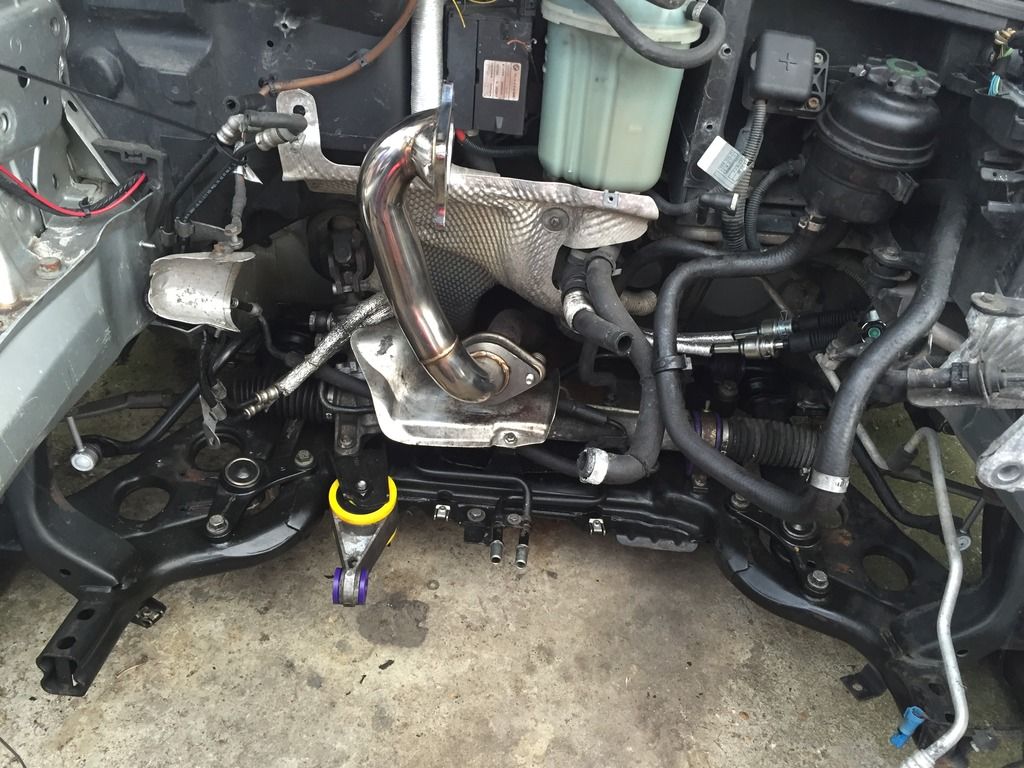
Seeing as I will have to order another PAS belt there wasn't really much else I could do to the engine so I decided to bolt on my shiny decat downpipe that I bought ages ago. Another nice simple job that was actually nice and simple. Makes a change I decided to end today on a high note and give up while I was ahead (ish). I will order another PAS belt tomorrow and have another go at getting the poxy thing fitted! I may possibly lose my temper with it again though if it snaps! Once the belt is fitted then the engine can come off the stand, fit the flywheel, clutch and gearbox and then slide the engine back in! Then it's just a case of bolting everything back together and plugging it all in (in theory that should only take an hour or so!) I can kind of see the finish line and I really do hope this car doesn't put up too much more of a fight! I'm tired and it's rapidly sapping my enthusiasm!
I had the afternoon off work today to get some things done. They didn't take as long as expected so I headed into the marquee to crack on with the Mini. Now at the last update I was waiting for the stretchy belt tool to arrive. It arrived ages ago so I set to work fitting the PAS belt. It should be nice and simple. Slide the belt over the crank pulley, start to feed it over the PAS pulley and the clamp the belt to the pulley with the tool and turn the crank until the belt is on. Simple! Well actually no, it wasn't simple at all! I followed the (very basic) instructions and got as far as turning the crank, at which point the belt just started to slip. Then I tried turning the PAS pulley at the same time, which started pulling the belt on! Then as the belt was starting to look good a piece of the PAS pulley snapped where the belt was pulling on it! I honestly don't know who came up with this idea but its the most f
king stupid piece of st idea I have ever come across! What the fk is wrong with a tensioner?!?!? I moved the tool to the other side of the pulley and tried again. I got to about the same point and the supposedly stretchy belt snapped! 

At this point I started to lose my temper and almost gave up and went straight back inside. Then I decided there was other stuff I could do instead...
I decided to bolt the turbo back on with its new gaskets etc and then started removing the snapped stud. It was putting up a hell of a fight and just as I was about to admit defeat I found a knackered old 7mm socket that hammered nicely over the bit of leftover stud
As if by magic the stud unwound itself and I cheered up a little! The shiny new one went in and that was another (small) job crossed off the list.
By now I had cheered up a little and decided to get a few more little bits done. I figured I may as well bolt on the shiny new (very expensive) engine mount brackets. If you remember back to when I first got the car, these had both snapped causing the engine to rock about when driving. It took all of 5 minutes to get them bolted up and the engine was one step closer to going back in the engine bay.

Seeing as I will have to order another PAS belt there wasn't really much else I could do to the engine so I decided to bolt on my shiny decat downpipe that I bought ages ago. Another nice simple job that was actually nice and simple. Makes a change
I decided to end today on a high note and give up while I was ahead (ish). I will order another PAS belt tomorrow and have another go at getting the poxy thing fitted! I may possibly lose my temper with it again though if it snaps! Once the belt is fitted then the engine can come off the stand, fit the flywheel, clutch and gearbox and then slide the engine back in! Then it's just a case of bolting everything back together and plugging it all in (in theory that should only take an hour or so!) I can kind of see the finish line and I really do hope this car doesn't put up too much more of a fight! I'm tired and it's rapidly sapping my enthusiasm!
S0 What said:
I've tried those belt fitters before and TBH they are crap, fiesta 1.25s use them as well and after trying 3 differant belt fitting tools i went back to a small pair of molegrips to clamp the belt to the outer lip of the pully then rotate the engine till it's on, maybe the same will work on the new pully/pump when you get it on ?
I'm honestly at a loss as to what to do next! I've never been stumped by fitting a bloody PAS belt before!bungz said:
Stick with it you are not far off the home straight with it now.
There must be a way to get these things on in seconds, cant see them taking hours to put a belt on when they are assembled but I agree it looks like a god awful set up.
Edit:
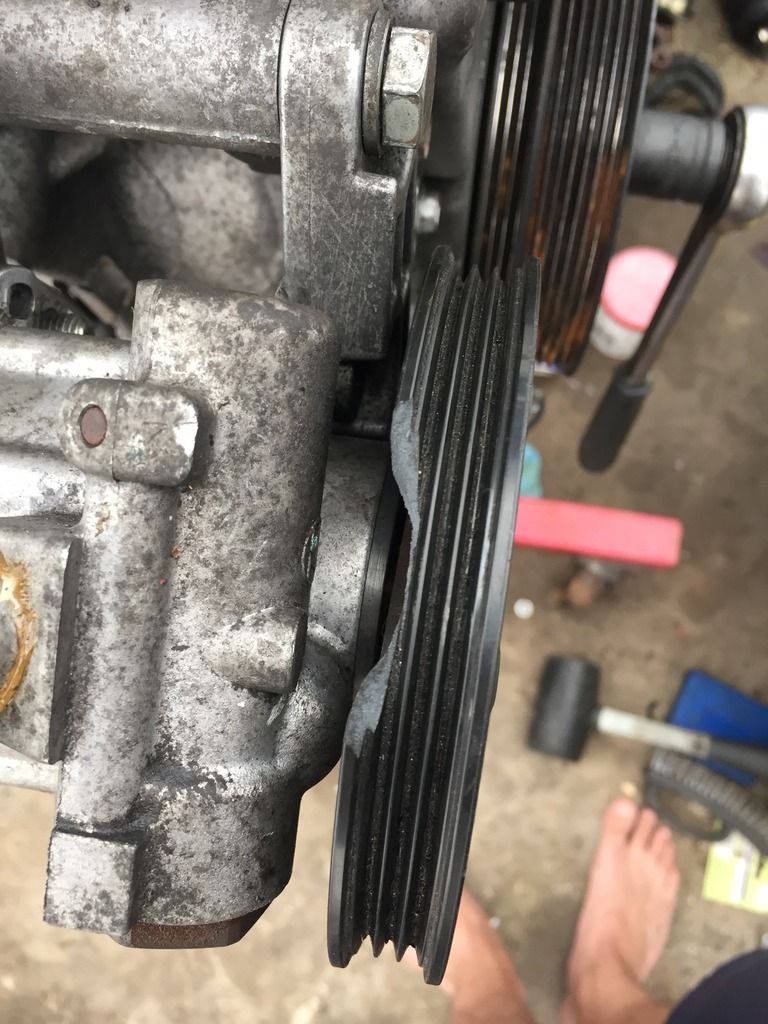
I am thinking the problem is getting the belt over the actual lip of the pulley? When the belt is bedded on its ribs that would give it a little slack wouldn't it? How about removing the pas pulley, seating the belt then finding a way of getting enough force on the belt to line the pulley back up?
The problem is getting the belt to even begin to stretch over the pulley. It genuinely doesn't seem long enough. It doesn't help that it's a plastic pulley so is going to end up snapping clean in half if I carry on like this. Have a look back at one of my previous posts ad you'll see even without the PAS pump bolted in the belt is pretty taught already!There must be a way to get these things on in seconds, cant see them taking hours to put a belt on when they are assembled but I agree it looks like a god awful set up.
Edit:
I am thinking the problem is getting the belt over the actual lip of the pulley? When the belt is bedded on its ribs that would give it a little slack wouldn't it? How about removing the pas pulley, seating the belt then finding a way of getting enough force on the belt to line the pulley back up?
Edited by bungz on Friday 12th August 08:42
Gassing Station | Readers' Cars | Top of Page | What's New | My Stuff