My Very Cheap Mini One D Dooer Upper...
Discussion


Sorry for the lack of updates. Being busy at work and the crappy weather have slowed things down a bit!
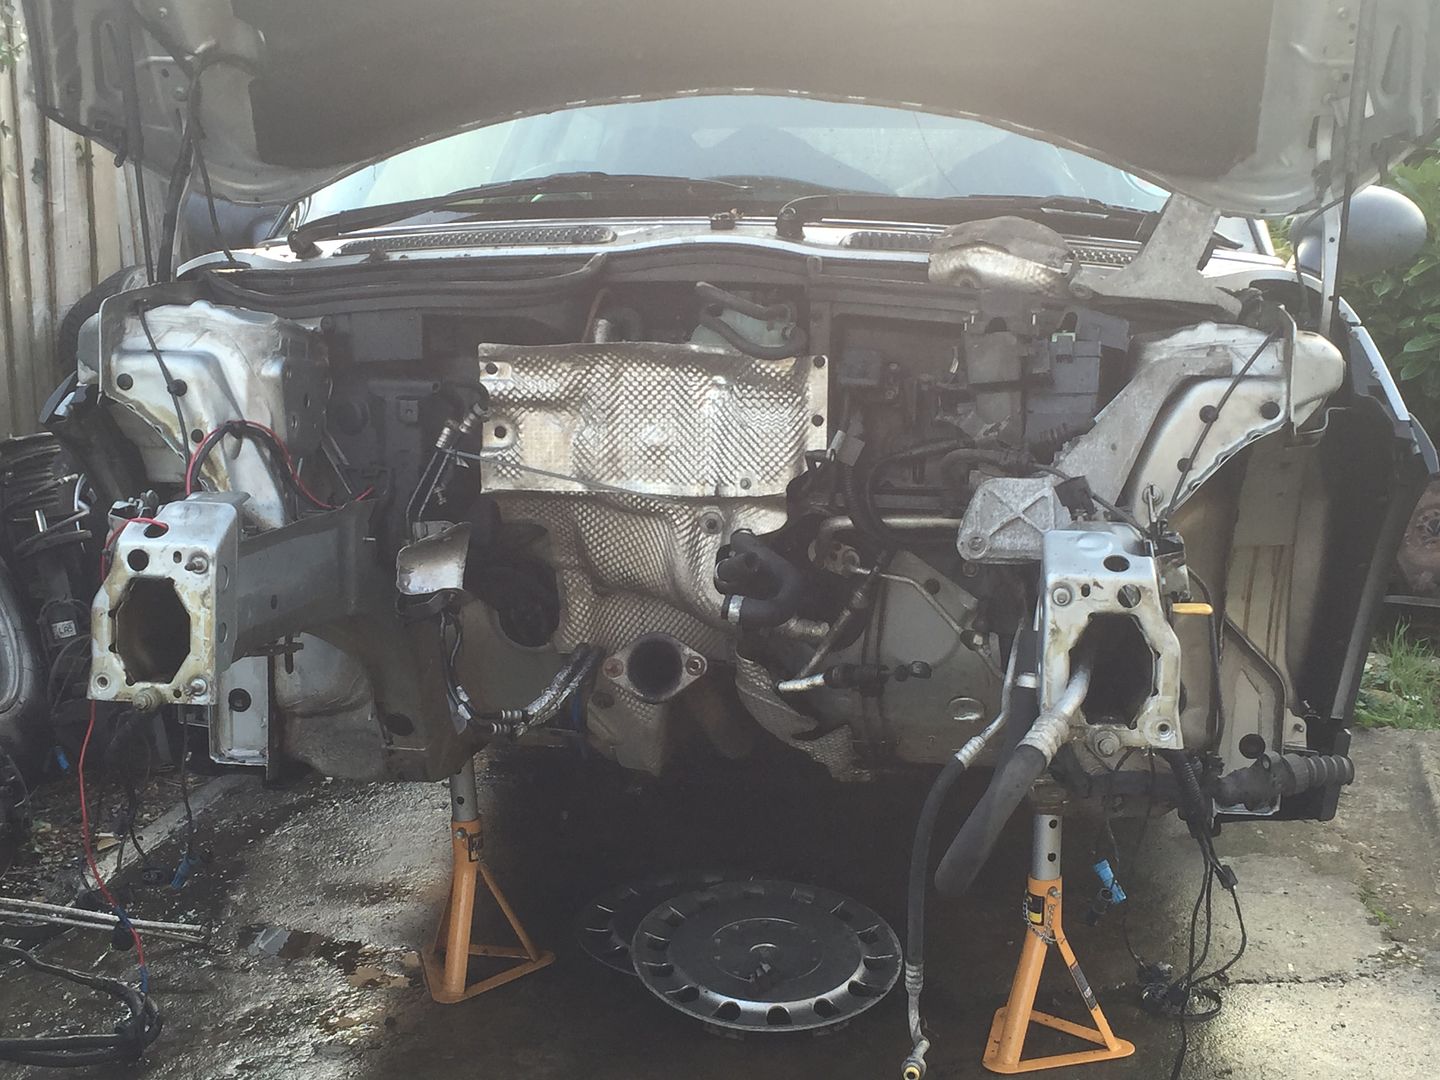
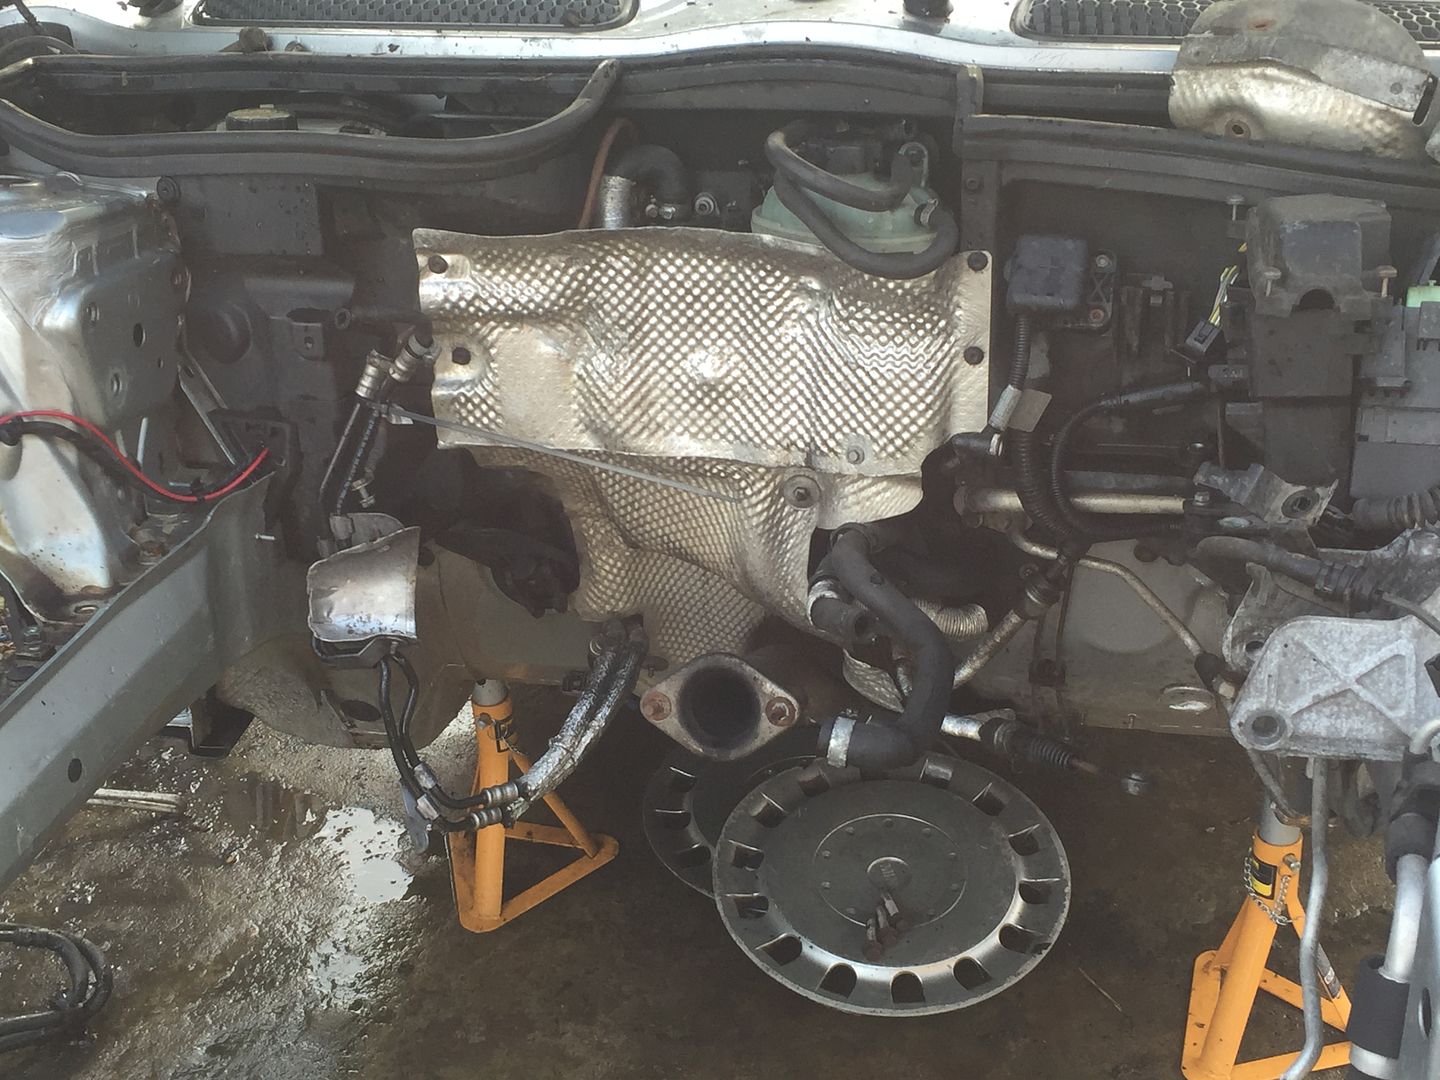
So at the last update I had removed the engine.
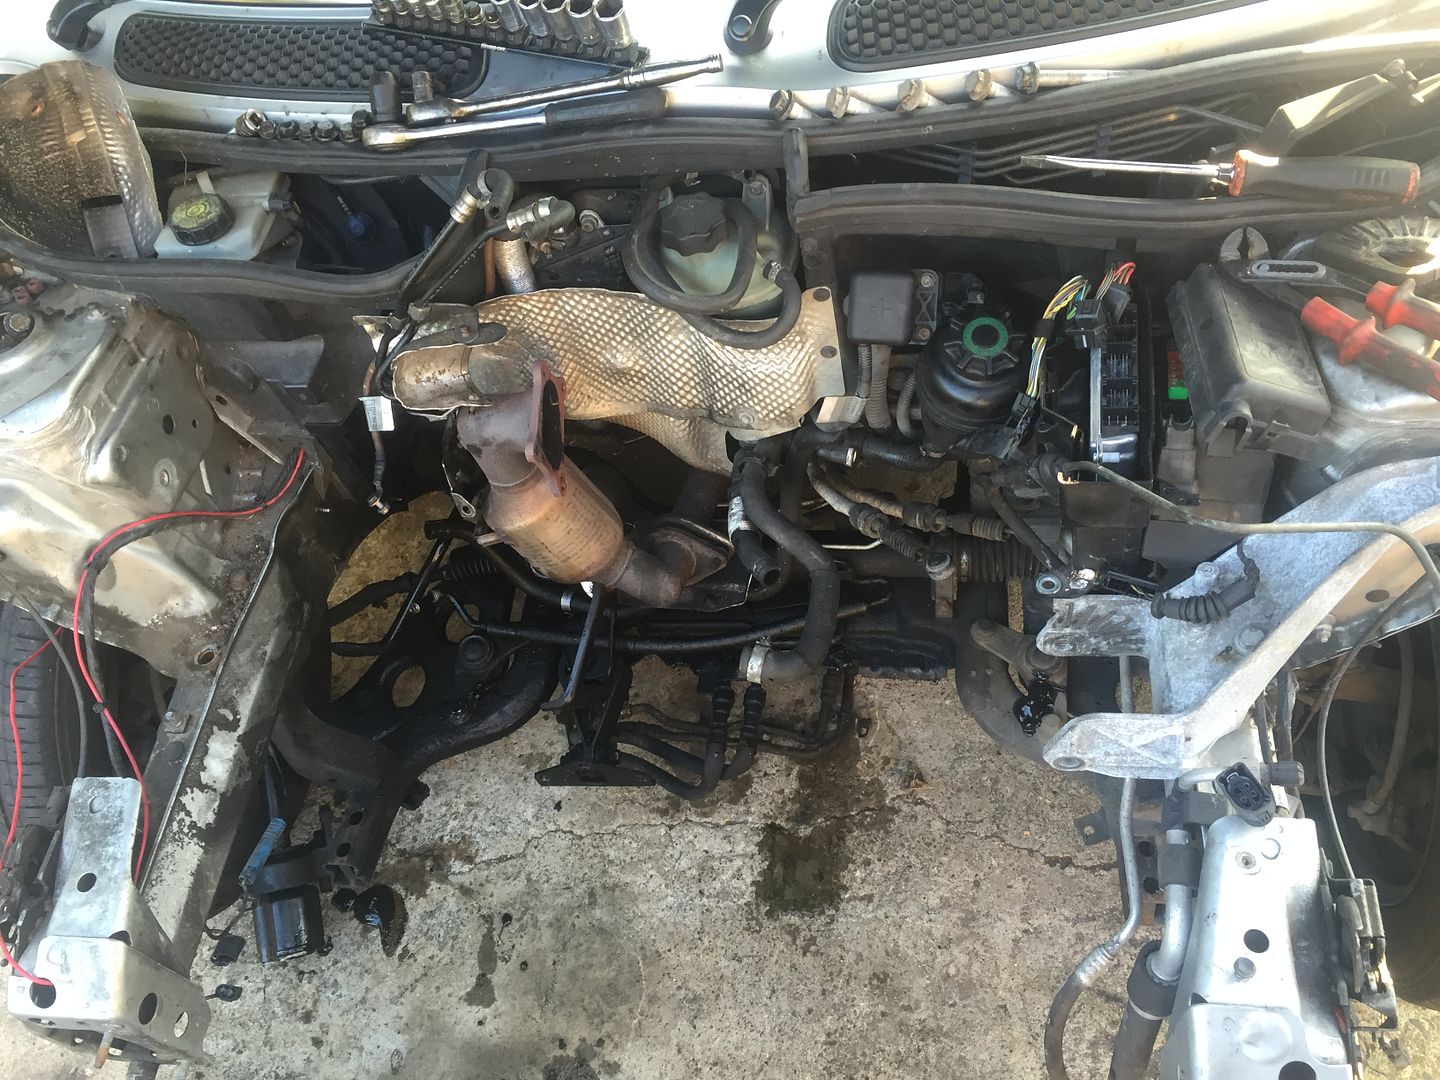
I have since removed the front subframe, shocks, and exhaust down pipe. Due to the liberal coating of oil on everything, all the subframe and steering rack bolts came undone without a fight which makes a change in this car
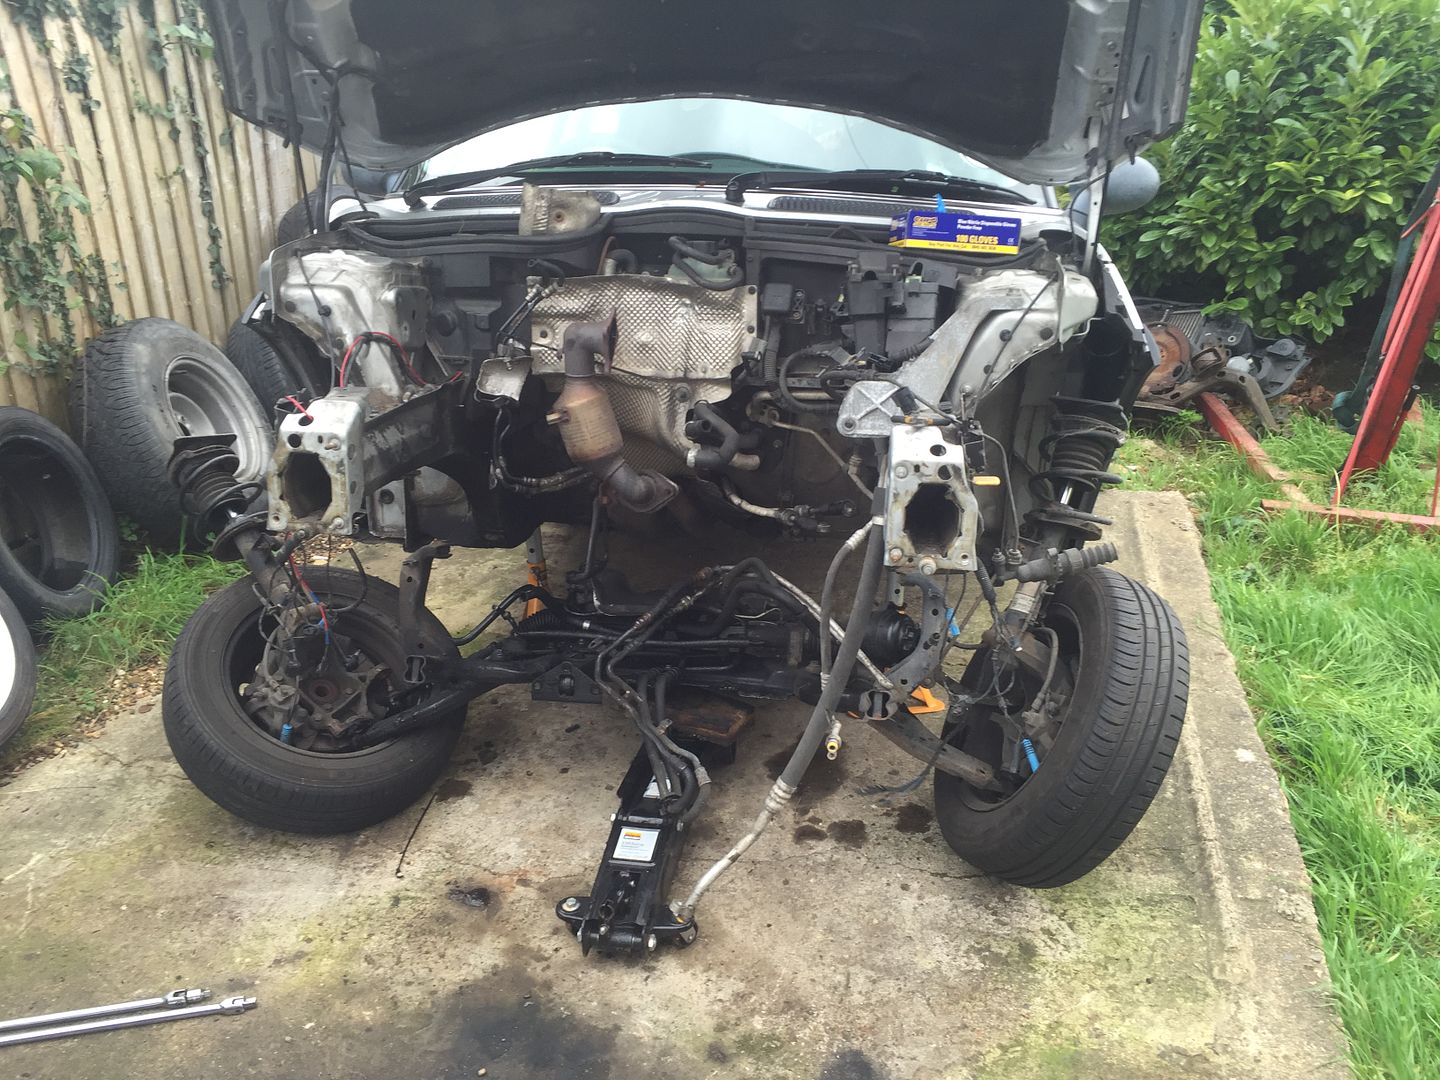

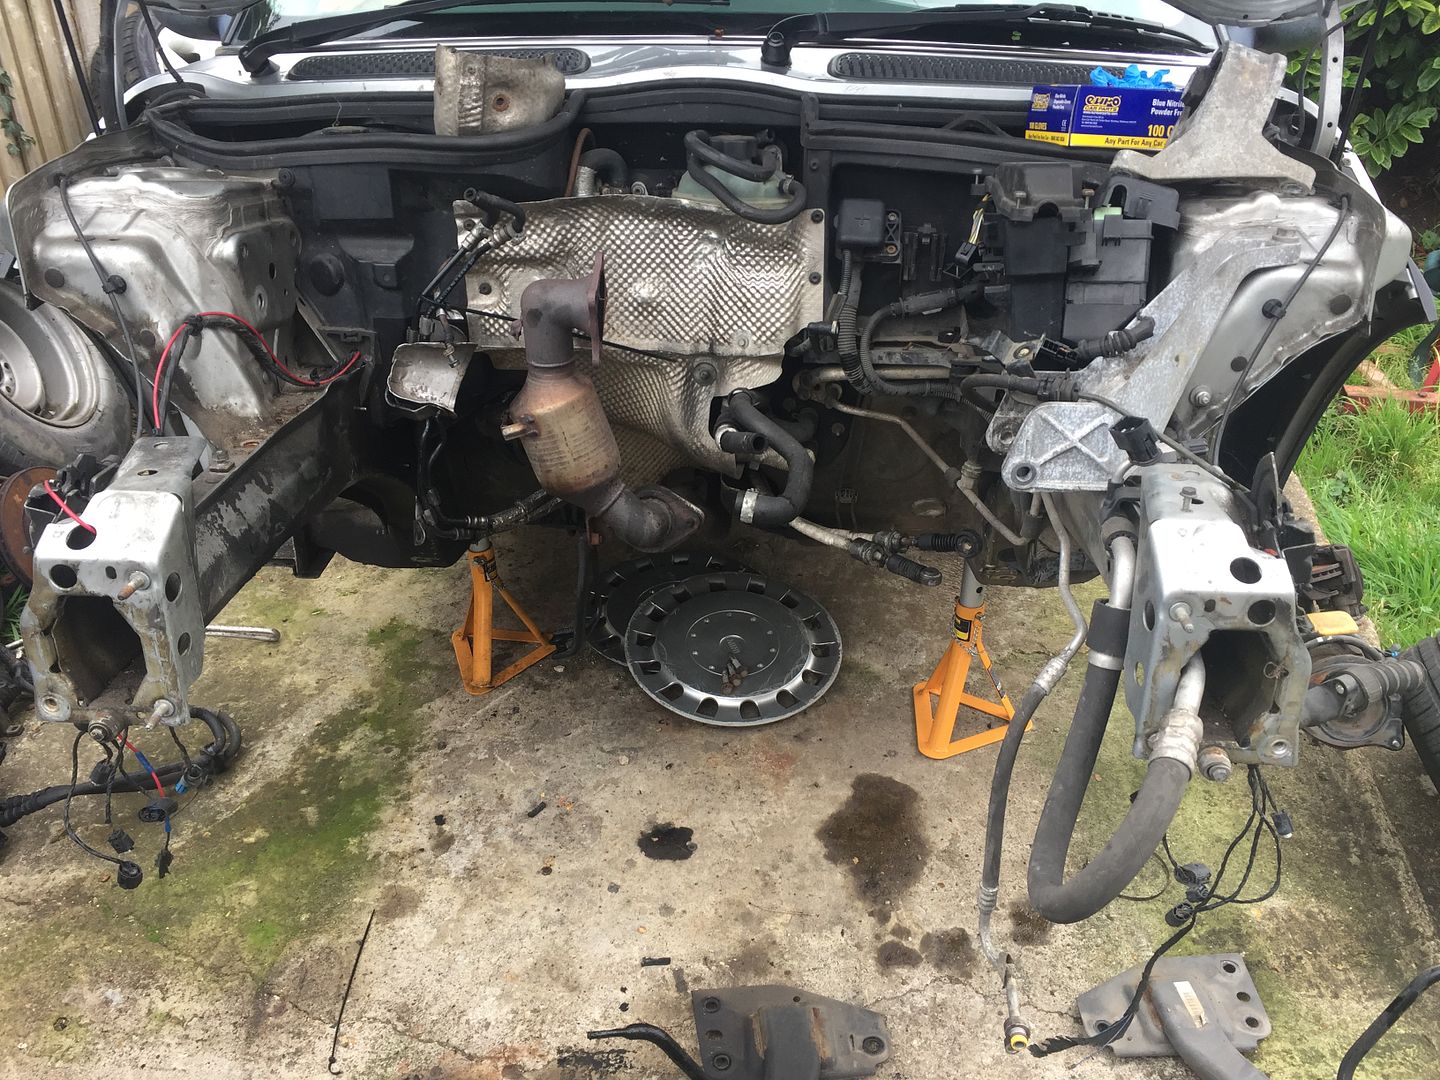
Once everything was off I degreased the subframe and then gave the engine bay a good going over. I also got rid of all traces of rat poo that I could find
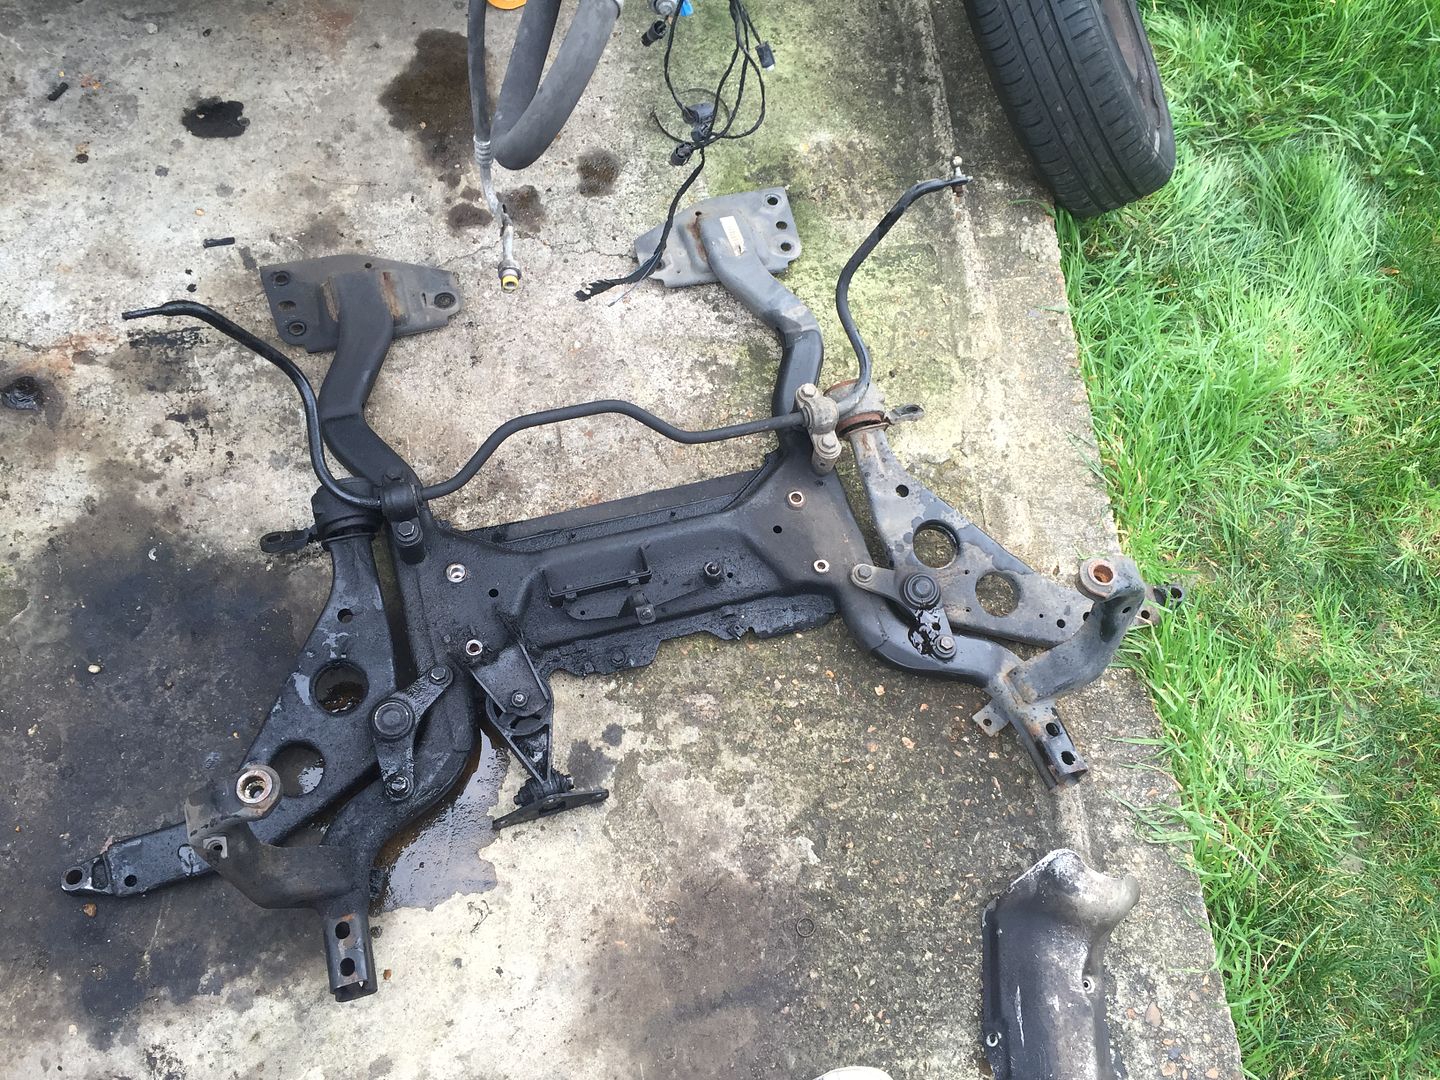
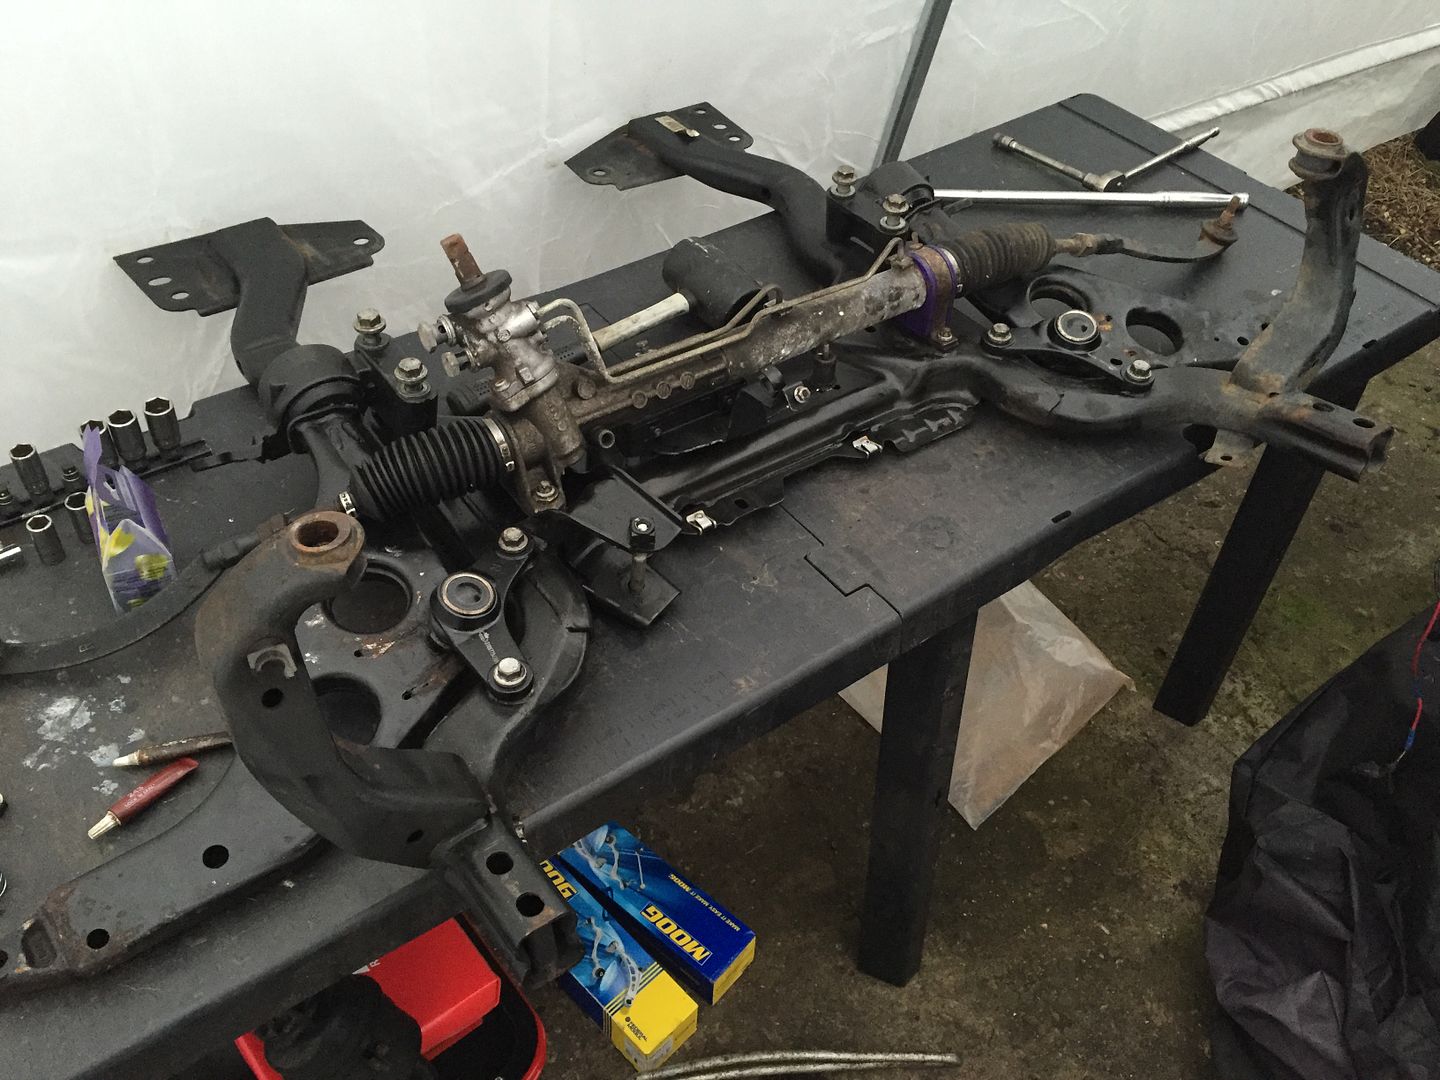
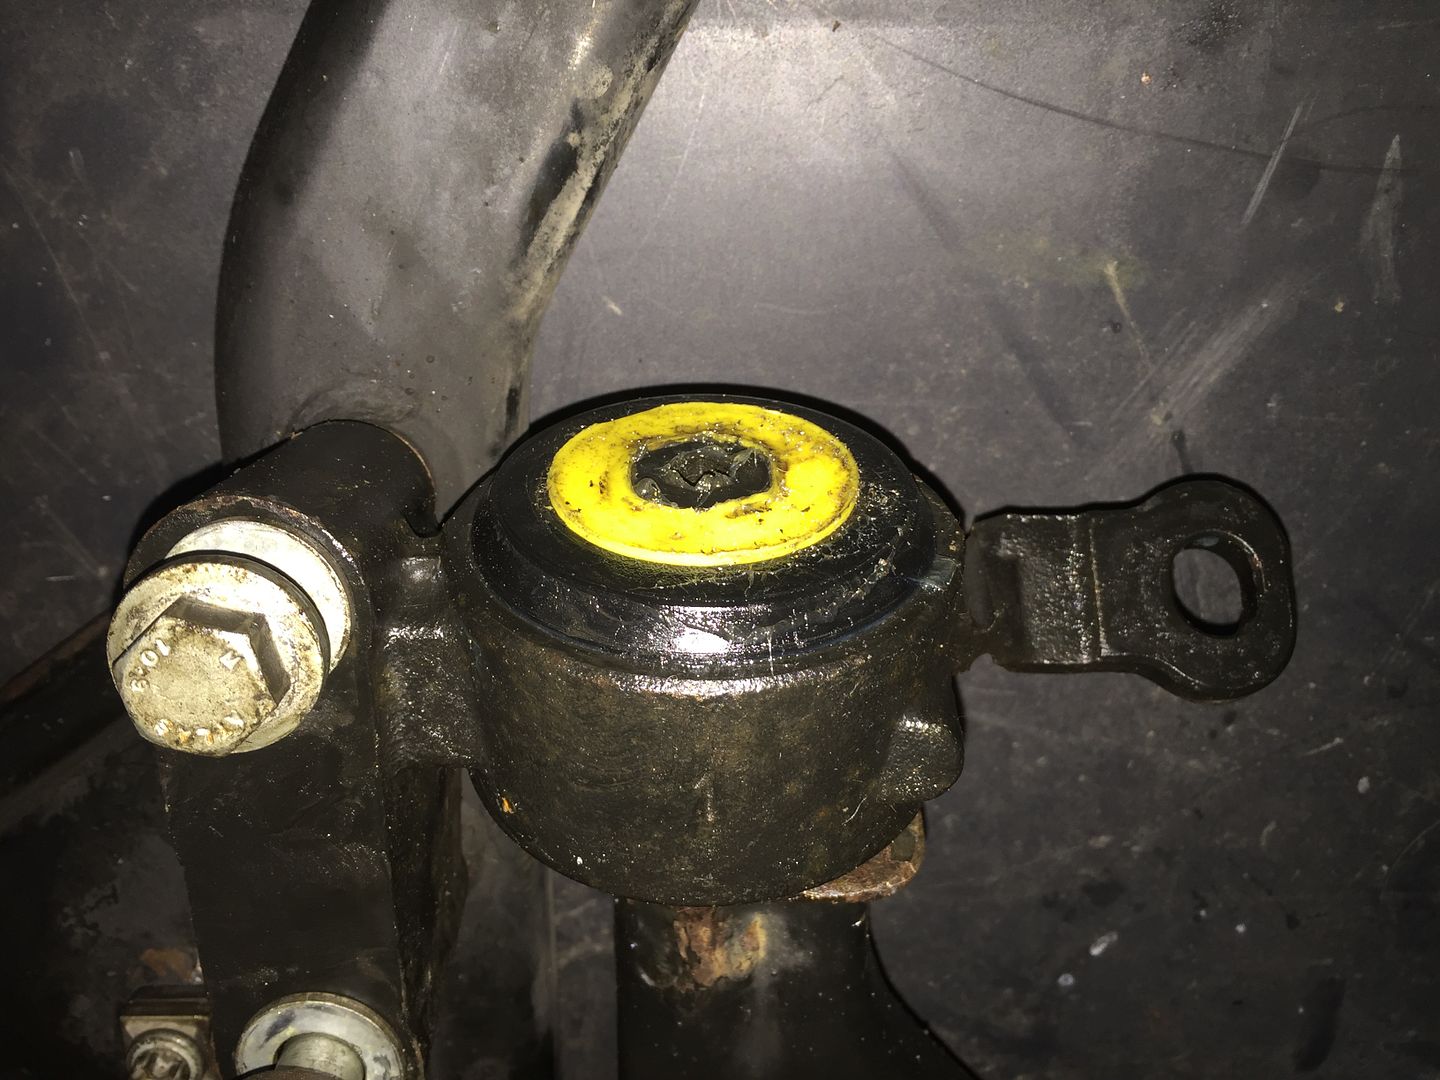
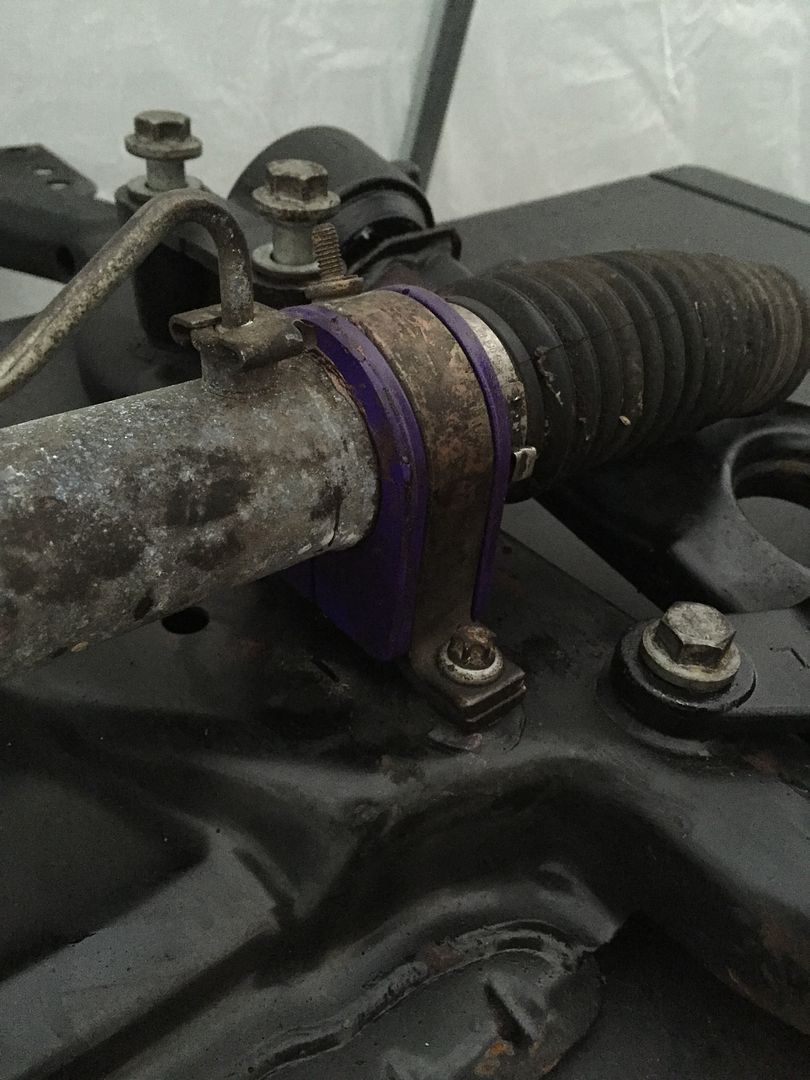
So once all that was clean I started stripping the subframe down ready to replace all the tired old bushes. I don't have any photos of anything else at the moment but I have replaced the wishbone bushes, ARB bushes, steering rack bush and all engine and gearbox mounts with Powerflex poly bushes. I was also offered a set of coilovers very cheaply. I don't know if I'm going to use them yet but they were too cheap to turn down. I've bought new track rods and ends, ball joints, a gasket set for the engine and new front wheel bearings. I managed to get all those bits from eBay and Euro Car Parts. Annoyingly I still needed to buy the snapped engine mount brackets which had to come from Mini You may remember I picked up some second hand engine mount brackets from a breakers but unfortunately they turned out to be from the later Mini One D and were slightly different
I've bought loads of other little bits and bobs while the weather has been crap but I'll wait until I'm fitting them to let you know what I've got
So at the last update I had removed the engine.

I have since removed the front subframe, shocks, and exhaust down pipe. Due to the liberal coating of oil on everything, all the subframe and steering rack bolts came undone without a fight which makes a change in this car


Once everything was off I degreased the subframe and then gave the engine bay a good going over. I also got rid of all traces of rat poo that I could find


So once all that was clean I started stripping the subframe down ready to replace all the tired old bushes. I don't have any photos of anything else at the moment but I have replaced the wishbone bushes, ARB bushes, steering rack bush and all engine and gearbox mounts with Powerflex poly bushes. I was also offered a set of coilovers very cheaply. I don't know if I'm going to use them yet but they were too cheap to turn down. I've bought new track rods and ends, ball joints, a gasket set for the engine and new front wheel bearings. I managed to get all those bits from eBay and Euro Car Parts. Annoyingly I still needed to buy the snapped engine mount brackets which had to come from Mini
You may remember I picked up some second hand engine mount brackets from a breakers but unfortunately they turned out to be from the later Mini One D and were slightly different I've bought loads of other little bits and bobs while the weather has been crap but I'll wait until I'm fitting them to let you know what I've got
Edited by Sammo123 on Saturday 5th December 18:45
Another quick update. Seeing as the bad weather is here to stay for the foreseeable future I thought I better sort out some sort of shelter so the work on the Mini can continue through the winter. I got straight onto eBay and started looking at marquees. I was a bit taken aback at how expensive they are! I only want it to keep me dry for a bit, I'm not going to be hosting weddings in it for gods sake! Anyway after keeping an eye on them I finally managed to get myself one for the princely sum of £139 with free shipping. Bargain!
Now upon its arrival I took a brief glance at the pitiful instructions before cracking on. The instructions suggested building the roof first, laying the cover over it and then building the legs. Well that would probably be the best way to go about it, but unfortunately there's a car on axle stands in the way. So instead of doing what I was told I started building the frame up around the car. It didn't take as long as I thought it would and it was pretty solid once it was up! It was also a lot taller than I was expecting! I'm not sure what I was expecting to be honest but never mind. I was halfway there.
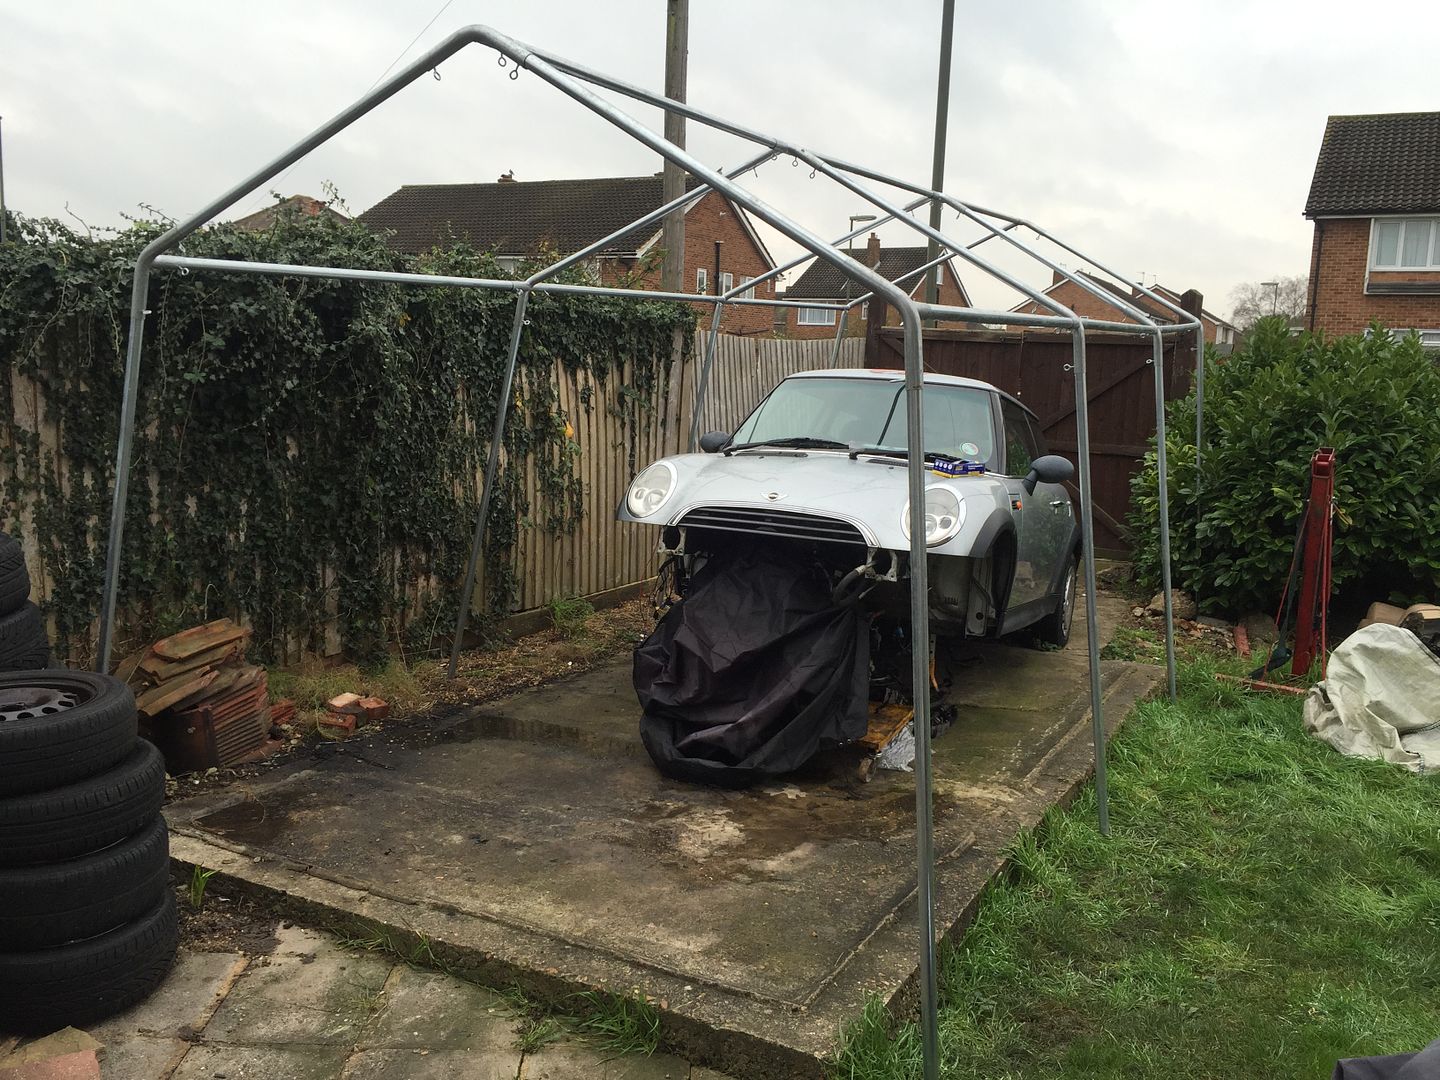
All that was left to do was chuck the cover over it (this might prove slightly troublesome due to the height), secure it down and voila, a nice dry work space. Unfortunately the weather had other ideas and instead it started to absolutely piss it down!
Fast forward to today and it's dry(ish) outside and not too windy. I got the cover back out of the shed and started opening it out onto the lawn to see which way round it went on. At this very moment my Brother arrived home from his 12 hour night shift, so was dualley enrolled as apprentice cover thrower overer. We managed to tie some rope to the tie down eyes and pulled the cover over the frame. It secured down easily and then the front and rear doors went on.
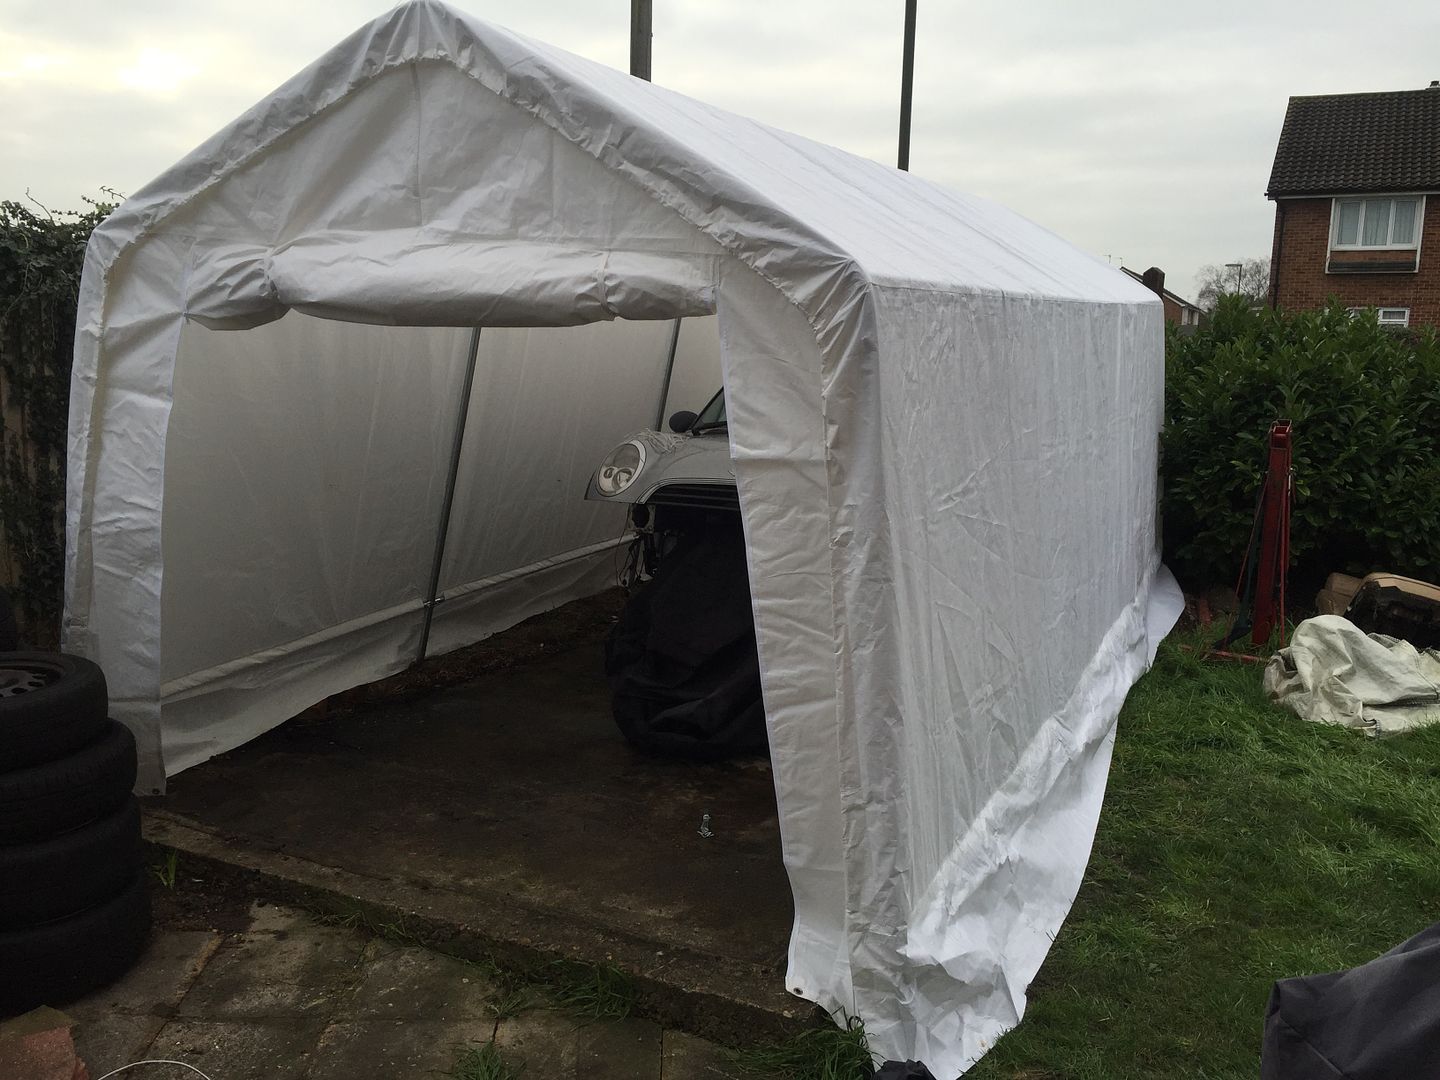
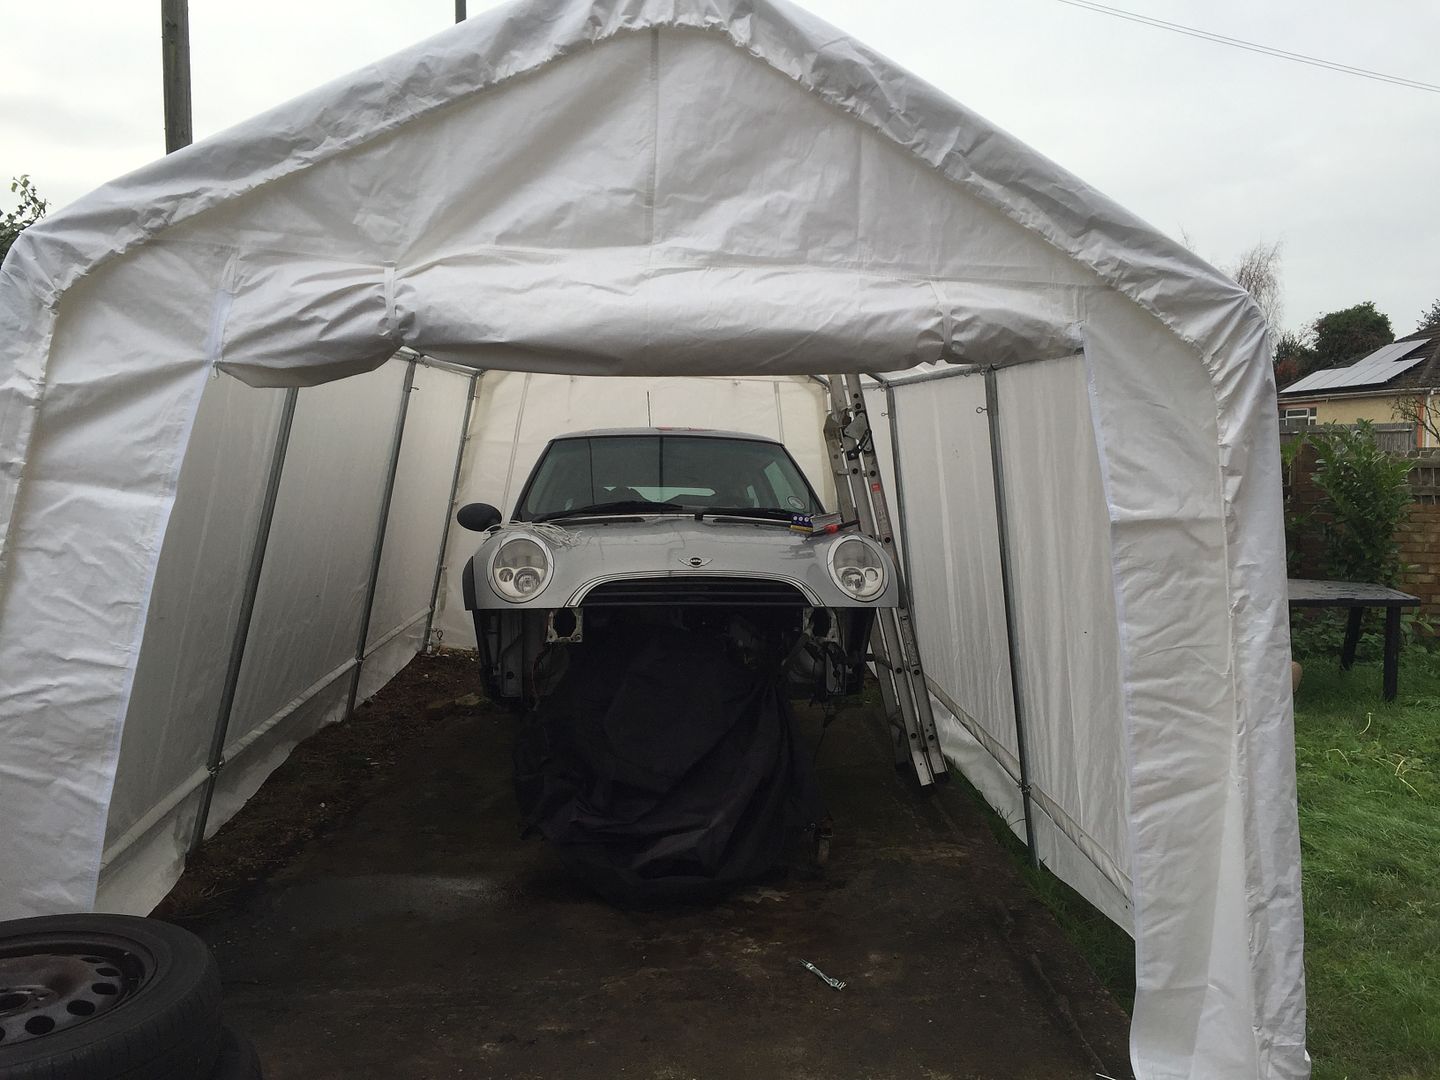
Done! I zipped the doors up and it actually got quite warm in there after a few minutes! I'm just going to wait for it to dry out a bit in there and then I can crack on with the Mini I've got some spotlights that will hang quite nicely from the framework and also provide a bit of extra warmth!
This should mean I will be providing more frequent updates now too as I can work on the car when I get home in the evenings
Now upon its arrival I took a brief glance at the pitiful instructions before cracking on. The instructions suggested building the roof first, laying the cover over it and then building the legs. Well that would probably be the best way to go about it, but unfortunately there's a car on axle stands in the way. So instead of doing what I was told I started building the frame up around the car. It didn't take as long as I thought it would and it was pretty solid once it was up! It was also a lot taller than I was expecting! I'm not sure what I was expecting to be honest but never mind. I was halfway there.

All that was left to do was chuck the cover over it (this might prove slightly troublesome due to the height), secure it down and voila, a nice dry work space. Unfortunately the weather had other ideas and instead it started to absolutely piss it down!
Fast forward to today and it's dry(ish) outside and not too windy. I got the cover back out of the shed and started opening it out onto the lawn to see which way round it went on. At this very moment my Brother arrived home from his 12 hour night shift, so was dualley enrolled as apprentice cover thrower overer. We managed to tie some rope to the tie down eyes and pulled the cover over the frame. It secured down easily and then the front and rear doors went on.


Done! I zipped the doors up and it actually got quite warm in there after a few minutes! I'm just going to wait for it to dry out a bit in there and then I can crack on with the Mini
I've got some spotlights that will hang quite nicely from the framework and also provide a bit of extra warmth!This should mean I will be providing more frequent updates now too as I can work on the car when I get home in the evenings

james_tigerwoods said:
I have to ask - what's the end plan of this or is it an engineering exercise? And what has it cost you, all in, so far?
I'm going to use it as my daily driver. It's actually worked out quite well for me being able to spend small amounts every so often to get the bits I need for it rather than having to spend out all in one go. I've actually not sat and added it all up but with having to buy the engine mounts from BMW and all the bits and bobs I've picked up I'm probably looking at around £1000 in total. That's including buying the car.
Sammo123 said:
james_tigerwoods said:
I have to ask - what's the end plan of this or is it an engineering exercise? And what has it cost you, all in, so far?
I'm going to use it as my daily driver. It's actually worked out quite well for me being able to spend small amounts every so often to get the bits I need for it rather than having to spend out all in one go. I've actually not sat and added it all up but with having to buy the engine mounts from BMW and all the bits and bobs I've picked up I'm probably looking at around £1000 in total. That's including buying the car.
Hrimfaxi said:
Another bookmarker here 
I really wish I had the mechanical know-how, that goes beyond general servicing and bits and bobs, to do something like this. Great thread!
It's nowhere near as hard as you think to do this sort of thing. I used to be a mechanic so it's second nature to me but my Brother is equally as capable and he's a Police Officer. He's watched me work on cars over the years, realised it's simple and just got on with it himself. I really wish I had the mechanical know-how, that goes beyond general servicing and bits and bobs, to do something like this. Great thread!
I managed to get out for an hour this afternoon while my Mum took my Daughter out. In that time I was able to get the subframe back together so it's almost ready to be bolted back on. I just need to clean up the PAS pipes that came off the old steering rack as they're covered in a thick layer of grease and then get them bolted up too. I could of gotten more done but it was the work Xmas party last night so I'm a bit delicate today hehe! See the very boring pics below of a reassembled subframe with poly bushes installed


Due to utter laziness I my part I've done sod all to the car recently. On Sunday I figured I need to get out there and at least do something for an hour or so.
One thing that was very noticeable when driving the Mini home from collecting it was how stiff the gearchange was. I was really having to put a lot of effort in and even use both hand to get it into reverse. Once the engine was out I very quickly realised that the shifter cables were well and truly knackered. I was spraying WD40 down the conduits and brown rusty cack was flowing back out. I ordered 2 new (bloody expensive) cables from Mini and the put them in the car and forgot about them. I decided this was the job for Sunday and set about dropping the exhaust, the exhaust heat shield and finally the shifter box. It was surprisingly simple to get out (the lack of engine and subframe probably helped!) and if it hadn't been for the big piece of dirt that fell in my eye while I was under the car it would of been even simpler!
The cables unclipped from the box nice and easily and the new ones went back in even easier. Refitting was the reverse of removal (I could work for Haynes!) and everything was back together. Annoyingly I forgot to take many pictures so these will have to do
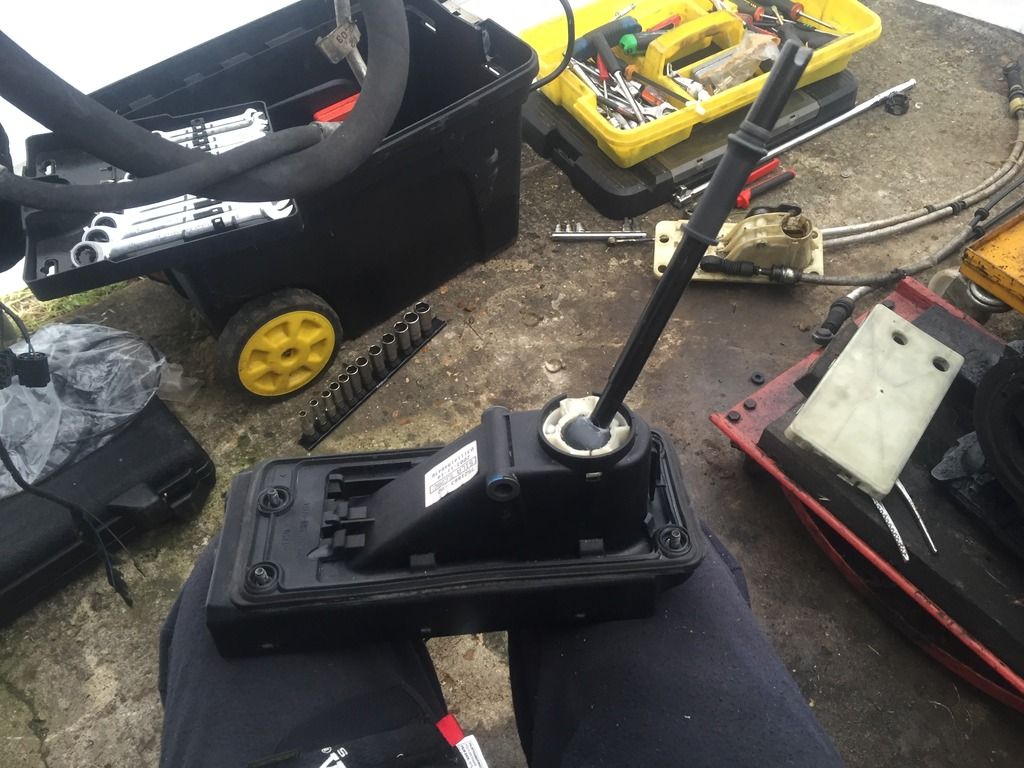
The shifter box with old cables removed. You'll notice the other on on the floor which had a short shifter fitted. Annoyingly the fittings are smaller on the diesel so the short shifter wouldn't fit
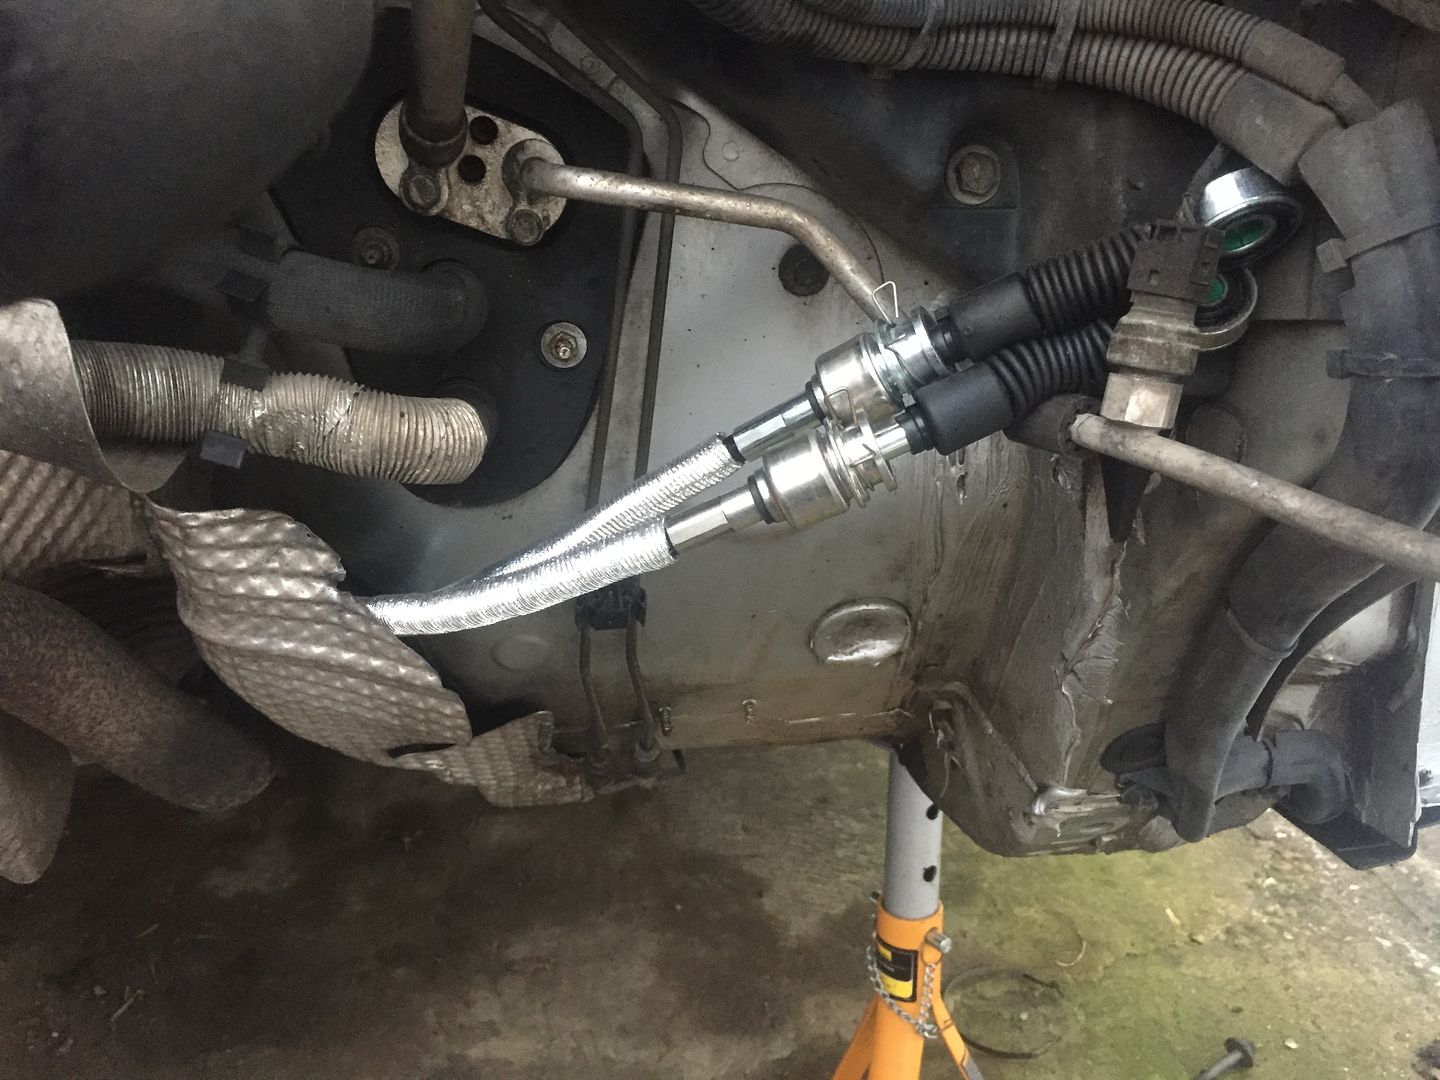
The cables all fitted up and ready for some nice smooth gear shifts.
One thing that was very noticeable when driving the Mini home from collecting it was how stiff the gearchange was. I was really having to put a lot of effort in and even use both hand to get it into reverse. Once the engine was out I very quickly realised that the shifter cables were well and truly knackered. I was spraying WD40 down the conduits and brown rusty cack was flowing back out. I ordered 2 new (bloody expensive) cables from Mini and the put them in the car and forgot about them. I decided this was the job for Sunday and set about dropping the exhaust, the exhaust heat shield and finally the shifter box. It was surprisingly simple to get out (the lack of engine and subframe probably helped!) and if it hadn't been for the big piece of dirt that fell in my eye while I was under the car it would of been even simpler!
The cables unclipped from the box nice and easily and the new ones went back in even easier. Refitting was the reverse of removal (I could work for Haynes!) and everything was back together. Annoyingly I forgot to take many pictures so these will have to do
The shifter box with old cables removed. You'll notice the other on on the floor which had a short shifter fitted. Annoyingly the fittings are smaller on the diesel so the short shifter wouldn't fit

The cables all fitted up and ready for some nice smooth gear shifts.

Gassing Station | Readers' Cars | Top of Page | What's New | My Stuff