TA22 Toyota Celica - the a hedge find...
Discussion


A bumper belated festive edition this time!
Yes I've been quiet... too quiet some might say (others not!). The reason; I suffered the usual Christmas cold/flu so it’s been somewhat of an unsociable Christmas and New Year. Not that I enjoy the sitting round being inactive and feeling ‘festively plump’ anyway, give me a couple of days like that and I’ll be climbing the walls without fail.
The same goes for sitting around and feeling sorry for myself when not quite 100%. So I got wrapped up and spent a few days in a cold cow shed (no manger in this one) to see what progress I could achieve. As with all the projects this was mostly forwards, occasionally sideways and, for once rarely backwards… ok maybe a little
The plan was to try and get the engine bay tidied, a few things serviced and ultimately any welding required in that vicinity all finished so the engine and gearbox can go back in.
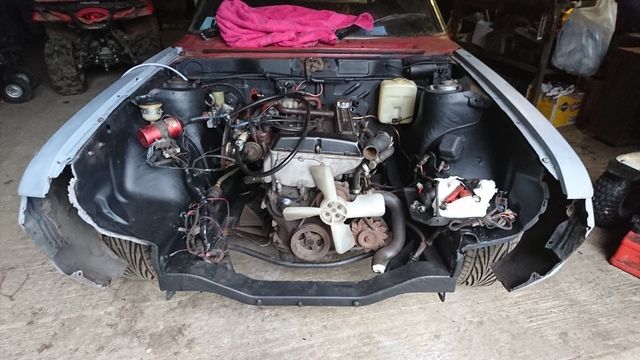
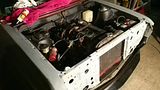
So first things first, I had a couple of days holiday booked before Christmas as a backup for any last minute present purchasing. As it happened I was actually ahead of myself so instead I visited the blasters to pick up the myriad of bits I dropped off a couple of weeks prior. During a bit of down time on Christmas day these got a healthy coat of etch (sorry crap pic with V8 distraction but they are in there somewhere!):
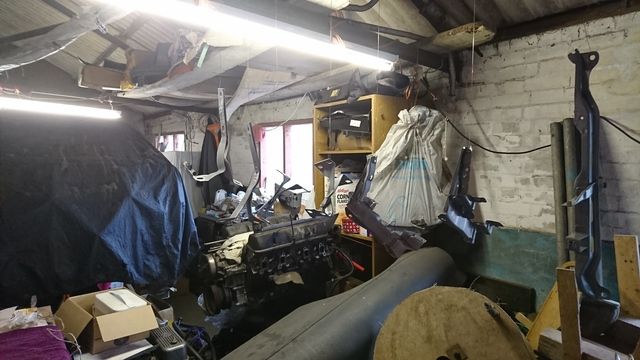
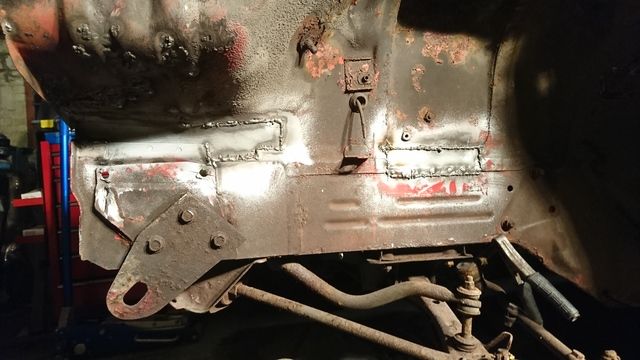
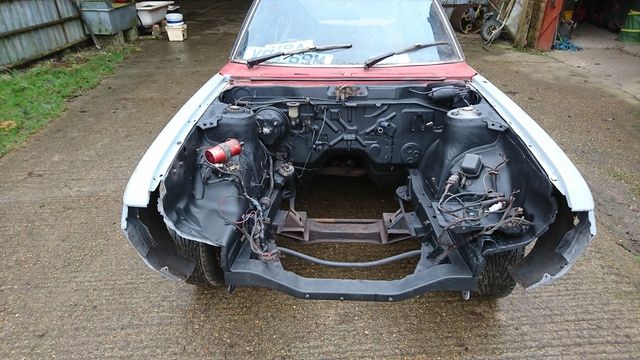
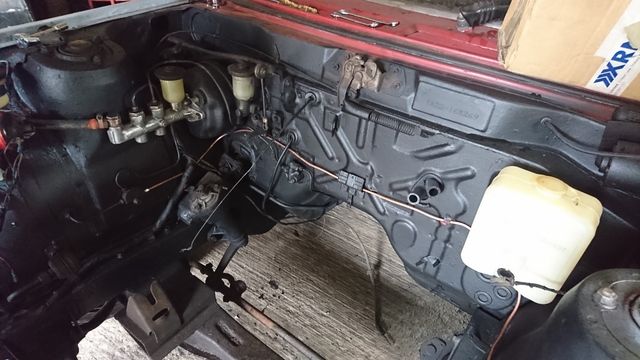
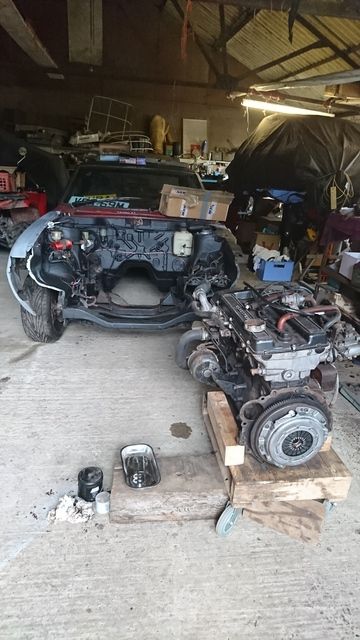
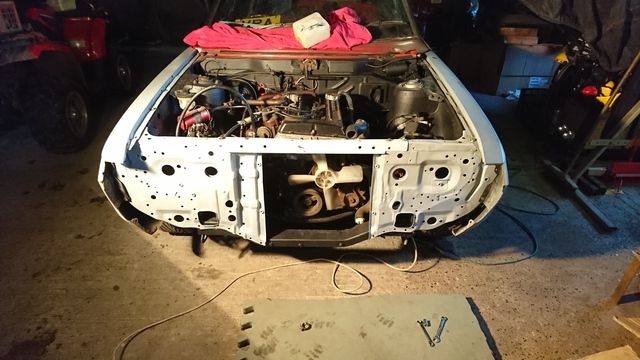
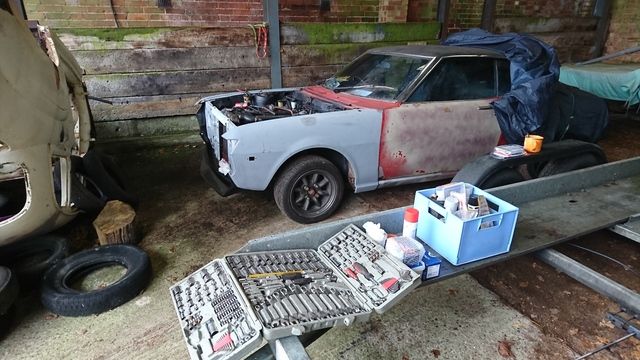
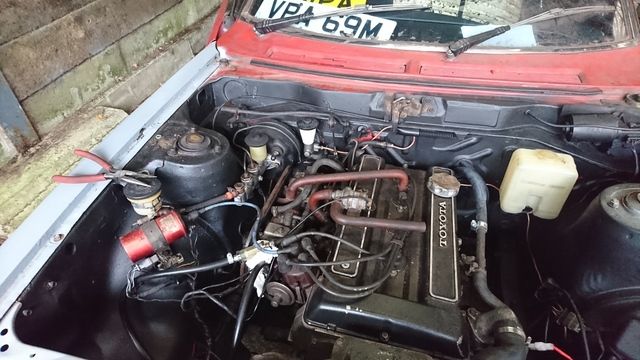
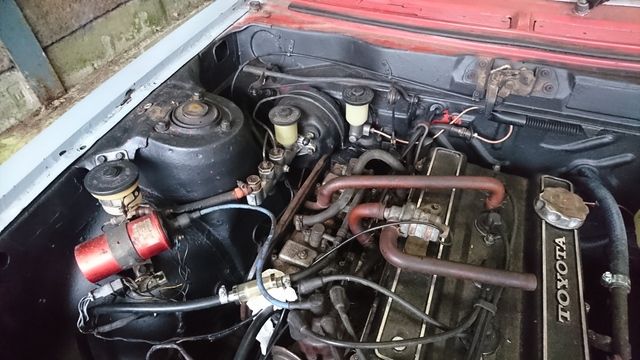
The car was then wheeled into the shed from its usual resting spot to remind myself where I’d got to… Yup not looking too pretty:
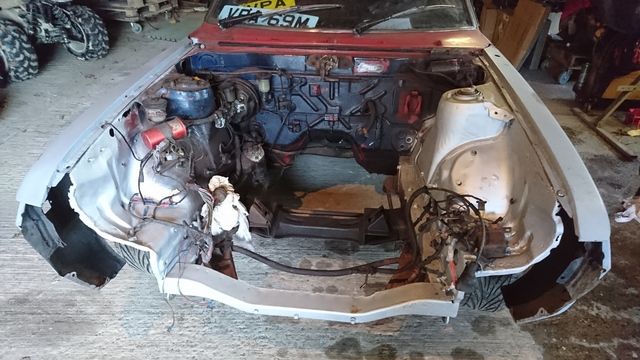
With a few holes visible:
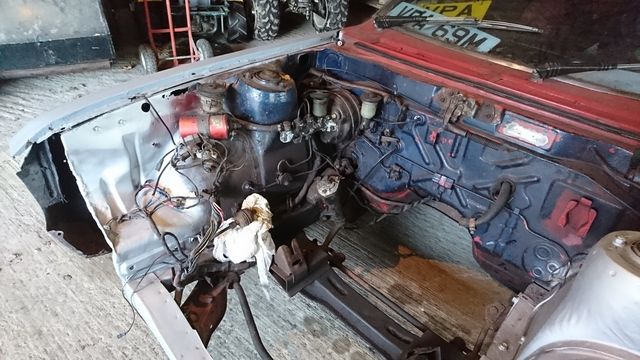
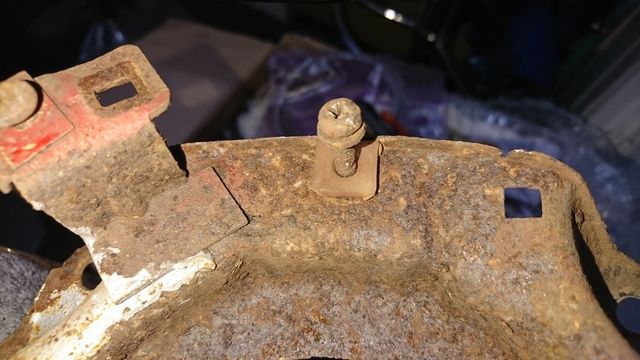
The brake cylinder wasn’t looking too healthy either.
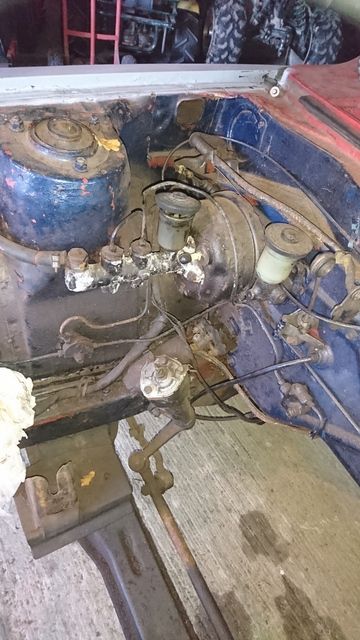
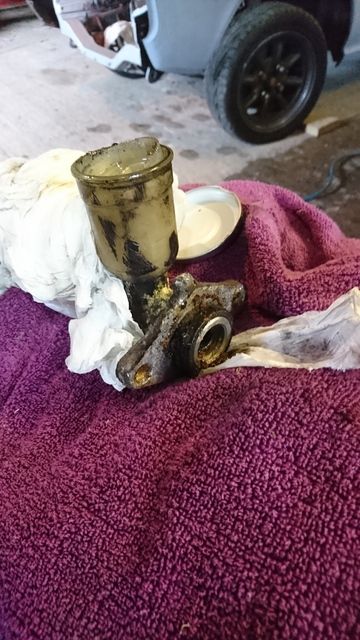
The intention is to clean it up, and if it’s too far gone replace it for a more compact Mitsubishi Pajero unit which fits nicely.
I then cracked on with dealing with the previously started task of clearing the engine wiring out of the way and cleaning up around the previously rotted out holes that I’d opened up to clean metal.
Unfortunately the suspension was in the way of access from the wheel arch so after a bit of a fight this was removed:
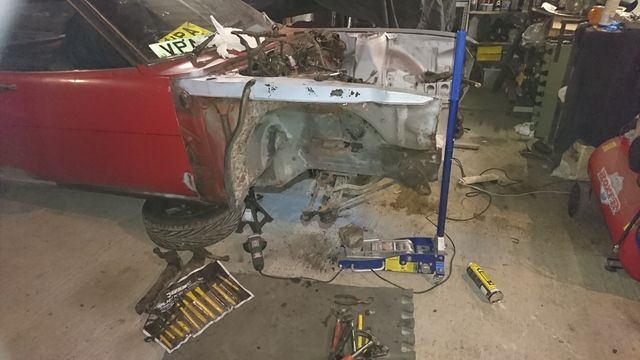
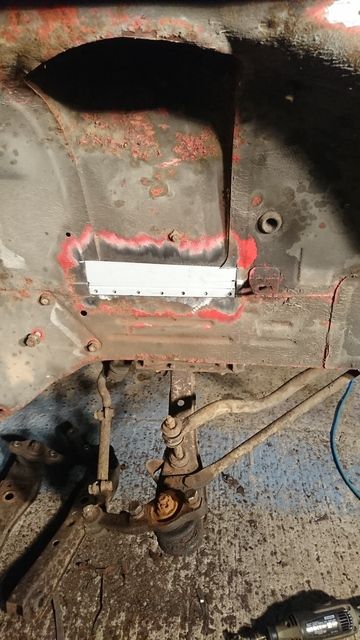
Plate made up, joggled and punched for puddle welding
It was then onto the other side – rather a bit more to do here! Including removing the battery tray support which was obviously a perfect place for harbouring dirt and moisture as it was doing a very good sieve impression!
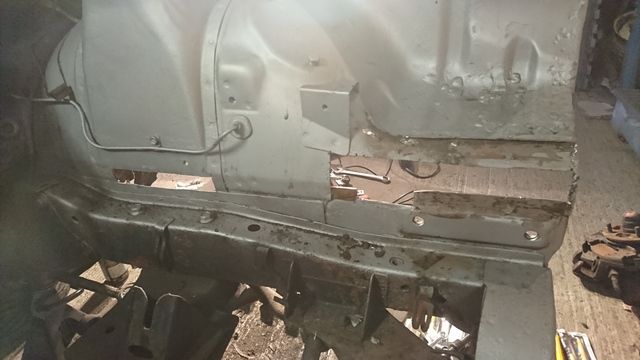
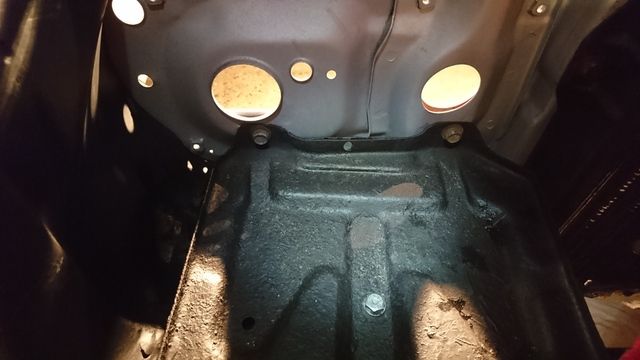
All patched. Not pretty but a lot better than what was there (or not there!) before.
Spot the broken brake pipe… more on this in a bit. Inside view:

The next job was a tiny patch on the inside of the driver’s side wing behind the VIN plate, it’d been annoying me for ages so it was time to get it sorted.
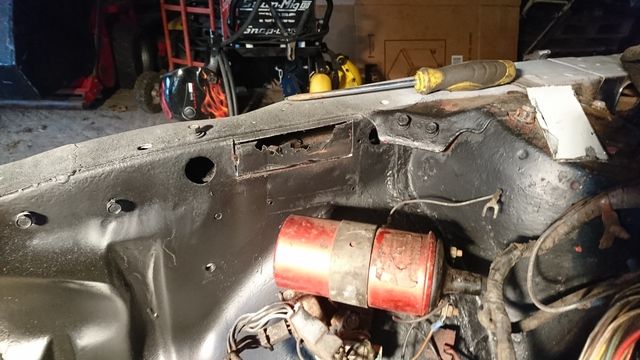
Once cut away I saw yet more newspaper and what I thought was more of that damn expanding foam that seems to haunt me on everything I’ve done on this car to date. As it happened I was wrong…
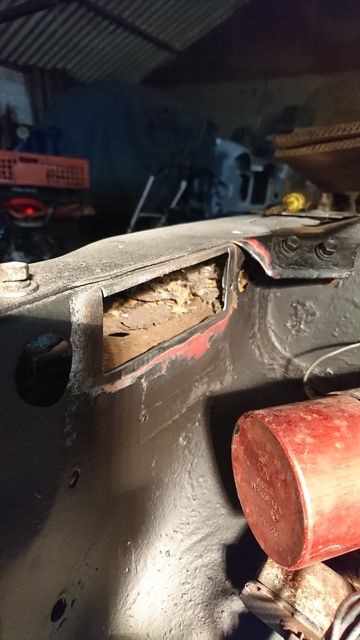
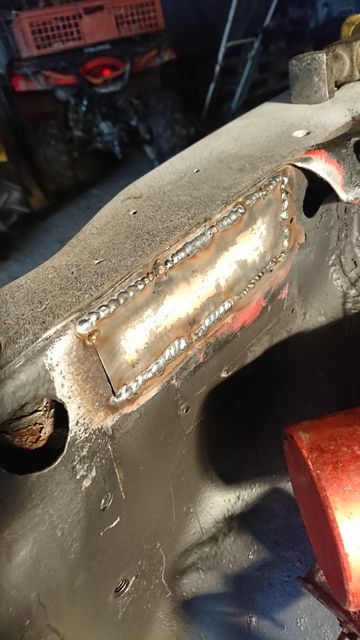
Just a mouse nest and one very dead, very stiff mouse… lovely! That all got hovered out and another patch welded in:
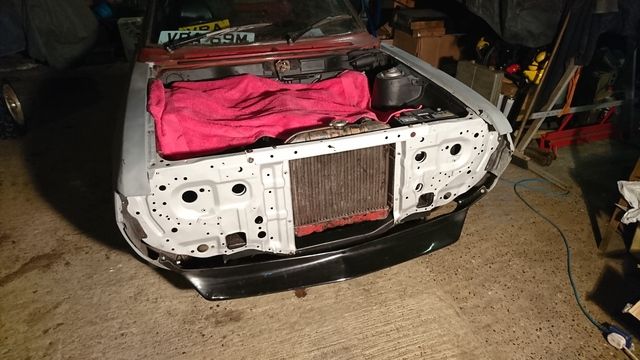
Finally the engine bay got a very rough coat of matt black as an interim just to tidy things up a bit as I was sick of looking at flaking red and blue paint.
Much better! In time it’ll all come off again when the car gets a proper paint job but for now it’ll do while I focus on getting everything else sorted.
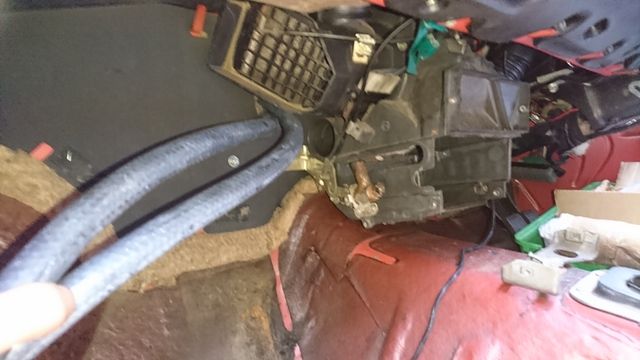
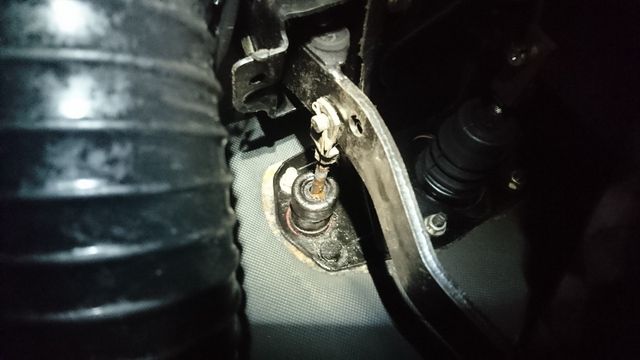
Now the eagle eyed of you may have spotted in an earlier picture that one of the heater hoses had sheared due to fatigue at the bulkhead… the seemingly simple enough fix was to trace it through, remove from heater and re-plumb with new hose… err nor quite.
As it happens it seems the hose was not the only thing to have become fatigued during the cars life - so had the copper pipe on the heater matrix. Any guesses as to what happened when I tried to remove the hose? Yup the copper pipe from the matrix came off as well! Botox!
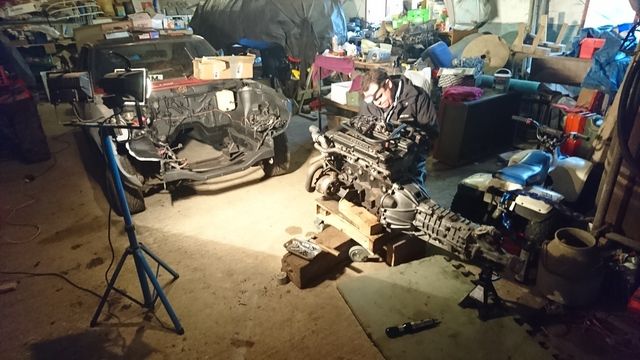
Next thought: Where the hell am I going to find another heater for one of these, let alone the matrix to go in one… Well as it happens… my garage. Remember the car that I went to Scotland for… guess what was lurking under the dash when I dismantled it
So when the wife went to bed early one eve, I did the opposite to James May’s latest series and became ‘The Dismantler’.
Take one underdash heater:
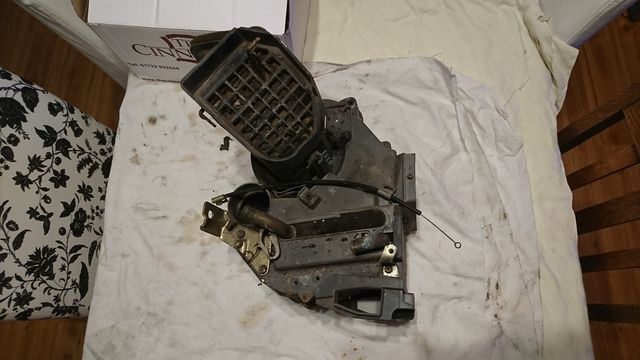
Undo a few screws, unclip a tab or two and pull… ta da…
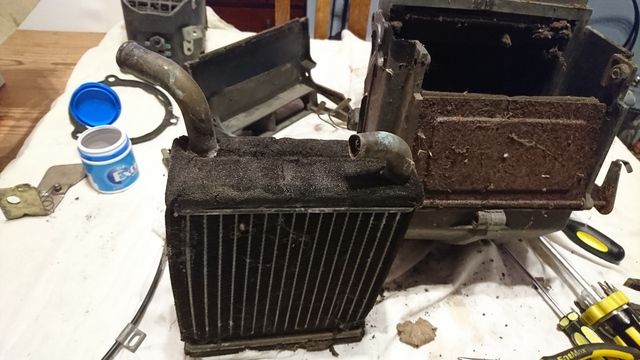
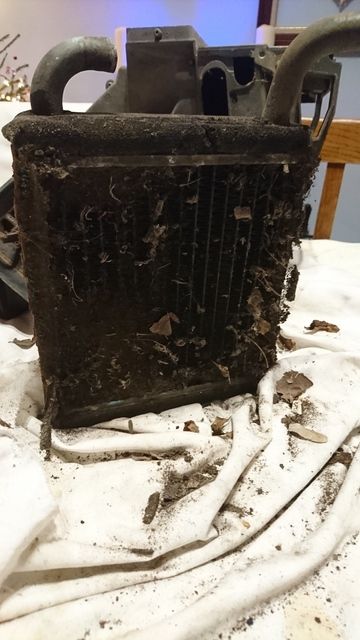
Resulting in a slightly grim but perfectly whole matrix… no mice this time but plenty of spiders... Scottish ones probably.
Both will now be shipped of for a bit of tlc, possibly a re-core if warranted and hopefully it can slot back in here without issue.
The other outstanding issues are replacing the brake pipe that runs around the rear of the engine bay (all because one, little union sheared), refurbishing the calipers, suspension struts and replacing the hoses – I do want this thing to stop assuming one day it will actually go.
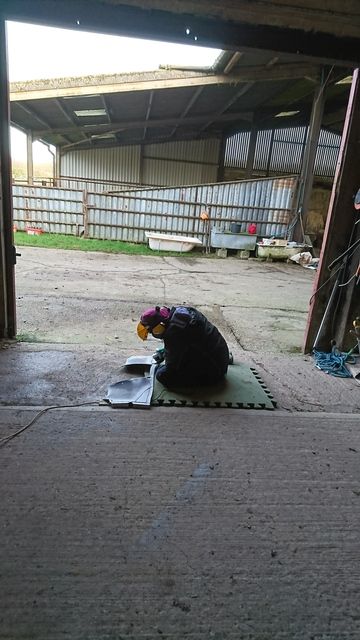
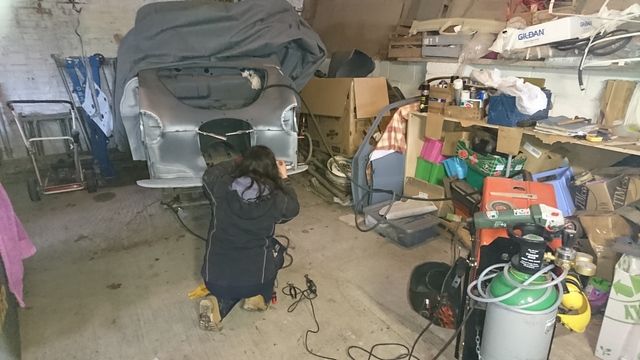
Now while this was all going on my better half was busy cracking on with the A35, namely the troublesome front panel, with me dipping in and helping when needed… it kept her happy and she was able to use some of the pressies santa brought her (so mine don’t keep disappearing!)
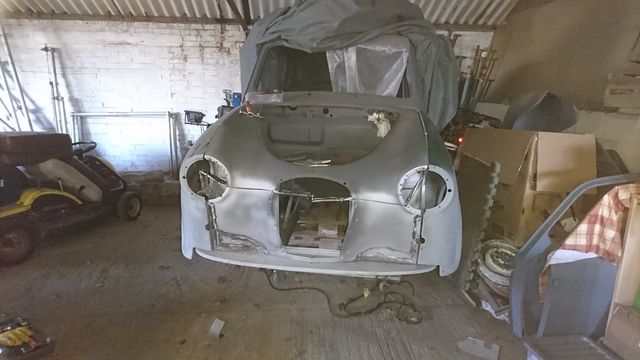
By the end of the hols the little fella almost has a face again:
And that was Christmas and New Year… some satisfying progress and nicely set up for 2017… when finally I will be driving the Celica for the first time... Bring it on.
Happy New Year all – here’s to a successful and productive 2017.
Yes I've been quiet... too quiet some might say (others not!). The reason; I suffered the usual Christmas cold/flu so it’s been somewhat of an unsociable Christmas and New Year. Not that I enjoy the sitting round being inactive and feeling ‘festively plump’ anyway, give me a couple of days like that and I’ll be climbing the walls without fail.
The same goes for sitting around and feeling sorry for myself when not quite 100%. So I got wrapped up and spent a few days in a cold cow shed (no manger in this one) to see what progress I could achieve. As with all the projects this was mostly forwards, occasionally sideways and, for once rarely backwards… ok maybe a little
The plan was to try and get the engine bay tidied, a few things serviced and ultimately any welding required in that vicinity all finished so the engine and gearbox can go back in.
So first things first, I had a couple of days holiday booked before Christmas as a backup for any last minute present purchasing. As it happened I was actually ahead of myself so instead I visited the blasters to pick up the myriad of bits I dropped off a couple of weeks prior. During a bit of down time on Christmas day these got a healthy coat of etch (sorry crap pic with V8 distraction but they are in there somewhere!):
The car was then wheeled into the shed from its usual resting spot to remind myself where I’d got to… Yup not looking too pretty:
With a few holes visible:
The brake cylinder wasn’t looking too healthy either.
The intention is to clean it up, and if it’s too far gone replace it for a more compact Mitsubishi Pajero unit which fits nicely.
I then cracked on with dealing with the previously started task of clearing the engine wiring out of the way and cleaning up around the previously rotted out holes that I’d opened up to clean metal.
Unfortunately the suspension was in the way of access from the wheel arch so after a bit of a fight this was removed:
Plate made up, joggled and punched for puddle welding
It was then onto the other side – rather a bit more to do here! Including removing the battery tray support which was obviously a perfect place for harbouring dirt and moisture as it was doing a very good sieve impression!
All patched. Not pretty but a lot better than what was there (or not there!) before.
Spot the broken brake pipe… more on this in a bit. Inside view:
The next job was a tiny patch on the inside of the driver’s side wing behind the VIN plate, it’d been annoying me for ages so it was time to get it sorted.
Once cut away I saw yet more newspaper and what I thought was more of that damn expanding foam that seems to haunt me on everything I’ve done on this car to date. As it happened I was wrong…
Just a mouse nest and one very dead, very stiff mouse… lovely! That all got hovered out and another patch welded in:
Finally the engine bay got a very rough coat of matt black as an interim just to tidy things up a bit as I was sick of looking at flaking red and blue paint.
Much better! In time it’ll all come off again when the car gets a proper paint job but for now it’ll do while I focus on getting everything else sorted.
Now the eagle eyed of you may have spotted in an earlier picture that one of the heater hoses had sheared due to fatigue at the bulkhead… the seemingly simple enough fix was to trace it through, remove from heater and re-plumb with new hose… err nor quite.
As it happens it seems the hose was not the only thing to have become fatigued during the cars life - so had the copper pipe on the heater matrix. Any guesses as to what happened when I tried to remove the hose? Yup the copper pipe from the matrix came off as well! Botox!
Next thought: Where the hell am I going to find another heater for one of these, let alone the matrix to go in one… Well as it happens… my garage. Remember the car that I went to Scotland for… guess what was lurking under the dash when I dismantled it
So when the wife went to bed early one eve, I did the opposite to James May’s latest series and became ‘The Dismantler’.
Take one underdash heater:
Undo a few screws, unclip a tab or two and pull… ta da…
Resulting in a slightly grim but perfectly whole matrix… no mice this time but plenty of spiders... Scottish ones probably.
Both will now be shipped of for a bit of tlc, possibly a re-core if warranted and hopefully it can slot back in here without issue.
The other outstanding issues are replacing the brake pipe that runs around the rear of the engine bay (all because one, little union sheared), refurbishing the calipers, suspension struts and replacing the hoses – I do want this thing to stop assuming one day it will actually go.
Now while this was all going on my better half was busy cracking on with the A35, namely the troublesome front panel, with me dipping in and helping when needed… it kept her happy and she was able to use some of the pressies santa brought her (so mine don’t keep disappearing!)
By the end of the hols the little fella almost has a face again:
And that was Christmas and New Year… some satisfying progress and nicely set up for 2017… when finally I will be driving the Celica for the first time... Bring it on.
Happy New Year all – here’s to a successful and productive 2017.
Bit of a double update as seemingly didn't post anything last week.
So firstly - it’s all in the detail…
The weekend before last bought about some much needed pottering, progress but at a much more relaxed pace as was feeling it after the first week back at work (how after only 4 days I don’t know!) and in truth there were lots of little jobs that needed doing before I could get on with the main aim of refitting the gearbox and engine.
First up was the aforementioned brake cylinder… Still looking delightfully furry and half covered in the remaining hammerite used to coat everything in sight all those years ago.

After a bit of dismantling and an attack with various forms of abrasive things started to look a bit better
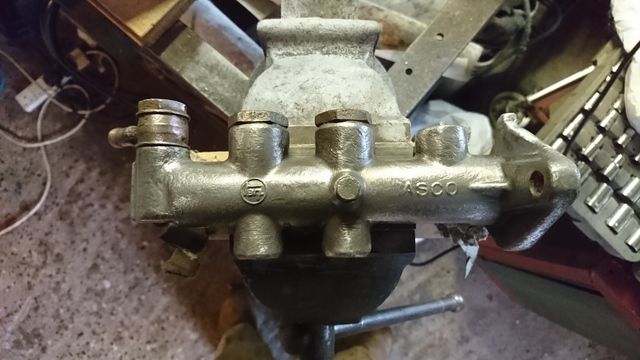
I checked the seals and everything seemed to work as it should so moved on to dealing with the errant paint on the reservoir
All cleaned up, filters replaced and reassembled
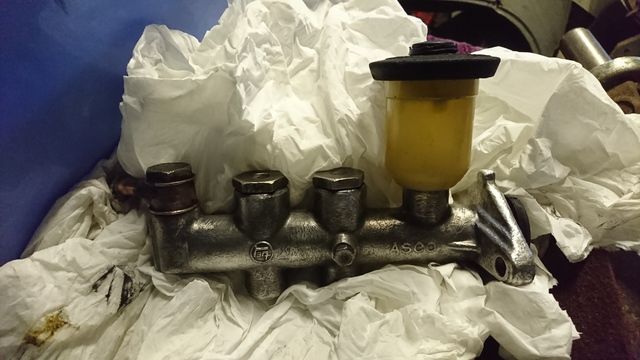
That looks more like it should.
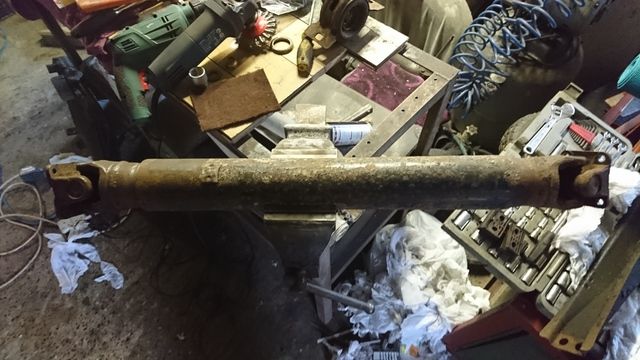
Next job – propshaft.
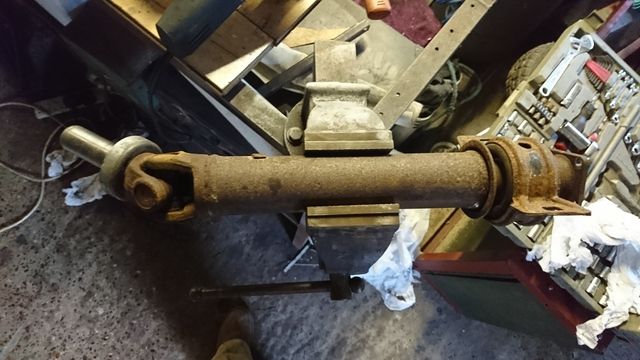
Yes it’s going to live under the car but think it can look a bit better than this – not to mention have a bit more protection applied. I also needed to change the bearing as there was quite a bit of slop in it.
Other section was equally as bad.
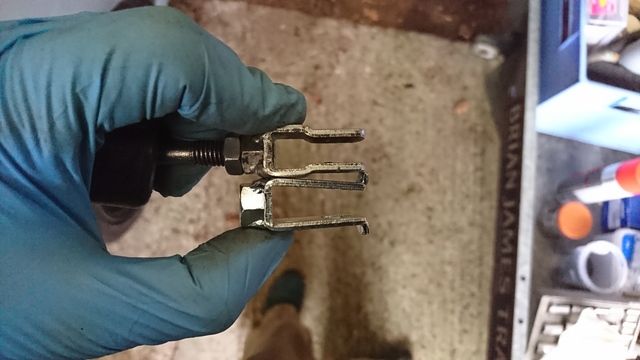
Bearing comparison:

Not quite the same in terms of the brackets and angle… will see what happens when it comes to refitting on the car I guess!
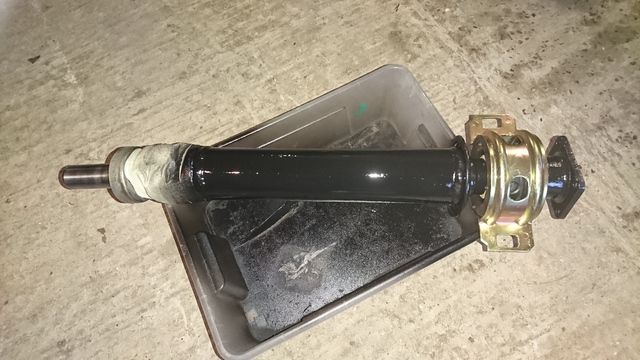
All reassembled and with cost of paint applied - shiny!
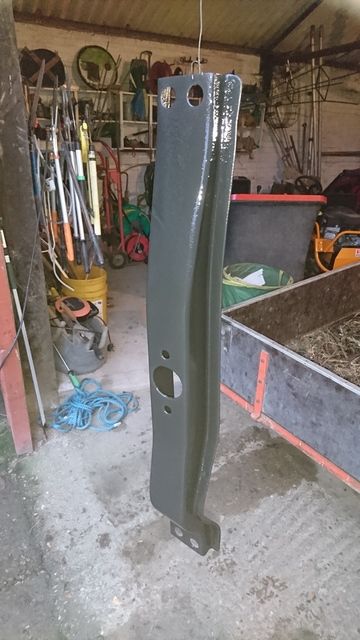
Attacked the gearbox cross member as well
Gearbox also started to get the cleaning treatment while the paint was drying
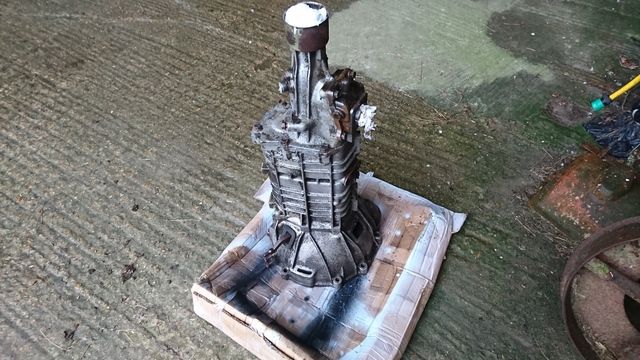
Although some of the deposits on this will need a bit more of a soak so this got left for now.
Washer bottle, pump and a few other parts got de-painted also… just need to sort the clutch and get the gearbox cleaned and reattached before installation… not long now hopefully.
So firstly - it’s all in the detail…
The weekend before last bought about some much needed pottering, progress but at a much more relaxed pace as was feeling it after the first week back at work (how after only 4 days I don’t know!) and in truth there were lots of little jobs that needed doing before I could get on with the main aim of refitting the gearbox and engine.
First up was the aforementioned brake cylinder… Still looking delightfully furry and half covered in the remaining hammerite used to coat everything in sight all those years ago.
After a bit of dismantling and an attack with various forms of abrasive things started to look a bit better
I checked the seals and everything seemed to work as it should so moved on to dealing with the errant paint on the reservoir
All cleaned up, filters replaced and reassembled
That looks more like it should.
Next job – propshaft.
Yes it’s going to live under the car but think it can look a bit better than this – not to mention have a bit more protection applied. I also needed to change the bearing as there was quite a bit of slop in it.
Other section was equally as bad.
Bearing comparison:
Not quite the same in terms of the brackets and angle… will see what happens when it comes to refitting on the car I guess!
All reassembled and with cost of paint applied - shiny!
Attacked the gearbox cross member as well
Gearbox also started to get the cleaning treatment while the paint was drying
Although some of the deposits on this will need a bit more of a soak so this got left for now.
Washer bottle, pump and a few other parts got de-painted also… just need to sort the clutch and get the gearbox cleaned and reattached before installation… not long now hopefully.
Despite the weathers best efforts (i reckon it was no more that 2 degrees C in the workshop all day!), it was another productive Saturday.
A good friend (who often appears on these pages in the photos) popped up to assist me with fitting the new clutch as well as a couple of bits I had lined up. Between us we managed to do rather well and got more done than I envisioned at the start of the day - Neil once again your assistance was hugely appreciated!
So while he started with flaring the new brake line, I got on with refitting the cleaned brake cylinder and connecting the other pipes back up. It was soon in situ along with the washer bottle I'd cleaned up over christmas.
Then onto the main job - that famous clutch I've spoken about for so long, well no more because it's actually fitted
Bit of a milestone for me as it's been a long time coming (just over a year to be precise!)
It was then onto the gearbox, although I started on this last weekend I only really tickled the outside!
Unfortunately due to being run with a missing grommet, dirt grease and rubbish had accumulated over time and it was seriously gunked up in the bell housing. So out came the scrapers, cleaning fluid and elbow grease and it was soon looking considerably better. (Sadly no before and after pics as my hands were too filthy to pick up my phone!)
After a bit of a clean up (me this time!), the gearbox went back on to the engine.
and that was as far as I expected to get, not sure why but I had it in my head that I could then have a sort of the parts I've accumulated, tidy a few other things up and go thaw out by the fire.
Instead this happened:
Prop shaft was reassembled and fitted, clutch slave and piping unwrapped and reinstalled, refurbished starter motor put back in and all the electrics reattached.
It was at this point that we thought we'd test the clutch. The reservoir was filled and the pedal pumped, resulting in... nothing. No fluid drawn down... hmmm.
Thinking back to when we removed the slave cylinder all those months ago, we never really gave much thought to the master cylinder, the pedal moved as it should and we quickly discovered the slave cylinder was seized and so attention was very much focused on that.
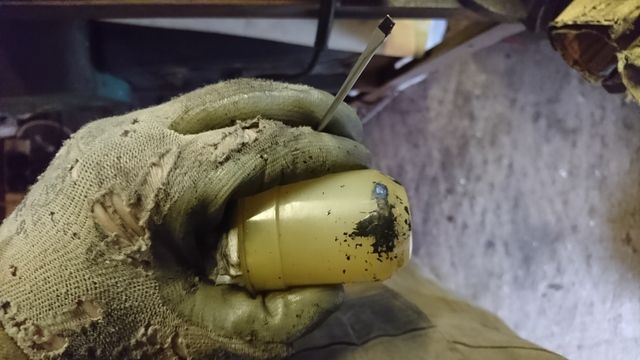
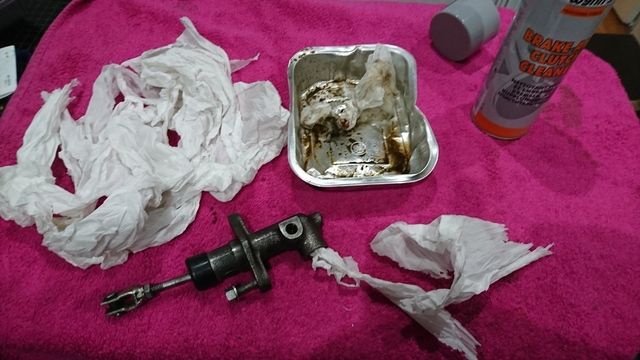
Time to investigate and remove the master cylinder - really didn't look too clever from the inside:
On removal it appears to be pretty blocked up inside so this will get the refurbishment treatment over the next few days ready to try again next weekend, at least I'll know the whole system will then have been sorted for peace of mind.
and that was how the weekends tinkering finished... One step closer to its first drive = one happy boy indeed.
A good friend (who often appears on these pages in the photos) popped up to assist me with fitting the new clutch as well as a couple of bits I had lined up. Between us we managed to do rather well and got more done than I envisioned at the start of the day - Neil once again your assistance was hugely appreciated!
So while he started with flaring the new brake line, I got on with refitting the cleaned brake cylinder and connecting the other pipes back up. It was soon in situ along with the washer bottle I'd cleaned up over christmas.
Then onto the main job - that famous clutch I've spoken about for so long, well no more because it's actually fitted
Bit of a milestone for me as it's been a long time coming (just over a year to be precise!)
It was then onto the gearbox, although I started on this last weekend I only really tickled the outside!
Unfortunately due to being run with a missing grommet, dirt grease and rubbish had accumulated over time and it was seriously gunked up in the bell housing. So out came the scrapers, cleaning fluid and elbow grease and it was soon looking considerably better. (Sadly no before and after pics as my hands were too filthy to pick up my phone!)
After a bit of a clean up (me this time!), the gearbox went back on to the engine.
and that was as far as I expected to get, not sure why but I had it in my head that I could then have a sort of the parts I've accumulated, tidy a few other things up and go thaw out by the fire.
Instead this happened:
Prop shaft was reassembled and fitted, clutch slave and piping unwrapped and reinstalled, refurbished starter motor put back in and all the electrics reattached.
It was at this point that we thought we'd test the clutch. The reservoir was filled and the pedal pumped, resulting in... nothing. No fluid drawn down... hmmm.
Thinking back to when we removed the slave cylinder all those months ago, we never really gave much thought to the master cylinder, the pedal moved as it should and we quickly discovered the slave cylinder was seized and so attention was very much focused on that.
Time to investigate and remove the master cylinder - really didn't look too clever from the inside:
On removal it appears to be pretty blocked up inside so this will get the refurbishment treatment over the next few days ready to try again next weekend, at least I'll know the whole system will then have been sorted for peace of mind.
and that was how the weekends tinkering finished... One step closer to its first drive = one happy boy indeed.
Pretty much there I think, it's run before so hopefully will play ball again... he says.
I still need to get the radiator refurbished and get the front panels back on so they actually support it, but asides that I think I've everything else. Then it's onto brakes and suspension before the rest of the bodywork.
If all goes to plan I should find out this weekend
I still need to get the radiator refurbished and get the front panels back on so they actually support it, but asides that I think I've everything else. Then it's onto brakes and suspension before the rest of the bodywork.
If all goes to plan I should find out this weekend
Thanks for the positive comments chaps - always good for the motivation and the realisation that folk do actually read this thread.
The master cylinders were pretty grim all round, perfectly understandable having been left for as long as they were, I'm certainly pleased with how they've turned out.
After some retail therapy ordering up various oils for the engine, gearbox and diff, I'm going to have a fight with the clutch cylinder tonight to see if I can get that functioning as intended.
Getting closer...
You know when people restore old furniture and they go from a horrid bit of wood that looks like it belonged to the mary rose to a fabulous dinner table? You sir are like that with cars. Some great work and dedication, I also no longer feel worried about the small patch of surface rust on a jacking point lol.
Out of interest what tools are you using to clear the rust off? I never seem to be able to get back to bare metal quite so nicely.
Out of interest what tools are you using to clear the rust off? I never seem to be able to get back to bare metal quite so nicely.
Thanks guys.
Daston, unfortunately the rest of the car isn't quite so pretty yet but we'll get there. In terms of tools to clean the rust, depending on the subject matter in hand I usually use a combination of a twisted knot wheel on a grinder, softer brass bristle brush in a drill and sometimes a carbide disk or drill attachment. The most important bit - patience. Often it's when you are rushing that the damage occurs... and I don't just mean to the car or part you are working on - I've a couple of scars from near misses as proof!
So with motivation at a high with an impending start and possible drive on the horizon, some evening activities have been taking place.
This week, I have been mostly focusing on... the headlights and clutch master cylinder. (something for fans of the Fast show there)
As mentioned above, one eve when the wife was out I decamped to the kitchen once more and started with digging out the headlights and seeing what I had to play with... remember these?
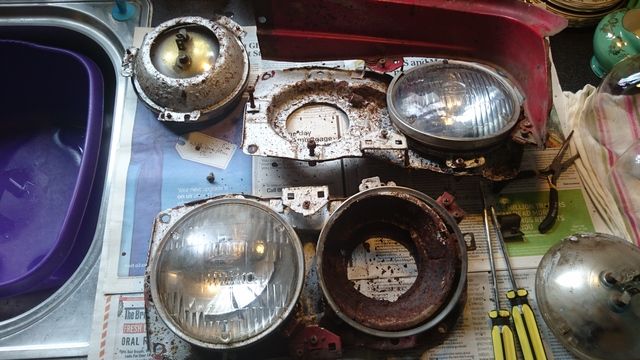
After deciding at the time that the original frames were too far gone I managed to get some second hand replacements from the early celica guru that is Bob Clark down in Bristol, he also sent me a set of replacement headlamp bowls as well and upgraded H4 lights.
The intention was to swap the various clips and bushings over from the old to the new... however the truth was that most were so rusted up or just plain tired I didn't see much point. So I ended up wrapping everything back up and hitting the net to order some more from some far flung part of the world. That'll have to keep for another eve.
Next up, the clutch master cylinder mentioned in my previous update. But before that some much needed shopping...
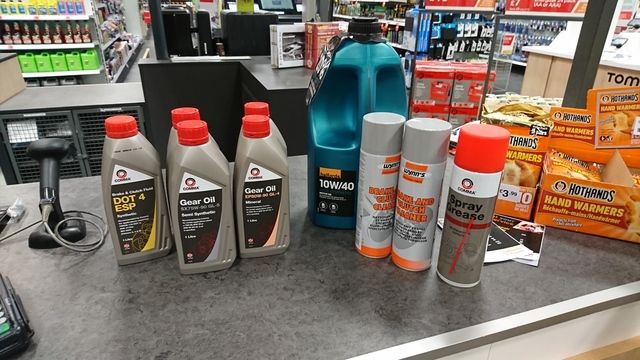
That should do it!
Before I packed the master cylinder away at the weekend, I dismantled it and cleaned it up as much as I could with various wire wheels and cleaner. However there were some stubborn bits that I couldn't get to which required fluid to shift that I didn't have to hand. After the above spot of retail therapy, it was out with the brake and clutch cleaning fluid.
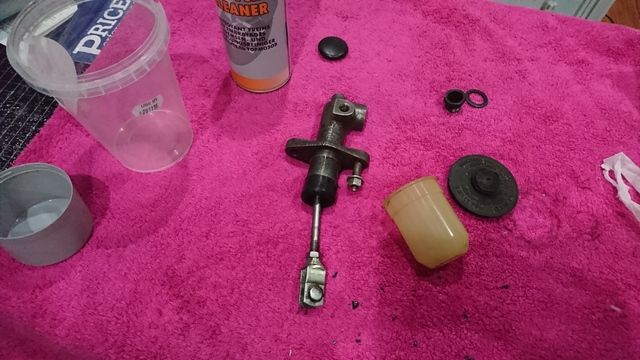
I ran this through a few times and pumped the cylinder. After a few flushes through I started to see the grit and general gunk coming through... no wonder it wasn't working!
After a few more goes and ensuring that it did draw fluid down as expected once more, it was a quick clean of the reservoir, seals and cap and we were left with this ready to be assembled and refitted.
Bring on the weekend...
Daston, unfortunately the rest of the car isn't quite so pretty yet but we'll get there. In terms of tools to clean the rust, depending on the subject matter in hand I usually use a combination of a twisted knot wheel on a grinder, softer brass bristle brush in a drill and sometimes a carbide disk or drill attachment. The most important bit - patience. Often it's when you are rushing that the damage occurs... and I don't just mean to the car or part you are working on - I've a couple of scars from near misses as proof!
So with motivation at a high with an impending start and possible drive on the horizon, some evening activities have been taking place.
This week, I have been mostly focusing on... the headlights and clutch master cylinder. (something for fans of the Fast show there)
As mentioned above, one eve when the wife was out I decamped to the kitchen once more and started with digging out the headlights and seeing what I had to play with... remember these?
After deciding at the time that the original frames were too far gone I managed to get some second hand replacements from the early celica guru that is Bob Clark down in Bristol, he also sent me a set of replacement headlamp bowls as well and upgraded H4 lights.
The intention was to swap the various clips and bushings over from the old to the new... however the truth was that most were so rusted up or just plain tired I didn't see much point. So I ended up wrapping everything back up and hitting the net to order some more from some far flung part of the world. That'll have to keep for another eve.
Next up, the clutch master cylinder mentioned in my previous update. But before that some much needed shopping...
That should do it!
Before I packed the master cylinder away at the weekend, I dismantled it and cleaned it up as much as I could with various wire wheels and cleaner. However there were some stubborn bits that I couldn't get to which required fluid to shift that I didn't have to hand. After the above spot of retail therapy, it was out with the brake and clutch cleaning fluid.
I ran this through a few times and pumped the cylinder. After a few flushes through I started to see the grit and general gunk coming through... no wonder it wasn't working!
After a few more goes and ensuring that it did draw fluid down as expected once more, it was a quick clean of the reservoir, seals and cap and we were left with this ready to be assembled and refitted.
Bring on the weekend...
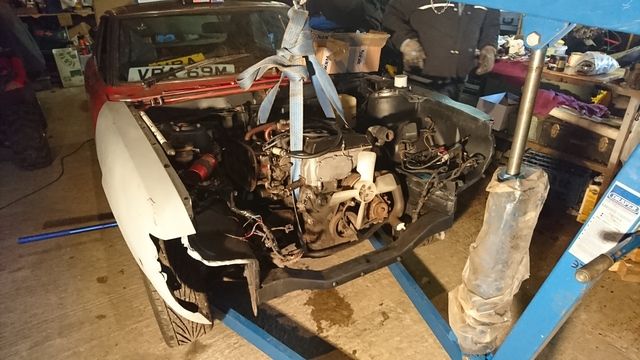
Saturday morning started with the usual shenanigans of moving the car from its resting place to where I needed to work on it, now considerably harder with its lump of an engine back in the front! However it served a purpose as with temperatures hovering just below zero it warmed me up nicely 
Finally we were where we needed to be:

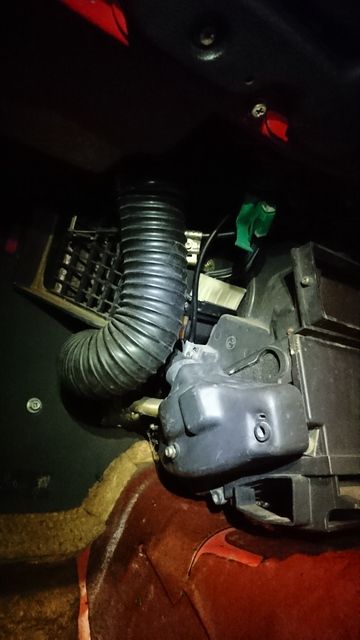
The plan was to carry on with the previous weekends activity and get everything plumbed and wired back up where possible. Starting with the heater matrix, which involved a contortionist act in the passenger footwell with my lower back resting on the top metal edge of the sill - it hurt... a lot...
But finally I got all the clamps and hoses tightened and the covers reattached... hateful job!
Next was to align and fit the front radiator, the only issue being that in order for it stay in position, it required attaching to the front panels... which were not on the car.
I've mentioned previously that I managed to get some solid replacements from the land of Oz, well they have since been blasted and given a good dousing in etch primer ready for reattaching to the car. Using them to fit the radiator was quite a good test in itself as it would help me line them up ready for reattaching onto the wings and lower front subframe.
So on they went
There was a little bit of distortion in places from the blasting process but nothing that can't be remedied with a dolly and hammer. On the whole though they fitted as expected, and with a bit of jiggling the bolts from the battery tray lined up as well. Happy days!
As my hands were starting to seriously feel the cold by this point, (warming them on a halogen work lamp only lasts for so long!), I decided I'd quickly bolt the front end back together ensuring that the front wing holes lined up with the panels and the lip spoiler also lined up as expected.
Thankfully everything was spot on so the panels got a tack weld in a couple of places just to hold them in position.
I was going to fit the exhaust headers, but after seeing the state of them I decided they would get cleaned and painted first. There was only one thing left to do... fill it with fluids and see if there was life in the old girl.
I'll just leave this here...
Sadly despite my best efforts the clutch master cylinder still didn't want to play ball, but I've managed to track one down so that has been ordered, assuming it arrives in time I may have a special birthday treat coming up next weekend!
Finally we were where we needed to be:
The plan was to carry on with the previous weekends activity and get everything plumbed and wired back up where possible. Starting with the heater matrix, which involved a contortionist act in the passenger footwell with my lower back resting on the top metal edge of the sill - it hurt... a lot...
But finally I got all the clamps and hoses tightened and the covers reattached... hateful job!
Next was to align and fit the front radiator, the only issue being that in order for it stay in position, it required attaching to the front panels... which were not on the car.
I've mentioned previously that I managed to get some solid replacements from the land of Oz, well they have since been blasted and given a good dousing in etch primer ready for reattaching to the car. Using them to fit the radiator was quite a good test in itself as it would help me line them up ready for reattaching onto the wings and lower front subframe.
So on they went
There was a little bit of distortion in places from the blasting process but nothing that can't be remedied with a dolly and hammer. On the whole though they fitted as expected, and with a bit of jiggling the bolts from the battery tray lined up as well. Happy days!
As my hands were starting to seriously feel the cold by this point, (warming them on a halogen work lamp only lasts for so long!), I decided I'd quickly bolt the front end back together ensuring that the front wing holes lined up with the panels and the lip spoiler also lined up as expected.
Thankfully everything was spot on so the panels got a tack weld in a couple of places just to hold them in position.
I was going to fit the exhaust headers, but after seeing the state of them I decided they would get cleaned and painted first. There was only one thing left to do... fill it with fluids and see if there was life in the old girl.
I'll just leave this here...
Sadly despite my best efforts the clutch master cylinder still didn't want to play ball, but I've managed to track one down so that has been ordered, assuming it arrives in time I may have a special birthday treat coming up next weekend!
Bit of a belated update as things have been somewhat busy of late.
Last weekend was a bit of a write off on the car front as birthday surprises courtesy of my wife and friends meant that I was kept well away from the workshop.
This was probably a blessing as the replacement clutch master cylinder I ordered frustratingly didn't appear until the Monday anyway. That said I did get some nice pressies to fill the new tool chest which will no doubt come in very useful over the coming months

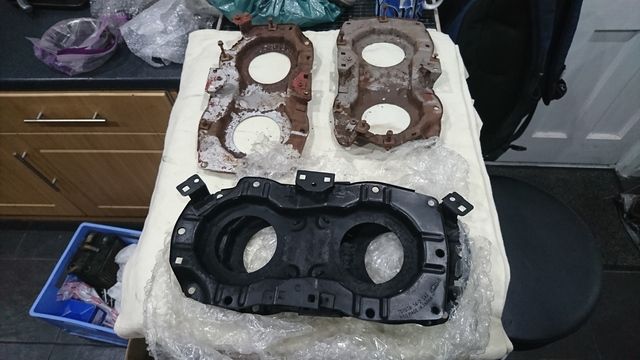
So although no playtime on the weekend, I did have a bit of spare time during the week, so one eve I started reassembling the upgraded headlights. I'd already ordered the replacement screws, springs and grommets I needed so when I had 5 mins one eve I started assembling:
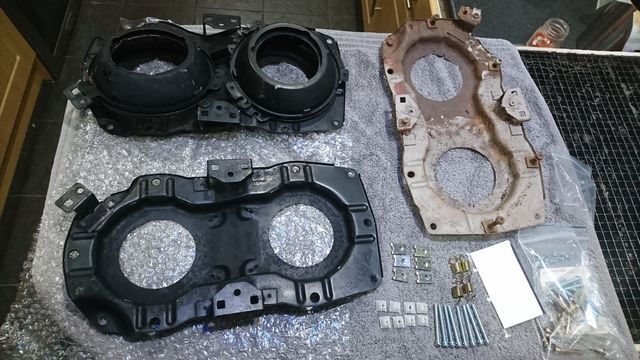
...alas I didn't as get far as I hoped as the replacement grommets didn't fit in the holes that I needed them to.
This is what they looked like originally:

You might just be able to make out in the pic above that the replacements are completely different. So without wanting to butcher the newly painted frames or spend hours slicing and shaping the new ones to fit, I decided I'd try another route from another supplier I've found, if they're still no good then I may just use nuts and washers as they'll do the same job of being able to offer adjustment.
Saturday 4th finally bought some time to get over to the car with the new clutch cylinder, along with a newly acquired tool for the collection
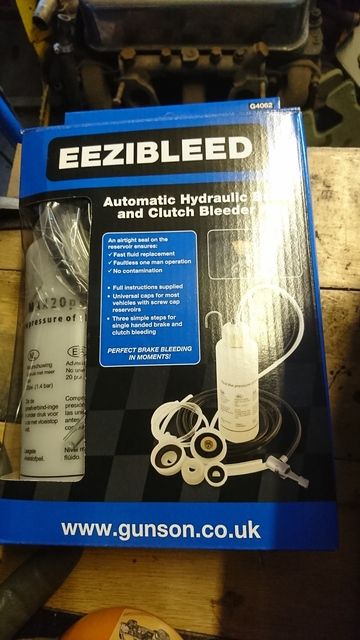
Tools, tea, parts and motivation... check
Time to fit the new cylinder, but first the threaded lug needed to be swapped over from the old cylinder to new, a job I thought was going to prove troublesome, as it happens with a squirt of deblock oil and the two nut technique it unwound relatively easily. so with that swapped, time to get it bolted in.
Hmmm the reservoir looked a bit too white and 'new' for my liking... easy enough to sort seeing as I'd spent the time cleaning the old one up
Much better!
Once I'd contorted myself into the drivers foot well enough to tighten everything up, I noticed that the push rod from the pedal was too wide, meaning the split pin wouldn't locate, so this came off and was matched to the same gap as the old with a bit of gentle persuasion
Time to break out the new eezibleed kit ...except none of the caps fitted the reservoir top, without a fitting top you have no pressure, and with no pressure the kit won't function as intended.
Frankly I couldn't be bothered to fashion some kind of clamp and membrane to cover the reservoir, so it fell to the trusty method of a length of wood, the seat ratchet mechanism and much rolling around for me pushing pedal, locking seat in place, reaching under car, undo bleed nipple, tighten bleed nipple, crawl back to release seat, depress pedal... repeat as necessary etc.
I got there eventually and after a quick tidy, a check of fluids the car was started, trailer moved out the way and 1 year, 5 months, 22 days and 1hr.52 minutes since I was first presented with it, the car moved under it's own power for the first time... ironically in reverse. Much tea was then consumed in celebration - One happy boy indeed!
There's a long way still to go but feels like quite a milestone has been reached.
Last weekend was a bit of a write off on the car front as birthday surprises courtesy of my wife and friends meant that I was kept well away from the workshop.
This was probably a blessing as the replacement clutch master cylinder I ordered frustratingly didn't appear until the Monday anyway. That said I did get some nice pressies to fill the new tool chest which will no doubt come in very useful over the coming months
So although no playtime on the weekend, I did have a bit of spare time during the week, so one eve I started reassembling the upgraded headlights. I'd already ordered the replacement screws, springs and grommets I needed so when I had 5 mins one eve I started assembling:
...alas I didn't as get far as I hoped as the replacement grommets didn't fit in the holes that I needed them to.
This is what they looked like originally:
You might just be able to make out in the pic above that the replacements are completely different. So without wanting to butcher the newly painted frames or spend hours slicing and shaping the new ones to fit, I decided I'd try another route from another supplier I've found, if they're still no good then I may just use nuts and washers as they'll do the same job of being able to offer adjustment.
Saturday 4th finally bought some time to get over to the car with the new clutch cylinder, along with a newly acquired tool for the collection
Tools, tea, parts and motivation... check
Time to fit the new cylinder, but first the threaded lug needed to be swapped over from the old cylinder to new, a job I thought was going to prove troublesome, as it happens with a squirt of deblock oil and the two nut technique it unwound relatively easily. so with that swapped, time to get it bolted in.
Hmmm the reservoir looked a bit too white and 'new' for my liking... easy enough to sort seeing as I'd spent the time cleaning the old one up
Much better!
Once I'd contorted myself into the drivers foot well enough to tighten everything up, I noticed that the push rod from the pedal was too wide, meaning the split pin wouldn't locate, so this came off and was matched to the same gap as the old with a bit of gentle persuasion
Time to break out the new eezibleed kit ...except none of the caps fitted the reservoir top, without a fitting top you have no pressure, and with no pressure the kit won't function as intended.
Frankly I couldn't be bothered to fashion some kind of clamp and membrane to cover the reservoir, so it fell to the trusty method of a length of wood, the seat ratchet mechanism and much rolling around for me pushing pedal, locking seat in place, reaching under car, undo bleed nipple, tighten bleed nipple, crawl back to release seat, depress pedal... repeat as necessary etc.
I got there eventually and after a quick tidy, a check of fluids the car was started, trailer moved out the way and 1 year, 5 months, 22 days and 1hr.52 minutes since I was first presented with it, the car moved under it's own power for the first time... ironically in reverse.
Much tea was then consumed in celebration - One happy boy indeed! There's a long way still to go but feels like quite a milestone has been reached.
Gassing Station | Readers' Cars | Top of Page | What's New | My Stuff