TA22 Toyota Celica - the a hedge find...
Discussion


Well not a massive update on actual car progress, due to weddings and other family events but a long update on some progress (and slight madness) nonetheless over the last week...
First things first, I managed to get the clutch release bearing sorted and so that is now as it should be and ready to be refitted. The original plan was to then refit the clutch, gearbox etc and simply make the car drive-able and MOT ready, starting with the decidedly crusty inner wings. So a bit of metalwork, bit of welding and it would be good to go... yeah right!
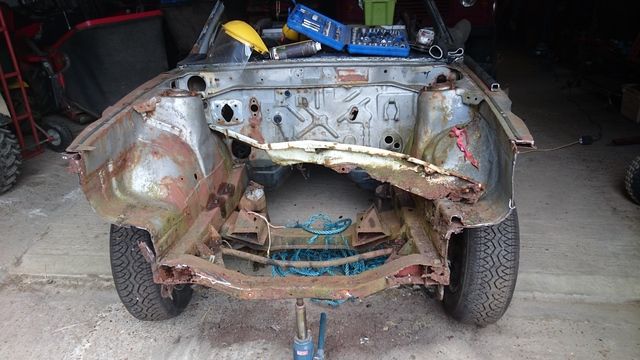
Things soon went off on a bit of a tangent when I got a message via the celica club forum along the lines of "I have a spare shell with all the bits you need, is it of interest?". I must confess my initial reaction was that it was too far from me (Kent to Glasgow) and so just not feasible with current diary commitments... I was soon convinced by a mate that I would be mad to not think seriously about it given it had what I needed. Sooooo (you can see what's coming), a plan was soon hatched to fetch it over as minimal time frame as possible and a date was set...
The day of reckoning came last Friday morning and after an early visit from the roofers (another story!), I headed, albeit slightly later than intended, over to Horsham to pick up the transporter from http://www.transporterhire.co.uk who couldn't have been more helpful.
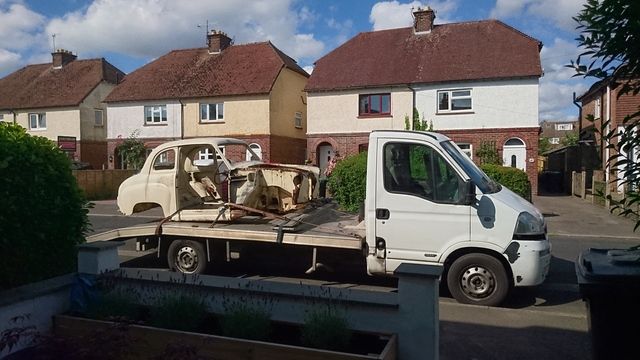
However before I could merrily head northbound, just to complicate things even more, I had to head south to get an A35 shell for one of our other projects that I'd agreed to pick up for SWMBO before the Celica shell - in for a penny and all that...
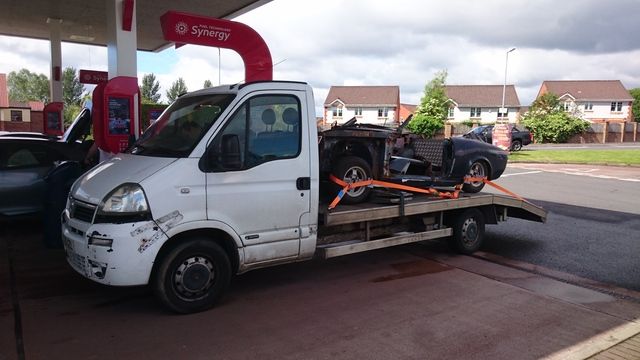
Now I must confess, what I was expecting and what I saw when I went to collect the transporter were two very different things... nice comfortable transit for some serious mileage... er no... in short the van was a bit grim to say the least, it was definitely showing the full extent of it's 233,000 miles on the clock inside and out. If I'm honest I was doubtful of reaching Southampton let alone Scotland at that point, particularly in any form of comfort. The seat padding was definitely 'used' (read non-existent for passenger seat!) and the steering wheel had shed its outer skin a long, long time ago to the extent you got black hands whenever you grabbed it... Still it was too late now so the paperwork was done and I hit the road.
The beast in question...

Thanks to the world seemingly going utterly mad in the wake of the Brexit outcome, the motorways were a state and so I decided to head cross-country, seemingly a good decision as with minimal holdups I was at my destination in a couple of hours. Lugged the first shell on (joys of getting a transporter with a winch!), a fill up of diesel and a quick bite saw me heading back for the fist unload... although not before the M25 had it's say on my return - definitely should've stuck to A-roads!
But I made it eventually - 165 miles and nearly 6.5 hours later.
So after unloading the first shell and safely storing that away it was home for a quick shower and bite before meeting my copilot ready for the trip north. The plan we'd concocted was to leave at c10.30pm to avoid the worst of the Friday night traffic, that would allow us time to park up just shy of our final destination for a quick kip and breakfast. We could then finish the last leg at a more sociable hour and still be on time for an early-ish start back home.
Now on the whole the great thing about travelling at night is the lack of traffic (asides lorries), there is however one scourge - the night workman and their penchant for road cones... a familiar sight was soon becoming regular every few miles along with the mandatory 50 mph limit despite not seeing a single workman for many miles.

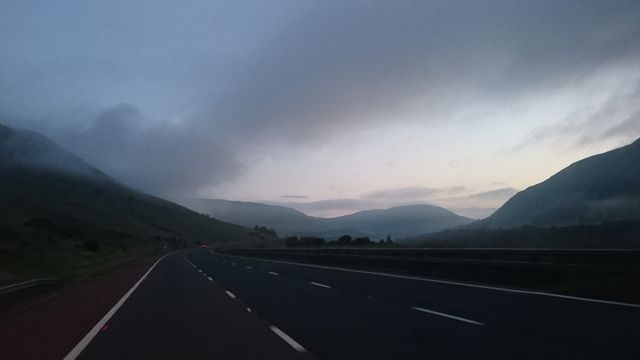
As we drove on it soon became apparent that dawn was not far away and we'd be back in daylight sooner than we thought - 3am to be precise... ahh the joys of summer!

What we eventually got was a stunning sunrise as we drove through the lake district - the one where the mist is laying in the valleys and the hills rising like islands - must admit despite the lack of sleep I was feeling pretty good at this point and in awe of what a stunning country we live in. We might just do this - Game on.
We crossed the Scottish border at 5am, knowing we weren't too far away from a bit of brekkie and a short kip... all the motivation we needed at this stage. We eventually parked up at 6.30 and got a brief kip in before it was time for a quick bite and the last leg of about 30m mins to finish.
After being greeted by David and called a couple of mad men by his wife! we loaded the shell and then had a brief tour of his toys - just wow! It was particularly good to see a project I've followed on Retro Rides for a while (http://retrorides.proboards.com/thread/149868/1980-m535i-black-toyota-celica), will make a stunning car when finished. My personal favourite though was his TA22 longnose GT (http://retrorides.proboards.com/thread/171227/74-celica-ta22gt) - looked just as impressive in the flesh... if mine ends up half as good looking I'll be a happy boy.
So at 10am with the shell loaded it was time to point the boneshaker south and head on home... with one quick essential stop first...
The journey back, despite being during the day, was pretty uneventful. A bit more traffic so took a little bit longer, but as we were that little bit more jaded and the important bit had been done, we just took our time, not without a good dousing from the Scottish weather as a reminder of where we'd been.
At just after 6.30pm we arrived at the final destination and unloaded... job done!

Well almost... I must confess that after the best part of 20 hours on the road not including the trip to Southampton and back, I did resort to consuming a can of redbull just to get me over the finish line and get the truck returned. Finally returning home at 9.30pm a very tired, yet very happy boy - mission complete! Honestly couldn't believe we'd done it and the van had performed effortlessly.
So in summary, two mates, nearly 1,300 miles, numerous coffees, 2 fill stops, and a battered old bus that didn't die and instead delivered... mostly backache come to think of it!
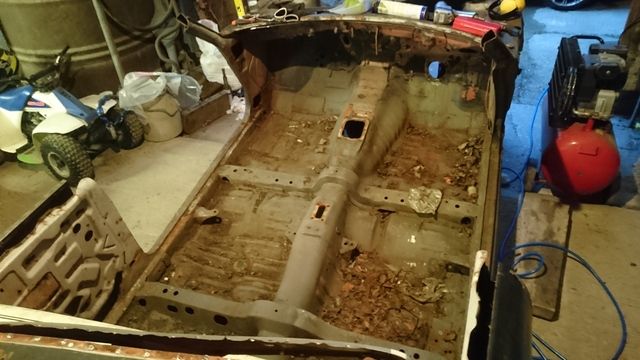
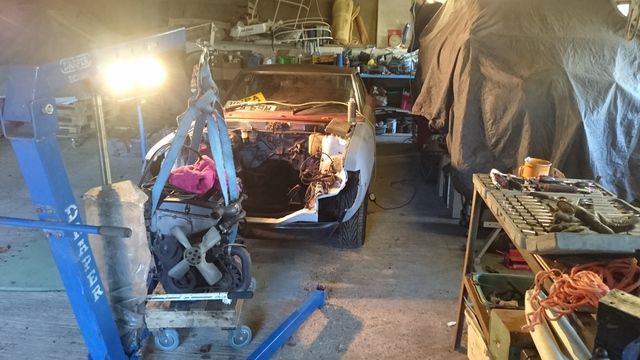
Sunday... alas no real chance of a lie in so out came the angle grinder and the salvaging began
What a weekend! Some great memories made and something to look back on for a while. Would I do it again? absolutely... but perhaps in something a bit nicer inside and with cruise control...
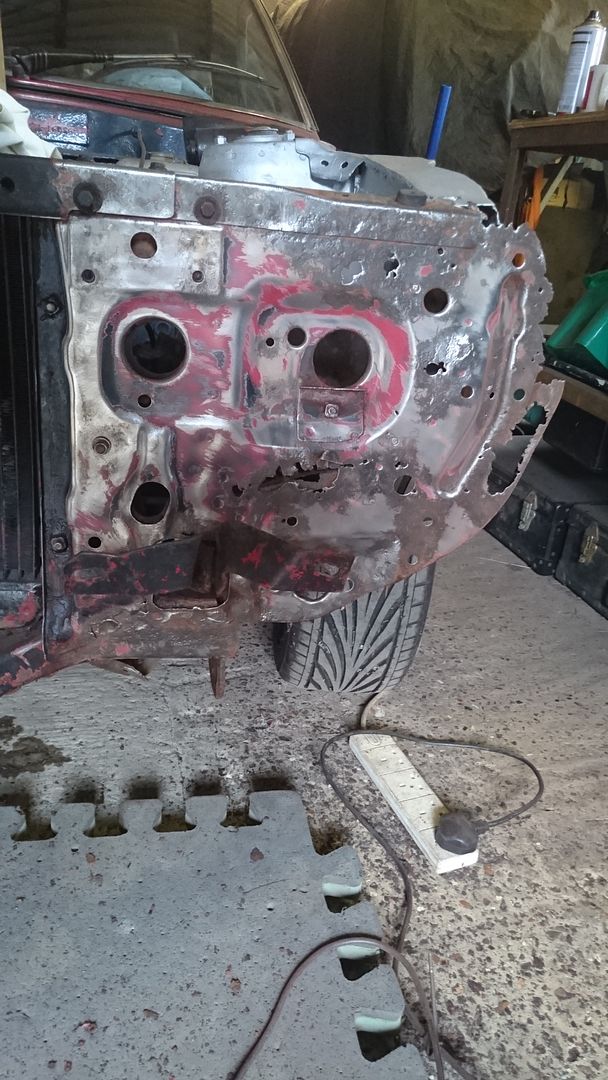
To try and keep momentum (and clear things away before the in-laws get back from hols!) I've been working on the shell every eve this week starting at the front and working backwards - gotta love Deblock oil!

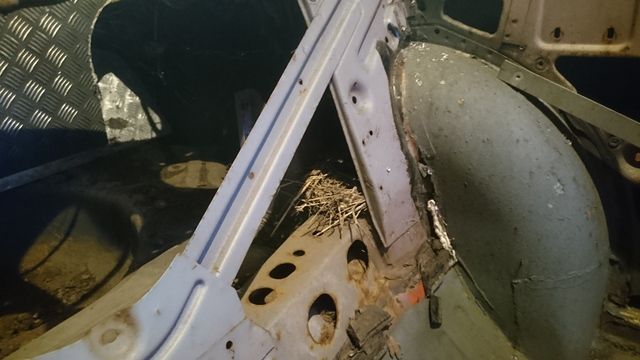
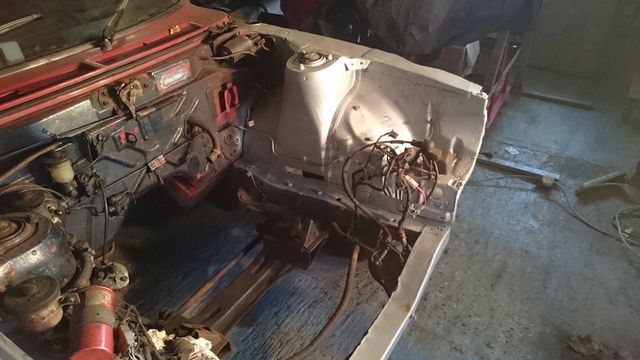
Once the aluminium sheeting was removed from the rear bulkhead I also discovered that as well as being used as an ex-race car it was also once a nursery...
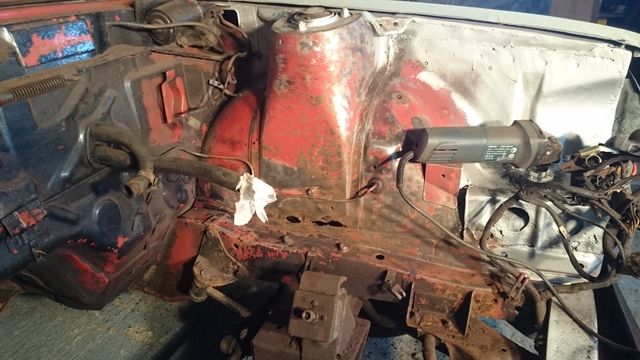
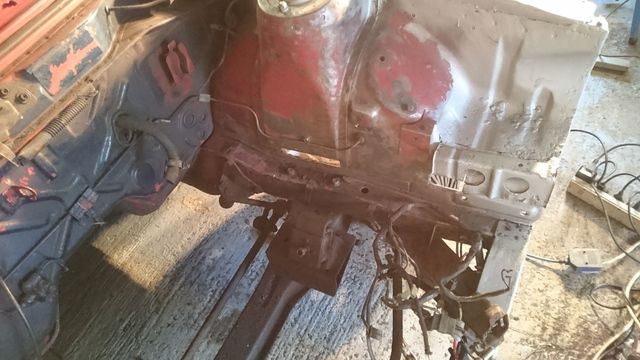
Carried on working backwards and discovered that it's pretty rough underneath, nevertheless, the shell has been fully stripped of all ancillaries ready for the fun bit of devising the best way to save panels as best as I can...
Any suggestions/tips on the approach to panel saving welcome...
First things first, I managed to get the clutch release bearing sorted and so that is now as it should be and ready to be refitted. The original plan was to then refit the clutch, gearbox etc and simply make the car drive-able and MOT ready, starting with the decidedly crusty inner wings. So a bit of metalwork, bit of welding and it would be good to go... yeah right!
Things soon went off on a bit of a tangent when I got a message via the celica club forum along the lines of "I have a spare shell with all the bits you need, is it of interest?". I must confess my initial reaction was that it was too far from me (Kent to Glasgow) and so just not feasible with current diary commitments... I was soon convinced by a mate that I would be mad to not think seriously about it given it had what I needed. Sooooo (you can see what's coming), a plan was soon hatched to fetch it over as minimal time frame as possible and a date was set...
The day of reckoning came last Friday morning and after an early visit from the roofers (another story!), I headed, albeit slightly later than intended, over to Horsham to pick up the transporter from http://www.transporterhire.co.uk who couldn't have been more helpful.
However before I could merrily head northbound, just to complicate things even more, I had to head south to get an A35 shell for one of our other projects that I'd agreed to pick up for SWMBO before the Celica shell - in for a penny and all that...
Now I must confess, what I was expecting and what I saw when I went to collect the transporter were two very different things... nice comfortable transit for some serious mileage... er no... in short the van was a bit grim to say the least, it was definitely showing the full extent of it's 233,000 miles on the clock inside and out. If I'm honest I was doubtful of reaching Southampton let alone Scotland at that point, particularly in any form of comfort. The seat padding was definitely 'used' (read non-existent for passenger seat!) and the steering wheel had shed its outer skin a long, long time ago to the extent you got black hands whenever you grabbed it... Still it was too late now so the paperwork was done and I hit the road.
The beast in question...
Thanks to the world seemingly going utterly mad in the wake of the Brexit outcome, the motorways were a state and so I decided to head cross-country, seemingly a good decision as with minimal holdups I was at my destination in a couple of hours. Lugged the first shell on (joys of getting a transporter with a winch!), a fill up of diesel and a quick bite saw me heading back for the fist unload... although not before the M25 had it's say on my return - definitely should've stuck to A-roads!
But I made it eventually - 165 miles and nearly 6.5 hours later.
So after unloading the first shell and safely storing that away it was home for a quick shower and bite before meeting my copilot ready for the trip north. The plan we'd concocted was to leave at c10.30pm to avoid the worst of the Friday night traffic, that would allow us time to park up just shy of our final destination for a quick kip and breakfast. We could then finish the last leg at a more sociable hour and still be on time for an early-ish start back home.
Now on the whole the great thing about travelling at night is the lack of traffic (asides lorries), there is however one scourge - the night workman and their penchant for road cones... a familiar sight was soon becoming regular every few miles along with the mandatory 50 mph limit despite not seeing a single workman for many miles.
As we drove on it soon became apparent that dawn was not far away and we'd be back in daylight sooner than we thought - 3am to be precise... ahh the joys of summer!
What we eventually got was a stunning sunrise as we drove through the lake district - the one where the mist is laying in the valleys and the hills rising like islands - must admit despite the lack of sleep I was feeling pretty good at this point and in awe of what a stunning country we live in. We might just do this - Game on.
We crossed the Scottish border at 5am, knowing we weren't too far away from a bit of brekkie and a short kip... all the motivation we needed at this stage. We eventually parked up at 6.30 and got a brief kip in before it was time for a quick bite and the last leg of about 30m mins to finish.
After being greeted by David and called a couple of mad men by his wife! we loaded the shell and then had a brief tour of his toys - just wow! It was particularly good to see a project I've followed on Retro Rides for a while (http://retrorides.proboards.com/thread/149868/1980-m535i-black-toyota-celica), will make a stunning car when finished. My personal favourite though was his TA22 longnose GT (http://retrorides.proboards.com/thread/171227/74-celica-ta22gt) - looked just as impressive in the flesh... if mine ends up half as good looking I'll be a happy boy.
So at 10am with the shell loaded it was time to point the boneshaker south and head on home... with one quick essential stop first...
The journey back, despite being during the day, was pretty uneventful. A bit more traffic so took a little bit longer, but as we were that little bit more jaded and the important bit had been done, we just took our time, not without a good dousing from the Scottish weather as a reminder of where we'd been.
At just after 6.30pm we arrived at the final destination and unloaded... job done!
Well almost... I must confess that after the best part of 20 hours on the road not including the trip to Southampton and back, I did resort to consuming a can of redbull just to get me over the finish line and get the truck returned. Finally returning home at 9.30pm a very tired, yet very happy boy - mission complete! Honestly couldn't believe we'd done it and the van had performed effortlessly.
So in summary, two mates, nearly 1,300 miles, numerous coffees, 2 fill stops, and a battered old bus that didn't die and instead delivered... mostly backache come to think of it!
Sunday... alas no real chance of a lie in so out came the angle grinder and the salvaging began
What a weekend! Some great memories made and something to look back on for a while. Would I do it again? absolutely... but perhaps in something a bit nicer inside and with cruise control...
To try and keep momentum (and clear things away before the in-laws get back from hols!) I've been working on the shell every eve this week starting at the front and working backwards - gotta love Deblock oil!
Once the aluminium sheeting was removed from the rear bulkhead I also discovered that as well as being used as an ex-race car it was also once a nursery...
Carried on working backwards and discovered that it's pretty rough underneath, nevertheless, the shell has been fully stripped of all ancillaries ready for the fun bit of devising the best way to save panels as best as I can...
Any suggestions/tips on the approach to panel saving welcome...
Most definitely... I've been told that a few times of late 
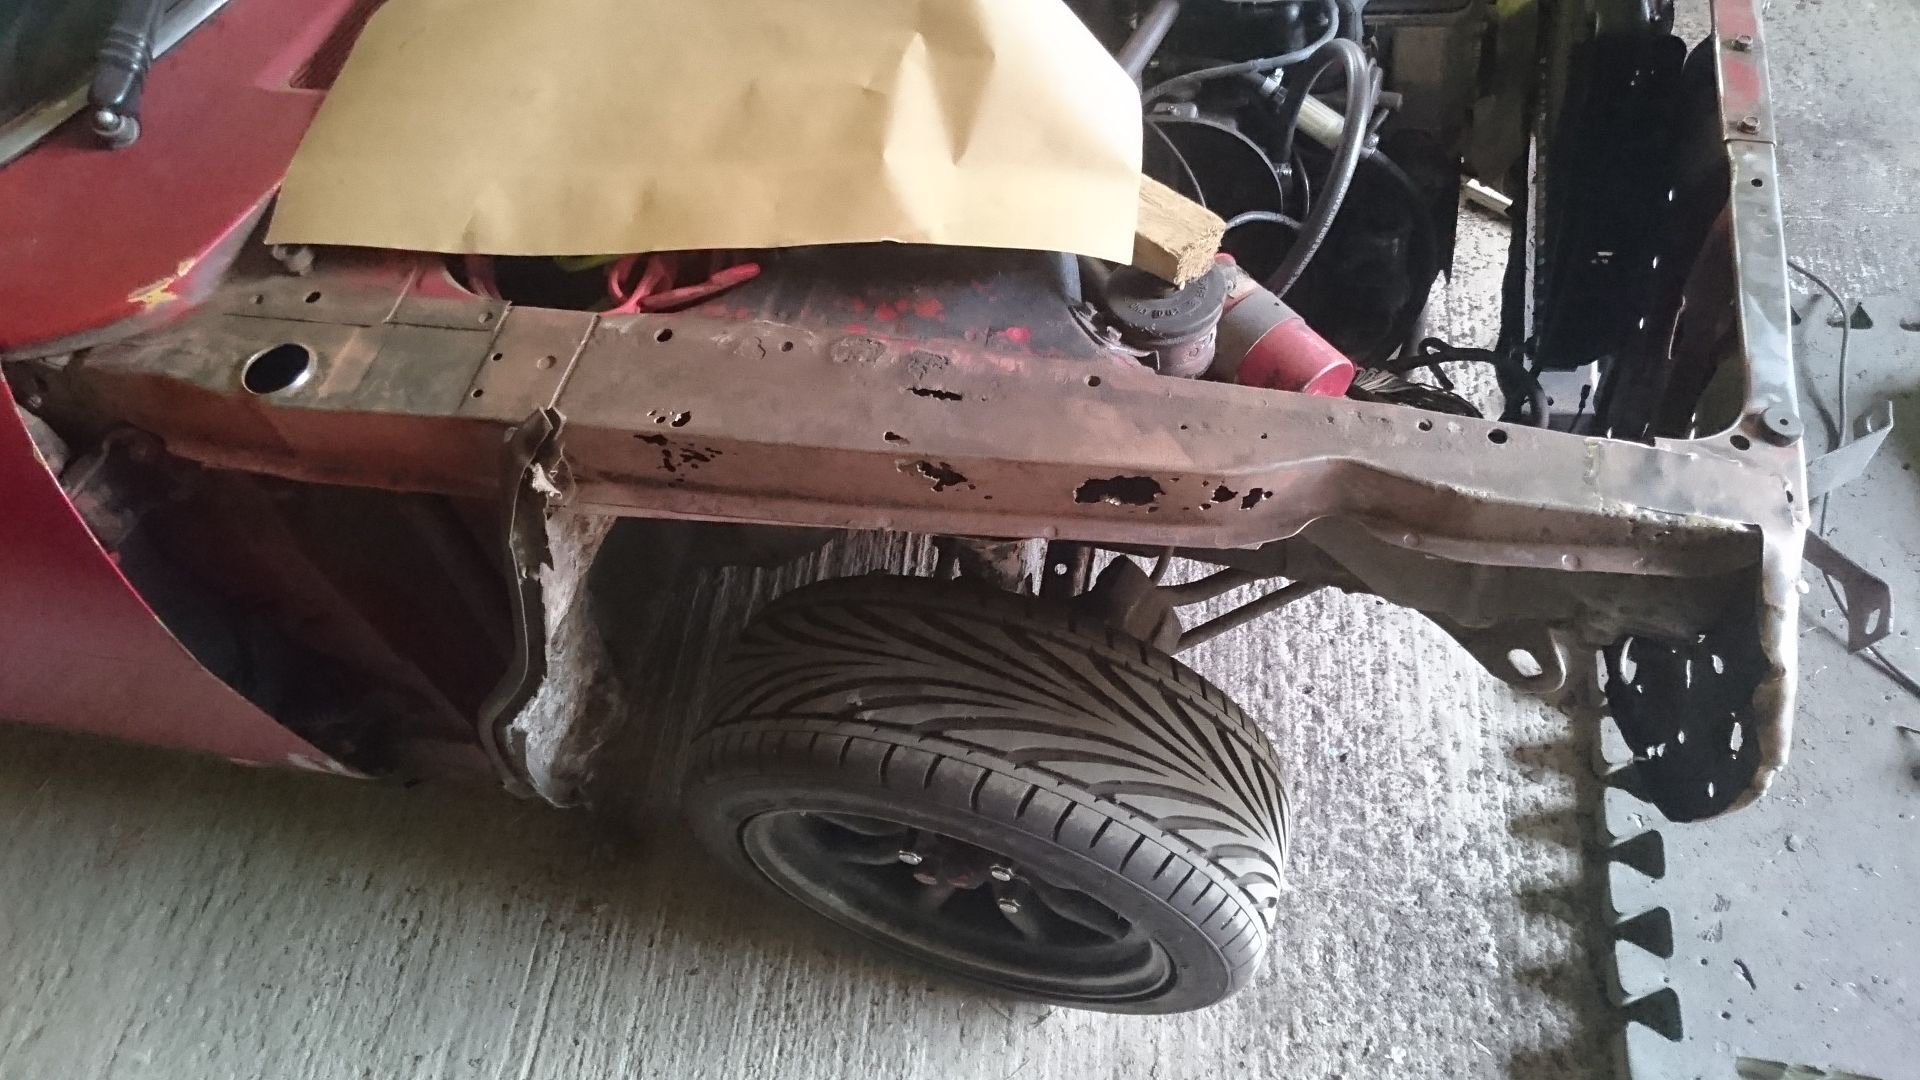
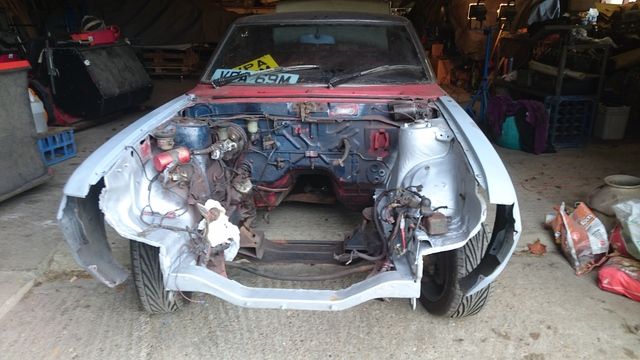
So just to update from last weekend following the previous weeks stripping efforts during the evenings, it was time for some careful slicing and dicing to preserve as many panels and parts as possible.
First off was inner wings and strut towers
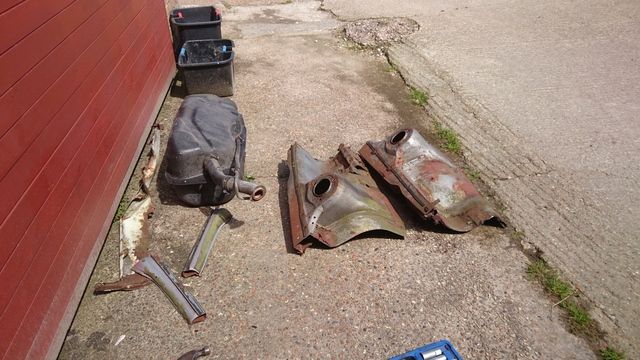
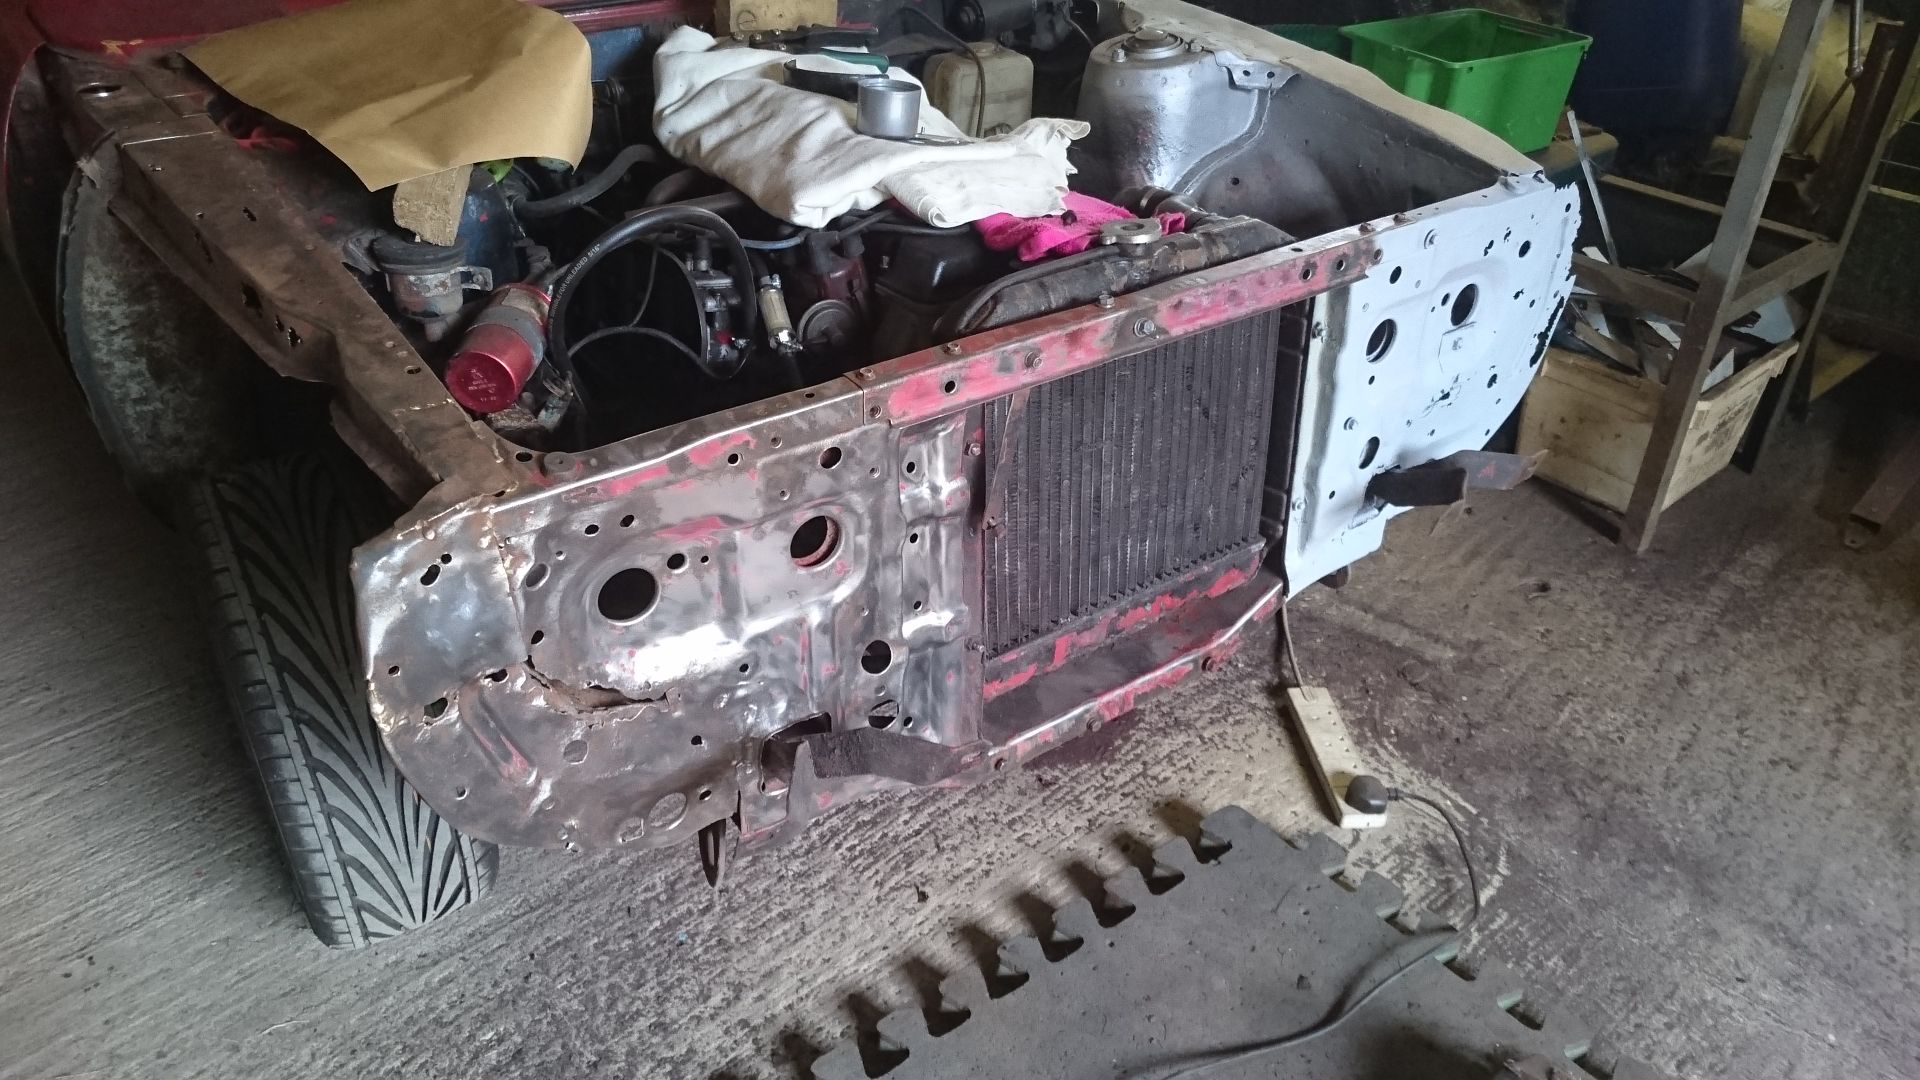
Then the bulk head which my other half took great pleasure in using as a seat while she buzzed the front steering and subframe apart. Car was starting to look a bit sad at this point
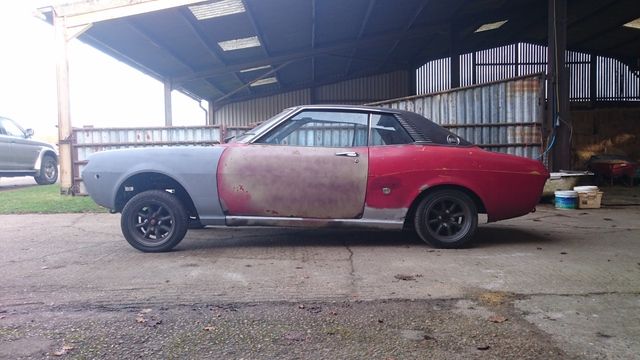
Rear wings...
Finally separation of the boot floor and rear arches

Which meant by the end of the day my trailer looked decidedly full of parts ready for storage - good stuff!
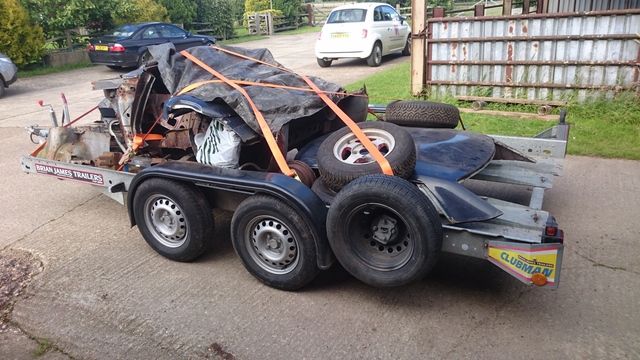
I should point out it won't be towed like this - this was just for parking up purposes so the place didn't look like a scrapyard and I wouldn't get in trouble with the in laws!
This weekend should see the start of the metal work on the car that's still in one piece!
So just to update from last weekend following the previous weeks stripping efforts during the evenings, it was time for some careful slicing and dicing to preserve as many panels and parts as possible.
First off was inner wings and strut towers
Then the bulk head which my other half took great pleasure in using as a seat while she buzzed the front steering and subframe apart. Car was starting to look a bit sad at this point
Rear wings...
Finally separation of the boot floor and rear arches
Which meant by the end of the day my trailer looked decidedly full of parts ready for storage - good stuff!
I should point out it won't be towed like this - this was just for parking up purposes so the place didn't look like a scrapyard and I wouldn't get in trouble with the in laws!
This weekend should see the start of the metal work on the car that's still in one piece!
A long overdue update as I finally had some Celica time while waiting for parts on the other projects.
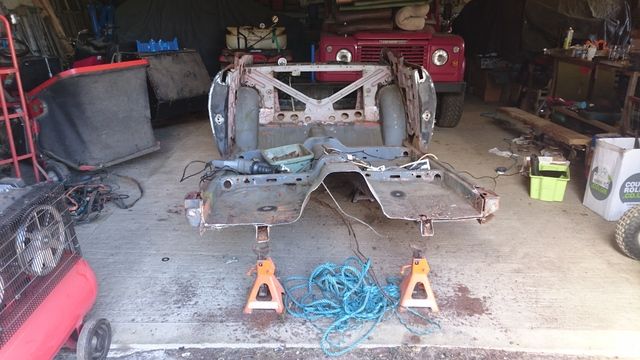
First job was to start to dismantle front sub frame, steering rods and linkages from the donor car ready for cleaning and then a rebuild with new bushes
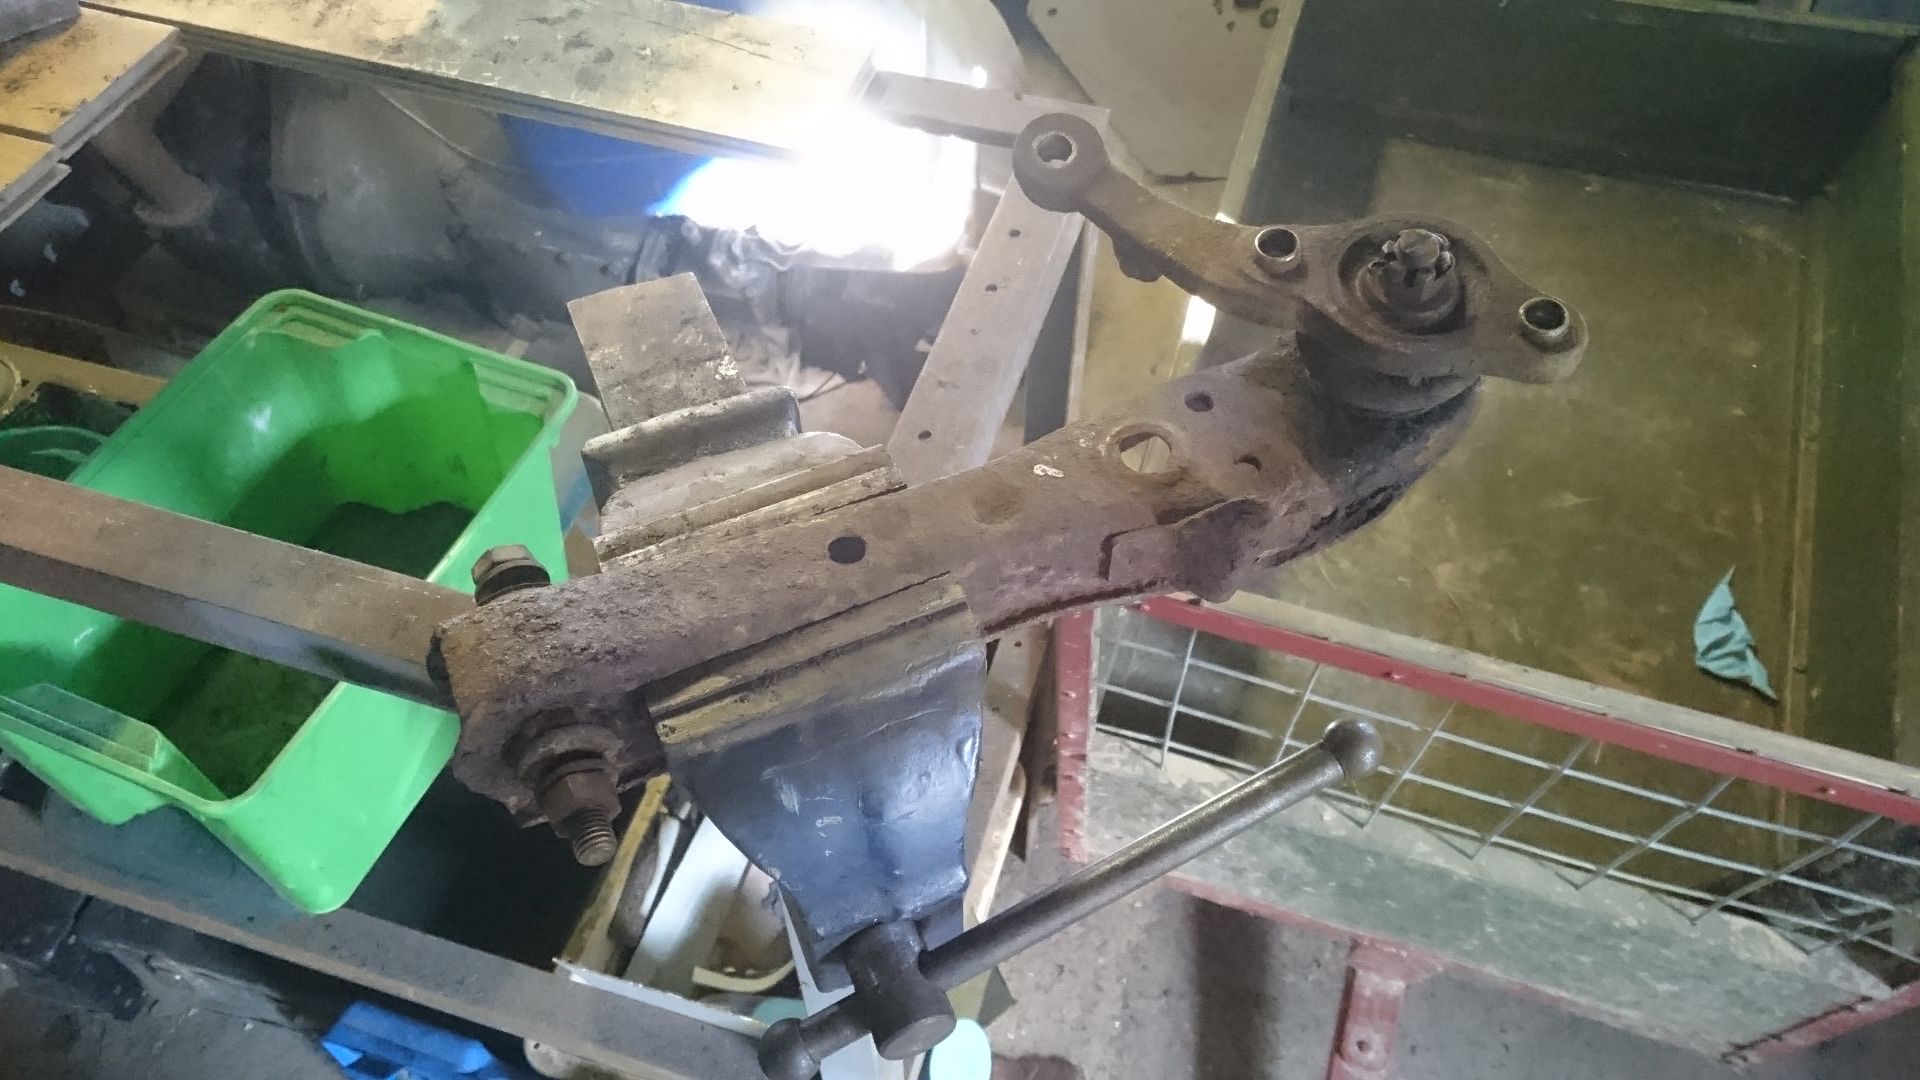
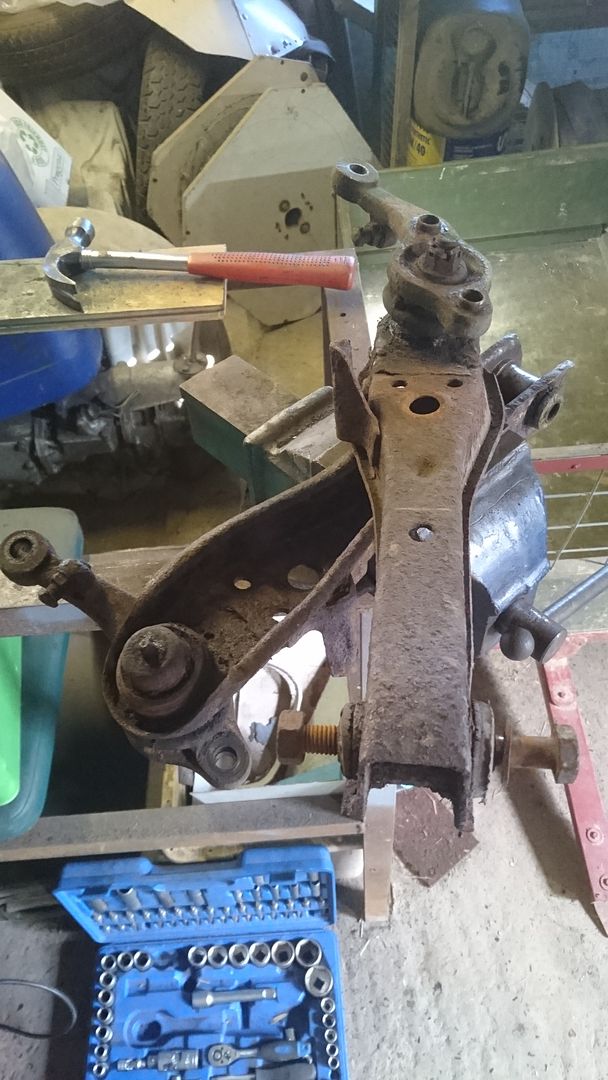
The bits are actually pretty solid, just look a little rough in places - nothing a good clean won't sort.
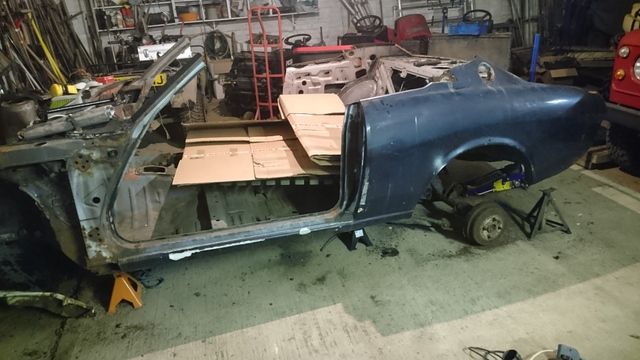
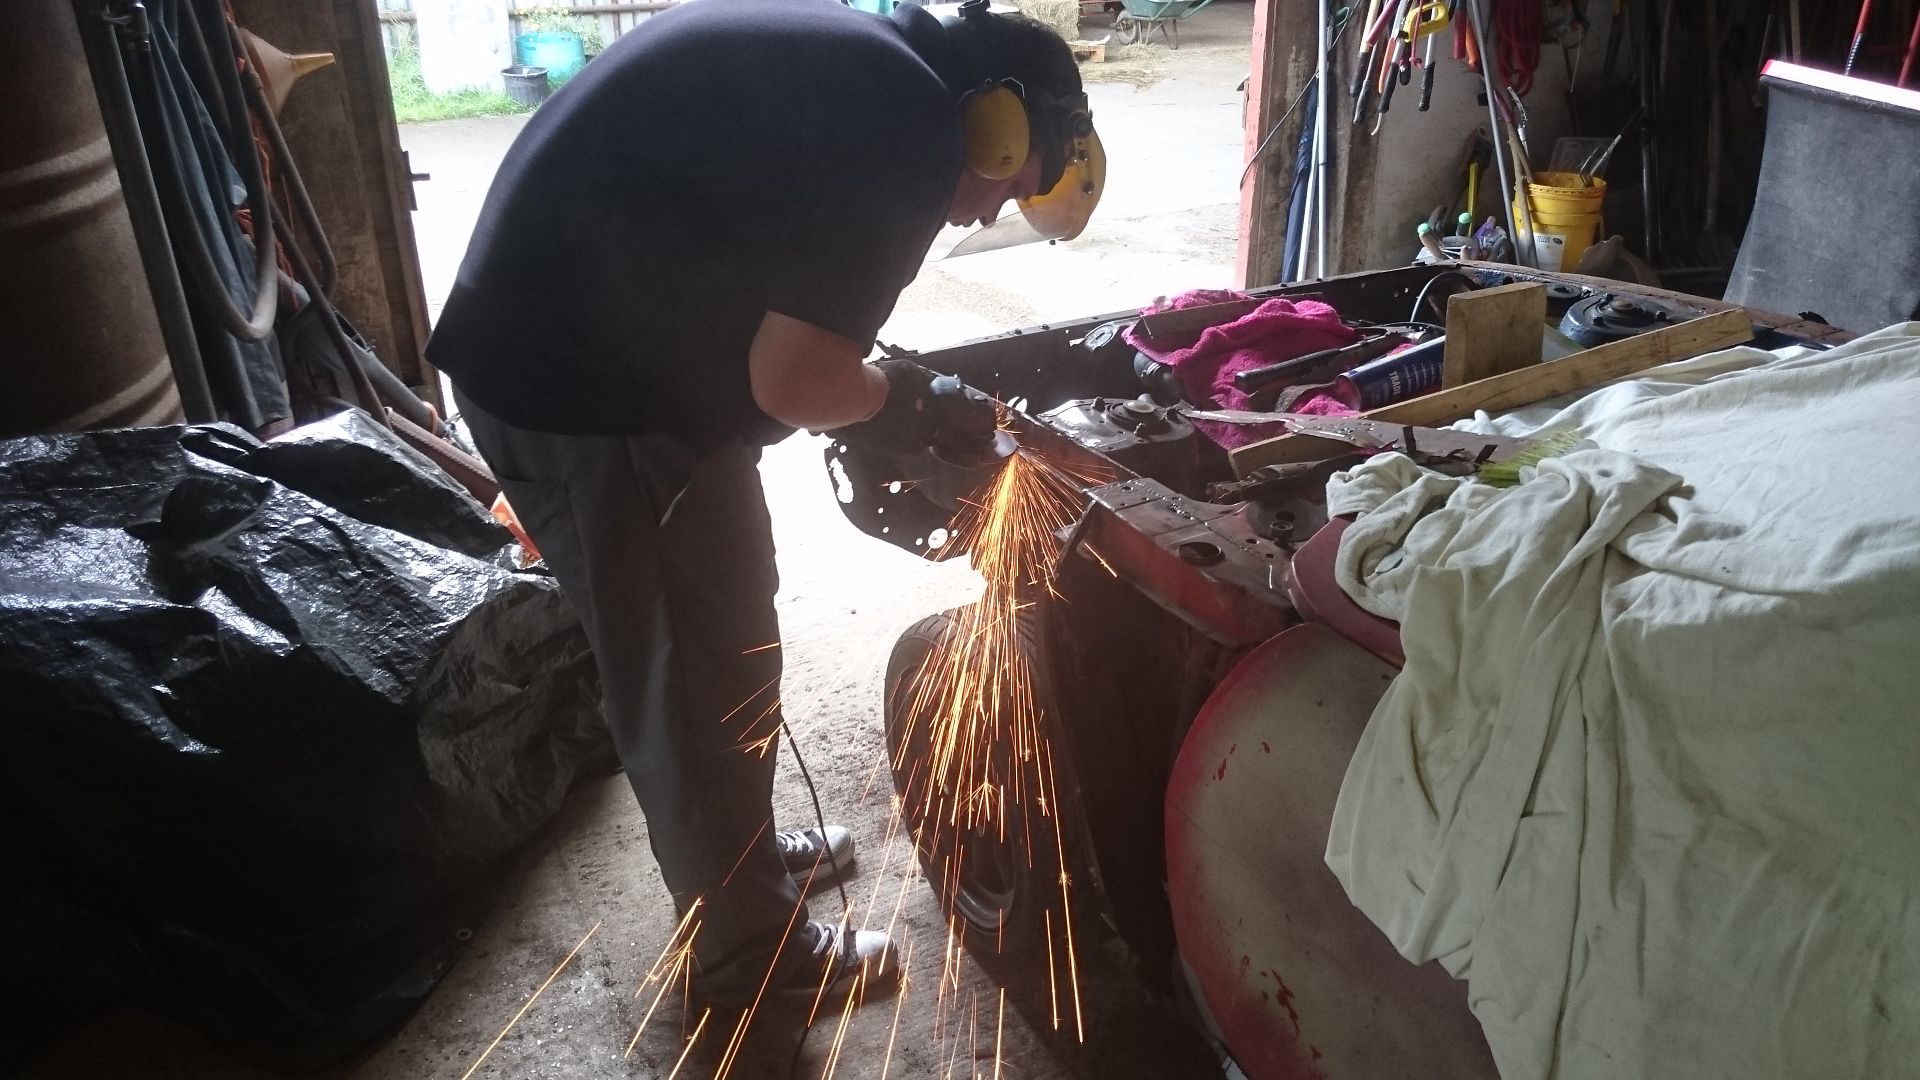
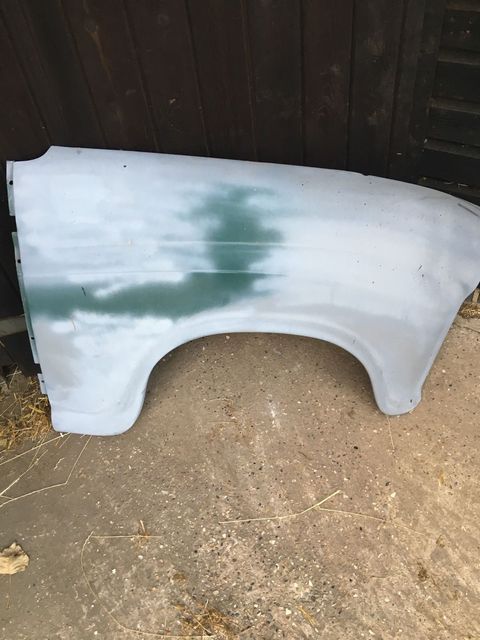
The car was then rolled into the workshop and the nastier of the two front wing tops cut away using the donor part as a template ready for replacement.
Everything cleaned up for a coat of etch primer
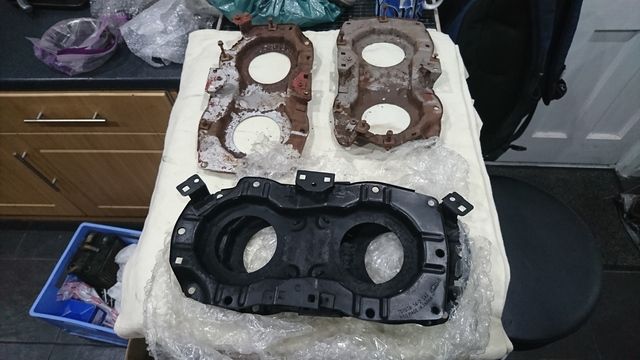
Including the donor panel which was removed from the other cars strut tower, this had already been plated in the past but rather than separate things to start again it was decided to use the panel as it was and keep it as complete as possible
Panel was welded in place with an excess lip left on to seam weld to which can be trimmed later. Everything was then given the flap disc treatment and a coat of etch for good measure.
The wire wheel then came out again briefly on Sunday to clean the top of the other wing and front panels up, these I knew wouldn't be pretty!
Proves it's always good to check - I thought this one was solid!
Panels were carefully covered in etch as I went
As the car currently stands:
So not masses achieved but nice to get back on it. No playtime next weekend as off to the revival (and 1st wedding anniversary, which means I've now had the car a year!)
First job was to start to dismantle front sub frame, steering rods and linkages from the donor car ready for cleaning and then a rebuild with new bushes
The bits are actually pretty solid, just look a little rough in places - nothing a good clean won't sort.
The car was then rolled into the workshop and the nastier of the two front wing tops cut away using the donor part as a template ready for replacement.
Everything cleaned up for a coat of etch primer
Including the donor panel which was removed from the other cars strut tower, this had already been plated in the past but rather than separate things to start again it was decided to use the panel as it was and keep it as complete as possible
Panel was welded in place with an excess lip left on to seam weld to which can be trimmed later. Everything was then given the flap disc treatment and a coat of etch for good measure.
The wire wheel then came out again briefly on Sunday to clean the top of the other wing and front panels up, these I knew wouldn't be pretty!
Proves it's always good to check - I thought this one was solid!
Panels were carefully covered in etch as I went
As the car currently stands:
So not masses achieved but nice to get back on it. No playtime next weekend as off to the revival (and 1st wedding anniversary, which means I've now had the car a year!)
Thanks chaps, good to see there's some interest in my meagre efforts
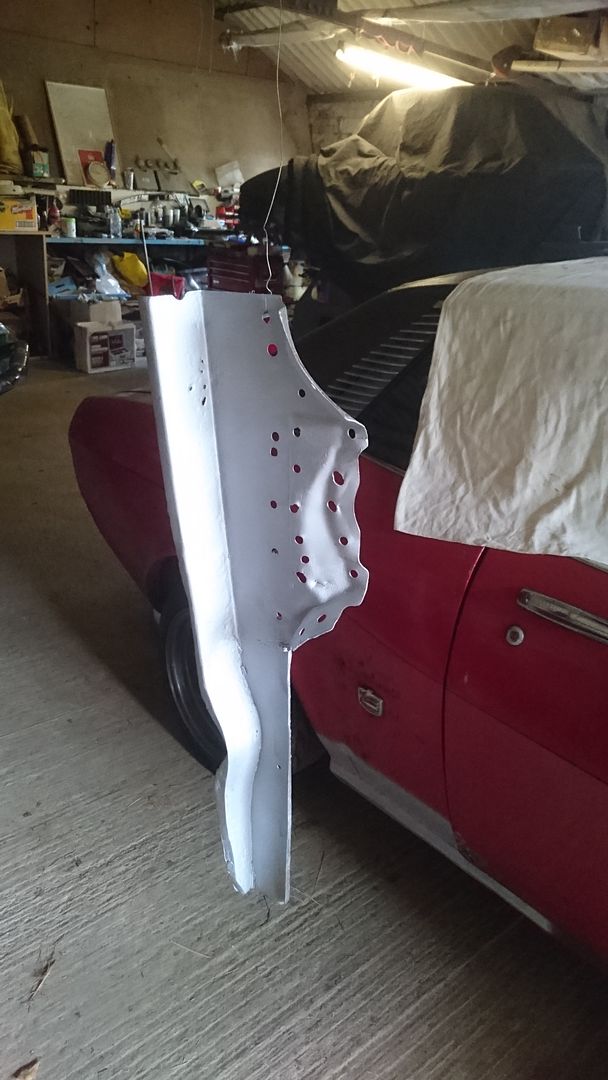
After the weekends effort and feeling a bit down at yet another rust discovery (I know there will be plenty more yet!), this week has seen a bit of a change in fortune.
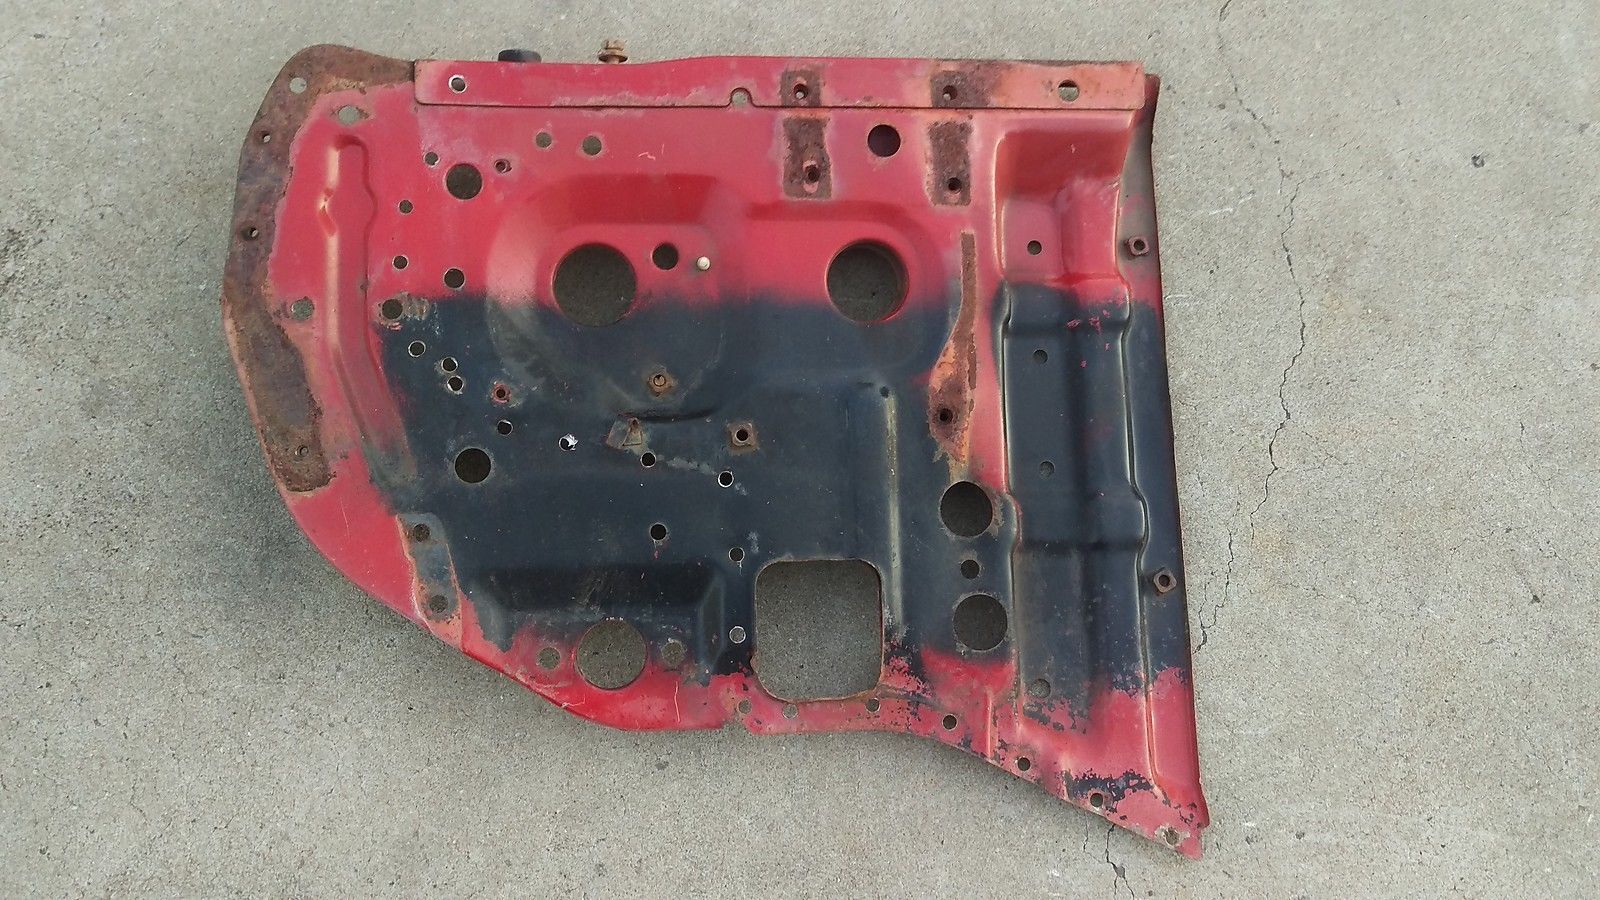
A trawl through the various auction sites and a cheeky offer later, has resulted in a couple of much needed panels winging their way across from the land of Oz... yes I could've probably repaired what I had, but seeing as one had been plated and filled with filler, the other was barely left on one edge which would've taken a fair few hours to remake, I decided that getting some rarely available panels was probably the best option.
A gentle blast and coat of paint and they should be good to go
vs.
and
vs.
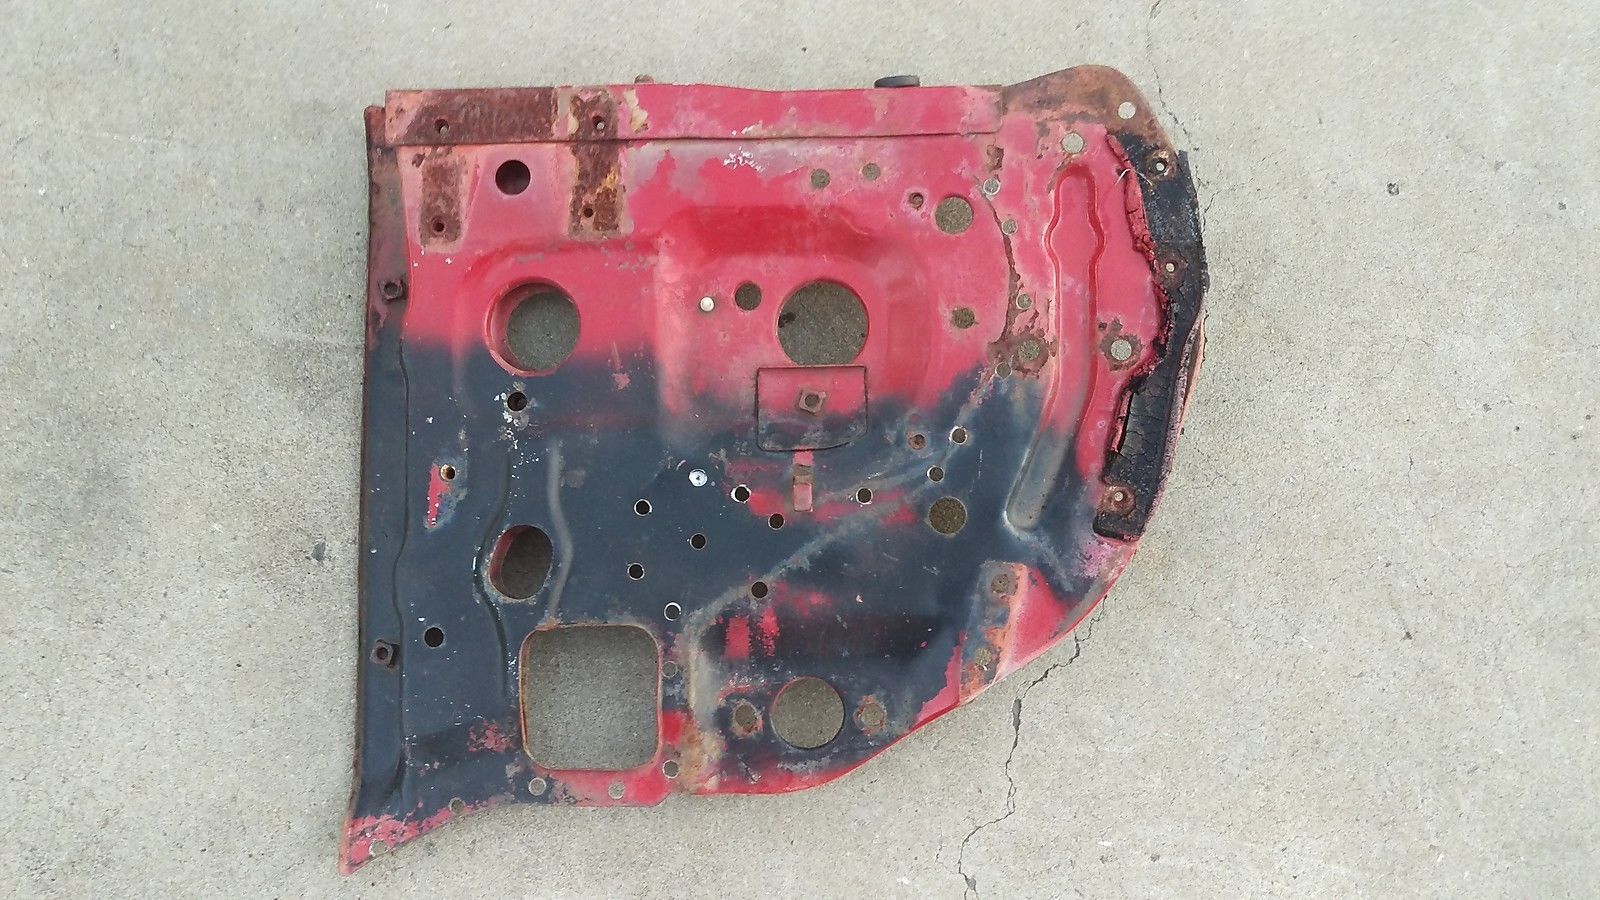
Both also come with the brackets attached which joins them to the top of the inner wings - good stuff!
After the weekends effort and feeling a bit down at yet another rust discovery (I know there will be plenty more yet!), this week has seen a bit of a change in fortune.
A trawl through the various auction sites and a cheeky offer later, has resulted in a couple of much needed panels winging their way across from the land of Oz... yes I could've probably repaired what I had, but seeing as one had been plated and filled with filler, the other was barely left on one edge which would've taken a fair few hours to remake, I decided that getting some rarely available panels was probably the best option.
A gentle blast and coat of paint and they should be good to go
vs.
and
vs.
Both also come with the brackets attached which joins them to the top of the inner wings - good stuff!
Finally got some more Toyota time this weekend, albeit nothing too exciting though while I wait for the panels to arrive from Aus. Unfortunately unbeknown to me and from looking at the tracking information this morning it seems that they tried to deliver while I popped out briefly on Saturday morning, couldn't have missed them by more than a couple of minutes! Sadly no card was left or even a means of contacting to say they had tried to deliver... so infuriating! Oh well... means they are close and I should have them sometime this week... fingers crossed!
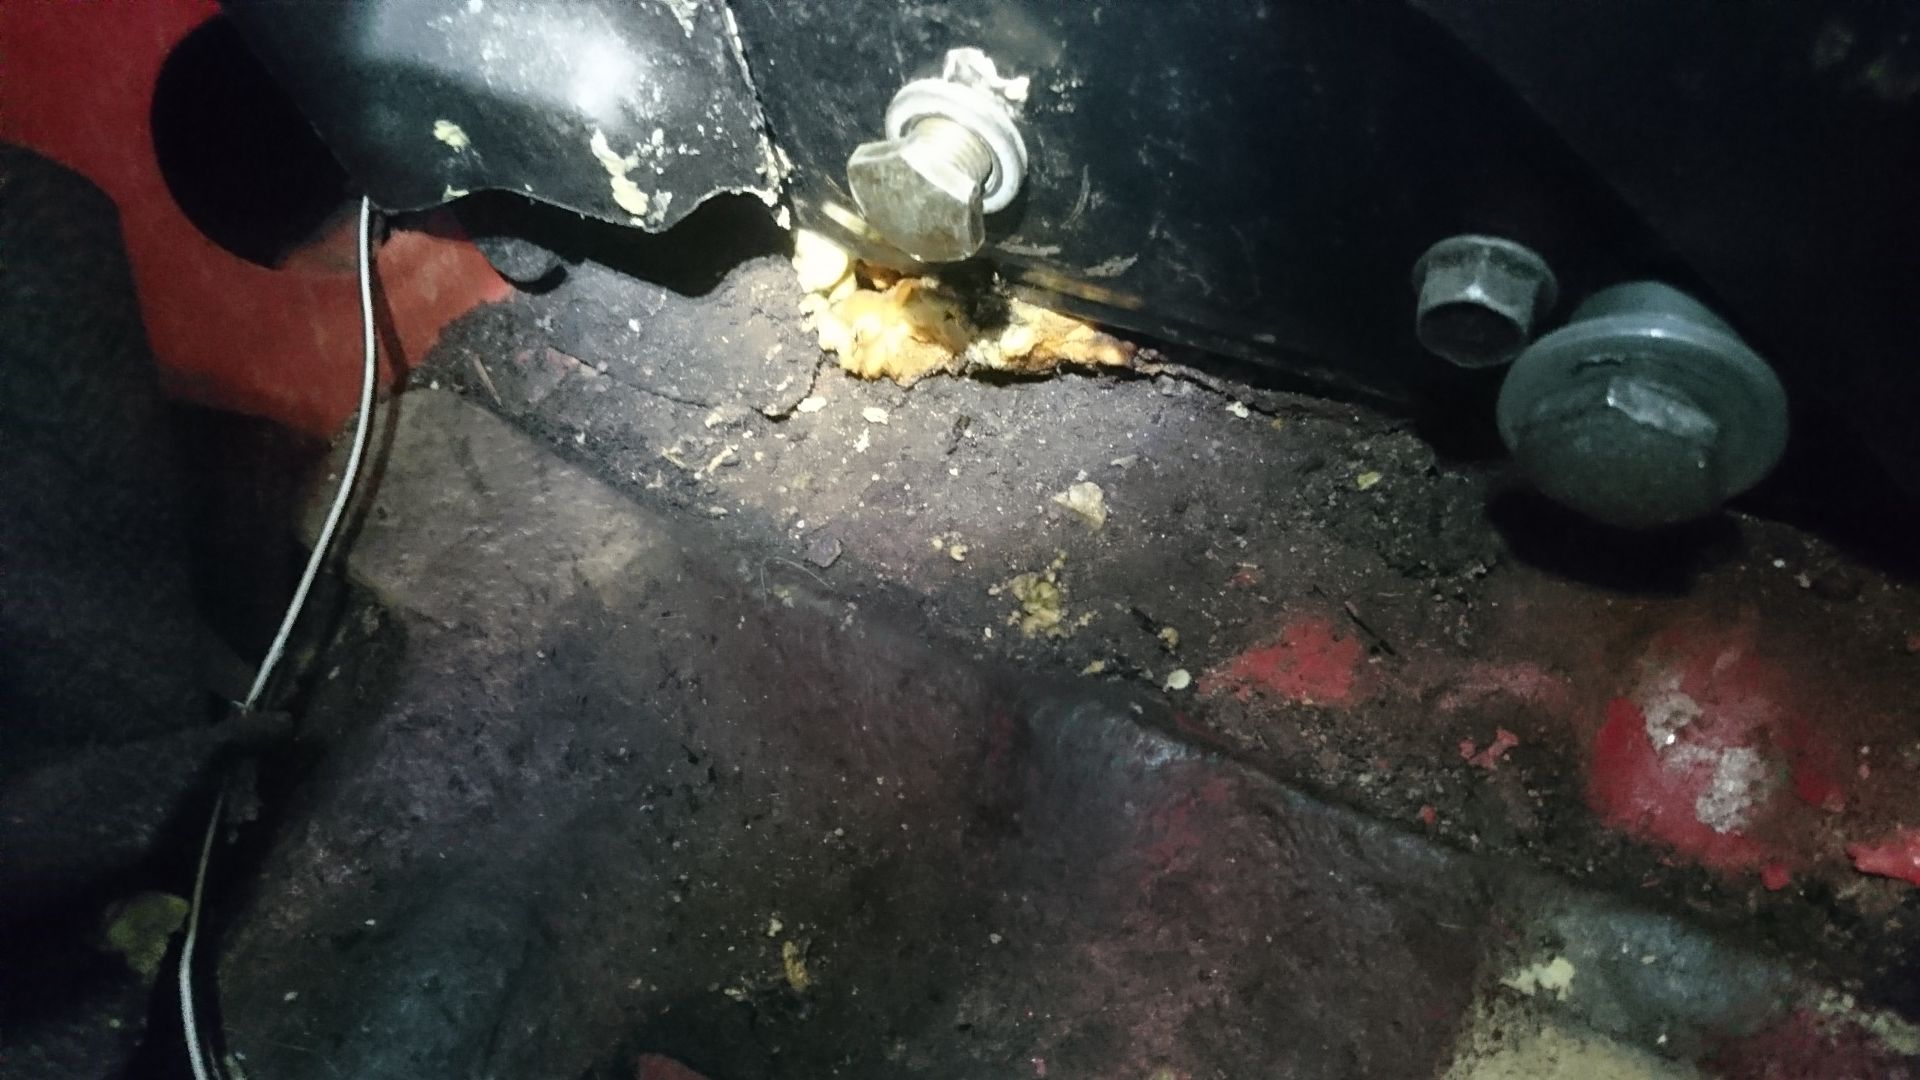
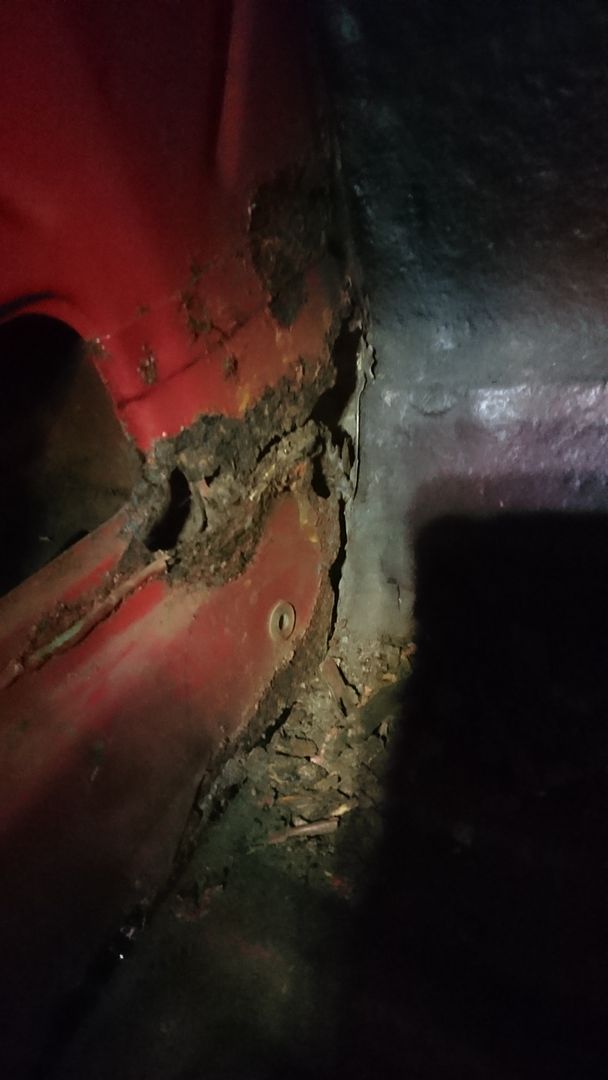
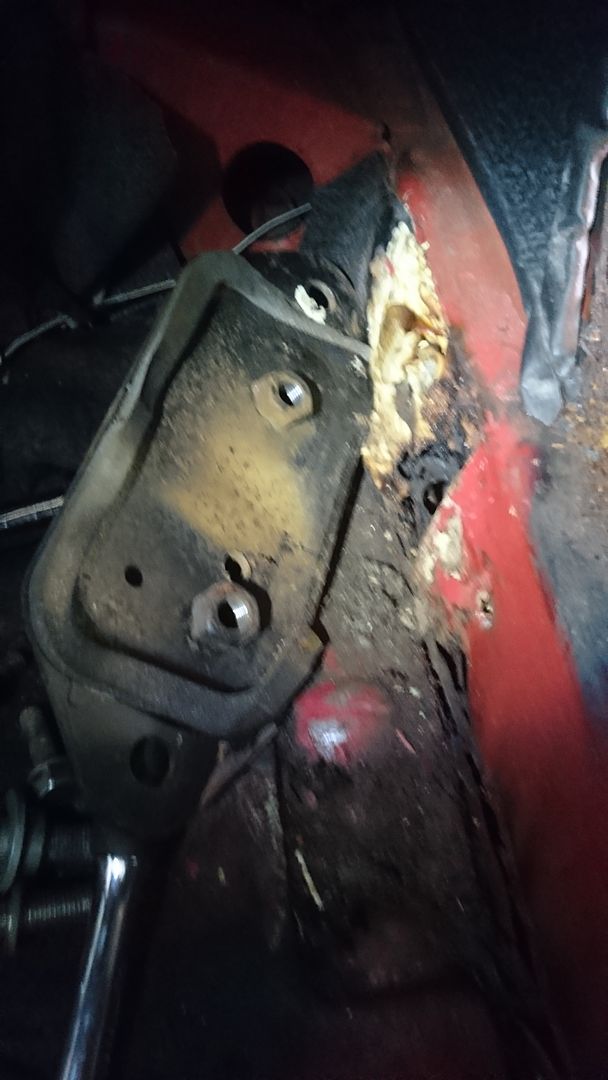
Continuing blissfully unaware of the panels close proximity, I thought I'd crack on stripping the interior ready for sorting the gearbox cross member mounts which need access from within and seeing what other delights I might find. The carpet had seen better days so I wasn't too worried about saving it which made things easier
First things first - front seats and centre console out... then the removal of the rather tired carpet... now at this point a few interesting things appeared... a funny little 80's plastic reflector, (you know the kind that used to go on the back edge of doors) some missing wheel nuts that I still need a few more of, some traces of expanding foam (uh ohhhh) and loooooots more rust... b*gger! Although I was expecting this last bit, I wasn't quite prepared for the full horror of how much
(excuse the crap pics - was in a dark barn with a head torch, but you get the idea!)
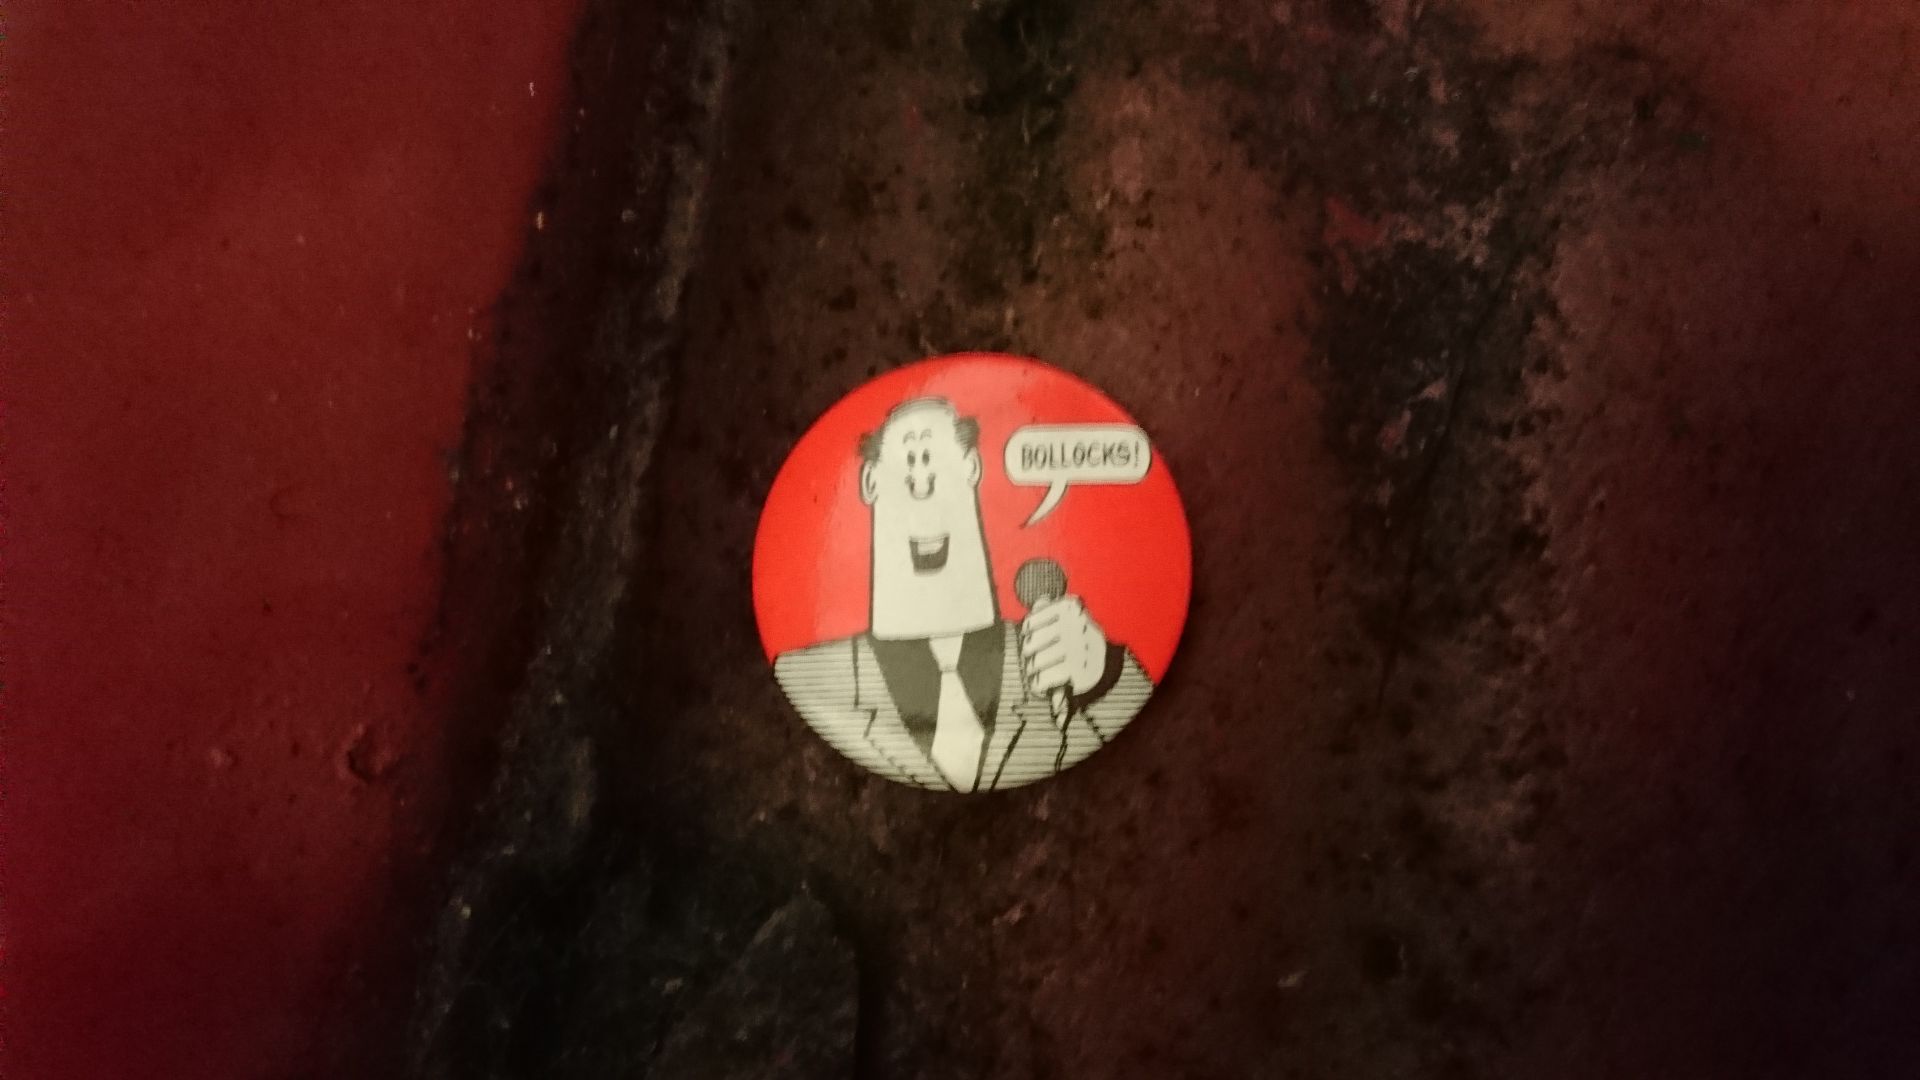
I then came across an old Viz badge which summed things up perfectly for me at that point...
So as it appeared rather a lot of welding is going to be needed inside, I stripped out as much as I could:
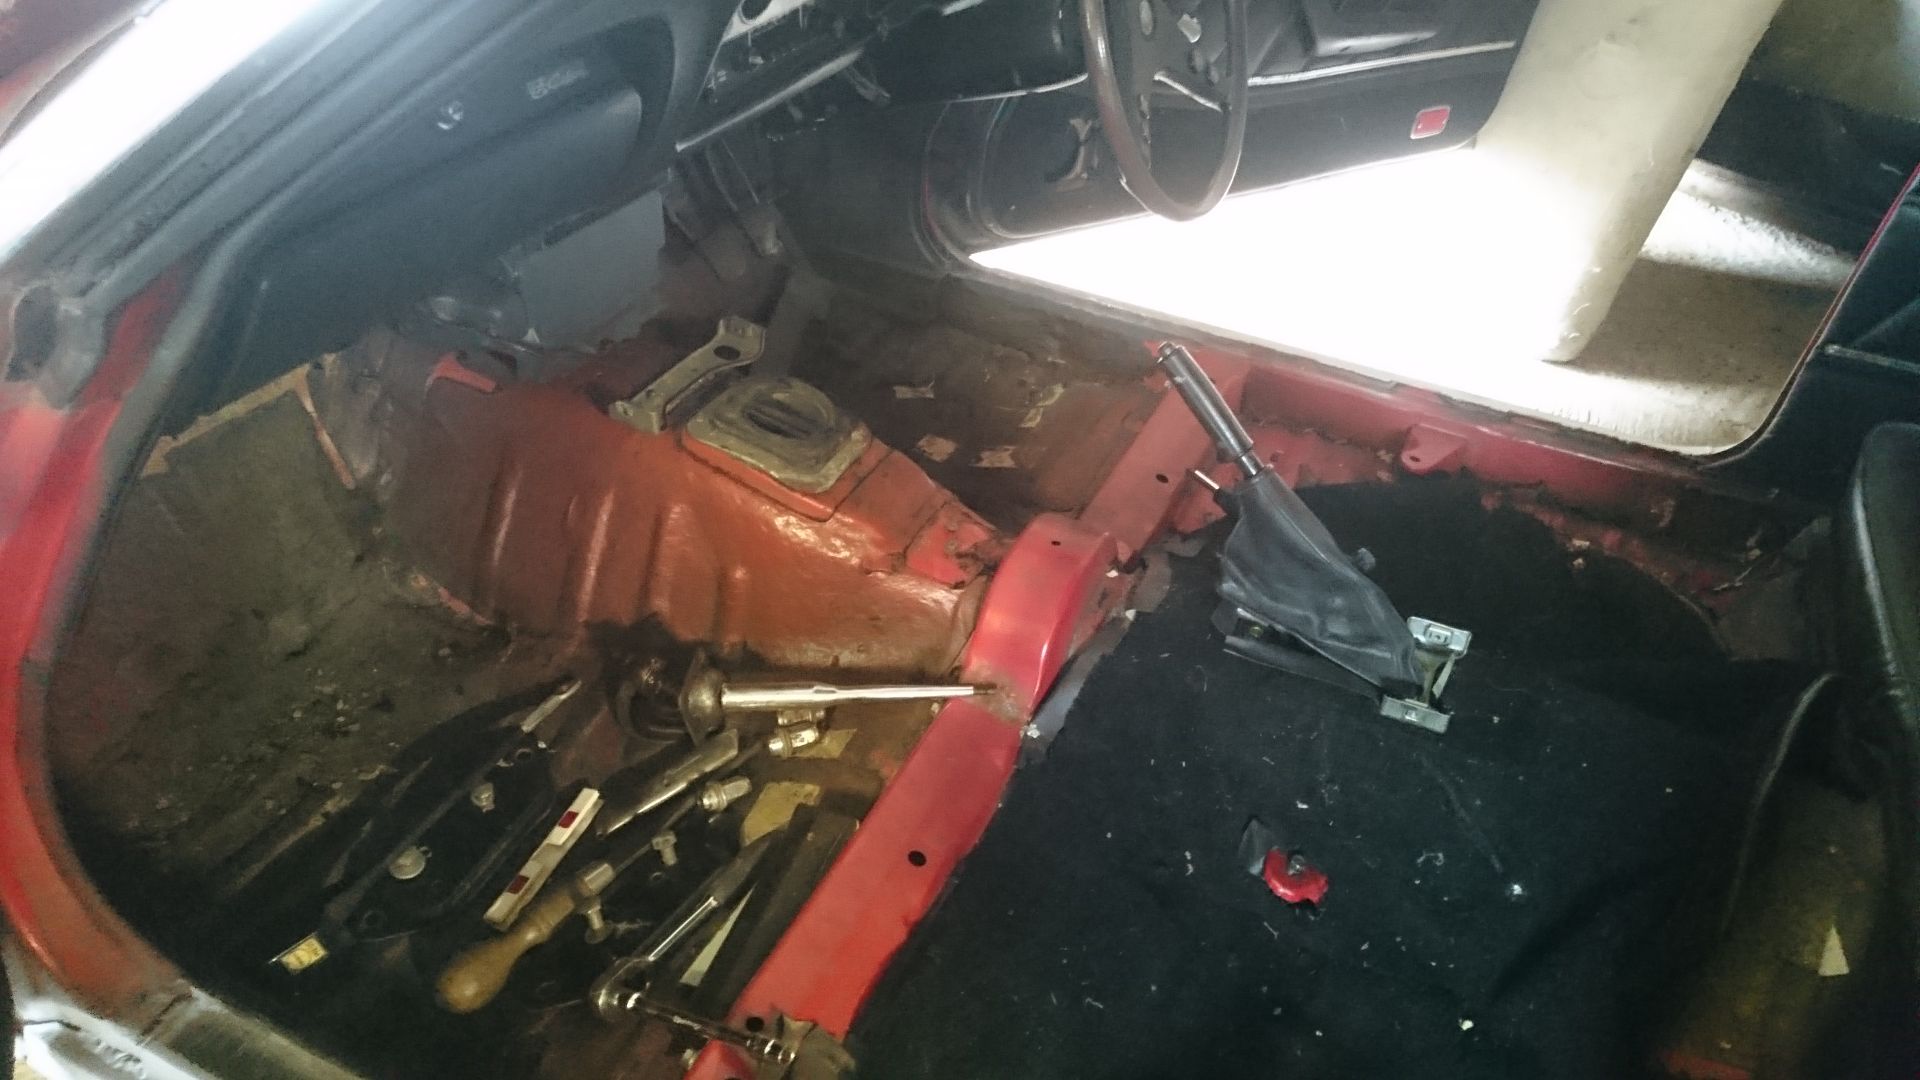
including the lower dashboard tray, kick plates, rear seats and seatbelts, along with the two reinforcing plates where the pre-tensioners bolt... guess what was hiding behind them...
any ideas? (the clue is above....)
yup...
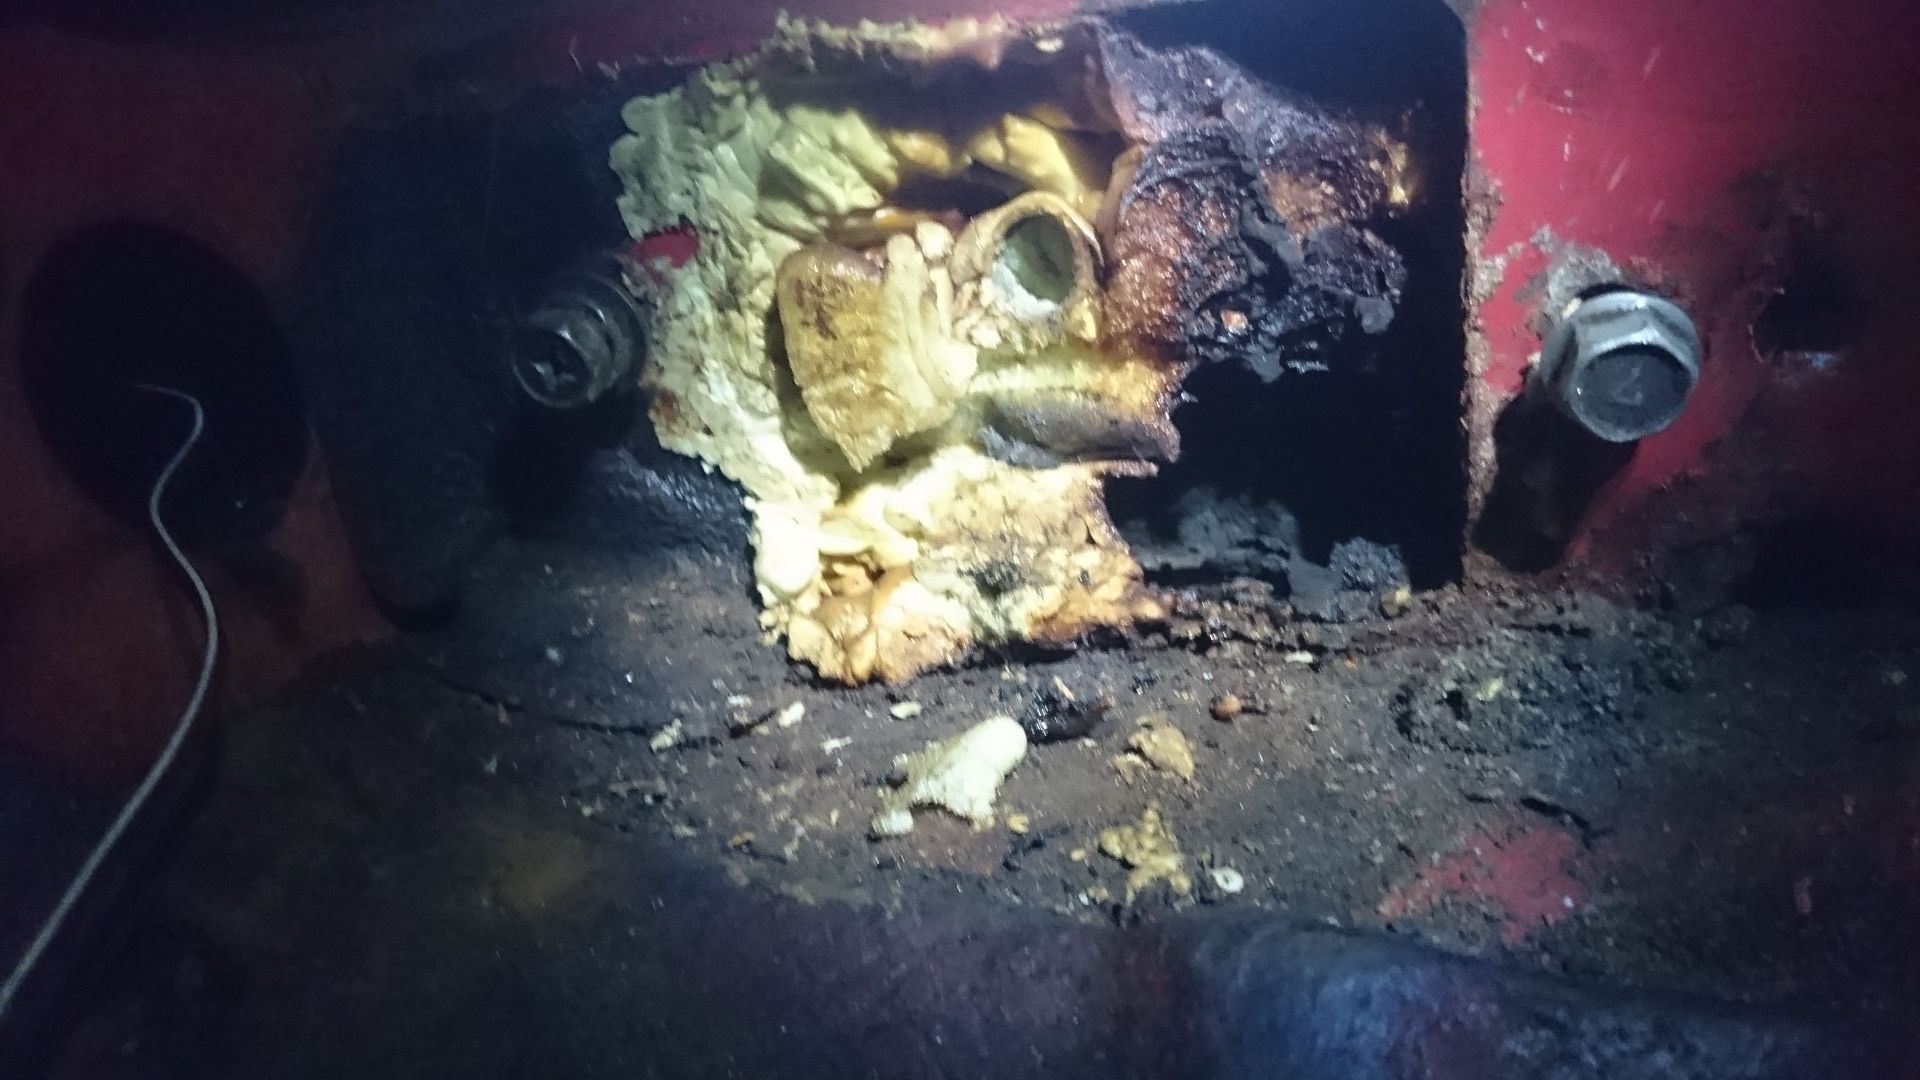
More expanding foam that has been set alight at some point - probably when they welded the over sills on... unbelievable!
Some of the floor insulation had also got a little warm too!

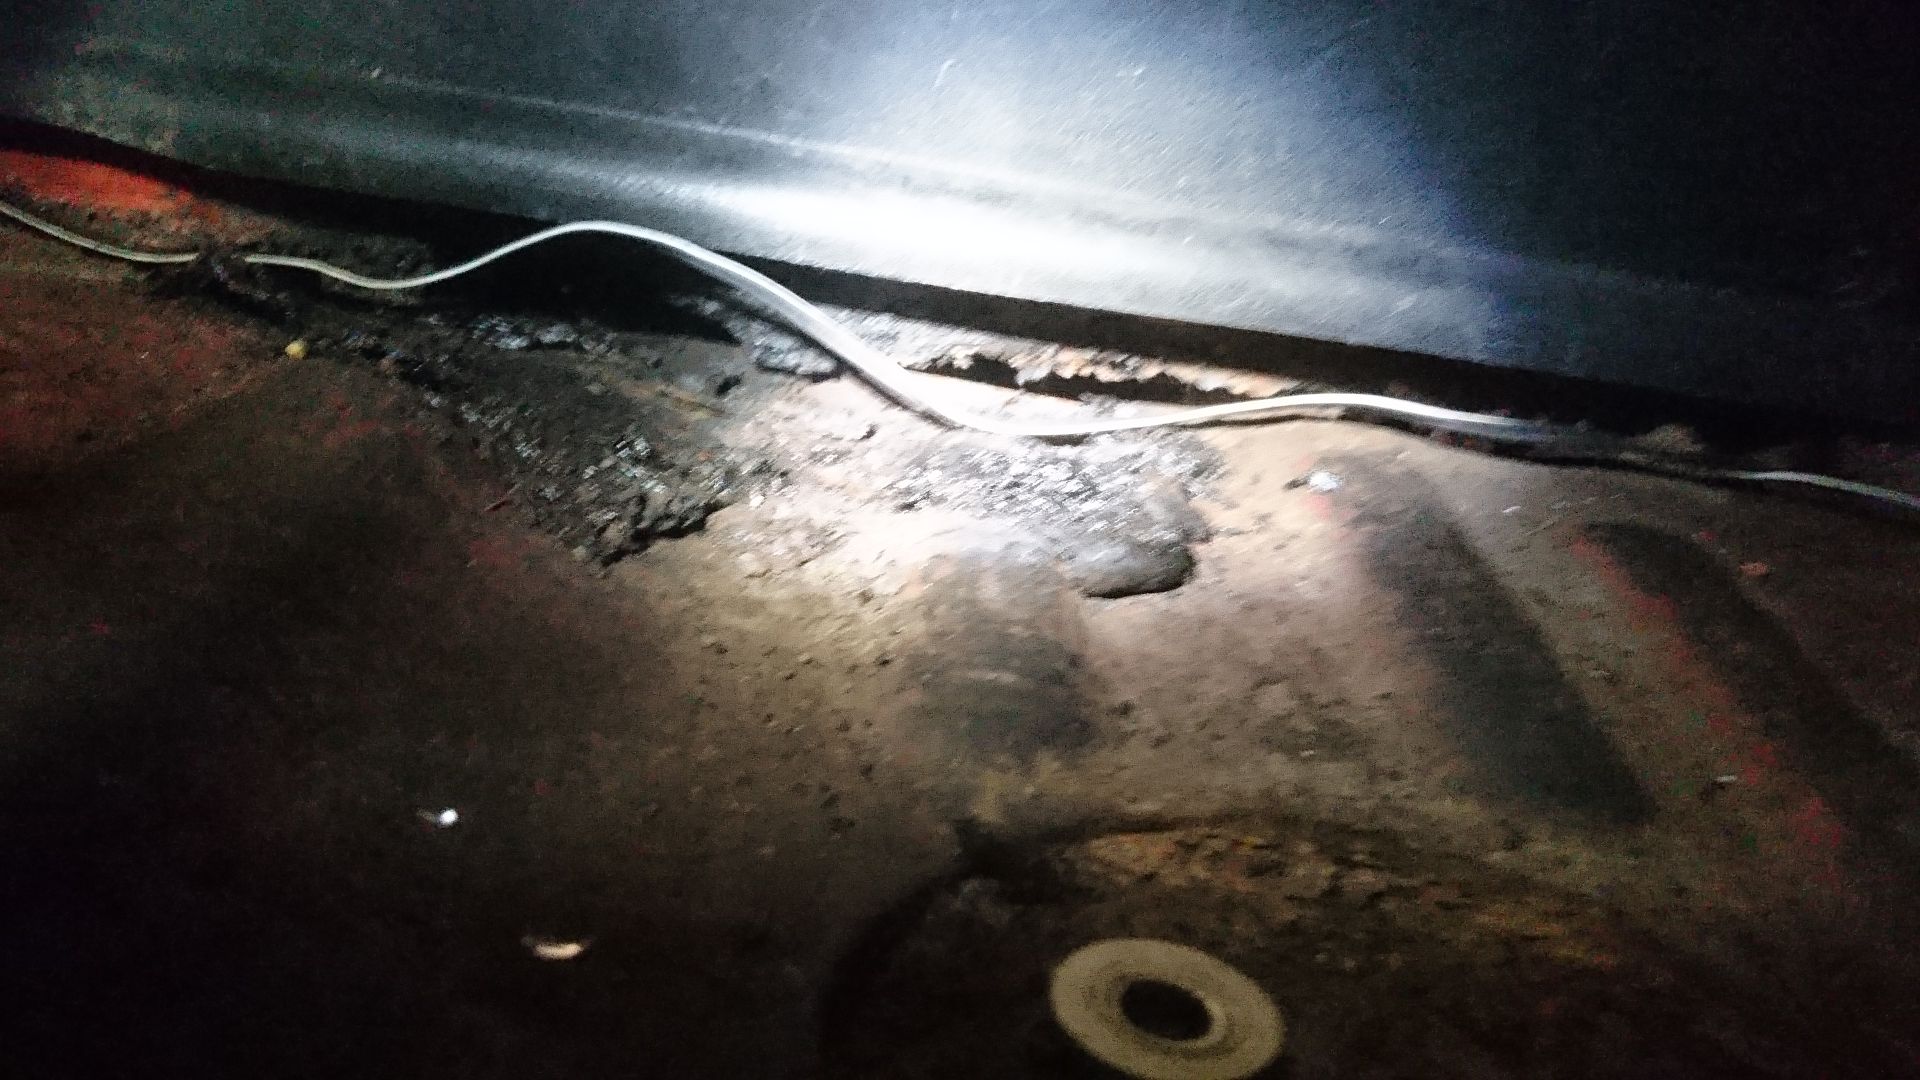
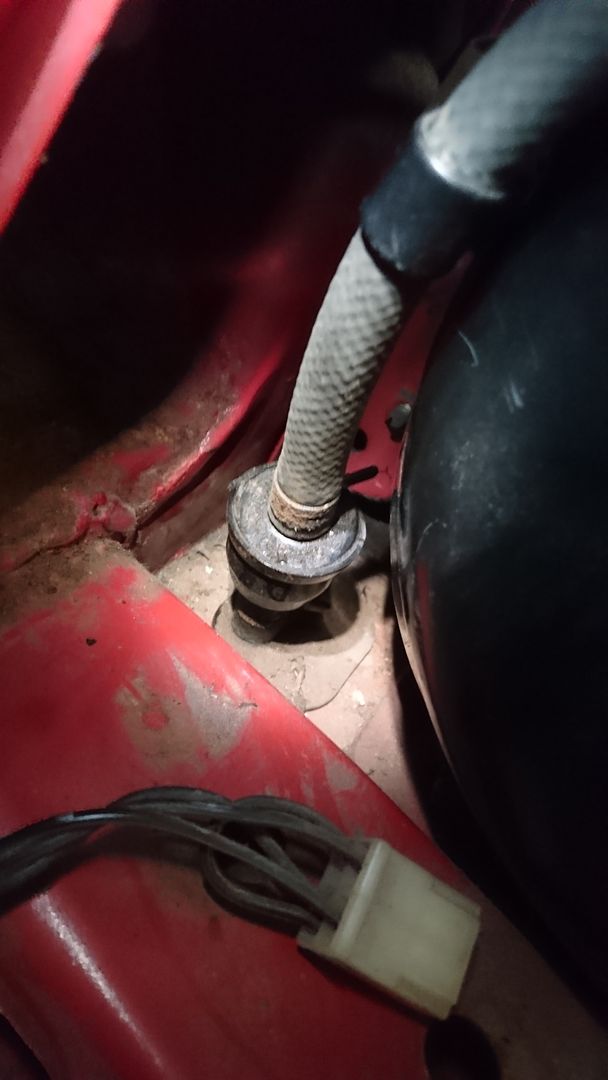
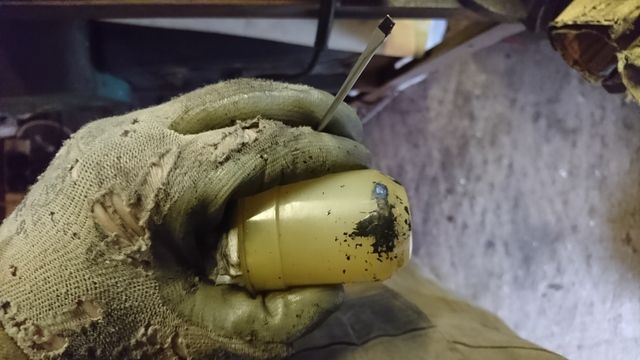
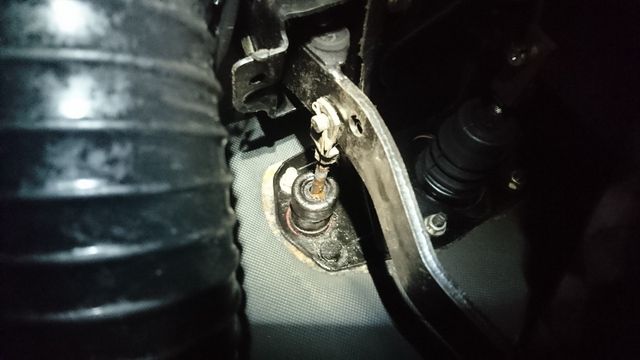
After removing the rear seats I also came across this little device - something to do with the fuel system but the top and bottom came apart way too easily for my liking revealing a spring with a sort of plunger balanced on top - any ideas what it is?
So after a vacuum inside to get rid of the dust and a bit of a tidy of the rest of the parts currently stored in the car, I eventually had a floor that looked like this:
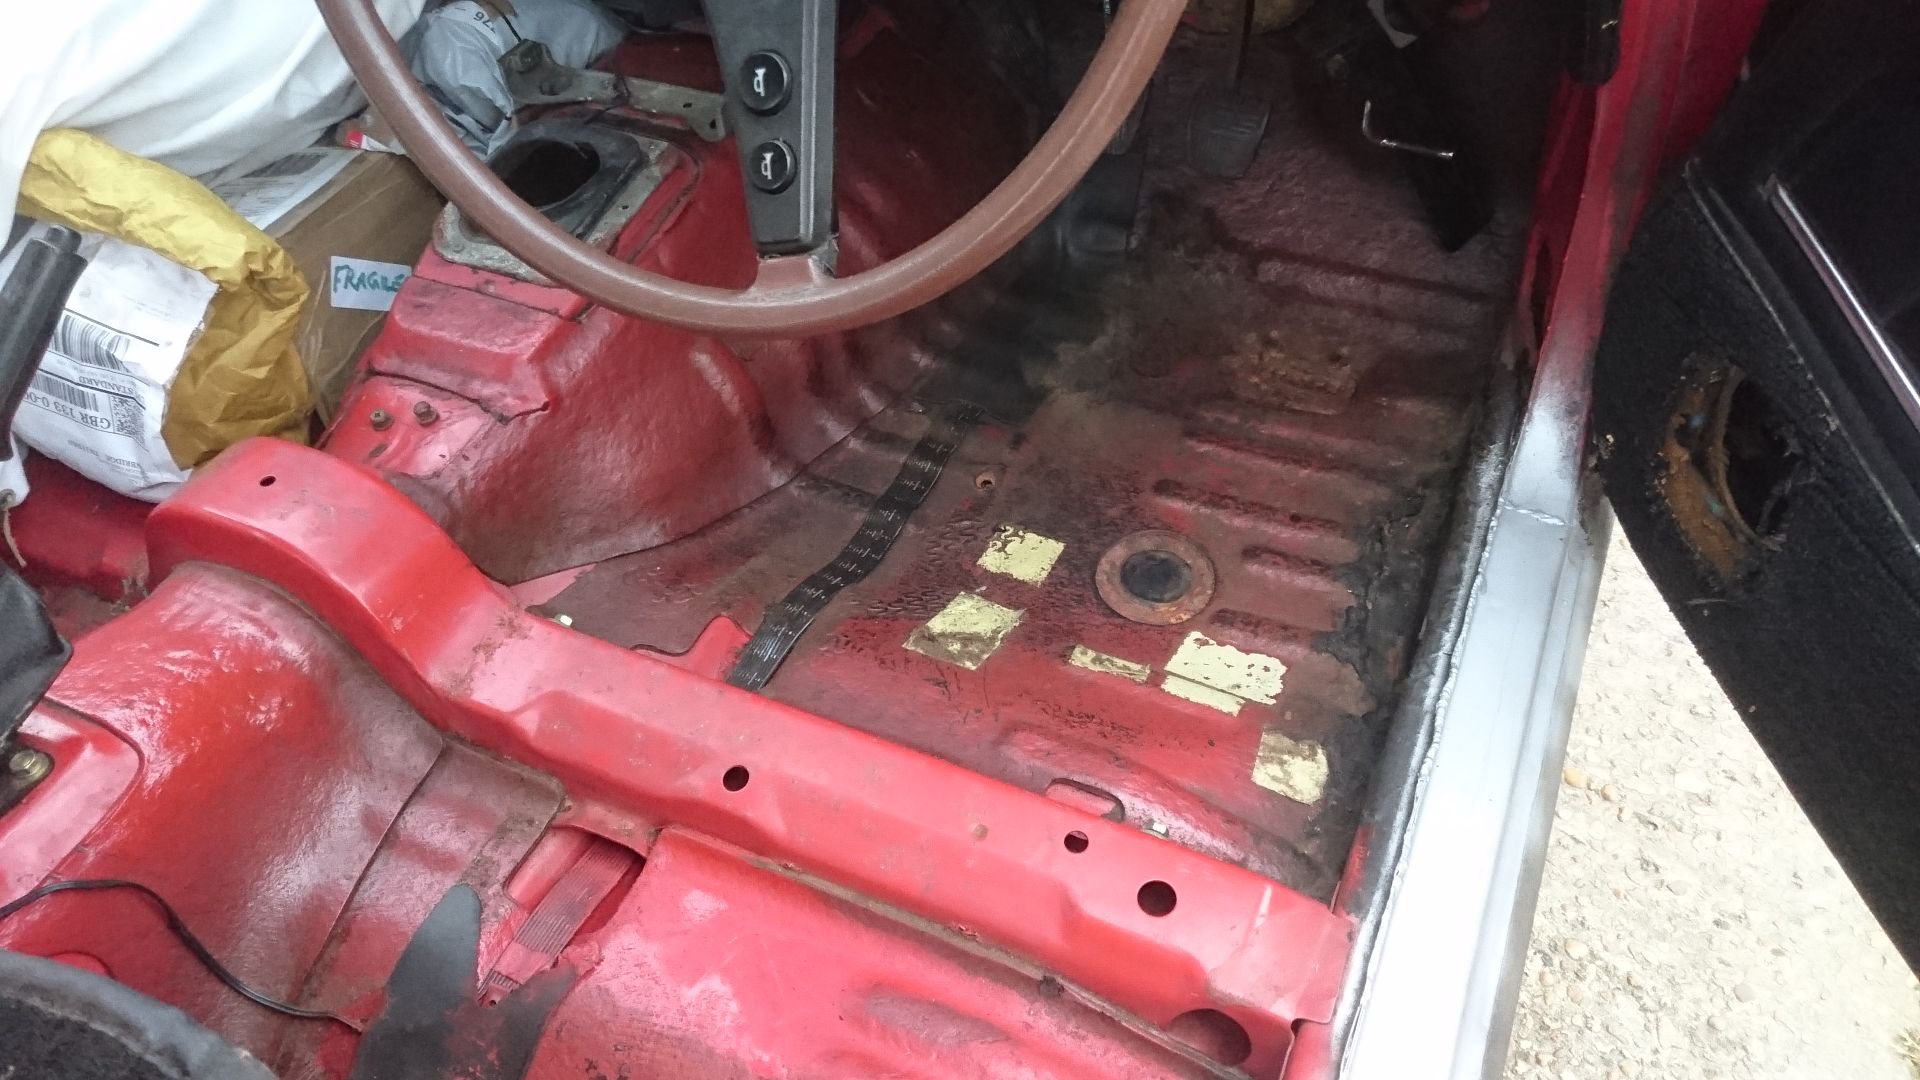
With the odd hole in the usual places...

Could be a lot worse I guess...
Finally I thought I'd boost my mojo a little by bolting the front wings on with the new lip spoiler...
Amazing how doing such a simple thing can help the motivation
Continuing blissfully unaware of the panels close proximity, I thought I'd crack on stripping the interior ready for sorting the gearbox cross member mounts which need access from within and seeing what other delights I might find. The carpet had seen better days so I wasn't too worried about saving it which made things easier
First things first - front seats and centre console out... then the removal of the rather tired carpet... now at this point a few interesting things appeared... a funny little 80's plastic reflector, (you know the kind that used to go on the back edge of doors) some missing wheel nuts that I still need a few more of, some traces of expanding foam (uh ohhhh) and loooooots more rust... b*gger! Although I was expecting this last bit, I wasn't quite prepared for the full horror of how much
(excuse the crap pics - was in a dark barn with a head torch, but you get the idea!)
I then came across an old Viz badge which summed things up perfectly for me at that point...
So as it appeared rather a lot of welding is going to be needed inside, I stripped out as much as I could:
including the lower dashboard tray, kick plates, rear seats and seatbelts, along with the two reinforcing plates where the pre-tensioners bolt... guess what was hiding behind them...
any ideas? (the clue is above....)
yup...
More expanding foam that has been set alight at some point - probably when they welded the over sills on... unbelievable!
Some of the floor insulation had also got a little warm too!
After removing the rear seats I also came across this little device - something to do with the fuel system but the top and bottom came apart way too easily for my liking revealing a spring with a sort of plunger balanced on top - any ideas what it is?
So after a vacuum inside to get rid of the dust and a bit of a tidy of the rest of the parts currently stored in the car, I eventually had a floor that looked like this:
With the odd hole in the usual places...
Could be a lot worse I guess...
Finally I thought I'd boost my mojo a little by bolting the front wings on with the new lip spoiler...
Amazing how doing such a simple thing can help the motivation
Wish mine looked like that at the moment!
Good thinking on the pipe - would make sense with the spring and cap inside, will do some more research.
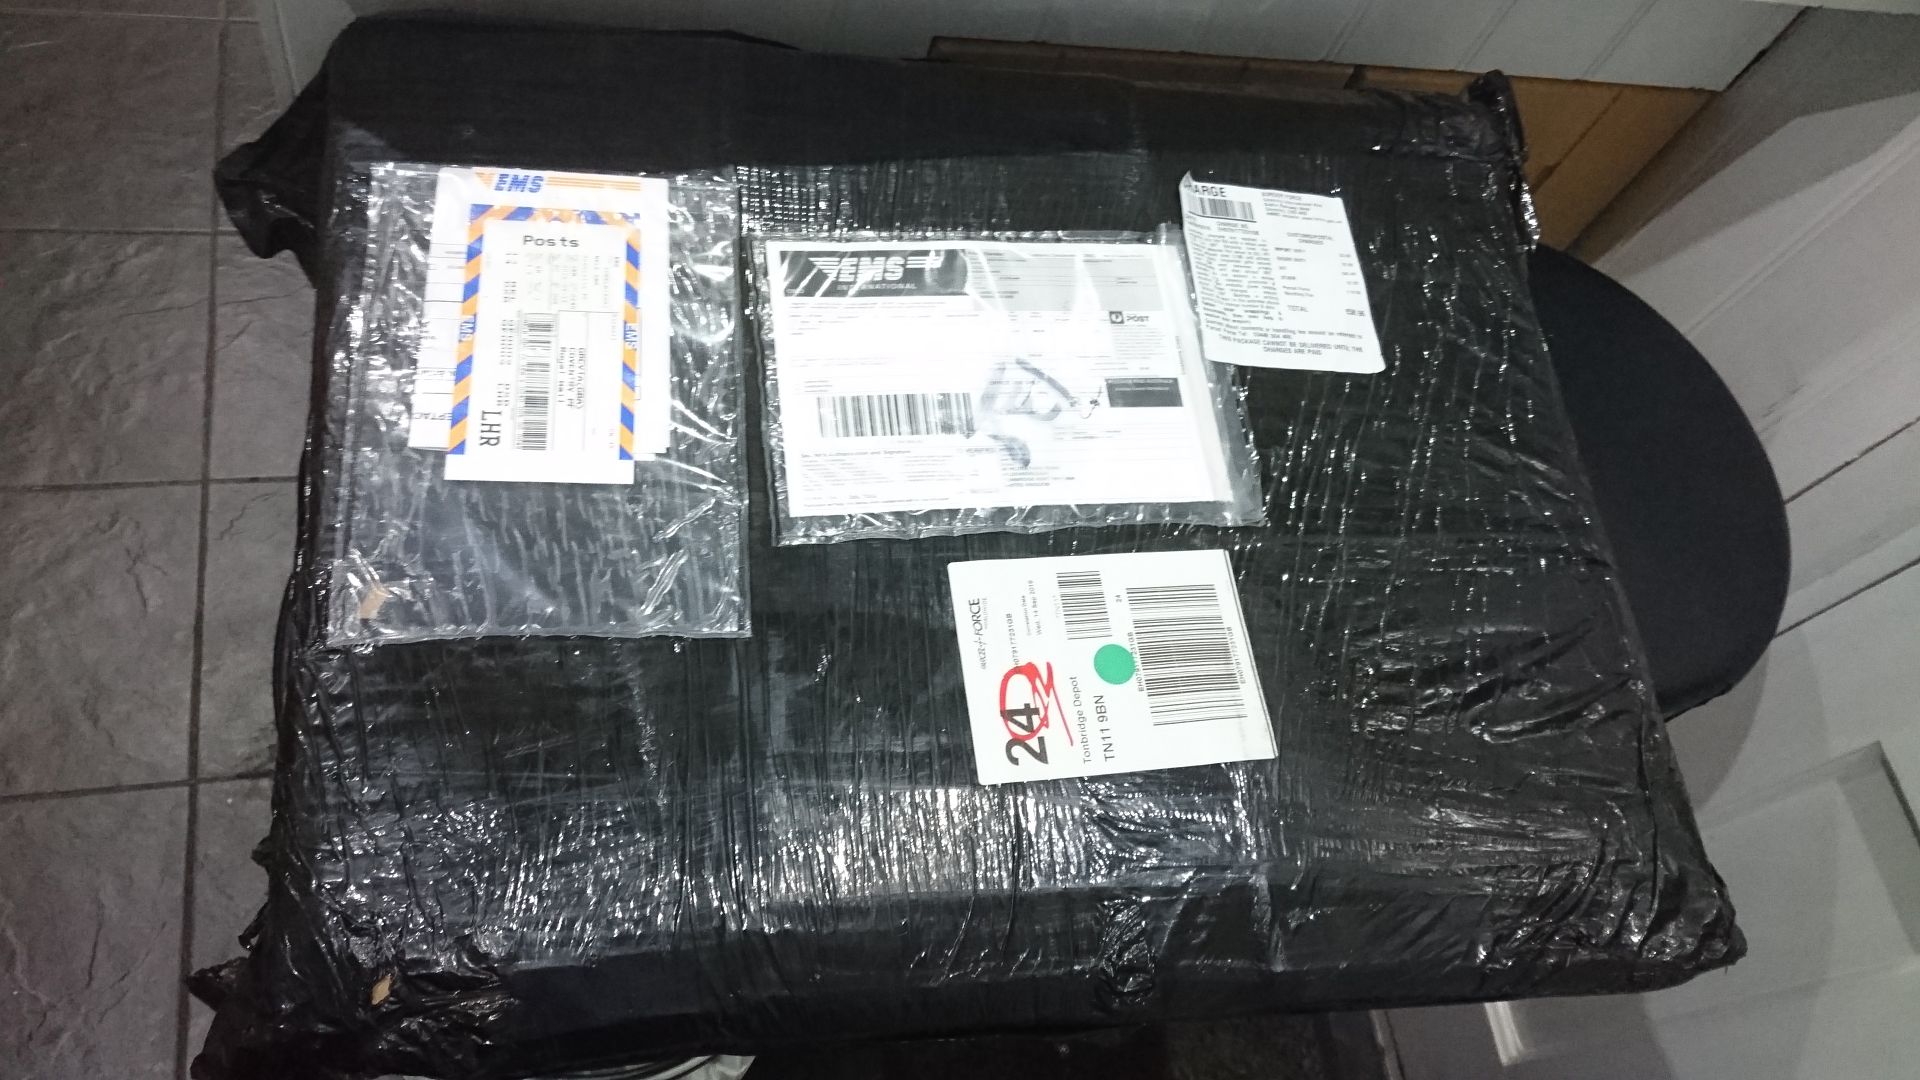
In other news, I got home last night to find this waiting
Knowing how frustrated I was at missing them on the weekend and having no chance to go collect it in the week, my amazing wife had gone and collected it for me, including paying the customs charges. Now call me a sceptic but I'm wondering what will need to be done/bought in return
Good thinking on the pipe - would make sense with the spring and cap inside, will do some more research.
In other news, I got home last night to find this waiting
Knowing how frustrated I was at missing them on the weekend and having no chance to go collect it in the week, my amazing wife had gone and collected it for me, including paying the customs charges. Now call me a sceptic but I'm wondering what will need to be done/bought in return
So the weekend bought with it some actual Toyota time... bit of a miracle I know!
As the aforementioned panels had made their way across from the other side of the planet, I thought I'd make a start on removing their predecessors.
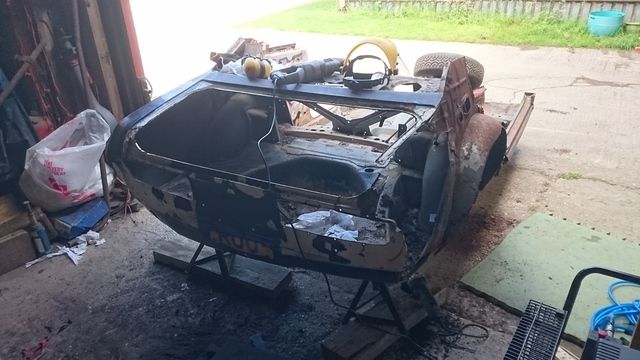
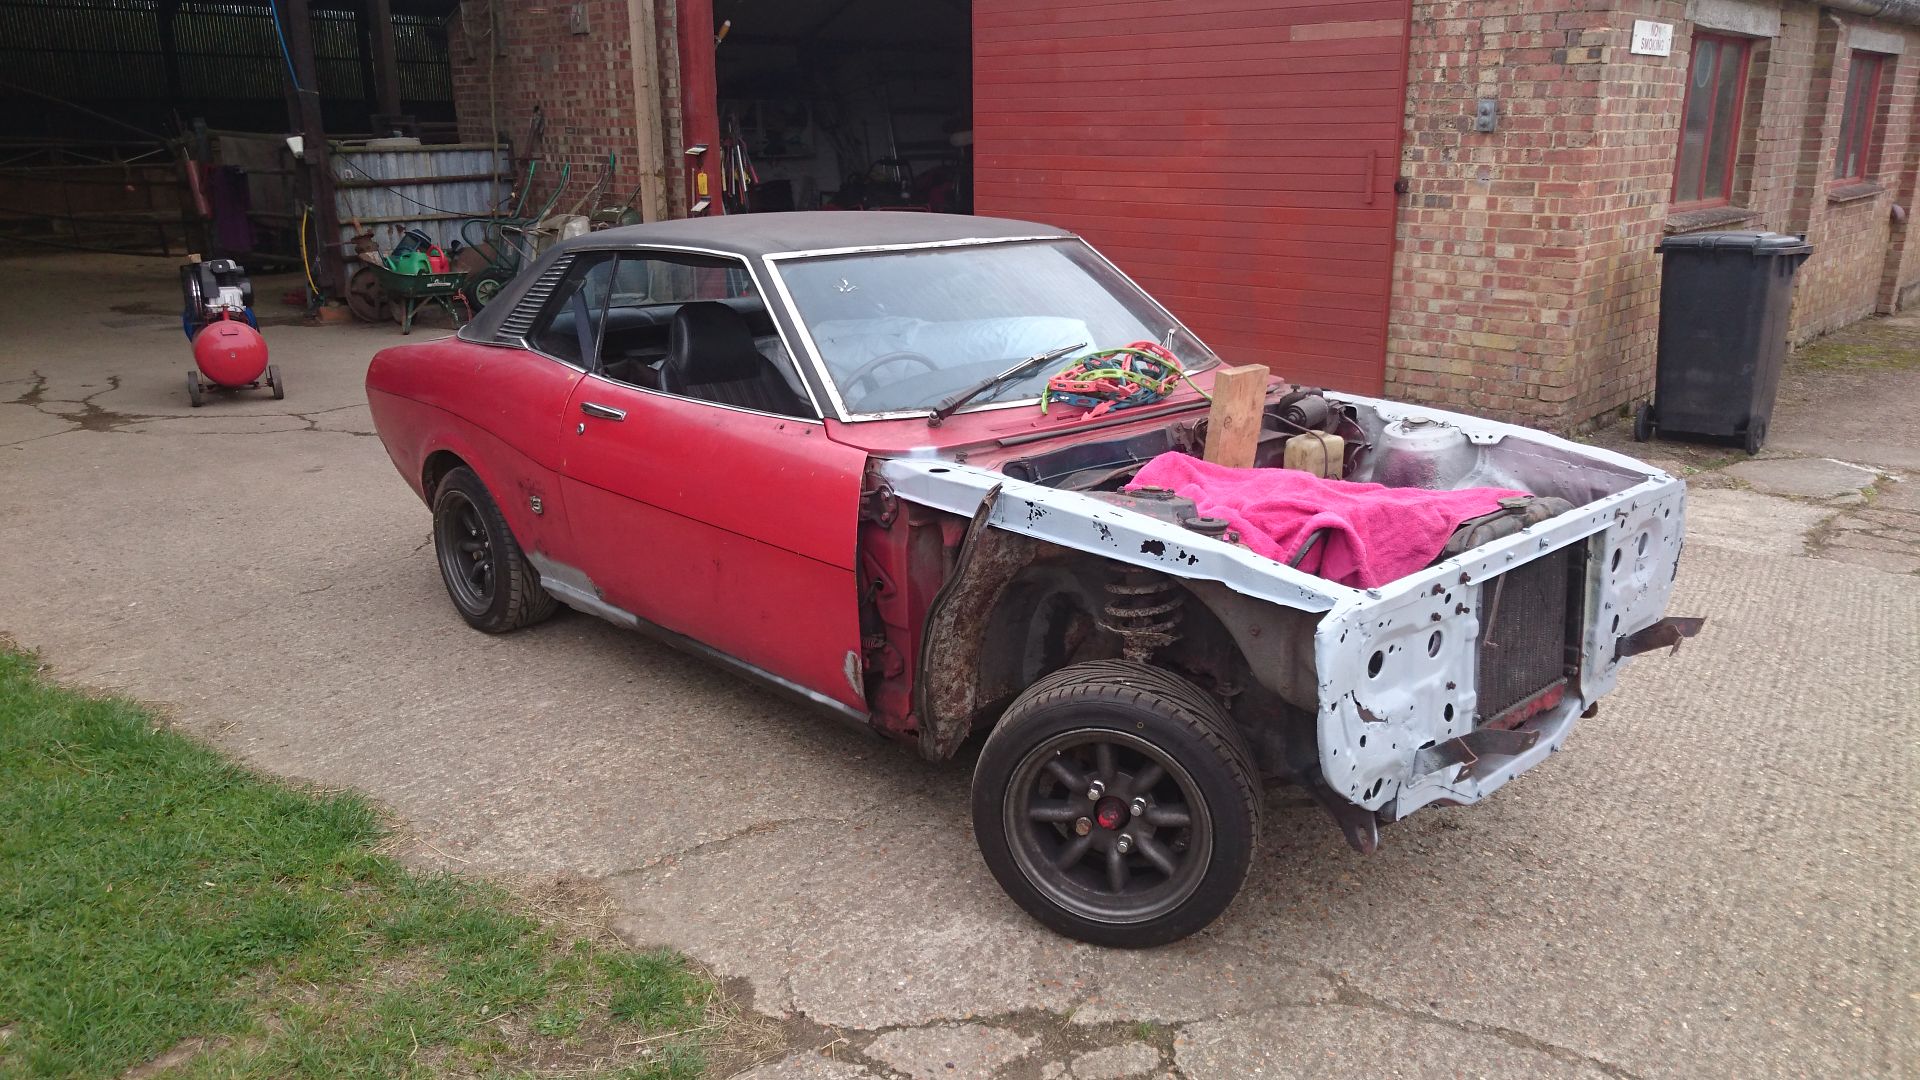
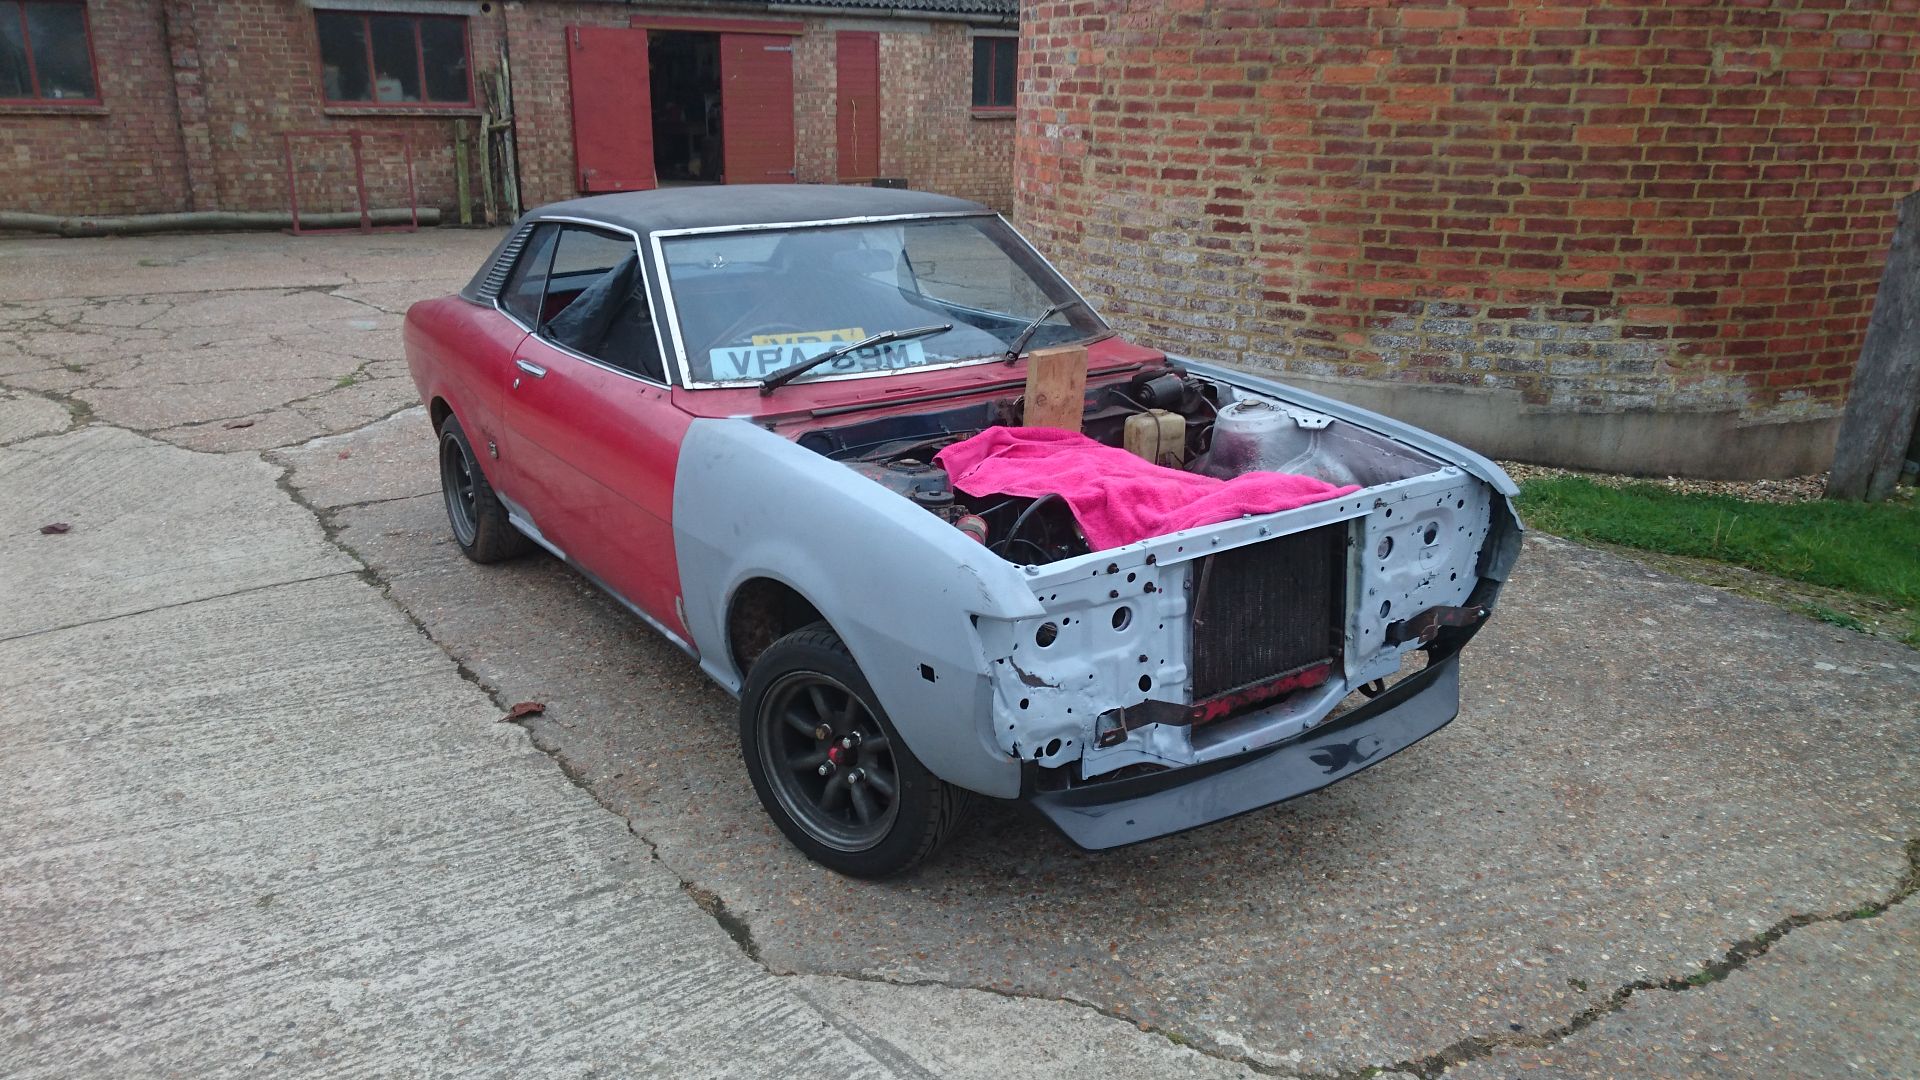
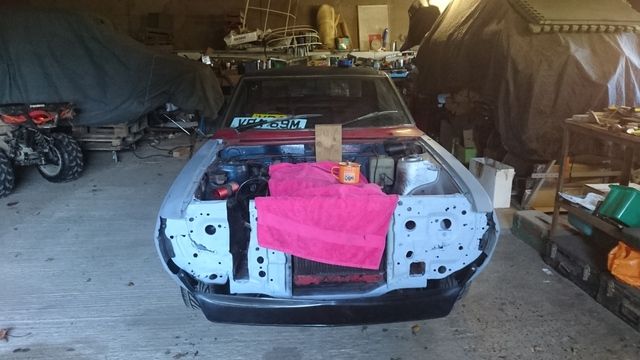
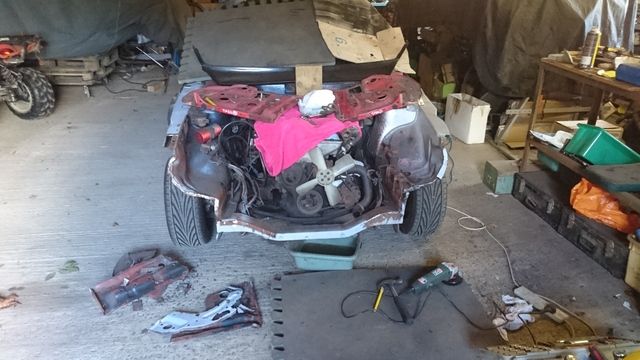
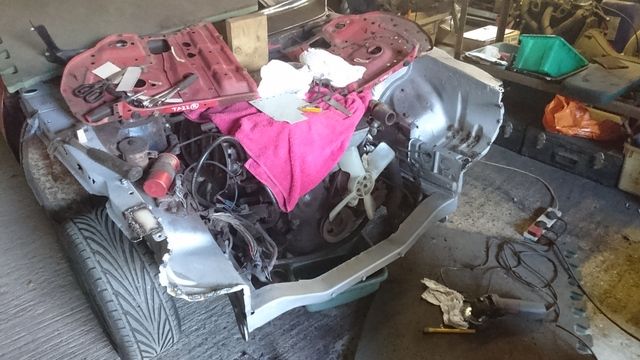
So the day started with the car looking like this, complete with its fetching pink towel to try and keep that rocker cover looking as it should.
Even though it seemed to be a relatively straightforward job, I wasn't particularly looking forward to it as it was always going to throw a few surprises.
So on with the panel removal

This also involved removing some slightly suspect repairs where things had just been plated over in the past.
First one side
then the other...
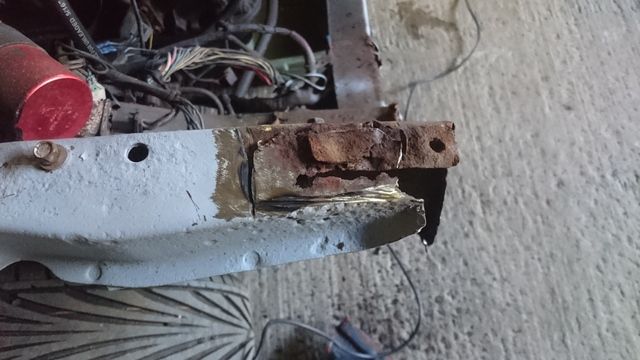
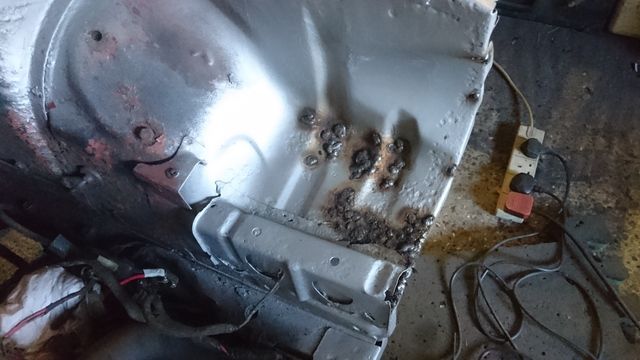
As to be expected, some rather scabby bits were then exposed
Bit of an attack with the wire wheel and the in-vogue swiss cheese look was back
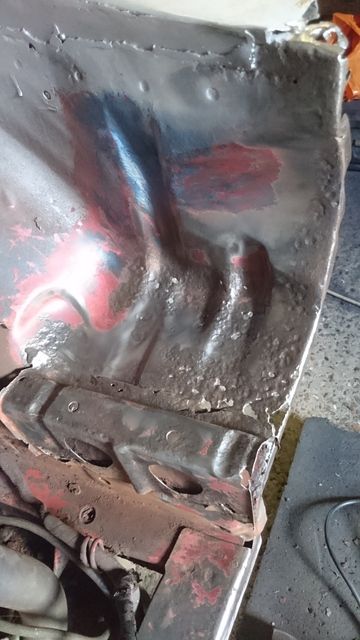
Thankfully the other side was a little more solid, although it was showing signs of some accident damage in the past. Look closely and you can spot the holes on the corner of the lip that were previously filled with fibreglass and given a healthy dosing of seam sealer over the top.
So out with the welder, old metal cut out and new piece welded in on wing and several hours spent filling the holes with weld using the flattened copper pipe trick. (House renovation does have its benefits).
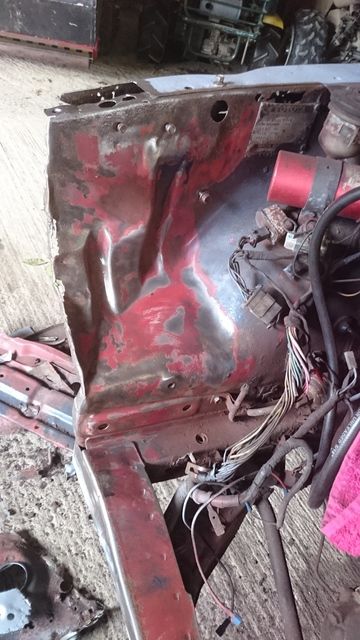
Not that pretty but once linished back and given a coat of etch it looked much better... not that it'll be seen as this is under the battery tray...
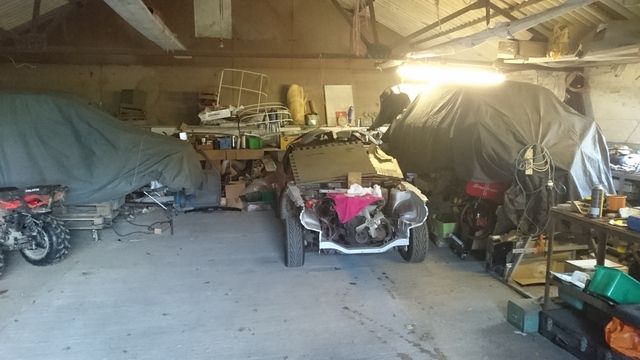
and that was the bulk of progress this weekend... looks a bit sad compared to how it started and feels like a step or two back, but ultimately it's moving forward.
tucked back in with its project mates
Next installment will most likely involve pulling the engine while it's easy to do so so I can deal with the rusty holes coming through from the wheel arches - seemingly a common issue on these.
Onwards and backwards...
As the aforementioned panels had made their way across from the other side of the planet, I thought I'd make a start on removing their predecessors.
So the day started with the car looking like this, complete with its fetching pink towel to try and keep that rocker cover looking as it should.
Even though it seemed to be a relatively straightforward job, I wasn't particularly looking forward to it as it was always going to throw a few surprises.
So on with the panel removal
This also involved removing some slightly suspect repairs where things had just been plated over in the past.
First one side
then the other...
As to be expected, some rather scabby bits were then exposed
Bit of an attack with the wire wheel and the in-vogue swiss cheese look was back
Thankfully the other side was a little more solid, although it was showing signs of some accident damage in the past. Look closely and you can spot the holes on the corner of the lip that were previously filled with fibreglass and given a healthy dosing of seam sealer over the top.
So out with the welder, old metal cut out and new piece welded in on wing and several hours spent filling the holes with weld using the flattened copper pipe trick. (House renovation does have its benefits).
Not that pretty but once linished back and given a coat of etch it looked much better... not that it'll be seen as this is under the battery tray...
and that was the bulk of progress this weekend... looks a bit sad compared to how it started and feels like a step or two back, but ultimately it's moving forward.
tucked back in with its project mates
Next installment will most likely involve pulling the engine while it's easy to do so so I can deal with the rusty holes coming through from the wheel arches - seemingly a common issue on these.
Onwards and backwards...
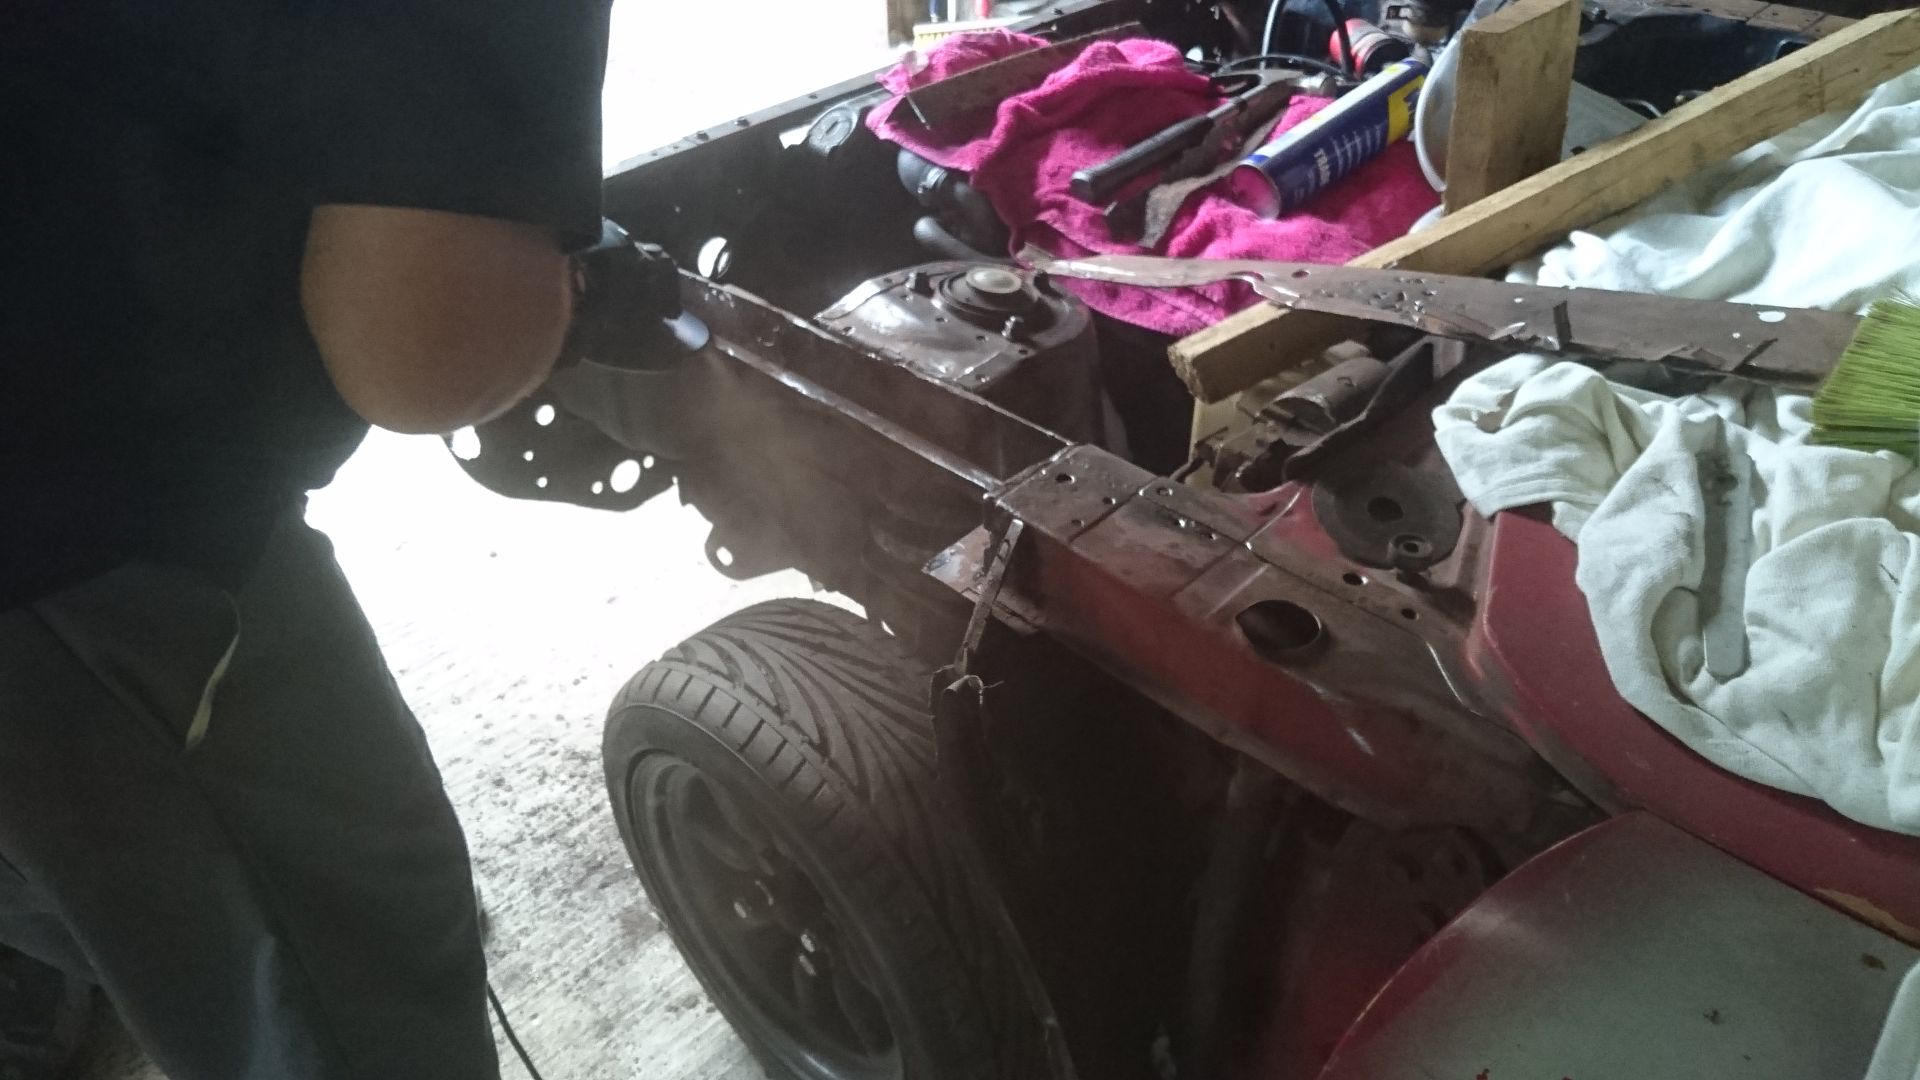
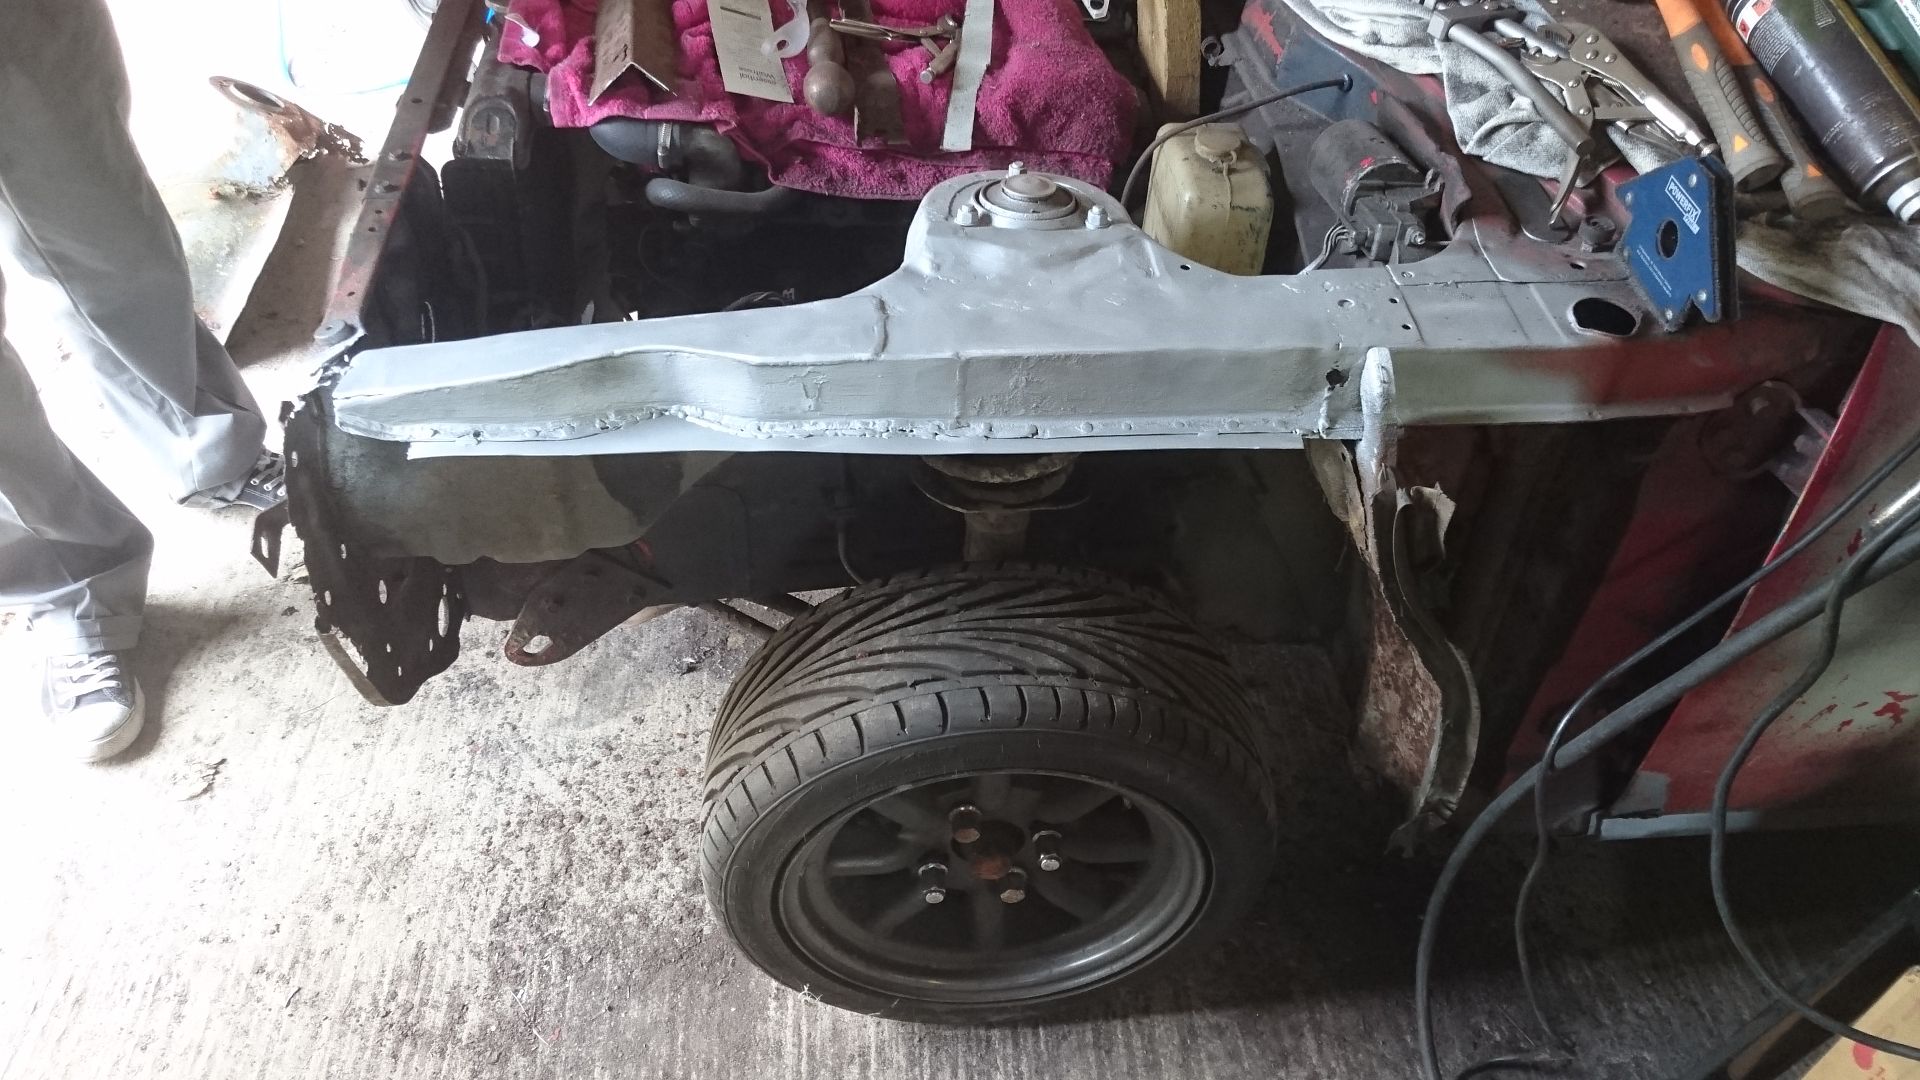
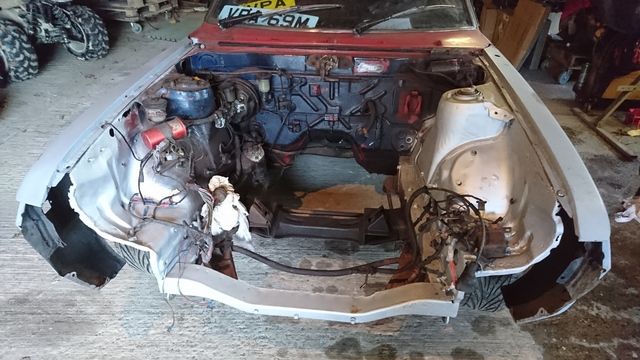
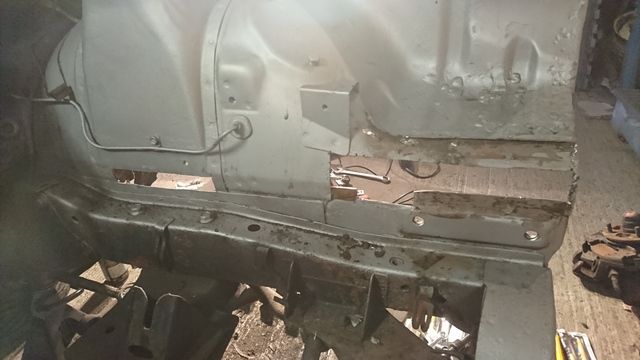
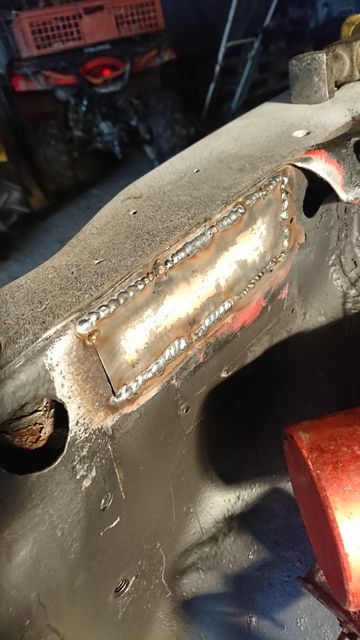
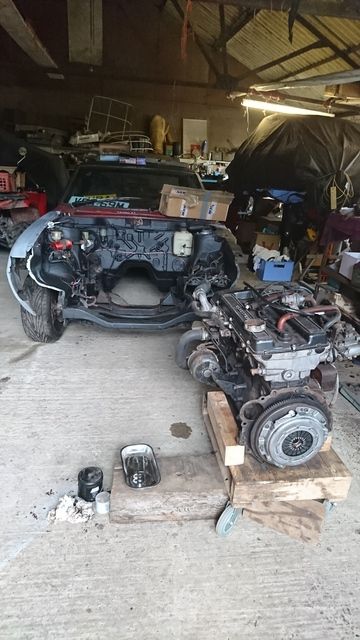
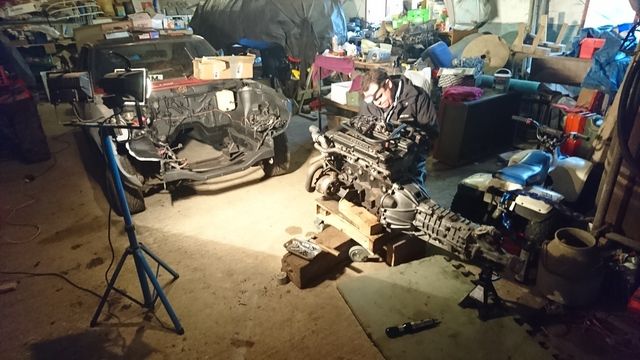
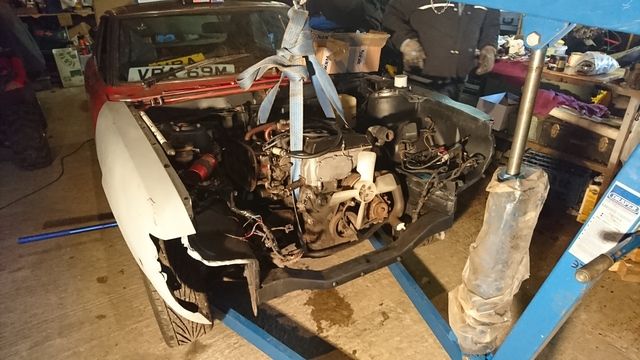
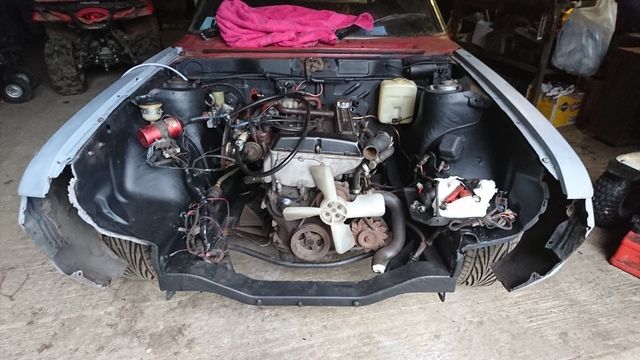
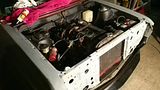
Well as predicted in the last installment for things to progress sometimes things have to go seemingly backwards. The car has a running engine that really needs little work other than to be driven, however the sides of the engine bay were looking a little worse for wear and needed to be sorted. So this is how saturday started:
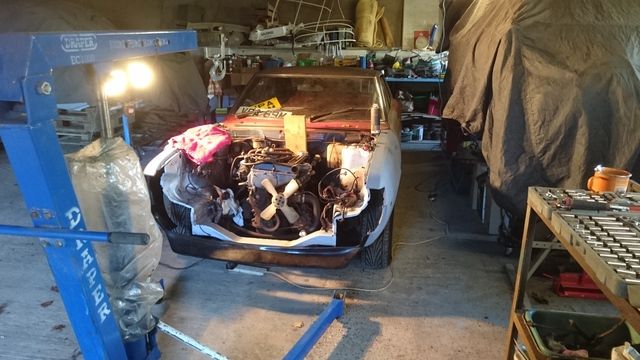
Which rather quickly escalated to this, without too much drama at all:
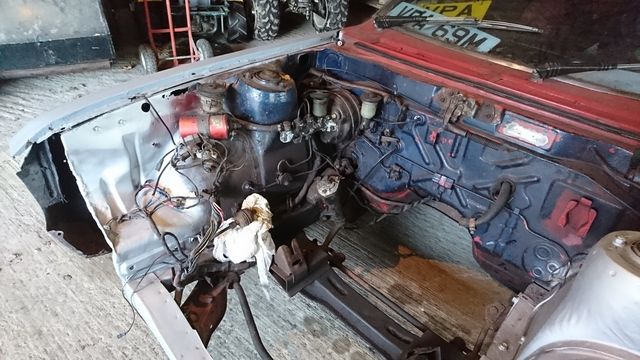
I could then start work on trying to clean up the slightly scabby inners wings and see what I'd be left with:
Rather surprisingly the wings proved to be better that I imagined and the bubbling rust spots I'd envisaged were no more than flaking hammerite where the PO had liberally applied it many years ago, on the whole thankfully it seemed to have protected the car rather well. There were however the two areas that I already knew about so these were cut back and cleaned up:
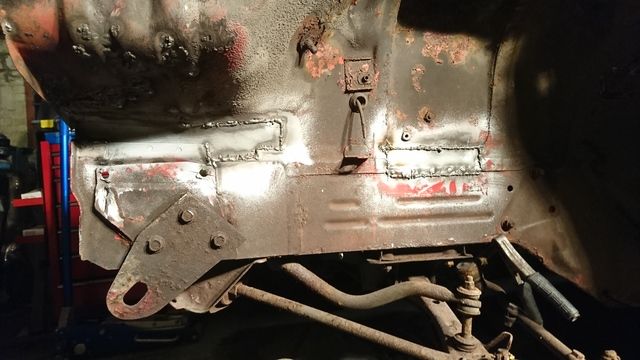
The other side wasn't much prettier - didn't fancy welding this up with a fuel line running rather close by!
First side cleaned up and treated to a coat of weld through etch primer
and how things stood once I ran out of time as I had to give my car trailer a once over and sort a couple of other jobs.
I think the front end was a bit lighter by the time I was finished!
Will strip the rest of the bay next time so I can get it all welded and painted before the engine goes back in.
Sunday bought a little roadtrip to the south coast amongst the wind farms and MOD land in Lydd to collect some parts for another one of the other projects - just the job to keep SWMBO happy as it's really her baby.
Remember this?
Well it's now got a nice pair of these
The rest of the day just seemed to disappear so I never got any more time on the Celica, instead it was a relaxing eve in front of the fire to watch two blokes restoring a green lotus - oh to have the space and means they have.
Which rather quickly escalated to this, without too much drama at all:
I could then start work on trying to clean up the slightly scabby inners wings and see what I'd be left with:
Rather surprisingly the wings proved to be better that I imagined and the bubbling rust spots I'd envisaged were no more than flaking hammerite where the PO had liberally applied it many years ago, on the whole thankfully it seemed to have protected the car rather well. There were however the two areas that I already knew about so these were cut back and cleaned up:
The other side wasn't much prettier - didn't fancy welding this up with a fuel line running rather close by!
First side cleaned up and treated to a coat of weld through etch primer
and how things stood once I ran out of time as I had to give my car trailer a once over and sort a couple of other jobs.
I think the front end was a bit lighter by the time I was finished!
Will strip the rest of the bay next time so I can get it all welded and painted before the engine goes back in.
Sunday bought a little roadtrip to the south coast amongst the wind farms and MOD land in Lydd to collect some parts for another one of the other projects - just the job to keep SWMBO happy as it's really her baby.
Remember this?
Well it's now got a nice pair of these
The rest of the day just seemed to disappear so I never got any more time on the Celica, instead it was a relaxing eve in front of the fire to watch two blokes restoring a green lotus - oh to have the space and means they have.
A bumper belated festive edition this time!
Yes I've been quiet... too quiet some might say (others not!). The reason; I suffered the usual Christmas cold/flu so it’s been somewhat of an unsociable Christmas and New Year. Not that I enjoy the sitting round being inactive and feeling ‘festively plump’ anyway, give me a couple of days like that and I’ll be climbing the walls without fail.
The same goes for sitting around and feeling sorry for myself when not quite 100%. So I got wrapped up and spent a few days in a cold cow shed (no manger in this one) to see what progress I could achieve. As with all the projects this was mostly forwards, occasionally sideways and, for once rarely backwards… ok maybe a little
The plan was to try and get the engine bay tidied, a few things serviced and ultimately any welding required in that vicinity all finished so the engine and gearbox can go back in.
So first things first, I had a couple of days holiday booked before Christmas as a backup for any last minute present purchasing. As it happened I was actually ahead of myself so instead I visited the blasters to pick up the myriad of bits I dropped off a couple of weeks prior. During a bit of down time on Christmas day these got a healthy coat of etch (sorry crap pic with V8 distraction but they are in there somewhere!):
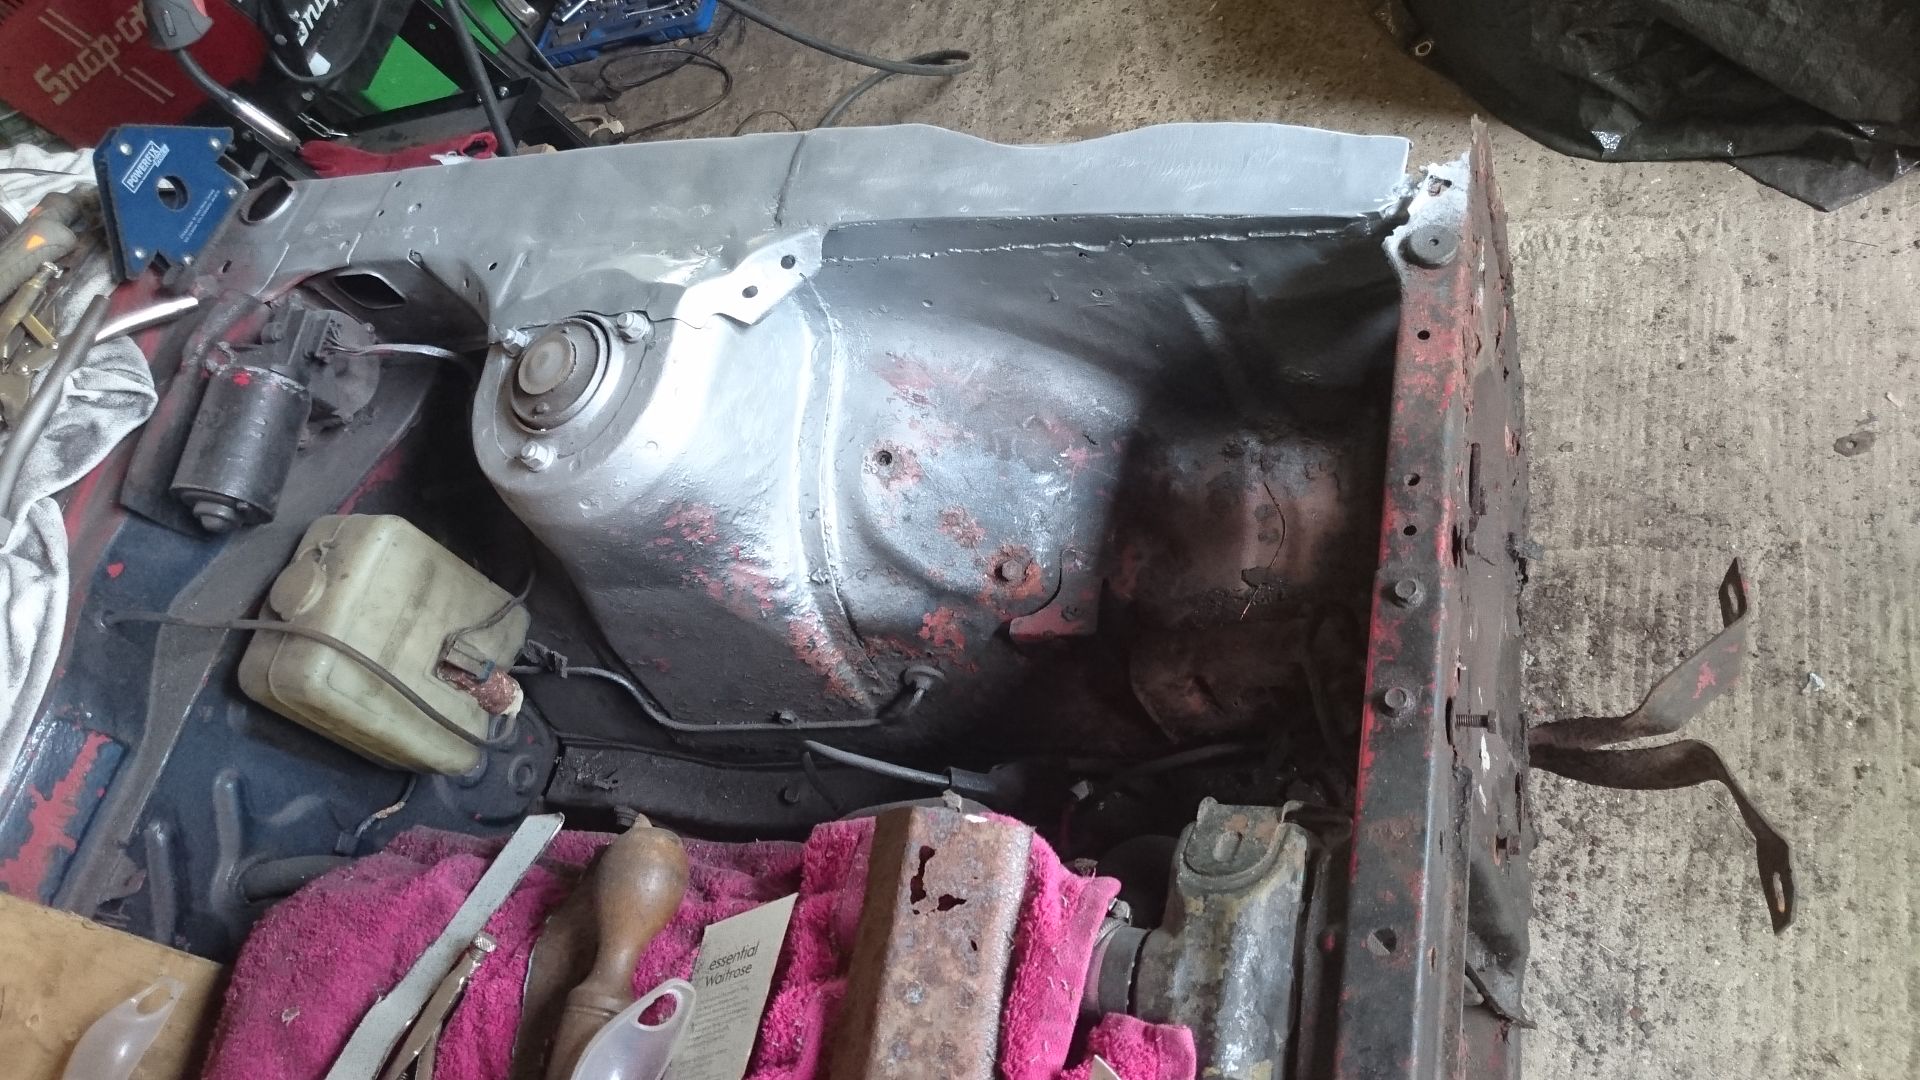
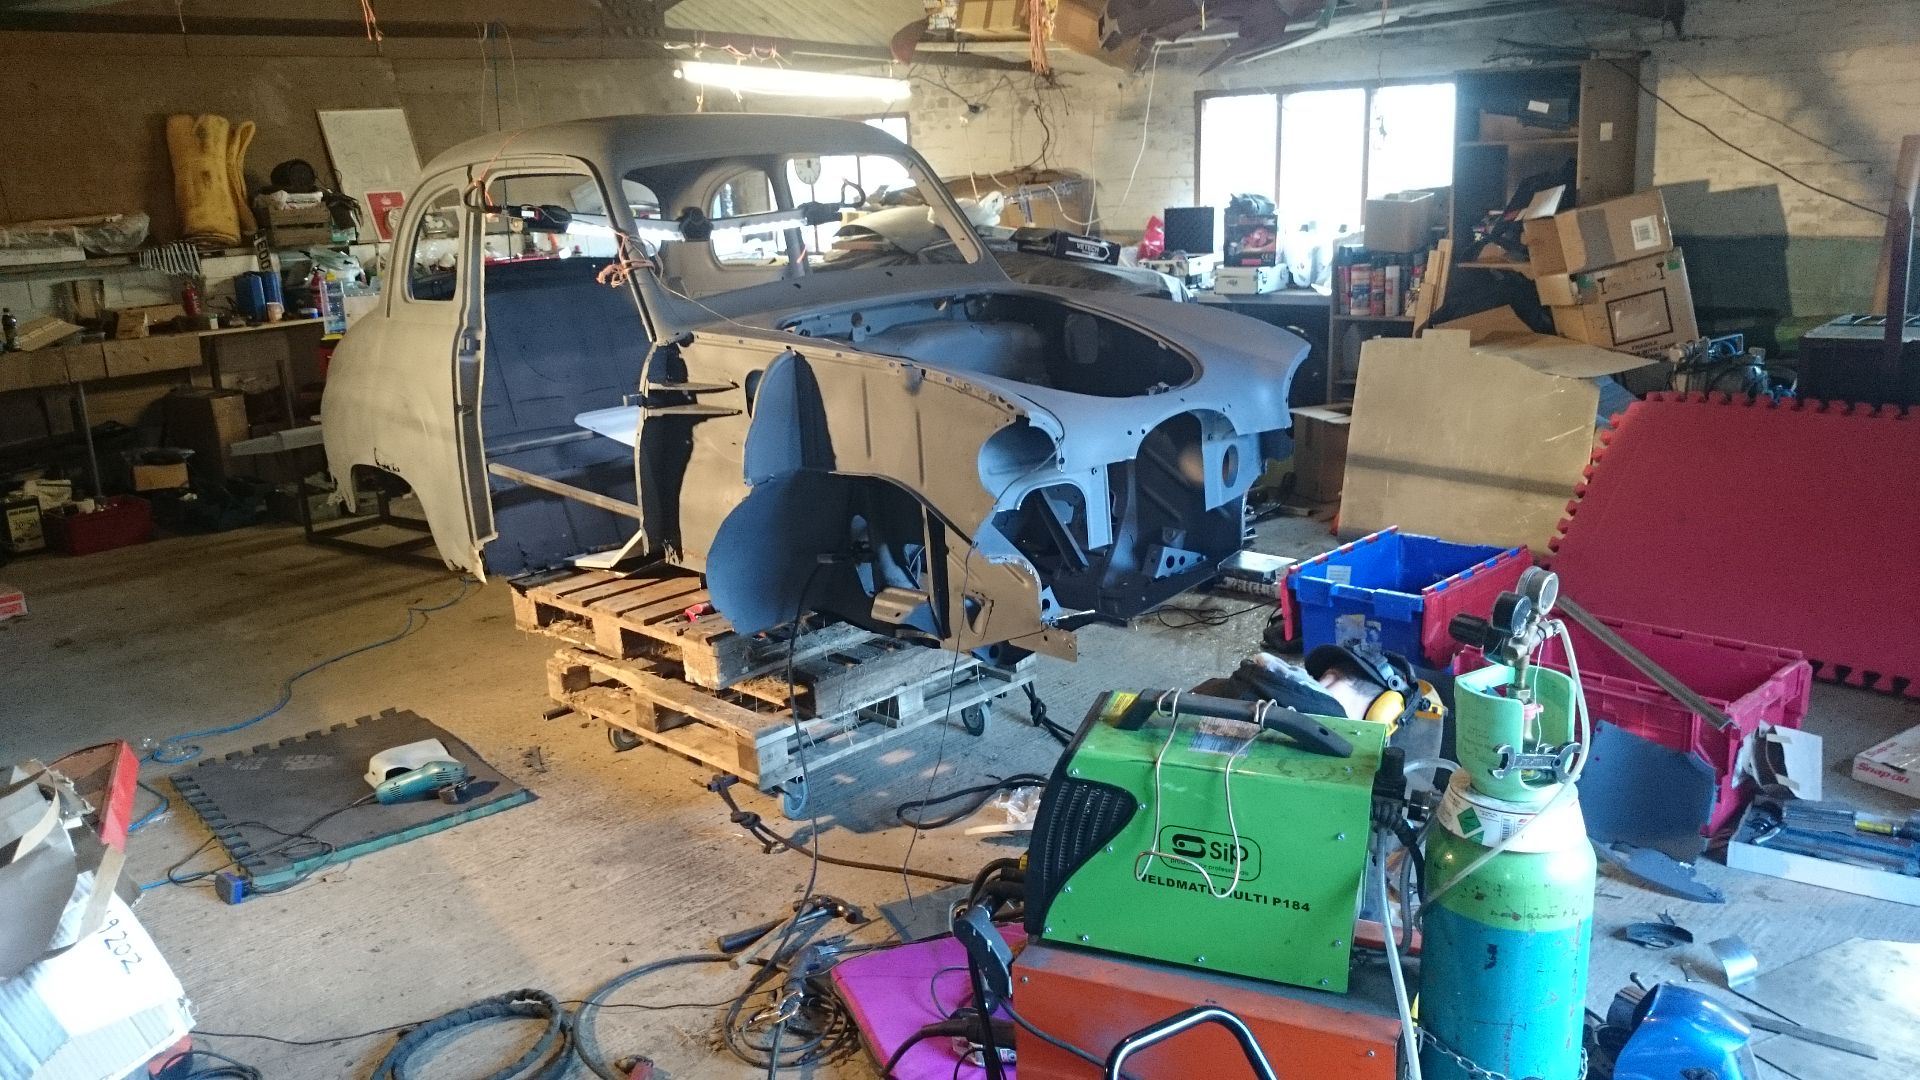
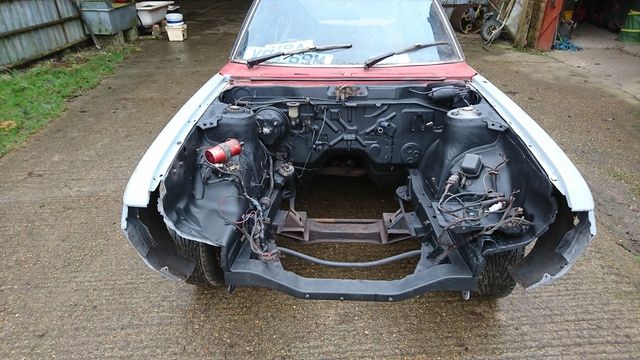
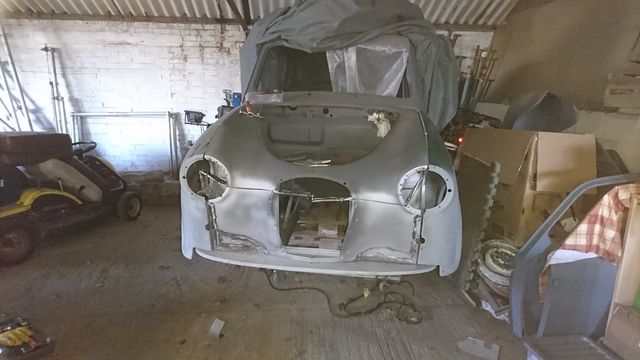
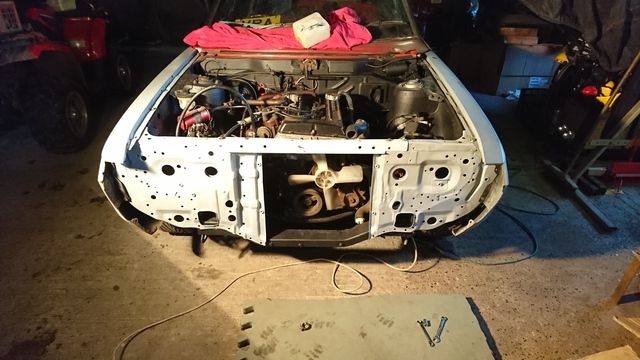
The car was then wheeled into the shed from its usual resting spot to remind myself where I’d got to… Yup not looking too pretty:
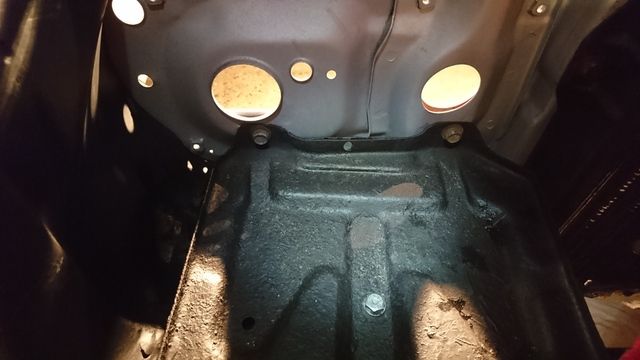
With a few holes visible:
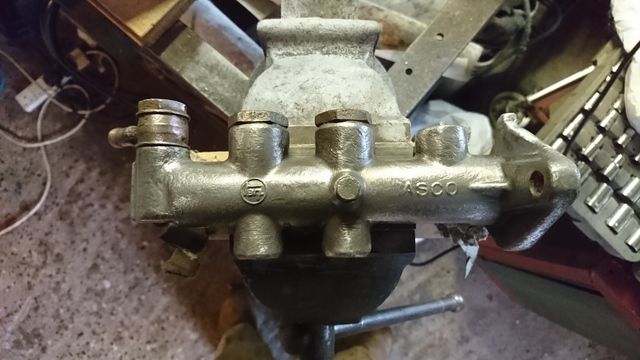
The brake cylinder wasn’t looking too healthy either.
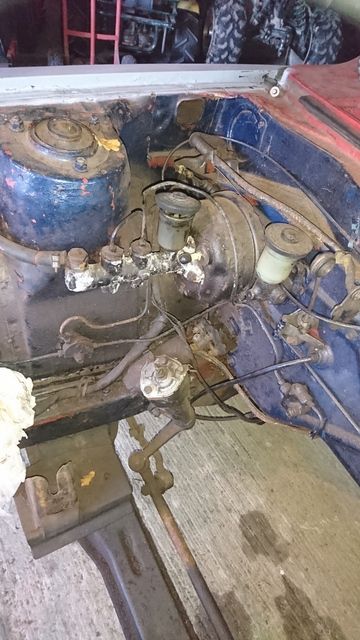
The intention is to clean it up, and if it’s too far gone replace it for a more compact Mitsubishi Pajero unit which fits nicely.
I then cracked on with dealing with the previously started task of clearing the engine wiring out of the way and cleaning up around the previously rotted out holes that I’d opened up to clean metal.
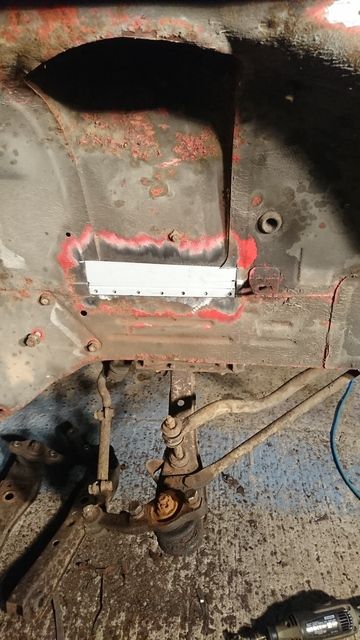
Unfortunately the suspension was in the way of access from the wheel arch so after a bit of a fight this was removed:
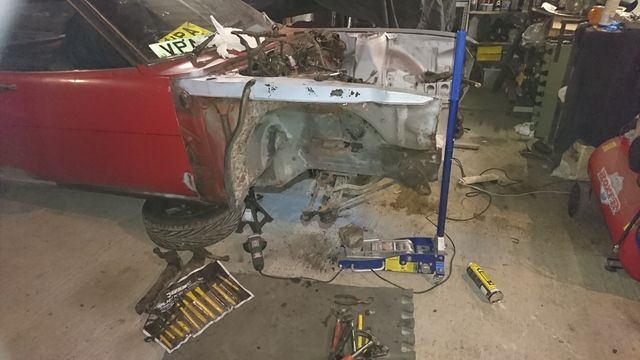
Plate made up, joggled and punched for puddle welding
It was then onto the other side – rather a bit more to do here! Including removing the battery tray support which was obviously a perfect place for harbouring dirt and moisture as it was doing a very good sieve impression!
All patched. Not pretty but a lot better than what was there (or not there!) before.
Spot the broken brake pipe… more on this in a bit. Inside view:

The next job was a tiny patch on the inside of the driver’s side wing behind the VIN plate, it’d been annoying me for ages so it was time to get it sorted.
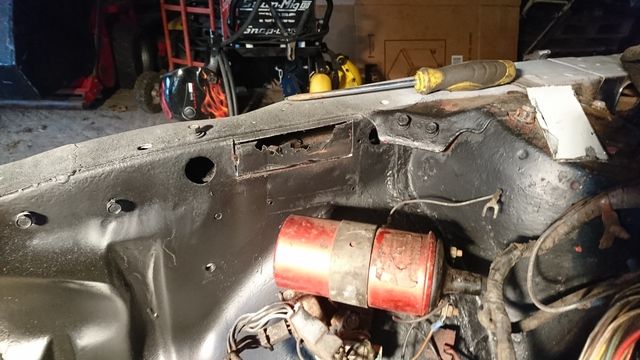
Once cut away I saw yet more newspaper and what I thought was more of that damn expanding foam that seems to haunt me on everything I’ve done on this car to date. As it happened I was wrong…
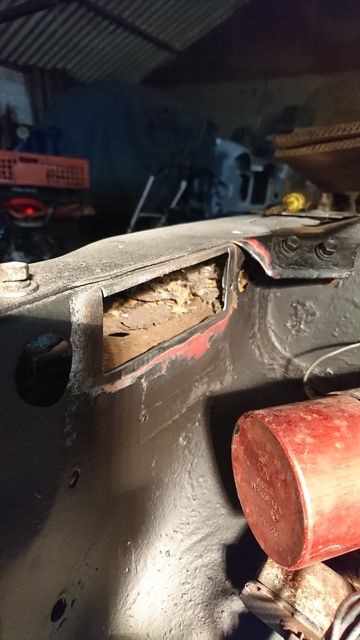
Just a mouse nest and one very dead, very stiff mouse… lovely! That all got hovered out and another patch welded in:
Finally the engine bay got a very rough coat of matt black as an interim just to tidy things up a bit as I was sick of looking at flaking red and blue paint.
Much better! In time it’ll all come off again when the car gets a proper paint job but for now it’ll do while I focus on getting everything else sorted.
Now the eagle eyed of you may have spotted in an earlier picture that one of the heater hoses had sheared due to fatigue at the bulkhead… the seemingly simple enough fix was to trace it through, remove from heater and re-plumb with new hose… err nor quite.
As it happens it seems the hose was not the only thing to have become fatigued during the cars life - so had the copper pipe on the heater matrix. Any guesses as to what happened when I tried to remove the hose? Yup the copper pipe from the matrix came off as well! Botox!
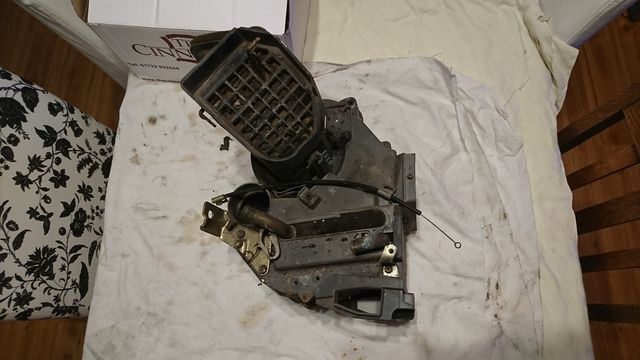
Next thought: Where the hell am I going to find another heater for one of these, let alone the matrix to go in one… Well as it happens… my garage. Remember the car that I went to Scotland for… guess what was lurking under the dash when I dismantled it
So when the wife went to bed early one eve, I did the opposite to James May’s latest series and became ‘The Dismantler’.
Take one underdash heater:
Undo a few screws, unclip a tab or two and pull… ta da…
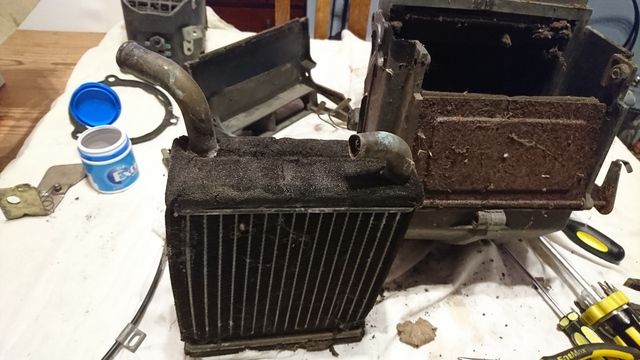
Resulting in a slightly grim but perfectly whole matrix… no mice this time but plenty of spiders... Scottish ones probably.
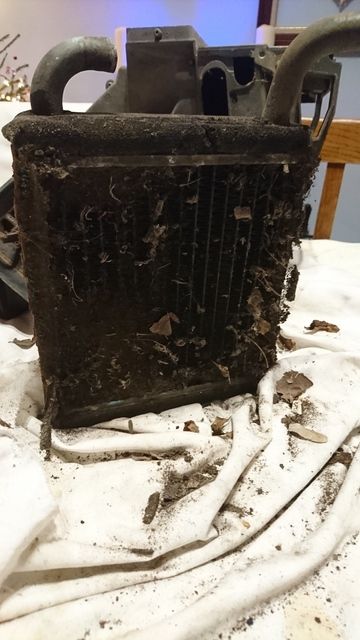
Both will now be shipped of for a bit of tlc, possibly a re-core if warranted and hopefully it can slot back in here without issue.
The other outstanding issues are replacing the brake pipe that runs around the rear of the engine bay (all because one, little union sheared), refurbishing the calipers, suspension struts and replacing the hoses – I do want this thing to stop assuming one day it will actually go.
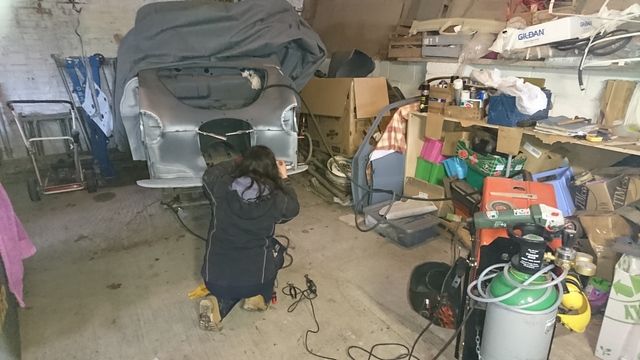
Now while this was all going on my better half was busy cracking on with the A35, namely the troublesome front panel, with me dipping in and helping when needed… it kept her happy and she was able to use some of the pressies santa brought her (so mine don’t keep disappearing!)
By the end of the hols the little fella almost has a face again:
And that was Christmas and New Year… some satisfying progress and nicely set up for 2017… when finally I will be driving the Celica for the first time... Bring it on.
Happy New Year all – here’s to a successful and productive 2017.
Yes I've been quiet... too quiet some might say (others not!). The reason; I suffered the usual Christmas cold/flu so it’s been somewhat of an unsociable Christmas and New Year. Not that I enjoy the sitting round being inactive and feeling ‘festively plump’ anyway, give me a couple of days like that and I’ll be climbing the walls without fail.
The same goes for sitting around and feeling sorry for myself when not quite 100%. So I got wrapped up and spent a few days in a cold cow shed (no manger in this one) to see what progress I could achieve. As with all the projects this was mostly forwards, occasionally sideways and, for once rarely backwards… ok maybe a little
The plan was to try and get the engine bay tidied, a few things serviced and ultimately any welding required in that vicinity all finished so the engine and gearbox can go back in.
So first things first, I had a couple of days holiday booked before Christmas as a backup for any last minute present purchasing. As it happened I was actually ahead of myself so instead I visited the blasters to pick up the myriad of bits I dropped off a couple of weeks prior. During a bit of down time on Christmas day these got a healthy coat of etch (sorry crap pic with V8 distraction but they are in there somewhere!):
The car was then wheeled into the shed from its usual resting spot to remind myself where I’d got to… Yup not looking too pretty:
With a few holes visible:
The brake cylinder wasn’t looking too healthy either.
The intention is to clean it up, and if it’s too far gone replace it for a more compact Mitsubishi Pajero unit which fits nicely.
I then cracked on with dealing with the previously started task of clearing the engine wiring out of the way and cleaning up around the previously rotted out holes that I’d opened up to clean metal.
Unfortunately the suspension was in the way of access from the wheel arch so after a bit of a fight this was removed:
Plate made up, joggled and punched for puddle welding
It was then onto the other side – rather a bit more to do here! Including removing the battery tray support which was obviously a perfect place for harbouring dirt and moisture as it was doing a very good sieve impression!
All patched. Not pretty but a lot better than what was there (or not there!) before.
Spot the broken brake pipe… more on this in a bit. Inside view:
The next job was a tiny patch on the inside of the driver’s side wing behind the VIN plate, it’d been annoying me for ages so it was time to get it sorted.
Once cut away I saw yet more newspaper and what I thought was more of that damn expanding foam that seems to haunt me on everything I’ve done on this car to date. As it happened I was wrong…
Just a mouse nest and one very dead, very stiff mouse… lovely! That all got hovered out and another patch welded in:
Finally the engine bay got a very rough coat of matt black as an interim just to tidy things up a bit as I was sick of looking at flaking red and blue paint.
Much better! In time it’ll all come off again when the car gets a proper paint job but for now it’ll do while I focus on getting everything else sorted.
Now the eagle eyed of you may have spotted in an earlier picture that one of the heater hoses had sheared due to fatigue at the bulkhead… the seemingly simple enough fix was to trace it through, remove from heater and re-plumb with new hose… err nor quite.
As it happens it seems the hose was not the only thing to have become fatigued during the cars life - so had the copper pipe on the heater matrix. Any guesses as to what happened when I tried to remove the hose? Yup the copper pipe from the matrix came off as well! Botox!
Next thought: Where the hell am I going to find another heater for one of these, let alone the matrix to go in one… Well as it happens… my garage. Remember the car that I went to Scotland for… guess what was lurking under the dash when I dismantled it
So when the wife went to bed early one eve, I did the opposite to James May’s latest series and became ‘The Dismantler’.
Take one underdash heater:
Undo a few screws, unclip a tab or two and pull… ta da…
Resulting in a slightly grim but perfectly whole matrix… no mice this time but plenty of spiders... Scottish ones probably.
Both will now be shipped of for a bit of tlc, possibly a re-core if warranted and hopefully it can slot back in here without issue.
The other outstanding issues are replacing the brake pipe that runs around the rear of the engine bay (all because one, little union sheared), refurbishing the calipers, suspension struts and replacing the hoses – I do want this thing to stop assuming one day it will actually go.
Now while this was all going on my better half was busy cracking on with the A35, namely the troublesome front panel, with me dipping in and helping when needed… it kept her happy and she was able to use some of the pressies santa brought her (so mine don’t keep disappearing!)
By the end of the hols the little fella almost has a face again:
And that was Christmas and New Year… some satisfying progress and nicely set up for 2017… when finally I will be driving the Celica for the first time... Bring it on.
Happy New Year all – here’s to a successful and productive 2017.
Bit of a double update as seemingly didn't post anything last week.
So firstly - it’s all in the detail…
The weekend before last bought about some much needed pottering, progress but at a much more relaxed pace as was feeling it after the first week back at work (how after only 4 days I don’t know!) and in truth there were lots of little jobs that needed doing before I could get on with the main aim of refitting the gearbox and engine.
First up was the aforementioned brake cylinder… Still looking delightfully furry and half covered in the remaining hammerite used to coat everything in sight all those years ago.

After a bit of dismantling and an attack with various forms of abrasive things started to look a bit better
I checked the seals and everything seemed to work as it should so moved on to dealing with the errant paint on the reservoir
All cleaned up, filters replaced and reassembled
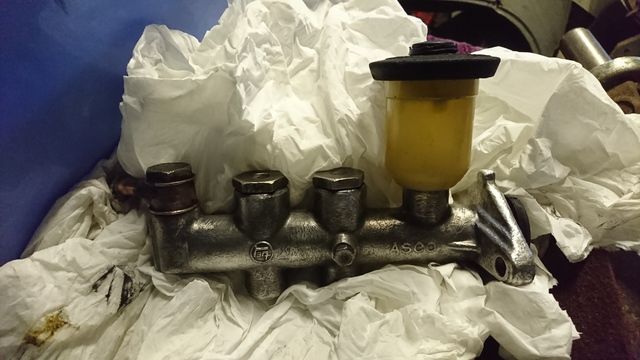
That looks more like it should.
Next job – propshaft.
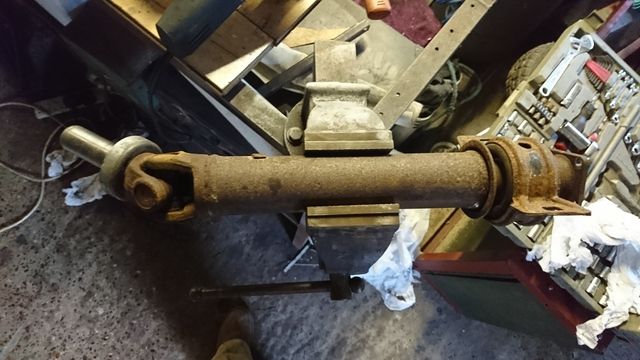
Yes it’s going to live under the car but think it can look a bit better than this – not to mention have a bit more protection applied. I also needed to change the bearing as there was quite a bit of slop in it.
Other section was equally as bad.
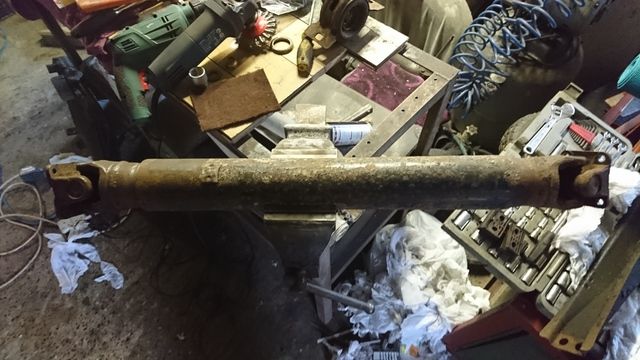
Bearing comparison:

Not quite the same in terms of the brackets and angle… will see what happens when it comes to refitting on the car I guess!
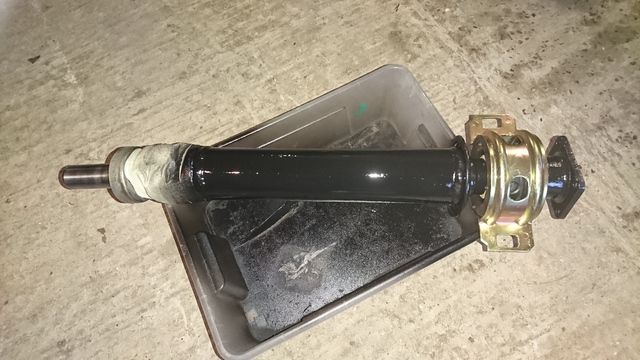
All reassembled and with cost of paint applied - shiny!
Attacked the gearbox cross member as well
Gearbox also started to get the cleaning treatment while the paint was drying
Although some of the deposits on this will need a bit more of a soak so this got left for now.
Washer bottle, pump and a few other parts got de-painted also… just need to sort the clutch and get the gearbox cleaned and reattached before installation… not long now hopefully.
So firstly - it’s all in the detail…
The weekend before last bought about some much needed pottering, progress but at a much more relaxed pace as was feeling it after the first week back at work (how after only 4 days I don’t know!) and in truth there were lots of little jobs that needed doing before I could get on with the main aim of refitting the gearbox and engine.
First up was the aforementioned brake cylinder… Still looking delightfully furry and half covered in the remaining hammerite used to coat everything in sight all those years ago.
After a bit of dismantling and an attack with various forms of abrasive things started to look a bit better
I checked the seals and everything seemed to work as it should so moved on to dealing with the errant paint on the reservoir
All cleaned up, filters replaced and reassembled
That looks more like it should.
Next job – propshaft.
Yes it’s going to live under the car but think it can look a bit better than this – not to mention have a bit more protection applied. I also needed to change the bearing as there was quite a bit of slop in it.
Other section was equally as bad.
Bearing comparison:
Not quite the same in terms of the brackets and angle… will see what happens when it comes to refitting on the car I guess!
All reassembled and with cost of paint applied - shiny!
Attacked the gearbox cross member as well
Gearbox also started to get the cleaning treatment while the paint was drying
Although some of the deposits on this will need a bit more of a soak so this got left for now.
Washer bottle, pump and a few other parts got de-painted also… just need to sort the clutch and get the gearbox cleaned and reattached before installation… not long now hopefully.
Despite the weathers best efforts (i reckon it was no more that 2 degrees C in the workshop all day!), it was another productive Saturday.
A good friend (who often appears on these pages in the photos) popped up to assist me with fitting the new clutch as well as a couple of bits I had lined up. Between us we managed to do rather well and got more done than I envisioned at the start of the day - Neil once again your assistance was hugely appreciated!
So while he started with flaring the new brake line, I got on with refitting the cleaned brake cylinder and connecting the other pipes back up. It was soon in situ along with the washer bottle I'd cleaned up over christmas.
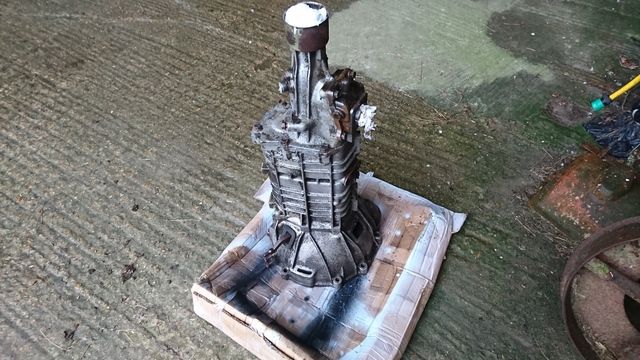
Then onto the main job - that famous clutch I've spoken about for so long, well no more because it's actually fitted
Bit of a milestone for me as it's been a long time coming (just over a year to be precise!)
It was then onto the gearbox, although I started on this last weekend I only really tickled the outside!
Unfortunately due to being run with a missing grommet, dirt grease and rubbish had accumulated over time and it was seriously gunked up in the bell housing. So out came the scrapers, cleaning fluid and elbow grease and it was soon looking considerably better. (Sadly no before and after pics as my hands were too filthy to pick up my phone!)
After a bit of a clean up (me this time!), the gearbox went back on to the engine.
and that was as far as I expected to get, not sure why but I had it in my head that I could then have a sort of the parts I've accumulated, tidy a few other things up and go thaw out by the fire.
Instead this happened:
Prop shaft was reassembled and fitted, clutch slave and piping unwrapped and reinstalled, refurbished starter motor put back in and all the electrics reattached.
It was at this point that we thought we'd test the clutch. The reservoir was filled and the pedal pumped, resulting in... nothing. No fluid drawn down... hmmm.
Thinking back to when we removed the slave cylinder all those months ago, we never really gave much thought to the master cylinder, the pedal moved as it should and we quickly discovered the slave cylinder was seized and so attention was very much focused on that.
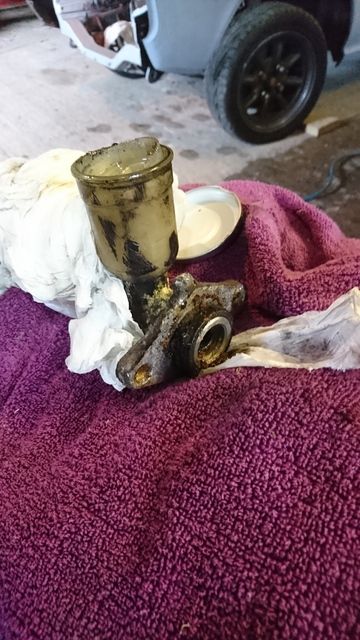
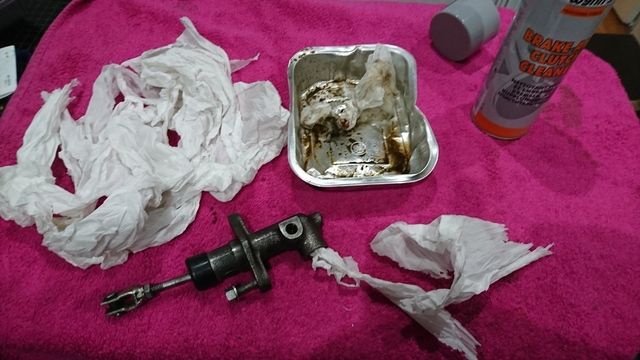
Time to investigate and remove the master cylinder - really didn't look too clever from the inside:
On removal it appears to be pretty blocked up inside so this will get the refurbishment treatment over the next few days ready to try again next weekend, at least I'll know the whole system will then have been sorted for peace of mind.
and that was how the weekends tinkering finished... One step closer to its first drive = one happy boy indeed.
A good friend (who often appears on these pages in the photos) popped up to assist me with fitting the new clutch as well as a couple of bits I had lined up. Between us we managed to do rather well and got more done than I envisioned at the start of the day - Neil once again your assistance was hugely appreciated!
So while he started with flaring the new brake line, I got on with refitting the cleaned brake cylinder and connecting the other pipes back up. It was soon in situ along with the washer bottle I'd cleaned up over christmas.
Then onto the main job - that famous clutch I've spoken about for so long, well no more because it's actually fitted
Bit of a milestone for me as it's been a long time coming (just over a year to be precise!)
It was then onto the gearbox, although I started on this last weekend I only really tickled the outside!
Unfortunately due to being run with a missing grommet, dirt grease and rubbish had accumulated over time and it was seriously gunked up in the bell housing. So out came the scrapers, cleaning fluid and elbow grease and it was soon looking considerably better. (Sadly no before and after pics as my hands were too filthy to pick up my phone!)
After a bit of a clean up (me this time!), the gearbox went back on to the engine.
and that was as far as I expected to get, not sure why but I had it in my head that I could then have a sort of the parts I've accumulated, tidy a few other things up and go thaw out by the fire.
Instead this happened:
Prop shaft was reassembled and fitted, clutch slave and piping unwrapped and reinstalled, refurbished starter motor put back in and all the electrics reattached.
It was at this point that we thought we'd test the clutch. The reservoir was filled and the pedal pumped, resulting in... nothing. No fluid drawn down... hmmm.
Thinking back to when we removed the slave cylinder all those months ago, we never really gave much thought to the master cylinder, the pedal moved as it should and we quickly discovered the slave cylinder was seized and so attention was very much focused on that.
Time to investigate and remove the master cylinder - really didn't look too clever from the inside:
On removal it appears to be pretty blocked up inside so this will get the refurbishment treatment over the next few days ready to try again next weekend, at least I'll know the whole system will then have been sorted for peace of mind.
and that was how the weekends tinkering finished... One step closer to its first drive = one happy boy indeed.
Pretty much there I think, it's run before so hopefully will play ball again... he says.
I still need to get the radiator refurbished and get the front panels back on so they actually support it, but asides that I think I've everything else. Then it's onto brakes and suspension before the rest of the bodywork.
If all goes to plan I should find out this weekend
I still need to get the radiator refurbished and get the front panels back on so they actually support it, but asides that I think I've everything else. Then it's onto brakes and suspension before the rest of the bodywork.
If all goes to plan I should find out this weekend
Thanks for the positive comments chaps - always good for the motivation and the realisation that folk do actually read this thread.
The master cylinders were pretty grim all round, perfectly understandable having been left for as long as they were, I'm certainly pleased with how they've turned out.
After some retail therapy ordering up various oils for the engine, gearbox and diff, I'm going to have a fight with the clutch cylinder tonight to see if I can get that functioning as intended.
Getting closer...
Thanks guys.
Daston, unfortunately the rest of the car isn't quite so pretty yet but we'll get there. In terms of tools to clean the rust, depending on the subject matter in hand I usually use a combination of a twisted knot wheel on a grinder, softer brass bristle brush in a drill and sometimes a carbide disk or drill attachment. The most important bit - patience. Often it's when you are rushing that the damage occurs... and I don't just mean to the car or part you are working on - I've a couple of scars from near misses as proof!
So with motivation at a high with an impending start and possible drive on the horizon, some evening activities have been taking place.
This week, I have been mostly focusing on... the headlights and clutch master cylinder. (something for fans of the Fast show there)
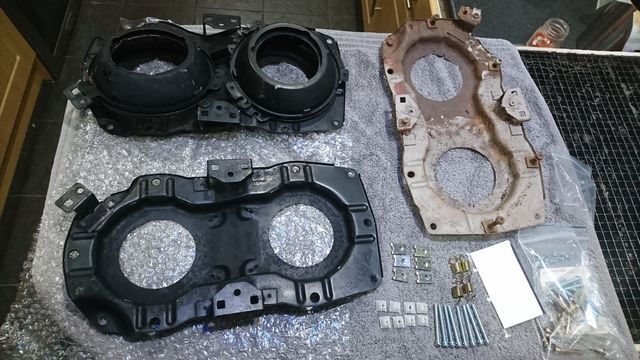
As mentioned above, one eve when the wife was out I decamped to the kitchen once more and started with digging out the headlights and seeing what I had to play with... remember these?
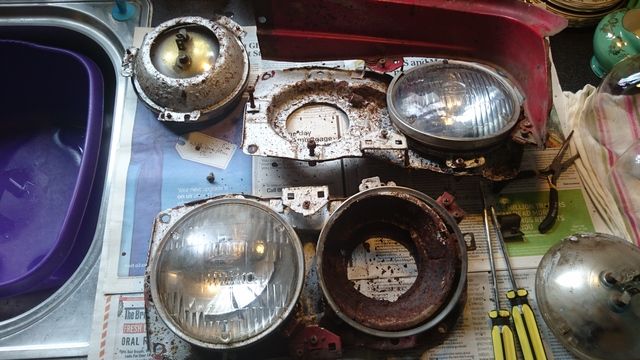
After deciding at the time that the original frames were too far gone I managed to get some second hand replacements from the early celica guru that is Bob Clark down in Bristol, he also sent me a set of replacement headlamp bowls as well and upgraded H4 lights.
The intention was to swap the various clips and bushings over from the old to the new... however the truth was that most were so rusted up or just plain tired I didn't see much point. So I ended up wrapping everything back up and hitting the net to order some more from some far flung part of the world. That'll have to keep for another eve.
Next up, the clutch master cylinder mentioned in my previous update. But before that some much needed shopping...
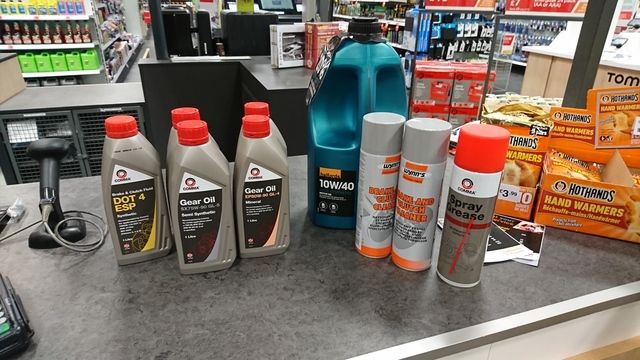
That should do it!
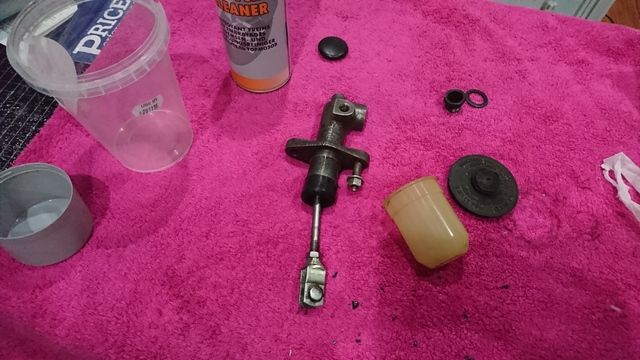
Before I packed the master cylinder away at the weekend, I dismantled it and cleaned it up as much as I could with various wire wheels and cleaner. However there were some stubborn bits that I couldn't get to which required fluid to shift that I didn't have to hand. After the above spot of retail therapy, it was out with the brake and clutch cleaning fluid.
I ran this through a few times and pumped the cylinder. After a few flushes through I started to see the grit and general gunk coming through... no wonder it wasn't working!
After a few more goes and ensuring that it did draw fluid down as expected once more, it was a quick clean of the reservoir, seals and cap and we were left with this ready to be assembled and refitted.
Bring on the weekend...
Daston, unfortunately the rest of the car isn't quite so pretty yet but we'll get there. In terms of tools to clean the rust, depending on the subject matter in hand I usually use a combination of a twisted knot wheel on a grinder, softer brass bristle brush in a drill and sometimes a carbide disk or drill attachment. The most important bit - patience. Often it's when you are rushing that the damage occurs... and I don't just mean to the car or part you are working on - I've a couple of scars from near misses as proof!
So with motivation at a high with an impending start and possible drive on the horizon, some evening activities have been taking place.
This week, I have been mostly focusing on... the headlights and clutch master cylinder. (something for fans of the Fast show there)
As mentioned above, one eve when the wife was out I decamped to the kitchen once more and started with digging out the headlights and seeing what I had to play with... remember these?
After deciding at the time that the original frames were too far gone I managed to get some second hand replacements from the early celica guru that is Bob Clark down in Bristol, he also sent me a set of replacement headlamp bowls as well and upgraded H4 lights.
The intention was to swap the various clips and bushings over from the old to the new... however the truth was that most were so rusted up or just plain tired I didn't see much point. So I ended up wrapping everything back up and hitting the net to order some more from some far flung part of the world. That'll have to keep for another eve.
Next up, the clutch master cylinder mentioned in my previous update. But before that some much needed shopping...
That should do it!
Before I packed the master cylinder away at the weekend, I dismantled it and cleaned it up as much as I could with various wire wheels and cleaner. However there were some stubborn bits that I couldn't get to which required fluid to shift that I didn't have to hand. After the above spot of retail therapy, it was out with the brake and clutch cleaning fluid.
I ran this through a few times and pumped the cylinder. After a few flushes through I started to see the grit and general gunk coming through... no wonder it wasn't working!
After a few more goes and ensuring that it did draw fluid down as expected once more, it was a quick clean of the reservoir, seals and cap and we were left with this ready to be assembled and refitted.
Bring on the weekend...
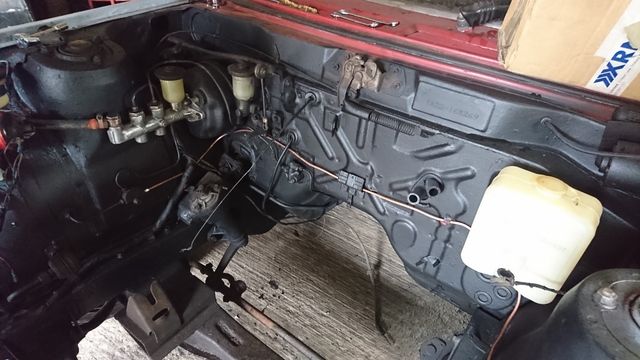
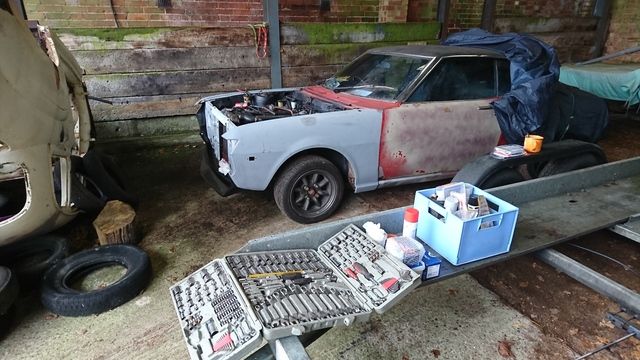
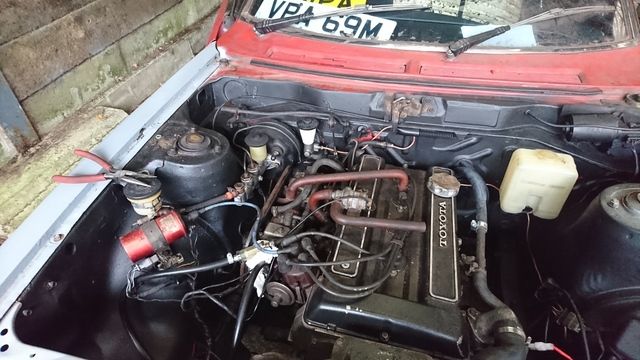
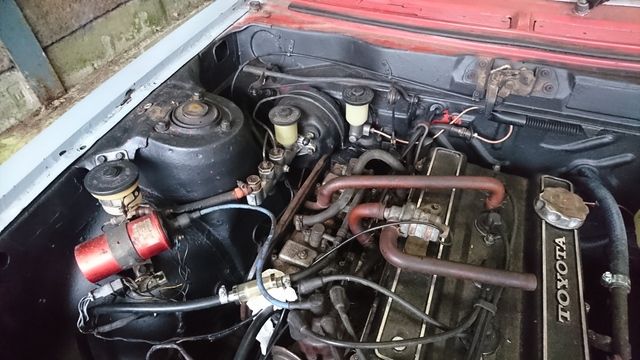
Saturday morning started with the usual shenanigans of moving the car from its resting place to where I needed to work on it, now considerably harder with its lump of an engine back in the front! However it served a purpose as with temperatures hovering just below zero it warmed me up nicely
Finally we were where we needed to be:

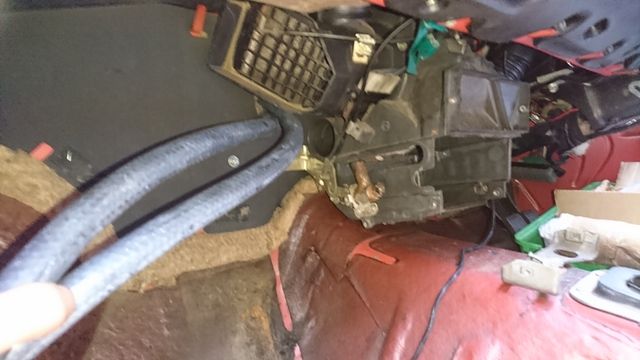
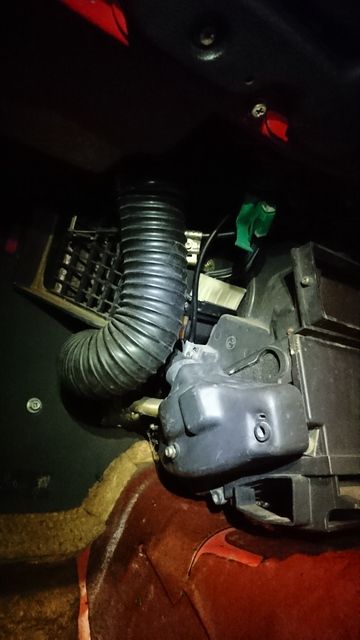
The plan was to carry on with the previous weekends activity and get everything plumbed and wired back up where possible. Starting with the heater matrix, which involved a contortionist act in the passenger footwell with my lower back resting on the top metal edge of the sill - it hurt... a lot...
But finally I got all the clamps and hoses tightened and the covers reattached... hateful job!
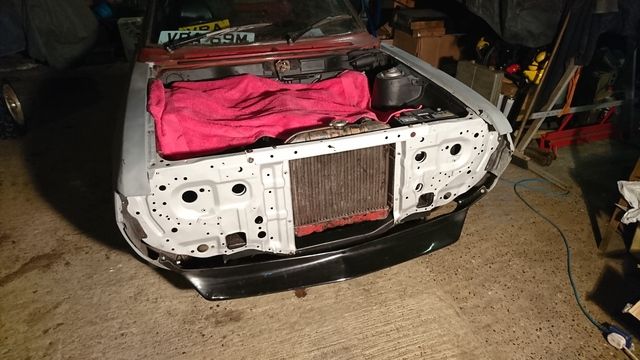
Next was to align and fit the front radiator, the only issue being that in order for it stay in position, it required attaching to the front panels... which were not on the car.
I've mentioned previously that I managed to get some solid replacements from the land of Oz, well they have since been blasted and given a good dousing in etch primer ready for reattaching to the car. Using them to fit the radiator was quite a good test in itself as it would help me line them up ready for reattaching onto the wings and lower front subframe.
So on they went
There was a little bit of distortion in places from the blasting process but nothing that can't be remedied with a dolly and hammer. On the whole though they fitted as expected, and with a bit of jiggling the bolts from the battery tray lined up as well. Happy days!
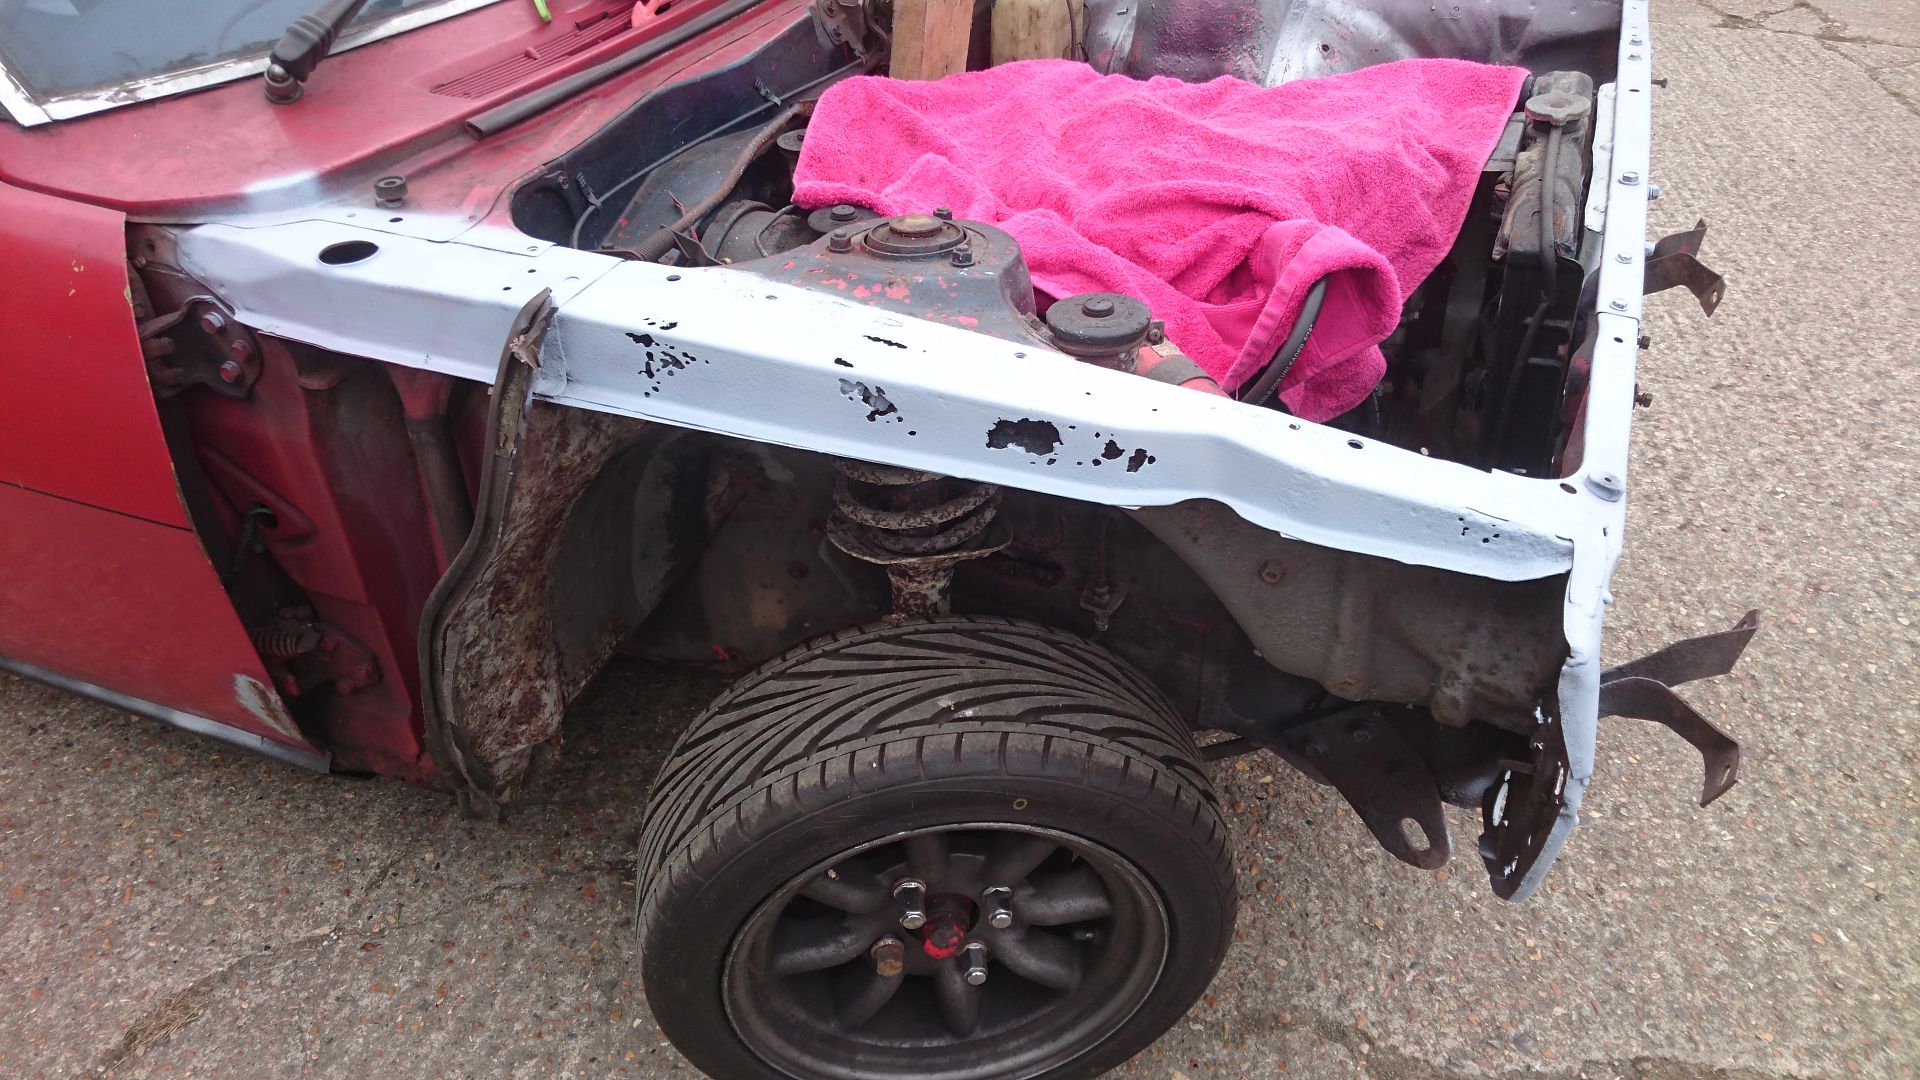
As my hands were starting to seriously feel the cold by this point, (warming them on a halogen work lamp only lasts for so long!), I decided I'd quickly bolt the front end back together ensuring that the front wing holes lined up with the panels and the lip spoiler also lined up as expected.
Thankfully everything was spot on so the panels got a tack weld in a couple of places just to hold them in position.
I was going to fit the exhaust headers, but after seeing the state of them I decided they would get cleaned and painted first. There was only one thing left to do... fill it with fluids and see if there was life in the old girl.
I'll just leave this here...
Sadly despite my best efforts the clutch master cylinder still didn't want to play ball, but I've managed to track one down so that has been ordered, assuming it arrives in time I may have a special birthday treat coming up next weekend!
Finally we were where we needed to be:
The plan was to carry on with the previous weekends activity and get everything plumbed and wired back up where possible. Starting with the heater matrix, which involved a contortionist act in the passenger footwell with my lower back resting on the top metal edge of the sill - it hurt... a lot...
But finally I got all the clamps and hoses tightened and the covers reattached... hateful job!
Next was to align and fit the front radiator, the only issue being that in order for it stay in position, it required attaching to the front panels... which were not on the car.
I've mentioned previously that I managed to get some solid replacements from the land of Oz, well they have since been blasted and given a good dousing in etch primer ready for reattaching to the car. Using them to fit the radiator was quite a good test in itself as it would help me line them up ready for reattaching onto the wings and lower front subframe.
So on they went
There was a little bit of distortion in places from the blasting process but nothing that can't be remedied with a dolly and hammer. On the whole though they fitted as expected, and with a bit of jiggling the bolts from the battery tray lined up as well. Happy days!
As my hands were starting to seriously feel the cold by this point, (warming them on a halogen work lamp only lasts for so long!), I decided I'd quickly bolt the front end back together ensuring that the front wing holes lined up with the panels and the lip spoiler also lined up as expected.
Thankfully everything was spot on so the panels got a tack weld in a couple of places just to hold them in position.
I was going to fit the exhaust headers, but after seeing the state of them I decided they would get cleaned and painted first. There was only one thing left to do... fill it with fluids and see if there was life in the old girl.
I'll just leave this here...
Sadly despite my best efforts the clutch master cylinder still didn't want to play ball, but I've managed to track one down so that has been ordered, assuming it arrives in time I may have a special birthday treat coming up next weekend!
Bit of a belated update as things have been somewhat busy of late.
Last weekend was a bit of a write off on the car front as birthday surprises courtesy of my wife and friends meant that I was kept well away from the workshop.
This was probably a blessing as the replacement clutch master cylinder I ordered frustratingly didn't appear until the Monday anyway. That said I did get some nice pressies to fill the new tool chest which will no doubt come in very useful over the coming months

So although no playtime on the weekend, I did have a bit of spare time during the week, so one eve I started reassembling the upgraded headlights. I'd already ordered the replacement screws, springs and grommets I needed so when I had 5 mins one eve I started assembling:
...alas I didn't as get far as I hoped as the replacement grommets didn't fit in the holes that I needed them to.
This is what they looked like originally:
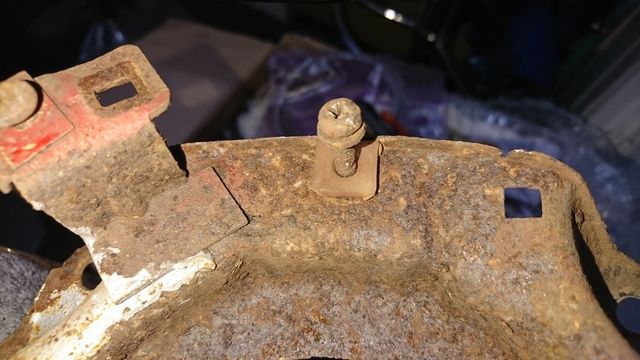

You might just be able to make out in the pic above that the replacements are completely different. So without wanting to butcher the newly painted frames or spend hours slicing and shaping the new ones to fit, I decided I'd try another route from another supplier I've found, if they're still no good then I may just use nuts and washers as they'll do the same job of being able to offer adjustment.
Saturday 4th finally bought some time to get over to the car with the new clutch cylinder, along with a newly acquired tool for the collection
Tools, tea, parts and motivation... check
Time to fit the new cylinder, but first the threaded lug needed to be swapped over from the old cylinder to new, a job I thought was going to prove troublesome, as it happens with a squirt of deblock oil and the two nut technique it unwound relatively easily. so with that swapped, time to get it bolted in.
Hmmm the reservoir looked a bit too white and 'new' for my liking... easy enough to sort seeing as I'd spent the time cleaning the old one up
Much better!
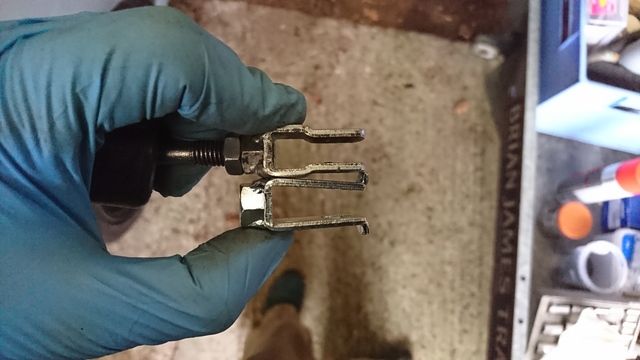
Once I'd contorted myself into the drivers foot well enough to tighten everything up, I noticed that the push rod from the pedal was too wide, meaning the split pin wouldn't locate, so this came off and was matched to the same gap as the old with a bit of gentle persuasion
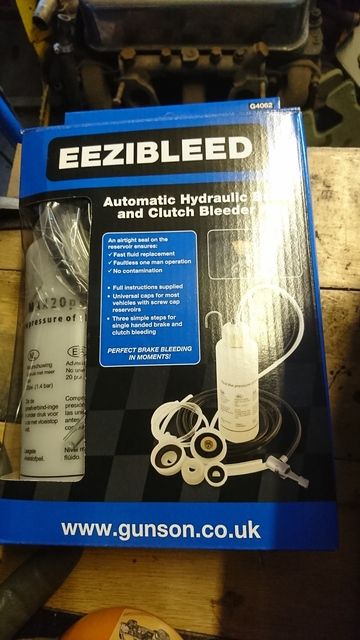
Time to break out the new eezibleed kit ...except none of the caps fitted the reservoir top, without a fitting top you have no pressure, and with no pressure the kit won't function as intended.
Frankly I couldn't be bothered to fashion some kind of clamp and membrane to cover the reservoir, so it fell to the trusty method of a length of wood, the seat ratchet mechanism and much rolling around for me pushing pedal, locking seat in place, reaching under car, undo bleed nipple, tighten bleed nipple, crawl back to release seat, depress pedal... repeat as necessary etc.
I got there eventually and after a quick tidy, a check of fluids the car was started, trailer moved out the way and 1 year, 5 months, 22 days and 1hr.52 minutes since I was first presented with it, the car moved under it's own power for the first time... ironically in reverse. Much tea was then consumed in celebration - One happy boy indeed!
There's a long way still to go but feels like quite a milestone has been reached.
Last weekend was a bit of a write off on the car front as birthday surprises courtesy of my wife and friends meant that I was kept well away from the workshop.
This was probably a blessing as the replacement clutch master cylinder I ordered frustratingly didn't appear until the Monday anyway. That said I did get some nice pressies to fill the new tool chest which will no doubt come in very useful over the coming months
So although no playtime on the weekend, I did have a bit of spare time during the week, so one eve I started reassembling the upgraded headlights. I'd already ordered the replacement screws, springs and grommets I needed so when I had 5 mins one eve I started assembling:
...alas I didn't as get far as I hoped as the replacement grommets didn't fit in the holes that I needed them to.
This is what they looked like originally:
You might just be able to make out in the pic above that the replacements are completely different. So without wanting to butcher the newly painted frames or spend hours slicing and shaping the new ones to fit, I decided I'd try another route from another supplier I've found, if they're still no good then I may just use nuts and washers as they'll do the same job of being able to offer adjustment.
Saturday 4th finally bought some time to get over to the car with the new clutch cylinder, along with a newly acquired tool for the collection
Tools, tea, parts and motivation... check
Time to fit the new cylinder, but first the threaded lug needed to be swapped over from the old cylinder to new, a job I thought was going to prove troublesome, as it happens with a squirt of deblock oil and the two nut technique it unwound relatively easily. so with that swapped, time to get it bolted in.
Hmmm the reservoir looked a bit too white and 'new' for my liking... easy enough to sort seeing as I'd spent the time cleaning the old one up
Much better!
Once I'd contorted myself into the drivers foot well enough to tighten everything up, I noticed that the push rod from the pedal was too wide, meaning the split pin wouldn't locate, so this came off and was matched to the same gap as the old with a bit of gentle persuasion
Time to break out the new eezibleed kit ...except none of the caps fitted the reservoir top, without a fitting top you have no pressure, and with no pressure the kit won't function as intended.
Frankly I couldn't be bothered to fashion some kind of clamp and membrane to cover the reservoir, so it fell to the trusty method of a length of wood, the seat ratchet mechanism and much rolling around for me pushing pedal, locking seat in place, reaching under car, undo bleed nipple, tighten bleed nipple, crawl back to release seat, depress pedal... repeat as necessary etc.
I got there eventually and after a quick tidy, a check of fluids the car was started, trailer moved out the way and 1 year, 5 months, 22 days and 1hr.52 minutes since I was first presented with it, the car moved under it's own power for the first time... ironically in reverse.
Much tea was then consumed in celebration - One happy boy indeed! There's a long way still to go but feels like quite a milestone has been reached.
Wow, it's been a while since I last updated this thread so will do my best to bring you all up to speed.
Thanks for all the encouragement though, all helps on those days in the workshop when things just aren't going your way!
In all fairness it did it's job perfectly well... was just so damn uncomfortable! Over a year ago now and the memory of those seats is still fresh.
Thanks for all the encouragement though, all helps on those days in the workshop when things just aren't going your way!
Sparky137 said:
Heres some inspiration for you.......
Amazing - that looks like a serious bit of kit! What lump is in that?vr6chris said:
...Unfortunately for me i hired the same vehicle last month...
You poor man! I thought that the Scotland trip would've been it's last In all fairness it did it's job perfectly well... was just so damn uncomfortable! Over a year ago now and the memory of those seats is still fresh.
Gassing Station | Readers' Cars | Top of Page | What's New | My Stuff