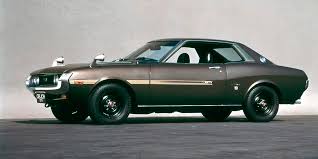
TA22 Toyota Celica - the a hedge find...
Discussion


I am sooo jealous of this project.
I have very fond memories of a 1974 ST in bright yellow with back vinyl roof that I owned in my early 20s.
Its the only car I ever had that attracted regular attention from people wanting to know what it was / how fast / race you from the lights etc.
Drove me and my wife in it to the registry office to get married :-)
It was well on its way to being thoroughly rotten by the time I sold it at around 10 years old which I guess would account for their rarity now sadly.
OP - I have an 'Autobooks' workshop manual for it. As I am unlikely to be getting the car to go with it any time soon you would be welcome to it with my compliments if you want to PM your address.
(edit - not that I'm suggesting that you need a workshop manual, you look to be getting along rather nicely )
)
I have very fond memories of a 1974 ST in bright yellow with back vinyl roof that I owned in my early 20s.
Its the only car I ever had that attracted regular attention from people wanting to know what it was / how fast / race you from the lights etc.
Drove me and my wife in it to the registry office to get married :-)
It was well on its way to being thoroughly rotten by the time I sold it at around 10 years old which I guess would account for their rarity now sadly.
OP - I have an 'Autobooks' workshop manual for it. As I am unlikely to be getting the car to go with it any time soon you would be welcome to it with my compliments if you want to PM your address.
(edit - not that I'm suggesting that you need a workshop manual, you look to be getting along rather nicely
) Edited by garybezz on Thursday 7th July 19:48
garybezz said:
OP - I have an 'Autobooks' workshop manual for it. As I am unlikely to be getting the car to go with it any time soon you would be welcome to it with my compliments if you want to PM your address.
(edit - not that I'm suggesting that you need a workshop manual, you look to be getting along rather nicely)
This is what makes PH so good, what a top bloke (edit - not that I'm suggesting that you need a workshop manual, you look to be getting along rather nicely
) Edited by garybezz on Thursday 7th July 19:48

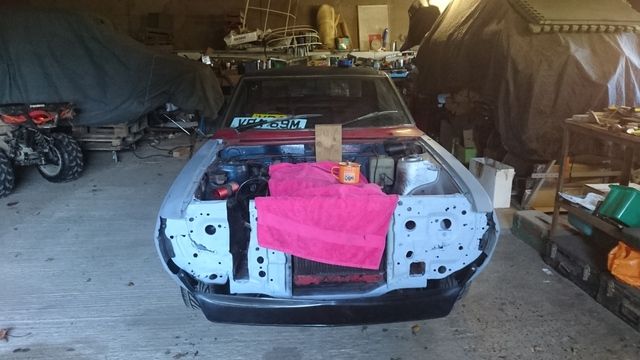
A long overdue update as I finally had some Celica time while waiting for parts on the other projects.
First job was to start to dismantle front sub frame, steering rods and linkages from the donor car ready for cleaning and then a rebuild with new bushes
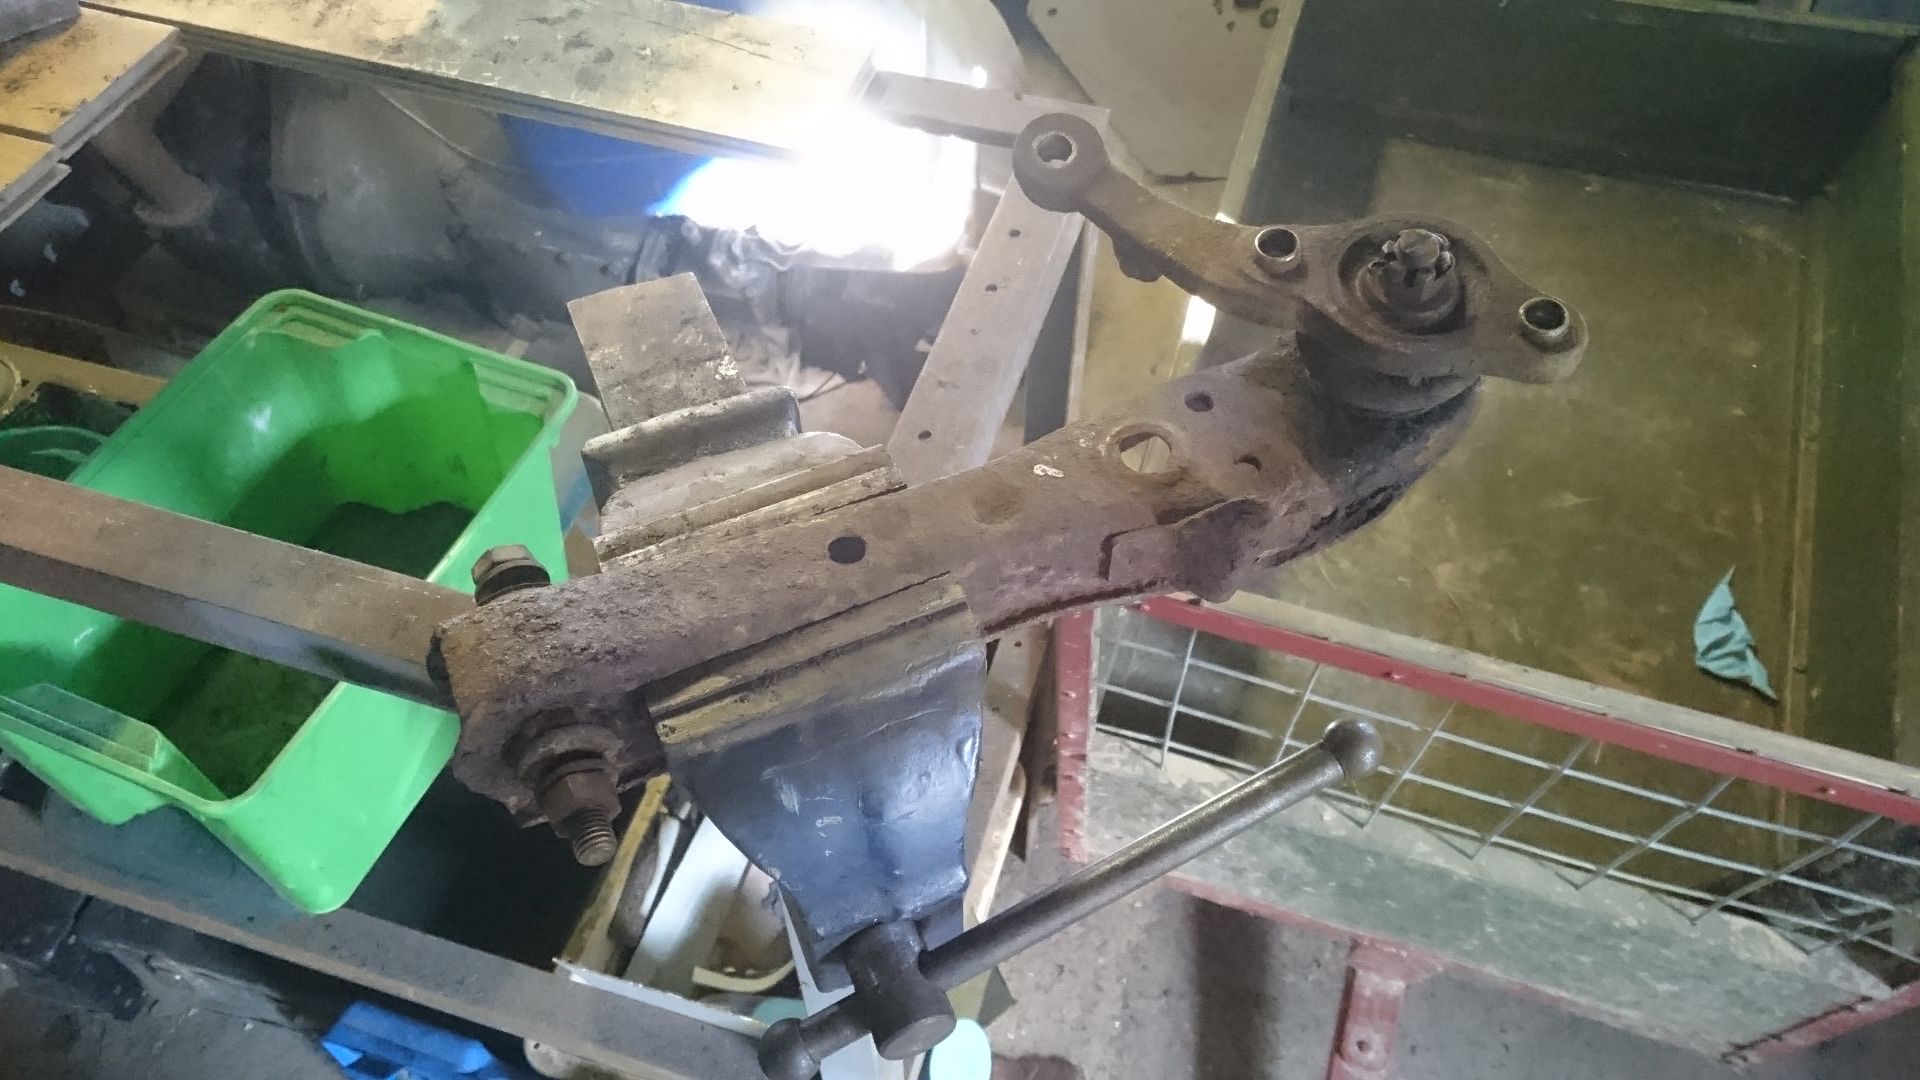
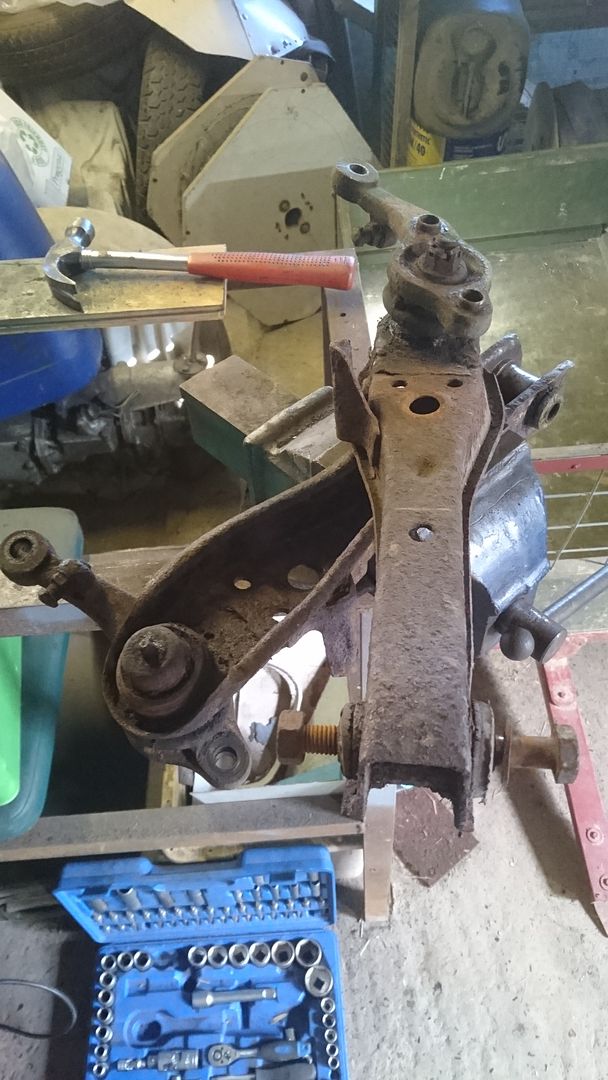
The bits are actually pretty solid, just look a little rough in places - nothing a good clean won't sort.
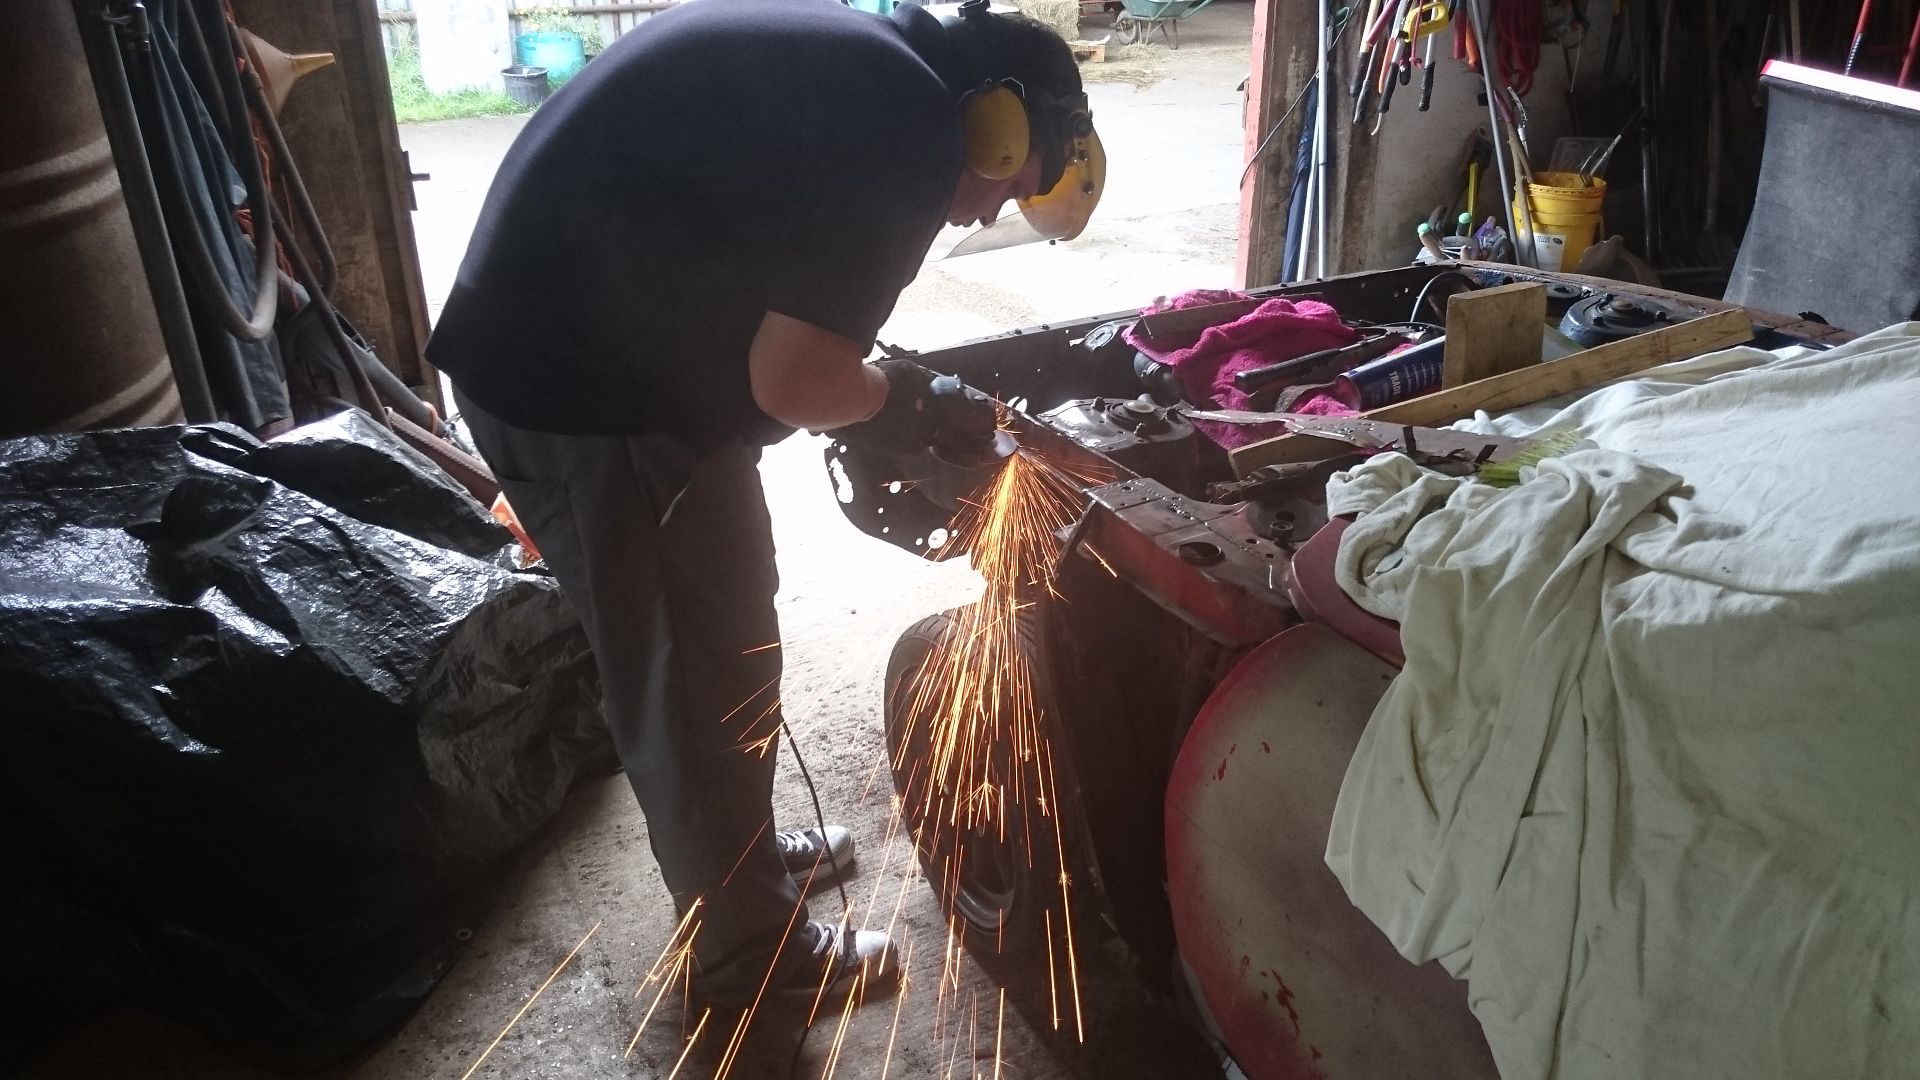
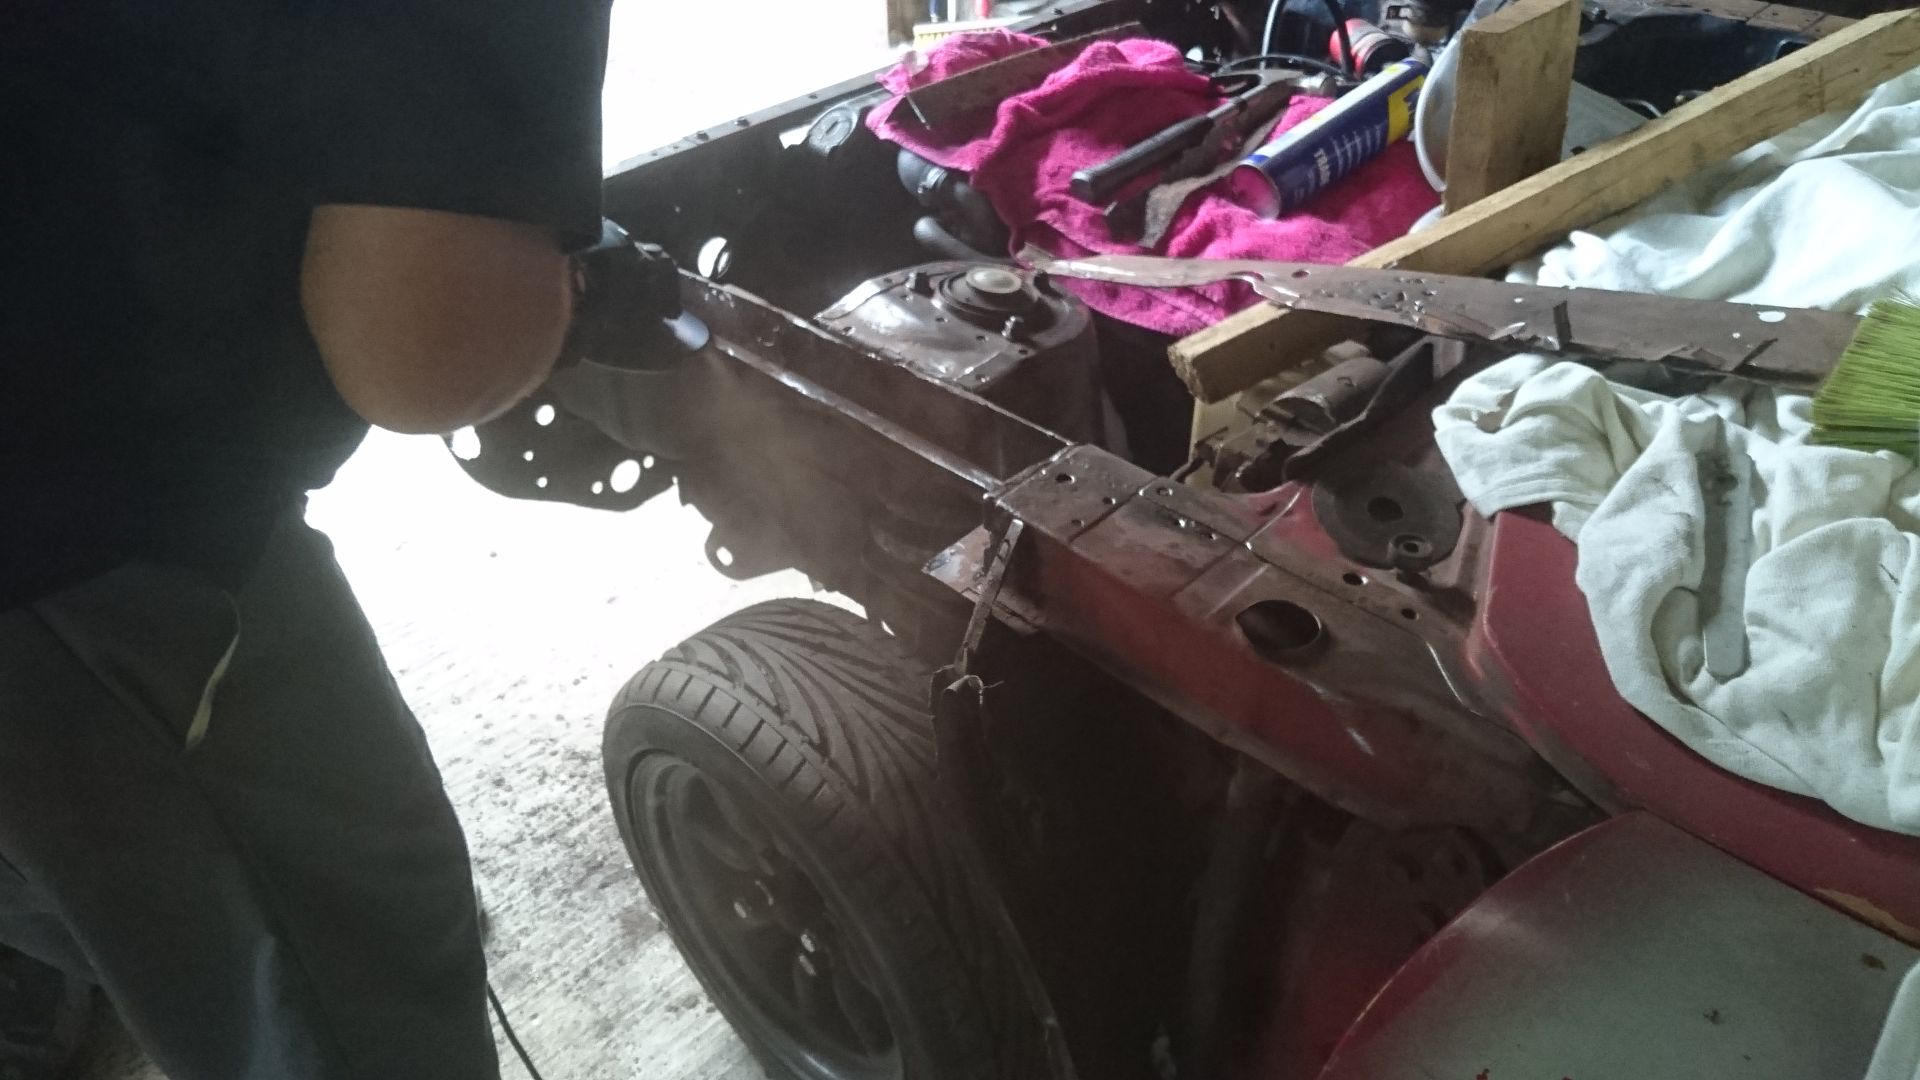
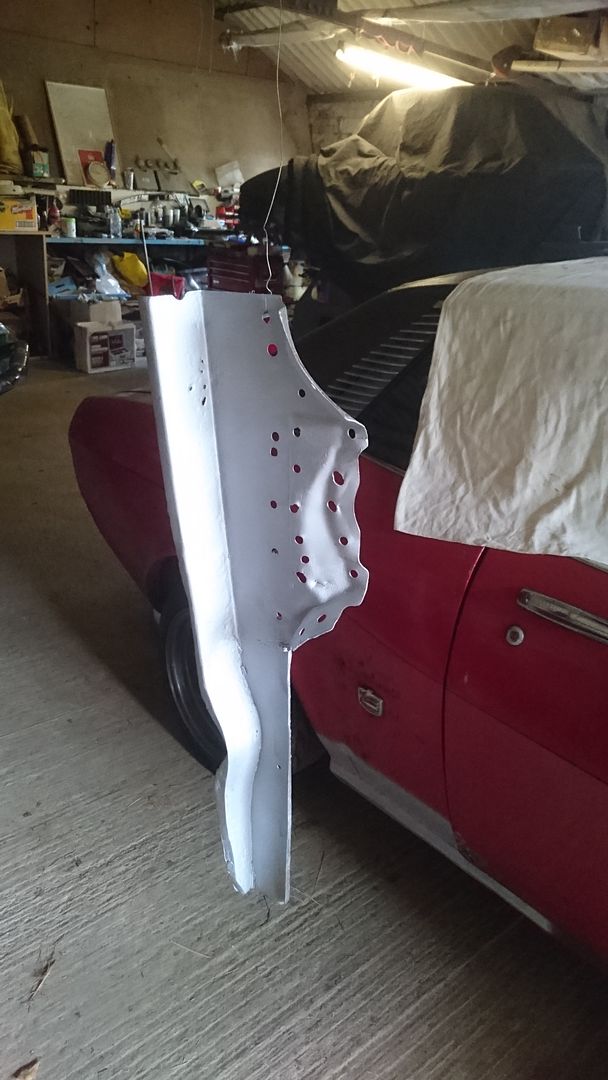
The car was then rolled into the workshop and the nastier of the two front wing tops cut away using the donor part as a template ready for replacement.
Everything cleaned up for a coat of etch primer
Including the donor panel which was removed from the other cars strut tower, this had already been plated in the past but rather than separate things to start again it was decided to use the panel as it was and keep it as complete as possible
Panel was welded in place with an excess lip left on to seam weld to which can be trimmed later. Everything was then given the flap disc treatment and a coat of etch for good measure.
The wire wheel then came out again briefly on Sunday to clean the top of the other wing and front panels up, these I knew wouldn't be pretty!
Proves it's always good to check - I thought this one was solid!
Panels were carefully covered in etch as I went
As the car currently stands:
So not masses achieved but nice to get back on it. No playtime next weekend as off to the revival (and 1st wedding anniversary, which means I've now had the car a year!)
First job was to start to dismantle front sub frame, steering rods and linkages from the donor car ready for cleaning and then a rebuild with new bushes
The bits are actually pretty solid, just look a little rough in places - nothing a good clean won't sort.
The car was then rolled into the workshop and the nastier of the two front wing tops cut away using the donor part as a template ready for replacement.
Everything cleaned up for a coat of etch primer
Including the donor panel which was removed from the other cars strut tower, this had already been plated in the past but rather than separate things to start again it was decided to use the panel as it was and keep it as complete as possible
Panel was welded in place with an excess lip left on to seam weld to which can be trimmed later. Everything was then given the flap disc treatment and a coat of etch for good measure.
The wire wheel then came out again briefly on Sunday to clean the top of the other wing and front panels up, these I knew wouldn't be pretty!
Proves it's always good to check - I thought this one was solid!
Panels were carefully covered in etch as I went
As the car currently stands:
So not masses achieved but nice to get back on it. No playtime next weekend as off to the revival (and 1st wedding anniversary, which means I've now had the car a year!)
Thanks chaps, good to see there's some interest in my meagre efforts 
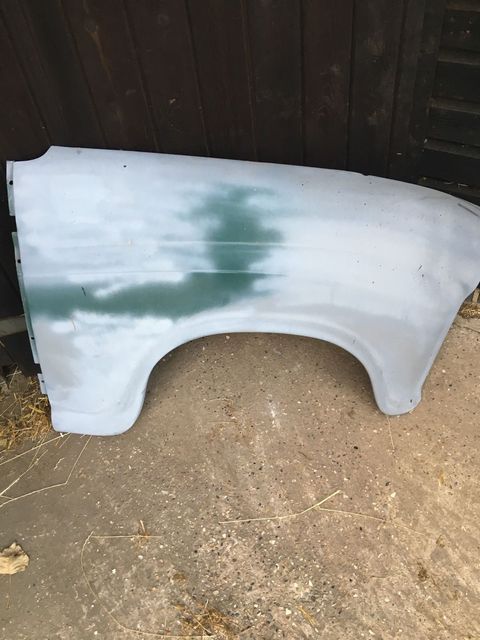
After the weekends effort and feeling a bit down at yet another rust discovery (I know there will be plenty more yet!), this week has seen a bit of a change in fortune.
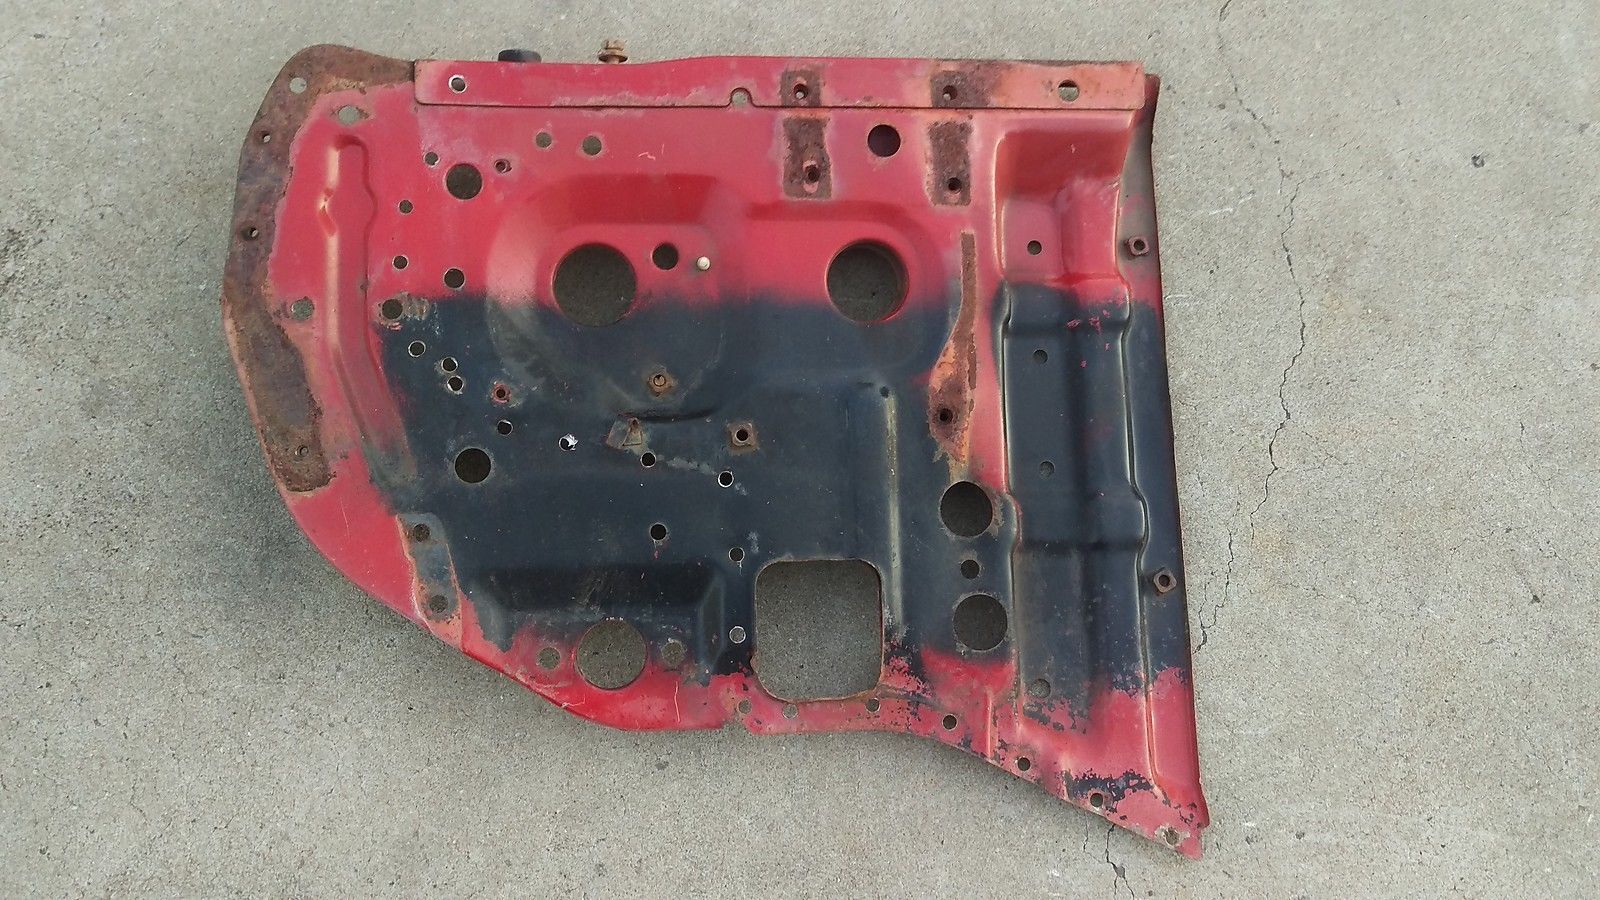
A trawl through the various auction sites and a cheeky offer later, has resulted in a couple of much needed panels winging their way across from the land of Oz... yes I could've probably repaired what I had, but seeing as one had been plated and filled with filler, the other was barely left on one edge which would've taken a fair few hours to remake, I decided that getting some rarely available panels was probably the best option.
A gentle blast and coat of paint and they should be good to go
vs.
and
vs.
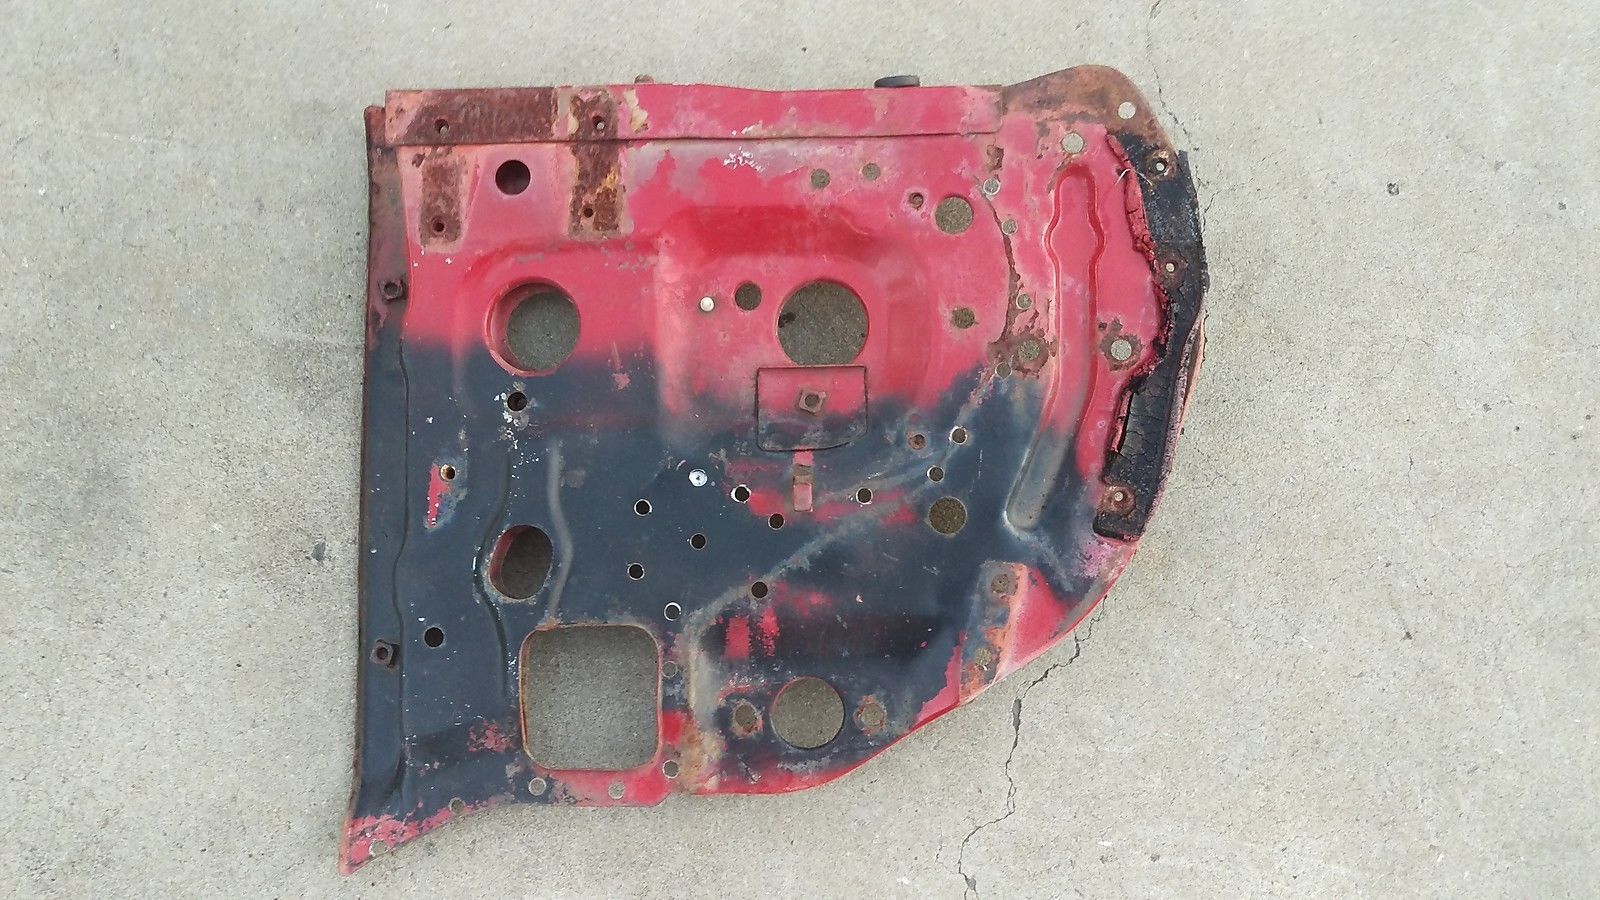
Both also come with the brackets attached which joins them to the top of the inner wings - good stuff!
After the weekends effort and feeling a bit down at yet another rust discovery (I know there will be plenty more yet!), this week has seen a bit of a change in fortune.
A trawl through the various auction sites and a cheeky offer later, has resulted in a couple of much needed panels winging their way across from the land of Oz... yes I could've probably repaired what I had, but seeing as one had been plated and filled with filler, the other was barely left on one edge which would've taken a fair few hours to remake, I decided that getting some rarely available panels was probably the best option.
A gentle blast and coat of paint and they should be good to go
vs.
and
vs.
Both also come with the brackets attached which joins them to the top of the inner wings - good stuff!
Finally got some more Toyota time this weekend, albeit nothing too exciting though while I wait for the panels to arrive from Aus. Unfortunately unbeknown to me and from looking at the tracking information this morning it seems that they tried to deliver while I popped out briefly on Saturday morning, couldn't have missed them by more than a couple of minutes! Sadly no card was left or even a means of contacting to say they had tried to deliver... so infuriating! Oh well... means they are close and I should have them sometime this week... fingers crossed!
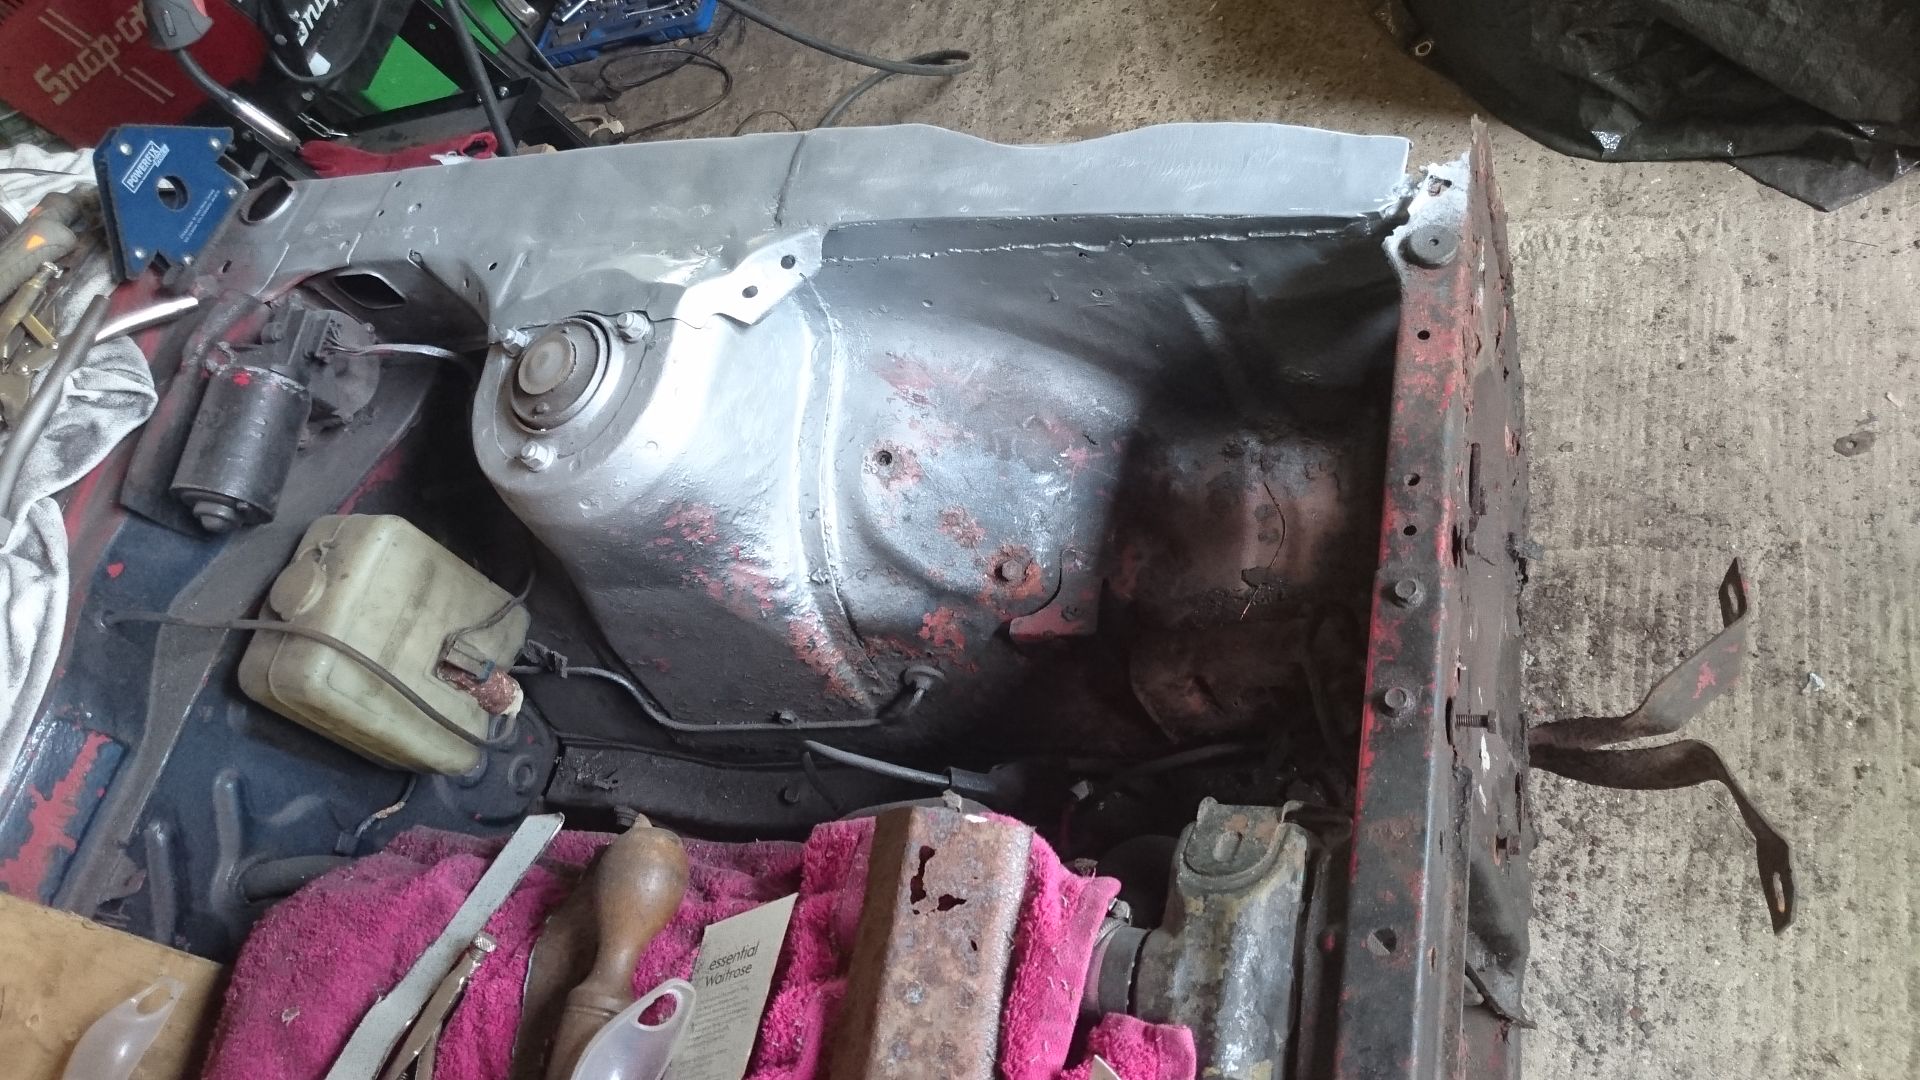
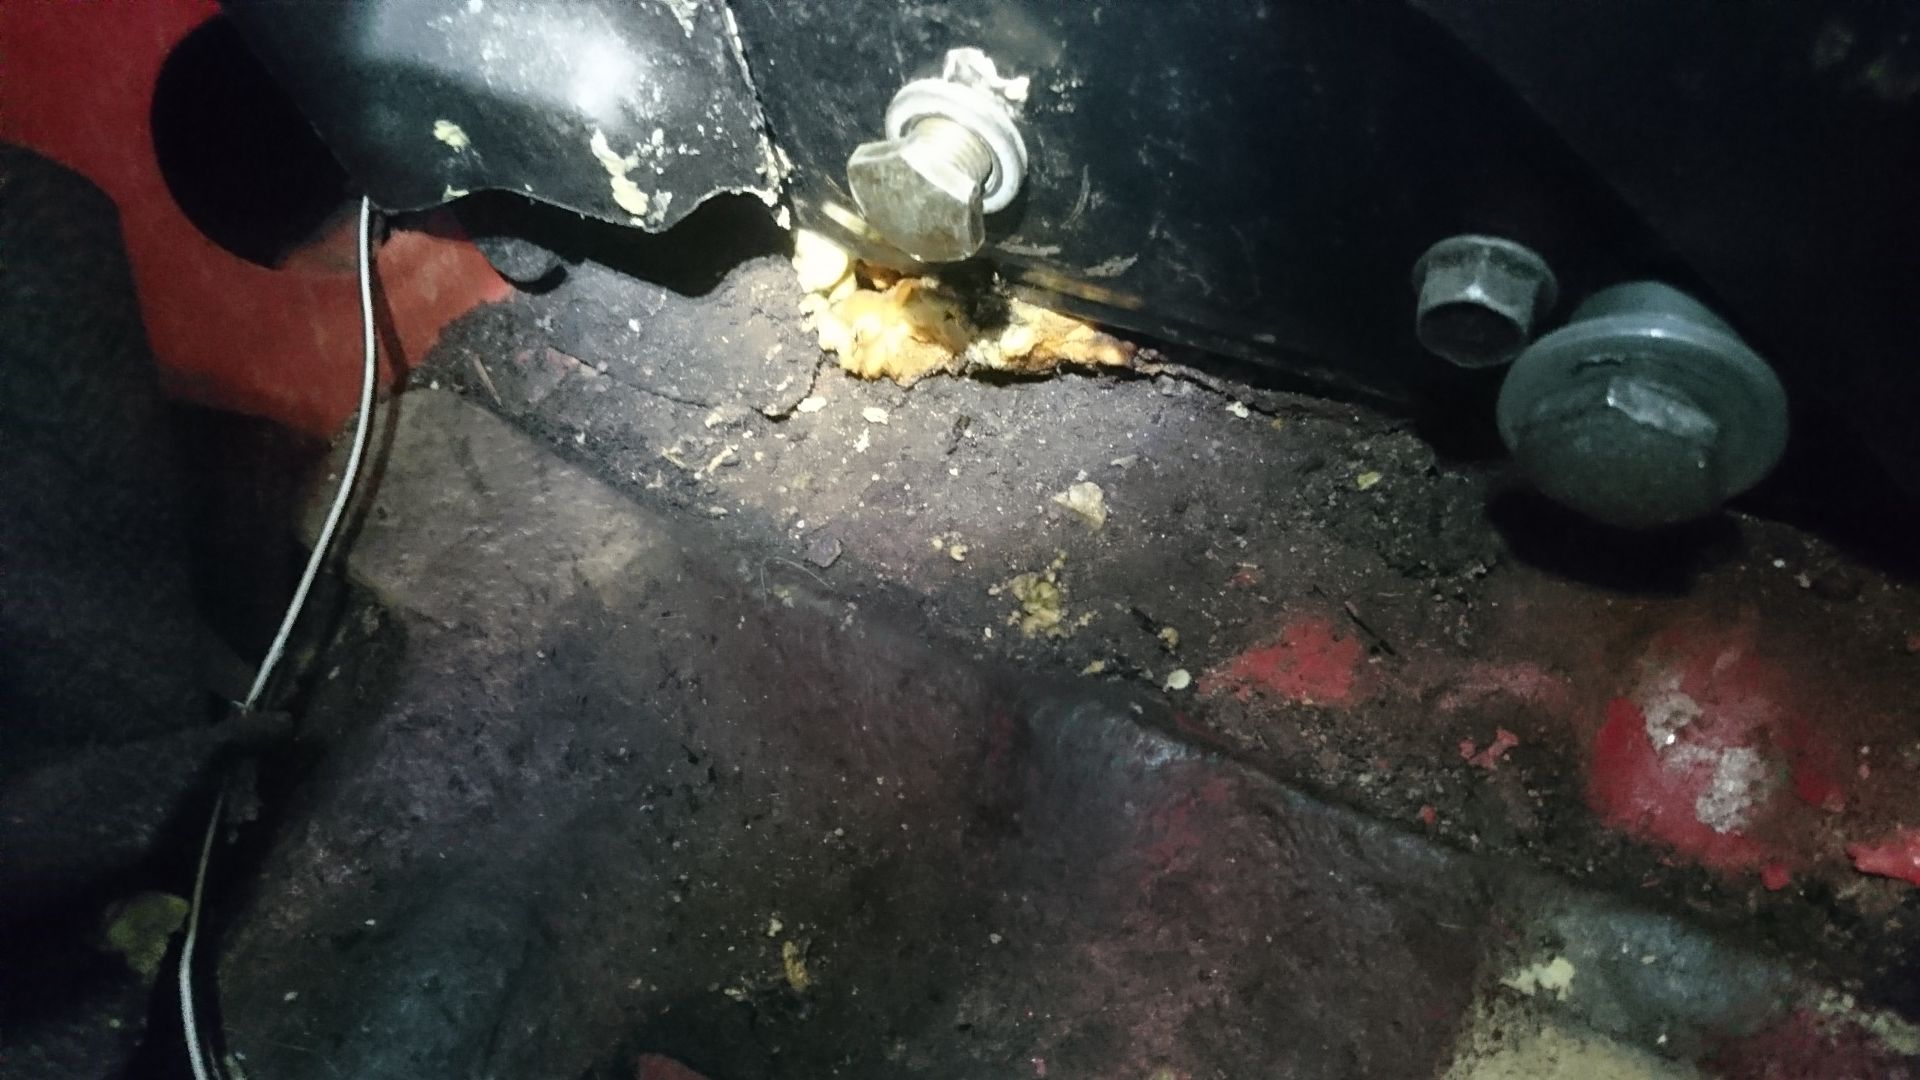
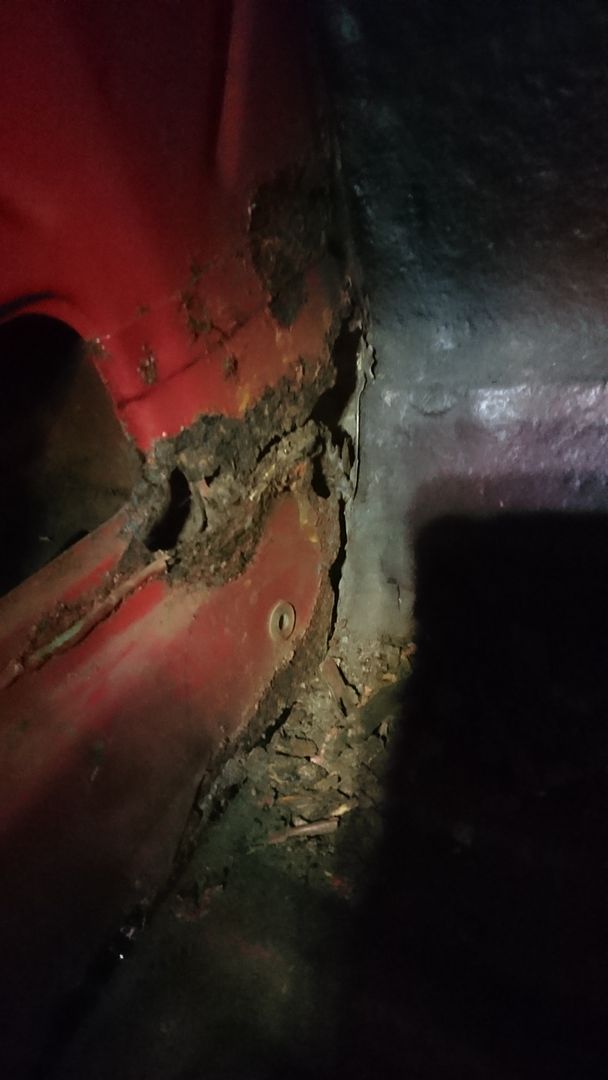
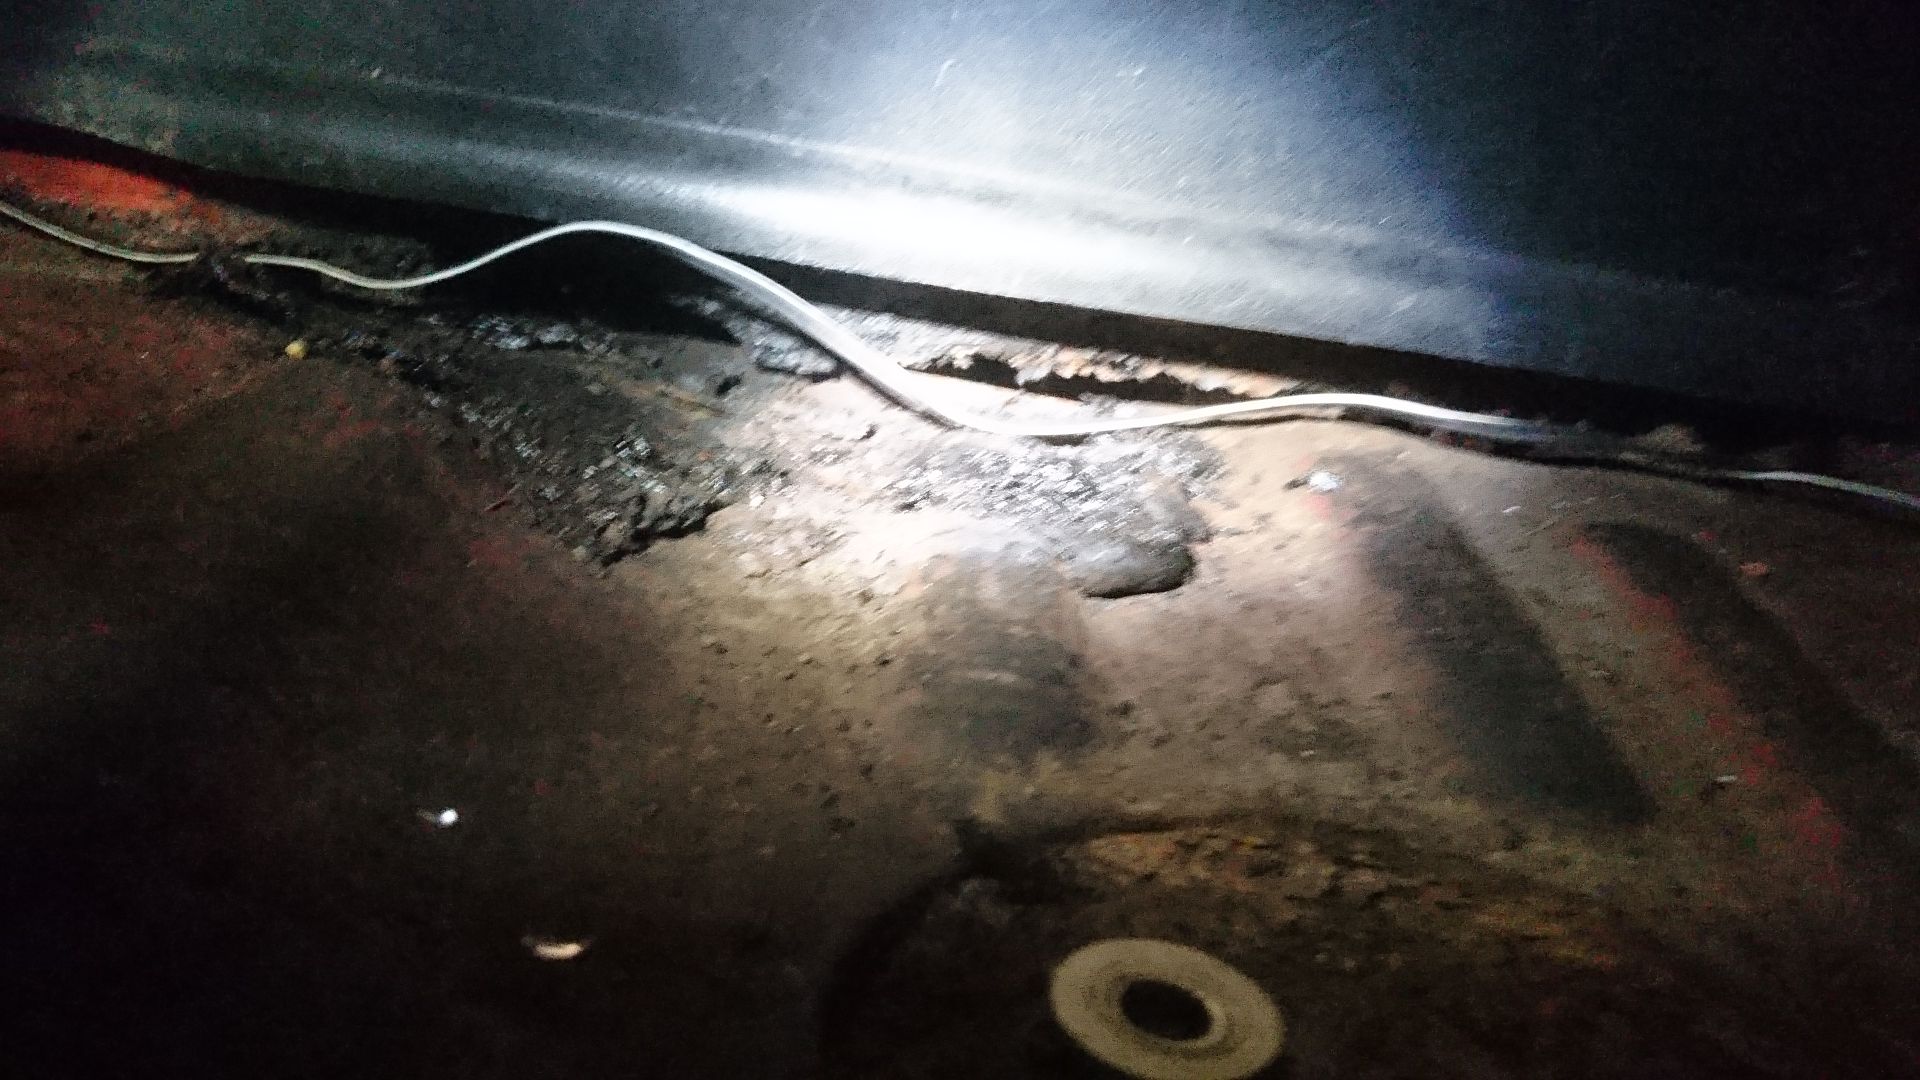
Continuing blissfully unaware of the panels close proximity, I thought I'd crack on stripping the interior ready for sorting the gearbox cross member mounts which need access from within and seeing what other delights I might find. The carpet had seen better days so I wasn't too worried about saving it which made things easier
First things first - front seats and centre console out... then the removal of the rather tired carpet... now at this point a few interesting things appeared... a funny little 80's plastic reflector, (you know the kind that used to go on the back edge of doors) some missing wheel nuts that I still need a few more of, some traces of expanding foam (uh ohhhh) and loooooots more rust... b*gger! Although I was expecting this last bit, I wasn't quite prepared for the full horror of how much
(excuse the crap pics - was in a dark barn with a head torch, but you get the idea!)
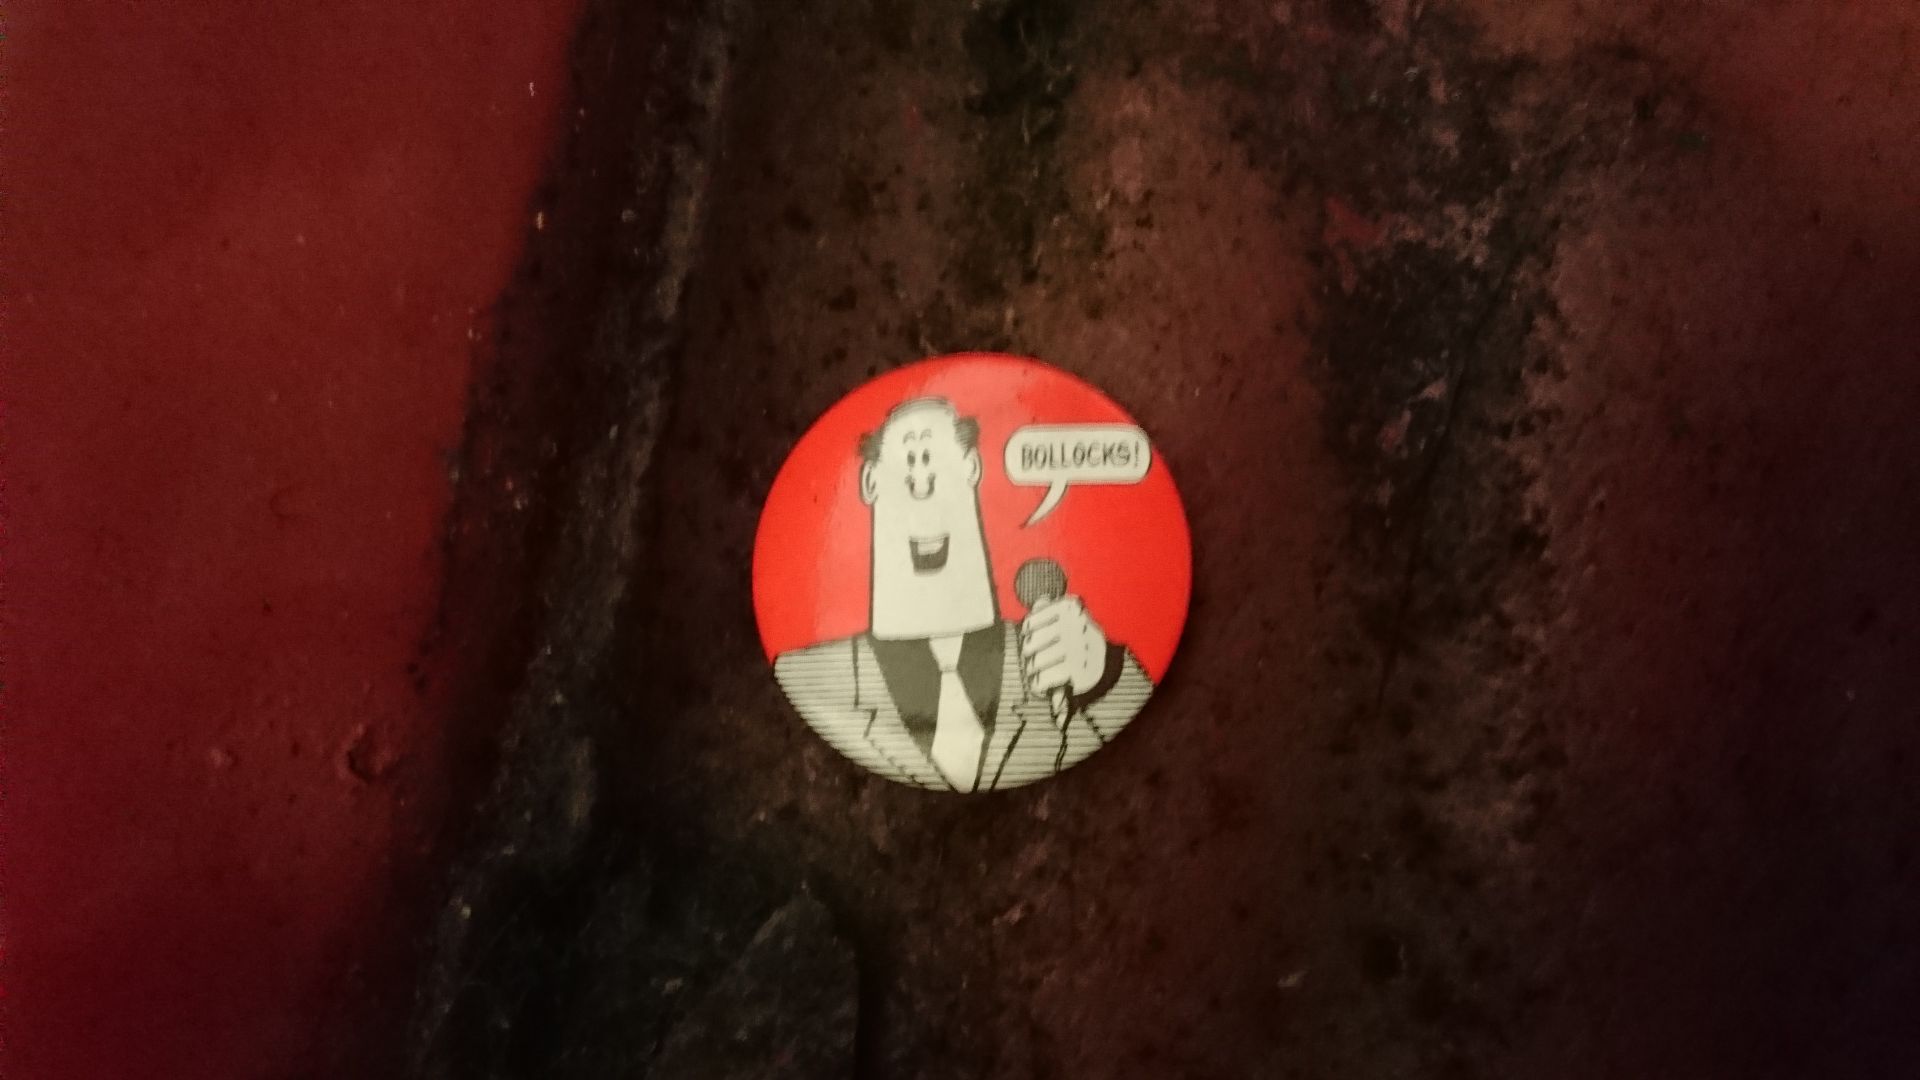
I then came across an old Viz badge which summed things up perfectly for me at that point...
So as it appeared rather a lot of welding is going to be needed inside, I stripped out as much as I could:
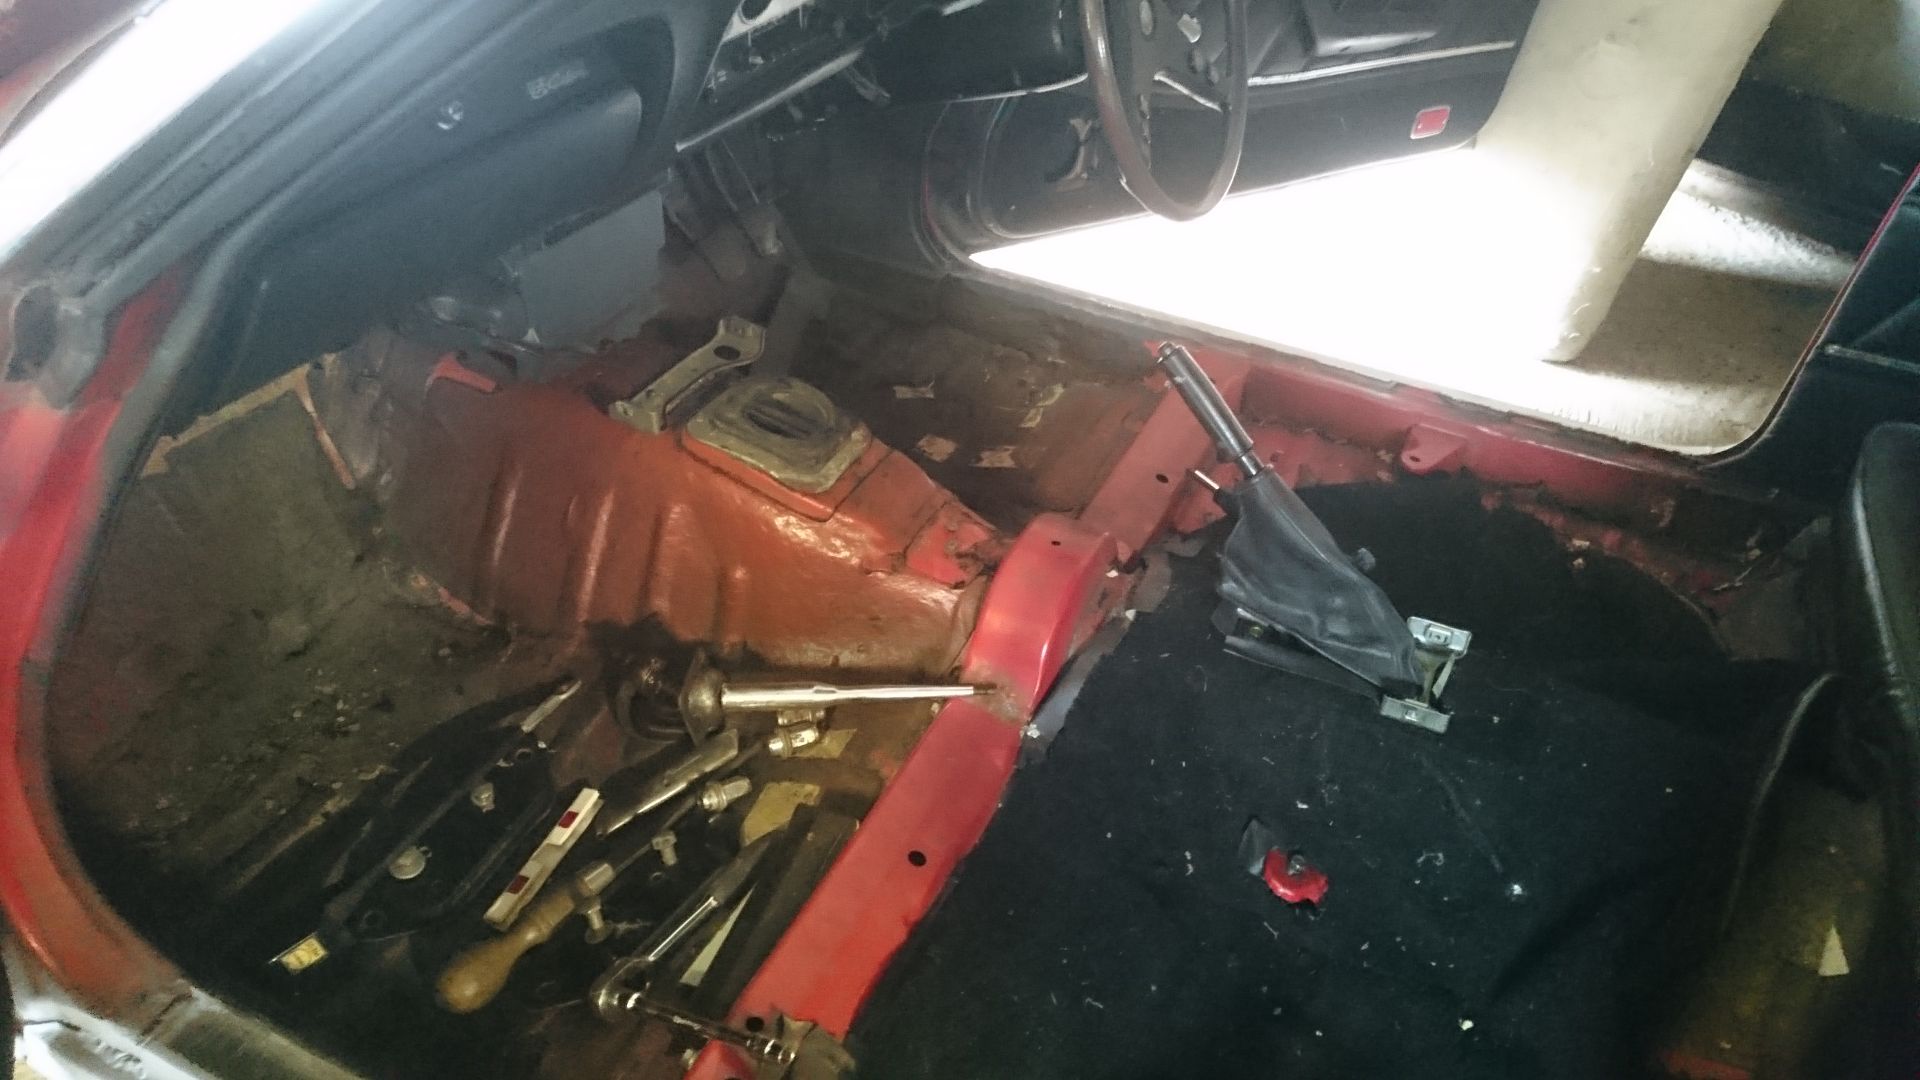
including the lower dashboard tray, kick plates, rear seats and seatbelts, along with the two reinforcing plates where the pre-tensioners bolt... guess what was hiding behind them...
any ideas? (the clue is above....)
yup...
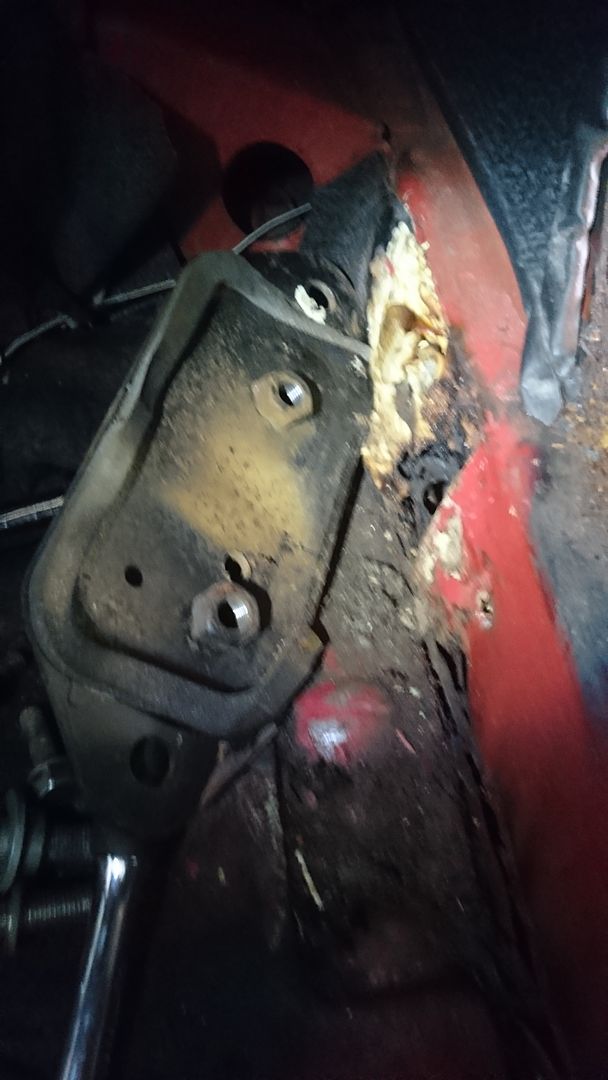
More expanding foam that has been set alight at some point - probably when they welded the over sills on... unbelievable!
Some of the floor insulation had also got a little warm too!

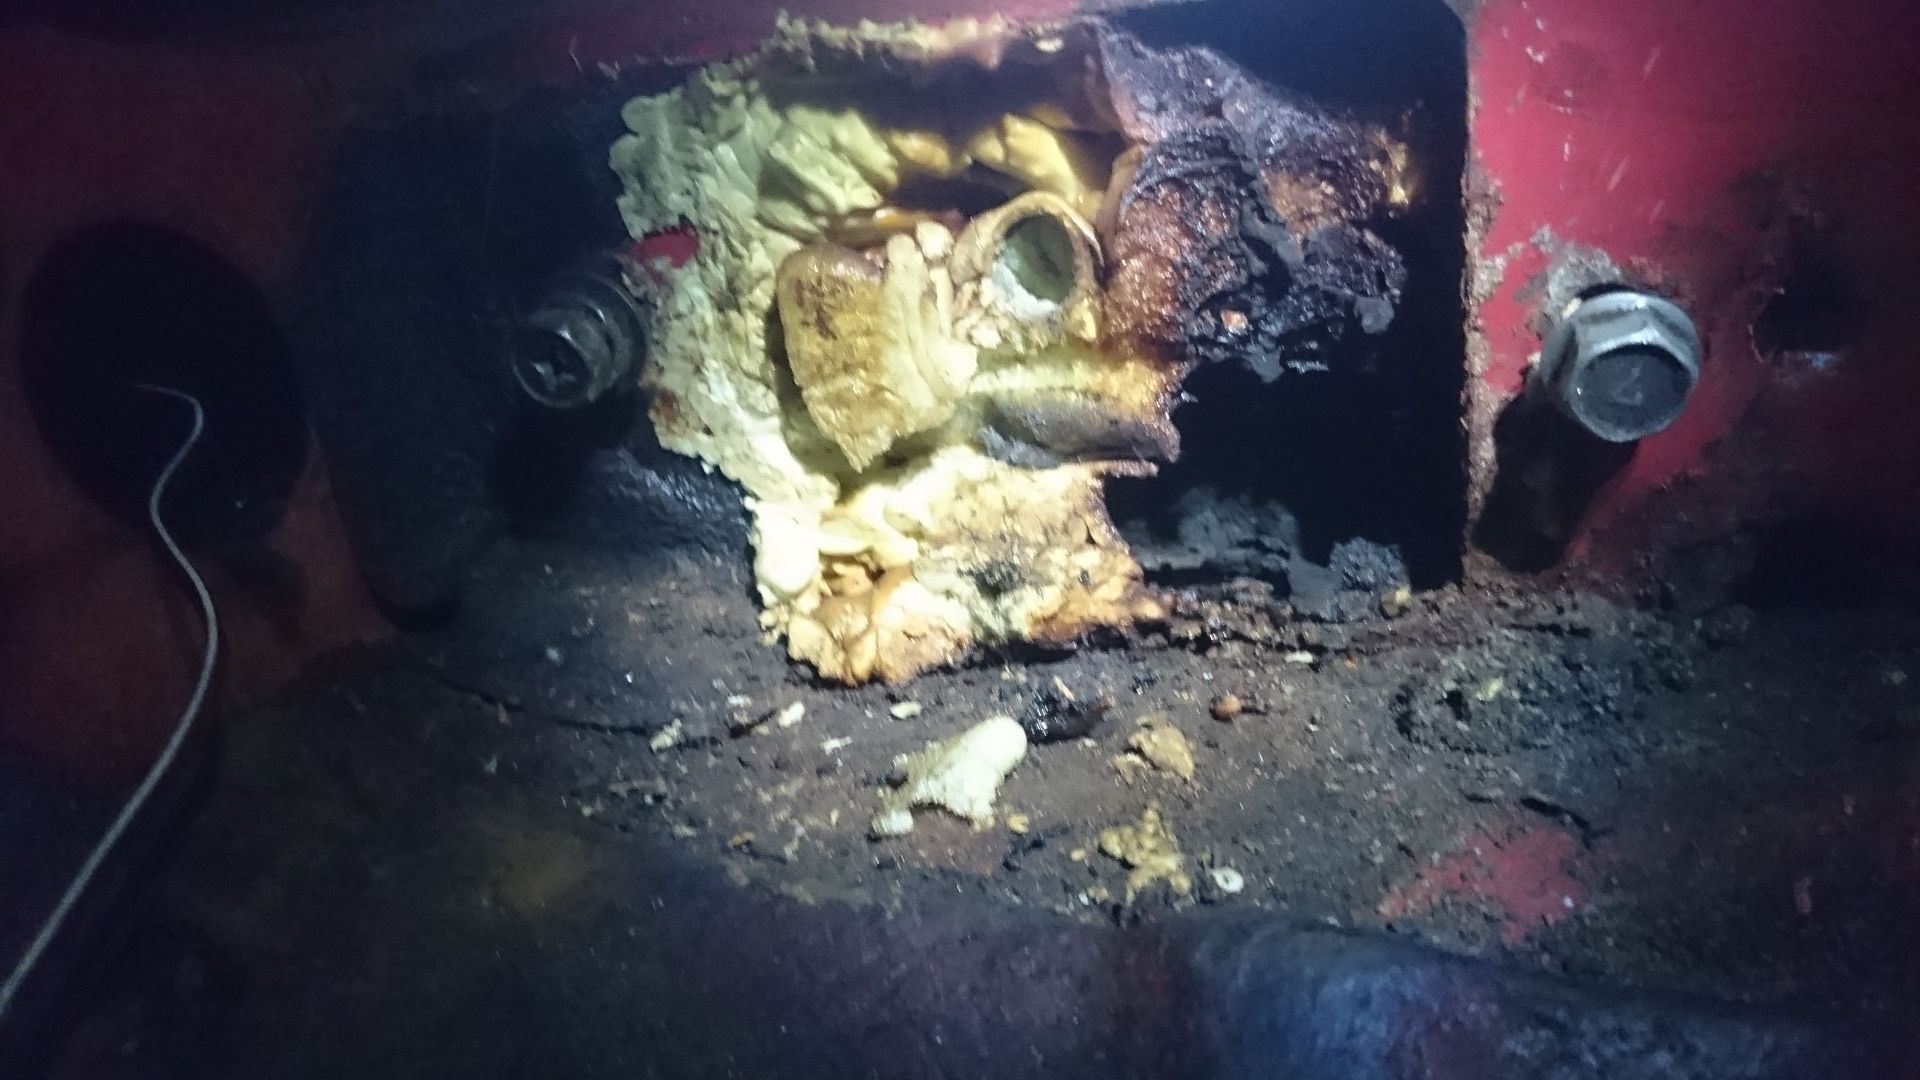
After removing the rear seats I also came across this little device - something to do with the fuel system but the top and bottom came apart way too easily for my liking revealing a spring with a sort of plunger balanced on top - any ideas what it is?
So after a vacuum inside to get rid of the dust and a bit of a tidy of the rest of the parts currently stored in the car, I eventually had a floor that looked like this:
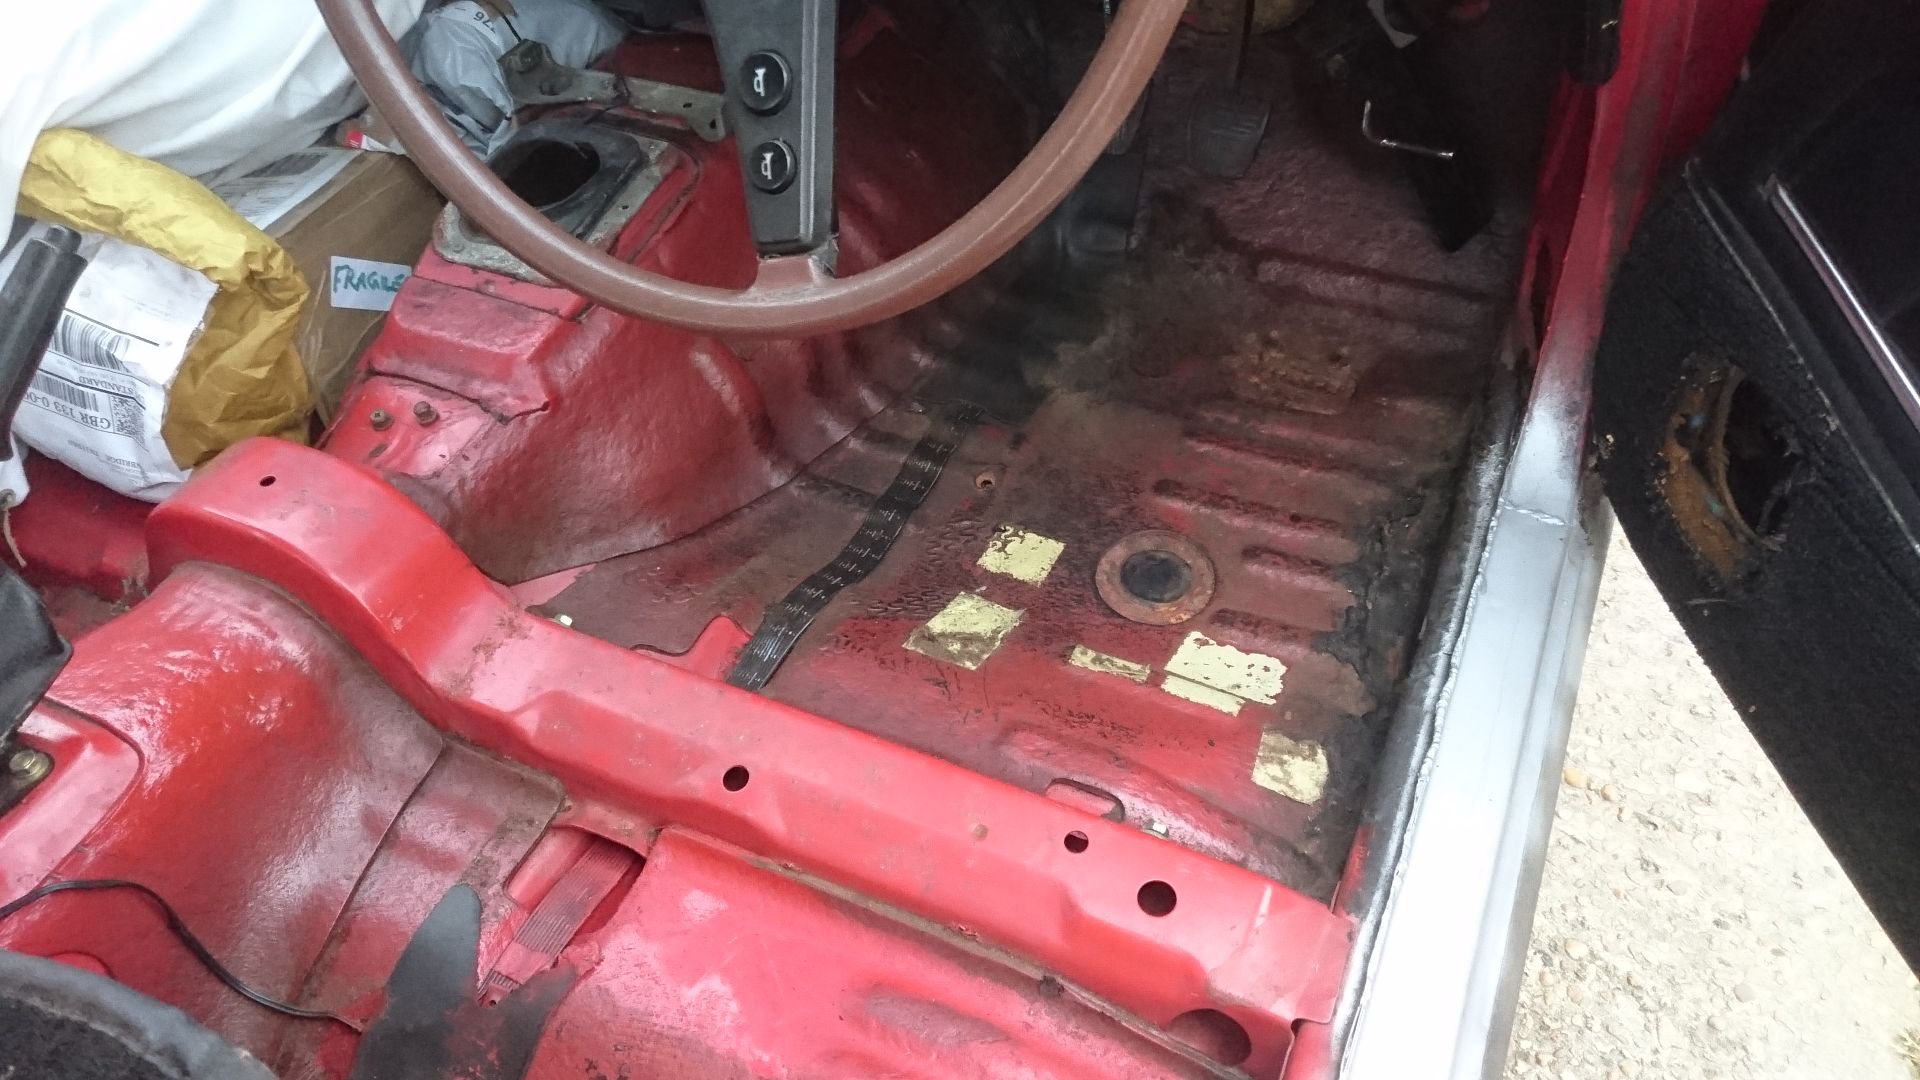
With the odd hole in the usual places...

Could be a lot worse I guess...
Finally I thought I'd boost my mojo a little by bolting the front wings on with the new lip spoiler...
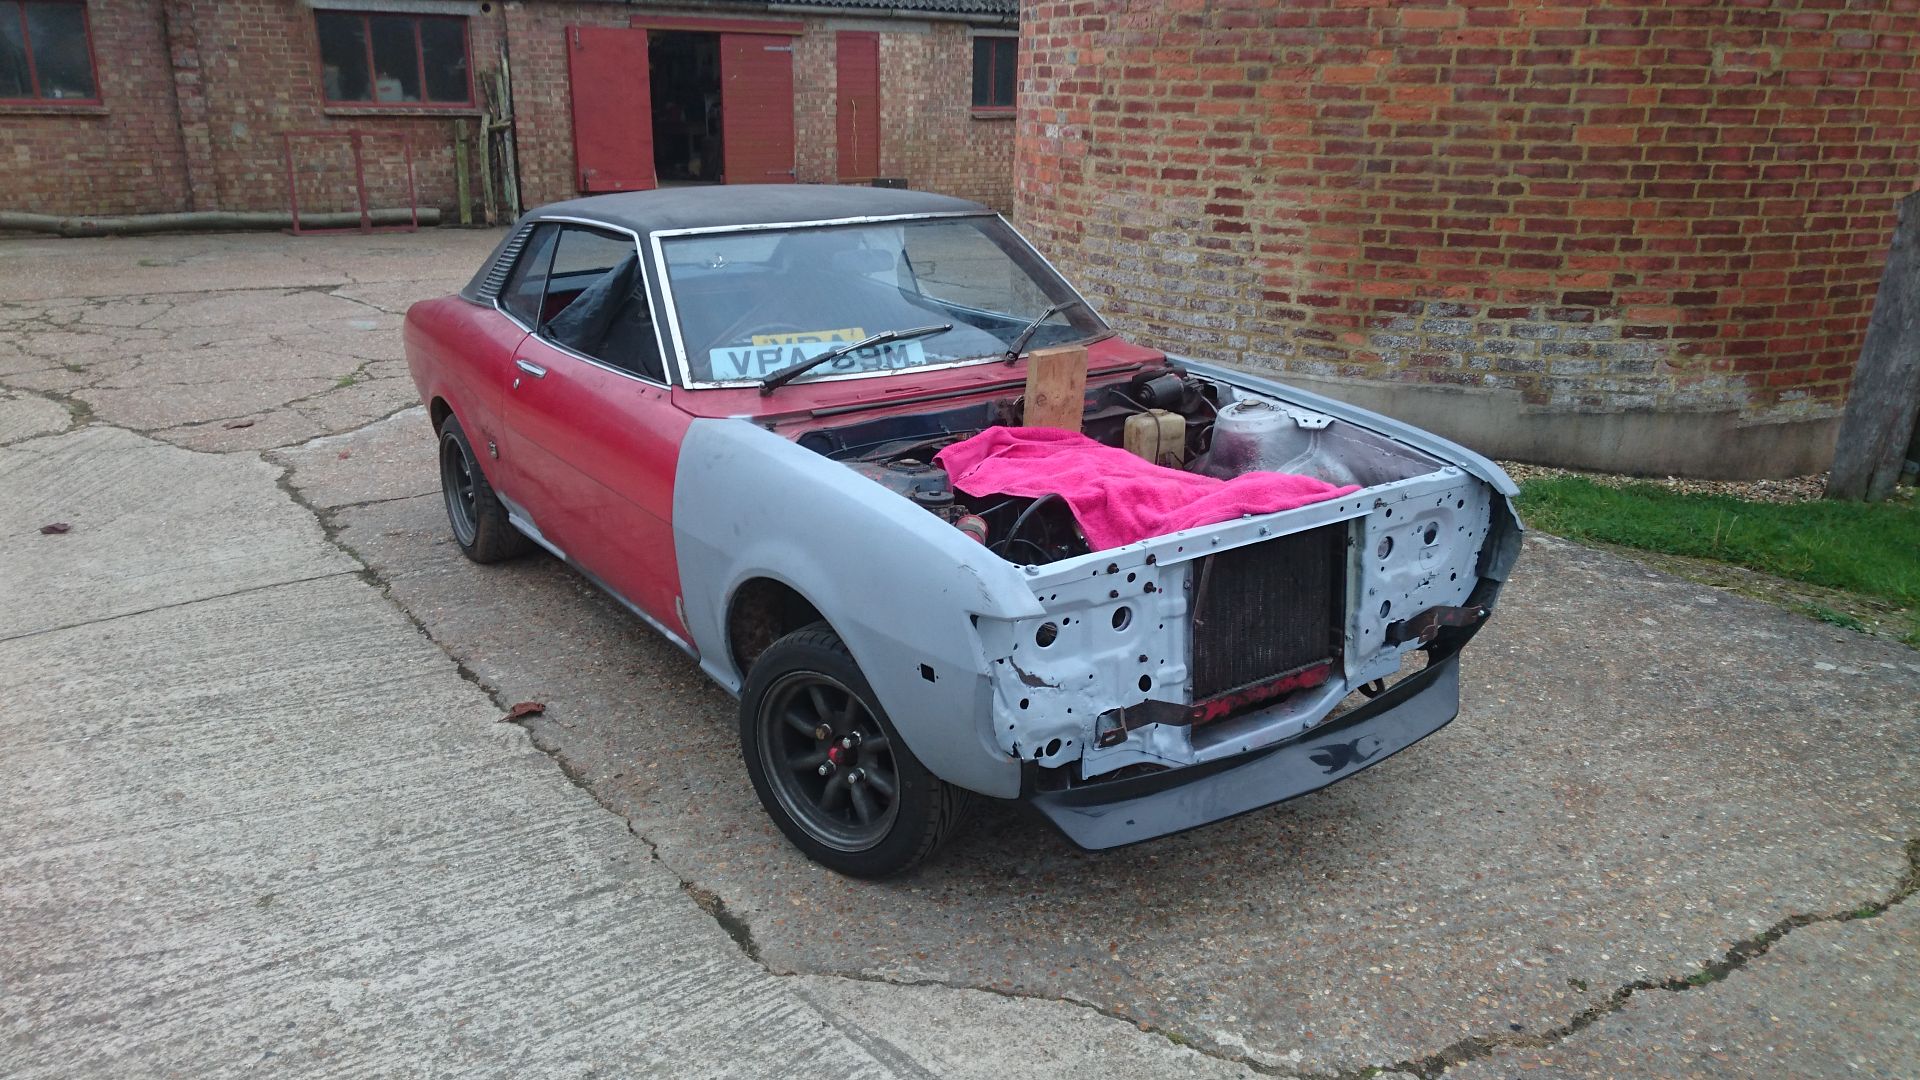
Amazing how doing such a simple thing can help the motivation
Continuing blissfully unaware of the panels close proximity, I thought I'd crack on stripping the interior ready for sorting the gearbox cross member mounts which need access from within and seeing what other delights I might find. The carpet had seen better days so I wasn't too worried about saving it which made things easier
First things first - front seats and centre console out... then the removal of the rather tired carpet... now at this point a few interesting things appeared... a funny little 80's plastic reflector, (you know the kind that used to go on the back edge of doors) some missing wheel nuts that I still need a few more of, some traces of expanding foam (uh ohhhh) and loooooots more rust... b*gger! Although I was expecting this last bit, I wasn't quite prepared for the full horror of how much
(excuse the crap pics - was in a dark barn with a head torch, but you get the idea!)
I then came across an old Viz badge which summed things up perfectly for me at that point...
So as it appeared rather a lot of welding is going to be needed inside, I stripped out as much as I could:
including the lower dashboard tray, kick plates, rear seats and seatbelts, along with the two reinforcing plates where the pre-tensioners bolt... guess what was hiding behind them...
any ideas? (the clue is above....)
yup...
More expanding foam that has been set alight at some point - probably when they welded the over sills on... unbelievable!
Some of the floor insulation had also got a little warm too!
After removing the rear seats I also came across this little device - something to do with the fuel system but the top and bottom came apart way too easily for my liking revealing a spring with a sort of plunger balanced on top - any ideas what it is?
So after a vacuum inside to get rid of the dust and a bit of a tidy of the rest of the parts currently stored in the car, I eventually had a floor that looked like this:
With the odd hole in the usual places...
Could be a lot worse I guess...
Finally I thought I'd boost my mojo a little by bolting the front wings on with the new lip spoiler...
Amazing how doing such a simple thing can help the motivation
Wish mine looked like that at the moment!
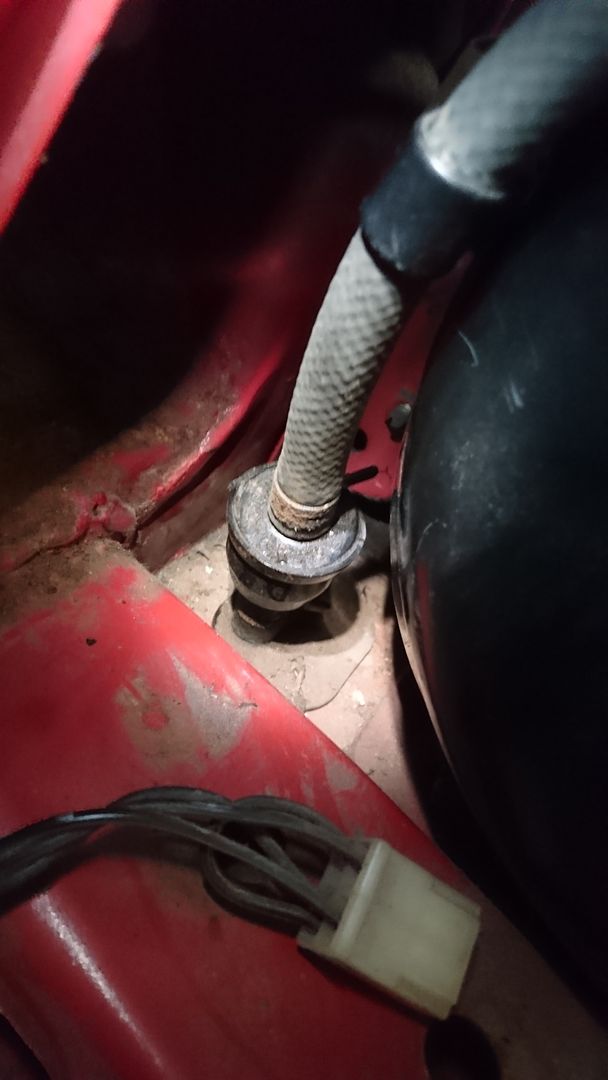
Good thinking on the pipe - would make sense with the spring and cap inside, will do some more research.
In other news, I got home last night to find this waiting
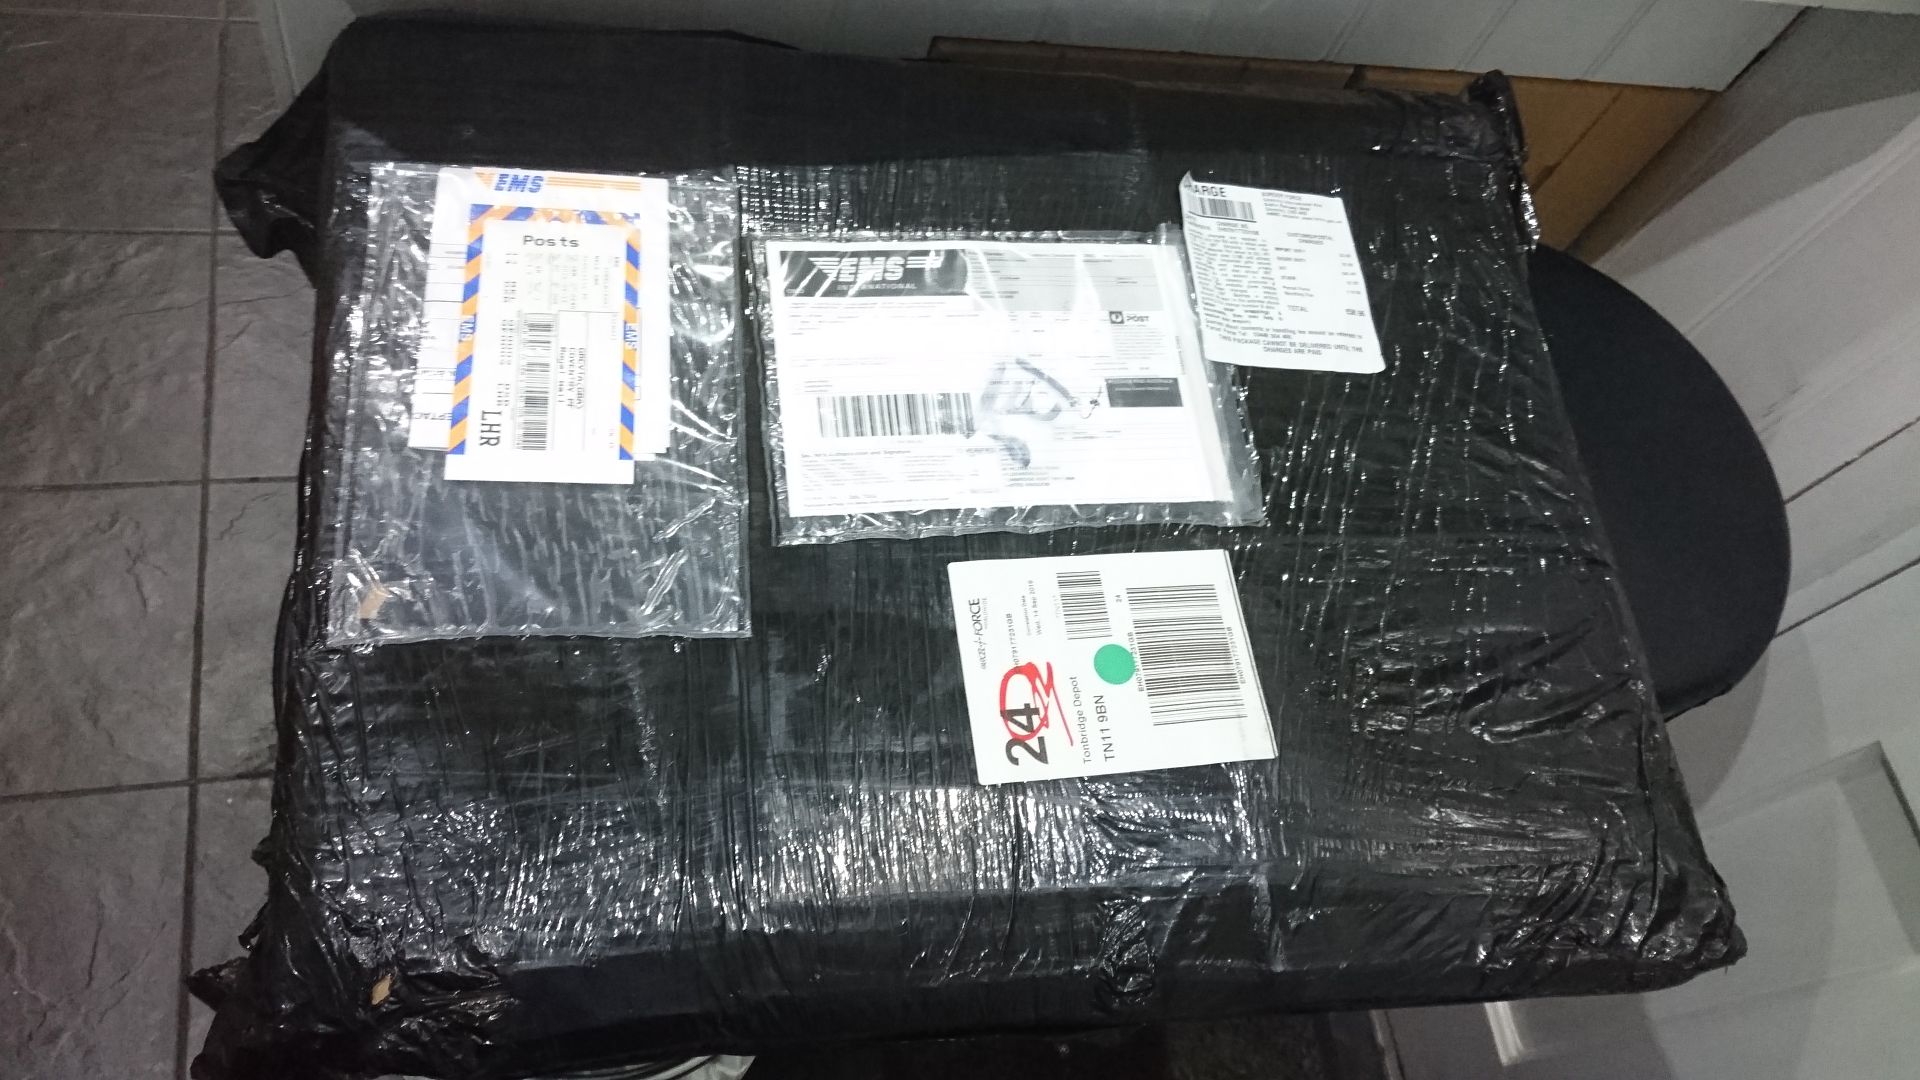
Knowing how frustrated I was at missing them on the weekend and having no chance to go collect it in the week, my amazing wife had gone and collected it for me, including paying the customs charges. Now call me a sceptic but I'm wondering what will need to be done/bought in return
Good thinking on the pipe - would make sense with the spring and cap inside, will do some more research.
In other news, I got home last night to find this waiting
Knowing how frustrated I was at missing them on the weekend and having no chance to go collect it in the week, my amazing wife had gone and collected it for me, including paying the customs charges. Now call me a sceptic but I'm wondering what will need to be done/bought in return
 Love these, always have - TA22 and RA25 two of my favourites as a spotty youth.

So the weekend bought with it some actual Toyota time... bit of a miracle I know!
As the aforementioned panels had made their way across from the other side of the planet, I thought I'd make a start on removing their predecessors.
So the day started with the car looking like this, complete with its fetching pink towel to try and keep that rocker cover looking as it should.
Even though it seemed to be a relatively straightforward job, I wasn't particularly looking forward to it as it was always going to throw a few surprises.
So on with the panel removal

This also involved removing some slightly suspect repairs where things had just been plated over in the past.
First one side
then the other...
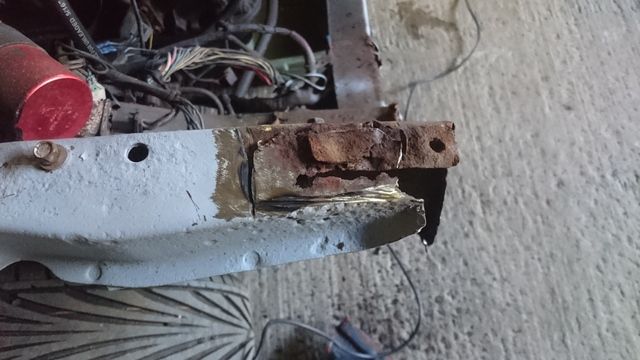
As to be expected, some rather scabby bits were then exposed
Bit of an attack with the wire wheel and the in-vogue swiss cheese look was back
Thankfully the other side was a little more solid, although it was showing signs of some accident damage in the past. Look closely and you can spot the holes on the corner of the lip that were previously filled with fibreglass and given a healthy dosing of seam sealer over the top.
So out with the welder, old metal cut out and new piece welded in on wing and several hours spent filling the holes with weld using the flattened copper pipe trick. (House renovation does have its benefits).
Not that pretty but once linished back and given a coat of etch it looked much better... not that it'll be seen as this is under the battery tray...
and that was the bulk of progress this weekend... looks a bit sad compared to how it started and feels like a step or two back, but ultimately it's moving forward.
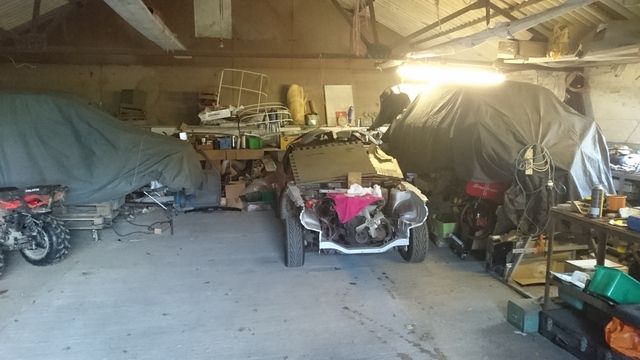
tucked back in with its project mates
Next installment will most likely involve pulling the engine while it's easy to do so so I can deal with the rusty holes coming through from the wheel arches - seemingly a common issue on these.
Onwards and backwards...
As the aforementioned panels had made their way across from the other side of the planet, I thought I'd make a start on removing their predecessors.
So the day started with the car looking like this, complete with its fetching pink towel to try and keep that rocker cover looking as it should.
Even though it seemed to be a relatively straightforward job, I wasn't particularly looking forward to it as it was always going to throw a few surprises.
So on with the panel removal
This also involved removing some slightly suspect repairs where things had just been plated over in the past.
First one side
then the other...
As to be expected, some rather scabby bits were then exposed
Bit of an attack with the wire wheel and the in-vogue swiss cheese look was back
Thankfully the other side was a little more solid, although it was showing signs of some accident damage in the past. Look closely and you can spot the holes on the corner of the lip that were previously filled with fibreglass and given a healthy dosing of seam sealer over the top.
So out with the welder, old metal cut out and new piece welded in on wing and several hours spent filling the holes with weld using the flattened copper pipe trick. (House renovation does have its benefits).
Not that pretty but once linished back and given a coat of etch it looked much better... not that it'll be seen as this is under the battery tray...
and that was the bulk of progress this weekend... looks a bit sad compared to how it started and feels like a step or two back, but ultimately it's moving forward.
tucked back in with its project mates
Next installment will most likely involve pulling the engine while it's easy to do so so I can deal with the rusty holes coming through from the wheel arches - seemingly a common issue on these.
Onwards and backwards...
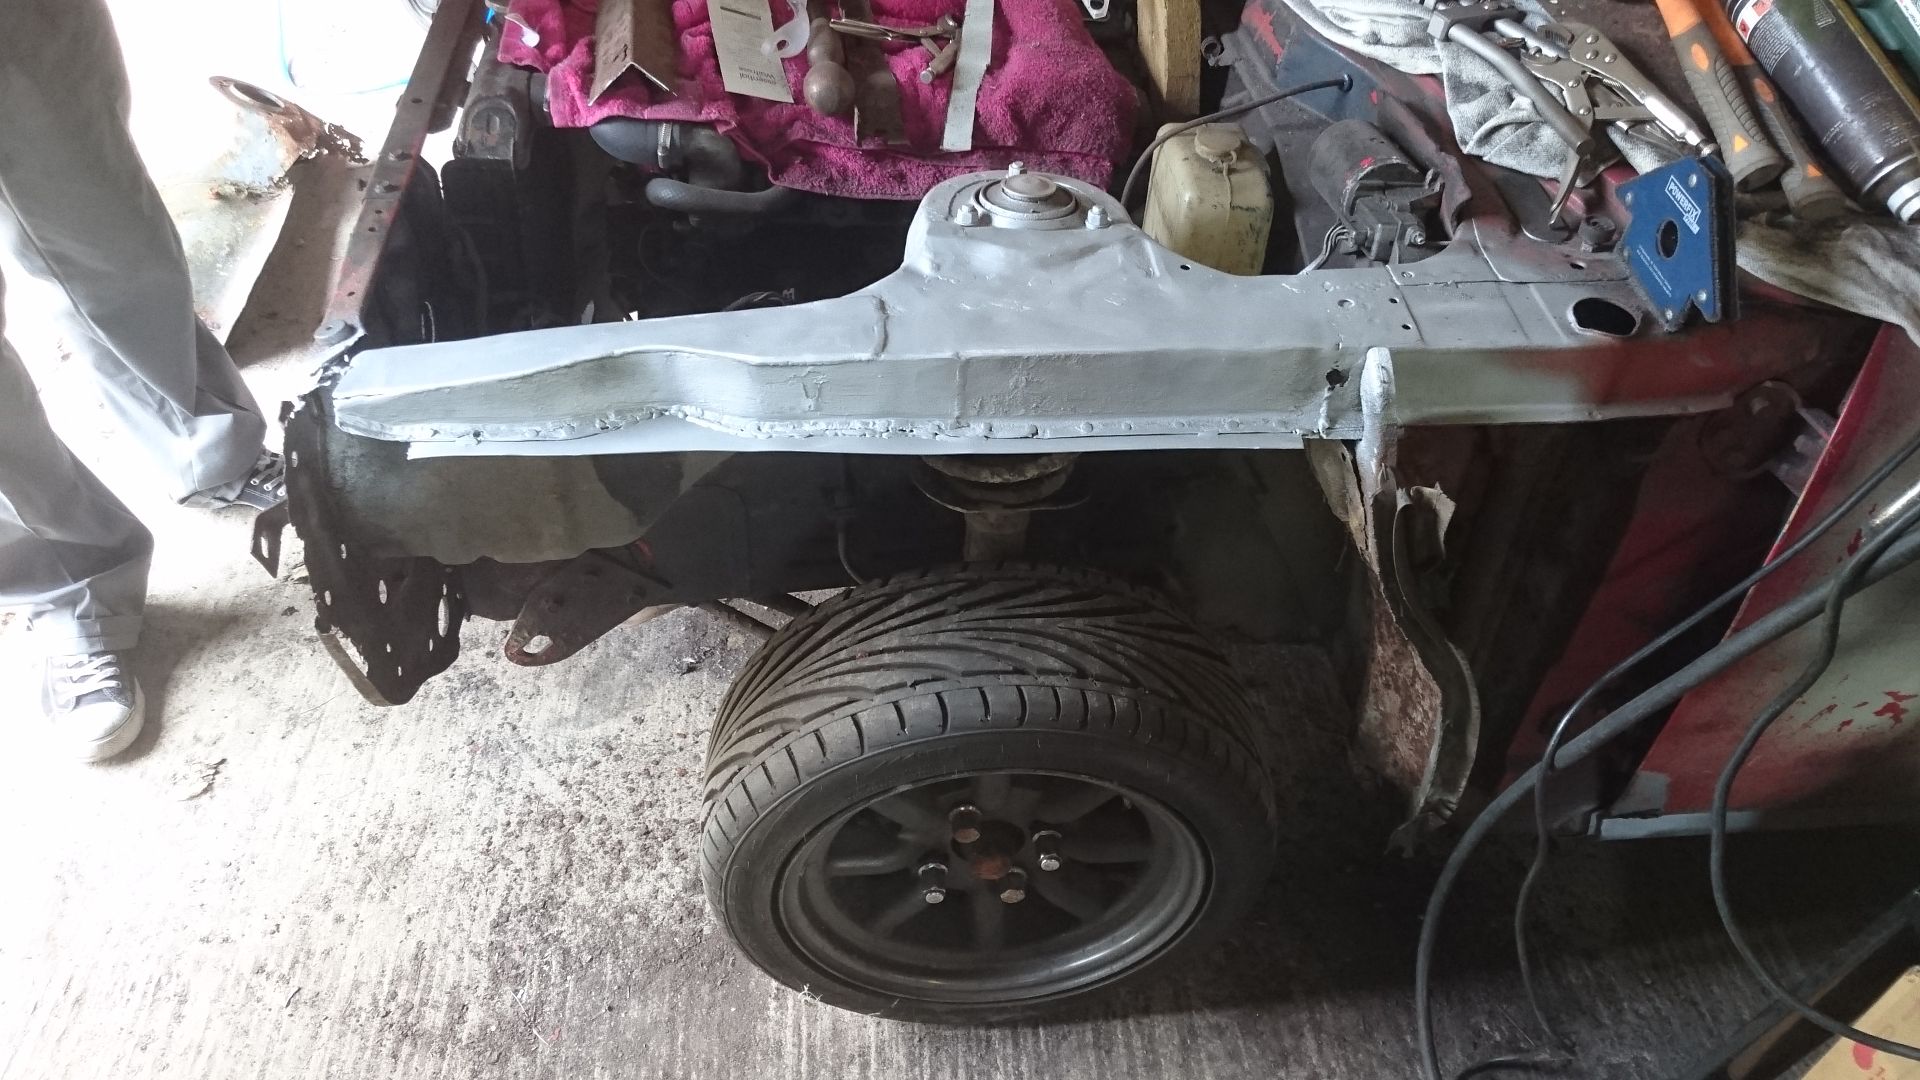
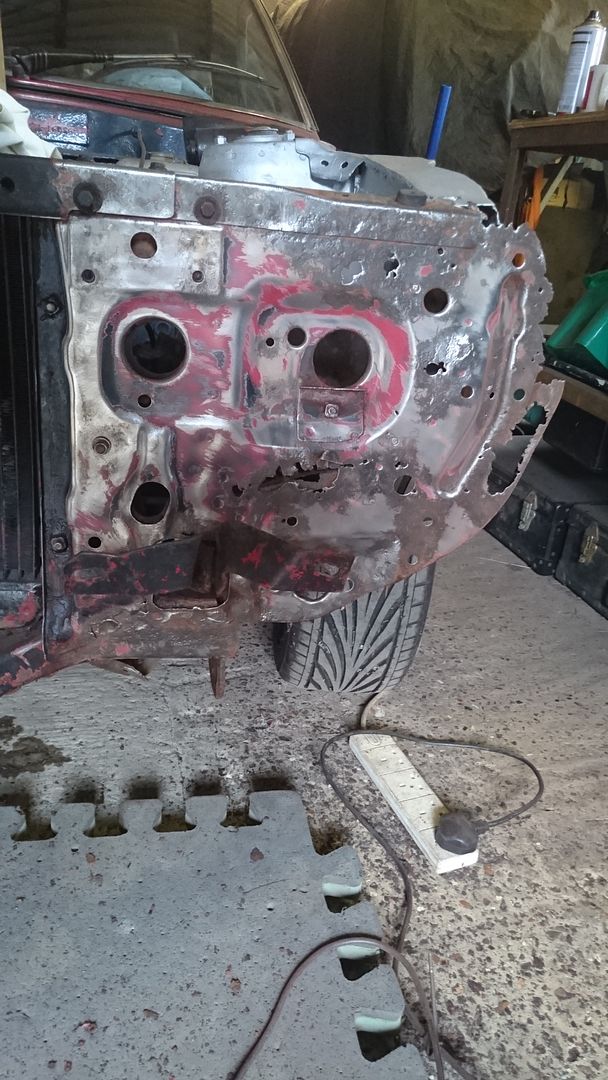
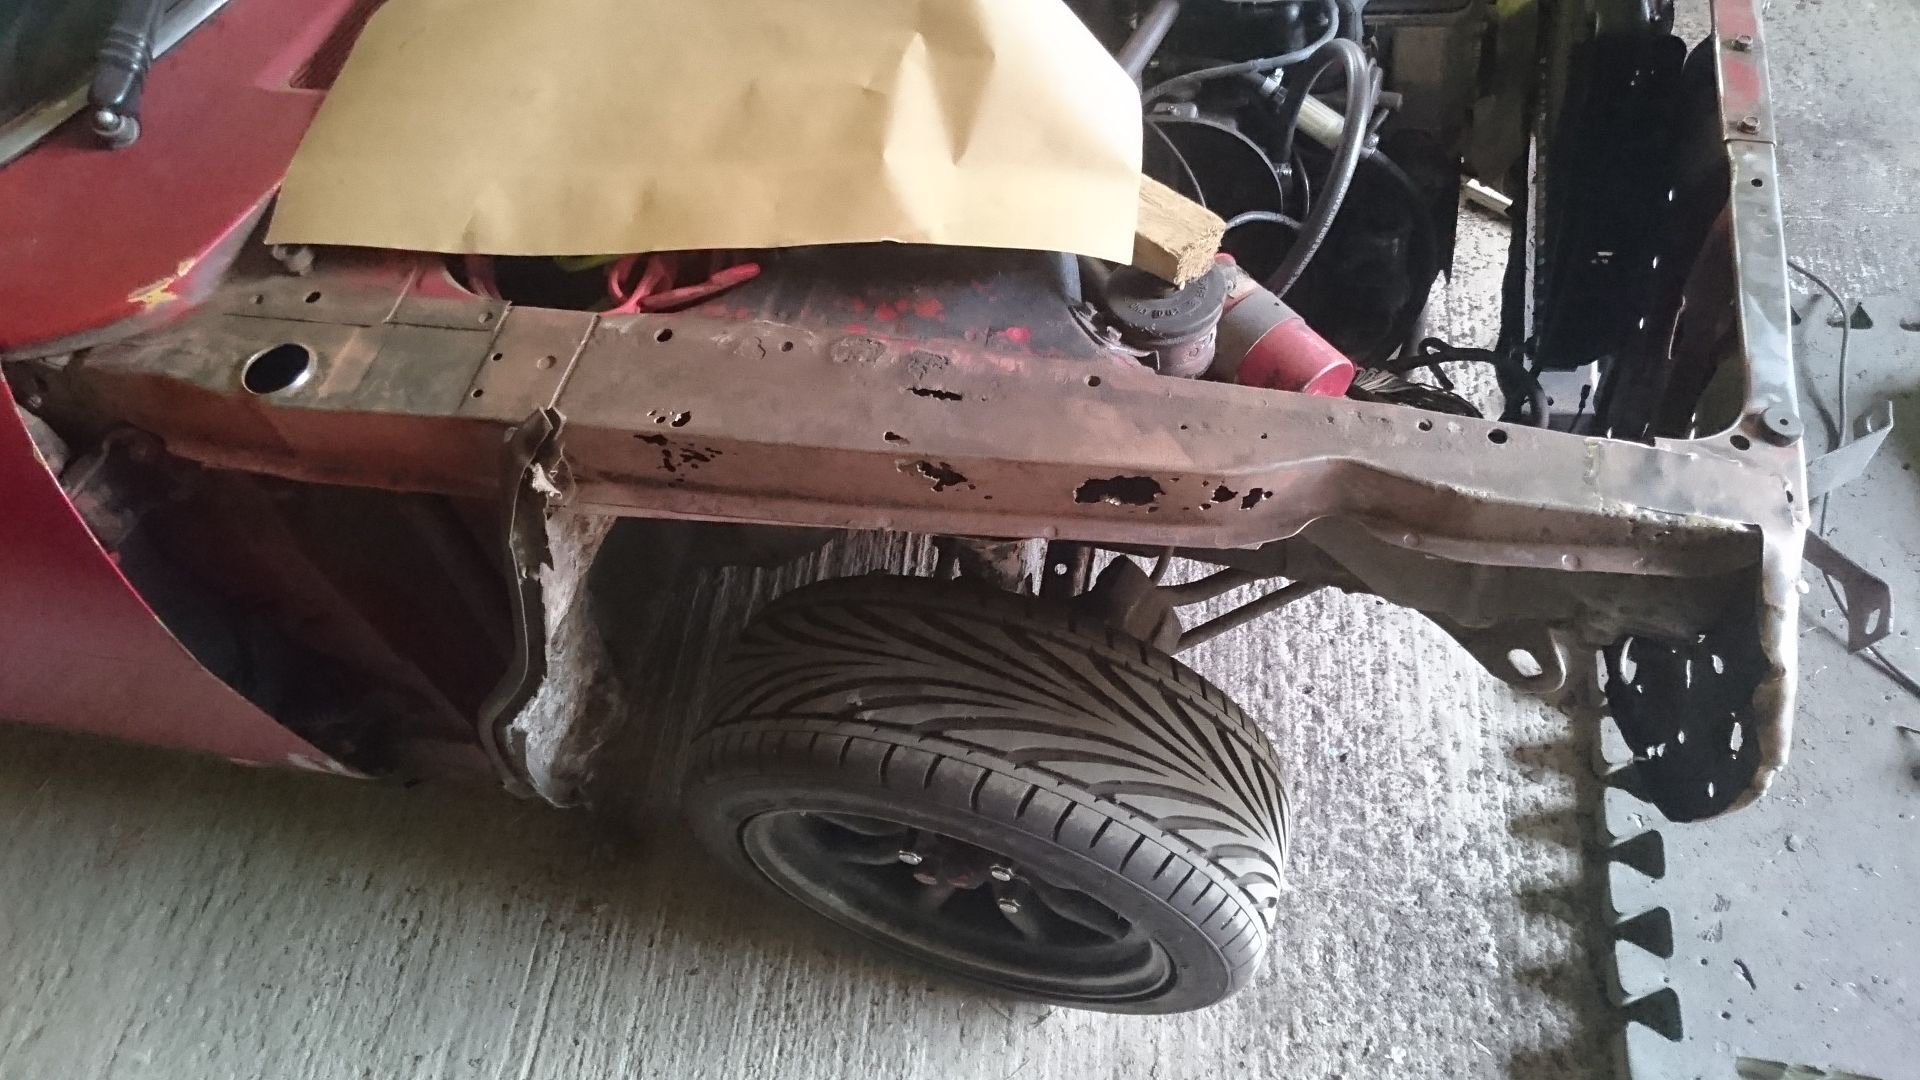
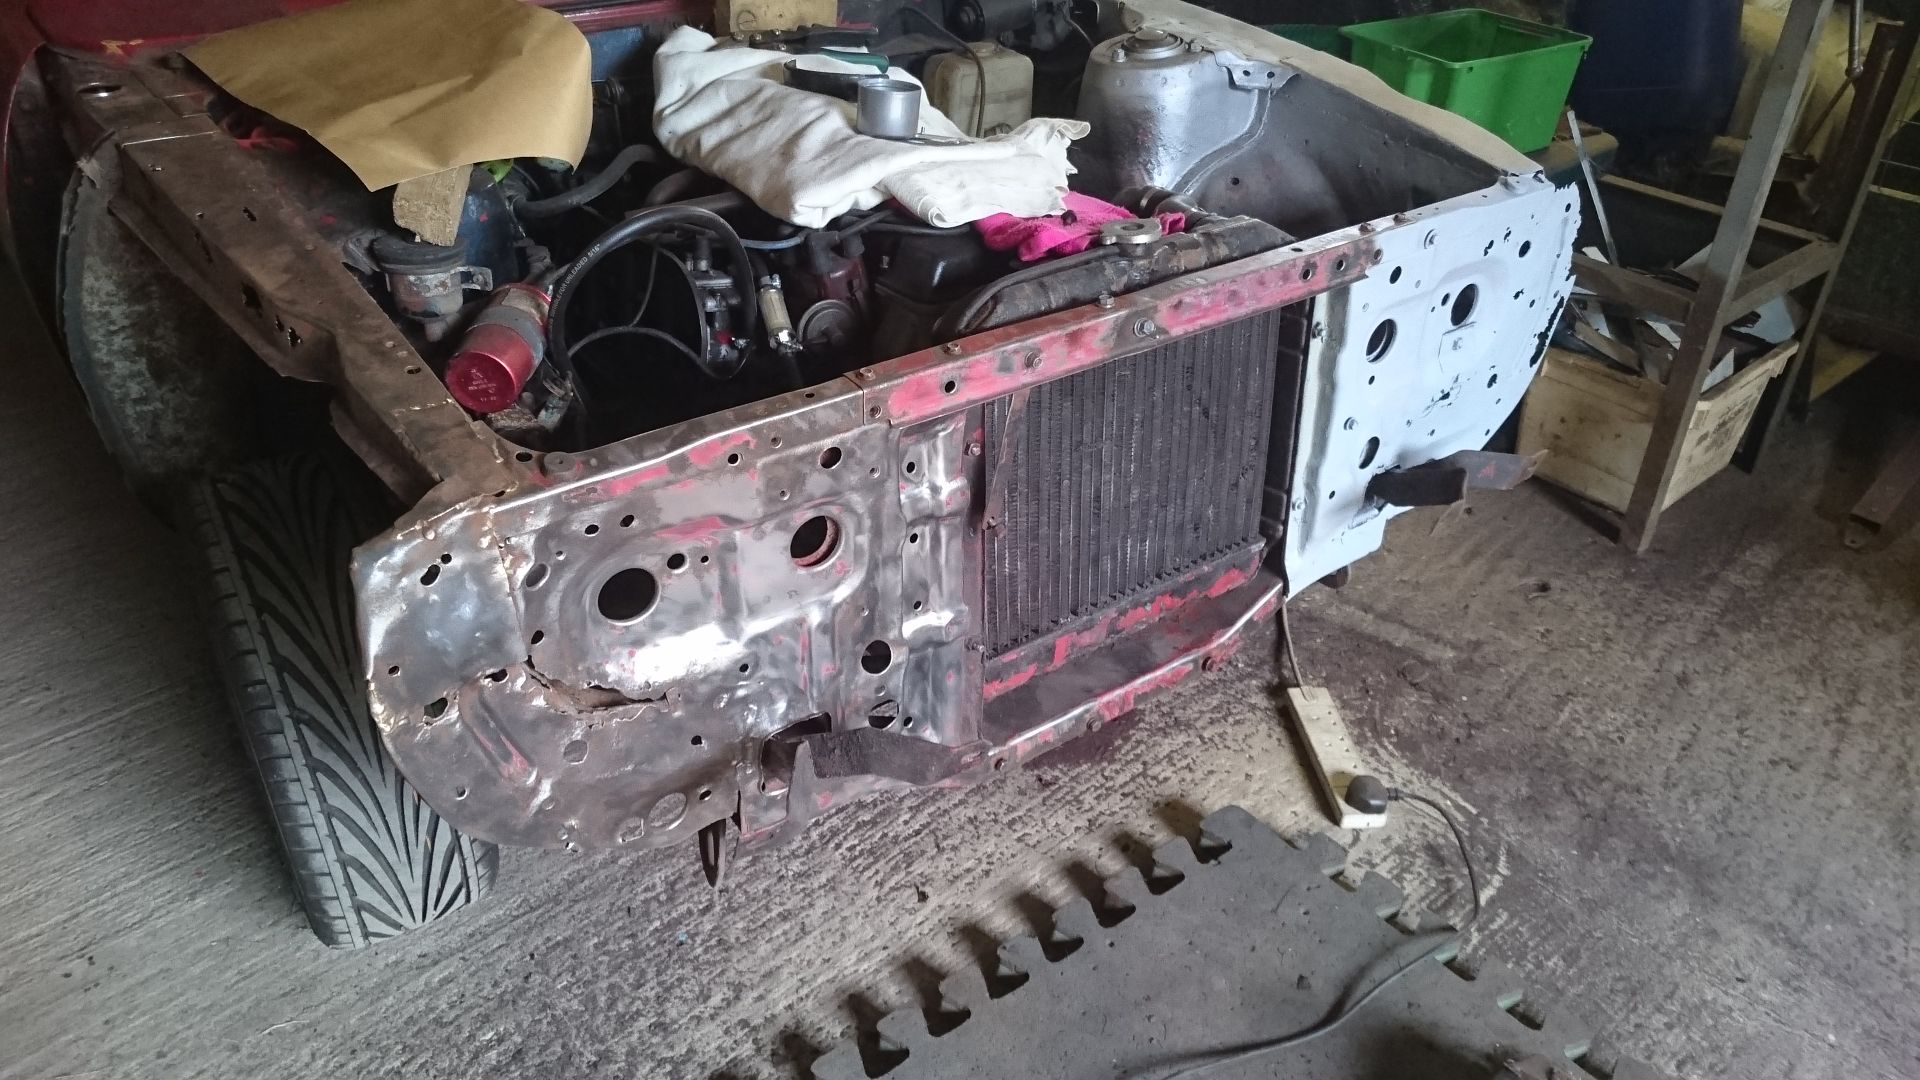
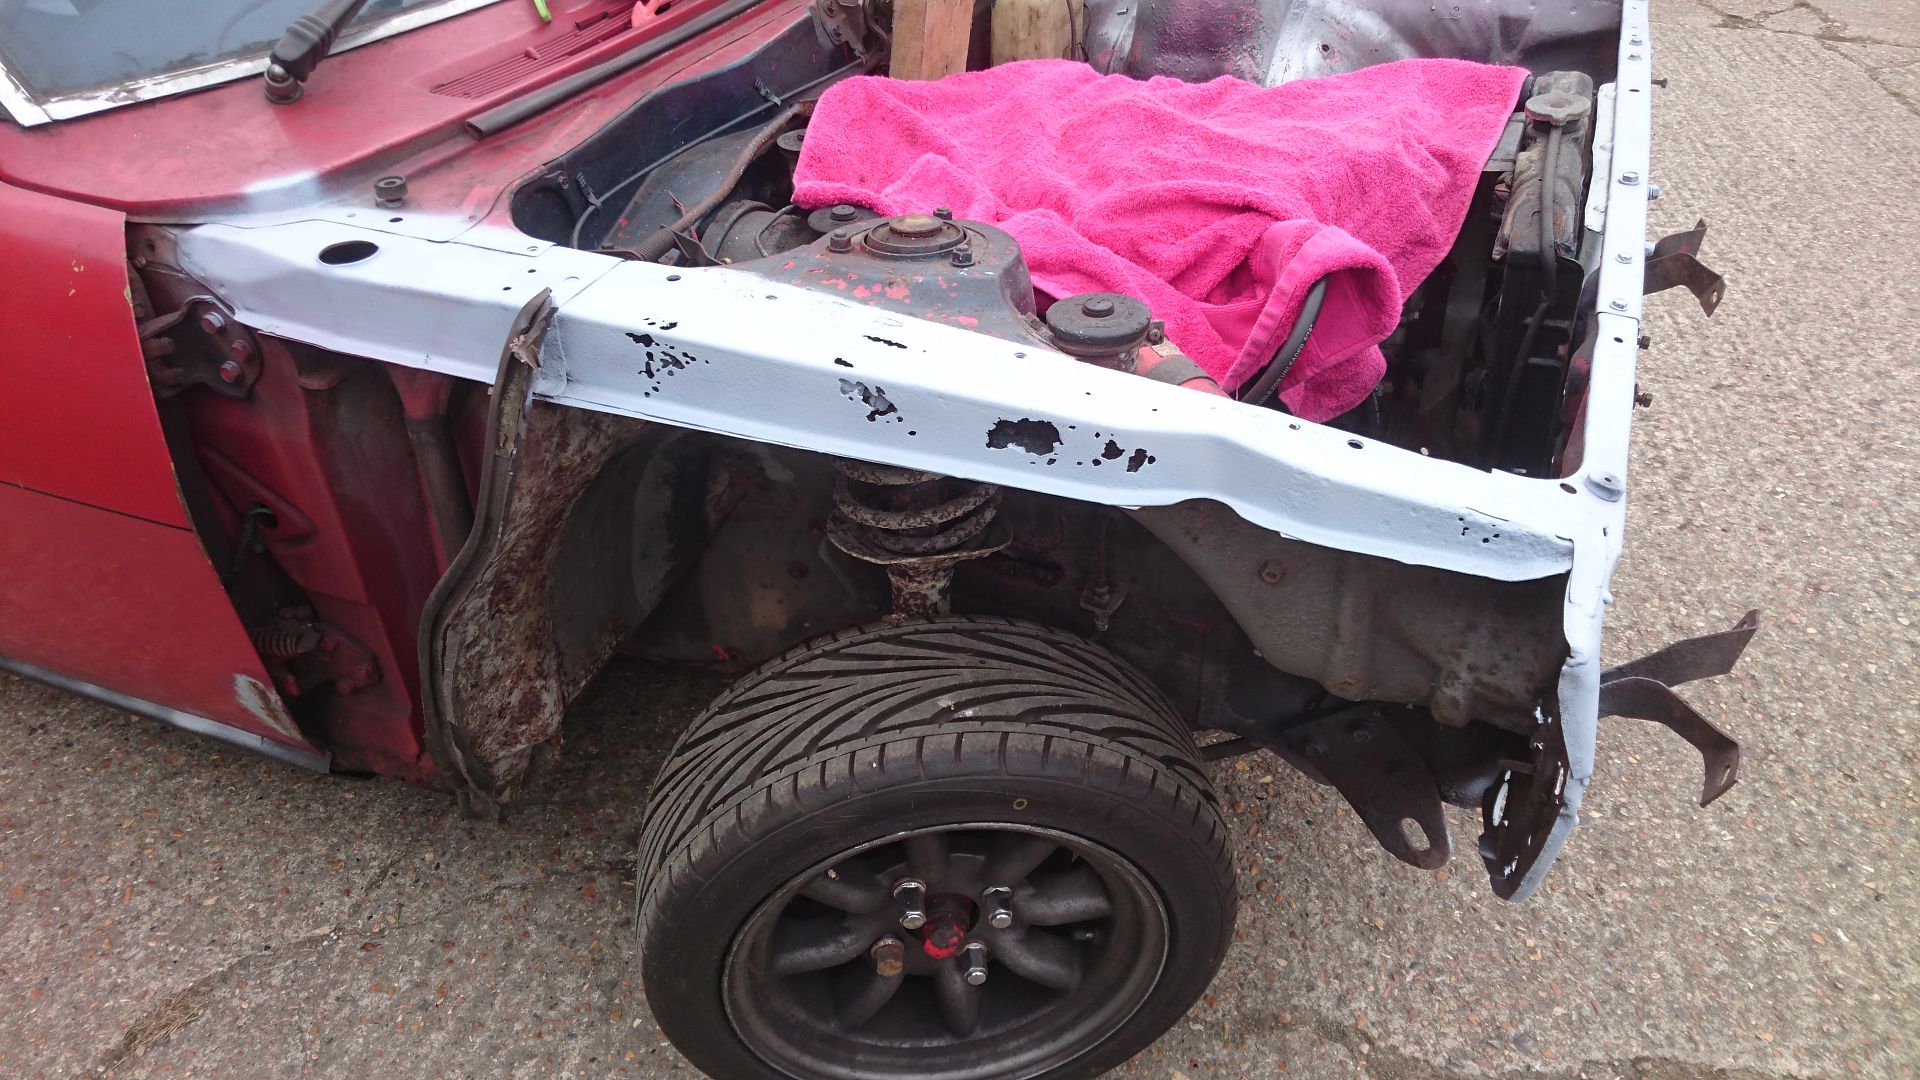
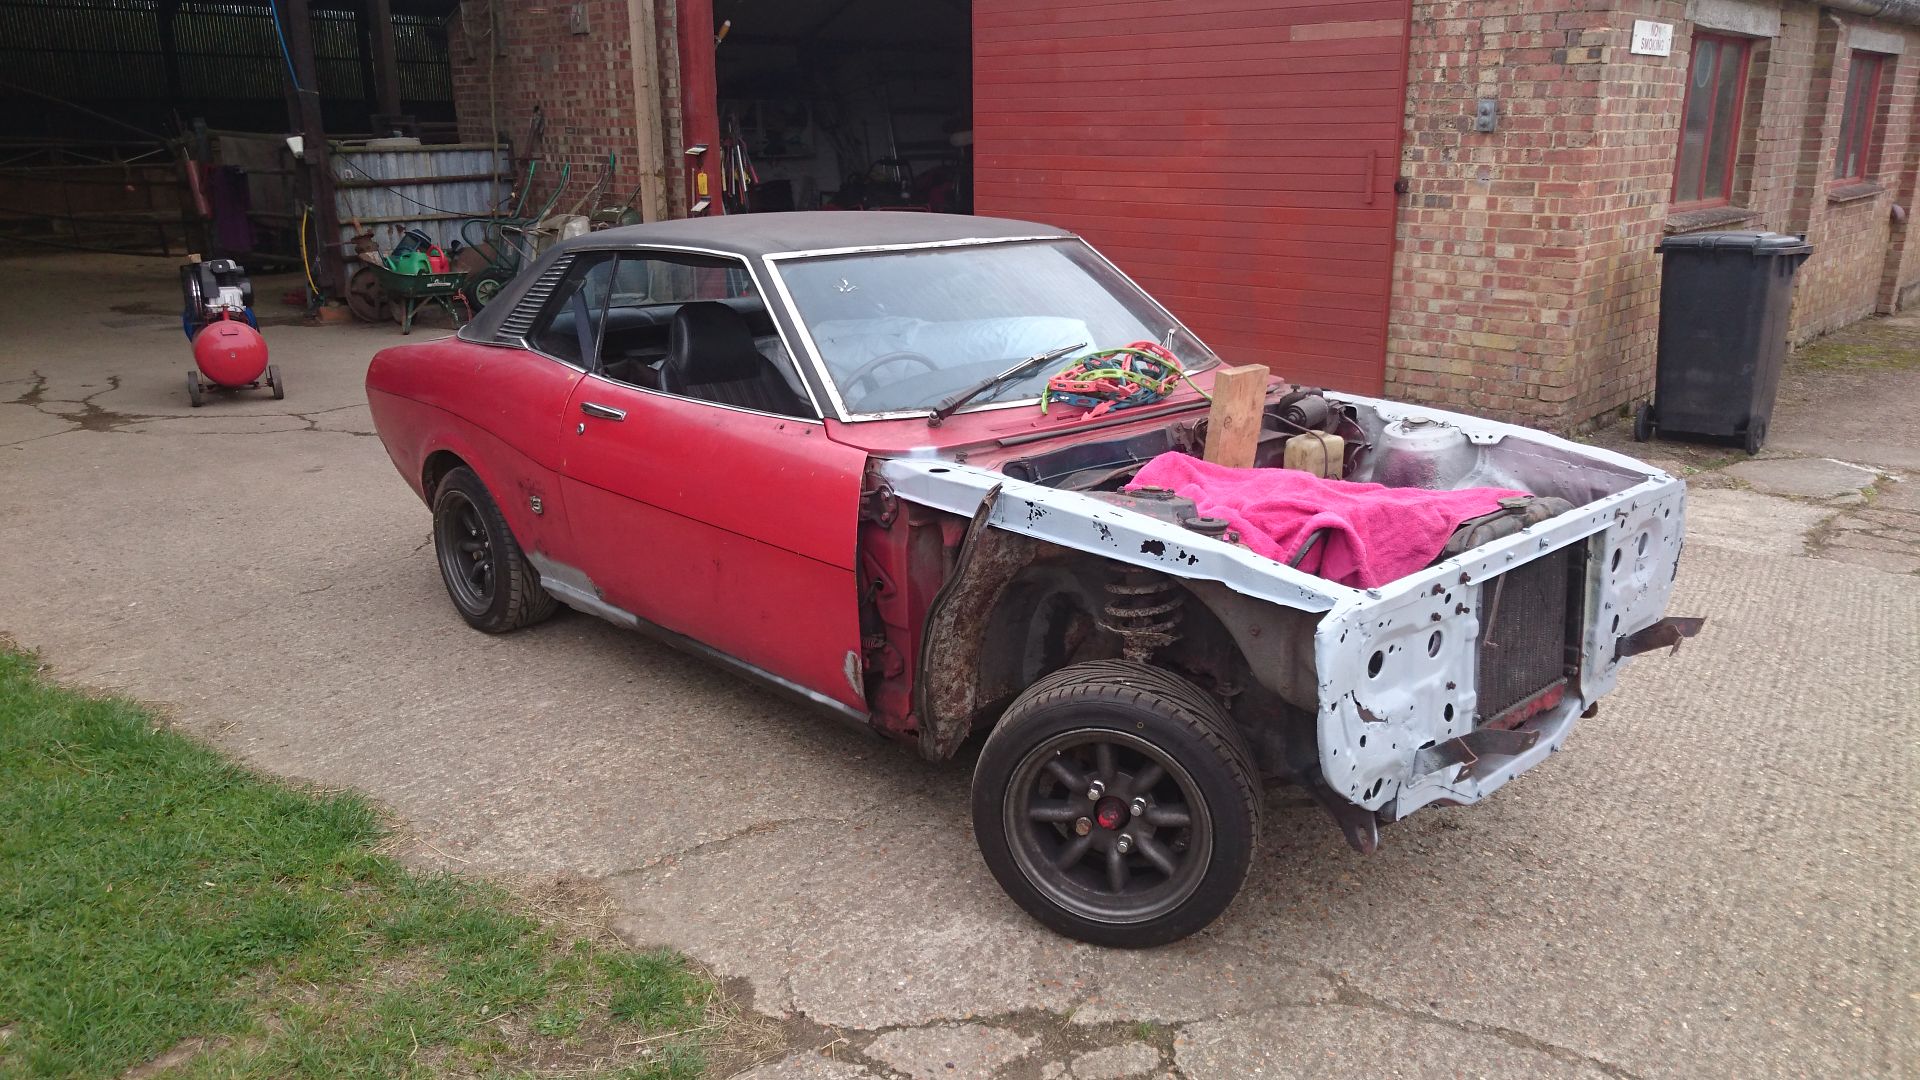
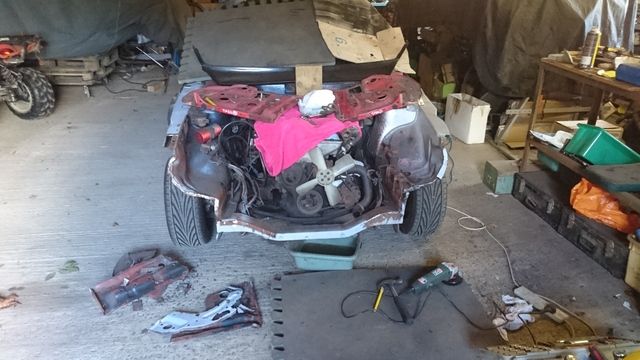
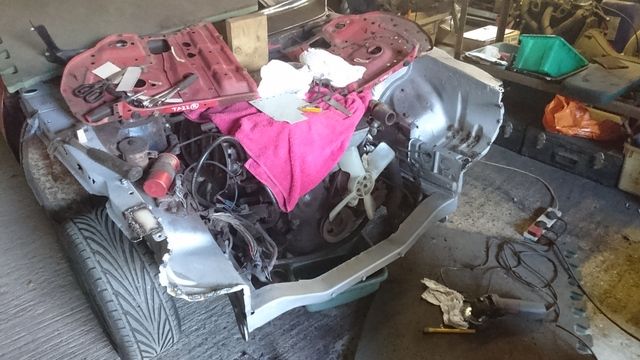
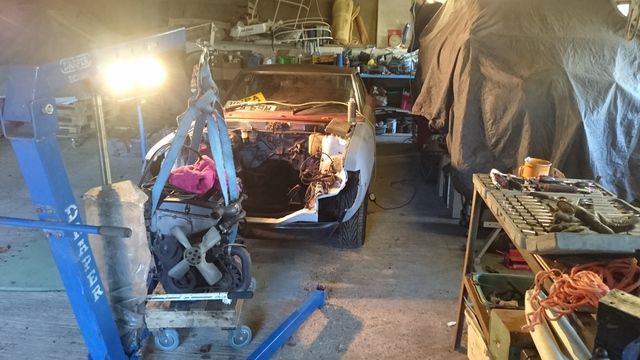
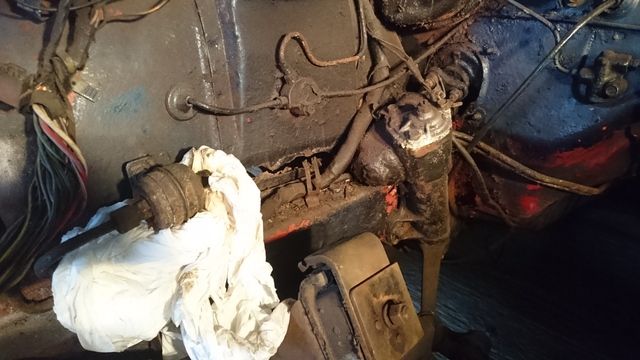
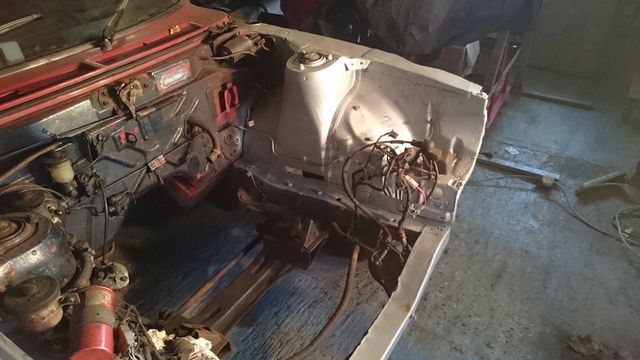
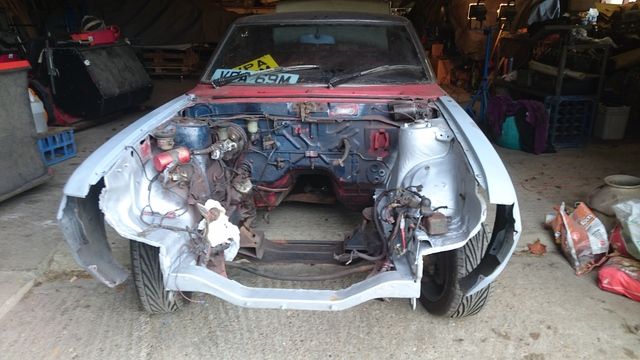
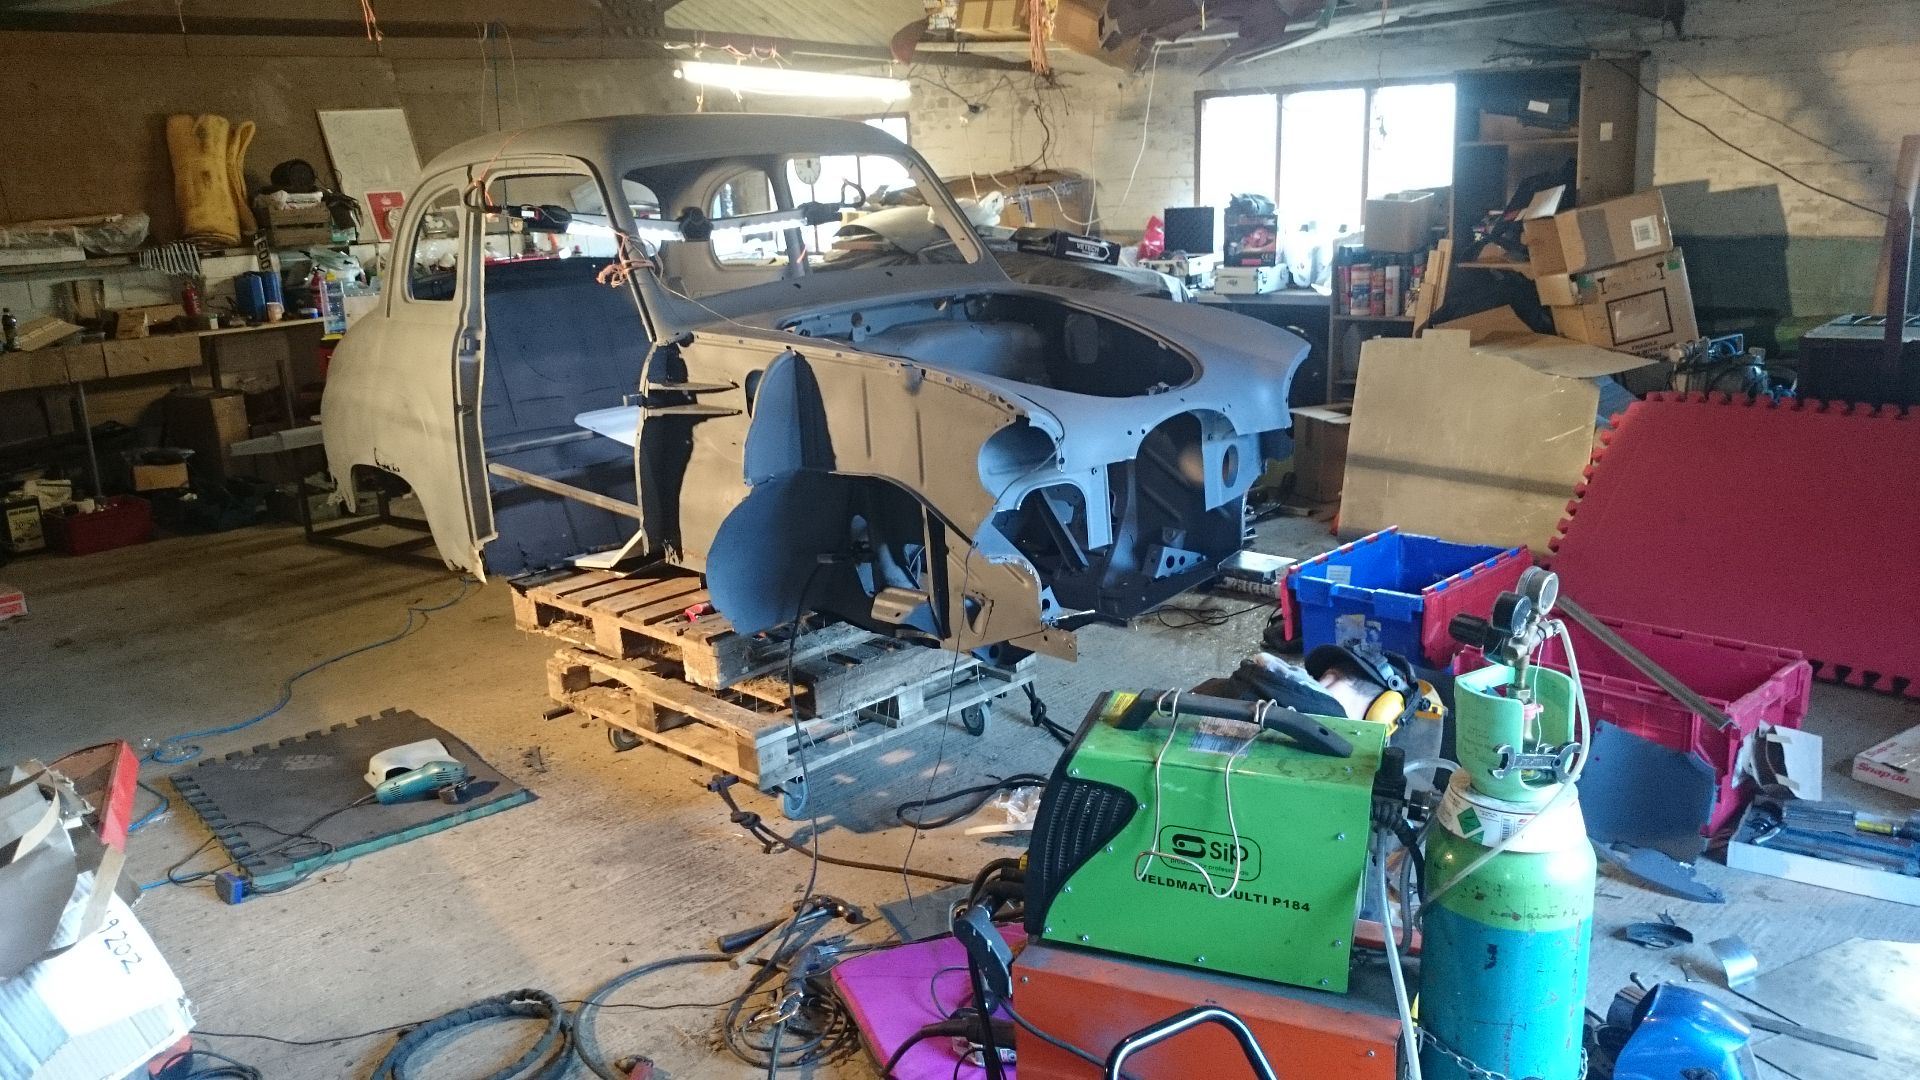
Well as predicted in the last installment for things to progress sometimes things have to go seemingly backwards. The car has a running engine that really needs little work other than to be driven, however the sides of the engine bay were looking a little worse for wear and needed to be sorted. So this is how saturday started:
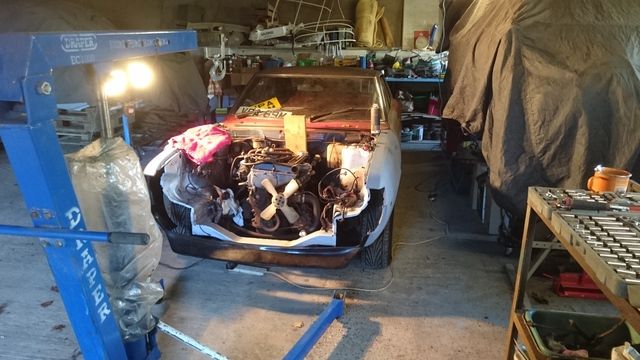
Which rather quickly escalated to this, without too much drama at all:
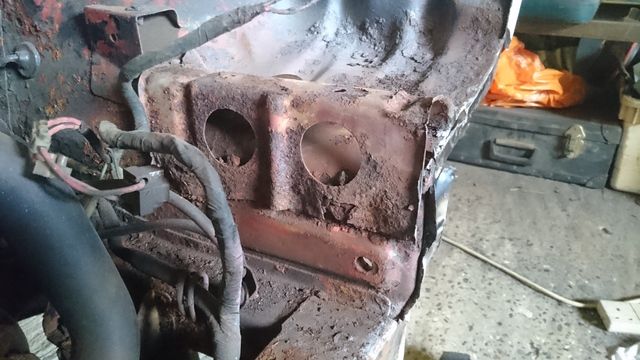
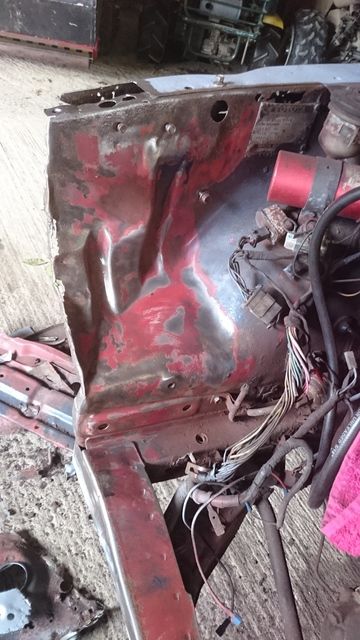
I could then start work on trying to clean up the slightly scabby inners wings and see what I'd be left with:
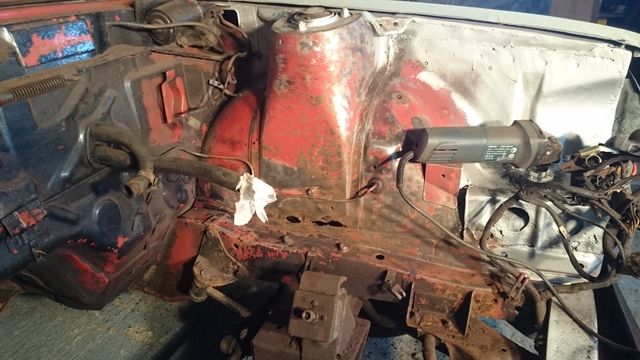
Rather surprisingly the wings proved to be better that I imagined and the bubbling rust spots I'd envisaged were no more than flaking hammerite where the PO had liberally applied it many years ago, on the whole thankfully it seemed to have protected the car rather well. There were however the two areas that I already knew about so these were cut back and cleaned up:
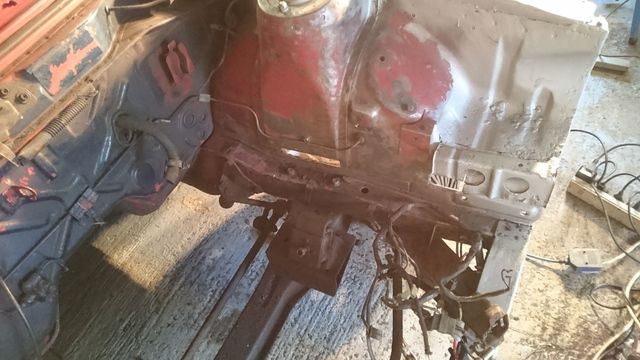
The other side wasn't much prettier - didn't fancy welding this up with a fuel line running rather close by!
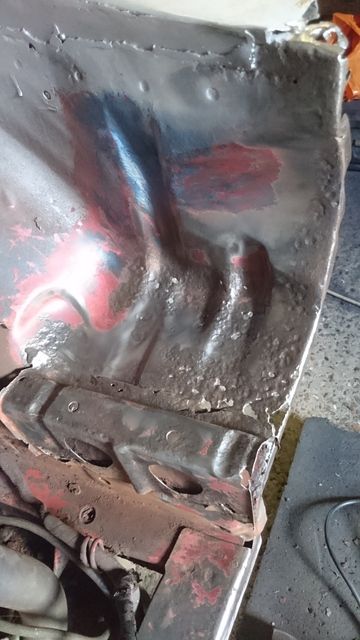
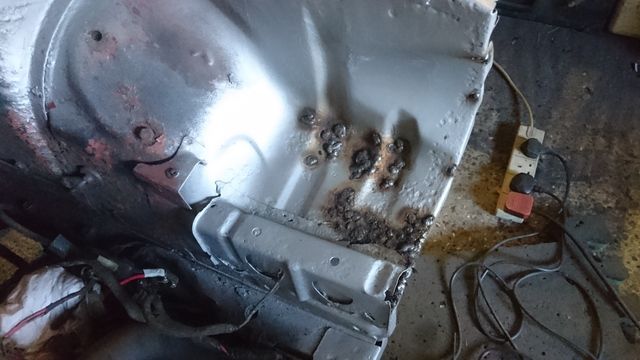
First side cleaned up and treated to a coat of weld through etch primer
and how things stood once I ran out of time as I had to give my car trailer a once over and sort a couple of other jobs.
I think the front end was a bit lighter by the time I was finished!
Will strip the rest of the bay next time so I can get it all welded and painted before the engine goes back in.
Sunday bought a little roadtrip to the south coast amongst the wind farms and MOD land in Lydd to collect some parts for another one of the other projects - just the job to keep SWMBO happy as it's really her baby.
Remember this?
Well it's now got a nice pair of these
The rest of the day just seemed to disappear so I never got any more time on the Celica, instead it was a relaxing eve in front of the fire to watch two blokes restoring a green lotus - oh to have the space and means they have.
Which rather quickly escalated to this, without too much drama at all:
I could then start work on trying to clean up the slightly scabby inners wings and see what I'd be left with:
Rather surprisingly the wings proved to be better that I imagined and the bubbling rust spots I'd envisaged were no more than flaking hammerite where the PO had liberally applied it many years ago, on the whole thankfully it seemed to have protected the car rather well. There were however the two areas that I already knew about so these were cut back and cleaned up:
The other side wasn't much prettier - didn't fancy welding this up with a fuel line running rather close by!
First side cleaned up and treated to a coat of weld through etch primer
and how things stood once I ran out of time as I had to give my car trailer a once over and sort a couple of other jobs.
I think the front end was a bit lighter by the time I was finished!
Will strip the rest of the bay next time so I can get it all welded and painted before the engine goes back in.
Sunday bought a little roadtrip to the south coast amongst the wind farms and MOD land in Lydd to collect some parts for another one of the other projects - just the job to keep SWMBO happy as it's really her baby.
Remember this?
Well it's now got a nice pair of these
The rest of the day just seemed to disappear so I never got any more time on the Celica, instead it was a relaxing eve in front of the fire to watch two blokes restoring a green lotus - oh to have the space and means they have.
Gassing Station | Readers' Cars | Top of Page | What's New | My Stuff