Land Rover 90 TD5 Tribute Build & Video Series
Discussion


https://www.youtube.com/watch?v=I3cKPF3G-08
This week, we've been mainly working on our engine, as well as inspecting the rear tub.
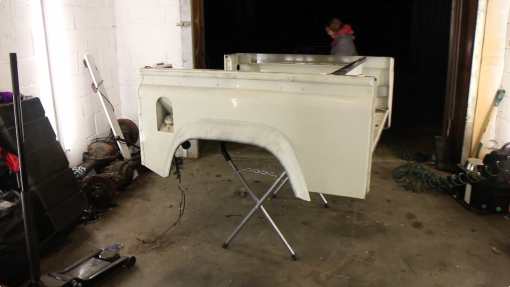
It's a good idea to get the tub sat on an body painting trestle. These can be found on eBay pretty reasonably. They give you really good access to the underside and as an added bonus, fold away when not needed.
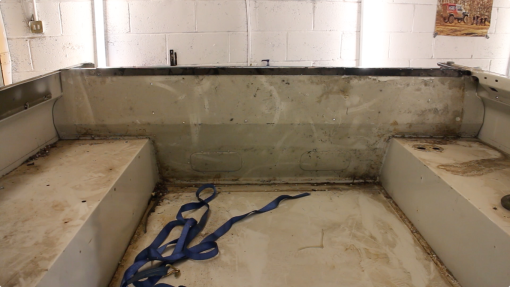
The inside of the tub has accumulated a lot of grime from the workshop and so it needed a good clean out. We used a strong road and traffic film remover to strip away any oils that might have been on the surfaces of the tub.
After cleaning, the body mappings have revealed some rust, not to worry, these are going to be blasted and then galved.
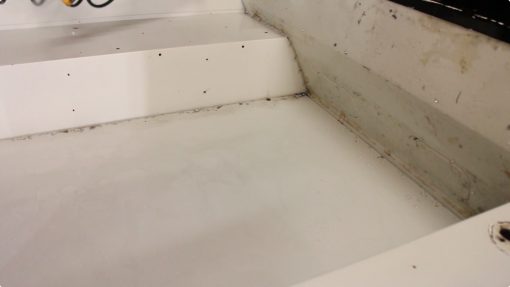
There are a lot of holes left in the tub. We'll try alloy brazing to fill them in.
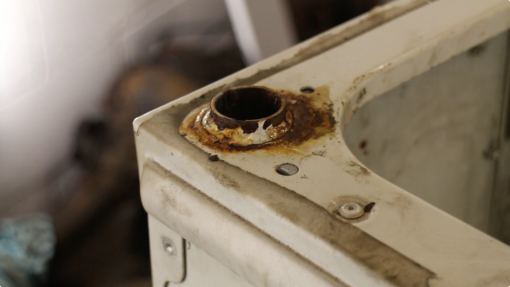
This seat belt mounting bracket is corroded, fortunately YRM metal solutions produces laser cut reproduction panels that we can simply rivet on. The part isn't too expensive either!
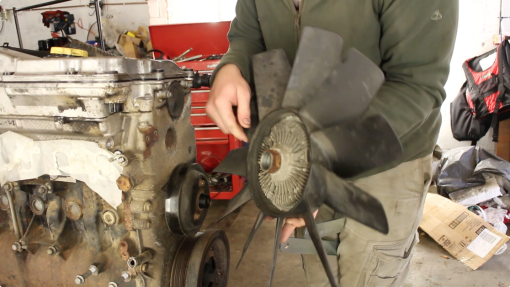
Use a TD5 / V8 Viscous fan set from FlatDog UK we removed the viscous fan in preparation for cleaning and painting the engine.
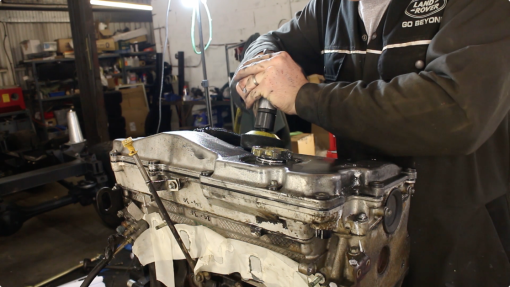
Using a 75mm air polisher and white diamond metal polish and sealer. Why are we polishing the rocker cover? Well, we're not refitting the acoustic cover on the engine, so we want it to look as good as the rest of the vehicle.
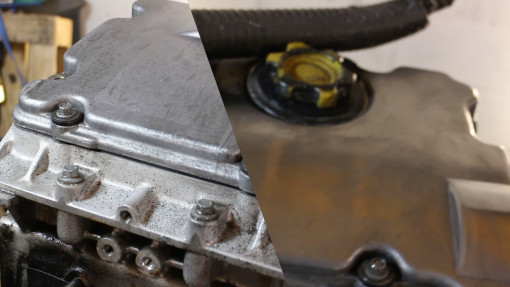
Here's a before and part way through, the White Diamond polish is great, it takes very little effort to get to the finish on the right. A few more passes and we'll have a chrome like finish that is protected from further oxidisation thanks to the sealer in the polishing compound.
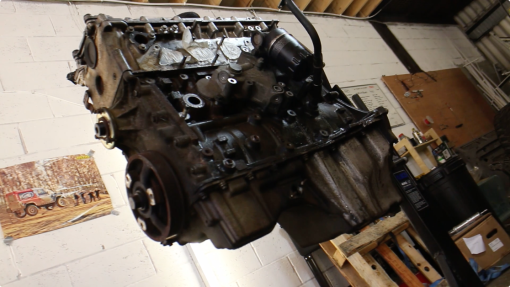
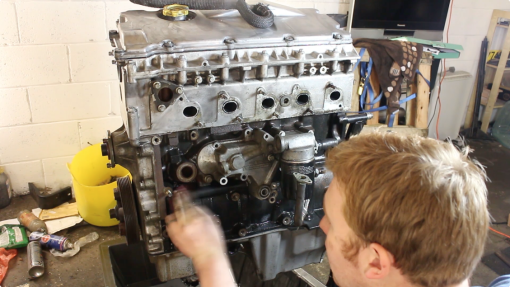
Then we moved onto cleaning the engine, which had a lot of baked on oils, carbon deposits, mud and corrosion.
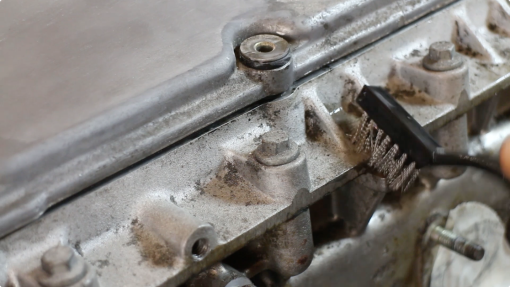
First, it was given a thorough scrub down with some small stainless steel wire brushes and a degreasing detergent.
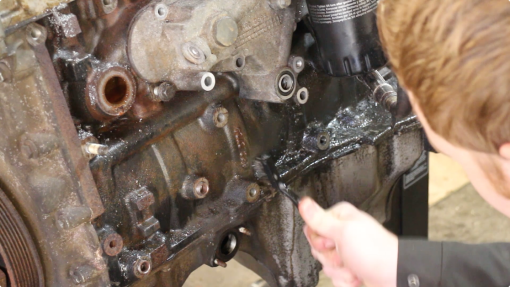
Once dry, we could then tackle the corrosion. Here we're working the corroded areas with the brush more, before switching to a dremel with a wire cup.
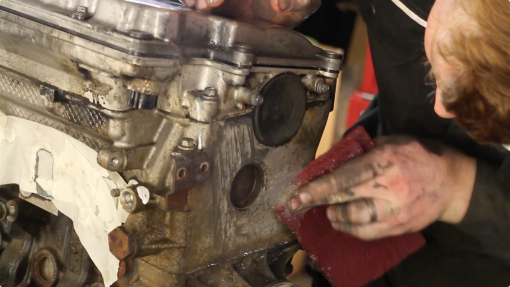
Areas such as the end of the block were pretty corroded so it was knocked back with a red scotchbrite pad, polished and then sealed.
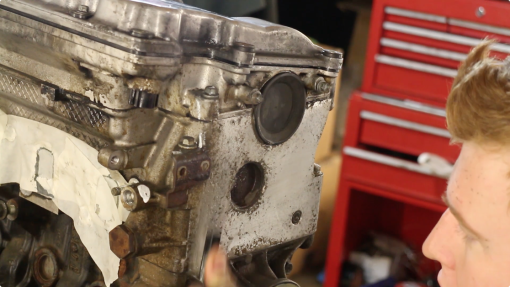
Still a little more corrosion that was removed with a flapper wheel on the dremel.]
This week, we've been mainly working on our engine, as well as inspecting the rear tub.

It's a good idea to get the tub sat on an body painting trestle. These can be found on eBay pretty reasonably. They give you really good access to the underside and as an added bonus, fold away when not needed.

The inside of the tub has accumulated a lot of grime from the workshop and so it needed a good clean out. We used a strong road and traffic film remover to strip away any oils that might have been on the surfaces of the tub.

After cleaning, the body mappings have revealed some rust, not to worry, these are going to be blasted and then galved.
There are a lot of holes left in the tub. We'll try alloy brazing to fill them in.

This seat belt mounting bracket is corroded, fortunately YRM metal solutions produces laser cut reproduction panels that we can simply rivet on. The part isn't too expensive either!

Use a TD5 / V8 Viscous fan set from FlatDog UK we removed the viscous fan in preparation for cleaning and painting the engine.

Using a 75mm air polisher and white diamond metal polish and sealer. Why are we polishing the rocker cover? Well, we're not refitting the acoustic cover on the engine, so we want it to look as good as the rest of the vehicle.

Here's a before and part way through, the White Diamond polish is great, it takes very little effort to get to the finish on the right. A few more passes and we'll have a chrome like finish that is protected from further oxidisation thanks to the sealer in the polishing compound.

Then we moved onto cleaning the engine, which had a lot of baked on oils, carbon deposits, mud and corrosion.
First, it was given a thorough scrub down with some small stainless steel wire brushes and a degreasing detergent.

Once dry, we could then tackle the corrosion. Here we're working the corroded areas with the brush more, before switching to a dremel with a wire cup.

Areas such as the end of the block were pretty corroded so it was knocked back with a red scotchbrite pad, polished and then sealed.

Still a little more corrosion that was removed with a flapper wheel on the dremel.]


https://youtu.be/3ofuyHLnue0

Recon Gearboxes LTD completed our R380 and it's looking superb! We're having the brackets blasted and galved so hope to put that back in soon!
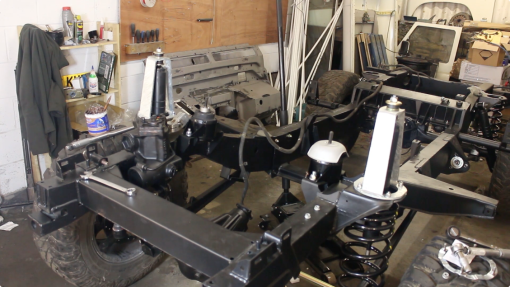
Following a suggestion from one of the forum posts we've been running for the build, we swapped our Britpart galvanised turrets for some heavy duty
http://www.gwynlewis4x4.co.uk/product/std-height-h...
. These replacement turrets are stronger, galvanised, easier to clean / maintain and once fitted, will make shock replacement much faster! These have been designed for challenge trucks and are extremely well made. We're also fitting matching
http://www.gwynlewis4x4.co.uk/product/heavy-duty-f...
. These have 10.9 tensile bolts welded into the ring and feature a chamfered edge to stop tyres rubbing at full articulation.
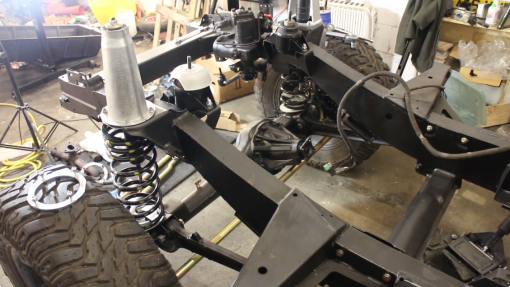
Fitting these turrets is a doddle. The easiest way is to undo the lower nut on the shock, then jack the chassis up to release the spring from it's seat about an inch or two.
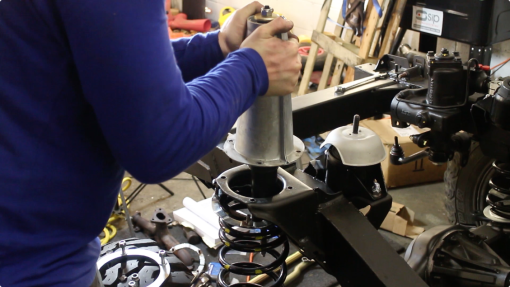
Then, if you unbolt the access panel in the wheel arch, and carefully undo the four nuts on the ring, the whole assembly will lift out in one piece. You may have to use a propane torch on the nuts as these can shear quite easily on corroded parts.
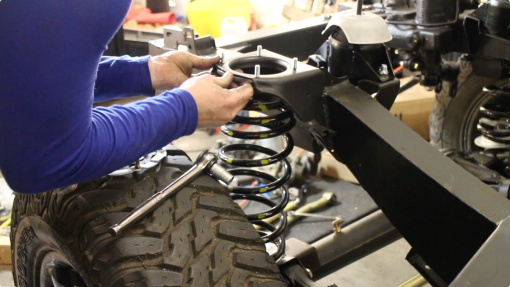
Then the ring can be slipped into place, the turret offered up and bolted down to 24nm or 17.7lb ft.
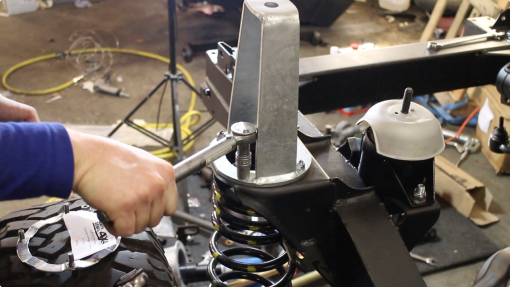
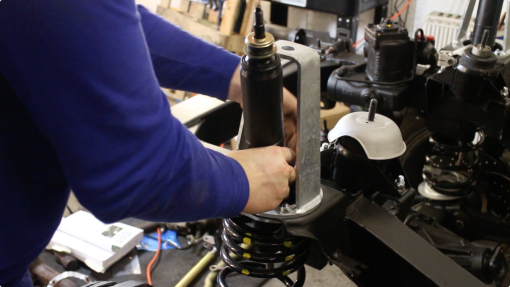
One key benefit of the Gwynn Lewis shock is that you can fit a shock absorber without removing the turret or spring.
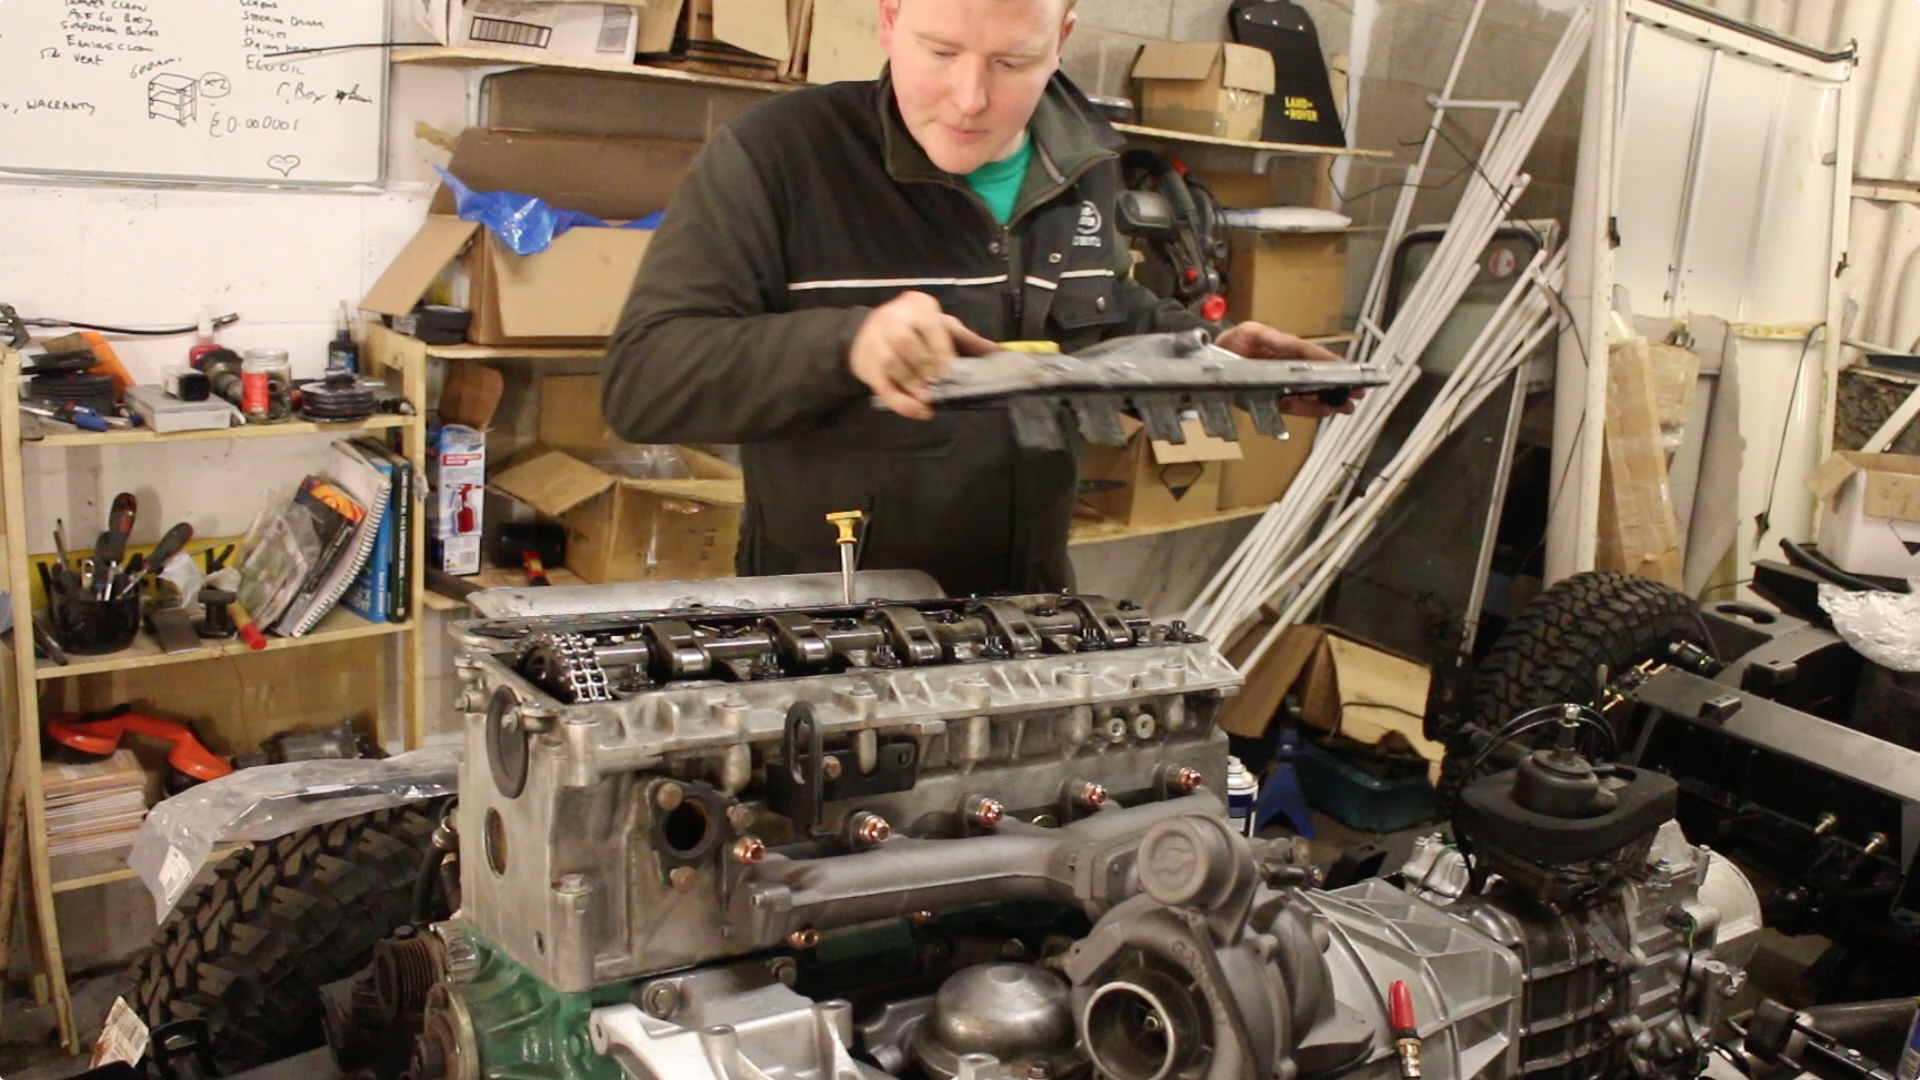
Engine Painting
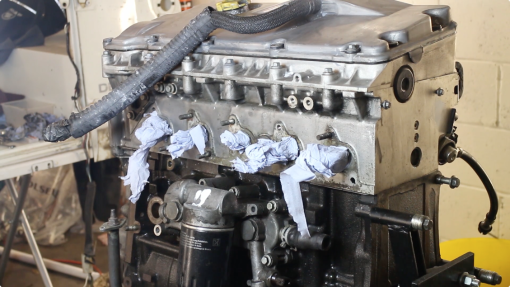
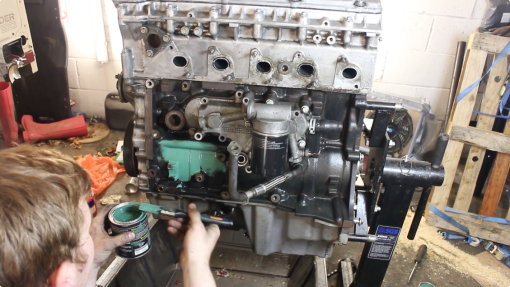
The TD5 rocker cover has been polished up and cleaned, so now it's the blocks turn for some attention. First off, all holes are plugged and bolts are temporarily placed back into their holes.
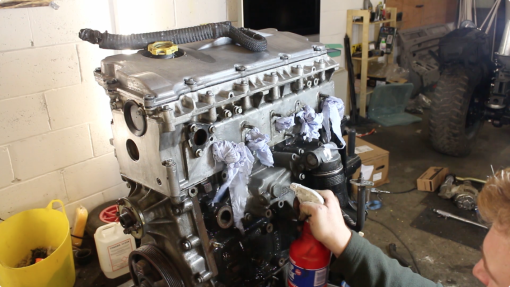
Look how clean that head is! Took a lot of work, but the results are worth it! Now using a bottle of brake cleaner, the block was throughly scrubbed down and agitated with brushes.
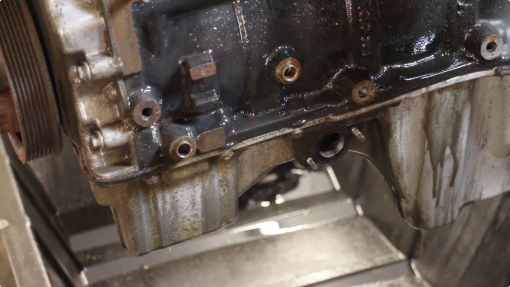
This is why it's so important! Even after 3 wash downs already, there's still dirt and oil left behind!
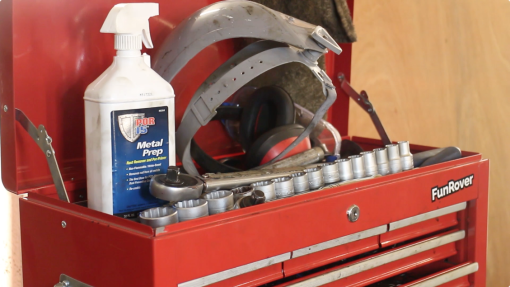
I'm using POR 15 Engine Enamel from
http://Frost.co.uk]
to paint the block, it is recommended that bare aluminium surfaces should be treated with metal prep first before painting.
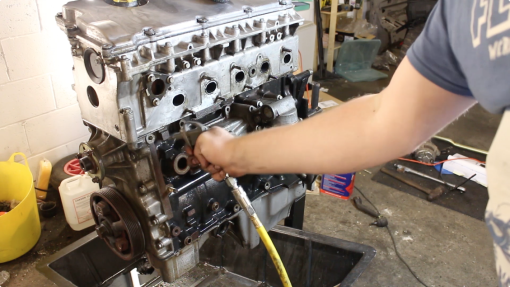
Then blown down with the air gun to get rid of any final bits of debris and moisture that might effect our paint.
Almost ready to paint, I keyed off the surface with a 3M scrotchbrite pad, just for a little extra adhesion!
Finally! Painting time! I'm using a good quality brush and POR 15 Engine enamel from Frost. It's designed specifically to be used on engine blocks so will withstand higher temperatures and comes in a selection of colours. I've chosen Buick Green, which is as near as makes no difference to the final build colour, Pastel Green. This colour has become ever so popular recently, however, I bought mine about a year ago. Oh well, this is one Defender that isn't just following the crowd!
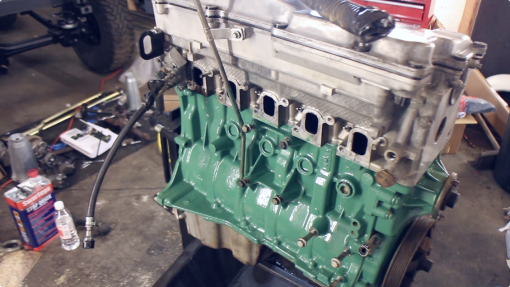
Looks good! Need to leave this 6 days to fully cure before starting the engine, but we can be on with putting it back in over the next week!
Engine Mounts
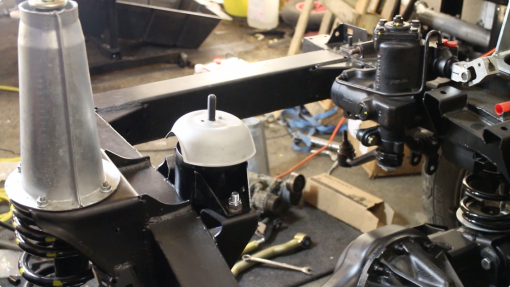
Engine mounts have been refitted, we've replaced the tired originals for some OEM replacements. These need to be torqued to 85NM. We also took the time to shot blast the original heat shield and paint that in a high temperature spray paint.
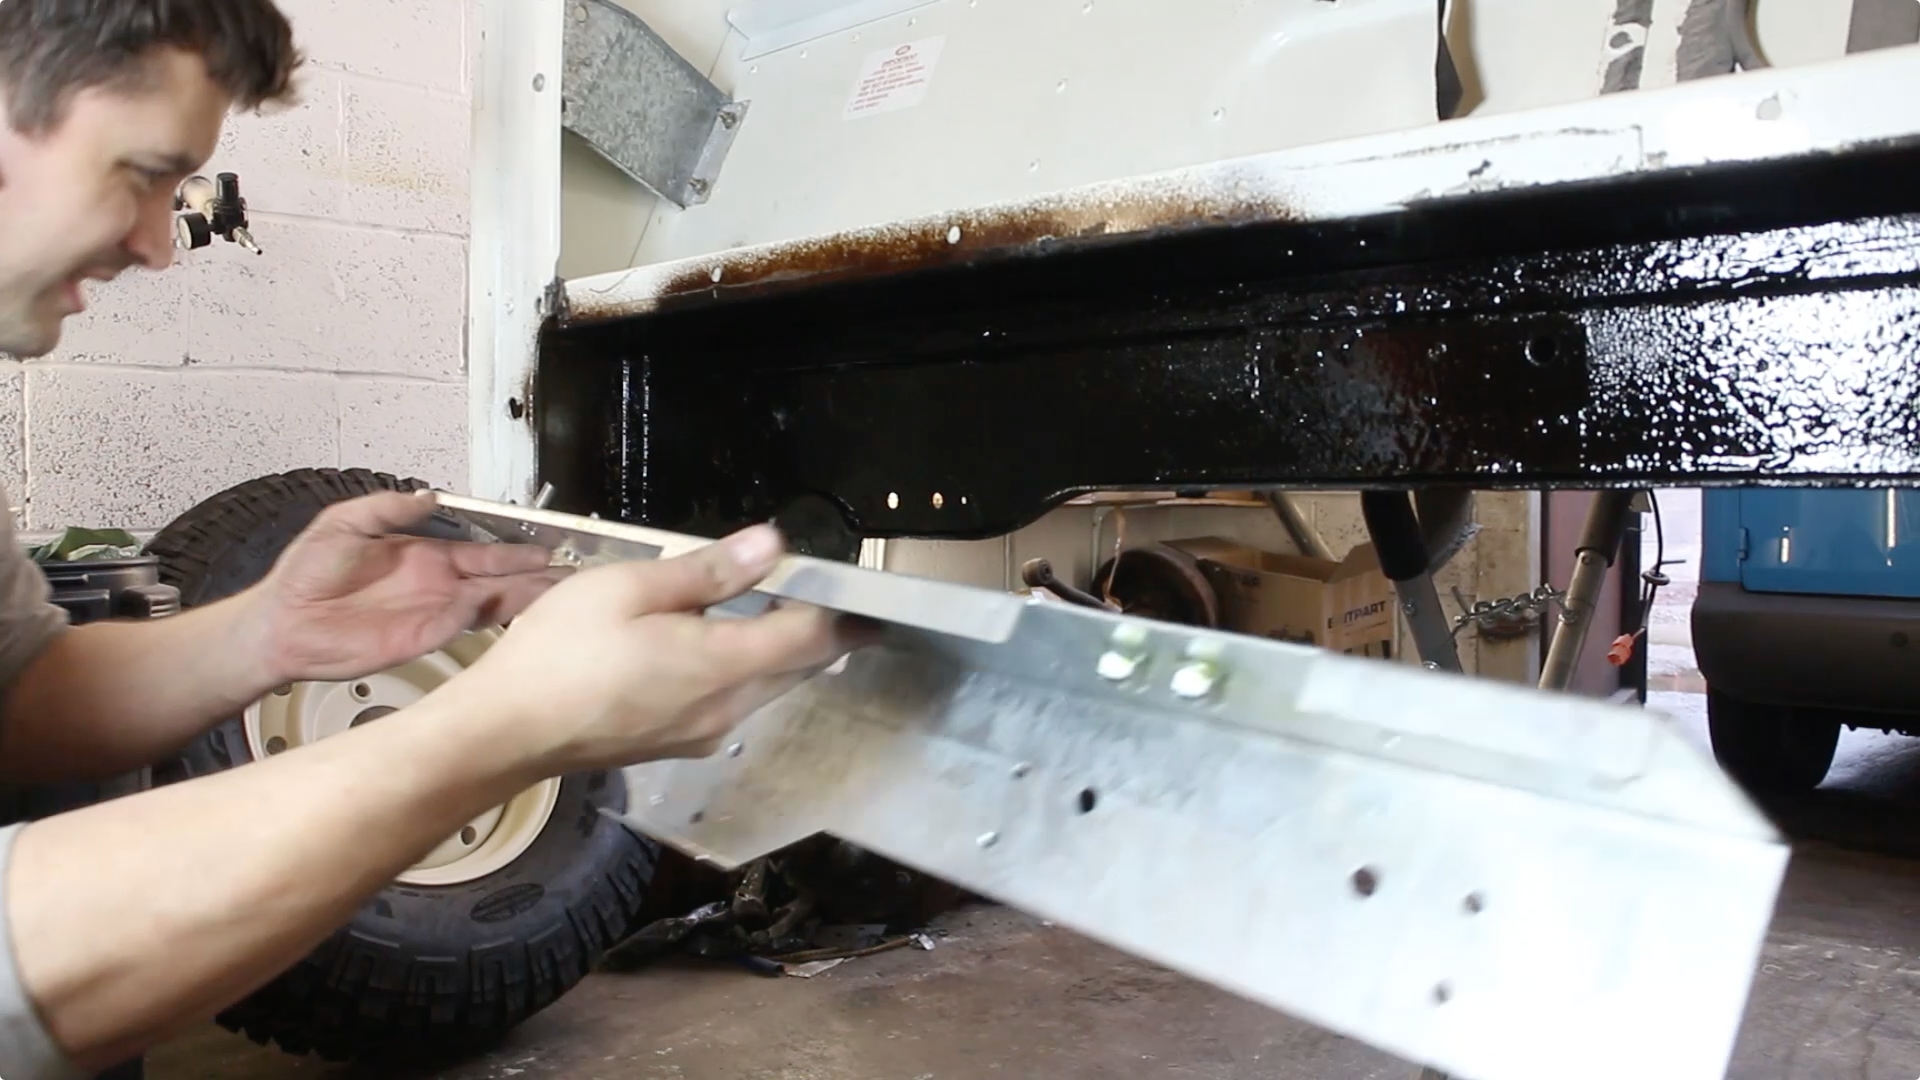
Fuel Tank and Guard
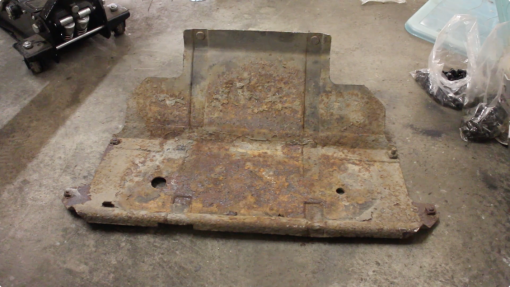
The old fuel tank guard looks a bit sorry for itself. On the TD5 90 this is all that holds the fuel tank in place - it also offers a little protection against terrain when off-roading. We could have replaced it with an original style guard, but these were actually more expensive than an aftermarket, heavy duty galvanised guard (bought from
http://paddockspares.com]
). So we cleaned up the tank, and fitted up the replacement item
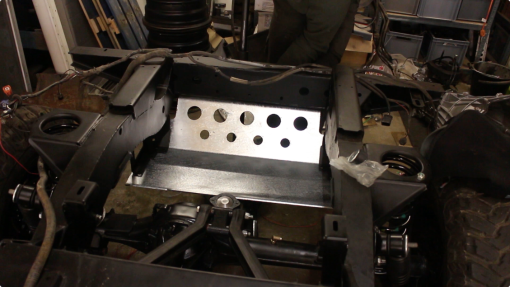
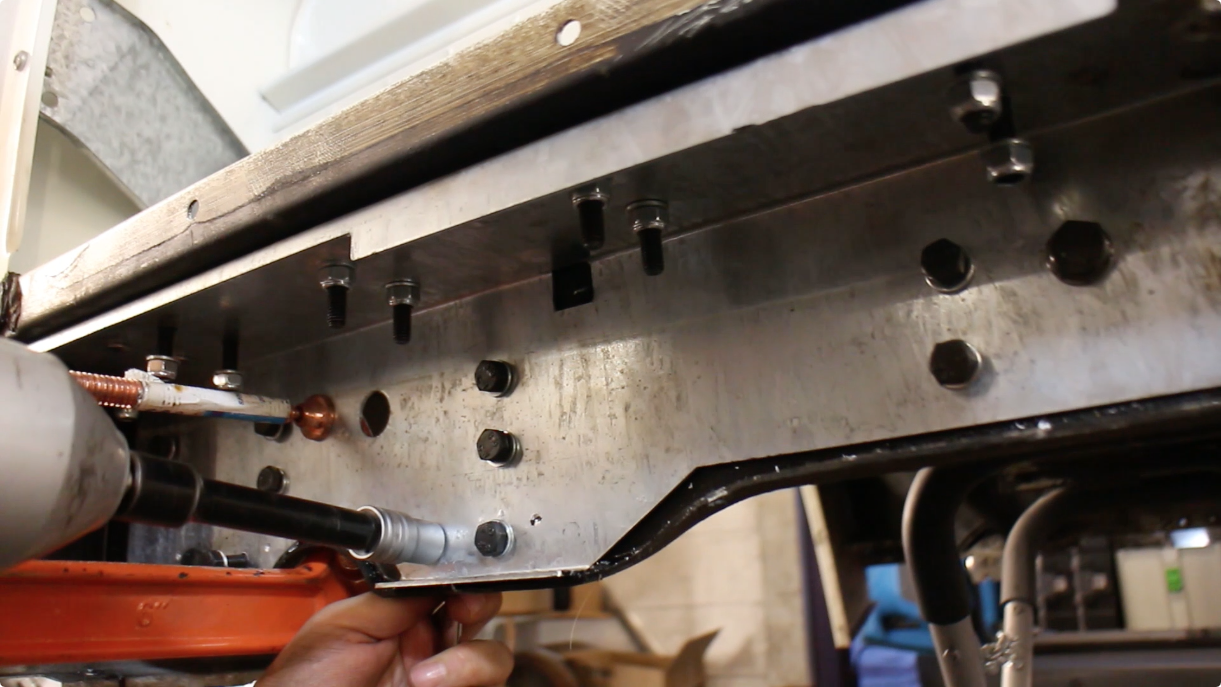
I used a trolley jack to line it up and hold the guard in place, it's quite cumbersome to do this on your back by yourself. Once bolted up, it looks great and is very tough! I can stand on the guard and it will take all 16 stone (100kg) of me no worries.
A great value replacement / upgrade!
Recon Gearboxes LTD completed our R380 and it's looking superb! We're having the brackets blasted and galved so hope to put that back in soon!
Following a suggestion from one of the forum posts we've been running for the build, we swapped our Britpart galvanised turrets for some heavy duty
http://www.gwynlewis4x4.co.uk/product/std-height-h...
. These replacement turrets are stronger, galvanised, easier to clean / maintain and once fitted, will make shock replacement much faster! These have been designed for challenge trucks and are extremely well made. We're also fitting matching
http://www.gwynlewis4x4.co.uk/product/heavy-duty-f...
. These have 10.9 tensile bolts welded into the ring and feature a chamfered edge to stop tyres rubbing at full articulation.
Fitting these turrets is a doddle. The easiest way is to undo the lower nut on the shock, then jack the chassis up to release the spring from it's seat about an inch or two.
Then, if you unbolt the access panel in the wheel arch, and carefully undo the four nuts on the ring, the whole assembly will lift out in one piece. You may have to use a propane torch on the nuts as these can shear quite easily on corroded parts.
Then the ring can be slipped into place, the turret offered up and bolted down to 24nm or 17.7lb ft.
One key benefit of the Gwynn Lewis shock is that you can fit a shock absorber without removing the turret or spring.
Engine Painting
The TD5 rocker cover has been polished up and cleaned, so now it's the blocks turn for some attention. First off, all holes are plugged and bolts are temporarily placed back into their holes.
Look how clean that head is! Took a lot of work, but the results are worth it! Now using a bottle of brake cleaner, the block was throughly scrubbed down and agitated with brushes.
This is why it's so important! Even after 3 wash downs already, there's still dirt and oil left behind!
I'm using POR 15 Engine Enamel from
http://Frost.co.uk]
to paint the block, it is recommended that bare aluminium surfaces should be treated with metal prep first before painting.
Then blown down with the air gun to get rid of any final bits of debris and moisture that might effect our paint.
Almost ready to paint, I keyed off the surface with a 3M scrotchbrite pad, just for a little extra adhesion!
Finally! Painting time! I'm using a good quality brush and POR 15 Engine enamel from Frost. It's designed specifically to be used on engine blocks so will withstand higher temperatures and comes in a selection of colours. I've chosen Buick Green, which is as near as makes no difference to the final build colour, Pastel Green. This colour has become ever so popular recently, however, I bought mine about a year ago. Oh well, this is one Defender that isn't just following the crowd!
Looks good! Need to leave this 6 days to fully cure before starting the engine, but we can be on with putting it back in over the next week!
Engine Mounts
Engine mounts have been refitted, we've replaced the tired originals for some OEM replacements. These need to be torqued to 85NM. We also took the time to shot blast the original heat shield and paint that in a high temperature spray paint.
Fuel Tank and Guard
The old fuel tank guard looks a bit sorry for itself. On the TD5 90 this is all that holds the fuel tank in place - it also offers a little protection against terrain when off-roading. We could have replaced it with an original style guard, but these were actually more expensive than an aftermarket, heavy duty galvanised guard (bought from
http://paddockspares.com]
). So we cleaned up the tank, and fitted up the replacement item
I used a trolley jack to line it up and hold the guard in place, it's quite cumbersome to do this on your back by yourself. Once bolted up, it looks great and is very tough! I can stand on the guard and it will take all 16 stone (100kg) of me no worries.
A great value replacement / upgrade!
https://youtu.be/9VCDqXqbCqg
[url=http://funrover.com/wp-content/uploads/2015/11/Screen-Shot-2015-11-27-at-12.44.57.png]
[/url]
This week, I've had my better half working on the bulkhead, removing the remains of the seam sealer so the bulkhead can be sent off to the shot blasters, then to the galvanisers and back to me for painting.
[url=http://funrover.com/wp-content/uploads/2015/11/Screen-Shot-2015-11-27-at-12.45.29.png]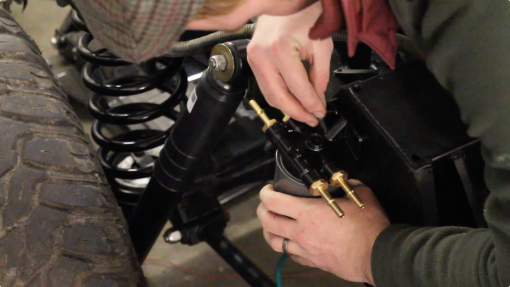
[/url]
The filter housing corrodes on the TD5, the one we removed was unusable. I replaced it with this new part which is anodised and also took the time to spray the casting cavity with Dinitrol.
[url=http://funrover.com/wp-content/uploads/2015/11/Screen-Shot-2015-11-27-at-12.47.05.png]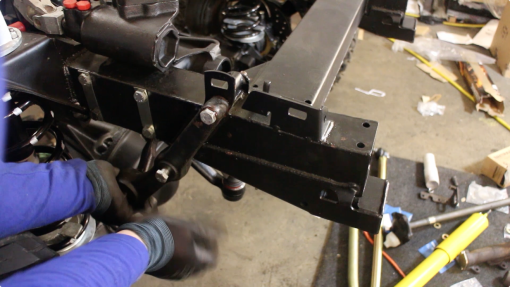
[/url]
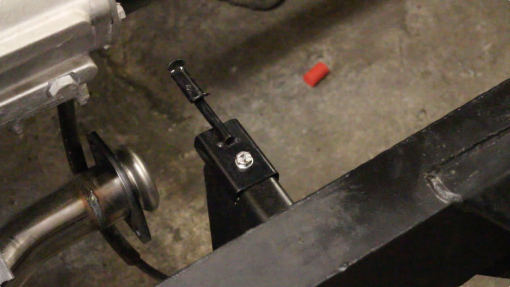
Then I fitted up this bracket, ready to accept the panhard rod.
[url=http://funrover.com/wp-content/uploads/2015/11/Screen-Shot-2015-11-27-at-12.49.43.png]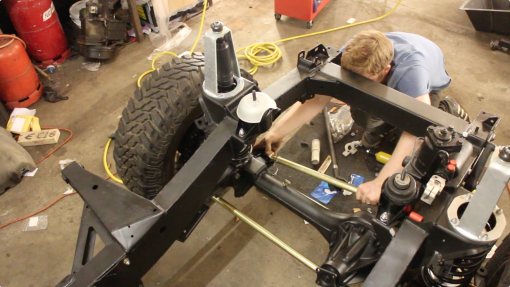
[/url]
I've chosen to use a heavy duty adjustable panhard rod from Terrafirma. It's well made and looks good. I had to tap it in place with a soft faced hammer.
[url=http://funrover.com/wp-content/uploads/2015/11/Screen-Shot-2015-11-27-at-12.51.27.png]
[/url]
To get it to fit, I had to adjust it slightly - then use a screwdriver to align the bolt hole. Both bolts then need*torquing*down. I'm having the Defender professionally set-up and aligned at a later date, so the steering arms e.t.c will be adjusted then.
[url=http://funrover.com/wp-content/uploads/2015/11/Screen-Shot-2015-11-27-at-12.54.25.png]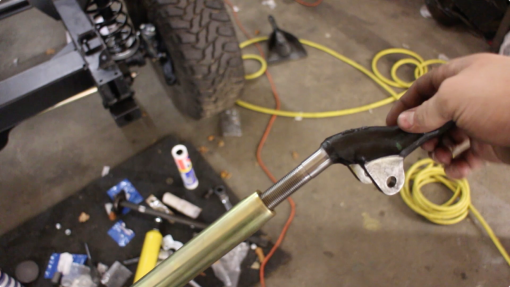
[/url]
Then I fitted the cross rod eye into the steering arm. This has a counter clockwise thread so it tightens opposite to what you're normally used to.
[url=http://funrover.com/wp-content/uploads/2015/11/Screen-Shot-2015-11-27-at-12.56.03.png]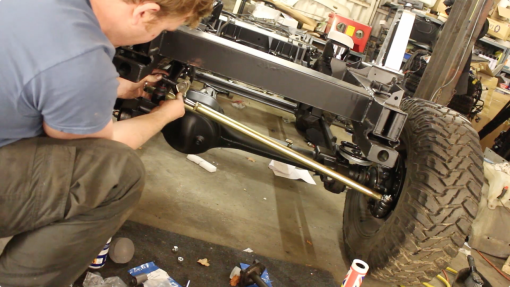
[/url]
Then offered up the steering arm. Unfortunately, I've lost the castellated nuts that go onto the track rods so will need to replace those, along with the split pins.
[url=http://funrover.com/wp-content/uploads/2015/11/Screen-Shot-2015-11-27-at-12.57.22.png]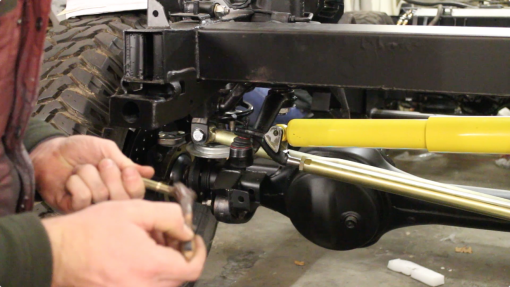
[/url]
Next I dropped in the new Old Man Emu steering damper. This is a very heavy duty damper, it's fairly easy to fit though I did have to file down the lower bush race slightly (mostly just the powder coat really).
[url=http://funrover.com/wp-content/uploads/2015/11/Screen-Shot-2015-11-27-at-12.59.07.png]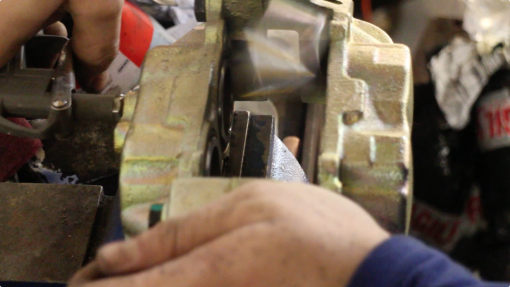
[/url]
Moving onto the brake callipers, we were shot blasting our old ones, which brought them up a treat. But when you have 4 callipers that need blasting, painting, the seals replacing then refitting 0 the time taken quickly adds up. So, the decision was made to replace them with 4 OEM new brake callipers. We are also swapping*the standard steel*piston callipers with stainless steel replacements. In the past, I've had to rebuild the brakes almost everytime I swapped brake pads - as we cover very little miles in the Land Rover, it allows the callipers to corrode. Then when you come along to replace the pads, the callipers will not retract. Lots of people say "just force them", but if your pistons are binding, this is more friction and thus a less efficient brake.
[url=http://funrover.com/wp-content/uploads/2015/11/Screen-Shot-2015-11-27-at-13.00.37.png]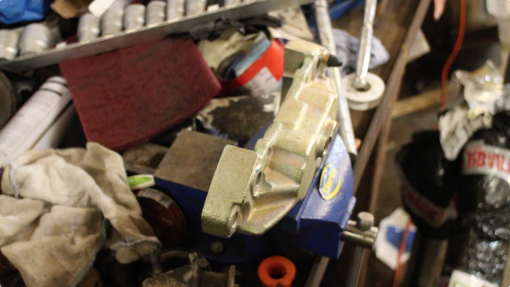
[/url]
The easiest way to remove the old pistons is using an air line and blow gun. Be careful though, they fly out with tremendous force! I've had caliber pistons fly 30 feet easily! Then unbolt the calliper halves (this is not recommended by us or any brake manufacturer) but if you do so - you must have a spotlessly clean work area.
[url=http://funrover.com/wp-content/uploads/2015/11/Screen-Shot-2015-11-27-at-13.03.49.png]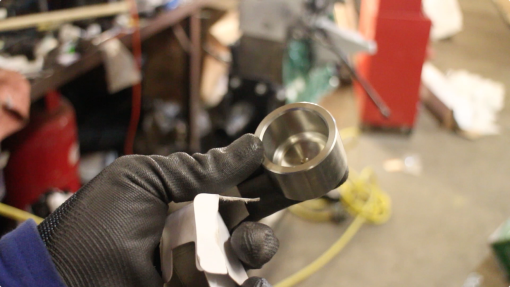
[/url]
This is the*stainless steel replacement, they can be picked up quite reasonably nowadays and should prevent any problems in the future!
[url=http://funrover.com/wp-content/uploads/2015/11/Screen-Shot-2015-11-27-at-13.04.56.png]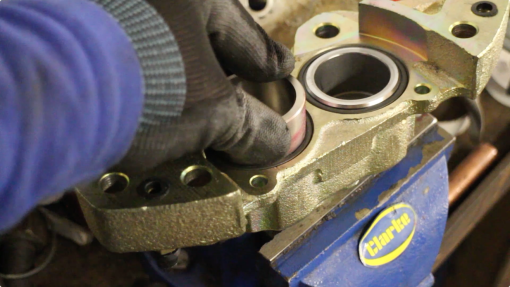
[/url]
When assembling, smear Red Rubber Grease on the piston calliper. These has numerous benefits:[list][*]It prolongs the life of the rubber seal[*]It reduces the effects of wear from moving parts[*]It helps helps to resist*water ingress / hydroscopic action[*]It's a rust inhibitor[/list]Once smeared in red rubber grease, the piston*should slide smoothly back into place. Repeat for the remaining pistons. When doing the calliper bolts up, it's best to do these as tight as you can.
[url=http://funrover.com/wp-content/uploads/2015/11/Screen-Shot-2015-11-27-at-13.07.06.png]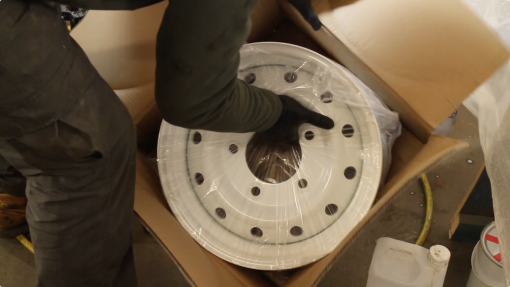
[/url]
We sold our 90's old wheels. These were aftermarket & oversized*alloys that wouldn't suit our build, to a fellow Land Rover enthusiast and FunRover fan. In their place, we're fitting Wolf steel rims. We're trying to stick very closely to Land Rover factory fitment options so these suit our build perfectly, whilst still giving us a more vintage Land Rover appearance. Wolf rims are also impressively strong with a high load ratings per corner. These need painting though to match our concept drawings. We've chosen the classic Land Rover wheel colour: Limestone.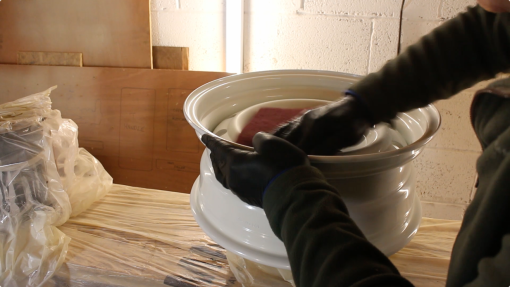 Throughly keying*off our wheels with a 3M red scotchbrite*pad, and blowing away the resulting dust. Anywhere that isn't keyed off will likely not adhere correctly with the paint.
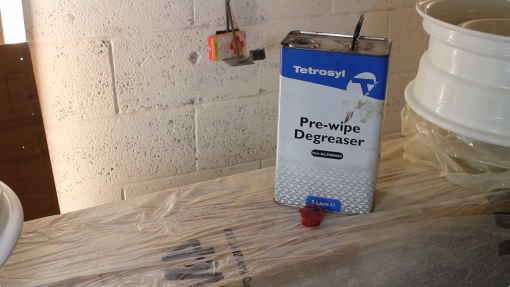 The whole rim was degreased. After the degreaser evaporated, it was then tack clothed.
[url=http://funrover.com/wp-content/uploads/2015/11/Screen-Shot-2015-11-27-at-13.19.23.png]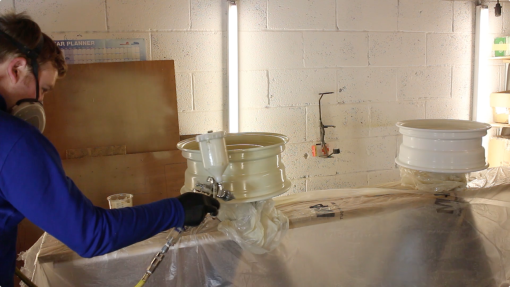
[/url]
Finally, onto painting. We're using a single pack, matt finish acrylic enamel. This one uses Xylene industrial thinners, at a ratio of around 10 / 15%. However, since it's so cold in the workshop, I had to add more to suit. A light coat of paint was added for*the first layer. Subsequent layers were*medium wet. We;d been firing up the space heater prior to painting to raise the ambient temperature and burn off some of the humidity. Paints work best when applied around 20 degrees, so the closer to this mark you get, the better.
[url=http://funrover.com/wp-content/uploads/2015/11/Screen-Shot-2015-11-27-at-13.22.29.jpg]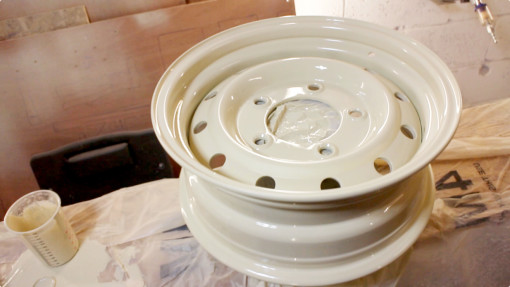
[/url]
The wheels will then be left to cure for a week at least before mounting the tyres. The coat here is still drying, hence the high gloss appearance.
[url=http://funrover.com/wp-content/uploads/2015/11/Screen-Shot-2015-11-27-at-12.44.57.png]
[/url]
This week, I've had my better half working on the bulkhead, removing the remains of the seam sealer so the bulkhead can be sent off to the shot blasters, then to the galvanisers and back to me for painting.
[url=http://funrover.com/wp-content/uploads/2015/11/Screen-Shot-2015-11-27-at-12.45.29.png]
[/url]
The filter housing corrodes on the TD5, the one we removed was unusable. I replaced it with this new part which is anodised and also took the time to spray the casting cavity with Dinitrol.
[url=http://funrover.com/wp-content/uploads/2015/11/Screen-Shot-2015-11-27-at-12.47.05.png]
[/url]
Then I fitted up this bracket, ready to accept the panhard rod.
[url=http://funrover.com/wp-content/uploads/2015/11/Screen-Shot-2015-11-27-at-12.49.43.png]
[/url]
I've chosen to use a heavy duty adjustable panhard rod from Terrafirma. It's well made and looks good. I had to tap it in place with a soft faced hammer.
[url=http://funrover.com/wp-content/uploads/2015/11/Screen-Shot-2015-11-27-at-12.51.27.png]
[/url]
To get it to fit, I had to adjust it slightly - then use a screwdriver to align the bolt hole. Both bolts then need*torquing*down. I'm having the Defender professionally set-up and aligned at a later date, so the steering arms e.t.c will be adjusted then.
[url=http://funrover.com/wp-content/uploads/2015/11/Screen-Shot-2015-11-27-at-12.54.25.png]
[/url]
Then I fitted the cross rod eye into the steering arm. This has a counter clockwise thread so it tightens opposite to what you're normally used to.
[url=http://funrover.com/wp-content/uploads/2015/11/Screen-Shot-2015-11-27-at-12.56.03.png]
[/url]
Then offered up the steering arm. Unfortunately, I've lost the castellated nuts that go onto the track rods so will need to replace those, along with the split pins.
[url=http://funrover.com/wp-content/uploads/2015/11/Screen-Shot-2015-11-27-at-12.57.22.png]
[/url]
Next I dropped in the new Old Man Emu steering damper. This is a very heavy duty damper, it's fairly easy to fit though I did have to file down the lower bush race slightly (mostly just the powder coat really).
[url=http://funrover.com/wp-content/uploads/2015/11/Screen-Shot-2015-11-27-at-12.59.07.png]
[/url]
Moving onto the brake callipers, we were shot blasting our old ones, which brought them up a treat. But when you have 4 callipers that need blasting, painting, the seals replacing then refitting 0 the time taken quickly adds up. So, the decision was made to replace them with 4 OEM new brake callipers. We are also swapping*the standard steel*piston callipers with stainless steel replacements. In the past, I've had to rebuild the brakes almost everytime I swapped brake pads - as we cover very little miles in the Land Rover, it allows the callipers to corrode. Then when you come along to replace the pads, the callipers will not retract. Lots of people say "just force them", but if your pistons are binding, this is more friction and thus a less efficient brake.
[url=http://funrover.com/wp-content/uploads/2015/11/Screen-Shot-2015-11-27-at-13.00.37.png]
[/url]
The easiest way to remove the old pistons is using an air line and blow gun. Be careful though, they fly out with tremendous force! I've had caliber pistons fly 30 feet easily! Then unbolt the calliper halves (this is not recommended by us or any brake manufacturer) but if you do so - you must have a spotlessly clean work area.
[url=http://funrover.com/wp-content/uploads/2015/11/Screen-Shot-2015-11-27-at-13.03.49.png]
[/url]
This is the*stainless steel replacement, they can be picked up quite reasonably nowadays and should prevent any problems in the future!
[url=http://funrover.com/wp-content/uploads/2015/11/Screen-Shot-2015-11-27-at-13.04.56.png]
[/url]
When assembling, smear Red Rubber Grease on the piston calliper. These has numerous benefits:[list][*]It prolongs the life of the rubber seal[*]It reduces the effects of wear from moving parts[*]It helps helps to resist*water ingress / hydroscopic action[*]It's a rust inhibitor[/list]Once smeared in red rubber grease, the piston*should slide smoothly back into place. Repeat for the remaining pistons. When doing the calliper bolts up, it's best to do these as tight as you can.
[url=http://funrover.com/wp-content/uploads/2015/11/Screen-Shot-2015-11-27-at-13.07.06.png]
[/url]
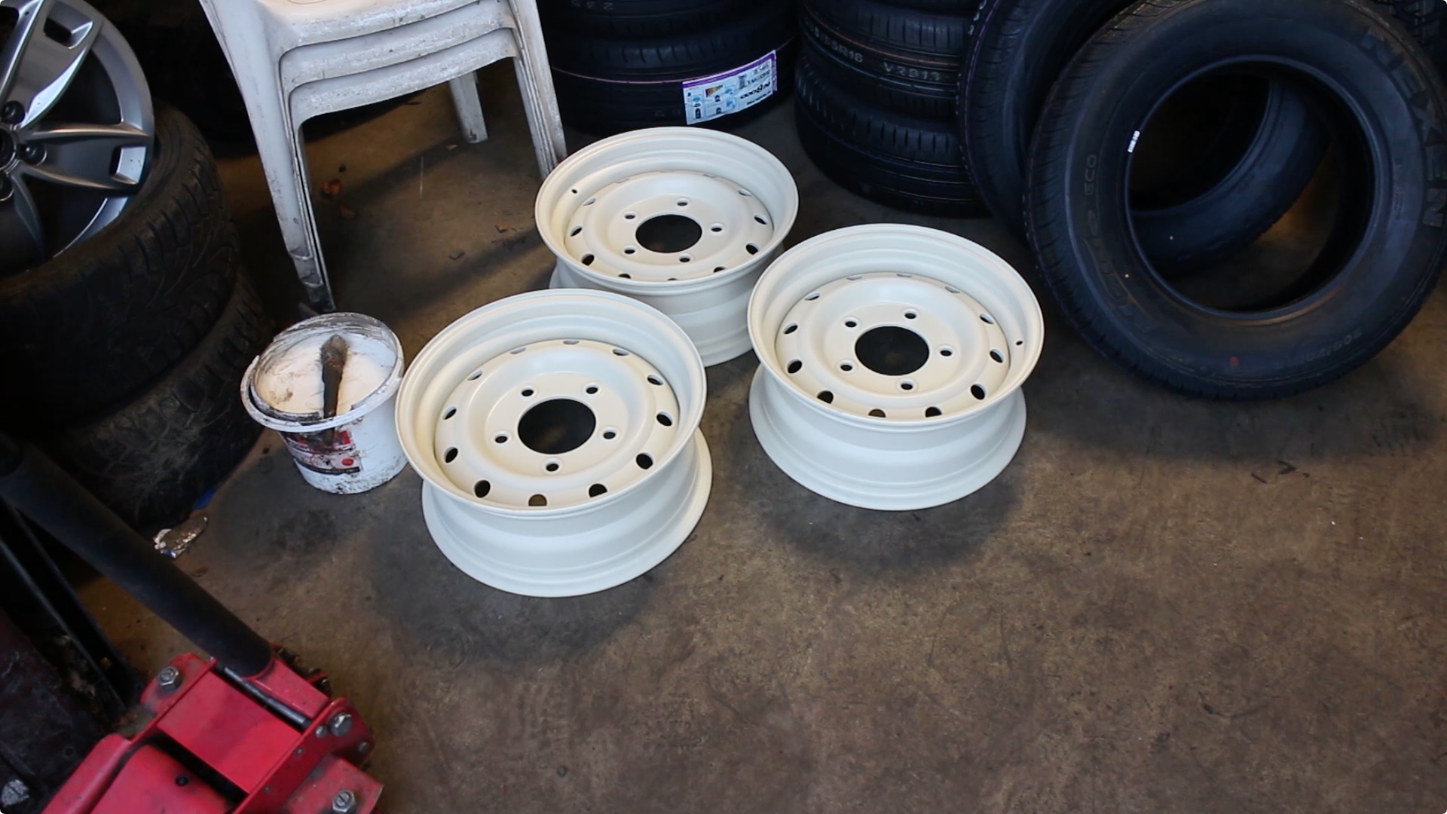
We sold our 90's old wheels. These were aftermarket & oversized*alloys that wouldn't suit our build, to a fellow Land Rover enthusiast and FunRover fan. In their place, we're fitting Wolf steel rims. We're trying to stick very closely to Land Rover factory fitment options so these suit our build perfectly, whilst still giving us a more vintage Land Rover appearance. Wolf rims are also impressively strong with a high load ratings per corner. These need painting though to match our concept drawings. We've chosen the classic Land Rover wheel colour: Limestone.
Throughly keying*off our wheels with a 3M red scotchbrite*pad, and blowing away the resulting dust. Anywhere that isn't keyed off will likely not adhere correctly with the paint.The whole rim was degreased. After the degreaser evaporated, it was then tack clothed.[url=http://funrover.com/wp-content/uploads/2015/11/Screen-Shot-2015-11-27-at-13.19.23.png]
[/url]
Finally, onto painting. We're using a single pack, matt finish acrylic enamel. This one uses Xylene industrial thinners, at a ratio of around 10 / 15%. However, since it's so cold in the workshop, I had to add more to suit. A light coat of paint was added for*the first layer. Subsequent layers were*medium wet. We;d been firing up the space heater prior to painting to raise the ambient temperature and burn off some of the humidity. Paints work best when applied around 20 degrees, so the closer to this mark you get, the better.
[url=http://funrover.com/wp-content/uploads/2015/11/Screen-Shot-2015-11-27-at-13.22.29.jpg]
[/url]
The wheels will then be left to cure for a week at least before mounting the tyres. The coat here is still drying, hence the high gloss appearance.
TacoExcellence said:
I've always wanted to do this with a 110, but looking at this I'm now realising what a massive undertaking and how far beyond my abilities it is.
Fantastic work though.
It is indeed a big job, even more so on a 110, but very rewarding. You just need to remain motivated as much as possibleFantastic work though.
https://www.youtube.com/watch?v=WLLmDy4aUxc
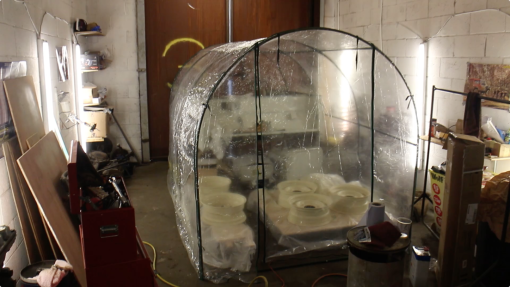
This is Spray booth MK2 which I'll show in a future episode, it's working very well, cutting humidity to the low 30s and upping the air temp to a solid 20+ celsius. It means that I can get the whole car painted even if it's freezing outside and the workshop is only 1 or 2 degrees warmer.

Once the wheels had been cured in the booth I took them along to a local tyre fitters

I've chosen the Wolf HD rims (as seen on Heritage edition Defenders). These are tough, strong and quite cheap.
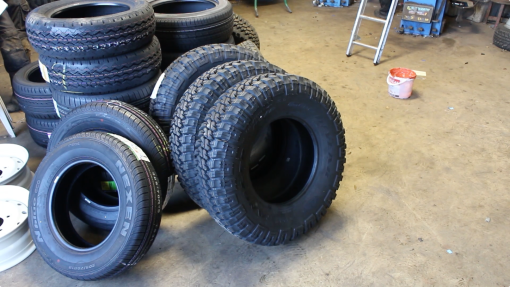
Along with tubeless Goodyear MTR tyres, another factory fit option.

The tyre fitter used a product known as Rim Seal that has anti-corrosion properties as well as adding lubrication for the next step

The tyre fitting machine has a large guide that eases the tyre bead of the lip of the wheel.

Finally, the tyres are inflated to manufacturer specifications, this helps to seat them too (watch the video too see how loud this stage is!)
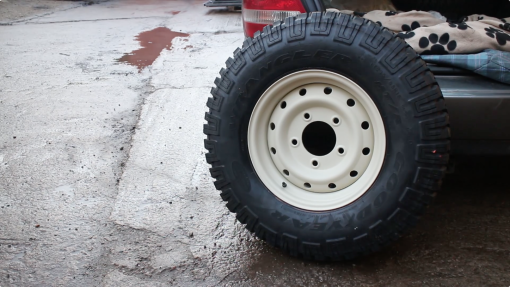
Here they are mounted up in daylight, the colour and*finish is perfect! The SIP HVLP gun I used works well for the money!
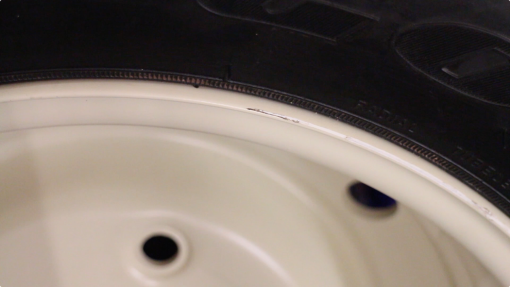
The tyre fitting guide can score the lips of the wheel, which is no real problem!
[img:510:287]http://funrover.com/wp-content/uploads/2015/12/Screen-Shot-2015-12-14-at-08.42.38-510x287.png[/img]
I simply wiped it clean with alcohol then used an artist brush to touch in the scrapes.
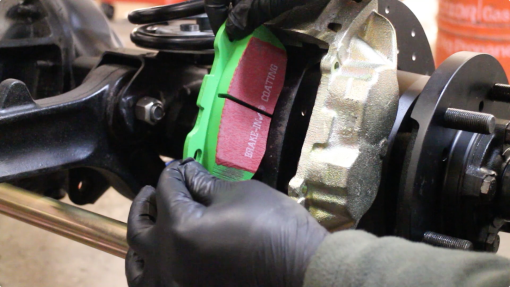
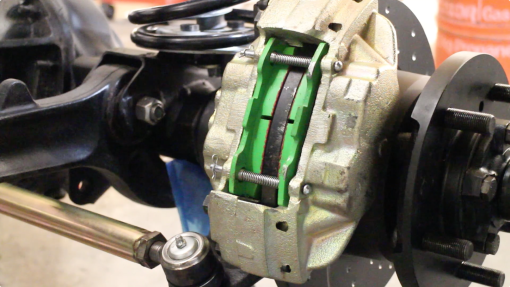
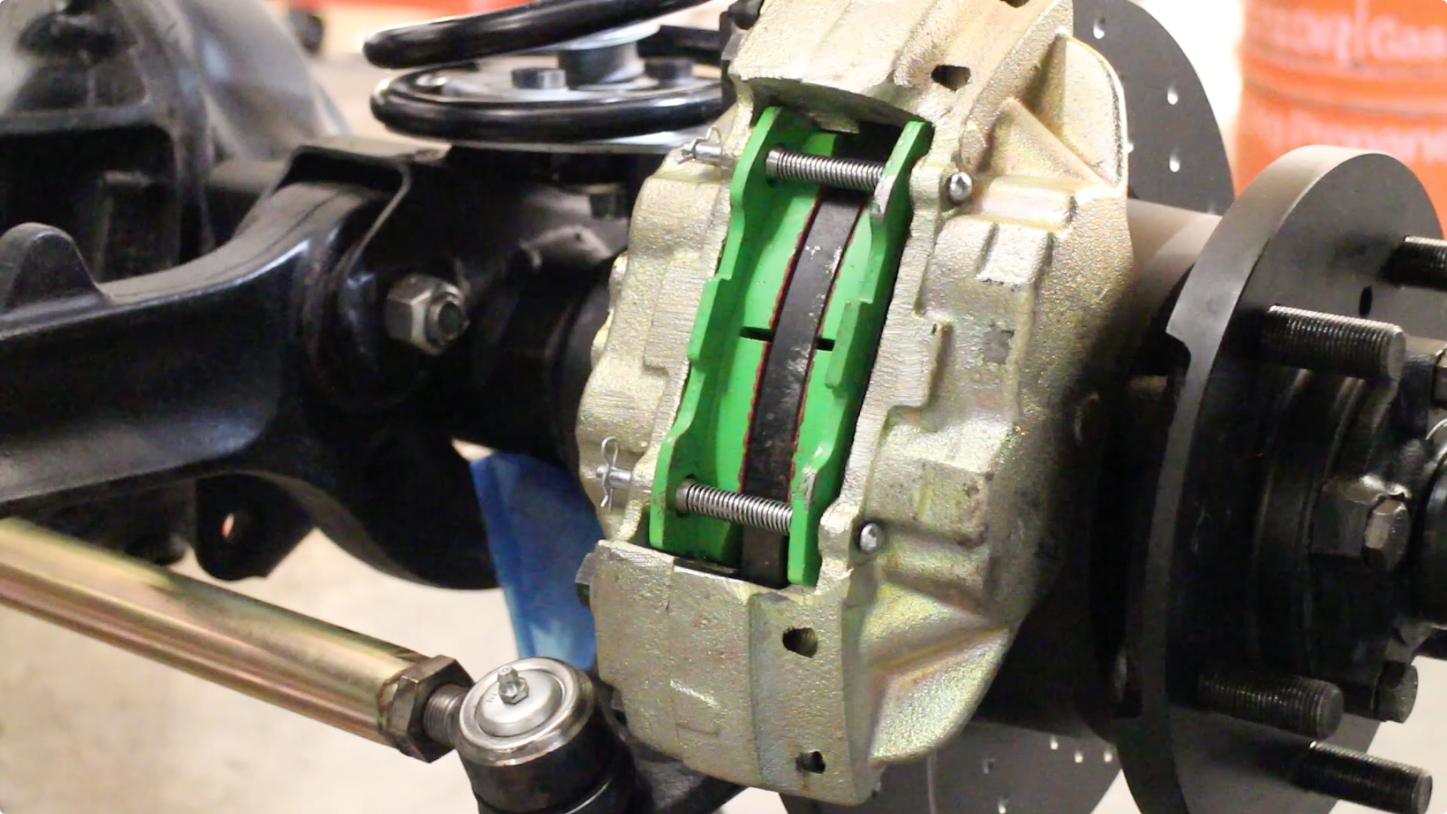
Whilst the repairs are drying, I dropped in the pads - EBC Green stuff to match the EBC performance disks. This Land Rover will stop on a penny if needs be!
Not keen on the colour, but the wheels will cover them up!
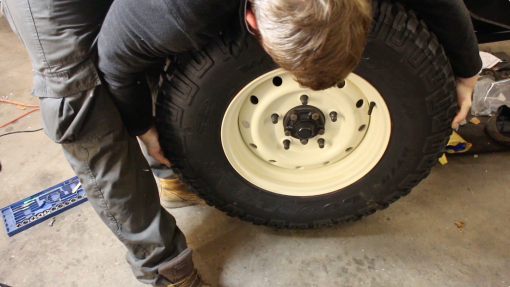
Lifting the wheels onto the longer Wolf*FRC7577 extended wheel studs - expensive but*designed to work with the Wolf rim

Nipping the nuts up, they need to be torqued to 170NM after lowering the Landy of it's jacks.
All 4 wheels fitted!
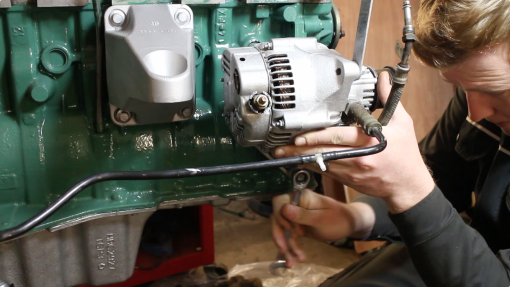
Fitting up the alternator / vacuum pump whilst the engine is still on the stand
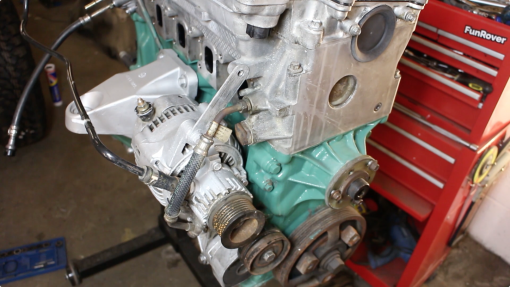
This has been painted with a high temp paint to match the rest of the engine
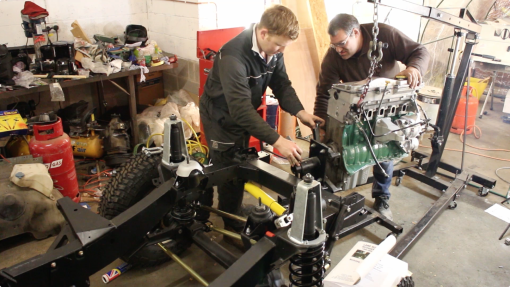
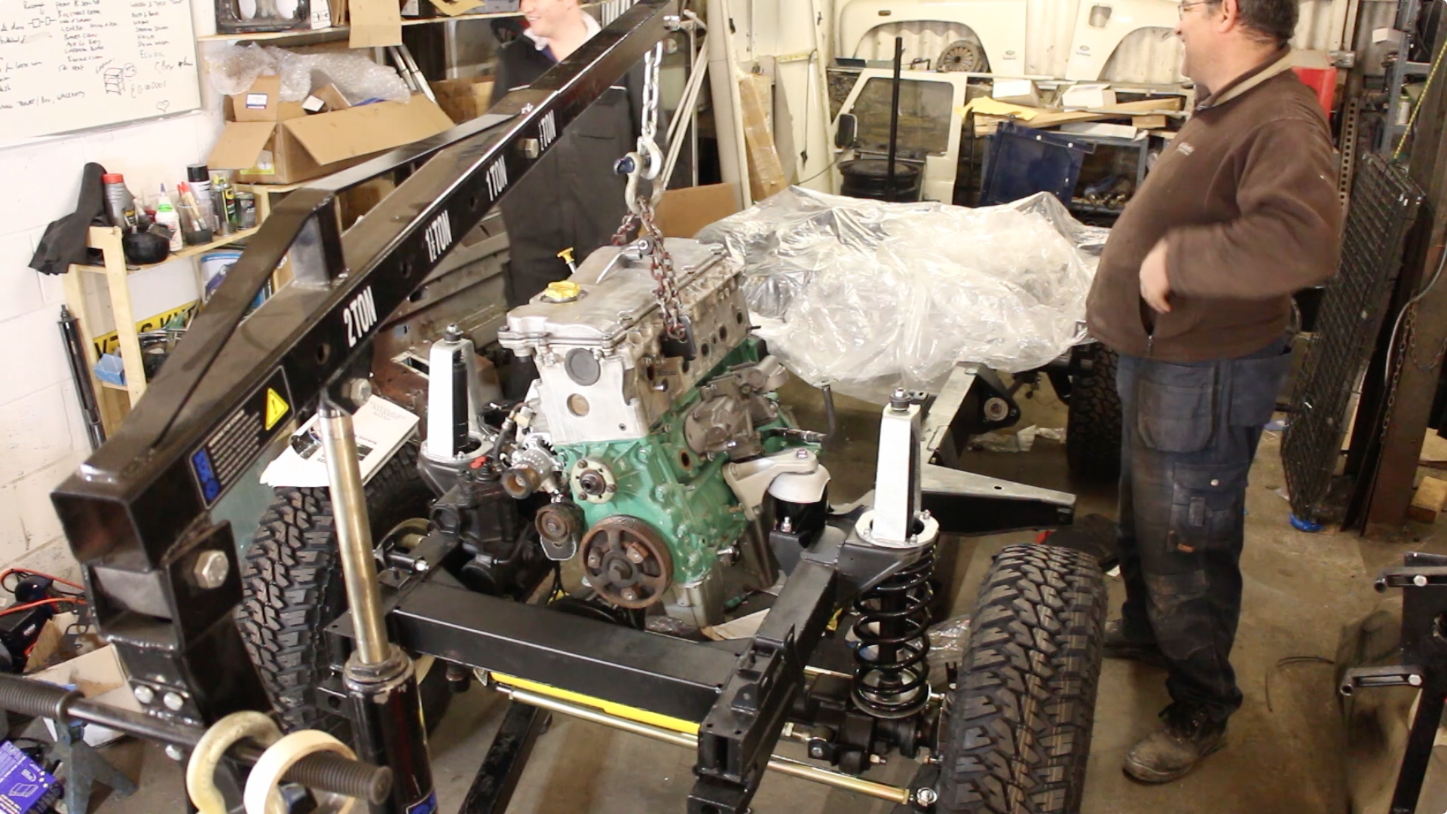
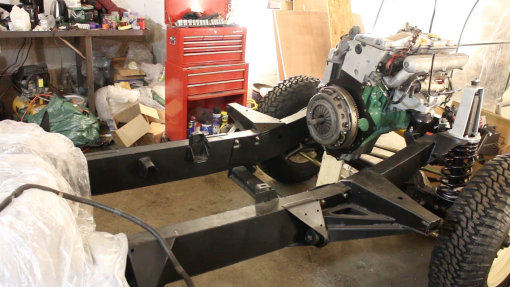
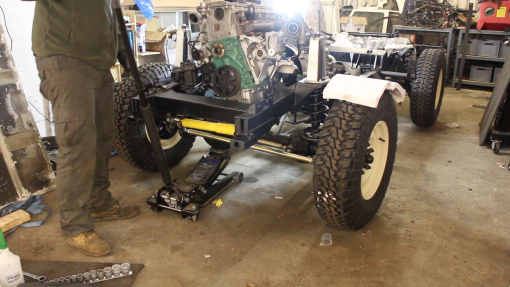
Now it's time to finally drop the engine back in the 90! This feels like it's finally getting somewhere!
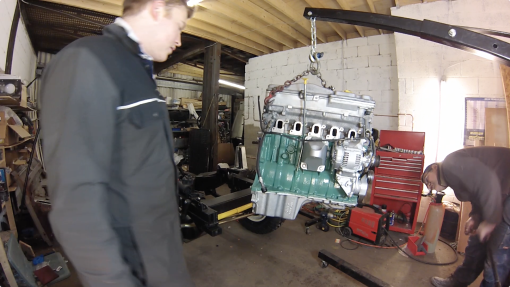
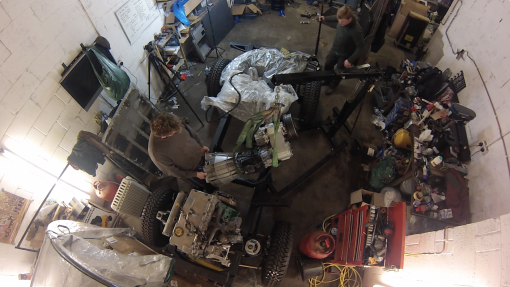
The engine needs to*be lifted over the front crossmember between the dumb irons. The engine crane is an extremely useful tool, I love it! It's also useful to have 2 people here, one to jack and watch the near side, whilst the other guides in the engine from the other.
Fitting an engine to a rolling chassis is great, there's nothing in the way! Takes about a minute!

And that's it for this week, need to get cracking now as I would still like to hit my deadline of January 1st XD

This is Spray booth MK2 which I'll show in a future episode, it's working very well, cutting humidity to the low 30s and upping the air temp to a solid 20+ celsius. It means that I can get the whole car painted even if it's freezing outside and the workshop is only 1 or 2 degrees warmer.
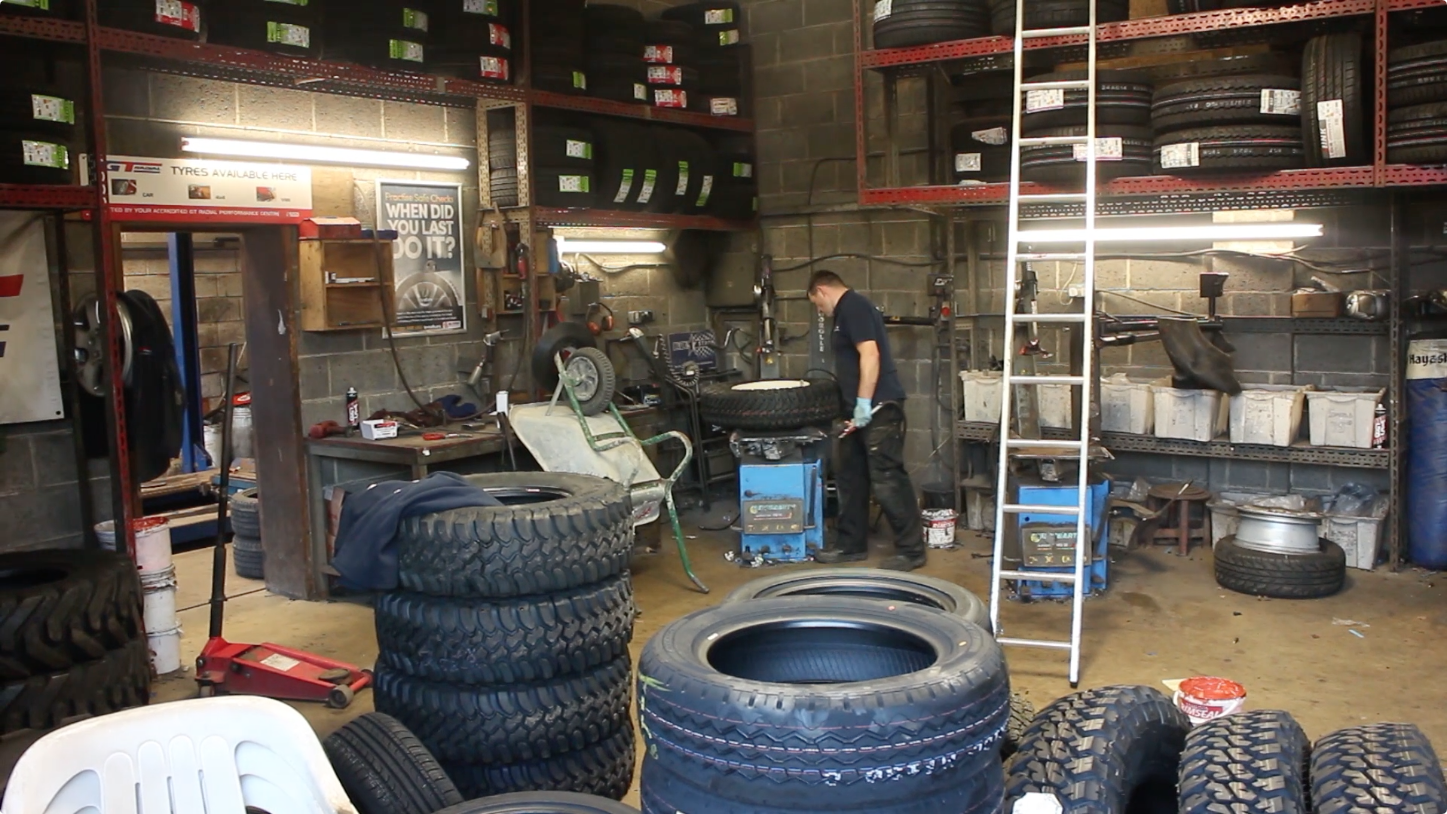
Once the wheels had been cured in the booth I took them along to a local tyre fitters
I've chosen the Wolf HD rims (as seen on Heritage edition Defenders). These are tough, strong and quite cheap.

Along with tubeless Goodyear MTR tyres, another factory fit option.
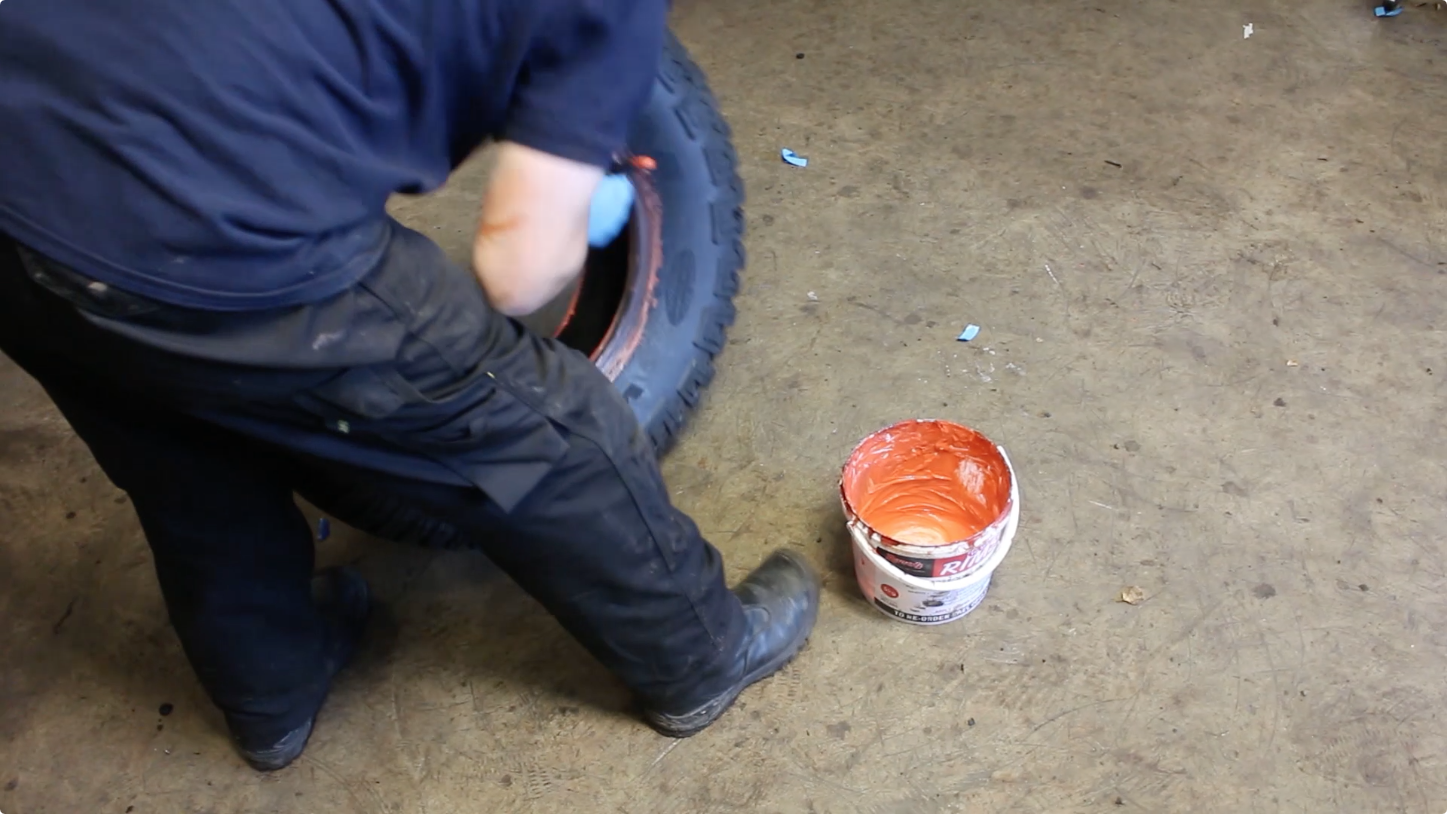
The tyre fitter used a product known as Rim Seal that has anti-corrosion properties as well as adding lubrication for the next step
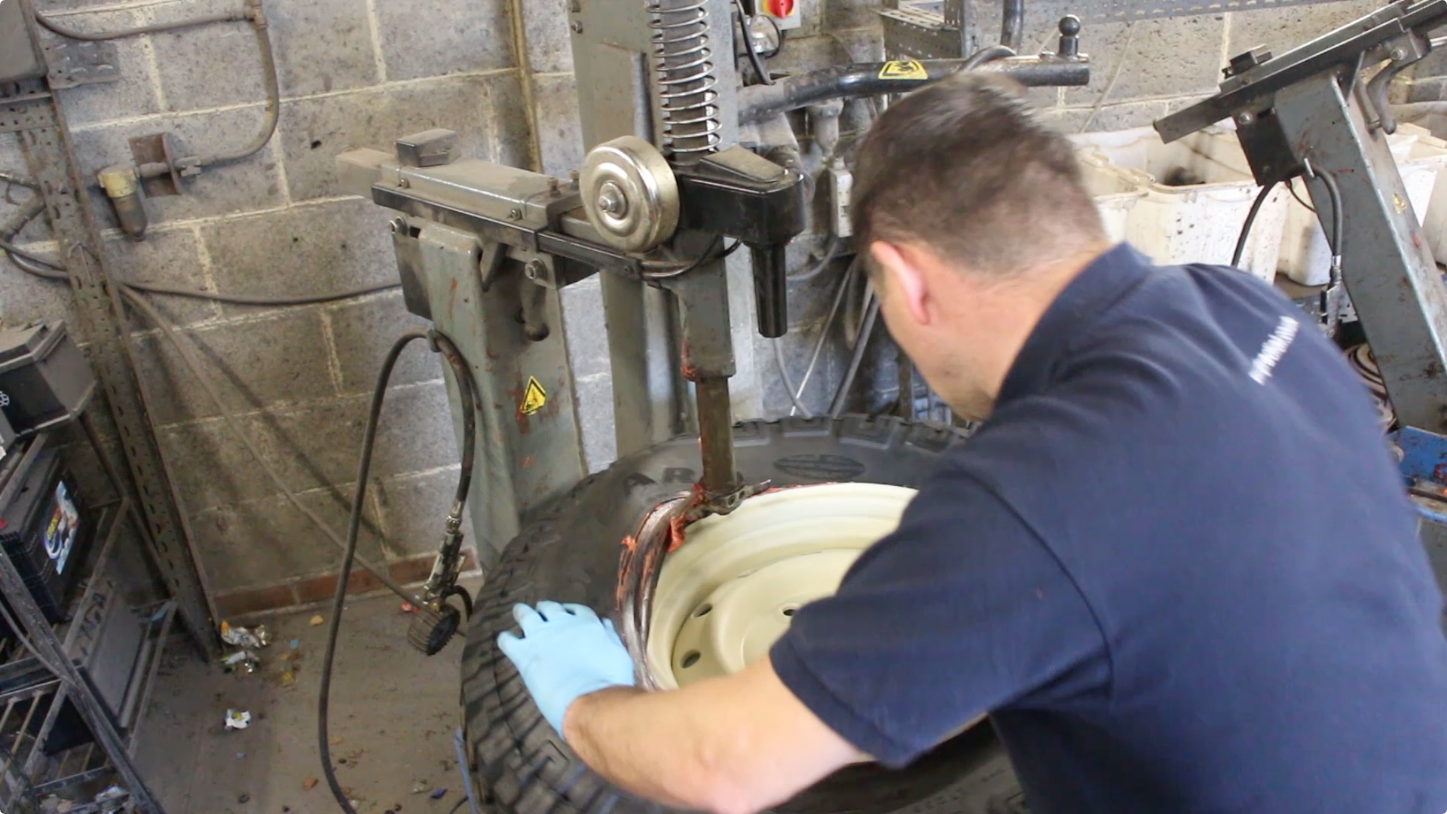
The tyre fitting machine has a large guide that eases the tyre bead of the lip of the wheel.
Finally, the tyres are inflated to manufacturer specifications, this helps to seat them too (watch the video too see how loud this stage is!)

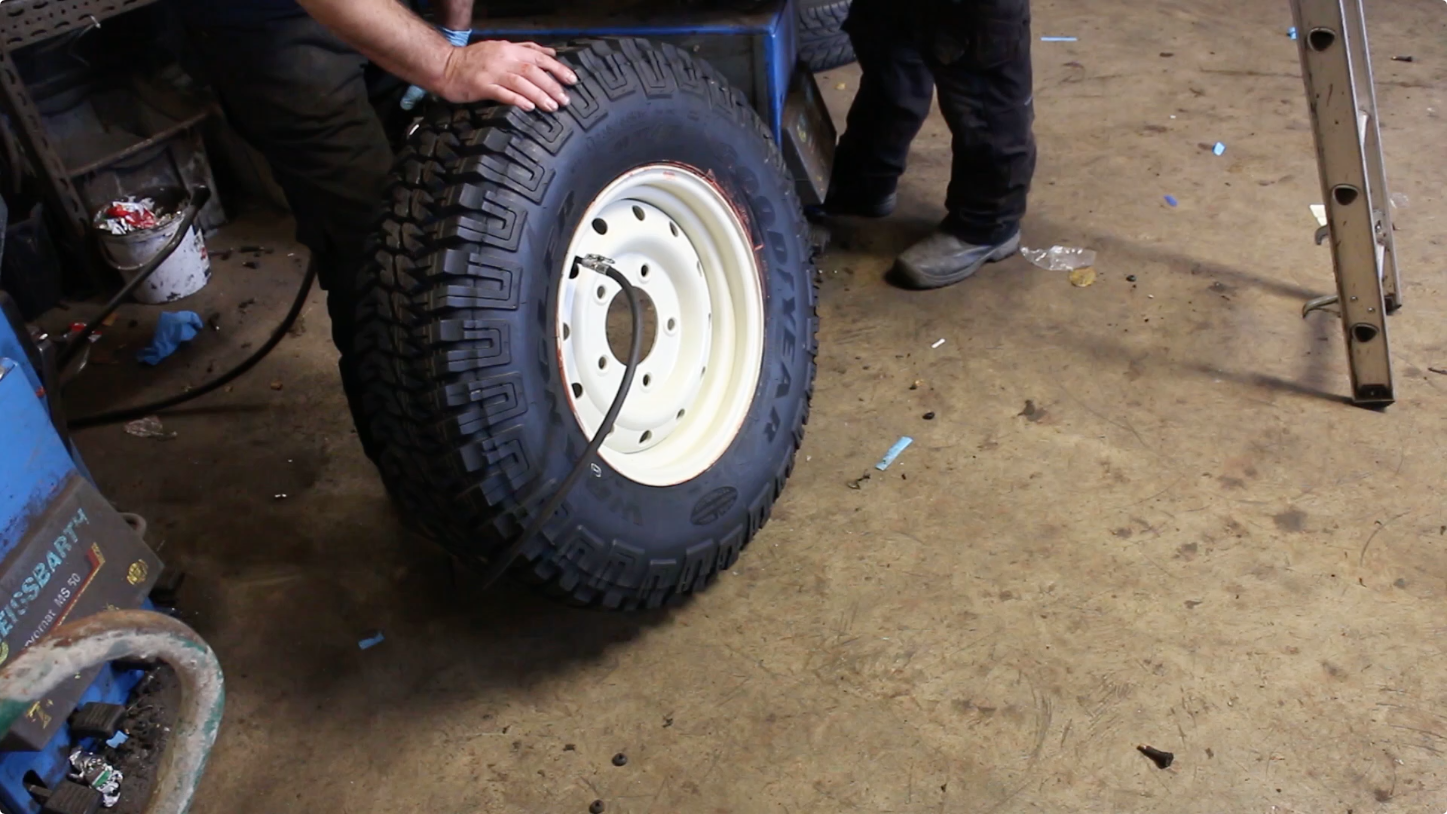
Here they are mounted up in daylight, the colour and*finish is perfect! The SIP HVLP gun I used works well for the money!

The tyre fitting guide can score the lips of the wheel, which is no real problem!
[img:510:287]http://funrover.com/wp-content/uploads/2015/12/Screen-Shot-2015-12-14-at-08.42.38-510x287.png[/img]
I simply wiped it clean with alcohol then used an artist brush to touch in the scrapes.

Whilst the repairs are drying, I dropped in the pads - EBC Green stuff to match the EBC performance disks. This Land Rover will stop on a penny if needs be!
Not keen on the colour, but the wheels will cover them up!

Lifting the wheels onto the longer Wolf*FRC7577 extended wheel studs - expensive but*designed to work with the Wolf rim
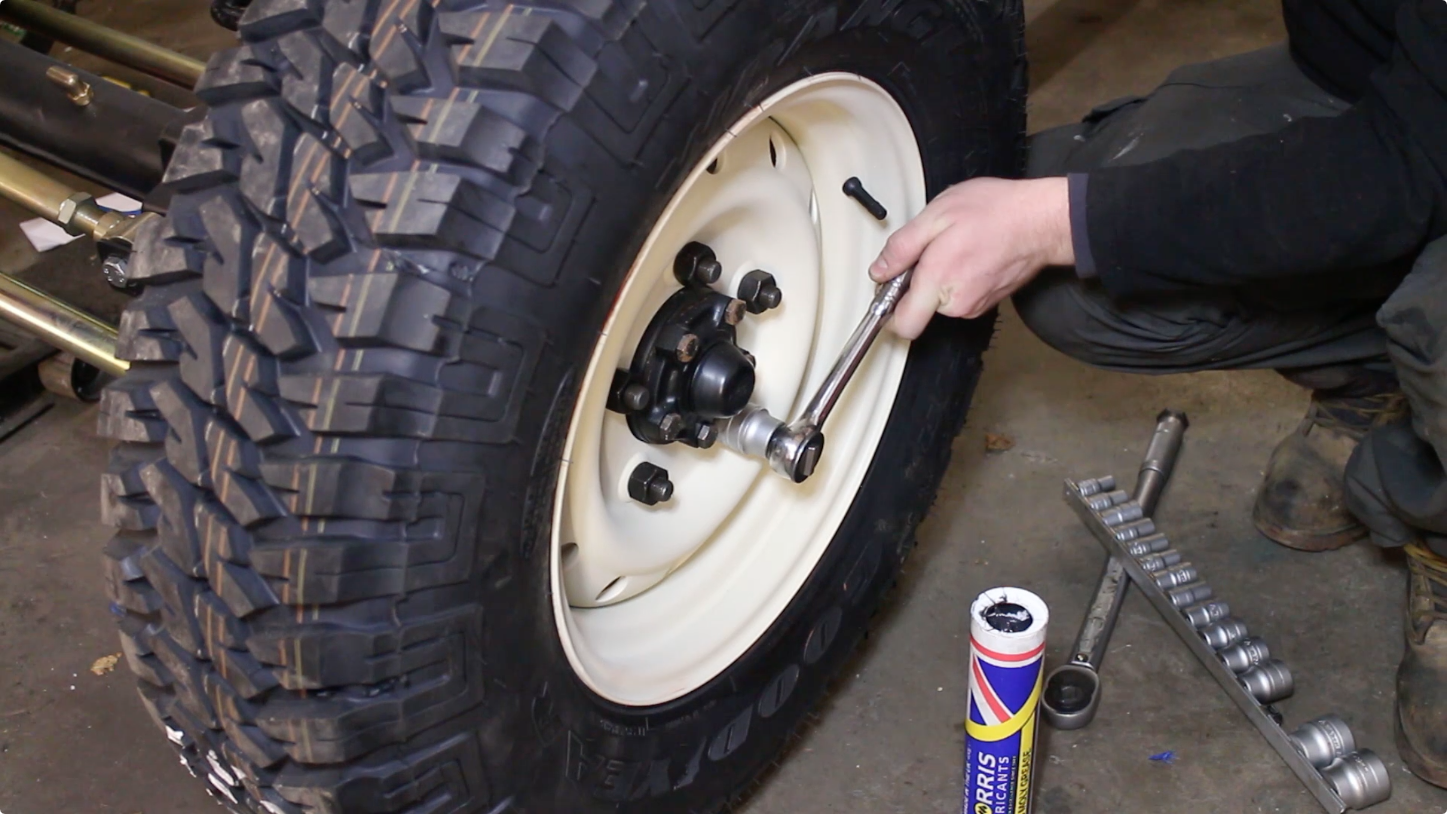
Nipping the nuts up, they need to be torqued to 170NM after lowering the Landy of it's jacks.

All 4 wheels fitted!

Fitting up the alternator / vacuum pump whilst the engine is still on the stand

This has been painted with a high temp paint to match the rest of the engine

Now it's time to finally drop the engine back in the 90! This feels like it's finally getting somewhere!

The engine needs to*be lifted over the front crossmember between the dumb irons. The engine crane is an extremely useful tool, I love it! It's also useful to have 2 people here, one to jack and watch the near side, whilst the other guides in the engine from the other.
Fitting an engine to a rolling chassis is great, there's nothing in the way! Takes about a minute!
And that's it for this week, need to get cracking now as I would still like to hit my deadline of January 1st XD
https://www.youtube.com/watch?v=vrEJwVE1jr4
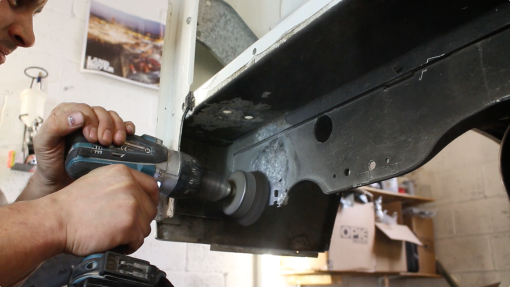
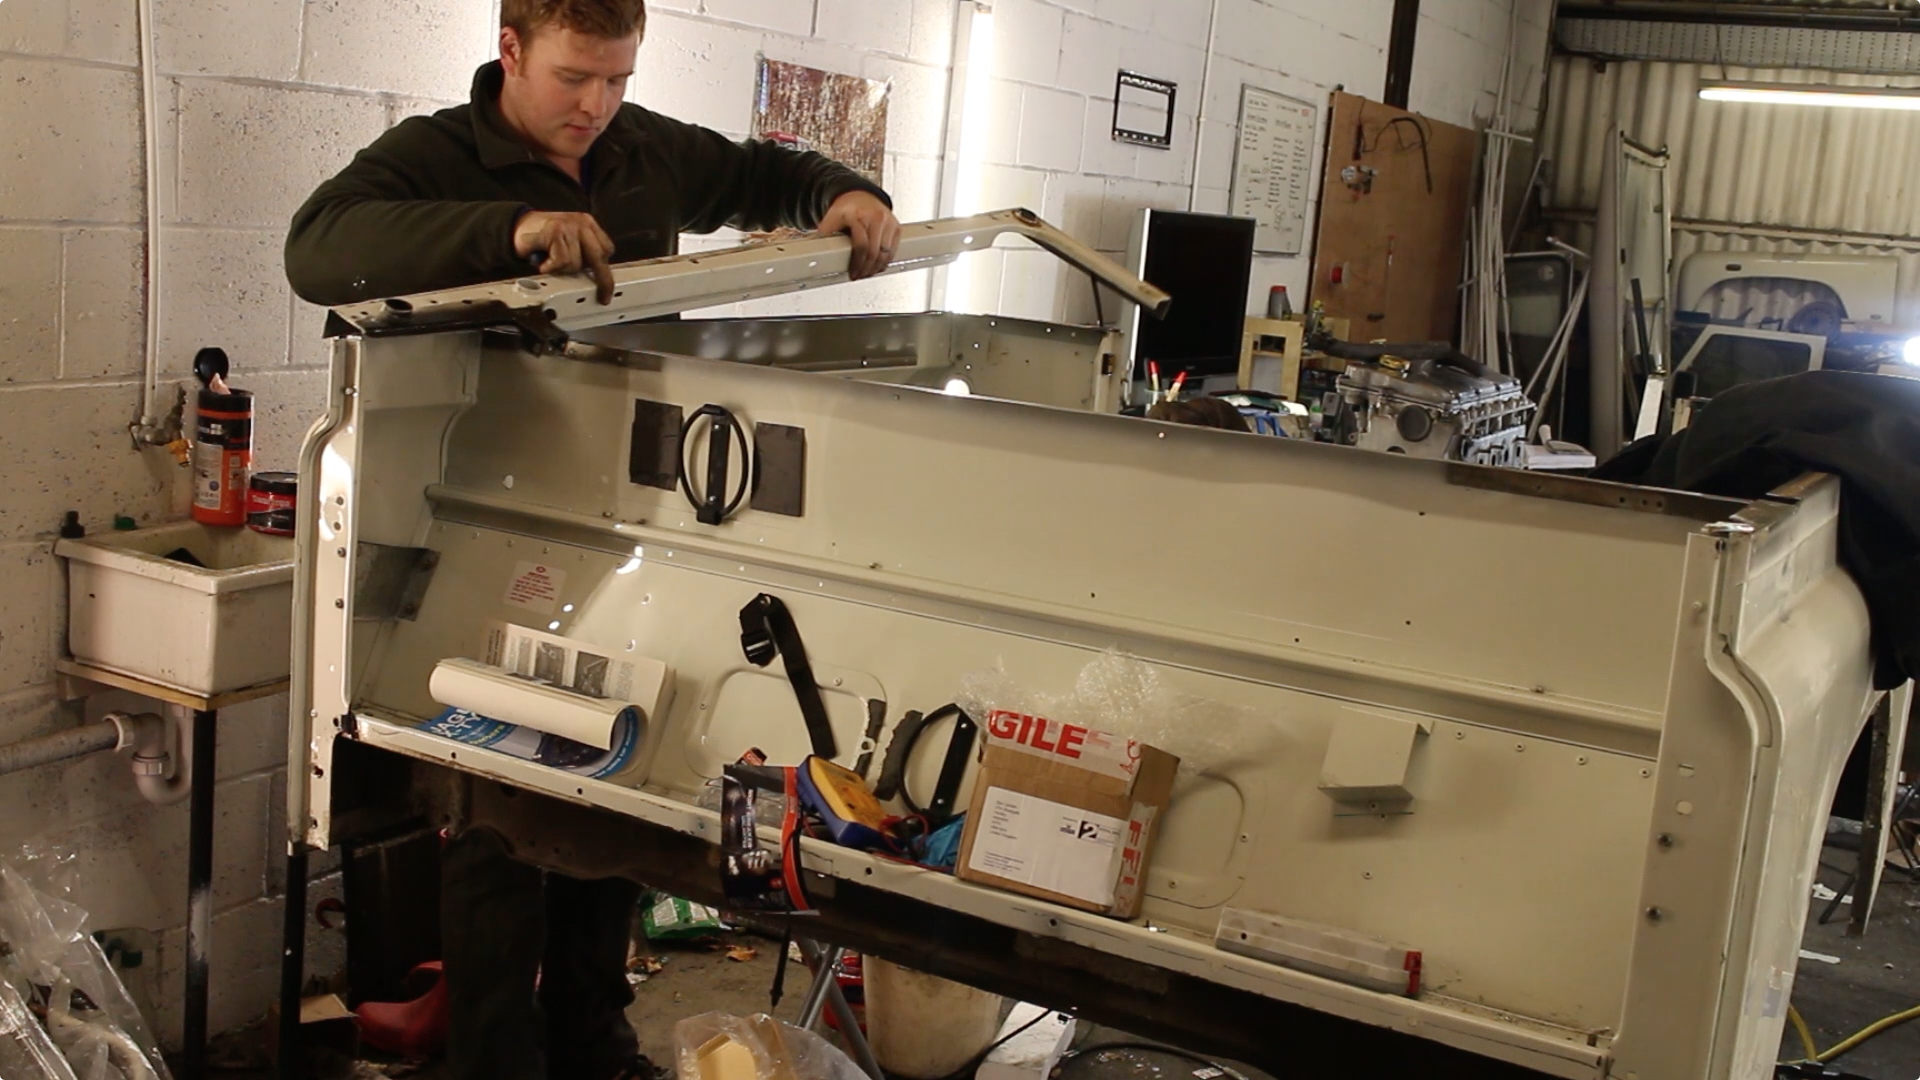
The rear tub is in need of some minor repairs. The tub cappings will be removed and sent off for galvanising. Everywhere else, we have replacement repair sections.
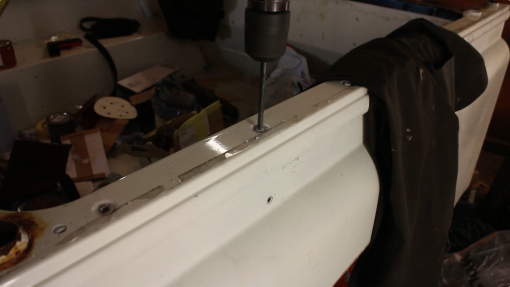
Using a 6mm drill bit, we're drilling into the rivet head, which typically shears off.

Then the crush section of the rivet can be tapped out, this is the quickest way to remove rivets.
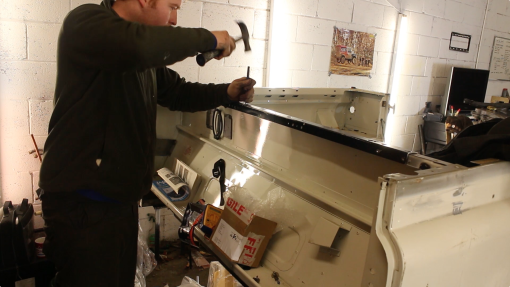
There are quite a number of rivets all told on the cappings
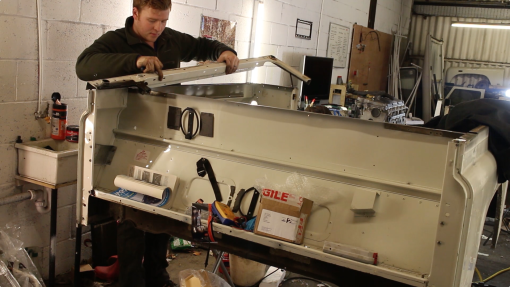
In addition to rivets, the cappings are typically held on with some mild adhesives / foam tape and can then be lifted away. Those will be going to the galvanisers along side the bulkhead and will be fitted unpainted to the 90 for that classic Land Rover appearance.
Cappings gone, you can see the Zinc Phosphate primer applied at the factory. Over the primer, the tub is currently overcoated in 2 pack (Chawton White). We'll be going to the classic (and now rather popular) Pastel Green, a Series 1 colour

These seatbelt mount brackets panels came from YRM Metal Solutions. They've been laser cut, CNC folded and galvanised. The result is excellent tolerances and a lasting repair!

Fitting is easy, the old seat belt mount bracket is removed.
And any flaky aluminium corrosion is stripped away with a wire wheel.

We applied Dinitrol cavity wax to the tub, before offering up the repair section.
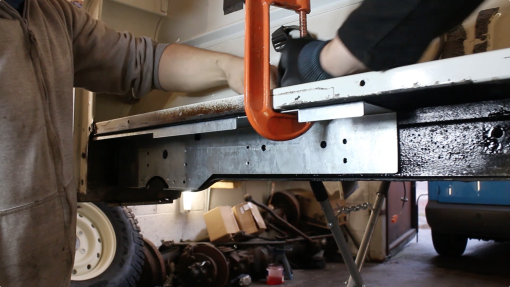
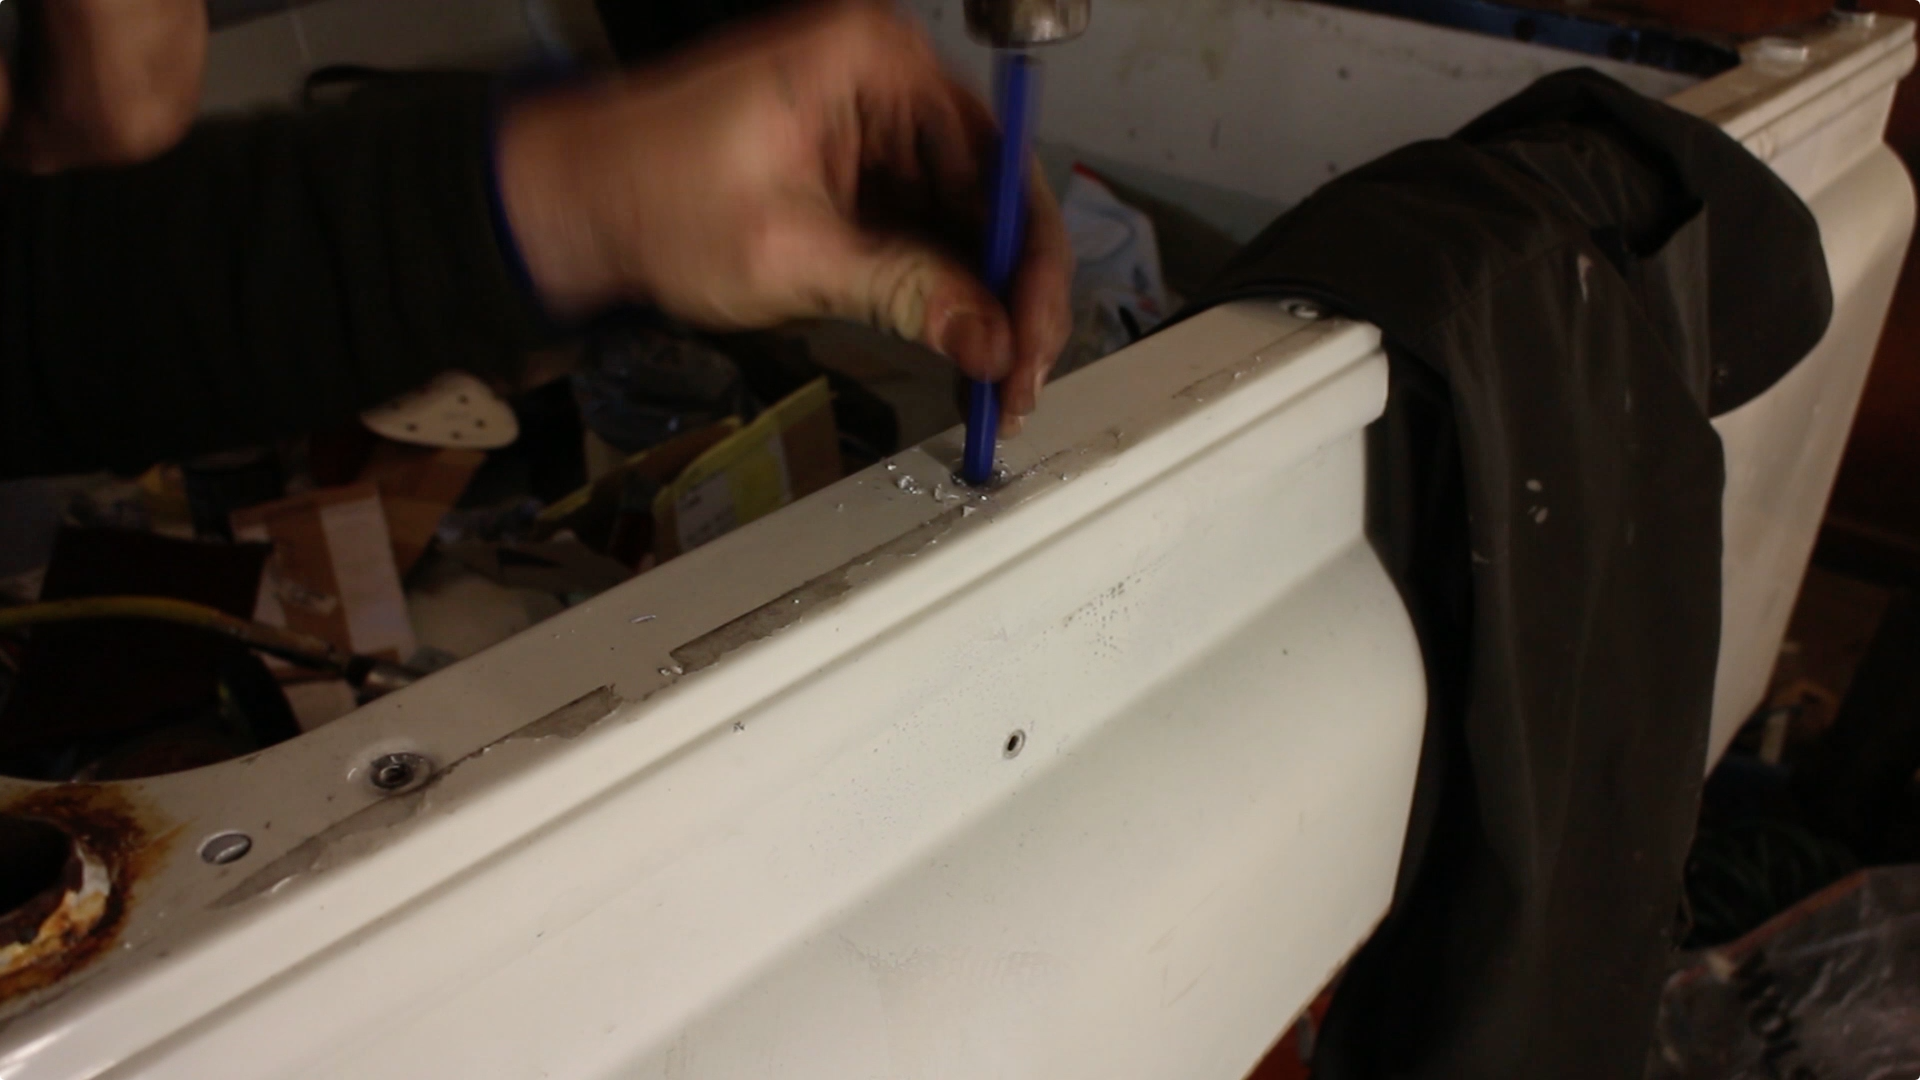
It's supplied in 2 pieces (otherwise it wouldn't fit), there are a few holes that have captive nuts so bolts were installed to hold the panel in place, along with a G clamp.
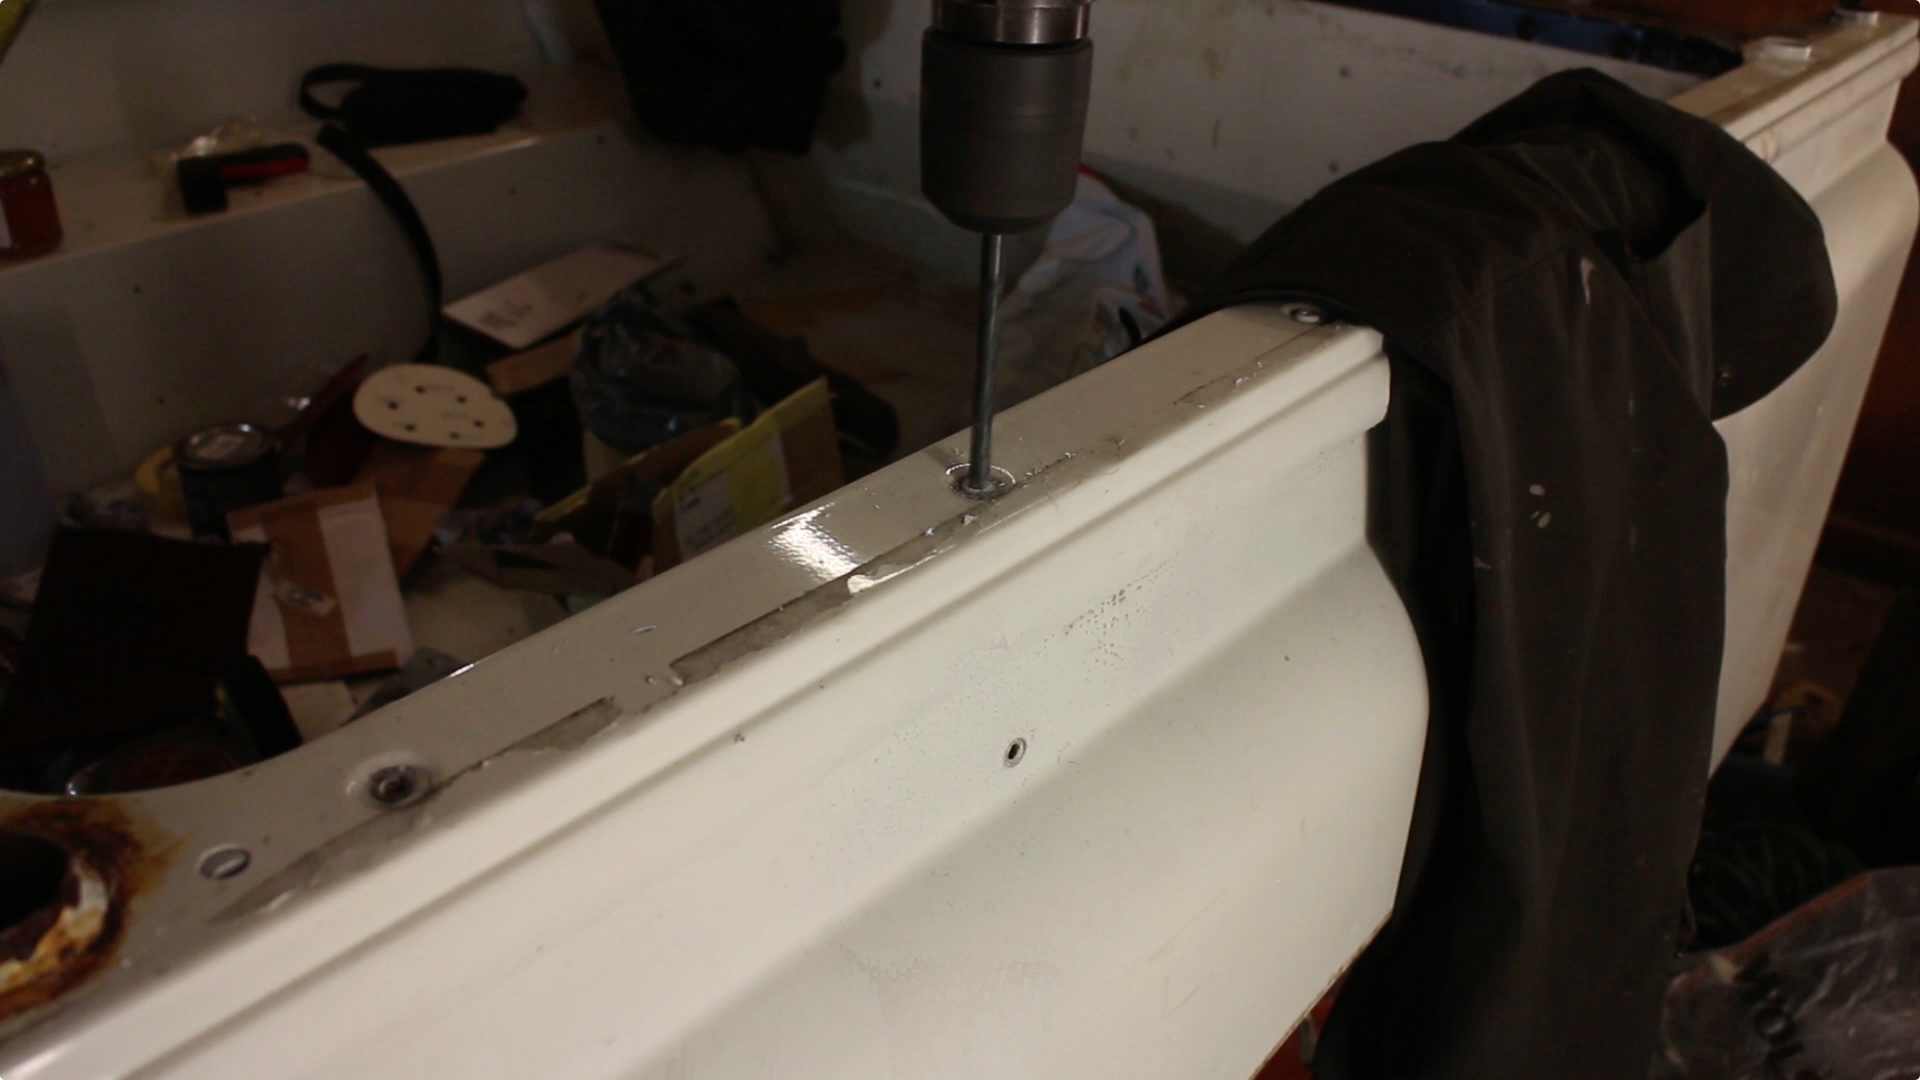
Before drilling the holes for each fixing.

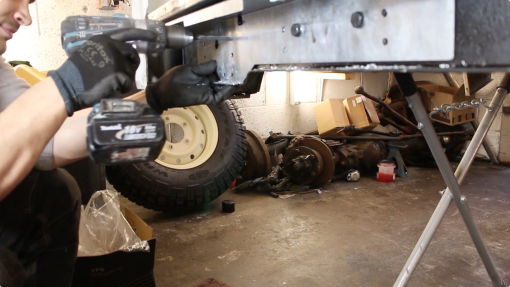
There are a total of 48 M8 bolts required. Once secured, these panels are very strong! There's zero movement and the whole lot will be overcoated with stone chip for further protection.

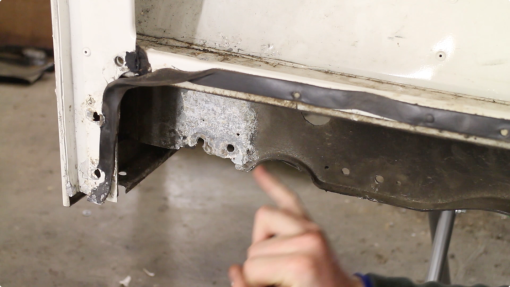
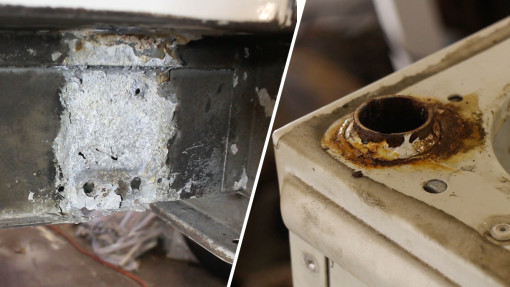
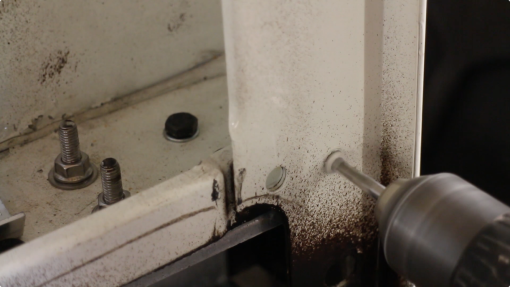
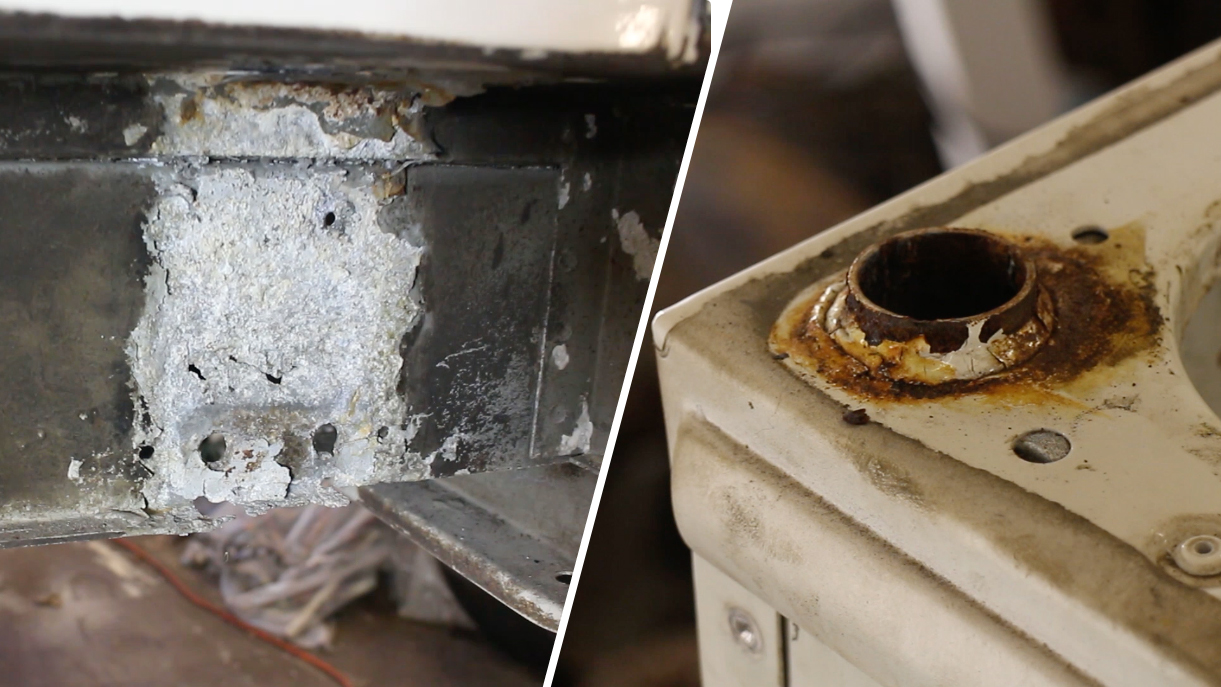
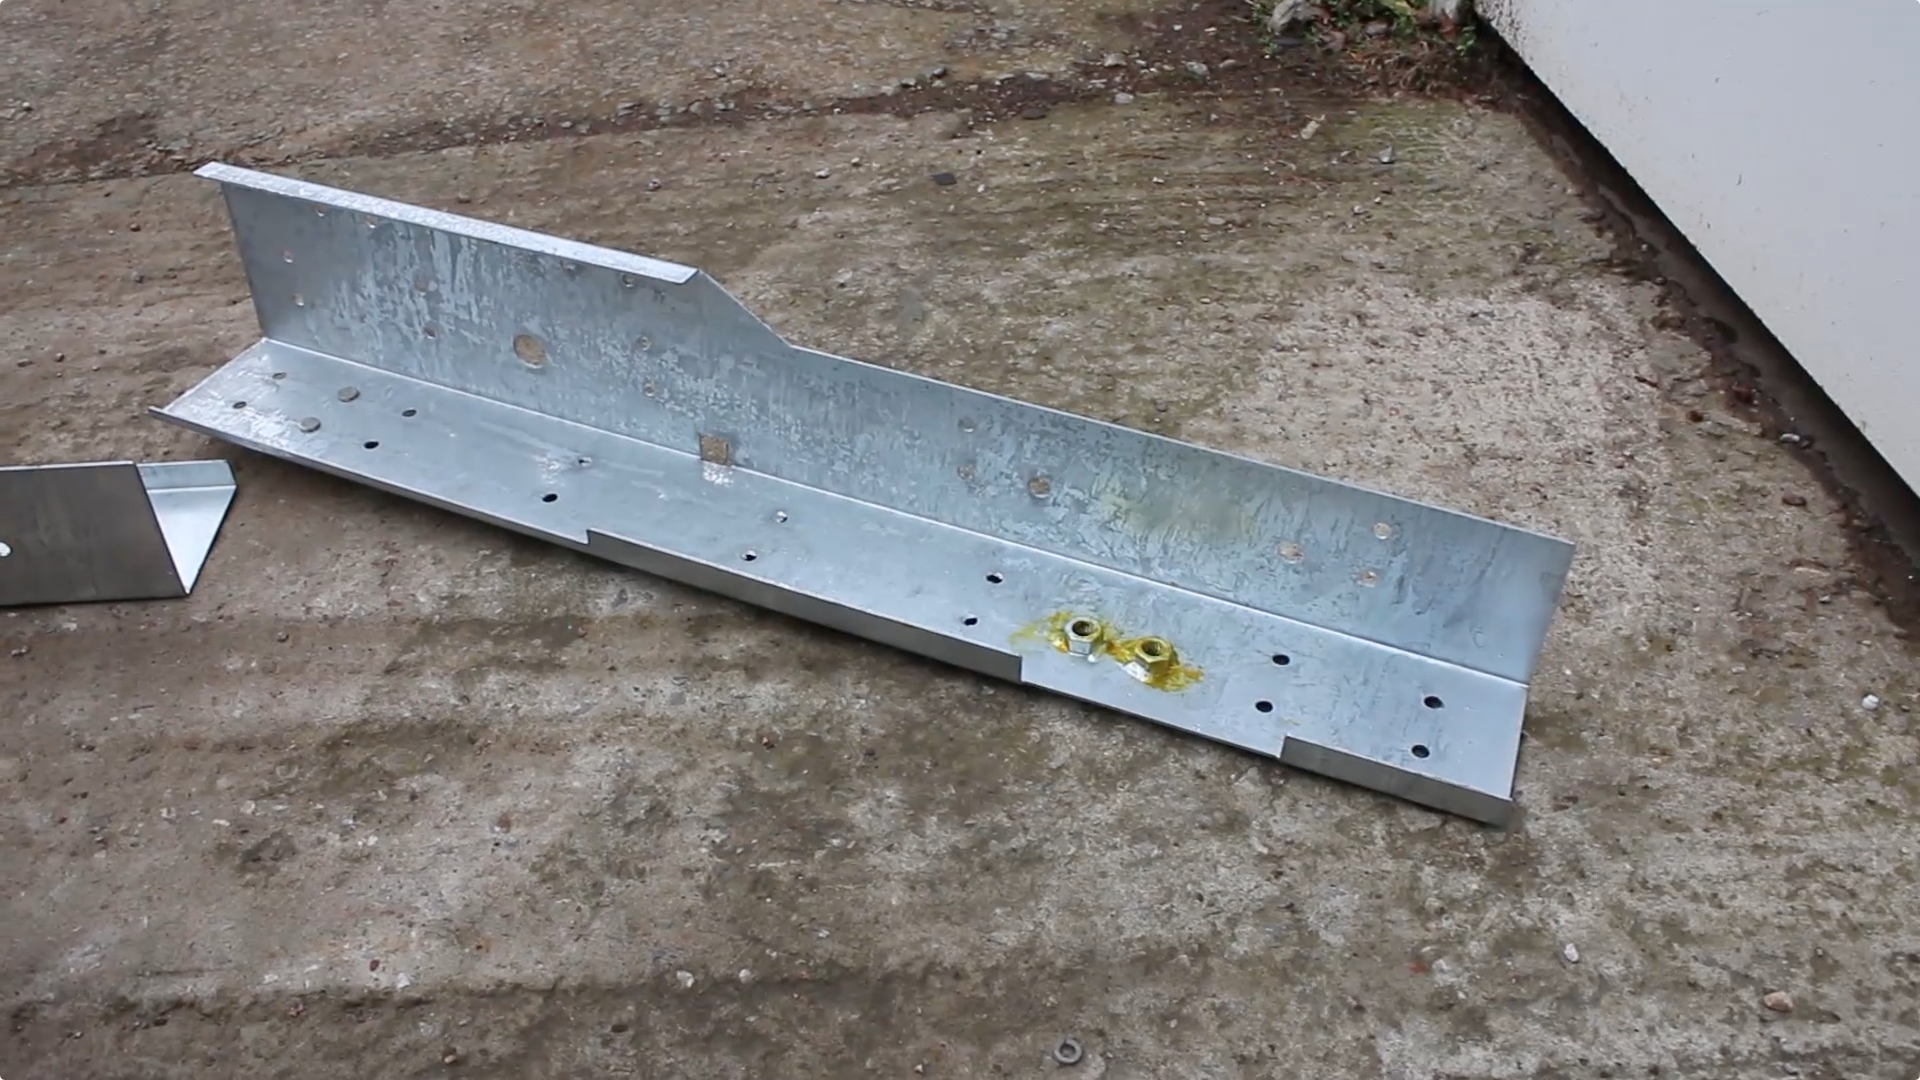
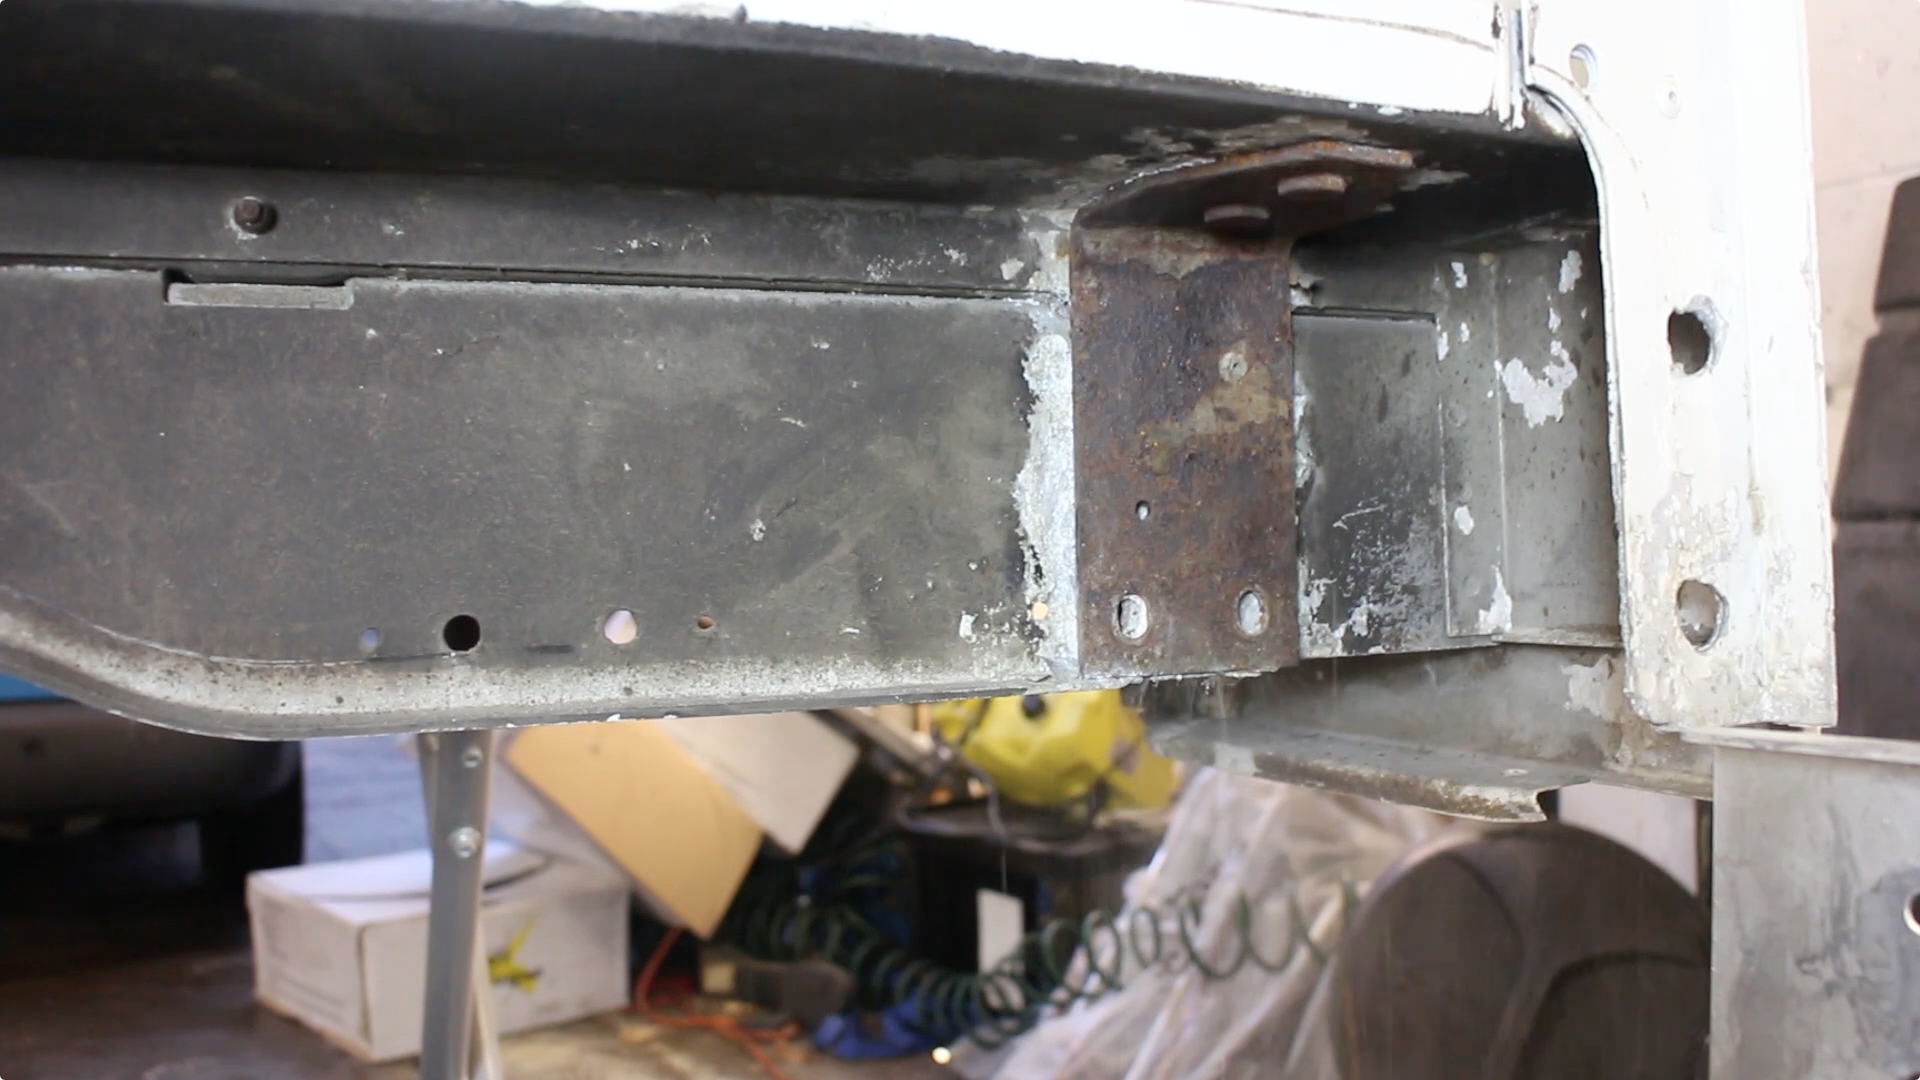
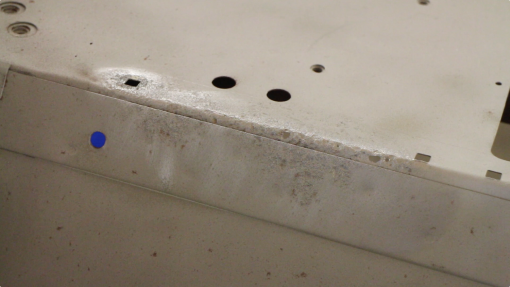
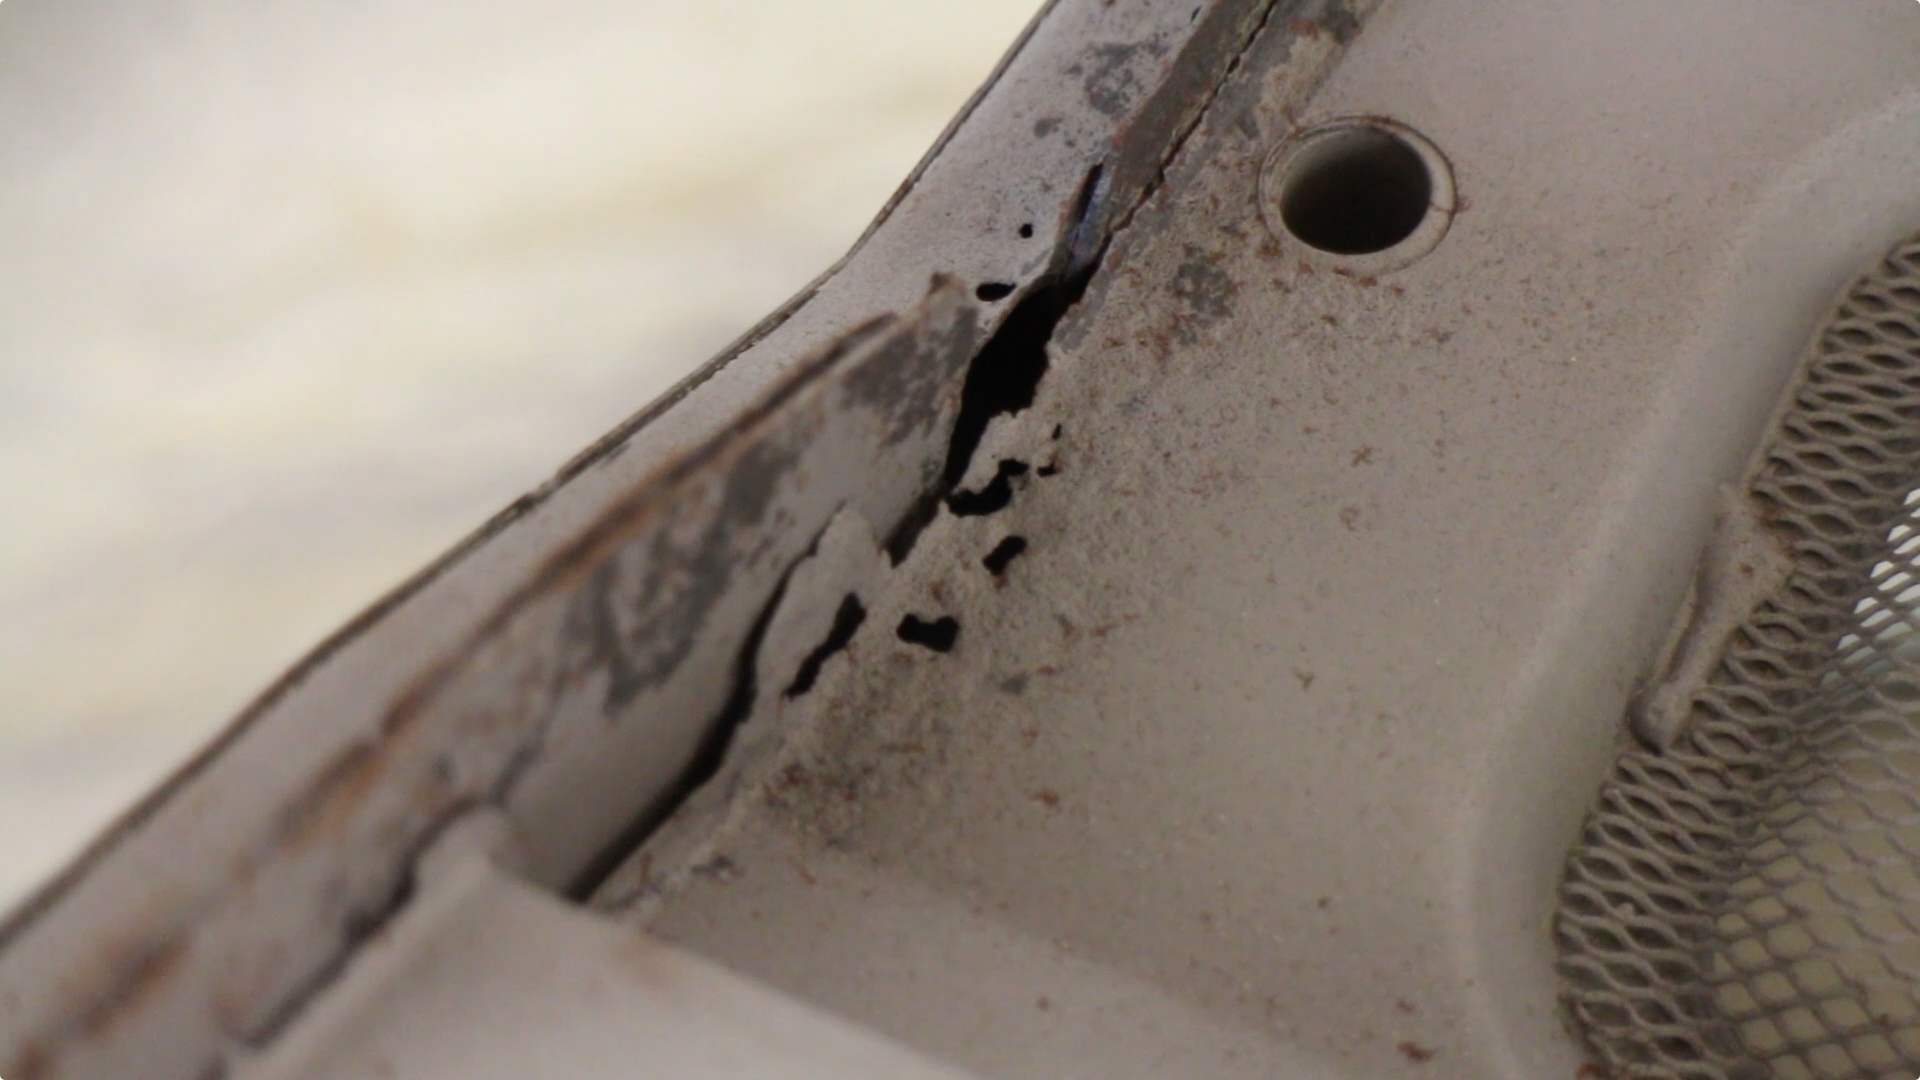
Moving onto the strike plate, this often corrodes where the tub fits to the sill rail, due to bimetallic reaction. The aluminium turns to a powder and is completely unusable.
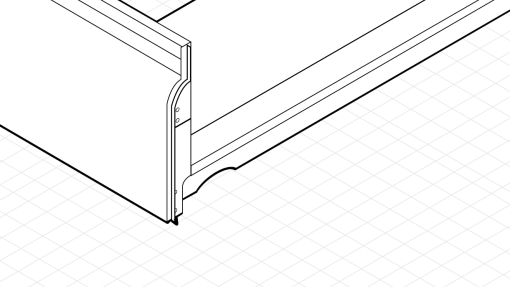
So to repair we'll fit new strike plate sections from YRM too. These are pretty simple to fit, and once prepared and painted, it should be as good as new.

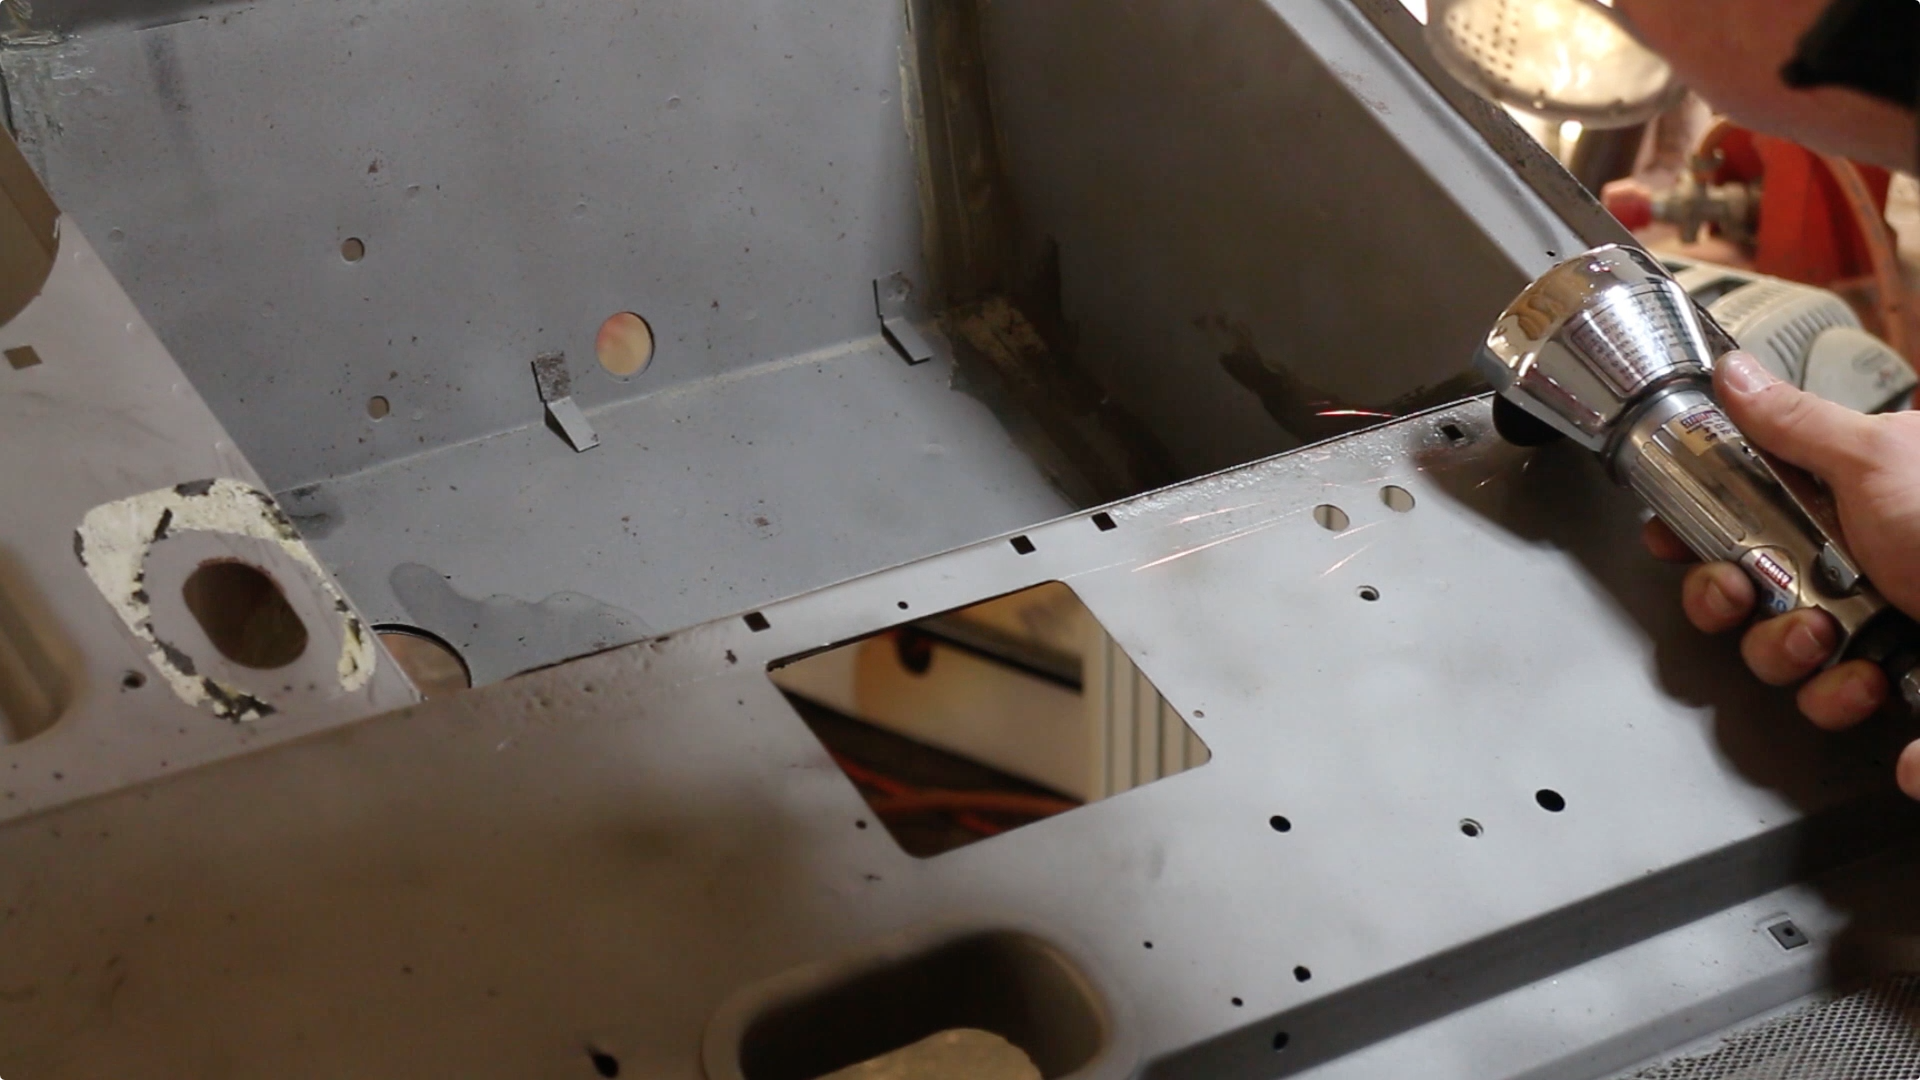
We're starting by marking off where we'd like to cut off the strike plate.
And using a spot weld drill to remove the spot welds and rivets below the line, including on the seal retainer.
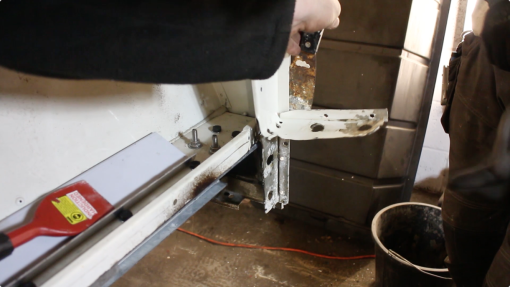
Then, using a bolster chisel and a scraper, we can begin to prise the 2 skins apart

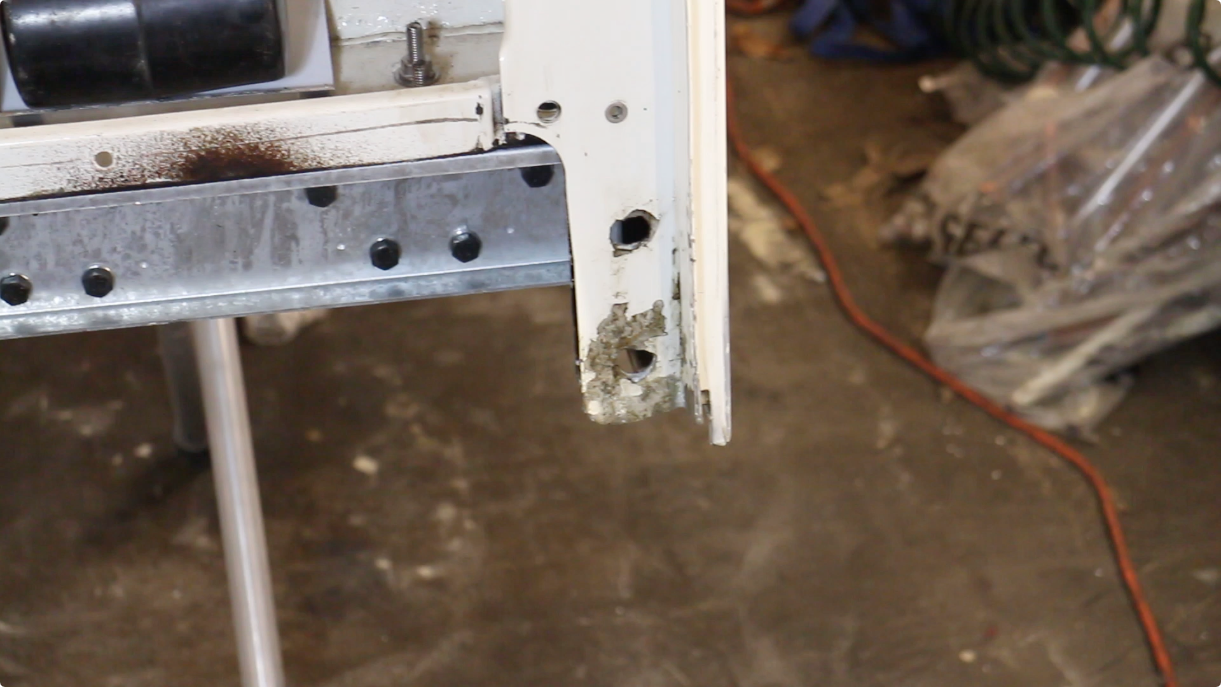
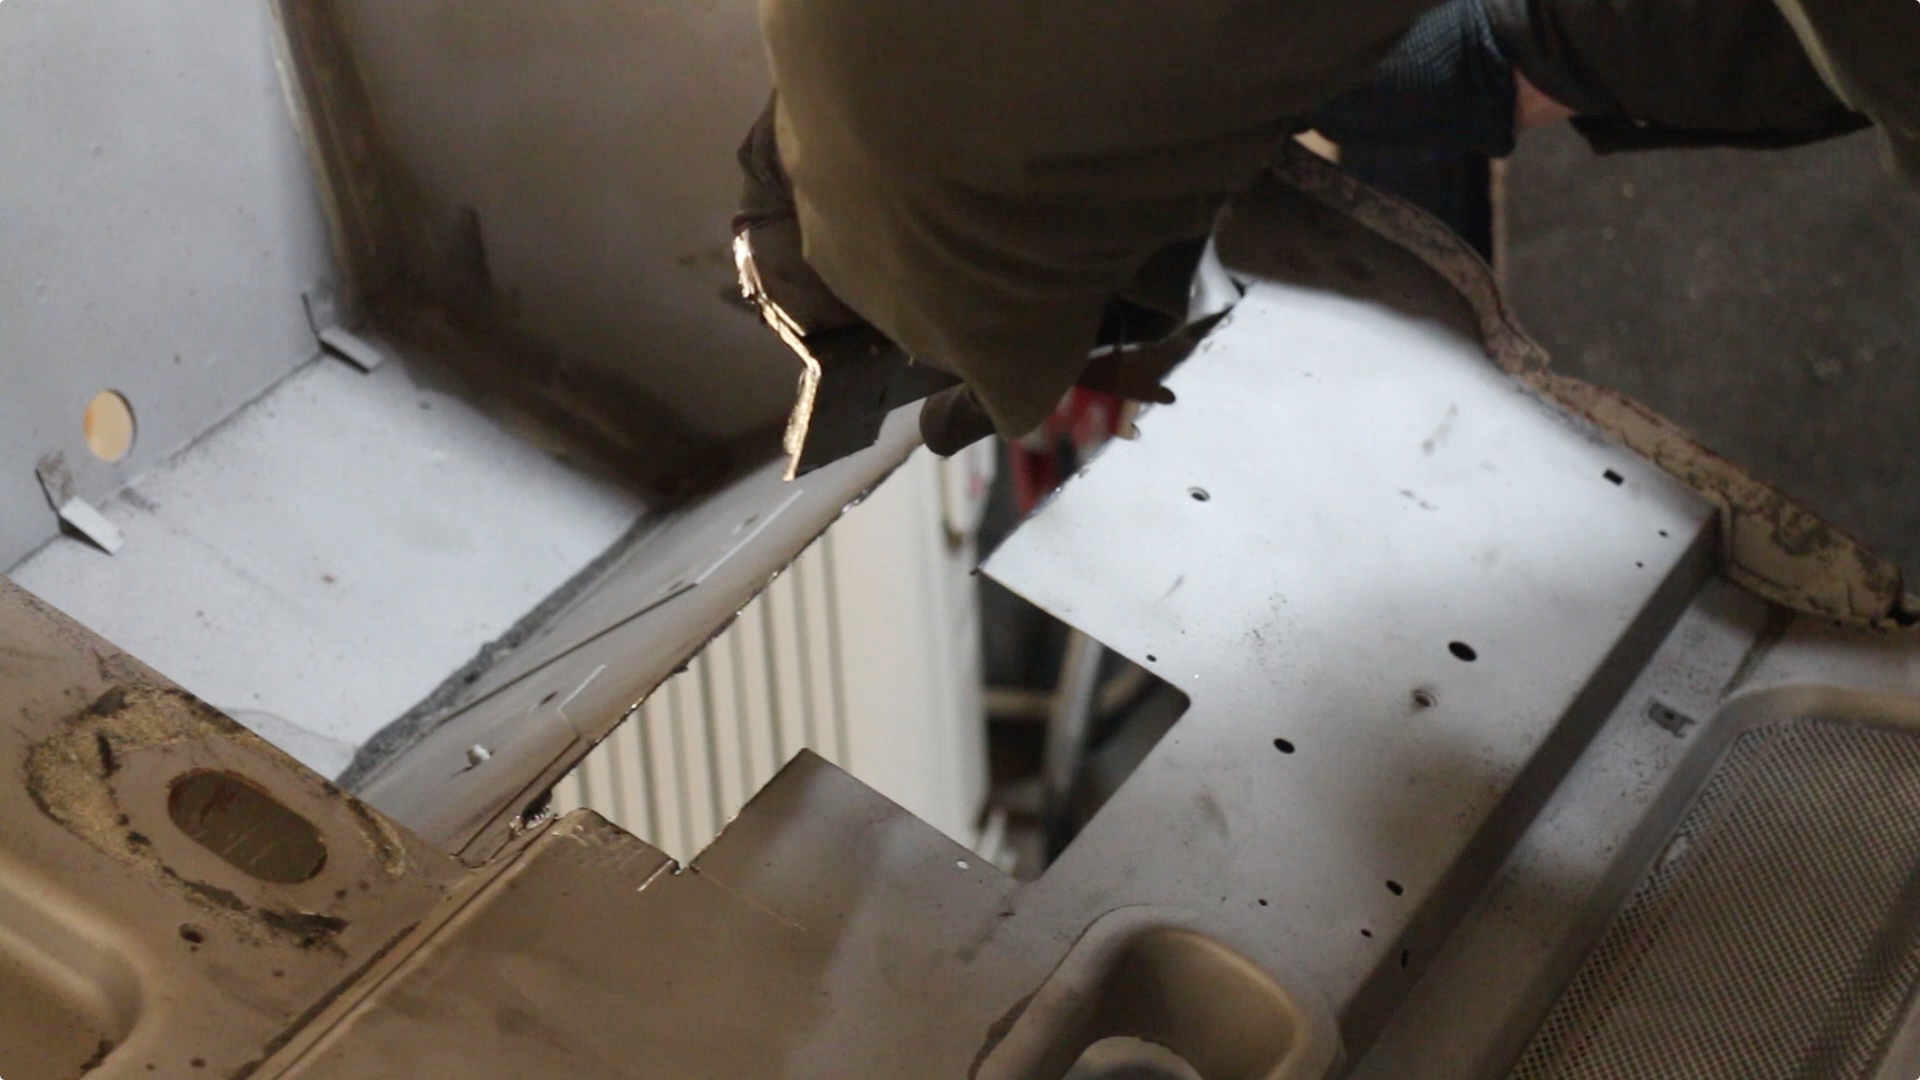
Finally, we scored a mark with a Dremel multi tool along the line. Then we were able to fracture the corroded part off, with a clean break formed along our score.
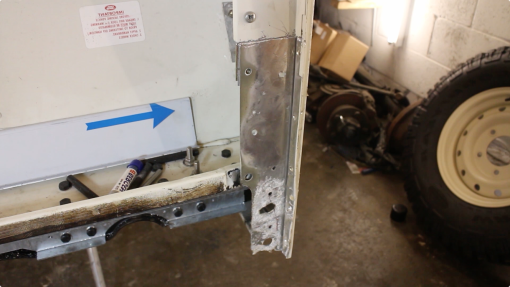
I'll be fitting the new sections in another video, shown here is the exposed rear skin.
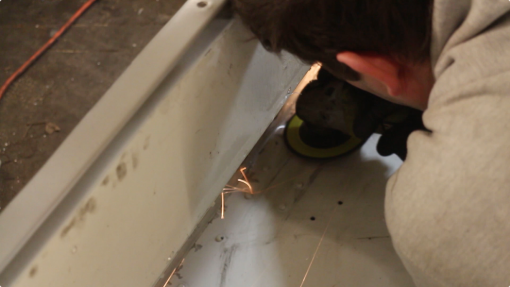
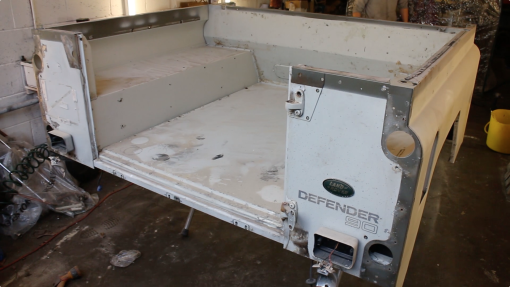
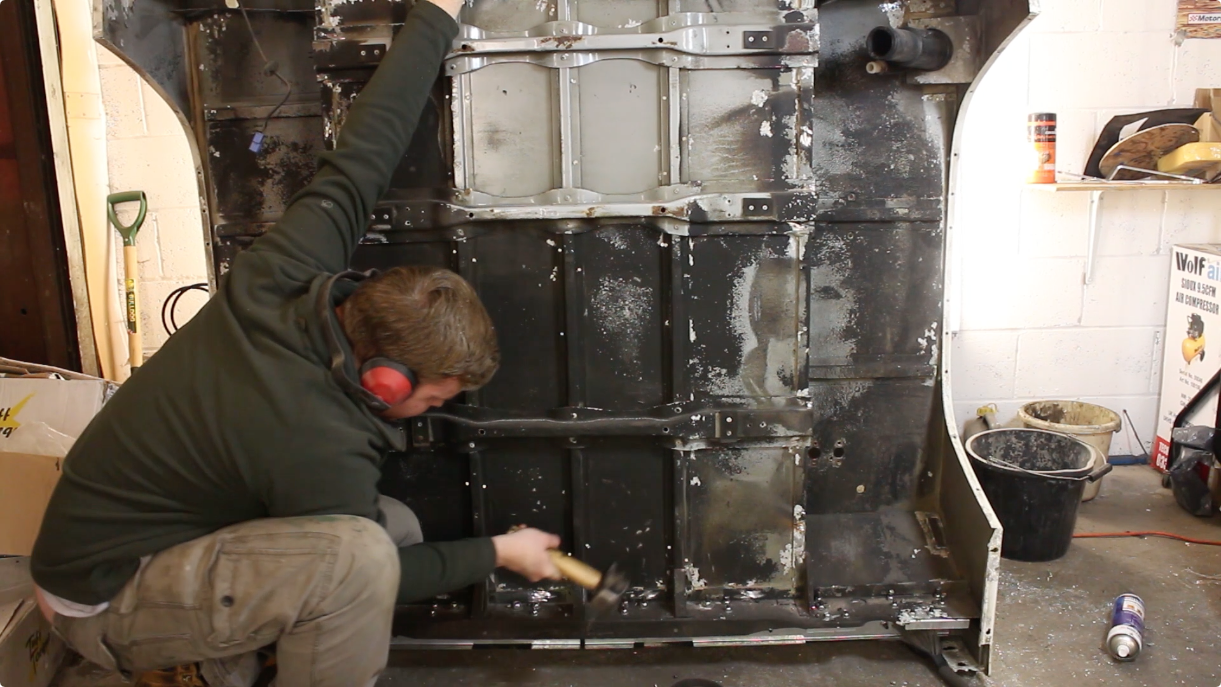
The floor too has suffered with some corrosion and needs replacing. The dome rivets need to be ground down, others will need to be drilled and others still, cut with a grinder.

The floor has adhesives applied in key areas, so it can take some time with a breaker bar & hammer to separate the floor from the supports.
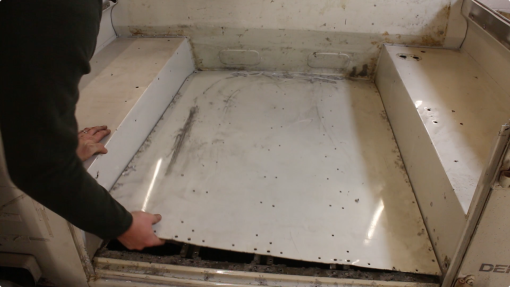
After all rivets have been drilled out, the floor will lift out
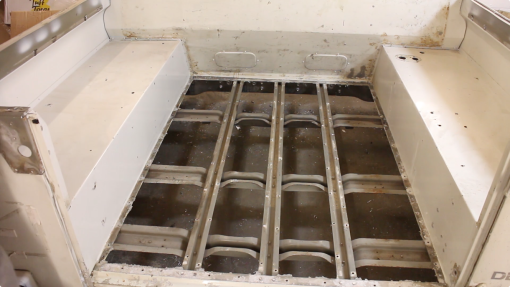
Now's a good time to assess the condition of the tub supports. We can also throughly rust proof these whilst they're exposed.
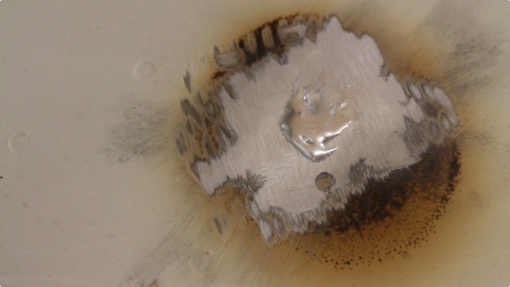
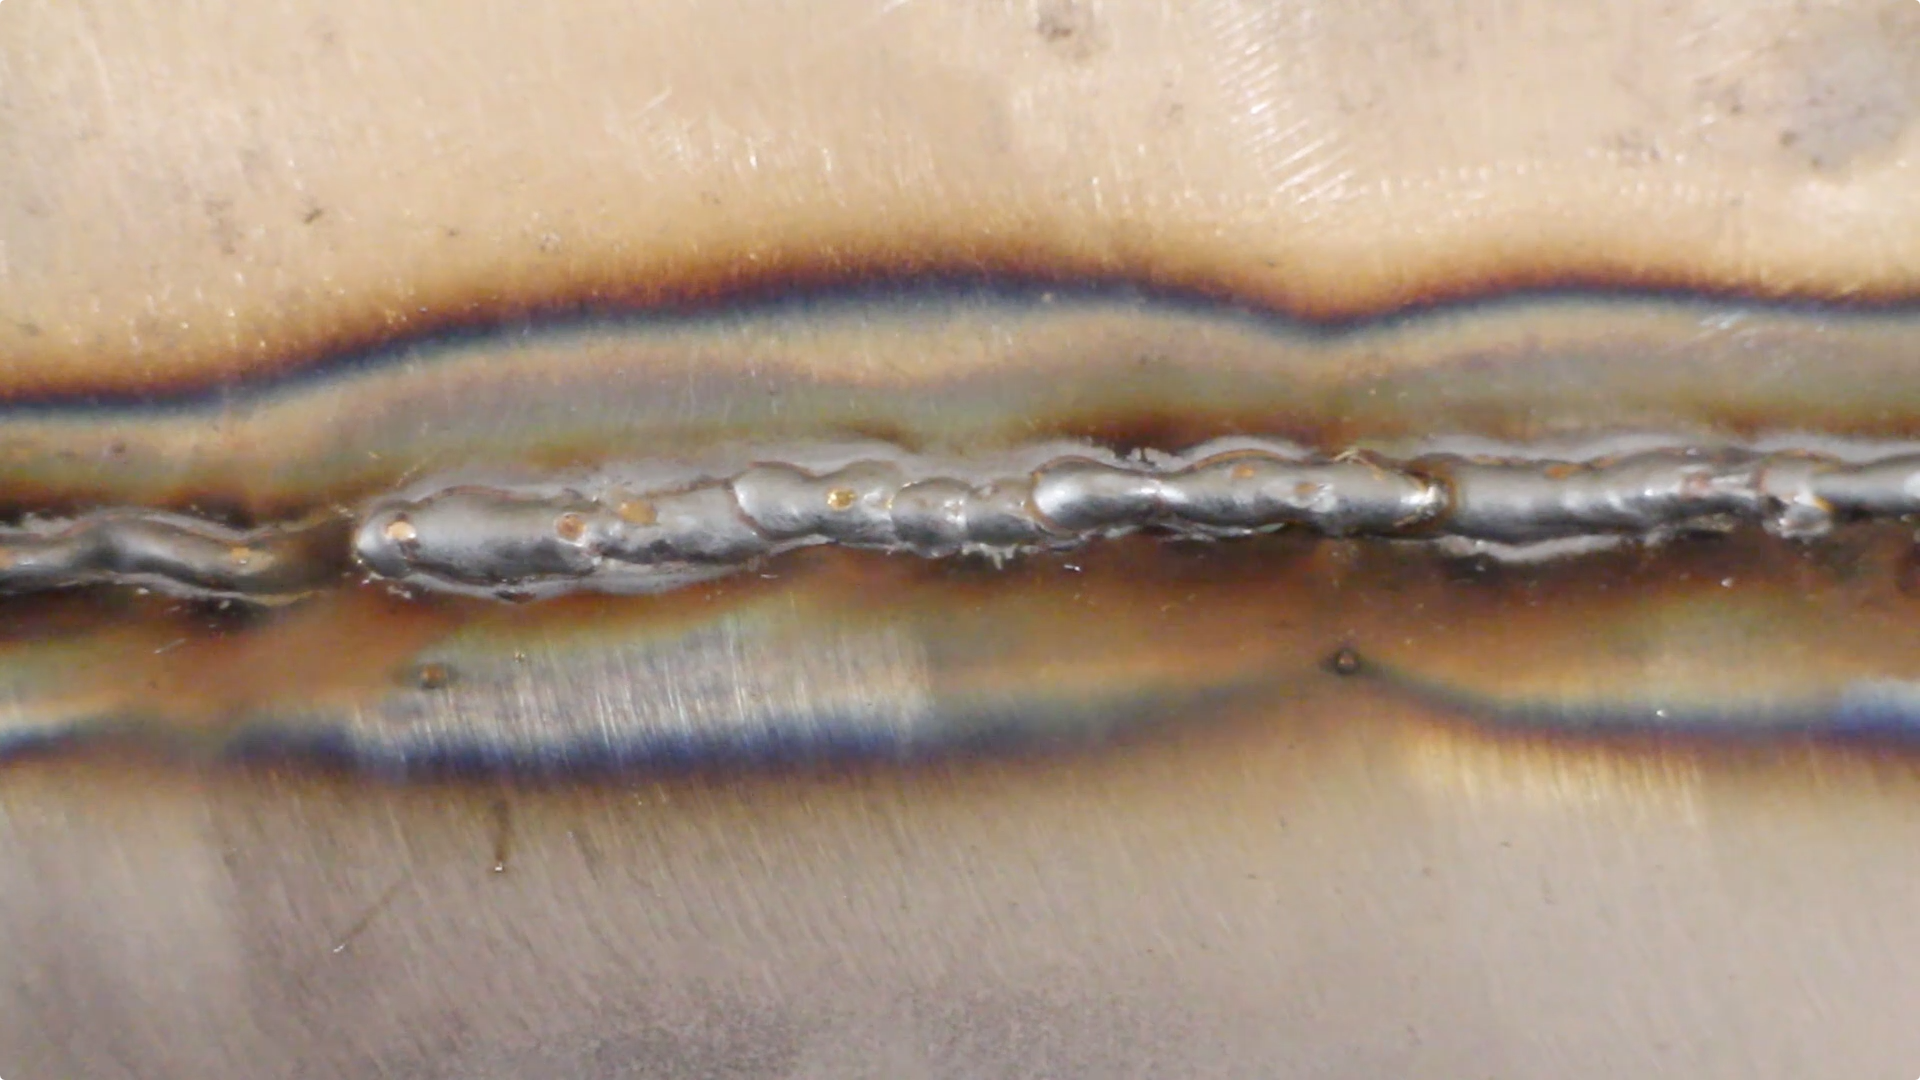
Finally, my plumber wife kindly began brazing some of the redundant holes in my tub, using the excellent Lumiweld from Frost.co.uk. You can check out the results at the end of the video, it's impressive stuff! And is formulated to work on Birmabright!
The rear tub is in need of some minor repairs. The tub cappings will be removed and sent off for galvanising. Everywhere else, we have replacement repair sections.
Using a 6mm drill bit, we're drilling into the rivet head, which typically shears off.
Then the crush section of the rivet can be tapped out, this is the quickest way to remove rivets.

There are quite a number of rivets all told on the cappings
In addition to rivets, the cappings are typically held on with some mild adhesives / foam tape and can then be lifted away. Those will be going to the galvanisers along side the bulkhead and will be fitted unpainted to the 90 for that classic Land Rover appearance.

Cappings gone, you can see the Zinc Phosphate primer applied at the factory. Over the primer, the tub is currently overcoated in 2 pack (Chawton White). We'll be going to the classic (and now rather popular) Pastel Green, a Series 1 colour
These seatbelt mount brackets panels came from YRM Metal Solutions. They've been laser cut, CNC folded and galvanised. The result is excellent tolerances and a lasting repair!
Fitting is easy, the old seat belt mount bracket is removed.

And any flaky aluminium corrosion is stripped away with a wire wheel.
We applied Dinitrol cavity wax to the tub, before offering up the repair section.

It's supplied in 2 pieces (otherwise it wouldn't fit), there are a few holes that have captive nuts so bolts were installed to hold the panel in place, along with a G clamp.

Before drilling the holes for each fixing.
There are a total of 48 M8 bolts required. Once secured, these panels are very strong! There's zero movement and the whole lot will be overcoated with stone chip for further protection.
Moving onto the strike plate, this often corrodes where the tub fits to the sill rail, due to bimetallic reaction. The aluminium turns to a powder and is completely unusable.

So to repair we'll fit new strike plate sections from YRM too. These are pretty simple to fit, and once prepared and painted, it should be as good as new.
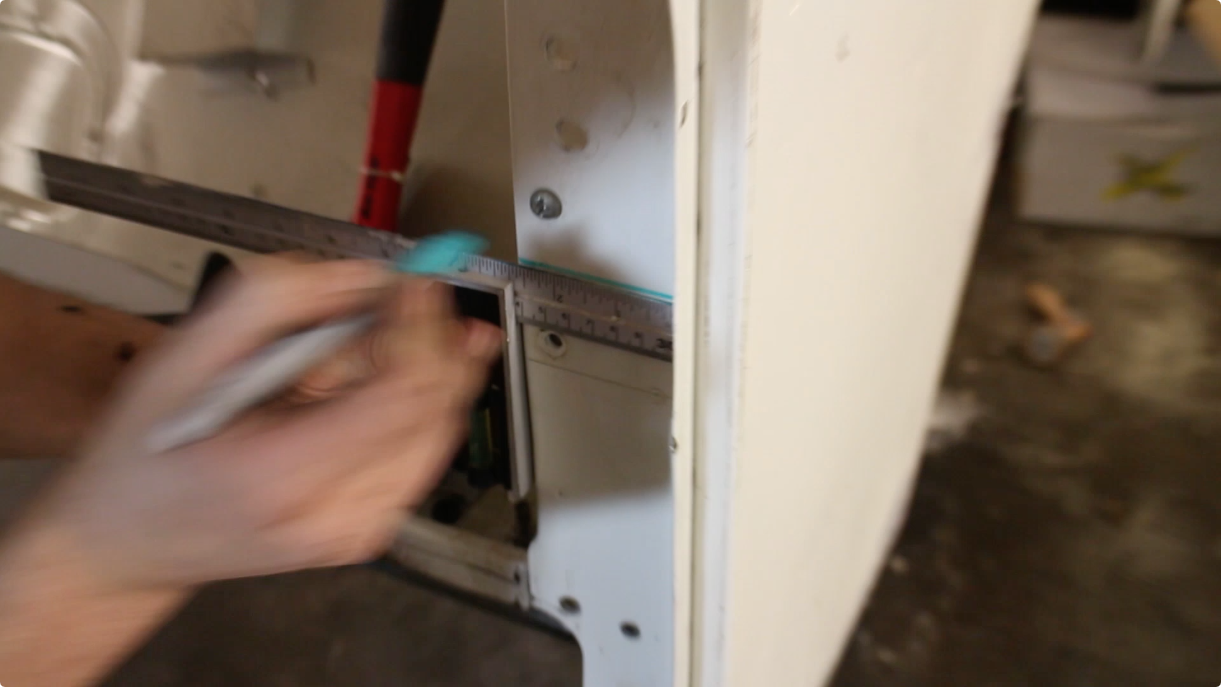
We're starting by marking off where we'd like to cut off the strike plate.

And using a spot weld drill to remove the spot welds and rivets below the line, including on the seal retainer.

Then, using a bolster chisel and a scraper, we can begin to prise the 2 skins apart

Finally, we scored a mark with a Dremel multi tool along the line. Then we were able to fracture the corroded part off, with a clean break formed along our score.

I'll be fitting the new sections in another video, shown here is the exposed rear skin.

The floor too has suffered with some corrosion and needs replacing. The dome rivets need to be ground down, others will need to be drilled and others still, cut with a grinder.
The floor has adhesives applied in key areas, so it can take some time with a breaker bar & hammer to separate the floor from the supports.

After all rivets have been drilled out, the floor will lift out

Now's a good time to assess the condition of the tub supports. We can also throughly rust proof these whilst they're exposed.

Finally, my plumber wife kindly began brazing some of the redundant holes in my tub, using the excellent Lumiweld from Frost.co.uk. You can check out the results at the end of the video, it's impressive stuff! And is formulated to work on Birmabright!
https://www.youtube.com/watch?v=lKugafonbWo

One of the many brilliant things about YouTube is that we can get feedback directly from our viewers. Some of these these comments are very useful (in fact*we read and respond to every single one). One fan told us a woeful story when he had to remove his gearbox for a 2nd time after forgetting*to change the rear crankshaft oil seal on a high mileage TD5. So a replacement was sort from LR Parts.

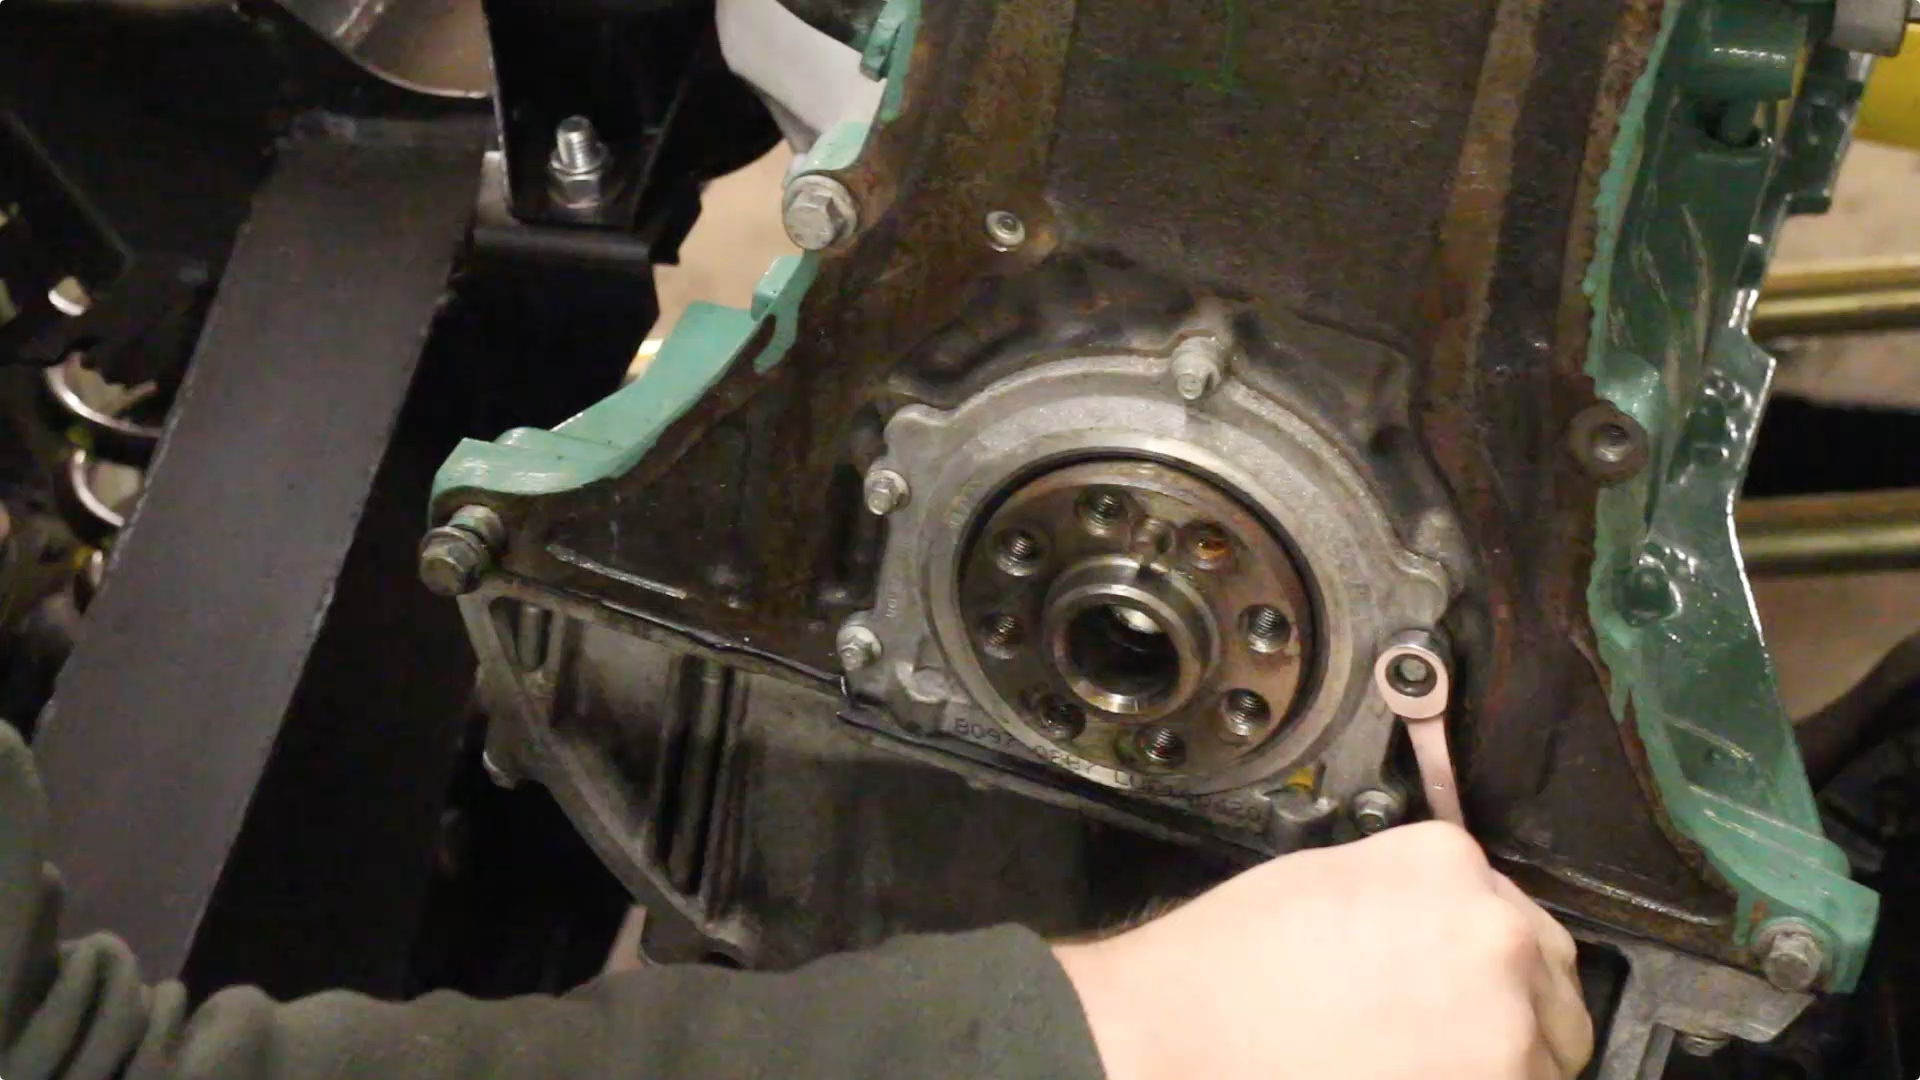
Once the*new item was in place (see video for fitting), the spigot bush was pressed into place. This had*been soaked in engine oil for a few days. This is an old school trick I read about that helps sintered bronze bushes (which are supposedly*porous) to add extra lubrication to a material that is already self-lubricating. I've read of premature spigot bush failings and figured it was worth a shot. The rear of the engine block was cleaned up too.

Once cleaned off, the gearbox shim plate / cover and DMF were fitted up. You can purchase a flywheel holder to fasten down the 2 stage bolts, or simply get someone else to hold it. The bolts are tightened up by*diagonal selection (star pattern).
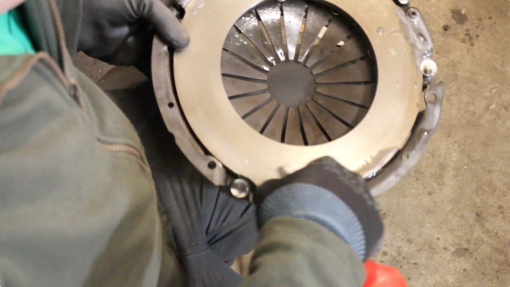
The clutch cover (and flywheel) were*cleaned up using Brake & Clutch cleaner.
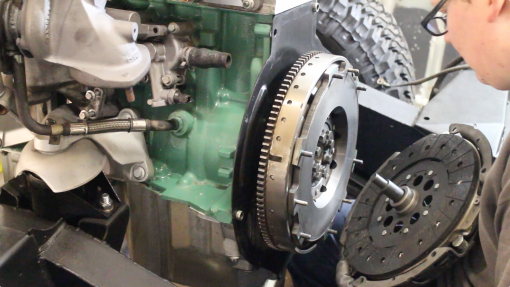
Using a clutch alignment tool (these are available on eBay at a good price), the clutch plate was offered up and correctly positioned.
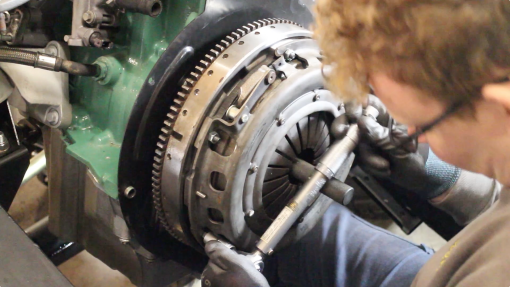
And the 3/8 torque wrench broken out to secure down the clutch cover

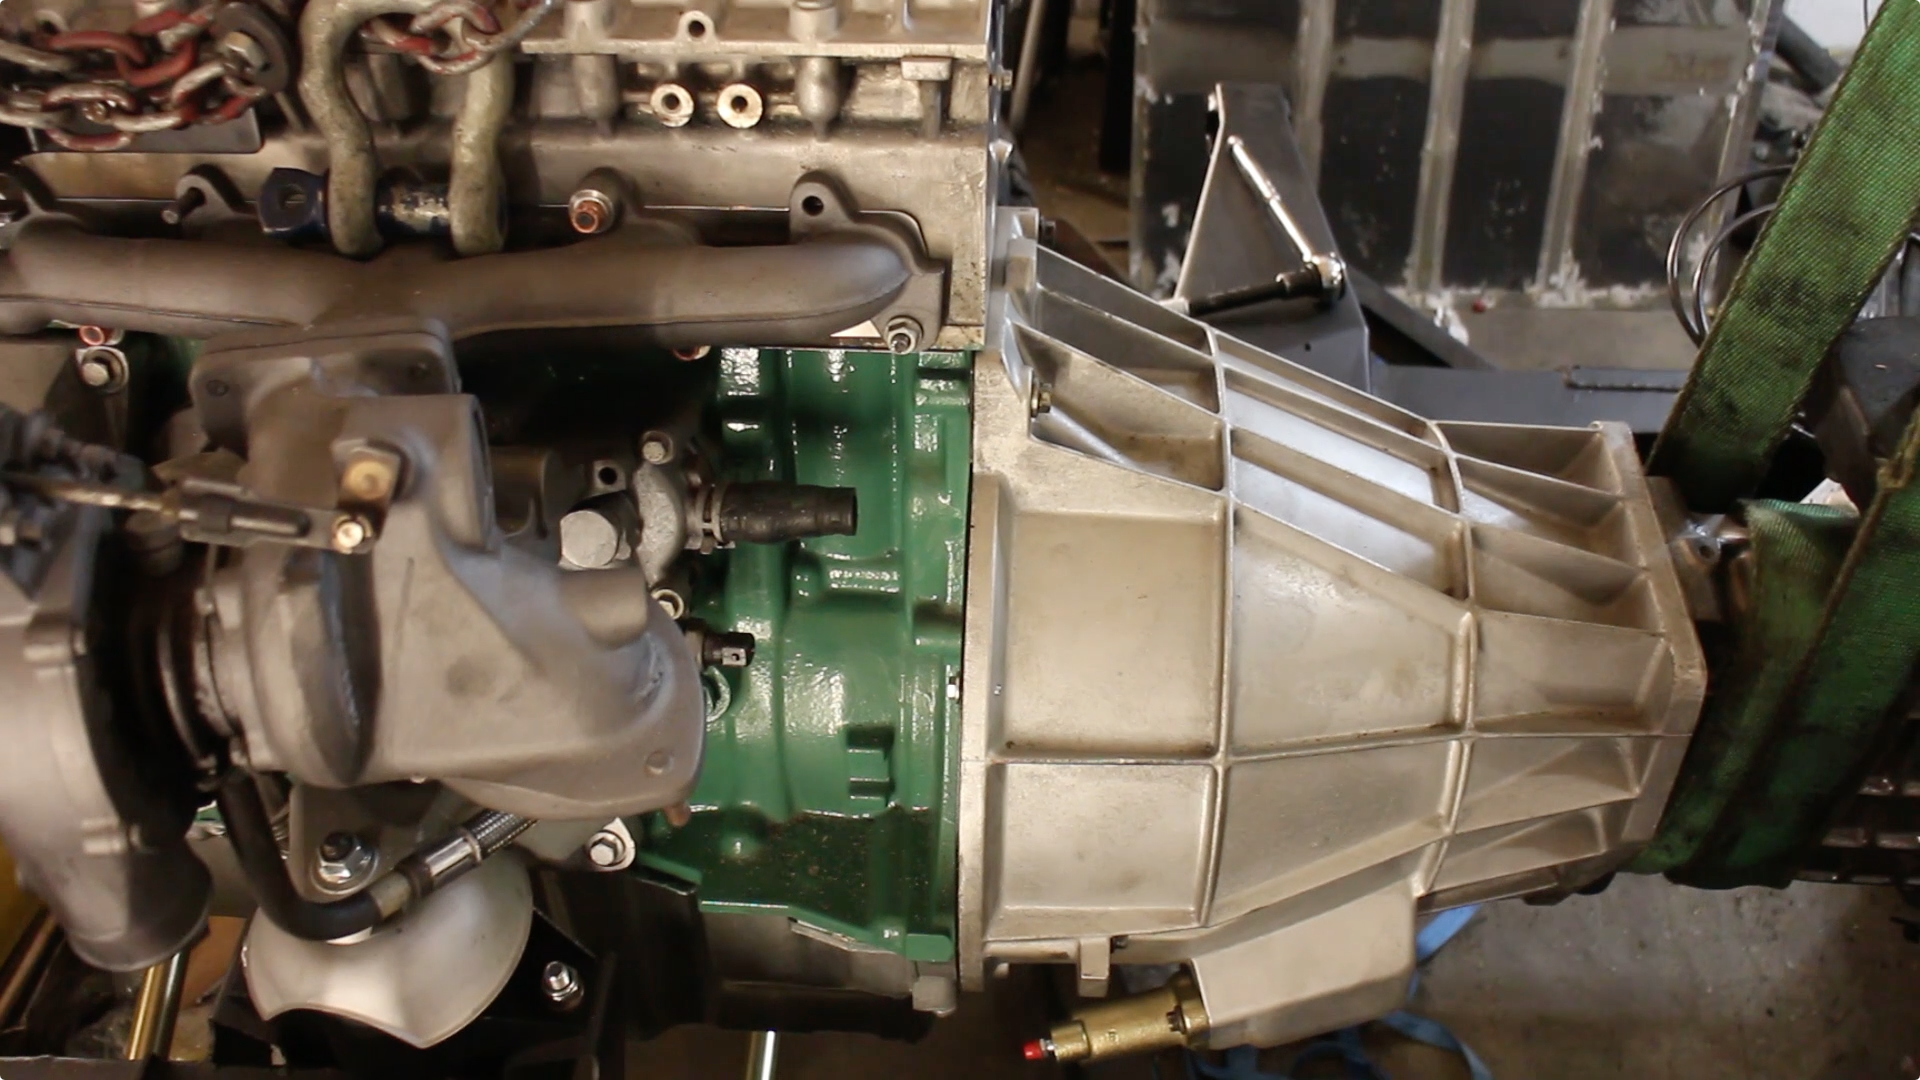
Moving onto the transfer box, this needed to be reunited with the reconditioned R380. I toyed with the idea of fitting a Discovery transfer box, with it's preferable ratio that offers lower revs at cruising speeds. *On balance, I decided against fitting the disco box as I*rarely go on substantial motorway trips to warrant such a change. This was most easily achieved by standing the gearbox on end, then square lifting the transfer box onto the output*shaft of the gearbox.
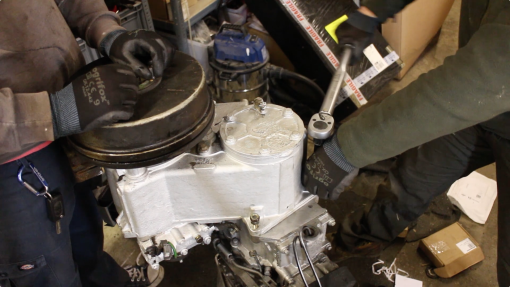
Torque settings can be found in the manual. We'll re-finish the hand brake drum once the gearbox is in place, as it will undoubtedly get scratched during fitting.
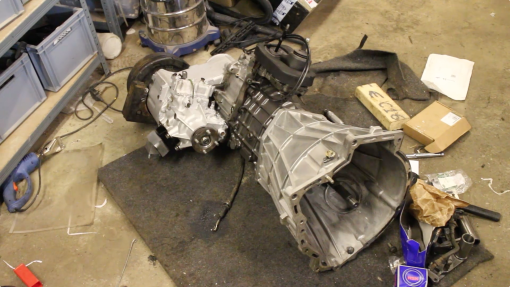
The gearbox and transfer box are joined once more! Incidentally, I've been making use of some carpeted plywood panels as assembly mats. We removed them from the 90*on disassembly, but they've proven useful at preventing newly painted components from getting marked and scuffed*up.
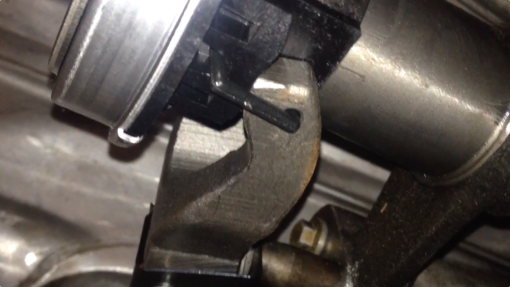
We next fitted the clutch release bearing guide (of which I now have 3, thanks to ordering one part that was completely wrong and losing my original one and then finding it a few days later). The clutch fork, push rod and clips such as this one above that prevent the whole lot from*dislodging and destroying the clutch plate, were secured also. Molybdenum grease was used in appropriate areas.
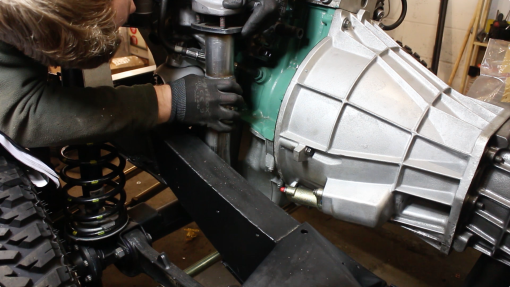
The engine ready to receive the gearbox /transfer box assembly.
An engine crane is worth it's weight in gold here. A second pair of hands (thanks Phil, he always brings biscuits!) make lighter work of aligning the box, as does a high lift*trolley jack to fine tune positioning. Strap the gearbox to the crane as though the bell housing wasn't present as this weighs almost nothing. Try go diagonally across the gearbox casing and transfer box to get as level*a lift as possible.

Reconditioned gearbox meets the engine for the first time! Meshing the splines together was a little tricky and took a while, but once done, it's very satisfying! Need to fire some oil in both of those now. I'm going to run some cheap oil*through both to flush them out (just in case)
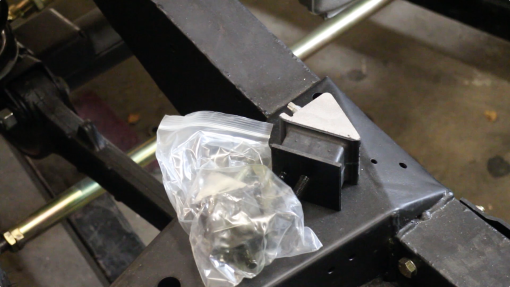
Took the chance to renew the gearbox mounts whilst I had access. These are OEM replacements.

The slave cylinder and associated pipes were looking worse for wear. It was decided to replace them as the cost isn't particularly prohibitive and it's an easy job.
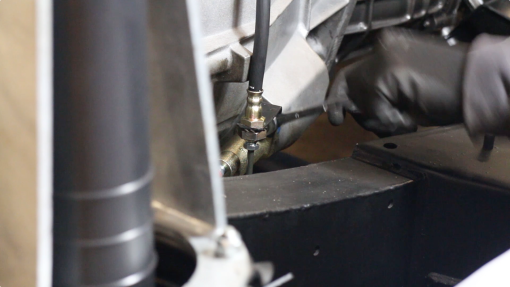
The only original parts saved were the bracket and the nuts (albeit,*cleaned up on the wire wheel and the bracket was sanded and painted). I've popped a pen lid on there to stop any dirt from the ceiling dropping in (there's a shop*above mine and when they walk around, tiny specs of chipboard*dust fall everywhere)
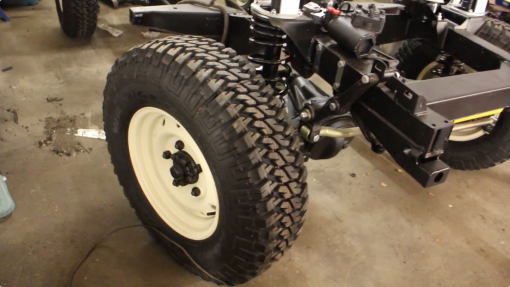
Once that's sorted, I can put my new props on. In the end, the decision came down to either reconditioning the old ones, replacing them with large and expensive HD ones or just purchasing new OEM ones. I chose OEM ones from Britpart as I've been told these are produced by Hardy Spicer (well, GKN as they bought out HS apparently). Time will tell if this was the right decision. Fitting the props is made easier if you jack up one wheel, allowing the transmission to freely rotate.
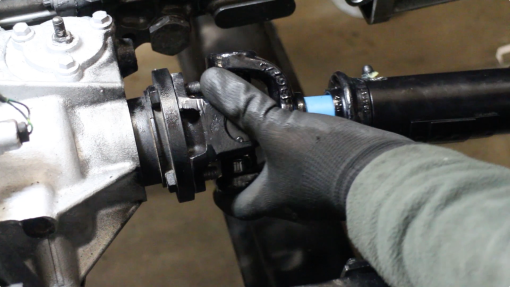
I'll grease those UJs and props again before running the vehicle, once offered up, fixings were lightly greased to prevent seizing up, and torqued down to 48nm. A propshaft socket is very handy here, you'll also need a 9/16 spanner*(some owners make a 14mm combination*work, though this isn't quite the right size and can cause nut rounding)
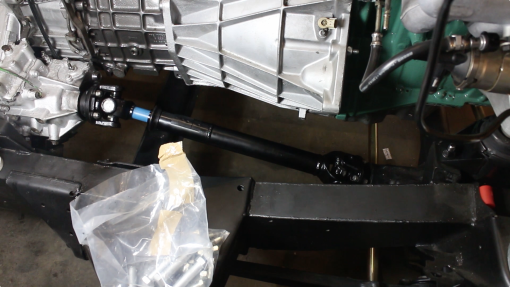
Props in place
I've fitted the oil cooler, however some owners have contacted me suggesting an upgrade to this area - will feature that in a coming episode.
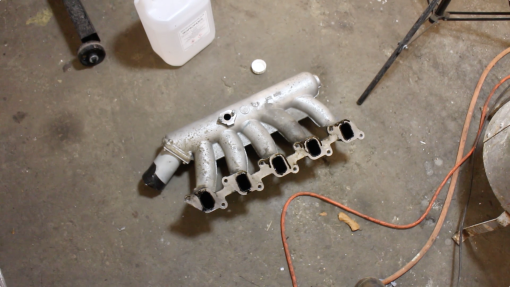
I managed to accidentally format my SD card the other week, losing a lot of engine re-assmebly clips! And a rather humorous one of me putting the inlet manifold into a dishwasher, before the dishwasher began to spew diesel and oil*bubbles all over the kitchen. The wife, needless to say, wasn't impressed.
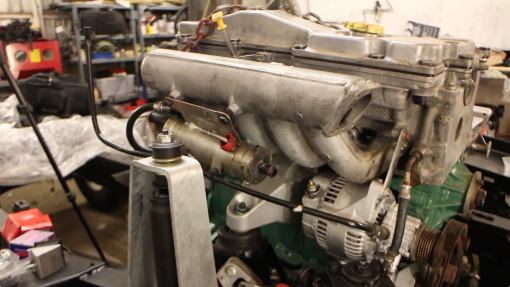
Inlet manifold and fuel cooler in position.

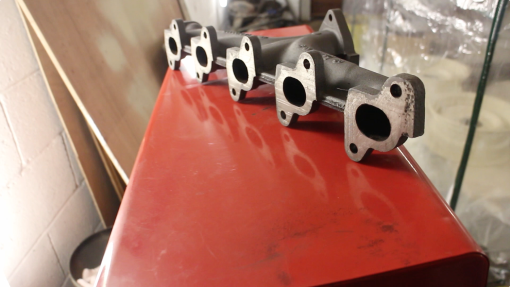
The painted turbo and exhaust manifold, we used grey POR 15 high temperature*manifold paint from Frost.co.uk.
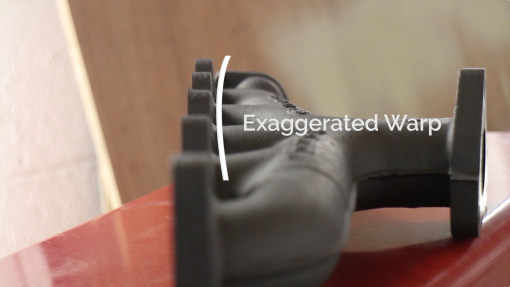
You might*remember that our manifold had warped and snapped studs. This is a common issue on Td5's. The easiest fix (and most cost effective) is to remove the manifold and have it skimmed true and dewebbed. The theory is that the casting*has warped and shouldn't warp again. Once it's been engineered back to acceptable tolerances, you can fit longer studs from AliveTuning or similar with spacers to help prevent the studs from snapping again. We purchased a set of 16mm stainless steel spacers from eBay, along with an extended stud kit and then painted the whole lot*to match the turbo. It shouldn't ever shift*again and the cost was preferential to that of a custom stainless or ceramic coated manifold.
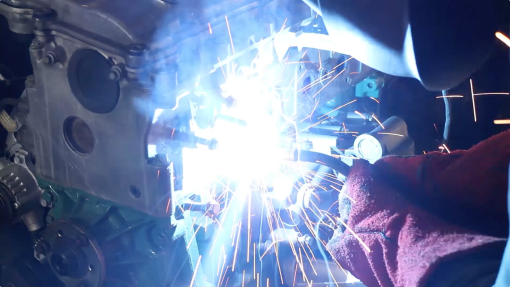
Removing broken studs: you can try stud extractors (didn't work for me), drilling and retapping, drilling and helicoiling or welding a nut onto the end of the stud and removing that way.
This works well as the heat from welding helps*free up*the threads*and the whole stud*should simply*wind out.
The manifold skimming*cost £90 in the end from a local machine shop. This was considerably cheaper than £500+ for a stainless part.
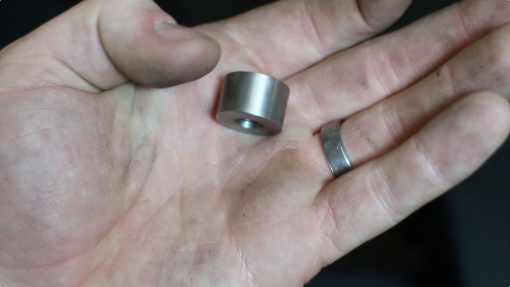
These M8 16mm spacers were purchased from eBay and match our Wurth extended studs nicely.
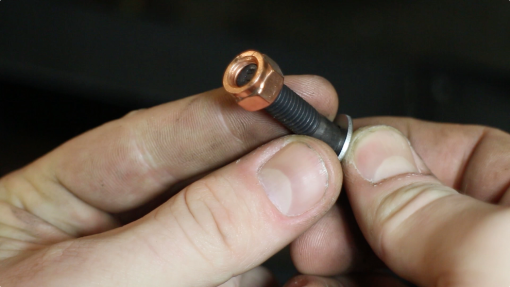
The kit also includes a washer and copper flashed nut, helping avoid*corrosion issues.
Here's the manifold in place, complete with it's spacers. It certainly looks the part and shouldn't warp again. I also fitted 2 gaskets because when I removed it, there were 2 gaskets - probably a service bulletin fix from a dealer!

Next time, we can fit up our stainless exhaust system, weld the bulkhead and sort out the brake pipes.
One of the many brilliant things about YouTube is that we can get feedback directly from our viewers. Some of these these comments are very useful (in fact*we read and respond to every single one). One fan told us a woeful story when he had to remove his gearbox for a 2nd time after forgetting*to change the rear crankshaft oil seal on a high mileage TD5. So a replacement was sort from LR Parts.
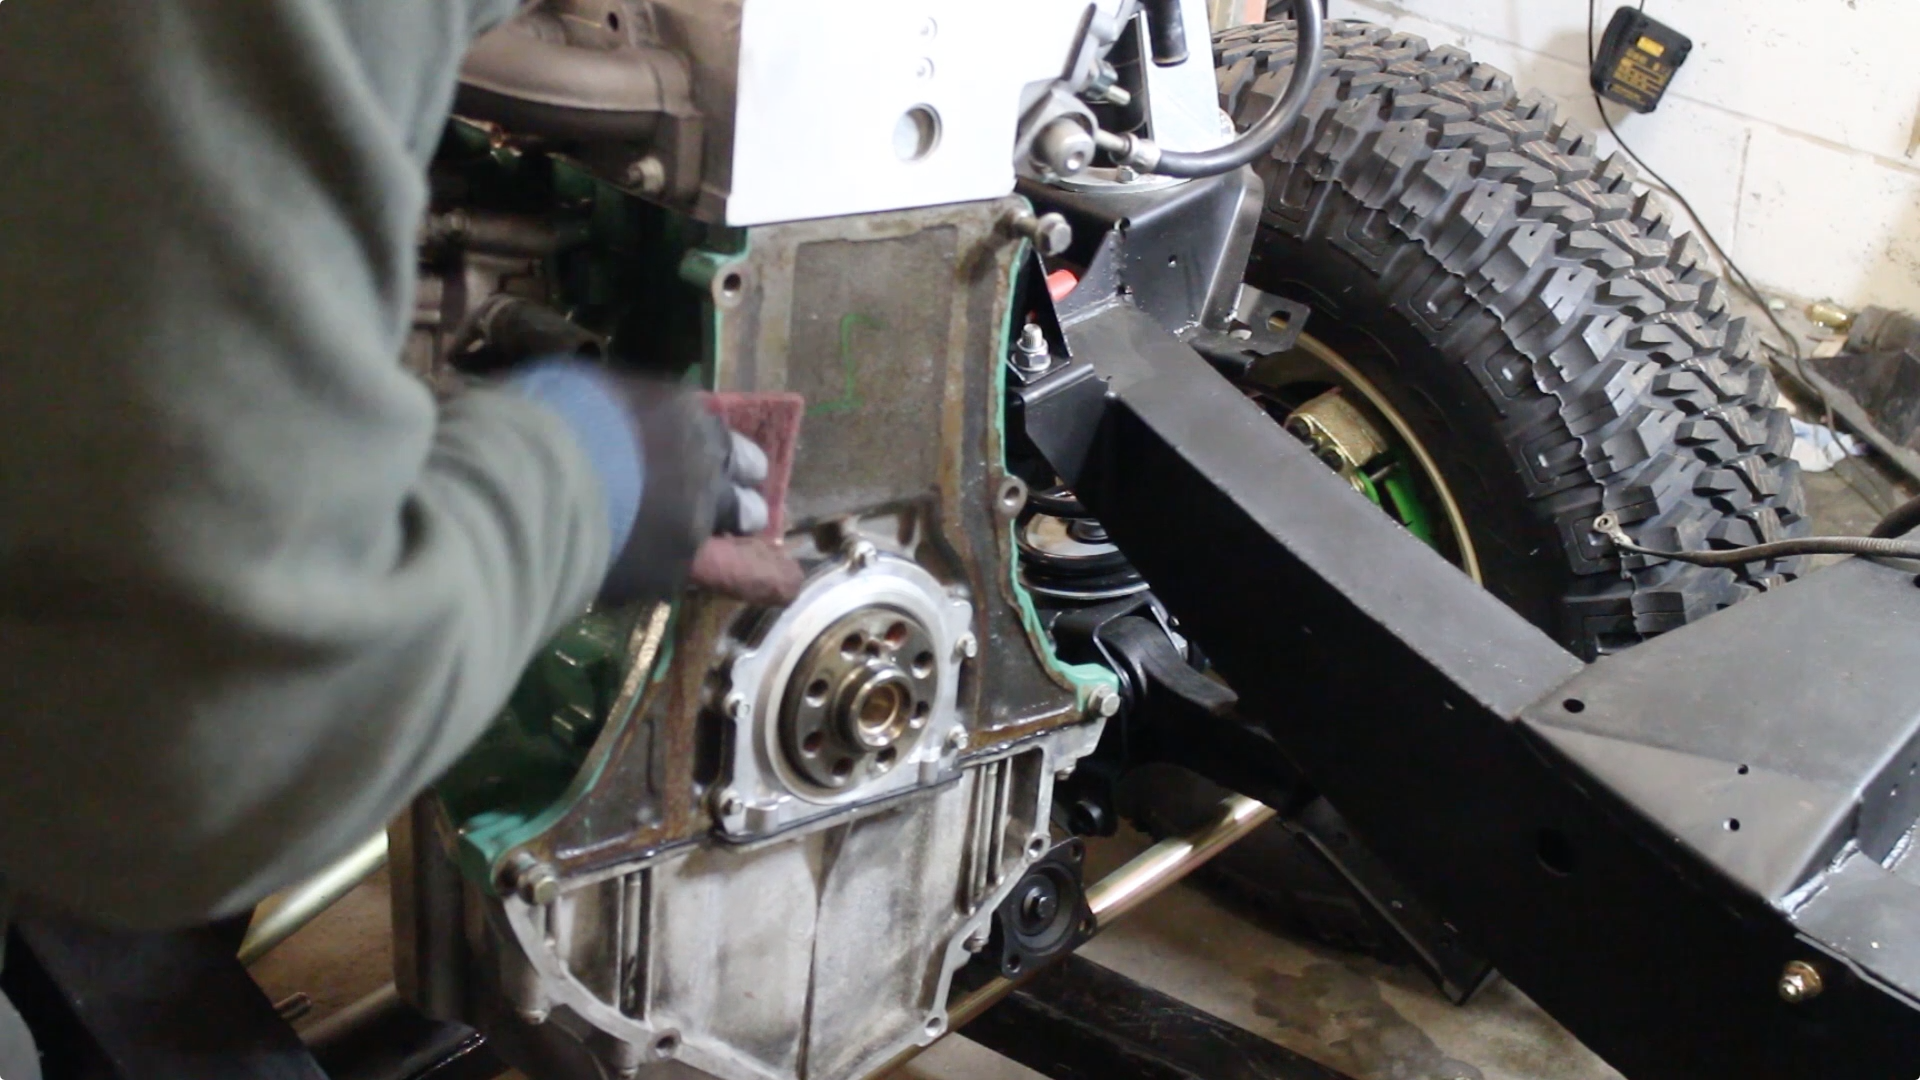
Once the*new item was in place (see video for fitting), the spigot bush was pressed into place. This had*been soaked in engine oil for a few days. This is an old school trick I read about that helps sintered bronze bushes (which are supposedly*porous) to add extra lubrication to a material that is already self-lubricating. I've read of premature spigot bush failings and figured it was worth a shot. The rear of the engine block was cleaned up too.

Once cleaned off, the gearbox shim plate / cover and DMF were fitted up. You can purchase a flywheel holder to fasten down the 2 stage bolts, or simply get someone else to hold it. The bolts are tightened up by*diagonal selection (star pattern).

The clutch cover (and flywheel) were*cleaned up using Brake & Clutch cleaner.

Using a clutch alignment tool (these are available on eBay at a good price), the clutch plate was offered up and correctly positioned.

And the 3/8 torque wrench broken out to secure down the clutch cover
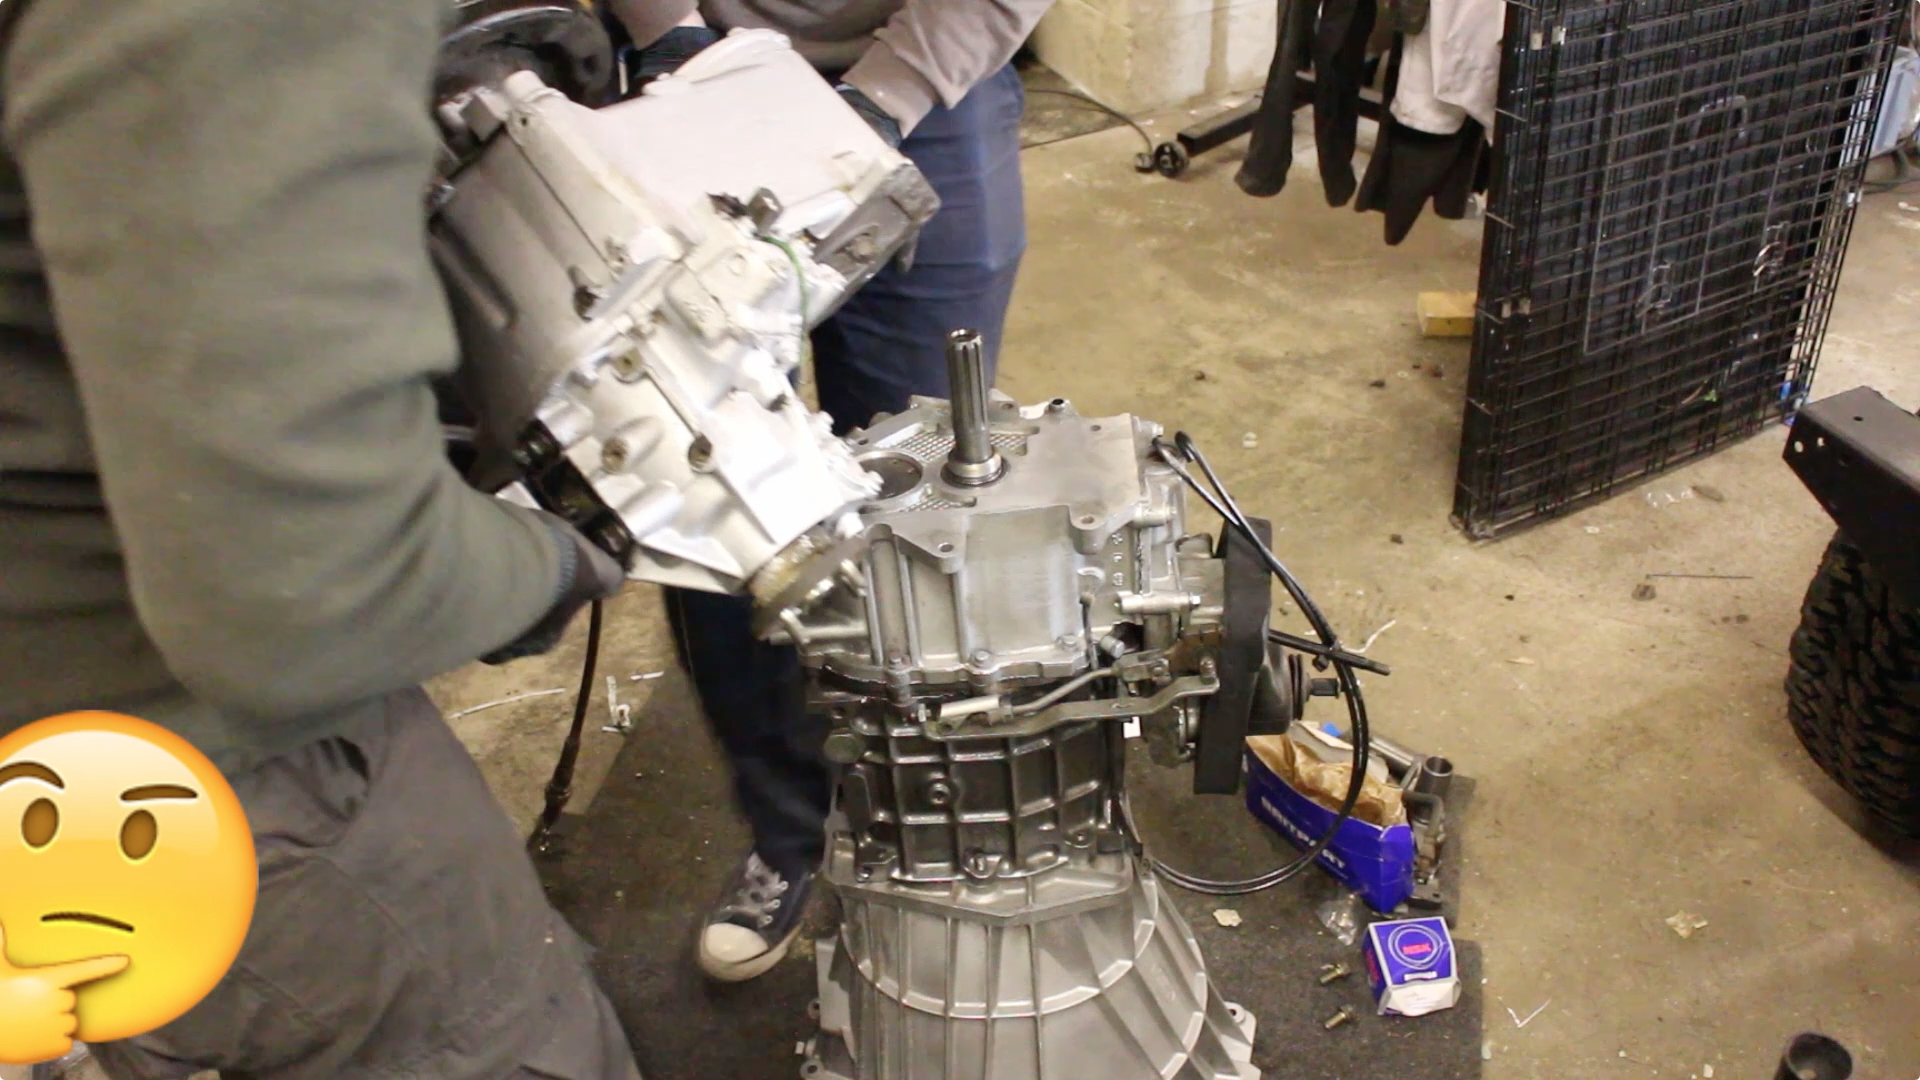
Moving onto the transfer box, this needed to be reunited with the reconditioned R380. I toyed with the idea of fitting a Discovery transfer box, with it's preferable ratio that offers lower revs at cruising speeds. *On balance, I decided against fitting the disco box as I*rarely go on substantial motorway trips to warrant such a change. This was most easily achieved by standing the gearbox on end, then square lifting the transfer box onto the output*shaft of the gearbox.

Torque settings can be found in the manual. We'll re-finish the hand brake drum once the gearbox is in place, as it will undoubtedly get scratched during fitting.

The gearbox and transfer box are joined once more! Incidentally, I've been making use of some carpeted plywood panels as assembly mats. We removed them from the 90*on disassembly, but they've proven useful at preventing newly painted components from getting marked and scuffed*up.

We next fitted the clutch release bearing guide (of which I now have 3, thanks to ordering one part that was completely wrong and losing my original one and then finding it a few days later). The clutch fork, push rod and clips such as this one above that prevent the whole lot from*dislodging and destroying the clutch plate, were secured also. Molybdenum grease was used in appropriate areas.

The engine ready to receive the gearbox /transfer box assembly.

An engine crane is worth it's weight in gold here. A second pair of hands (thanks Phil, he always brings biscuits!) make lighter work of aligning the box, as does a high lift*trolley jack to fine tune positioning. Strap the gearbox to the crane as though the bell housing wasn't present as this weighs almost nothing. Try go diagonally across the gearbox casing and transfer box to get as level*a lift as possible.
Reconditioned gearbox meets the engine for the first time! Meshing the splines together was a little tricky and took a while, but once done, it's very satisfying! Need to fire some oil in both of those now. I'm going to run some cheap oil*through both to flush them out (just in case)

Took the chance to renew the gearbox mounts whilst I had access. These are OEM replacements.

The slave cylinder and associated pipes were looking worse for wear. It was decided to replace them as the cost isn't particularly prohibitive and it's an easy job.

The only original parts saved were the bracket and the nuts (albeit,*cleaned up on the wire wheel and the bracket was sanded and painted). I've popped a pen lid on there to stop any dirt from the ceiling dropping in (there's a shop*above mine and when they walk around, tiny specs of chipboard*dust fall everywhere)

Once that's sorted, I can put my new props on. In the end, the decision came down to either reconditioning the old ones, replacing them with large and expensive HD ones or just purchasing new OEM ones. I chose OEM ones from Britpart as I've been told these are produced by Hardy Spicer (well, GKN as they bought out HS apparently). Time will tell if this was the right decision. Fitting the props is made easier if you jack up one wheel, allowing the transmission to freely rotate.

I'll grease those UJs and props again before running the vehicle, once offered up, fixings were lightly greased to prevent seizing up, and torqued down to 48nm. A propshaft socket is very handy here, you'll also need a 9/16 spanner*(some owners make a 14mm combination*work, though this isn't quite the right size and can cause nut rounding)

Props in place

I've fitted the oil cooler, however some owners have contacted me suggesting an upgrade to this area - will feature that in a coming episode.

I managed to accidentally format my SD card the other week, losing a lot of engine re-assmebly clips! And a rather humorous one of me putting the inlet manifold into a dishwasher, before the dishwasher began to spew diesel and oil*bubbles all over the kitchen. The wife, needless to say, wasn't impressed.
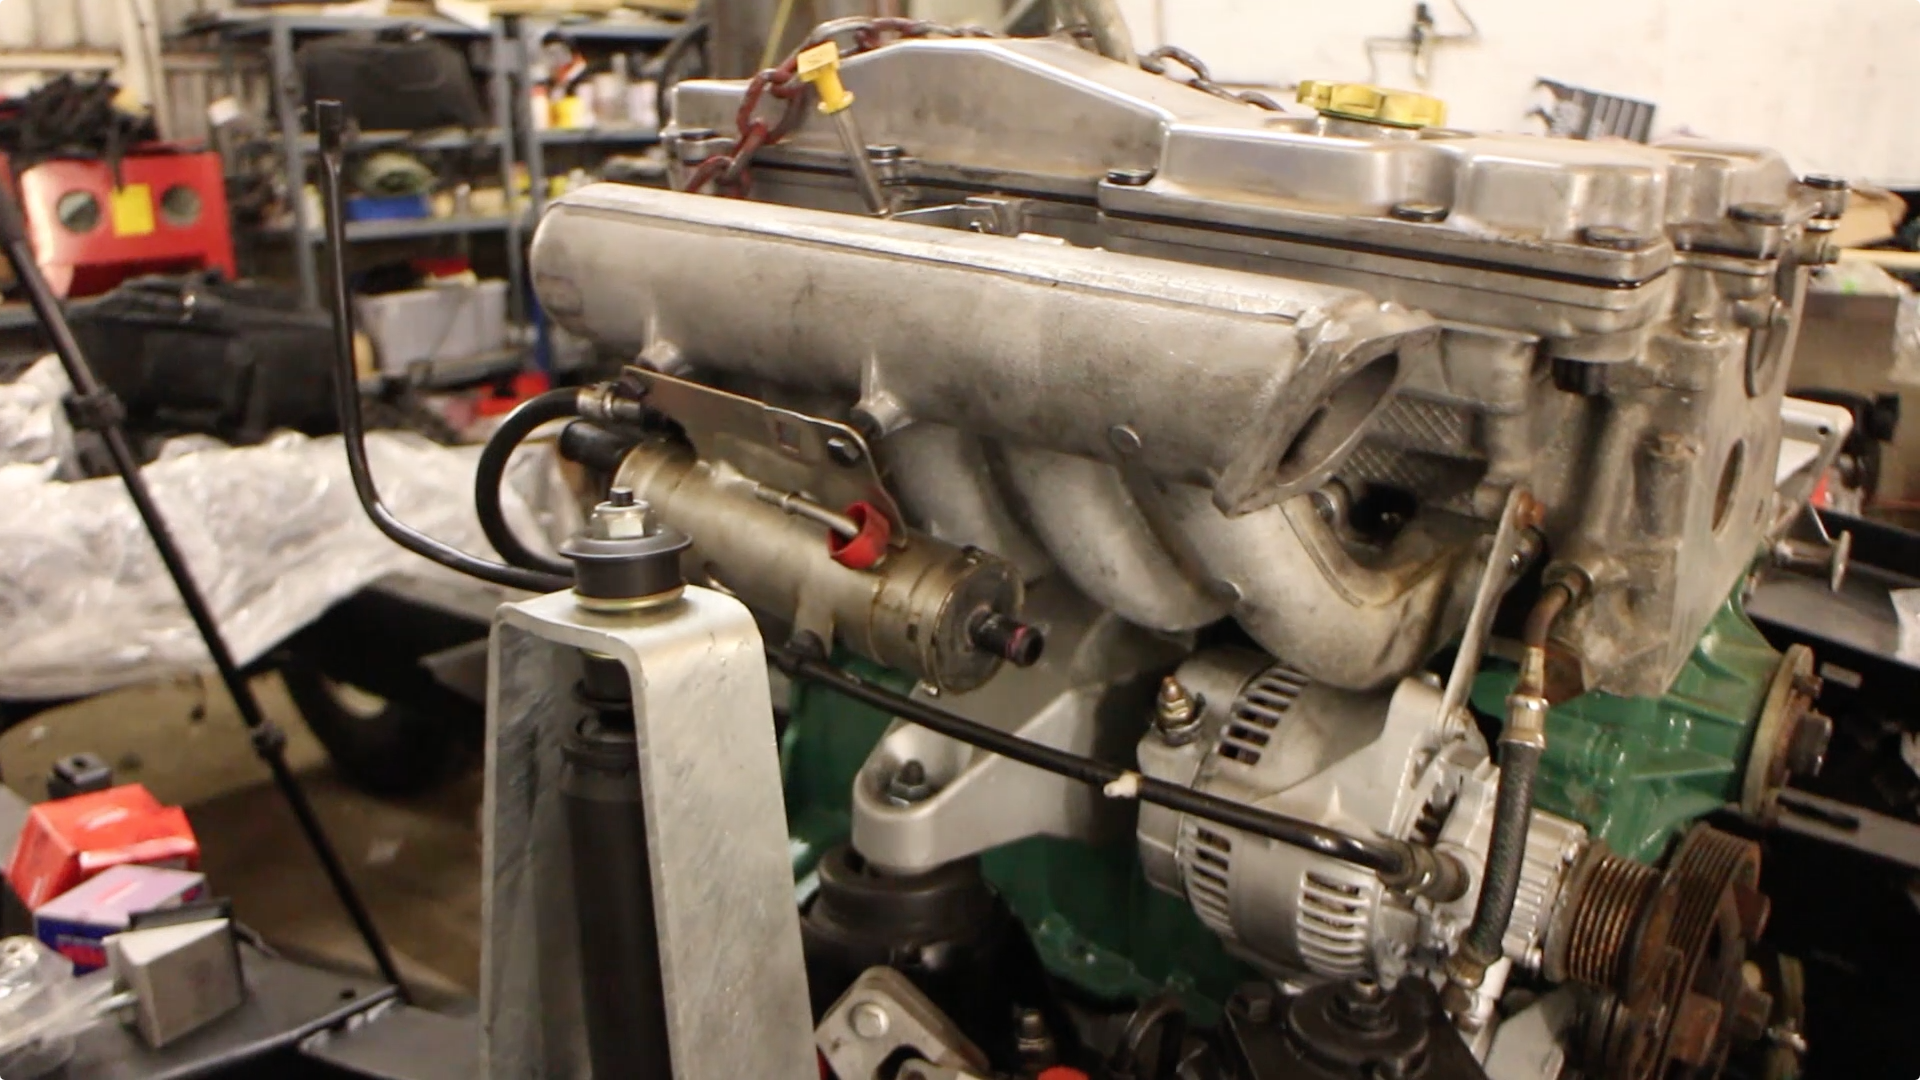
Inlet manifold and fuel cooler in position.
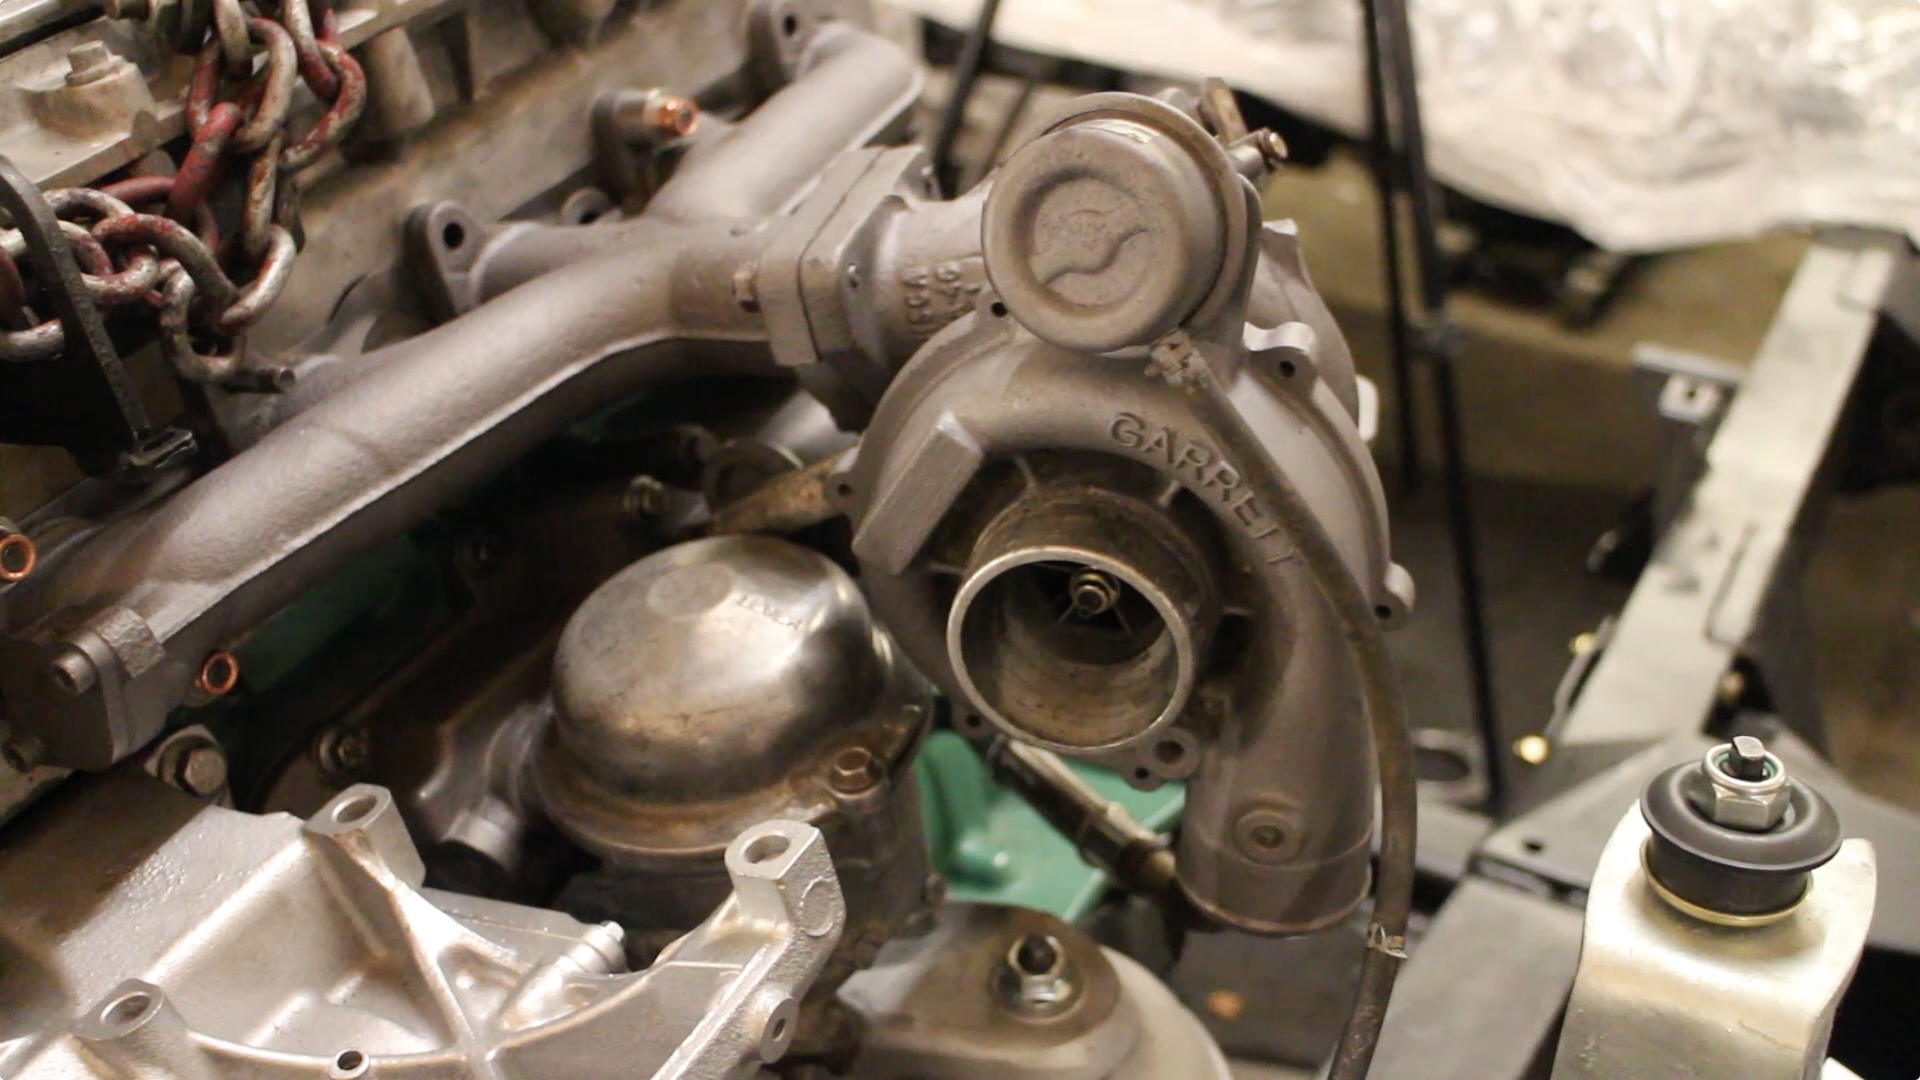
The painted turbo and exhaust manifold, we used grey POR 15 high temperature*manifold paint from Frost.co.uk.

You might*remember that our manifold had warped and snapped studs. This is a common issue on Td5's. The easiest fix (and most cost effective) is to remove the manifold and have it skimmed true and dewebbed. The theory is that the casting*has warped and shouldn't warp again. Once it's been engineered back to acceptable tolerances, you can fit longer studs from AliveTuning or similar with spacers to help prevent the studs from snapping again. We purchased a set of 16mm stainless steel spacers from eBay, along with an extended stud kit and then painted the whole lot*to match the turbo. It shouldn't ever shift*again and the cost was preferential to that of a custom stainless or ceramic coated manifold.

Removing broken studs: you can try stud extractors (didn't work for me), drilling and retapping, drilling and helicoiling or welding a nut onto the end of the stud and removing that way.

This works well as the heat from welding helps*free up*the threads*and the whole stud*should simply*wind out.

The manifold skimming*cost £90 in the end from a local machine shop. This was considerably cheaper than £500+ for a stainless part.
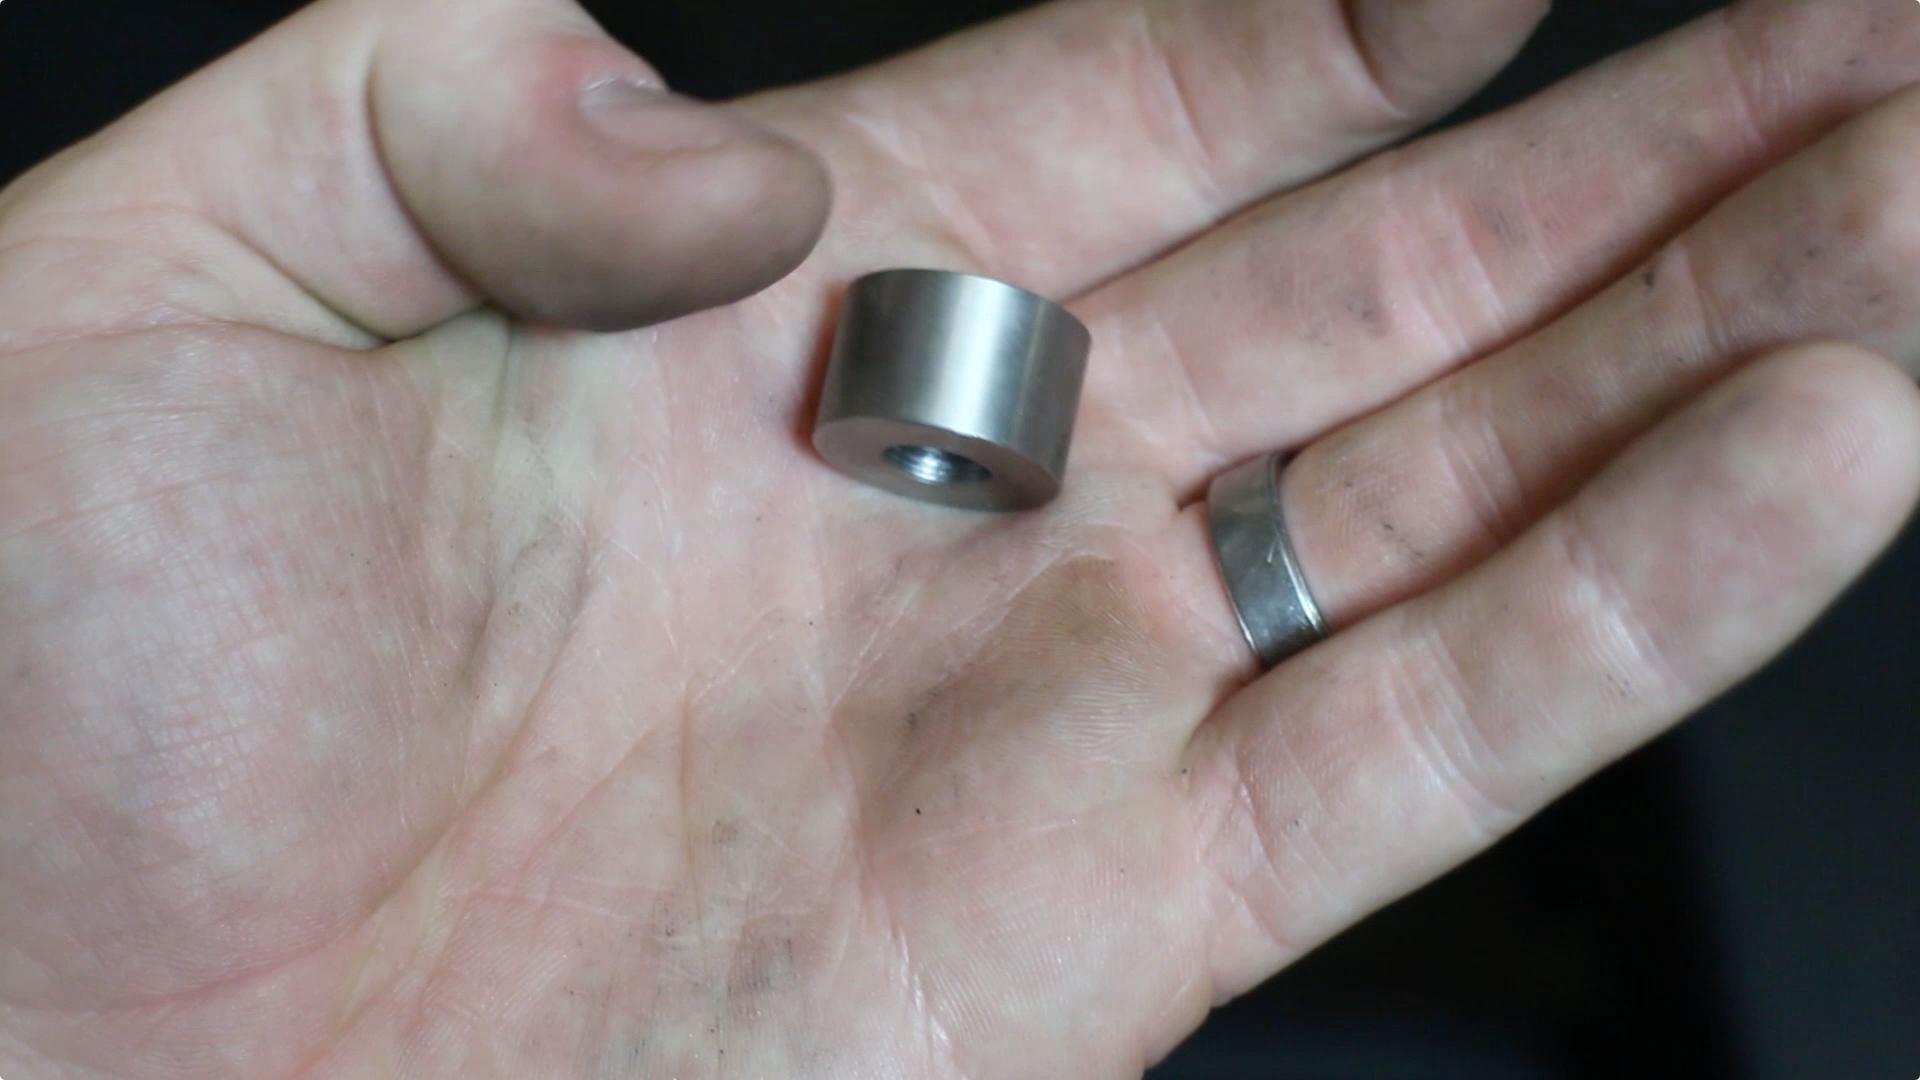
These M8 16mm spacers were purchased from eBay and match our Wurth extended studs nicely.
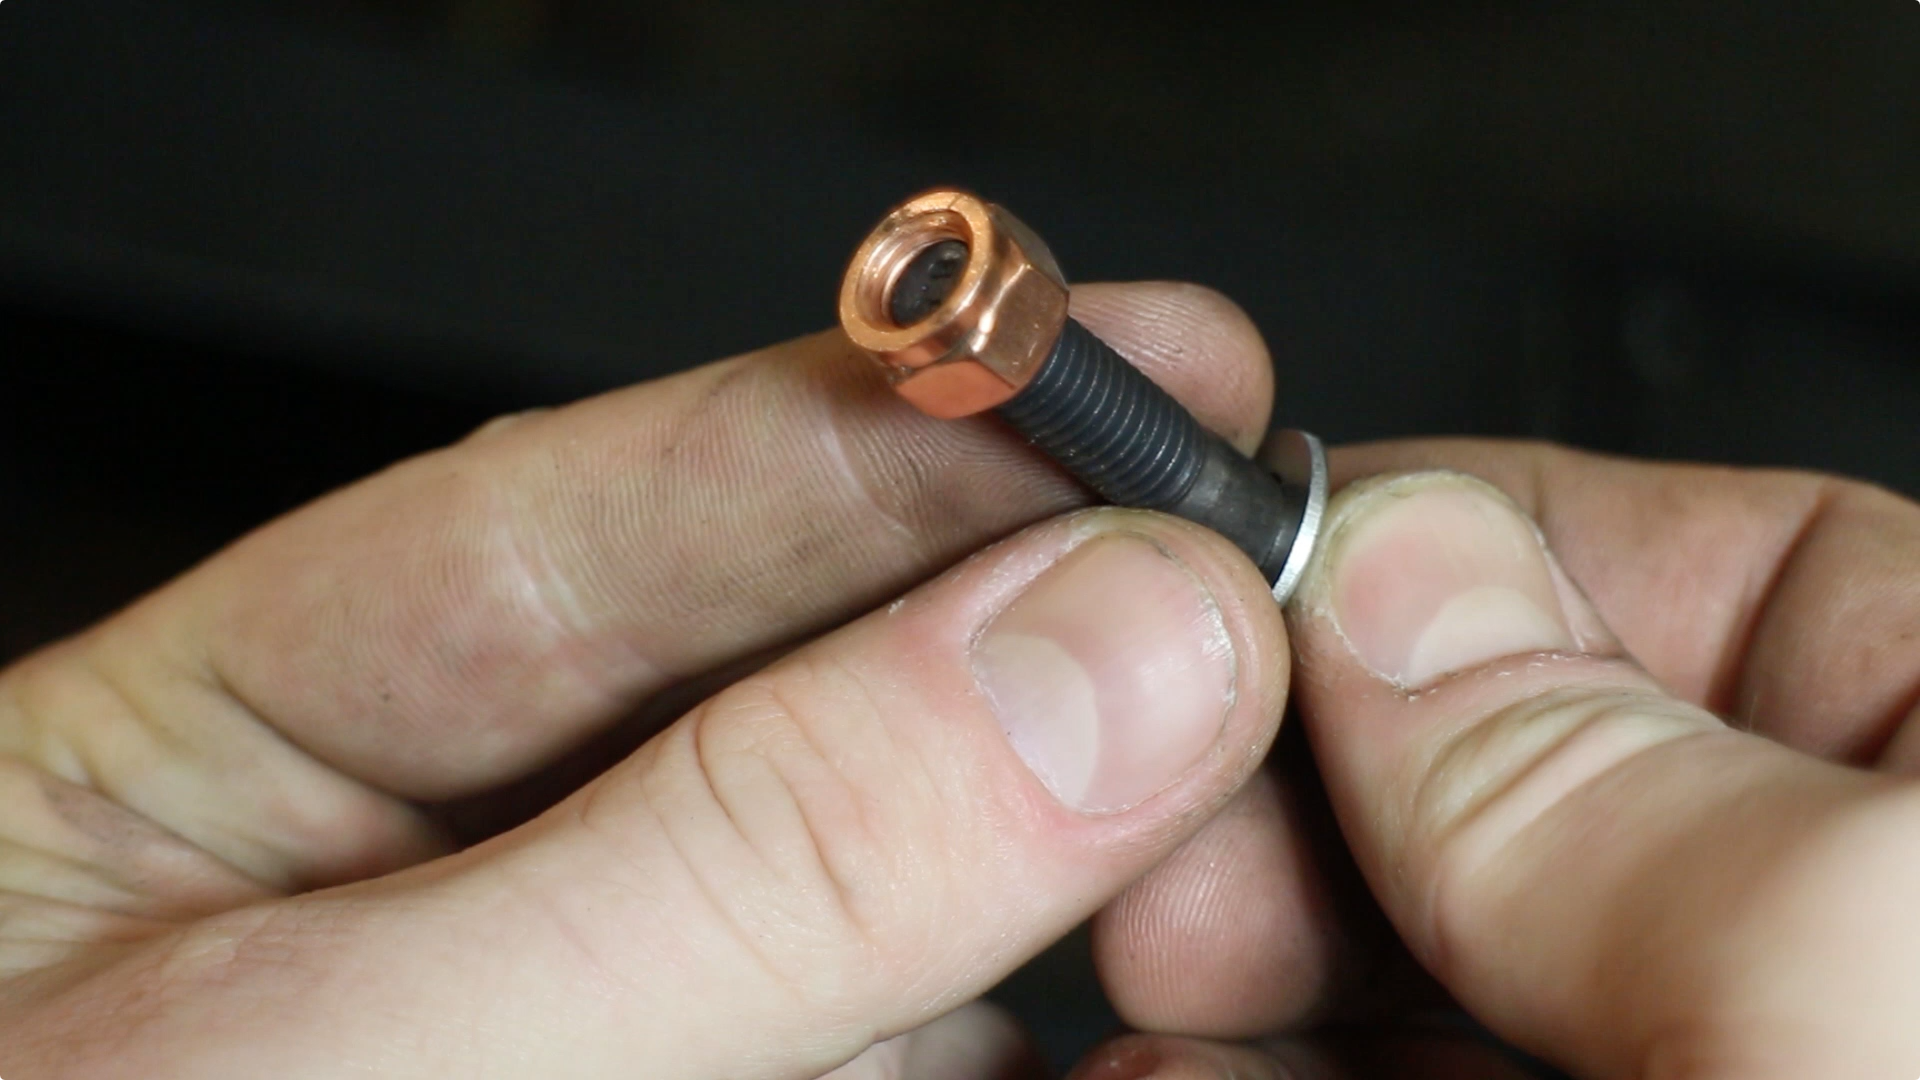
The kit also includes a washer and copper flashed nut, helping avoid*corrosion issues.

Here's the manifold in place, complete with it's spacers. It certainly looks the part and shouldn't warp again. I also fitted 2 gaskets because when I removed it, there were 2 gaskets - probably a service bulletin fix from a dealer!
Next time, we can fit up our stainless exhaust system, weld the bulkhead and sort out the brake pipes.
Latest video is here:
https://www.youtube.com/watch?v=nDlnyEQVp20
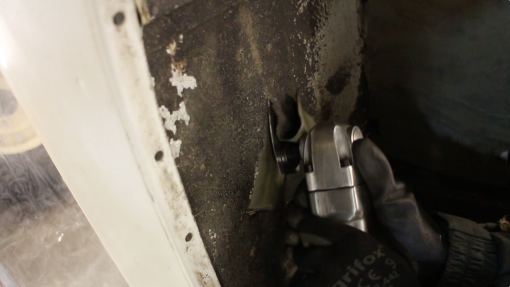
First job of the week was removing old waxoyl and factory applied stone chipping material. When perusing the workshop manual, I noticed that Land Rover recommend dealers use an air powered scraper. These things are superb! Probably my favourite tool at the moment, the whole tub was stripped in under an hour, ready for a reapplication of stone chipping.

With that done, I moved my attention to the injector loom harness. On the TD5, oil eventually wicks along the wiring into the ECM - this had happened with our vehicle. Hopefully, we've caught it in time. The ECM has been drained and cleaned.

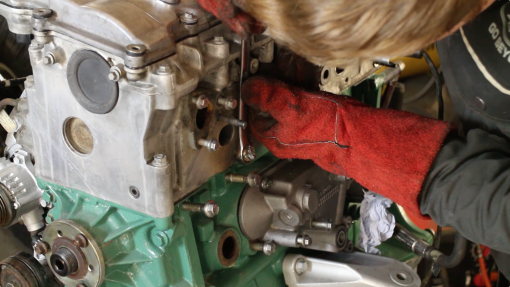
After removing the rocker cover, it's simply a case of removing the electrical connects for each injector.
And then prizing out the main connector for the harness. The new harness drops into place in the same manner. All told, with no body on the vehicle - this takes around 5 minutes.
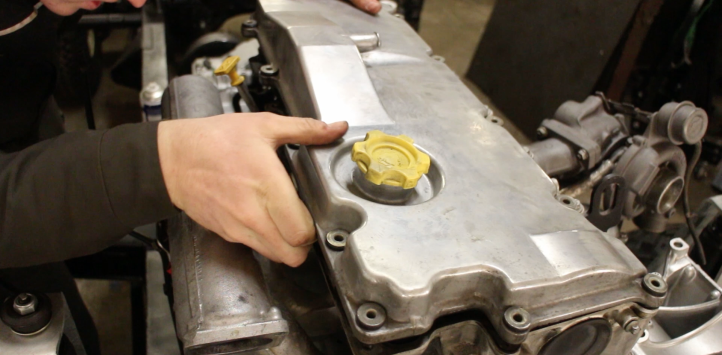
Dropping the rocker cover back onto a new gasket.
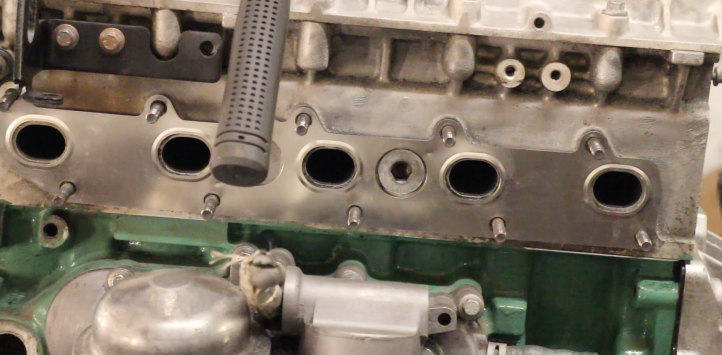
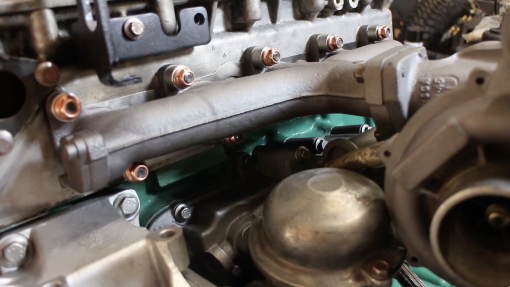
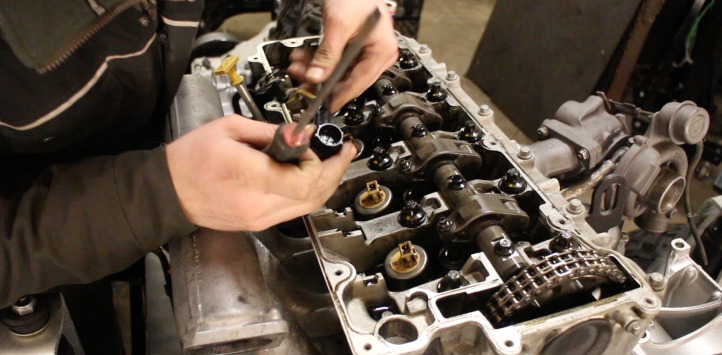
One of the great things about building a Land Rover in the manner we have, involving a huge community of Land Rover owners, is that we can get real time feedback. One viewer asked us to show how to replace this cylinder head coolant plug. So the exhaust manifold was removed again, and a 12mm allen key sourced.
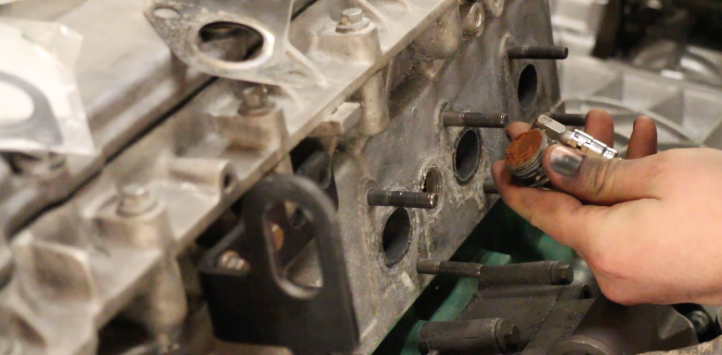
A set of hex sockets are useful to have in the toolbox.
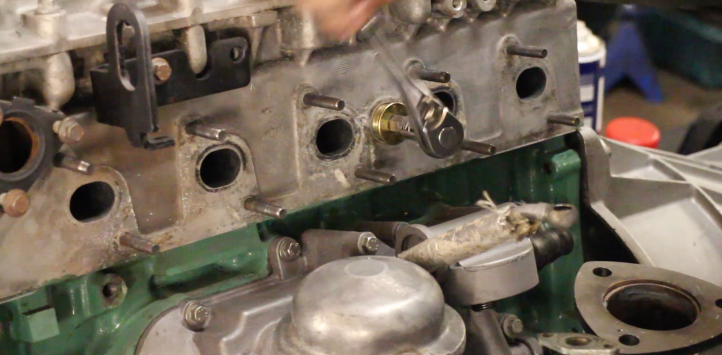
As you can apply more force to the socket handle than a humble allen key. The new plug winds in quite nicely.
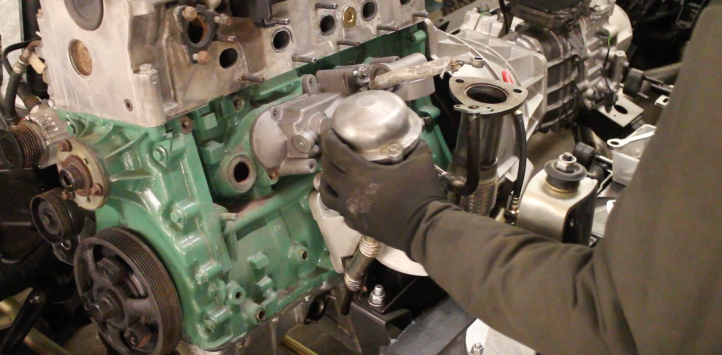
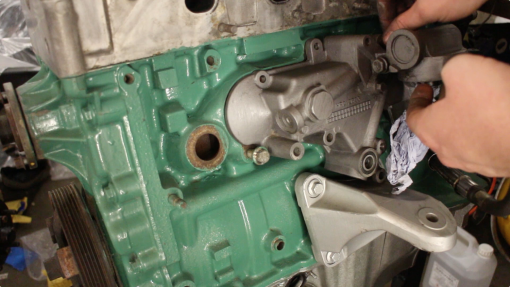
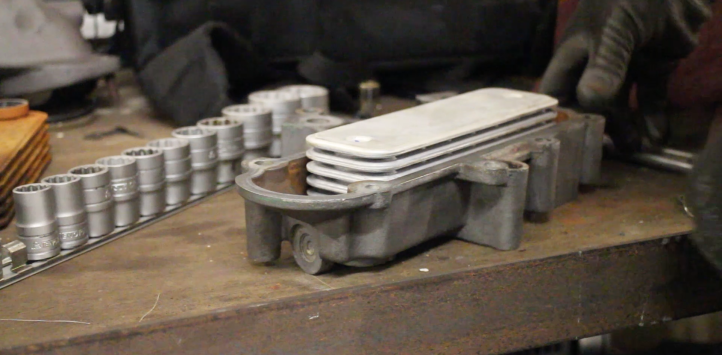
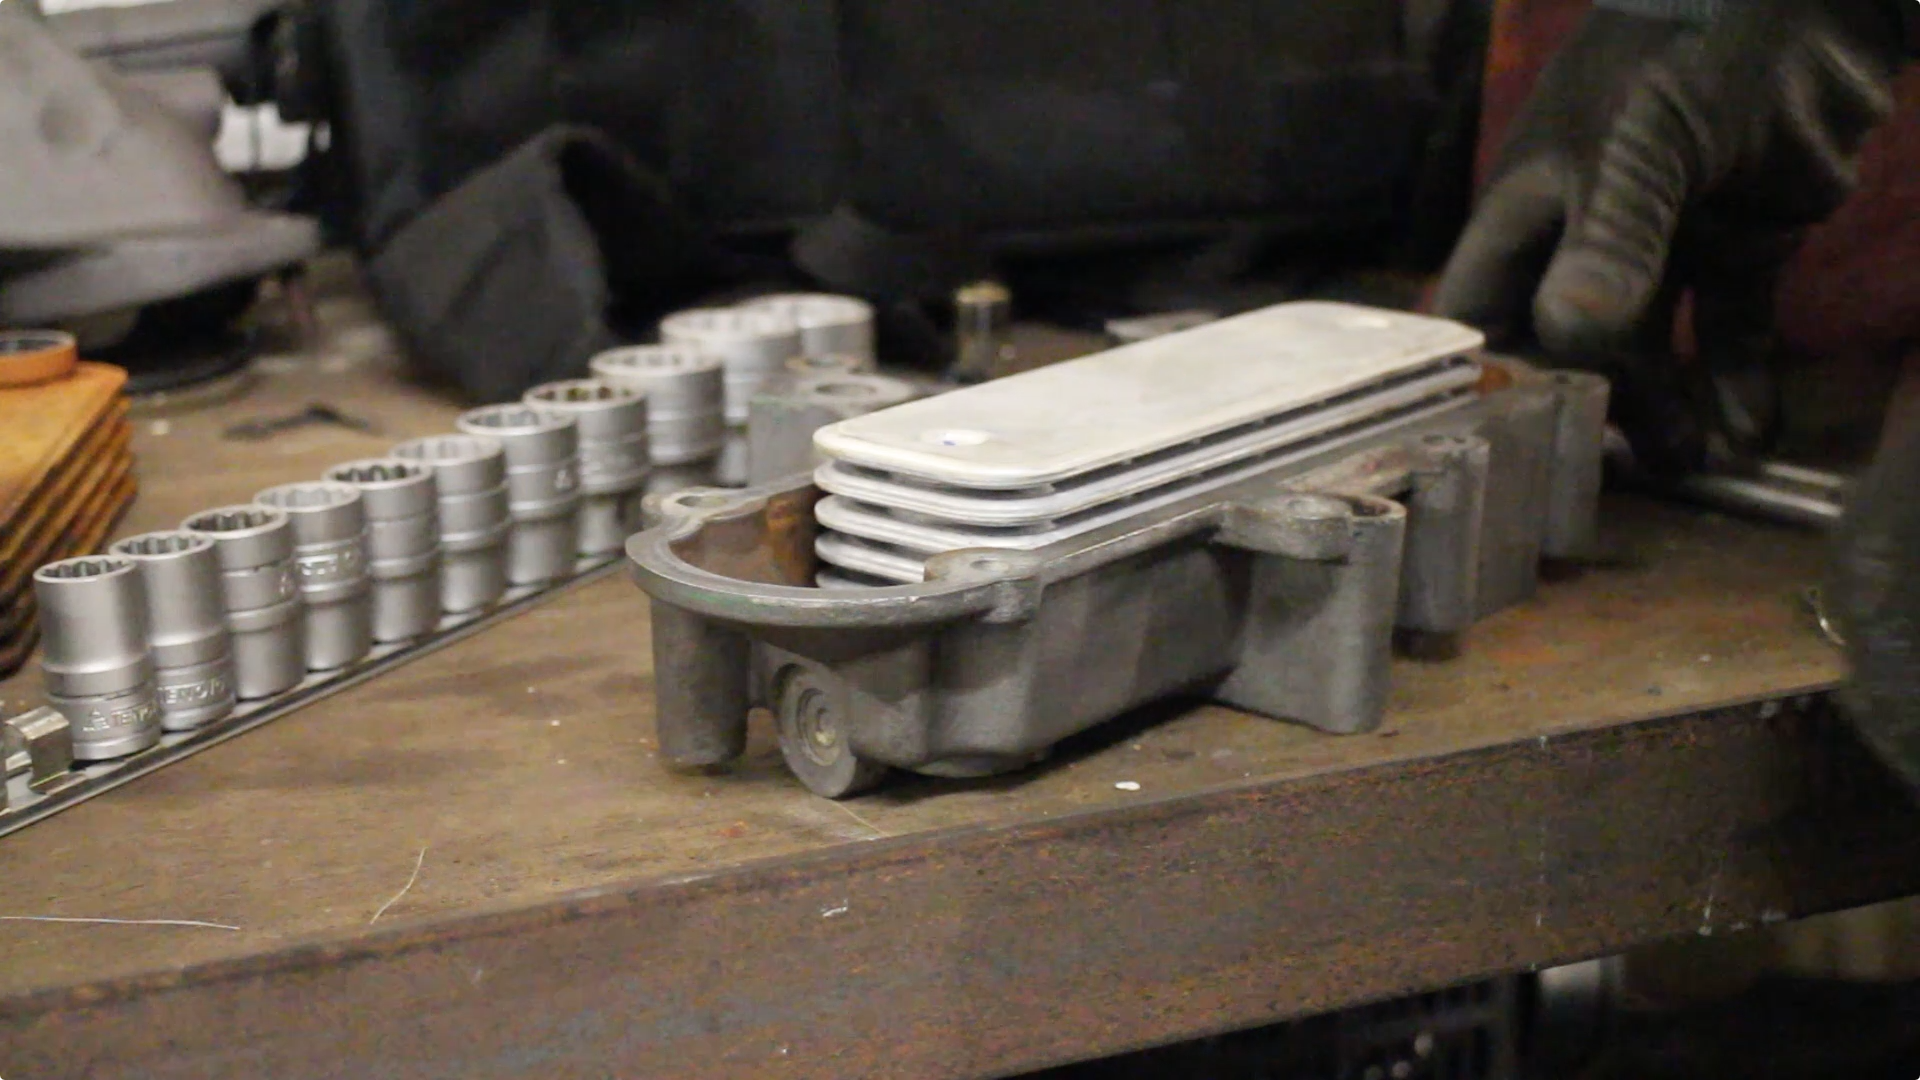
Following the advice of another viewer, we removed the oil cooler housing to replace the internal cooling block. The rotor oil filter housing needed to be removed.
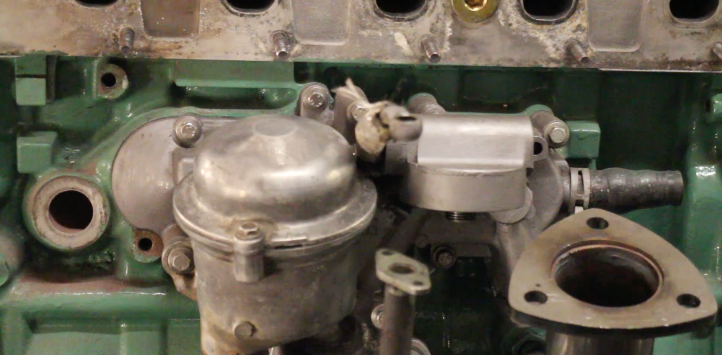
And the whole thing is lifted clean off.
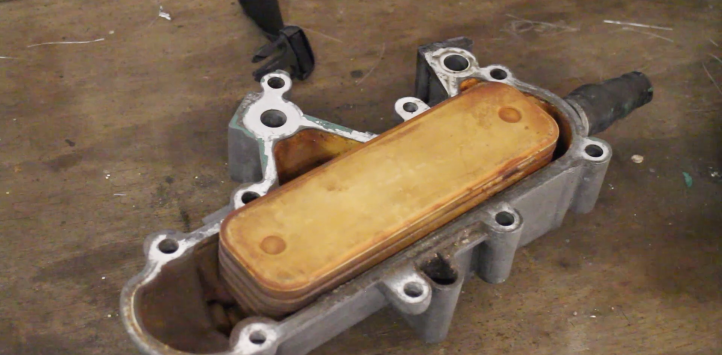
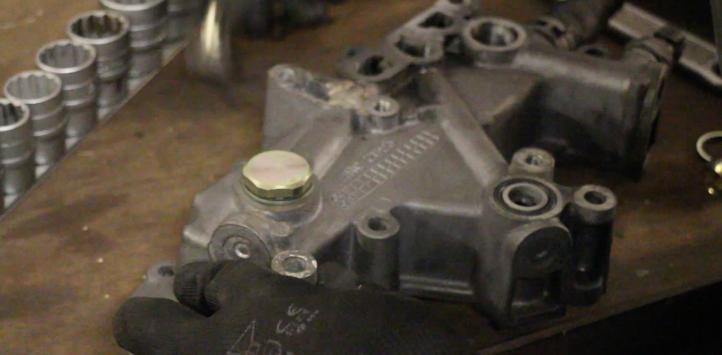
After stripping it down, we found ours to be in good condition, if not slightly tarnished from coolant / rust.

The cooling block is secured by 2 banjo bolts (internally relieved fixings). Thee are not overly tight and so easy to undo.
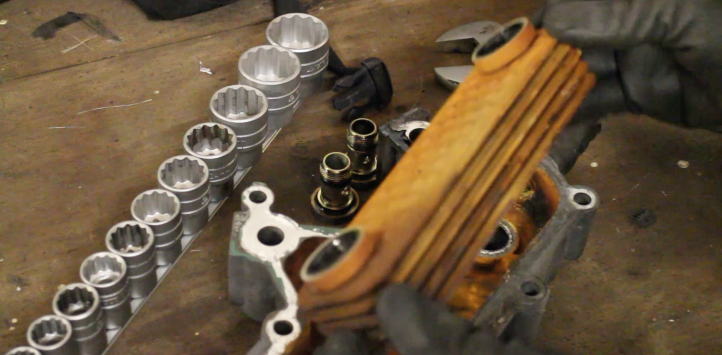
The old coolant block.
And the new one dropped in
Along with the 2 supplied replacement banjo bolts. An internally rubberised washer sits under the head.
The gaskets on the oil rotor to sump pipe are also replace
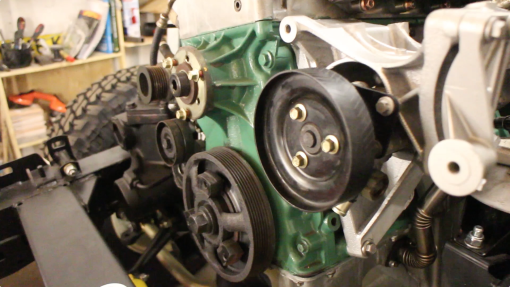
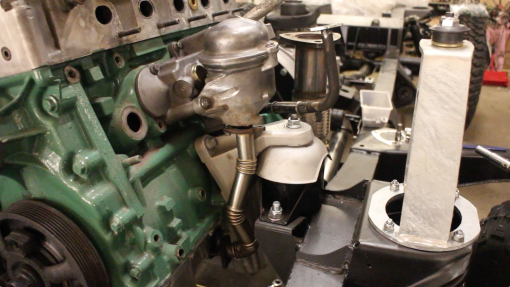
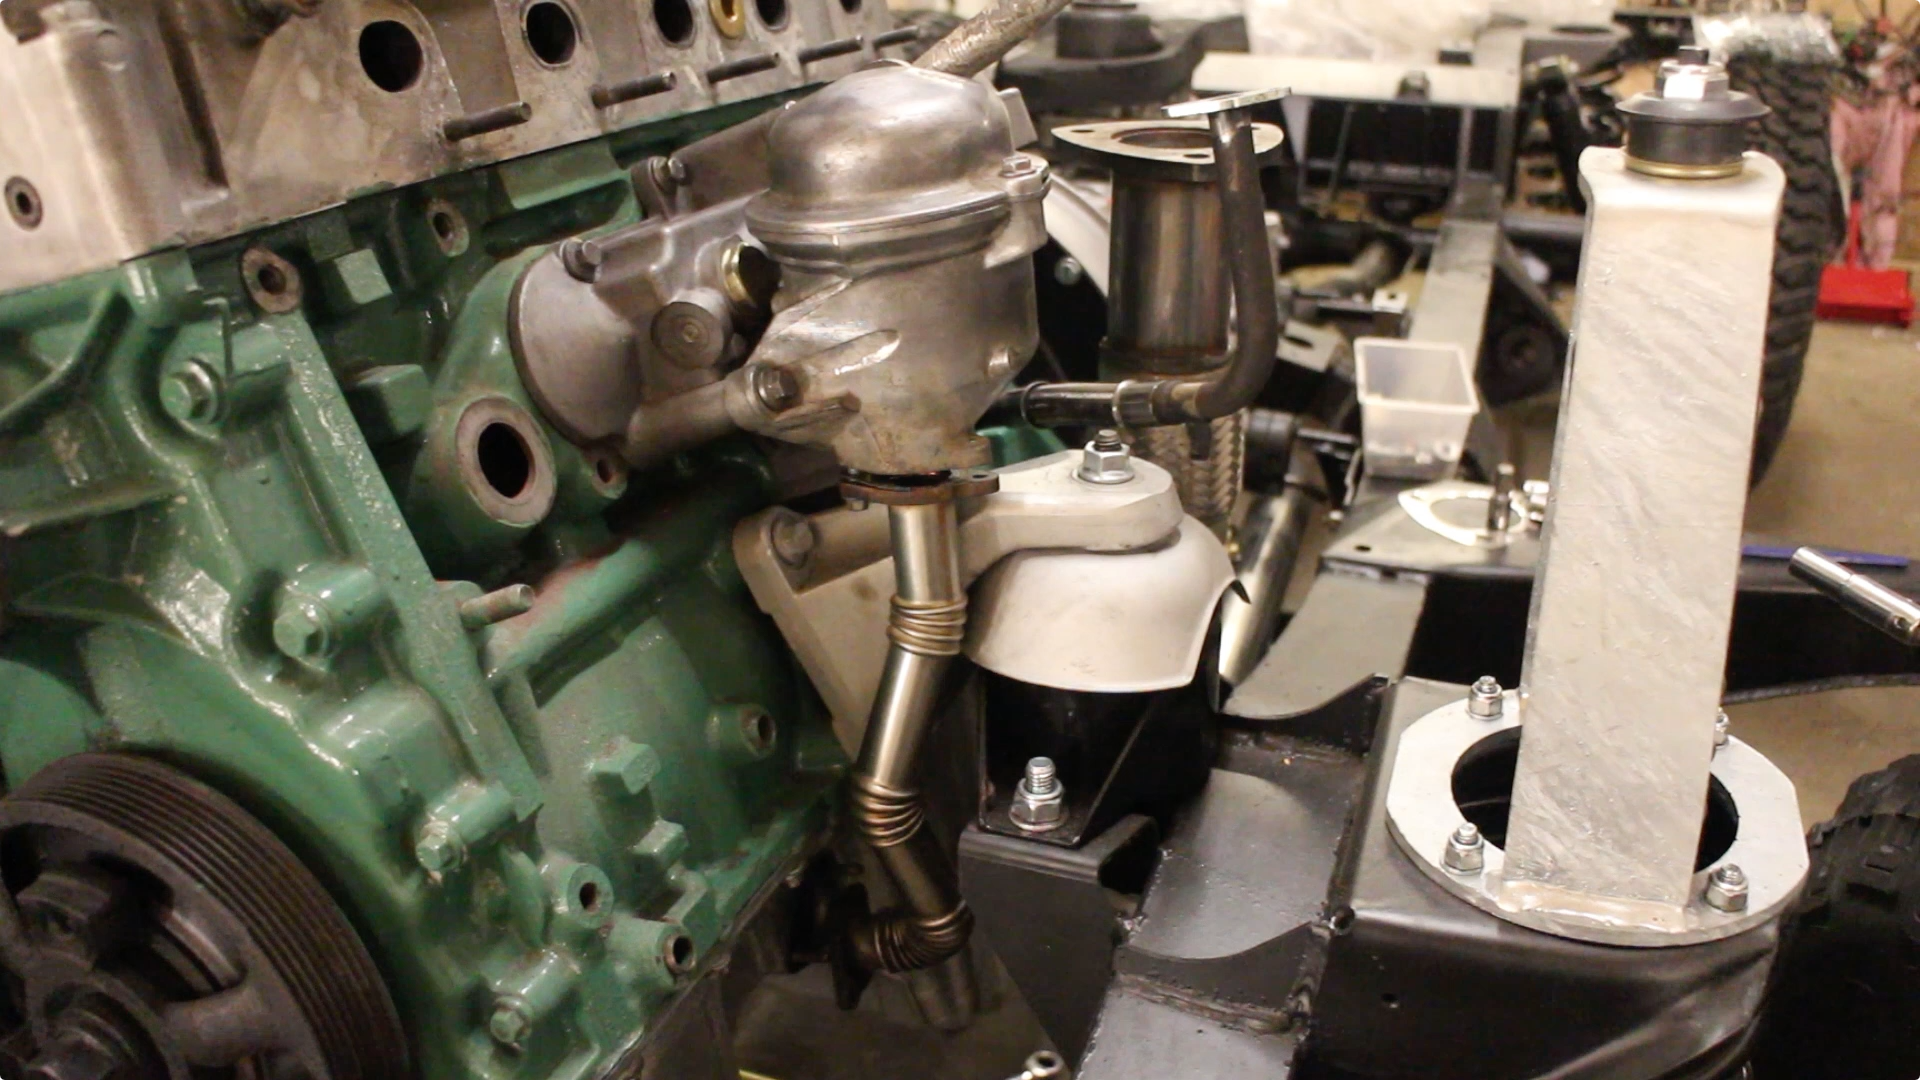
As we're nearing the point where I'd like to drop the main belt on, I decided to bolt up the power steering pump. This had been reconditioned.

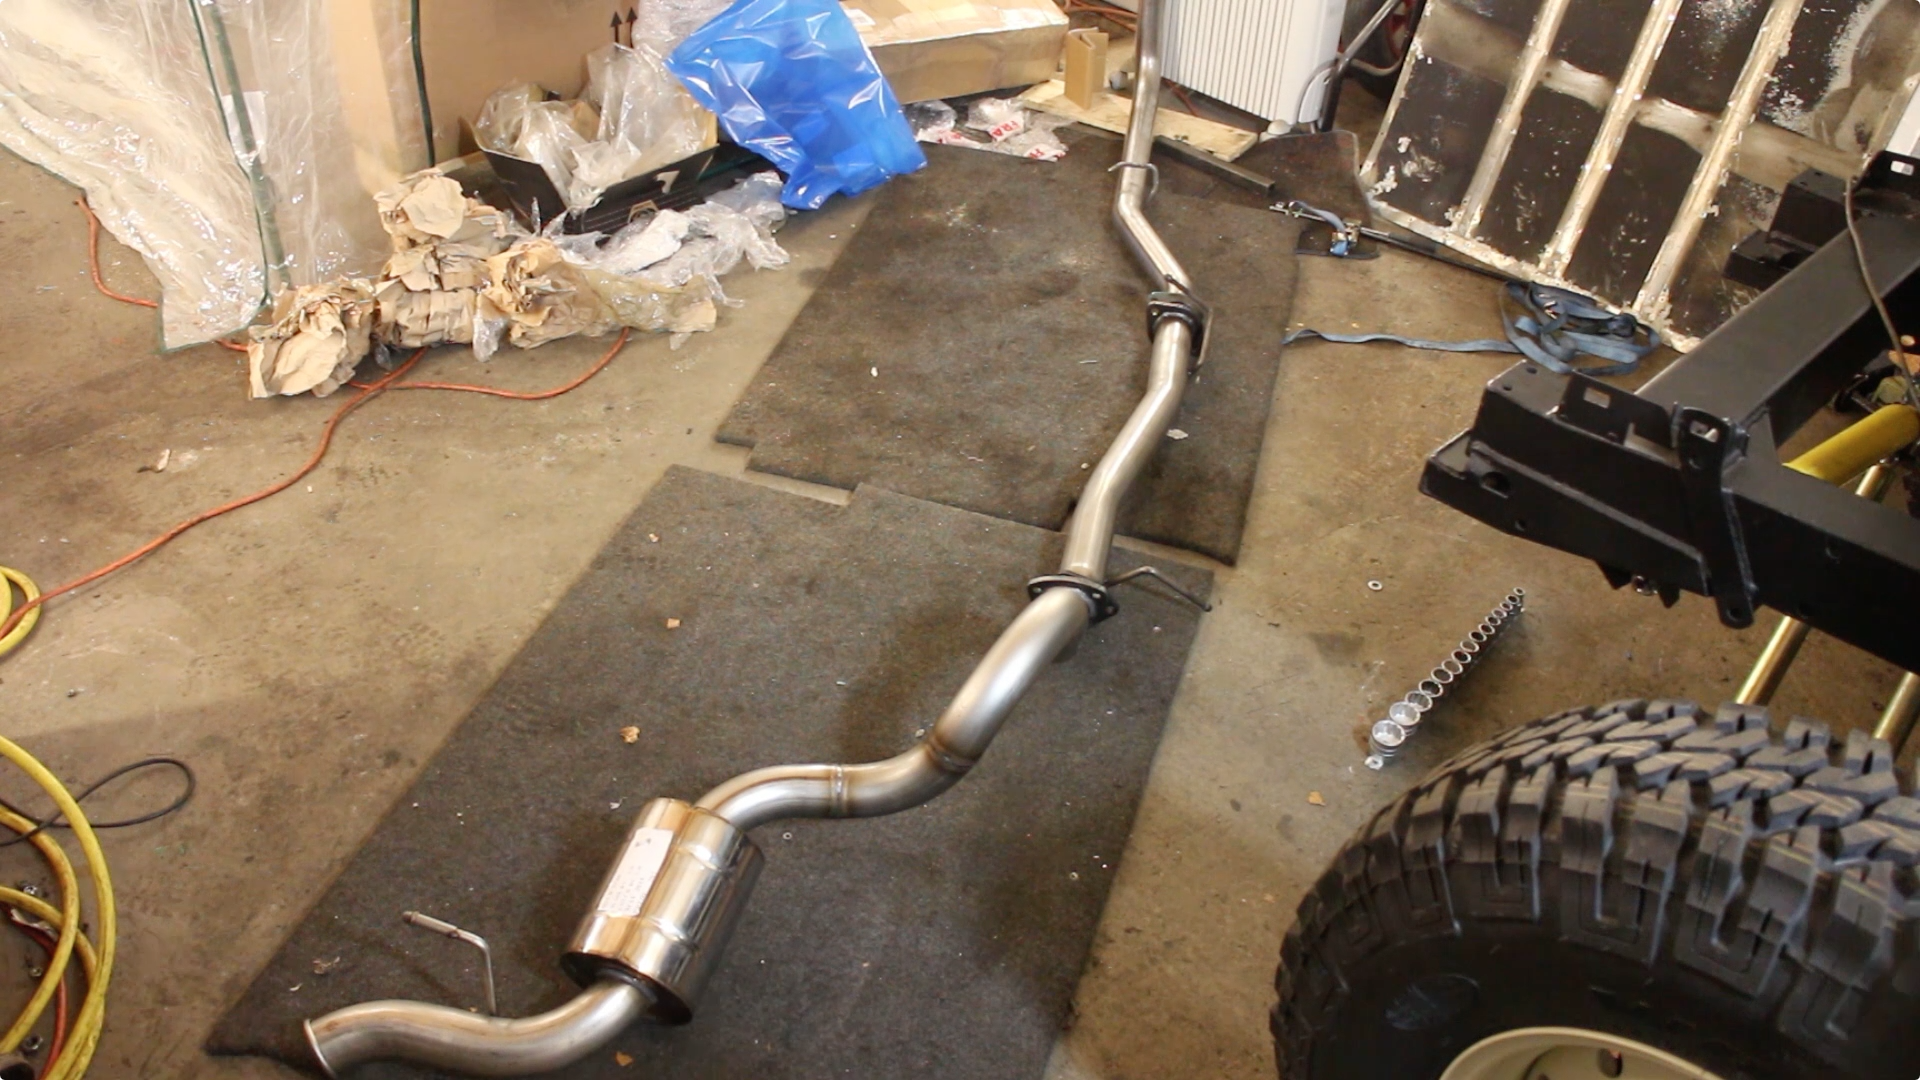
Now it's time to fit the exhaust. As we're fitting a few tasteful performance upgrades, we've gone for a stainless steel straight through exhaust (with an end silencer). When combined with the Td5, this produces a lovely, throaty burble - with the added benefit of long term corrosion resistance.
Starting at the turbo, we dropped a new gasket onto the down pipe and bolted the exhaust to the lower face of the turbo outlet. The 10P Td5 doesn't have a CAT or DPF, instead it has a braided flexi joint.
I took the time to replace all the exhaust mounts. Unfortunately, one of them was only available as a genuine part - pricey stuff! This is the mount for the mid pipe.
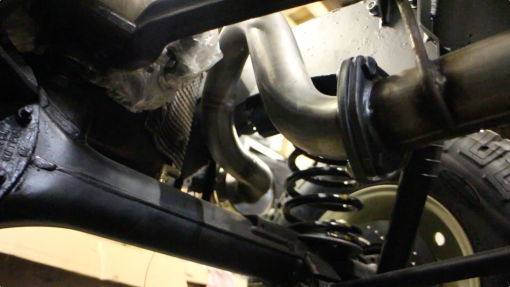
The rear silencer section can be carefully rotated into place without the need for removing any parts

Time to bust out the welder. I've been using Hobby Weld 5, it's a superb gas to weld with for, well, hobby welders! There's no canister fees to pay and there are dealers all over the country. Hobby Weld 5 is perfectly suited to MIG welding thin metal, which we are about to do, when we repair the bulkhead.

If you are hobby welder, or weld infrequently, Hobbyweld shielding gases are very cost effective. I also spent a bit of time replacing the torch wire liner, fitted some new tips and shrouds and it's transformed my welds!
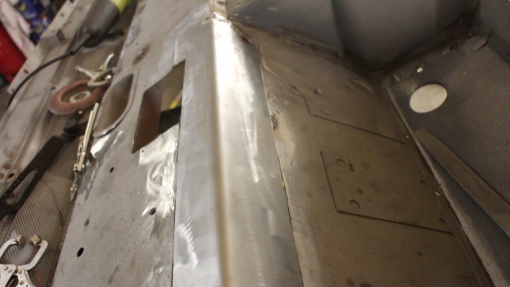
The bulkhead had some pitting that was revealed after blasting. I also stored this in the workshop for a while, which isn't the driest environment, so further rust formed on the surface. Only slightly worse than mill scale though.

This area too had some corroded metal. Fortunately, there are companies who now produce replacement sections for commonly rusted out areas. Namely YRM Metal Solutions. In this case, I decided to have a go at localised repairs, using pieces that I'll fabricate myself.

First, the corroding areas were marked and cut out

I wanted to get back to sound metal to weld my repairs to

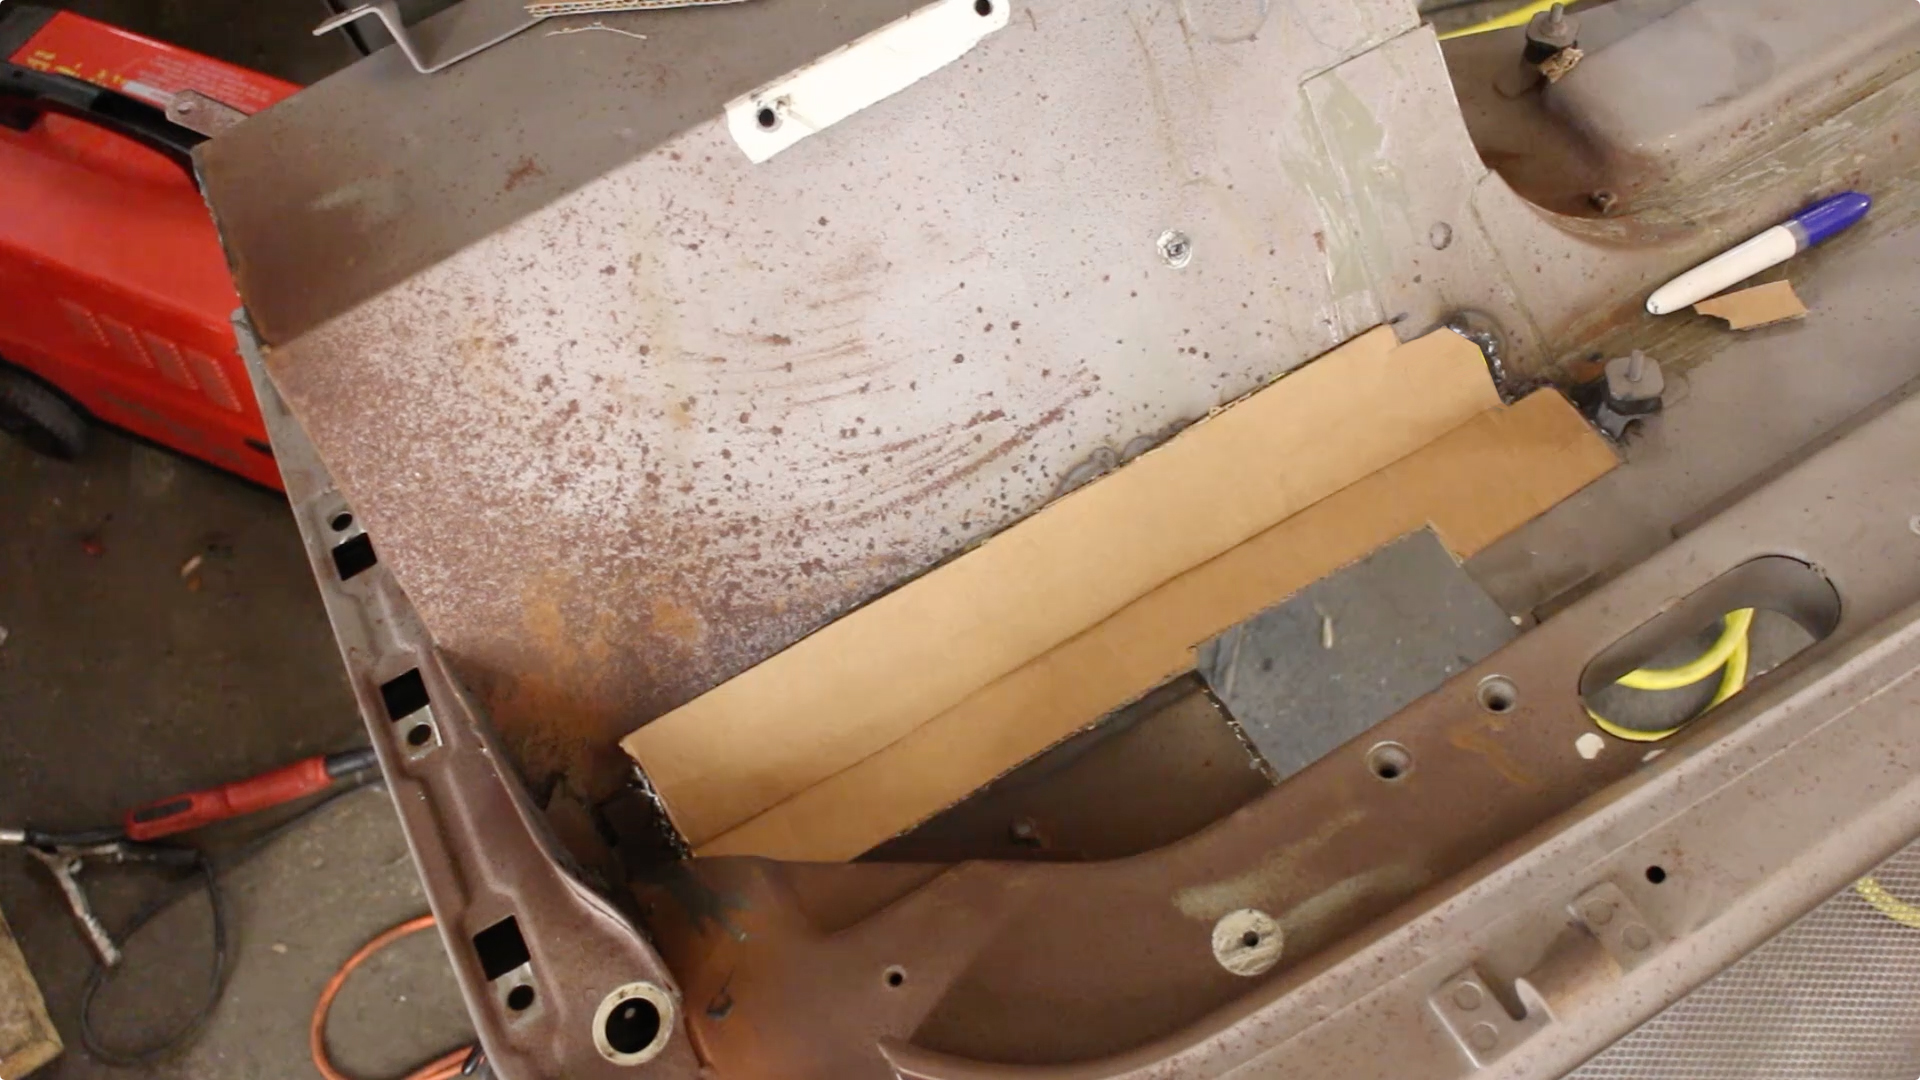
Then I made a cardboard template, this works really well for getting a perfect outline of the repair section to be made
I picked up a Clarke sheet metal folder to use in matching our repair piece to the form lines of the bulkhead.
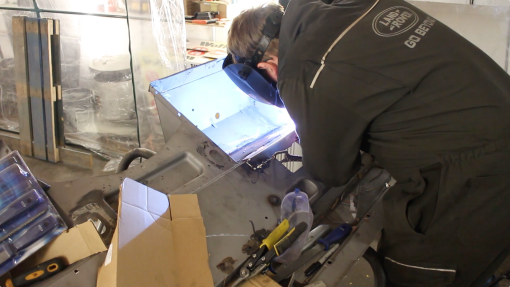
Then MIG welded the repair section in. I tacked the panel every inch or two, to try prevent warp, before filling in sections randomly.

The end result is a sound repair piece, even if my welds required a lot of grinding. Then, we shipped the whole lot off to the galvanisers.
https://www.youtube.com/watch?v=nDlnyEQVp20
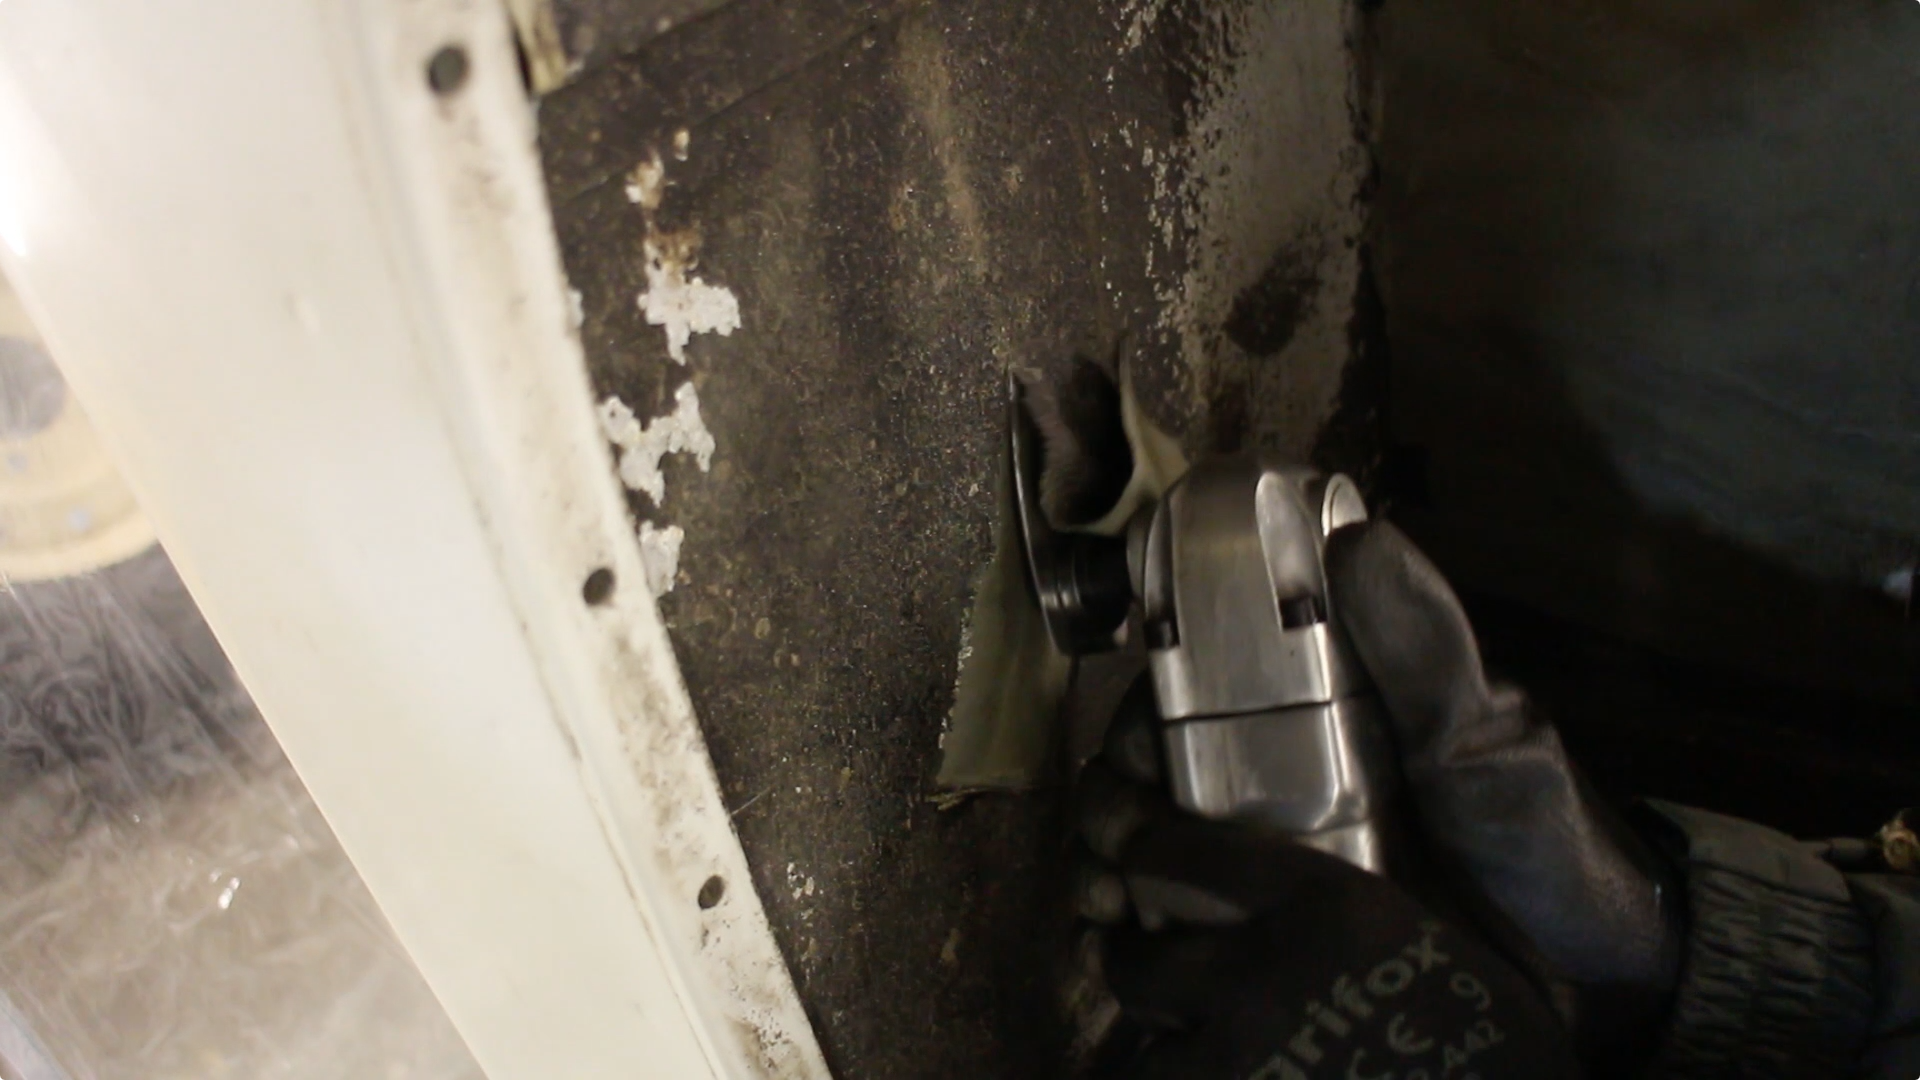
First job of the week was removing old waxoyl and factory applied stone chipping material. When perusing the workshop manual, I noticed that Land Rover recommend dealers use an air powered scraper. These things are superb! Probably my favourite tool at the moment, the whole tub was stripped in under an hour, ready for a reapplication of stone chipping.
With that done, I moved my attention to the injector loom harness. On the TD5, oil eventually wicks along the wiring into the ECM - this had happened with our vehicle. Hopefully, we've caught it in time. The ECM has been drained and cleaned.
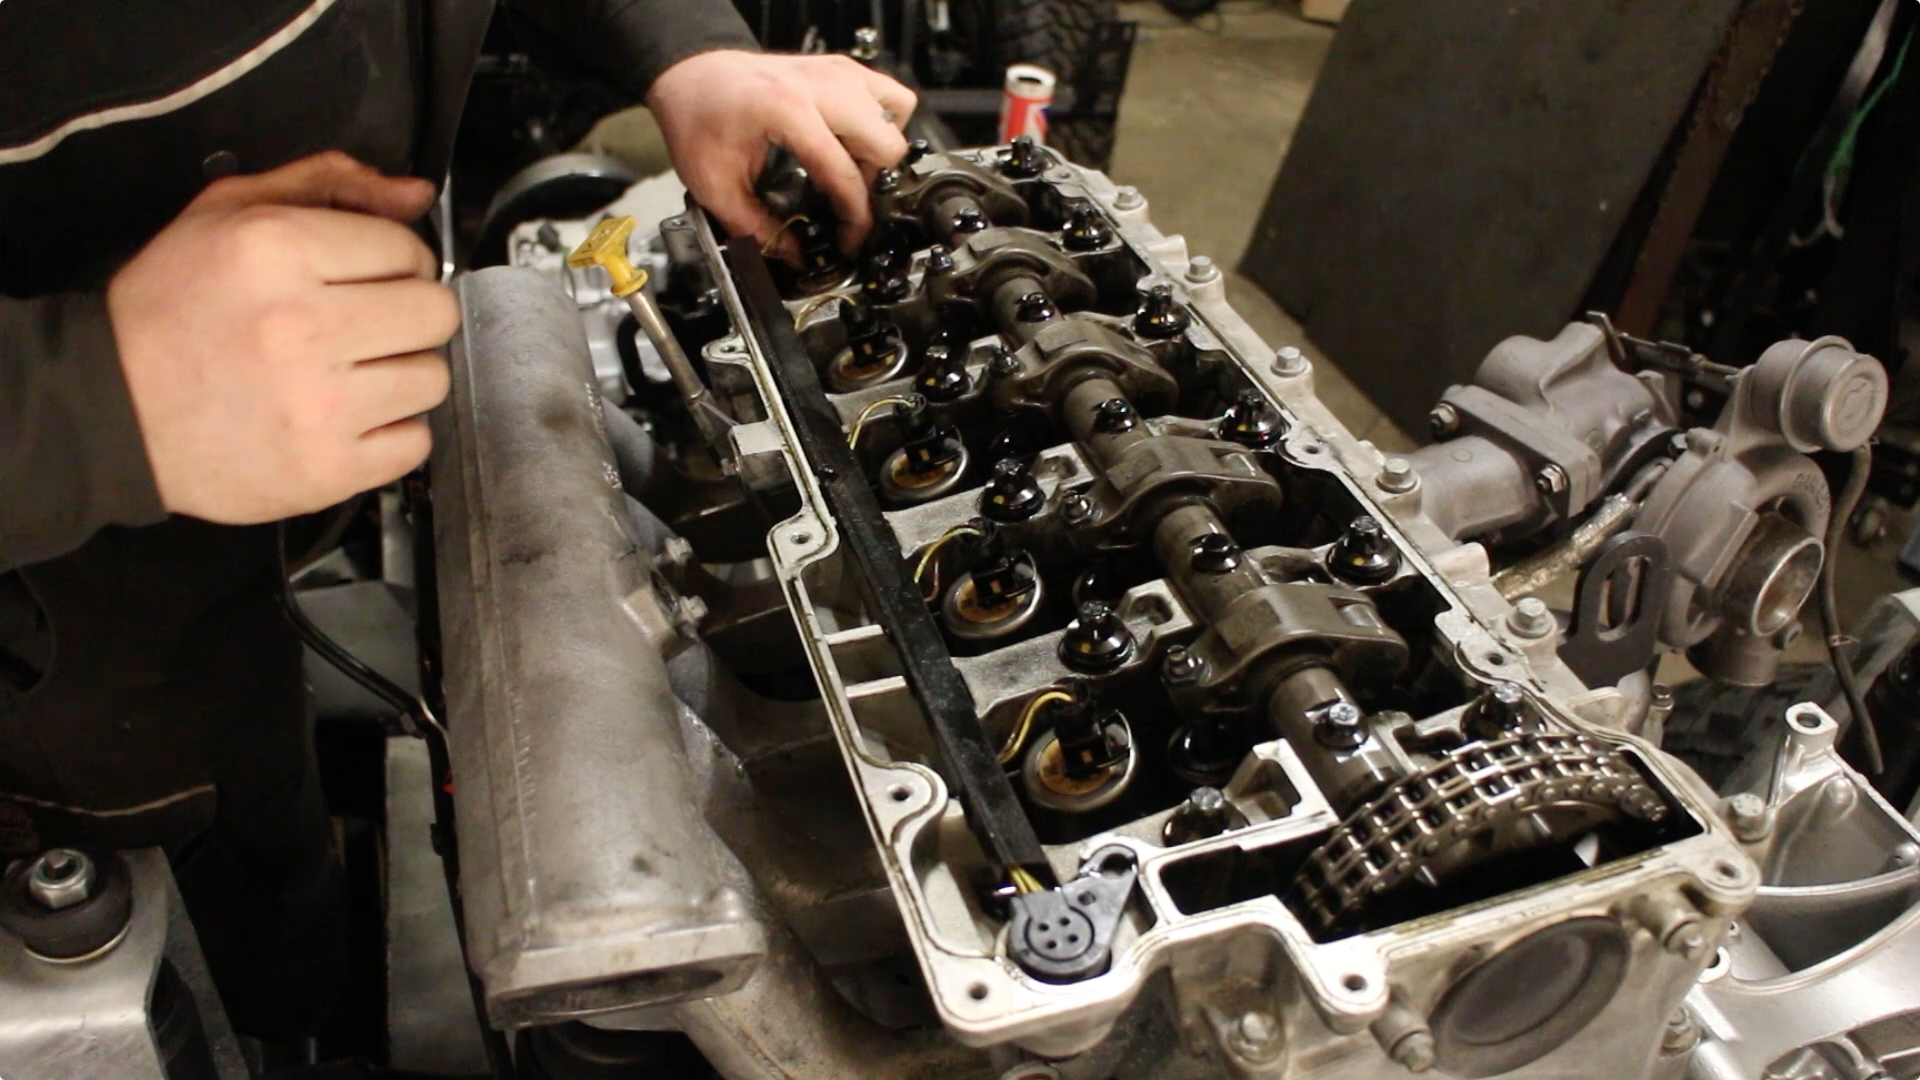
After removing the rocker cover, it's simply a case of removing the electrical connects for each injector.
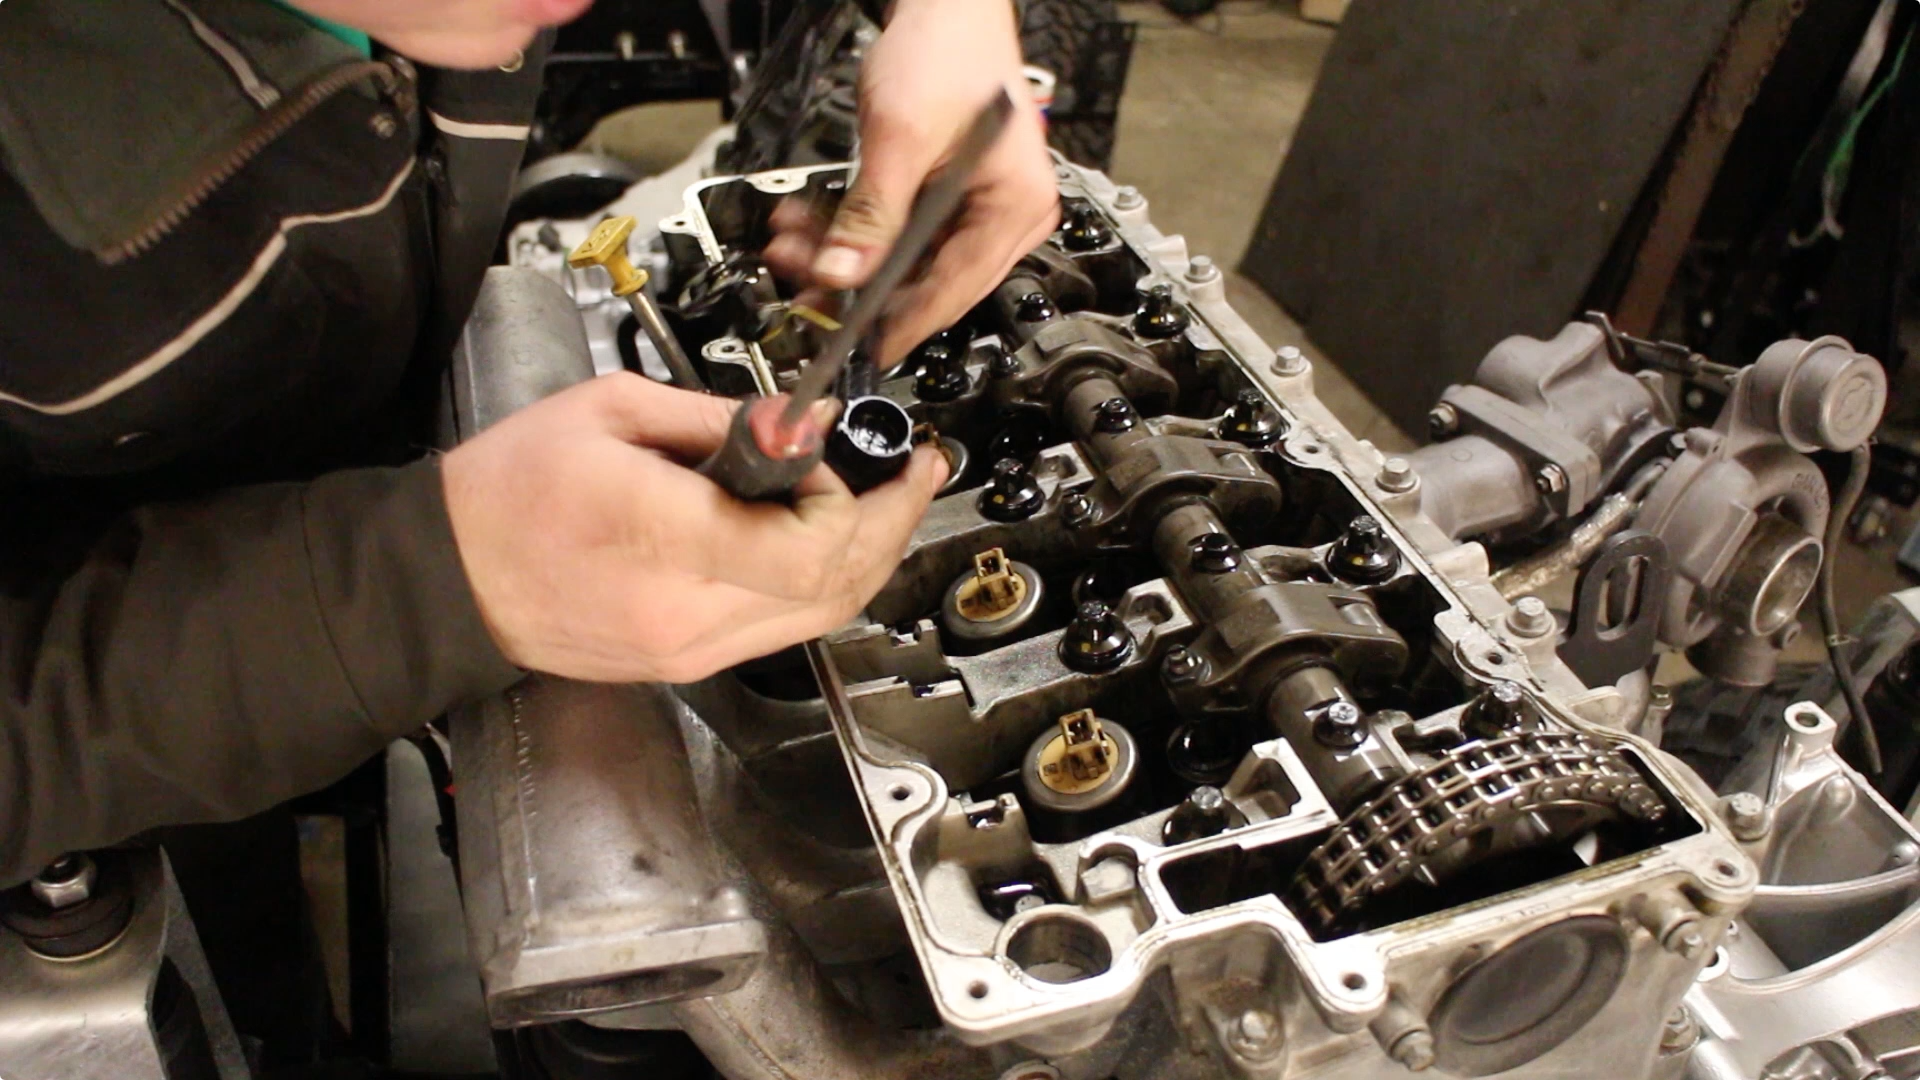
And then prizing out the main connector for the harness. The new harness drops into place in the same manner. All told, with no body on the vehicle - this takes around 5 minutes.

Dropping the rocker cover back onto a new gasket.
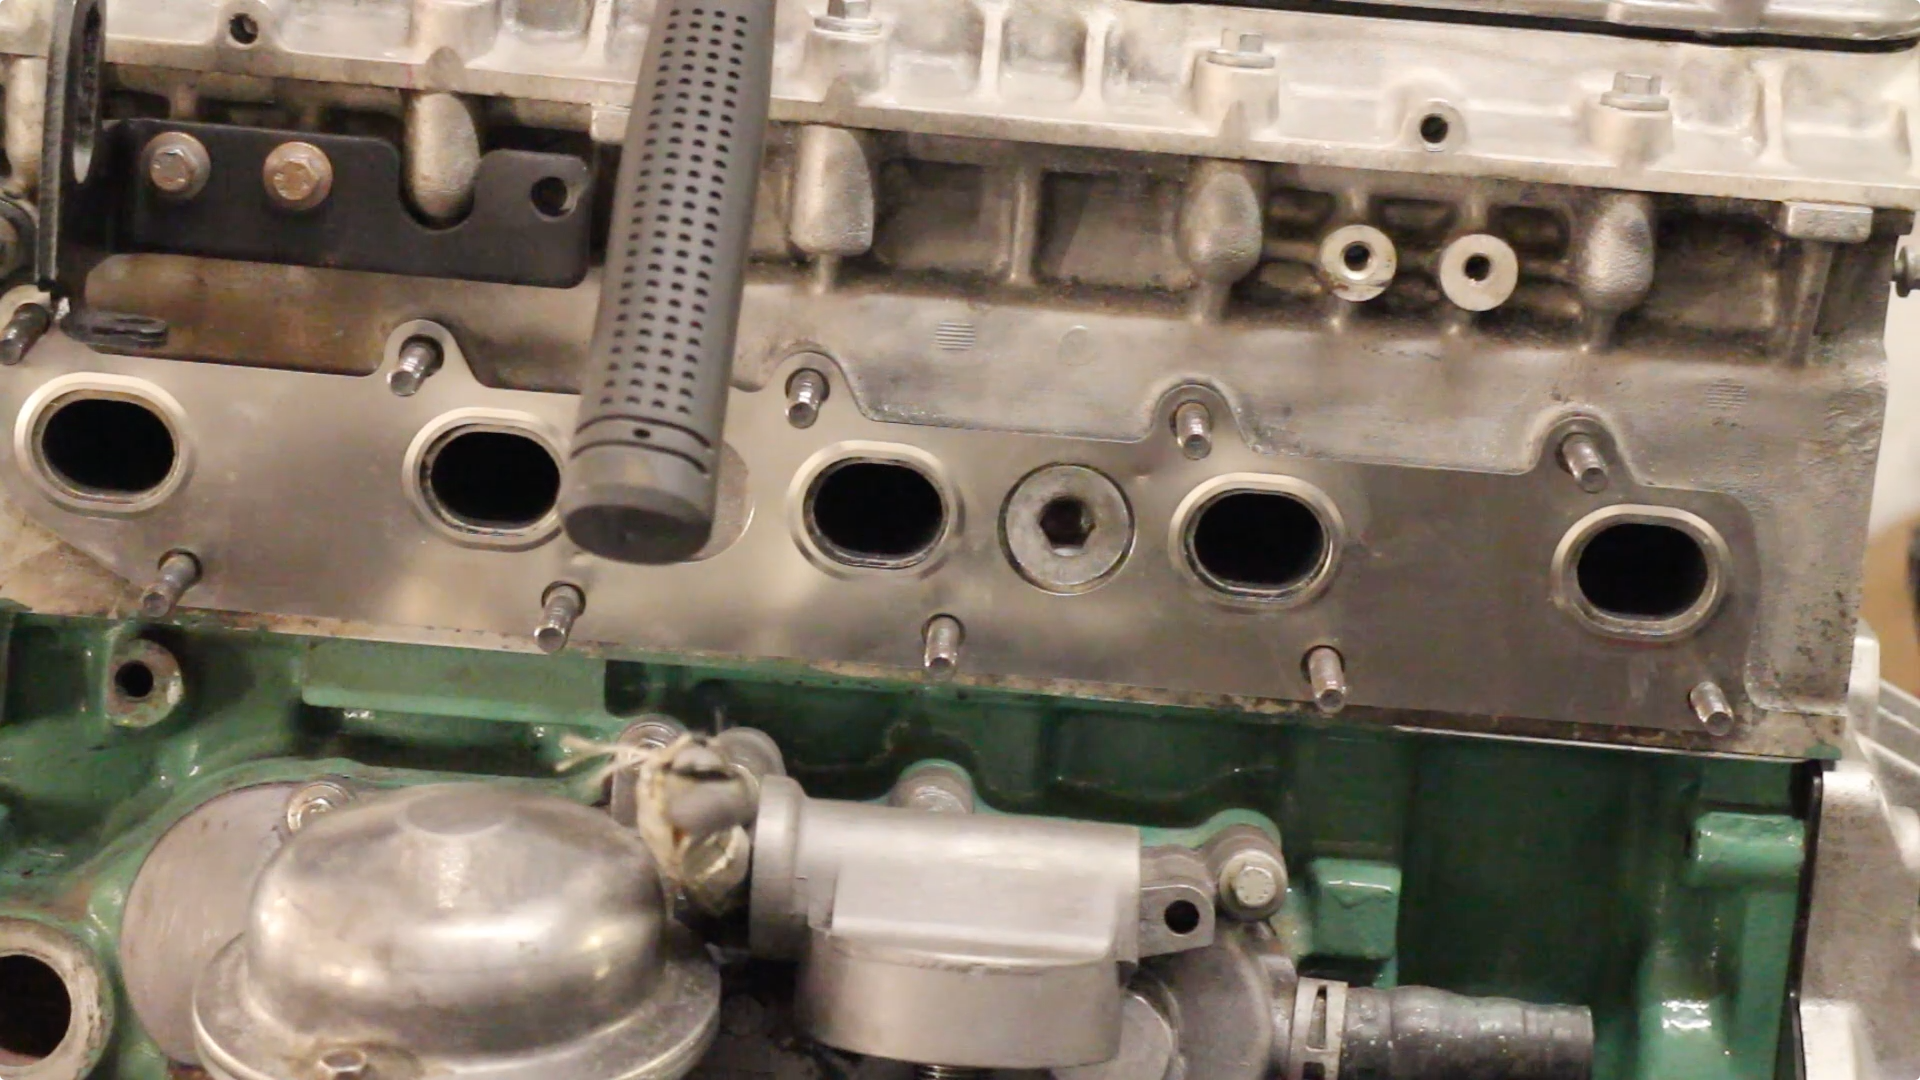
One of the great things about building a Land Rover in the manner we have, involving a huge community of Land Rover owners, is that we can get real time feedback. One viewer asked us to show how to replace this cylinder head coolant plug. So the exhaust manifold was removed again, and a 12mm allen key sourced.

A set of hex sockets are useful to have in the toolbox.
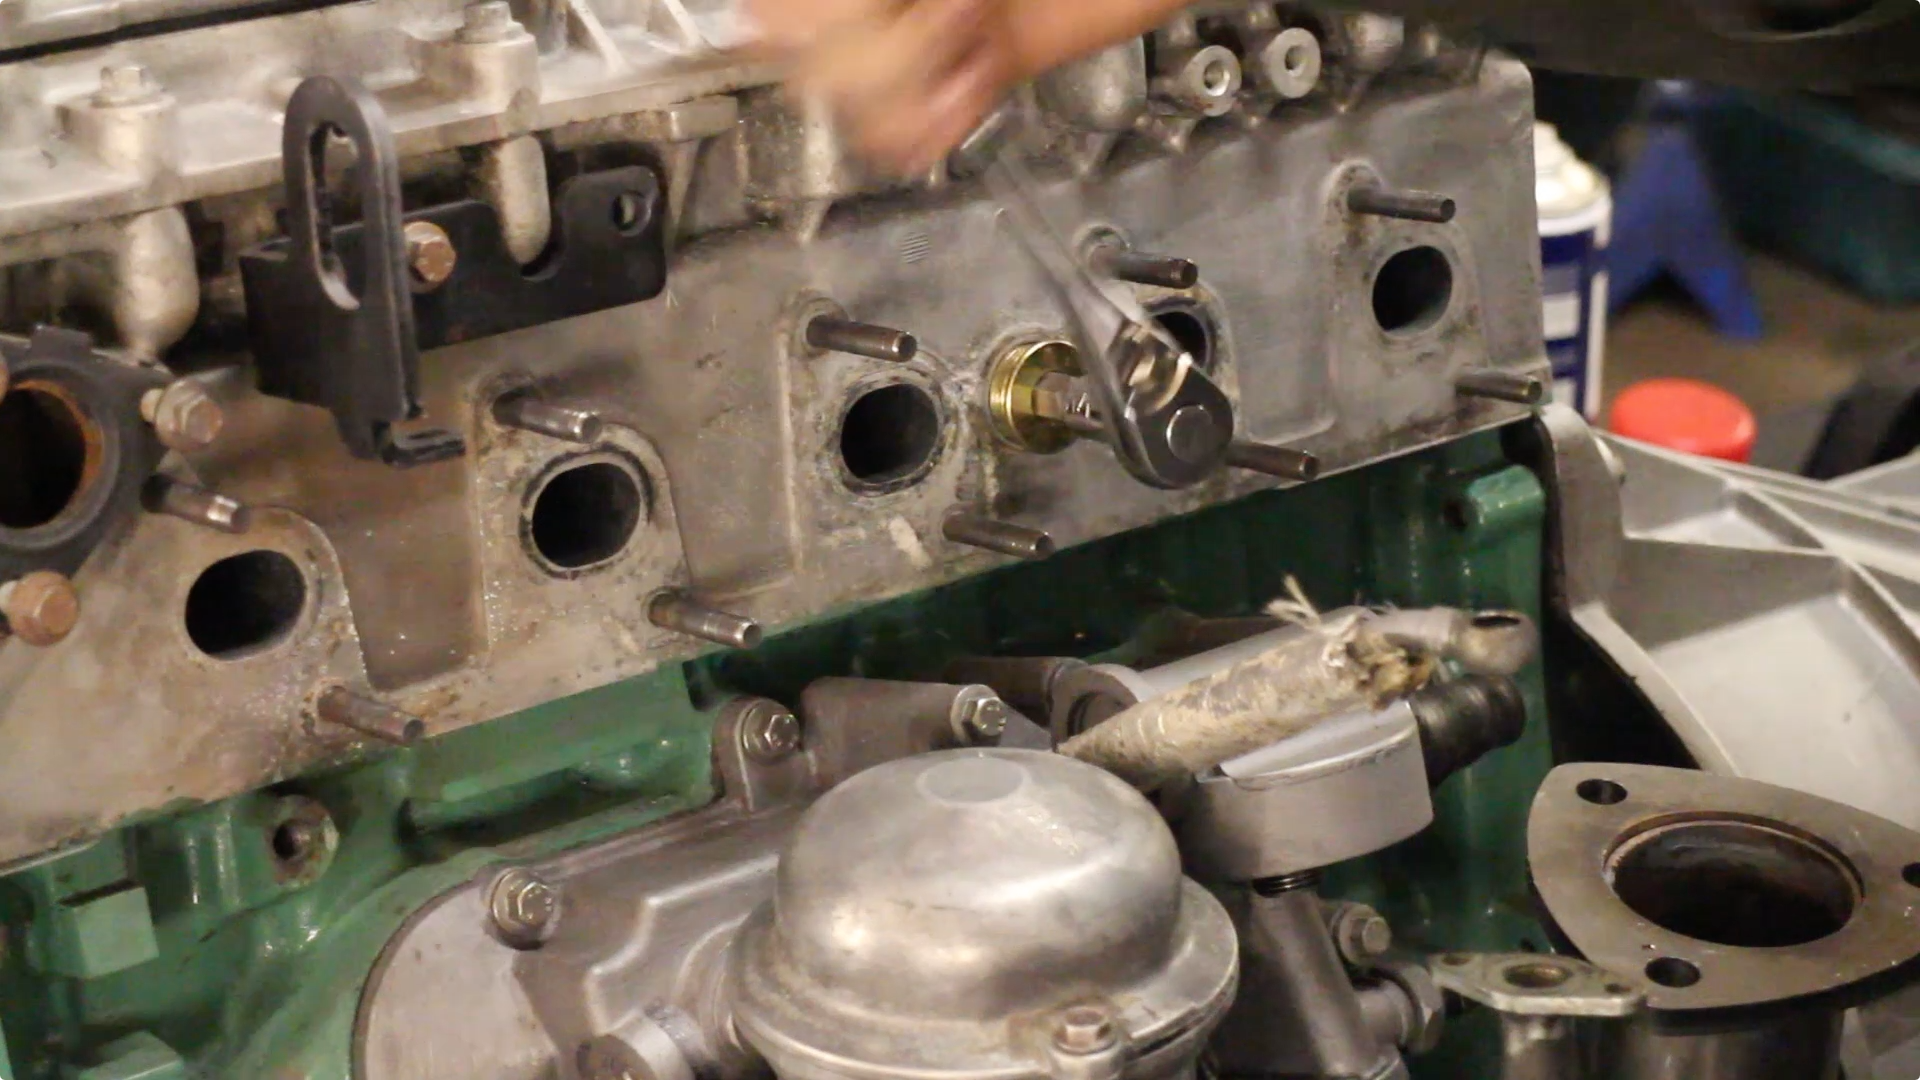
As you can apply more force to the socket handle than a humble allen key. The new plug winds in quite nicely.

Following the advice of another viewer, we removed the oil cooler housing to replace the internal cooling block. The rotor oil filter housing needed to be removed.
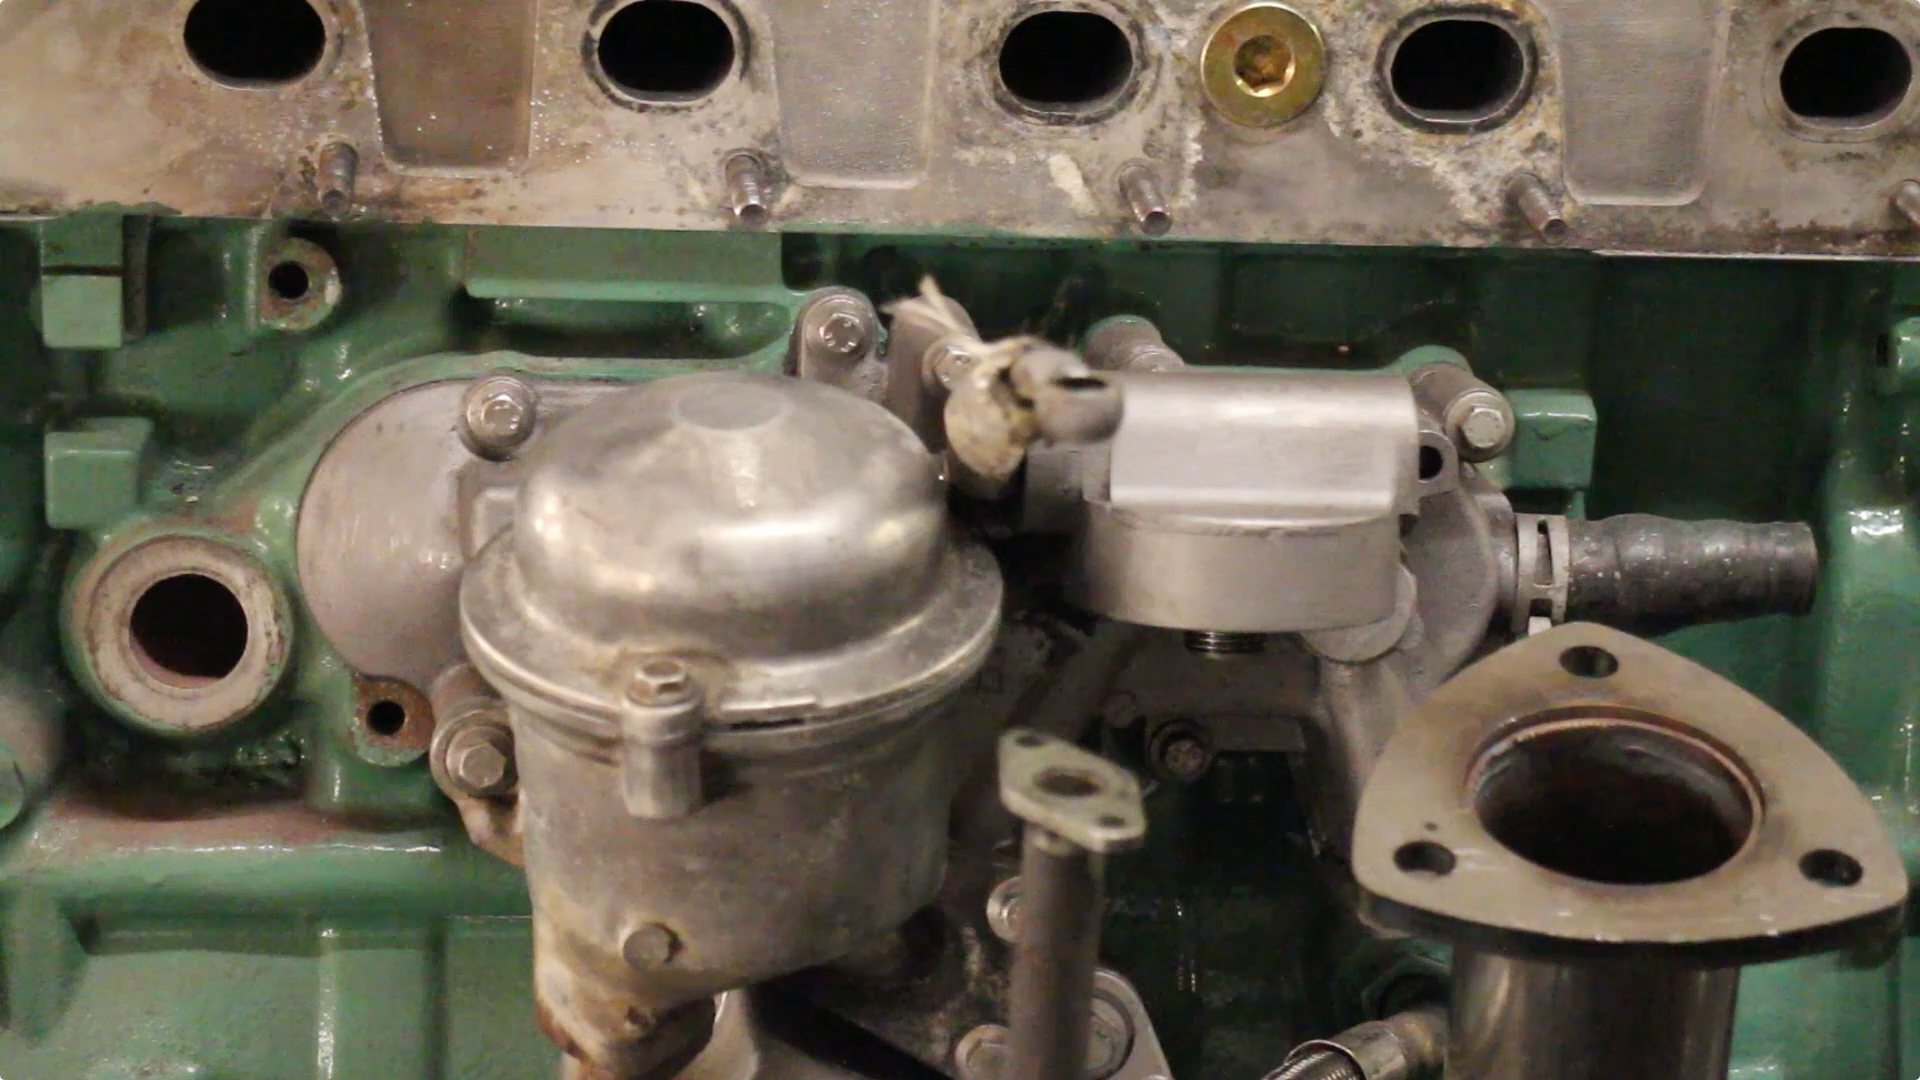
And the whole thing is lifted clean off.
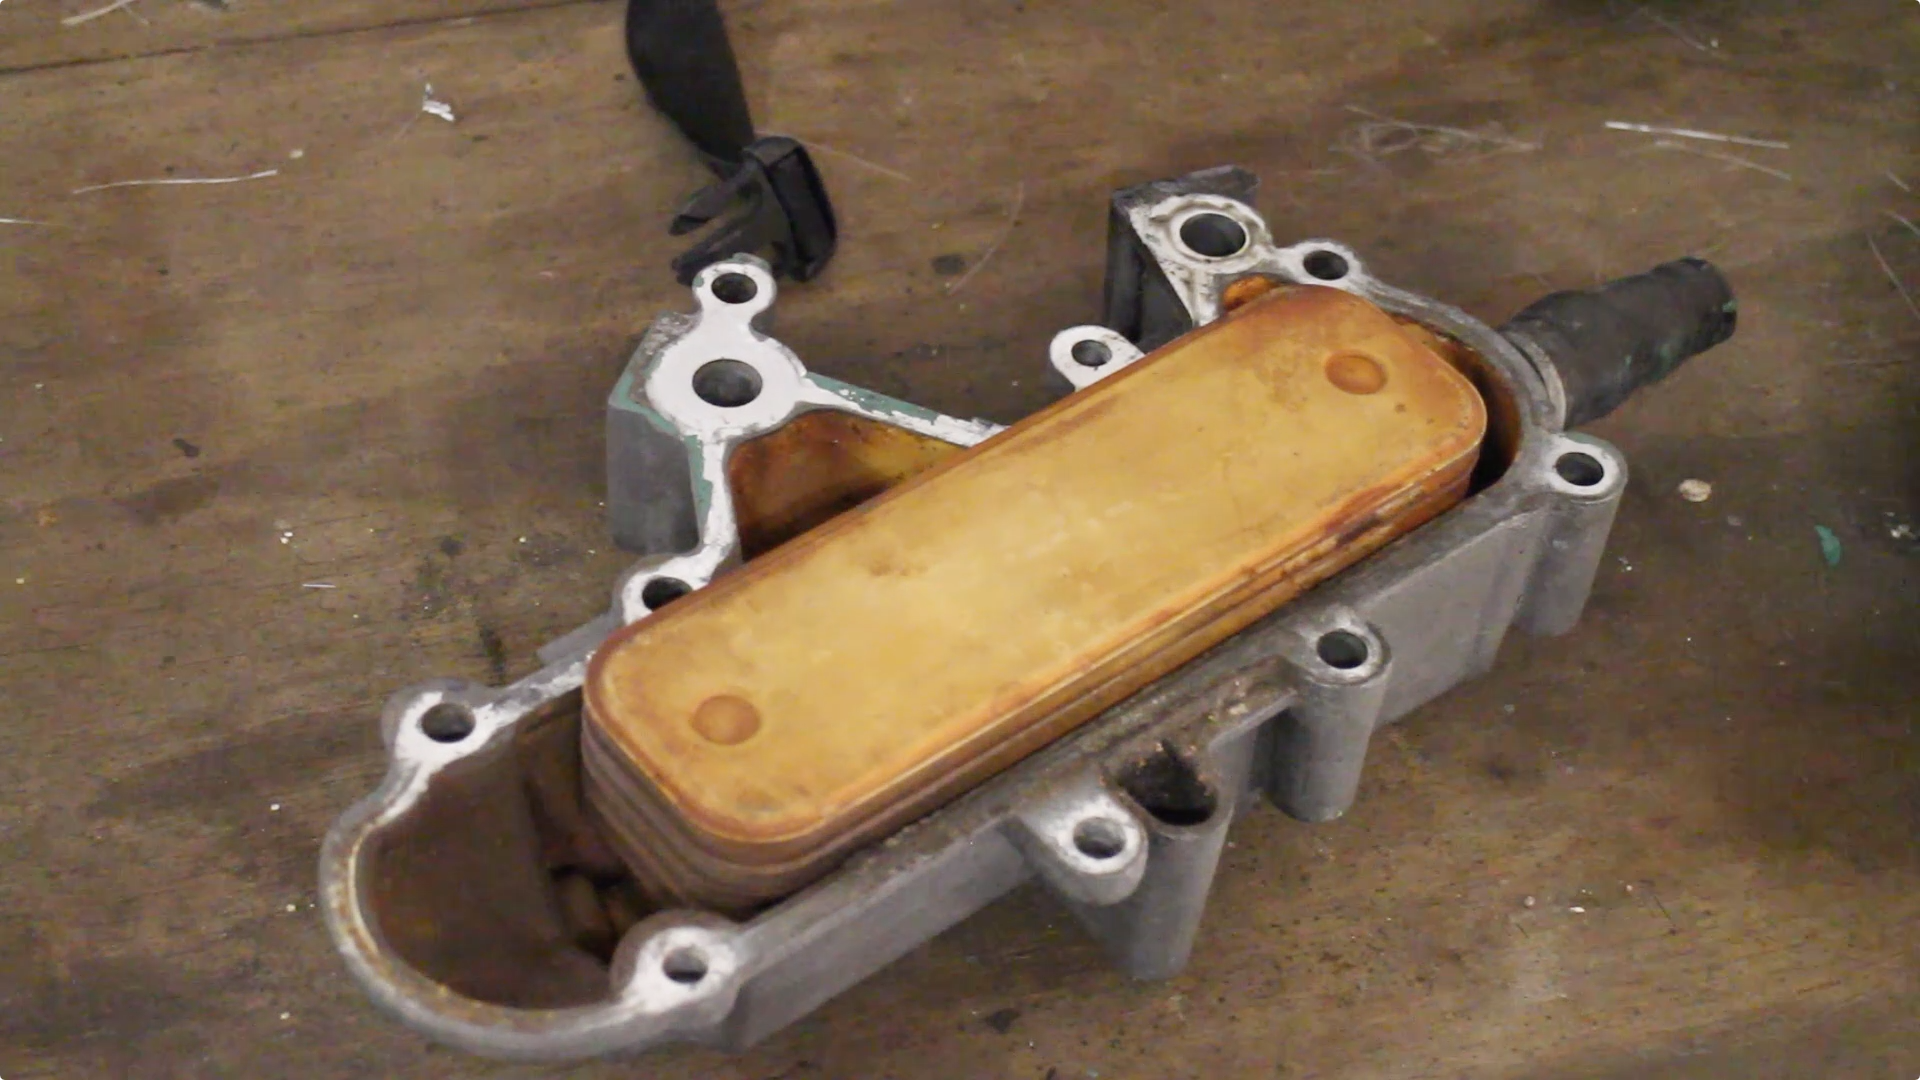
After stripping it down, we found ours to be in good condition, if not slightly tarnished from coolant / rust.
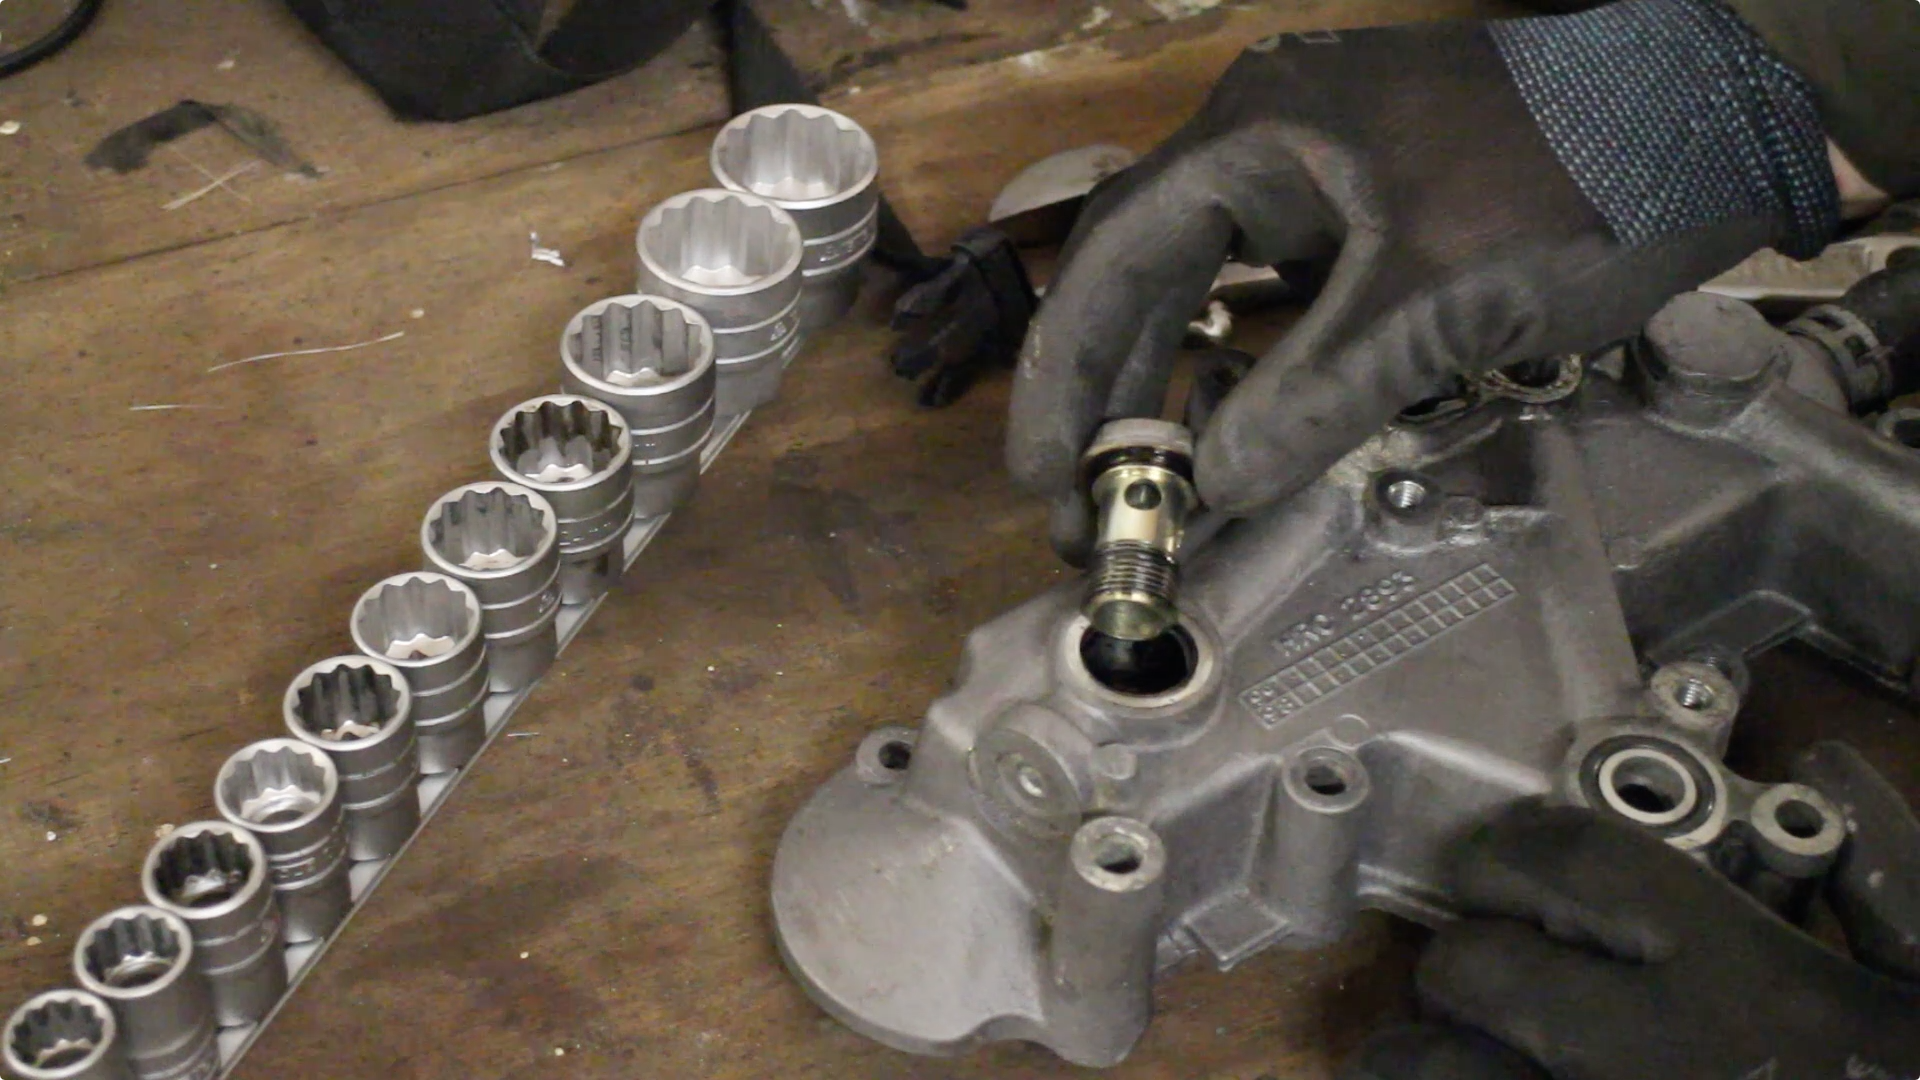
The cooling block is secured by 2 banjo bolts (internally relieved fixings). Thee are not overly tight and so easy to undo.
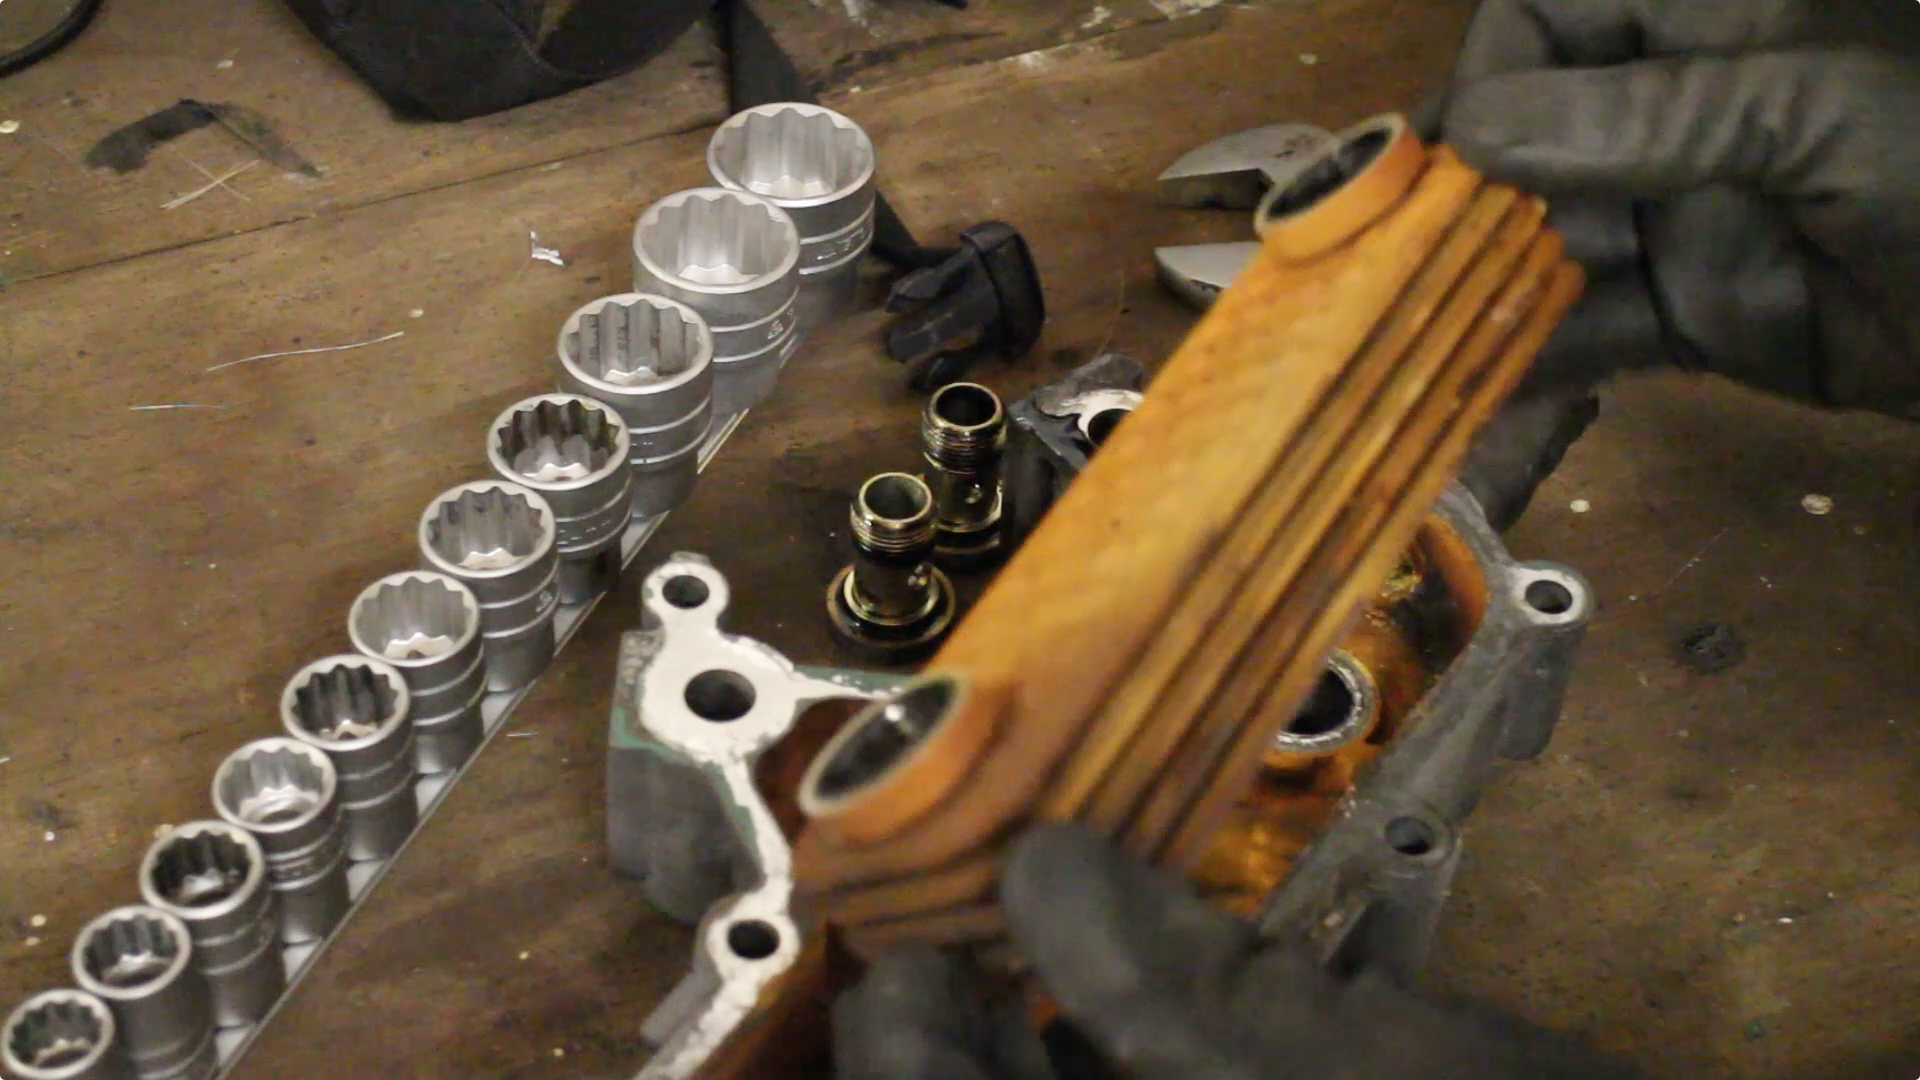
The old coolant block.
And the new one dropped in
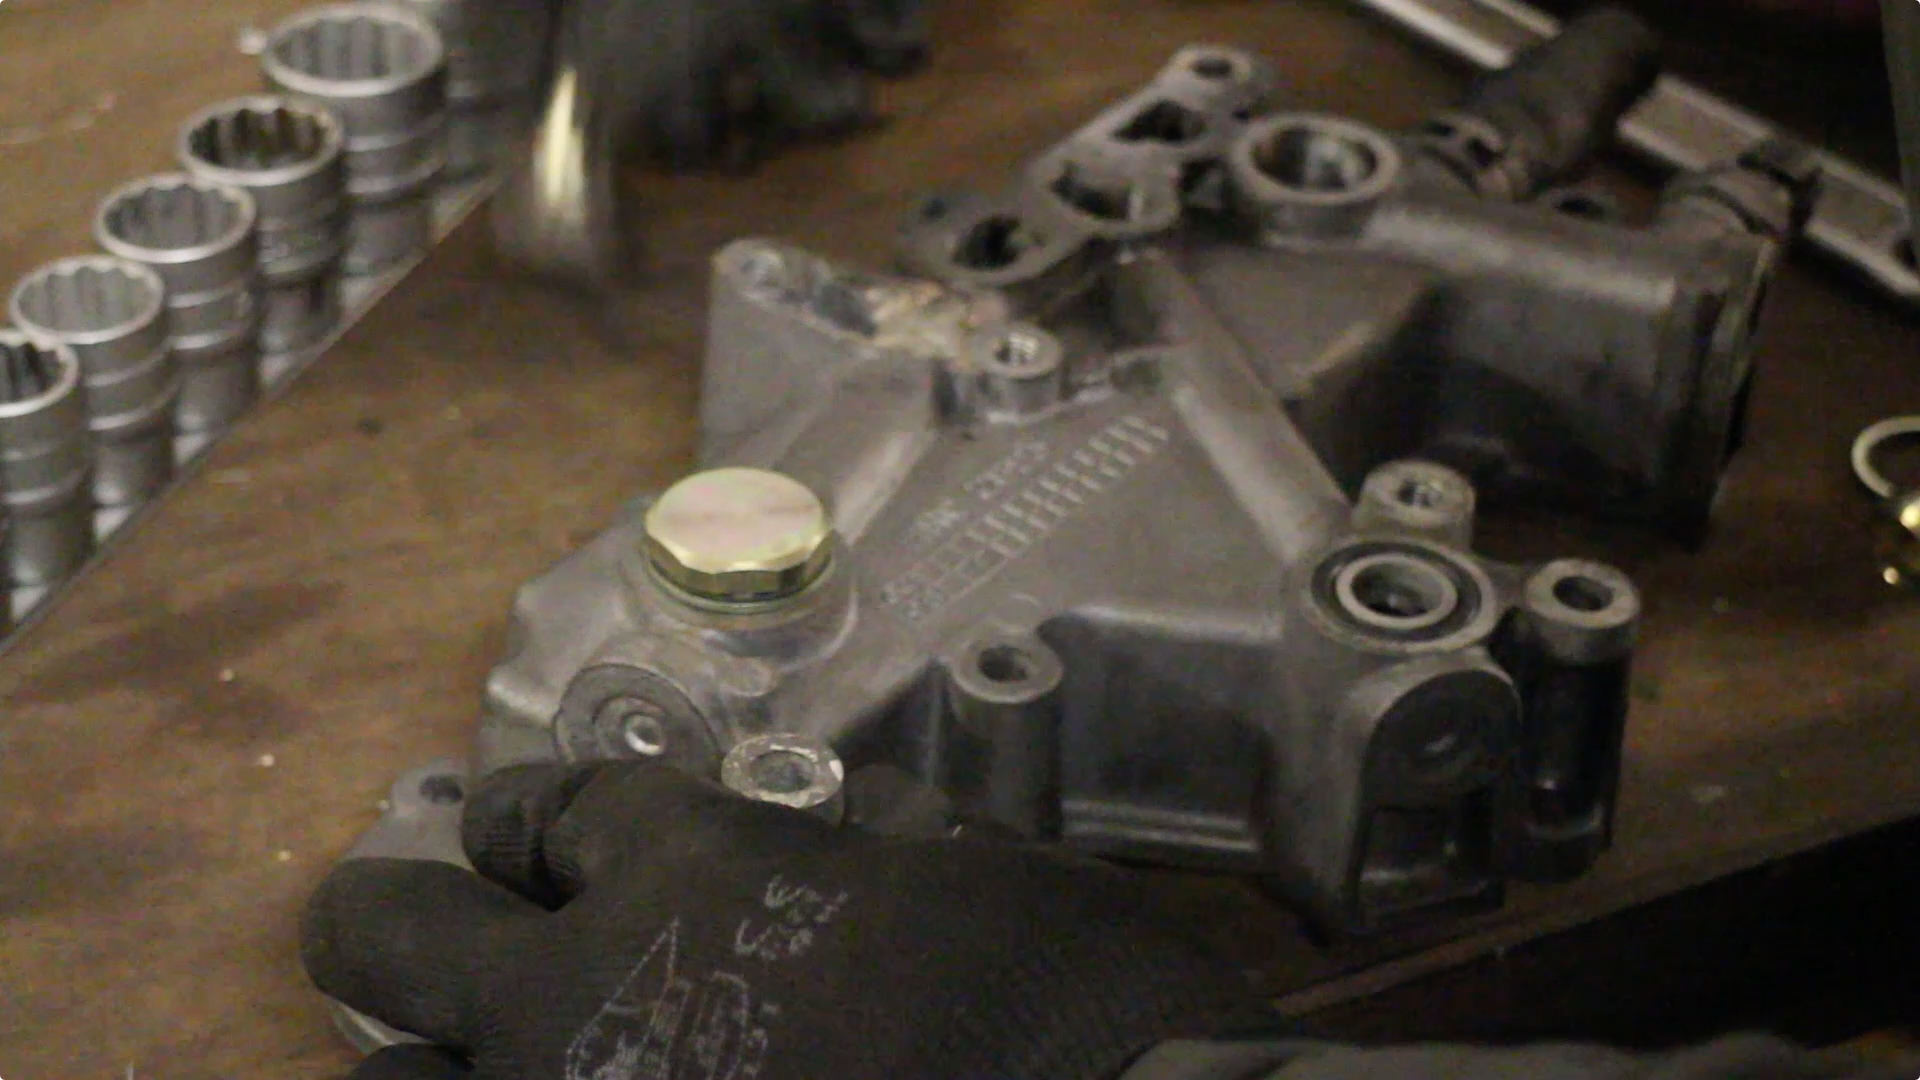
Along with the 2 supplied replacement banjo bolts. An internally rubberised washer sits under the head.
The gaskets on the oil rotor to sump pipe are also replace

As we're nearing the point where I'd like to drop the main belt on, I decided to bolt up the power steering pump. This had been reconditioned.
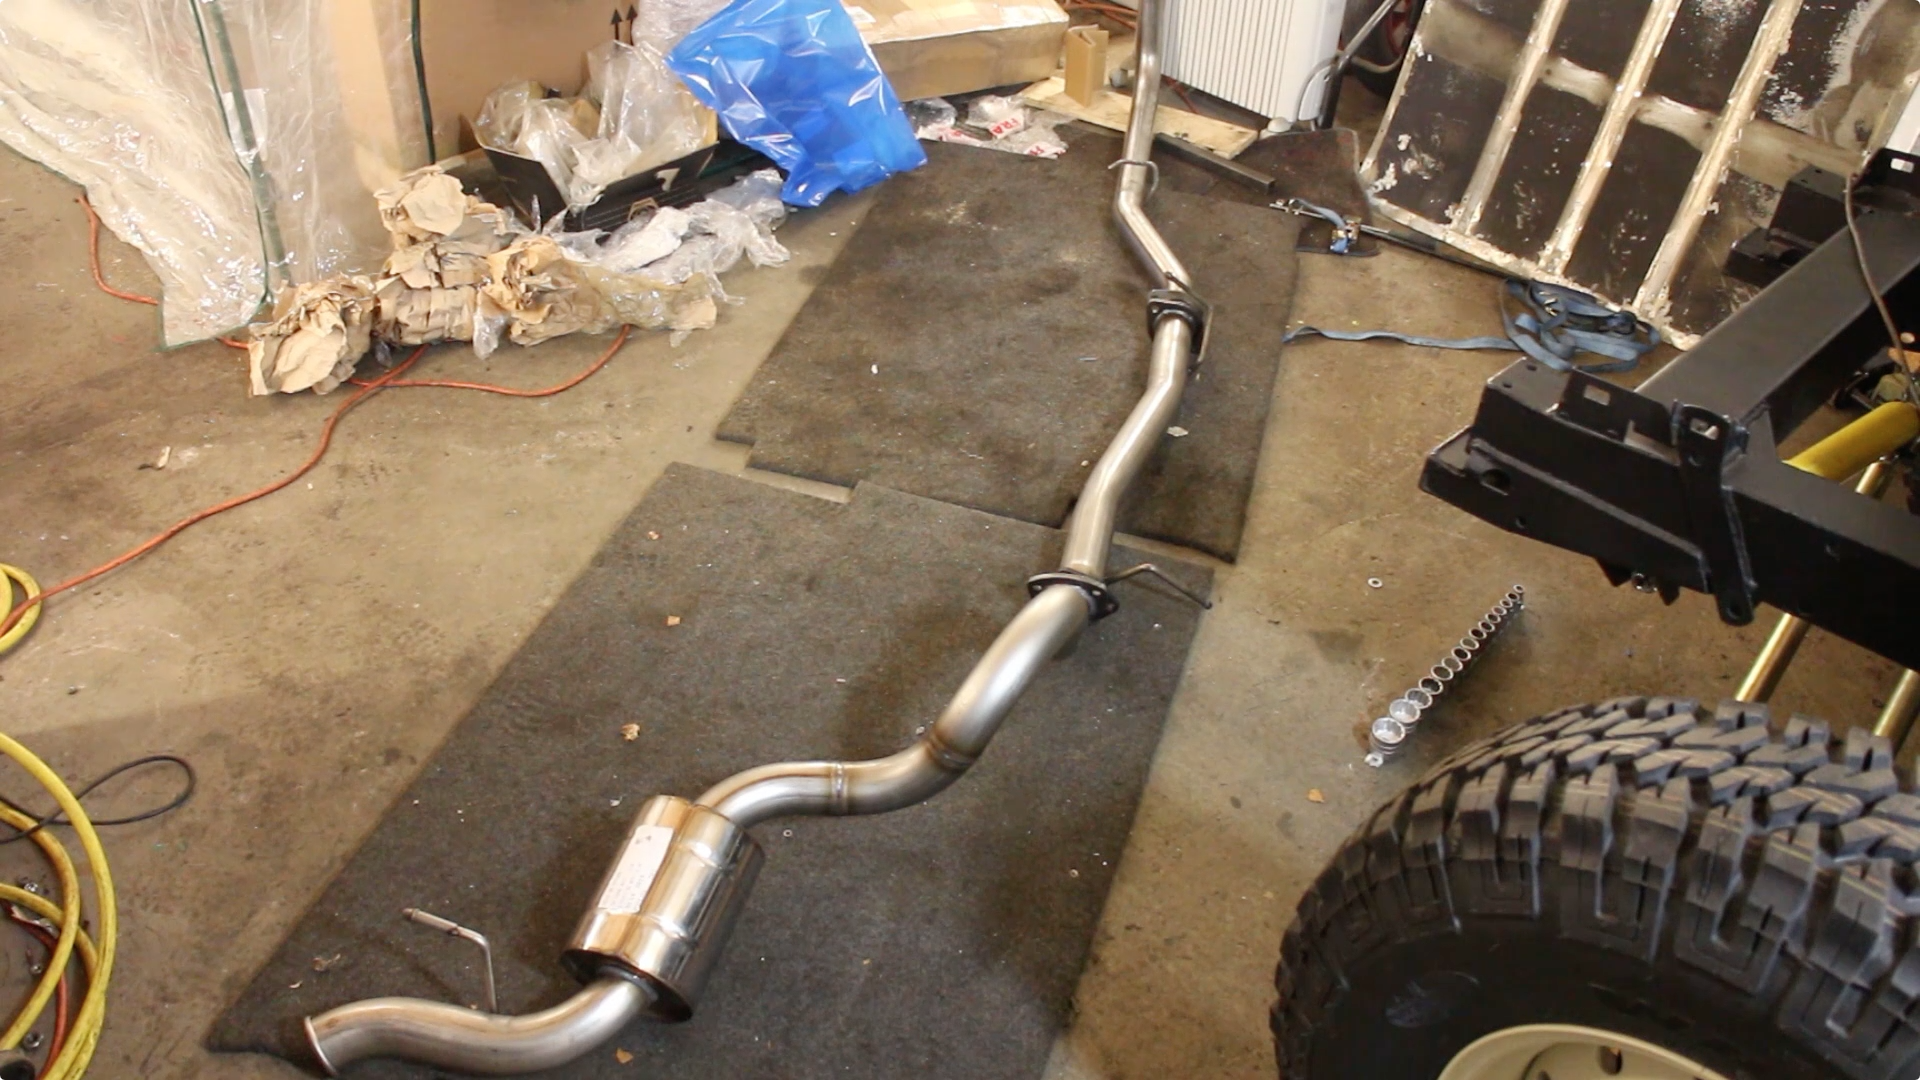
Now it's time to fit the exhaust. As we're fitting a few tasteful performance upgrades, we've gone for a stainless steel straight through exhaust (with an end silencer). When combined with the Td5, this produces a lovely, throaty burble - with the added benefit of long term corrosion resistance.

Starting at the turbo, we dropped a new gasket onto the down pipe and bolted the exhaust to the lower face of the turbo outlet. The 10P Td5 doesn't have a CAT or DPF, instead it has a braided flexi joint.

I took the time to replace all the exhaust mounts. Unfortunately, one of them was only available as a genuine part - pricey stuff! This is the mount for the mid pipe.

The rear silencer section can be carefully rotated into place without the need for removing any parts

Time to bust out the welder. I've been using Hobby Weld 5, it's a superb gas to weld with for, well, hobby welders! There's no canister fees to pay and there are dealers all over the country. Hobby Weld 5 is perfectly suited to MIG welding thin metal, which we are about to do, when we repair the bulkhead.

If you are hobby welder, or weld infrequently, Hobbyweld shielding gases are very cost effective. I also spent a bit of time replacing the torch wire liner, fitted some new tips and shrouds and it's transformed my welds!

The bulkhead had some pitting that was revealed after blasting. I also stored this in the workshop for a while, which isn't the driest environment, so further rust formed on the surface. Only slightly worse than mill scale though.
This area too had some corroded metal. Fortunately, there are companies who now produce replacement sections for commonly rusted out areas. Namely YRM Metal Solutions. In this case, I decided to have a go at localised repairs, using pieces that I'll fabricate myself.
First, the corroding areas were marked and cut out
I wanted to get back to sound metal to weld my repairs to
Then I made a cardboard template, this works really well for getting a perfect outline of the repair section to be made

I picked up a Clarke sheet metal folder to use in matching our repair piece to the form lines of the bulkhead.

Then MIG welded the repair section in. I tacked the panel every inch or two, to try prevent warp, before filling in sections randomly.
The end result is a sound repair piece, even if my welds required a lot of grinding. Then, we shipped the whole lot off to the galvanisers.
BullyB said:
Fantastic progress!
I think you were very calm about the wheels getting scratched. You would think they could manage to do it without scratching?
Keep up the good work
Probably, but for the sake of 5 minutes with a brush I don't think it was worth a fuss. Plus, these were newly painted and so very easy to mark.I think you were very calm about the wheels getting scratched. You would think they could manage to do it without scratching?
Keep up the good work
TacoExcellence said:
I've always wanted to do this with a 110, but looking at this I'm now realising what a massive undertaking and how far beyond my abilities it is.
Fantastic work though.
I'm currently doing a rolling resto of sorts on my 110. It's a big job, but they're fundamentally simple vehicles. As long as you start with something that's not completely destroyed, you can chunk up the work and do a good job. Not to the level of this thread, but still a good job!!Fantastic work though.
I find if mine's off the road too long, I get bored of not being able to drive it, and really have to dig deep for motivation. The timing chain let go 5 weeks ago on mine. Decided to replace the engine. It's got the new engine, just needs a couple of replacement injectors fitted and a bit of love from the diagnostics PC, then I'll (hopefully) be on the road. Which is good as I'm getting twitchy!!
Edited by abbotsmike on Friday 12th February 23:48
Gassing Station | Readers' Cars | Top of Page | What's New | My Stuff