147 GTA progress thread (July 2013 to present)
Discussion


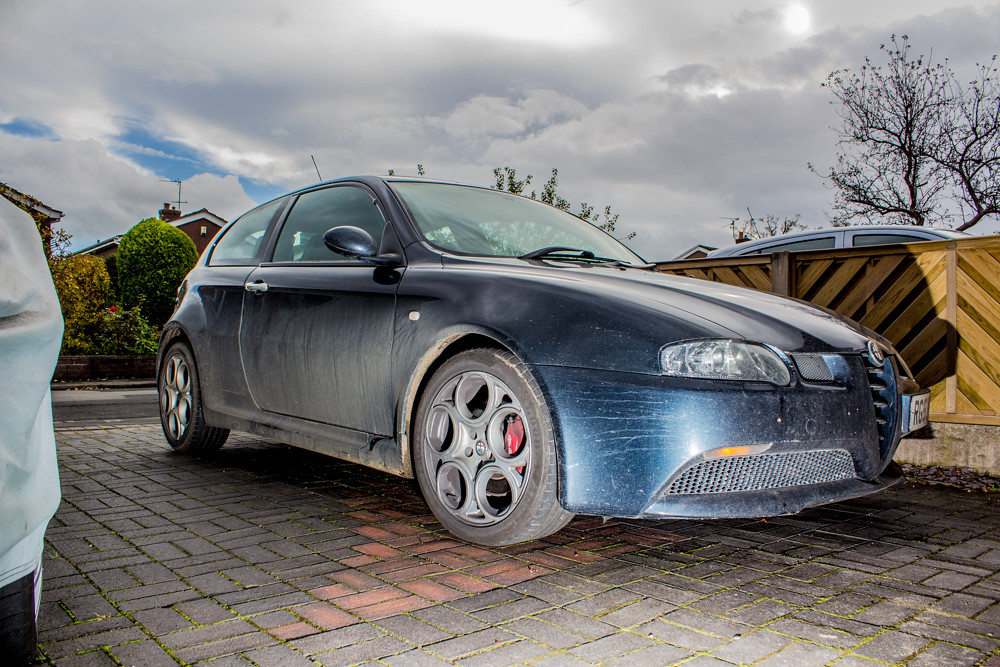
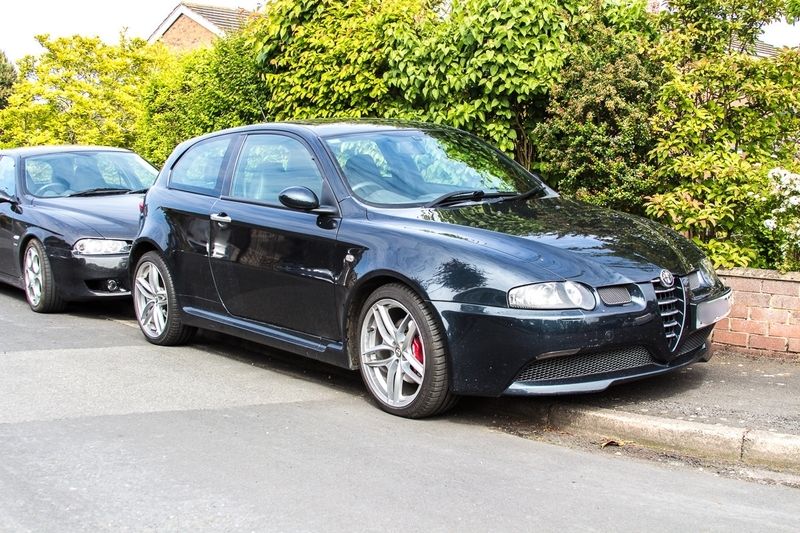
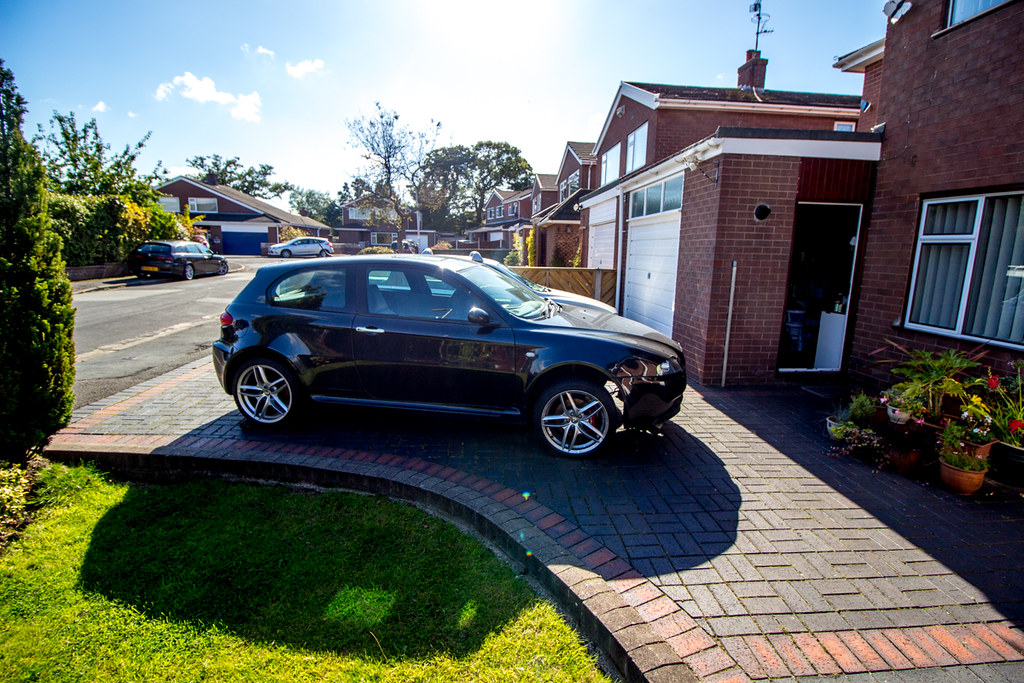
So this is my current car, I bought it as a daily drive but I've since acquired a 156SW JTD for that job (Dec 2014)...
This is also a cut and shut job from one of the Alfa forums, I just want to get the details down in this thread and then I'll start editing it, so please bare with me.
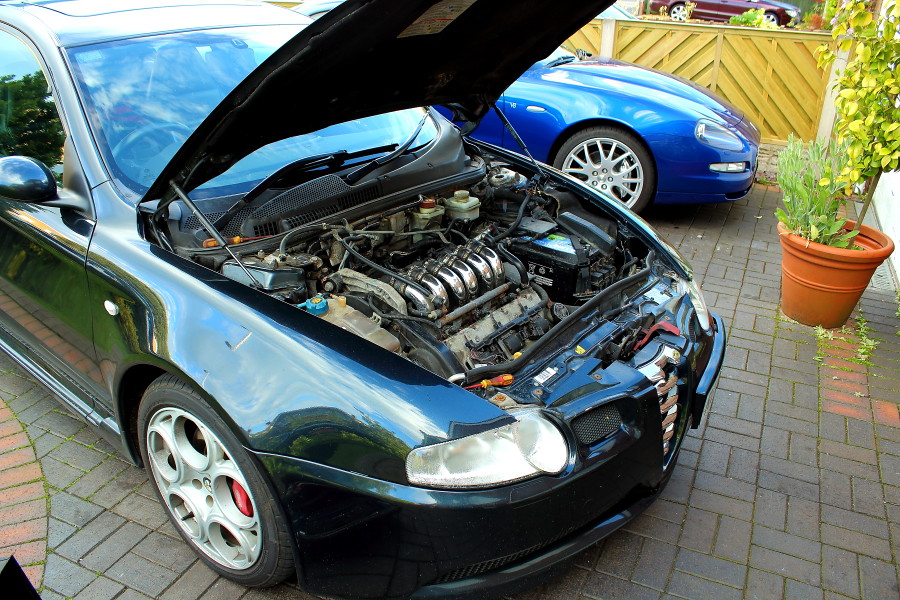
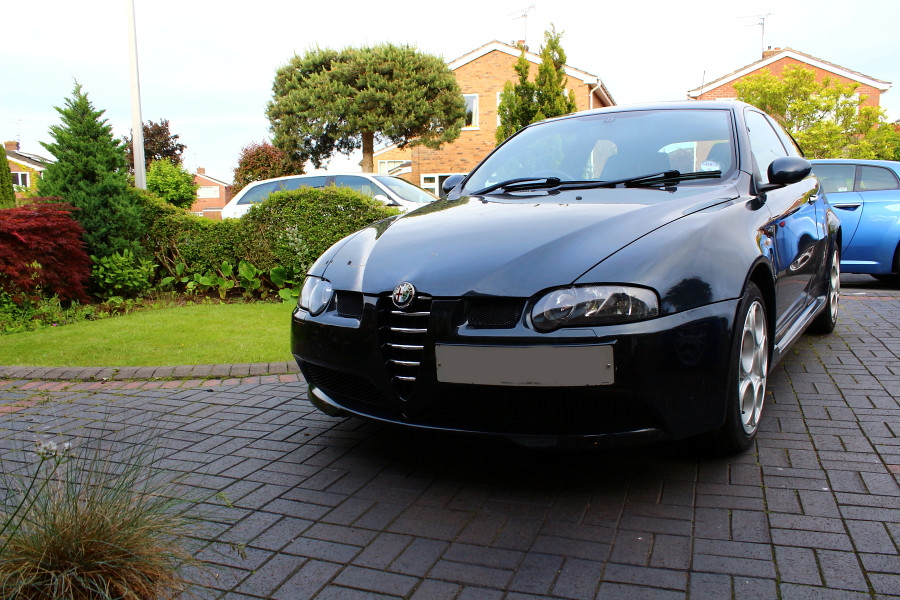
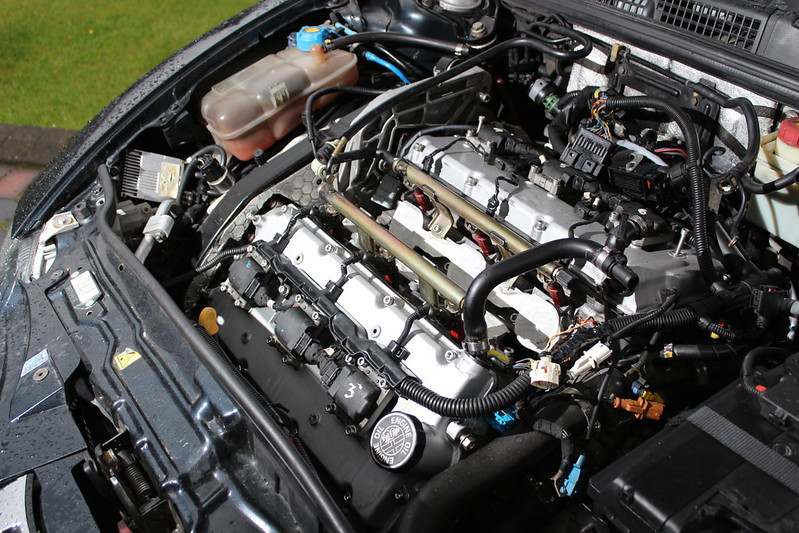
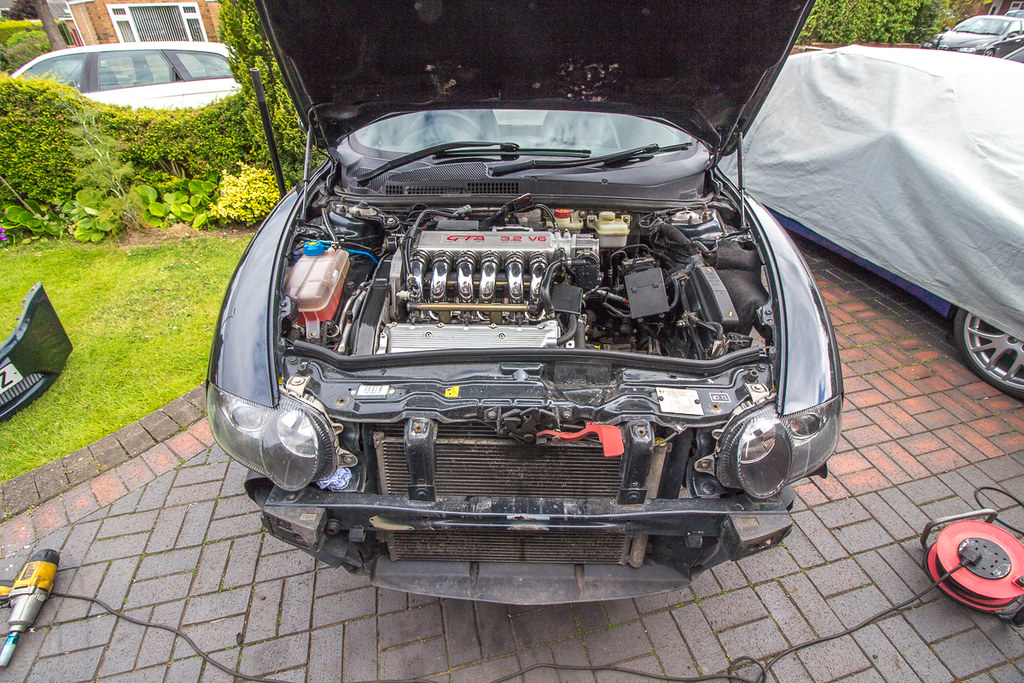
When I bought it;

Image1 by chris147gta, on Flickr
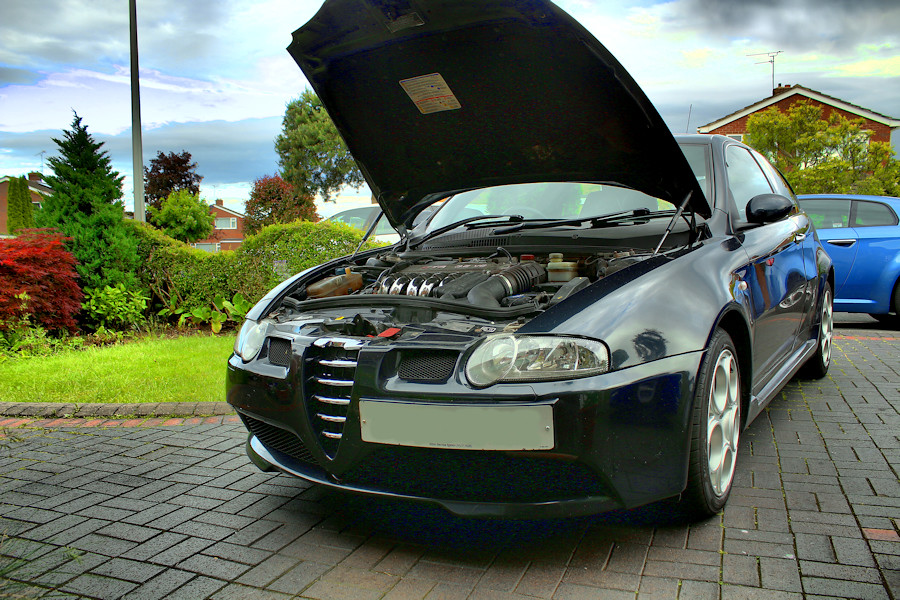
Image2 by chris147gta, on Flickr
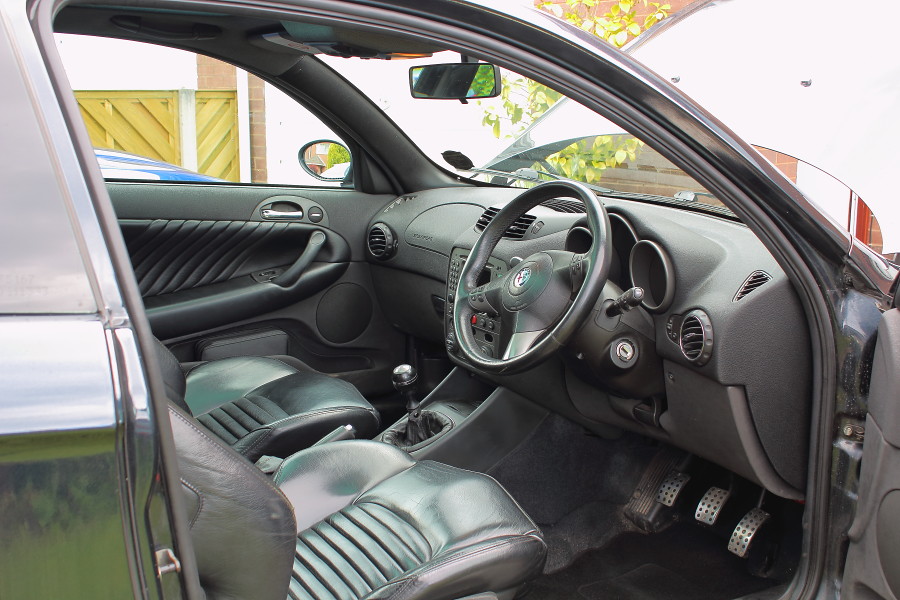
Interior needs a going over with saddle soap;
IMG_7089 by chris147gta, on Flickr

IMG_7093 by chris147gta, on Flickr
IMG_7096 by chris147gta, on Flickr
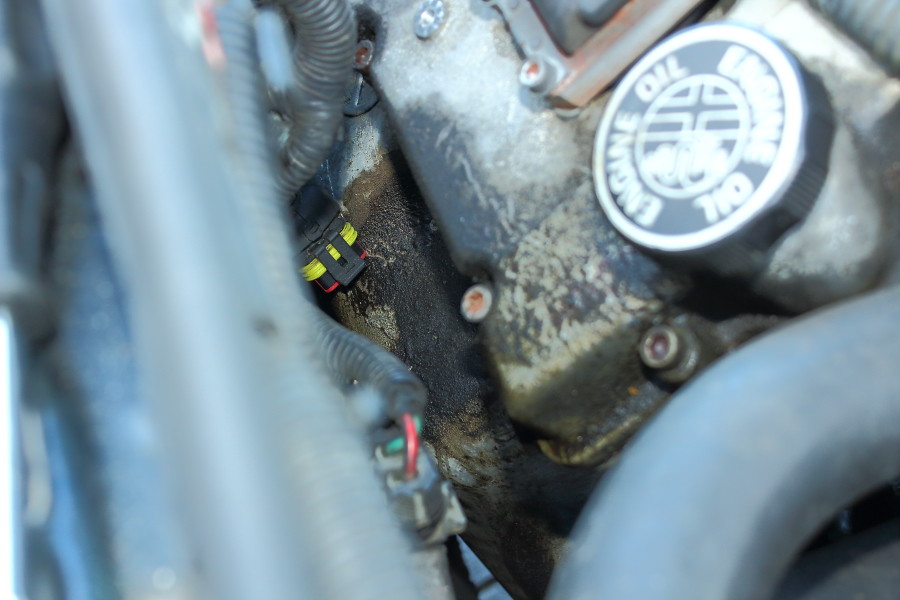
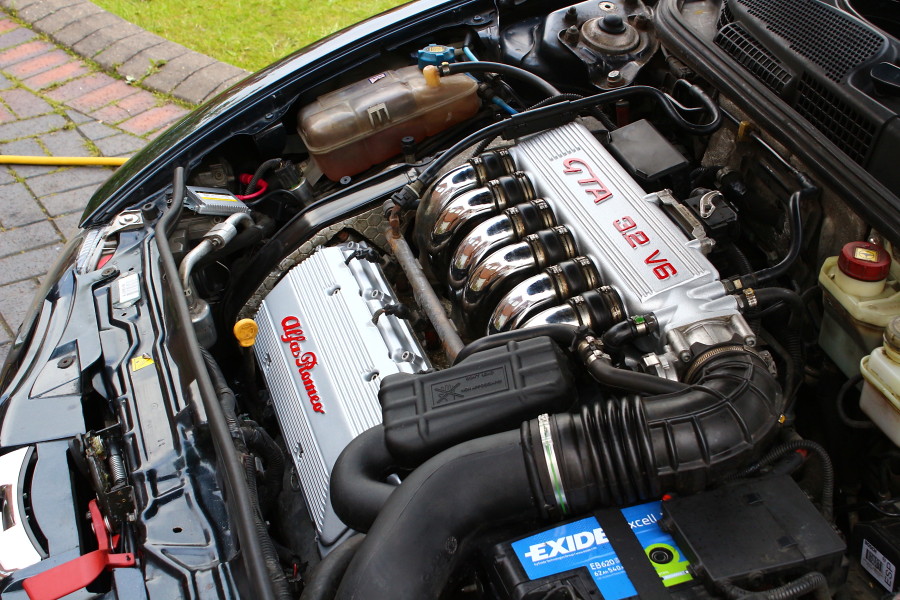
Another reason to pull the cam covers off (oil leak) Or is it just from clumsy topping up? Meh.
IMG_7113 by chris147gta, on Flickr
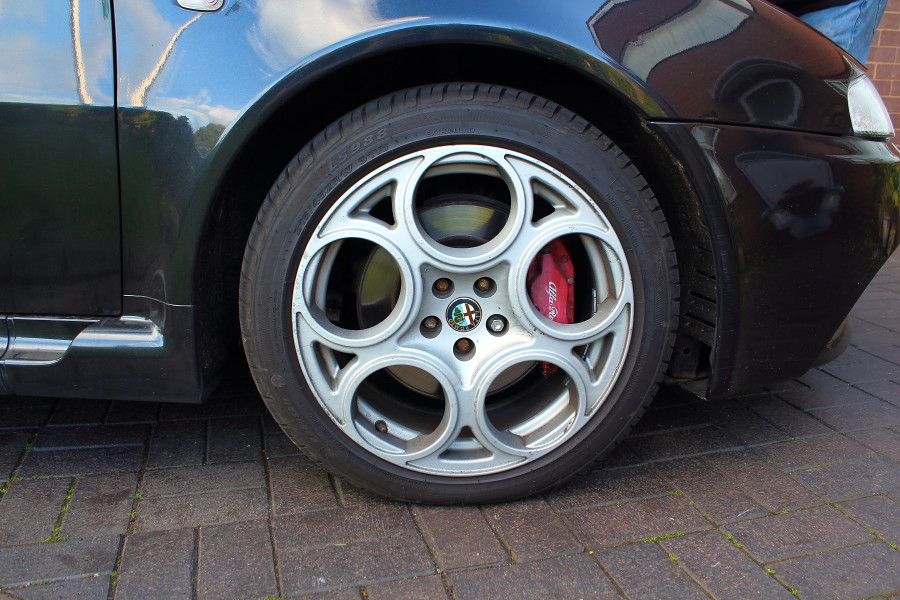
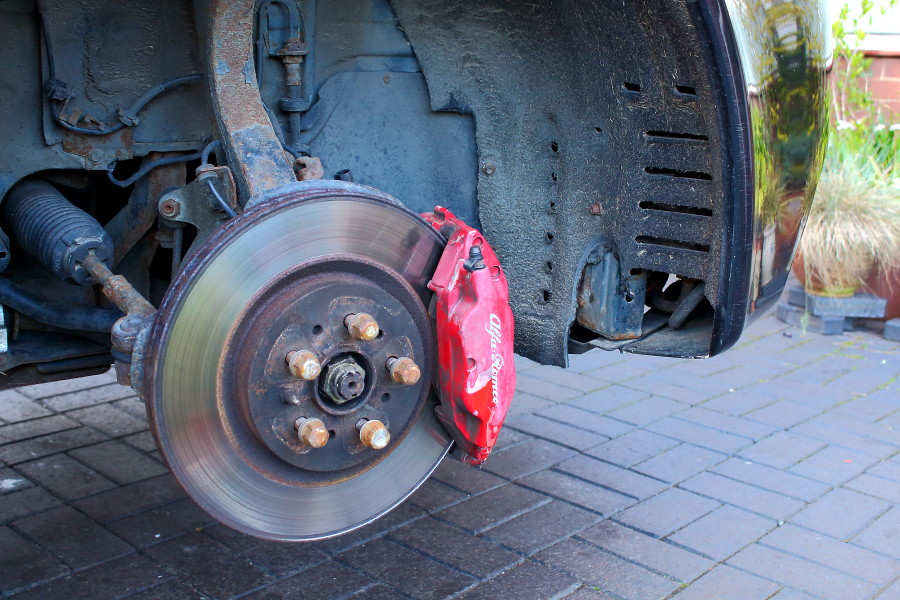
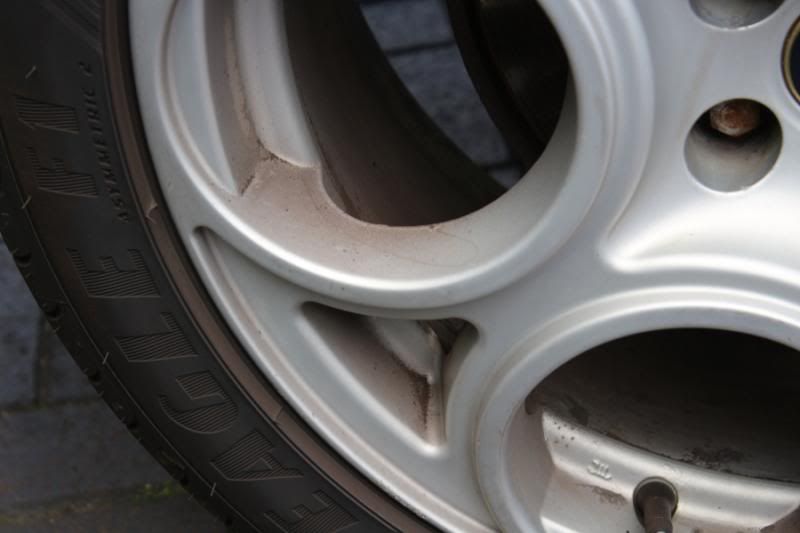
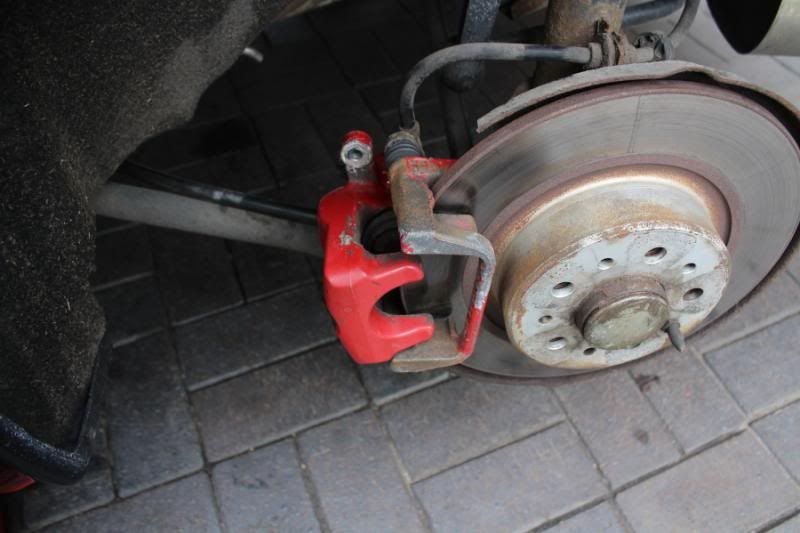
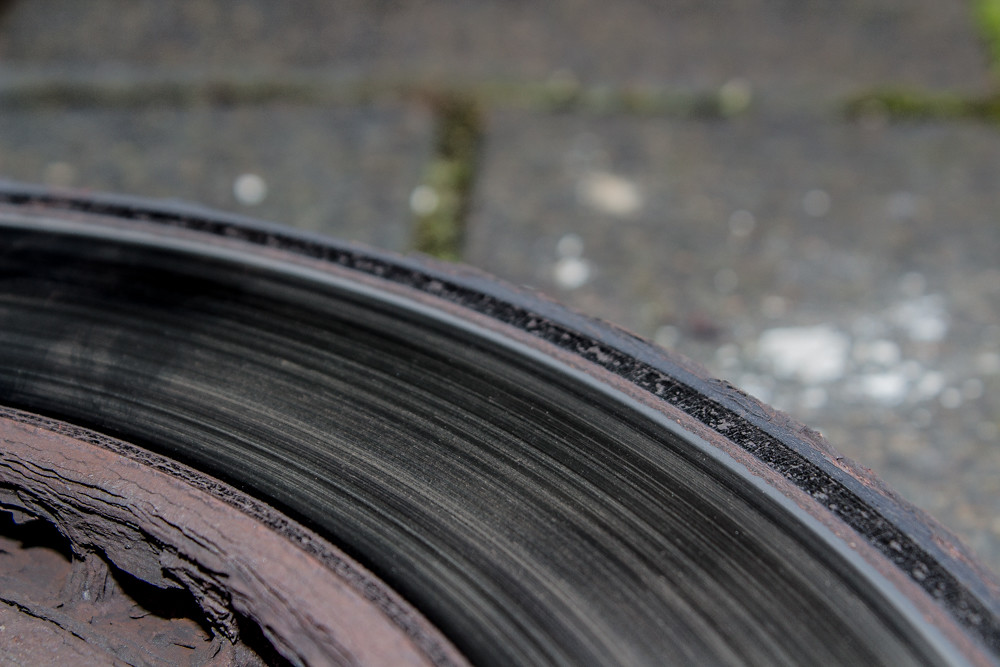
The wheels are wearing 215's for some reason and juding by the receipts it has been for most of it's life. They're also looking very dull, as are the (305mm) brakes;
IMG_7099 by chris147gta, on Flickr
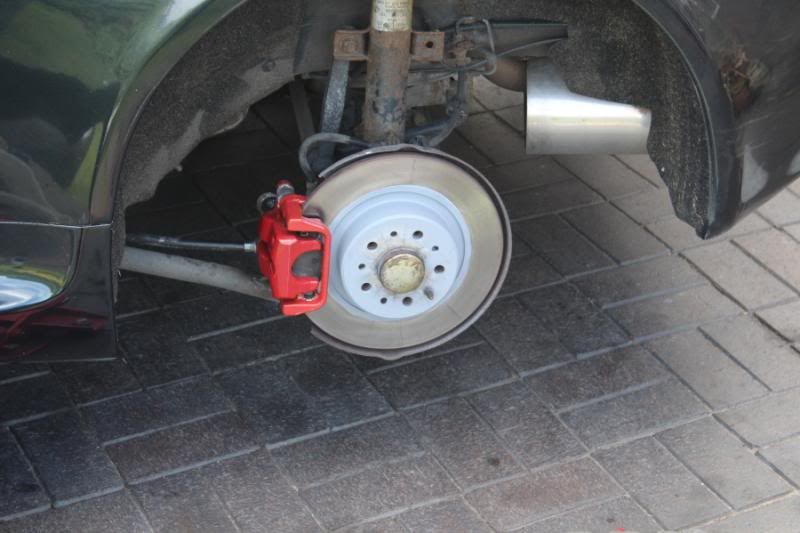
Shiney (post Dad's efforts) front wheel
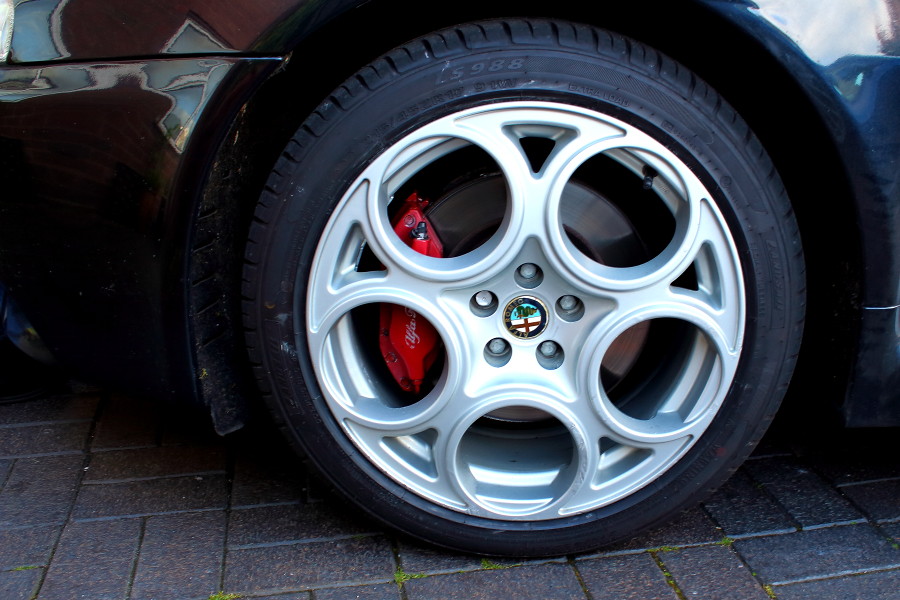
IMG_7102 by chris147gta, on Flickr
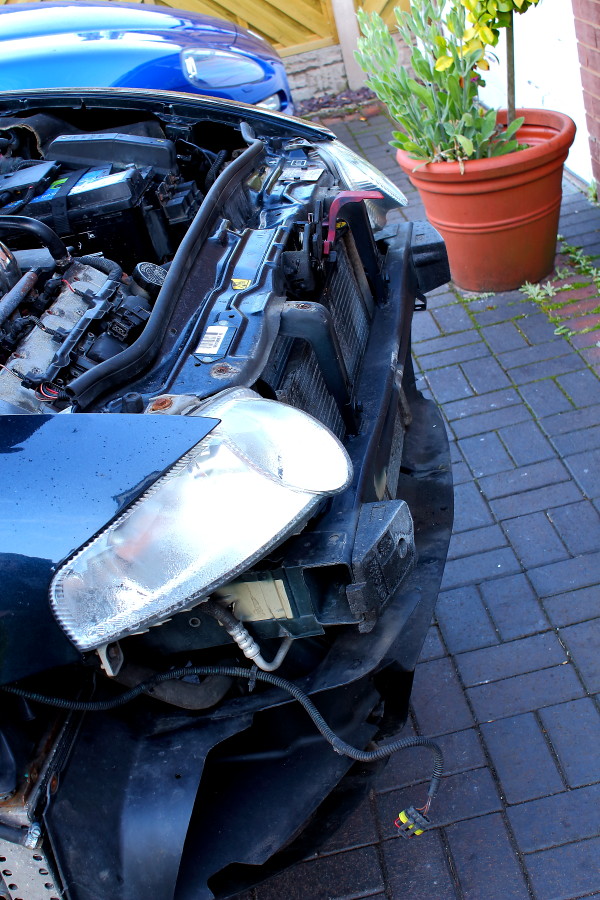
The os front keeps rubbing against the liner. The non GTA lights and used to be silver front bumper suggest front end damage but I think this is just down to the wing suppor/leg being twisted out of shape because the bolt in the bottom siezed.
IMG_7108 by chris147gta, on Flickr
The other side is equally grubby;

IMG_7107 by chris147gta, on Flickr
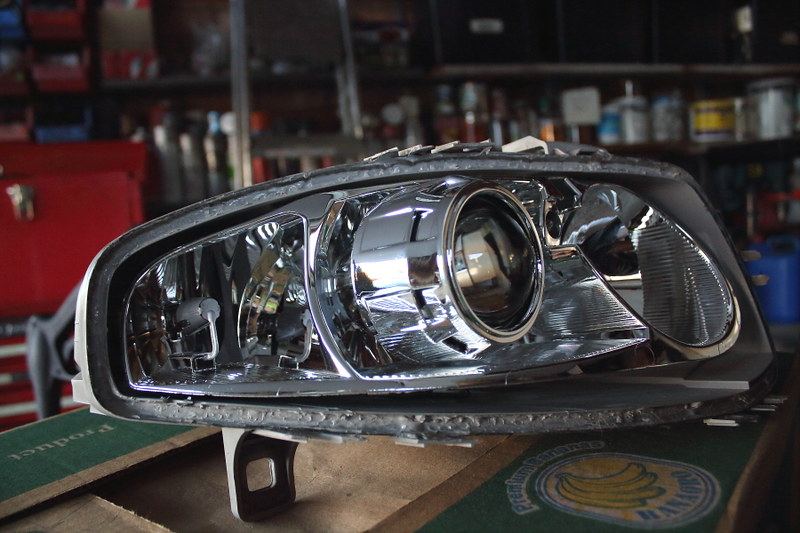
The suggestion of a light front end is also evidenced by the headlights and the moisture in one of them. The front end is straight otherwise
IMG_7119 by chris147gta, on Flickr
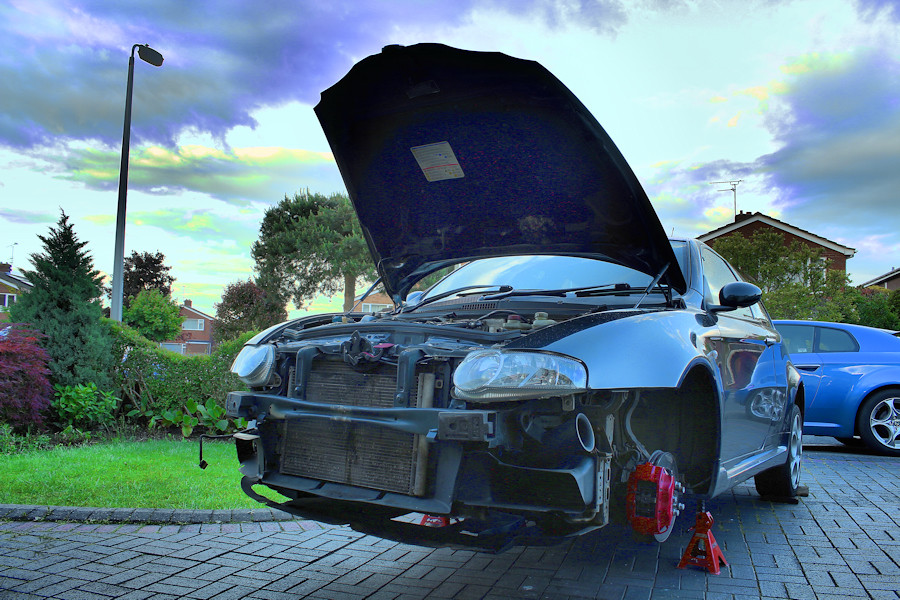
Image5 by chris147gta, on Flickr
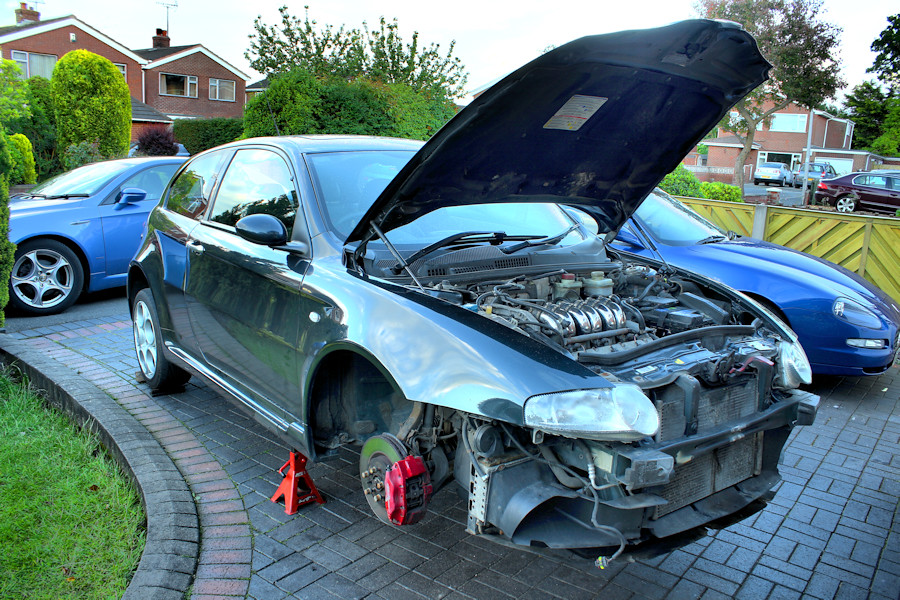
Image3 by chris147gta, on Flickr

IMG_7128 by chris147gta, on Flickr
IMG_7130 by chris147gta, on Flickr
IMG_7131 by chris147gta, on Flickr
IMG_7132 by chris147gta, on Flickr
IMG_7144 by chris147gta, on Flickr

IMG_7145 by chris147gta, on Flickr

IMG_7141 by chris147gta, on Flickr
IMG_7142 by chris147gta, on Flickr
There's other bits to sort out too;
IMG_7137 by chris147gta, on Flickr
And manky bits...
IMG_7139 by chris147gta, on Flickr
This is also a cut and shut job from one of the Alfa forums, I just want to get the details down in this thread and then I'll start editing it, so please bare with me.
When I bought it;
Image1 by chris147gta, on Flickr
Image2 by chris147gta, on Flickr
Interior needs a going over with saddle soap;
IMG_7089 by chris147gta, on Flickr
IMG_7093 by chris147gta, on Flickr
IMG_7096 by chris147gta, on Flickr
Another reason to pull the cam covers off (oil leak) Or is it just from clumsy topping up? Meh.
IMG_7113 by chris147gta, on Flickr
The wheels are wearing 215's for some reason and juding by the receipts it has been for most of it's life. They're also looking very dull, as are the (305mm) brakes;
IMG_7099 by chris147gta, on Flickr
Shiney (post Dad's efforts) front wheel
IMG_7102 by chris147gta, on Flickr
The os front keeps rubbing against the liner. The non GTA lights and used to be silver front bumper suggest front end damage but I think this is just down to the wing suppor/leg being twisted out of shape because the bolt in the bottom siezed.
IMG_7108 by chris147gta, on Flickr
The other side is equally grubby;
IMG_7107 by chris147gta, on Flickr
The suggestion of a light front end is also evidenced by the headlights and the moisture in one of them. The front end is straight otherwise
IMG_7119 by chris147gta, on Flickr
Image5 by chris147gta, on Flickr
Image3 by chris147gta, on Flickr
IMG_7128 by chris147gta, on Flickr
IMG_7130 by chris147gta, on Flickr
IMG_7131 by chris147gta, on Flickr
IMG_7132 by chris147gta, on Flickr
IMG_7144 by chris147gta, on Flickr
IMG_7145 by chris147gta, on Flickr
IMG_7141 by chris147gta, on Flickr
IMG_7142 by chris147gta, on Flickr
There's other bits to sort out too;
IMG_7137 by chris147gta, on Flickr
And manky bits...
IMG_7139 by chris147gta, on Flickr
Edited by Zombie on Saturday 7th April 21:57
Again, July 2013;
IMG_7176 by chris147gta, on Flickr
It's by no means clean, just cleaner... New stainless bolts fitted and various brakets have been cleaned up;
IMG_7195 by chris147gta, on Flickr
IMG_7196 by chris147gta, on Flickr
I think the clean bits just highlight the rest of the mank...

IMG_7207 by chris147gta, on Flickr
IMG_7208 by chris147gta, on Flickr
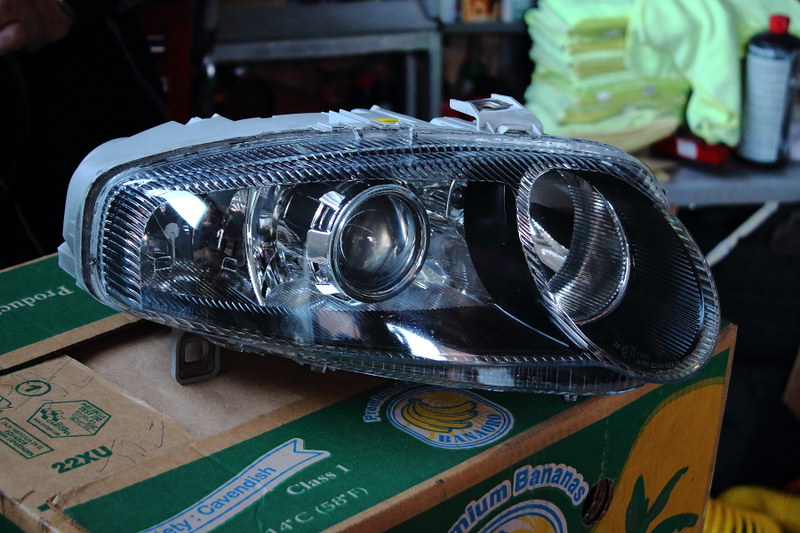
Replacement GTA headlights and 5000k HID's fitted.
IMG_7211 by chris147gta, on Flickr
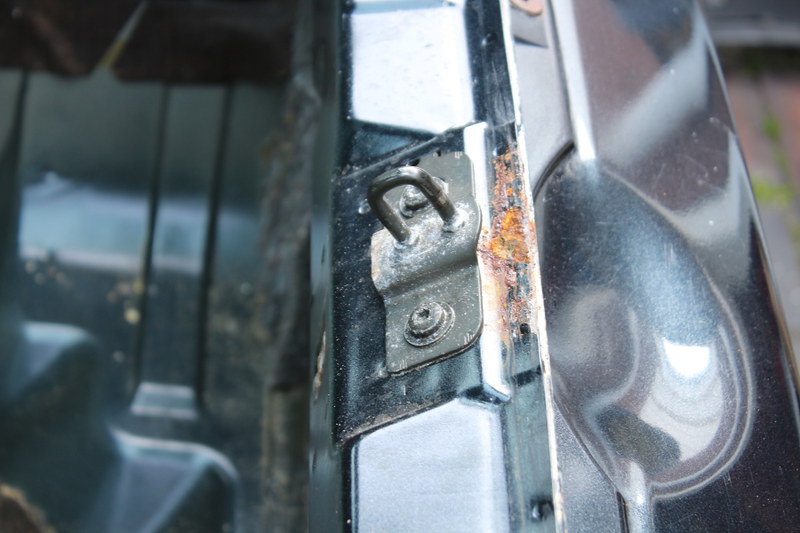
And the bonnet catch has been given a thorough clean...
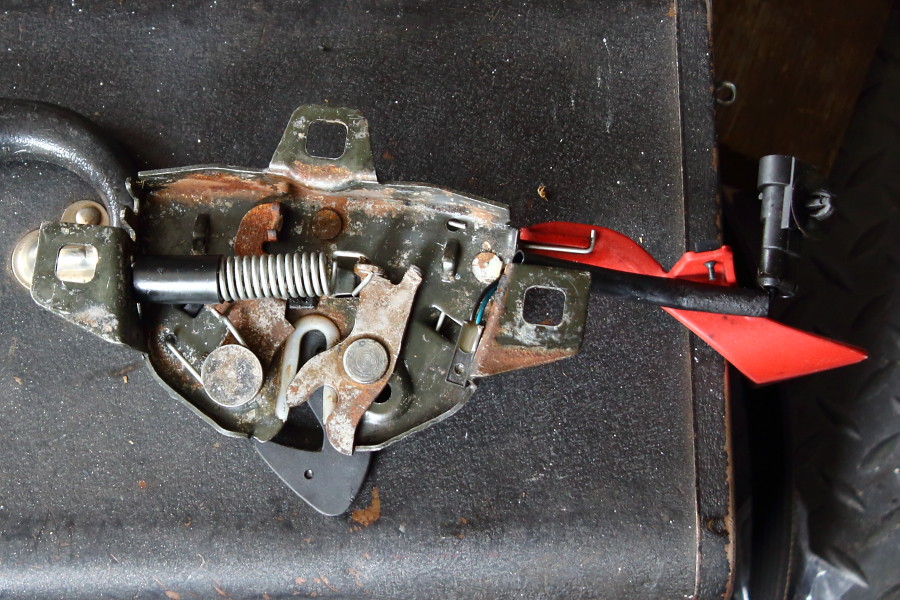
IMG_7177 by chris147gta, on Flickr
Sodding thing gave me a right scare a couple of days ago. Leaving some traffic lights I gave it a boot full of revs then changed up thinking the rev limiter had cut in earlier than expected. Next thing, MCSF!!! And a beep every 30 seconds.
Now, if you said to me this had happened to you, I would diagnose the fault as being the wiring to a coil pack. Particularly if you mentioned that you've had them all off to paint the cam covers... But el panic here was convinced it was cam timing, "it's jumped a tooth, it's not misfiring at idle, it's not showing mcsf at idle, it's jumped a tooth"...
It was a coil pack. And despite the seller's most sincere assurances that the belt and tensioner have been recently changed, it's having new ones just for my own peace of mind. (The tensioner doesn't look like its new)
After playing 2nd fiddle to the 75 over the weekend (Still haven't been able to bleed the sodding brakes!) I was obliged to look at it last night. - Finished work and wandered over to my mate's garage to work on it.
Replacement front pipes fitted (flexi's were blowing)
New handbrake cables fitted (cable snapped sunday)
Tonight I mostly fitted a denison ipod link and usb port;
IMG_7388 by chris147gta, on Flickr
IMG_7390 by chris147gta, on Flickr

IMG_7406 by chris147gta, on Flickr
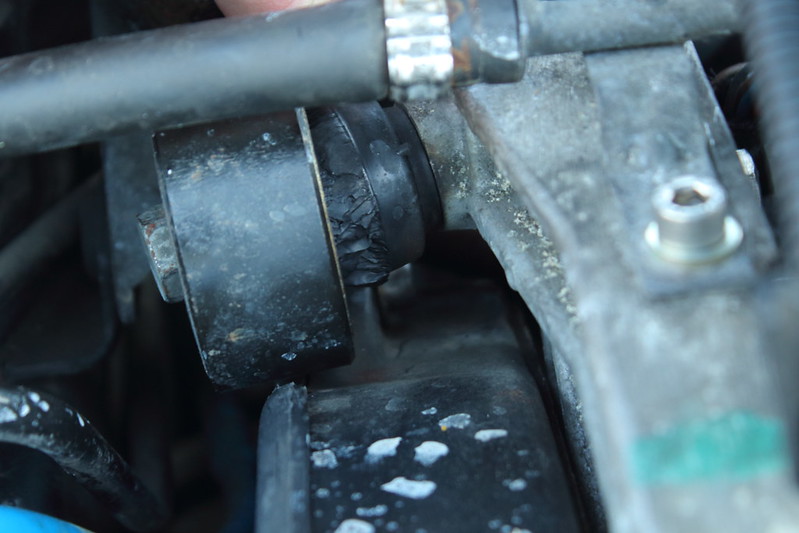
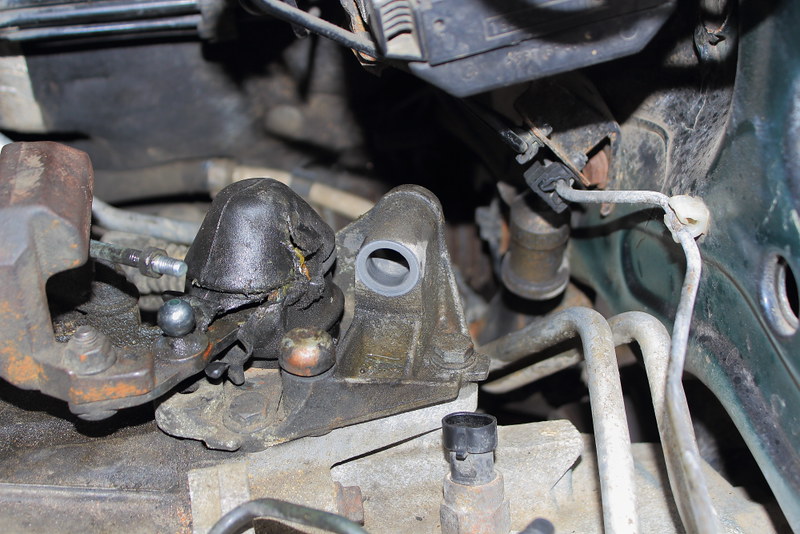
The engine mount I ordered yesterday afternoon from Autolusso turned up today (Thanks guys!:thumbs::thumbs::thumbs so I fitted that too, pic is of the worn out one (obviously)...
IMG_7393 by chris147gta, on Flickr
And my Dad has been busy;
IMG_7397 by chris147gta, on Flickr
IMG_7401 by chris147gta, on Flickr

IMG_7403 by chris147gta, on Flickr
IMG_7176 by chris147gta, on Flickr
It's by no means clean, just cleaner... New stainless bolts fitted and various brakets have been cleaned up;
IMG_7195 by chris147gta, on Flickr
IMG_7196 by chris147gta, on Flickr
I think the clean bits just highlight the rest of the mank...
IMG_7207 by chris147gta, on Flickr
IMG_7208 by chris147gta, on Flickr
Replacement GTA headlights and 5000k HID's fitted.
IMG_7211 by chris147gta, on Flickr
And the bonnet catch has been given a thorough clean...
IMG_7177 by chris147gta, on Flickr
Sodding thing gave me a right scare a couple of days ago. Leaving some traffic lights I gave it a boot full of revs then changed up thinking the rev limiter had cut in earlier than expected. Next thing, MCSF!!! And a beep every 30 seconds.
Now, if you said to me this had happened to you, I would diagnose the fault as being the wiring to a coil pack. Particularly if you mentioned that you've had them all off to paint the cam covers... But el panic here was convinced it was cam timing, "it's jumped a tooth, it's not misfiring at idle, it's not showing mcsf at idle, it's jumped a tooth"...
It was a coil pack. And despite the seller's most sincere assurances that the belt and tensioner have been recently changed, it's having new ones just for my own peace of mind. (The tensioner doesn't look like its new)
After playing 2nd fiddle to the 75 over the weekend (Still haven't been able to bleed the sodding brakes!) I was obliged to look at it last night. - Finished work and wandered over to my mate's garage to work on it.
Replacement front pipes fitted (flexi's were blowing)
New handbrake cables fitted (cable snapped sunday)
Tonight I mostly fitted a denison ipod link and usb port;
IMG_7388 by chris147gta, on Flickr
IMG_7390 by chris147gta, on Flickr
IMG_7406 by chris147gta, on Flickr
The engine mount I ordered yesterday afternoon from Autolusso turned up today (Thanks guys!:thumbs::thumbs::thumbs
so I fitted that too, pic is of the worn out one (obviously)...IMG_7393 by chris147gta, on Flickr
And my Dad has been busy;
IMG_7397 by chris147gta, on Flickr
IMG_7401 by chris147gta, on Flickr
IMG_7403 by chris147gta, on Flickr
Edited by Zombie on Saturday 7th April 22:15
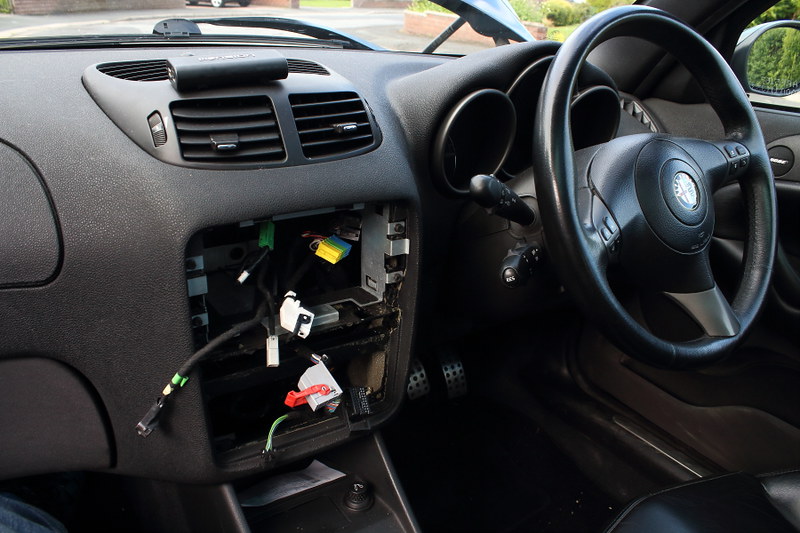
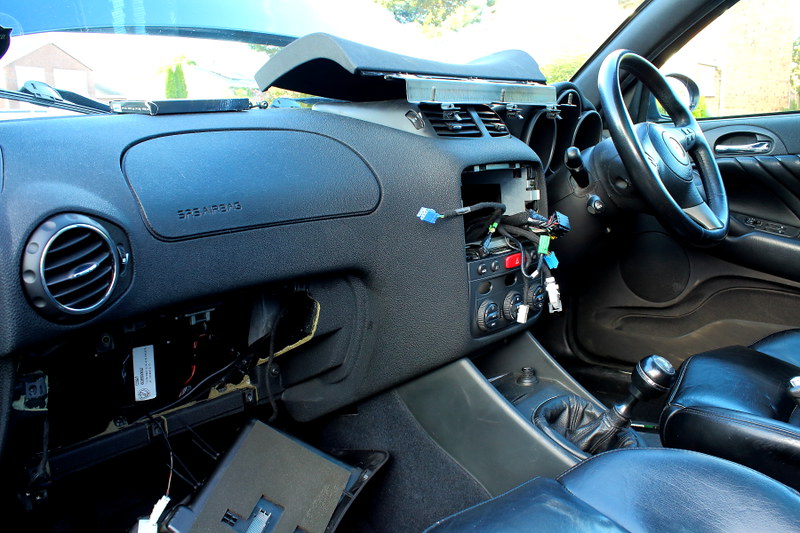
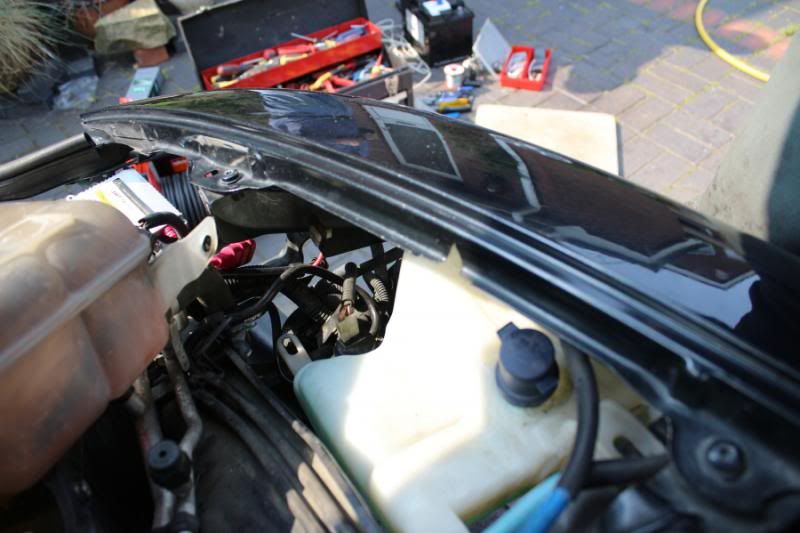
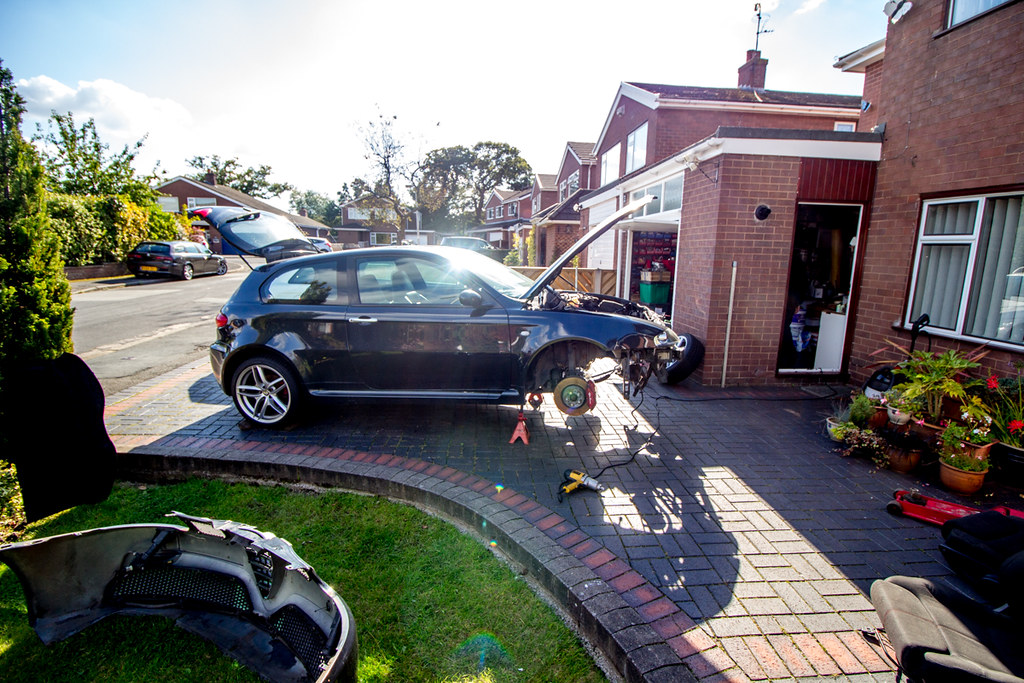
The car was fitted with OE xenons and has the levelling system. But it's been "modified" to take standard headlights. I had the day off today, spent 8 hours working on it with my dad but I don't feel like I've really achieved anything.
We started by taking the bumper off, again, and looking the original wiring to the OE xenons so that we understood what had been done.
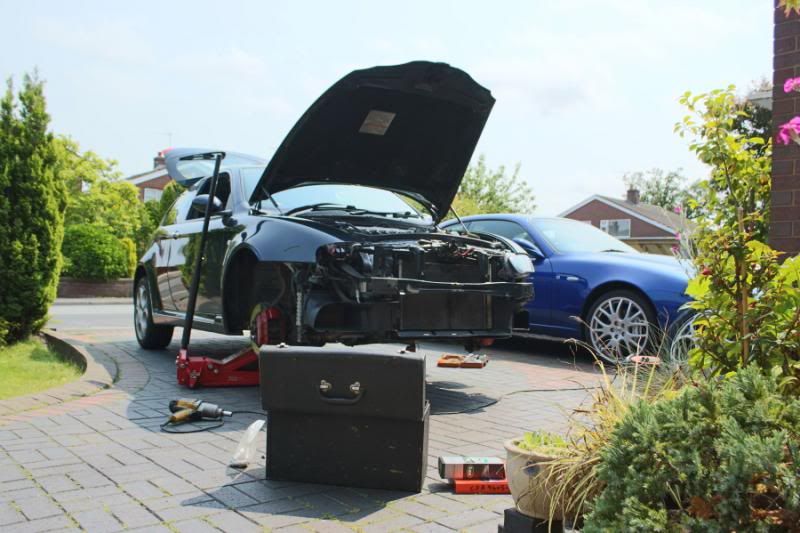
On finding it my dad sighed and said "I'll go and get the wiring diagram"...
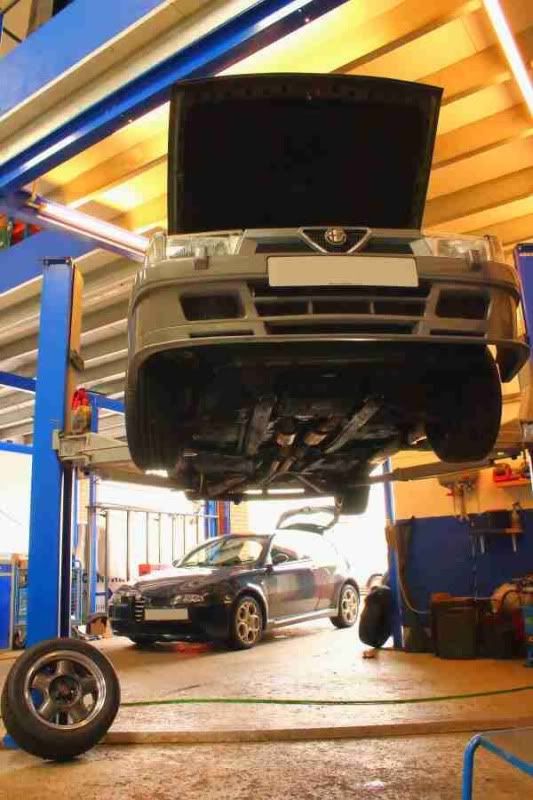
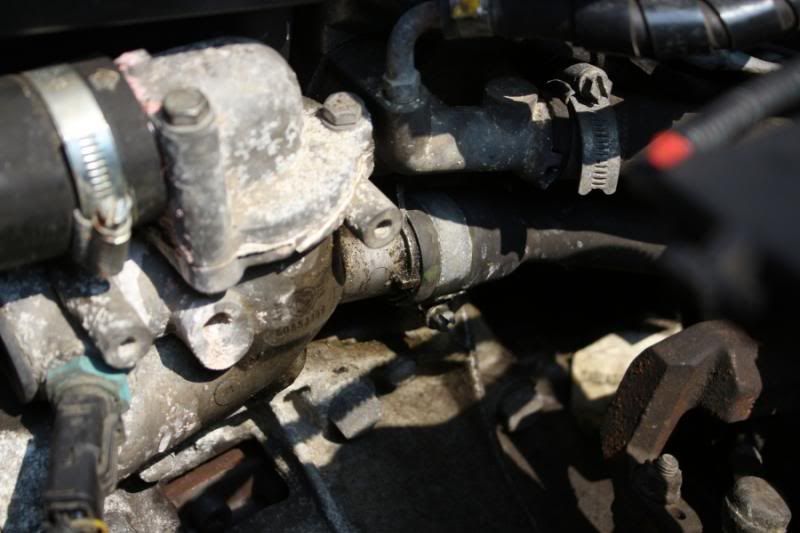
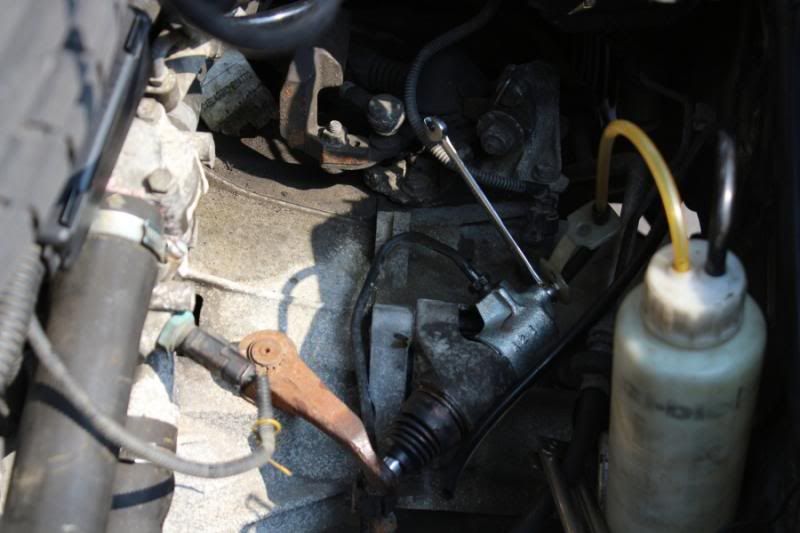
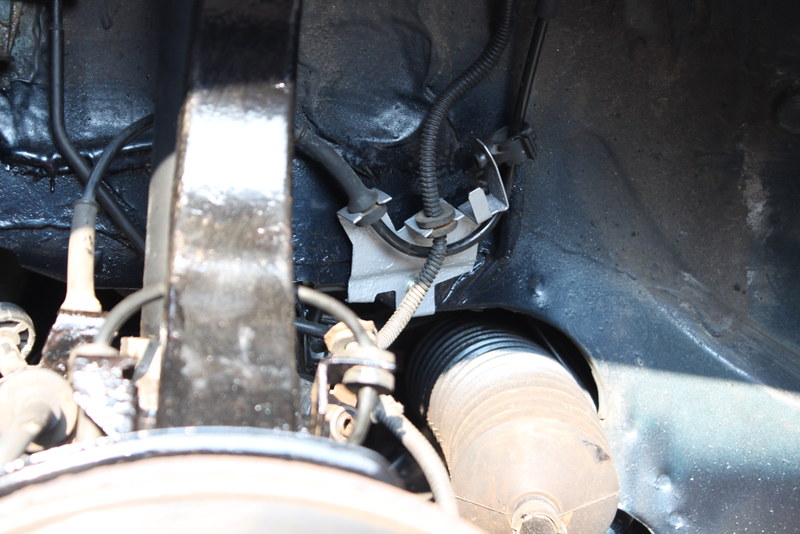
I've obviously got some problems with the clutch and this doesn't look good in terms of the gearbox's health;

But on further investigation it may be coming from elsewhere;
I also found another slight leak. - These newfangled alloy radiators don't appear to be worth it. The bottom rail is made of steel by the looks of it. It's corroded and the radiator looks like it has a leak from the bottom nearside corner. Ill be replacing that with a bogo copper one!
Last time I looked at the clutch slave I did think about swapping it out but I can't remember if I did or not. Thought it would be worthwhile trying one before ripping the engine out to change the clutch and cambelt...
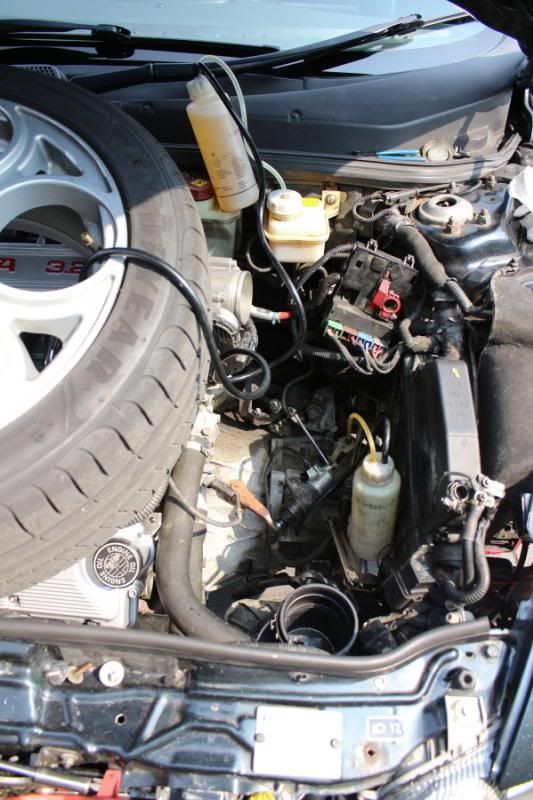
I took the pictures before apply pressure to the eazi bleed and before the lid on the reservoir started leaking brake fluid everywhere. #frantic 5 mins dragging the hose pipe out to wash it all off the underside of the car.
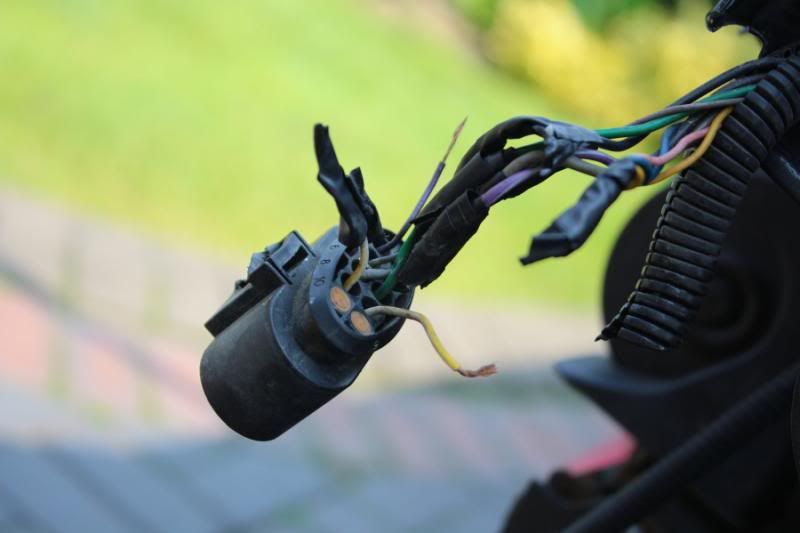
I knew the headlight sloshers didn't work from previous expeditions behind the bumper;
Top
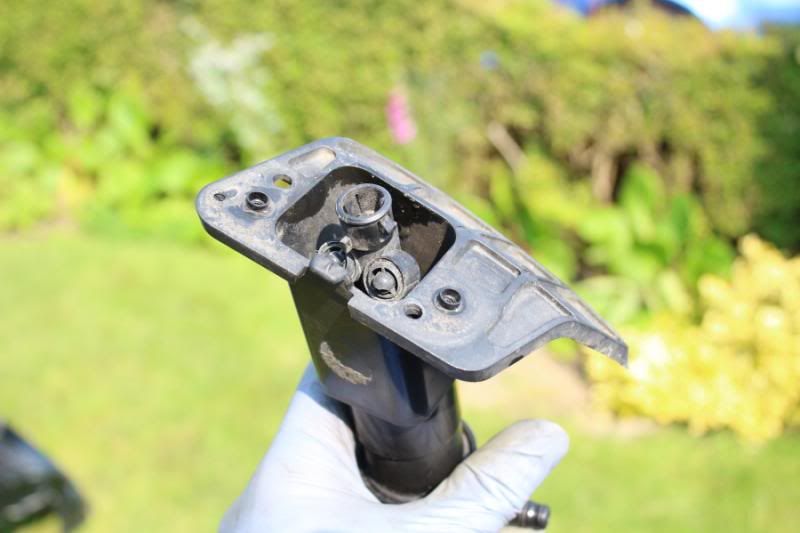
Bottom (broken bit)
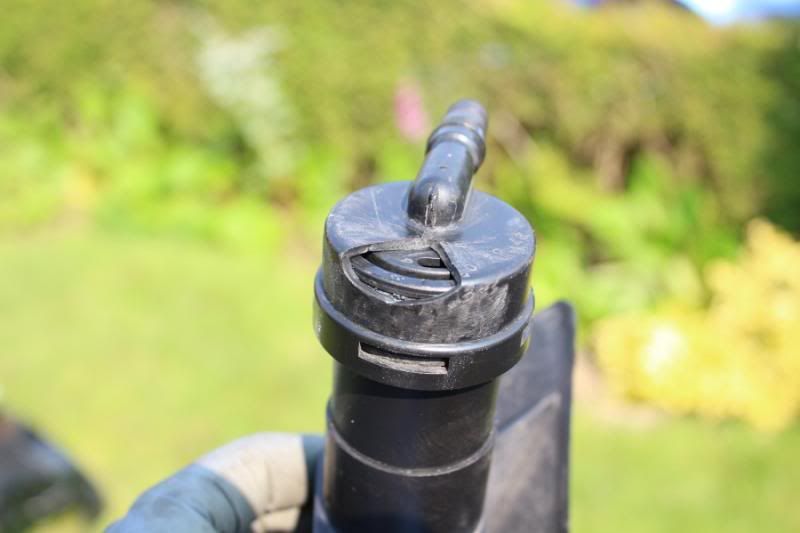
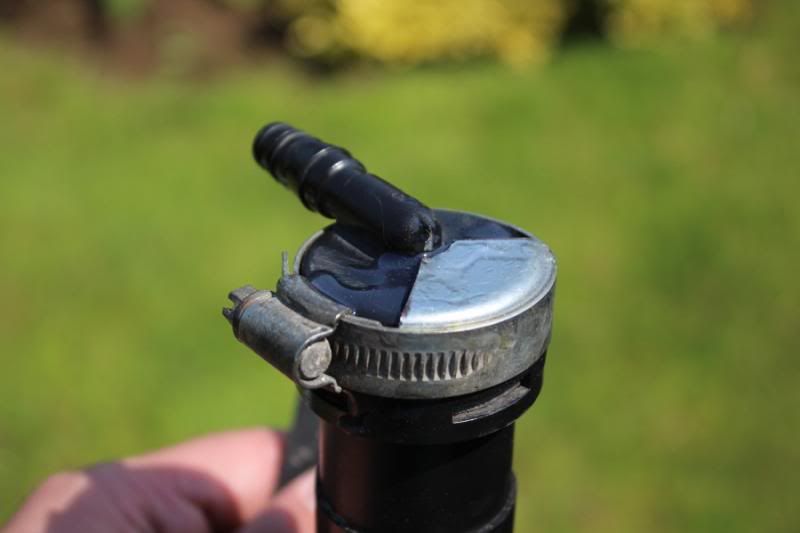
Again my dad, rather ingeniously has repaired it *touch wood* using a bit of a core plug, some araldite and a hose clip. I thought I'd taken a pic of it but apparently I haven't.
The windscreen washers and the rear washer don't work very well. They're a bit limp at best. I thought it might be a problem with the pump but testing and replacing it has proven otherwise. We think it could be a problem with the non return valves but I can't see both of them failing.
Looking forward to fitting the projector lens lights tomorrow.
So here's the repaired headlight washer;
And the new lights fitted;
Repaired air box;
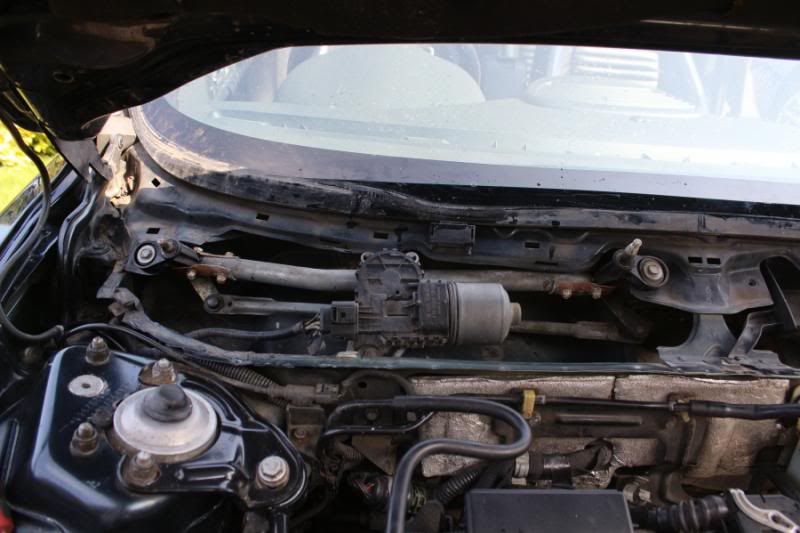
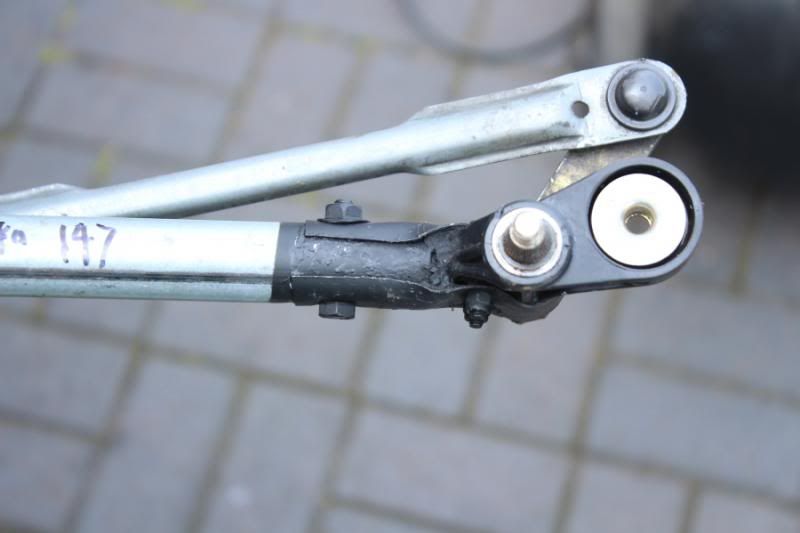
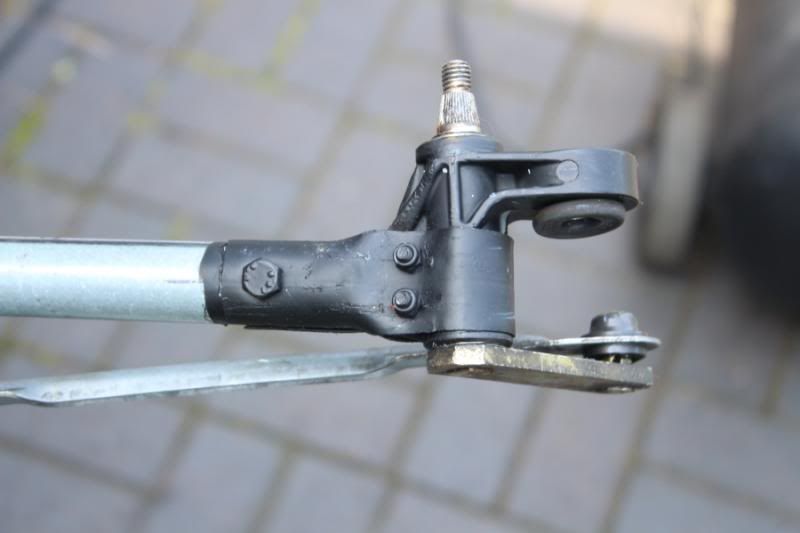
We then went off looking at why the windscreen and rear wash wipe don't work very well. The front washer jets were just clogged with dirt, a blast with the air line has sorted them out. We also investigated the wiper mechanism;
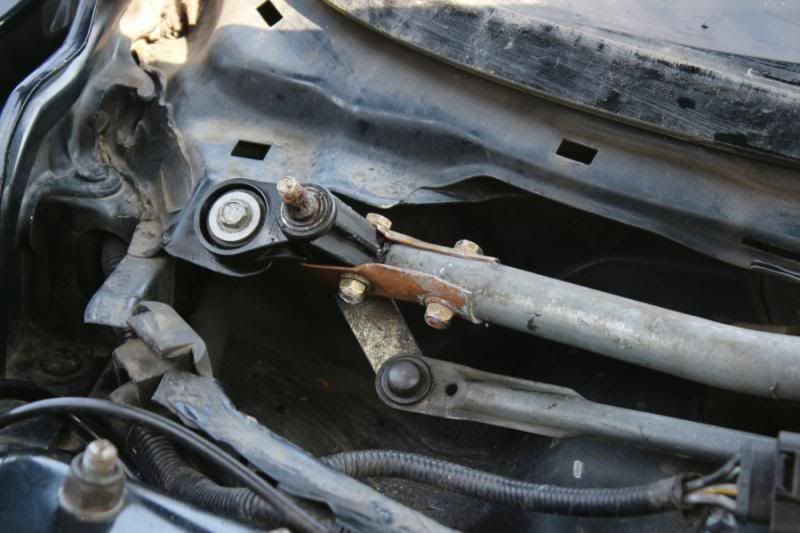
Not a bad repair but the one my dad had repaired previously is a stronger job;
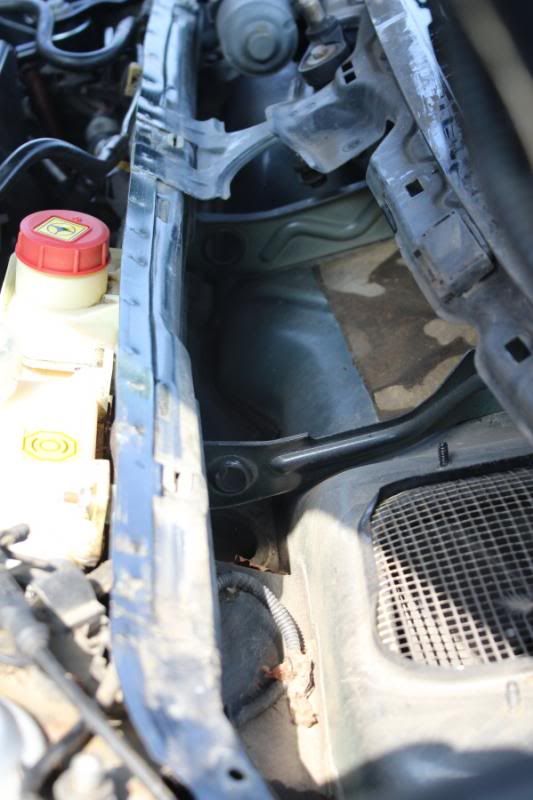
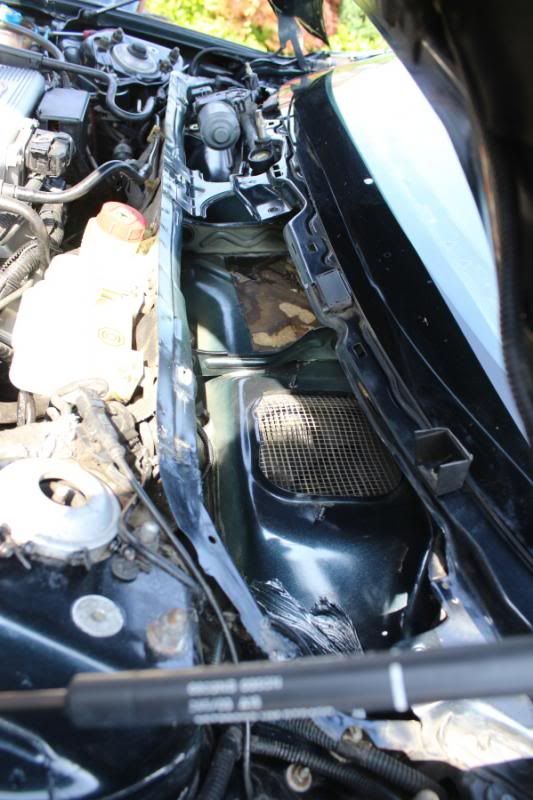
Bulk head was pretty grubby so I cleaned that up;
And what the hell is this heracey?!!!!
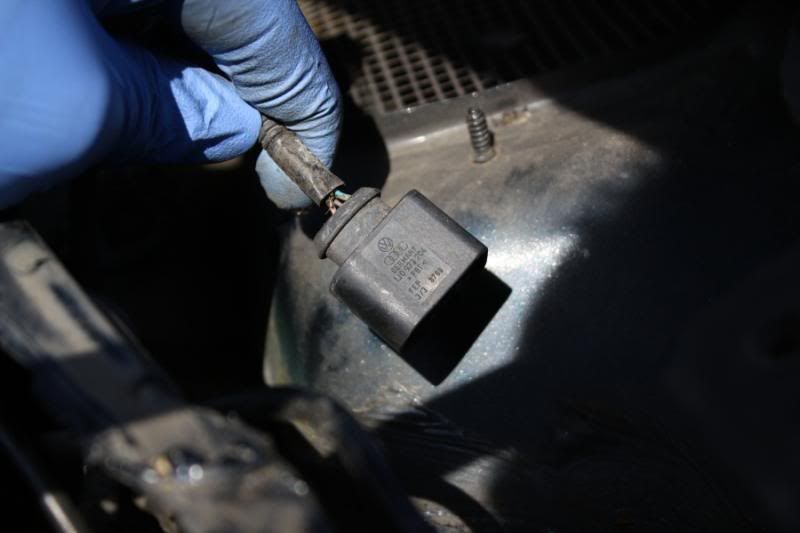
(It's an unused connection on mine but is, on some cars, connected to some sort of sensor related to the climate control and auto demist.)
We found the problem with the rear wash wipe when we opened the boot and found the bootlid was fu of water. The washer housing was cracked so that's been replaced with the new motor mechanism as the bit that was cracked was integral.
I then went to check that the engine would still start after all the playing we'd been doing. I did but with the MCSF warning. Hooked it up to fECUs and that showed a fault with the throttle pedal potentiometer. It will only read up to 25% of its travel. Interestingly it won't rev at all if you have your foot on the brakes. I would presume this is an inbuilt precaution just in case a fault causes it to say its 100% open.
I can tell you that removing one is a hatefull stand on your head job.
Durty door crack;
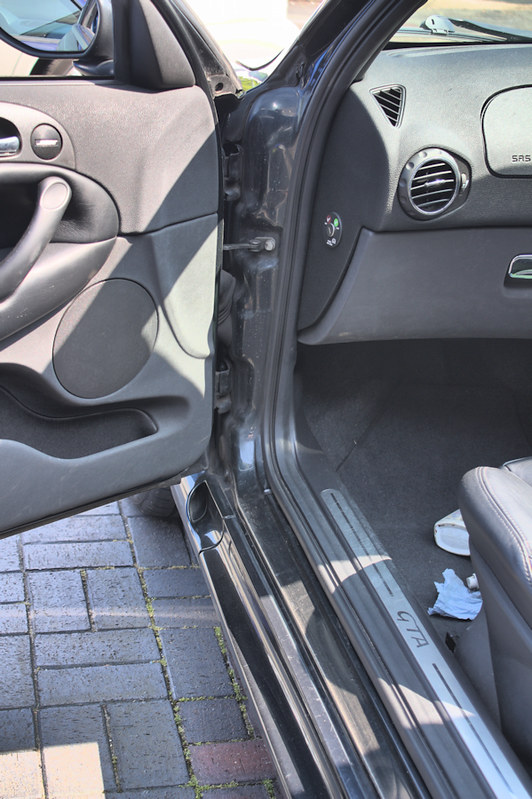
Image1 by chris147gta, on Flickr
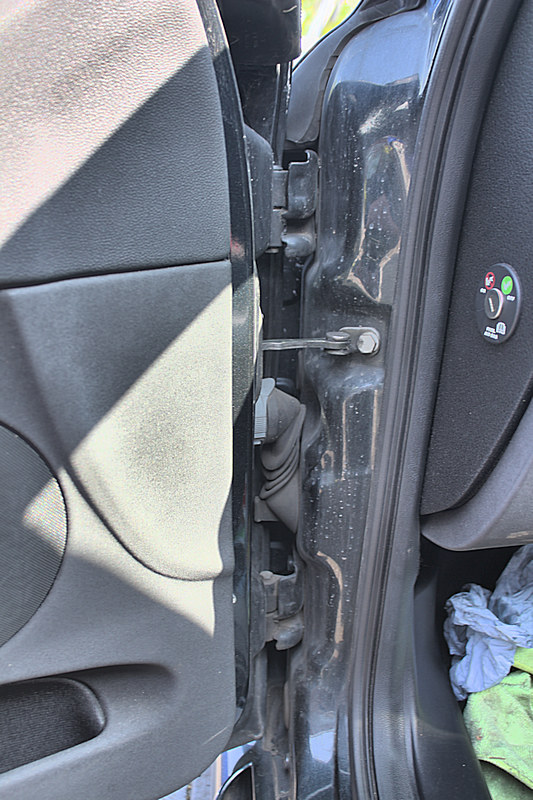
Image2 by chris147gta, on Flickr
Fixed the air conditioning!!!
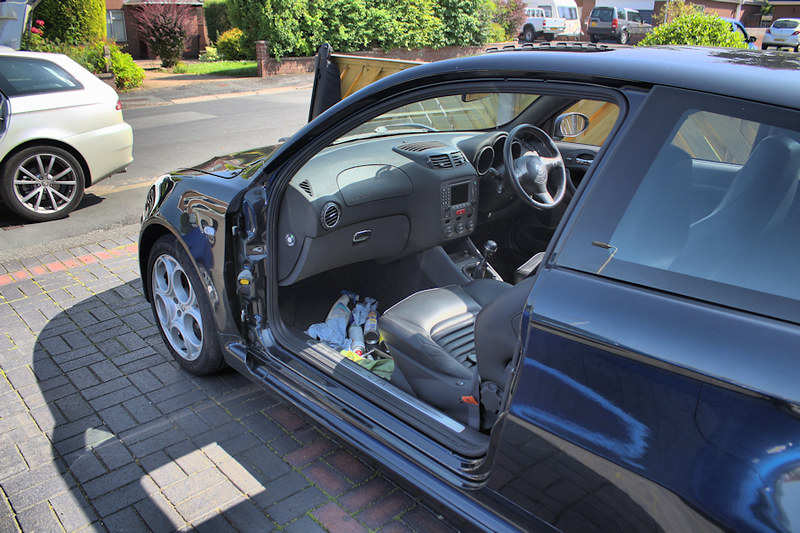
Image3 by chris147gta, on Flickr
Clean crack...
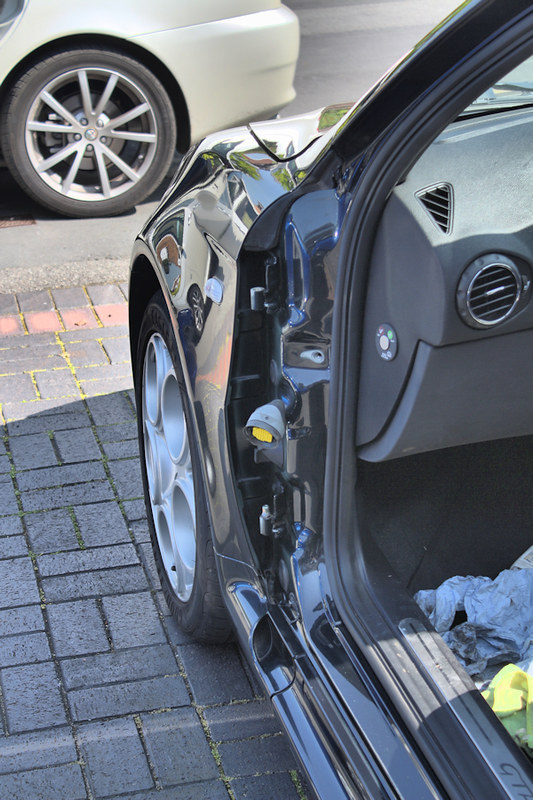
Image4 by chris147gta, on Flickr
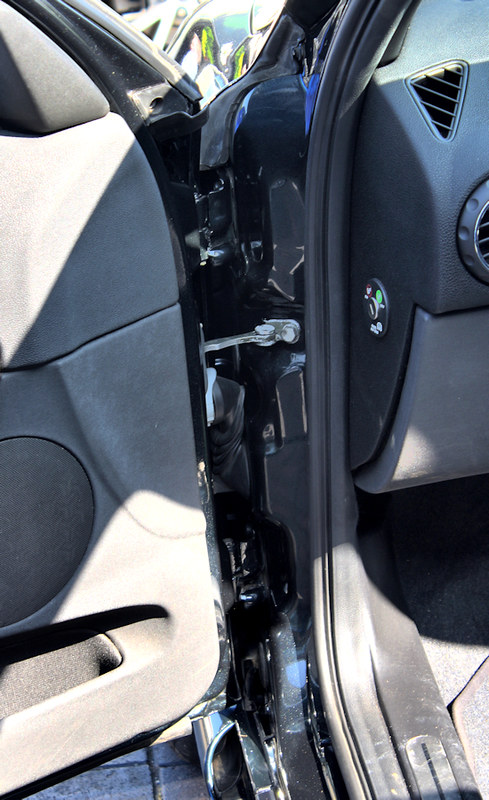
Image5 by chris147gta, on Flickr
I did a similar thing with the durty rear crack and found some rot that needs attention. I cleaned it up, rust proofed fit and repaired it. Didn't take a pic though. I broke my vertibre trying to refit the doors....
IMG_7492 by chris147gta, on Flickr
We started by taking the bumper off, again, and looking the original wiring to the OE xenons so that we understood what had been done.
On finding it my dad sighed and said "I'll go and get the wiring diagram"...
I've obviously got some problems with the clutch and this doesn't look good in terms of the gearbox's health;
But on further investigation it may be coming from elsewhere;
I also found another slight leak. - These newfangled alloy radiators don't appear to be worth it. The bottom rail is made of steel by the looks of it. It's corroded and the radiator looks like it has a leak from the bottom nearside corner. Ill be replacing that with a bogo copper one!
- wonders whether the thermal conductivity of copper is better than alloy.
Last time I looked at the clutch slave I did think about swapping it out but I can't remember if I did or not. Thought it would be worthwhile trying one before ripping the engine out to change the clutch and cambelt...
I took the pictures before apply pressure to the eazi bleed and before the lid on the reservoir started leaking brake fluid everywhere. #frantic 5 mins dragging the hose pipe out to wash it all off the underside of the car.
I knew the headlight sloshers didn't work from previous expeditions behind the bumper;
Top
Bottom (broken bit)
Again my dad, rather ingeniously has repaired it *touch wood* using a bit of a core plug, some araldite and a hose clip. I thought I'd taken a pic of it but apparently I haven't.
The windscreen washers and the rear washer don't work very well. They're a bit limp at best. I thought it might be a problem with the pump but testing and replacing it has proven otherwise. We think it could be a problem with the non return valves but I can't see both of them failing.
Looking forward to fitting the projector lens lights tomorrow.
So here's the repaired headlight washer;
And the new lights fitted;
Repaired air box;
We then went off looking at why the windscreen and rear wash wipe don't work very well. The front washer jets were just clogged with dirt, a blast with the air line has sorted them out. We also investigated the wiper mechanism;
Not a bad repair but the one my dad had repaired previously is a stronger job;
Bulk head was pretty grubby so I cleaned that up;
And what the hell is this heracey?!!!!
(It's an unused connection on mine but is, on some cars, connected to some sort of sensor related to the climate control and auto demist.)
We found the problem with the rear wash wipe when we opened the boot and found the bootlid was fu of water. The washer housing was cracked so that's been replaced with the new motor mechanism as the bit that was cracked was integral.
I then went to check that the engine would still start after all the playing we'd been doing. I did but with the MCSF warning. Hooked it up to fECUs and that showed a fault with the throttle pedal potentiometer. It will only read up to 25% of its travel. Interestingly it won't rev at all if you have your foot on the brakes. I would presume this is an inbuilt precaution just in case a fault causes it to say its 100% open.
I can tell you that removing one is a hatefull stand on your head job.
Durty door crack;
Image1 by chris147gta, on Flickr
Image2 by chris147gta, on Flickr
Fixed the air conditioning!!!
Image3 by chris147gta, on Flickr
Clean crack...
Image4 by chris147gta, on Flickr
Image5 by chris147gta, on Flickr
I did a similar thing with the durty rear crack and found some rot that needs attention. I cleaned it up, rust proofed fit and repaired it. Didn't take a pic though. I broke my vertibre trying to refit the doors....
IMG_7492 by chris147gta, on Flickr
Edited by Zombie on Saturday 7th April 22:17
(Still July 2013...)
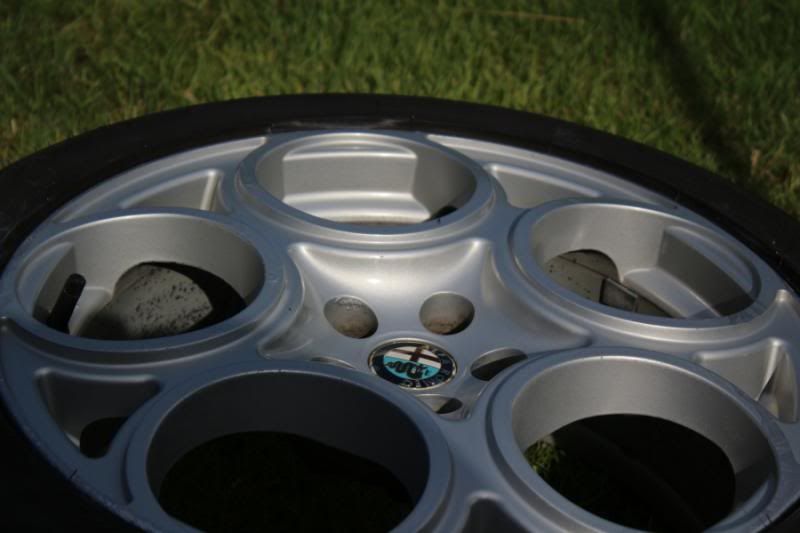
When I say 'we' I again mean my dad has been cleaning the matt finish wheels with g3, menzurma and touching in the numerous marks. I did make an effort today (I've had been having problems with my back again) and I did clean one of the wheels up... The gave it to my dad to finish off lol...

Sunset was nice tonight
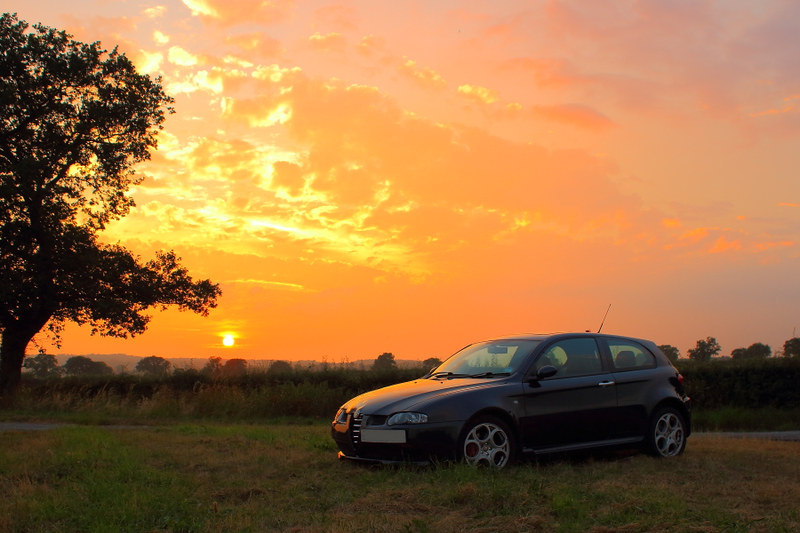
IMG_7525 by chris147gta, on Flickr
August 2013
Been cleaning today...
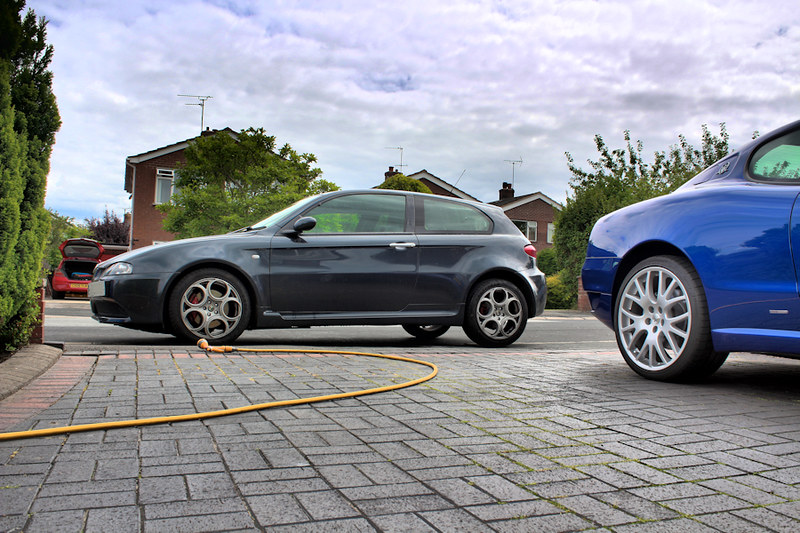
Image1 by chris147gta, on Flickr
Washed;
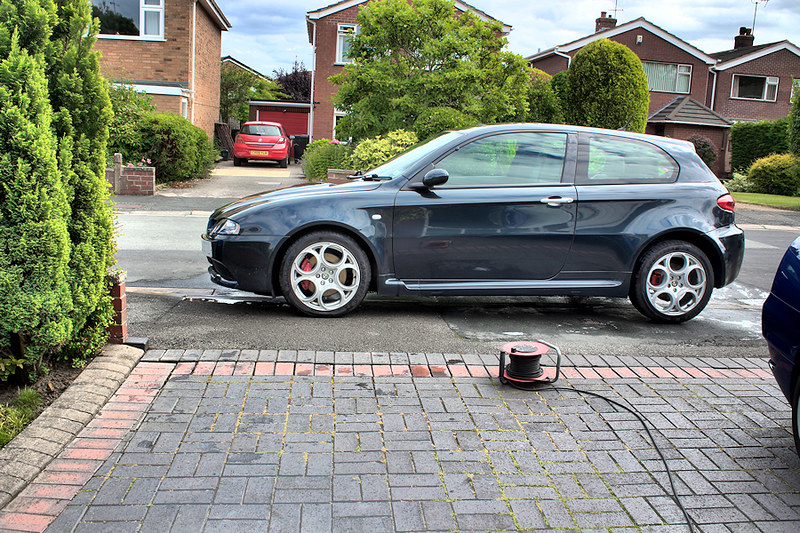
Image2 by chris147gta, on Flickr
Buffed;
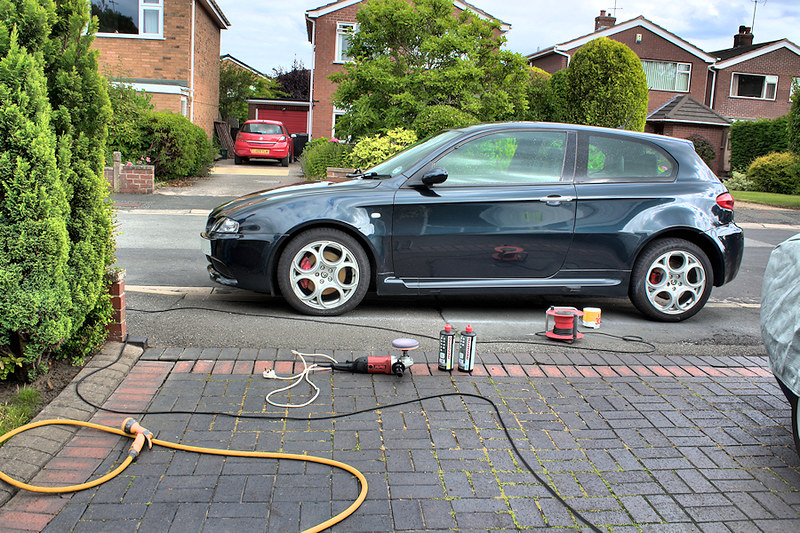
Image3 by chris147gta, on Flickr
Polished;
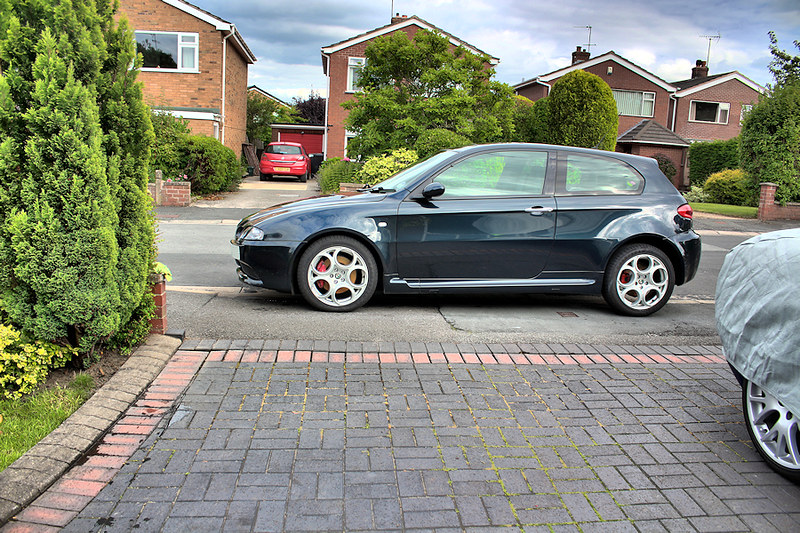
Image4 by chris147gta, on Flickr
Update from November...
Not done much with it tbh since August / September...
Just the following;
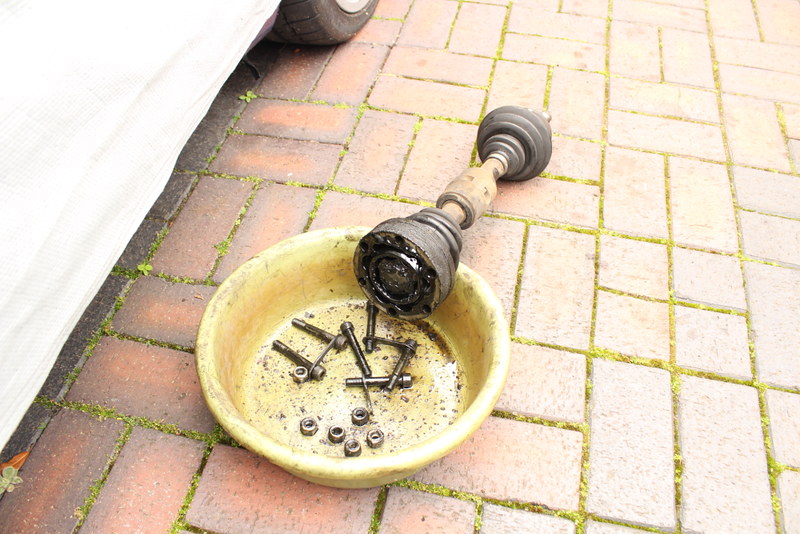
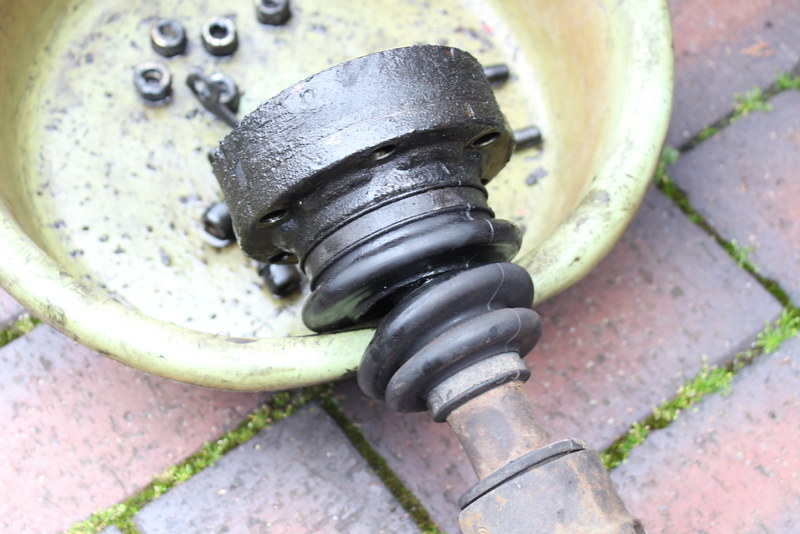
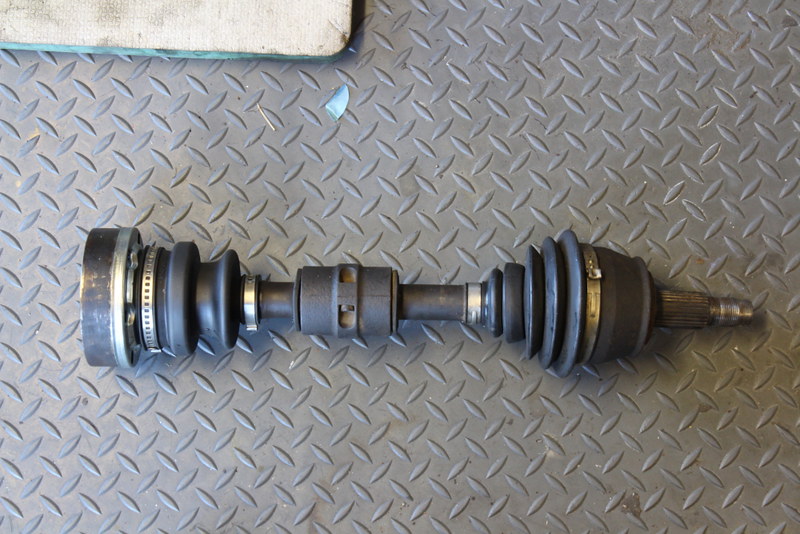
Rebuilt the drive shafts;
IMG_8169 by chris147gta, on Flickr
IMG_8171 by chris147gta, on Flickr
IMG_8194 by chris147gta, on Flickr
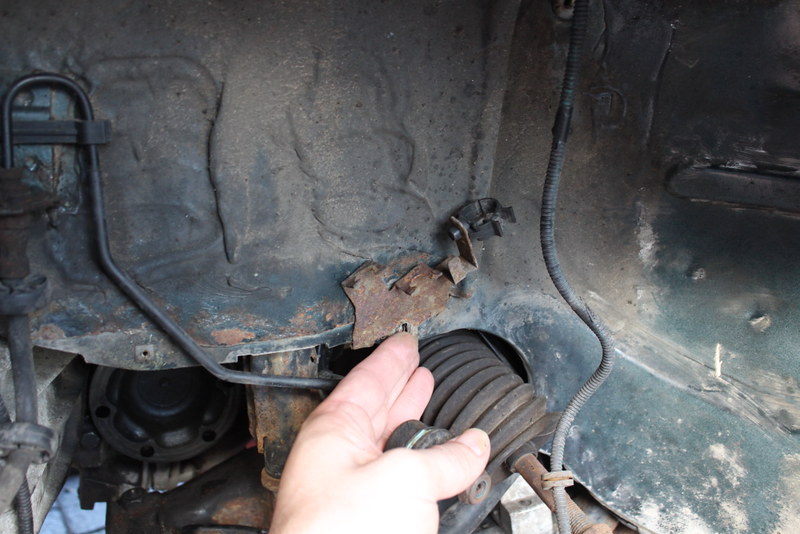
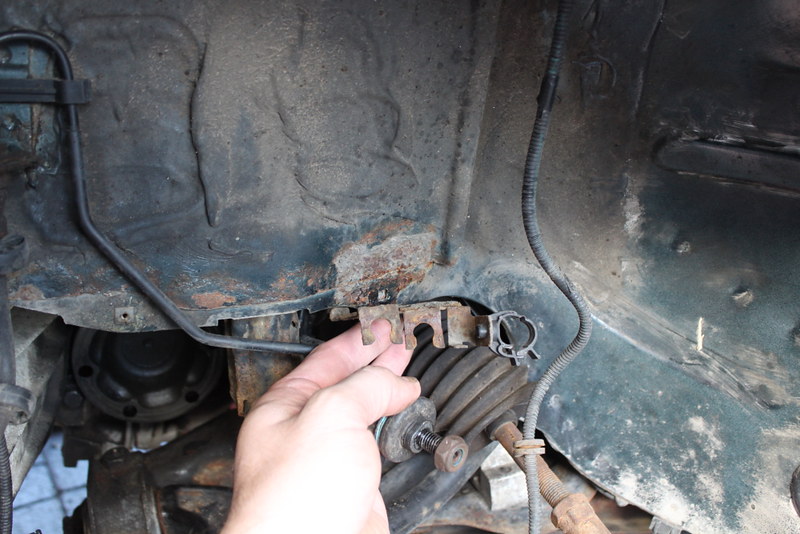
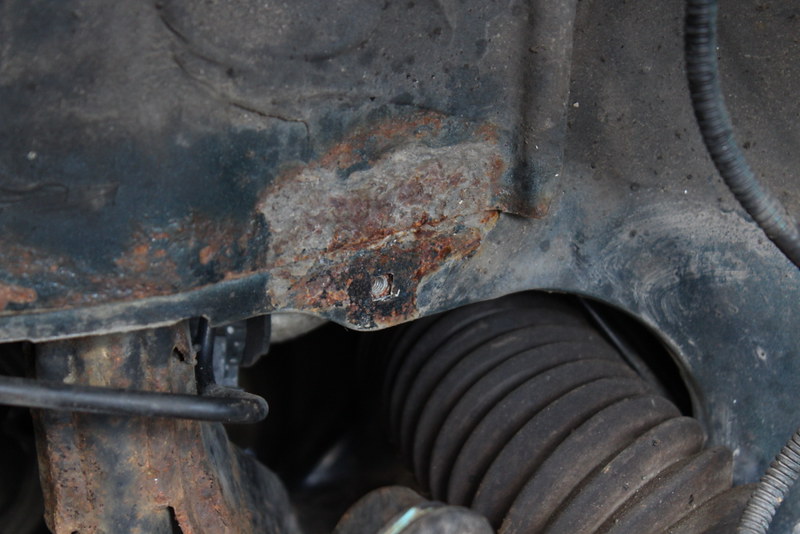
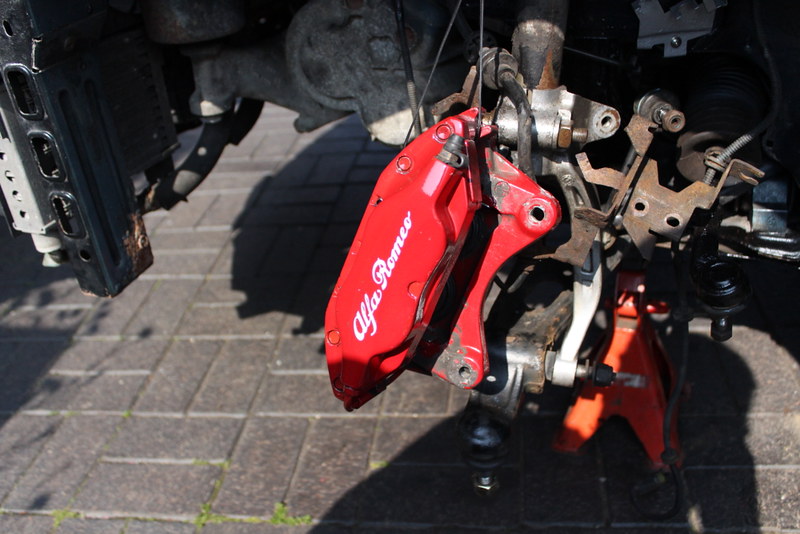
It was looking a bit tatty behind the arch lines and knowing they corrode in this area we did a little clean up job;
IMG_8178 by chris147gta, on Flickr
Which included the uprights. As per the norm, the bolts holding the disc shields on snapped
IMG_8179 by chris147gta, on Flickr
IMG_8180 by chris147gta, on Flickr
IMG_8192 by chris147gta, on Flickr
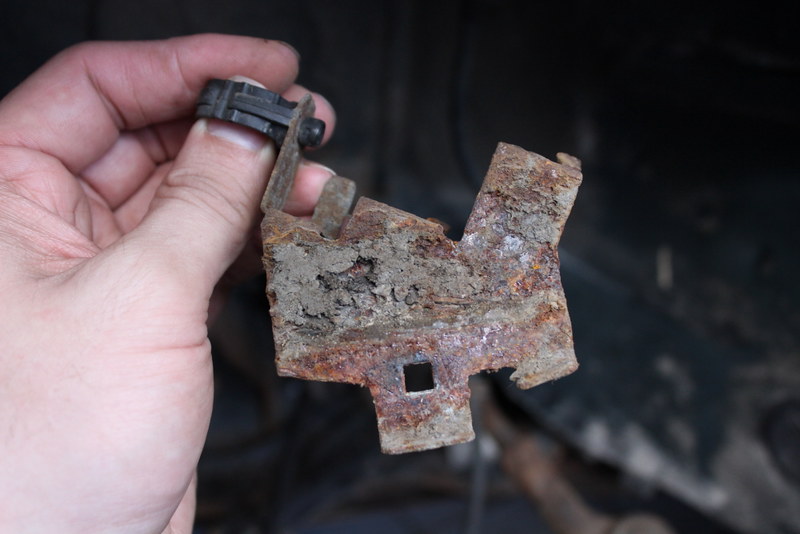
The bolts that hold the brake hose bracket also snapped
;

IMG_8182 by chris147gta, on Flickr
These brackets are just trouble...
IMG_8183 by chris147gta, on Flickr
IMG_8184 by chris147gta, on Flickr
IMG_8185 by chris147gta, on Flickr
IMG_8187 by chris147gta, on Flickr
IMG_8189 by chris147gta, on Flickr
Poly bushed the upper wishbones...
IMG_8190 by chris147gta, on Flickr
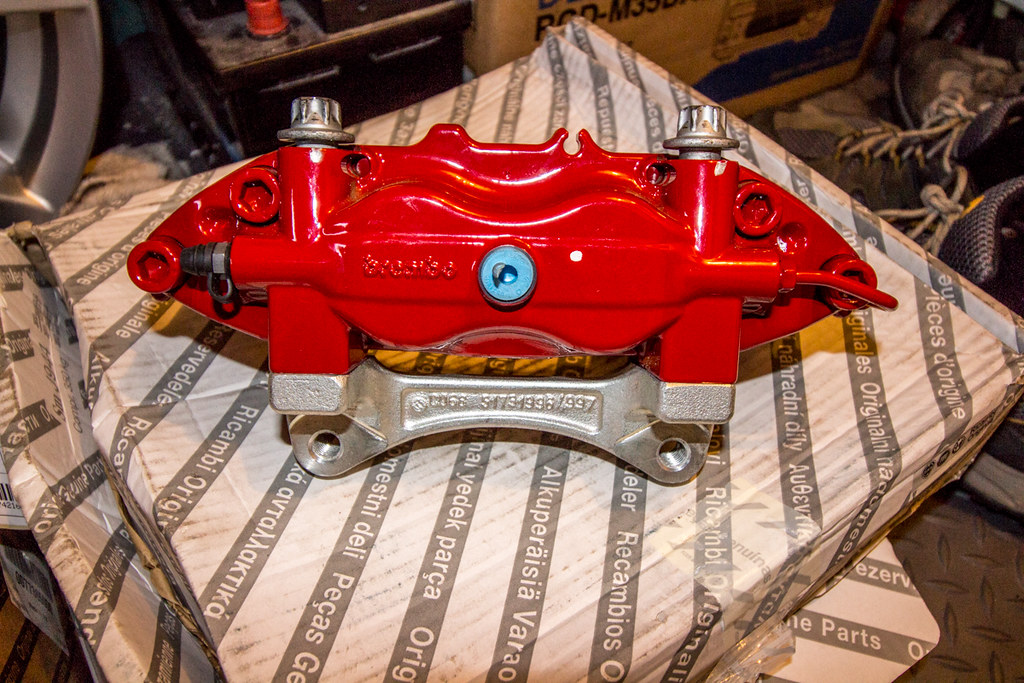
The calipers received some attention too (before)
IMG_8191 by chris147gta, on Flickr
Zinc'ed and primed;
IMG_8195 by chris147gta, on Flickr
IMG_8198 by chris147gta, on Flickr
IMG_8200 by chris147gta, on Flickr
IMG_8203 by chris147gta, on Flickr
I also ended up replacing the radiator last month after it sprouted a small leak. Started that at 3pm on a Sunday...
When I say 'we' I again mean my dad has been cleaning the matt finish wheels with g3, menzurma and touching in the numerous marks. I did make an effort today (I've had been having problems with my back again) and I did clean one of the wheels up... The gave it to my dad to finish off lol...
Sunset was nice tonight
IMG_7525 by chris147gta, on Flickr
August 2013
Been cleaning today...
Image1 by chris147gta, on Flickr
Washed;
Image2 by chris147gta, on Flickr
Buffed;
Image3 by chris147gta, on Flickr
Polished;
Image4 by chris147gta, on Flickr
Update from November...
Not done much with it tbh since August / September...
Just the following;
Rebuilt the drive shafts;
IMG_8169 by chris147gta, on Flickr
IMG_8171 by chris147gta, on Flickr
IMG_8194 by chris147gta, on Flickr
It was looking a bit tatty behind the arch lines and knowing they corrode in this area we did a little clean up job;
IMG_8178 by chris147gta, on Flickr
Which included the uprights. As per the norm, the bolts holding the disc shields on snapped
IMG_8179 by chris147gta, on Flickr
IMG_8180 by chris147gta, on Flickr
IMG_8192 by chris147gta, on Flickr
The bolts that hold the brake hose bracket also snapped
;
IMG_8182 by chris147gta, on Flickr
These brackets are just trouble...
IMG_8183 by chris147gta, on Flickr
IMG_8184 by chris147gta, on Flickr
IMG_8185 by chris147gta, on Flickr
IMG_8187 by chris147gta, on Flickr
IMG_8189 by chris147gta, on Flickr
Poly bushed the upper wishbones...
IMG_8190 by chris147gta, on Flickr
The calipers received some attention too (before)
IMG_8191 by chris147gta, on Flickr
Zinc'ed and primed;
IMG_8195 by chris147gta, on Flickr
IMG_8198 by chris147gta, on Flickr
IMG_8200 by chris147gta, on Flickr
IMG_8203 by chris147gta, on Flickr
I also ended up replacing the radiator last month after it sprouted a small leak. Started that at 3pm on a Sunday...
Edited by Zombie on Saturday 7th April 22:18
And an update from the end of January 2014...
I've not been happy with the throttle response I've been getting from it since I bought it, particularly on downshifts whilst braking, it wont rev up high enough.
It's also had a reoccuring misfire which we've been trying to diagnose without much success. Last time around I think I checked the cam timing, compression, maf, lamda's, checked the coil pack resistances and replaced the plugs.
But, it's been getting worse. It was logging fault codes for multiple misfires on cylinders 1 2 & 3.
So, knowing it needed other work and having accumulated several days worth of time owed in work, I had Friday off to investigate the matter...
IMG_9925 by chris147gta, on Flickr
The first thing I found was this bet of rubber wrapped around no 1 spark plug...
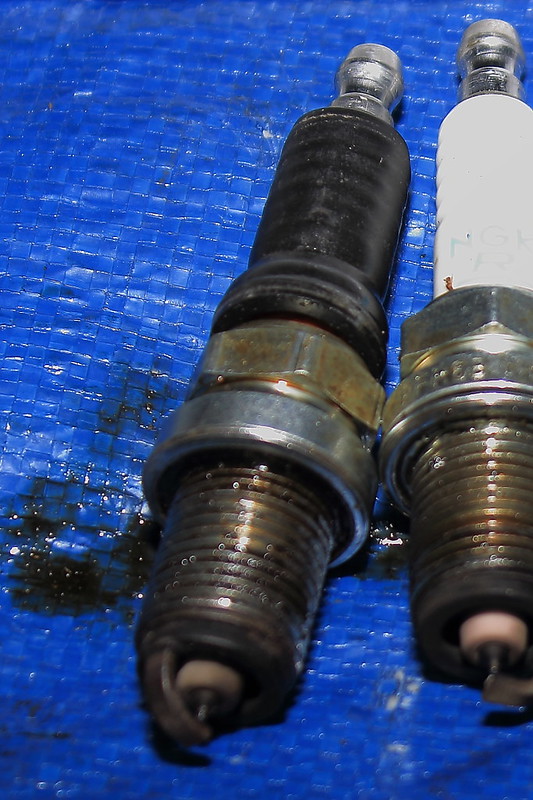
IMG_9931 by chris147gta, on Flickr
It's the bit of rubber that is supposed to hold the plug into the socket wrench I used to fit them last time around... [:$] Oooops.
I don't think it was the root cause of the fault codes though.
I'd imagine that a failed coil pack on no 2 may be a prime candidate;
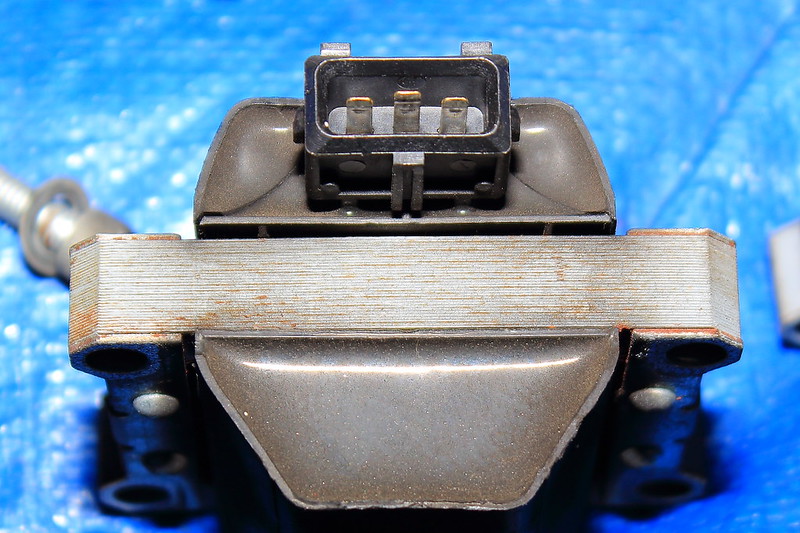
IMG_9928 by chris147gta, on Flickr
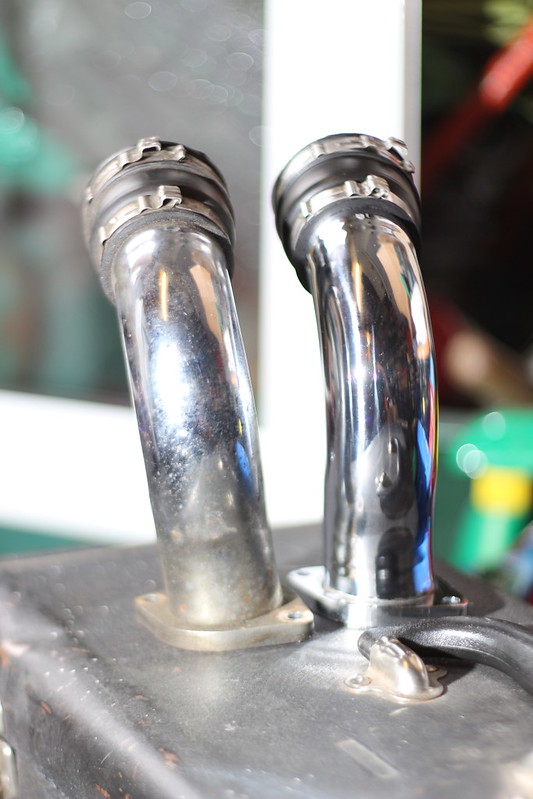
This was all I could find this time around. I then moved onto the other pressing issue we'd Identified...
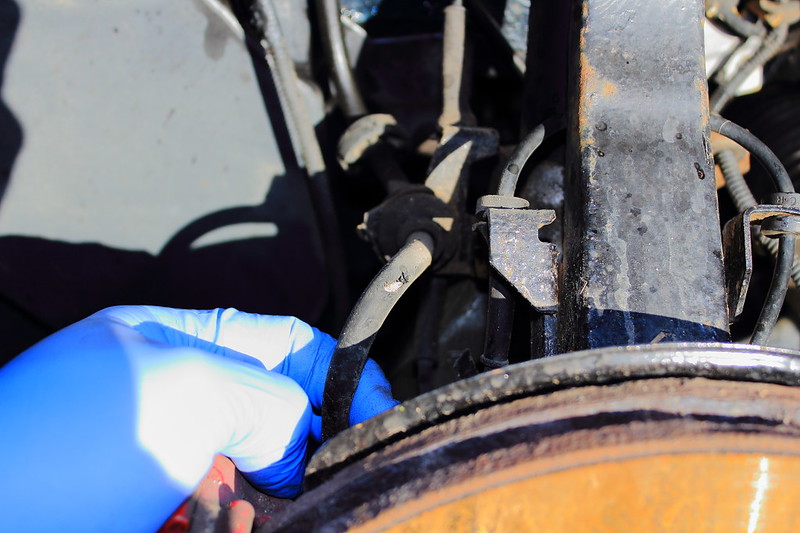
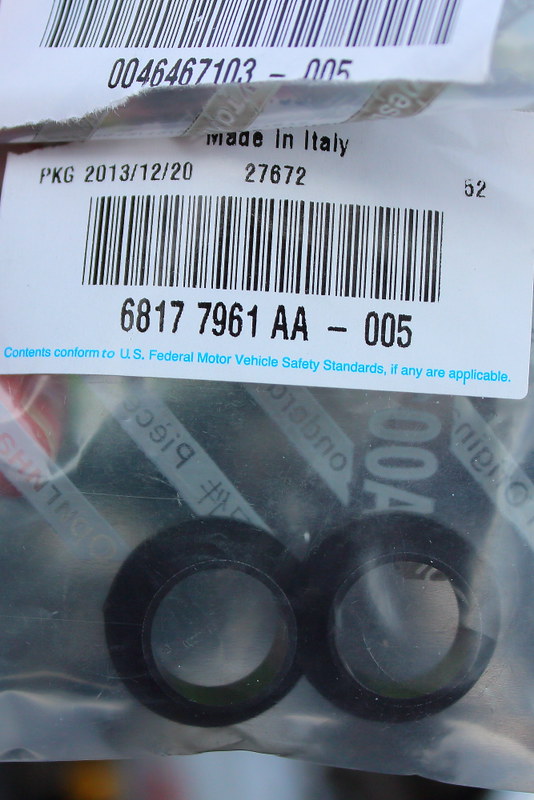
IMG_9993 by chris147gta, on Flickr
Which was fixed with these [ ] ....
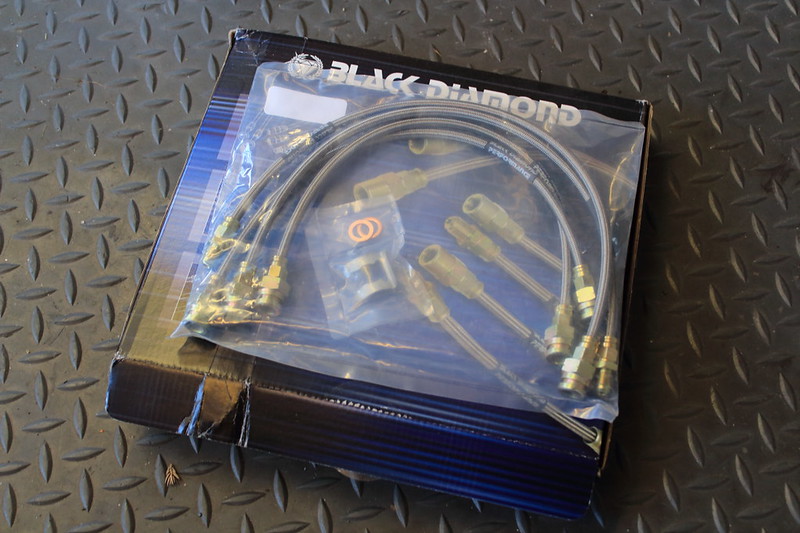
IMG_9994 by chris147gta, on Flickr
But not before all the unions where doused in rost-off several times over a 36 hour period - it pee'd down on Saturday, ******** to that!

IMG_9926 by chris147gta, on Flickr
But even the magic release fluid didn't entirely work. The rear pipe unions proved to be difficult but we did evetually pesuade 'em to part company with the OE hoses.
Shiney new ones fitted...
IMG_9995 by chris147gta, on Flickr
'Course, as I couldn't be bothered doing anything with it on Saturday, it took till 7pm on Sunday to finish it off. It felt warmer that the 1 deg c the car was showing though. [LOL]

IMG_9997 by chris147gta, on Flickr
I've not had chance to try it on the road since - Slow puncture being fixed, but it is idling much better and the brake pedal seems firmer. Fingers x'd.
May 2014
It's still jumping out of revese gear despite the fact I've changed the gearbox mount. I'm starting to run out of ideas as to what it could short of a fault internally within the box.
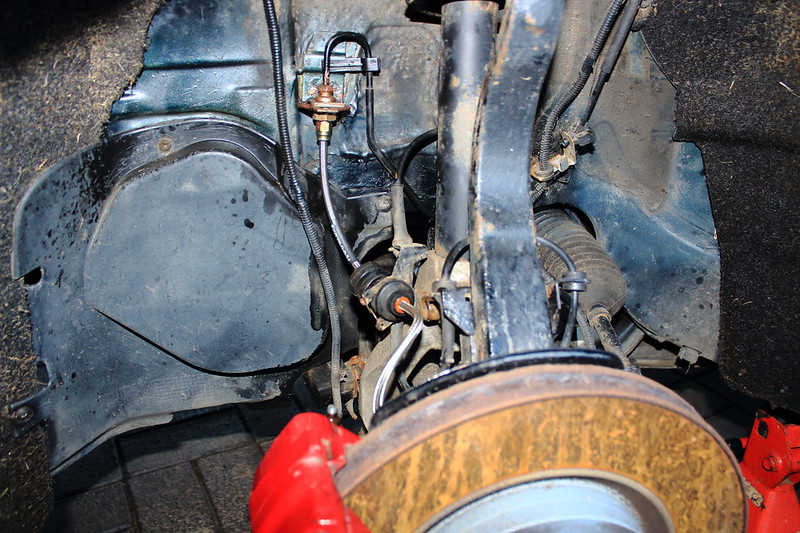
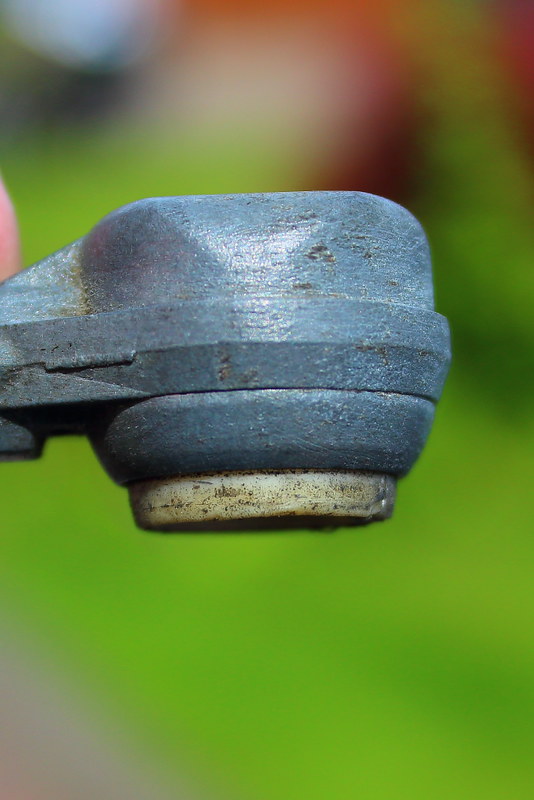
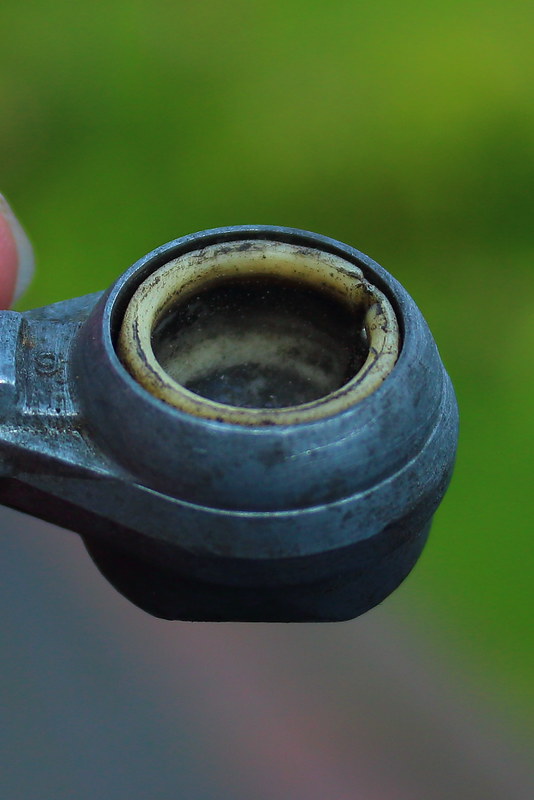
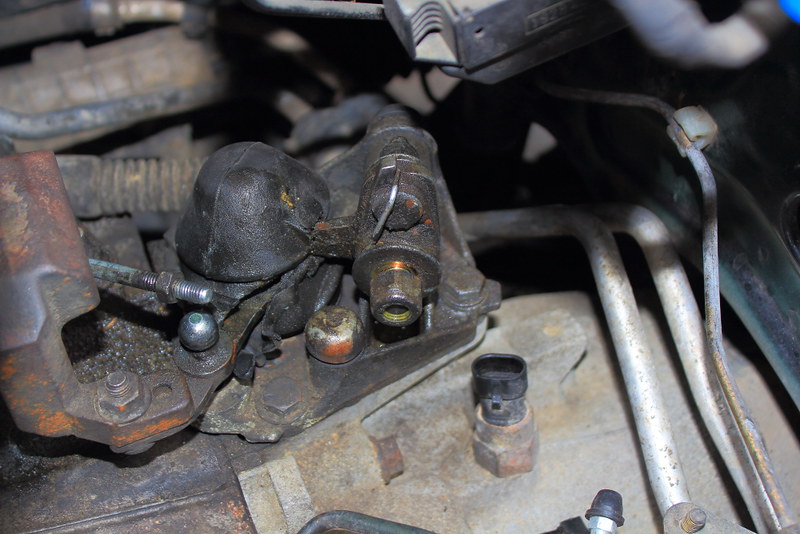
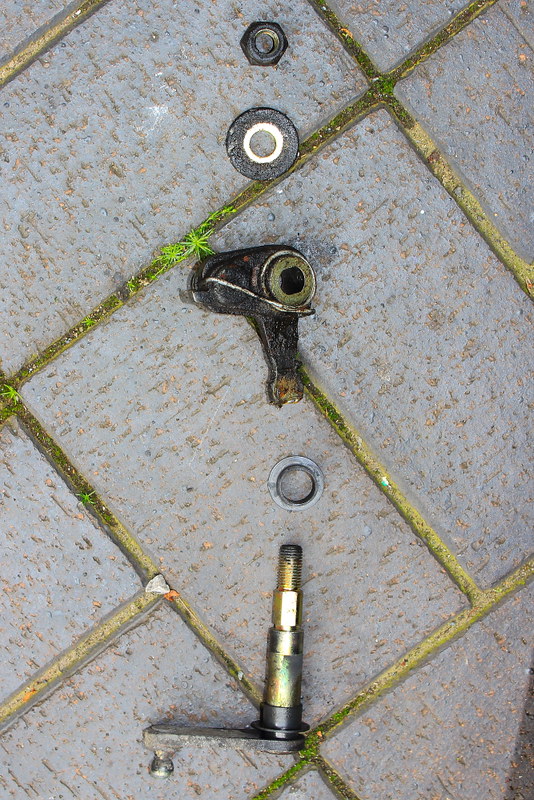
We did find that the plastic bit inside the gear change cable ball joint was loose though and somewhat hopefull hoped this could be the problem. It wasn't, but heres some pics of that and those pesk gear selector mechanism bushes, which we also replaced...

IMG_1656 by chris147gta, on Flickr
IMG_1653 by chris147gta, on Flickr
IMG_1654 by chris147gta, on Flickr
My Dad repaired it by drilling a hole in the back of it and filling it with expoxy to secure it in place.
IMG_1660 by chris147gta, on Flickr
IMG_1658 by chris147gta, on Flickr
IMG_1663 by chris147gta, on Flickr
IMG_1664 by chris147gta, on Flickr
I've not been happy with the throttle response I've been getting from it since I bought it, particularly on downshifts whilst braking, it wont rev up high enough.
It's also had a reoccuring misfire which we've been trying to diagnose without much success. Last time around I think I checked the cam timing, compression, maf, lamda's, checked the coil pack resistances and replaced the plugs.
But, it's been getting worse. It was logging fault codes for multiple misfires on cylinders 1 2 & 3.
So, knowing it needed other work and having accumulated several days worth of time owed in work, I had Friday off to investigate the matter...
IMG_9925 by chris147gta, on Flickr
The first thing I found was this bet of rubber wrapped around no 1 spark plug...
IMG_9931 by chris147gta, on Flickr
It's the bit of rubber that is supposed to hold the plug into the socket wrench I used to fit them last time around... [:$] Oooops.
I don't think it was the root cause of the fault codes though.
I'd imagine that a failed coil pack on no 2 may be a prime candidate;
IMG_9928 by chris147gta, on Flickr
This was all I could find this time around. I then moved onto the other pressing issue we'd Identified...
IMG_9993 by chris147gta, on Flickr
Which was fixed with these [
] ....IMG_9994 by chris147gta, on Flickr
But not before all the unions where doused in rost-off several times over a 36 hour period - it pee'd down on Saturday, ******** to that!
IMG_9926 by chris147gta, on Flickr
But even the magic release fluid didn't entirely work. The rear pipe unions proved to be difficult but we did evetually pesuade 'em to part company with the OE hoses.
Shiney new ones fitted...
IMG_9995 by chris147gta, on Flickr
'Course, as I couldn't be bothered doing anything with it on Saturday, it took till 7pm on Sunday to finish it off. It felt warmer that the 1 deg c the car was showing though. [LOL]
IMG_9997 by chris147gta, on Flickr
I've not had chance to try it on the road since - Slow puncture being fixed, but it is idling much better and the brake pedal seems firmer. Fingers x'd.
May 2014
It's still jumping out of revese gear despite the fact I've changed the gearbox mount. I'm starting to run out of ideas as to what it could short of a fault internally within the box.
We did find that the plastic bit inside the gear change cable ball joint was loose though and somewhat hopefull hoped this could be the problem. It wasn't, but heres some pics of that and those pesk gear selector mechanism bushes, which we also replaced...
IMG_1656 by chris147gta, on Flickr
IMG_1653 by chris147gta, on Flickr
IMG_1654 by chris147gta, on Flickr
My Dad repaired it by drilling a hole in the back of it and filling it with expoxy to secure it in place.
IMG_1660 by chris147gta, on Flickr
IMG_1658 by chris147gta, on Flickr
IMG_1663 by chris147gta, on Flickr
IMG_1664 by chris147gta, on Flickr
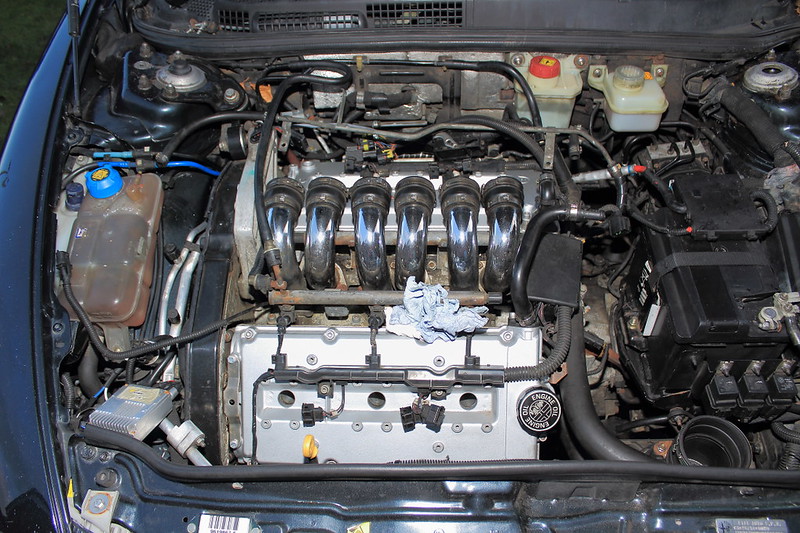
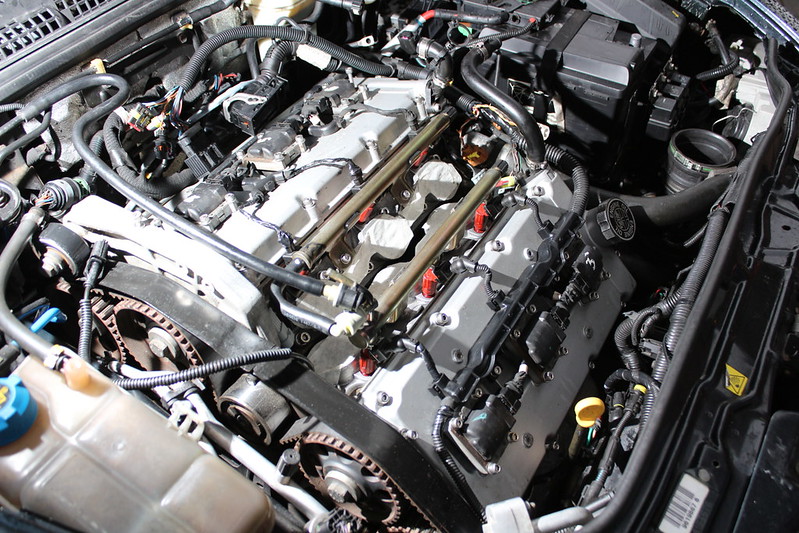
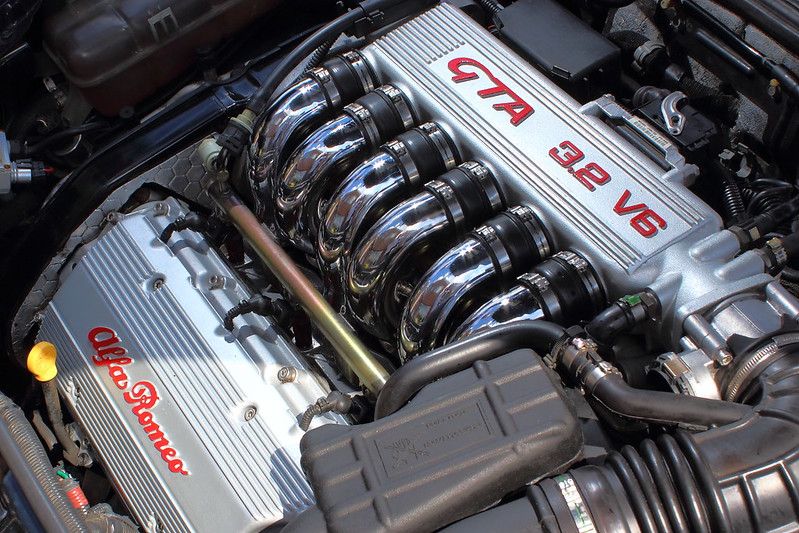
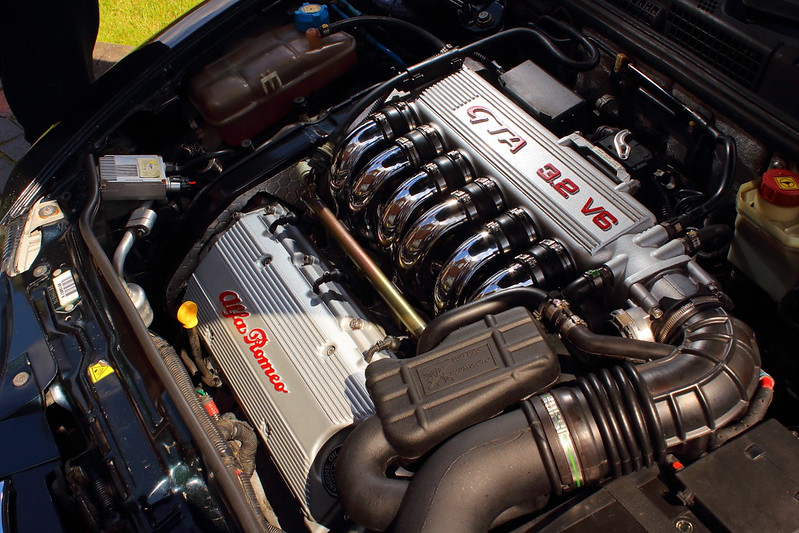
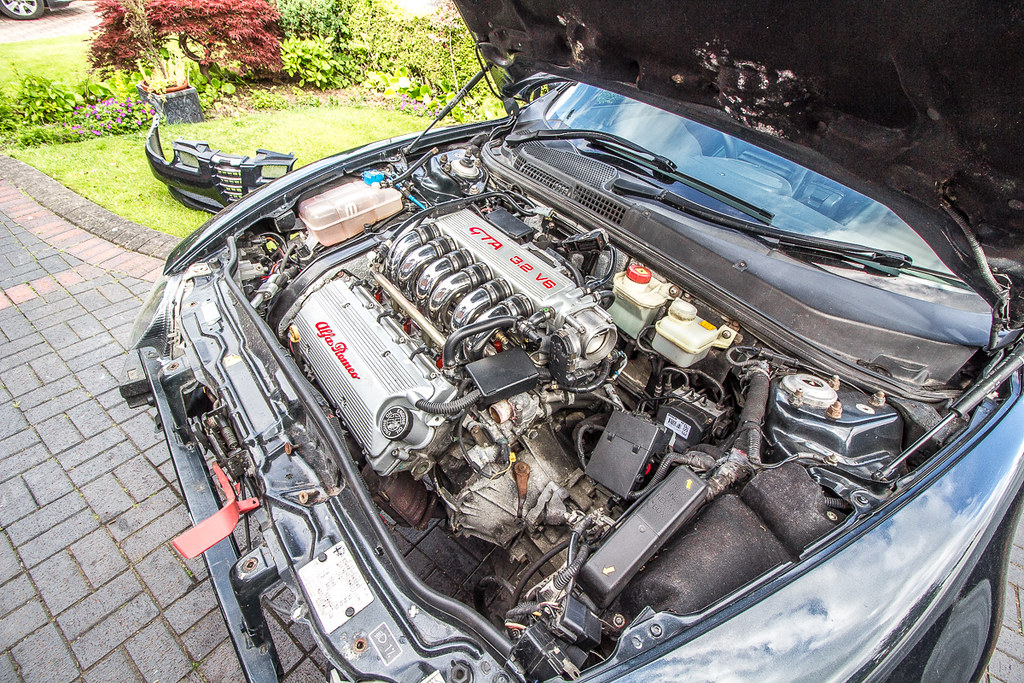
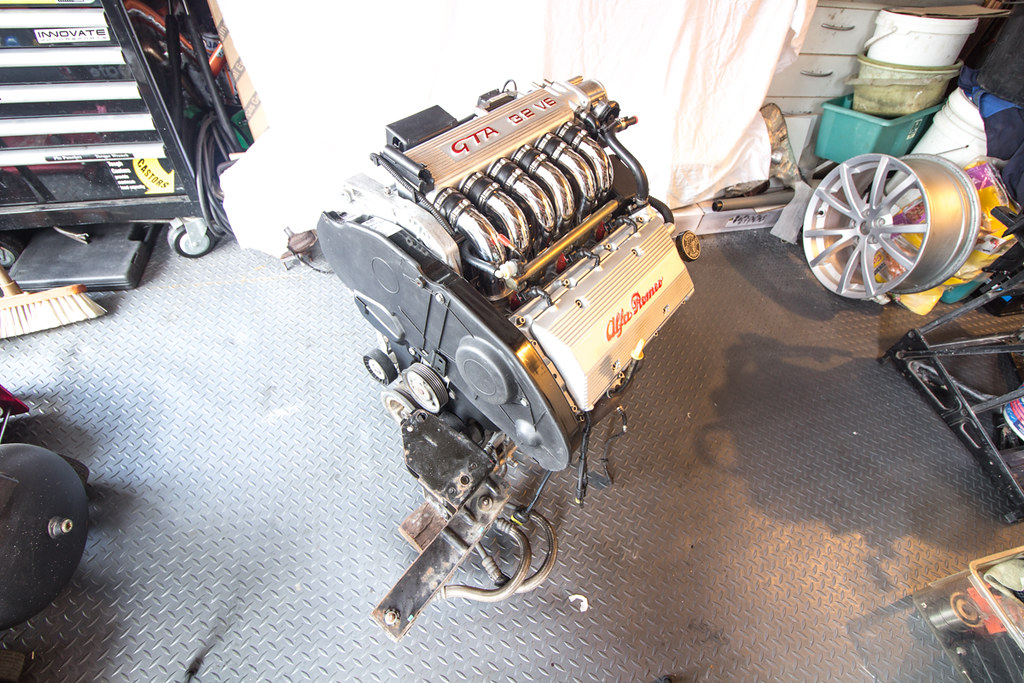
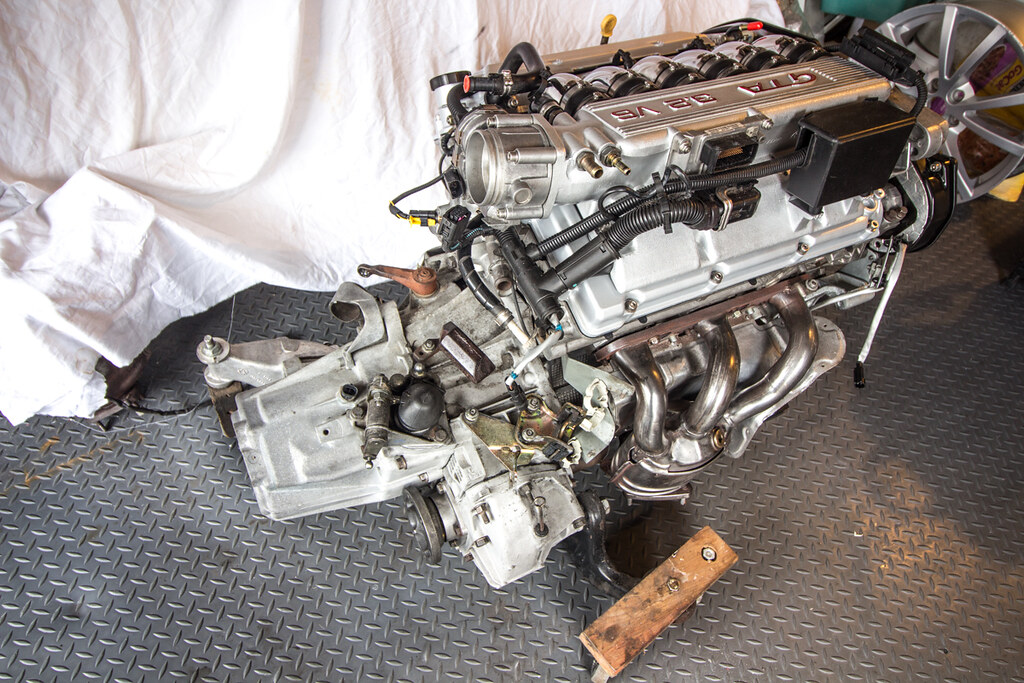
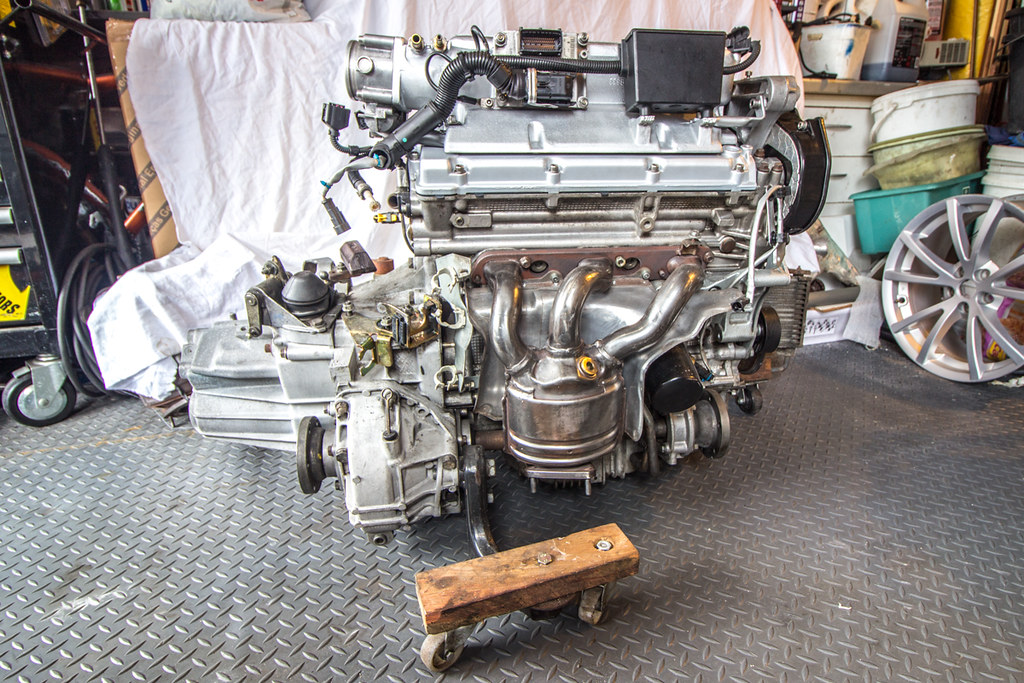
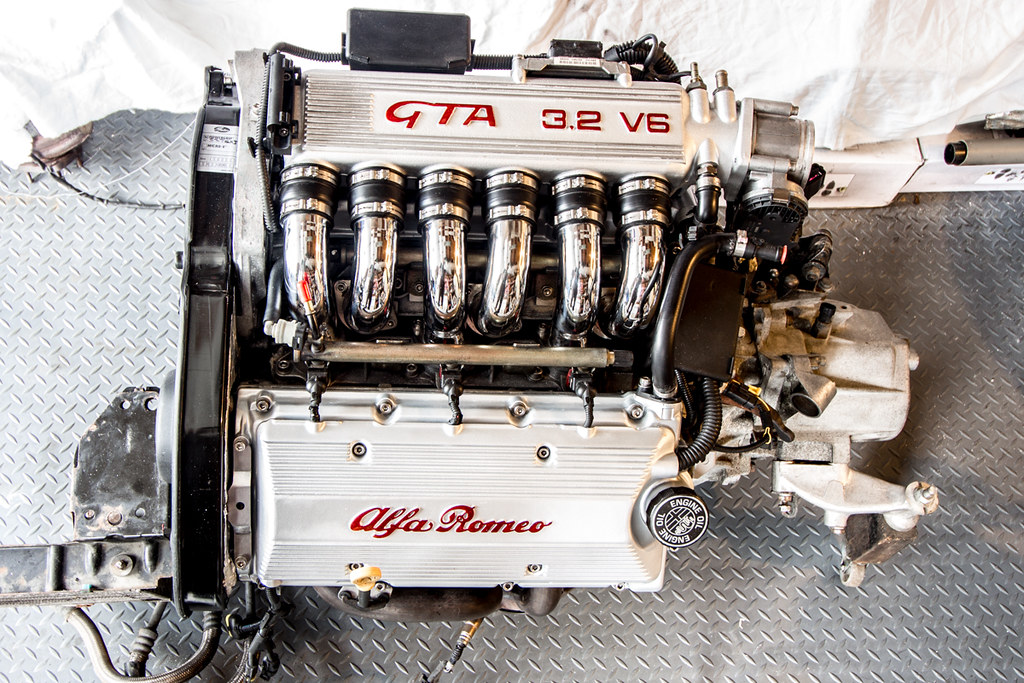
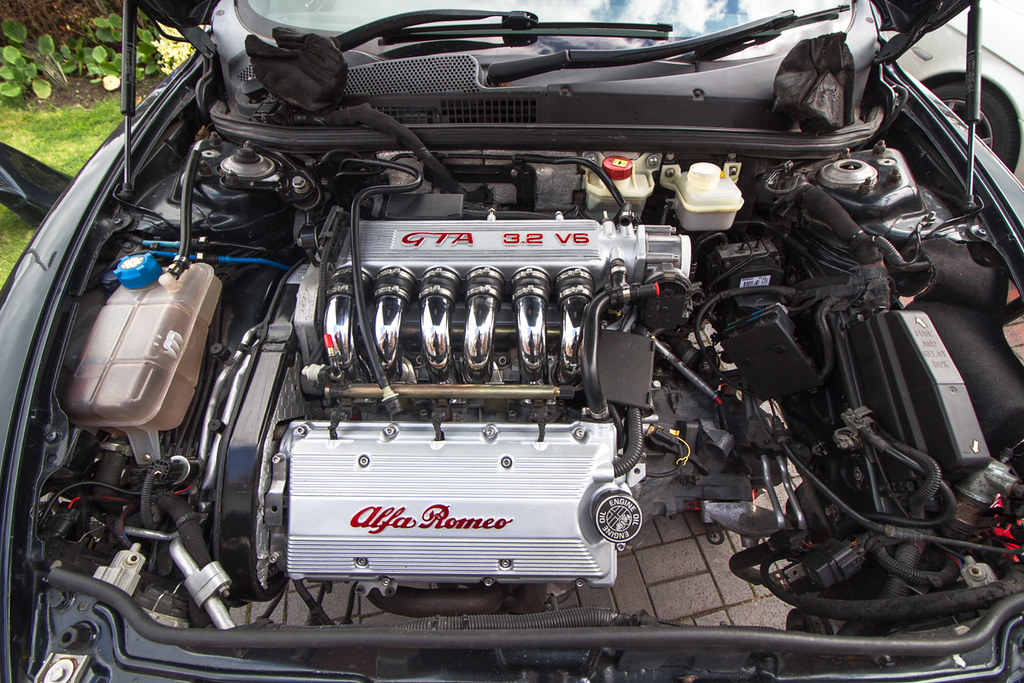
August 2014 - Engine clean and tidy...
So, I've acquired some stainless bolts as part of the group buy toxic organised and maxiboy sized up (thanks guys!����) which included the m7's that hold the cam covers on. This has prompted me to pull the engine apart and give it a clean...
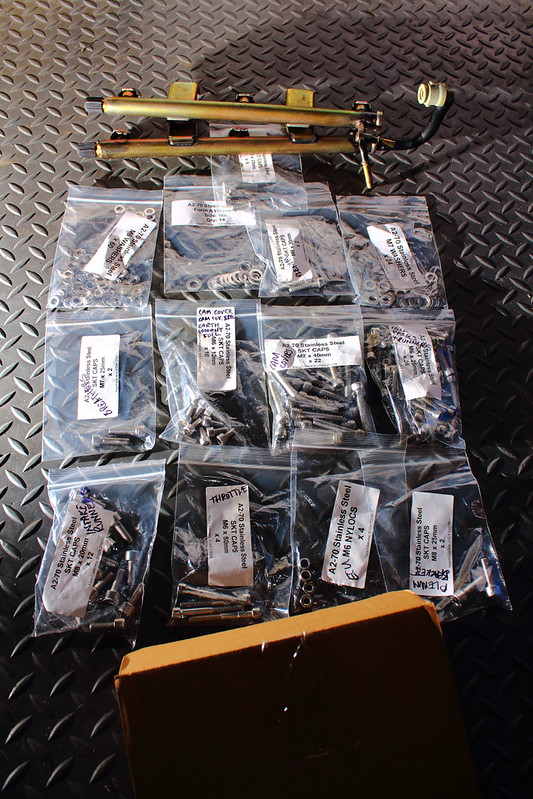
IMG_2540 by chris147gta, on Flickr
Before;
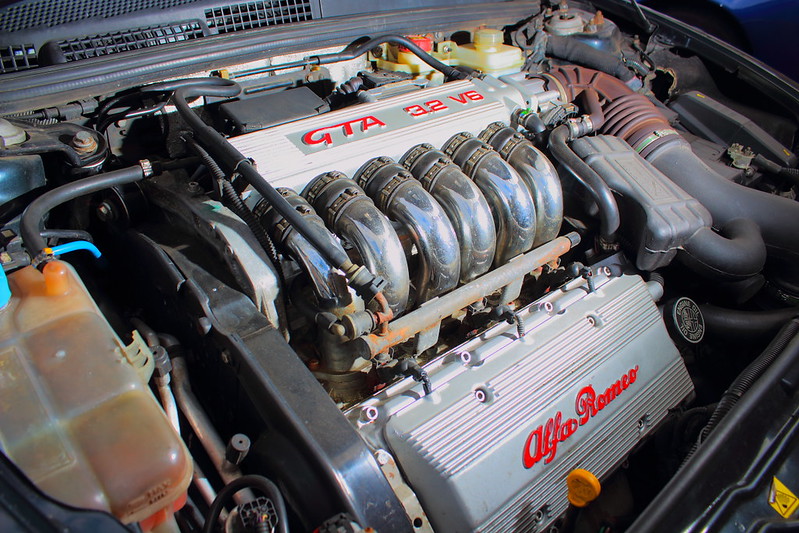
IMG_2528 by chris147gta, on Flickr
During;
IMG_2542 by chris147gta, on Flickr
IMG_2581resized by chris147gta, on Flickr
IMG_2578resized by chris147gta, on Flickr
IMG_2597resized by chris147gta, on Flickr
IMG_2609resized by chris147gta, on Flickr
IMG_2573resized by chris147gta, on Flickr
IMG_2623 by chris147gta, on Flickr
IMG_2618 by chris147gta, on Flickr
IMG_2617 by chris147gta, on Flickr
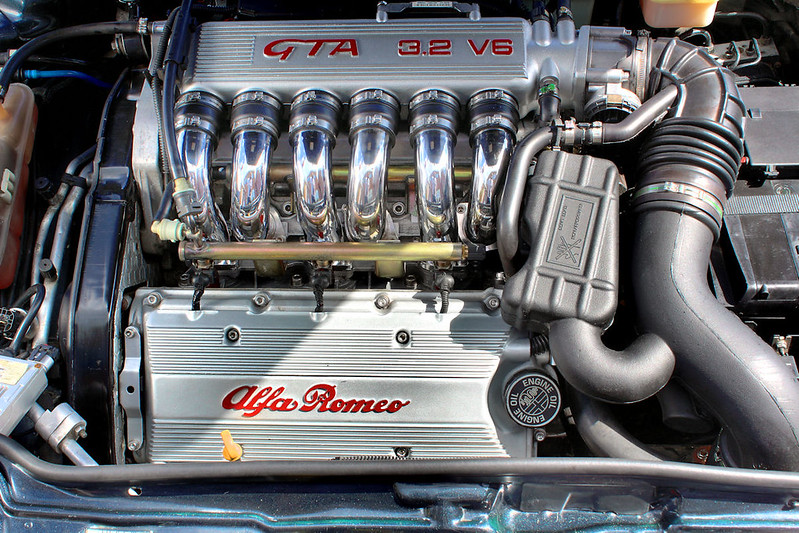
Image1 by chris147gta, on Flickr
So, I've acquired some stainless bolts as part of the group buy toxic organised and maxiboy sized up (thanks guys!����) which included the m7's that hold the cam covers on. This has prompted me to pull the engine apart and give it a clean...
IMG_2540 by chris147gta, on Flickr
Before;
IMG_2528 by chris147gta, on Flickr
During;
IMG_2542 by chris147gta, on Flickr
IMG_2581resized by chris147gta, on Flickr
IMG_2578resized by chris147gta, on Flickr
IMG_2597resized by chris147gta, on Flickr
IMG_2609resized by chris147gta, on Flickr
IMG_2573resized by chris147gta, on Flickr
IMG_2623 by chris147gta, on Flickr
IMG_2618 by chris147gta, on Flickr
IMG_2617 by chris147gta, on Flickr
Image1 by chris147gta, on Flickr
September 2014
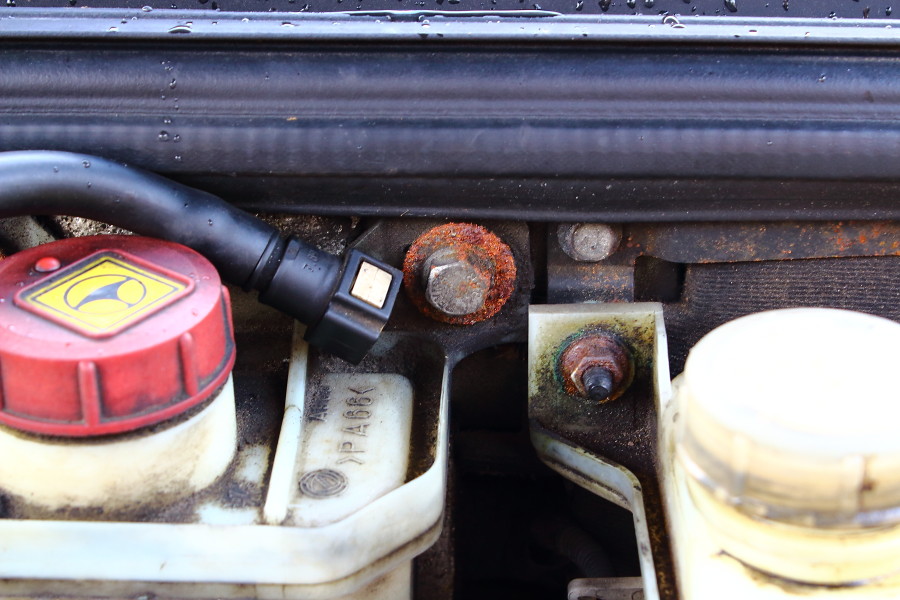
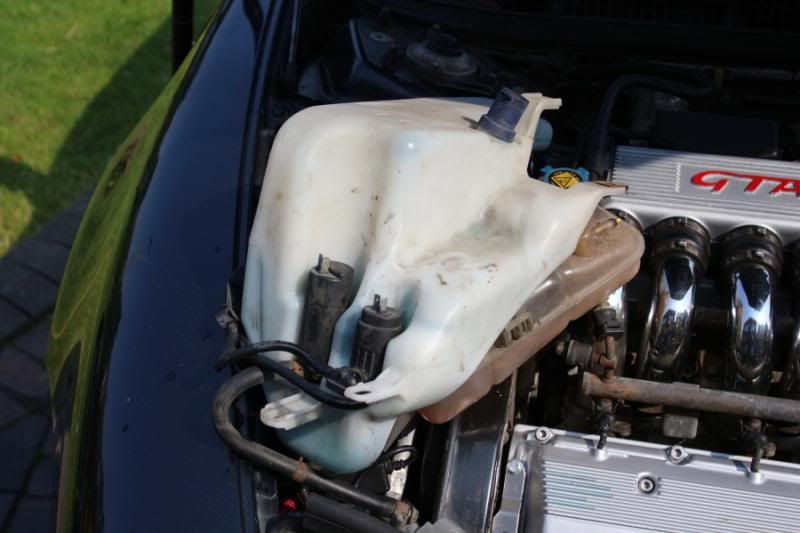
Right, focusing on the positives, half glass is full, etc and before I start with another update I'd like to confirm that the grubby ar5e expansion tank has been replaced with a sparkley new one.
I'm not going to post any pics ATM as I'm still peeved about this. A f*****g selfish c**t has sideswiped the passenger door whilst it was parked up in my work's car park. It now needs a new door. In cosmos blue.
I've elected to ignore that for the time being.
Instead, I had a week off work and spent it on repainting the driver's side door sill - the leading edge was missing paint and was starting to corrode.
I took the plastic sill off to repaint it...
Which was a right pita to do (hours of swearing).
In doing so I had the opportunity to inspect the sills for rot and address the minor issues I did find. I also scrubbed and repainted the driver's side floor pans with zinc primer, Hammerite and rubberised stone chip stuff.
I did the same in the rear wheel well. I think corrosion around the fuel filler next and where it's welded to the rear quarter panel is going to be an issue for Gta's in the future but (I hope) mine should be ok now that I've repainted it.
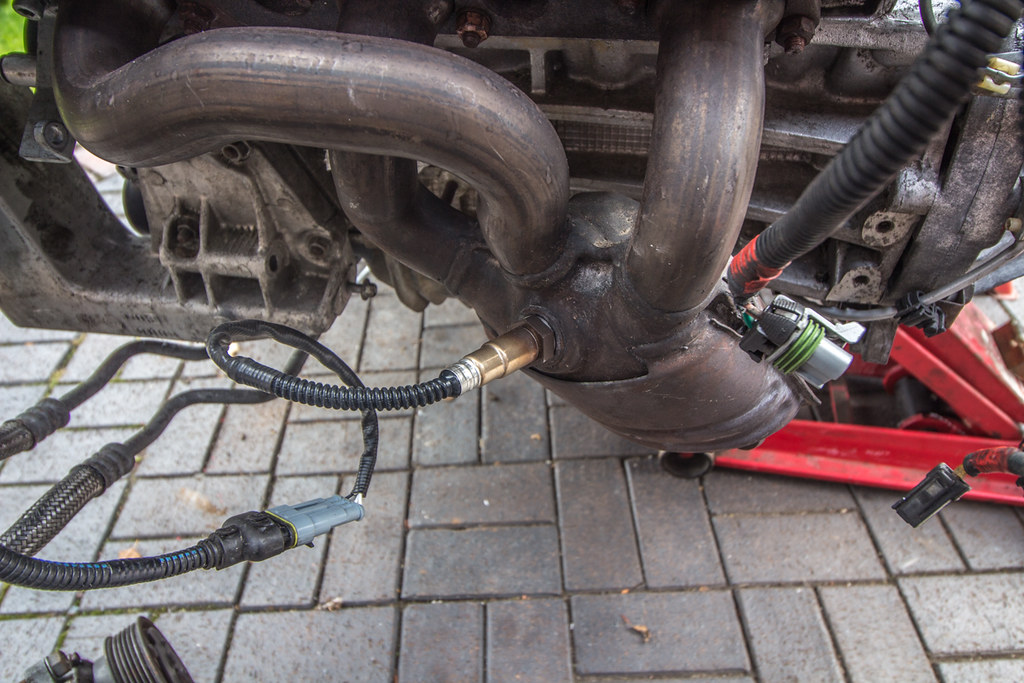
The reports (mcsf) of a misfire at idle is getting worse. I'm now convinced the rear bank lambda sensor is at fault but I can't see how I can replace it (it's in effing tight) without major work. I'm still going to replace it with the clutch, which needs doing soon. Bugger. (That's the engine out...)
The rear springs and dampers are looking like they're about to fail. They're bubbling with rust. Ar5e.
I (we) changed the oil and filter this weekend just gone. That was a mission. It's got eq pipes on it and access to the oil filter is awkward. I had to remove the front bank pipe, and the ps / oil cooler pipe brackets to gain access. Typically, the exhaust bolts were seized and I had to spend an hour (or 3) working them backwards and forwards to remove it.
Then I noticed the lower coolant pipe that runs across the base of the radiator has corroded and is now leaking ever so slightly.
There's an oil leak in between the gearbox and the back end of the engine.
And the front anti roll bar bushes are fubar.
Also, the rear arb bushes squeak.
I suspect Autolusso are going to enjoy the next phone call I have with them...
Right, focusing on the positives, half glass is full, etc and before I start with another update I'd like to confirm that the grubby ar5e expansion tank has been replaced with a sparkley new one.
I'm not going to post any pics ATM as I'm still peeved about this. A f*****g selfish c**t has sideswiped the passenger door whilst it was parked up in my work's car park. It now needs a new door. In cosmos blue.
I've elected to ignore that for the time being.
Instead, I had a week off work and spent it on repainting the driver's side door sill - the leading edge was missing paint and was starting to corrode.
I took the plastic sill off to repaint it...
Which was a right pita to do (hours of swearing).
In doing so I had the opportunity to inspect the sills for rot and address the minor issues I did find. I also scrubbed and repainted the driver's side floor pans with zinc primer, Hammerite and rubberised stone chip stuff.
I did the same in the rear wheel well. I think corrosion around the fuel filler next and where it's welded to the rear quarter panel is going to be an issue for Gta's in the future
but (I hope) mine should be ok now that I've repainted it. The reports (mcsf) of a misfire at idle is getting worse. I'm now convinced the rear bank lambda sensor is at fault but I can't see how I can replace it (it's in effing tight) without major work. I'm still going to replace it with the clutch, which needs doing soon. Bugger. (That's the engine out...)
The rear springs and dampers are looking like they're about to fail. They're bubbling with rust. Ar5e.
I (we) changed the oil and filter this weekend just gone. That was a mission. It's got eq pipes on it and access to the oil filter is awkward. I had to remove the front bank pipe, and the ps / oil cooler pipe brackets to gain access. Typically, the exhaust bolts were seized and I had to spend an hour (or 3) working them backwards and forwards to remove it.
Then I noticed the lower coolant pipe that runs across the base of the radiator has corroded and is now leaking ever so slightly.
- runs out of expletives*
There's an oil leak in between the gearbox and the back end of the engine.
And the front anti roll bar bushes are fubar.
Also, the rear arb bushes squeak.
I suspect Autolusso are going to enjoy the next phone call I have with them...
November 2014
Yup, I know, it needs a wash...
 IMG_3575 by chris147gta, on Flickr
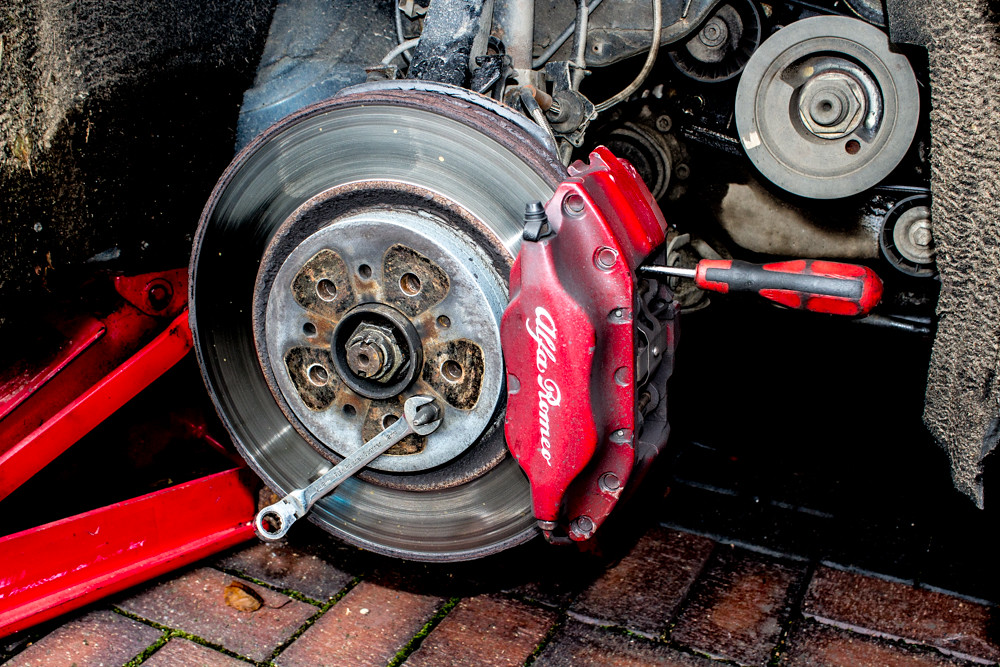
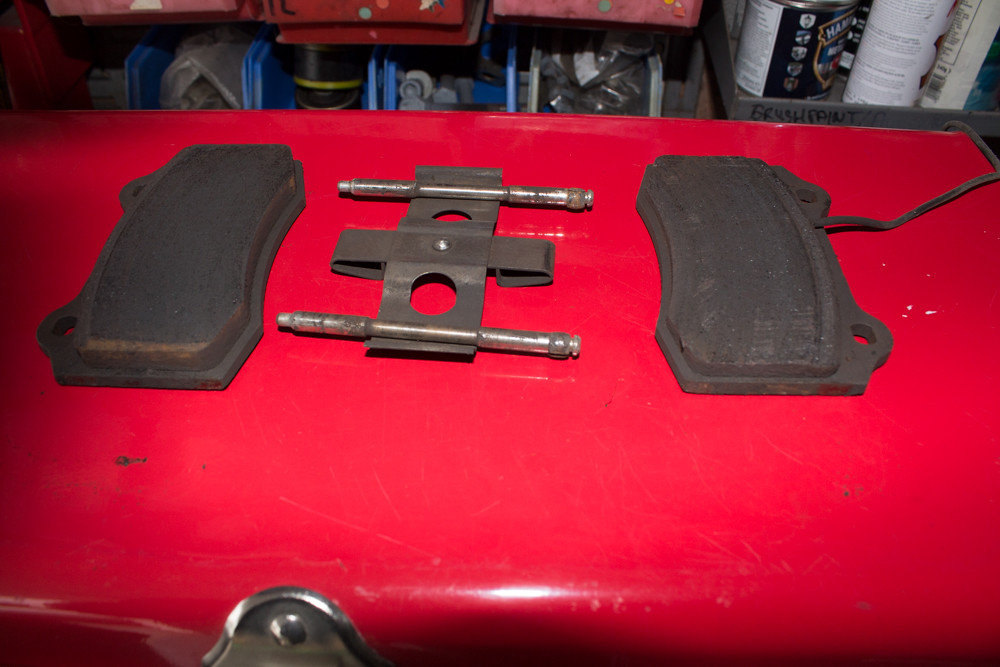
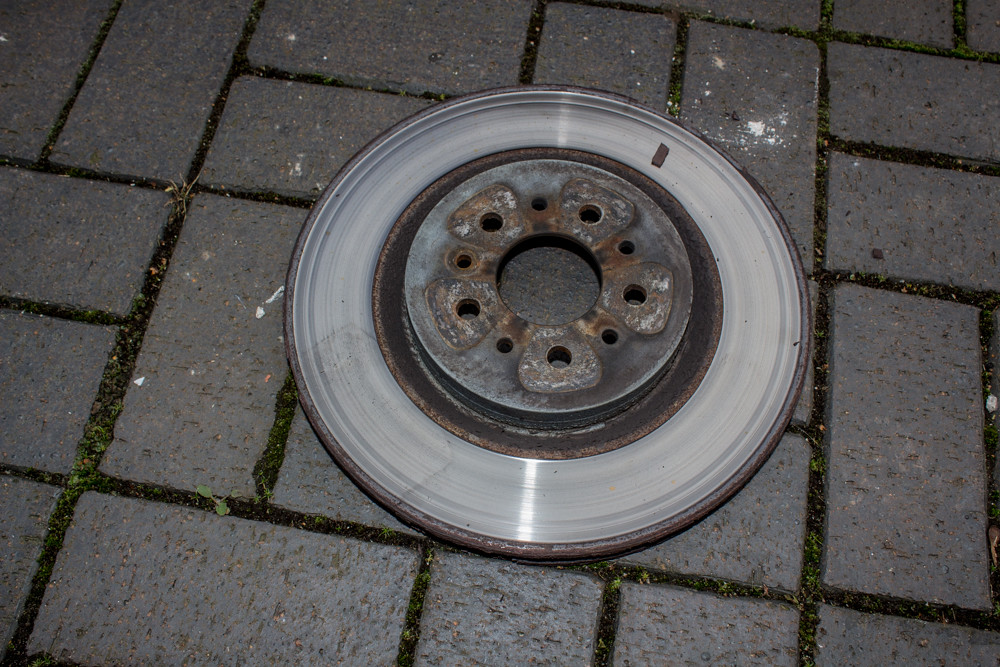
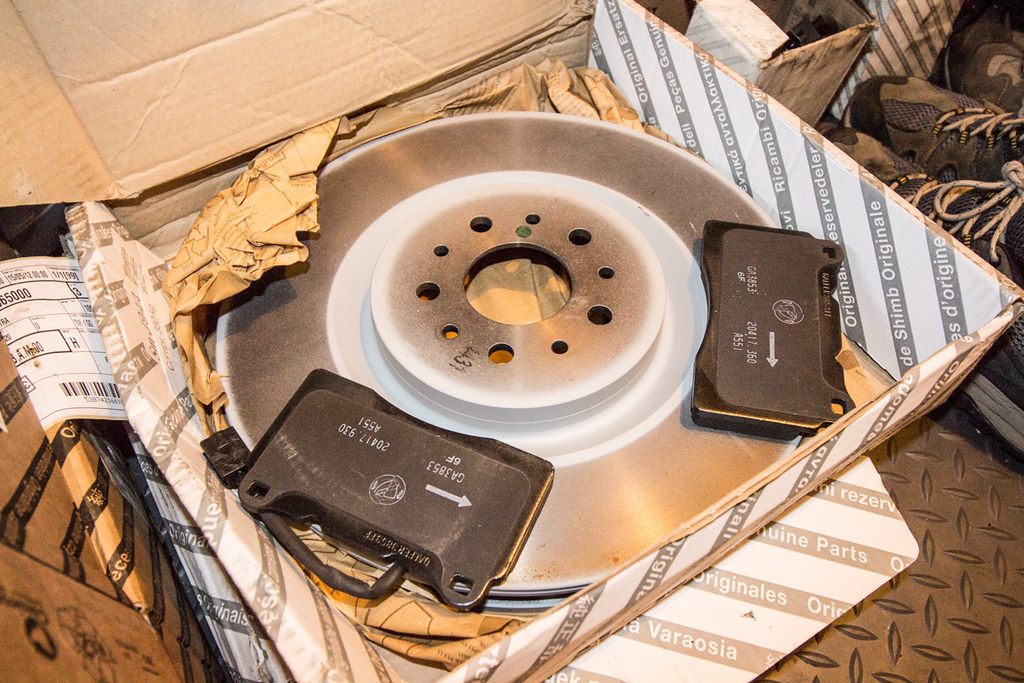
But the roads round here a thick with mud from all the farm traffic atm, so washing it would be pointless. Instead, I changed the front pads and discs. They felt like they were warped, but they're not. Just completely worn out;
Shiny new bits
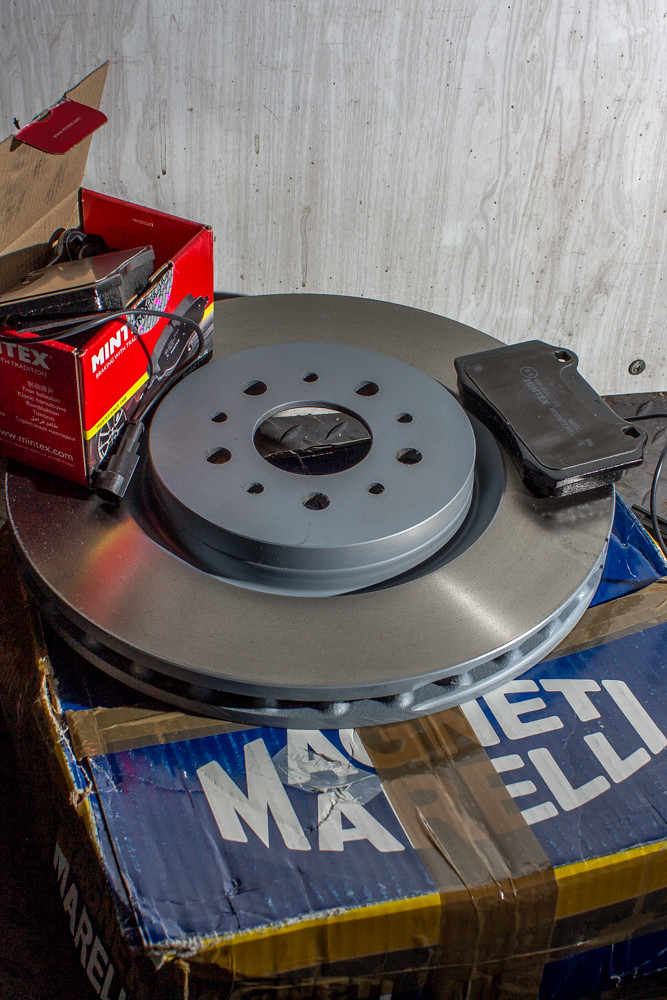 IMG_3571 by chris147gta, on Flickr
 IMG_3580 by chris147gta, on Flickr
 IMG_3583 by chris147gta, on Flickr
 IMG_3596 by chris147gta, on Flickr
 IMG_3598 by chris147gta, on Flickr
 IMG_3609 by chris147gta, on Flickr
I also wrote a replacement guide;
http://www.alfaowner.com/Forum/motoring-images/741...
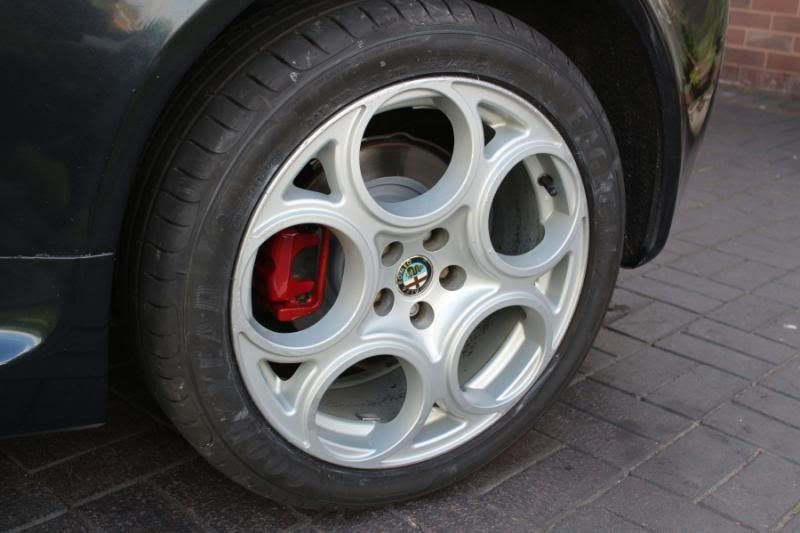
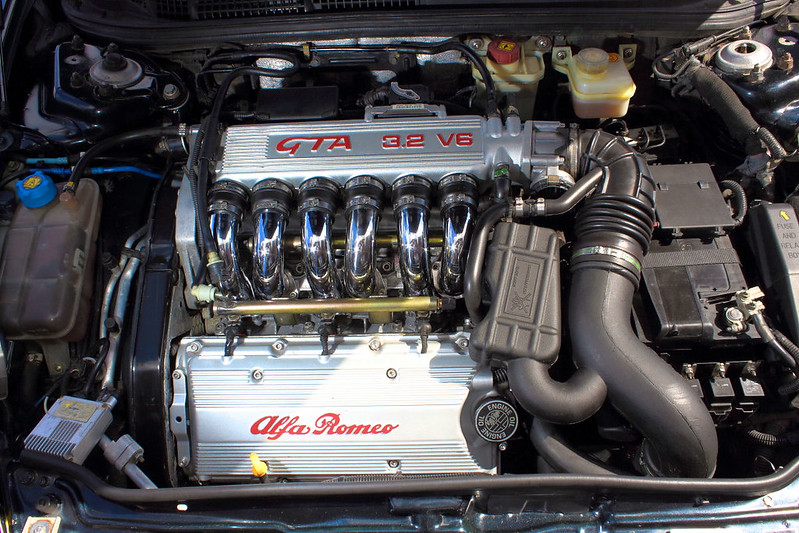
May 2015
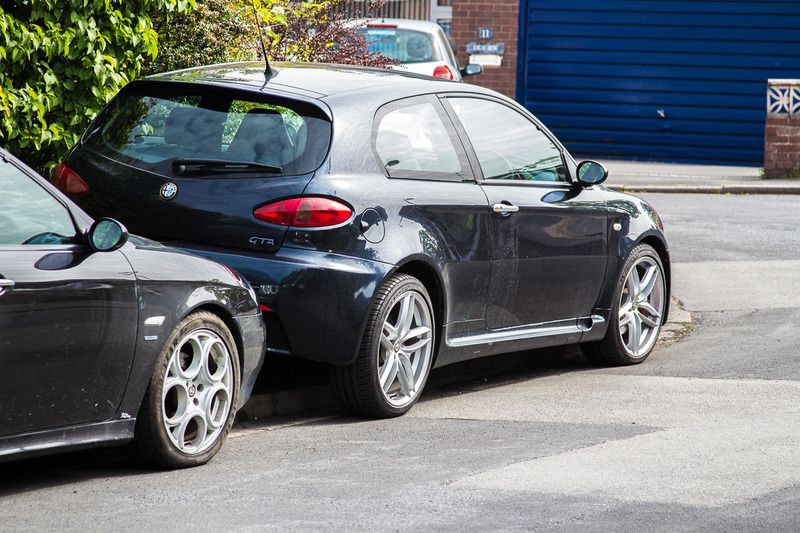
18" GT Cloverleaf fitted (OMG ) with brand new Michelin PS3's
But the fecking diesel is broke, so it's either fix that or clean the gta for a few pics.
Hence no pics...
Unless you count these... (later update)
Yup, I know, it needs a wash...
IMG_3575 by chris147gta, on FlickrBut the roads round here a thick with mud from all the farm traffic atm, so washing it would be pointless. Instead, I changed the front pads and discs. They felt like they were warped, but they're not. Just completely worn out;
Shiny new bits
IMG_3571 by chris147gta, on FlickrIMG_3580 by chris147gta, on FlickrIMG_3583 by chris147gta, on FlickrIMG_3596 by chris147gta, on FlickrIMG_3598 by chris147gta, on FlickrIMG_3609 by chris147gta, on FlickrI also wrote a replacement guide;
http://www.alfaowner.com/Forum/motoring-images/741...
May 2015
18" GT Cloverleaf fitted (OMG
) with brand new Michelin PS3'sBut the fecking diesel is broke, so it's either fix that or clean the gta for a few pics.
Hence no pics...
Unless you count these... (later update)
Edited by Zombie on Saturday 7th April 22:19
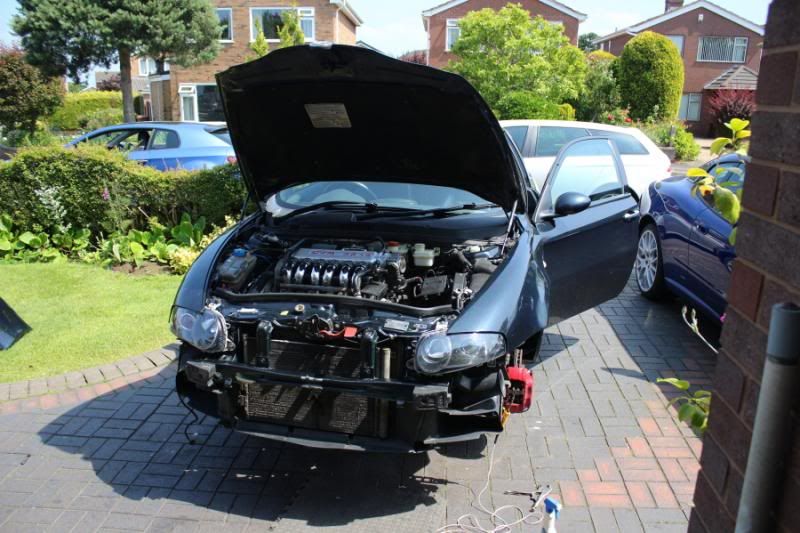
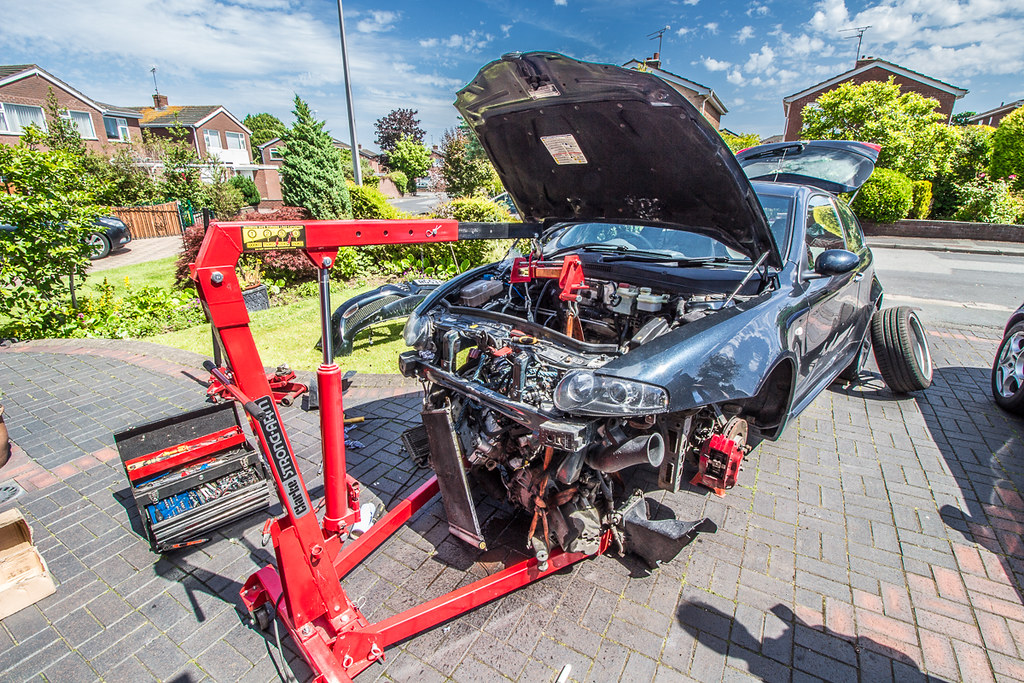
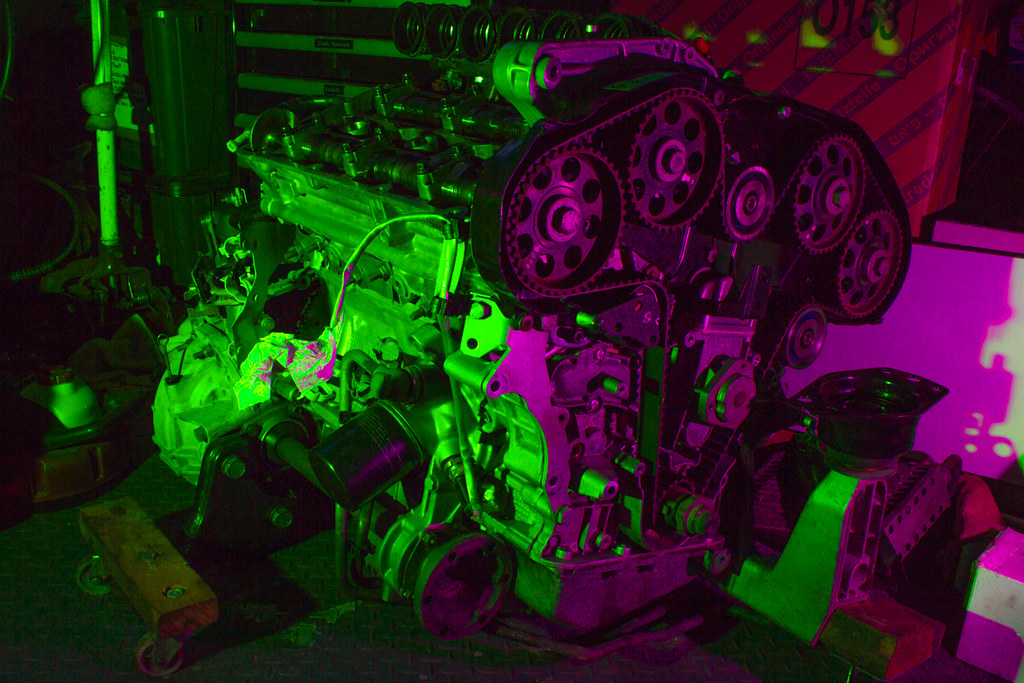
And what follows from here has pretty much been every single spare day I've had since 30-06-15. And I mean that. I've had weddings (which included a week in Greece for on wedding) but I can say it's my life has been spent under or over the car and or the engine since July this year...
Hmmmmm.
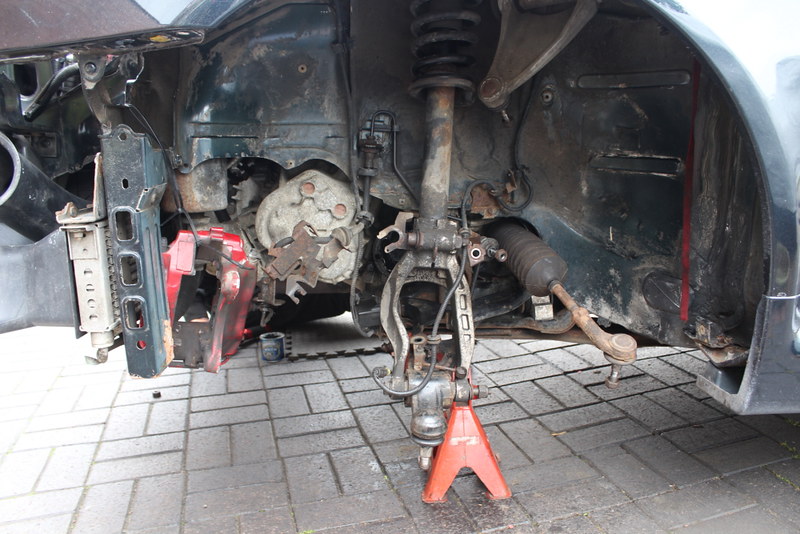
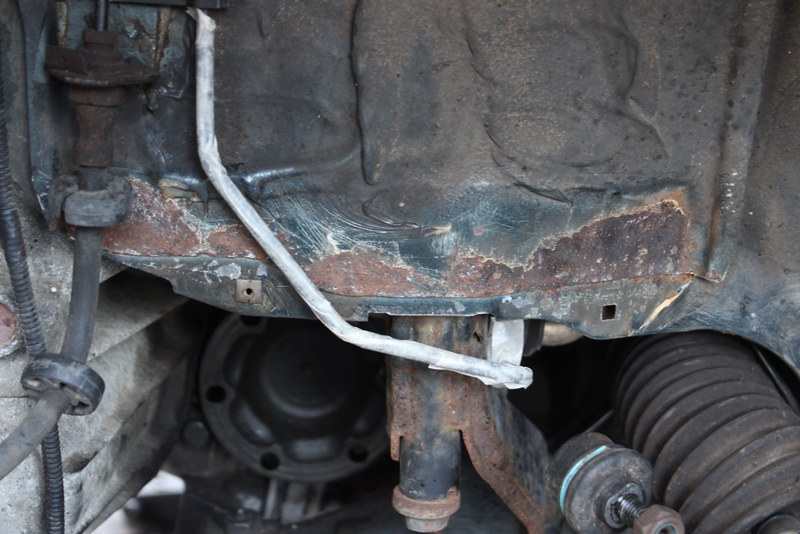
Out in the sun on Saturday, feeling like a vampire and my Dad says to me "are you going to fix that coolant leak then?"
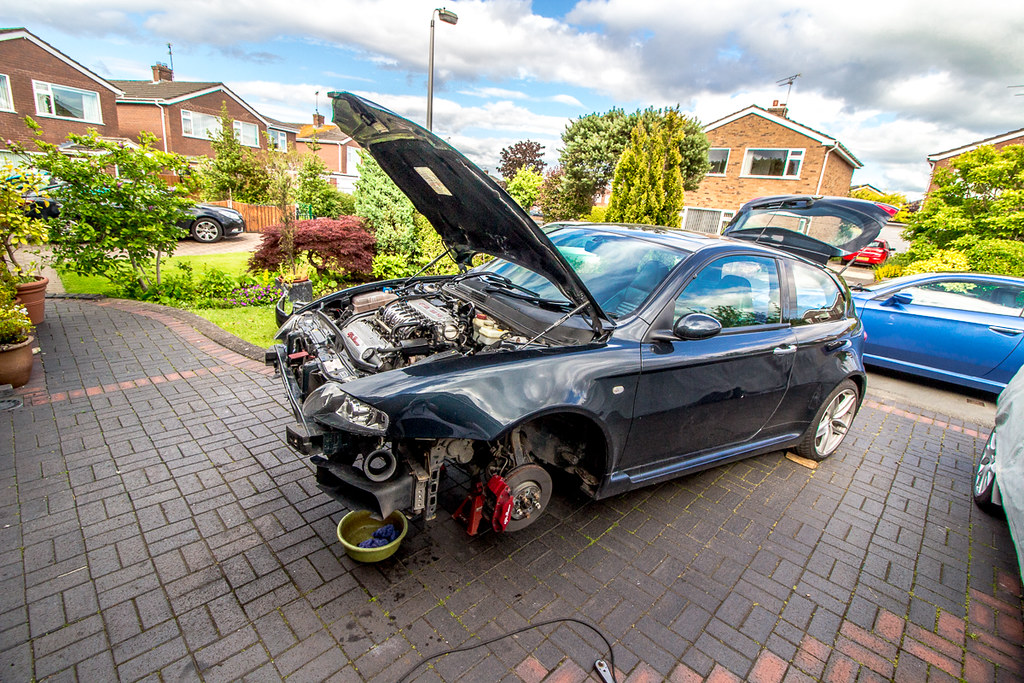
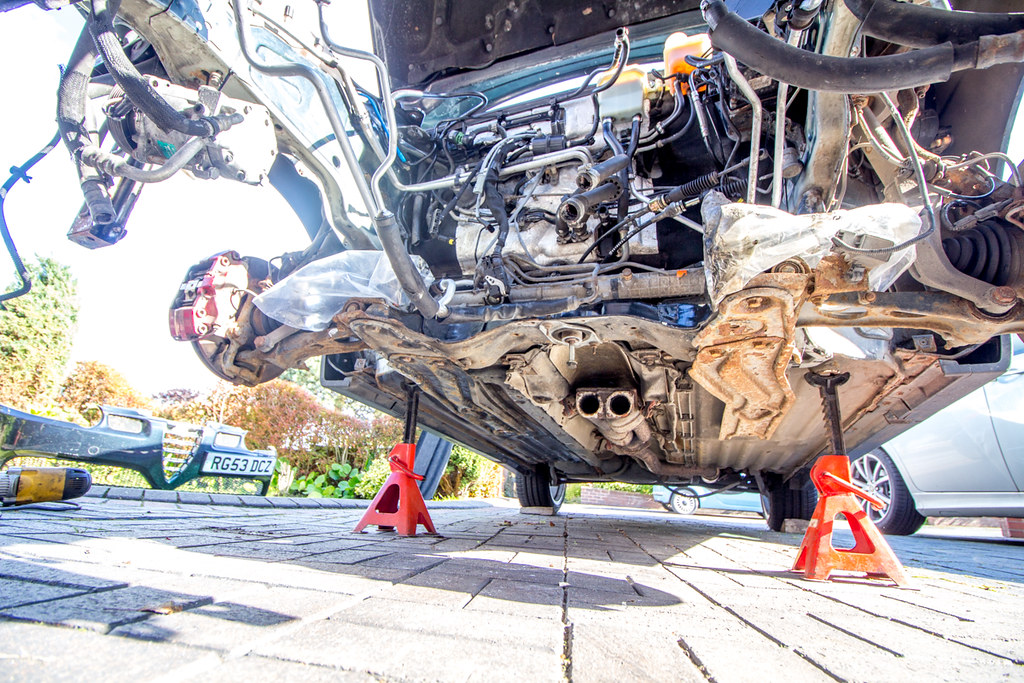
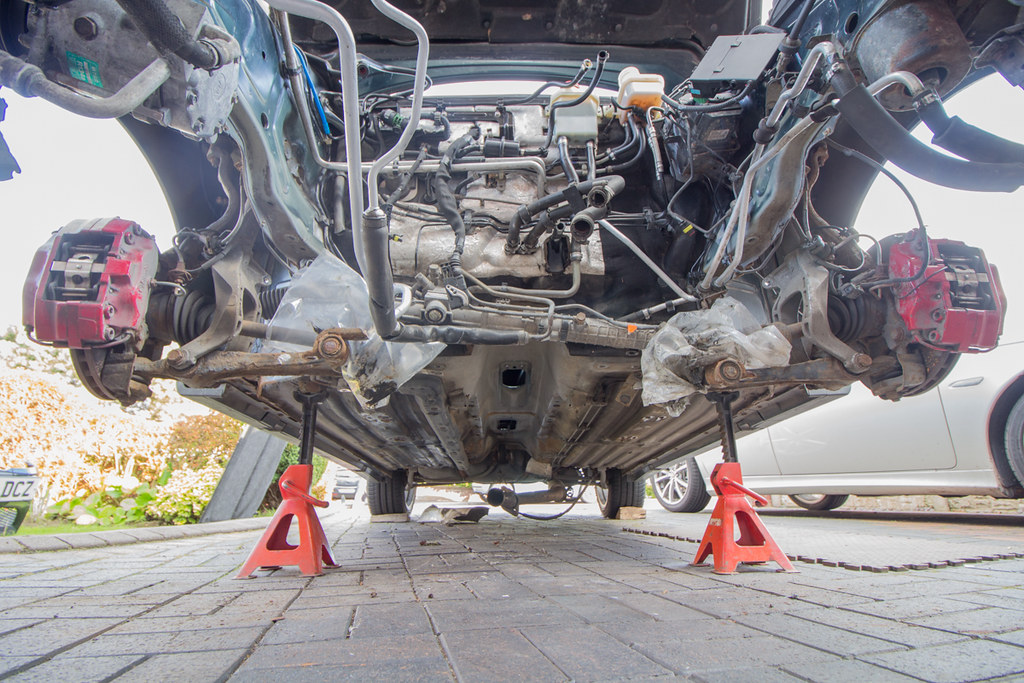
As a leak, it's only minor, and I was feeling lazy. It's not like it's my everyday car... But I ended up shrugging like a teenager and put it up on axle stands with the intention of pulling the coolant pipe off, the one that runs across the bottom of the radiator, yeah, that one. The one that goes rusty...
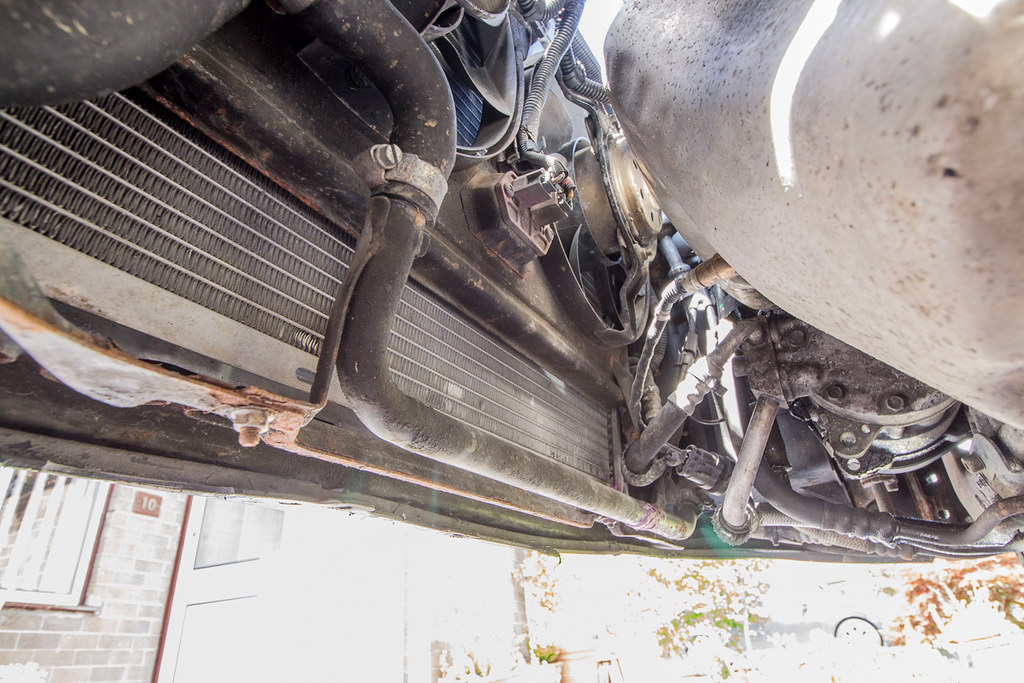 IMG_5998 by Chris 155, on Flickr
 IMG_5991 by Chris 155, on Flickr
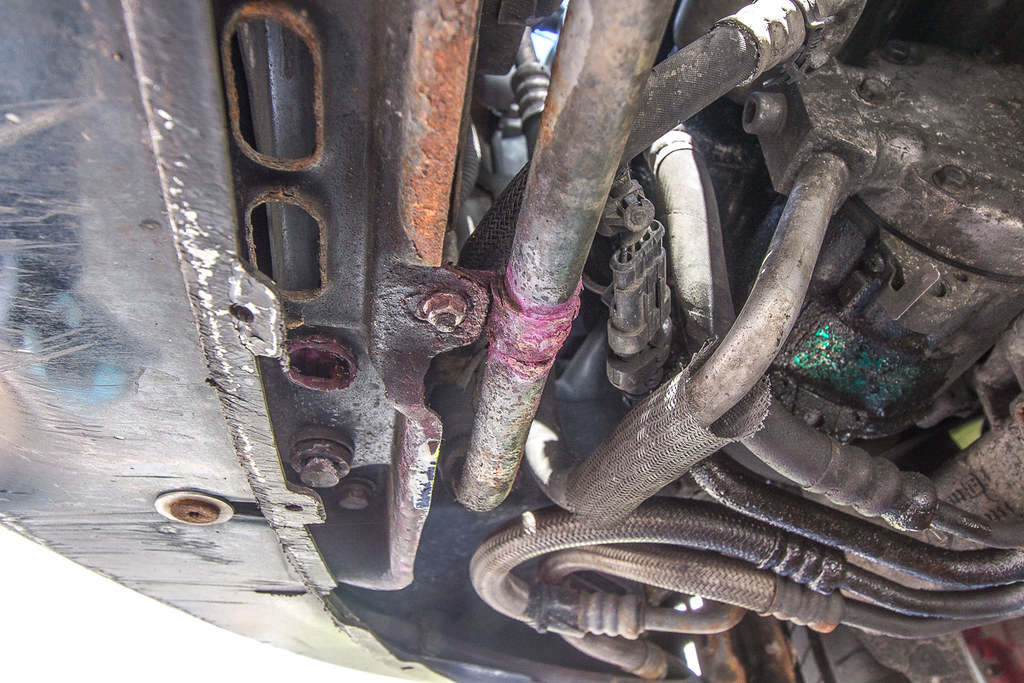
And then I started looking around at everything else...
 IMG_5993-2 by Chris 155, on Flickr
And why is it leaking from the bottom hose?
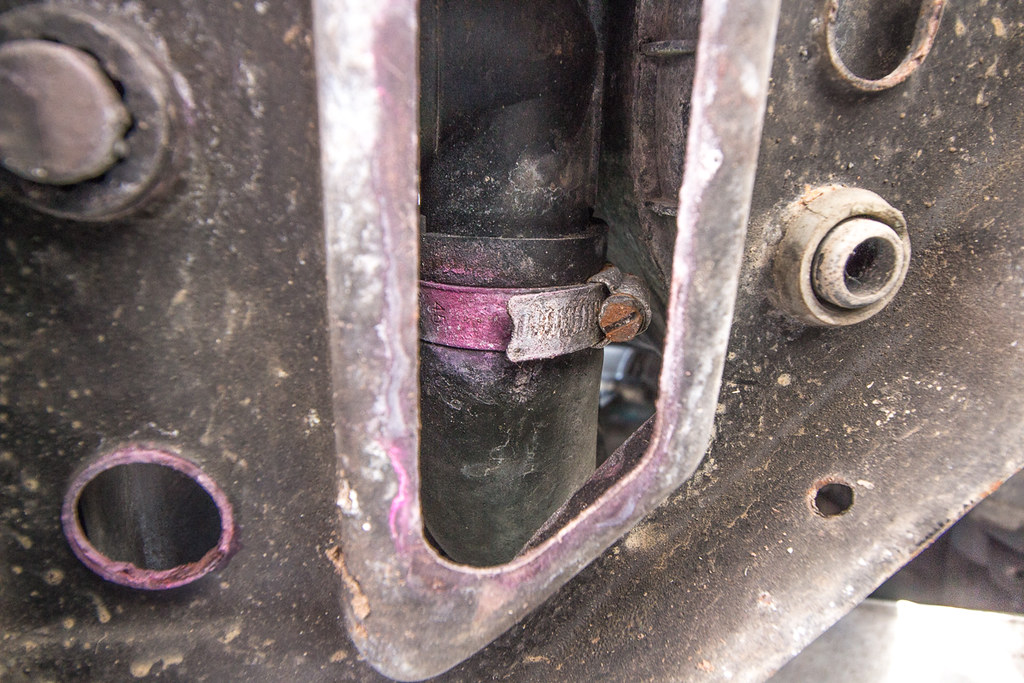 IMG_5996 by Chris 155, on Flickr
Oh, that's why... The (newish) radiator is leaking at the seams. Grrrr.
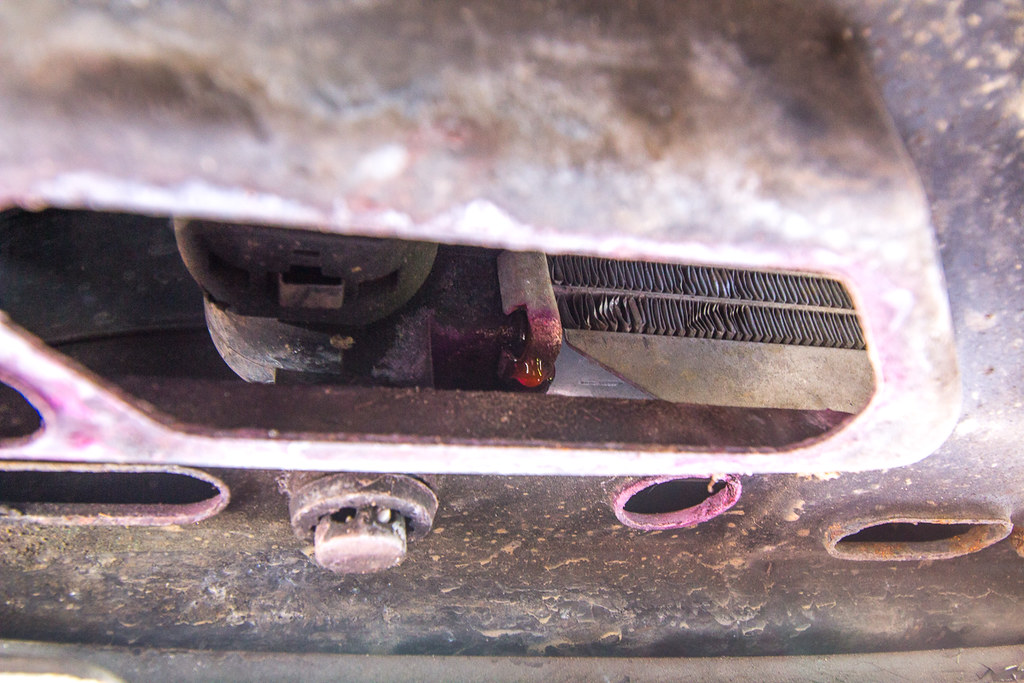 IMG_5997 by Chris 155, on Flickr
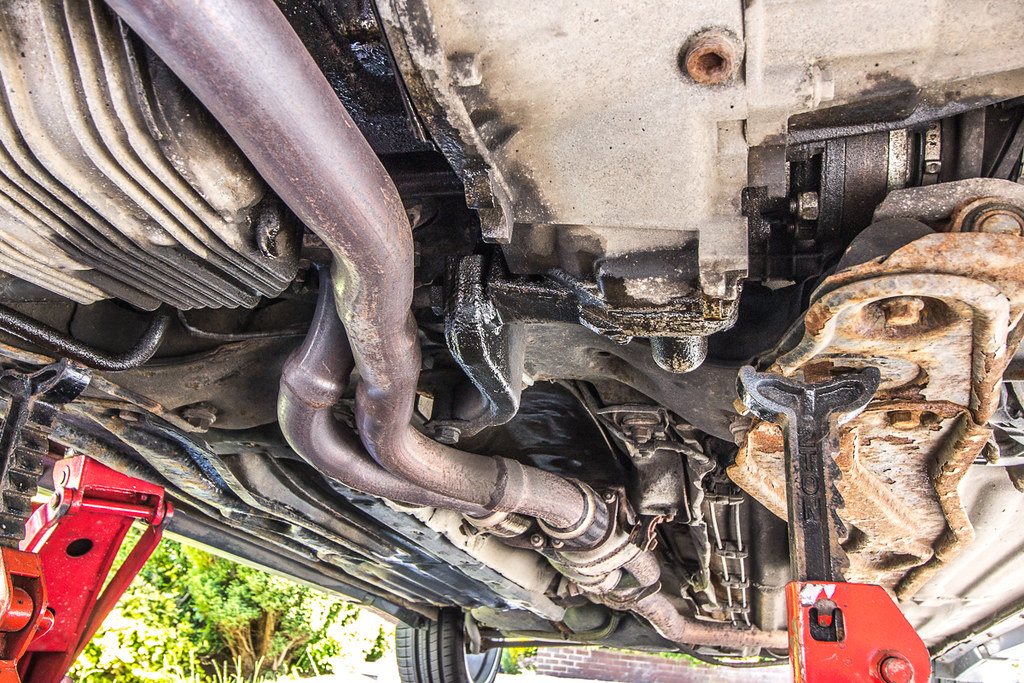
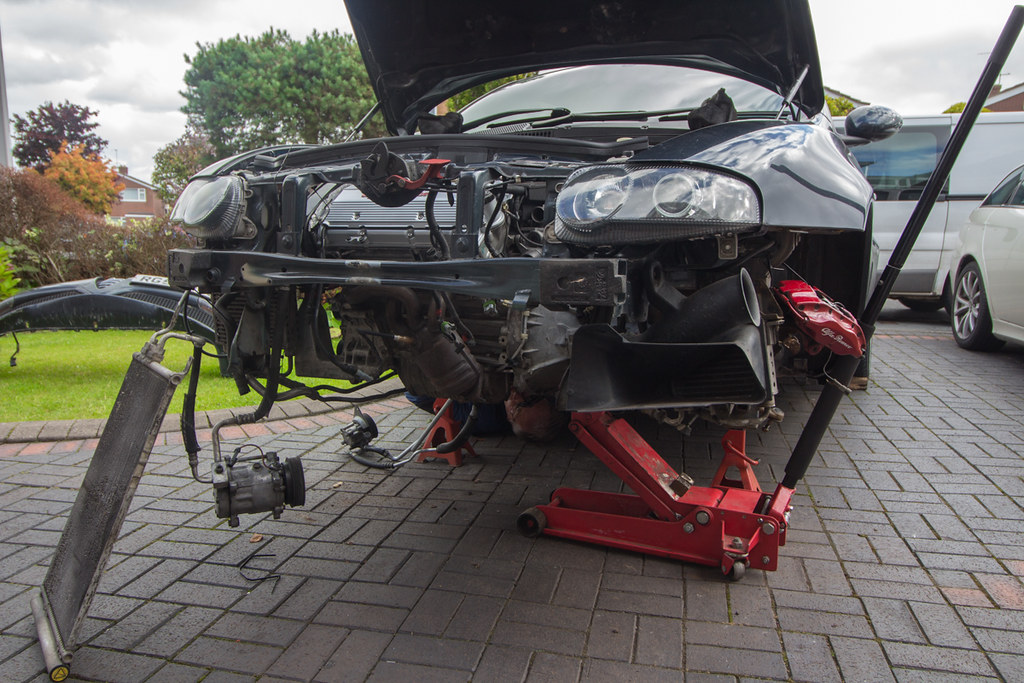
Given it jumps out of reverse, needs a clutch, head gaskets are suspect and will need a cam belt in 10k/12months...
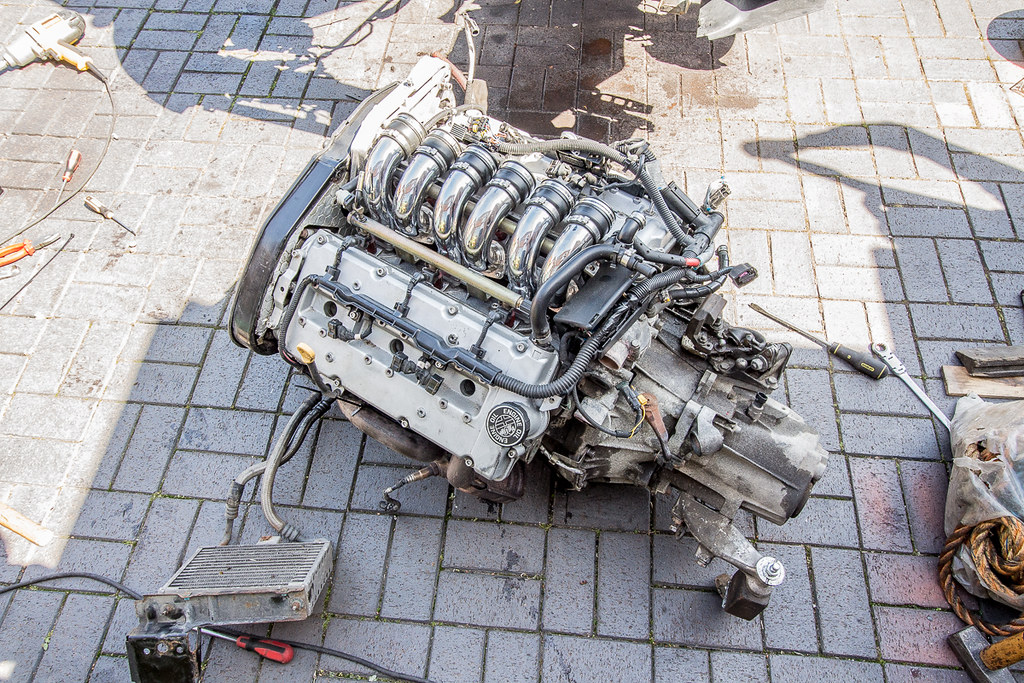
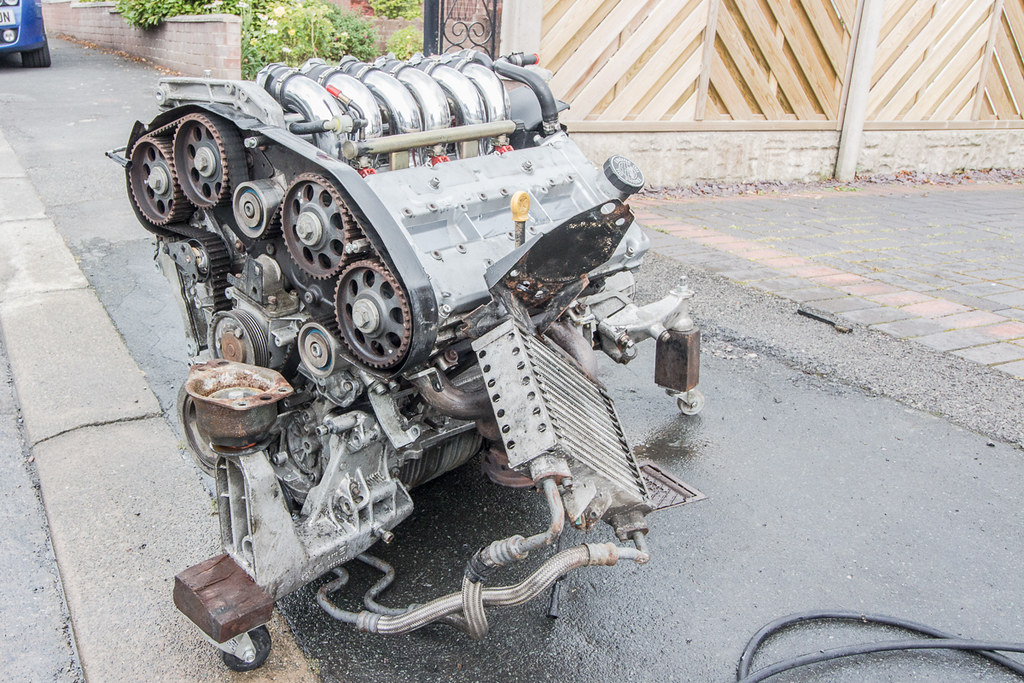
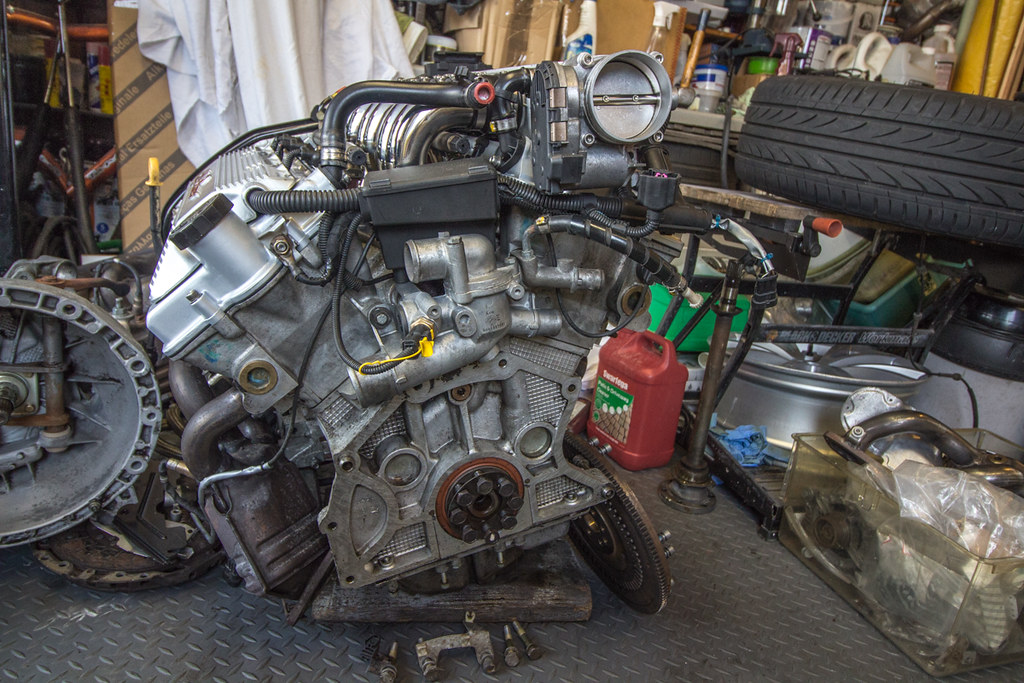
10mins after my conversation with my Dad I'd gone from lazy afternoon watching TV/xbox to taking the engine out of the car.
Arse.
 IMG_5999 by Chris 155, on Flickr
 IMG_6000 by Chris 155, on Flickr
 IMG_6001-2 by Chris 155, on Flickr
It's pretty much ready to come out (started 3pm Sat and was busy Sun) but I want to do a compression test before I take it out, so that's the next step...
Out in the sun on Saturday, feeling like a vampire and my Dad says to me "are you going to fix that coolant leak then?"
As a leak, it's only minor, and I was feeling lazy. It's not like it's my everyday car... But I ended up shrugging like a teenager and put it up on axle stands with the intention of pulling the coolant pipe off, the one that runs across the bottom of the radiator, yeah, that one. The one that goes rusty...
IMG_5998 by Chris 155, on FlickrIMG_5991 by Chris 155, on FlickrAnd then I started looking around at everything else...
IMG_5993-2 by Chris 155, on FlickrAnd why is it leaking from the bottom hose?
IMG_5996 by Chris 155, on FlickrOh, that's why... The (newish) radiator is leaking at the seams. Grrrr.
IMG_5997 by Chris 155, on FlickrGiven it jumps out of reverse, needs a clutch, head gaskets are suspect and will need a cam belt in 10k/12months...
10mins after my conversation with my Dad I'd gone from lazy afternoon watching TV/xbox to taking the engine out of the car.
Arse.
IMG_5999 by Chris 155, on FlickrIMG_6000 by Chris 155, on FlickrIMG_6001-2 by Chris 155, on FlickrIt's pretty much ready to come out (started 3pm Sat and was busy Sun) but I want to do a compression test before I take it out, so that's the next step...
01-07-15
Compression test today gave up some good news. 230psi +/- 5psi on all cylinders. The first 2 compression cycles also gave very close values on all 6, so no issues there.
11-07-15
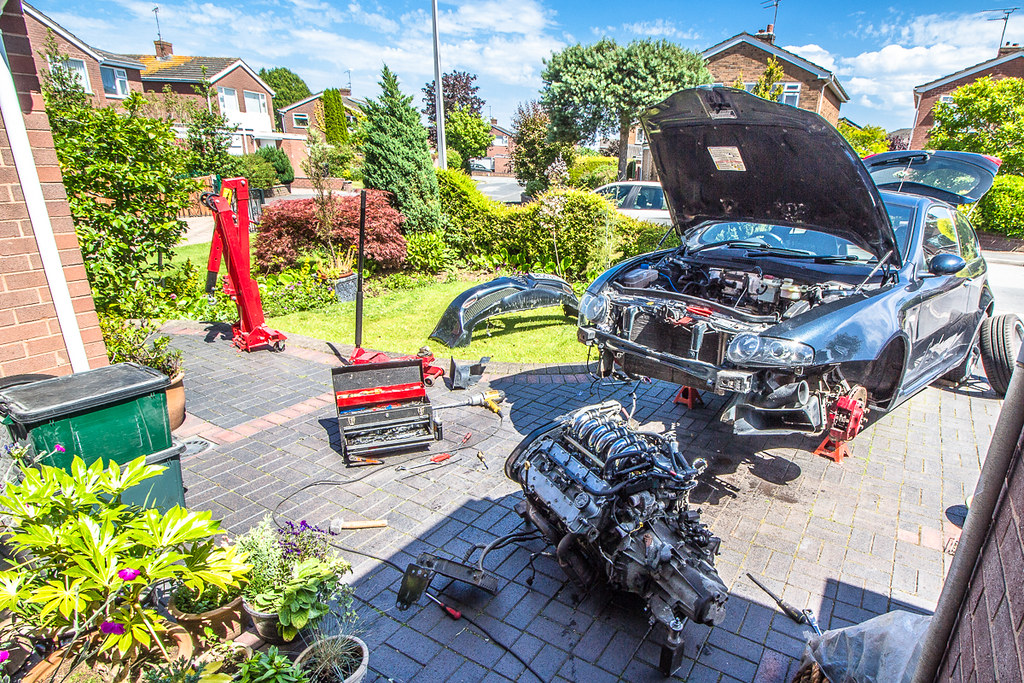
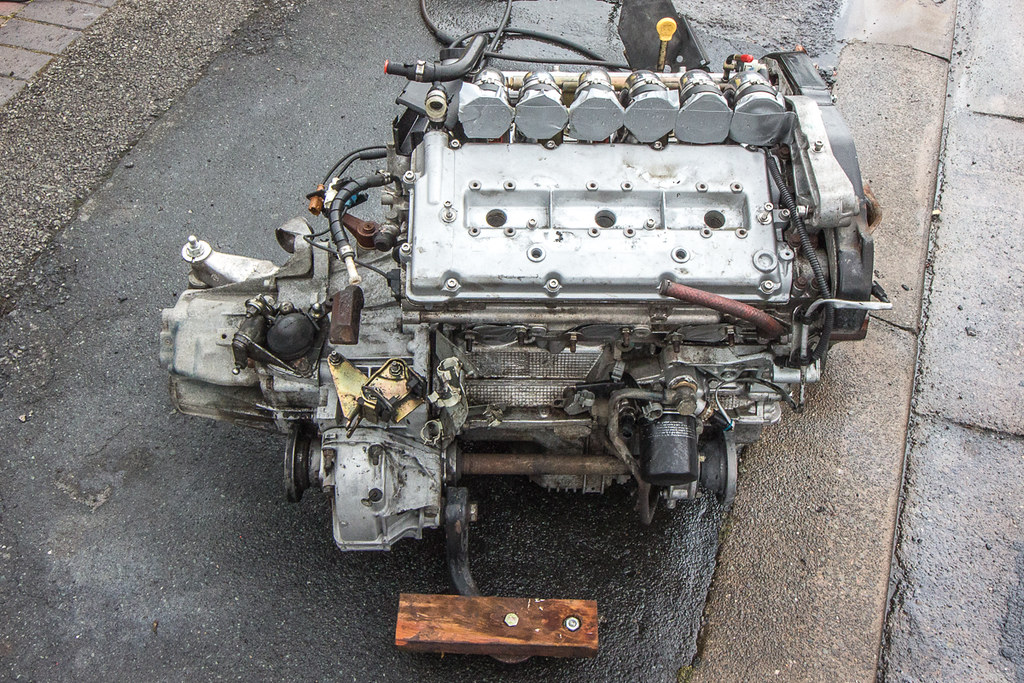
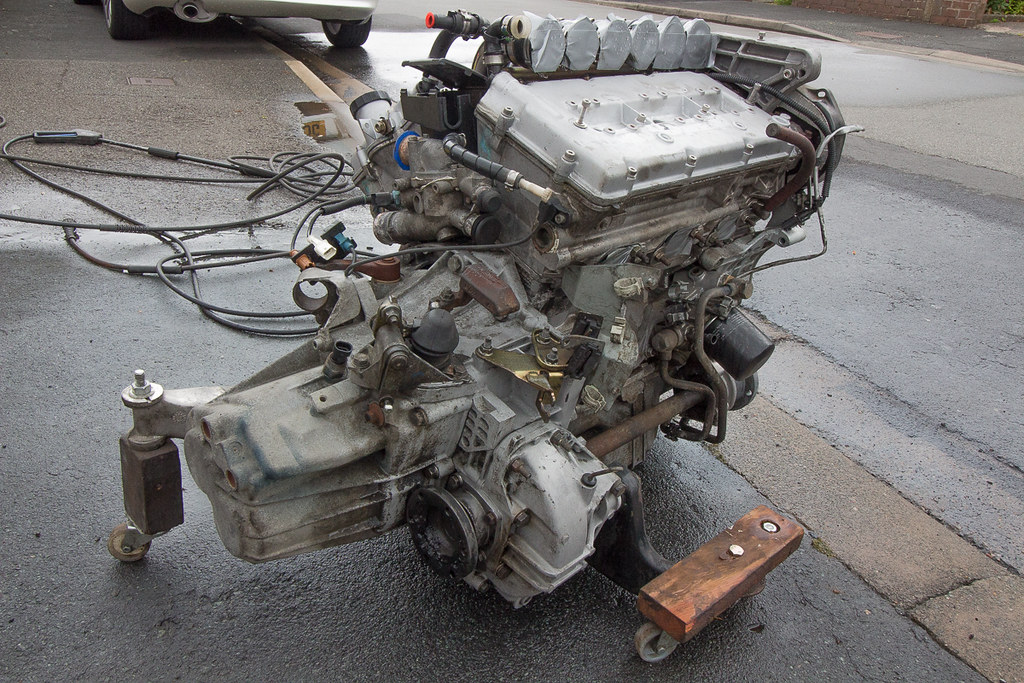
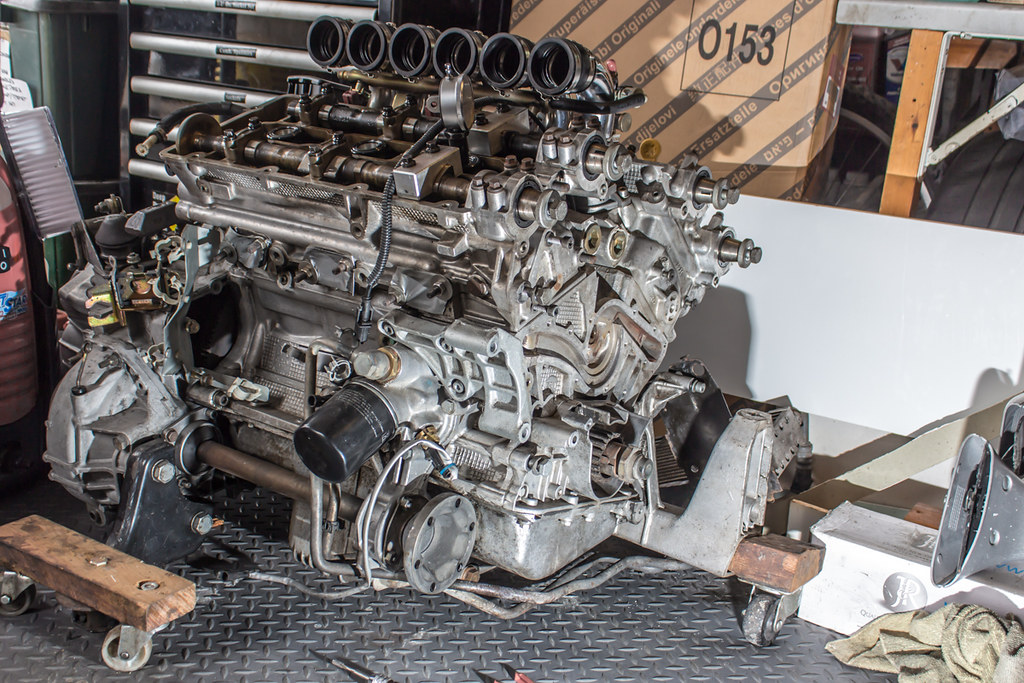
Finished off taking the engine out yesterday afternoon. Because I left the air con system connected taking it out with the subframe on proved to be difficult. So yeah it it possible to get it out but Given that it takes less than an hour to drop it I am going to take it off when I put the engine/box back in...
 IMG_6077-2 by Chris 155, on Flickr
 IMG_6078-2 by Chris 155, on Flickr
 IMG_6082 by Chris 155, on Flickr
 IMG_6087 by Chris 155, on Flickr
 IMG_6089 by Chris 155, on Flickr
Some cleaning to be done in here I think...
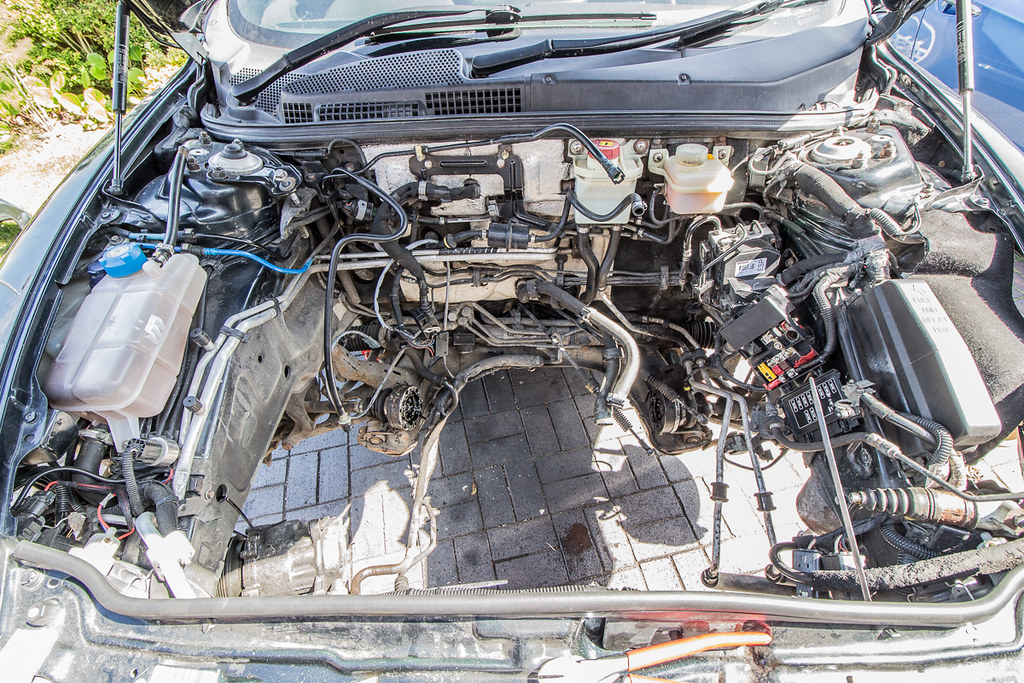 IMG_6086 by Chris 155, on Flickr
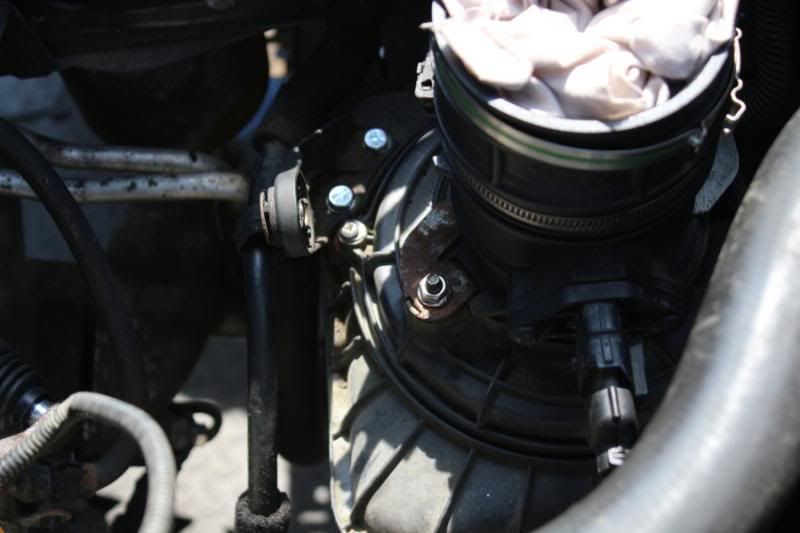
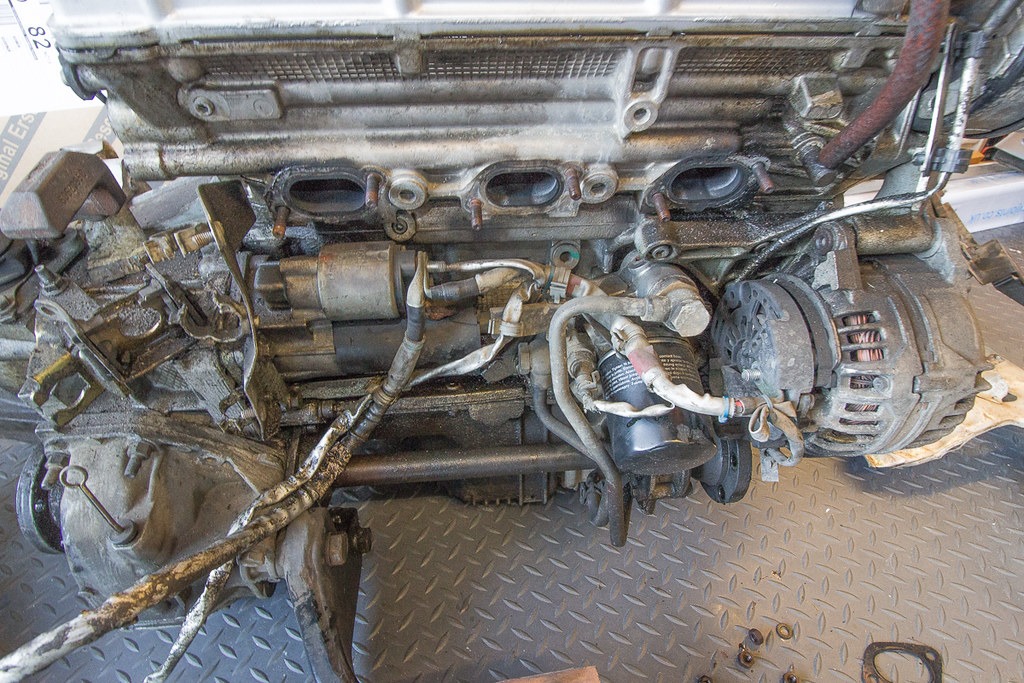
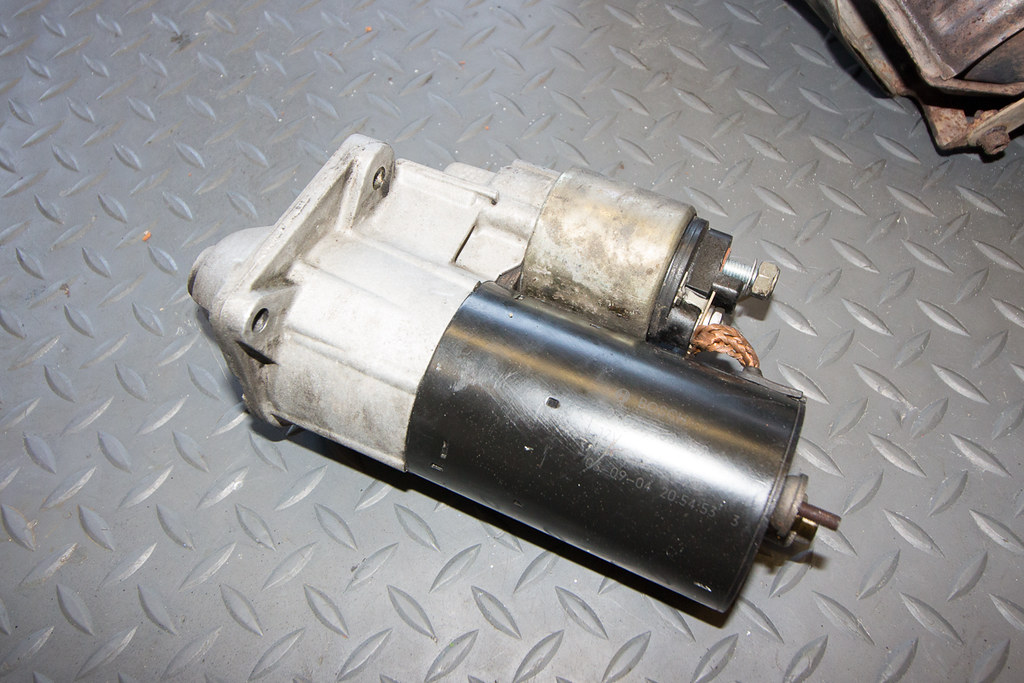
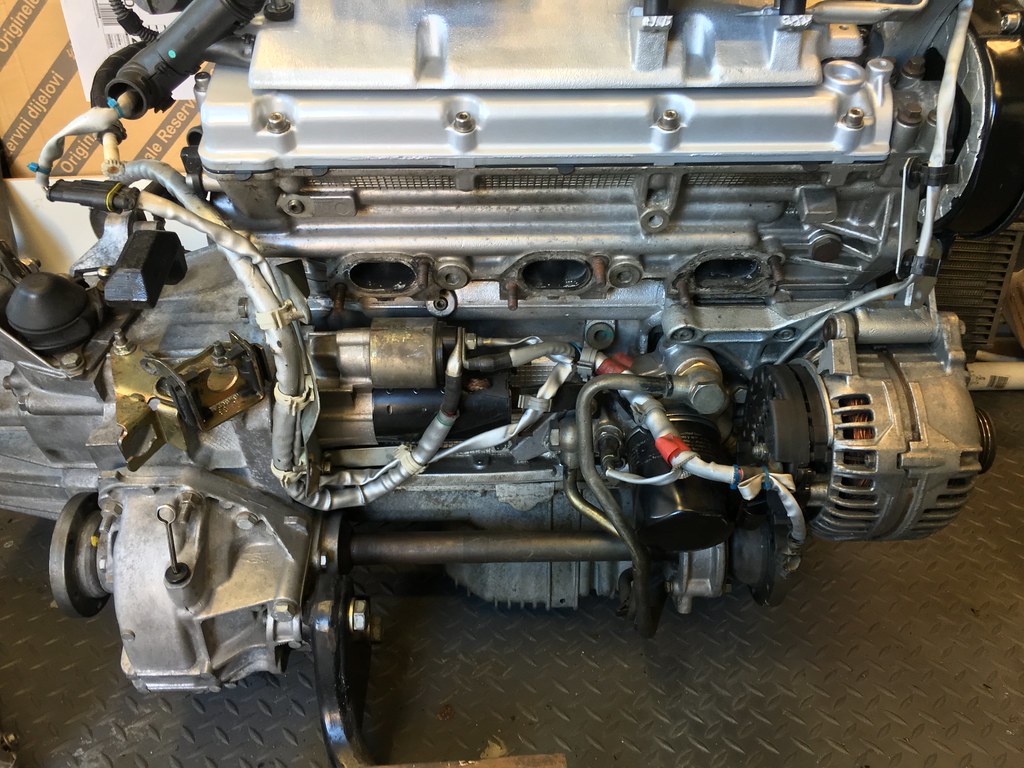
In addition to finding that the power steering pump has literally hanging on by a couple of threads, The nuts holding the rear manifold on were also loose It's no wonder it was ticking when it was cold. So I stripped that off together with the alternator and starter motor and started to clean all the oil and dirt off them;
 IMG_6091-2 by Chris 155, on Flickr
 IMG_6095 by Chris 155, on Flickr
Clean(er)...
 IMG_6096-2 by Chris 155, on Flickr
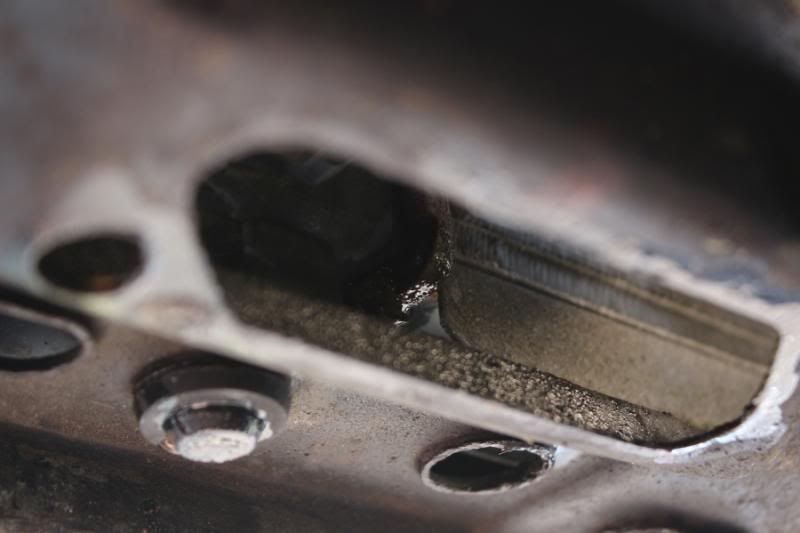
The cam belt had been changed shortly before I bought it and it's done about 15k in my ownership, so I felt somewhat vindicated when I found that the cam belt is running very close to the edge of the tensioner - i.e. it has started to fail;
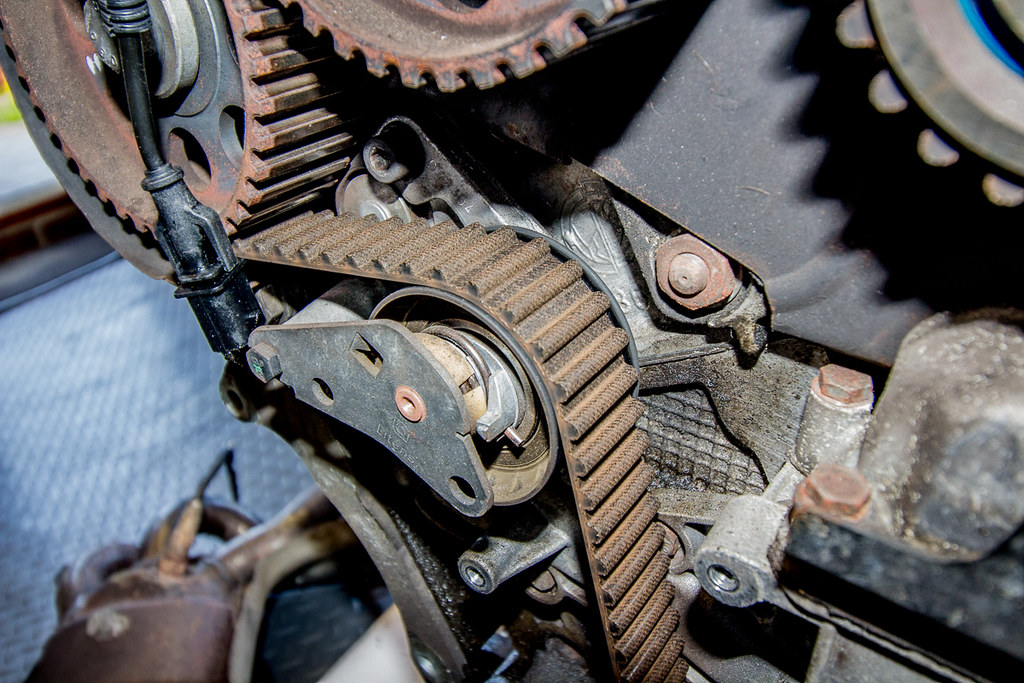 IMG_6093 by Chris 155, on Flickr
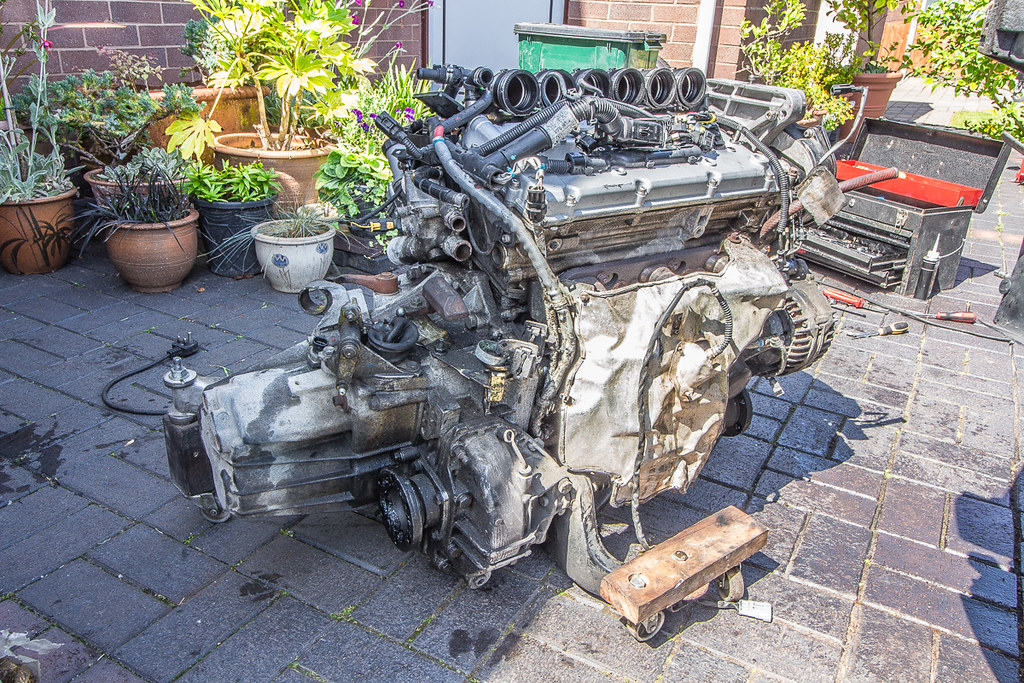
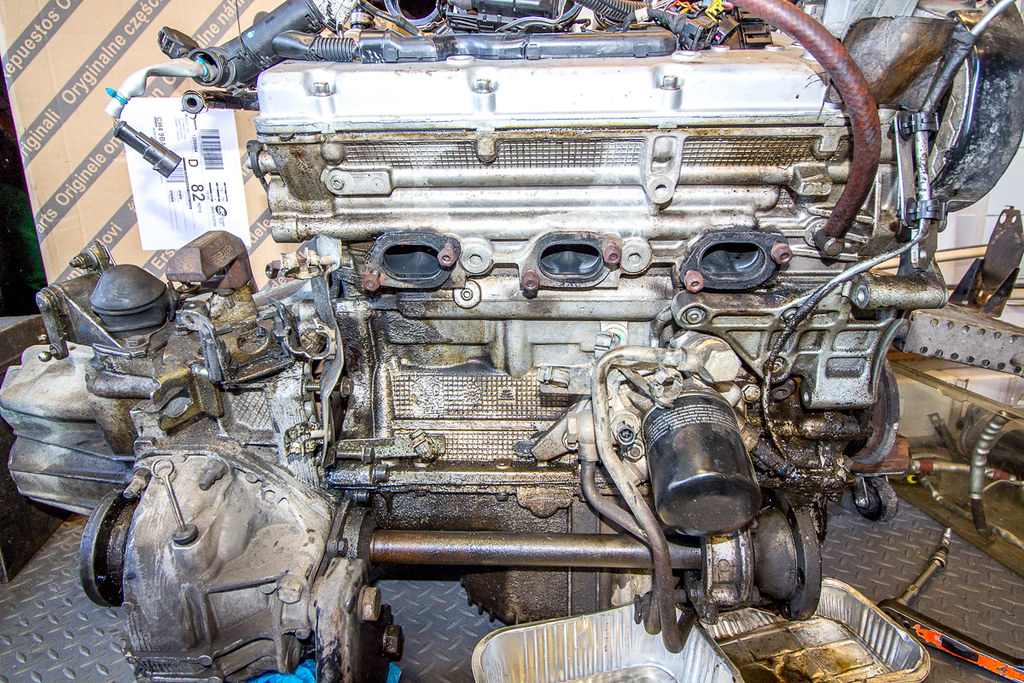
And today we plugged all the holes (including the rear bank plug holes) and gave a it a clean with degreaser and a pressure washer.
 IMG_6099 by Chris 155, on Flickr
 IMG_6100 by Chris 155, on Flickr
 IMG_6097 by Chris 155, on Flickr
My Dad was using an air line from the compressor to dry it off... So it's now cleaner but not entirely clean. Next up is more cleaning, take the box off and check the clutch.
02-08-15
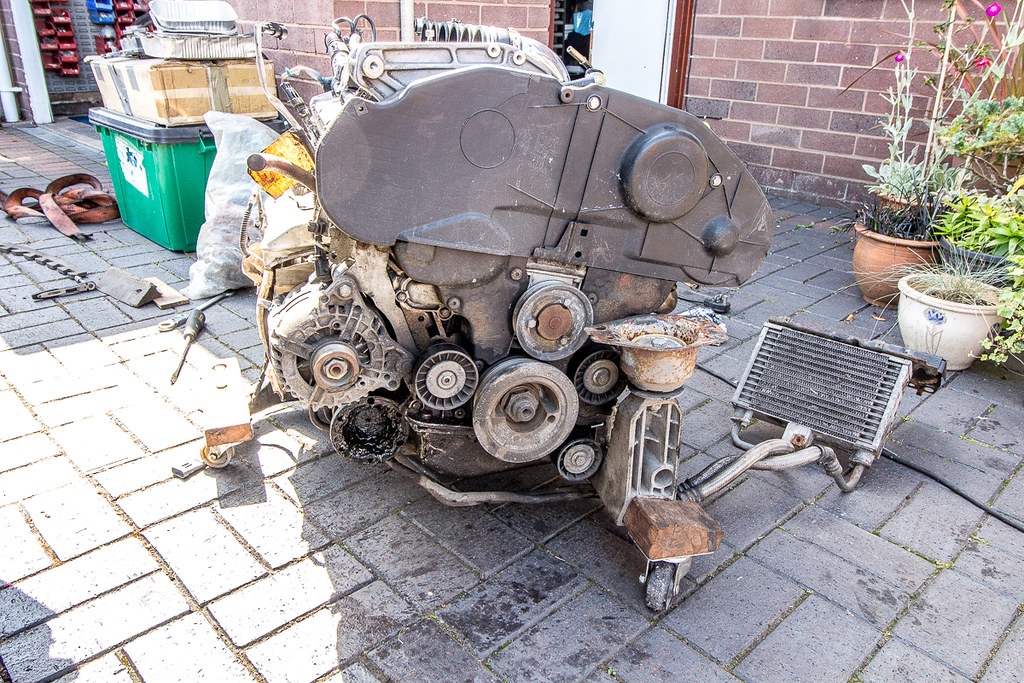
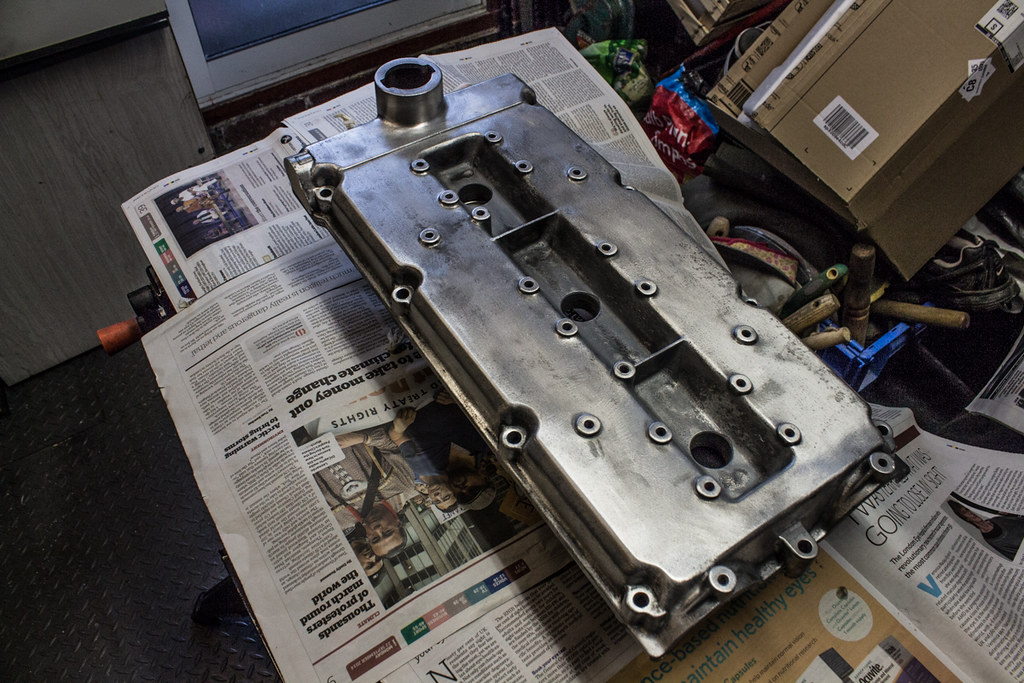
We've been busy with other family commitments of late, notably me nephew's 1st birthday (he's so ace) but I have done a few jobs. I've stripped the front of the engine to change the cam belt, tensioner, water pump and sundries;
 IMG_6335 by Chris 155, on Flickr
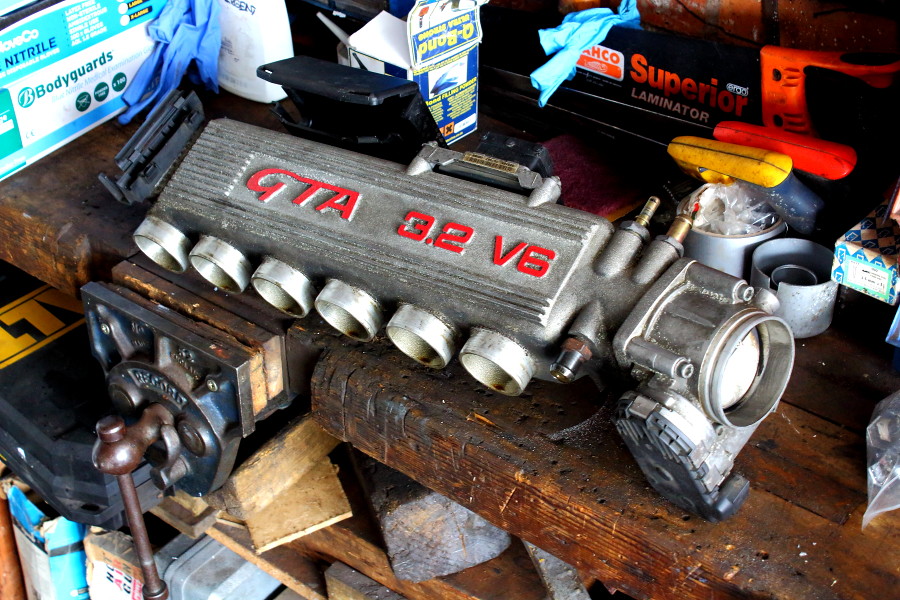
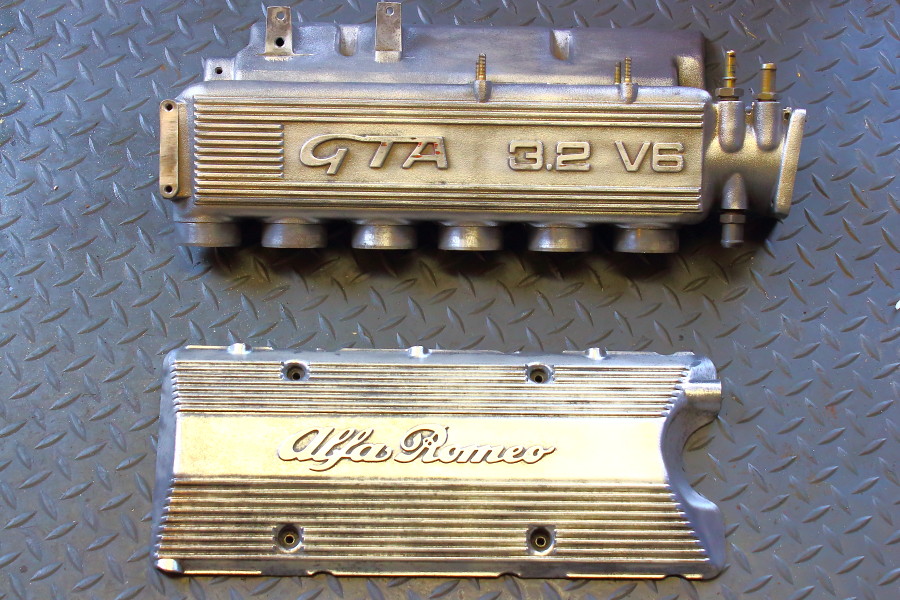
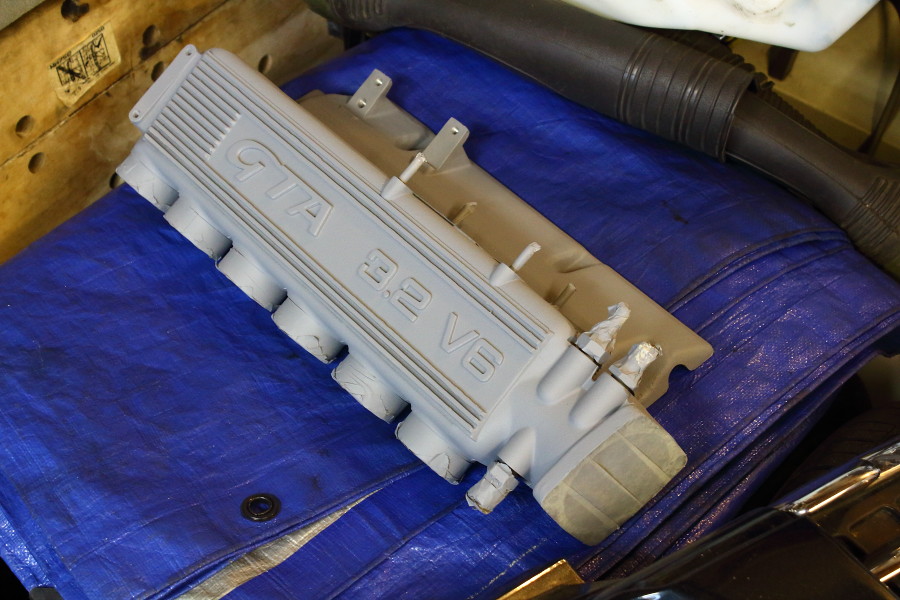
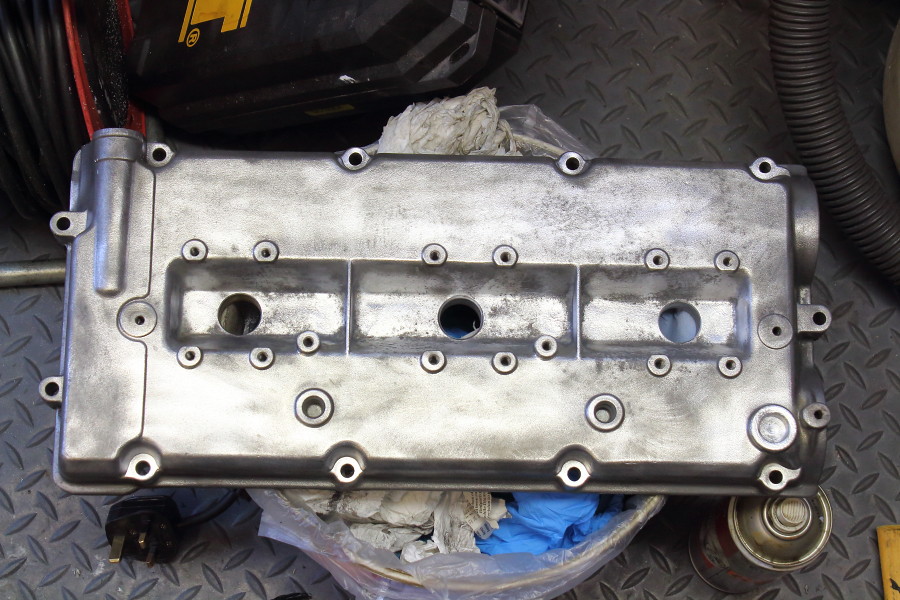
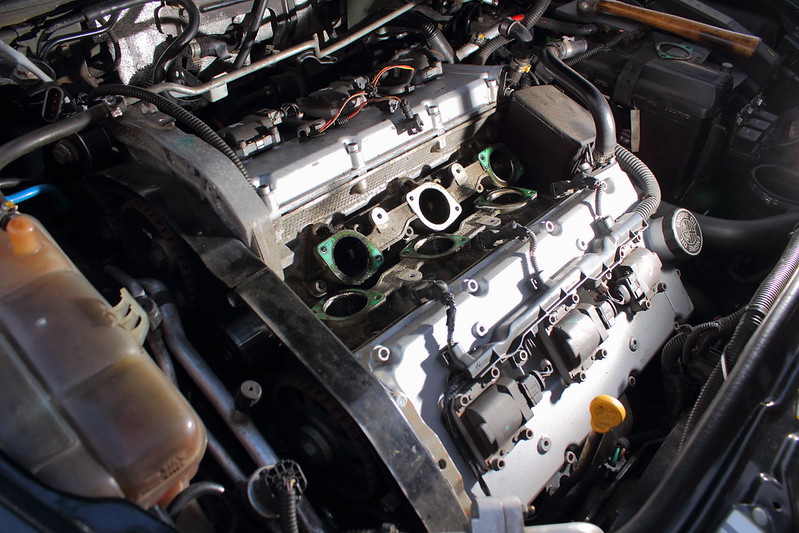
Cam covers as they came of the engine. Since been refurbished / in the process of being...
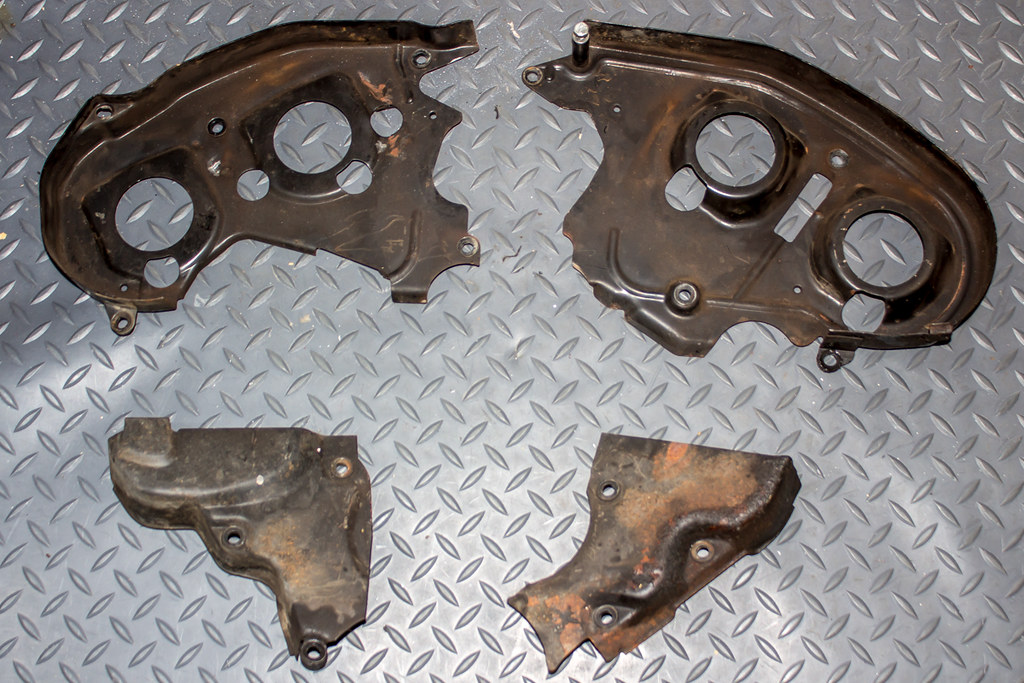 IMG_6340 by Chris 155, on Flickr\
And then I started playing with filters on the flash guns.... These are my first attempts using filters and an 80's relic TBH... but anyway...
Before belt...
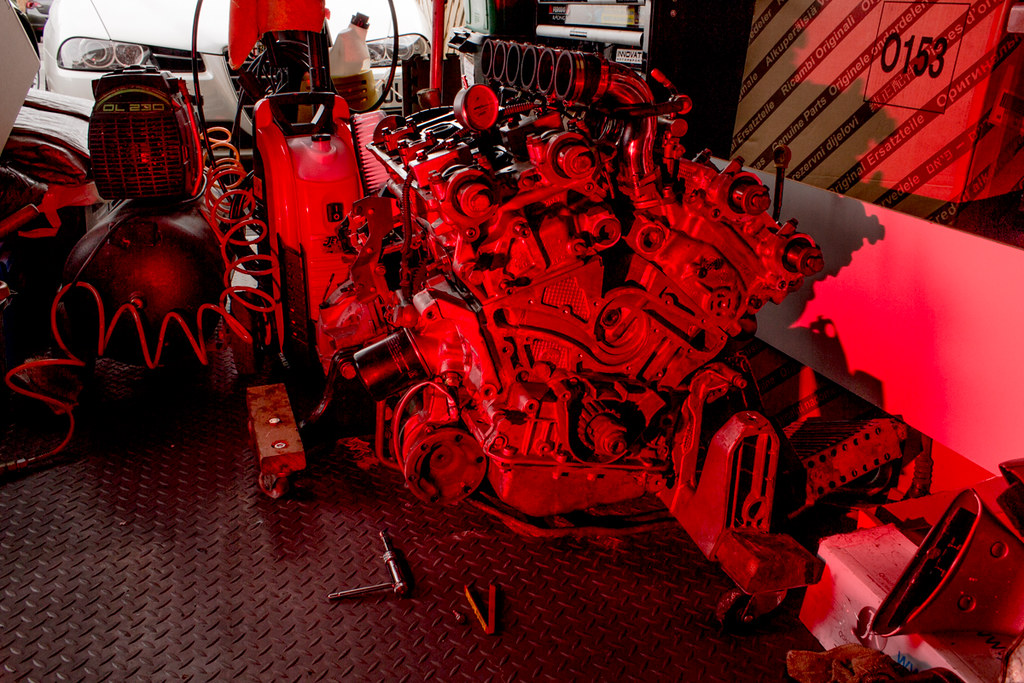 IMG_6346 by Chris 155, on Flickr
And after I'd done the belt etc;
 IMG_6347-2 by Chris 155, on Flickr
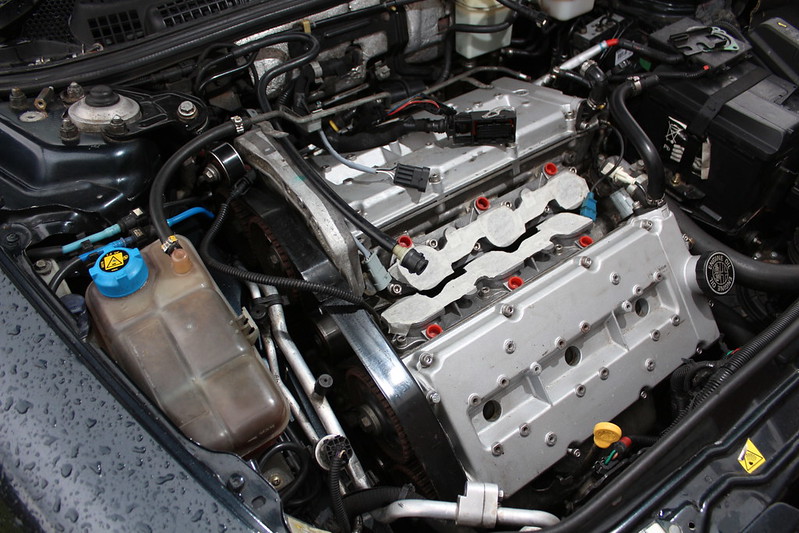
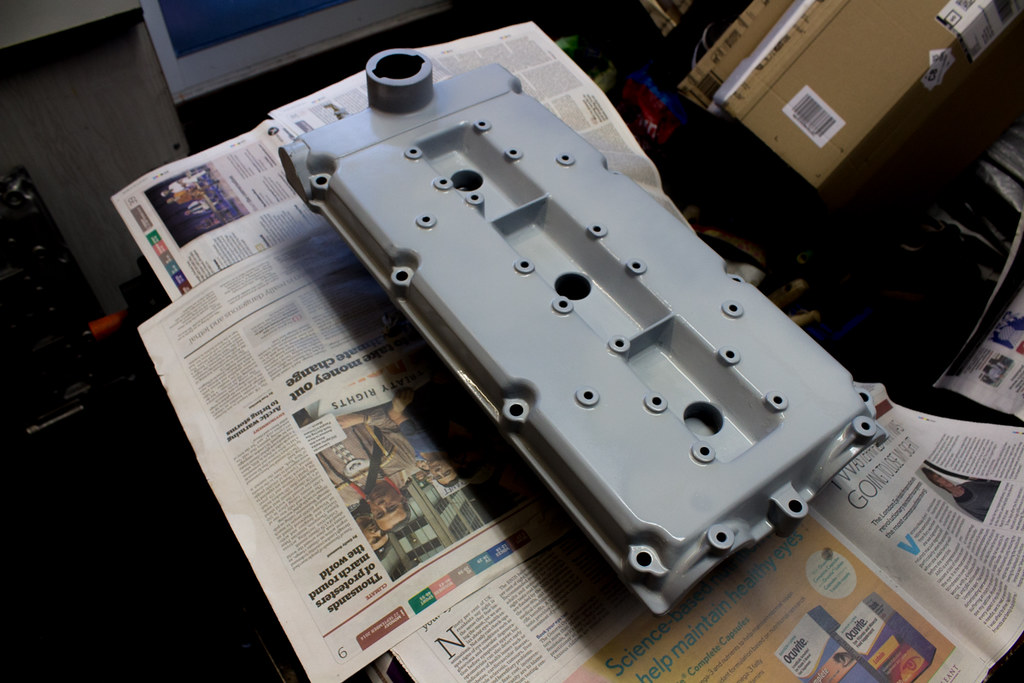
14-08-15
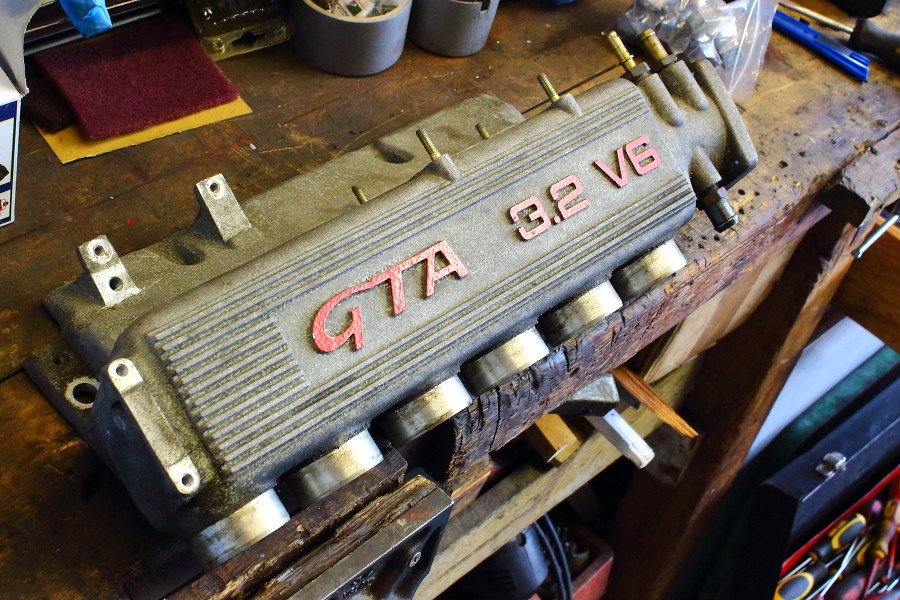
It's taken 2 weeks due to other commitments but I've stripped back the old paint on the covers, repainted them with etch primer and silver paint, then lacquered them, which I didn't do last time and the paint didn't last well as a consequence.
 IMG_6352 by Chris 155, on Flickr
 IMG_6355 by Chris 155, on Flickr
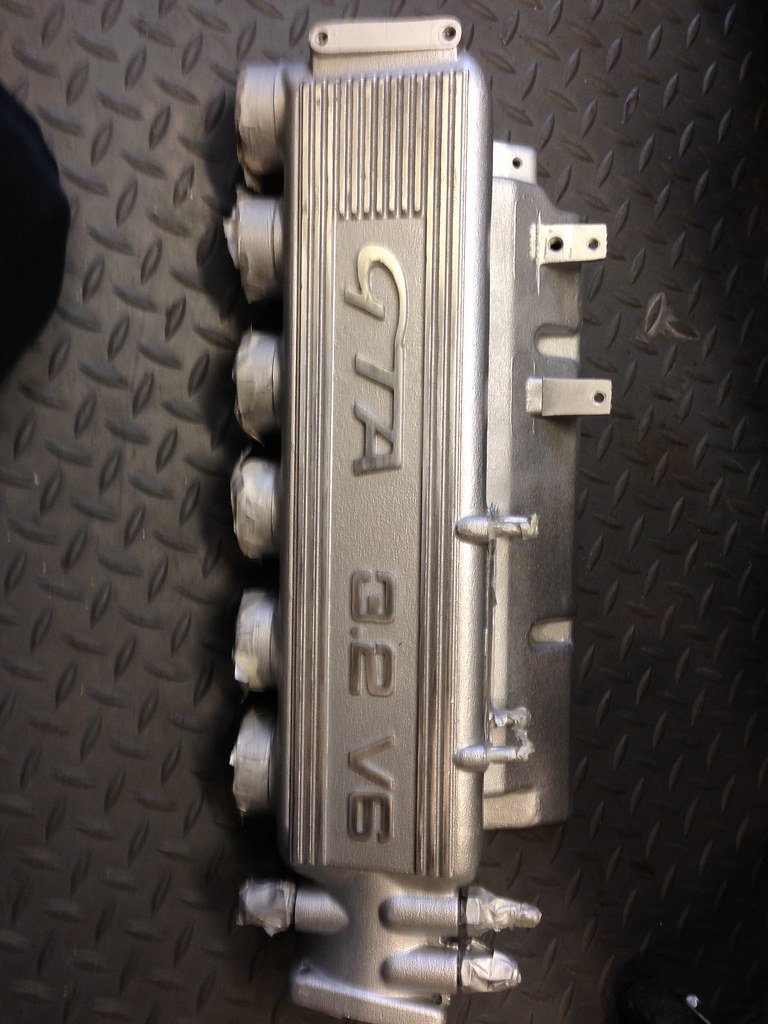
I then used a sanding block and 800 grit paper and 1000g wet and dry to polish the lettering and ribs in the plenum/colipack cover;
 Untitled by Chris 155, on Flickr
 Untitled by Chris 155, on Flickr
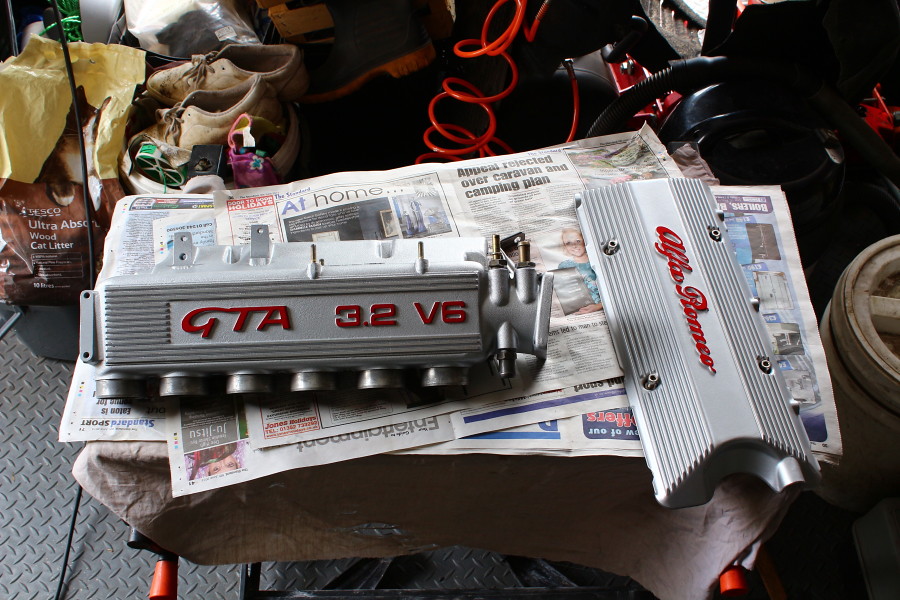
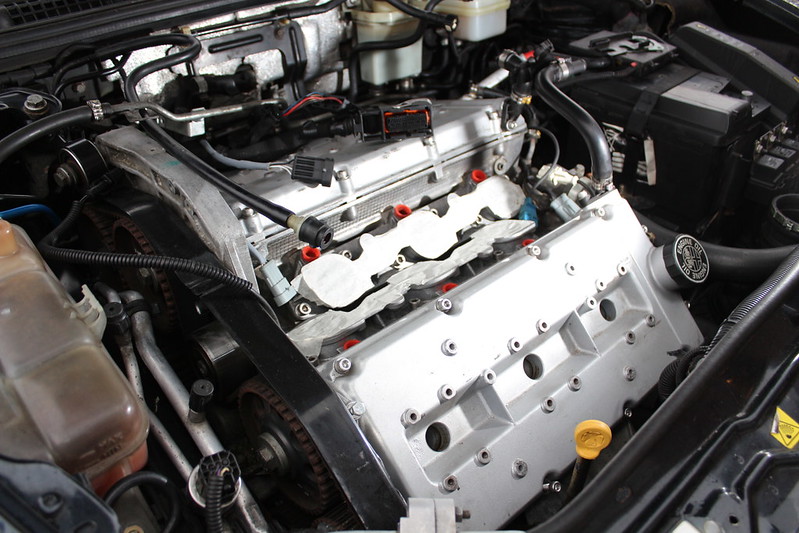
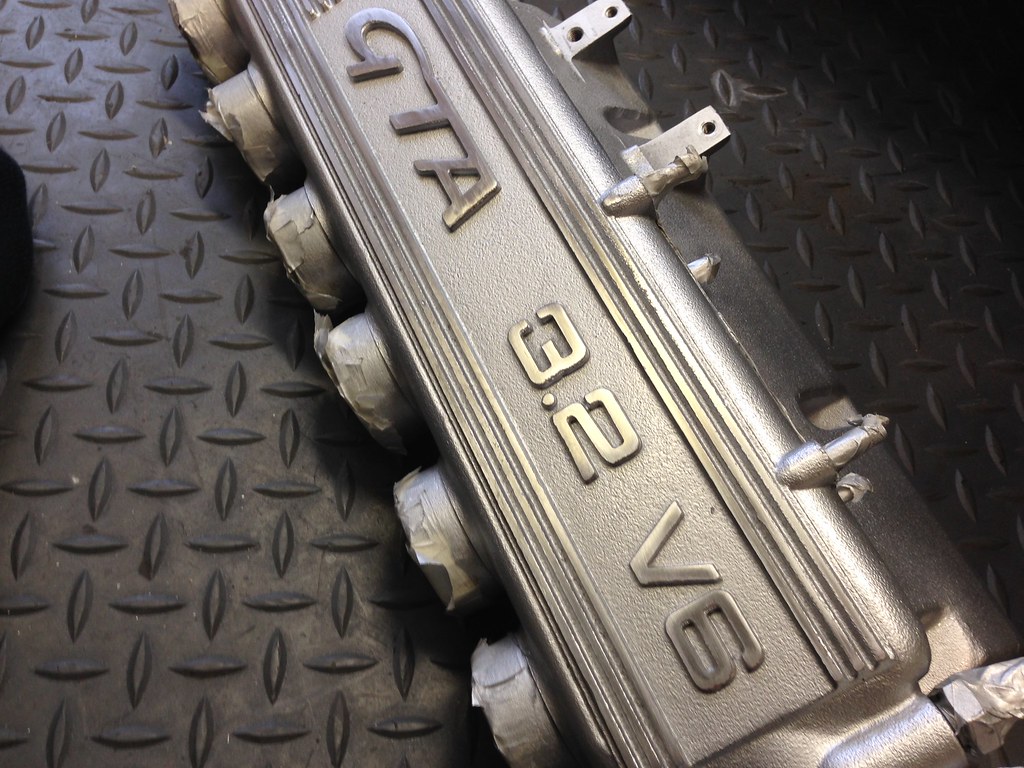
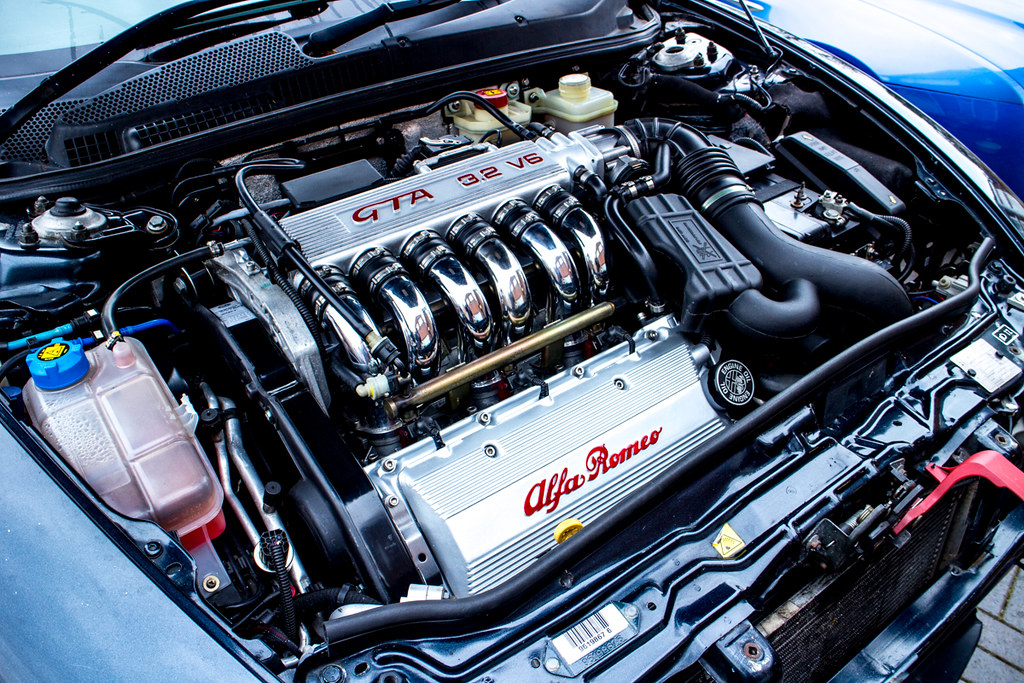
Finally I've repainted the lettering in red but I did something a little bit different;
 IMG_6694 by Chris 155, on Flickr
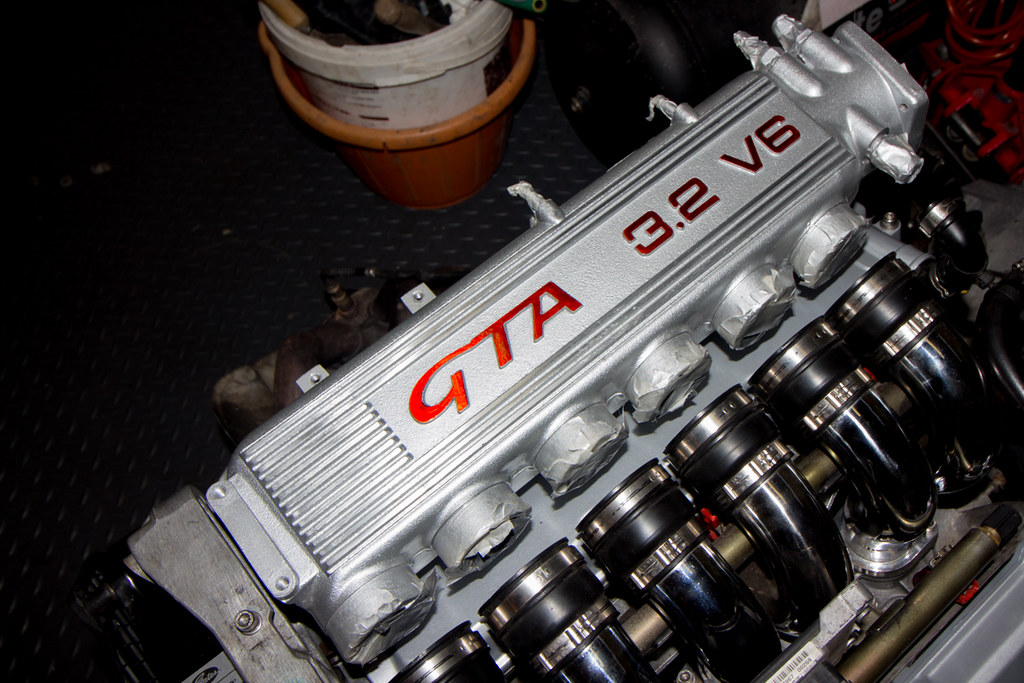 IMG_6698 by Chris 155, on Flickr
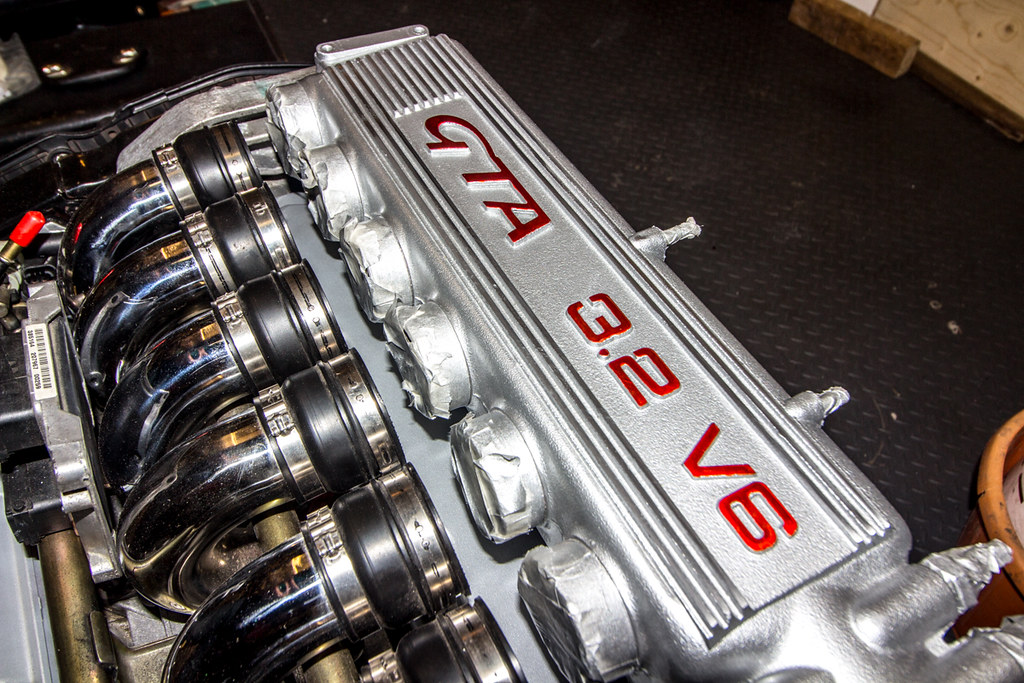 IMG_6699-2 by Chris 155, on Flickr
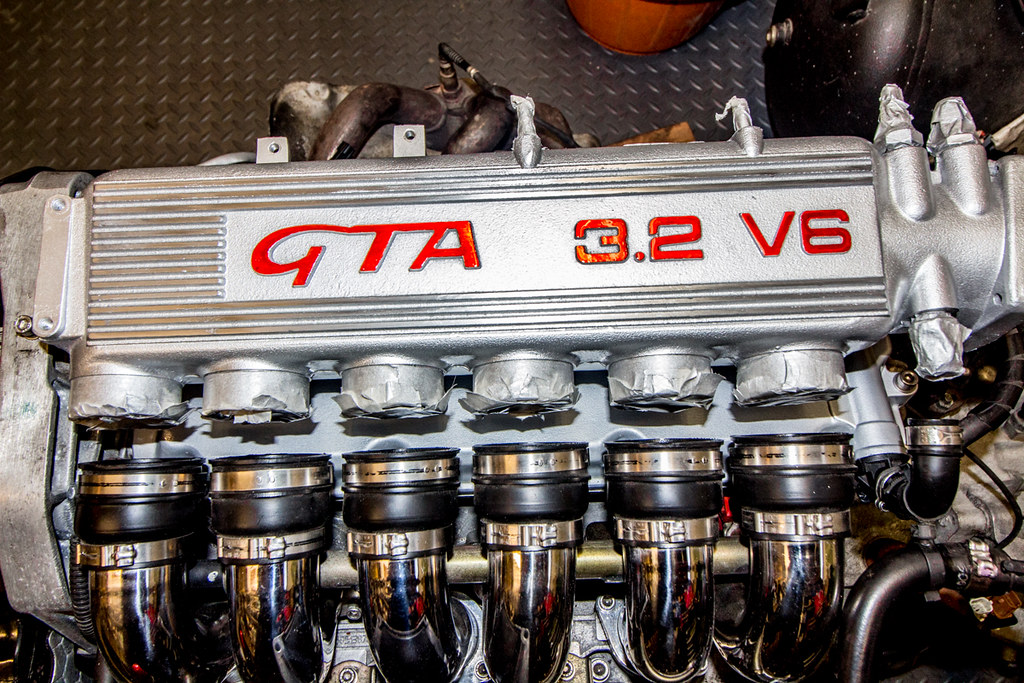 IMG_6701 by Chris 155, on Flickr
Compression test today gave up some good news. 230psi +/- 5psi on all cylinders. The first 2 compression cycles also gave very close values on all 6, so no issues there.
11-07-15
Finished off taking the engine out yesterday afternoon. Because I left the air con system connected taking it out with the subframe on proved to be difficult. So yeah it it possible to get it out but Given that it takes less than an hour to drop it I am going to take it off when I put the engine/box back in...
IMG_6077-2 by Chris 155, on FlickrIMG_6078-2 by Chris 155, on FlickrIMG_6082 by Chris 155, on FlickrIMG_6087 by Chris 155, on FlickrIMG_6089 by Chris 155, on FlickrSome cleaning to be done in here I think...
IMG_6086 by Chris 155, on FlickrIn addition to finding that the power steering pump has literally hanging on by a couple of threads, The nuts holding the rear manifold on were also loose
It's no wonder it was ticking when it was cold. So I stripped that off together with the alternator and starter motor and started to clean all the oil and dirt off them;IMG_6091-2 by Chris 155, on FlickrIMG_6095 by Chris 155, on FlickrClean(er)...
IMG_6096-2 by Chris 155, on FlickrThe cam belt had been changed shortly before I bought it and it's done about 15k in my ownership, so I felt somewhat vindicated when I found that the cam belt is running very close to the edge of the tensioner - i.e. it has started to fail;
IMG_6093 by Chris 155, on FlickrAnd today we plugged all the holes (including the rear bank plug holes) and gave a it a clean with degreaser and a pressure washer.
IMG_6099 by Chris 155, on FlickrIMG_6100 by Chris 155, on FlickrIMG_6097 by Chris 155, on FlickrMy Dad was using an air line from the compressor to dry it off... So it's now cleaner but not entirely clean. Next up is more cleaning, take the box off and check the clutch.
02-08-15
We've been busy with other family commitments of late, notably me nephew's 1st birthday (he's so ace) but I have done a few jobs. I've stripped the front of the engine to change the cam belt, tensioner, water pump and sundries;
IMG_6335 by Chris 155, on FlickrCam covers as they came of the engine. Since been refurbished / in the process of being...
IMG_6340 by Chris 155, on Flickr\And then I started playing with filters on the flash guns.... These are my first attempts using filters and an 80's relic TBH... but anyway...
Before belt...
IMG_6346 by Chris 155, on FlickrAnd after I'd done the belt etc;
IMG_6347-2 by Chris 155, on Flickr14-08-15
It's taken 2 weeks due to other commitments but I've stripped back the old paint on the covers, repainted them with etch primer and silver paint, then lacquered them, which I didn't do last time and the paint didn't last well as a consequence.
IMG_6352 by Chris 155, on FlickrIMG_6355 by Chris 155, on FlickrI then used a sanding block and 800 grit paper and 1000g wet and dry to polish the lettering and ribs in the plenum/colipack cover;
Untitled by Chris 155, on FlickrUntitled by Chris 155, on FlickrFinally I've repainted the lettering in red but I did something a little bit different;
IMG_6694 by Chris 155, on FlickrIMG_6698 by Chris 155, on FlickrIMG_6699-2 by Chris 155, on FlickrIMG_6701 by Chris 155, on Flickr22-08-15
Had yesterday off so I spent some time on it, same again today... Finished rebuilding the engine on Friday;
 IMG_6802 by Chris 155, on Flickr
 IMG_6804 by Chris 155, on Flickr
 IMG_6805 by Chris 155, on Flickr
 IMG_6800 by Chris 155, on Flickr
It doesn't seem like much but because I was cleaning everything before I put it back together just rebuilding the engine from where I last left it too 8 hours. It's the little things like retaking all the threads that takes the time...
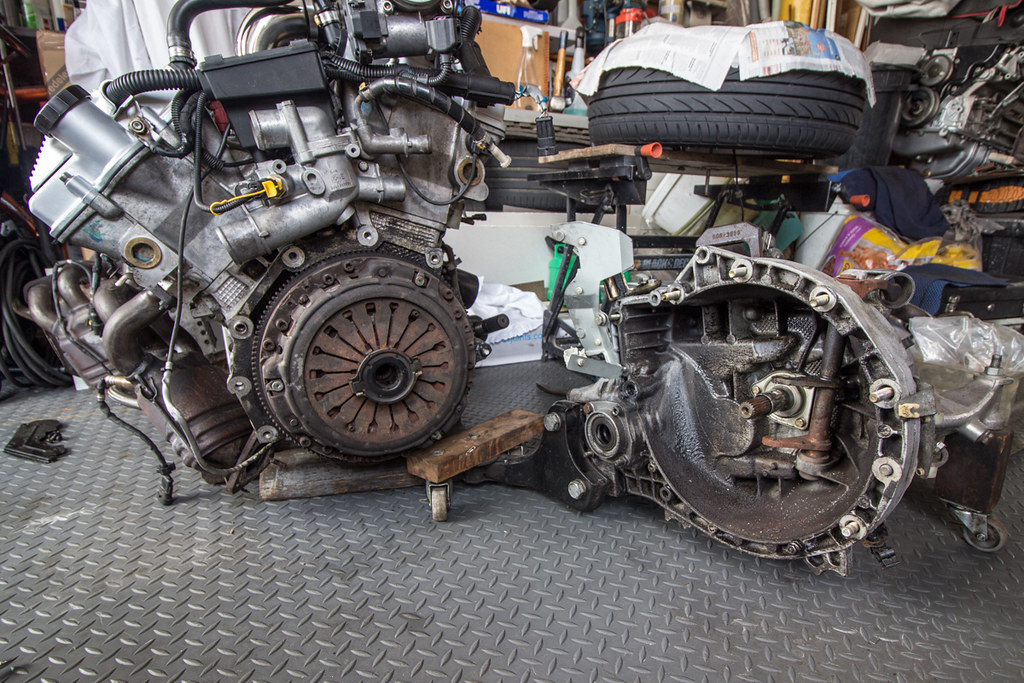
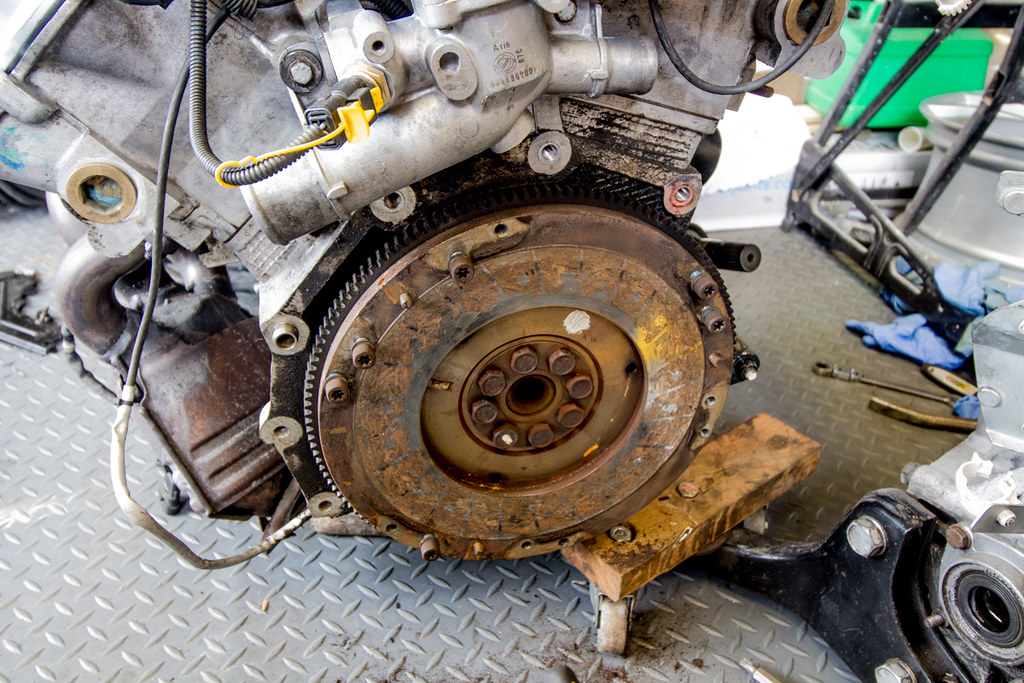
And today I started on the gearbox / clutch. Separating them was easy enough but it revealed a bit of an issue with oil - as in where did it come from...
 IMG_6808 by Chris 155, on Flickr
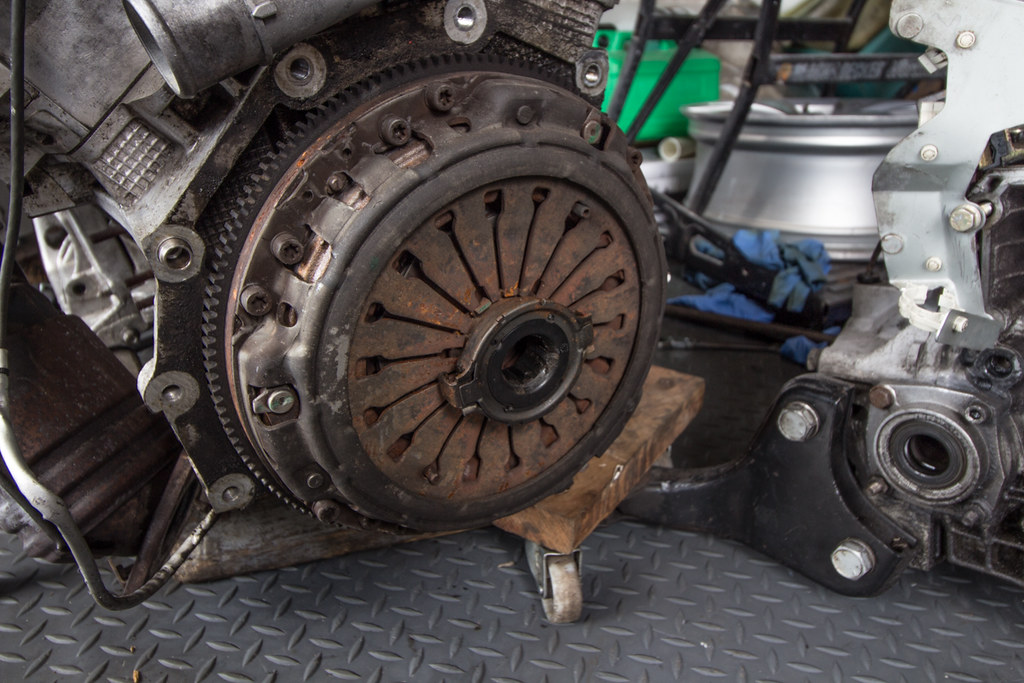
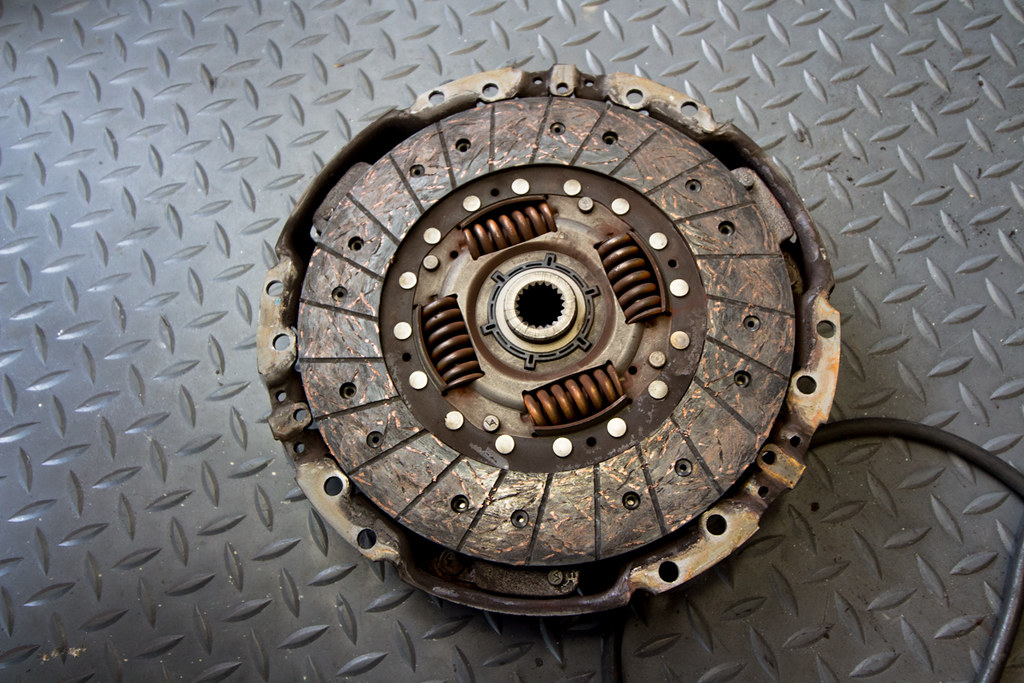
The clutch has pretty much had it, nearly worn down past the grooves and it was heavy. That might be something to do with the actuating arm though which is very stiff and needs looking at.
 IMG_6810 by Chris 155, on Flickr
 IMG_6812 by Chris 155, on Flickr
 IMG_6815 by Chris 155, on Flickr
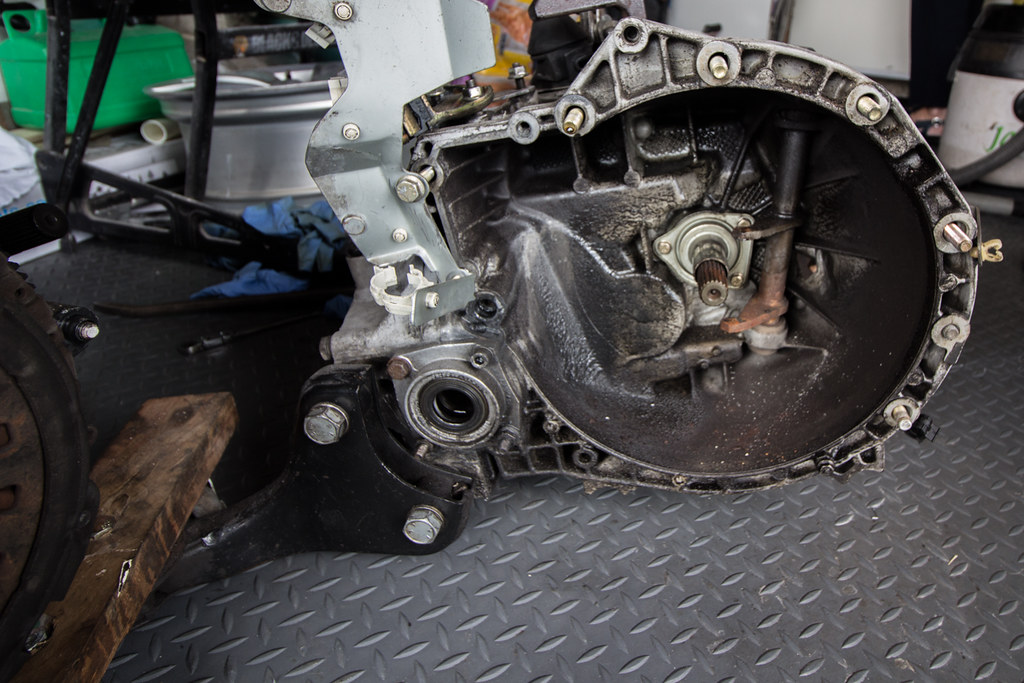
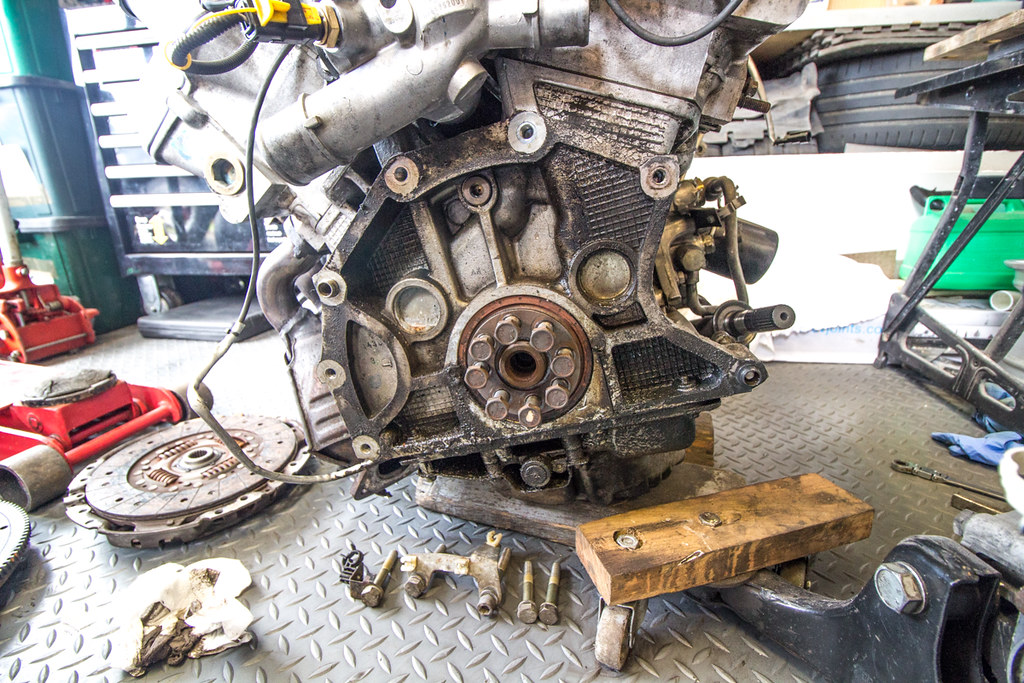
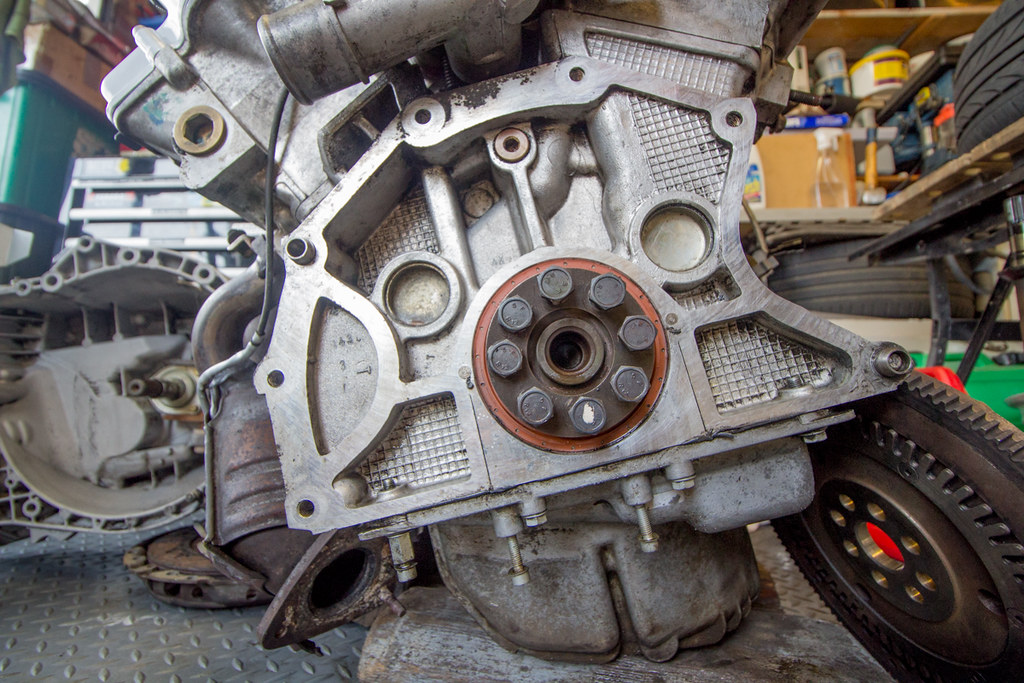
The good news is that it's not leaking from the rear main seal;
 IMG_6814 by Chris 155, on Flickr
 IMG_6816 by Chris 155, on Flickr
Although there is a lot of oil around it... Cam cover gaskets again maybe...
Then it was out with the degreaser (again) and the pressure washer for more hours of fun.:depressed:
 IMG_6817 by Chris 155, on Flickr
No... I didn't use it on the engine, tempting as that was, it would have made a bit of a mess I think.
 IMG_6819 by Chris 155, on Flickr
 IMG_6821 by Chris 155, on Flickr
So that was another 6 hours worth of work. I reckon about 50 hours has gone into it now since I took the engine out and I'm not even halfway there!
Had yesterday off so I spent some time on it, same again today... Finished rebuilding the engine on Friday;
IMG_6802 by Chris 155, on FlickrIMG_6804 by Chris 155, on FlickrIMG_6805 by Chris 155, on FlickrIMG_6800 by Chris 155, on FlickrIt doesn't seem like much but because I was cleaning everything before I put it back together just rebuilding the engine from where I last left it too 8 hours. It's the little things like retaking all the threads that takes the time...
And today I started on the gearbox / clutch. Separating them was easy enough but it revealed a bit of an issue with oil - as in where did it come from...
IMG_6808 by Chris 155, on FlickrThe clutch has pretty much had it, nearly worn down past the grooves and it was heavy. That might be something to do with the actuating arm though which is very stiff and needs looking at.
IMG_6810 by Chris 155, on FlickrIMG_6812 by Chris 155, on FlickrIMG_6815 by Chris 155, on FlickrThe good news is that it's not leaking from the rear main seal;
IMG_6814 by Chris 155, on FlickrIMG_6816 by Chris 155, on FlickrAlthough there is a lot of oil around it... Cam cover gaskets again maybe...
Then it was out with the degreaser (again) and the pressure washer for more hours of fun.:depressed:
IMG_6817 by Chris 155, on FlickrNo... I didn't use it on the engine, tempting as that was, it would have made a bit of a mess I think.
IMG_6819 by Chris 155, on FlickrIMG_6821 by Chris 155, on FlickrSo that was another 6 hours worth of work. I reckon about 50 hours has gone into it now since I took the engine out and I'm not even halfway there!
31-08-15
Had yesterday off so I spent some time on it, same again today... Finished rebuilding the engine on Friday;
IMG_6802 by Chris 155, on Flickr
IMG_6804 by Chris 155, on Flickr
IMG_6805 by Chris 155, on Flickr
IMG_6800 by Chris 155, on Flickr
It doesn't seem like much but because I was cleaning everything before I put it back together just rebuilding the engine from where I last left it too 8 hours. It's the little things like retaking all the threads that takes the time...
And today I started on the gearbox / clutch. Separating them was easy enough but it revealed a bit of an issue with oil - as in where did it come from...
IMG_6808 by Chris 155, on Flickr
The clutch has pretty much had it, nearly worn down past the grooves and it was heavy. That might be something to do with the actuating arm though which is very stiff and needs looking at.
IMG_6810 by Chris 155, on Flickr
IMG_6812 by Chris 155, on Flickr
IMG_6815 by Chris 155, on Flickr
The good news is that it's not leaking from the rear main seal;
IMG_6814 by Chris 155, on Flickr
IMG_6816 by Chris 155, on Flickr
Although there is a lot of oil around it... Cam cover gaskets again maybe...
Then it was out with the degreaser (again) and the pressure washer for more hours of fun.:depressed:
IMG_6817 by Chris 155, on Flickr
No... I didn't use it on the engine, tempting as that was, it would have made a bit of a mess I think.
IMG_6819 by Chris 155, on Flickr
IMG_6821 by Chris 155, on Flickr
So that was another 6 hours worth of work. I reckon about 50 hours has gone into it now since I took the engine out and I'm not even halfway there!
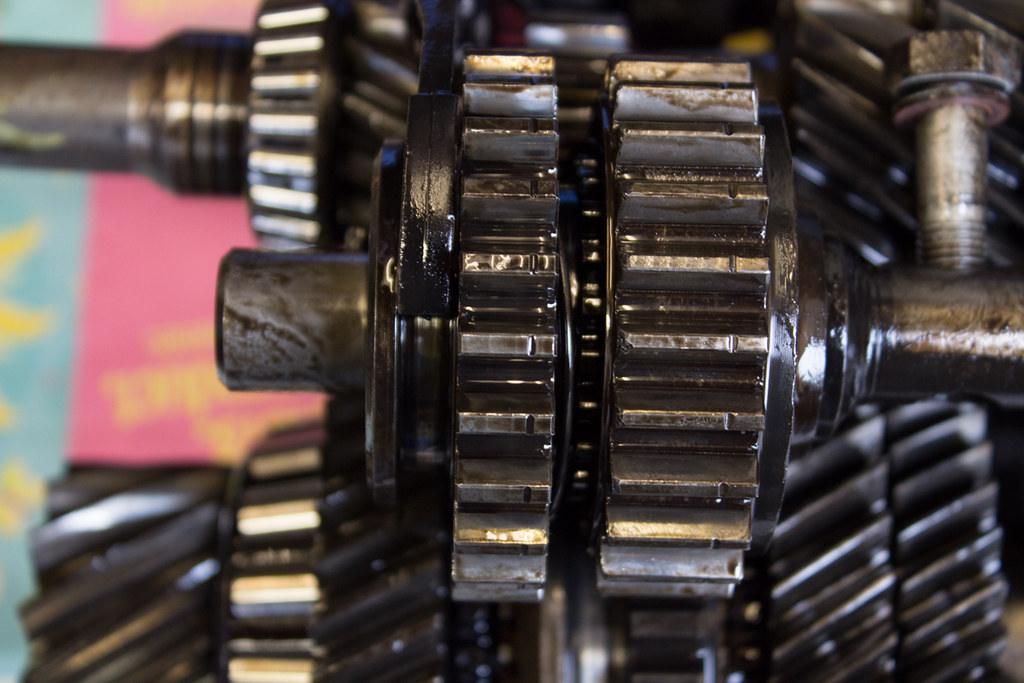
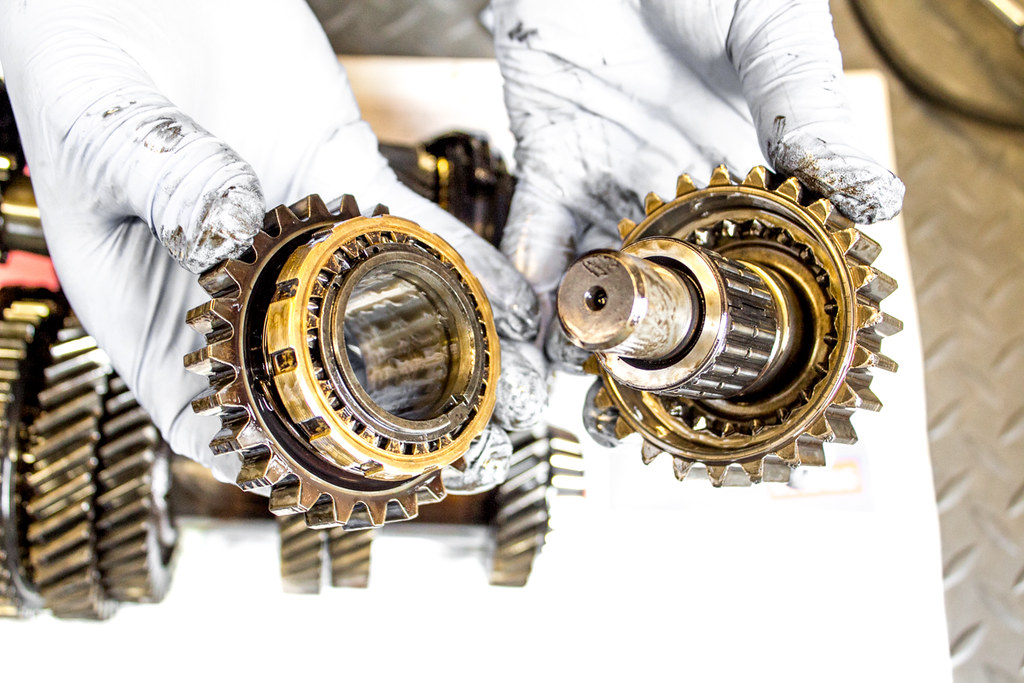
And this is 2nd gear. The box has been rebuilt following the expiration of the standard diff, I suspect that the marks on the gears will be as a result of this but could this be the cause of the whine it has in 2nd only?
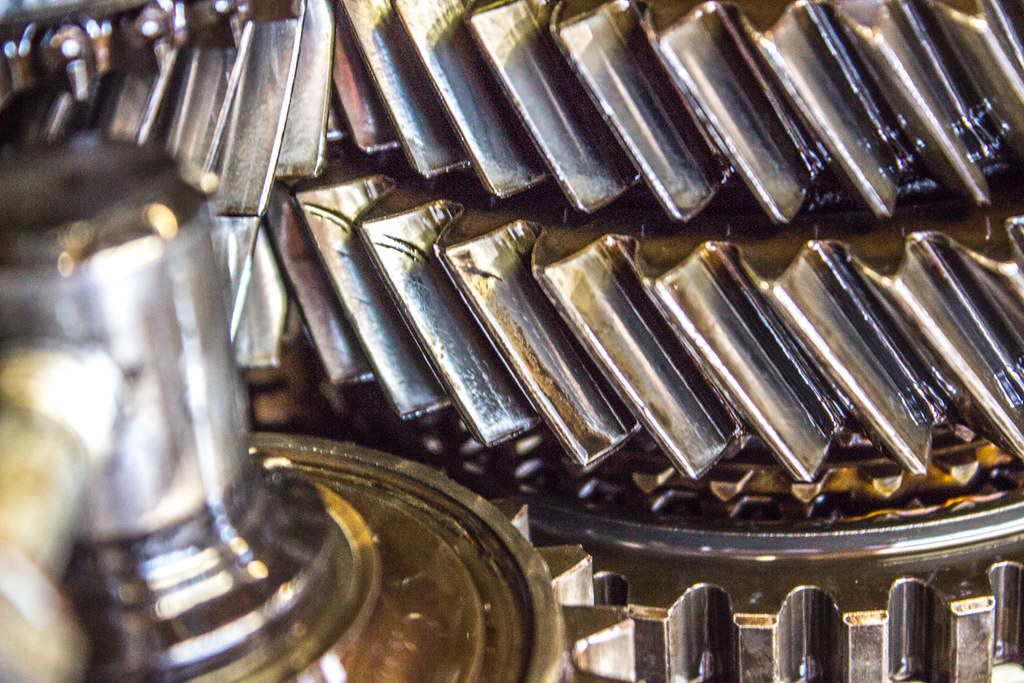 IMG_7068 by Chris 155, on Flickr
 IMG_7072 by Chris 155, on Flickr
 IMG_7074-2 by Chris 155, on Flickr
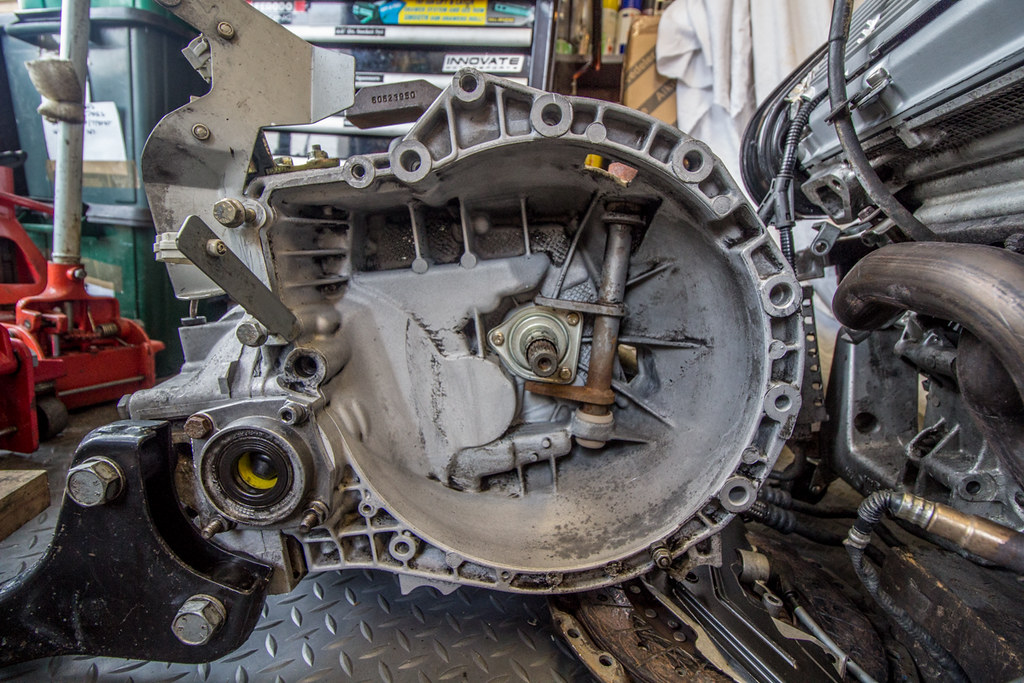
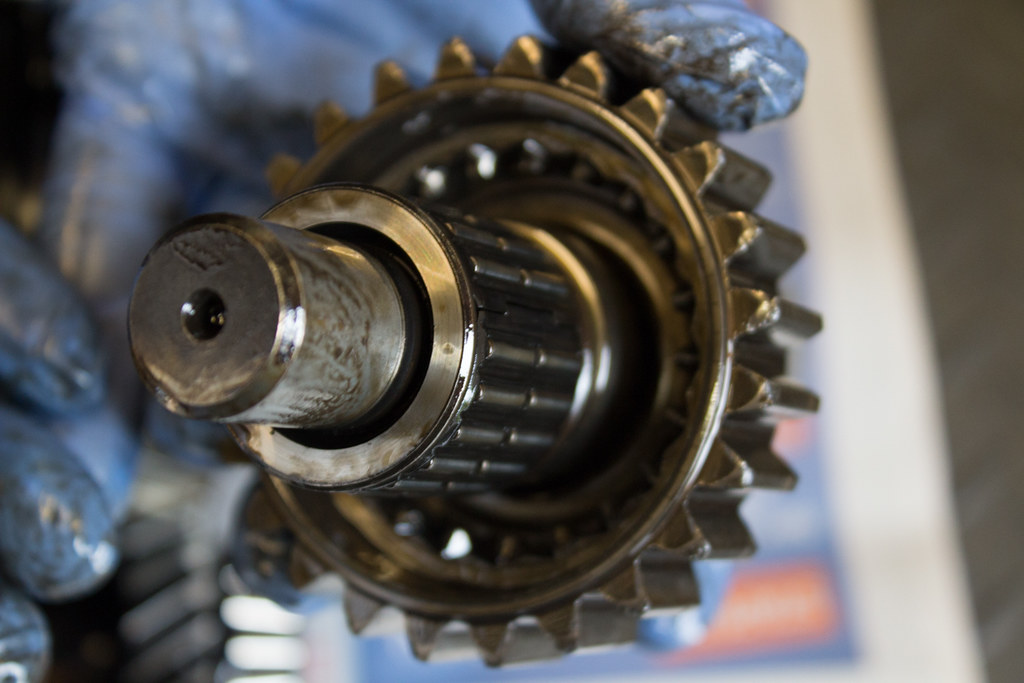
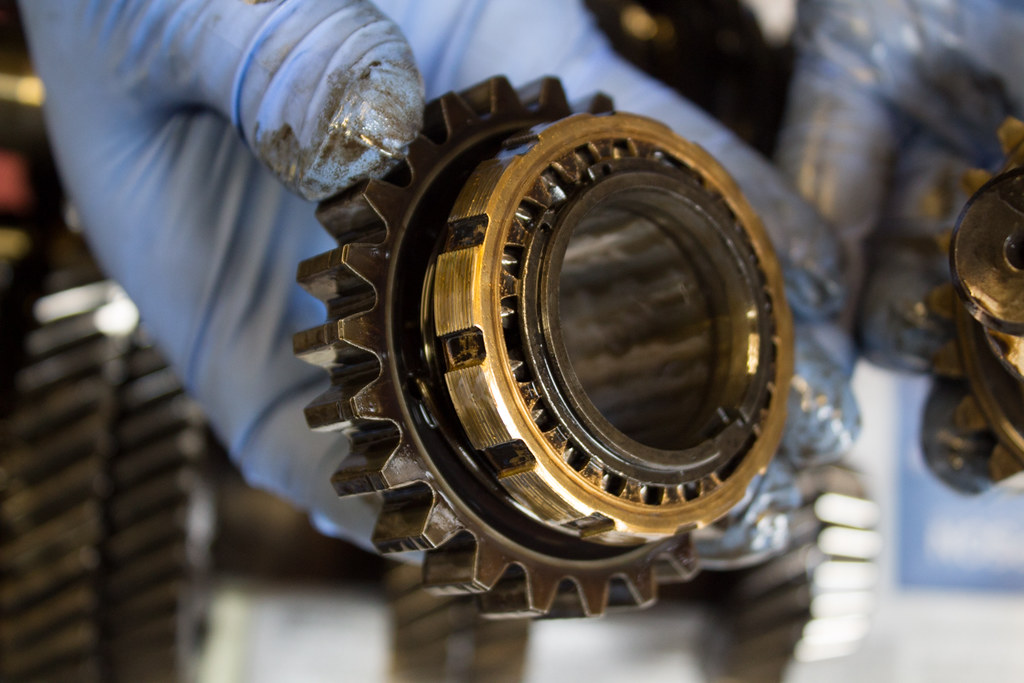
Back to reverse. If you move the selector ring to engage reverse, it doesn't lock into position like the other gears do. I don't really understand how it is supposed to work as the other gears use a different mechanism (3 roller bearings with springs behind them that lock into a groove on the inside of the gear).
This is it in it's disengaged state
 IMG_7077 by Chris 155, on Flickr
And engaged...
 IMG_7076 by Chris 155, on Flickr
There's not really anything to it and I can't see anything missing relative to what's on elearn.
 IMG_7078 by Chris 155, on Flickr
 IMG_7079 by Chris 155, on Flickr
 IMG_7080 by Chris 155, on Flickr
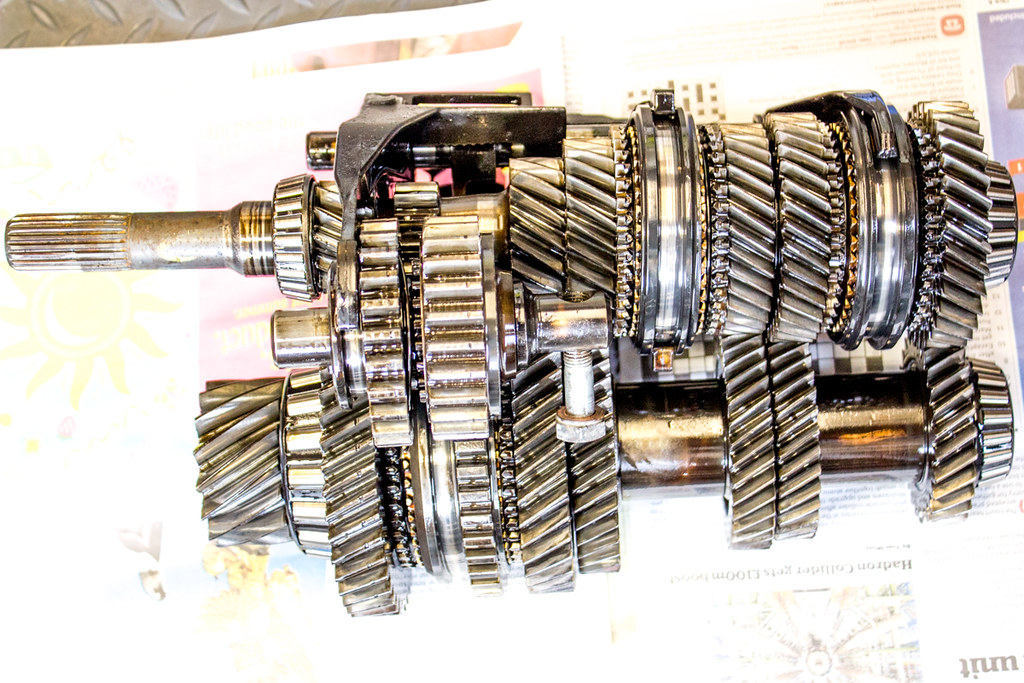
But if you prod at it in its disengaged state in the open box there is significant movement in the deeper (thicker) top cog, like something is amiss. (see video below) There is a point where I think the two parts will hold the top cog in a correct position and not allow it to rattle around whilst still not being engaged but I can't see how this would be achieved. There doesn't appear to be any means of adjustment.
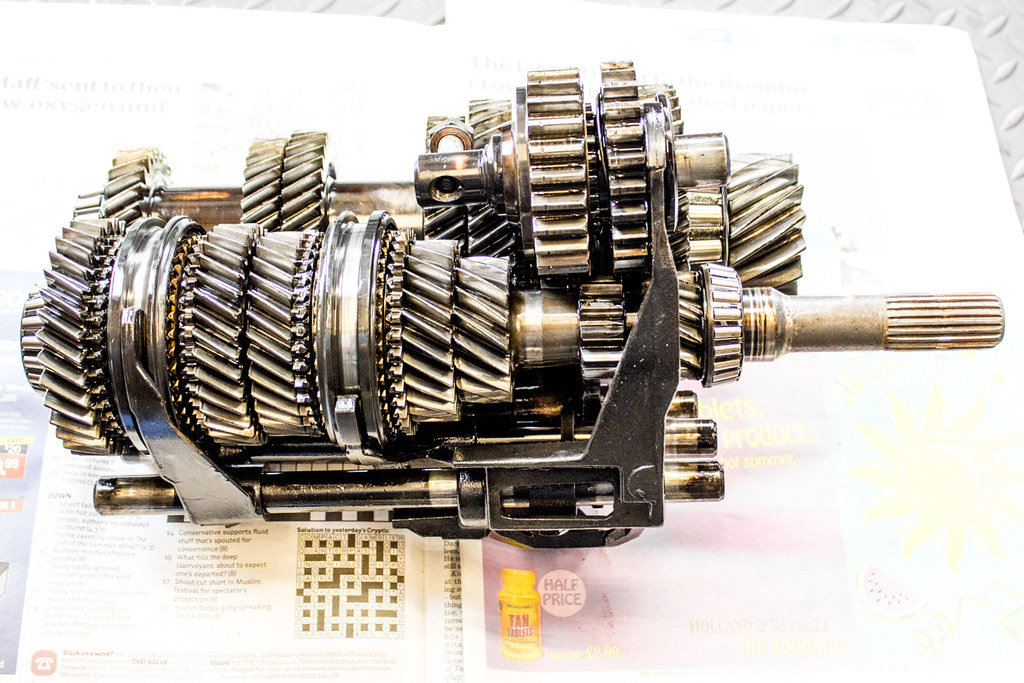
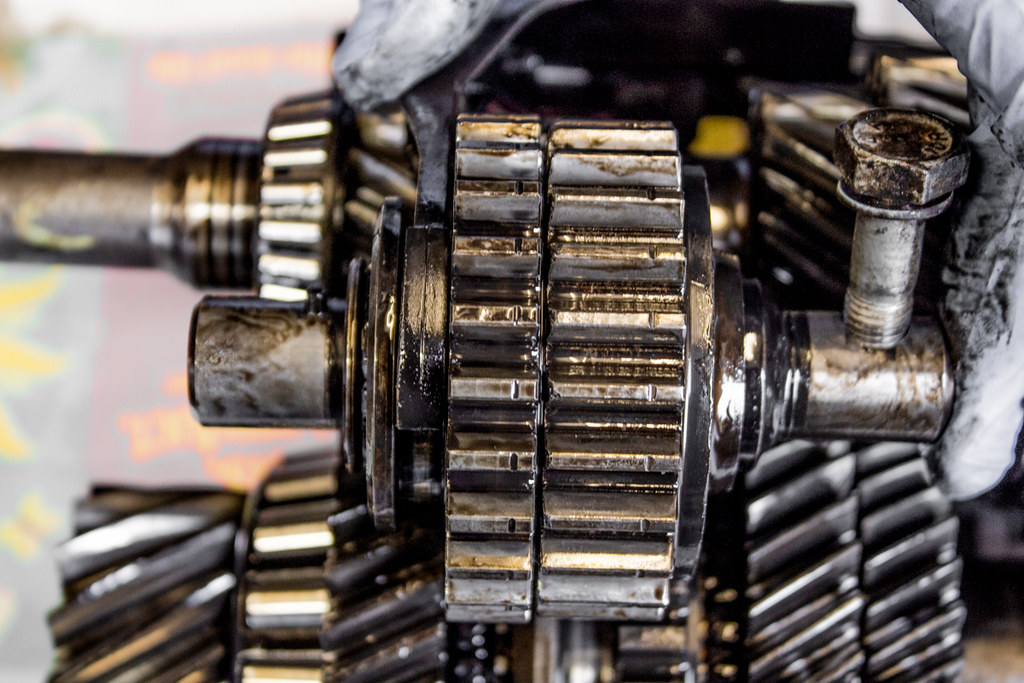
Pic below is of of the 2 main shafts in the box, reverse operates as a 3rd gear between the two so that, obviously, one the output shaft turns in the opposite direction...
The shaft at the top of the pic is the input shaft and the one below it is the output. The pinion gear for the crown wheel on the diff is on the thick one on the very left of the output shaft.
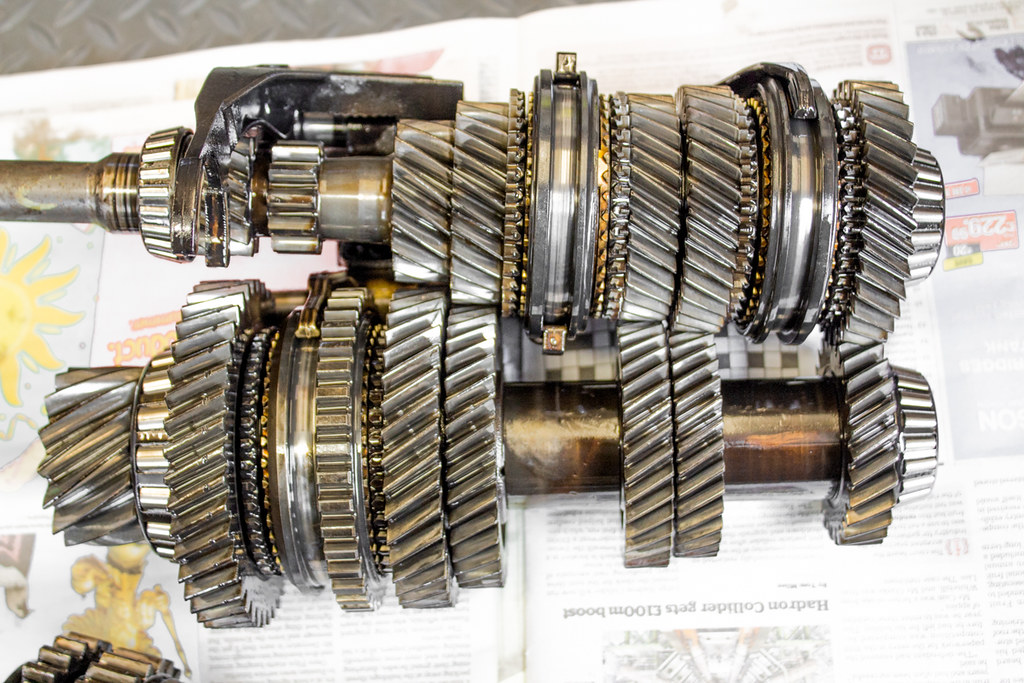 IMG_7082-2 by Chris 155, on Flickr
 IMG_7083 by Chris 155, on Flickr
It's got me beat. Help?
Help? aranoid:
And here is a link to the video I refer to in my latter comment showing the movement in the reverse gear when not engaged. Is this really normal?aranoid:

06-09-15
My Dad found these on eBay, been down to Romford for them today;
 IMG_7138 by Chris 155, on Flickr
 IMG_7139 by Chris 155, on Flickr
 IMG_7141 by Chris 155, on Flickr
Had yesterday off so I spent some time on it, same again today... Finished rebuilding the engine on Friday;
IMG_6802 by Chris 155, on FlickrIMG_6804 by Chris 155, on FlickrIMG_6805 by Chris 155, on FlickrIMG_6800 by Chris 155, on FlickrIt doesn't seem like much but because I was cleaning everything before I put it back together just rebuilding the engine from where I last left it too 8 hours. It's the little things like retaking all the threads that takes the time...
And today I started on the gearbox / clutch. Separating them was easy enough but it revealed a bit of an issue with oil - as in where did it come from...
IMG_6808 by Chris 155, on FlickrThe clutch has pretty much had it, nearly worn down past the grooves and it was heavy. That might be something to do with the actuating arm though which is very stiff and needs looking at.
IMG_6810 by Chris 155, on FlickrIMG_6812 by Chris 155, on FlickrIMG_6815 by Chris 155, on FlickrThe good news is that it's not leaking from the rear main seal;
IMG_6814 by Chris 155, on FlickrIMG_6816 by Chris 155, on FlickrAlthough there is a lot of oil around it... Cam cover gaskets again maybe...
Then it was out with the degreaser (again) and the pressure washer for more hours of fun.:depressed:
IMG_6817 by Chris 155, on FlickrNo... I didn't use it on the engine, tempting as that was, it would have made a bit of a mess I think.
IMG_6819 by Chris 155, on FlickrIMG_6821 by Chris 155, on FlickrSo that was another 6 hours worth of work. I reckon about 50 hours has gone into it now since I took the engine out and I'm not even halfway there!
And this is 2nd gear. The box has been rebuilt following the expiration of the standard diff, I suspect that the marks on the gears will be as a result of this but could this be the cause of the whine it has in 2nd only?
IMG_7068 by Chris 155, on FlickrIMG_7072 by Chris 155, on FlickrIMG_7074-2 by Chris 155, on FlickrBack to reverse. If you move the selector ring to engage reverse, it doesn't lock into position like the other gears do. I don't really understand how it is supposed to work as the other gears use a different mechanism (3 roller bearings with springs behind them that lock into a groove on the inside of the gear).
This is it in it's disengaged state
IMG_7077 by Chris 155, on FlickrAnd engaged...
IMG_7076 by Chris 155, on FlickrThere's not really anything to it and I can't see anything missing relative to what's on elearn.
IMG_7078 by Chris 155, on FlickrIMG_7079 by Chris 155, on FlickrIMG_7080 by Chris 155, on FlickrBut if you prod at it in its disengaged state in the open box there is significant movement in the deeper (thicker) top cog, like something is amiss. (see video below) There is a point where I think the two parts will hold the top cog in a correct position and not allow it to rattle around whilst still not being engaged but I can't see how this would be achieved. There doesn't appear to be any means of adjustment.
Pic below is of of the 2 main shafts in the box, reverse operates as a 3rd gear between the two so that, obviously, one the output shaft turns in the opposite direction...
The shaft at the top of the pic is the input shaft and the one below it is the output. The pinion gear for the crown wheel on the diff is on the thick one on the very left of the output shaft.
IMG_7082-2 by Chris 155, on FlickrIMG_7083 by Chris 155, on FlickrIt's got me beat.
Help?aranoid:And here is a link to the video I refer to in my latter comment showing the movement in the reverse gear when not engaged. Is this really normal?
aranoid:06-09-15
My Dad found these on eBay, been down to Romford for them today;
IMG_7138 by Chris 155, on FlickrIMG_7139 by Chris 155, on FlickrIMG_7141 by Chris 155, on FlickrAnd the last month;
Soooo... carrying on... Bits to refurb the alternator arrived yesterday. (I don't even need to ask, my Dad'll likely take that at some point...)
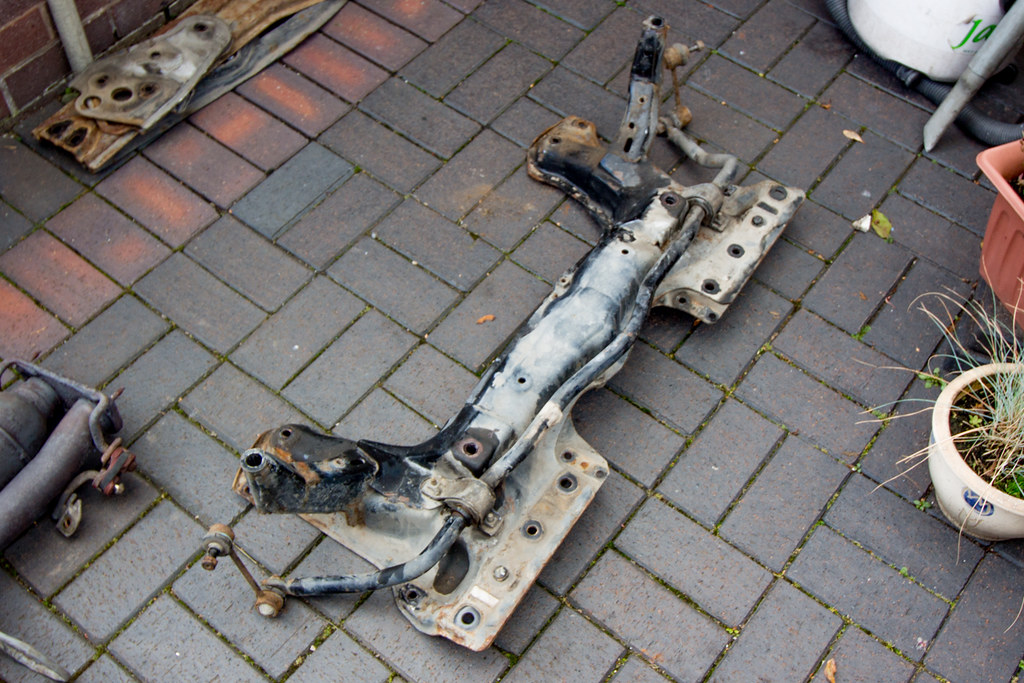
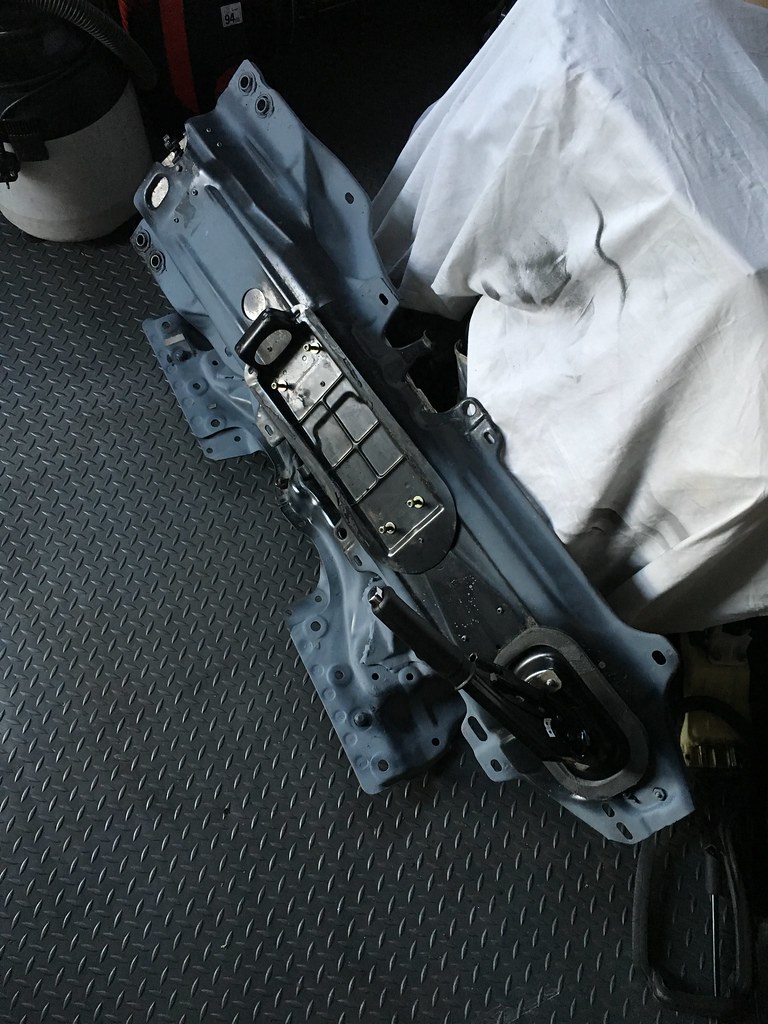
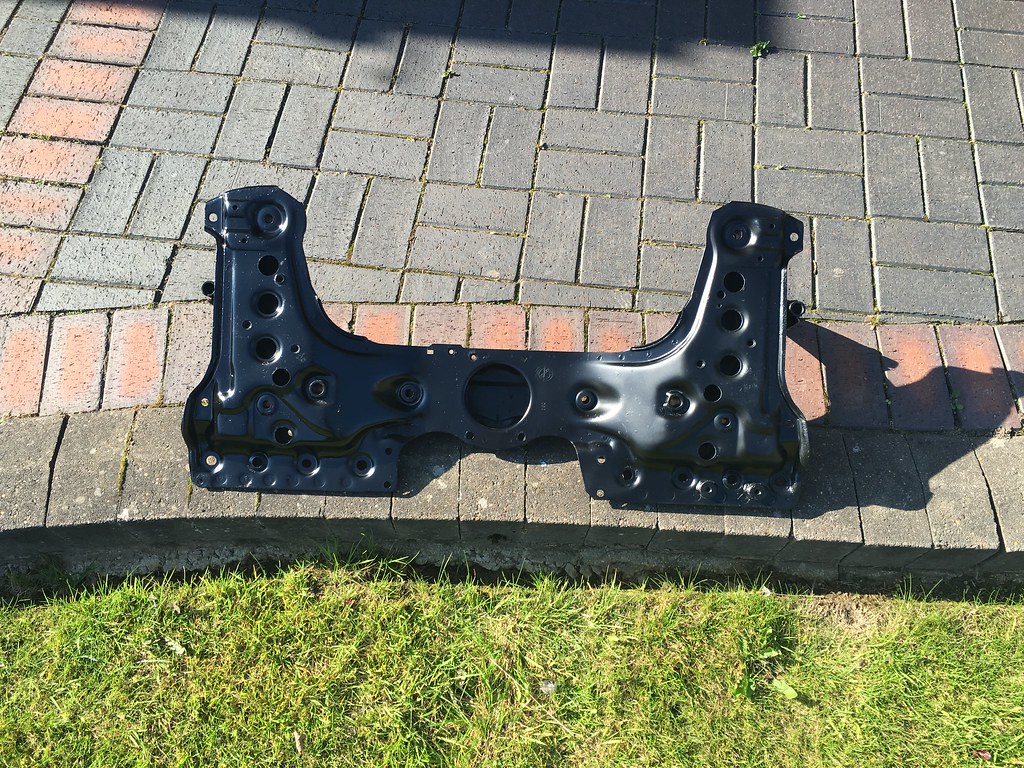
The subframe was a PITA when I was trying to get the engine out, I've explained why I left it in place previously but there's no way I was going to try and put the engine back in with it fitted. Been there, done that and reconfirmed my view that it's categorically easier to refit the engine with it out of the way. In terms of both time and skill. There is no argument in my mind anymore. It is the most efficient way of getting the engine and out.
Buuuut to add fuel to that argument, it was going rusty and needed attention. My Dad has also sourced some new gearbox cables via eBay and a new gear leaver base but I stand by my thoughts regardless.
Pics showing removal of the subframe and transmission tunnel now follow...
 IMG_8770 by Chris 155, on Flickr
 IMG_8775 by Chris 155, on Flickr
 IMG_8778 by Chris 155, on Flickr
 IMG_8781 by Chris 155, on Flickr
 IMG_8784 by Chris 155, on Flickr
 IMG_8787 by Chris 155, on Flickr
 IMG_8793 by Chris 155, on Flickr
 IMG_8796-2 by Chris 155, on Flickr
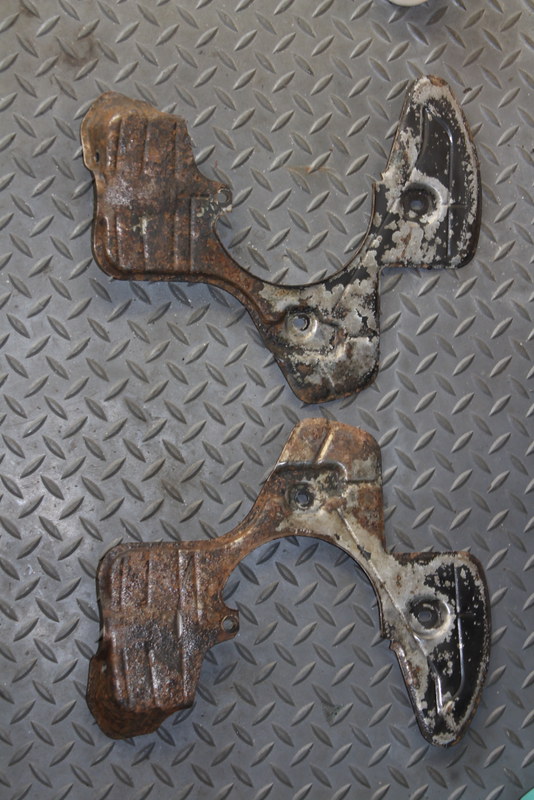
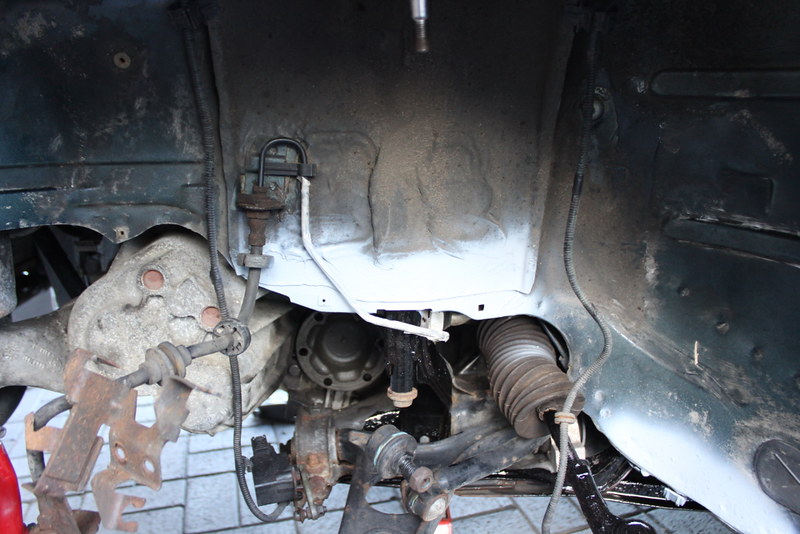
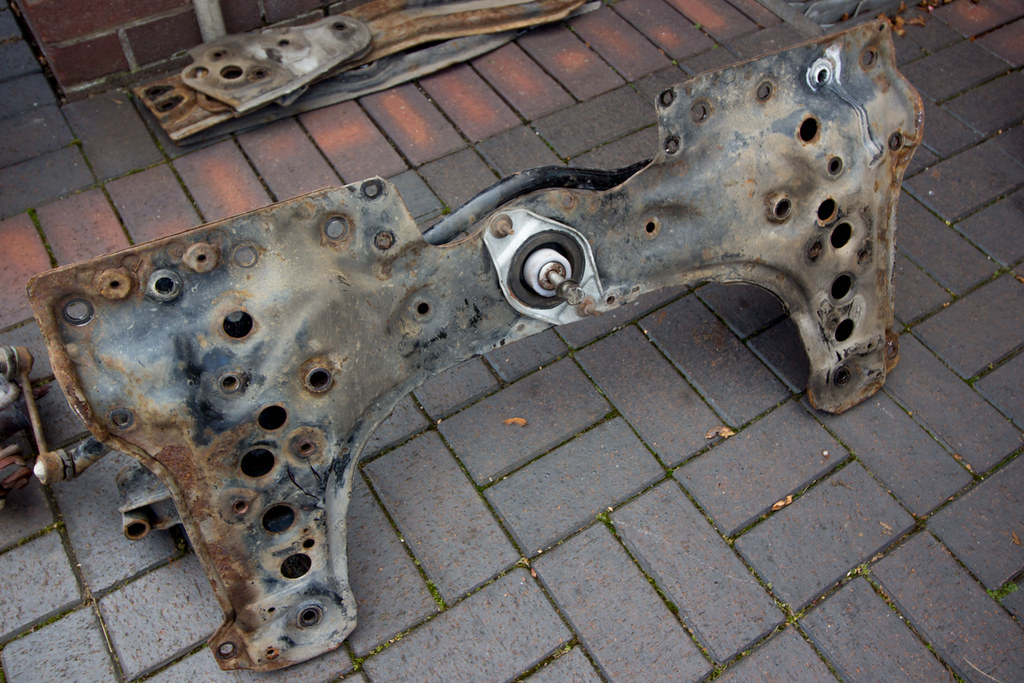
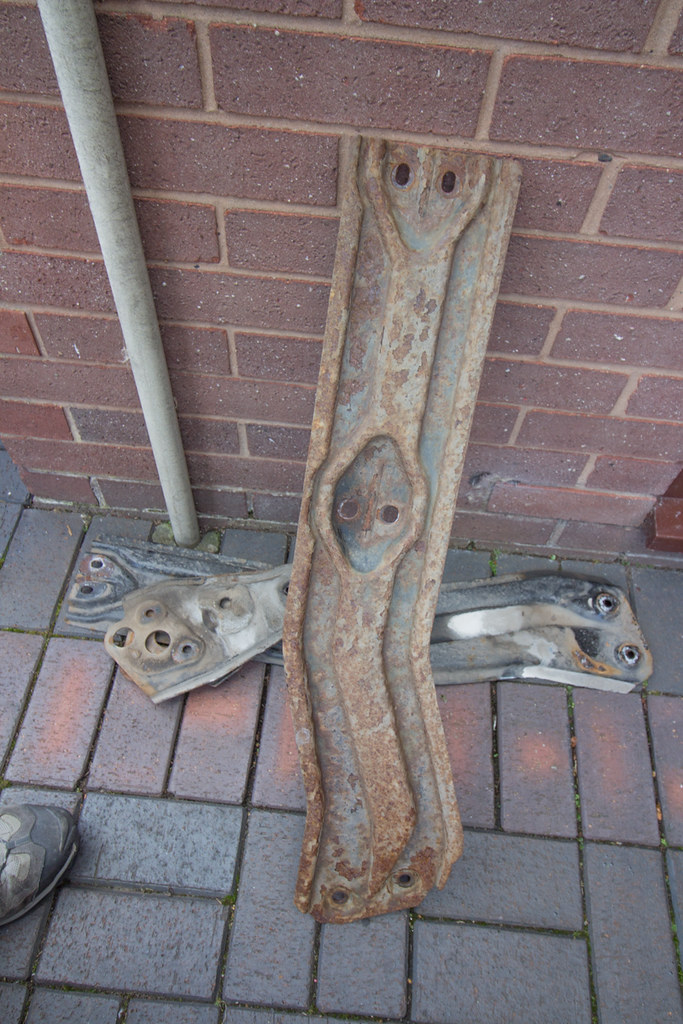
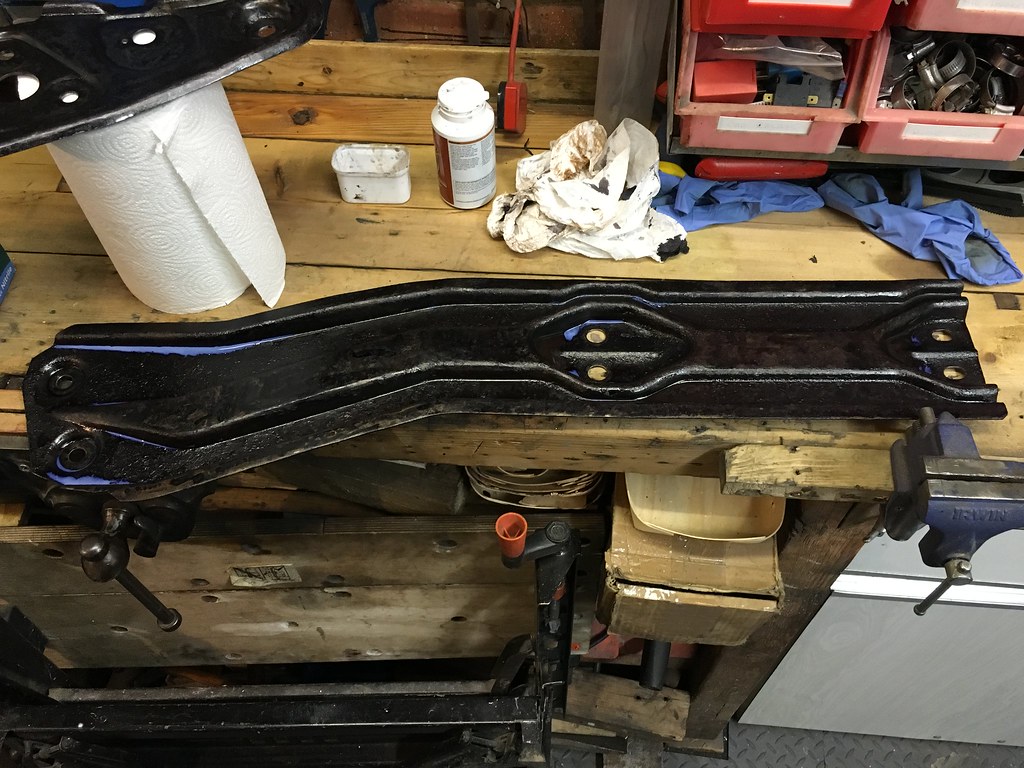
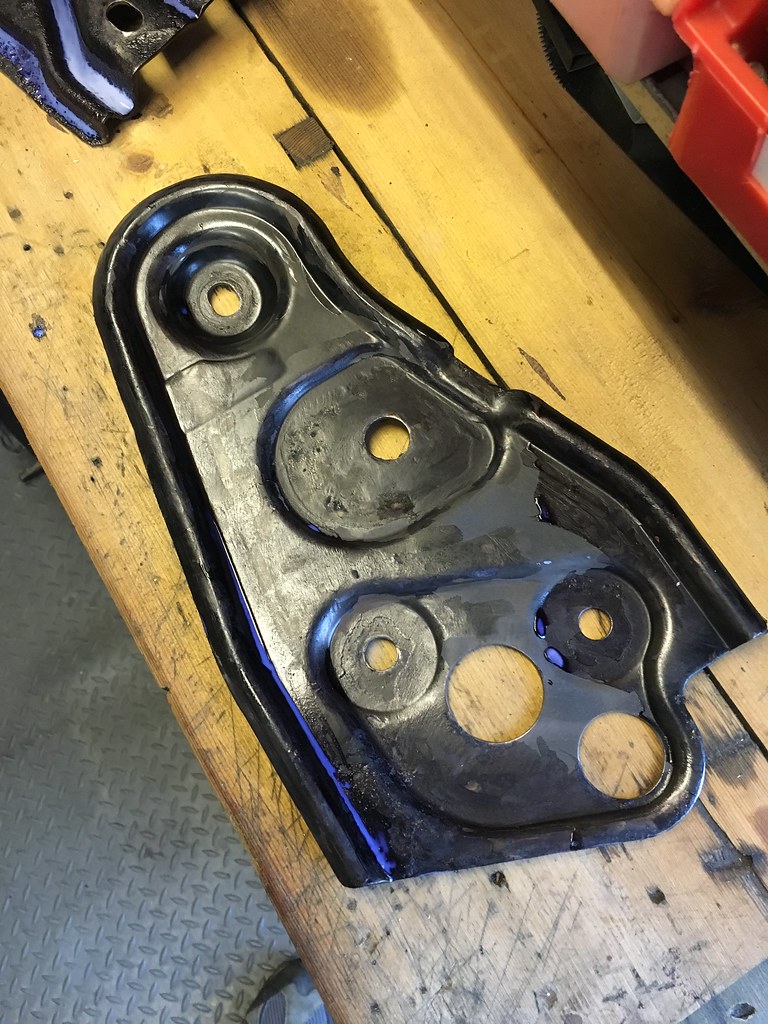
We've spent the last week cleaning up the subframe transmission tunnel and the stiffening plates;
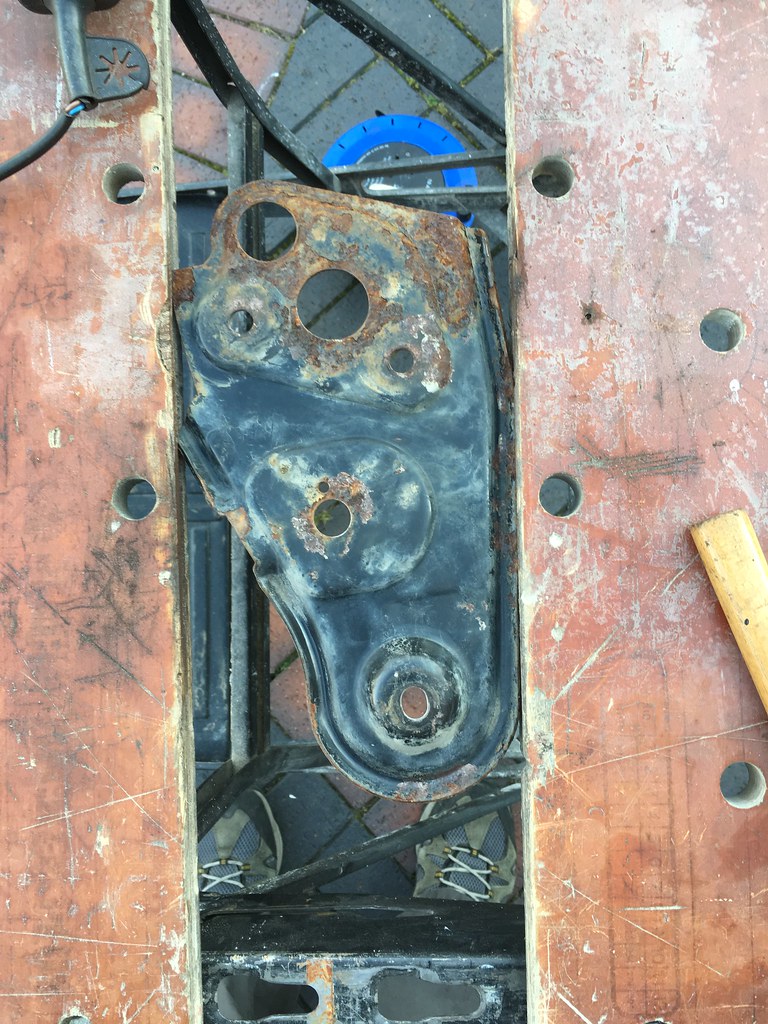 Untitled by Chris 155, on Flickr
After spending a decent amount of time with a drill and wire brushes....
 Untitled by Chris 155, on Flickr
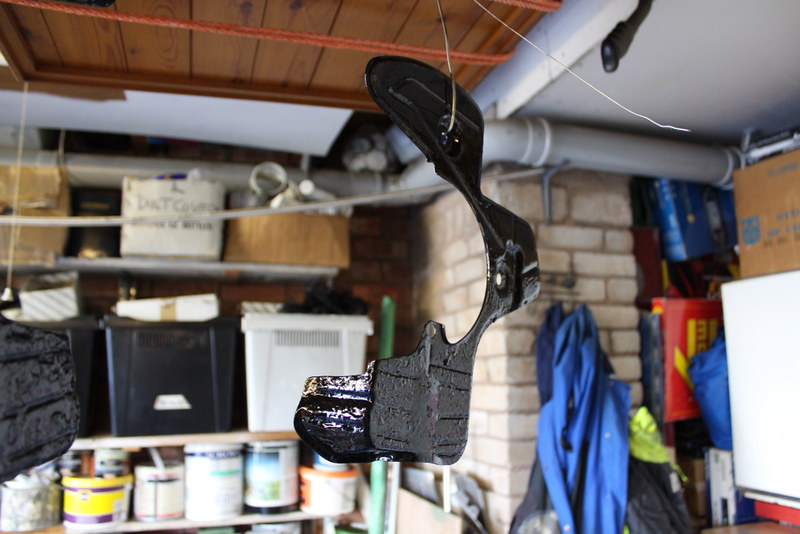
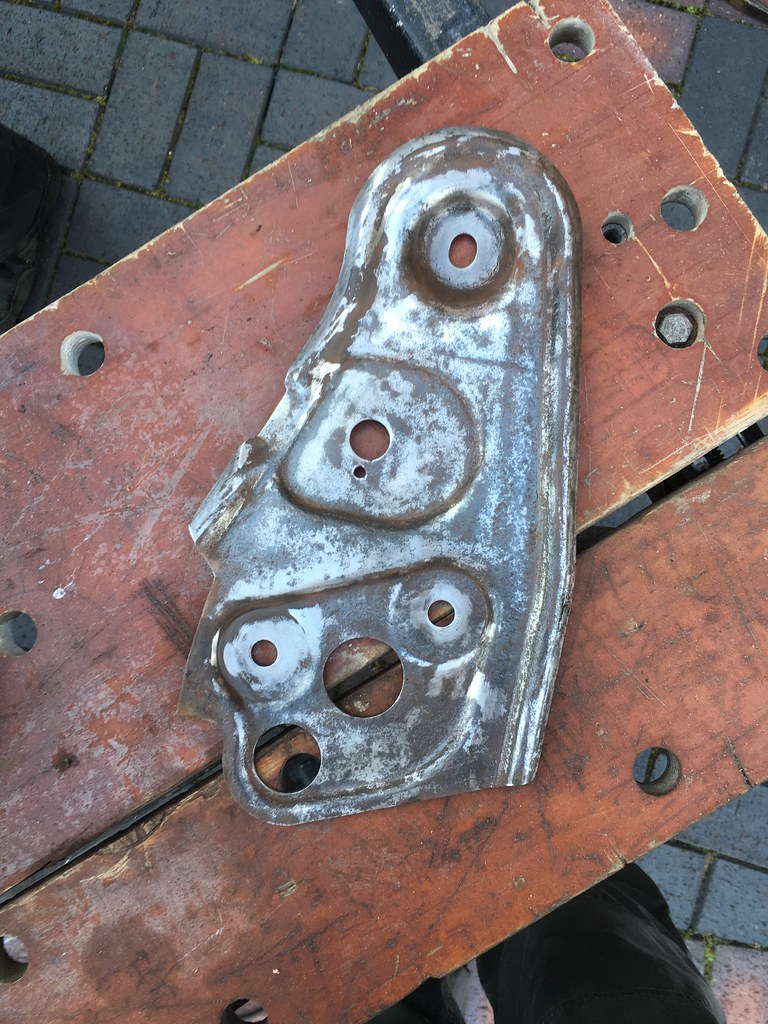
Then treated with rust killer...
 Untitled by Chris 155, on Flickr
 Untitled by Chris 155, on Flickr
Then etch primed and repainted...
 Untitled by Chris 155, on Flickr
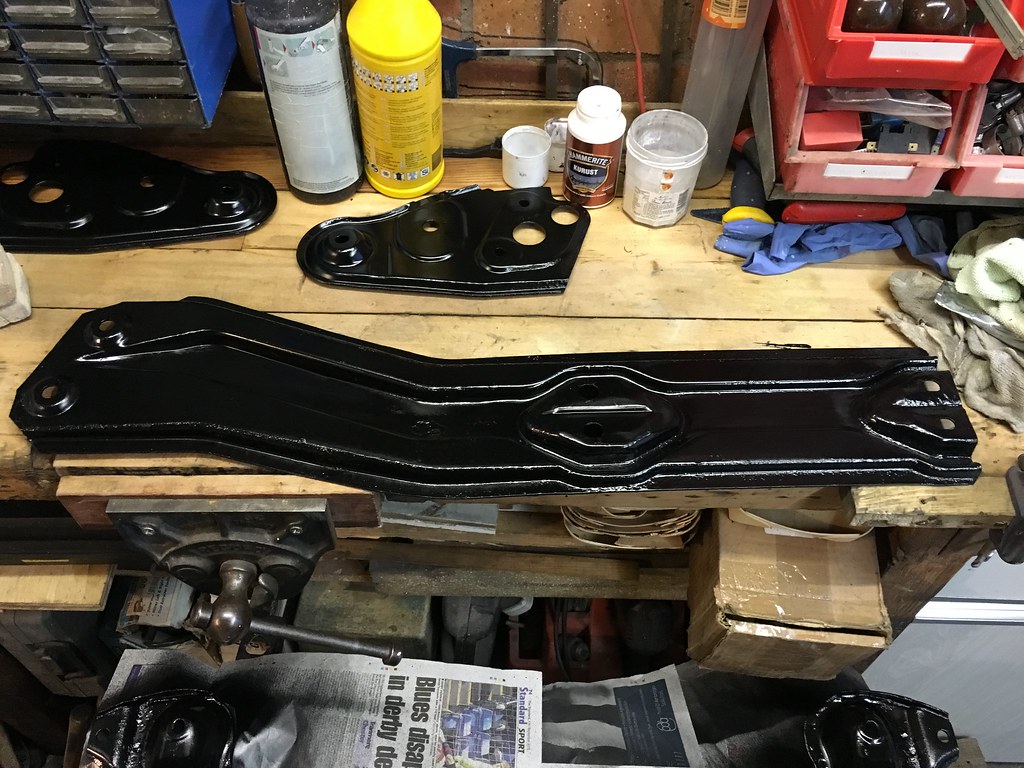 Untitled by Chris 155, on Flickr
 Untitled by Chris 155, on Flickr
 Untitled by Chris 155, on Flickr
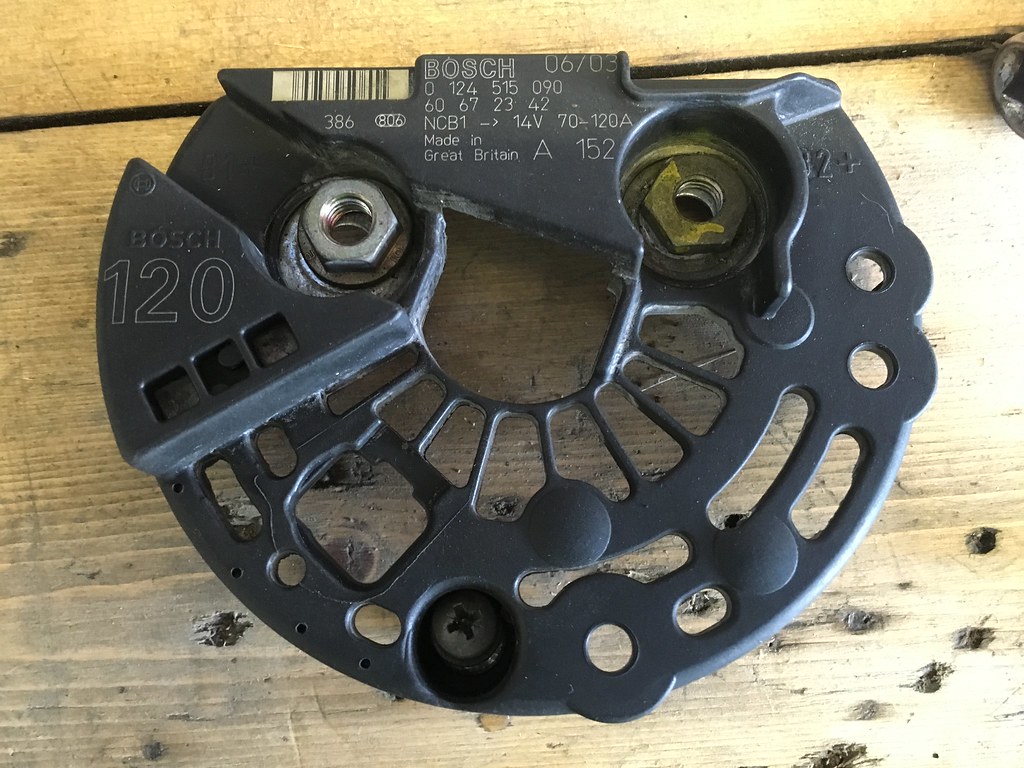
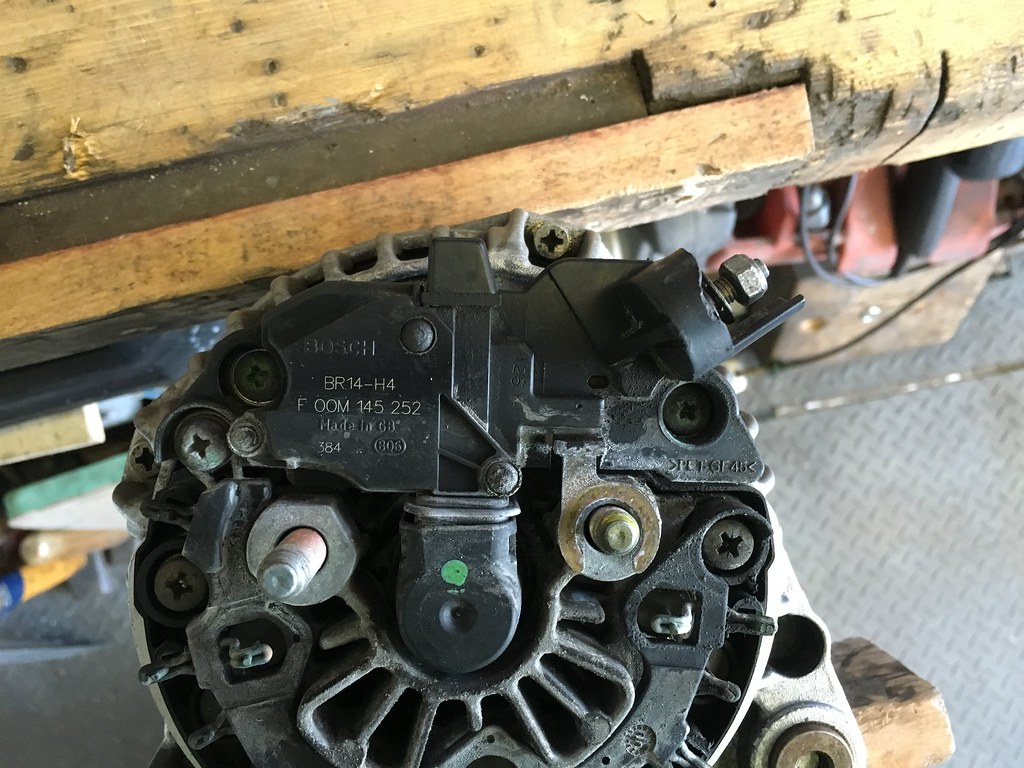
And yesterday I replaced the voltage regulator on the alternator as a precautionary measure, which was an easy job...
 Untitled by Chris 155, on Flickr
 Untitled by Chris 155, on Flickr
 Untitled by Chris 155, on Flickr
Regulator removed;
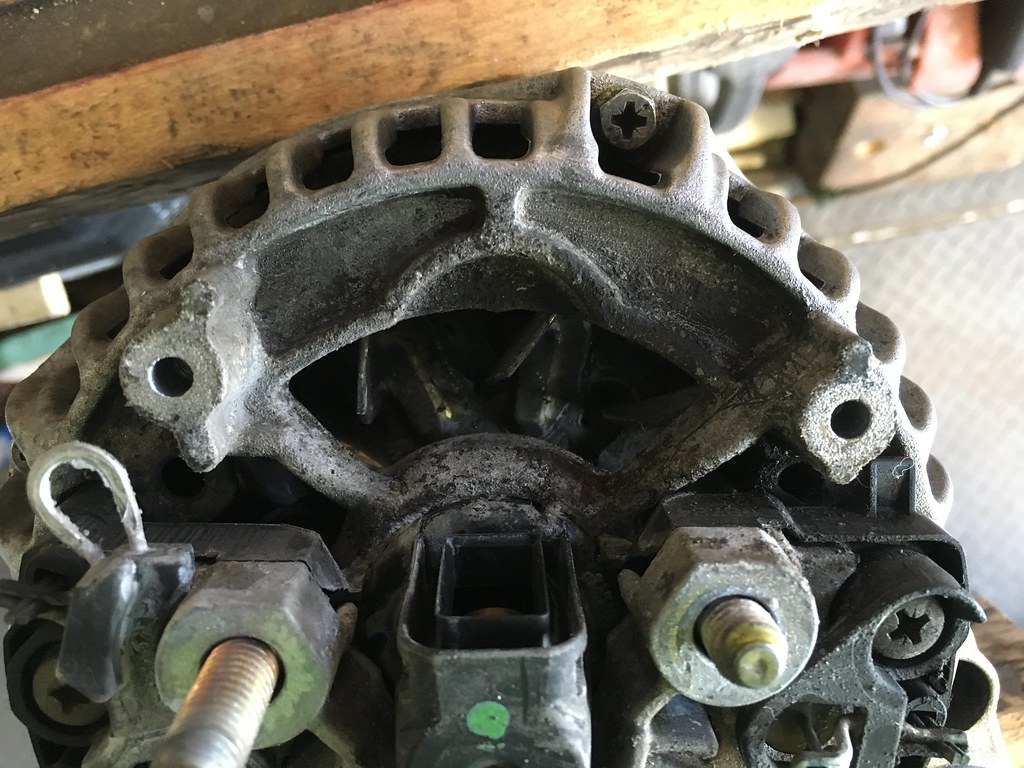 Untitled by Chris 155, on Flickr
New vs old - you can see the difference in the brushes, the old one looks to be nearing the end of it's life;
 Untitled by Chris 155, on Flickr
And back on the engine with the wiring harness and starter motor too...
 Untitled by Chris 155, on Flickr
It's now nearly ready to go back in. :big laugh:
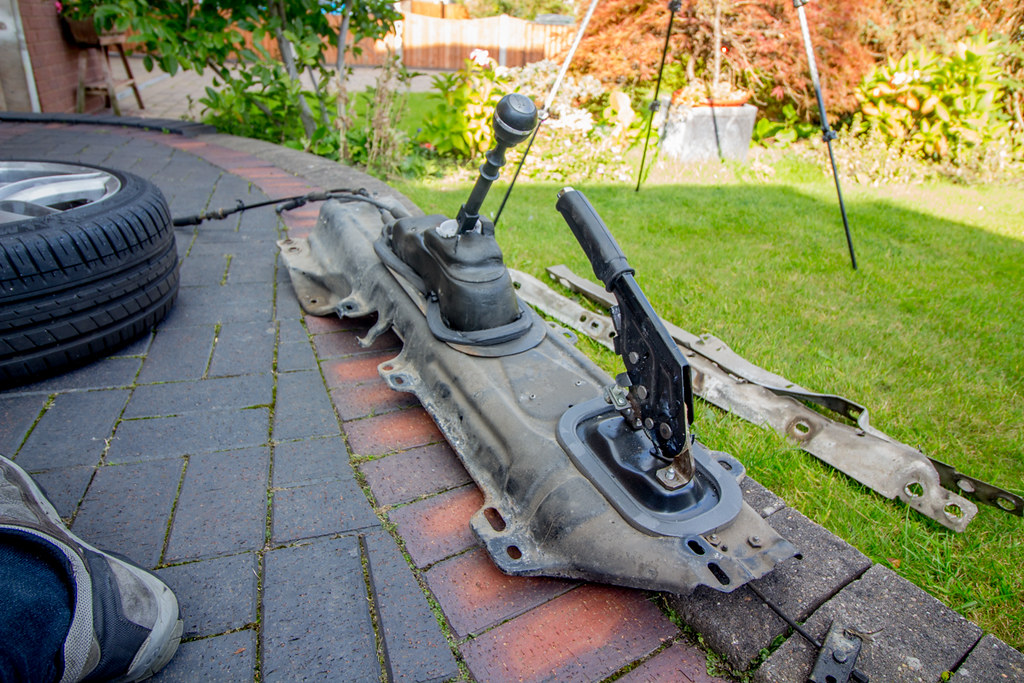
It seems I didn't mention it in my last post - we dropped the transmission tunnel to replace the gear lever base, the gear selection cables (my dad's earlier fix is still sound though) and tighten the handbrake mounts as they had worked themselves loose which meant the hand brake would knock itself off on occasion
We put the engine back in today (yay!):
 IMG_9304 by Chris 155, on Flickr
 IMG_9305 by Chris 155, on Flickr
With new front and rear bank lambdas which was another reason why I took the engine out...
 IMG_9303 by Chris 155, on Flickr
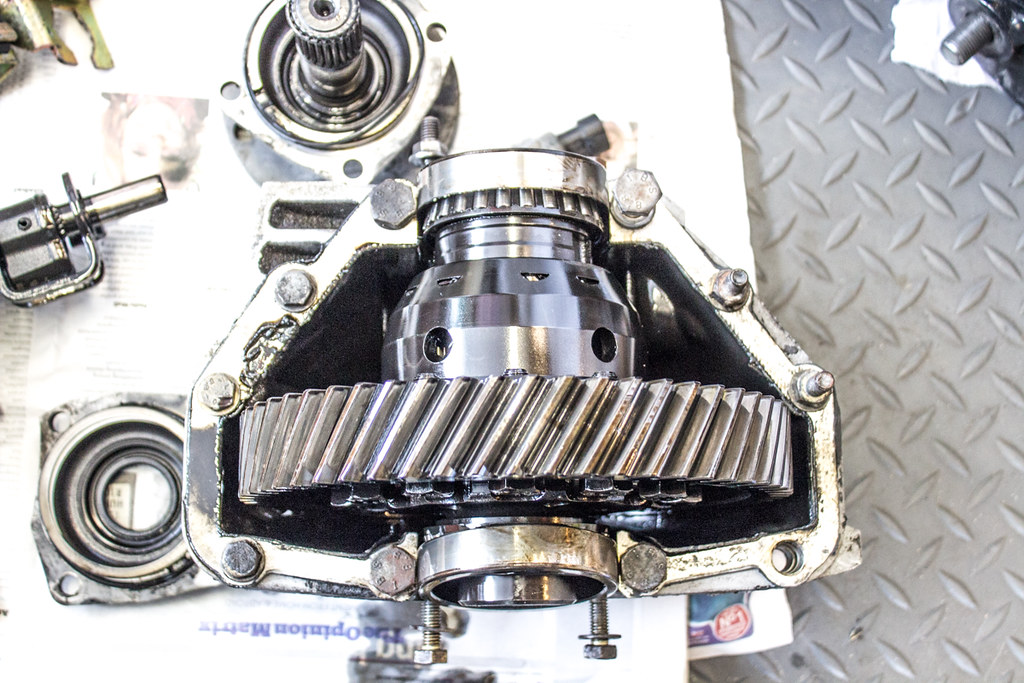
Yet another part that has been rebuilt (low mileage fan motors and repainted frame)
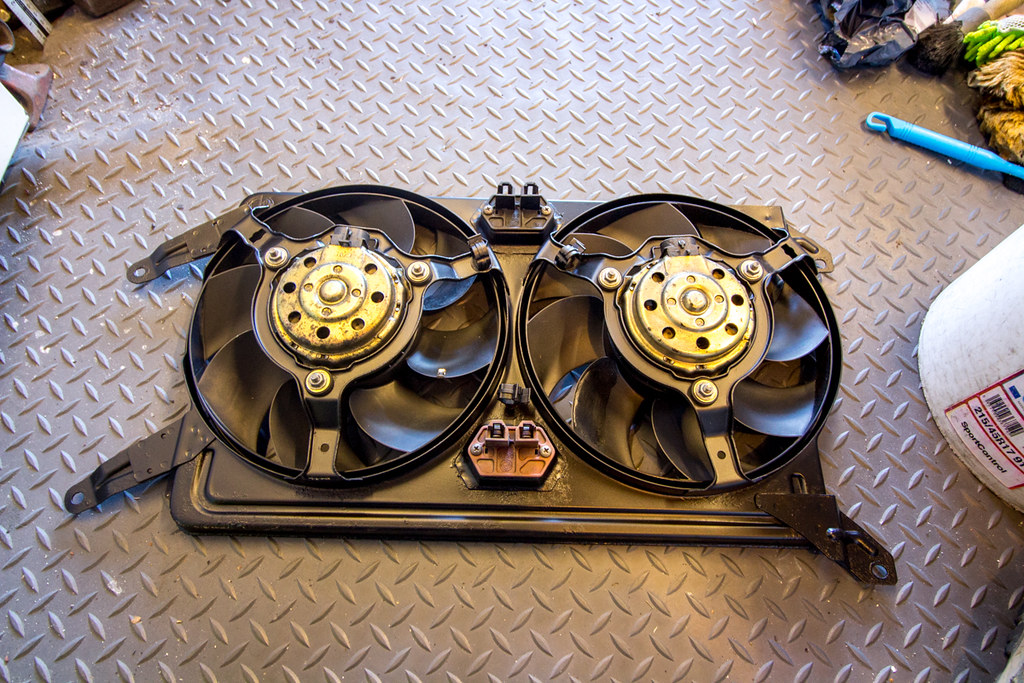 IMG_9308 by Chris 155, on Flickr
And yet ANOTHER bit that still needs looking at (threads are properly goosed). My Dad has just bought a new heat gun though :devious: One that'll have them glowing orange easily enough:big laugh:
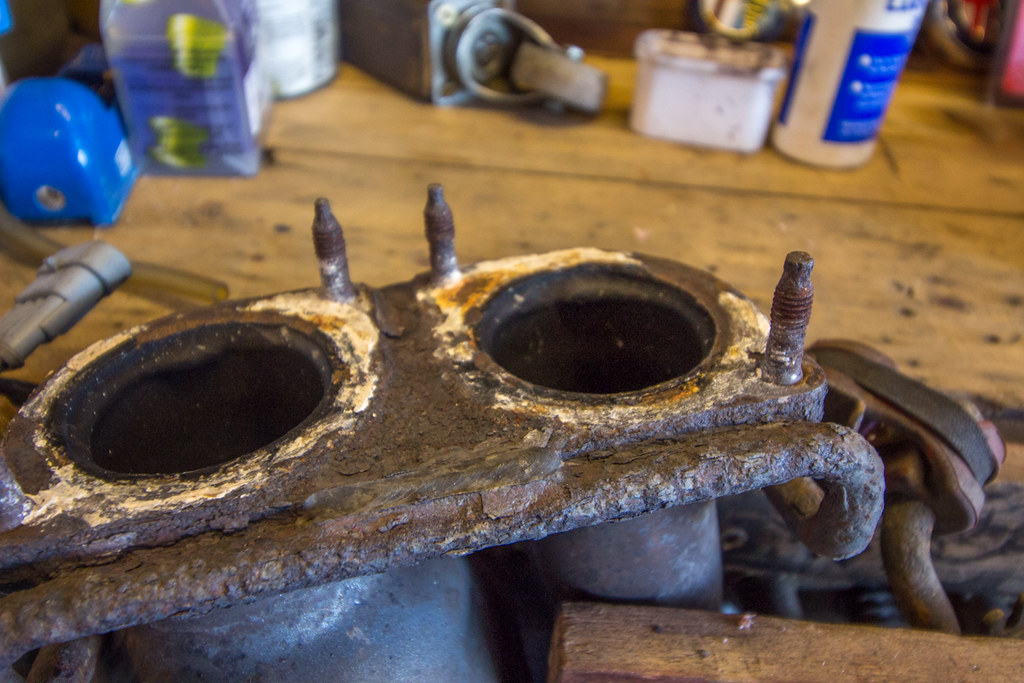 IMG_9310 by Chris 155, on Flickr
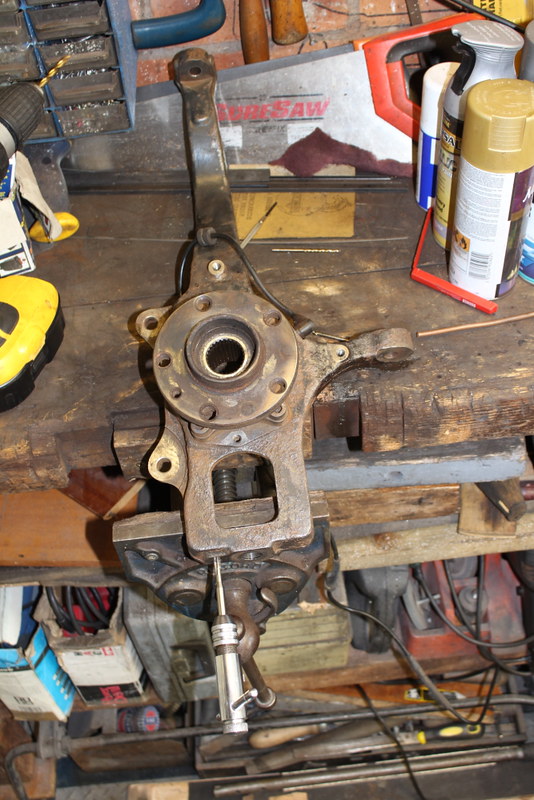
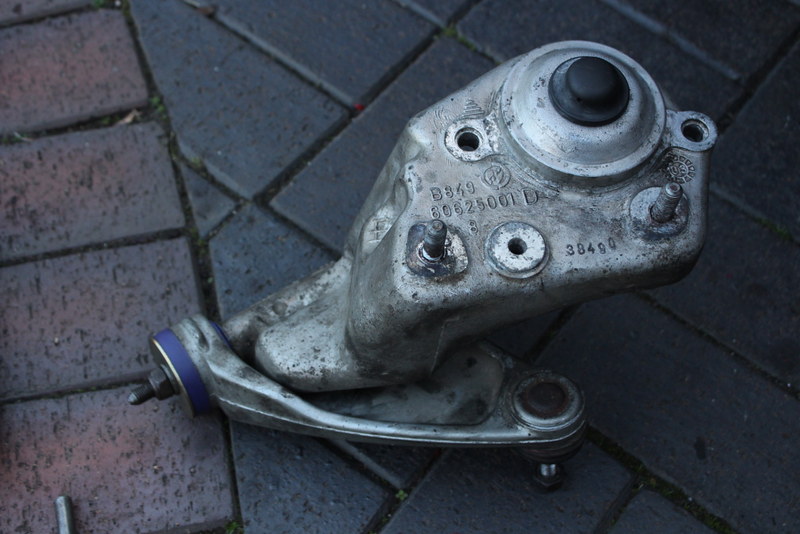
So the we had the engine in by midday. Along with the subframe we dropped the hub carriers, lower arms and drive shafts for ease of refinement and because one of the upper arm ball joints is goosed, the O/S inner CV gasket is damaged and some bits need painting.
The engine is pretty much in and hooked up though, just need to fit the radiators. Like the new OE rad (2.5 v6) Father found on fleabay :big laugh: The tunnel and subframe are back in too.
https://www.flickr.com/photos/97420435@N05/2140283...
So, all excited, or as excited as you can get about a radiator I pulled it out of the box to get on with fitting it and... errr what's wrong with this pic? :depressed:
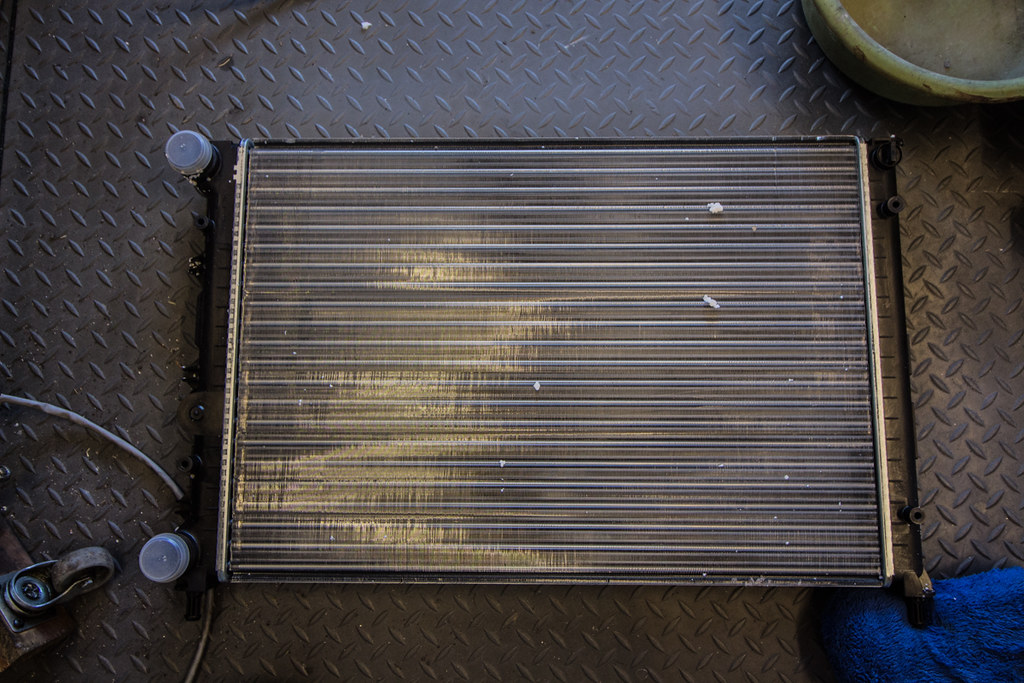 IMG_9313 by Chris 155, on Flickr
It's not a v6 rad, that's for sure. Bloody eBay... I reckon its for a 147 2.0, but does anyone recognise it?
I spent another hour working on odds and sods then gave up for today. I've gpt tomorrow off but the replacement rad isn't going to be here till Friday so I'm not sure what I can do with it.
Carried on with it today, despite the continued threat of being drenched.
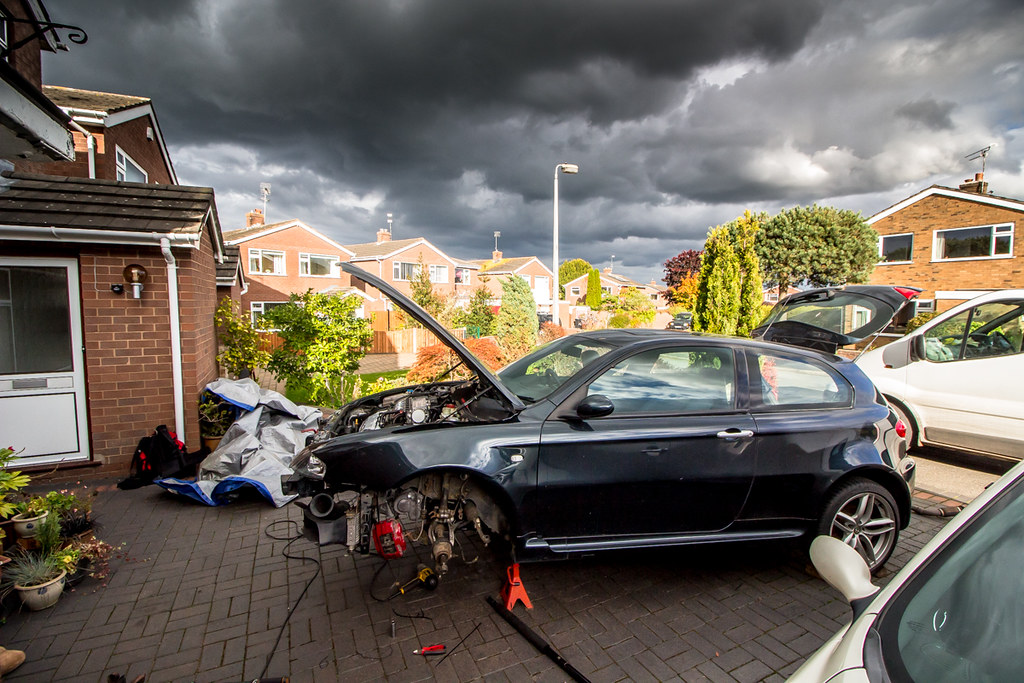 IMG_9322-2 by Chris 155, on Flickr
We tried separating the forks from the dampers, but that wasn't happening, a more determined effort will be required so there time, so the suspension is back together and it's back on the floor.
Exhaust is back on too after making friends with a blow torch and having had all the studs in the cat and manifolds replaced;
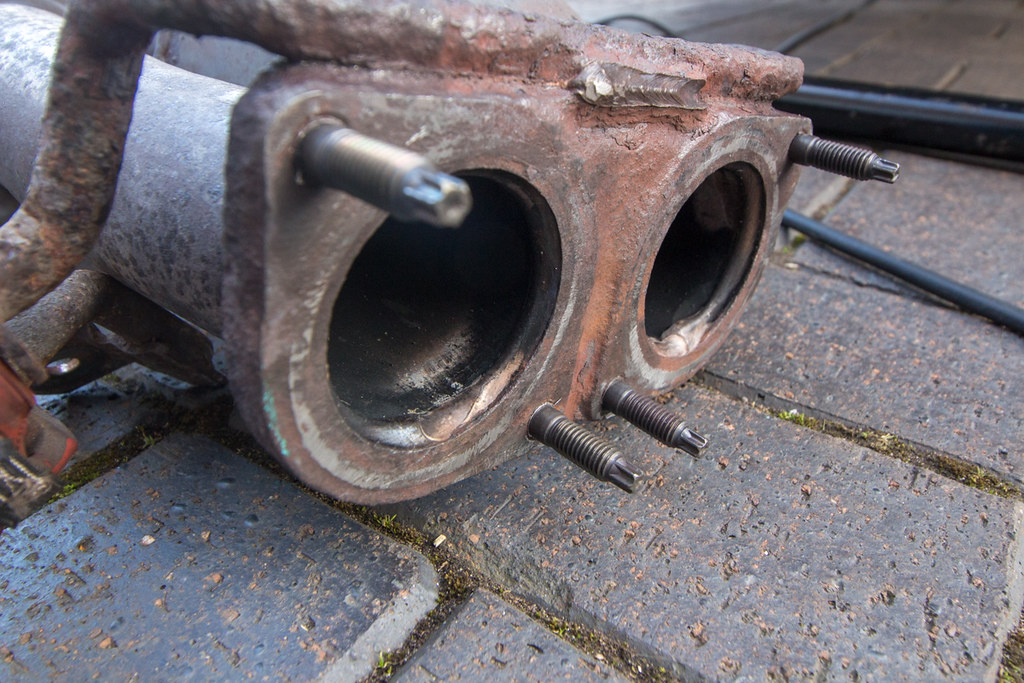 IMG_9325 by Chris 155, on Flickr
It had new gaskets too;
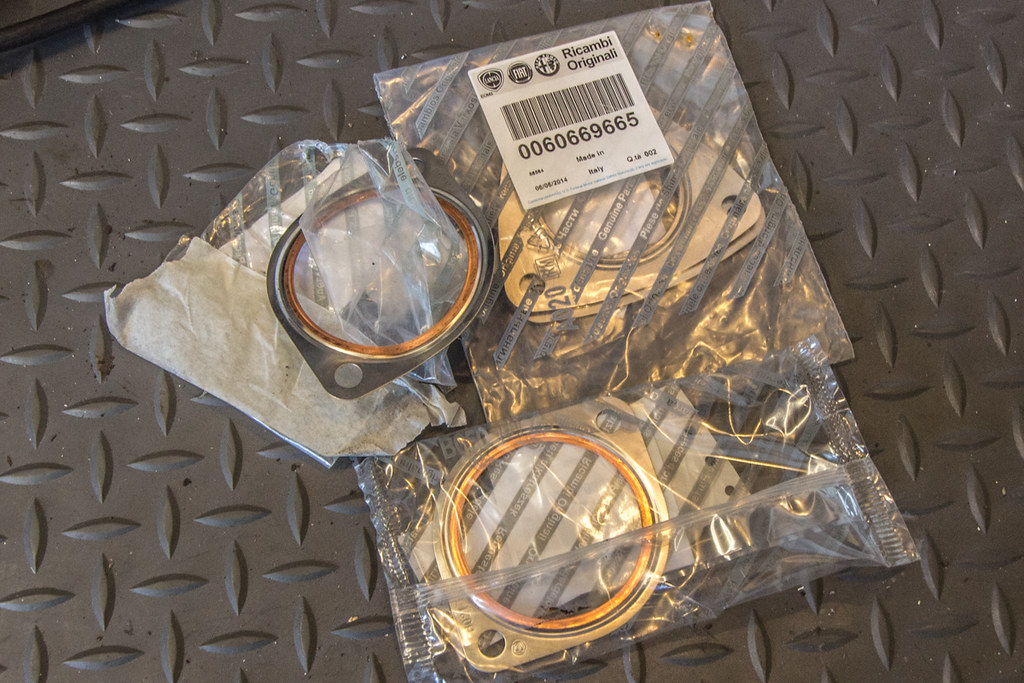 IMG_9328-2 by Chris 155, on Flickr
Soooo... carrying on... Bits to refurb the alternator arrived yesterday. (I don't even need to ask, my Dad'll likely take that at some point...)
The subframe was a PITA when I was trying to get the engine out, I've explained why I left it in place previously but there's no way I was going to try and put the engine back in with it fitted. Been there, done that and reconfirmed my view that it's categorically easier to refit the engine with it out of the way. In terms of both time and skill. There is no argument in my mind anymore. It is the most efficient way of getting the engine and out.
Buuuut to add fuel to that argument, it was going rusty and needed attention. My Dad has also sourced some new gearbox cables via eBay and a new gear leaver base but I stand by my thoughts regardless.
Pics showing removal of the subframe and transmission tunnel now follow...
IMG_8770 by Chris 155, on FlickrIMG_8775 by Chris 155, on FlickrIMG_8778 by Chris 155, on FlickrIMG_8781 by Chris 155, on FlickrIMG_8784 by Chris 155, on FlickrIMG_8787 by Chris 155, on FlickrIMG_8793 by Chris 155, on FlickrIMG_8796-2 by Chris 155, on FlickrWe've spent the last week cleaning up the subframe transmission tunnel and the stiffening plates;
Untitled by Chris 155, on FlickrAfter spending a decent amount of time with a drill and wire brushes....
Untitled by Chris 155, on FlickrThen treated with rust killer...
Untitled by Chris 155, on FlickrUntitled by Chris 155, on FlickrThen etch primed and repainted...
Untitled by Chris 155, on FlickrUntitled by Chris 155, on FlickrUntitled by Chris 155, on FlickrUntitled by Chris 155, on FlickrAnd yesterday I replaced the voltage regulator on the alternator as a precautionary measure, which was an easy job...
Untitled by Chris 155, on FlickrUntitled by Chris 155, on FlickrUntitled by Chris 155, on FlickrRegulator removed;
Untitled by Chris 155, on FlickrNew vs old - you can see the difference in the brushes, the old one looks to be nearing the end of it's life;
Untitled by Chris 155, on FlickrAnd back on the engine with the wiring harness and starter motor too...
Untitled by Chris 155, on FlickrIt's now nearly ready to go back in. :big laugh:
It seems I didn't mention it in my last post - we dropped the transmission tunnel to replace the gear lever base, the gear selection cables (my dad's earlier fix is still sound though) and tighten the handbrake mounts as they had worked themselves loose which meant the hand brake would knock itself off on occasion
We put the engine back in today (yay!):
IMG_9304 by Chris 155, on FlickrIMG_9305 by Chris 155, on FlickrWith new front and rear bank lambdas which was another reason why I took the engine out...
IMG_9303 by Chris 155, on FlickrYet another part that has been rebuilt (low mileage fan motors and repainted frame)
IMG_9308 by Chris 155, on FlickrAnd yet ANOTHER bit that still needs looking at (threads are properly goosed). My Dad has just bought a new heat gun though :devious: One that'll have them glowing orange easily enough:big laugh:
IMG_9310 by Chris 155, on FlickrSo the we had the engine in by midday. Along with the subframe we dropped the hub carriers, lower arms and drive shafts for ease of refinement and because one of the upper arm ball joints is goosed, the O/S inner CV gasket is damaged and some bits need painting.
The engine is pretty much in and hooked up though, just need to fit the radiators. Like the new OE rad (2.5 v6) Father found on fleabay :big laugh: The tunnel and subframe are back in too.
https://www.flickr.com/photos/97420435@N05/2140283...
So, all excited, or as excited as you can get about a radiator I pulled it out of the box to get on with fitting it and... errr what's wrong with this pic? :depressed:
IMG_9313 by Chris 155, on FlickrIt's not a v6 rad, that's for sure. Bloody eBay... I reckon its for a 147 2.0, but does anyone recognise it?
I spent another hour working on odds and sods then gave up for today. I've gpt tomorrow off but the replacement rad isn't going to be here till Friday so I'm not sure what I can do with it.
Carried on with it today, despite the continued threat of being drenched.
IMG_9322-2 by Chris 155, on FlickrWe tried separating the forks from the dampers, but that wasn't happening, a more determined effort will be required so there time, so the suspension is back together and it's back on the floor.
Exhaust is back on too after making friends with a blow torch and having had all the studs in the cat and manifolds replaced;
IMG_9325 by Chris 155, on FlickrIt had new gaskets too;
IMG_9328-2 by Chris 155, on FlickrLast week
Radiator turned up Friday as promised. I spent 2 hours looking for the associated bots to fit it, gave up, used some new ones and some "spares" and put that in on Saturday after the F1 qualifying. I got the battery on it to, if only so that I could open the boot instead of having to clamber through the car. Turned the ignition on to check for any problems and sure enough, MCSF.
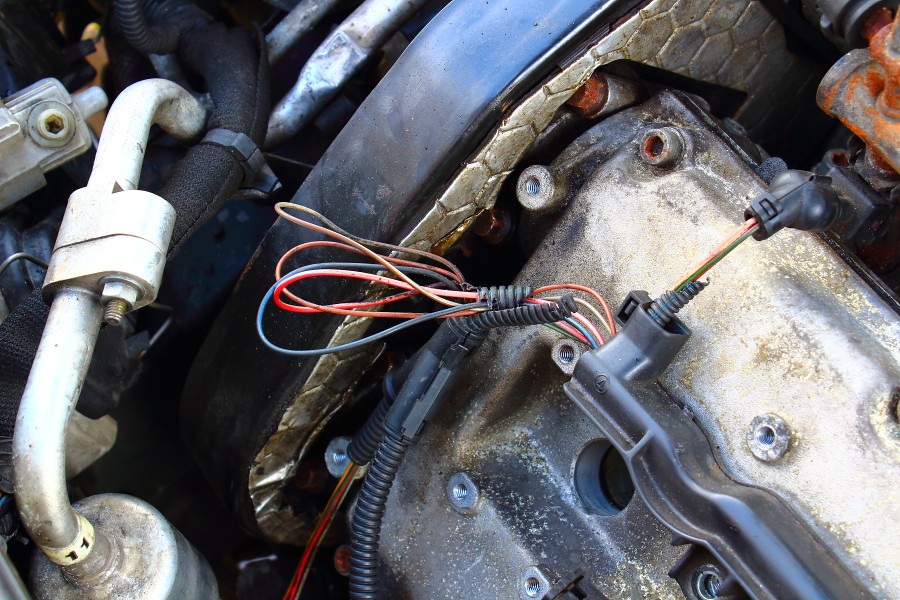
Dug the laptop out and the fault came back as oil pressure sender not connected.
I was panicking a little as I couldn't remember where it was located, whether or not it was behind the exhaust manifold and I didn't want to be taking that and the sub frame off to reconnect the sender.
Fortunately, my Dad turned up and pointed out I'd not connected the connections in the box on the back of the plenum...
Same deal on Sunday, spent a few hours on it with my Dad. It had to be the most frustrating day I've spent working on it so far.
I put the intake trunking on the realised i'd not attached the battery strap...
I spent 2 hours fighting with the oil cooler and power steering pipes. I had to disconnect both power steering pipes to route them correctly, found that the rerouted pipes were still in the wrong place, tried again and finaly got them somewhere near where the should be, then spent another hour trying to get them all into that stupid bracket on the bottom of the O/S engine mount.
But, eventually, it did start. 1st time, no hesitation, no leaks, no worrying noises. The clutch works too, so all is good.
Just need to tidy the floors and inner wings, fit the brakes and it'll be done.
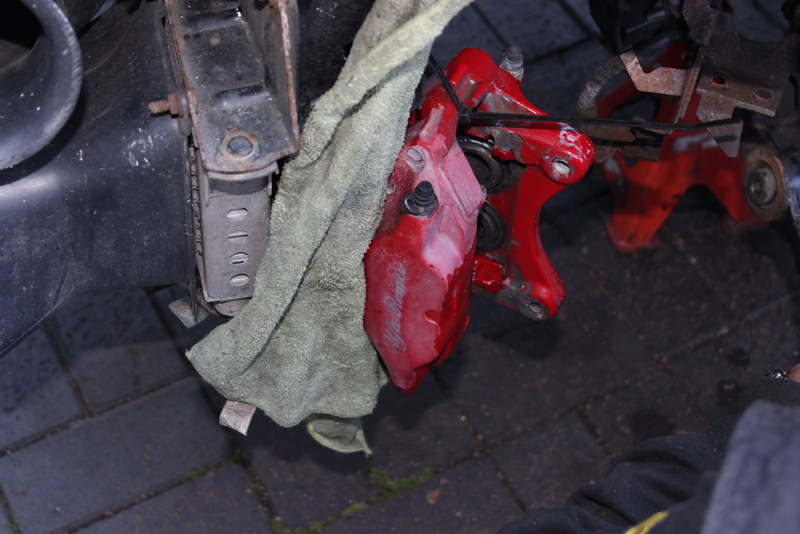
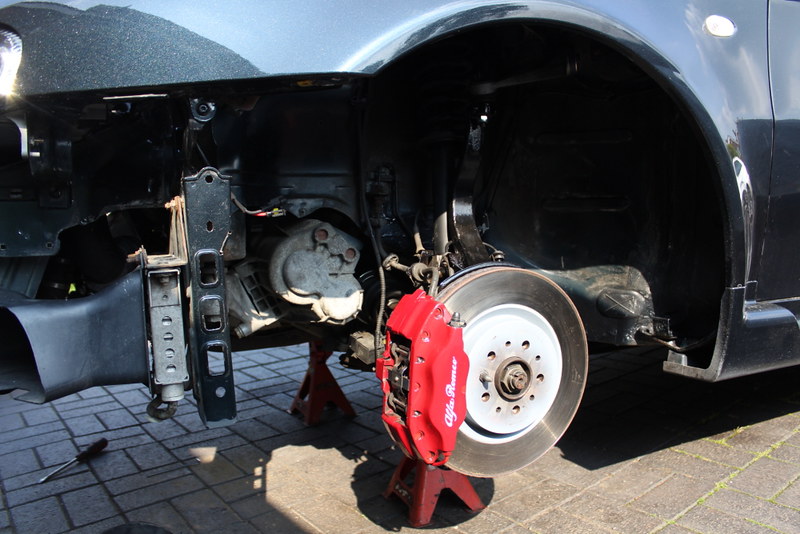
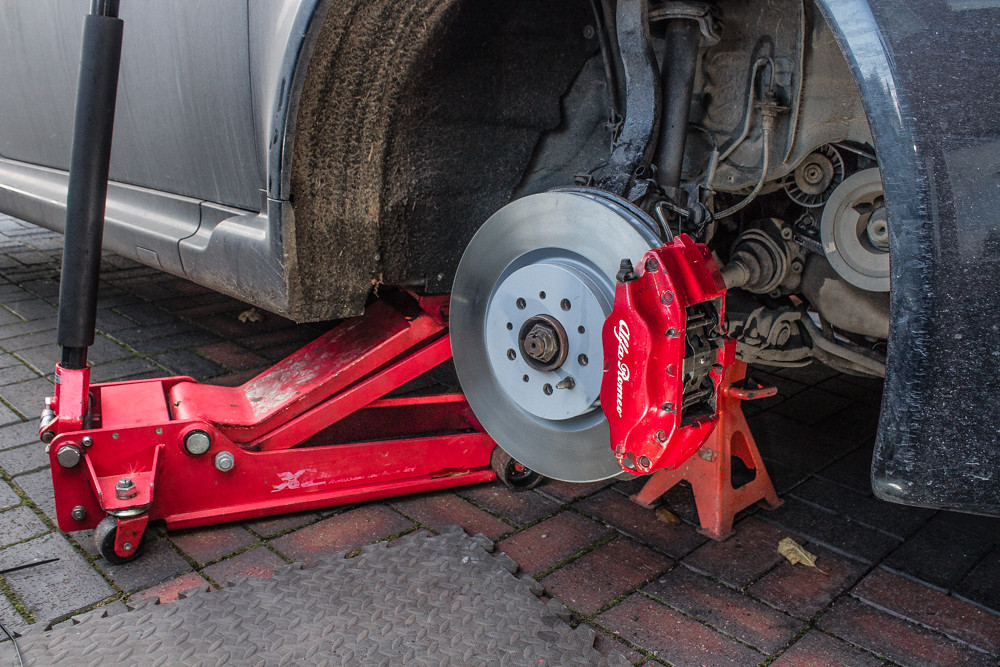
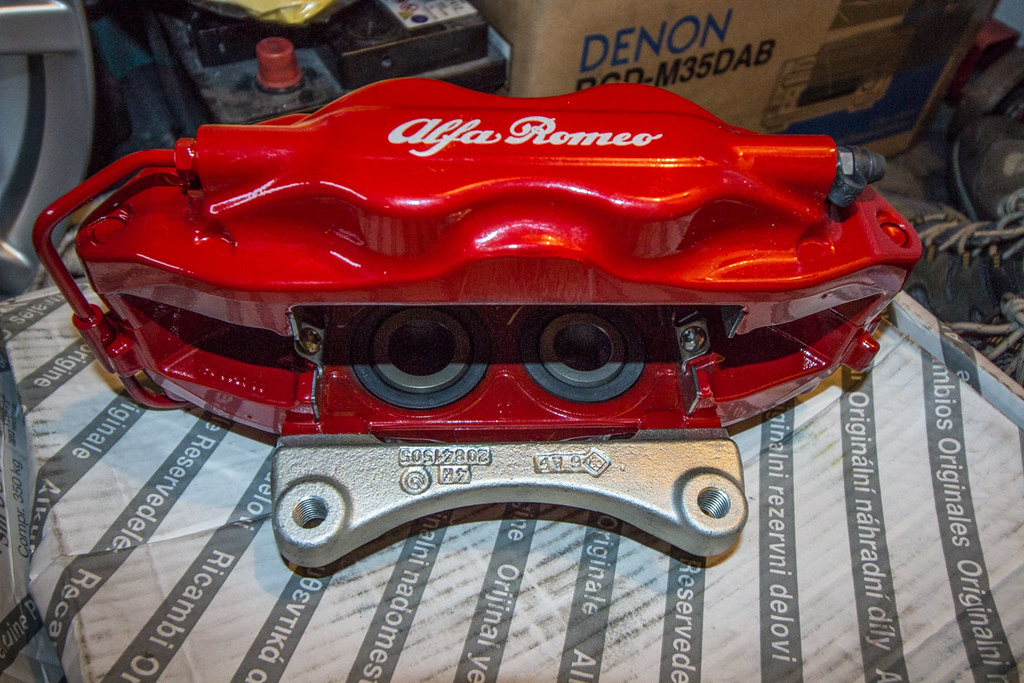
Shiny brakes are shiny:big laugh:
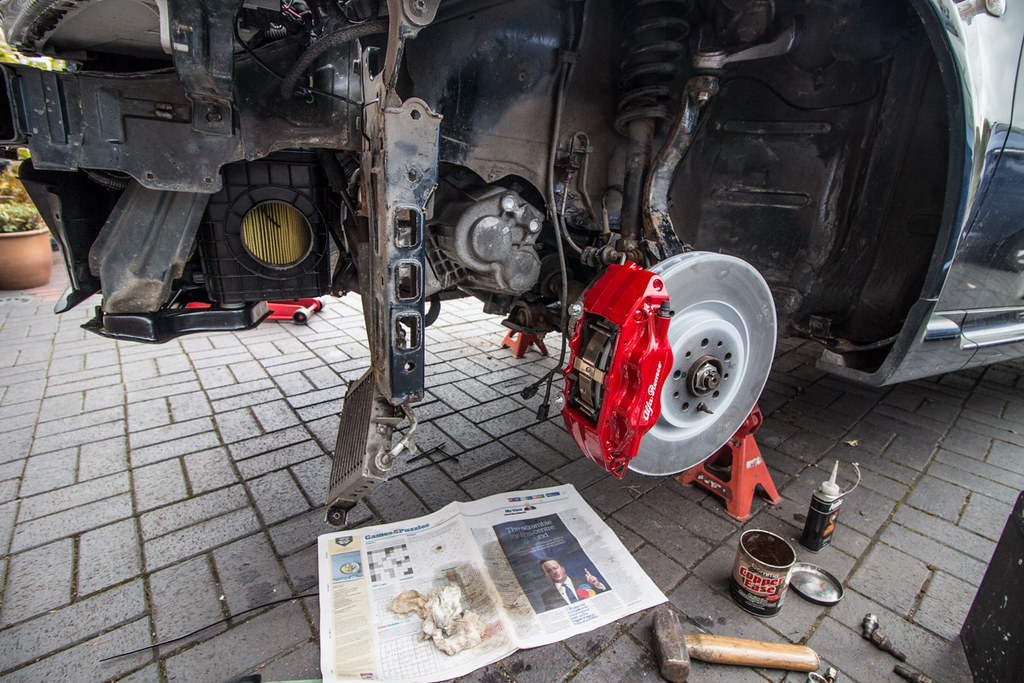 IMG_9348 by Chris 155, on Flickr
Finished
 IMG_9359 by Chris 155, on Flickr
(Ish)
 IMG_9364 by Chris 155, on Flickr
Well it is now. I've got a thread up in the gta lounge about the calliper pins but the 305 pins work. So I'm going to run it using them for now till I find a definitive answer.
Took it out for some petrol, so I didn't go far but it's going well, sounds awesome and the brakes are superb. Really sharp.
All is good.
Just need to fix the passenger door.
Radiator turned up Friday as promised. I spent 2 hours looking for the associated bots to fit it, gave up, used some new ones and some "spares" and put that in on Saturday after the F1 qualifying. I got the battery on it to, if only so that I could open the boot instead of having to clamber through the car. Turned the ignition on to check for any problems and sure enough, MCSF.
Dug the laptop out and the fault came back as oil pressure sender not connected.
I was panicking a little as I couldn't remember where it was located, whether or not it was behind the exhaust manifold and I didn't want to be taking that and the sub frame off to reconnect the sender.
Fortunately, my Dad turned up and pointed out I'd not connected the connections in the box on the back of the plenum...
Same deal on Sunday, spent a few hours on it with my Dad. It had to be the most frustrating day I've spent working on it so far.
I put the intake trunking on the realised i'd not attached the battery strap...
I spent 2 hours fighting with the oil cooler and power steering pipes. I had to disconnect both power steering pipes to route them correctly, found that the rerouted pipes were still in the wrong place, tried again and finaly got them somewhere near where the should be, then spent another hour trying to get them all into that stupid bracket on the bottom of the O/S engine mount.
But, eventually, it did start. 1st time, no hesitation, no leaks, no worrying noises. The clutch works too, so all is good.
Just need to tidy the floors and inner wings, fit the brakes and it'll be done.
Shiny brakes are shiny:big laugh:
IMG_9348 by Chris 155, on FlickrFinished
IMG_9359 by Chris 155, on Flickr(Ish)
IMG_9364 by Chris 155, on FlickrWell it is now. I've got a thread up in the gta lounge about the calliper pins but the 305 pins work. So I'm going to run it using them for now till I find a definitive answer.
Took it out for some petrol, so I didn't go far but it's going well, sounds awesome and the brakes are superb. Really sharp.
All is good.
Just need to fix the passenger door.

Bloody hell! That seems like such a labour of love for an occasional use hatchback - I'm sure there are sports and supercar owners who have spent less time and effort keeping their cars on the road.
Kudos to you for the effort, but it does strike me that the GTA isn't a car that can be used daily without significant upkeep.
Kudos to you for the effort, but it does strike me that the GTA isn't a car that can be used daily without significant upkeep.
Gassing Station | Readers' Cars | Top of Page | What's New | My Stuff