147 GTA progress thread (July 2013 to present)
Discussion


V6Nelo said:
Enjoying the updates.
My V6 (Gtv) needs the AC to be looked at, I thought the dye method would be useful but interesting reading about your experience, might not be a simple as I thought.
Is that the Mocal replacement oil cooler in the last photo, I've got the kit from Autolusso with the rubber hoses, been maybe 5 years and no issues.
Thanks.My V6 (Gtv) needs the AC to be looked at, I thought the dye method would be useful but interesting reading about your experience, might not be a simple as I thought.
Is that the Mocal replacement oil cooler in the last photo, I've got the kit from Autolusso with the rubber hoses, been maybe 5 years and no issues.
Depends on how bad the leak is on yours I would imagine, mine is very slight and may actually be fixed this time.
The engine oil cooler is located on the offside, the radiator hanging loose in the last pic is actually the power steering oil cooler. It is the same size as the engine oil cooler and I think its an overkill - the 156 v6, which shares a lot of components just uses a bit of bent pipe looped across the front of the car. I've previously built a 156 with a 3.2 v6 and GTA steering rack but the standard oil cooler and it wasn't an issue, even on track.
Having said that, engine oil temp was an issue after sustained track use, so there may be some benefit to the AL Mocal set up. I wouldn't know as all the 3.2's I've had have been run on the standard cooler, including this one.
clowesy said:
I always enjoy your updates, Zombie. I owned my GTA for 3 years but never had the time/patience/skills/balls to to get as stuck in as you have, and I think that's what's required to really keep on top of the maintenance of these cars and get the most out of them. Your car looks stunning and really belies it's mileage.
Regarding the A/C system, I would disregard the use of a vacuum test to check for system leaks. The automated machines are useless at detecting a leak in this way, and even if you pull a good vacuum yourself, you're relying on a differential pressure of 1 Bar max to show up a leak on a system which can exceed 20 Bar on the high pressure side under heavy load. The best option would be to charge the system with oxygen-free nitrogen to a decent pressure and see whether it can hold that pressure. Also, an R134a sniffer/leak detector could help in tracking a leak down.
ETA... When you're tearing the A/C system down as you are, are you replacing the desiccant in the receiver/drier and then pulling a good, strong vacuum before recharging? You need to remove any moisture from the system as this can seriously impact performance.
Again, thank you for the words of encouragement, but I must admit, it is in desperate need of a wash, it is covered in a summer's worth of dust despite being kept undercover.Regarding the A/C system, I would disregard the use of a vacuum test to check for system leaks. The automated machines are useless at detecting a leak in this way, and even if you pull a good vacuum yourself, you're relying on a differential pressure of 1 Bar max to show up a leak on a system which can exceed 20 Bar on the high pressure side under heavy load. The best option would be to charge the system with oxygen-free nitrogen to a decent pressure and see whether it can hold that pressure. Also, an R134a sniffer/leak detector could help in tracking a leak down.
ETA... When you're tearing the A/C system down as you are, are you replacing the desiccant in the receiver/drier and then pulling a good, strong vacuum before recharging? You need to remove any moisture from the system as this can seriously impact performance.
AC - yeah I'm done with the vacuum testing, it doesn't seem to be an effective test as you say. I've tried using a sniffer on it - one of my friends has one at the garage he owns, but again, I've not found anything. But I am hoping the new condenser has fixed it.
The drier is integrated as a no serviceable component as part of the new condenser - cylinder on the nearside. The old condenser had the drier in the same place but this was serviceable and I think I have changed it in the past.
And another job.
I think it had a new thermostat the last time the engine was out. However, it did not come with a new gasket, we reused the old one with some Hylomar IIRC, and the inevitable happened.


The thermostat itself was also not working as well as it should. It's replacement came with a new gasket;

Looking at the pic now, I almost wish I had changed the 3 bolts holding it in with new ones to match the rest of the engine, but they're hidden under a wiring connection box.
Whilst changing the stat, I also found a leak from one of the cam cover oil breathers;

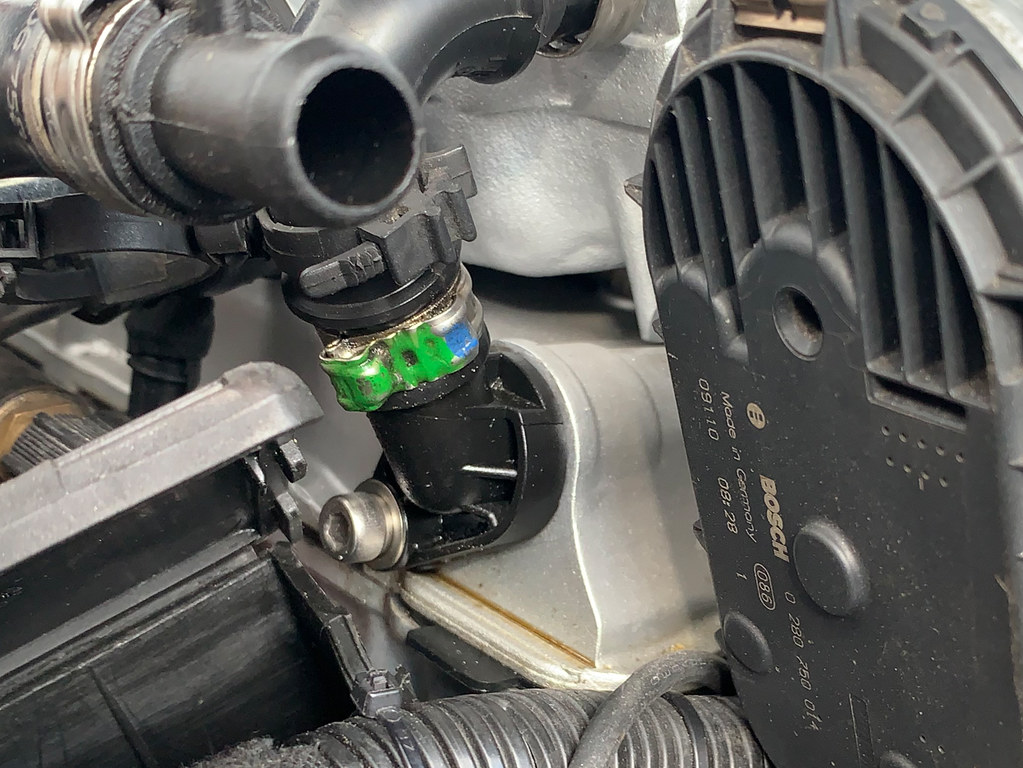
I knew this was a simple fix though, you just undo the retaining bolt remove the breather and there's a rubber O ring to replace.
However, there was another oil leak to attend to. We've had the engine out twice now, thinking that the rear main crank seal was leaking and twice found zero evidence that it was. But, again, I'd been finding evidence on the sump of a very slight oil weep.
I took the cover plate off the side of the gearbox, exposing the bottom of the flywheel and, again found no evidence of the rear main seal leaking. So We started looking at other suspects and decided that the rear bank cam cover gasket was to blame - the oil looked to be dripping down the back of the engine.
Obviously, we changed both of them, electing to use genuine gaskets;


I think it had a new thermostat the last time the engine was out. However, it did not come with a new gasket, we reused the old one with some Hylomar IIRC, and the inevitable happened.
The thermostat itself was also not working as well as it should. It's replacement came with a new gasket;
Looking at the pic now, I almost wish I had changed the 3 bolts holding it in with new ones to match the rest of the engine, but they're hidden under a wiring connection box.
Whilst changing the stat, I also found a leak from one of the cam cover oil breathers;
I knew this was a simple fix though, you just undo the retaining bolt remove the breather and there's a rubber O ring to replace.
However, there was another oil leak to attend to. We've had the engine out twice now, thinking that the rear main crank seal was leaking and twice found zero evidence that it was. But, again, I'd been finding evidence on the sump of a very slight oil weep.
I took the cover plate off the side of the gearbox, exposing the bottom of the flywheel and, again found no evidence of the rear main seal leaking. So We started looking at other suspects and decided that the rear bank cam cover gasket was to blame - the oil looked to be dripping down the back of the engine.
Obviously, we changed both of them, electing to use genuine gaskets;
Final job on the list was the brakes.
I con't remember for sure, but I think when I fitted new front pads last time around, we also changed the front discs as the discs that were on it had corroded on the inside face due to a lack of use.
I thought the (used) discs would be OK, but they weren't. They were a set I kept after using them on another car (3.2 converted 156) for some heavy trackway sessions with DS2500s;


Obviously, I thought they were OK when I fitted them but I think I had kept them with the intention of getting them skimmed if I chose to re-use them. After refitting them with new pads I found that they felt warped when they were hot. It wasn't too bad though which is why I added it to the list.
For the record, I really rate the DS2500, they were the only pad I used that lasted a full track day without destroying the discs. It was the engine oil temp that ended my sessions, not brake fade.
Anyway, the discs were she**ed...


I con't remember for sure, but I think when I fitted new front pads last time around, we also changed the front discs as the discs that were on it had corroded on the inside face due to a lack of use.
I thought the (used) discs would be OK, but they weren't. They were a set I kept after using them on another car (3.2 converted 156) for some heavy trackway sessions with DS2500s;
Obviously, I thought they were OK when I fitted them but I think I had kept them with the intention of getting them skimmed if I chose to re-use them. After refitting them with new pads I found that they felt warped when they were hot. It wasn't too bad though which is why I added it to the list.
For the record, I really rate the DS2500, they were the only pad I used that lasted a full track day without destroying the discs. It was the engine oil temp that ended my sessions, not brake fade.
Anyway, the discs were she**ed...
Brilliant thread, just read it from start to finish, this thread is exactly why I love reading build threads, you and your dads efforts to keep the Alfa tip top is a credit to you both, it’s an amazing car, rare and you just don’t find cars like this anymore, please don’t ever sell it, one to keep as long as you possibly can, you’ll only regret letting it go
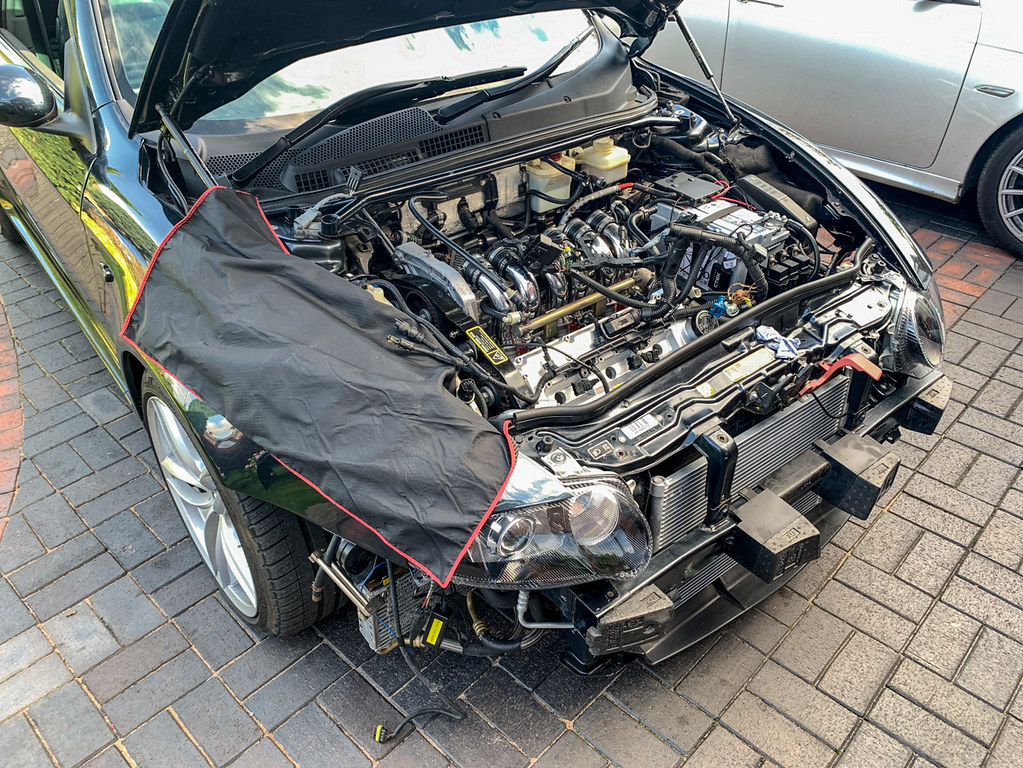
It's been a while since I've updated this thread, mainly because I didn't use the GTA over the winter - I currently have 3 cars including another "toy" and a diesel GT daily and, as a consequence of Covid, I WFH now which means I probably drive around 3,000 miles a year now.
With the weather improving I thought I'd tackle a few simple, little jobs.
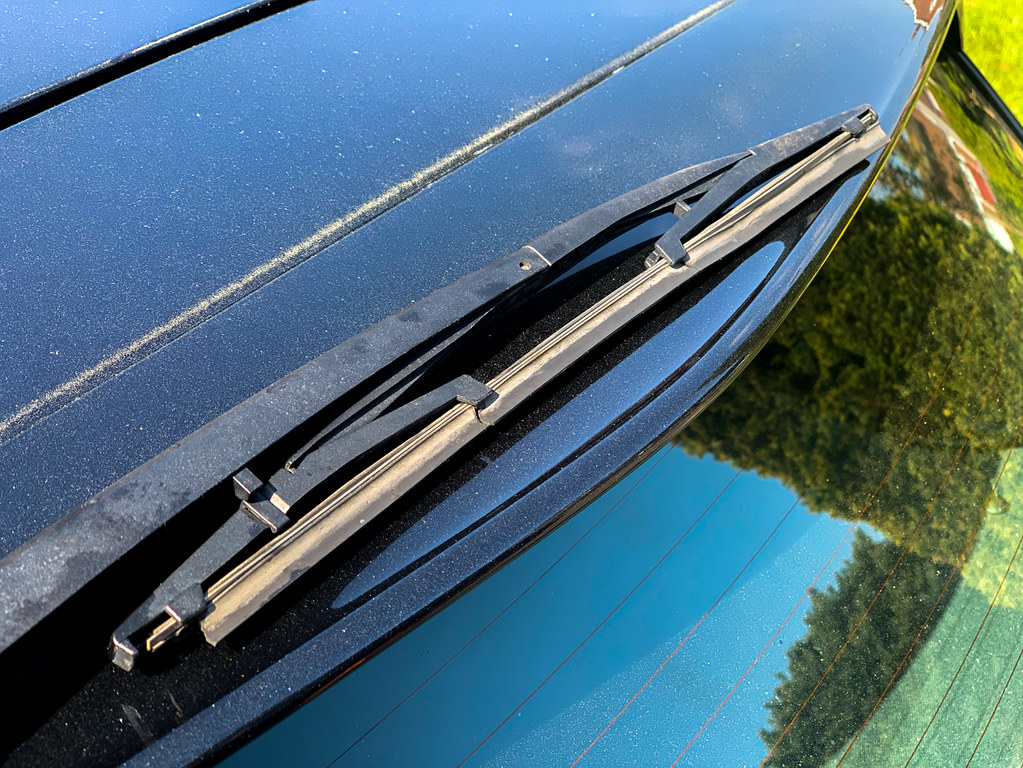
First off, the rear wiper was well past its sell by date. It actually works too - The spindle is known for corroding and seizing up.
 IMG_8666 by Zombie, on Flickr
 IMG_8665 by Zombie, on Flickr
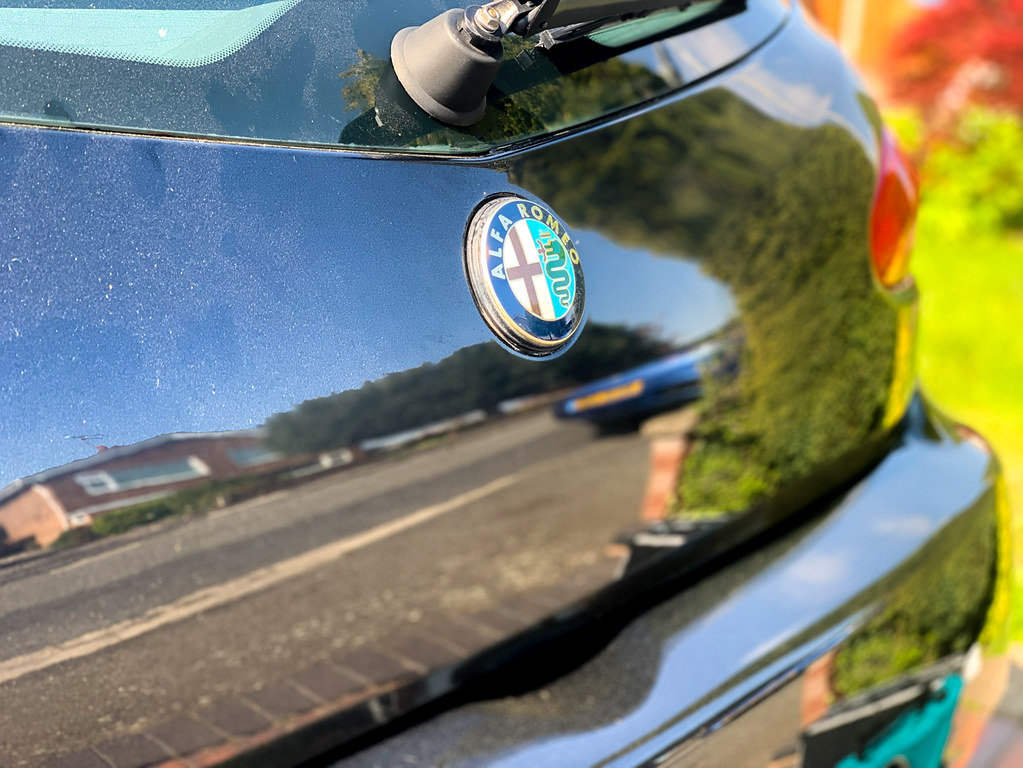
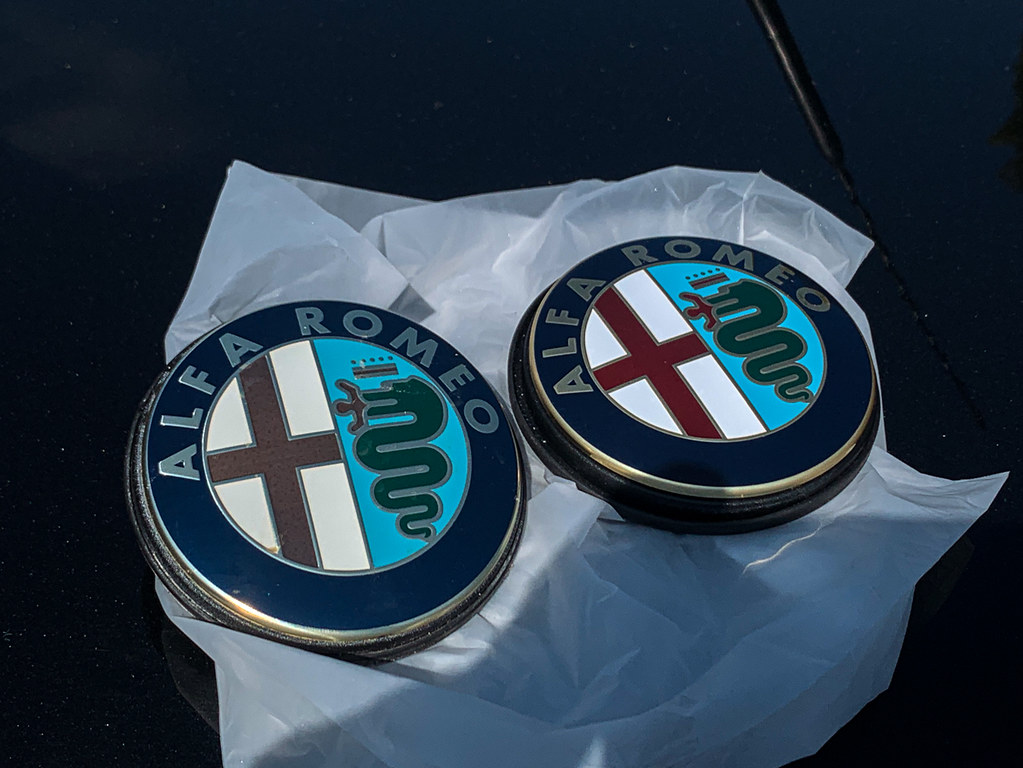
Next up, the rear badge was looking a bit faded so we replaced that.
(the reflections in this pic look odd as I was using an iPhone in portrait mode and the algorithm blurred out some but not all reflections)
 IMG_8668 by Zombie, on Flickr
It's held in place by 2 locating pins and a 10mm nut, accessed by removing the boot lid trim panel:
 IMG_8677 by Zombie, on Flickr
 IMG_8681-2 by Zombie, on Flickr
 IMG_8683 by Zombie, on Flickr
So far, so good. Of course, simple jobs are often not. Like replacing the check strap - it was worn, causing it to click loudly as the door opened.
 IMG_8673 by Zombie, on Flickr
 IMG_8675 by Zombie, on Flickr
Removal isn't as simple as it looks, it comes out from inside the door, which means removing the door card. But we knew that. And it's not that difficult.
 IMG_8687 by Zombie, on Flickr
It shouldn't require the door to be removed though...
 IMG_8688 by Zombie, on Flickr
 IMG_8692 by Zombie, on Flickr
When I removed the check strap I noticed a problem...
 IMG_8693 by Zombie, on Flickr
 IMG_8695 by Zombie, on Flickr
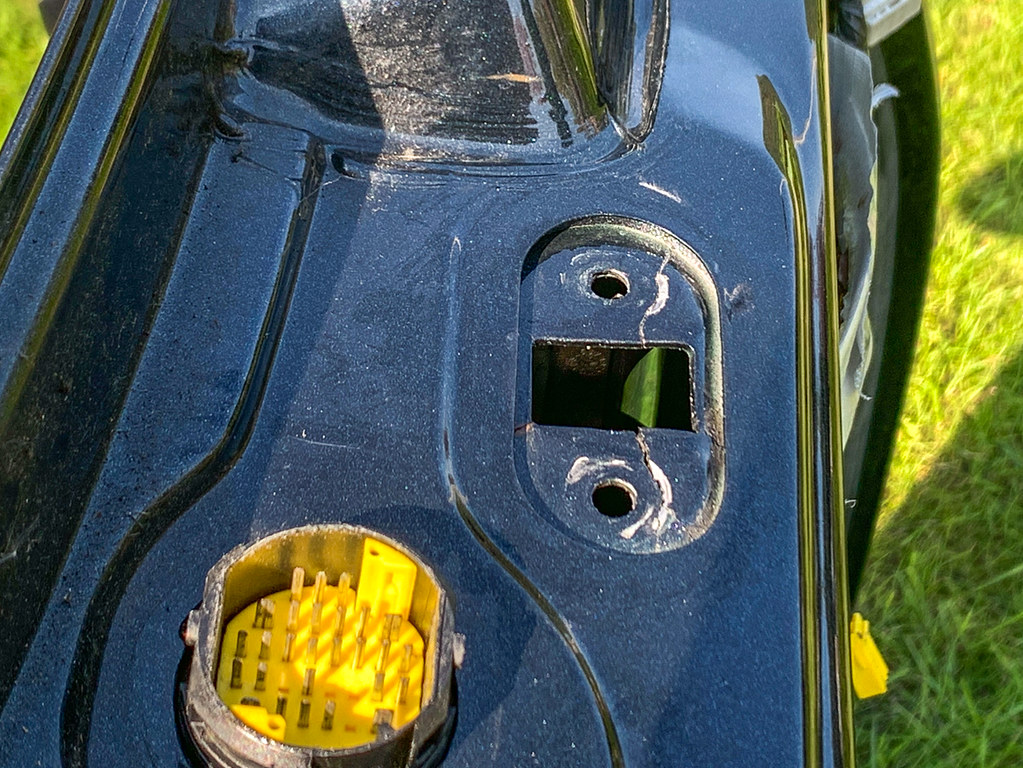
Yes. The strengthening plate around the check strap had cracked. 156's don't have this and are more prone to this problem it also means its the actual door frame that cracks.
I THINK GTs have a further revised design, I checked my 2008 GT and it does appear to be different.
But that didn't help solve the problem. "We" (my Dad) manufactured a replica strengthening plate and affixed it to the inside of the door using the existing bolt holes and the check strap's captive bolts to hold it all together.
I think it's a repair that will work but I'm still thinking about it. The only other solution I can think of is to take the door off again and weld the cracks up.
In the meanwhile, with the door off I gave the aperture a bit of a clean...
 IMG_8697 by Zombie, on Flickr
With the weather improving I thought I'd tackle a few simple, little jobs.
First off, the rear wiper was well past its sell by date. It actually works too - The spindle is known for corroding and seizing up.
IMG_8666 by Zombie, on FlickrIMG_8665 by Zombie, on FlickrNext up, the rear badge was looking a bit faded so we replaced that.
(the reflections in this pic look odd as I was using an iPhone in portrait mode and the algorithm blurred out some but not all reflections)
IMG_8668 by Zombie, on FlickrIt's held in place by 2 locating pins and a 10mm nut, accessed by removing the boot lid trim panel:
IMG_8677 by Zombie, on FlickrIMG_8681-2 by Zombie, on FlickrIMG_8683 by Zombie, on FlickrSo far, so good. Of course, simple jobs are often not. Like replacing the check strap - it was worn, causing it to click loudly as the door opened.
IMG_8673 by Zombie, on FlickrIMG_8675 by Zombie, on FlickrRemoval isn't as simple as it looks, it comes out from inside the door, which means removing the door card. But we knew that. And it's not that difficult.
IMG_8687 by Zombie, on FlickrIt shouldn't require the door to be removed though...
IMG_8688 by Zombie, on FlickrIMG_8692 by Zombie, on FlickrWhen I removed the check strap I noticed a problem...
IMG_8693 by Zombie, on FlickrIMG_8695 by Zombie, on FlickrYes. The strengthening plate around the check strap had cracked. 156's don't have this and are more prone to this problem it also means its the actual door frame that cracks.
I THINK GTs have a further revised design, I checked my 2008 GT and it does appear to be different.
But that didn't help solve the problem. "We" (my Dad) manufactured a replica strengthening plate and affixed it to the inside of the door using the existing bolt holes and the check strap's captive bolts to hold it all together.
I think it's a repair that will work but I'm still thinking about it. The only other solution I can think of is to take the door off again and weld the cracks up.
In the meanwhile, with the door off I gave the aperture a bit of a clean...
IMG_8697 by Zombie, on FlickrThanks for sharing your progress not only interesting but useful too.
Yesterday evening I was swapping fuses as the (heater) blow fan was unresponsive. Noticed the door made a loud clicking noise when I open it.
Thought that could be a secondary priority, seems likes it's the same issue you had so nice to know a bit more.
I'd be worried to take the door off with the current rain-sun-rain weather we have been having and how my 3 hour jobs bleed into the dark
In addition to the above jobs, a big box arrived from partsworld:
 IMG_8495 by Chris, on Flickr
As you might imagine, random bits of trim and other bits can be stupid expensive for what they are, so I keep an eye on their website and buy bits I don't really need as and when they turn up for a reasonable price.
This box contained....
 IMG_8496 by Chris, on Flickr
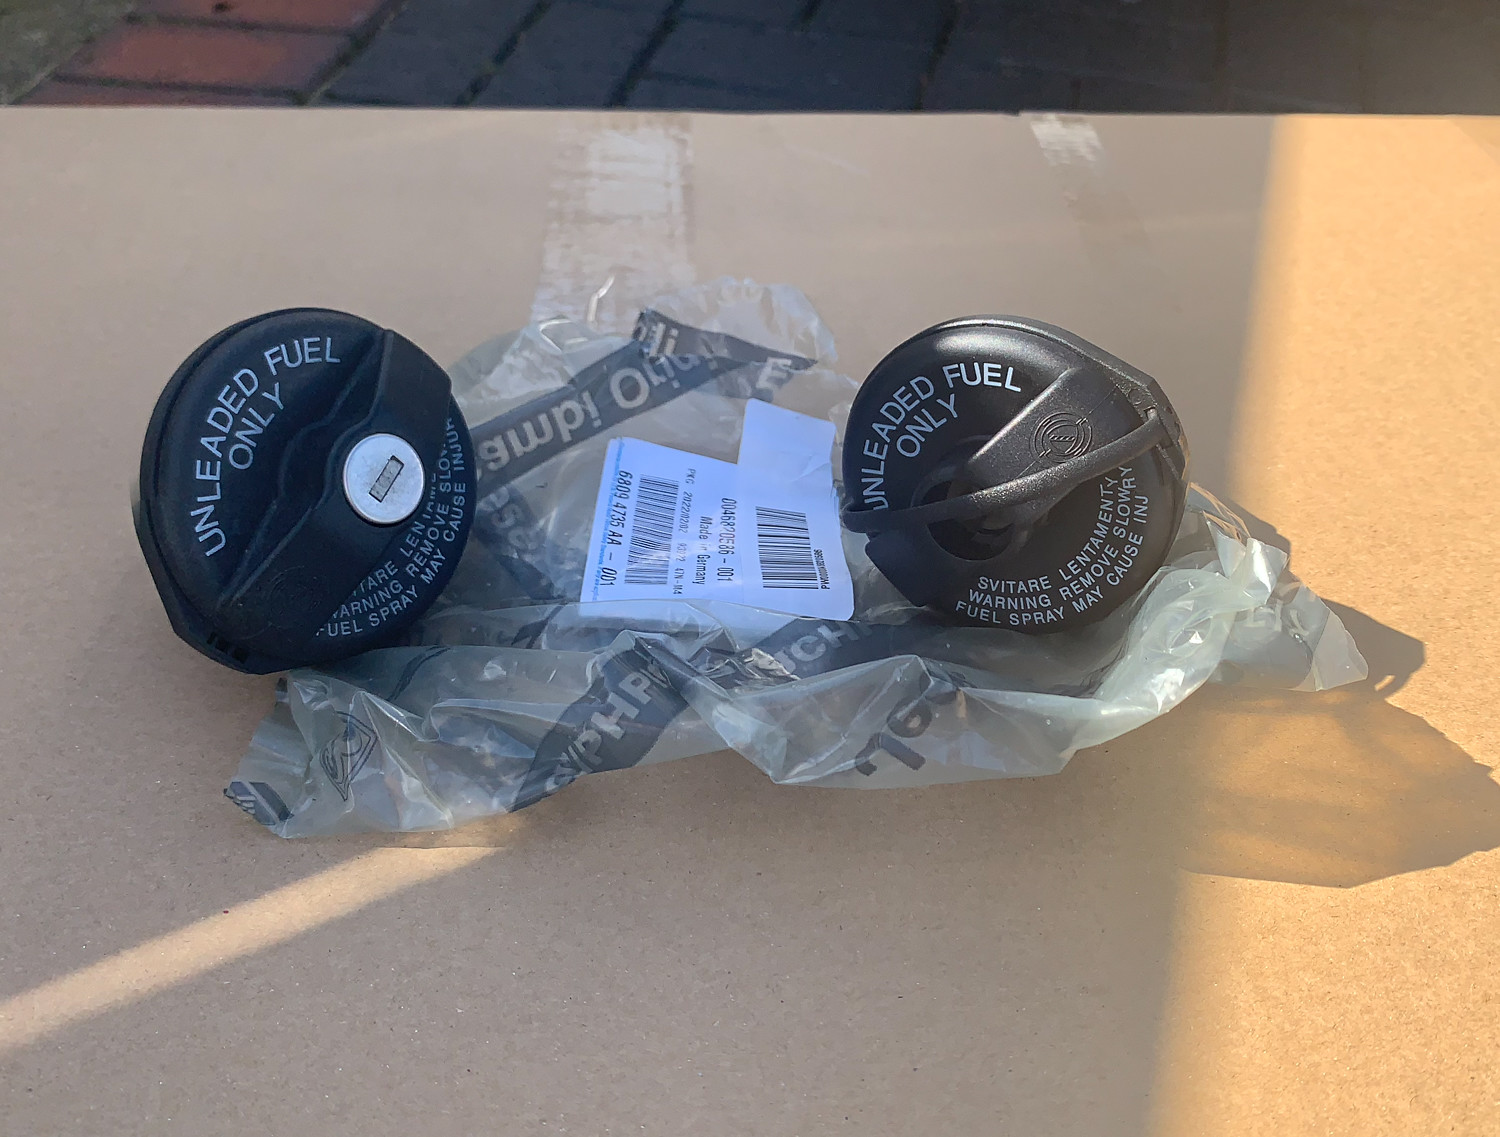
Door seals, more seals and a fuel filler cap.
I know, it's not exactly a rotrex, LS3 or even something moderately exciting like springs to sort out the rear ride height...
The main door aperture seals wer OK but they weren't perfect;
 IMG_8505 by Chris, on Flickr
(Look! No rust, as the interwebs may have you believe....)
 IMG_8513 by Chris, on Flickr
New seal being fitted - I replaced both.
 IMG_8511 by Chris, on Flickr
And again, more new door seals. Exciting stuff isn't it?
 IMG_8519 by Chris, on Flickr
 IMG_8514 by Chris, on Flickr
 IMG_8517 by Chris, on Flickr
 IMG_8525 by Chris, on Flickr
I feel like a total Dork posting about this. Final item. New fuel cap. Which was a PITA as the lock wouldn't come out of the old cap without it all being dismantled. (i.e. gently prised apart)
 IMG_8499 by Chris, on Flickr
 IMG_8503 by Chris, on Flickr
 IMG_8506 by Chris, on Flickr
Anyway, I thought I'd complete the dork-age with the usual cleaning routine. I can't be the only one who goes this far?
In fairness I was washing off the dust and debris that had accumulated whilst it was in the carport / garage over the winter. And the underbody clean is just something we do as a routine.
(Before)
 IMG_2343 by Chris, on Flickr
 IMG_2349 by Chris, on Flickr
 IMG_2355 by Chris, on Flickr
 IMG_2360 by Chris, on Flickr
 IMG_2363 by Chris, on Flickr
 IMG_2368 by Chris, on Flickr
 IMG_2384 by Chris, on Flickr
 IMG_2388 by Chris, on Flickr
 IMG_2390 by Chris, on Flickr
 IMG_8531 by Chris, on Flickr
 IMG_8529 by Chris, on Flickr
IMG_8495 by Chris, on FlickrAs you might imagine, random bits of trim and other bits can be stupid expensive for what they are, so I keep an eye on their website and buy bits I don't really need as and when they turn up for a reasonable price.
This box contained....
IMG_8496 by Chris, on FlickrDoor seals, more seals and a fuel filler cap.
I know, it's not exactly a rotrex, LS3 or even something moderately exciting like springs to sort out the rear ride height...
The main door aperture seals wer OK but they weren't perfect;
IMG_8505 by Chris, on Flickr(Look! No rust, as the interwebs may have you believe....)
IMG_8513 by Chris, on FlickrNew seal being fitted - I replaced both.
IMG_8511 by Chris, on FlickrAnd again, more new door seals. Exciting stuff isn't it?
IMG_8519 by Chris, on FlickrIMG_8514 by Chris, on FlickrIMG_8517 by Chris, on FlickrIMG_8525 by Chris, on FlickrI feel like a total Dork posting about this. Final item. New fuel cap. Which was a PITA as the lock wouldn't come out of the old cap without it all being dismantled. (i.e. gently prised apart)
IMG_8499 by Chris, on FlickrIMG_8503 by Chris, on FlickrIMG_8506 by Chris, on FlickrAnyway, I thought I'd complete the dork-age with the usual cleaning routine. I can't be the only one who goes this far?
In fairness I was washing off the dust and debris that had accumulated whilst it was in the carport / garage over the winter. And the underbody clean is just something we do as a routine.
(Before)
IMG_2343 by Chris, on FlickrIMG_2349 by Chris, on FlickrIMG_2355 by Chris, on FlickrIMG_2360 by Chris, on FlickrIMG_2363 by Chris, on FlickrIMG_2368 by Chris, on FlickrIMG_2384 by Chris, on FlickrIMG_2388 by Chris, on FlickrIMG_2390 by Chris, on FlickrIMG_8531 by Chris, on FlickrIMG_8529 by Chris, on FlickrMDMA . said:
Good to see all the work being done. However, more info on the face lift, pearl white 156 SW please
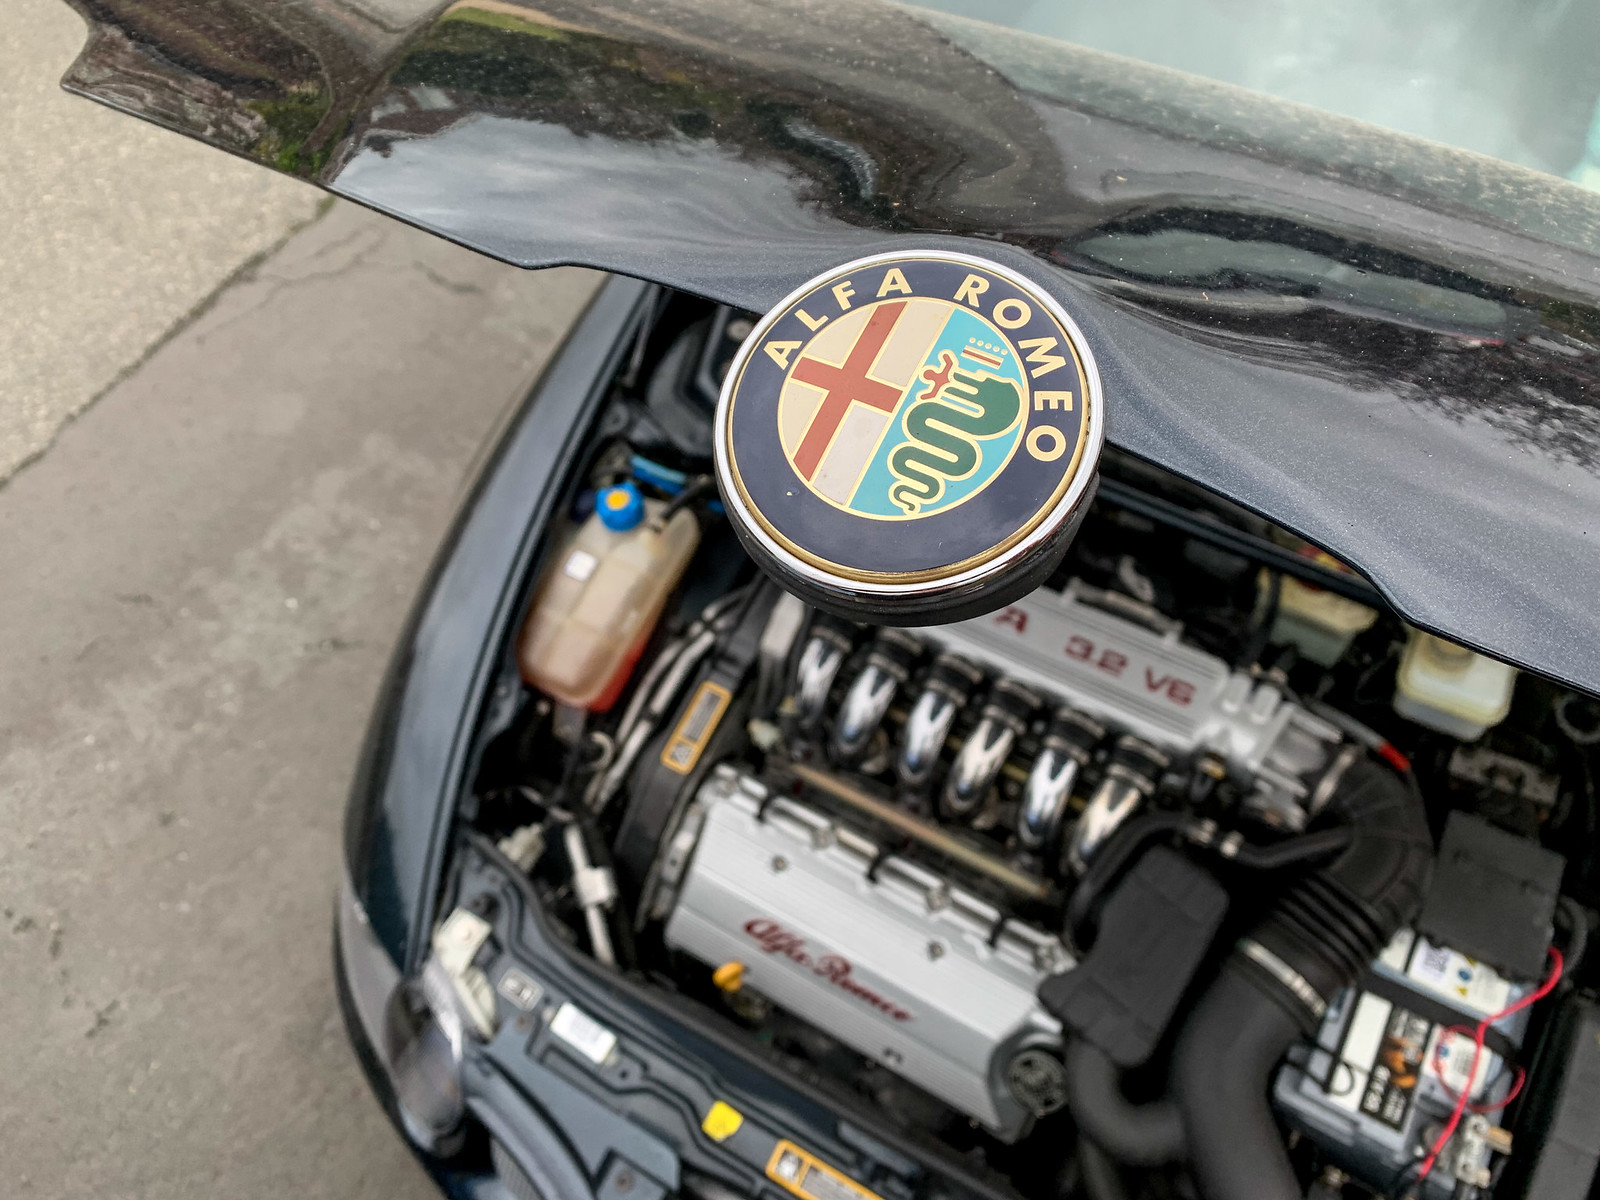
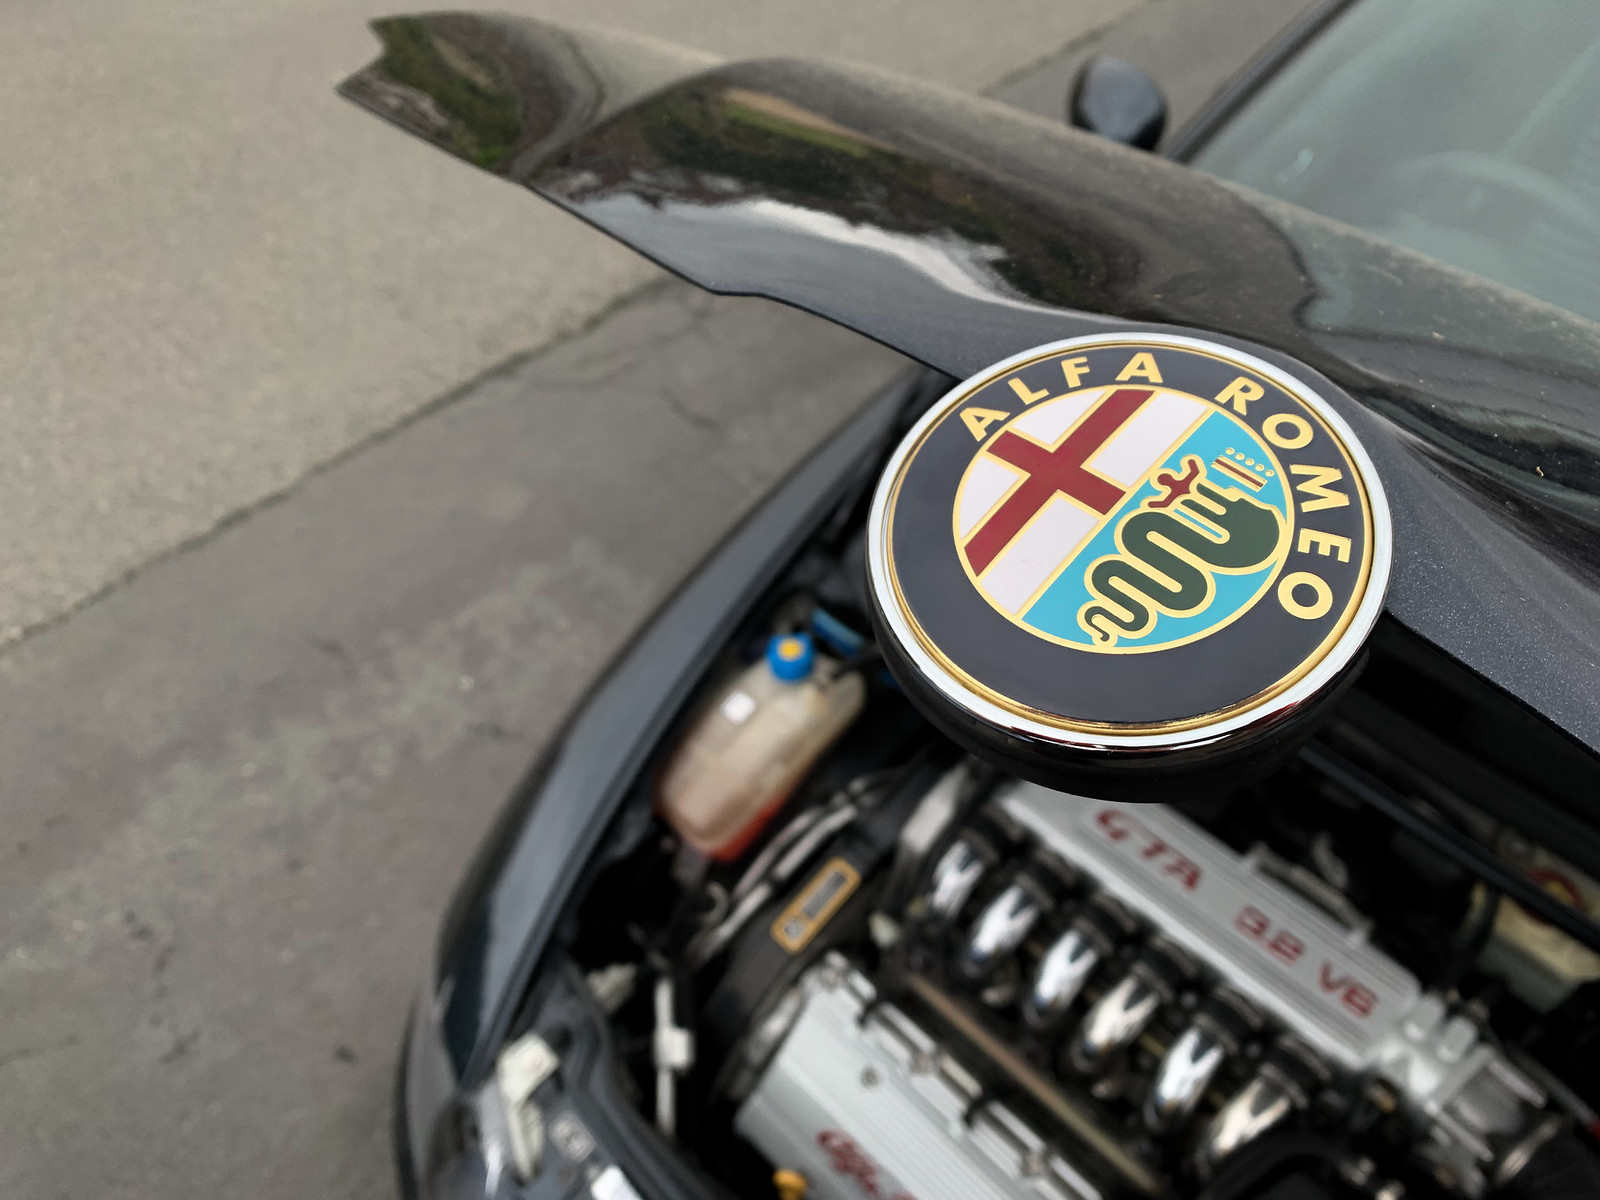
Thanks.The 156 is my Dad's. It really is unusual as it's also a factory V6. And it's a Ti Qsystem (Auto).
We also put a 3.0 in it...
He's selling it, if you're interested send me a PM?
Edited by Zombie on Tuesday 24th May 12:13
I'm not impressed Pistonheads.
https://www.pistonheads.com/features/ph-features/t...
I think the voting process is utterly compromised by ownership numbers. Which would explain why a dull as dishwater Golf would make it onto the list over a GTA. It seems to be more of a poll of who owns what within the PH membership.
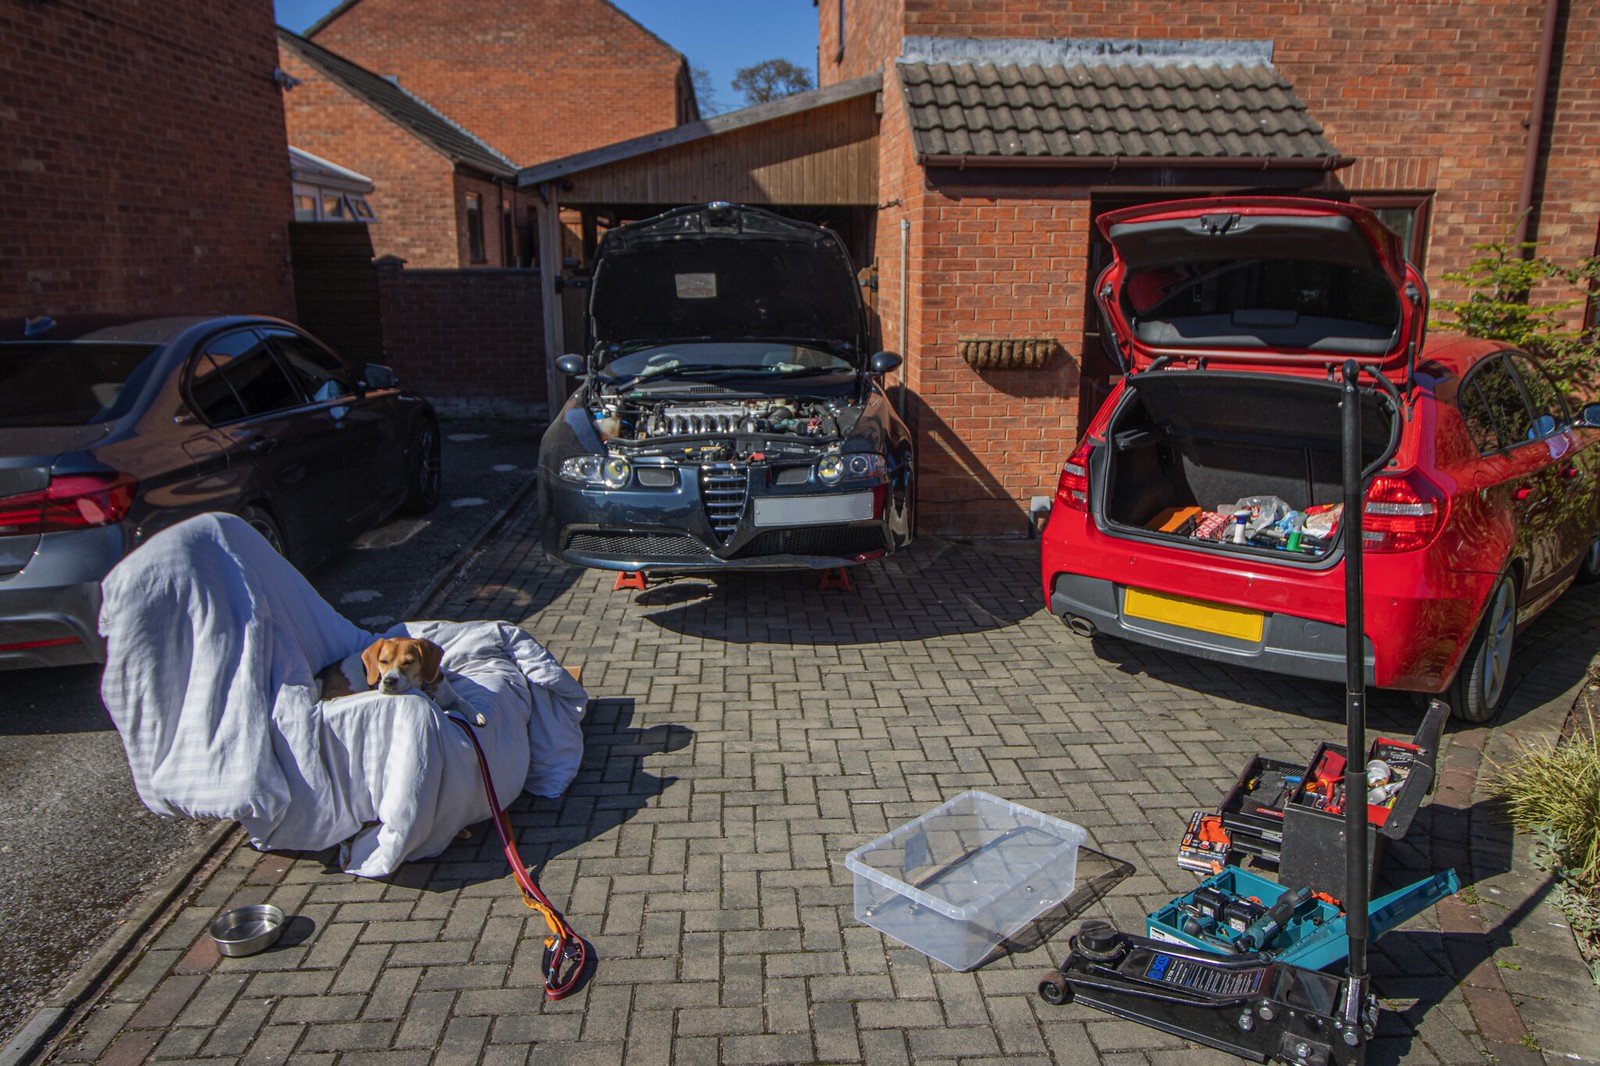
Anyway. Update time, which is long overdue. The GTA has been hibernating over the winter and I've only really started to think about what I want to do with it this year recently.
Last year however, we did undertake a few jobs before the winter hit. Starting with the boot carpet. A well know parts supplier regularly updates their stock with genuine parts, which included a new boot carpet for something like 40 quid. Might have been cheaper, can't remember tbh. Know that the boot trim isn't the best, I bought one:
 IMG_5336 by Chris, on Flickr
 IMG_5343 by Chris, on Flickr
 IMG_5339 by Chris, on Flickr
 IMG_5340 by Chris, on Flickr
And it didn't fit. The original mat, has a cut out on the nearside to fit around the bose subwoofer and former CD Changer box on the offside:
 IMG_5342 by Chris, on Flickr
 IMG_5344 by Chris, on Flickr
 IMG_5345 by Chris, on Flickr
 IMG_5346 by Chris, on Flickr
There was no way of fitting this under the sub, it needed to be trimmed to fit and the edge (it's a laminated mix of board, foam and carpet) re sealed.
My Dad found a furniture re-upholsterer who has since done this and the carpet has been fitted in the car. I've not taken any pics of it as yet because it's still a work in progress. We've found replacement (carpet) trim to for the seat backs that needs to be fitted and the side trims should clean up - they not as filthy as the floor but do need a proper clean;
 IMG_5390 by Chris, on Flickr
As the boot was apart I took the opportunity to investigate the bose system as the bass has been dropping out intermittently.
We tested the Amp with a spare;
 IMG_5394 by Chris, on Flickr
And the bass unit
 IMG_5408 by Chris, on Flickr
 IMG_9267 by Chris, on Flickr
And.... found no problem with either one. So not the problem. Don't know what it is either. Might be a wiring issue in the back if the head unit. We checked that but I've not used the car since to see if the problem is still there. I expect that it is.
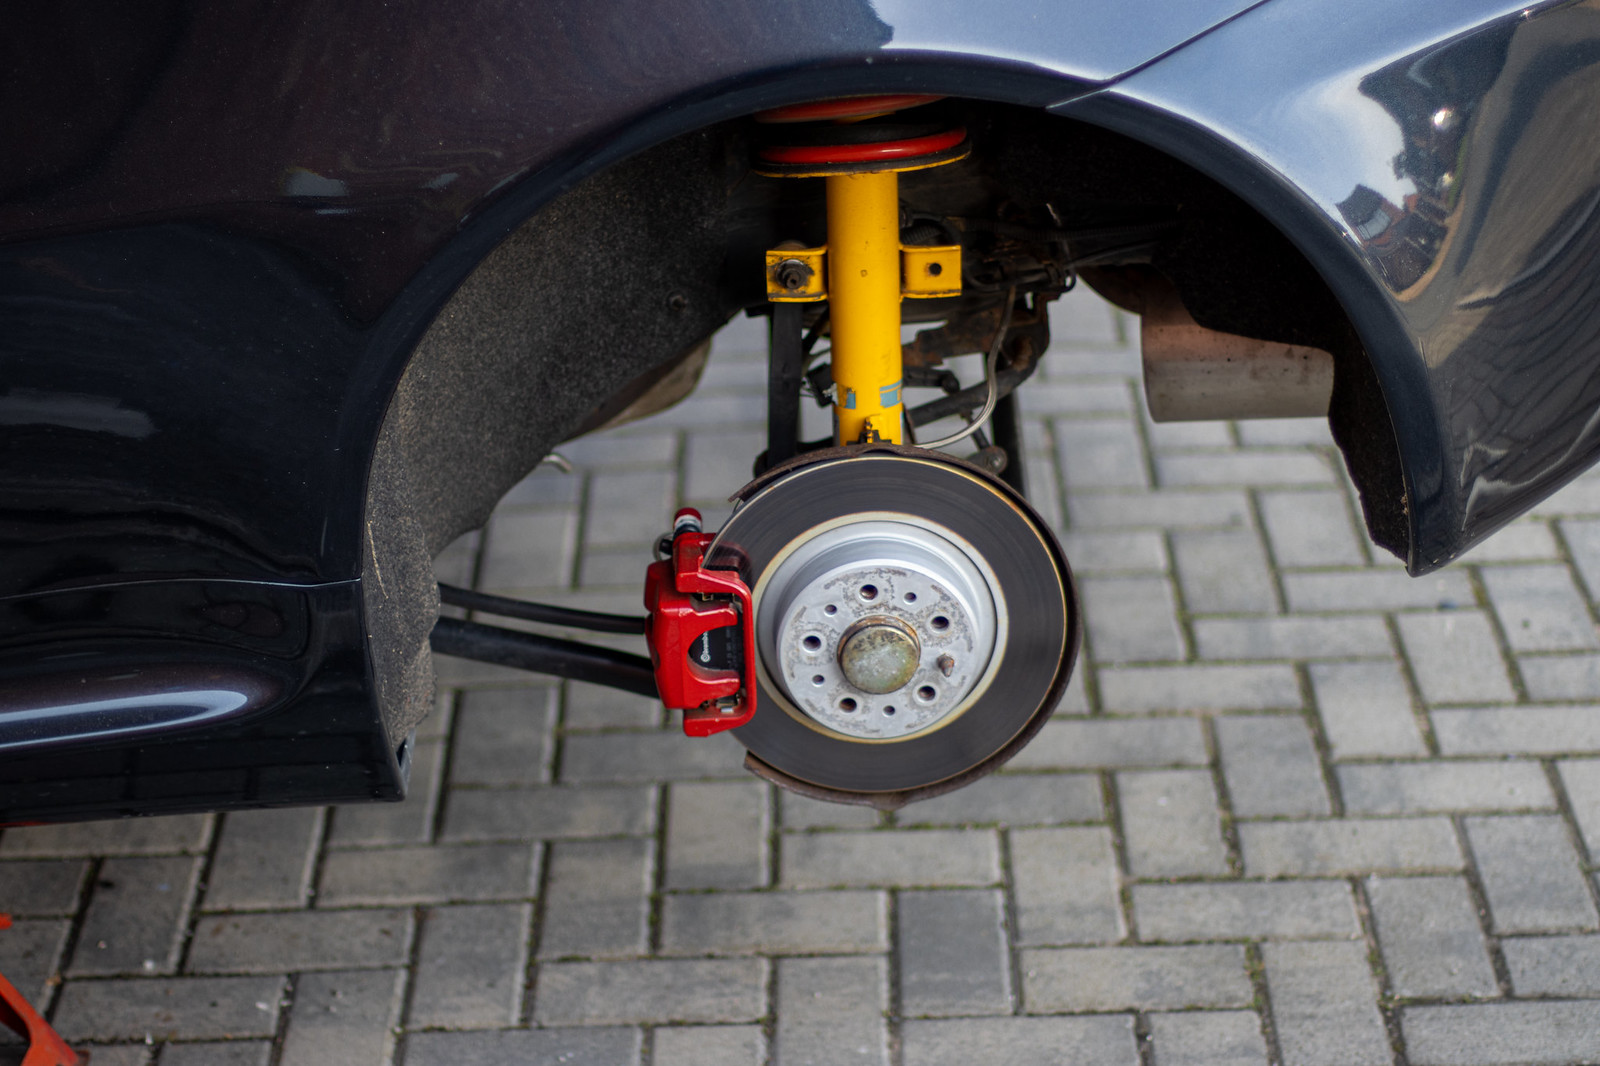
The jobs for this year are a bit more interesting. The springs and dampers currently fitted are Bilstien B8 dampers with eibach springs. With these fitted I think it sits too low at the front and too high at the back. And it understeers.
I can't justify spending £1,500 on some KW v3's, as much as I would like to, it's not a sensible option for me. But I have had an alert set up for GTA coilers and some eibach units eventually popped up on eBay;
 IMG_9778 by Chris, on Flickr
Whilst I've not got round to fitting them (other stupid cars keep getting in the way (buy a BMW they said, it'll be be more reliable than an Alfa they said...), they did need cleaning before I was going to put them on the car which included making sure that the platforms would actually move - they were totally seized... And yes, I did find the grub screw that locks their position.
 IMG_9780 by Chris, on Flickr
Cleaned ultrasonically
 IMG_9909 by Chris, on Flickr
 IMG_9911 by Chris, on Flickr
And manually in a big tub with a toothbrush...
 IMG_9910 by Chris, on Flickr
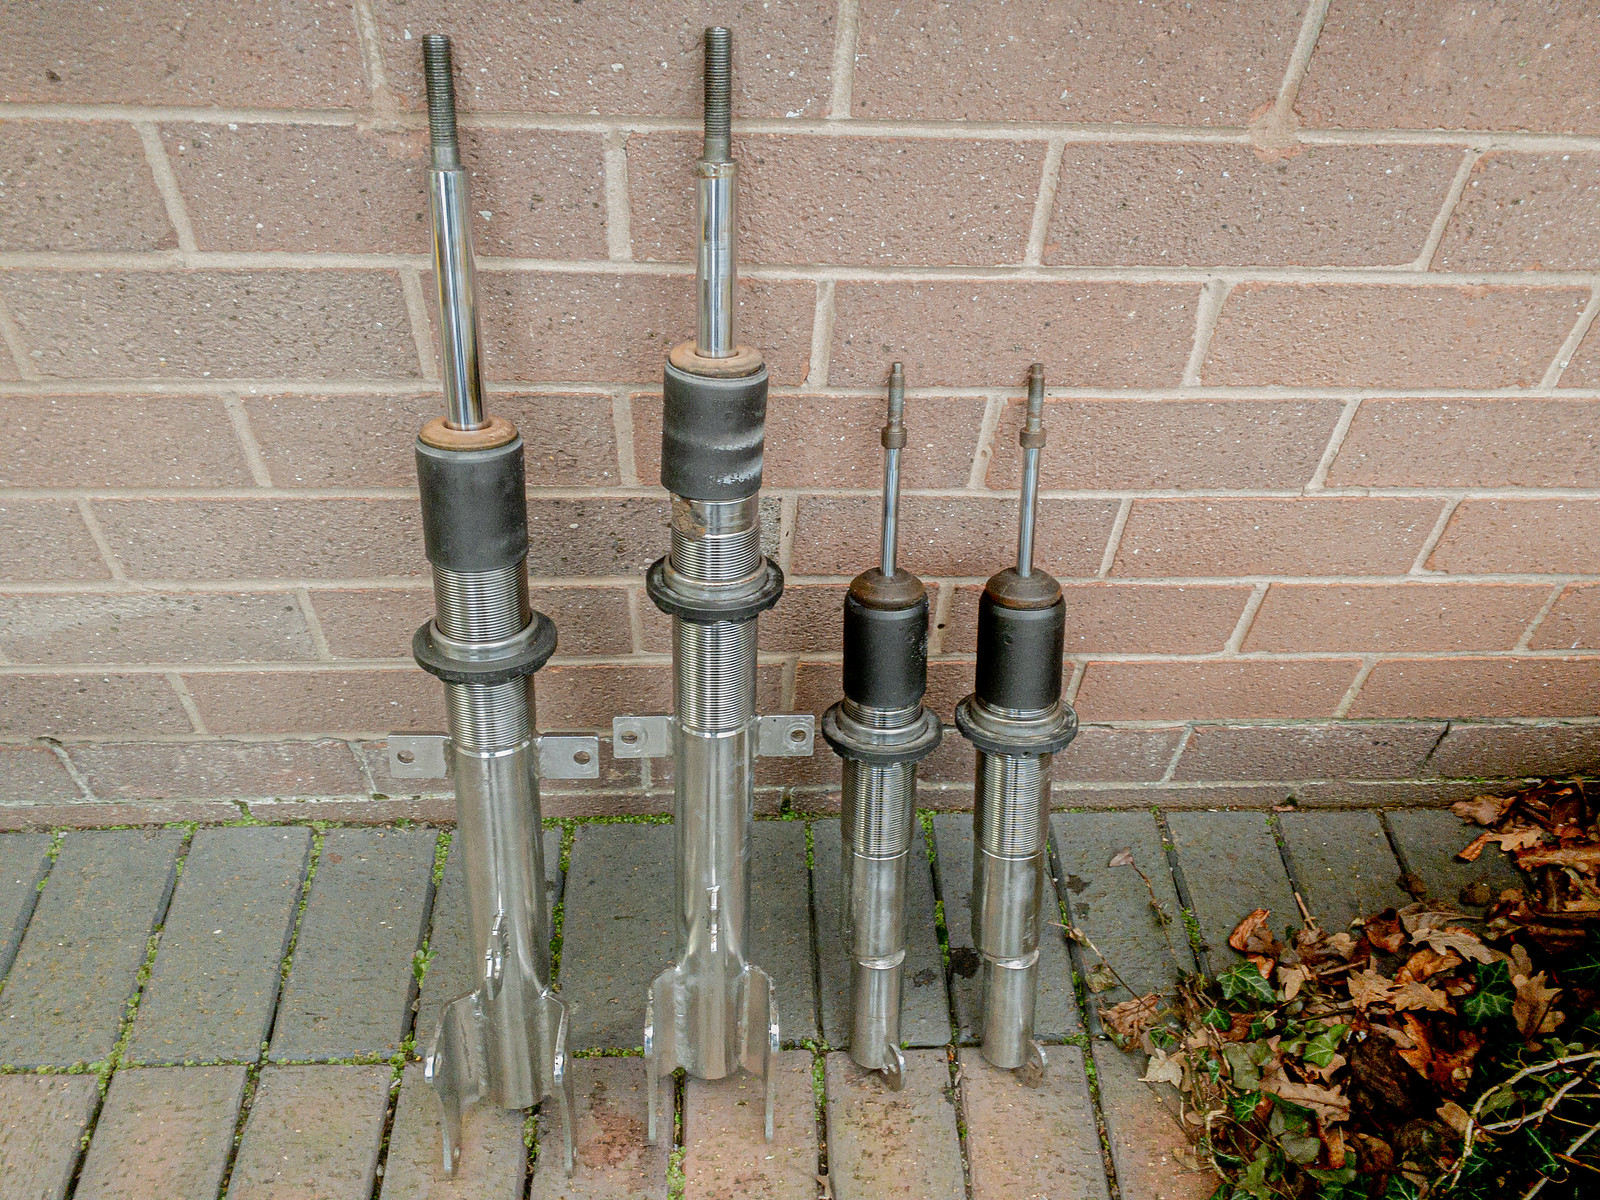 IMG_9912 by Chris, on Flickr
Which means they're now ready to go on. Maybe easter weekend, depending on the weather.
Other jobs for the year include a service. And tyres. Maybe. They're not worn out but they are getting old. I was hoping that the Michelin PS4 S replacement would be launched this year but that's looking unlikely, at best. I might leave this till next year.
https://www.pistonheads.com/features/ph-features/t...
I think the voting process is utterly compromised by ownership numbers. Which would explain why a dull as dishwater Golf would make it onto the list over a GTA. It seems to be more of a poll of who owns what within the PH membership.
Anyway. Update time, which is long overdue. The GTA has been hibernating over the winter and I've only really started to think about what I want to do with it this year recently.
Last year however, we did undertake a few jobs before the winter hit. Starting with the boot carpet. A well know parts supplier regularly updates their stock with genuine parts, which included a new boot carpet for something like 40 quid. Might have been cheaper, can't remember tbh. Know that the boot trim isn't the best, I bought one:
IMG_5336 by Chris, on FlickrIMG_5343 by Chris, on FlickrIMG_5339 by Chris, on FlickrIMG_5340 by Chris, on FlickrAnd it didn't fit. The original mat, has a cut out on the nearside to fit around the bose subwoofer and former CD Changer box on the offside:
IMG_5342 by Chris, on FlickrIMG_5344 by Chris, on FlickrIMG_5345 by Chris, on FlickrIMG_5346 by Chris, on FlickrThere was no way of fitting this under the sub, it needed to be trimmed to fit and the edge (it's a laminated mix of board, foam and carpet) re sealed.
My Dad found a furniture re-upholsterer who has since done this and the carpet has been fitted in the car. I've not taken any pics of it as yet because it's still a work in progress. We've found replacement (carpet) trim to for the seat backs that needs to be fitted and the side trims should clean up - they not as filthy as the floor but do need a proper clean;
IMG_5390 by Chris, on FlickrAs the boot was apart I took the opportunity to investigate the bose system as the bass has been dropping out intermittently.
We tested the Amp with a spare;
IMG_5394 by Chris, on FlickrAnd the bass unit
IMG_5408 by Chris, on FlickrIMG_9267 by Chris, on FlickrAnd.... found no problem with either one. So not the problem. Don't know what it is either. Might be a wiring issue in the back if the head unit. We checked that but I've not used the car since to see if the problem is still there. I expect that it is.
The jobs for this year are a bit more interesting. The springs and dampers currently fitted are Bilstien B8 dampers with eibach springs. With these fitted I think it sits too low at the front and too high at the back. And it understeers.
I can't justify spending £1,500 on some KW v3's, as much as I would like to, it's not a sensible option for me. But I have had an alert set up for GTA coilers and some eibach units eventually popped up on eBay;
IMG_9778 by Chris, on FlickrWhilst I've not got round to fitting them (other stupid cars keep getting in the way (buy a BMW they said, it'll be be more reliable than an Alfa they said...), they did need cleaning before I was going to put them on the car which included making sure that the platforms would actually move - they were totally seized... And yes, I did find the grub screw that locks their position.
IMG_9780 by Chris, on FlickrCleaned ultrasonically
IMG_9909 by Chris, on FlickrIMG_9911 by Chris, on FlickrAnd manually in a big tub with a toothbrush...
IMG_9910 by Chris, on FlickrIMG_9912 by Chris, on FlickrWhich means they're now ready to go on. Maybe easter weekend, depending on the weather.
Other jobs for the year include a service. And tyres. Maybe. They're not worn out but they are getting old. I was hoping that the Michelin PS4 S replacement would be launched this year but that's looking unlikely, at best. I might leave this till next year.
Self explanatory this one...
 IMG_0623-2 by Chris, on Flickr
 IMG_0626 by Chris, on Flickr
 IMG_0624-2 by Chris, on Flickr
 IMG_0627-2 by Chris, on Flickr
 IMG_0629-2 by Chris, on Flickr
IMG_0623-2 by Chris, on FlickrIMG_0626 by Chris, on FlickrIMG_0624-2 by Chris, on FlickrIMG_0627-2 by Chris, on FlickrIMG_0629-2 by Chris, on FlickrNow then.... time for an easter weekend update...
Coilovers.
I've mentioned this before. The car currently has bilstien dampers and eibach springs. I don't like them, it understeers, it sits too high at the rear and the ride quality is, well it's not as bad as the 145 I had running koni shocks, but it is pants.
 IMG_6668 by Chris, on Flickr
Because we had the car apart, including the suspension, on multiple occasions and used copper grease when reassembling things, this was a relatively simple job. Still took about 10 hours over 3 days though.
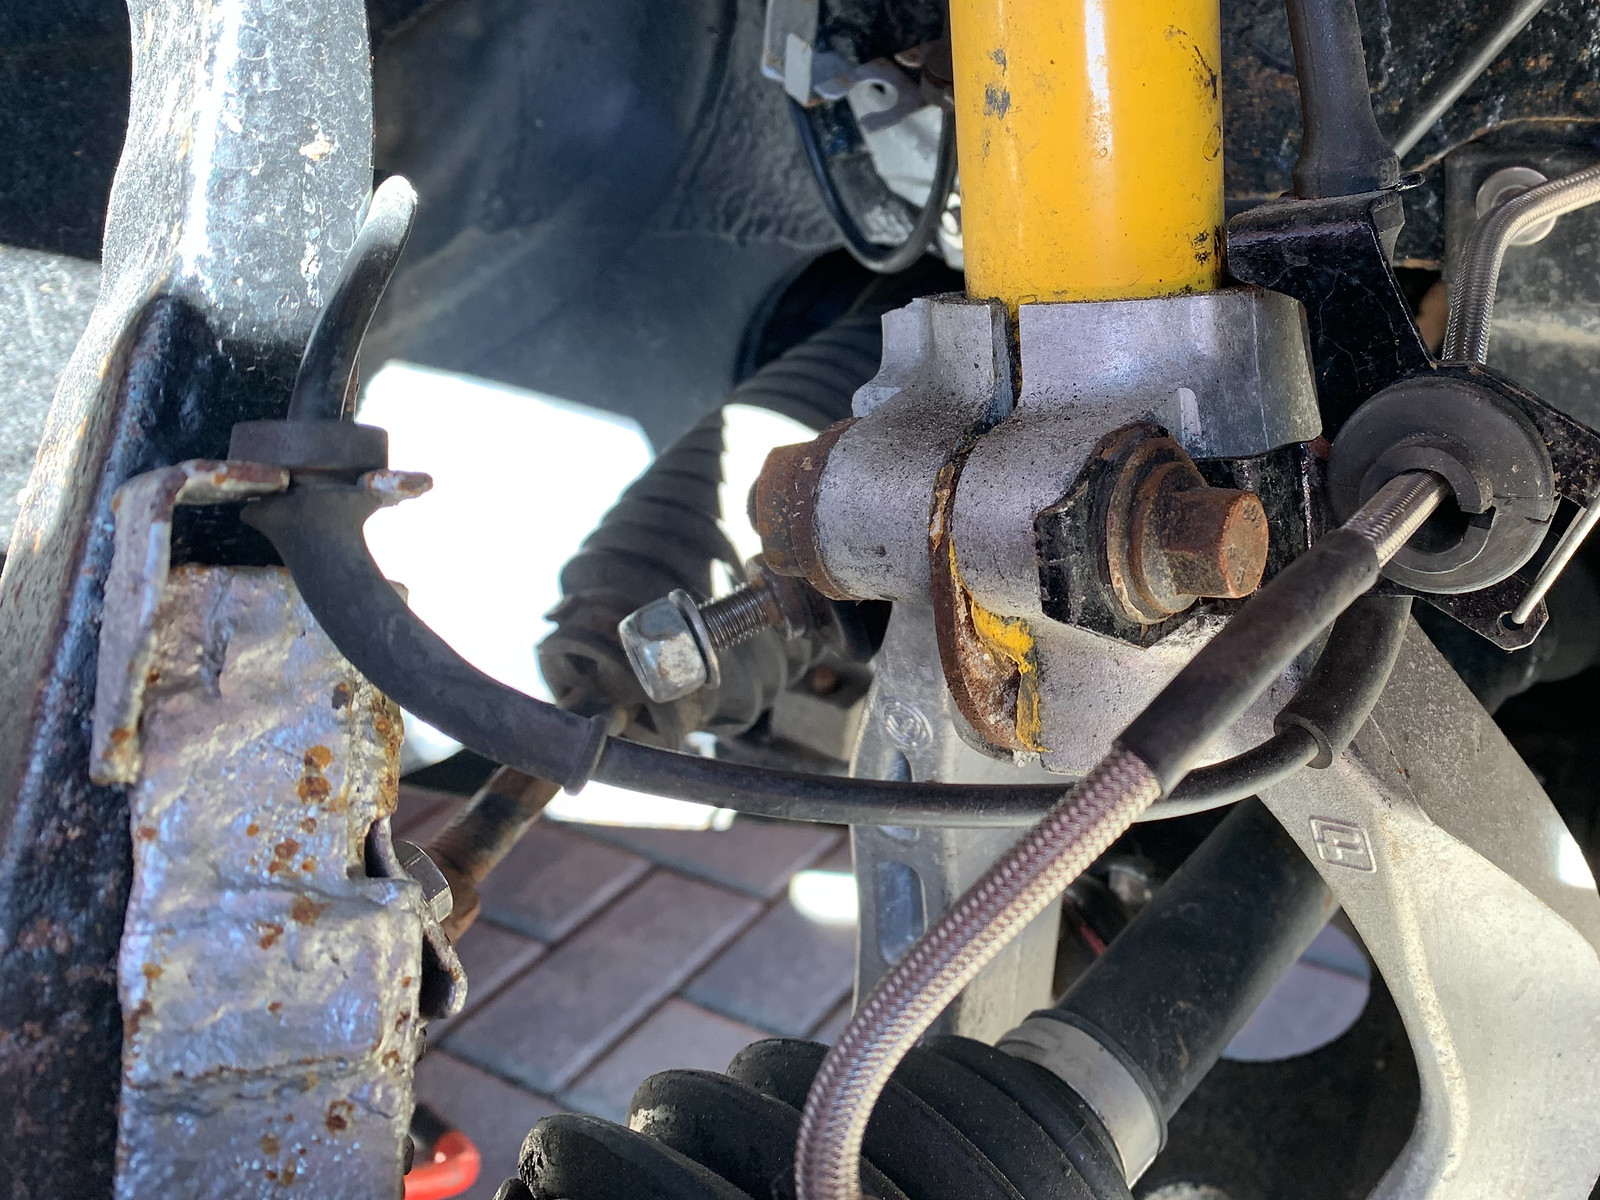
Normally, removing the front struts requires the removal of the lower arms, upright and other bits coupled with hours of swearing simply because the alloy fork that is bolted to the bottom of the damper corrodes and they will not separate.
But, when they will, the job is as simple as...
Split the upper arm ball joint
 IMG_6658 by Chris, on Flickr
 IMG_0684 by Chris, on Flickr
Undo the pinch bolt and the ARB drop link
 IMG_0687 by Chris, on Flickr
Remove the bolt that attaches the fork to the lower arm...
 IMG_0689 by Chris, on Flickr
Separate the damper and fork, et voilà:
 IMG_0690 by Chris, on Flickr
The new coilovers have a shorter spring, which was a bit concerning. It was already stoopid low at the front on the bilstien / eibachs. Low enough so that the under tray will catch speed cushions at anymore than 10mph.
I set them so that the spring was under slight tension at full droop. This placed the spring platform about 30mm down from the top of the thread on the shock body.
 IMG_0707 by Chris, on Flickr
It seems that there's not a loot of height adjustment at the front on this basis. Any lower and the spring would be rattling about, loose.
 IMG_6688 by Chris, on Flickr
Whilst the ARB drop links were absolutely fine, Meyle have started manufacturing an upgraded item, so these were replaced whilst we were at it.
 IMG_6669 by Chris, on Flickr
 IMG_6673 by Chris, on Flickr
 IMG_6681 by Chris, on Flickr
Coilovers.
I've mentioned this before. The car currently has bilstien dampers and eibach springs. I don't like them, it understeers, it sits too high at the rear and the ride quality is, well it's not as bad as the 145 I had running koni shocks, but it is pants.
IMG_6668 by Chris, on FlickrBecause we had the car apart, including the suspension, on multiple occasions and used copper grease when reassembling things, this was a relatively simple job. Still took about 10 hours over 3 days though.
Normally, removing the front struts requires the removal of the lower arms, upright and other bits coupled with hours of swearing simply because the alloy fork that is bolted to the bottom of the damper corrodes and they will not separate.
But, when they will, the job is as simple as...
Split the upper arm ball joint
IMG_6658 by Chris, on FlickrIMG_0684 by Chris, on FlickrUndo the pinch bolt and the ARB drop link
IMG_0687 by Chris, on FlickrRemove the bolt that attaches the fork to the lower arm...
IMG_0689 by Chris, on FlickrSeparate the damper and fork, et voilà:
IMG_0690 by Chris, on FlickrThe new coilovers have a shorter spring, which was a bit concerning. It was already stoopid low at the front on the bilstien / eibachs. Low enough so that the under tray will catch speed cushions at anymore than 10mph.
I set them so that the spring was under slight tension at full droop. This placed the spring platform about 30mm down from the top of the thread on the shock body.
IMG_0707 by Chris, on FlickrIt seems that there's not a loot of height adjustment at the front on this basis. Any lower and the spring would be rattling about, loose.
IMG_6688 by Chris, on FlickrWhilst the ARB drop links were absolutely fine, Meyle have started manufacturing an upgraded item, so these were replaced whilst we were at it.
IMG_6669 by Chris, on FlickrIMG_6673 by Chris, on FlickrIMG_6681 by Chris, on FlickrMoving backwards...
 IMG_6697 by Chris, on Flickr
 IMG_6695 by Chris, on Flickr
 IMG_6690 by Chris, on Flickr
Again, because we've had the suspension apart and rebuilt it with new bolts and copper grease, it fell apart, as it should do.
 IMG_6712 by Chris, on Flickr
I needed the strut tops for the new dampers, so I put them in a spring compressor only to realise that there was little to no pressure on the rear spring. I just undid the top nut with a impact gun:
 IMG_0709 by Chris, on Flickr
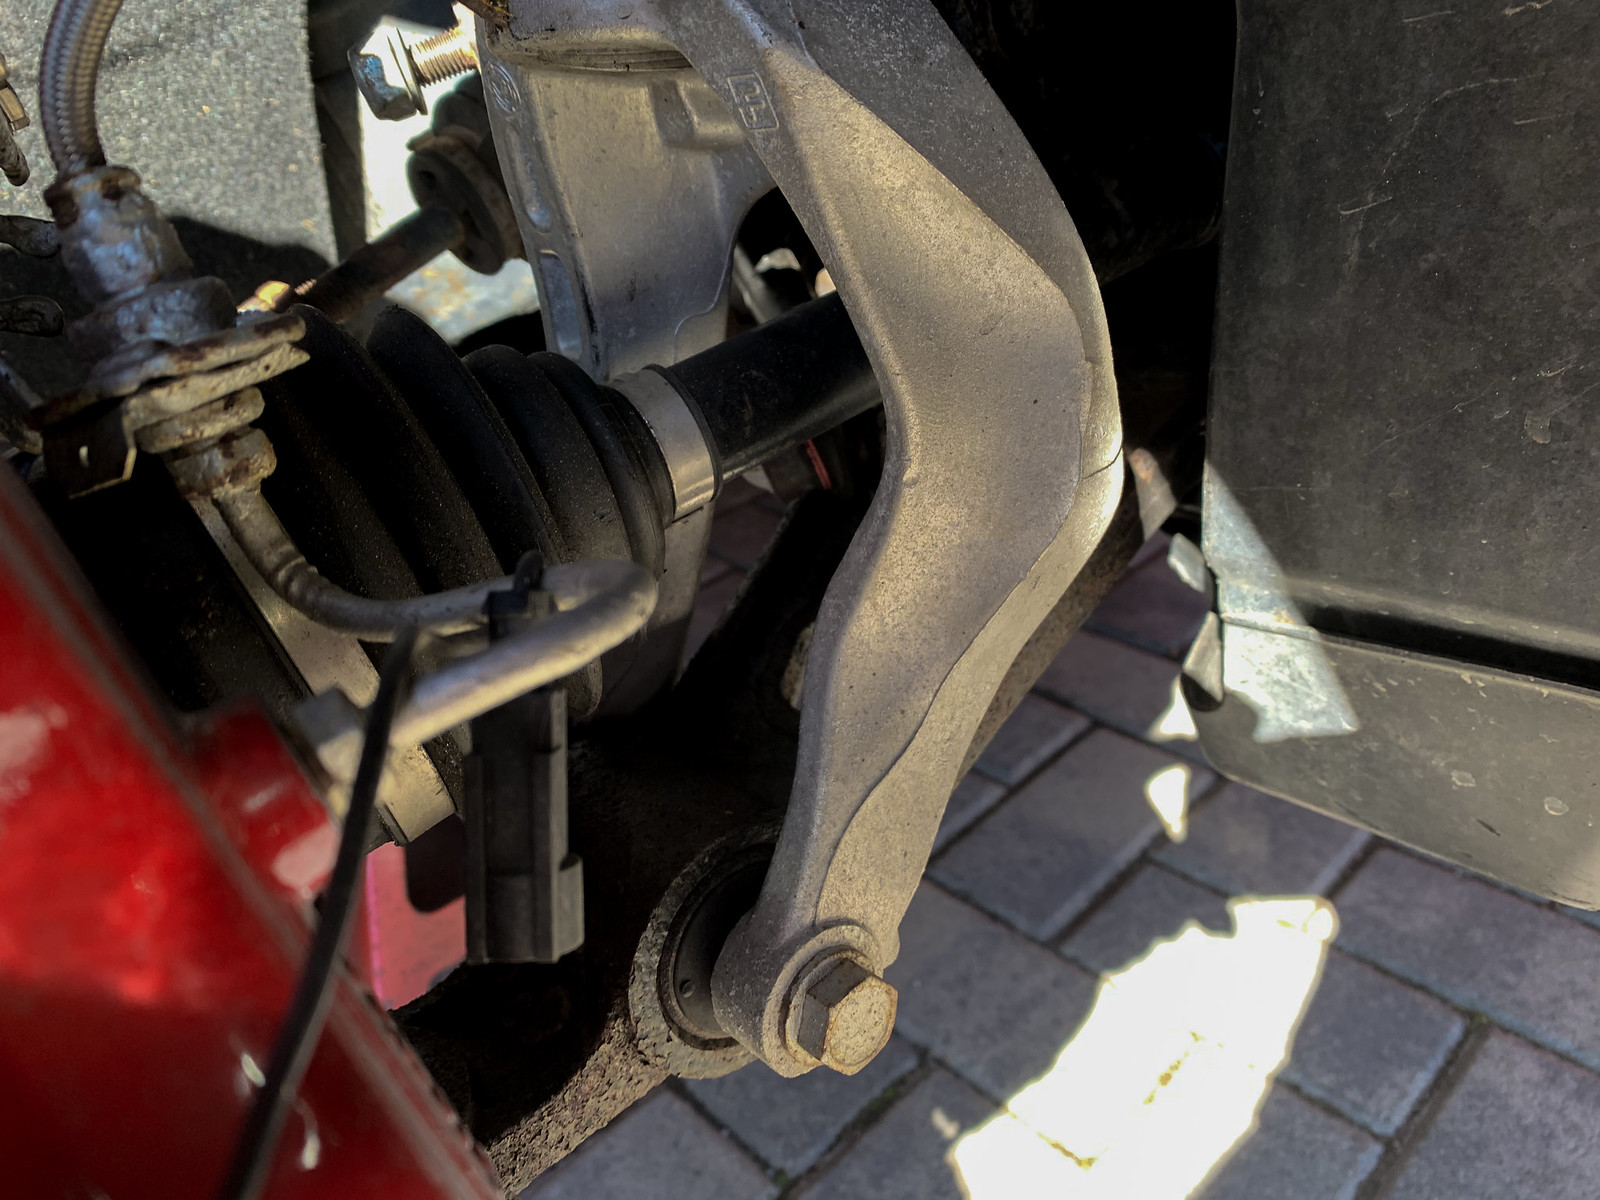
Comparing the 2 dampers, the bilstiens have the standard 2 bolt holes but the eibach/KW coilovers have an elongated upper bolt hole that allows for camber adjustment.
On a standard car, this might be useful but mine has adjustable traverse arms already fitted that allow for camber and toe adjustment.
Measuring the position of the bolt holes elicited the following results. Some fundamental assumptions were obviously made, notably the position of the damper centre line relative to the bolt holes.
Lower bolt hole;
 IMG_0716 by Chris, on Flickr
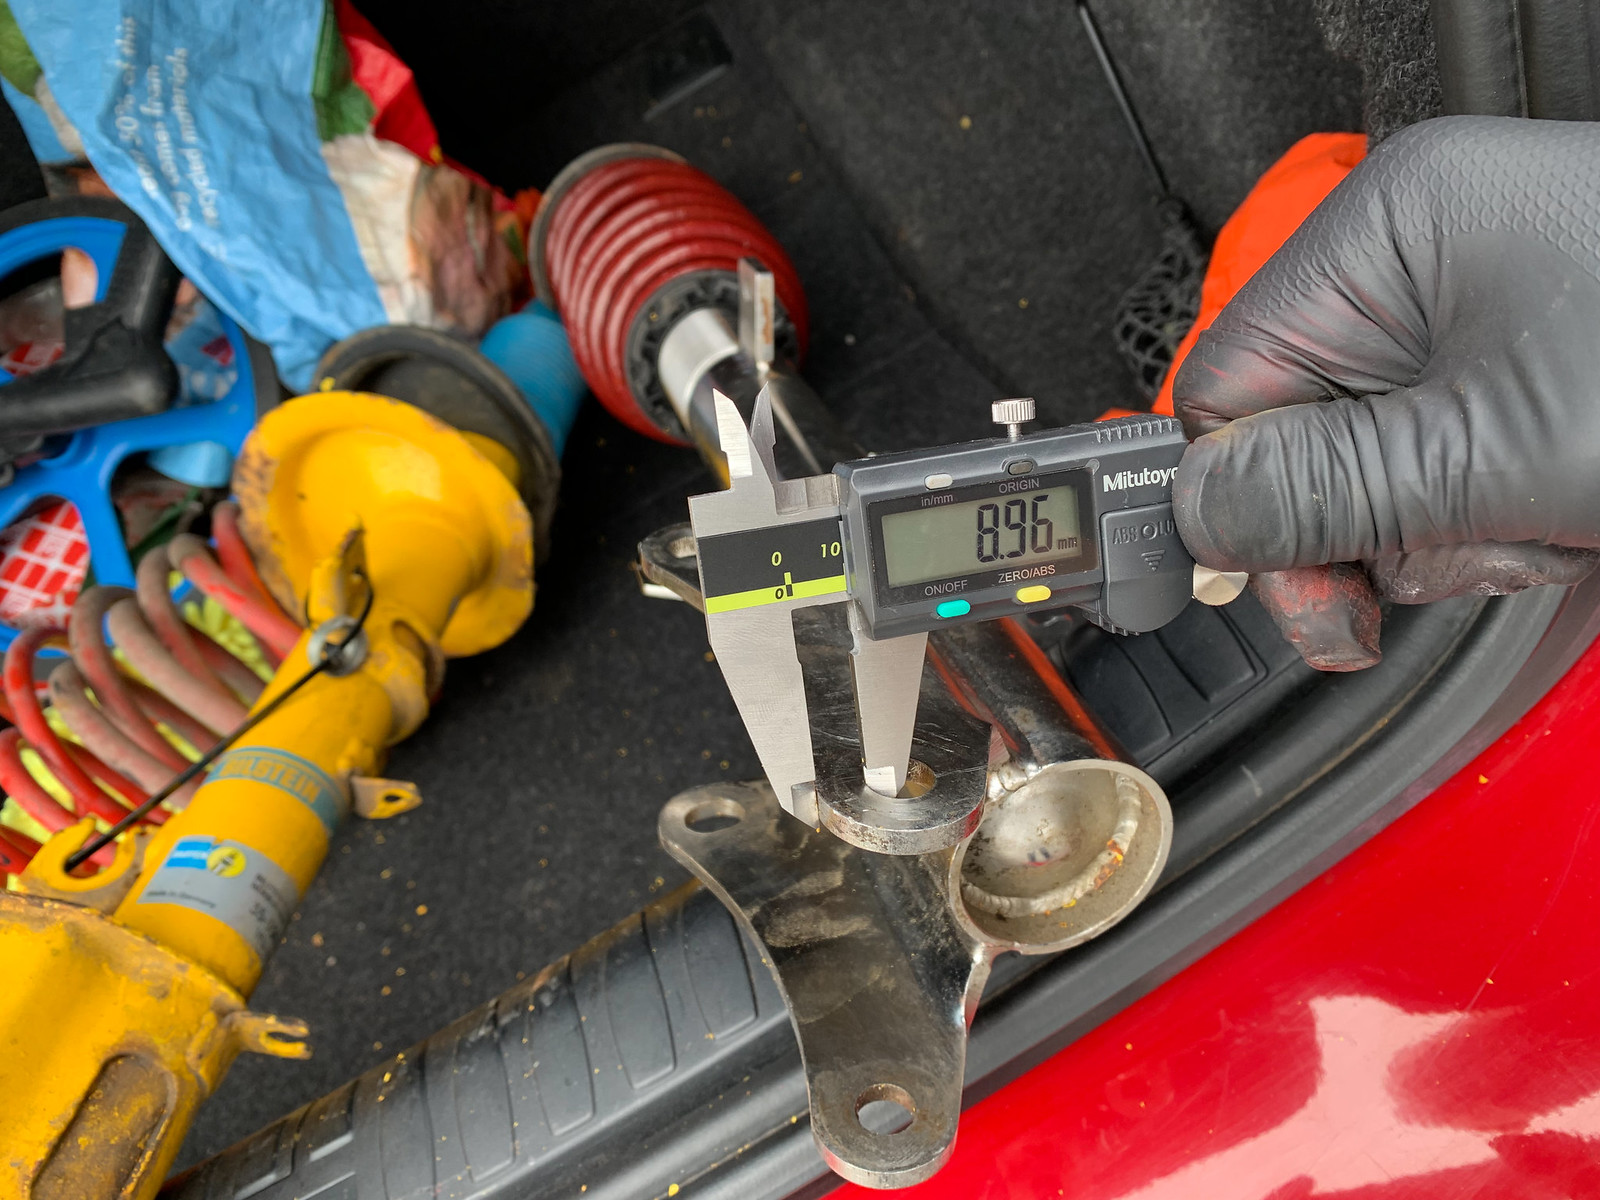 IMG_0718 by Chris, on Flickr
The 0.1mm difference could be ascribed to the missing powder coat on the bilsteiens.
Upper bolt hole - the adjustable one;
 IMG_0720 by Chris, on Flickr
 IMG_0722 by Chris, on Flickr
We also measured the position of the inner radius and found this was in the same place for both dampers. We concluded that the adjustment allows for the existing camber to be retained or additional positive camber to be added.
 IMG_6731 by Chris, on Flickr
End results.
It has pretty much the same ride height at the front and is about 20- 30mm lower at the back. Measuring the sill heights, they're now level with the ground front to rear at about 145-150mm. The same applies to wheel centre to arch height.
 IMG_6717 by Chris, on Flickr
 IMG_6725 by Chris, on Flickr
 IMG_6720 by Chris, on Flickr
On reflection, I think my Dad is right and it's too low at the back now. It needs lifting by about 5mm.
Ride quality is on a par wit the bilsteins, so not great.
But it after driving it all of 7 miles, the local roundabout appears to suggest a bias towards oversteer.
I think, if I raise the rear by the 5mm, this will add some compression to the rear springs and shift the handling bias further towards oversteer.
IMG_6697 by Chris, on FlickrIMG_6695 by Chris, on FlickrIMG_6690 by Chris, on FlickrAgain, because we've had the suspension apart and rebuilt it with new bolts and copper grease, it fell apart, as it should do.
IMG_6712 by Chris, on FlickrI needed the strut tops for the new dampers, so I put them in a spring compressor only to realise that there was little to no pressure on the rear spring. I just undid the top nut with a impact gun:
IMG_0709 by Chris, on FlickrComparing the 2 dampers, the bilstiens have the standard 2 bolt holes but the eibach/KW coilovers have an elongated upper bolt hole that allows for camber adjustment.
On a standard car, this might be useful but mine has adjustable traverse arms already fitted that allow for camber and toe adjustment.
Measuring the position of the bolt holes elicited the following results. Some fundamental assumptions were obviously made, notably the position of the damper centre line relative to the bolt holes.
Lower bolt hole;
IMG_0716 by Chris, on FlickrIMG_0718 by Chris, on FlickrThe 0.1mm difference could be ascribed to the missing powder coat on the bilsteiens.
Upper bolt hole - the adjustable one;
IMG_0720 by Chris, on FlickrIMG_0722 by Chris, on FlickrWe also measured the position of the inner radius and found this was in the same place for both dampers. We concluded that the adjustment allows for the existing camber to be retained or additional positive camber to be added.
IMG_6731 by Chris, on FlickrEnd results.
It has pretty much the same ride height at the front and is about 20- 30mm lower at the back. Measuring the sill heights, they're now level with the ground front to rear at about 145-150mm. The same applies to wheel centre to arch height.
IMG_6717 by Chris, on FlickrIMG_6725 by Chris, on FlickrIMG_6720 by Chris, on FlickrOn reflection, I think my Dad is right and it's too low at the back now. It needs lifting by about 5mm.
Ride quality is on a par wit the bilsteins, so not great.
But it after driving it all of 7 miles, the local roundabout appears to suggest a bias towards oversteer.
I think, if I raise the rear by the 5mm, this will add some compression to the rear springs and shift the handling bias further towards oversteer.
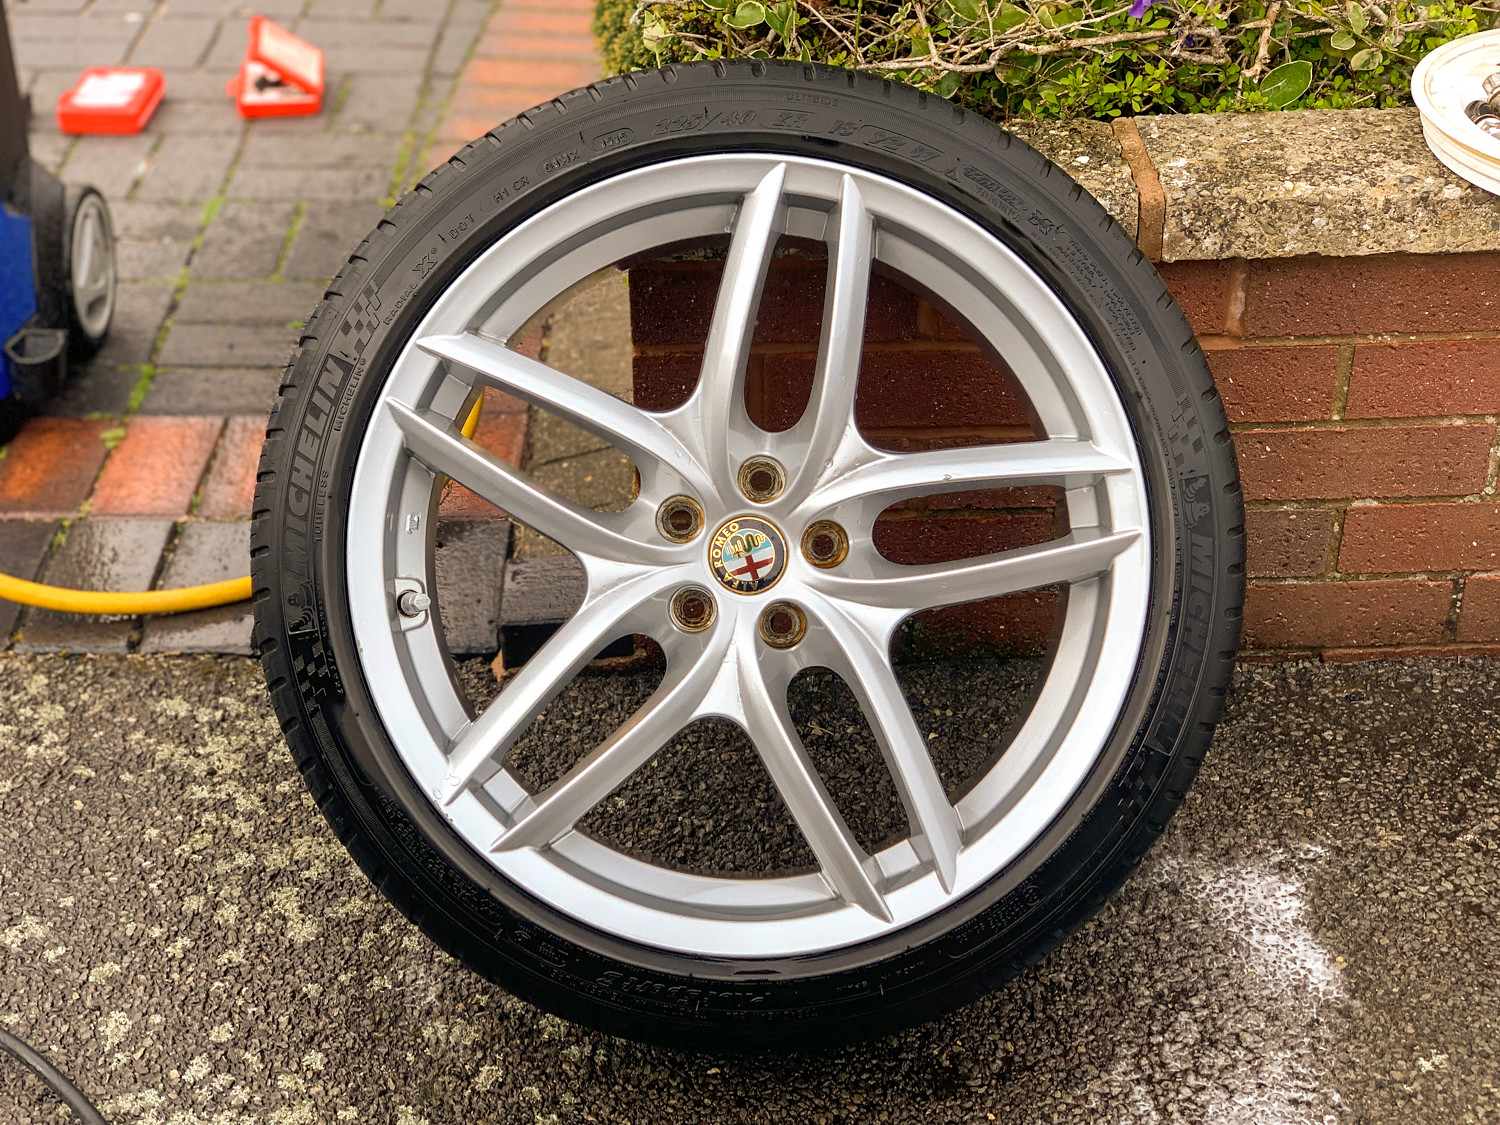
I didn't think it was that long ago that I took the GTA for an MOT but it was 6 months ago now. It passed with advisories for both from tyres being close to the wear bars.
Which is why it's now wearing new tyres all round and different wheels. Given how many pictures I take of it, I imagine anyone reading this would think I must have some decent pics of it on the new wheels but I don't. Just this one;
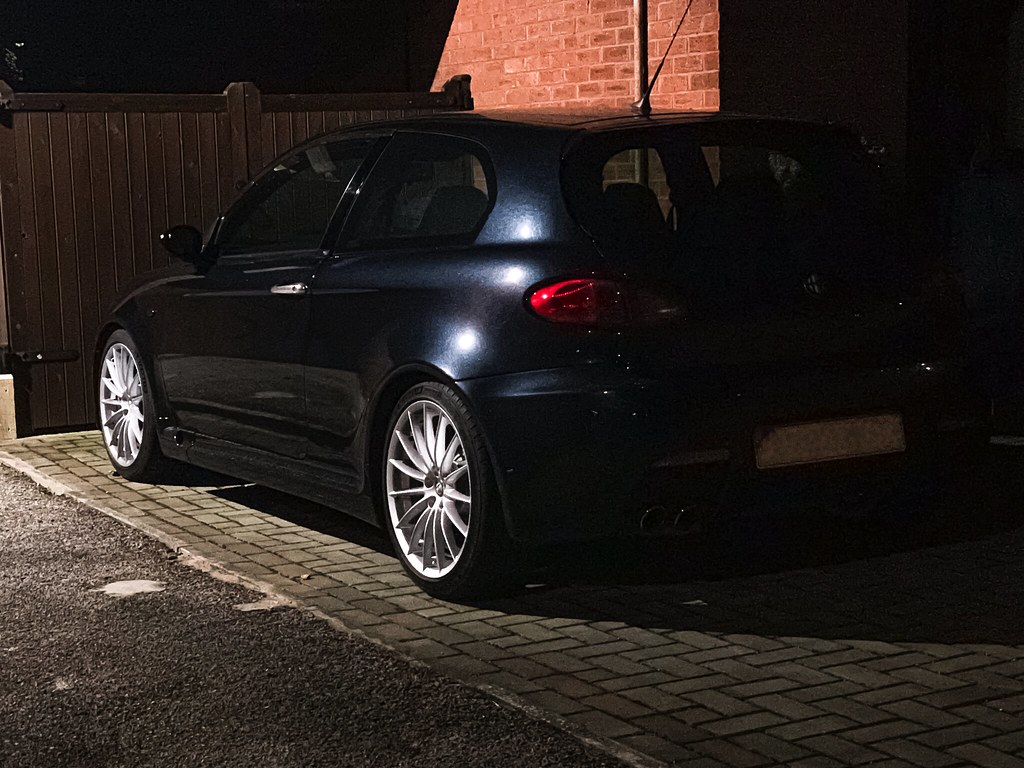 IMG_2851-2 by Chris, on Flickr
My Dad also gave me a very nice Christmas present, which arrived yesterday and prompted the thread update:
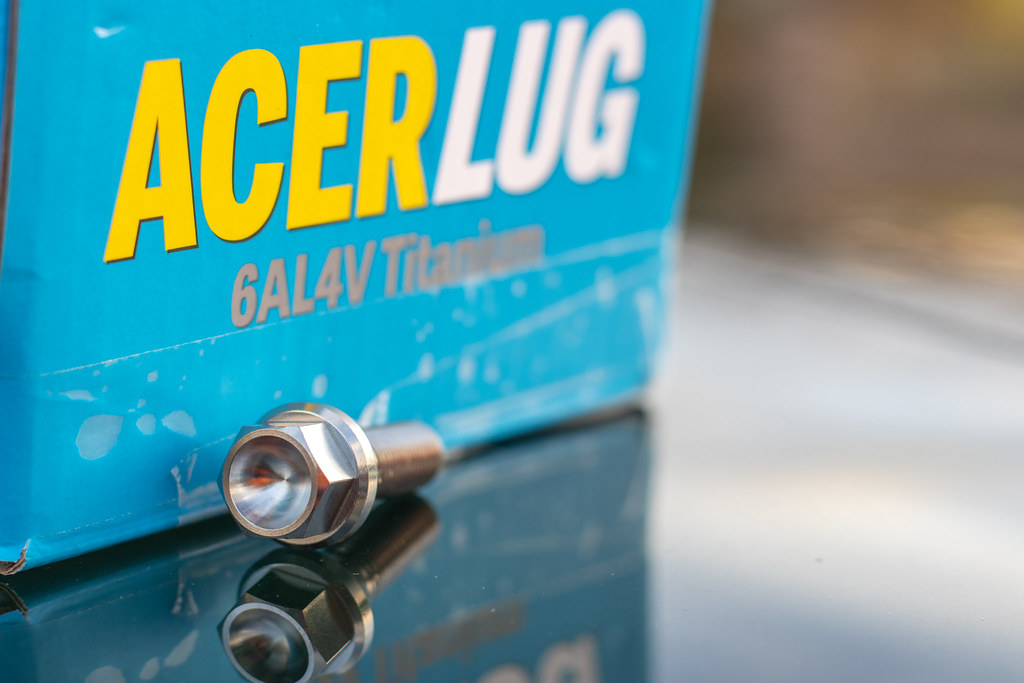 IMG_8397 by Chris, on Flickr
 IMG_8398 by Chris, on Flickr
Not that the old wheel bolts were that scruff but they do create issues with rust stains.
Before:
 IMG_8372-2 by Chris, on Flickr
After:
 IMG_8414-Enhanced-NR by Chris, on Flickr
 IMG_8414-Enhanced-NR-3 by Chris, on Flickr
Another job on the list was to replace the rear wiper arm / blade. The one I fitted earlier just wasn't up to par so a genuine part that was silly expensive for what it is was sourced and fitted.
Note the angle of the blade - It was noisy and wasn't effective at clearing the rear screen, so basically useless
 IMG_8360 by Chris, on Flickr
 IMG_8376 by Chris, on Flickr
 IMG_8373 by Chris, on Flickr
 IMG_8381 by Chris, on Flickr
 IMG_8384 by Chris, on Flickr
Which is why it's now wearing new tyres all round and different wheels. Given how many pictures I take of it, I imagine anyone reading this would think I must have some decent pics of it on the new wheels but I don't. Just this one;
IMG_2851-2 by Chris, on FlickrMy Dad also gave me a very nice Christmas present, which arrived yesterday and prompted the thread update:
IMG_8397 by Chris, on FlickrIMG_8398 by Chris, on FlickrNot that the old wheel bolts were that scruff but they do create issues with rust stains.
Before:
IMG_8372-2 by Chris, on FlickrAfter:
IMG_8414-Enhanced-NR by Chris, on FlickrIMG_8414-Enhanced-NR-3 by Chris, on FlickrAnother job on the list was to replace the rear wiper arm / blade. The one I fitted earlier just wasn't up to par so a genuine part that was silly expensive for what it is was sourced and fitted.
Note the angle of the blade - It was noisy and wasn't effective at clearing the rear screen, so basically useless
IMG_8360 by Chris, on FlickrIMG_8376 by Chris, on FlickrIMG_8373 by Chris, on FlickrIMG_8381 by Chris, on FlickrIMG_8384 by Chris, on FlickrGassing Station | Readers' Cars | Top of Page | What's New | My Stuff