147 GTA progress thread (July 2013 to present)
Discussion


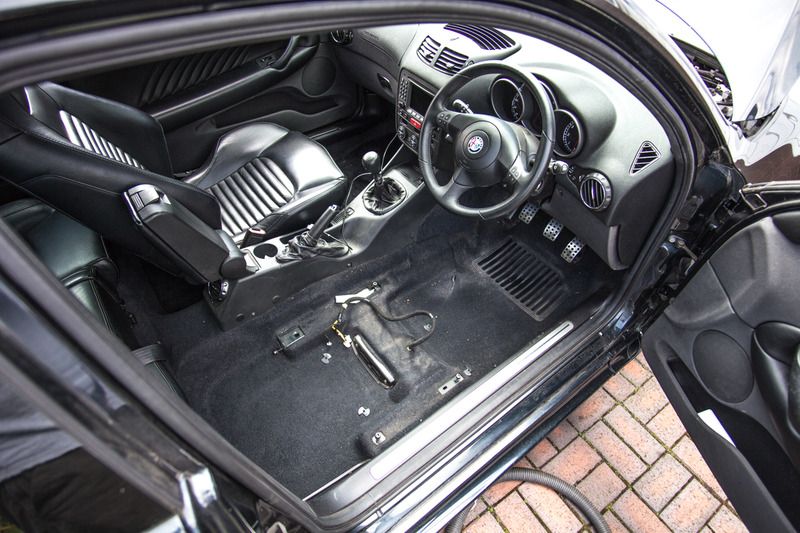
Not sure if mI've mentioned this before but throttle response when heel and toeing has been a bit off making it difficult to accomplish. I had put new MAF on it before I pulled the engine out and that had helped but I thought the duff lambda sensors were still a hindrance.
Thing is, I thought the maf was suspect on the diesel 156 I use as my daily drive, so I pinched the new one from the GTA, whilst it was off the road, and stuck it on the wiesel. (they're the same sensor, they just use different housings)...
With the new lambdas the GTA is running much better but still lacking that initial throttle pick up on the suspect maf out of the wiesel. So another new MAF has been fitted today and it's back to the way it should be. Result.
Edited by Zombie on Saturday 31st October 23:44
GTAs are an odd beast, there's something about them that persuades you to spent ungodly amounts of time and money maintaining them. Maintenance wise, I think I'm up to just shy of seven grand over the last three years (though 1k of that was on the recently acquired Wizard exhaust, whch was worth every penny.)
Your car - and the work you've done it - looks fantastic.
Your car - and the work you've done it - looks fantastic.
I gave it a quick service over the christmas break; new oil and filter. It should be a relatively simple job but it ended up take 3 bloody hours;
No fuel in the car - right, where's the jerry can? Ah typical, it's empty.
Petrol station it is...
Back to the car... Where's the neck for the jerry can? Spent an hour looking for that...
Back to car... 20 min warming it up then 20min with engine flush in it.
Then an hour fighting with the b d oil cooler and poor steering pipes trying to get the oil filter out.
By which time it was both dark and raining.
No fuel in the car - right, where's the jerry can? Ah typical, it's empty.
Petrol station it is...
Back to the car... Where's the neck for the jerry can? Spent an hour looking for that...
Back to car... 20 min warming it up then 20min with engine flush in it.
Then an hour fighting with the b
d oil cooler and poor steering pipes trying to get the oil filter out.By which time it was both dark and raining.

Passed it's MOT today 
Advisories for;
Weak handbrake - just needs adjusting
Trailing arm bushes have slight movement - They're supposed too...
Slight exhaust leak from centre section - Ahhhh. That explains the fault codes. The leak is right by the secondary lambdas. Can't hear it leaking as it has a stainless exhaust on it...
Edited by Zombie on Thursday 31st March 22:49
Lovely car mate, and a serious amount of talent gone into it to keep her sweet. Owning an Alfa is definitely a labour of love so hats off to you!
The Cloverleaf alloys look really good on the 147 but I honestly think the car could do with a slight drop in ride height for the wheels to fill the arches a bit more. Nothing serious, maybe 25mm or something in that region but its all down to personal preference
I'm seriously getting the GTA itch, I loved the 156's my Dad had years back.
Cheers!
Spantney said:
Lovely car mate, and a serious amount of talent gone into it to keep her sweet. Owning an Alfa is definitely a labour of love so hats off to you!
The Cloverleaf alloys look really good on the 147 but I honestly think the car could do with a slight drop in ride height for the wheels to fill the arches a bit more. Nothing serious, maybe 25mm or something in that region but its all down to personal preference
I'm seriously getting the GTA itch, I loved the 156's my Dad had years back.
Cheers!
Thank you very much. I agree, it needs a drop but i'm somewhat conflicted about the premise. The wheels it's on now are known for bucking easily and the 156 daily runner is on konis - rides like a bag of poo and doesn't handle unless the road is dry and super smooth. The GTA on it's softer set up with greater travel works. I will admit though, the bushes on the GTA are all new and the 156's are probably shagged.The Cloverleaf alloys look really good on the 147 but I honestly think the car could do with a slight drop in ride height for the wheels to fill the arches a bit more. Nothing serious, maybe 25mm or something in that region but its all down to personal preference
I'm seriously getting the GTA itch, I loved the 156's my Dad had years back.
Cheers!

I may have mentioned this earlier in the thread but I didn't feel like posting any pics...
 IMG_0453 by Chris, on Flickr
 IMG_0441 by Chris, on Flickr
I found a replacement door for it a while ago (in black not cosmos blue), but the rear quarter on the same side has tiger stripes in it where the flake in the metallic hasn't been applied evenly.
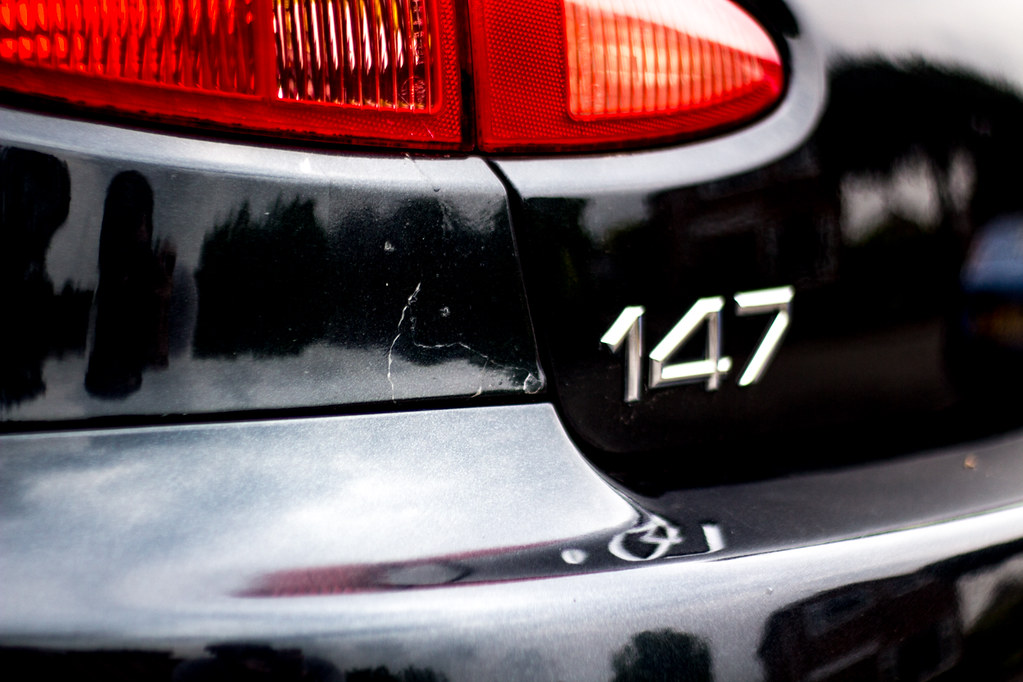
And then there's the pealing lacquer on the front bumper;
 IMG_0442 by Chris, on Flickr
The rear quarter;
 IMG_0450 by Chris, on Flickr
Around the rear window
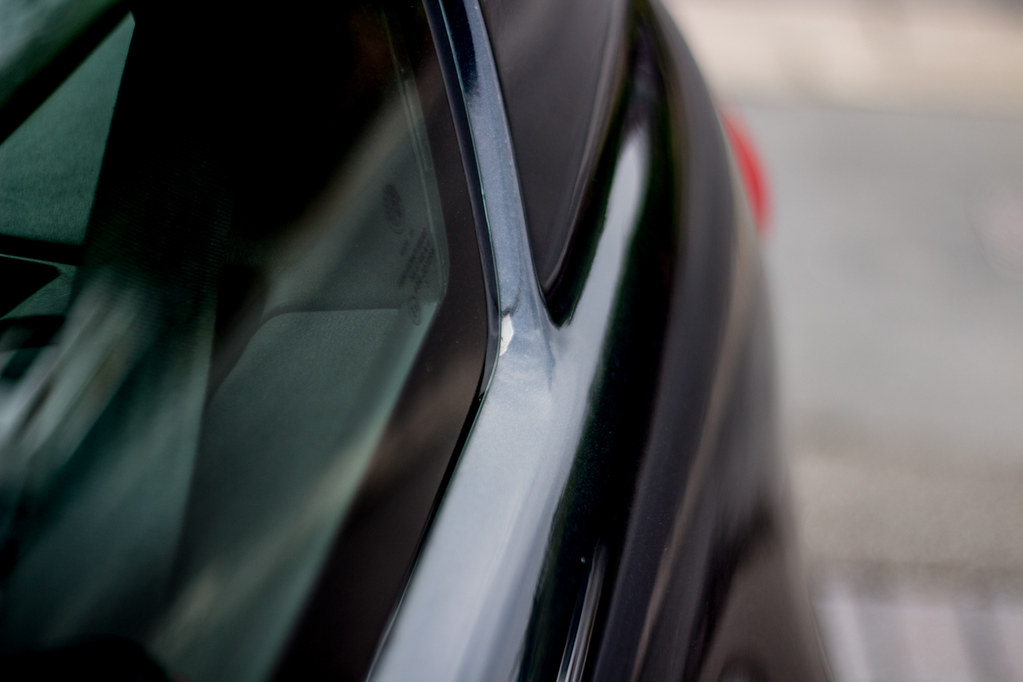 IMG_0447 by Chris, on Flickr
And the rear bumper
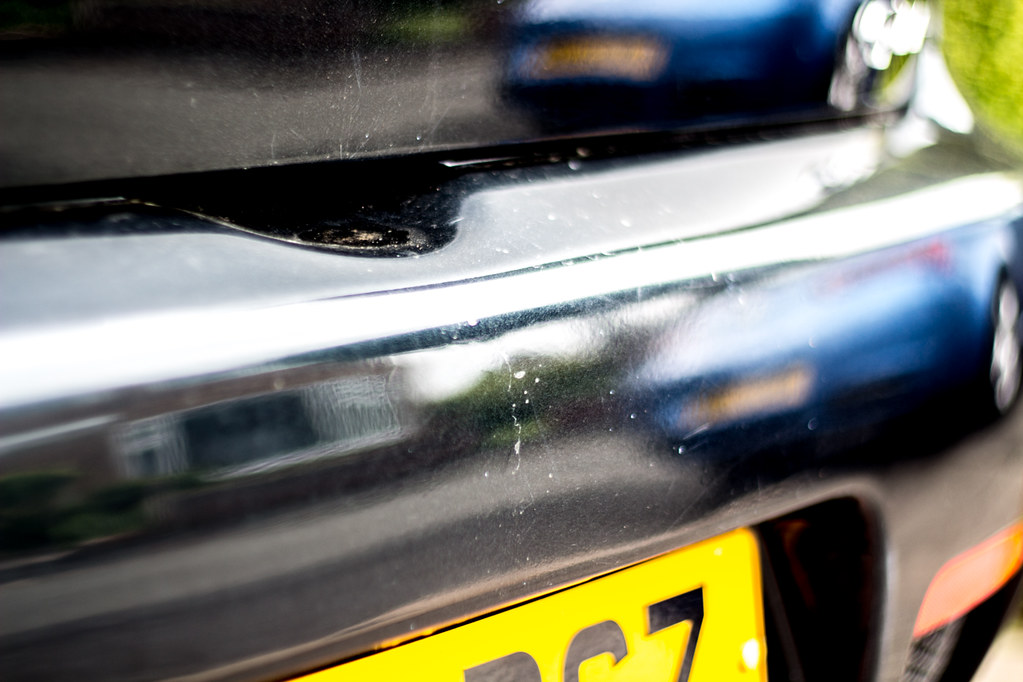 IMG_0433 by Chris, on Flickr
The rest of the front bumper is scruffy;
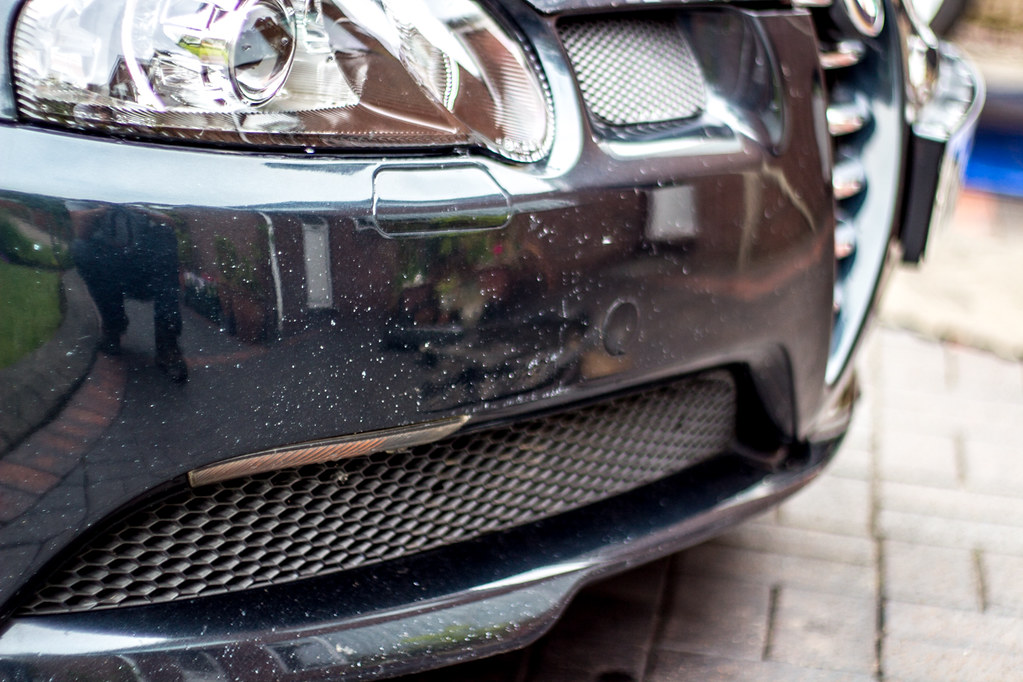 IMG_0443 by Chris, on Flickr
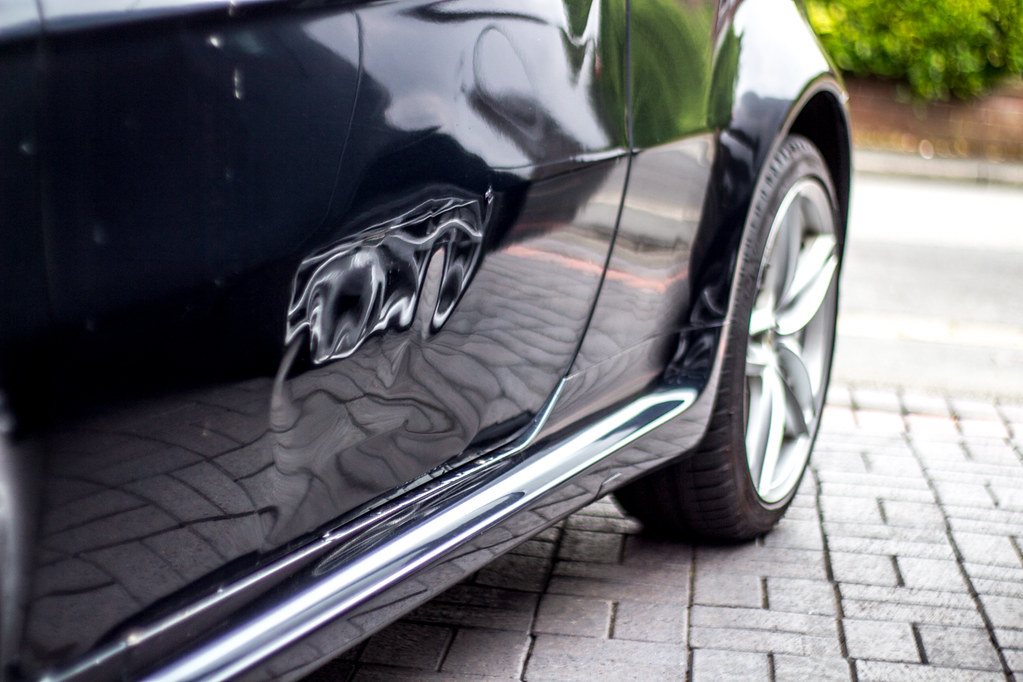
The wing has a ding in it as well...
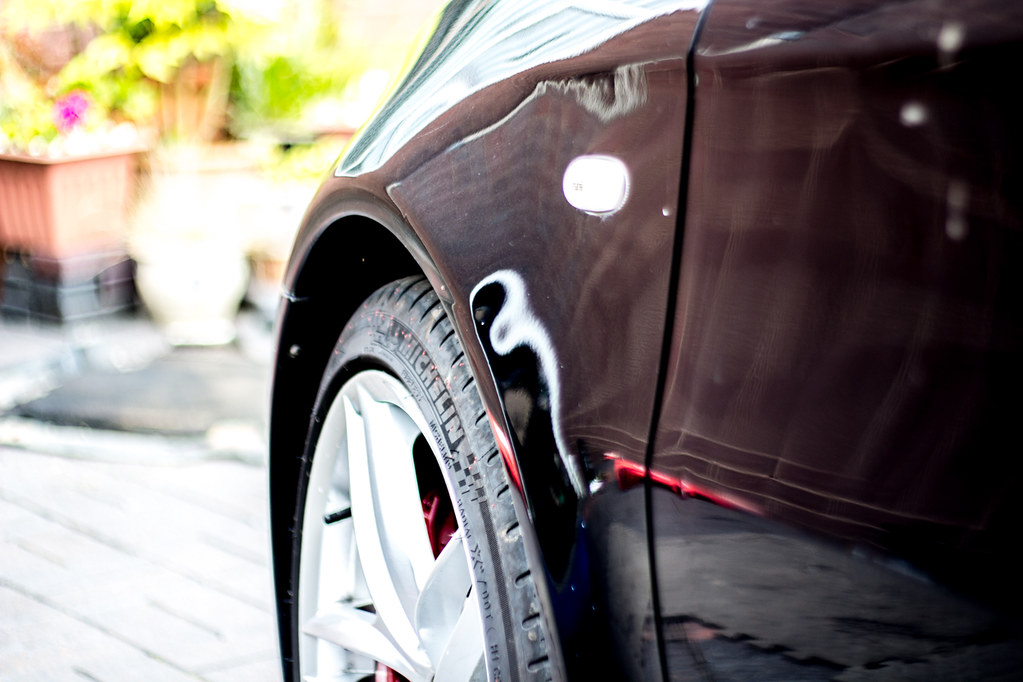 IMG_0440 by Chris, on Flickr
So what to do?
The inevitable I guess...
Sound insulation out, and washers removed
 IMG_0454 by Chris, on Flickr
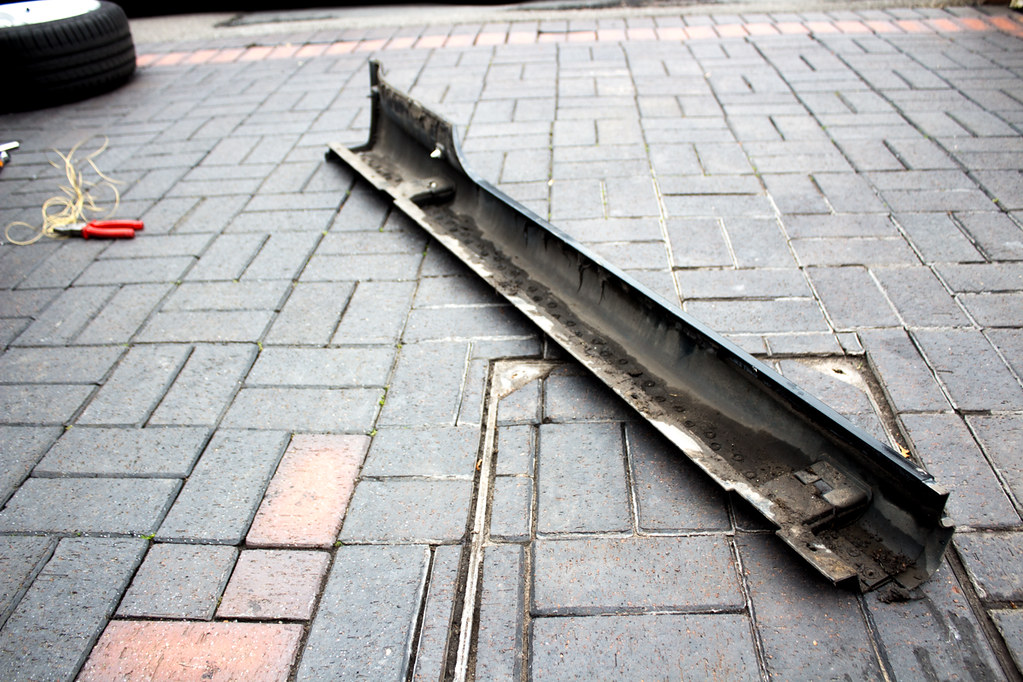
Side skirts off
https://www.flickr.com/photos/97420435@N05/2751413...
That was not an easy job but someone had been there before and broken the front mount
 IMG_0465 by Chris, on Flickr
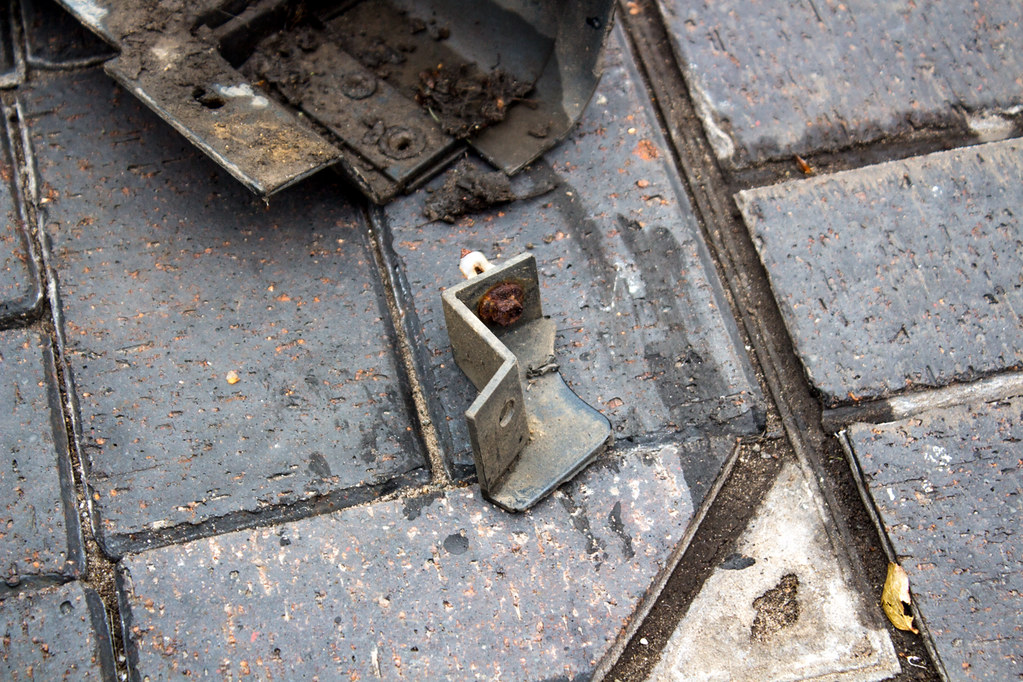 IMG_0466 by Chris, on Flickr
Front section came off easy enough;
 IMG_0467 by Chris, on Flickr
I've had the front arch liners out before but the rears? OMG! Hours of pain awaits...
IMG_0453 by Chris, on FlickrIMG_0441 by Chris, on FlickrI found a replacement door for it a while ago (in black not cosmos blue), but the rear quarter on the same side has tiger stripes in it where the flake in the metallic hasn't been applied evenly.
And then there's the pealing lacquer on the front bumper;
IMG_0442 by Chris, on FlickrThe rear quarter;
IMG_0450 by Chris, on FlickrAround the rear window
IMG_0447 by Chris, on FlickrAnd the rear bumper
IMG_0433 by Chris, on FlickrThe rest of the front bumper is scruffy;
IMG_0443 by Chris, on FlickrThe wing has a ding in it as well...
IMG_0440 by Chris, on FlickrSo what to do?
The inevitable I guess...
Sound insulation out, and washers removed
IMG_0454 by Chris, on FlickrSide skirts off
https://www.flickr.com/photos/97420435@N05/2751413...
That was not an easy job but someone had been there before and broken the front mount
IMG_0465 by Chris, on FlickrIMG_0466 by Chris, on FlickrFront section came off easy enough;
IMG_0467 by Chris, on FlickrI've had the front arch liners out before but the rears? OMG! Hours of pain awaits...
Rear liners are mostly easy. Plastic poppers, if you have one of those plastic trim tools they come out easily.
The exception is the 10 mm nut at the bottom front. It will be corroded solid, and you will shear the stud, no amount of WD40 will help you. The only technique that has worked for me is getting it white hot in 3 seconds with an induction heater, then unscrewing it quickly before the liner melts. Can't use a blow torch, the liner will go up and you're about 2 inches from the petrol tank.
The exception is the 10 mm nut at the bottom front. It will be corroded solid, and you will shear the stud, no amount of WD40 will help you. The only technique that has worked for me is getting it white hot in 3 seconds with an induction heater, then unscrewing it quickly before the liner melts. Can't use a blow torch, the liner will go up and you're about 2 inches from the petrol tank.
rxe said:
Rear liners are mostly easy. Plastic poppers, if you have one of those plastic trim tools they come out easily.
The exception is the 10 mm nut at the bottom front. It will be corroded solid, and you will shear the stud, no amount of WD40 will help you. The only technique that has worked for me is getting it white hot in 3 seconds with an induction heater, then unscrewing it quickly before the liner melts. Can't use a blow torch, the liner will go up and you're about 2 inches from the petrol tank.
Its the 3 self tappers that are the issue, particularly the one in the rear bumper. The are all seized, have no head left and all need drilling out.The exception is the 10 mm nut at the bottom front. It will be corroded solid, and you will shear the stud, no amount of WD40 will help you. The only technique that has worked for me is getting it white hot in 3 seconds with an induction heater, then unscrewing it quickly before the liner melts. Can't use a blow torch, the liner will go up and you're about 2 inches from the petrol tank.
And the cheapest induction heater I can find is £400! Bit of an indulgence when you consider I should be buying a house!
Edited by Zombie on Saturday 11th June 23:08
Gassing Station | Readers' Cars | Top of Page | What's New | My Stuff