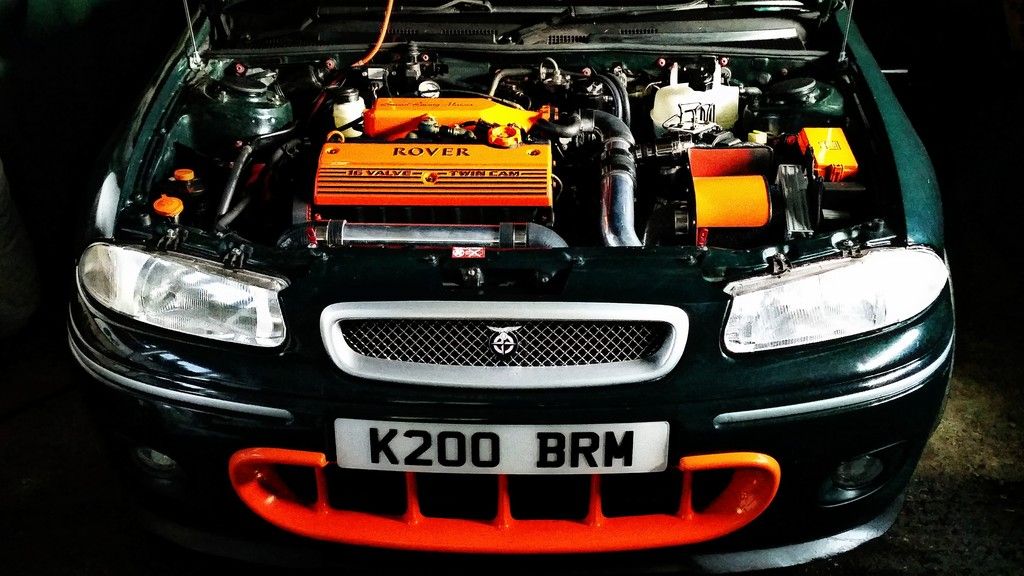
Rover 200 BRM - 1.8 K-Series turbo project
Discussion


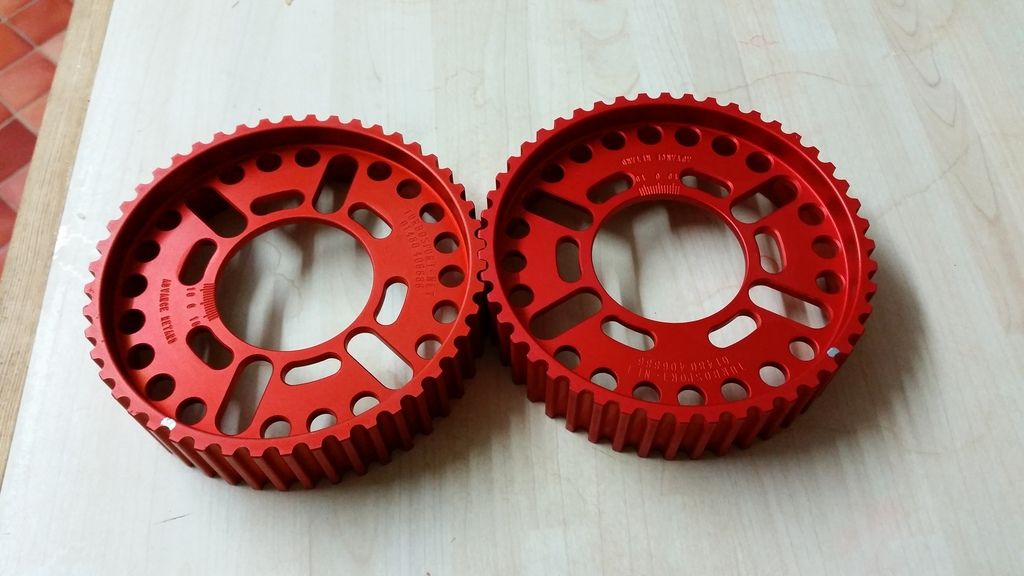
Mini update. I had a bit of time so I thought I'd change the colour of the vernier pulleys to match the rest of the engine bay and do something so they are on display.
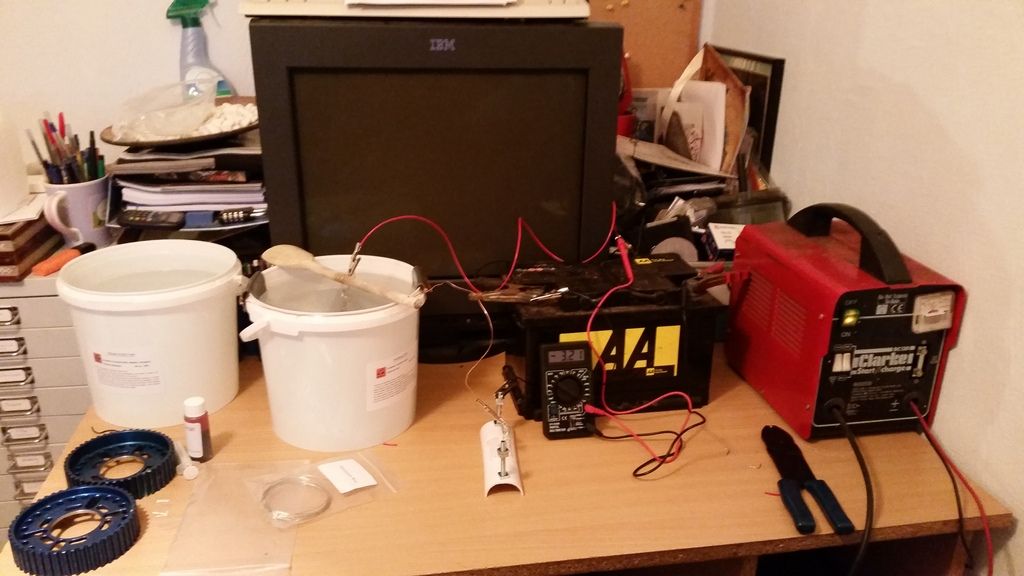
Anodising is actually a very simple process but involves some nasty chemicals so care must be taken. The part must be cleaned then stripped and etched in Sodium Hydroxide. Then it's just a case of rigging up a power supply and some electrodes in a solution of sulphuric acid electrolyte. I got everything in a kit off ebay and just used a12v car battery supported by a charger.
The setup :
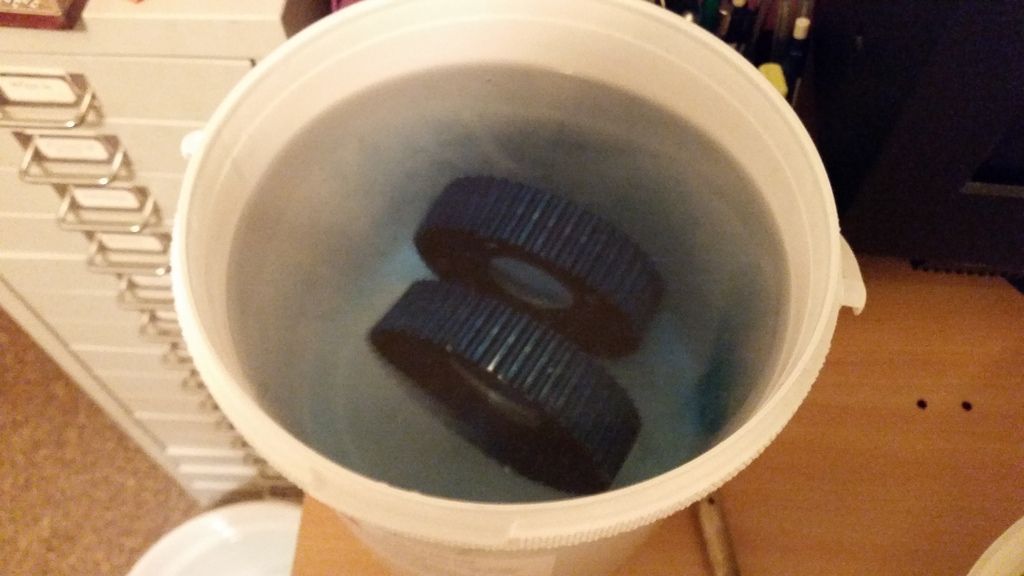
Removing the existing anodising and etching the aluminum bits in Sodium Hydroxide:
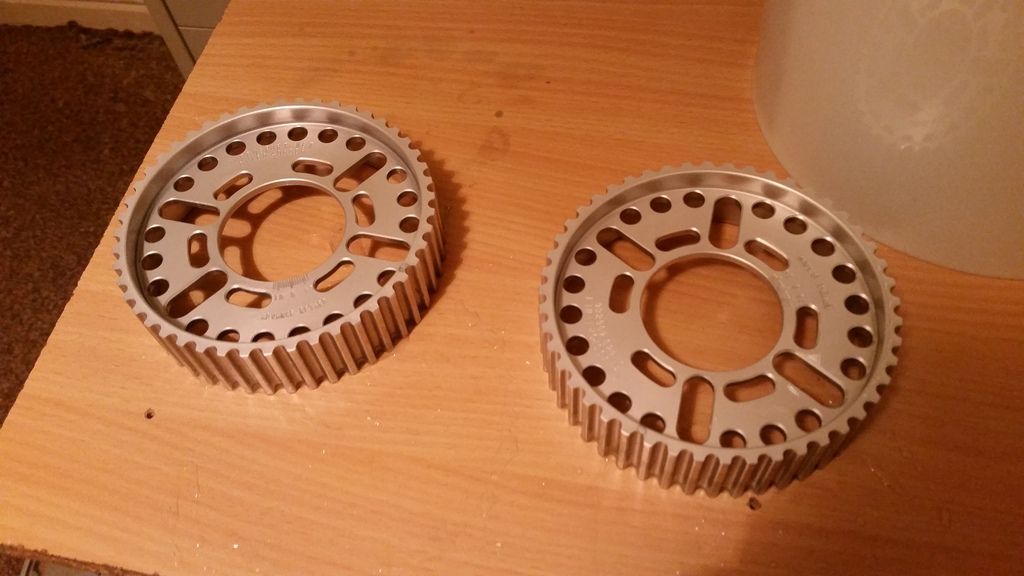
Nice and clean and ready for anodising:
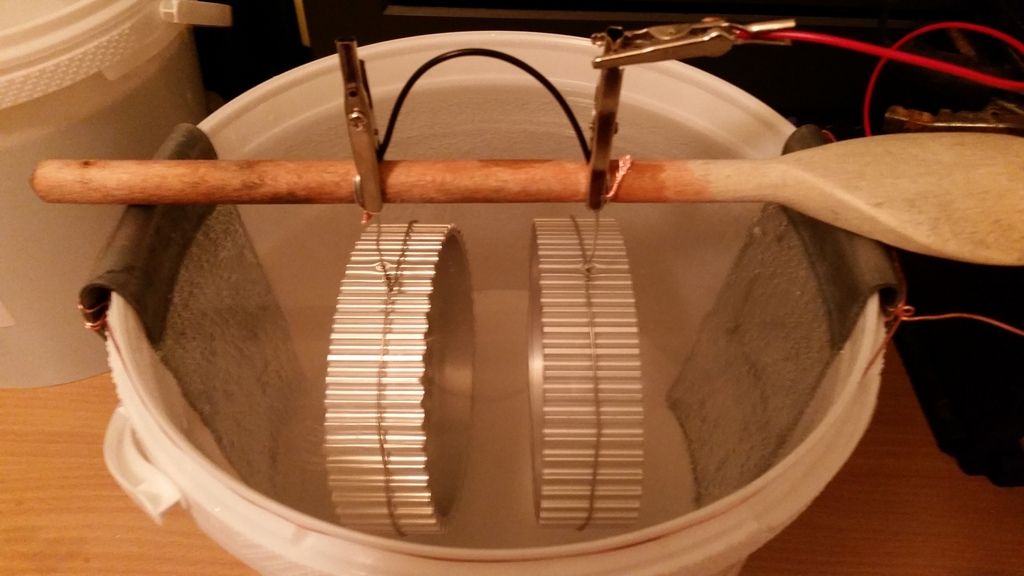
Process underway:
Once the anodising is complete (took about 45 minutes) it's just a case of soaking in dye for 20 minutes then sealing in boiling water for half hour.
This was the result:
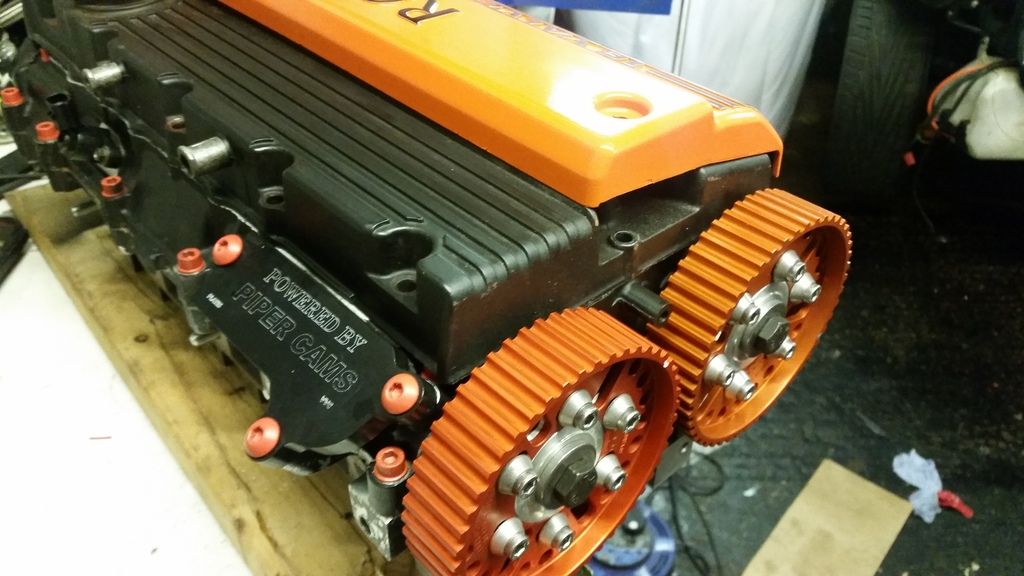
Fitted to the head which is now completely rebuilt and ready to refit to the car :
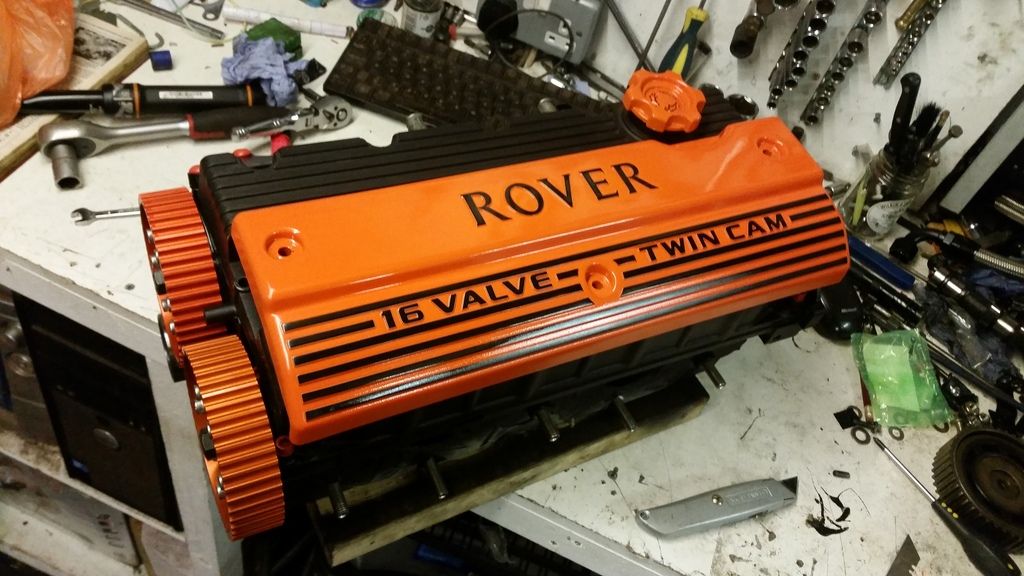
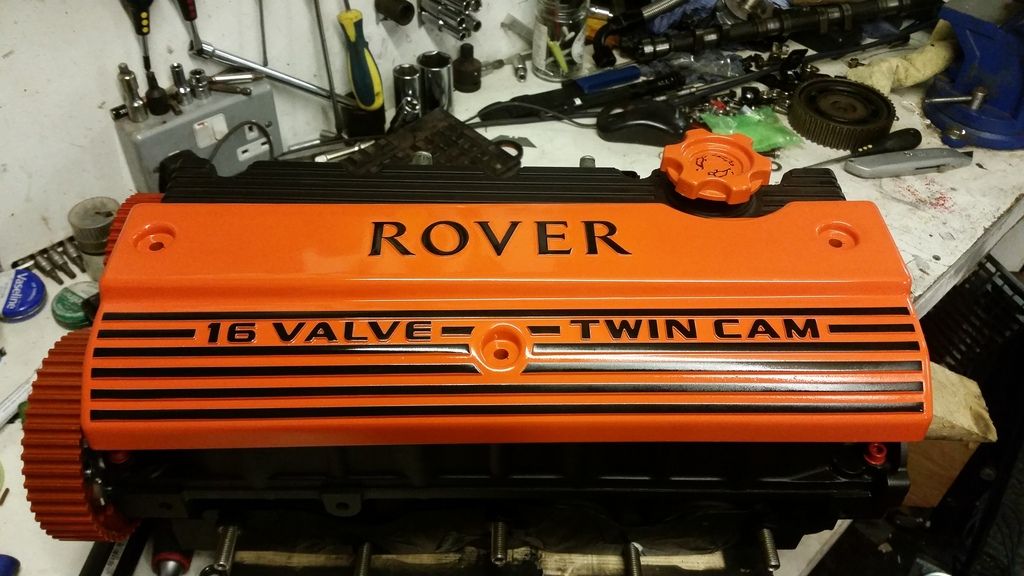
Mocked up with the new cam cover I acquired from an early mems3 setup so still had the "Rover" emblem. Very hard to come by:
Next job is just to pop this back on, get the cams properly timed in, then fire it up and see what happens!
Anodising is actually a very simple process but involves some nasty chemicals so care must be taken. The part must be cleaned then stripped and etched in Sodium Hydroxide. Then it's just a case of rigging up a power supply and some electrodes in a solution of sulphuric acid electrolyte. I got everything in a kit off ebay and just used a12v car battery supported by a charger.
The setup :
Removing the existing anodising and etching the aluminum bits in Sodium Hydroxide:
Nice and clean and ready for anodising:
Process underway:
Once the anodising is complete (took about 45 minutes) it's just a case of soaking in dye for 20 minutes then sealing in boiling water for half hour.
This was the result:
Fitted to the head which is now completely rebuilt and ready to refit to the car :
Mocked up with the new cam cover I acquired from an early mems3 setup so still had the "Rover" emblem. Very hard to come by:
Next job is just to pop this back on, get the cams properly timed in, then fire it up and see what happens!
Edited by Stuballs on Monday 22 January 13:12
Stuballs said:
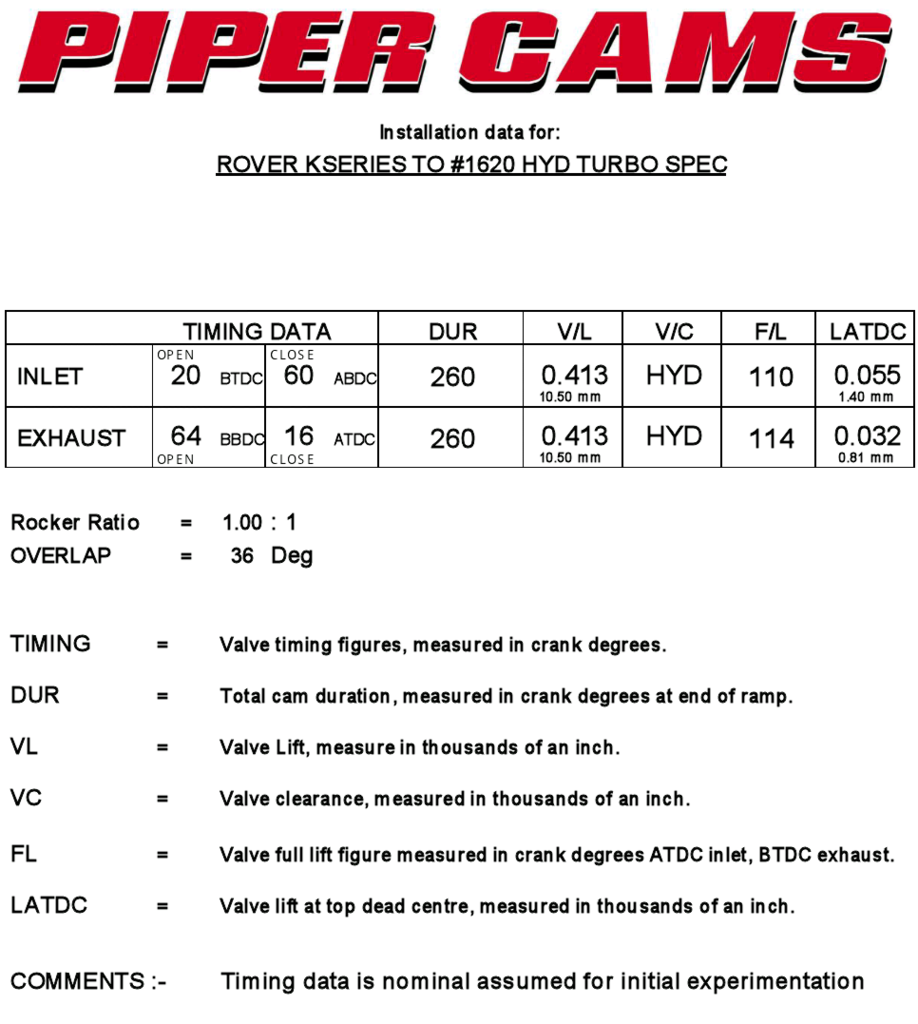
Piper sorted me out with some custom ground cams. They have fairly conservative duration given the forced induction with small turbo I'm running, but lift is a bit higher than stock. To compare against the VVC - they had 9.5mm lift with duration on the inlet ranging from 220 to 295 degrees.
Note the larger journals at each end of the inlet cam. This is why piper cams are the only option if ditching the split inlet cams the VVC system uses.
Also, the lack of position sensor pickup on the inlet means I have to revert to batch fuel injection. Shouldn't be a problem.
Spec:
Stu,Note the larger journals at each end of the inlet cam. This is why piper cams are the only option if ditching the split inlet cams the VVC system uses.
Also, the lack of position sensor pickup on the inlet means I have to revert to batch fuel injection. Shouldn't be a problem.
Spec:
Similar build to my supercharged K. Steel rods, JDM pistons, Westwood lines, Mahle bearings,.
A note regarding cams. Newman also make cams with the bigger journals for the VVC head. I use the Newman ph2 with very similar specs on a blanked VVC160 head. 10.15mm lift and 260 deg duration. Your's got a little more lift with 10.5mm. :-)
Marko
Edited by Ive on Monday 28th December 12:09
Ive said:
Stu,
Similar build to my supercharged K. Steel rods, JDM pistons, Westwood lines, Mahle bearings,.
A note regarding cams. Newman also make cams with the bigger journals for the VVC head. I use the Newman ph2 with very similar specs on a blanked VVC160 head. 10.15mm lift and 260 deg duration. Your's got a little more lift with 10.5mm. :-)
Marko
Sounds an interesting build. I contacted Newman and Kent cams and both told me they didn't make VVC journal cams. Guess I got some bad info from Newman.Similar build to my supercharged K. Steel rods, JDM pistons, Westwood lines, Mahle bearings,.
A note regarding cams. Newman also make cams with the bigger journals for the VVC head. I use the Newman ph2 with very similar specs on a blanked VVC160 head. 10.15mm lift and 260 deg duration. Your's got a little more lift with 10.5mm. :-)
Marko
I'm happy with what i ended up with.

Stuballs said:
Sounds an interesting build. I contacted Newman and Kent cams and both told me they didn't make VVC journal cams. Guess I got some bad info from Newman.
I'm happy with what i ended up with.
I got the VVC Newman cams through Roger Fabry (Sabreheads). I ordered a complete head from him ready to install :-) I'm happy with what i ended up with.
Those cams you got sound very good. I would have not minded a tad more lift, especially for the exhaust. Not that the engine doesn't make enough power....
Edited by Ive on Tuesday 29th December 11:43
Wet Lap in Spa
https://youtu.be/fNwCg9EudsE
Edited by Ive on Tuesday 29th December 11:48
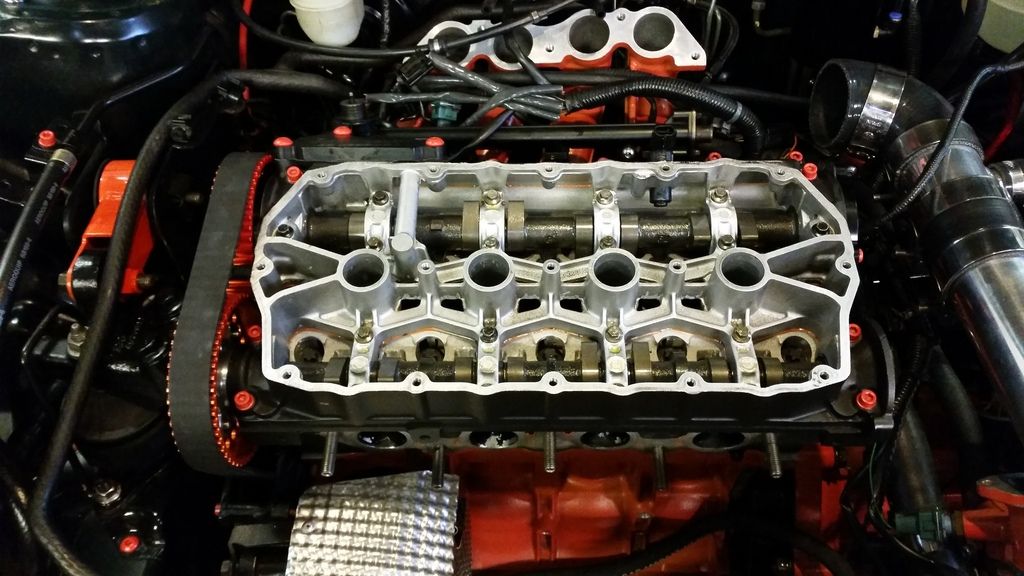
Update time! Fitting the head and timing the new cams in:
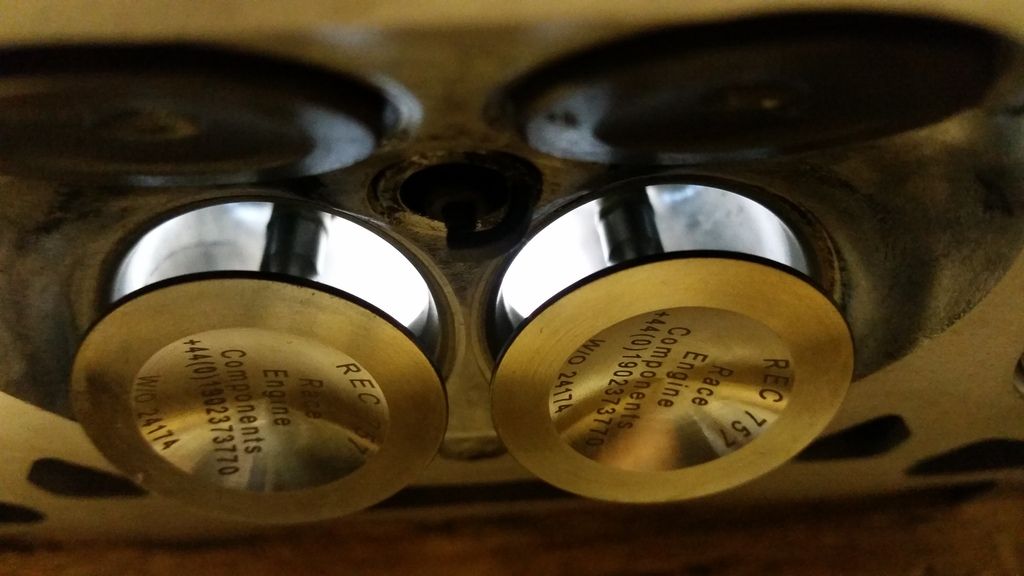
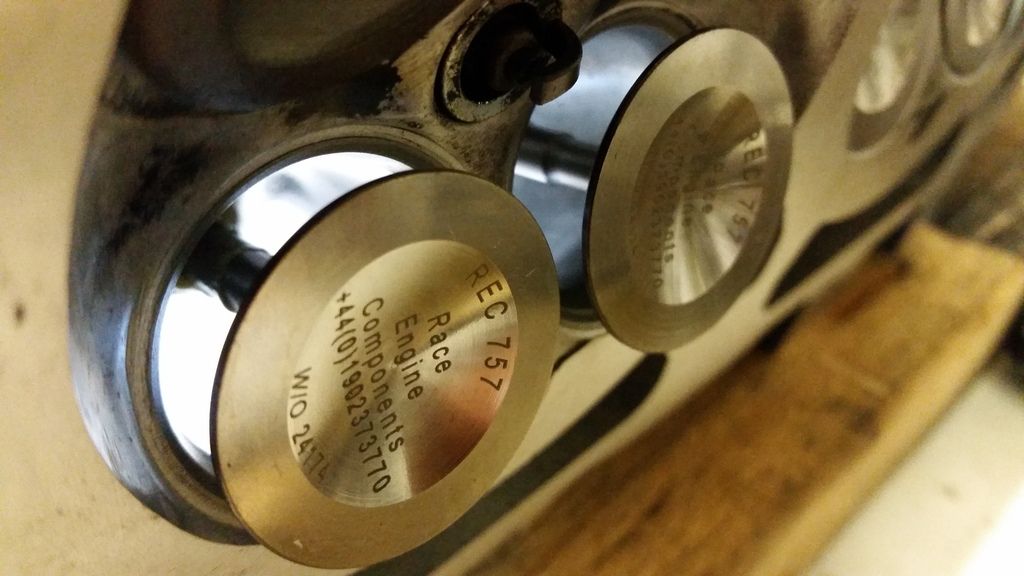
I've already got the cams installed with the vernier pulleys. 10.5mm lift over the standard 9.5mm:
Easiest way to time the cams correctly is by reference to lift at Top Dead Centre. Dave Andrews' k-series engine page has a very useful step by step guide on how to do this.
First, you need identify when cyl 1 and 4 are at TDC. There are a number of ways to do this. Since I had the head off, I just did it by eye. It took a lot of patience as there is a dwell point right at the top where the piston hardly moves. If the head is on, you could either rig up a dial gauge with a long probe down through the spark plug hole, or use a long bolt (like a head bolt) down through the plug hole and do it by eye. I made up a pointer for easy reference:
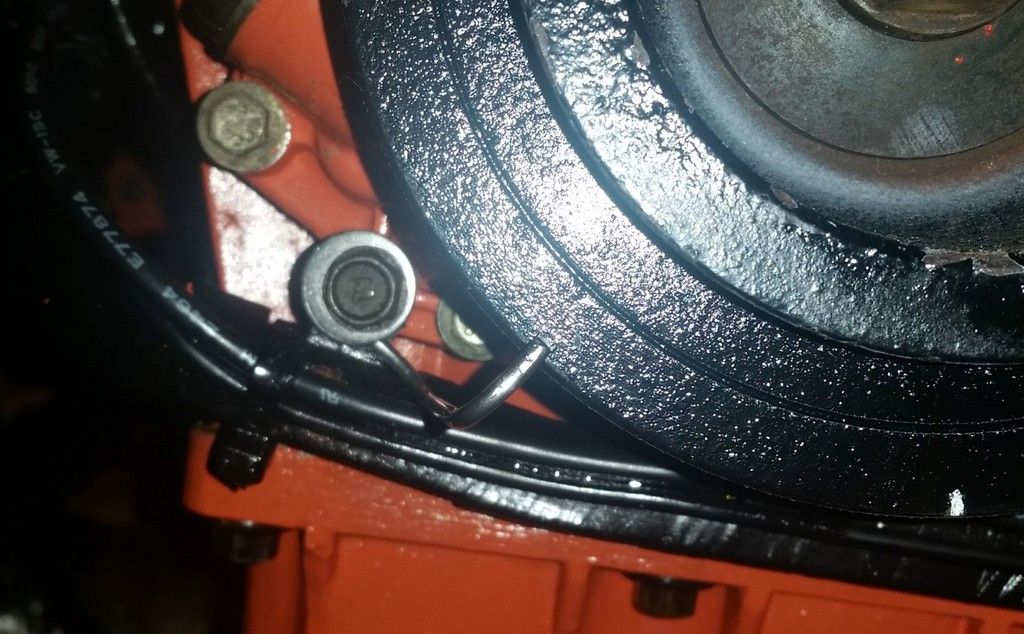
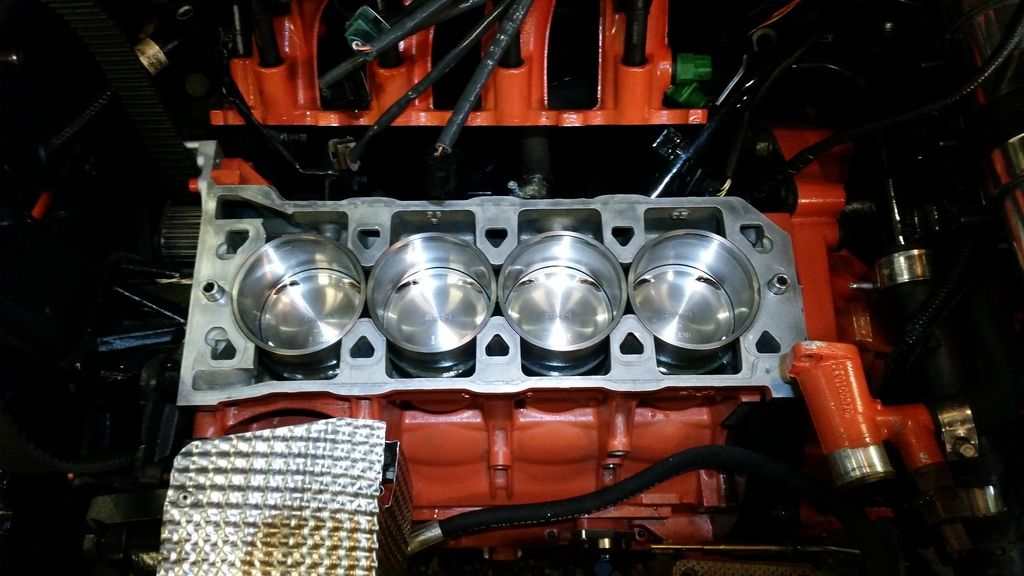
Before the head went on, I set the bottom end to exactly 90 degrees Before Top Dead Centre:
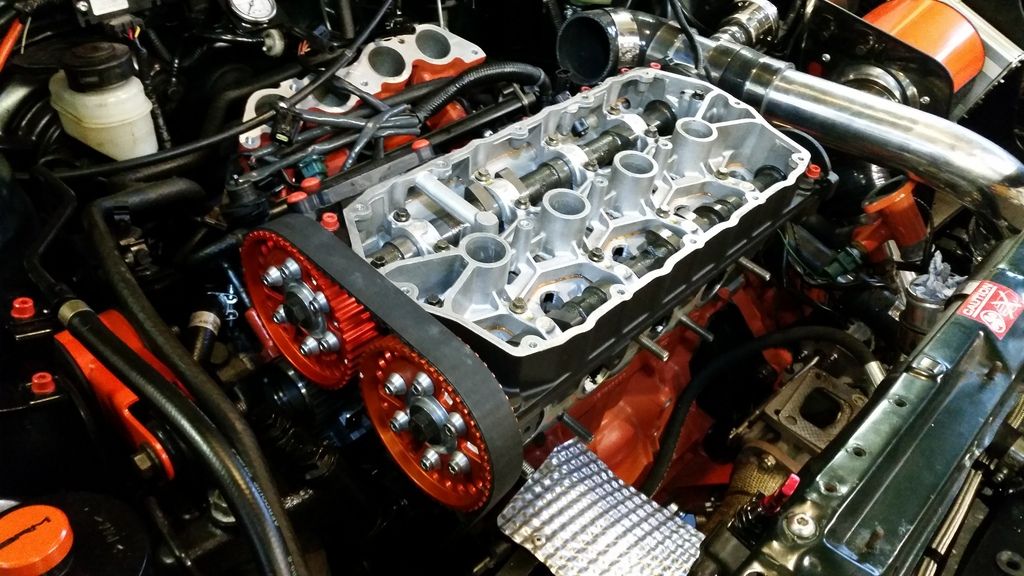
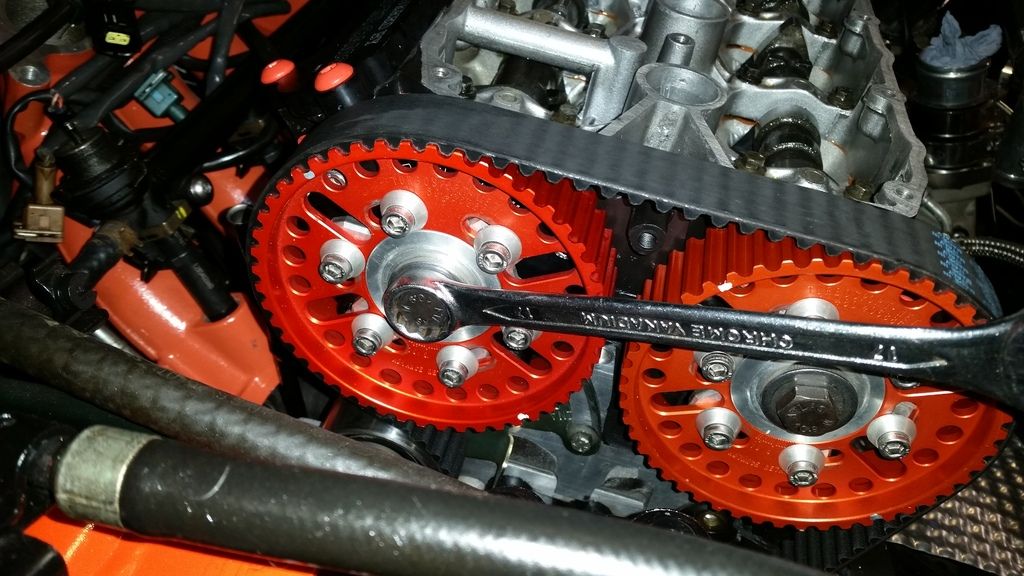
I then used the timing marks from the stock pulleys for 90BTDC to make equivalent marks on the vernier pulleys, so the timing is as close to correct as possible. Head on and cambelt refitted:
A quick point on head bolts. It is possible for the bolts to be too long and foul the sump. This obviously affects the clamping on the head gasket and it's believed to be one of the contributing causes of head gasket failure on the k-series, expecially if using cheaper aftermarket bolts.
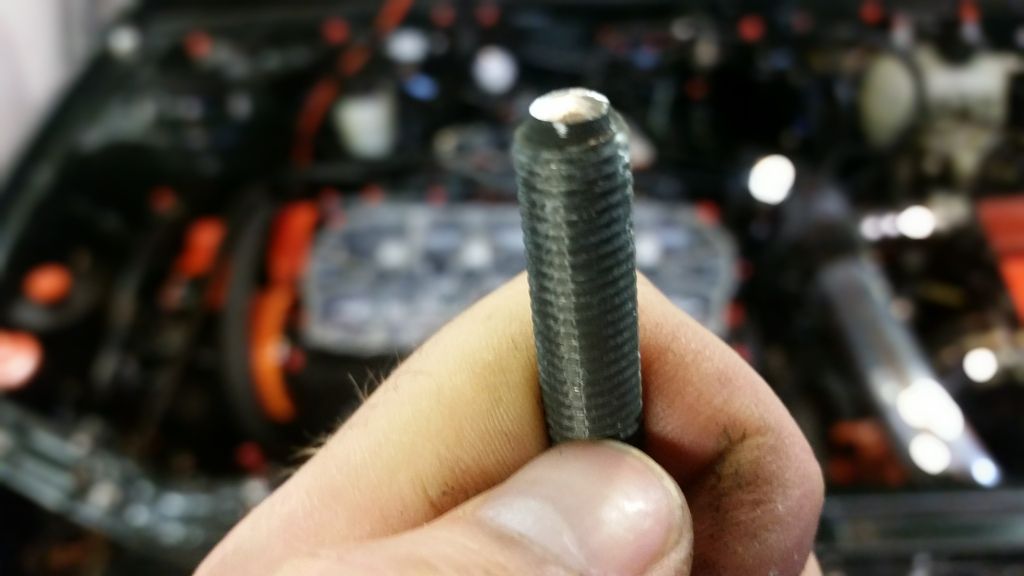
As before, I'm using the 5-layer n-series gasket but this time I'm using it with the supplied higher grade 10.9 bolts (which require a modified tightening procedure of 20nm + 180° + 135°). These bolts were very slightly longer than the old ones I took out (which being used stretch bolts had probably stretched slightly anyway). To be safe, I shaved a couple of mm from the tip of each bolt:
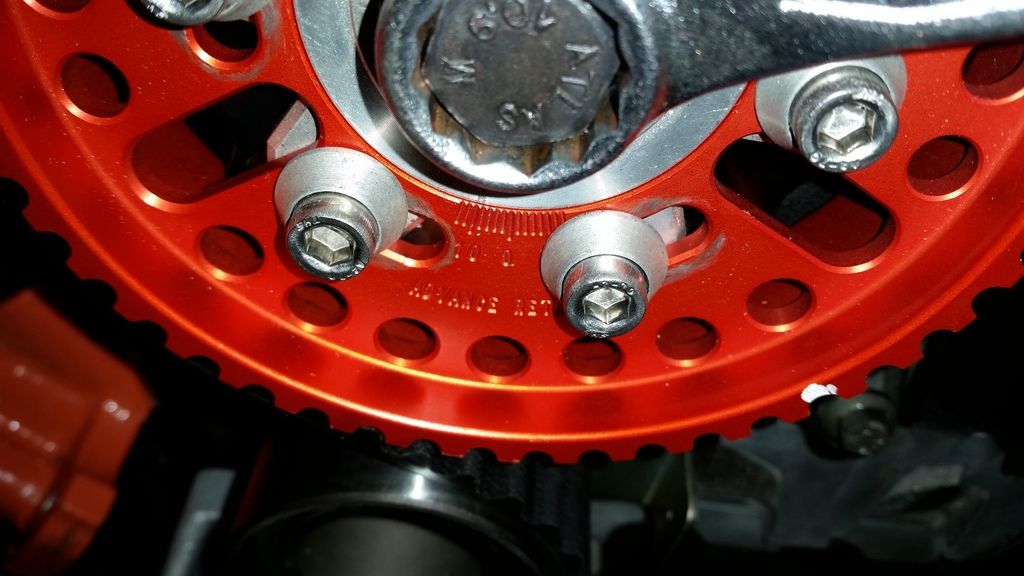
Rigging up a dial Gauge using brackets I had made up a while back to Dave Andrews design. Used some 2.4mm tig wire screwed into the tip of the gauge and bent to shape.
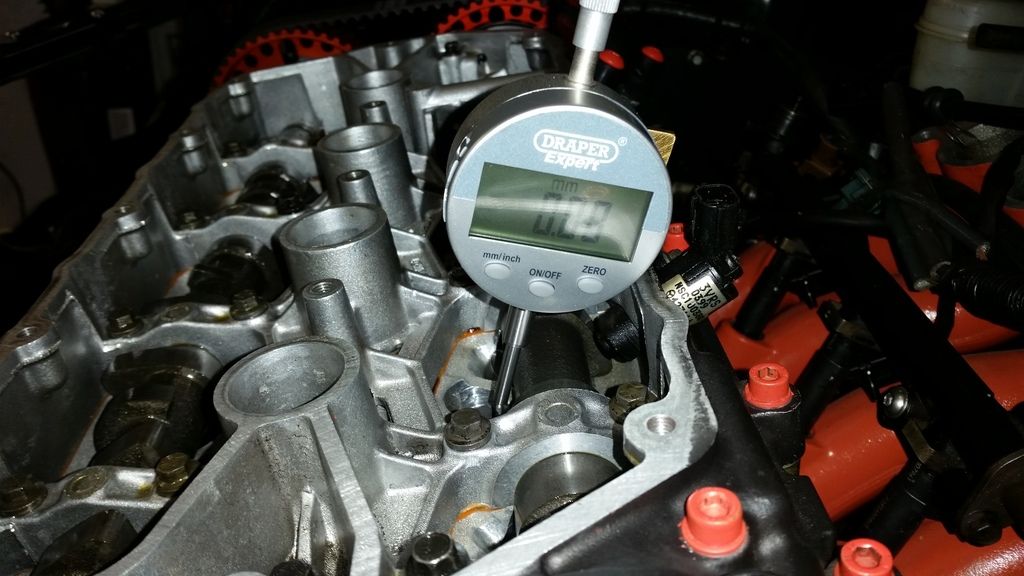
Very tricky getting the gauge in the right place with the gauge tip on the lifter but not fouling the camshaft:
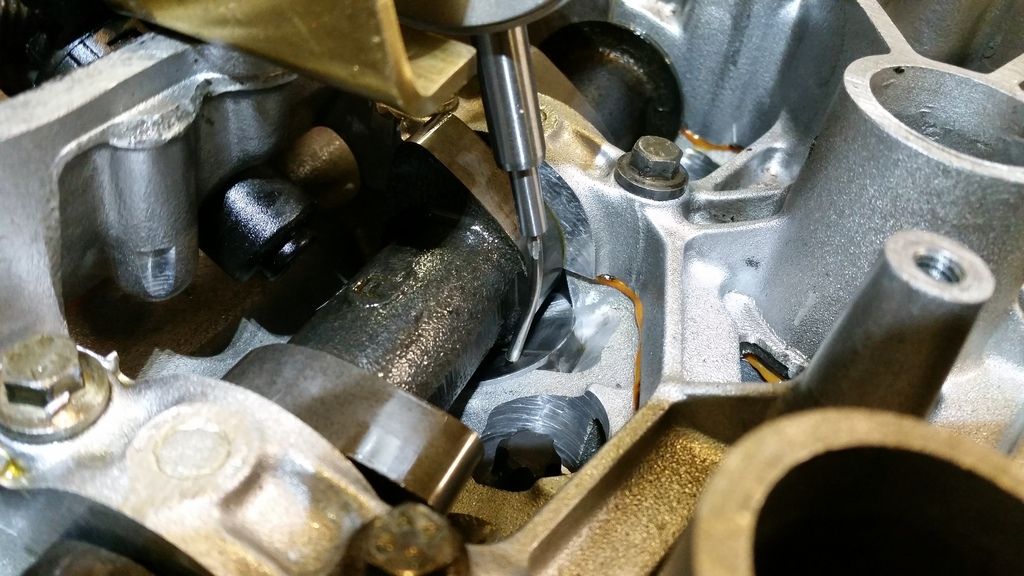
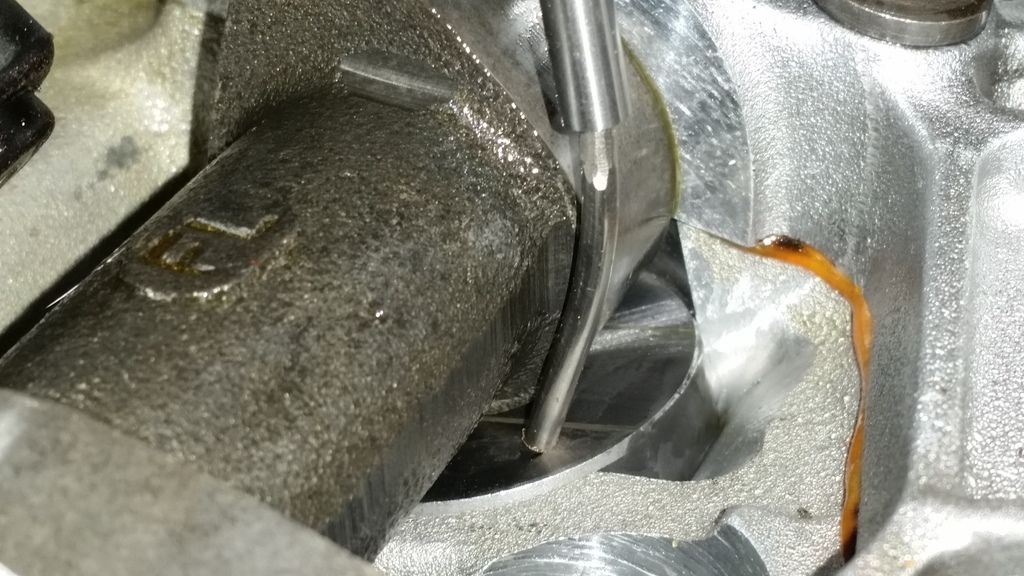
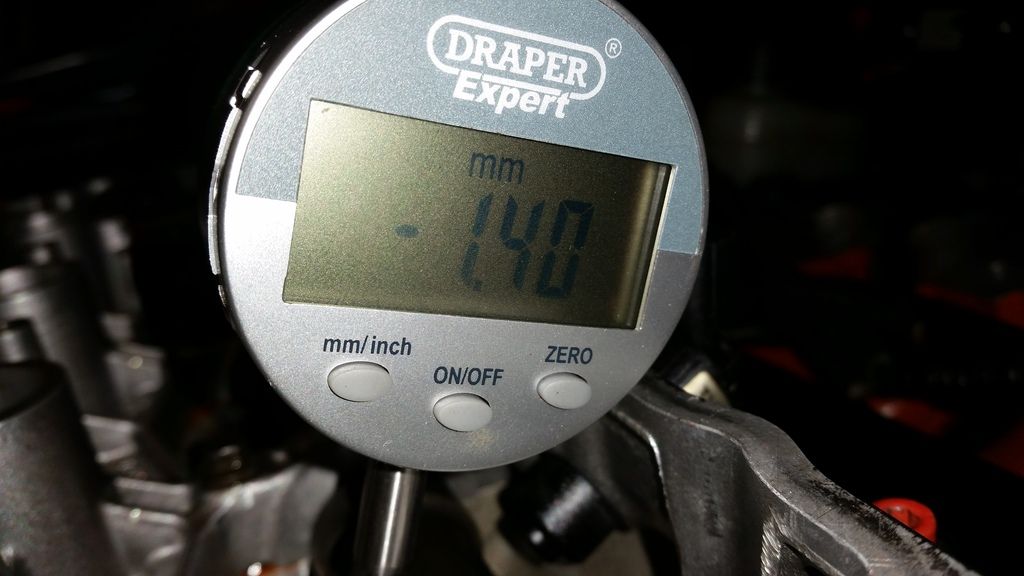
Engine set back to TDC. Then loosened the clamp bolts on the pulley and adjusted the cam to give the correct lift at TDC as specified in the spec sheet. On the inlet, this is 1.4mm:
Bang on!
Actually wasn't that simple at all! Every time you clamp up the vernier clamp bolts and turn the engine over a couple of times it changed! It took at least 5 iterations to get it right. Got there in the end though!
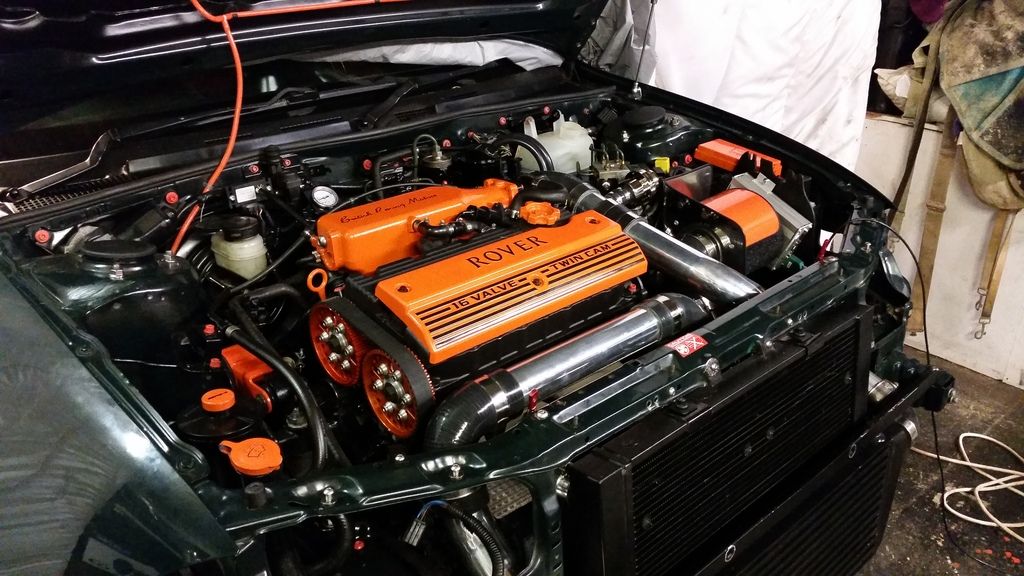
One last turn over by hand to make sure nothing collides. I then spent the next few hours putting everything back together and refilling fluids.

Crunch time. One last check over everything. Unplug injectors for a test turnover. Turn the key and...
Flat battery!
I rigged up a spare with enough charge to turn over and check I have oil pressure. All good.
A quick bit of breakfast then I'll fire up this afternoon.
I've already got the cams installed with the vernier pulleys. 10.5mm lift over the standard 9.5mm:
Easiest way to time the cams correctly is by reference to lift at Top Dead Centre. Dave Andrews' k-series engine page has a very useful step by step guide on how to do this.
First, you need identify when cyl 1 and 4 are at TDC. There are a number of ways to do this. Since I had the head off, I just did it by eye. It took a lot of patience as there is a dwell point right at the top where the piston hardly moves. If the head is on, you could either rig up a dial gauge with a long probe down through the spark plug hole, or use a long bolt (like a head bolt) down through the plug hole and do it by eye. I made up a pointer for easy reference:
Before the head went on, I set the bottom end to exactly 90 degrees Before Top Dead Centre:
I then used the timing marks from the stock pulleys for 90BTDC to make equivalent marks on the vernier pulleys, so the timing is as close to correct as possible. Head on and cambelt refitted:
A quick point on head bolts. It is possible for the bolts to be too long and foul the sump. This obviously affects the clamping on the head gasket and it's believed to be one of the contributing causes of head gasket failure on the k-series, expecially if using cheaper aftermarket bolts.
As before, I'm using the 5-layer n-series gasket but this time I'm using it with the supplied higher grade 10.9 bolts (which require a modified tightening procedure of 20nm + 180° + 135°). These bolts were very slightly longer than the old ones I took out (which being used stretch bolts had probably stretched slightly anyway). To be safe, I shaved a couple of mm from the tip of each bolt:
Rigging up a dial Gauge using brackets I had made up a while back to Dave Andrews design. Used some 2.4mm tig wire screwed into the tip of the gauge and bent to shape.
Very tricky getting the gauge in the right place with the gauge tip on the lifter but not fouling the camshaft:
Engine set back to TDC. Then loosened the clamp bolts on the pulley and adjusted the cam to give the correct lift at TDC as specified in the spec sheet. On the inlet, this is 1.4mm:
Bang on!
Actually wasn't that simple at all! Every time you clamp up the vernier clamp bolts and turn the engine over a couple of times it changed! It took at least 5 iterations to get it right. Got there in the end though!
One last turn over by hand to make sure nothing collides. I then spent the next few hours putting everything back together and refilling fluids.
Crunch time. One last check over everything. Unplug injectors for a test turnover. Turn the key and...
Flat battery!
I rigged up a spare with enough charge to turn over and check I have oil pressure. All good.
A quick bit of breakfast then I'll fire up this afternoon.
Awesome.
I used an analog dail gauge to determine TDC. I stopped right when the needle stopped moving with the piston before moving upwards. Still tricky, but reproducible to within a few thou. 5 thou won't make much of a difference around the recommend timing setting.
Looking forward to your report :-)
I used an analog dail gauge to determine TDC. I stopped right when the needle stopped moving with the piston before moving upwards. Still tricky, but reproducible to within a few thou. 5 thou won't make much of a difference around the recommend timing setting.
Looking forward to your report :-)
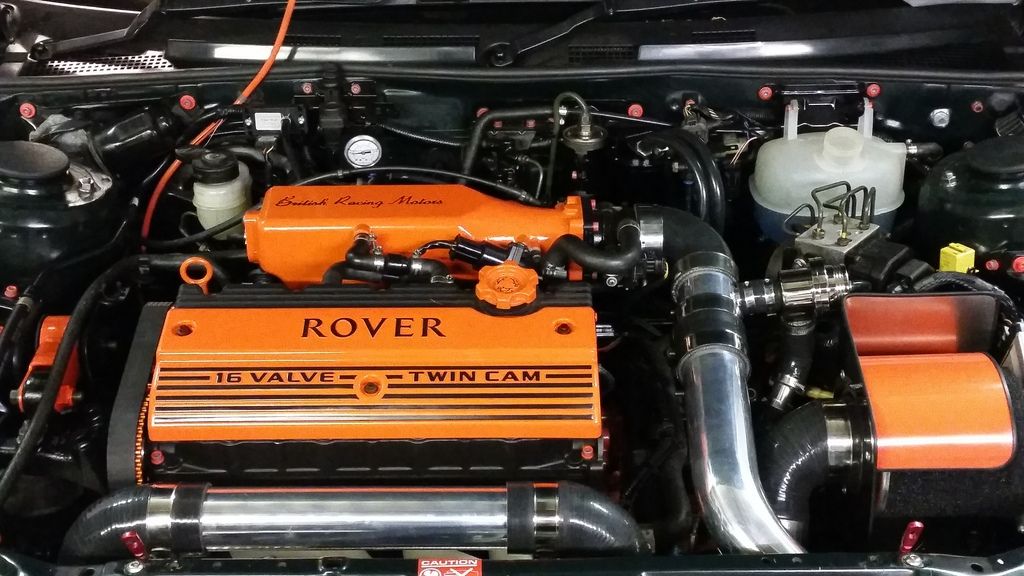
She lives! (again!)
Fired right up on the key despite this map being way out for these cams. Idle was obviously an issue.
There then followed a very nervous 20 minutes running at 2k - 2.5krpm to bed the cams in. During this time I checked for leaks and generally panicked and worried at every little noise. The top end is noisier than expected. Part of this I think is down to the low duration/high lift combo of these cams resulting in a high ramp. A lot of it, however, is down to a leaking exhaust manifold gasket!
Need to get booked in for mapping asap now!
Thanks guys.
Ticking is defo mostly the exhaust manifold. Nipped it up and started from cold and noise completely gone. Started to come back as it warmed up so will change it.
I'd forgotten how loud the top end was on the old VVC setup. Listen to the rattle right at the end!
https://youtu.be/O-zvICWkZ24
The engine defintely revs up quicker with these new cams. Sounds really good. Can't wait to get it mapped.

Gassing Station | Readers' Cars | Top of Page | What's New | My Stuff